June 15th, Jumet – a Black Powder Battle Report

I have previously noted that I have been reading John Husseys’ splendid book, ‘Waterloo, Volume 1’ covering the Campaign of 1815. Although somewhat drier than some accounts, the book is a detailed account of the campaign and new to me, was the forensic detail in which Hussey has examined the lead up to the more familiar Battles of Ligny, Quatre Bras and of course, Waterloo. Inspired by what I had read, and motivated by the delivery of my copy of the second edition of Black powder rules, I put together a very simple scenario, very loosely based on the French attack into Belgium, prior to the main battles that were to come later.

The briefing to the players was as follows:

You are commanded to lead the advance Corps into Belgium to split the Allied and Prussian Army. Having crossed the Sambre successfully and moved past Charleroi you have encountered a small force of Prussians that are holding the route onto Brussels as well as preventing access to the Brussels – Liege road. You must push on and brush aside these defenders. Time is of the essence.

Your scouts have informed you that the Prussians consist of approximately 2 brigades of Infantry, some artillery and a small brigade of Cavalry. There are other Allied and Prussian units in the area but you are confident that it is unlikely that they will give support.

The Prussian detachment has already deployed and is barring your advance.

You have one brigade of 3 regts of Light Cavalry already in position as well as one brigade of Infantry (including one light infantry battalion). These units do not have artillery. They are deployed as you wish anywhere within 8 inches of your table edge.

As the attacker, you will have the first move.

On your turn two you may deploy an additional brigade of 4 Battalions of infantry + One Artillery piece OR a brigade of 3 regiments of Cavalry + One Artillery piece of your choice. They must enter the centre of the table through a 12″ window depending on orders thrown. All French units within 12″ of their own table edge (on or off the table) will benefit from a re roll in the case of a failed order. Blunders excepted! Your command level is 8 – no ‘pa de charge’ but column movement bonuses apply.

On turn three you may repeat the above, and so on until the end of the game.

It is not possible for the French Army to be Broken….French Brigades that are broken will Rally automatically at their table edge and any casualties reduce by one and any disorder removed. Routed units will be removed and will not return.

All French INFANTRY units will roll off disorder on a 5+.

Victory will be achieved if you can remove the Prussian barrier before turn 5….

I had anticipated the battle would be between myself, playing the Prussians and Pete Harris, playing as the French. I knew that the table that we would be playing on was 8’x 4′, so I was concerned that the scenario might favour the French, with their ability to advance so quickly in attack column.

However, a new dynamic was introduced when we were joined by a couple of extra players! So Andy Callan took control of the Prussians with no other briefing than the above and Jaz Storey-Smith took command of the advance guard of the French, with Pete commanding the reinforcements as they arrived.

I had thrown in a bit of mis information in the briefing, hinting that Allied units might be available – they would not be.

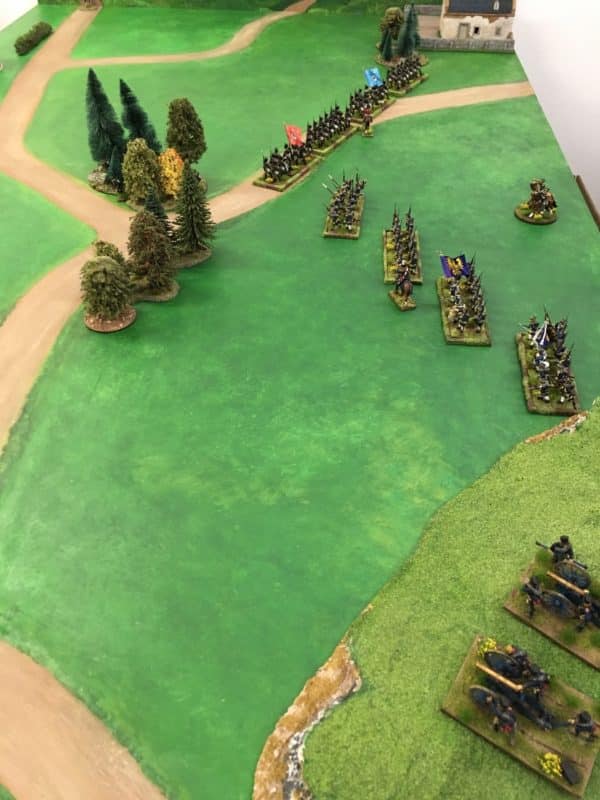
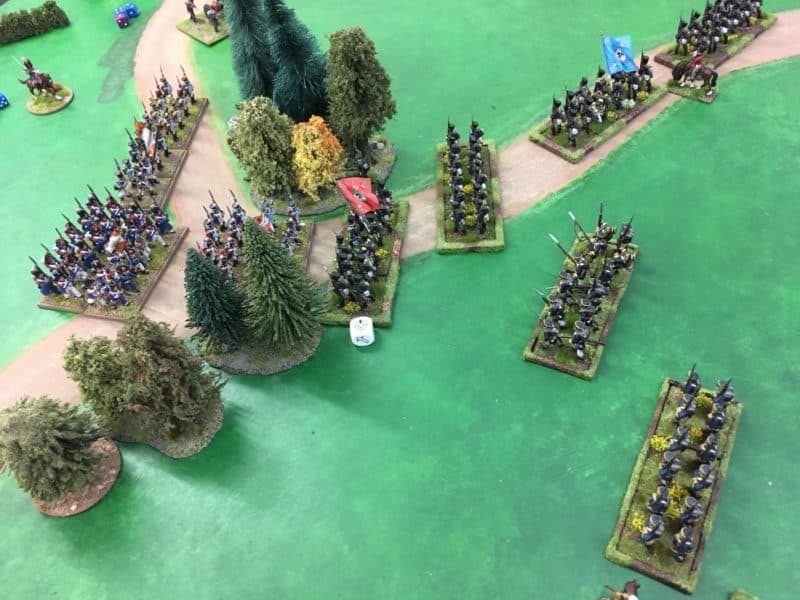
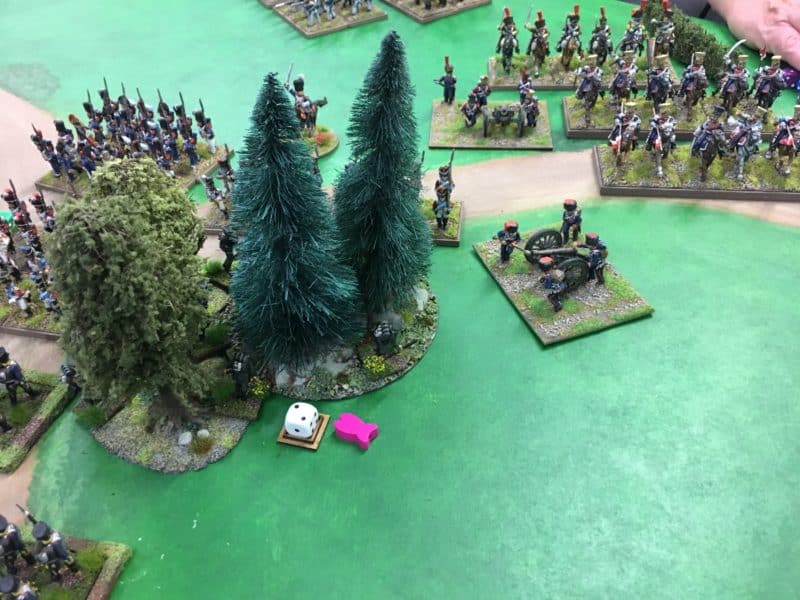
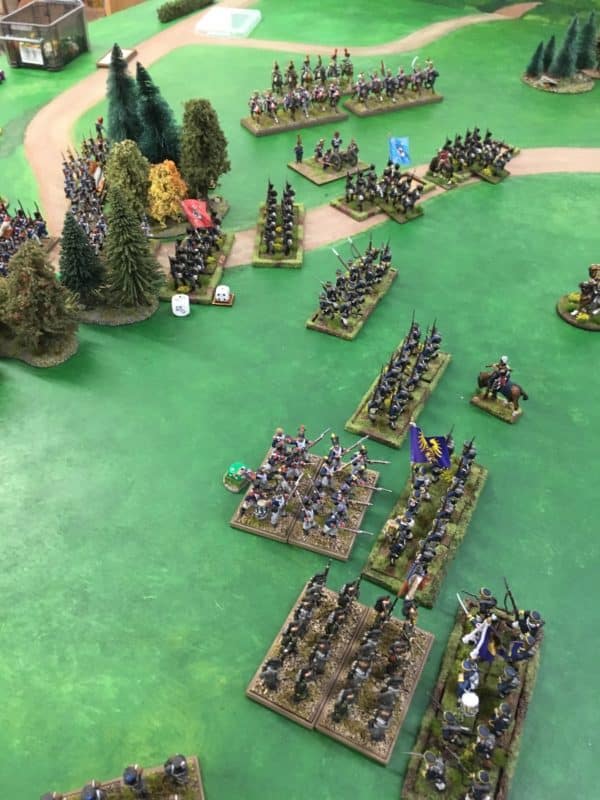
The Prussian deployment, the two Lancer regiments are to the far left of the artillery.

The Prussian deployment, the two Lancer regiments are to the far left of the artillery, out of camera shot.

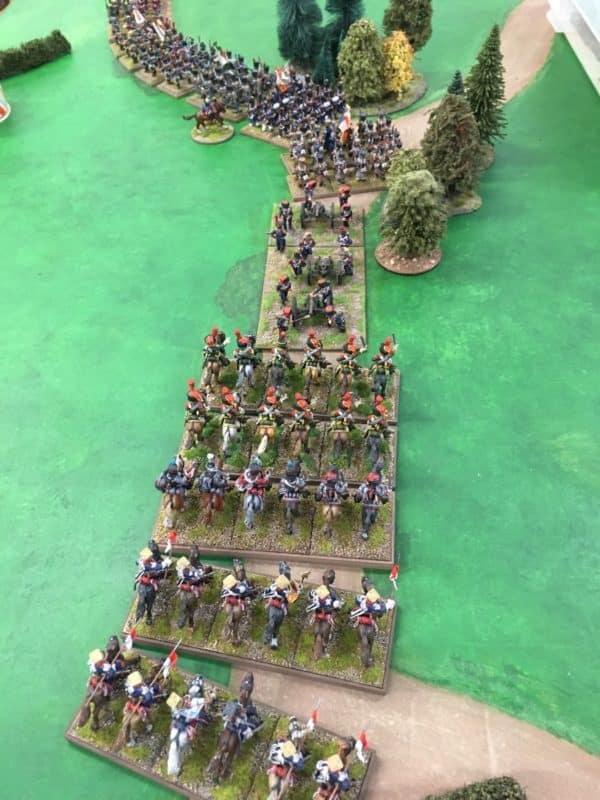
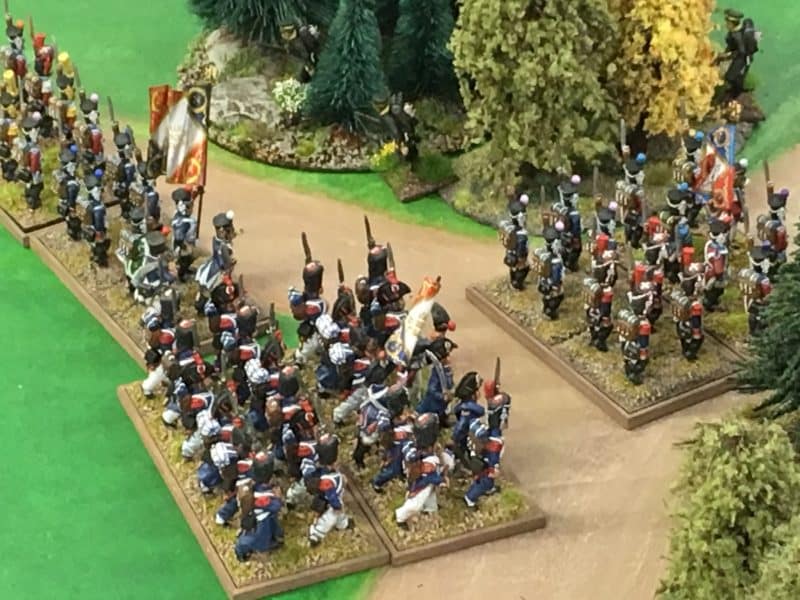
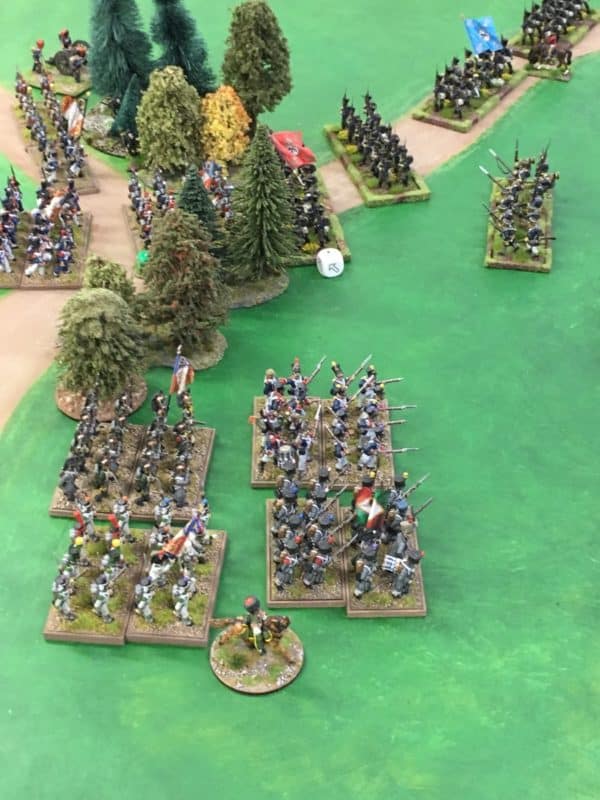
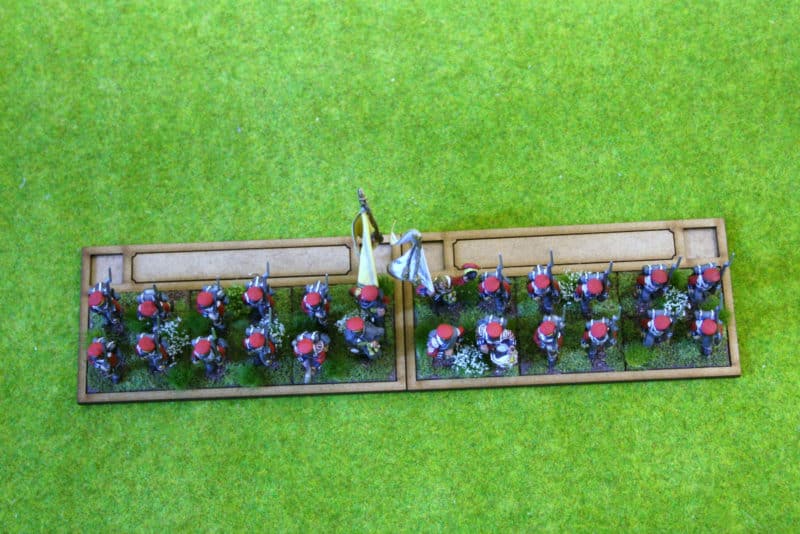
Having seen the Prussian deployment, the French then deployed their units. The first surprise was that the French commander decided that the main threat was to the advancing flank and so deployed the entire advance column of 4 battalions of infantry and three regiments of cavalry to the far left flank facing just two regiments of Prussian Lancers.

Initial French deployment - the coffee mat was not there to inhibit the move to the flank!

Initial French deployment – the coffee mat was not there to inhibit the move to the flank!

Turn one saw a very cautious advance by the French…It was at this point that Napoleon (well me) sent orders reminding the French that the object of the battle was to clear the Prussians from the table by turn 5. This had the effect of galvanising the Prussians into action and their Lancers charged the French Light cavalry.

Prussian lancers charge home!

Prussian lancers charge home!

The Lancers charge was devastating! The first unit of French cavalry lost the combat and failed their morale check routing from the table. One of the supporting units also routed and the final unit was shaken by the sweeping advance that followed. So turn one and the French infantry were isolated on the flank, the French Cavalry  had run away and the Prussian lancers were confidently holding the flank!

There's Jaeger in those woods!

There’s Jaeger in those woods!

Turn Two and the French brought on the next brigade which advanced in the centre toward the woods. The French Brigade on the Flank, continued with it’s slow advance but perhaps stunned by the loss of their Cavalry made little progress, being pushed into square by those pesky Prussian Lancers. The Prussians, in reply simply blocked the pass engaging in combat with the leading French unit.

Prussians hold the road to Brussels!

Prussians hold the road to Brussels!

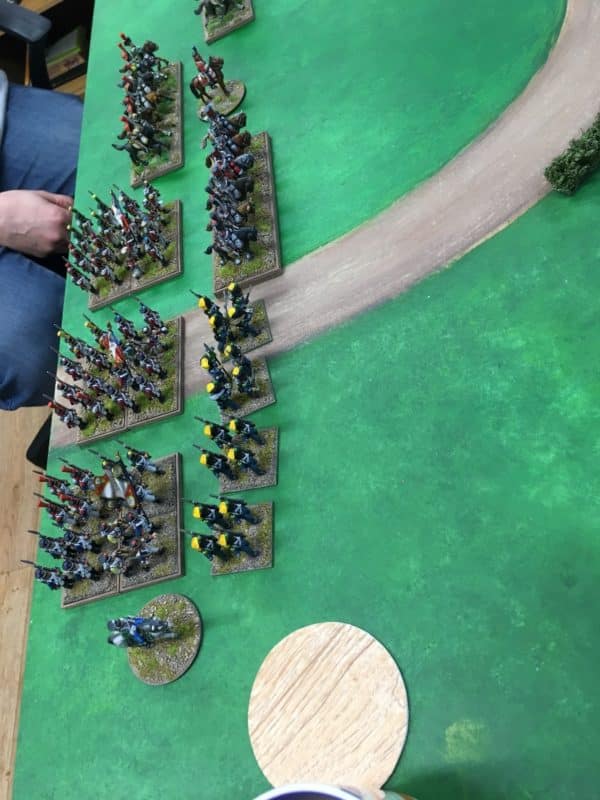
Turn three saw the French bring on a brigade of Cavalry to try and put pressure on the Prussian right Flank. However, despite orders to the contrary, the cavalry appeared to be in no great hurry… In the centre, the deadlock at the road junction continued with the Prussians holding firm and the French throwing more units into trying to dislodge the small unit of Jaegers in cover and force the road through the trees. On the left, the French continued with a rather ineffective advance whilst the Prussian Lancers smugly looked on! The Prussians were happy to hold, whilst in the French camp there was growing disquiet at the lack of progress.

Here come the cavalry.

Here come the cavalry.

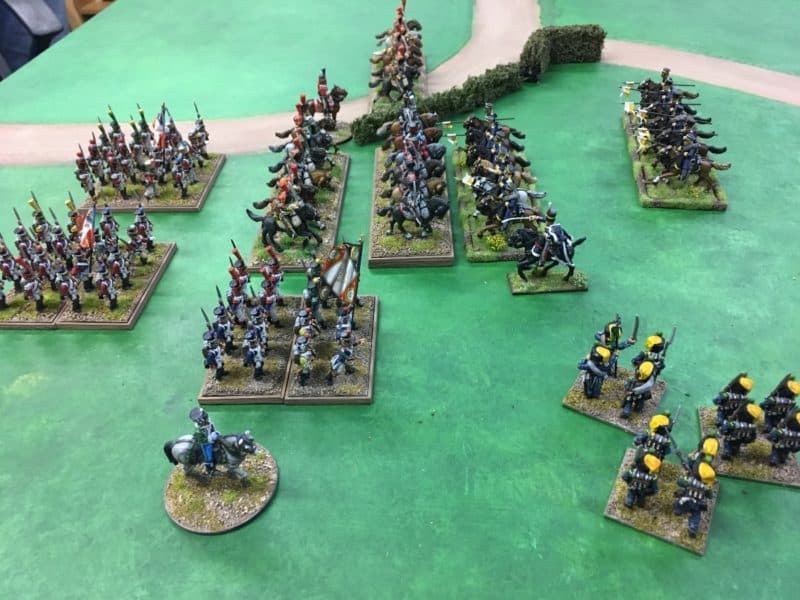
Turn Four and at last the French, in some desperation brought on the next brigade and force marched past the woods to threaten the Prussian Landwehr. The cavalry had moved out to the flank, pushing the Prussian infantry there into square but deadlock remained at the woods! Still the French on the left were unable to move!

The French Column pushes forwards

The French Column pushes forwards

The Prussians were now feeling quite confident of winning the game, if not the battle and the French morale was somewhat shaky.

At last, the French engage the Prussian

At last, the French engage the Prussian

Turn 5. At last the French columns closed with the Prussian Infantry Line in the centre and although casualties were heavy on both sides the Prussians were now under pressure. With the right flank tied up with cavalry and now facing artillery at close range, something would have to give. However, despite numerous rounds of close combat the Prussians at the road held on, stopping the advance here. As to the left flank, well the Prussian Lancers were still in the ascendancy whilst the French infantry here were unable to progress.

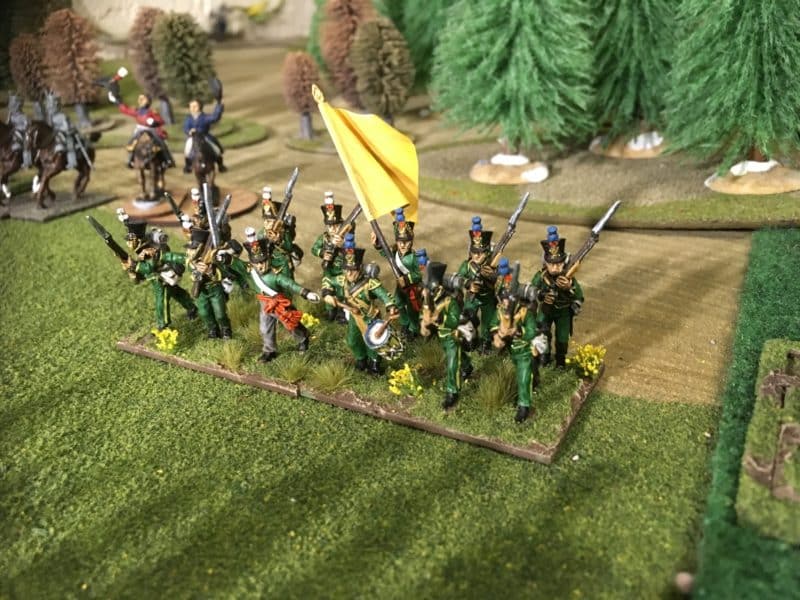
The French march to Ligny!

The French march to Ligny!

It was a tactical victory for the Prussians! The French would march on but somewhat delayed by a stout Prussian defence.

POST BATTLE ANALYSIS

My concern was that with the quick movement rates in Black Powder, the game would have been over by turn three. However, a combination of some timid decision making by the French Commanders combined with some unlucky orders rolls meant the it was only turn in turn five that the French really managed to push though and engage the Prussian infantry.

With hind sight, the French were overly concerned with the brigade of Prussian lancers on the left (Although to be fair – they did soundly beat the French lights in combat) and taking the narrow road through the woods was asking for trouble. Had they bypassed them as they eventually did so, the French would have engaged the Prussian far more quickly than they actually did.

That all said, there were two other factors that made the battle more difficult for the French. The commanders natural caution to preserve their forces as with ‘normal’ battles meant that perhaps they could have taken more risks with their troops. There were plenty of reinforcements available and they couldn’t be broken as an army, whereas the Prussians would have to accumulate any casualties and could be broken.The second factor was the time limit and the umpire (me!)goading them to go faster! this added to the pressure and lead to some errors – forgetting to give units orders, forgetting to rally off casualties and even forgetting to order units to fire, all in the ‘heat’ of battle!

I think that the players enjoyed a different type of battle. The Prussian commander went home happy and I certainly had some fun. May be next time for the French!

THE COMMERCIAL BIT

Just a reminder that orders from Arcane Scenery are post free to most worldwide destinations!

You can visit the shop here:

ARCANE SCENERY

If you would like a copy of Black Powder or any item from the Warlord Napoleonic range, we are offering 10% off plus free delivery worldwide for the next week until 19/10/2018. Enter black2 into the coupon code as you go through checkout – click here for Black Powder:

BLACK POWDER RULES SET

Click here to see the Warlord Napoleonic range:

WARLORD NAPOLEONICS

A Test of…..

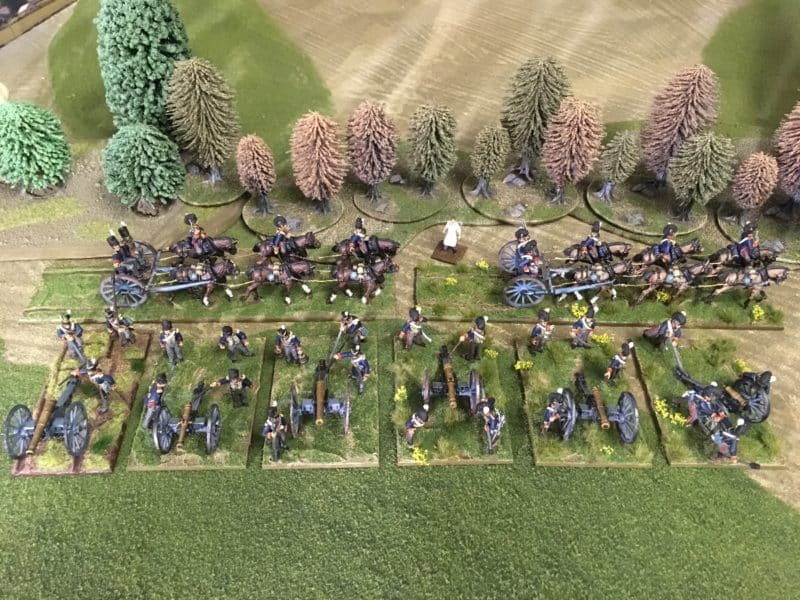
A short and mixed blog post this week. Just to record that my Royal Horse Artillery Battery is now complete and ready for action!

Royal Horse Artillery moves into position!

Royal Horse Artillery moves into position!

I have been very busy though, but the projects that I have been working on have yet to come to full fruition so I’m not in a position to write them up!

Another shot of my Royal Horse Artillery Battery

Another shot of my Royal Horse Artillery Battery

I have completed an article for the next issue of Wargames Illustrated, reviewing the new Black Powder rules but I don’t do spoilers so if you would like to read it, you will have to grab a copy of the mag – incidentally, Arcane Scenery send the Magazine out post free, worldwide, so no excuses for being able to get a copy. Mind you, I wont be offended if you decide that my article isn’t a big enough draw…

Black Powder 2ed. has arrived!

Black Powder 2ed. has arrived!

Inspired by my current reading, I have put together a small Black Powder Scenario to start to use the new rules with my gaming friends. We are due to play this through tonight and so I am not yet able to bring you the battle report. I am concerned that it is overly ‘asymmetric’ but as I am playing the Prussians, It should be OK…. Here’s the briefing for the players:

Dear General Reille,

You are commanded to lead the advance Corps into Belgium to split the Allied and Prussian Army. Having crossed the Sambre successfully and moved past Charleroi you have encountered a small force of Prussians that are holding the route onto Brussels as well as preventing access to the Brussels – Liege road. You must push on and brush aside these defenders. Time is of the essence.

Your scouts have informed you that the Prussians consist of approximately 2 brigades of Infantry, some artillery and a small brigade of Cavalry. There are other Allied and Prussian units in the area but you are confident that it is unlikely that they will give support.

The Prussian detachment has already deployed and is barring your advance.

You have one brigade of 3 regts of Light Cavalry already in position as well as one brigade of Infantry (including one light infantry battalion). These units do not have artillery. They are deployed as you wish anywhere within 8 inches of your table edge.

As the attacker, you will have the first move.

On your turn two you may deploy an additional brigade of 4 Battalions + One Artillery piece OR a brigade of 3 regiments of Cavalry + One Artillery piece of your choice. They must enter the centre of the table through a 12″ window depending on orders thrown. All French units within 12″ of their own table edge (on or off the table) will benefit from a re roll in the case of a failed order. Blunders excepted! Your command level is 8 – no ‘pa de charge’ but column movement bonuses apply.

On turn three you may repeat the above, and so on until the end of the game.

It is not possible for the French Army to be Broken….French Brigades that are broken will Rally automatically at their table edge and any casualties reduce by one. Routed units will be removed and will not return.

All French INFANTRY units will roll off disorder on a 5+.

Victory will be achieved if you can remove the Prussian barrier before turn 5….

Good Luck – the Emperor is watching….

I will report back if it works.

British Foot Artillery and .....

British Foot Artillery and …..

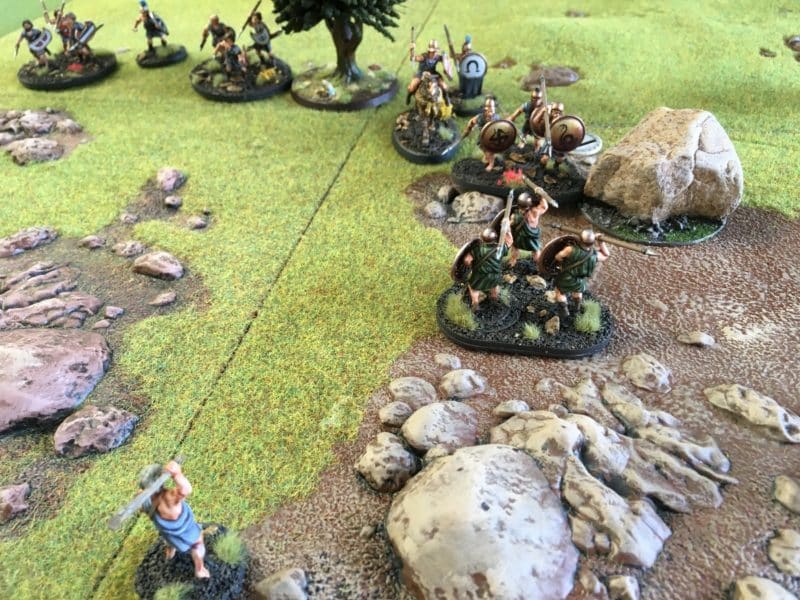
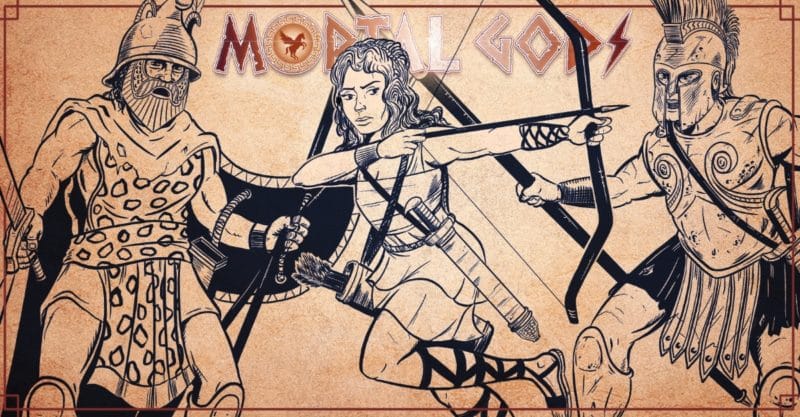
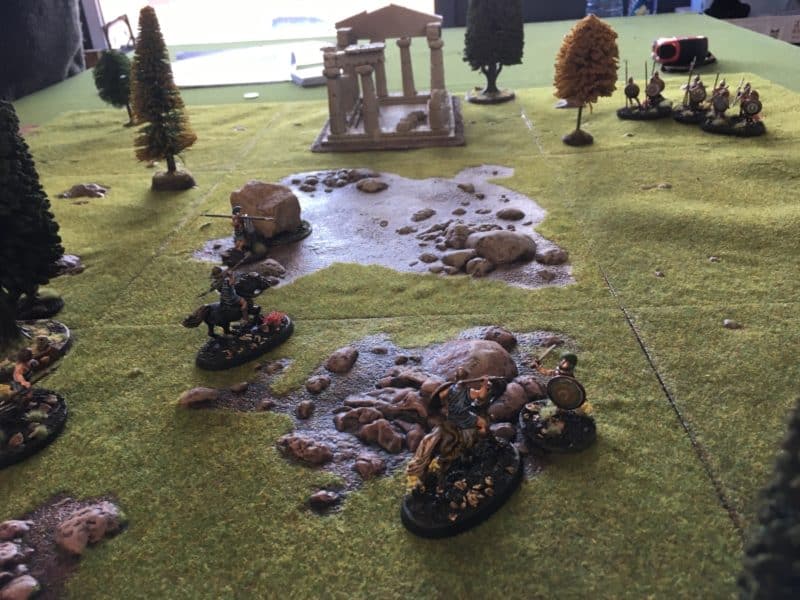
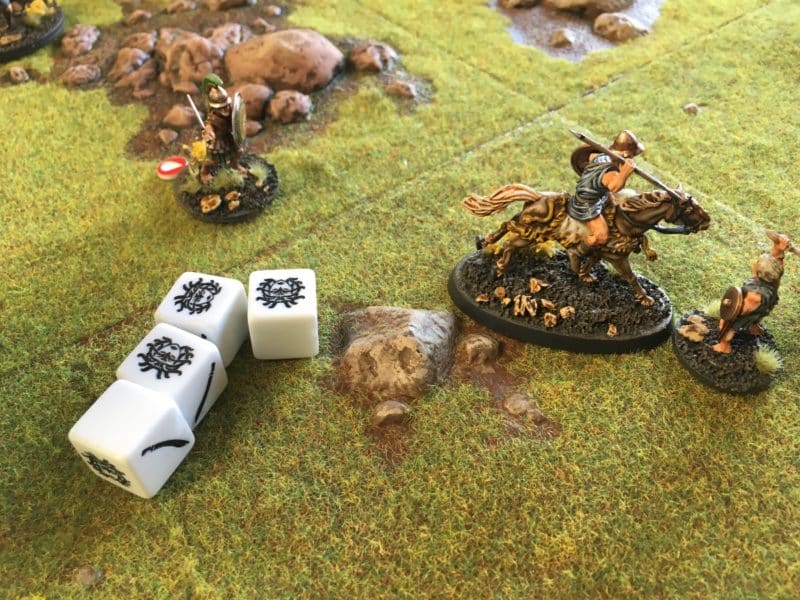
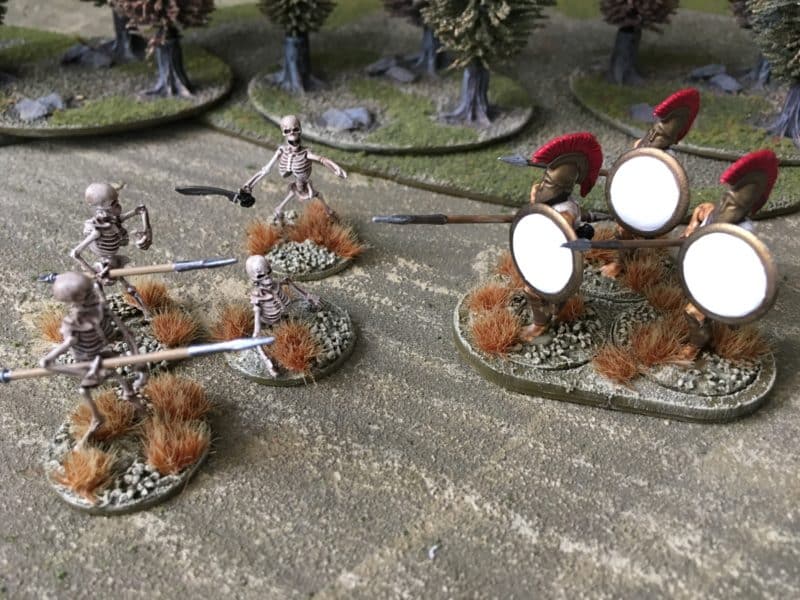
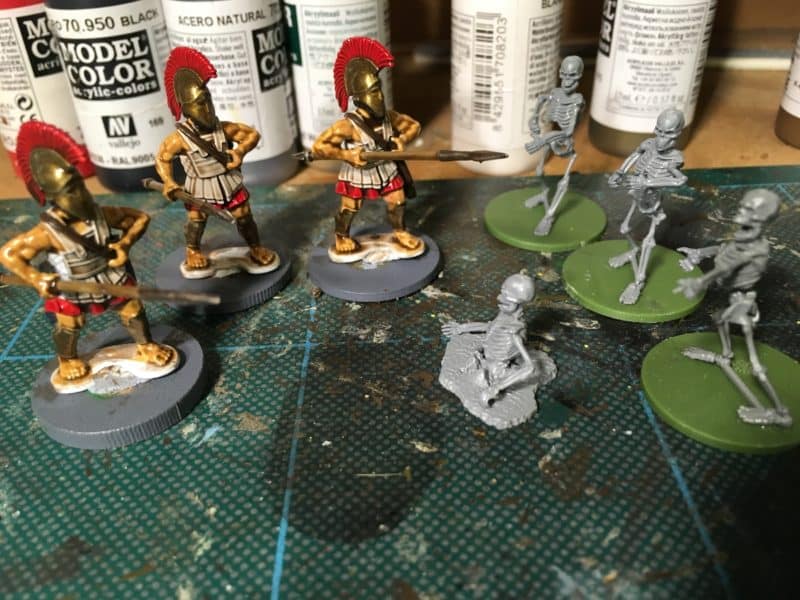
Back to the painting desk, I have the Foot Artillery crew on the go to complete my Artillery project. Some progress was made before a certain new game started a new itch to scratch! I am lucky enough to be close to the new games in development at Lenton in the heart of the Nottingham lead belt, and rarely comment on anything before it is released. However, The new game from Warbanner, Mortal Gods, A Test of Courage, is currently being play tested and I just happen to have an old box of War Games Factory Greeks on the Kit pile… It wouldn’t hurt to put a few test pieces together now would it?

More to follow!

THE COMMERCIAL BIT

To order your wargaming magazines, post free to most worldwide locations, Click Here:

WARGAMES MAGAZINES

For our Range of Watlord games Napoleonics, including Black Powder, Click here:

WARLORD GAMES NAPOLEONICS

To find out more about the forthcoming game Mortal Gods, join the Facebook group here:

MORTAL GODS

Happy Modelling!

Hussey and Vanity Fair

A somewhat appropriate combination you may think, but merely coincidence that I am reading one and watching the other! I will explain more later. My Artillery Autumn is still rumbling on and to be honest, I have been suffering from painting fatigue. To be fair, painting yellow is always difficult but trying to paint yellow piping and lace has left me somewhat frustrated. I had forgotten how difficult it is and this probably explains why it has taken so long to add to my artillery collection.

Artillery Collection - still plenty to paint!

Artillery Collection – still plenty to paint!

Nevertheless, I am making slow progress, with three horse artillery crews now painted and awaiting basing. Also on the go and nearing completion are the three cannon to go with them. As usual, I am block painting the figures, then painting over with Army painter quick shade, coating with matt varnish and finishing by re painting the lighter colours and metallics. Oh Joy! This means that I have actually painted most of the piping and lace in yellow twice to try to make it stand out.

Move that Howitzer!

Move that Howitzer!

Some of the lace work doesn’t bear close scrutiny but from a distance, the figures are looking OK. Once they are based with the cannon, I think that I will be happy with them.

Battery ready for action! - Well.... nearly!

Battery ready for action! – Well…. nearly!

Painting yellow is always fraught with difficulties. I have tried undercoating with white first, and Orange and sand yellow ( which is almost acceptable on it’s own) and I have tried many different manufacturers to find a yellow that covers in one coat – Vallejo is the best that I have used, albeit with some difficulties.

The cannon are also still in progress. I’ve stuck to my original method and paint scheme despite reservations as to how ‘accurate’ it may be. However, I have taken on board comments made regarding the wheel rims and despite initially painting them black, along with the other iron work, I will heavily dry brush with natural steel. I’ll also apply a light weathering of ‘mud’ to the wheels and spokes.

You will see from the pictures that I have some foot Artillery crew also waiting for their turn on the paint station. Whilst my painting mojo is being severely tested, I have decided to plough on regardless and finish all the artillery that I think that I will need for my army over the next month or so. I am being ‘helped’ by both my current reading and of all things, a drama on TV.

Vanity Fair...really?

Vanity Fair…really?

I knew that Vanity Fair was set around the Battle of Waterloo but most TV productions have ignored the battle. So I thought that this was a program more likely to appeal to Mrs W than to me. However, to my surprise, I have very much enjoyed it. The costumes and uniforms look fantastic (as do those wearing them), the acting is excellent ( Martin Clunes steals the show for me) and the modern take on the story has worked very well as far as I am concerned – even the soundtrack is excellent. The new ITV production has very much included the battle, with some excellent action. The scene where the infantry form square to fight off the Cuirassiers was excellent. I know some have raised eyebrows at the fact that the dismounted Cuirassiers attempted to press home their attack on foot but I wondered if it did happen. Who knows? What does one do when the blood lust is up, you’ve had your horse shot from beneath you and the bastard that did it is loading his gun ready for the next shot. Running away clearly isn’t going to work….

As if this wasn’t good enough, the next battle scene showed the French Old Guard, in all their glory, marching up what they thought was a deserted hill, only for the English to stand up and pour fire into them. Well, my imagination went into overdrive and I couldn’t wait to get back to painting my army!

John Hussey Waterloo Campaign

John Hussey Waterloo Campaign

On a more serious note, I am currently working my way through John Hussey’s first volume of the Waterloo campaign. There’s very little action in it so far – having reached page 373, we are just at the 15th June 1815 and the first encounters between the French and Prussians. BUT John Hussey has done a superb job with his forensic research and analysis of the campaign. Having read many accounts of the battles of Quatre Bras and Waterloo, so far, this book has been the best that I have read in helping me to understand how and why the battles took place.

This isn’t the place for me to do a full review but one rather simplistic impression stands out. If Wellington was trying to herd Cats to get the allies in place to fight Napoleon, Napoleon at times seemed to be herding snakes! There’s no evidence of a conspiracy in the French camp – they just don’t seem to like each other! Once again, each time I read a chapter, I am inspired to get painting again. I want my army ready to fight the French!

Black Powder 2ed. has arrived!

Black Powder 2ed. has arrived!

Finally, my copy of Black Powder 2ed. has arrived. Just in time to provide a tonic for the troops! I’d better get painting!

Horse Artillery colours.

Horse Artillery colours.

Back to painting – the colours that I have used for the Royal Horse artillery are as follows:

70955 flesh; 70950 black; 70899 dark Prussian blue; 70984 flat brown; 70901 pastel blue; 70871 leather brown; 70992 neutral grey; 70947 red; 70953 yellow; 70801 brass; 70864 steel; 70997 silver. That is also pretty much the sequence in which I have painted as well.

Happy painting!

THE COMMERCIAL BIT

All of the paints used are available post free from my shop here:

VALLEJO PAINTS

Use the search function if you are just looking for a specific colour

At the time of writing, you can still pre order Black Powder second edition through my shop and get the free figure and of course it will be sent out post free on 6th October, the official launch date. Hurry up though, I am running out of the preorder stock with the figures!

BLACK POWDER


Maiden Castle

One of the pleasures of the hobby, that I spend most of my time so immersed in, is the different facets that can be enjoyed with other people, family and friends. We are very lucky in this country to be surrounded by history that is very accessible and often set in the beautiful English countryside. So a casual walk with the family can still be a source of inspiration for my hobby.

A walk in the country

A walk in the country

We were in Dorset to celebrate my Brothers 60th Birthday and after a nice meal, a few drinks and countless games of Pool on the previous night, a nice walk to blow away the cobwebs was required. Pete had discovered that Maiden Castle, the largest Iron age hill fort in the country, was just a stones throw away from where we were staying. Even better, although being looked after by English heritage, entry is free!

2018-09-15 11.18.10 Rather than include the history of the castle here, I’ll add some links at the end of the blog so if you are interested, you can start your own research. In the meantime, here’s a pictorial tour of the castle from my perspective. I’ve added in pictures of some of the story boards, so you can see the official commentary.

The View as you approach the Western Entrance

The View as you approach the Western Entrance

As you approach the Entrance to the Castle, the scale and size becomes more apparent. In it’s time, Maiden Castle must have dominated the area as a seat of power.

How the Western Entrance might have looked

How the Western Entrance might have looked

Maiden Castle - the view from the top

Maiden Castle – the view from the top

The views of the surrounding countryside were certainly impressive on a clear day!

Maiden Castle - story board 3

Maiden Castle – story board 2

The fort started out as a Neolithic gathering place and over the course of the years, developed into the massive complex that we see today. There are stories of the Romans laying siege to the hill but it seems that there is no firm evidence to support this. I certainly would not have fancied trying to climb over the mounds and ditches whilst the locals were throwing sticks, stones and harsh words!

Maiden Castle - the complex banks and ditches protecting the summit.

Maiden Castle – the complex banks and ditches protecting the summit.

Maiden Castle - Burial Grounds

Maiden Castle – Burial Grounds

Maiden Castle -The Eastern Entrance Story Board

Maiden Castle -The Eastern Entrance Story Board

Whether the Romans fought their way into the fort or defeated the occupying people in battle elsewhere isn’t clear. What is for sure is that the Romans did take over here in Dorchester and the hill fort became the site of one of their Temples.

Maiden Castle - Roman Temple Ruins

Maiden Castle – Roman Temple Ruins

Maiden Castle Roman Temple

Maiden Castle Roman Temple

Maiden Castle - an Aerial View

Maiden Castle – an Aerial View

An aerial view of the castle shows it’s complexity and size. As I walked around it, I couldn’t help but think of the history and events that had taken place there. I have ambitions to build a Roman Army and I have been very tempted by the Victrix range of Imperial Romans available. Like wise, the Footsore Romano – British range would make a lovely warband. I’m sure that if King Arthur did exist, he would have at least ridden by this area!

King Arthur - Footsore Models

King Arthur – Footsore Models

The Commercial Bit

First the links to:

ENGLISH HERITAGE – MAIDEN CASTLE

WIKIPEDIA _ MAIDEN CASTLE

If, like me you are tempted to build a Roman army, a great place to start is with the new Victrix range:

VICTRIX RANGE

For an even more comprehensive range, you cant go wrong with the Warlord Hail Caesar range:

WARLORD GAMES – Hail Caesar 

For a later Roman or Romano British army, the footsore range contains some beautiful models:

FOOTSORE

At the time of writing, items are supplied post free to most world wide locations!

Happy Modelling!

Artillery Autumn – Jumping the traces…

My modelling continues to be dominated by my obsession to finish my Artillery project. I am having to use all of my self control not to be distracted by other more tempting models that I have recently acquired. So far , I’m sticking to the plan…’I’ve started , so I’ll finish’!

I had already decided but was further encouraged by some excellent feedback on TMP to add the traces to the limbers. I thought that this would be fairly straight forward and that it would be easily done once the horses were based. In my mind, I had decided that I needed the horses to be fixed in position to enable me to measure the traces accurately. This of course is true but the mistake that I made was that I should have prepared the horses before I had even started to paint them by drilling out the small holes where the traces would fit.

I also needed to make the traces. I had thought that I could use the wire used to hang pictures as this looks about right for the ropes. There was an issue though. The picture wire that I had was too thick and also would not work with the chain that I had in my spares box. I could go and either search out some narrower wire or a different sized chain but my patience was wearing thin and I wanted to get the job done. I decide to wind the rope myself, using some thin florists wire.

Wire traces in my bench vice

Wire traces in my bench vice

My first attempt at winding the rope was a bit patchy – I was trying to do the job by hand and the result was somewhat non – uniform to say the least. Regardless, I pressed on, and with ‘ropes’ the correct size, I was able to thread them through the chain to make my first trace.

The first trace!

The first trace!

It was then just a question of cutting them to the correct size and gluing them to the horses….it was at this point that I realised I should have drilled the holes first. Even with the smallest of hand drills, I couldn’t get an angle to make a decent hole and I was in danger of damaging the paintwork on the model. If a bad workman blames his tools, then I maybe not that bad after all, as it was my tools that came to the rescue. Using my Zuron flush cutters, I was able to get a perfect flat cut on the ropes and with a combination of Expo thick super glue and spray activator, I managed to get the traces to adhere to the horses.

First traces fixed to the horses

First traces fixed to the horses

It isn’t a perfect solution and if I’ve made it sound easy, trust me it wasn’t! It took about 30minutes to get the first trace in place during which time I had stuck it to myself about six times, ‘lost’ it on the floor, stuck it to the tweezers and developed a whole new combination of swear words, which is quite an achievement for me….Fortunately, to paraphrase an old movie poster, ‘nobody can hear you scream in the garage’.

Two traces done...22 to go! Two traces done…22 to go!

At that point, I gave it a rest for the evening. Overnight, I had a brain wave and remembered how to wind model rope from wire. The solution is simply to put a cup hook into a hand drill, fix three lengths of wire into the mini bench vice and then fix the wires to the cup hook and wind the drill at a steady pace – perfect traces every time!

The hand drill does it! Perfect traces everytime!

The hand drill does it! Perfect traces every time!

With the traces more uniform, I was able to make faster progress and over the course of the next two evenings, I finished making and attaching the traces. There is just one problem. Whilst the joints on the traces are quite strong when pulled, any lateral movement tends to dislodge them. So even with the reinforced Renedra limber bases the weight of the model will cause the base to flex – no problem – the traces flex and hold. But, pick up the model and accidentally press the traces and as likely as not they will snap off , as I have found to my cost. Despite this, I was able to finish the landscaping on the base and I think that I have a nice model for my cabinet.

Horse artillery Advance!

Horse artillery Advance!

So I now have a slight dilemma, do I add the traces to my other foot artillery limber and make it look nicer for the cabinet or do I leave the traces off and make it a more robust model for gaming? I think that I will add the traces but see if I can work out a way of drilling the horses without damaging them. There’s usually a simple solution to all problems. Hmmm, may be a bit of masking tape will protect the horses and give the drill something to ‘bite’ into…?

Horse Artillery Limber complete.

Horse Artillery Limber complete.

Whilst I summon up the enthusiasm to tackle the traces on the Foot artillery limber, I have decided to crack on with the crews for the guns.

Royal Horse Artillery Gun Crews - W.I.P.

Royal Horse Artillery Gun Crews – W.I.P.

At my current rate of progress it will be the end of September at least before everything is finished. I will have expanded my army collection to include a horse artillery battery of three guns and a limber and my foot artillery will have an extra 2 ( possibly 3) guns and crew as well as a new limber. With nine guns in my collection I think that I can say that I have enough British Artillery for now!

THE COMMERCIAL BIT

I have just decided to feature the three most useful tools that I used in this Project:

THE BENCH VICE

ZURON FLUSH CUTTERS

EXPO THICK SUPER GLUE

We have a huge range of tools, paints and adhesives in our range, to browse, just click into our shop using the link at the top of the page. At the time of writing, we post free to most worldwide locations.

Happy Modelling!

Battling with Black Powder

In what could be the last battle with the ‘old’ Black Powder rules set before the relaunch of the new version on the 6th October, I faced off against my long term gaming buddy Pete Harris in his new gaming room. We are both great fans of the Black powder rules set, having fought many a battle with them and enjoyed the easy going social atmosphere that the rules set bring to our games. We tend to play the ‘Vanilla version’ with very few of the extra rules from the supplements. We find that this makes for a simpler, fairer game, with less need to refer back to the rule book and fewer contentious issues to resolve. Our games are played in the course of an evening, on a smaller 6 x 4 or 8 x 4 foot table and so we use 66% movement and ranging distances. We also use half size units on the smaller tables for these ‘club’ battles. My British Battalions are actually split into 2 x 12’s, two units for the price of one! Pete has organised his French infantry into 16’s for club battles – the French are more likely to form column and 16’s look nicer. Cavalry are 6 per regiment, we simply split the full regiment of 12 for the club games. We still use one gun for our artillery but when we do get the chance to play larger battles, then we find that batteries of two guns look nice! Once on the table, there are enough figures to give the ‘feel’ of a decent sized battle but there is still space for the armies to  manoeuvre.

French Army deploy into line after a rapid advance.

French Army deploy into line after a rapid advance.

The only flavour that we have added to the basic game is to Give the French ‘Pas de Charge’ which effectively means that a level 8 general will pass orders for infantry columns on a 10. The British get first fire for their battalions but must fight in line. We do not give the Brit’s counter charge, or use any other of the rules in Albion Triumphant. These two simple changes are enough to ensure that the French will tend to be quicker to move around on the Battlefield and the British will tend to fight a more defensive battle.

The British Heavy Cavalry Brigade and the First Infantry Brigade.

The British Heavy Cavalry Brigade and the First Infantry Brigade.

Another change is our points system. It is very much simplified with standard Infantry battalions and Light Cavalry worth 2 points, Artillery 1.5 points, Lancers 2.5 points, Heavy Cavalry 2.5 pts. Add one point for D3 Heavy cavalry, Add 0.5 point for light Infantry, add 0.5 point for rifles. We also adjust by a point or so for elites, large units, small units etc. It is by no means a perfect system and how we got to those values is lost in the mists of time. However, it works and allows us to bring approximately equal forces or if required, deliberately unbalance the forces. For our battle tonight, Pete had 30.5 points and I had 31 points. This gave us both 2 Brigades of infantry and one Brigade of cavalry. If that sounds as though the forces were identical, the detail will show that this is not quite the case. For example, Petes’ cavalry brigade consisted of two regiments of Lancers and one regiment of light Chasseurs plus a Horse artillery gun. I had two regiments of Household heavy cavalry. There were other differences in the make up of our Infantry Brigades but I wont detail them here. You can see our original points system in an older blog here:

BLACK POWDER FOR CLUB NIGHTS

There’s one other rule we usually follow for a club night battle – we go off to the pub for a nice meal and a drink before settling down to play – We find this helps to put everyone in the right frame of mind! We don’t like to battle on an empty stomach!

THE BATTLE

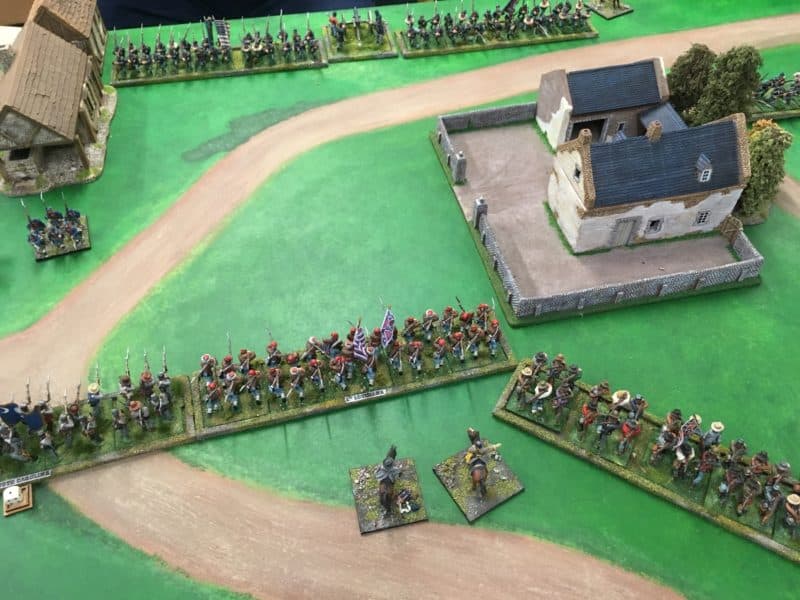
The French Infantry occupy the Farm House

The French Infantry occupy the Farm House

The French won the initiative and immediately advanced to capture the Farm house on the British Left. The general push forward saw them advancing on the Central pass between the hill and lake and attempting to capture the large hill that would dominate the battle. The British in reply decided that the French could have the Farm complex and moved their army to the open ground on the right. This would allow them to flank the French with the heavy Cavalry brigade and a strong infantry brigade, leaving the Rifles to defend the left wing and the rest of the brigade to hold the central pass.

British Move to the right

British Move to the right

It was now that the French ran into trouble. The artillery battery trying to gain a dominant position on the hill stalled, failing it’s orders to move thereby hampering the rest of the French brigade from moving. A blunder on the left also meant the the other brigade was not moving. Even though the French Commander was able to intervene, the French were unable to fully implement their plans. The Brigade on the far left was now playing catch up in pursuing the British, whilst the French cavalry were divided and vulnerable on the right.

Brish hold the pass - Rifles hold the flank!

Brish hold the pass – Rifles hold the flank!

The British Cavalry seized the initiative and the full Brigade charged a regiment of French Lancers. The ensuing combat saw the Lancers shaken and withdrawing in disorder. Although the lead British cavalry regiment had taken wounds, it was still able to follow up and charge the French Light Chasseurs. The resulting combat saw them forced from the table and the French Cavalry Brigade were now broken.

On the left, the Rifles had taken a pounding and before too long, they were unable to stand the pressure exerted by the full French Brigade on the left, resulting in them breaking and leaving the table. They had bought just enough time for the British to bring reinforcements to the centre to hold the pass and rout the lead French infantry unit.

The British Left under pressure. Can they hold?

The British Left under pressure. Can they hold?

For 5 turns, the French Artillery unit attempting to ascend to the top of the hill failed it’s orders, stalling the brigade and frustrating the French army in its attempt to dominate the centre of the Battlefield, whilst the British continued to press from the right. The French Commander was heard to shout ‘must I do everything myself?’ in frustration, as order after order was failed by his brigade commanders!

Withe the artillery stalled on the hill, the French infantry march into a trap!

With the artillery stalled on the hill, the French infantry march into a trap!

Eventually, the large French infantry unit ascended the hill only to find that they were in the jaws of a trap and facing two gun battery’s and five battalions of British infantry. They too were routed. With the British Heavy Cavalry now rested, they were now threatening the rear of the French army. Although the French were taking a heavy toll of the British brigade on the left, the game was up for the French. The Second Infantry brigade was broken and the Army decide to pull back, leaving the British in control of the field!

Heavy Cavalry break through! Fench rear under threat.

Heavy Cavalry break through! Fench rear under threat.

POST MATCH ANALYSIS!

Once the French had captured the farmhouse it was pointless to try and challenge on the left. It is difficult to take on infantry in fortified positions, so a move to the right was inevitable for the British. The surprise was how effectively the British were able to execute their orders. Conversely, the French had appalling luck with their orders rolls, leaving the commander to pick up the pieces and do the best he could. This gave the British the opportunity to exploit their numerical superiority on the right flank, whilst holding the majority of the French infantry on the left and in the centre. For once, the British Heavy Cavalry did as ordered and were more than a match for the Lancers. The real bonus was catching the French lights on the edge of the table, they were always going to loose the combat and get pushed back from the field of battle. With the French Cavalry gone, the British were free to move their infantry without threat.

Merde! Le Gun est stuck in ze mud...

Merde! Le Gun est stuck in ze mud…

The French gave the British Brigade on the left a good mauling, breaking them in the final turn but it was too late to save the battle. The French commander was going to have a serious talk with his Brigadiers!

French Infantry advance. These guys did their job!

French Infantry advance. These guys did their job!

It’s nice to win a battle but in fairness to Pete, I should point out that the last time our forces met, he trounced my army in three turns! The dice gods can be very fickle!

THE COMMERCIAL BIT

It’s no secret that I am a great fan of the Black Powder Rules set. I think that it facilitates a great game without losing sight of the fact that the hobby is about having fun with friends whilst playing with toy soldiers.

fc57c2a7-4872-488d-8dd9-61f47aa5e874

The new version of Black Powder is due to be released in Early October, provisionally on the 6th. If you would like a copy post free, with the exclusive miniature then simply click here!

BLACK POWDER VERSION 2


Limbering up…

Well ‘Artillery August’ is coming to an end and I had planned to complete some extra support for my Waterloo based army but I’m afraid that I will fall short. To be fair, my goal of completing two limbers, and five artillery pieces and the crew was very ambitious for the amount of time that I have to paint. To put this in perspective, I had planned to paint two limbers, 12 horses, four riders on the limbers, 6 outriders, 5 cannon and 20 crew in four weeks. Still lets look on the positive side. I have completed the two limbers, four limber riders, six outriders,  6 horses and 6 more are nearly complete. I also have 2 more cannon nearly ready for service, so another month should see this project finished…

British Horse Artillery Limber completed - awaiting basing.

British Horse Artillery Limber completed – awaiting basing.

So, to back track a bit and give some details of how I went about painting these lovely models from Warlord games. I have already discussed my choice of ‘grey’ for the limbers and guns in my previous blog, 50 Shades of Grey here:

50 SHADES OF GREY AND A TOUCH OF BLUE

This article was posted on TMP and as a result of some really good feedback, I’ve gone a bit heavier on the weathering of the wheels. There was quite a discussion regarding whether the wheel rims on the wagon would really be black – they were painted so for the ‘Parade Ground’ but it was felt this paint would soon rub off in service. So I think that I will re visit the weathering on the cannon and limber wheels and make the steel a bit more obvious. This then of course leads to the debate as to how much to weather equipment and uniforms. That topic in itself would be worth a blog article or two but I think that it is a question of personal taste. I am focused on producing units for wargames to the best of my ability, with the time that I have, not diorama standard figures. If you would like to have a look at the TMP thread, click here, there is some superb research in one of the links on the British Artillery.

TMP THREAD

Foot Artillery Cannon and Limber awaiting weathering and horses!

Foot Artillery Cannon and Limber awaiting weathering and horses!

When it comes to painting the horses, I am now happy with my ‘triad’ of colours method. I prefer to start with a black undercoat, and then paint the base coat, with the other two colours wet and dry brushed over the top.

Limber horses - work in progress.

Limber horses – work in progress.

You can see that the right hand horse is a bit messy from dry brushing but once the horse furniture is repainted in black, things look a bit more natural. For the Foot artillery horse I used triad of Chocolate brown, Flat Brown and then Mahogany Brown. I added a touch of Iraqui sand to the Mahogany Brown for the final light dry brush. For the Horse Artillery Limber I used a triad of Flat Brown, Flat Earth and Cork Brown for a lighter finish.

Saddle Horse for the limber

Saddle Horse for the limber

Once the detail is painted – steel chains, brass buckles etc the horses are ready to be based. I’ll also add some white or black ‘socks’ to at least four of the horses for some variation.  I don’t usually quick shade my horses but I did use army painter quick shade to finish the Horse Artillery Horses – it does make them more durable and helps with shading the saddle blankets etc.

Horse artillery limber - Lighter brown horses after Army painter quick shade applied.

Horse artillery limber – Lighter brown horses after Army painter quick shade applied.

As always, after the quick shade has been applied, I use a brushed on Matt varnish and I will usually rehighlight any whites and metallics to get rid of the ‘dirty’ effect.

The full limber on it's Renedra Base.

The full limber on it’s Renedra Base.

I have used the new Renedra specially designed Limber bases for the limber and team. These bases are a bit thicker than normal and are reinforced underneath to help support the weight of the model. I have also used a standard 25 x50mm base to raise the limber up to the same height as the horses, who have their own integral bases moulded on.

Out riders mounted for painting

Out riders mounted for painting

To paint the out riders, I use a blu-tack ‘saddle’ to mount them on Plastic tubes. They are then undercoated with a grey undercoat and block painted. I then paint on Army Painter Dark Tone quick shade and when dry, use a brush on Matt varnish. Once this is dry, I re paint the whites, leaving any shading and re highlight the metallic and lighter colours where I think necessary.

So with one limber more or less complete, the other awaiting it’s horses and both needing the basing completed it’s just a small matter of finishing the crews of the two foot artillery guns:

Foot Artillery crews ready for priming

Foot Artillery crews ready for priming

and of course, getting on with the Horse Artillery – which is what prompted this project….

Horse Artillery still in their packets

Horse Artillery still in their packets

As you can see, I have no hesitation in mixing manufacturers figures. I think that it gives a nice variety  in poses and any minor difference in size is barely noticeable on the table. I will have Victrix, Warlord and Perry Miniatures happily mixed together on the table! So Artillery August looks like turning into Artillery Autumn but once these are finished I will not be adding any more British artillery to my army for a while…..

The Commercial bit

All of the paints, tools, brushes, glues, and finishing products are available post free from my shop here:

ARCANE SCENERY

I would particularly recommend the new Renedra bases if you have a similar project:

HORSE AND LIMBER BASES

The rather superb Warlord Limbers are not held in stock but we can order them in for you and still send post free! Use the shop contact page here:

TO ORDER THE WARLORD LIMBERS

I hope that you enjoy your modelling!

Waterloo Men

The beauty of our hobby is the many facets that can absorb you. I spend a good deal of time modelling and painting (too much according to my Wife!), I game at least once a fortnight and I spend many a happy hour researching, either on the internet or reading. I am currently reading John Hussey’s book on the 100 days Campaign. Actually, it is in two volumes but lets get Volume 1 read first! There’s another facet that I also enjoy, visiting battlefields or historical sites. I have fulfilled one ambition by visiting the Battlefield at Waterloo. You can read about some of my impressions in early Blog articles here:

BATTLEFIELD VISIT – LA HAIE SAINTE

THE HEROIC STAND OF THE INNISKILLING

Cossall Church

Cossall Church

Grand excursions like this are few and far between. However, there is plenty to keep me occupied closer to home in Nottingham. I had come across the story of Corporal John Shaw of the life guards in quite a few accounts of the Battle of Waterloo. I have written a small piece on John Shaw for Wargames Illustrated when putting together a painting guide to the Warlord Games Household Cavalry boxed set.  Shaw was from Cossall, a small village to the north of  Nottingham and I was aware that there was a monument to him in the graveyard at St Catherine’s Church at Cossall but had yet to pay a visit. So this weekend, I combined a trip to Cossall Church with a errand to go out an buy some Wall Paper for the bedroom that we are decorating . Fortunately my Wife was focused on the wall paper, whilst I was day dreaming about Waterloo!

Memorial plate at Cossall Church

Memorial plate at Cossall Church

As it turned out, the monument, erected in 1877, is a memorial to three Waterloo veterans, John Shaw and Richard Waplington both of the Life Guards and Thomas Wheatley of the Light Dragoon Guards. The latter intrigued me. I thought that there were only Light Dragoon Cavalry Regiments not Light Dragoon Guard cavalry regiments. According to the references that I have so far found, Wheatley was in the 23rd Light Dragoons. I’m not sure if it is of significance and will do some further research. Was the memorial stone creator being generous in awarding Wheatley Guard status? Whatever, Wheatley survived the battle and lived the rest of his life in Nottingham once discharged from the Cavalry.

Cossall Memorial

Cossall Memorial

Memorial inscription

Memorial inscription

I was unable to locate his grave in the graveyard although I did find other Wheatleys’ buried there – it seems likely that there is a family connection and although a recent web article speculates that the memorial is built on his grave, I am unable to confirm this.

Detail on Memorial

Detail on Memorial

Unfortunately, the church was closed and so I was unable to find further information but I will go back over at some point to see what else I can discover.

Wheatley family grave

Wheatley family grave

In the course of telling one of my wargaming buddies, Andy,  about my excursion he said ‘of course, you do know that there is a Waterloo man buried in Bingham Churchyard?’ Well despite the fact I have lived in Bingham for some 27 yaers, I had no idea! So I had a wander around the local Church yard and sure enough found the grave of Richard Holt, who served at Waterloo. Initial information indicates that he was with 40th Foot but I have yet to confirm this. If it was so, he not only fought at Waterloo but was across the Atlantic, fighting the Americans in the war of 1812. I had a chat to the Church warden but he was unable to tell me any more about Richard Holt. He did say that he had a relative called Grey, who served in the artillery at Waterloo and who was also buried in the Church Yard but the grave was now lost.

Richard Holt a Waterloo man buried in Bingham

Richard Holt a Waterloo man buried in Bingham

All in all a most rewarding weekend. I’ve commented before that History is often very close to home – it’s just a question of knowing where to look. I find it all fascinating and the stories surrounding the individuals help to bring the past alive. I do love my hobby!

If you would like to read more about the Cossall Memorial to Waterloo, click here:

WATERLOO: THE COSSALL MONUMENT


50 Shades of Grey – and a Touch of Blue?

OK, it’s my attempt at a click bait title for this weeks blog but there is some rational behind it. The title was going to be Artillery August – snappy but not quite so interesting. So what am I rambling on about?

Victrix British Napoleonic foot artillery

Victrix British Napoleonic foot artillery

My first attempt at making and painting British Napoleonic Artillery was with the release of the superb Victrix British Napoleonic Artillery set in plastic. This was in the early days of my conversion to Napoleonic wargaming back in 2010! I built the set making a battery of two 9 pounders, a Howitzer and a couple of limbers, one of which, I added horses to.

Victrix 9 Pounder

Victrix 9 Pounder

Apart from a further three guns that I finished for my Prussian detachment, I haven’t added any artillery to my army in nearly 8 years! A strange thing, given that I am fascinated by the machinery of war as much as I am by the uniforms of the period. However, I have been adding to my Artillery park by building some of the ancillary equipment.

The field Forge takes it's place in Little Bingham!

The field Forge takes it’s place in Little Bingham


Wheel wagon and Limber

Wheel wagon and Limber

two wagons and casks trent6

Supply Wagons

Perry's British Ammunition Wagon

Perry’s British Ammunition Wagon

As well as the items shown above, there is also another limber with an ammunition limber, a water wagon and a spare limber and accessories. Quite a collection, so you would think that the last thing that I needed to paint was more limbers. However, Warlord Games had released a couple of lovely limbers, one horse artillery and one foot artillery and in a moment of madness, I was tempted….It was an excuse to add some Horse Artillery Guns to my army.

I started by cleaning up and assembling the guns and then went on to do the same with the limbers. They were then primed with Army painter Neutral Grey and I was ready to paint them. And now we come to the point of the blog post title – what colour is British Artillery painted? Well the answer is straight forward enough. British Artillery was painted a grey colour. Charles Franklins superb book on British Napoleonic Artillery shows the pieces to be painted a light grey – somewhere in the book ( the exact page eludes me as I write this) he gives the recipe for the paint which is a white base with lampblack mixed in a particular proportion to produce a neutral grey finish.

The problem for me is that in 2010 when I first started painting Napoleonics, the references that I initially found seemed to indicate that British Artillery was a bluish grey. In fact if you look at the art work on the Victrix box, the cannon look as though they are almost a pale blue. So when looking for the correct colours, I was pointed in the direction of the Foundry Triple, British Blue Grey and that is what I used to paint my British Artillery.

Next batch of Cannon

Next batch of Cannon

Now that I am converted to Vallejo paints, I think that I would now use Basalt grey as the under coat and gradually lighten it using Neutral grey through the light grey for dry brushing the details. In fact I started to do so on these new guns but then changed back to the Foundry Blue Grey. I decided that it was better for my collection to match than to have different coloured artillery in the same army – and no I’m not going back to repaint what I have already finished (that is despite my OCD circuit going into overload!).

Warlord Limbers Block Painted - in Bluey Grey!

Warlord Limbers Block Painted – in Bluey Grey!

As with many colours, the lighting can influence what you see, but there is definitely a hint of blue that probably shouldn’t be there! Once the models are inked or painted with quick shade, this effect will tone down and in the normal lighting conditions that seem to be common for wargames, they will look fine, albeit a little darker than perhaps they should. Incidentally, if you doubt that the same colour can look different under different lighting compare that pictures of the supply wagon with the wheel wagon and limber. I promise you that both were painted with the same pot of paint and highlighted and inked in the same way. It is either the lighting or photography that has changed the Supply wagon to blue!

Work in progress - horses for the limbers.

Work in progress – horses for the limbers.

So August is Artillery month for me. The plan is to complete the two limbers along with the 12 horses and 6 outriders and at least three guns and the 12 crew. I hope that I can then consider this part of my collection complete for another eight years…. I will follow up this blog with progress and show off the completed limbers in the next fortnight or so. I’ll also detail the colours and painting process that I have used to get the models finished.

The Commercial Bit

Nearly all of the paints, brushes, finishes and Models and much more are available, post free from my shop here:

ARCANE SCENERY

I haven’t supplied links to every thing this week but if you look in the manufactures categories, you will see exactly what we have in stock ready to ship. If you have problems finding something, please contact us through the shop link.

If you found this article of interest, there are plenty more to browse, either by category or date but if Napoleonics is your passion, particularly British and their Allies, click here:

NAPOLEONIC ARMY

I hope that you find the articles usful. Have fun!

Prince Bernhard of Saxe-Weimar-Eisenach

Prince Bernard was the commander of the second brigade of the Dutch Second Division. It was his brigade that was the first to arrive at Quatre Bras, and joined later by the First Brigade, they held the cross roads there for some 24 hours until reinforced by Wellington late in the afternoon on the 16th. The battle of Quatre Bras is somewhat overshadowed by the much larger affair at Waterloo a couple of days later. If Wellington was ‘humbugged’ by Napoleon in the opening stages of the campaign, it was the Dutch Brigades that initially saved the day at Quatre Bras and handed back some degree of initiative and contol to Wellington.  Some commentators have said that the holding action by these two brigades of the Dutch 2nd Division was one of the most important actions by any of the coalition brigades in the whole of the Waterloo Campaign.

800px-Karel_Bernhard_van_Saksen-Weimar-Eisenach

Following the Battle of Quatre Bras, Prince Bernard commanded the Dutch Forces holding Wellingtons far left wing, including the important farm houses at Papelotte, Frischermont and La Haie. Papelotte was temporarily taken by the French but subsequently recaptured. The Dutch forces here were also responsible for linking up with the Prussians although my understanding was that there was some initial ‘Blue on Blue’ action before the two armies were joined to advance against the French!

Followers of my blog will know that I had painted up a couple of the Nassau Battalions as part of a demonstration game at the Bingham Napoleonic day, where we based the action on the Battle for Pappelotte. You can read about the fictional battle for Papelotte in my blog here:

THE BATTLE FOR PAPELOTTE

If you are interested in how I built the Sarissa vesion of Papelotte, follow this link:

BUILDING PAPELOTTE FARMHOUSE

To read how I went about painting my Nassau Battalion, you can start here:

PAINTING THE NASSAU-USINGEN

However, despite painting 36 of the Nassau-Usingen Regiment second battalion and a further 12 figures to represent the volunteer Jaeger battalion, I had not managed to complete any Staff Officers. The Perry’s produce a lovely pack of figures representing Prince Bernard and his staff and it was this pack that I decided to add to my collection. I would paint one figure as a Brigade Commander and the other two models would be based together as a small vingnette so that I could use them as an Divisional Command stand in the event that I do actually get around to painting the rest of the Division…

Prince Bernard and his staff, block painted.

Prince Bernard and his staff, block painted.

As with the rank and file I decided to take the ‘easy’ route when it came to painting the command group and simply primed the figures with Army painter Greenskin spray. It was then just a question of block painting in the other colours of the uniform. I followed my usual reference from the Mont St Jean web site and the research that I had conducted for the Nassau Infantry. It’s possible that this is incorrect for Prince Bernhard, as he may have been wearing a blue Dutch Uniform but I am not too concerned – I am painting a Commander for my Black Powder army not a specific diorama of the Prince and his staff.

The figures have Dark Tone Quick shade brushed on.

The figures have Dark Tone Quick shade brushed on.

The next step is to brush on Army Painter Dark tone Quick shade. You could use ink but I like the protection the varnish gives, especially when painting metal figures. When it came to the horses, I didn’t use the quick shade method. I’m happy with my three colour dry/wet brush technique that I find quick and easy.

The figures on horseback

The figures on horseback

Once the figures were coated with Matt varnish, I re highlighted the metallic and the lighter colours as well as retouching and obvious mistakes – although looking at the pictures now, I think I have been a bit heavy handed with the horses eyes -something I will go back and fix and perhaps a dab of gloss varnish will help.

Another view of the Staff officers

Another view of the Staff officers

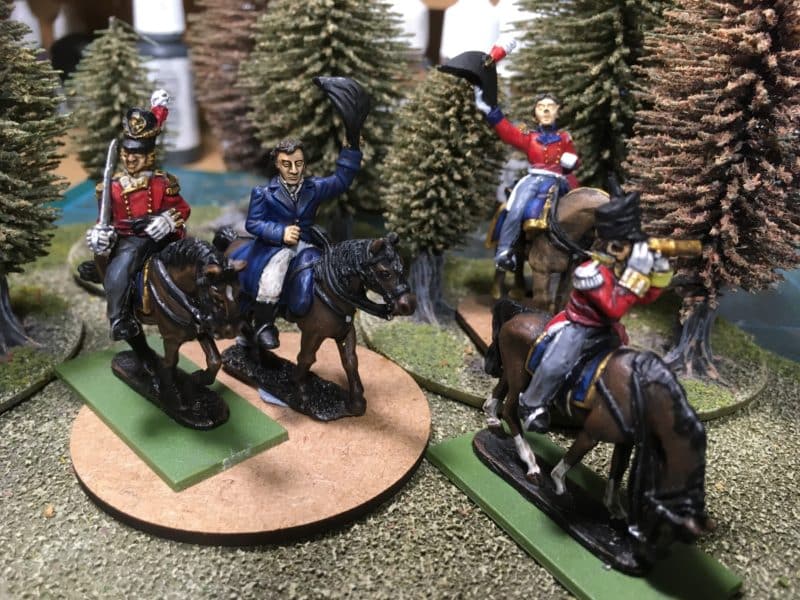
I had decided that the Officer wearing the Shako would make a good Brigade Commander, whilst the Aide mounting and the Prince Bernard figure would form the command group. So the Command group would go onto a 60mm round MDF base and the lone officer would be on a 20mm x 45mm base, the size I usually use for cavalry.

Nassau Commanders based

Nassau Commanders based

I used Vallejo dark earth paste to base the figures. Simply spread the paste over the base and push the figures into it. Then use a sculpting toll or even a cocktail stick to bring the paste over the figure bases and blend them in. I also added some ‘rocks’, from my garden, for a bit of detail.

I then painted the bases with my standard basing colour – Dehli Bazaar emulsion and dry brushed this with an Iraqi Sand mix to get highlights. A bit of scatter was added and of course some tufts and flowers to finish.

The Completed Command for the Nassau

The Completed Command for the Nassau

I now have a command staff for my Nassau Brigade!

As always, all of the paints, tools and basing products are available from my shop, post free at the time of writing:

ARCANE SCENERY SHOP

The models are only available direct from the Perry’s web site here:

PERRY MINIATURES


What a Distraction!


What a Tanker rules set.

What a Tanker rules set.

I’m not going to moan about the lovely weather and the Football again! No, I’ve been introduced to a new game, “What a Tanker!”. Written by Richard Clarke and Nick Skinner of Too Fat Lardies fame, the game is a simple and fun game of tank combat in World War Two. Fortunately, the game only really requires Two tanks per player ( you can of course just use one) and most wargamers will have a couple of tanks kicking around their collection somewhere! In my case I have some pre painted 1/72nd scale tanks that I had picked up cheaply as part of yet another of my ‘collections’, so I was good to go! I dusted off my late war Churchill and Sherman 75mm and trotted off to my mates house for a game. That in itself was a pleasure – no hernia inducing lifting of my growing Napoleonic army. Just two tanks, some dice and a ruler and set of rules and I’m sorted!

Sherman and Churchill ready for action

Sherman and Churchill ready for action

To be fair, Andy had set up the table with plenty of scenery, including the obligatory scattering of dead cows that were found over Normandy battlefields. He had also visited the Toofatlardies web site and downloaded the dashboard and other bits. You can see them here:
WHAT A TANKER DOWNLOADS

By the way, as far as I can see the downloads work perfectly- the people making the comments saying that they will not work may need to look at their own computer….

There are plenty of other reviews of the game out there on the net and ‘play through’ videos on Youtube but the one that I found the most useful is the one put together by the Lardies themselves. At just over thirty minutes long , it’s well worth a watch and you will be up to speed with the rules in no time.

The only thing is that I am unable to show you pictures of our game. I was so engrossed with the action, I forgot to take any! What I can tell you is that we had great fun playing the game and once we had got through a couple of turns, most of the rules/gameplay became second nature. The Lardies are experts at ensuring that their games are playable and create the sort of fun that most gamers will enjoy. The idea that initiative changes with each turn encourages players to take risks and creates those ‘cinematic’ show downs to produce high points ( or low… depending who wins through!) that keep the players engrossed in the game and provide the talking points afterwards.

My Sherman seemed to take on the character of a certain Brad Pitt movie, dicing with death and being constantly in harms way. It managed to survive most of the game- clearly there was a contract for a sequel in the offing! Andy’s star tank, a Jadgpanzer IV, quickly dealt with my Churchill, despite the superior armour of the Churchill but then he was promptly forced back into a wood and sat there as no movement dice were available! I think the correct word is schadenfreude as I watched Andy get ever more frustrated that his tank wouldn’t move. Eventually, it was the Jadgpanzer that won through, lumbering out of the wood (pun intended) and finally giving Brad Pitt the heroes ending that he was looking for! He who laughs last and all that…I only needed a small beer to overcome my brief disappointment at losing the game. Brad will no doubt be back again, perhaps next time with something more ‘shooty’ than the Churchill – pass the tank catalogue…

May be I need a bigger tank!

May be I need a bigger tank!

So we have another game to add to our repertoire. A slight distraction from Napoleonics and Samurai but with very little needed to get into the game, a welcome change. If you have a couple of Tanks gathering dust in your collection, I thoroughly recommend this game to you.

THE COMMERCIAL BIT

If you would like to get hold of this rules set, they are available post free, worldwide, at the time of writing, here:
WHAT A TANKER!

We have a huge range of 1/72nd scale tank kits in our shop. For a fast build, I recommend the Armourfast range, with two tanks per box, you only need spend £8.50 and you are in the game!

ARMOURFAST TANKS

ALL 1/72nd Scale Allied Tanks

ALL 1/72nd Scale Axis Tanks

Finally, if it’s scenery that you need we have plenty! However, We have just added some very nice 20mm or 1/72nd scale buildings to our range!

1/72 scale Buildings

I hope that you have as much fun as we did with these rules!

They think it’s all over…..

Well, it’s the day after England were knocked out of the World Cup by Croatia and I am somewhat melancholy as I sit to write my blog. To be fair, I haven’t much to write about. The World Cup gradually became all consuming for me and for once, my priority wasn’t the models on my work bench. Football combined with the hot weather meant that I have been spending less and less time on my modelling projects. Indeed, the last blog that I wrote showing my own work was dated 14th June, a month ago.

The last of Daimyo's Retinue on the work bench

The last of Daimyo’s Retinue on the work bench

In that time, I have managed to finish painting the last of Daimyos retinue. One mounted Samurai completed in a month is hardly something to crow about but I suppose it is progress. As I have been nipping out to paint and base in ever shorter bursts, I haven’t recorded my progress but six of the retinue are now complete.

Daimyos retinue

Daimyos retinue

REtinue showing detail of Arrow catcher.

Retinue showing detail of Arrow catcher.

As you can see, the last mounted Samurai that I completed has the Arrow catcher or Horo in place. I painted a very simple design on it to add some interest and based him in my usual style.

My Work bench is somewhat neglected...

My Work bench is somewhat neglected…

Another indication of my neglect of my hobby is the state of my work bench. If you look closely you can see another mounted Samurai – this is the spare Samurai that you get in the set mounted on a Warhammer horse. I’ve actually gone backwards here as although I have added some green stuff to make the horse look more ‘Samurai’ I have managed to break the model.

Green Stuff added but the model is a bit fragile...

Green Stuff added but the model is a bit fragile…

In trying to make the pose dynamic, I have created a somewhat fragile model that I doubt will stand the rigours of gaming – if you look closely, you can see that the one standing leg is threatening to snap as well – the white line above the hoof showing where the plastic is weakening.

So, the football is over for England (the play off for third place doesn’t really inspire me) and it’s time to get back to enjoying my modelling, hot weather or not. I will probably watch the Final but will find it hard to cheer for either side. More likely, I think I will tidy up my work bench and listen to it on the radio. As well as getting on with the final mounted Samurai, I can reorganise my lead mountain and decide on the next project.

Samurai Cavalry charge!

Samurai Cavalry charge!

In the meantime, just to cheer myself up, I got all of the samurai cavalry out of the cabinet for a photo shoot! I’m actually quite pleased with how they look. The football may be over but there’s plenty to keep me busy!

If you would like to read how I went about painting my Samurai, please look in the Samurai category of my Blog here:
SAMURAI BLOG

If you need anything to help you to complete your models, we probably have it in our shop and supply post free to most worldwide locations. Click here:
ARCANE SCENERY SHOP