My modelling continues to be dominated by my obsession to finish my Artillery project. I am having to use all of my self control not to be distracted by other more tempting models that I have recently acquired. So far , I’m sticking to the plan…’I’ve started , so I’ll finish’!
I had already decided but was further encouraged by some excellent feedback on TMP to add the traces to the limbers. I thought that this would be fairly straight forward and that it would be easily done once the horses were based. In my mind, I had decided that I needed the horses to be fixed in position to enable me to measure the traces accurately. This of course is true but the mistake that I made was that I should have prepared the horses before I had even started to paint them by drilling out the small holes where the traces would fit.
I also needed to make the traces. I had thought that I could use the wire used to hang pictures as this looks about right for the ropes. There was an issue though. The picture wire that I had was too thick and also would not work with the chain that I had in my spares box. I could go and either search out some narrower wire or a different sized chain but my patience was wearing thin and I wanted to get the job done. I decide to wind the rope myself, using some thin florists wire.
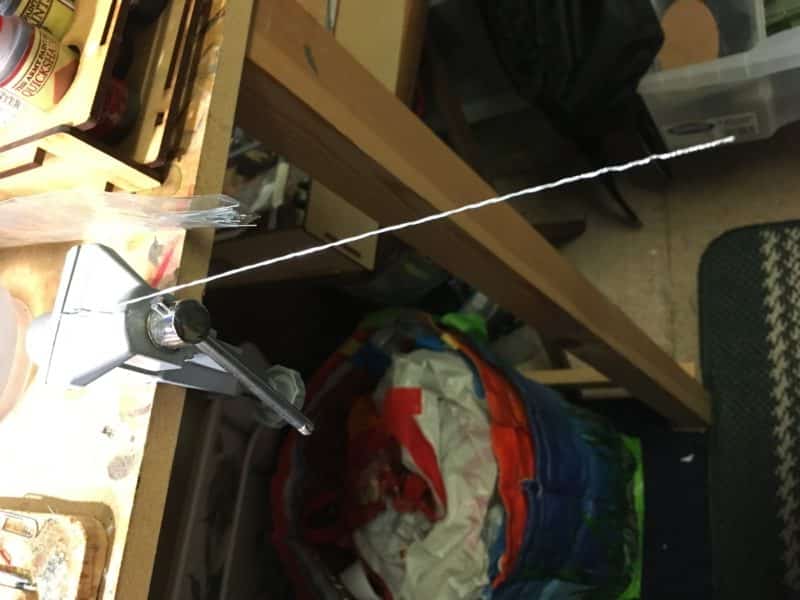
Wire traces in my bench vice
My first attempt at winding the rope was a bit patchy – I was trying to do the job by hand and the result was somewhat non – uniform to say the least. Regardless, I pressed on, and with ‘ropes’ the correct size, I was able to thread them through the chain to make my first trace.
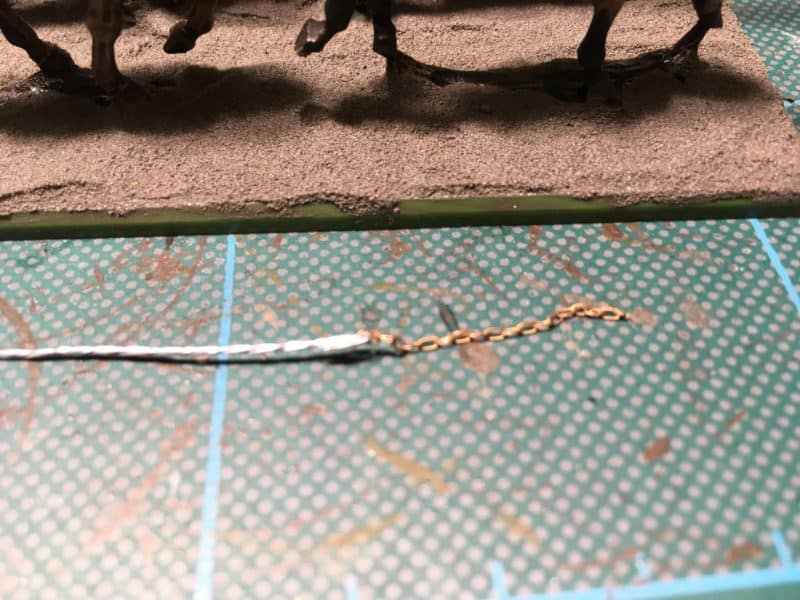
The first trace!
It was then just a question of cutting them to the correct size and gluing them to the horses….it was at this point that I realised I should have drilled the holes first. Even with the smallest of hand drills, I couldn’t get an angle to make a decent hole and I was in danger of damaging the paintwork on the model. If a bad workman blames his tools, then I maybe not that bad after all, as it was my tools that came to the rescue. Using my Zuron flush cutters, I was able to get a perfect flat cut on the ropes and with a combination of Expo thick super glue and spray activator, I managed to get the traces to adhere to the horses.
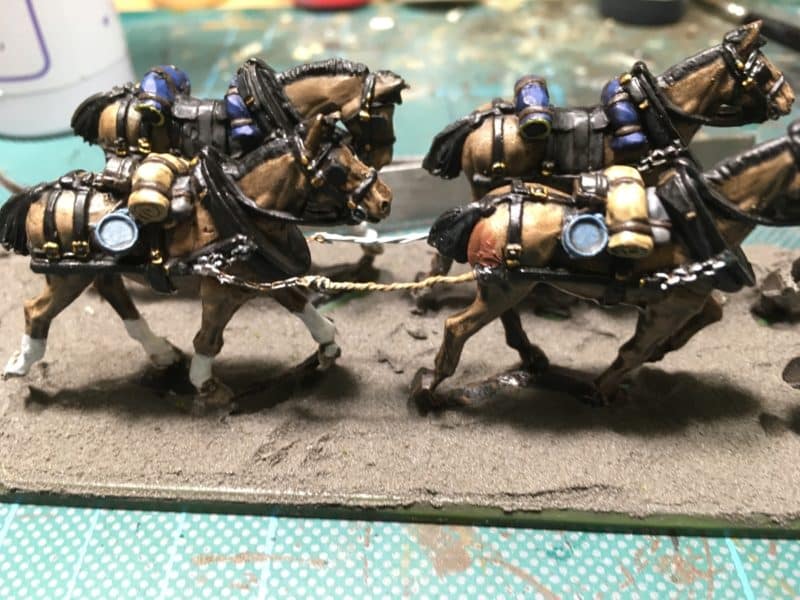
First traces fixed to the horses
It isn’t a perfect solution and if I’ve made it sound easy, trust me it wasn’t! It took about 30minutes to get the first trace in place during which time I had stuck it to myself about six times, ‘lost’ it on the floor, stuck it to the tweezers and developed a whole new combination of swear words, which is quite an achievement for me….Fortunately, to paraphrase an old movie poster, ‘nobody can hear you scream in the garage’.
At that point, I gave it a rest for the evening. Overnight, I had a brain wave and remembered how to wind model rope from wire. The solution is simply to put a cup hook into a hand drill, fix three lengths of wire into the mini bench vice and then fix the wires to the cup hook and wind the drill at a steady pace – perfect traces every time!
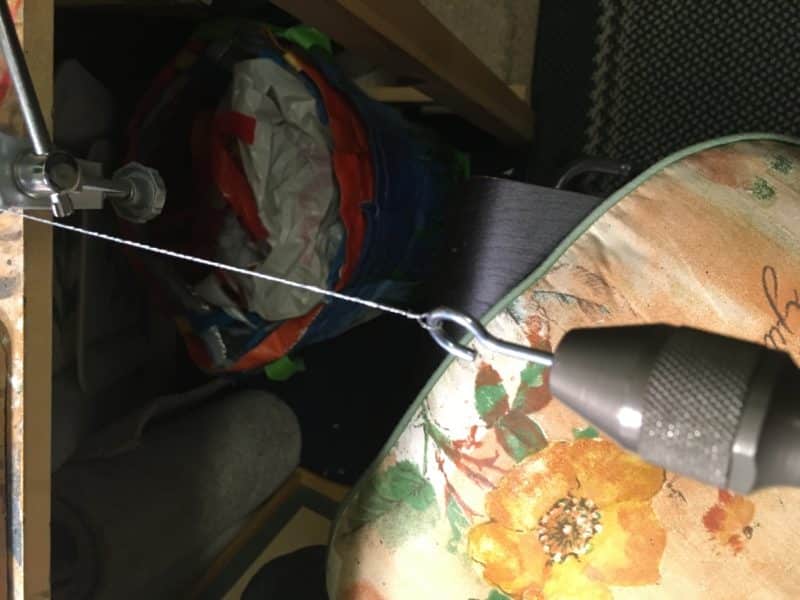
The hand drill does it! Perfect traces every time!
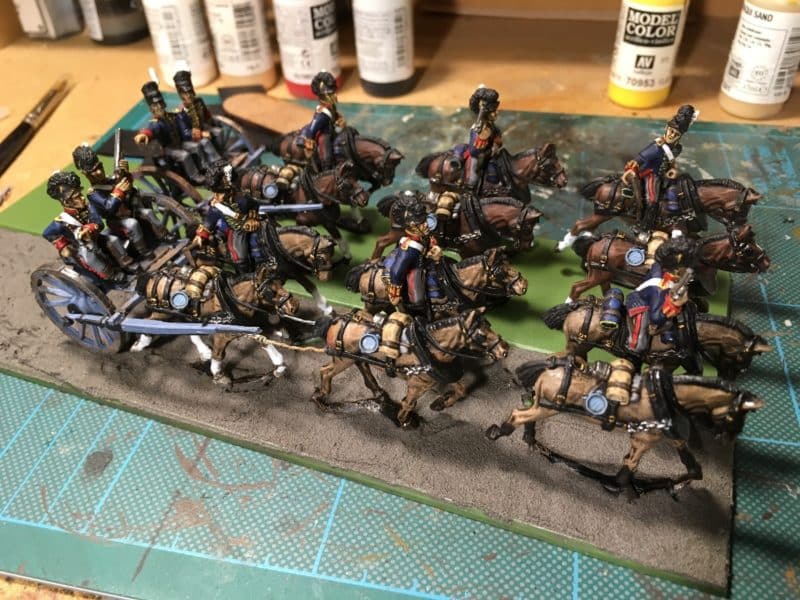
With the traces more uniform, I was able to make faster progress and over the course of the next two evenings, I finished making and attaching the traces. There is just one problem. Whilst the joints on the traces are quite strong when pulled, any lateral movement tends to dislodge them. So even with the reinforced Renedra limber bases the weight of the model will cause the base to flex – no problem – the traces flex and hold. But, pick up the model and accidentally press the traces and as likely as not they will snap off , as I have found to my cost. Despite this, I was able to finish the landscaping on the base and I think that I have a nice model for my cabinet.
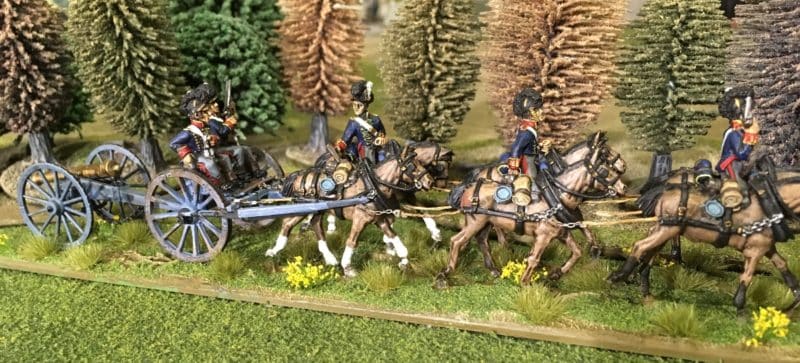
Horse artillery Advance!
So I now have a slight dilemma, do I add the traces to my other foot artillery limber and make it look nicer for the cabinet or do I leave the traces off and make it a more robust model for gaming? I think that I will add the traces but see if I can work out a way of drilling the horses without damaging them. There’s usually a simple solution to all problems. Hmmm, may be a bit of masking tape will protect the horses and give the drill something to ‘bite’ into…?
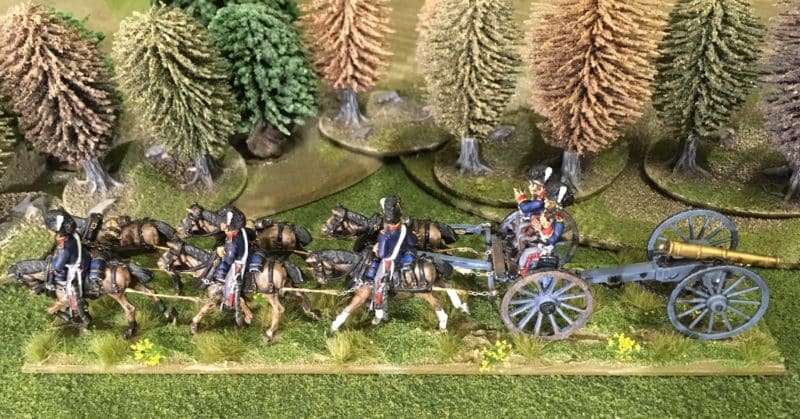
Horse Artillery Limber complete.
Whilst I summon up the enthusiasm to tackle the traces on the Foot artillery limber, I have decided to crack on with the crews for the guns.
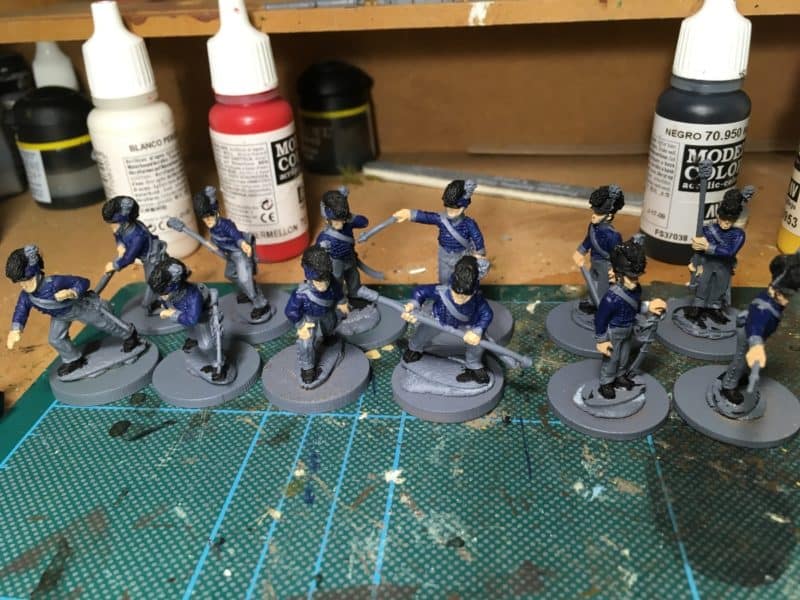
Royal Horse Artillery Gun Crews – W.I.P.
At my current rate of progress it will be the end of September at least before everything is finished. I will have expanded my army collection to include a horse artillery battery of three guns and a limber and my foot artillery will have an extra 2 ( possibly 3) guns and crew as well as a new limber. With nine guns in my collection I think that I can say that I have enough British Artillery for now!
THE COMMERCIAL BIT
I have just decided to feature the three most useful tools that I used in this Project:
THE BENCH VICE
ZURON FLUSH CUTTERS
EXPO THICK SUPER GLUE
We have a huge range of tools, paints and adhesives in our range, to browse, just click into our shop using the link at the top of the page. At the time of writing, we post free to most worldwide locations.
Happy Modelling!
