A Visit to Castle Rising

The pandemic has not just curtailed my wargaming over the last 18 months but prevented me from getting out and about to visit historical sites. Any spare time out of lockdown has been used to meet with Family and Friends. However, recently, the missus and I managed to sneak away for a weekend across to Norfolk. The primary aim of the weekend was a visit to Sandringham, the Queens personal home. We had a really excellent day there, made all the better by the fantastically helpful and pleasant staff. I would thoroughly recommend a visit. It certainly far exceeded my expectations as a place to visit. However, Sandringham wasn’t on my radar as a historical site. As far as I knew, it wasn’t involved in any sieges or battles, other than the occasional fallout between Andrew and Fergie or even Charles and Diana but I’ll leave all that to fans of the TV series, the Crown….

The Gate House and entrance to Castle Rising

Just down the road from our accommodation on the edge of Kings Lynn, was Castle Rising, a proper fortified castle with a long history to go with it. It was this site that interested me. At the time, I was unaware of the part that Castle Rising had played in history. I had not heard of it before my trip. I was not to be disapointed. Although the castle is now essentially a ruin, it is set in the most impressive defensive earthworks and looks everything like a castle should look! The entry fee was just £2.50 per person as there was no access to the upper ruins. Even so, I was happy to spend a couple of hours wandering around the place imagining how it would have looked in it’s prime.

The Castle Keep

It was originally built around 1140 by William d’ Aubigny primarily as a demonstration of his wealth and power. I’ve provided some links below to the official history and guides to the castle. It seems that the main claim to fame for the location is that it became the ‘prison’ of Isabella of France. She was the wife of Edward II but after attempting to take control of the crown with Roger Mortimer, Edward III, her son, placed her in house arrest here once he had toppled Mortimer.

Story board – A brief history of Queen Isabella

Although a most formidable fortress, Castle Rising came to be of more use as a hunting lodge and was known as a prestigious location in the 15th and early 16th centuries. The castle’s military defences were mobilised in 1461 by Henry VI in the Wars of the Roses but as far as I am aware no fighting took place in the immediate area.

View from the Left

I have since learnt that the castle had another role in the Wars of the Roses. On June 24th 1469, Richard, Duke of Gloucester ( later Richard III) was staying at Castle Rising. From here, he wrote to an unknown correspondent asking for a loan of £100. The Duke, who was on his first campaign, had left London in such a rush that had not had time to ‘purvey’ sufficient money for his own expenses.

The rear of the Keep

It seems that castles played a limited role in the War of the Roses but I suspect that they were used as ‘safe havens’ throughout the war. Although there were no great set piece sieges, it seems that Castles were still important as a means of projecting power and threatening the local area until such time as the protagonists eventually met on the field of battle. I guess that other point is that neither side really had the resources for prolonged sieges and no doubt there was little point in laying waste to a castle that you hoped to inherit!

Another view of the entrance

I find Castles both fascinating and inspiring and my imagination is usually in overdrive as I wander around these places. One day I really am going to build one for my gaming table! I hope that you enjoy the pictures and perhaps have a chance to visit for yourself.

The view of the Keep from the surrounding ramparts

The official links can be followed here:

CASTLE RISING WIKIPEDIA

CASTLE RISING ENGLISH HERITAGE

CASTLE RISING CASTLES FORTS AND BATTLES

THE COMMERCIAL BIT

I hope that you all enjoy your hobby as much as I do – remember that our web site will have much of what you need! Click here to see our shop:

ARCANE SCENERY

Happy Modelling!
Beaverette Armoured Car

I’m not sure why I am so attracted to Early War British Armour. In my youth I was obsessed with the more ‘glamorous’ German Armour and the idea of Blitzkrieg. But as I’ve got older, the quirky nature of the British Armour and the ‘Dads Army’ attitude to making the best of what they had has taken a hold in my imagination. So my focus now is building a collection representing these vehicles and weapons.

Beaverettes of 53rd Reconnaissance Regiment on manoeuvres in Northern Ireland, 1941

A perfect example of making the best of what you have is the Standard Beaverette Armoured Car. It really is an armoured car. That is, a car with armour bolted on to it. The first version of the vehicle was a Standard Motor Company chassis with 11mm steel plates bolted on to it. The steel was backed with 3 inch oak planks for extra protection. The driver could barely see where he was going and needed the help of an additional crew member to watch the roads. It was named the ‘Beaverette’ after Lord Beaverbrook, who was desperate to get some sort of replacement for the Armour lost in France and Dunkirk. The armament generally consisted of a Bren, Lewis gun or Boyes Anti Tank gun. Later models were used by the RAF for airfield defence and had twin Vickers or even a Turret from the Bolton Paul Defiant night Fighter.

The Beavette was never used overseas and production stopped in 1942. It was used mainly by the Home Guard and as has already been mentioned, by the RAF. Indeed, I first was made aware of the Beaverette when researching the ‘Rogation Raid’ on Torquay ( my home town), a ‘tip and run’ air raid that occurred in 1943. Beaverettes formed part of the towns Anti Aircraft defense that shot down 6 of the 21 Focke wulf 190 raiders.

I decided I had to have one for my collection.

Beaverette Armour car from 1st Corps

After a great deal of searching, I found that 1st Corps made a lovely model in 1/48th scale, complete with crew. The model consists of a resin body with metal Accessories – wheels, hatches and of course, the crew. It was a simple matter to wash, clean and assemble it and prime it ready for painting.

Beaverette crew painted & car primed
Basic colours added

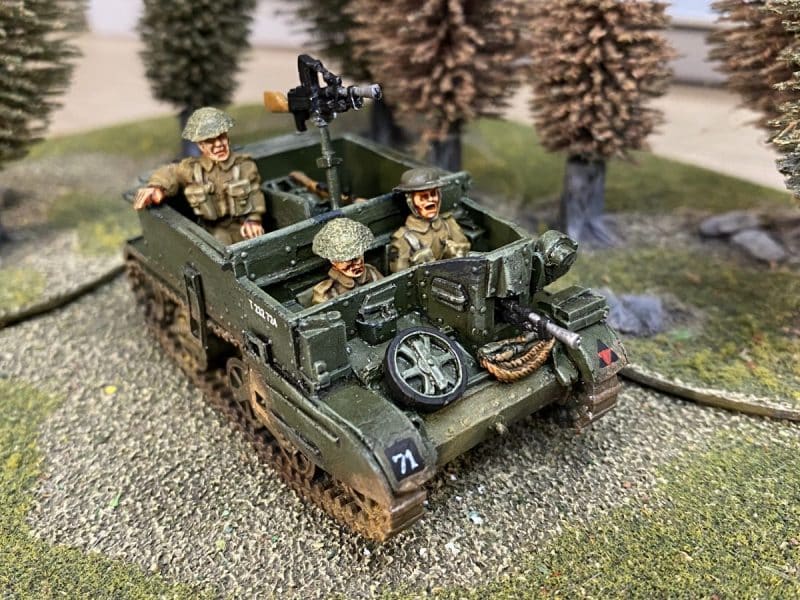
I used my airbrush to base coat the model with Mig Ammo Khaki Green (1939- 42) MIG113. I then hand painted the camouflage using British Olive Drab (1944-45) MIG0112. I should have masked off the model and used the airbrush again but I was too lazy and it seemed easier to use a brush. I wasn’t too worried about the colour either. Clearly, a 1944 olive drab isn’t going to be exactly the right shade but it gave me the effect that I wanted. In some of the reference pictures that I found, modellers had used a green/black combo but I quite liked the version below, which looks to me like the dark green on Khakhi green used by the BEF and so I based my scheme on this.

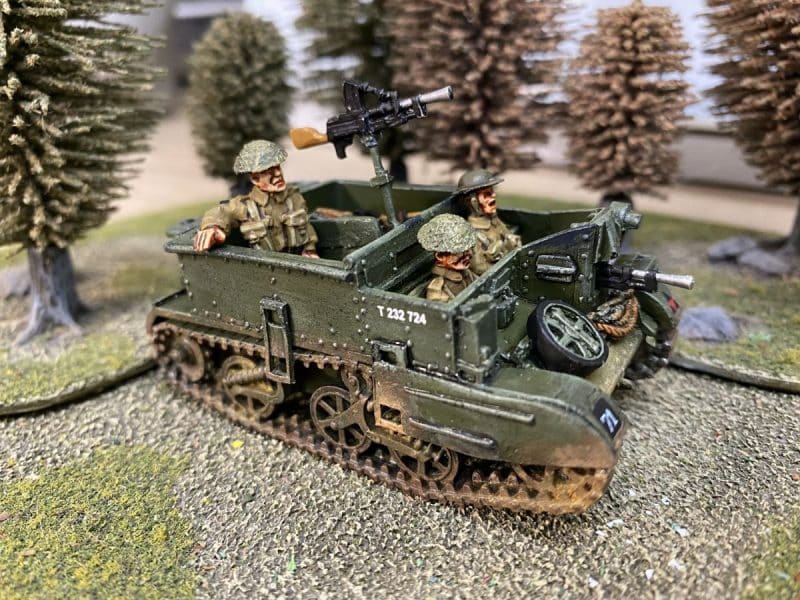
After the camouflage, I weathered the model with a pin wash of Dark tone ink around the rivets and panel lines and then I dry brushed the model using the original camouflage colours, lightened with Iraqi sand. The tyres were painted using Mig Ammo Rubber and tyres MIG0033 and darkened with a wash of dark tone. The markings were added using a combination of generic 1/56th markings that I had spare from Warlord games and I hand painted some of them. the vehicle number is ficticious. I then airbrushed the whole model with Mig Ultra matt varnish and when this was dry, I added some weathering in the form of pigments on the sides and wheel arches.

Weathering, crew and markings added
The other side!
The front view!

I had previously painted the crew in normal British army Khaki and added them, together with the bren gun to complete the model. So another model goes into the cabinet!

THE COMMERCIAL BIT

Almost all of the paints, miniatures, bases, basing materials and anything that you are likely to need for your hobby are available from my shop here:

ARCANE SCENERY

You can see our range of MIG ammo paints and accessories here:

MIG AMMO

we carry a huge range of Vallejo paint and accessories here:

VALLEJO

We dont carry 1st Corps models but you can order them direct here:

1st Corps

Happy Modelling!
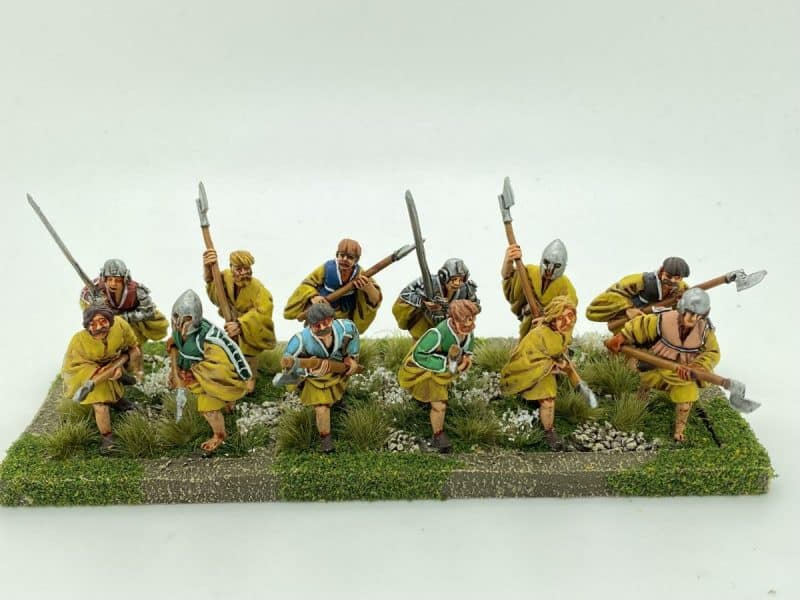
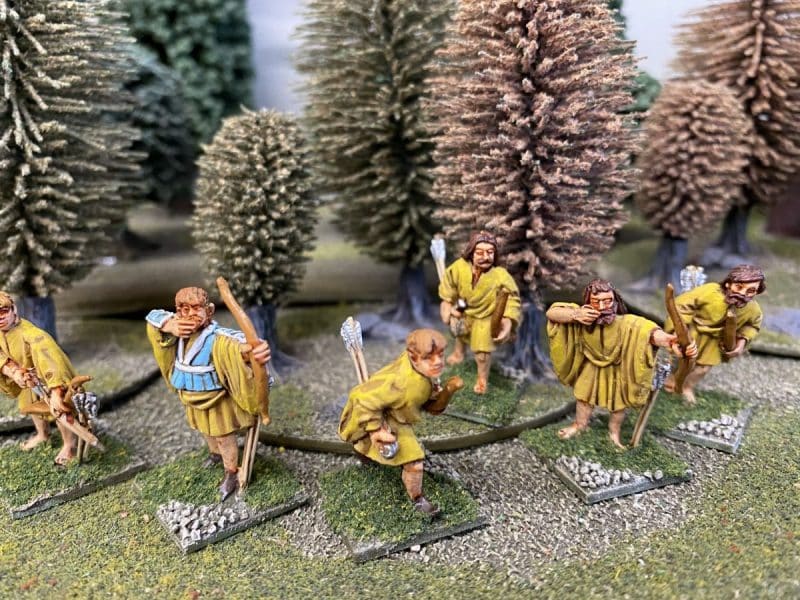
Kern Skirmishers

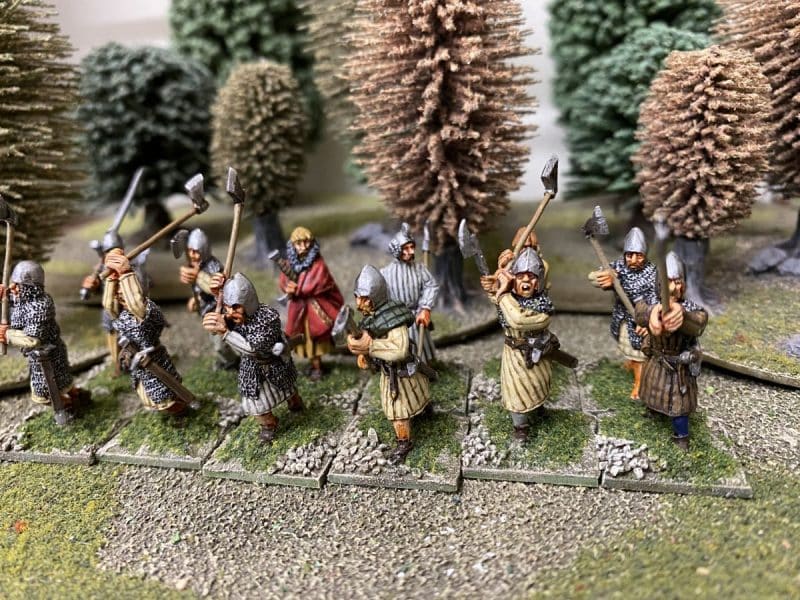
The War of the Roses rules set ‘Never Mind the Bill Hooks’ allows you to take Irish Kern as a skirmisher option. They were included as a nod towards their involvement at a couple of battles, notably the battle of Stokes Field 1497, considered to be the last battle in the War of the Roses. The inclusion of Kern was less of a historical requirement and more of an opportunity to add a bit of colour to players troops choices, as well as giving players a slightly different tactical problem to use/deal with.

On the face of it, a band of 6 Kern skirmishers are hardly likely to change the course of a game. But they can add to the fun and cause a great deal of mischief. Even if you don’t include them in your main list, it’s worth having a band in reserve, just in case the special event card is drawn that lets you deploy an extra band of Skirmishers anywhere on the table hidden in terrain.

special event card hidden Skirmishers!

Kern are pretty fragile. They only save on a 6 against shooting and they can only shoot ( throw Javelins or darts) a maximum of 6 inches themselves, so why take them? Well, where they come in handy is that they can move into hand to hand combat against other skirmishers. As they have the same movement as skirmishers, it’s unlikely that your opponent will be able to evade, so you will catch his skirmishers and then you will be fighting, rolling one dice for each kern against his 1/2 dice per skirmishers. So they are great at mopping up opposition skirmishers. They are also able to hide in cover, moving 16 inches regardless of the terrain, to attack any exposed flank or rear of a carelessly positioned unit. It’s unlikely that they will beat your average Billmen unit or for that matter, Men at Arms but they will upset your opponents plans and help to disrupt their battle line.

There is another risk to using these fierce warriors. Kern will pursue a beaten enemy, even if that means they go off table. They also ‘bounce’ off a unit if they dont daunt or rout the unit that they are attacking. This can be a mixed blessing as they will not stay locked in combat and can run away from a superior unit having caused their mischief. All in all well worth having a band just for the fun of it!

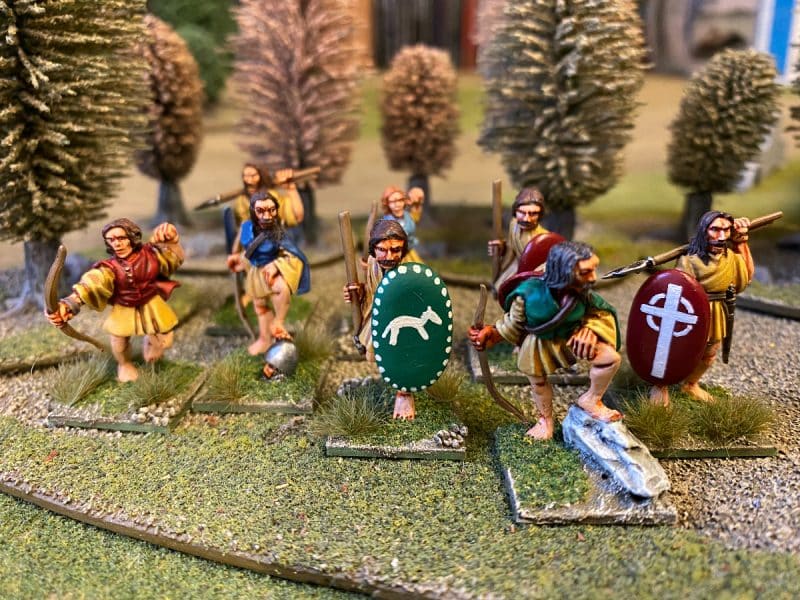
Crusader Miniatures Kern

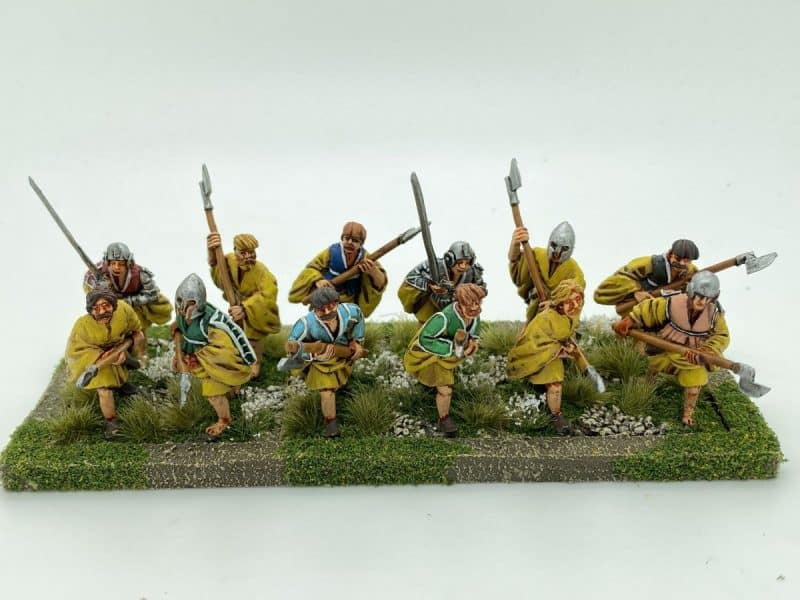
I used a pack of Crusader miniatures for my Kern. There are 8 in a pack, so although that is two more than needed, the other two figures will come in useful as additional levy or as part of a larger Irish contingient.

My research seemed to show that Irish Kern often dressed in yellow tunics. Painting yellow can be fraught with difficulties as it is not heavily pigmented as doesn’t cover well. Whilst chatting to a colleague about this problem, he told me that the best colour to paint over was pink. I decided to prime the figures in flesh and to test the theory. Priming the figures with Army Painter Flat Flesh would also save a bit of time as the figures are bare legged.

Primed with army Painter flesh.

I then painted the tunics with Yellow ochre. It’s a good yellow to use as it’s not too bright. I didn’t want my Kern to look as though they were wearing High Viz jackets! I then picked out the other featuresl – hair, belts, tunics in a variety of colours – see the picture for detail. The tunics were washed with soft tone and when dry, highlighted with yellow ochre again and then pale sand as the top highlight. The flesh was highlighted with flat flesh and then basic skin tone.

Yellow tunics done.

I used dark tone to wash the leather and other areas, then highlighted with the original colour and then added Iraqi sand to get the top highlights. Bows and weapons were painted with Vallejo old wood.

Detail added – tunics painted dark prussian blue and Burnt red to add some colour.
Lone Kern ready for basing

I did some research for the shield designs but decided that they wouldn’t have anything too sophisticated, so I hand painted the basic designs shown. I did consider painting a portrait of Phil Lynott on one of the shields, just so that I could sing ‘The Boys are back in Town’ when ever they charged out of cover into attack but decided my painting skills weren’t up to the job!

The finished Kern War band

I also made a minor conversion to one of the Kern. I thought that one figure with his foot on an opponents head was enough, so I removed the head on the second figure with a pair of clippers and added in an appropriately sized rock!

So another unit is added to my army. Am I finished now….? Well not quite. The next project will be to paint a couple of ‘rabble’ or levy units. I’m in no rush though, there’s plenty in the painting queue!

Almost all of the paints, miniatures, bases, basing materials and anything that you are likely to need for your hobby are available from my shop here:

ARCANE SCENERY

You can see the range of Crusader miniatures that we think are suitable to for the Wars of the roses, along with the rest of out Never mind The Bill Hooks range here:

NEVER MIND THE BILL HOOKS!

You can find all the Vallejo Model colour paints here. If you don’t want to browse, just enter the paint number into the shop search bar;

VALLEJO PAINTS

Happy Modelling!
Zulus at Balaclava

In the final battle of my gaming weekend, we played a Zulu’s vs British battle. The encounter was fictitious, although the battlefield layout was based loosely on the Battle of Balaclava from the Crimean War, with the Zulu’s playing the Russians. We have used this format of taking a battlefield from another period with great succes in our other games. It throws up some interesting problems for both players and of course some good talking points during and after the game!

Zulu’s scout the battlefield.

We also used the rules written by Andy Callan for Jacklex Miniatures ( Mark’s Company). They are available as a free download from the Jacklex site here:

“MAGDALA TO MAFEKING”
OLD SCHOOL COLONIAL RULES BY ANDY CALLAN

Once again, Simon drew the short straw and was playing the defending British encampment. He was certainly low on manpower to defend the camp but help was on the way. The question was – would it arrive on time? The Zulu army consisted of 7 large regiments of 50 Zulu’s each. Although the units are huge compared with the British, the simple but clever morale rules help to even things out. The large Zulu units make the game look fantastic though and give some idea of scale as well as intimidating the opposition!

The battlefield set up

Mark had done a superb job in painting and organising all of the figures and of course supplied the scenery for the giant sized gaming table. To add some extra atmosphere, Mark put on the Soundtrack from the film Zulu, and with the two of us providing the Zulu war cries, it was game on!

The initial positions – the British defend their camp

The battle commenced with the Zulu’s left horn of two regiments entering the battlefield to attack the forward gun emplacements. The rest of the Zulus, would only arrive on the throw of a dice, the ‘Head’ of three regiments of Zulu’s being the next in turn. The first two regt’s of Zulus advanced at speed, quickly overwhelming the first gun emplacement, putting the supporting Native Natal contingent to flight and moving on to engage the next gun emplacement.

The Zulu’s charge the guns!
The gun emplacements are quickly overwhelmed
The British firing line advances but the Zulu’s move around the flank!

The victorious Zulu’s left one regiment engaging the remaining gun emplacement, whilst the other regiment, rushed down the left flank towards the British encampment. The three companies of British regulars were drawn towards the battle for the surviving gun emplacement. With hindsight, this was a rash move, as the other Zulu regiment scooted around the back of the hill covering the flank of the camp before any determined resistance could be organised. The Zulu’s poured into the camp, over running the limited defence and proceeded to loot . A Royal Navy detachment managed to get away and after some time they began to subdue the Zulu’s but the damage had been done.

The Zulu’s are in the camp!

The main bulk of the Zulu force ‘ the head and chest of the buffalo’ in the form of three addition regiments were now attacking over the front ridge and charging the forlorn British firing line. There was a glimmer of hope, The relief column had finally arrived and by a stroke of luck it was four companies of British regular infantry. They immediately formed a firing line and attempted to support their colleagues further out on the battlefield.

More Zulu’s are on the way!
Steady lads – open fire, mind your marks!
Reinforcements have arrived!
The Zulu’s charge in!

Alas, they were too late. the Zulu’s swarmed into the firing line and after a brutal fight, the line was broken, with the British forced into forming a defensive knot. More British reinforcements now arrived in the shape of the irregular cavalry and an artillery detachment but it was too little, too late. The British centre had been crushed and wiped out to a man. The camp had been looted and the supply base smashed, it was time for the Zulus to withdraw. Even better the Zulu’s had achieved this with just 5 of the 7 regiments available. The right horn of the Zulu army didn’t make it to the battle – perhaps they were diverted by the action at Rorkes drift….

The British crumble under the assault!
The survivors attempt a last stand.
The Zulu’s are victorious!
The British are overwhelmed…

It was also time for us to head for home after a fantastic weekend of gaming. Thanks again to Mark of Jacklex miniatures for not only hosting the games,providing us with superbly painted and organised armies but for his wonderful hospitality.

THE COMMERCIAL BIT

I hope that you all enjoy your hobby as much as I do – remember that our web site will have much of what you need! Click here to see our shop:

ARCANE SCENERY

If you would like to see the classic range of Jacklex miniatures, click here:

JACKLEX MINIATURES

Happy Modelling!
Trafalgar- A wargaming weekend continued

My last blog article told the story of our refight of Vittoria. The game had lasted well into the early afternoon and so rather than start another large battle, we decided that something less serious was required. Andy Callan, is working with Wofun, a company that specializes in laser cutting 28mm gaming figures into acrylic plastic. The Company uses artwork by Peter Dennis. If you have any Osprey books in your collection or have bought a Perry or Warlord boxed set, the chances are that you are familiar with Peter’s excellent work. The combination of Peter Dennis’s artwork and the simple design of the acrylic figures mean that using the Wofun kits, you can produce a table ready army in a matter of an hour or so.

Admiral Collingwood (well, Steve Wood) surveys the enemy fleet!

Andy’s role with Wofun is to produce simple rules to use with the figures and as a result, he often receives samples of the latest Wofun products. He had recently acquired the Trafalgar boxed set, which features every ship from all three fleets present at the Battle of Trafalgar. It took about an hour to assemble the 60+ ships and we were ready to refight the battle. Andy hasn’t actually produced the rules for this set yet but over the course of lunch, he knocked up a set of simple rules that would give us a nice straight forward game.

There’ plenty of room on the table! The ship in the background is ‘Africa’

Our host, Mark, has a luxurious wargaming set up, including a massive 17x 8 foot table that uses carpet tiles for the base scenery. It was a simple task to relay the table in Blue carpet tiles and hey presto, we were ready to go!

Admiral Mark signals his fleet! ‘Get stuck in boys, last man in, buys the drinks!’

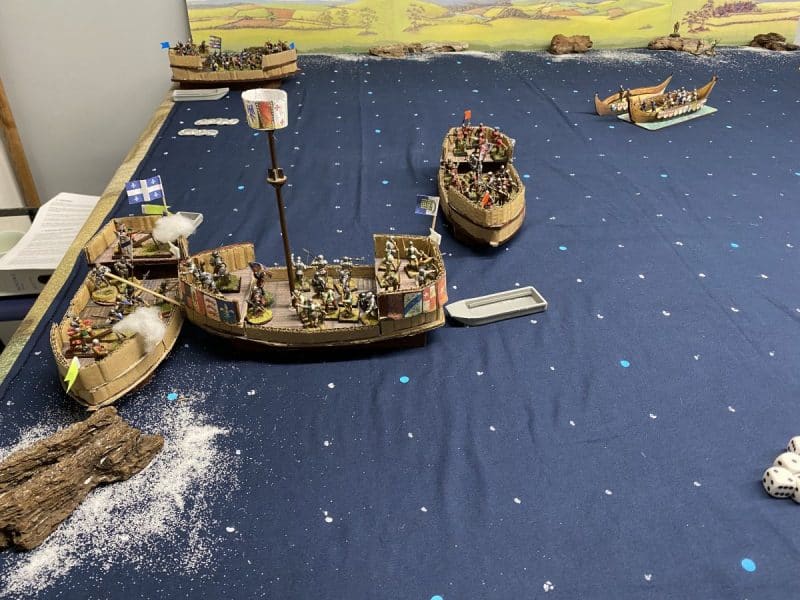
We chose admirals by drawing lots. Unfortunately for Simon, he drew the French and Spanish fleets – he was in for a difficult battle. As regards movement, the French and Spanish ships were given limited scope for maneuvering. We decided that the fleets would stay in the same relative position other than closing with each other, so forward movement was not allowed to any great degree – we didn’t want the ships to disappear off of the table! The French and Spanish were also at a disadvantage with firing, requiring 6’s to hit at anything over medium range, allowing the British fleet to close. The British had the advantage with their first broadside and so were encouraged to wait to open fire.

The French and Spanish open up at long range.

I’ll let the pictures tell the story of the battle. With the odds stacked against Admiral Simon, the Spanish and French were always going to struggle. Simon made things even more difficult by achieving the world record for rolling dice without getting a single 6! At one point, we actually checked to make sure he had 6’s on his dice!

The two British Fleets bear down on the Enemy.
Close action! Nelson gets to grips with the enemy
Collingwood prefers a more stately approach!

So the two British fleets, under Collingwood (me) and Nelson ( Mark) closed on the enemy and when in close range, opened with a devastating Broad side. As the British cut the Spanish and French line, raking the ships as they went, close combat ensued but by then it was very much over with a large number of the enemy ships out of action or smoking hulks! As expected, the fleet led by Nelson was first to contact the Enemy and was rewarded by forcing the French flagship to strike his colours.

The enemy fleet is raked from stem to stern!

Fortunately, Mark, who was playing Nelson did’nt get shot so I didn’t have to kiss him…..

Next up, Zulu’s at Balaclava!

THE COMMERCIAL BIT

I hope that you all enjoy your hobby as much as I do – remember that our web site will have much of what you need! Click here to see our shop:

ARCANE SCENERY

If you would like to see the classic range of Jacklex miniatures, click here:

JACKLEX MINIATURES

If you would like to see the range of Wofun products, Click here

WOFUN GAMES

Happy Modelling!
Prelude to Vittoria

Since lock down has been eased I have been making up for lost time on the gaming front. I was fortunate enough to be invited to my second weekend of gaming this year and joined Andy, Simon and Mark at Mark’s fantastic gaming venue at his house in North Yorkshire. Mark owns Jacklex Miniatures and his obsession is with 20mm classic metal gaming figures, rather than the 28mm armies that I am used to. The gaming group that Mark is part of also prefers umpired ‘old school home brew rules’ for Napoloeonics’, uses figure removal to count casualties and a more rigid command and control system, together with simultaneous orders and movement. All of which is a culture shock to someone who has spent 10 years or more playing the more relaxed ‘Black Powder’

The smaller scale figures still make an impressive sight!

None of the above detracts from the sheer spectacle of the games that we played, nor for that matter, the fun involved. Mind you, I do admit to a certain amount of frustration, particularly when I was unable to detach my rifle companies to subdue a French battery – apparently, that sort of thing might be OK for Bernard Cornwells’ Sharpe but isn’t the done thing in history! Otherwise, I think that I just about managed to keep my toys in the pram in what was a very hard fought battle!

Before the battle – most of the French army is hidden from view.

The game was based on the Battle of Vittoria and followed some of the narrative of the original battle although it had been scaled down slightly. The picture above shows the set up. Players were asked to submit their dispositions and order of march to the Umpire prior to the battle starting, along with any general orders to brigades. I neglected to bring the detailed orders of battle away with me, so I can only report that Andy was playing the French, with Simon and I playing the British and Allied armies.

The French had deployed a division of troops in the centre of the battlefield, with a battalion guarding one of the fords through the forward village. It was all that the Allies were able to see at this stage. It was likely that there would be more troops hidden from view!

The British Cavalry brigade embark on their scouting mission!

The British plan was to send the mixed brigade of Scots, Portuguese and Spanish Infantry straight through the centre to fix the French and to draw the French into supporting their troops at the various bridges and fords across the river in the centre of the battlefield. Three other infantry brigades and a cavalry brigade would deploy on the left flank and attempt to force a passage over the bridge and fords on this side of the battlefield. The Cavalry brigade had been given orders to scout the entire length of the river. We were interested to find out whether there were more French troops hiding in the village next to the bridge and to see if we could spot any further French deployment. The orders also included a request that once scouting had been completed, a full report should be sent back to HQ….

I’ll attempt to tell the tale of the battle using pictures to illustrate the key points.

The Allied Centre advances and immediately find their advance blocked by a strong contingent of skirmishers and artillery.
On the left, the Allied cavalry lead the advance, with Pictons infantry division following up.
The French deploy their artillery on the heights to defend the bridge on the left flank.
In the centre, the Allies pushed on to the bridge, with the Scots leading the way.
Scotland the brave!
The Scots attempt to push through the centre.

Encouraged by the skirmishers holding the French in check., the Scots attempted to force a passage through the centre by charging the guns. This was not going to end well for somebody…

With the British brigade charging the bridge, the Spanish brigade deploys to the right.

Meanwhile, back on the left flank the French artillery battery engaged the leading cavalry, breaking one regiment and causing disorder in another. Despite this set back, the cavalry were able to press on. With the knowledge that the village and bridge were undefended, the Allied infantry began preparations to force a crossing.

The situation on the left flank.
Further scouting by the Allied cavalry revealed a brigade of French Cavalry deployed in defence of the bridge.

With the bridge on the left flank looking strongly defended, the Allied cavalry pushed on and the infantry attempted to storm the guns on the hill over the ford. The final Infantry Brigade of Pictons Division had arrived and so one brigade was ordered to continue around the village to prevent the French from attacking over the bridge.

Keep going! The Allies reinforce the centre after the Scots have been mauled.

Back in the Centre, the Scots had been terribly mauled by the Artillery and had fled the battlefield! Fortunately, the Brigade morale held and yet another assault was attempted, whilst the Spanish brigade moved to flank the woods.

It’s all getting a bit fraught on the left wing!

It looked as though things were going badly for the Allies. The French artillery was inflicting tremendous losses on the allies and withstood all attempts to shift them. However, a glimmer of hope appeared for the allies. The cavalry had successfully scouted the length of the river and found two more crossings that appeared to be undefended. The French seemed oblivious to the existence of these fords and seemed only concerned to shadow the allied cavalry and reinforce the heights.

The British cross the ‘hidden’ fords to engage the French – completely surprising them!

As the French Cavalry pulled back, another trap was sprung as the British Cavalry crossed another hidden ford to catch them in the rear!

Now we have them!

Back in the centre, another assult on the french guns had failed but the Spanish had deployed and were occupying the French, preventing them from re deploying and reinforcing the left flank of the battlefield.

Hold the line!
More Spanish move up and the French skirmishers are pushed back.

Back on the left, the British cavalry had beaten their French counter parts and the Infantry had broken the French Battalions that had attempted to defend the hidden ford. Picton had aslo ordered his third brigade to ignore the guns and advance around the hill smashing into the flank of another defending French battalion.

The French are encircled!

With the collapse of the French on the left, the French were in danger of being encircled. Andy, decided that the battle was lost and began the retreat back towards Vittoria. Victory for the Allies….only just though! Without the successful reconnaissance by the Cavalry, the Allies would never have pushed though the other river crossings. The French defence was just too well planned.

Onwards men! Victory is in sight!

A very enjoyable game, where Mark, our host and umpire had to work very hard to keep some of the players in check (sorry Mark!) The game was made all the more enjoyable by the wonderful set up and beautifully painted and organised armies.

After a very nice late lunch we were ready to re-fight Trafalgar….but that will follow in my next battle report!

THE COMMERCIAL BIT

I hope that you all enjoy your hobby as much as I do – remember that our web site will have much of what you need! Click here to see our shop:

ARCANE SCENERY

If you would like to see the classic range of Jacklex miniatures, click here:

JACKLEX MINIATURES

Happy Modelling!
Where did the month go?

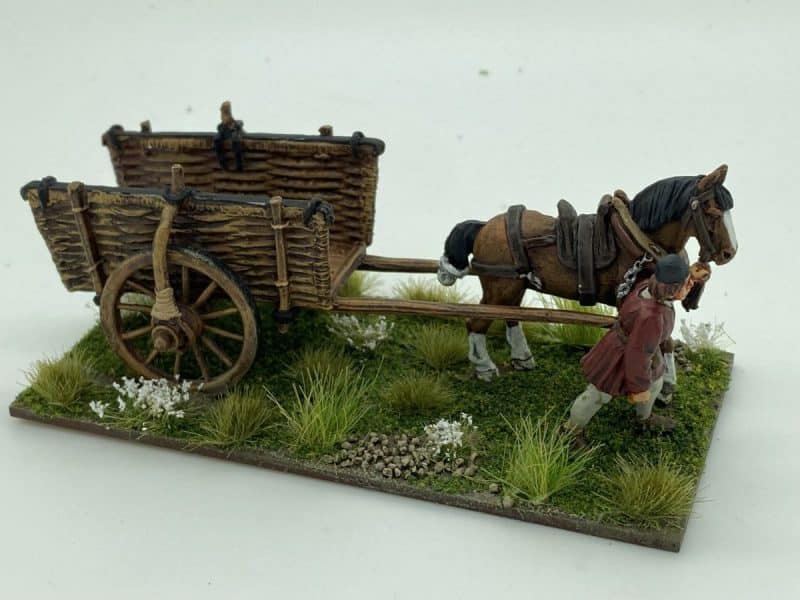
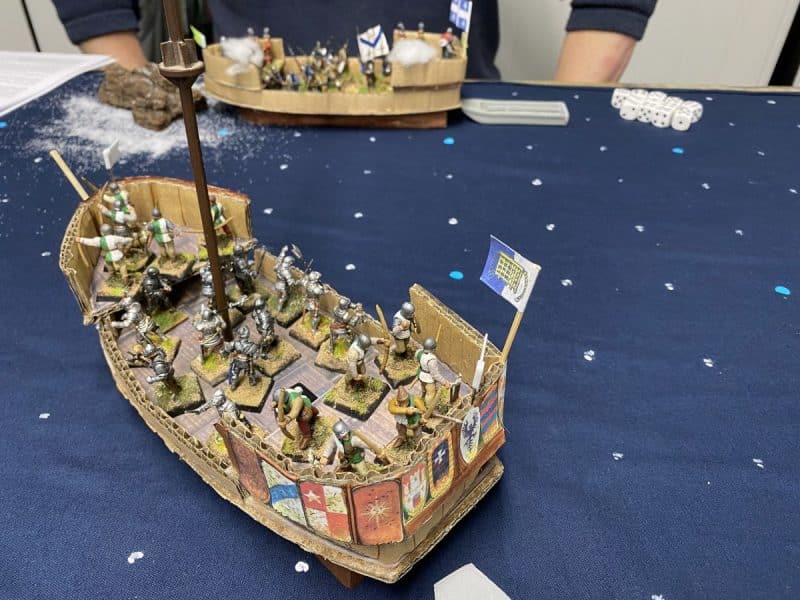
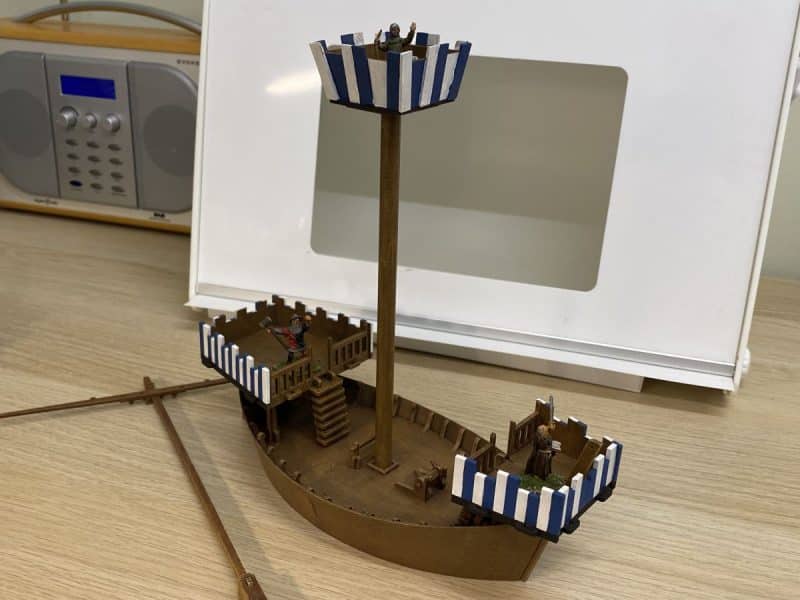
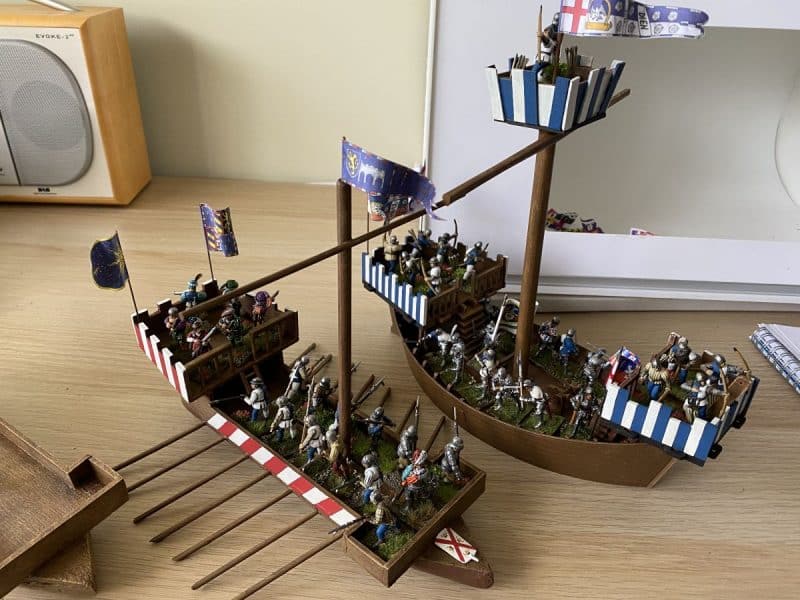
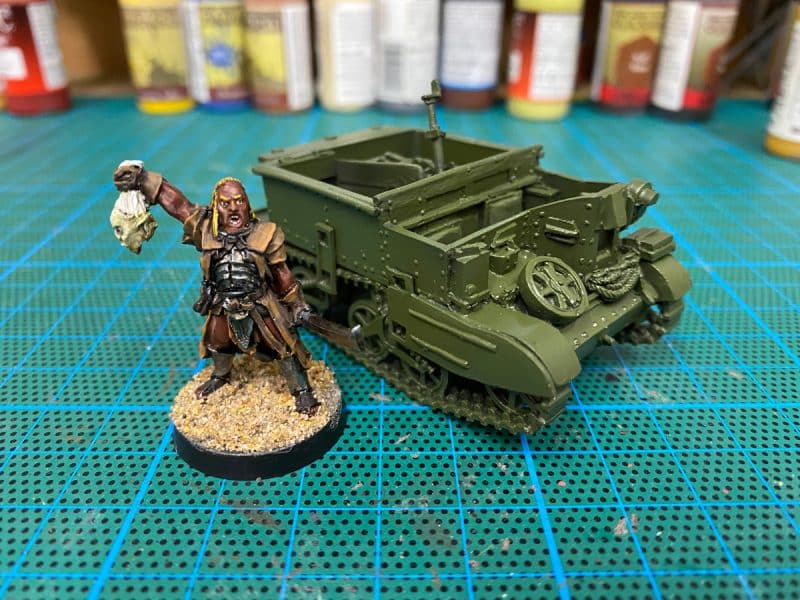
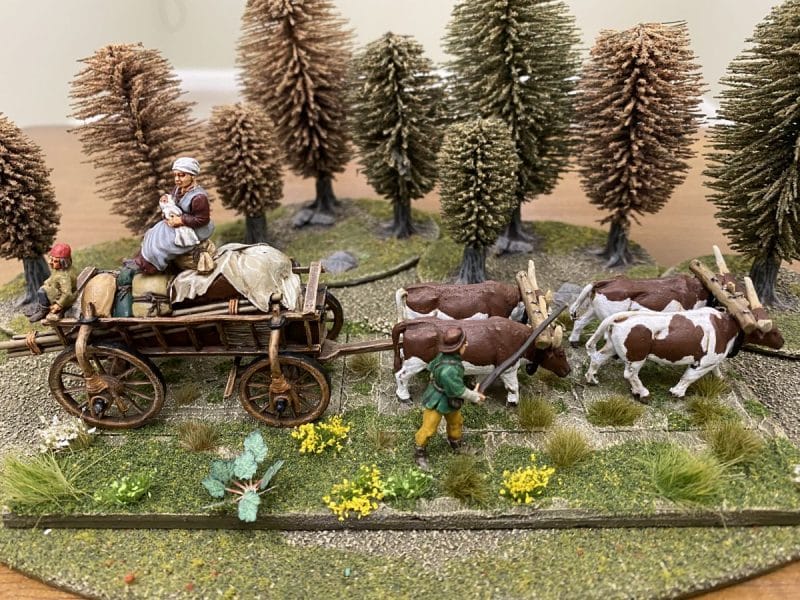
The good news is that I haven’t lost my painting mojo, more a case of losing my blog writing mojo! I last wrote about my Lord of the Rings project but also mentioned that I had started a WW2 Cromwell tank. Well since then, I have completed the tank, I’ve also expanded my collection of Home guard weaponry with a Blacker Bombard and a Northover Projector. I’ve also painted two Medieval wagons for my WOTR project, added eight Kern to my WOTR skirmish contingent, played at least 3 games of Never Mind The Billhooks, spent a weekend gaming including a Crimean War Battle, a Zombie apocalypse and a Swiss Burgundian play test. Oh, and I have finally tracked down a Beaverette Armoured Car for my Home guard and that is on the paint station as I write.

Beaverette Armoured Car under construction!

In this blog, I’ll show you the Cromwell that I have completed.

The Cromwell is a 1/48th scale resin model from Blitzkrieg miniatures. I prefer the larger 1/48th scale models as I think that they look better with the modern ’28mm’ figures which although are nominally 1/56th scale, in reality they are not a scale at all but a size. I know that not everyone agrees but I find that the 1/56th scale tanks look too small against the figures, especially when the figures are based. I am using 28mm crew and as you can see, they look fine.

Cromwell with basic paint job

The painting process was straight forward enough. After washing the tank in hot soapy water, I primed it with Vallejo Matt black model air primer. I then used the airbrush to spray it with Mig Ammo British 1944-45 Olive drab MIG0112. I had a bit of a wobble over the colour. I started to get hung up on whether I was using the correct shade of green. In fact, the whole process of completing the tank was almost derailed by being side-tracked into trying to produce an IPMS competition standard replica rather than a representation of the tank that would look reasonable both on the gaming table and in my own display cabinet.

Inked, Dry Brushed, tracks and road wheels painted

Putting aside such pedantry, I got on with the model and having airbrushed the basic colour, I used Army painter dark tone ink to add shadows to the panel lines and around the rivets. I then gave the tank a couple of dry brushes using the original colour, highlighted with Iraqi Sand added to the green and then white to get the top lights. The road wheels were painted in black ( a mistake – I think that black grey would have been better) and then the tracks painted with gun metal. All the running gear was then heavily ‘muddied up’ with a mixture of browns daubed and dry brushed on. I also added some mud pigment to get a ‘crusty’ effect in places where I thought that the mud would accumulate.

Mud, markings and aerial added

I took pragmatic approach to the markings. I suppose I could have sent off for some decals but I used a fictional vehicle number on the turret and I hand painted the Squadron triangle symbol. The final touch was to add the aerial. I’ve painted this black because it looks black to me in the photographs but I do wonder whether it would have been the same colour as the tank.

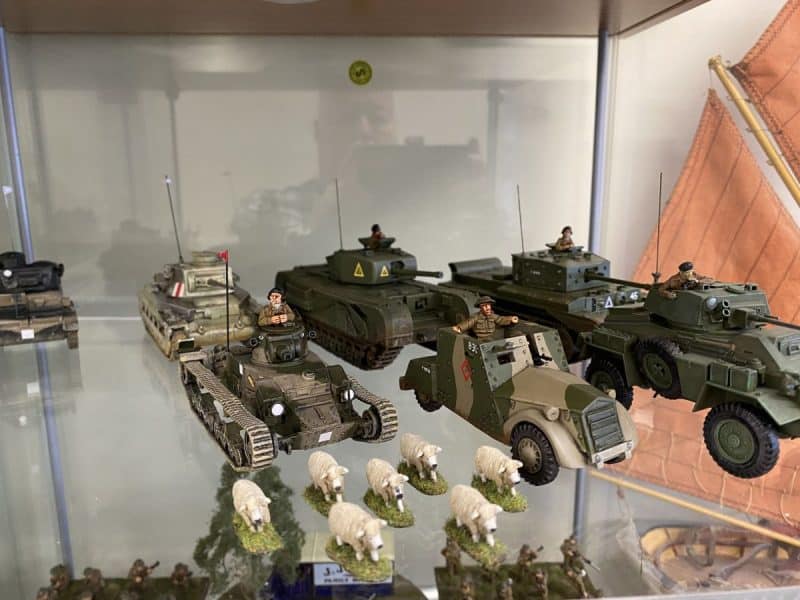
My tank collection – Cromwell, Matilda II, Matilda I, Vickers Mk VIb

So another tank is added to my collection. It wont win any prizes at competitons but then it isn’t going to be entered into any! The important thing for me is that it looks like a Cromwell! On to the next model!

THE COMMERCIAL BIT

Almost all of the paints, miniatures, bases, basing materials and anything that you are likely to need for your hobby are available from my shop here:

ARCANE SCENERY

You can see the Blitzkrieg range of both 1/48th and 1/56th scale tanks here:

BLITZKRIEG MODELS

You can see our range of MIG ammo paints and accessories here:

MIG AMMO

we carry a huge range of Vallejo paint and accessories here:

VALLEJO

We carry a full range of Evergreen Plastic – ideal for modelling and converting:

EVERGREEN PLASTIC

If you haven’t got a piece of wire….the 50mm spears are here!

50MM SPEARS

If you prefer proper brass rod or tube, we carry a huge range of Albion Alloy metals here:

ALBION ALLOYS

Happy Modelling!
Workbench update 06 May 2021

Having completed the Landsknechts, I was at a bit of a loss as to what to start as my next project. I took the easy option and resorted to my Lord of the Rings collection moving onto the next issue of the Magazine ‘Battle Games in Middle Earth’. Somewhere back in April, I found the time to complete Legolas, the figure that came with issue 8. As I was absorbed in my Bombard project, I neglected to take any photos other than the one below of the finished figure, before basing was completed.

Legolas, basing still to complete

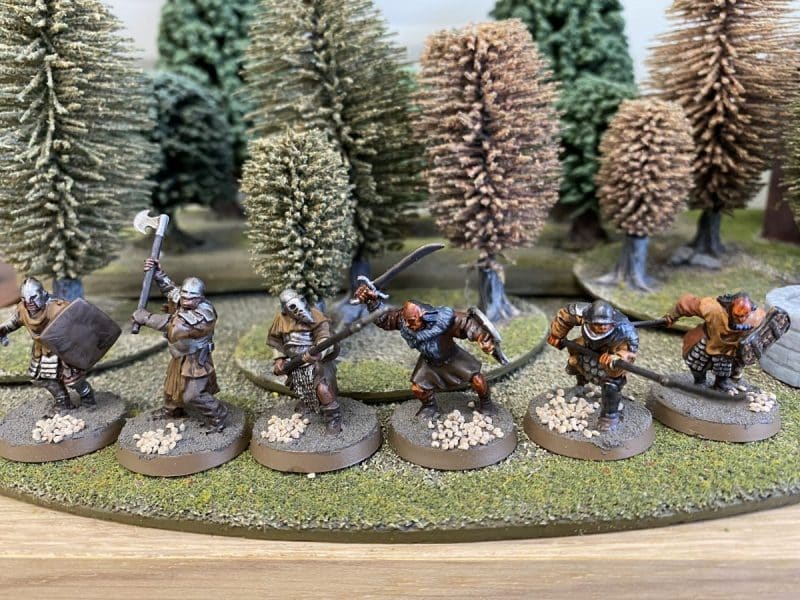
The next issue of ‘Battlegames in Middle Earth’, issue 9, came with an Uruk-Hai Scout. Issue 10 came with another sprue of 10 Uruk-Hai Warriors, so it made sense to paint all 11 figures as one batch. I cleaned up and assembled the figures and then primed them with a black undercoat. I then dry brushed them with gun metal to pick out the armour, painted the flesh using Vallejo Game Colour Dark Flesh and then the various straps and leather ‘kilts’ in either Leather brown or flat earth. The hair and spear staffs were painted in German Cam. Black brown. I then inked the armour with Dark tone and the rest of the colours with strong tone.

Uruk-Hai in progress as a batch paint job.

I went back over the colours and highlighted them using a lighter shade or simply the original colour, tidying up any obvious errors. I added the teeth and eye’s to the scout captain and based the figures with Vallejo textured paste and sand. The bases were painted with my usual emulsion paint ‘Delhi Bazaar’, and highlighted with progressive mixes of this mixed with Iraqi sand. The final touch was the Gamers Grass beige tufts.

Uruk-Hai based and ready for action!

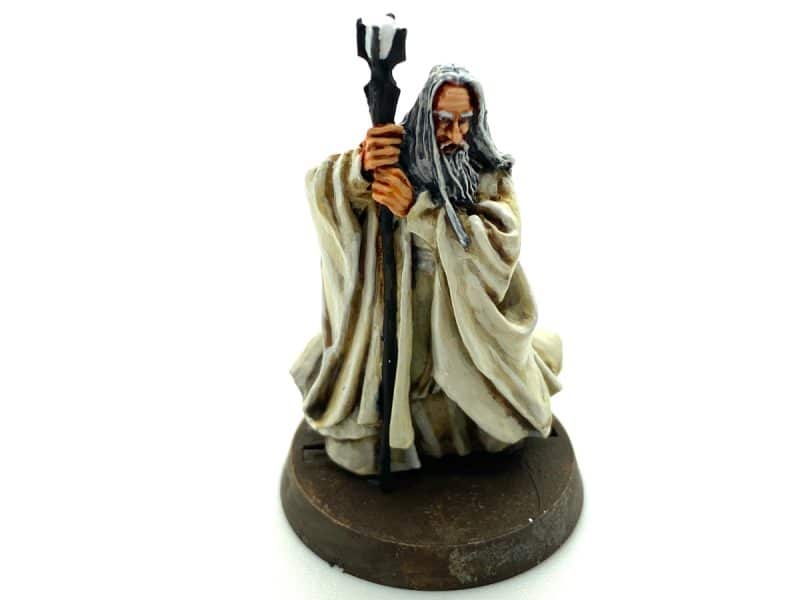
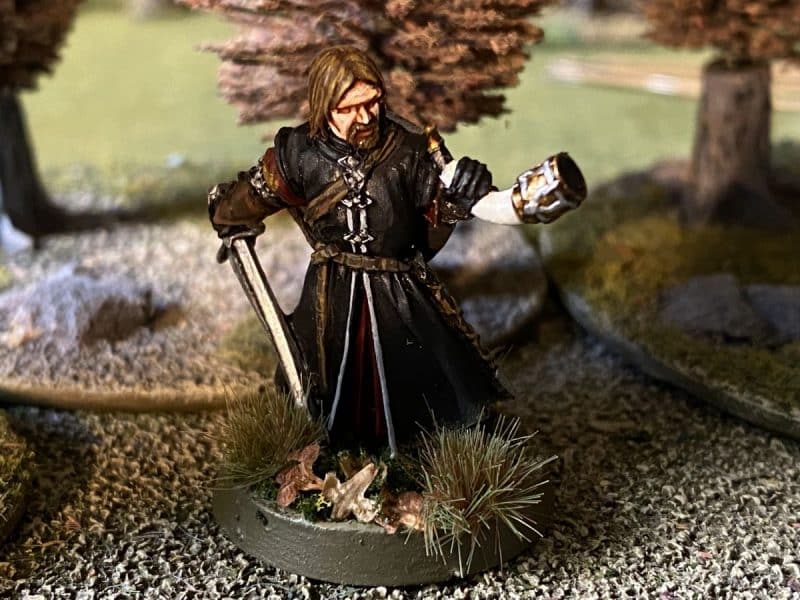
So another 11 LOTR figures are added to my collection – next up is Boromir. Just 81 magazines to go to complete the collection!

Cromwell basic colours applied – weathering and markings to add.

As well as the Uruk-Hai, I also have been working on a Blitzkrieg miniatures Cromwell tank. Here’s the progress so far. I’ll perhaps cover the stages of this project in my next blog. I now have four British tanks in my collection and I am quite pleased with the results. I have taken the view that these are going to be used as wargaming models which has liberated me from being too picky about the details. The result is that instead of getting bogged down and never finishing anything, I am making progress. The result should be a nice collection to go in the cabinet that shows off British tank development in World War Two – and of course, should I ever get around to it, I will have a nice selection for my war gaming!

THE COMMERCIAL BIT

The magazines that I am referring to are long out of print but still available on ebay should you wish to collect them.

If you need help in completing a project of your own we have a massive range of stock in the Arcane Scenery shop. Almost all of the paints, miniatures, bases, basing materials and anything that you are likely to need for your hobby are available from my shop here:

ARCANE SCENERY

You can see the Blitzkrieg range of both 1/48th and 1/56th scale tanks here:

BLITZKRIEG MODELS

You can see our selection of Gamers grass here:

GAMERS GRASS – ARCANE Scenery and Models

Happy Modelling!
Landsknechts!

Wargames Illustrated issue 383, September 2019, came with a free sprue of Landsknechts. At the time, I had a quick look at the figures, decided that it was unlikely that I would ever paint them and they were tossed onto my ‘leadpile’. Fast forward to April 2021 and I was looking for my next batch of figures to paint and I ‘rediscovered’ them. As you will know, I am currently working on my War of the Roses army and although these these troops were not really around at the time, I thought I might get away with using them!.

WI issue 383 with free Landsknechts

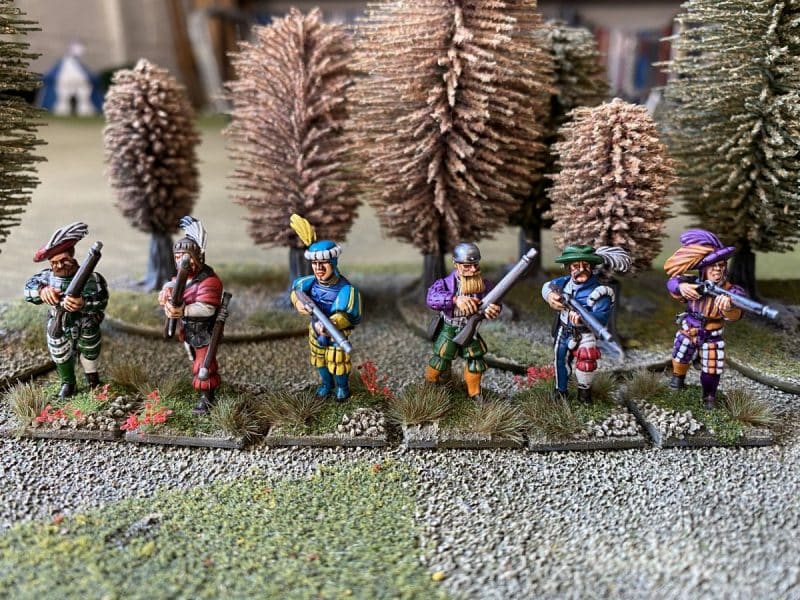
The nearest that I could get to Landsknechts appearing in England were the German and Swiss mercenary force under the command of Martin Schwartz, who fought at the battle of Stokes Field in 1487. According the the Wikipedia article, the German mercenaries were equipped with the latest handguns. By chance, my sprue of six Landsknechts were missile troops with the option of either hand guns or cross bows. That was good enough for me, I would complete the troops as a group Handgunner skirmishers and they could make a colourful, albeit, unlikely addition to my War Of The Roses collection and ‘Never Mind The Bill Hooks’ Army.

Close up of the sprues

I cleaned the figures up, assembled and primed them and then thought about how I would go about painting them. I am definitely getting lazy in my old age, when it comes to research. In the past I would have looked at countless references and articles to get an idea as to how to paint these troops. As it was, I used an earlier guide to painting Landsknechts in War Games Illustrated 129, written by Michael Perry. I also checked out a you tube video by Pete the wargamer and of course, used the painted figures on the Warlord site as my references.

Landsknecht Hand gunner number 1

Initially, I started with one of the simpler figures to paint and went for a straight forward red black and white scheme. Based on this test figure, I decided that a batch paint job was never going to work. Although I intended to keep things simple, even where the figures shared the same colour – on the guns, shoes, belts, sword scabards etc, the complexity of the colours on the rest of the figure made it difficult to paint these areas as a batch. So apart from the flesh, each figure was painted separately.

The next five primes and flesh blocked in

As I painted each figure, I became a little more adventurous with the colours. As always, yellow is a very difficult colour to paint as it just doesn’t cover well. I had the same problem with orange. In fairness, I think that my priming coat of grey was not such a good idea. White would have worked better. Still it was good fun in choosing the colour combinations. I particularly liked the purple and orange. I can’t remember the last time that I used either of these colours on wargames figures!

The next two under way

I was able to base the group as a batch and followed my usual basing procedure using Vallejo Dark Earth textured paste to blend the figures onto the base, added some ballast and then painted and highlighted with brown emulsion and Iraqi sand. I finished the basing with some woodland scenics coarse scatter and some gamers grass tufts. I couldn’t resist adding a few flowers to the bases – as if the figures weren’t bright enough!

Almost co0mplete – basing in progress

I have no doubt that when these figures appear on the table that my gaming buddies will take great delight in targeting them and they will no doubt finish the game looking like the German mercenaries at Stokes Field. To quote Jean Molinet, historian to the Burgundian court, writing c1490

“…when it came to the joining in battle (they) could not withstand the shooting of the English archers, especially the Germans, who were only half-armed; and although they displayed great bravery, as much, indeed, as their small number and substance allowed, they were routed and defeated, shot through and full of arrows like hedgehogs.”

Completed Landsknechts

I dont think that I will be painting any more Landsknechts but that might change when Bill Hooks volume two is released. Both the Swiss and Burgundian armies will be covered, along with the Italian wars at the time, so I may yet be tempted!

THE COMMERCIAL BIT

Almost all of the paints, miniatures, bases, basing materials and anything that you are likely to need for your hobby are available from my shop here:

ARCANE SCENERY

Perry’s WOTR plastic range are here, including some nice army deals!

PERRY MINIATURES

You can see the range of Renedra Accessories here:

Renadra Scenic Accessories

You can find all the Vallejo Model colour paints here. If you don’t want to browse, just enter the paint number into the shop search bar;

VALLEJO PAINTS

Happy Modelling!
Basing the Bombard

In my last blog I had painted the crew and the actual bombard. It was now a question of basing the models so that they will be ready for battle. I had already planned to use a Sarrissa terrain tile for this purpose. The idea being that should I decide to add to the siege or gun line, the Sarissa tile system would enable this. I also thought that the thicker base would give the Bombard a bit of elevation in respect of my normal troops.

I usually use Milliput for making the ground works on my bases but I had a pack of airdrying Daz clay that I found in my scenery materials stash and I decided to give this a try. I’ve not used this material before for this purpose but I have seen it used in many tutorials and my gaming buddy, Peter Harris uses it to great effect and has created some fantastic effects with it. So without any hesitation or preparation, I slapped it onto the Terrain tile. I then pressed the Bombard into it, carefully making sure that I had lined it up along the centre of the base. The next step was to place the figures onto the base and to cut out ‘sabot’ cavities for the ones that I wanted to remove. I also pressed the Gabions and boards for the mantlet into place.

Base in progress – Daz clay ground work completed and stuck to the terrain tile!

So far so good…except that when the Daz dried, it pulled away from the tile and came free. The tile had also warped. This surprised me as I had thought that MDF was pretty warp resistant. I suspect that when using milliput on MDF, there is no problem because there is no shrinkage and of course, no water. Once the tile dried out, the warpage disappeared and I simply glued the now dry airclay terrain piece back onto the tile with PVA glue. Problem solved – for now. In future, I will prime the MDF first!

Base with Vallejo texture paste.

I had not glued the bombard into place, so it was easy to get on with the next stage of the ground work. I used Vallejo Dark Earth Texture paste to cover the clay to give the base some texture and to blend everything into place. I had also filled the gabions with sand using a big blob of PVA to hold the sand in place. As the texture paste was drying, I placed the cannon balls onto the base and also placed some renedra barrels to leave an indent. It was at this stage that I noticed that the bombard was not quite centrally aligned on the base…When I had glued the clay back on to the base, I had obviously not quite centred it. My inner OCD now chipped in and I started to think about re making it all. However, I decide that I could live with it being slightly off centre and it would be OK. Phew!

Is that gun off centre? It’s staying put now!!!

The next step was to start to paint the items that I would be adding to the base. I painted the cannon balls in grey rather than black. I’m not sure if guns of this size used granite ‘gun stones’ but I thought that it was likely that stone would be used rather than cast iron. As an aside, my Brother has an allotment on the Isle of Wight in the shadow of Carrisbroke Castle and he regularly finds small ‘Gun stones’ that were either quarried nearby or test fired from the Castle. The renedra barrels were painted using the same colours and methods as the woodwork on the bombard. I also added some sacks to the base. I have a stash of these that I have made from Milliput. Whenever, I have some spare milliput left over from a project, I use it to make these sacks. I’m too frugal to throw anything away and they are very simple and quick to make!

The model is taking shape – ground work done.

You can also see that I had painted the Textured earth paste using an emulsion paint, ‘Delhi Bazaar’, highlighted with Iraqi Sand. I’ve also started to add the first layer of vegetation, Woodland Scenics Blended green turf.

Static grass and tufts added
Sacks and Gunstones – I’m not sure that health and safety will approve…

Once the base was coated with the turf scatter, I added some Static grass. this gave me the chance to test my ‘Static King’ applicator from woodlands scenics that I had been given as a Christmas present. The results were OK, but it’s fair to say that I need more practice. I spent more time snagging my fingers with the rather fierce crocodile clip and giving myself a buzz of static than I did in getting the grass to stand up! The good news is that what hair I have, is now slightly straighter than before! The static grass added another layer of texture and I finished of the base with an assortment of tufts and a few flowers to add some interest.

Tools and Barrels

I also thought that it would be fun to add some arrows to the Gabions, to make it look as though the enemy were nearby. I made these from scratch using thin Evergreen plastic rod (30/000) and some scrap 10/000 plasticard for the flights. Finally, I added some weathering powders to the bottom of the mantlet and added some black weathering powder to the front of the gun to represent the powder and smoke that would have come from firing the gun.

The completed base

So my Bombard is now ready for the table. There are a couple more details that I will add. I have a bucket and open cask of water to add, as well as a sledge hammer and rammer on the work bench in the final stages of painting. Andy Callan has suggested that I christen the gun ‘Little John’, so Little John will be making his debut in a battle soon!

The Completed model, the the extra barrels and tools added

THE COMMERCIAL BIT

Almost all of the paints, miniatures, bases, basing materials and anything that you are likely to need for your hobby are available from my shop here:

ARCANE SCENERY

Perry’s WOTR plastic range are here, including some nice army deals!

PERRY MINIATURES

You can see the range of Renedra Accessories here:

Renadra Scenic Accessories

The Sarissa Terrain Tiles can be seen here:

TERRAIN TILES

You can find all the Vallejo Model colour paints here. If you don’t want to browse, just enter the paint number into the shop search bar;

VALLEJO PAINTS

Happy Modelling!
Bombard in Progress

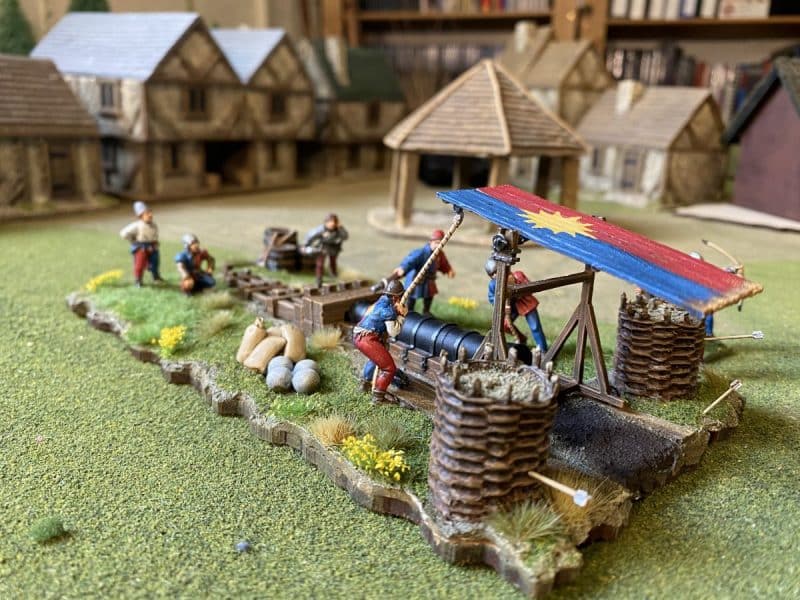
I continue to add to my War of the Roses army and the latest project is a Medieval Bombard from Perry’s. It’s a big old beast at nearly 140mm long and so basing it was always going to be a challenge. I have decided to use one of the Sarissa terrain tiles for the purpose. Although it is a bit on the thick side, the irregular edge will help it blend in to the wargames table. I also have vague ideas of adding siege works to either side of the bombard at some stage in the future. The terrain tiles will work well, should I actually do this!

Planning the bombard layout view 1

I decided that I would paint the crew in Edward IV ‘s retinue colours. I thought that only a King would have the finances and resources to bring such a large piece to a battle or seige. Just to be clear, I haven’t done any specific research on this! I just fancied the colours and thought that having a ‘sun in splendor’ motif on the manlet would look cool! Oh! and the fact that I could probably paint the sigil free hand, given my painting abilities…

Planning the Bombard Layout view 2

The only reference picture that caught my eye was the art work for the Zvezda version of the bombard. I’m not sure how accurate this is but there were a few details that I thought that I would add to my model. The first thing that I noticed was that the bombard was mounted on an earth work slope rather than flat on the ground as most of the other models that I had seen. After much thought and debate with friends, I decided that I would go with a fairly flat piece of ground. The Bombard in the Zvezda model was clearly being used in seige work and I wanted my model to be used in a set piece battle. I did like the idea of adding some extra protection for the crew in the form of some Gabions. I also liked the idea of the ‘special tools’ used to load the guns and of course the sacks and barrels lying around so I had it mind to add these.

Cover Art for the Zvezda Bombard

I also noticed that the Mantlet has small wheels allowing the crew to push it forward to facilitate access to the gun barrel for cleaning and loading. So I would add some timbers for the mantlet to run on. The last consideration was whether to make the crew removeable to facilitate game play in Never Mind the Billhooks. The two guys pulling down the Mantlet would have to be fixed but I would make ‘sabot’ bases for the rest of the crew to allow them to be removed if casualties.

Crew painted and ready for basing
View of the painted mantlet

Andy Callan has come up with some instant rules for using the Bombard:

“Huge Bombards fire only straight ahead (no arc of fire) and only on alternate turns but both 5s and 6s are kills. 15 pts inc. crew. Only 3 crew count towards firing dice.”

I think that this early version may be altered to take into account the protection that the crew have and that although only three crew count for dice, there are more to absorb wounds!

Bombard and Crew painted
Top down view of Bombard and crew before basing

As regards the painting details, the crew were painted in my usual style but I have used Army painter inks rather than the quick shade that I sometime resort to. As regards the Gun and wooden block work, I followed a ‘recipe’ that I have used before for siege engines. You can find the detail in another of my blog articles here:

https://arcanesceneryandmodels.co.uk/trebuchet/

The pictures through out this article show my progress so far. I hope that over the Easter break I will have this model finished and I’ll publish a follow up with a bit more information on how I went about making and painting the base and accessories.

Get ready to fire!

THE COMMERCIAL BIT

Almost all of the paints, miniatures, bases, basing materials and anything that you are likely to need for your hobby are available from my shop here:

ARCANE SCENERY

Perry’s WOTR plastic range are here, including some nice army deals!

PERRY MINIATURES

You can find all the Vallejo Model colour paints here. If you don’t want to browse, just enter the paint number into the shop search bar;

VALLEJO PAINTS

Happy Modelling!
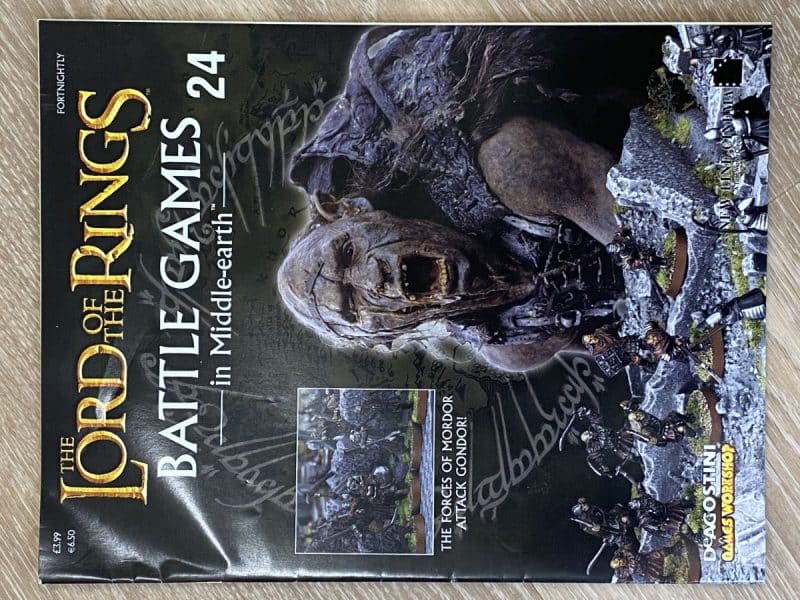
Battle Games in Middle Earth Issue 7 – Lord of the Rings

In between painting and expanding my Historical collection, I have continued to paint the miniatures that I had stashed away with this magazine. I have now completed issue 7 and the 12 warriors of Rohan that came with the magazine. As I have said before, the magazine has painting instructions for the models and I use these as a guide but put my own spin when it comes to colours.

Battle Games in Middle Earth issue 7

The models come in a sprue of 12 comprising of 4 bowmen, 4 spearmen and 4 swordsmen. It made sense to paint them in batches of four. This also made it easier to add a bit of variation in the clothes. So for the clothing under the armour,  I used pastel blue for the bowmen, German Camo Beige for the Spearmen and Burnt red for the Swordsmen. Some of the figures were painted with plate mail, some with leather armour, as the mood took me! This gives a slightly non uniform feel to the figures as suggested by the painting guide in the magazine. The other reference that I used was of course the tutorials on youtube. I only these as a general guide rather than specifically copying on this occasion.

Warriors of Rohan Spearmen


Warriors of Rohan Bowmen


Warriors of Rohan Swordsmen

Another twelve models are added to my collection and the next issue is issue 8 with the model being Legolas. So just another 84 issues to go to complete the project. I suspect that I might be working on this for a while but it is a welcome distraction from Historical modelling.

Warriors of Rohan – the full unit.

THE COMMERCIAL BIT

The magazines that I am referring to are long out of print but still available on ebay should you wish to collect them.

If you need help in completing a project of your own we have a massive range of stock in the Arcane Scenery shop. Almost all of the paints, miniatures, bases, basing materials and anything that you are likely to need for your hobby are available from my shop here:

ARCANE SCENERY

Happy Modelling!
1 4 5 6 7 8 41