Round and Round the Mulberry Bush!

I had been thinking that we were playing too many games of Never Mind the Bill Hooks where we just lined up the armies and set to. I shared the thought with my gaming buddy, Pete, and he quickly came up with the following very simple but effective scenario.
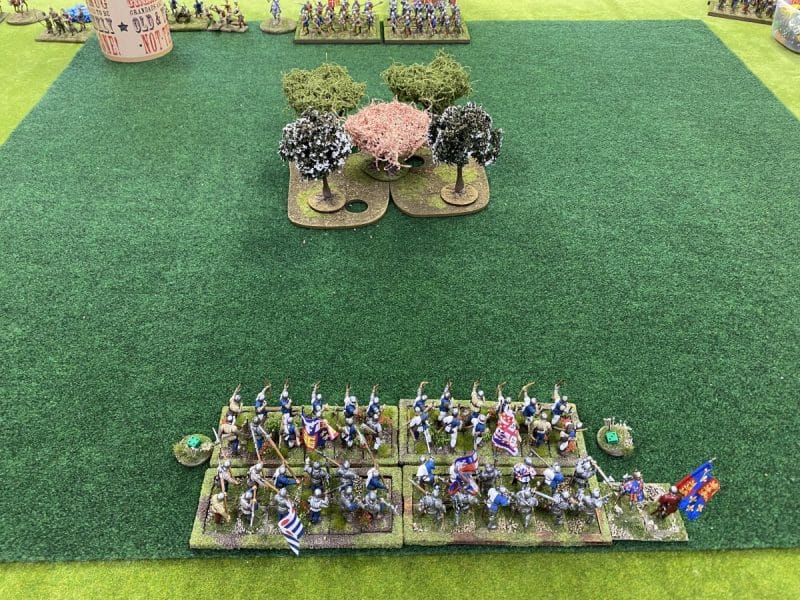
The initial deployment of the main ward and commanders

The set up is very straight forward. The table is clear of scenery apart from a large wood right in the centre. The wood will effectively block line of site across the table and be impassable to all units except skirmishers. Both sides must set up their Commander in chief and his ward in the middle of their deployment zone right opposite the wood. Your second ward of infantry must be left off the table and will only enter the game on the second turn – more on this later.
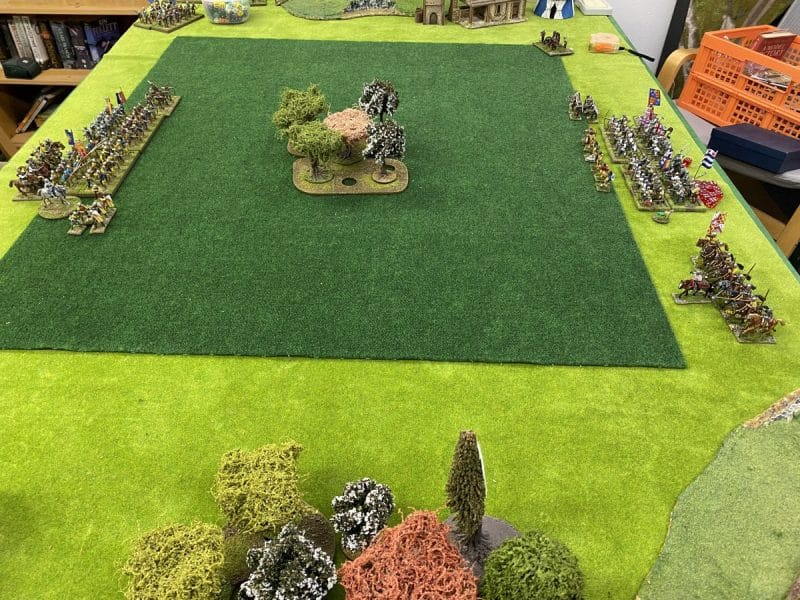
The view across the table. Skirmishers and Light Horse deployed. Not Artillery on the flank.

Each player now throws a D6. on a 1,2 or 3, you must move your commanders ward to the left of the wood when activated, both in the manoeuvre phase and card phase ( You can choose not to move at all…) A 4,5 or 6 means you must move to the right. This results in either both players moving to clash on one side of the wood or going around opposite sides of the wood, chasing after each other….
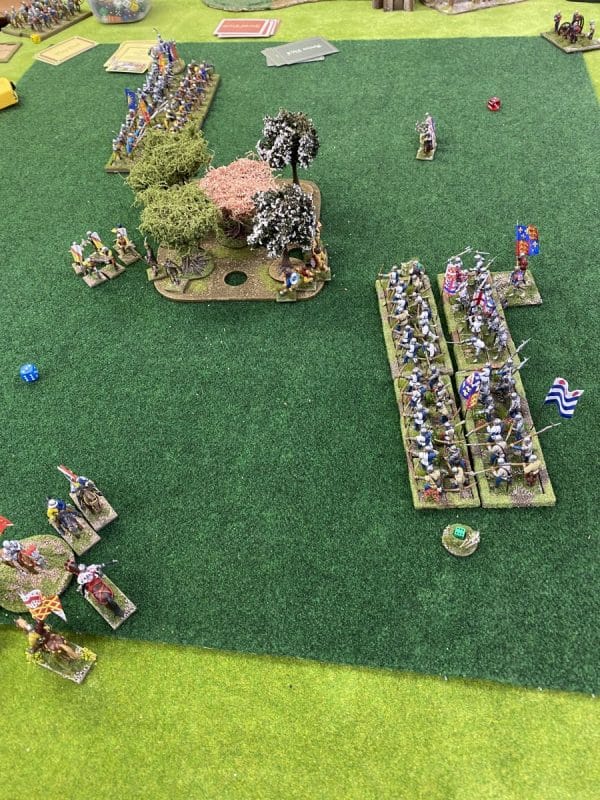
Around the woods they go!

Once you know which way your main ward is going, you then roll a dice to see which order you set up any remaining skirmishers, Artillery and other units. Of course, the dilemma that you now have is whether to support your main ward or to go the opposite way around the wood…..
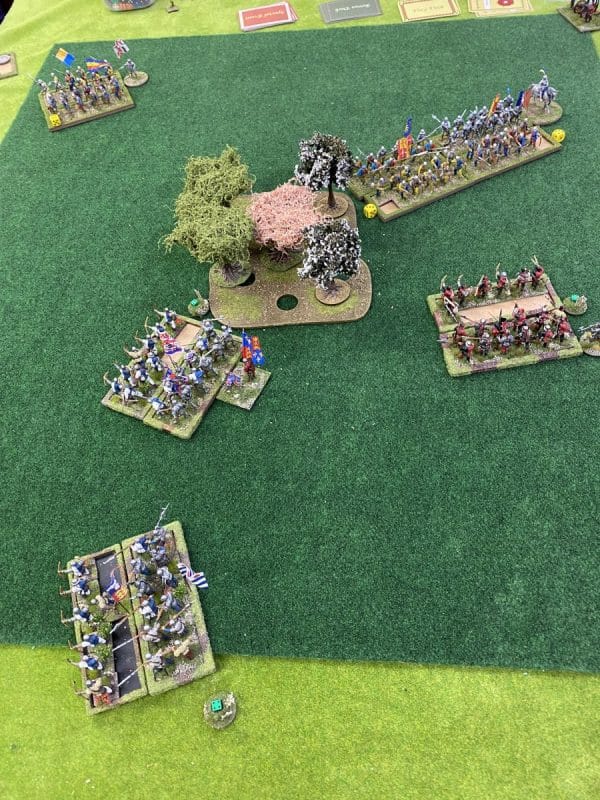
On the left, the reserve ward has deployed and engages with the enemy to slow them down!

Now back to the second ward. On turn two, they will join the battle on a roll of 5 or 6 on a D6. If they dont turn up, subsequent turns need a 4+, 3+, or 2+. You must get at least a 2+ after turn 5. A 1 is a fail regardles of how many times you have tried to bring the ward on. Just to add to the confusion, If your ward successfully throws to come on, you then throw a D6 to see which flank that they arrive on. a 1,2,3 it’s your left flank ( anywhere on that side of the board) – a 4,5,6, it’s the right hand flank.
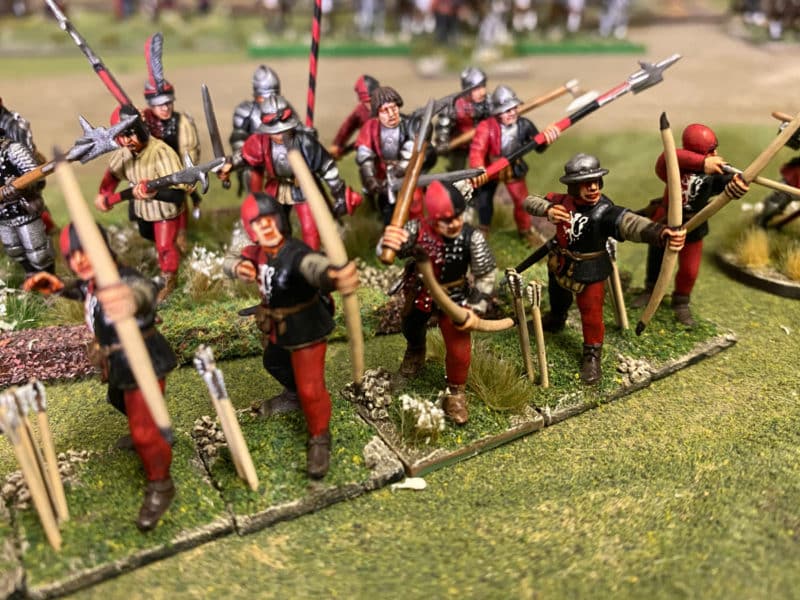
Lord Callans Archers were my reserve ward. They managed to hold off Lord Woodborough despite the odds!

As you can guess, it’s not the sort of scenario that allows you to plan a grand strategy, so if you are of a controlling disposition, this is not for you. However, if you like the challenge of having to react to reverses of fortune or enjoy watching your opponent doing so, then it will be great fun. We have played the scenario through twice now with different outcomes and different problems to overcome.
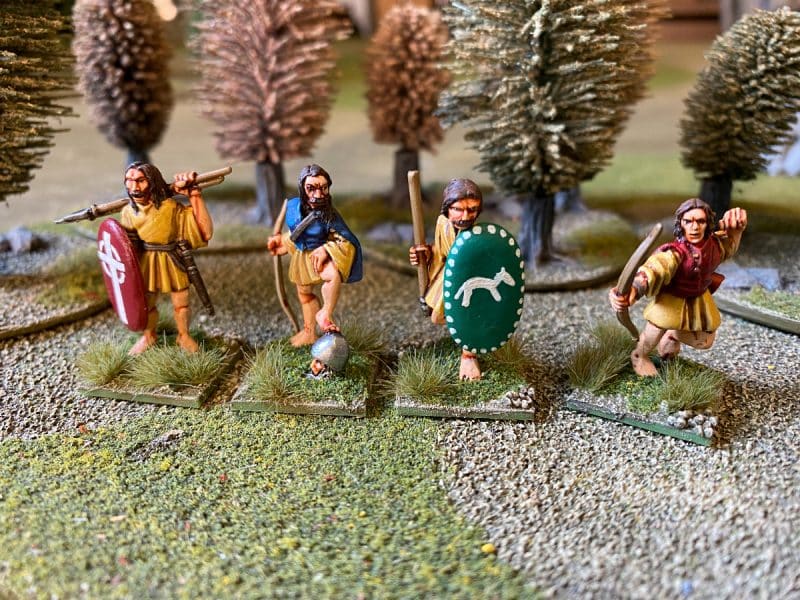
Kern are extremely useful for driving off other skirmishers!

Just for fun, we also used identical armies as follows:

Commander in Chief, Level 2 with ward of two bows, one bills and one Men at arms – 60points

Second commander, Level 2 with ward of one bows, one bills – 29 points ( 5pts for extra commander)

Third commander, Level 2 with ward of Light horse – 17 points ( 5 pts for extra Commander)

One unit of skirmishers with crossbows and pavises – 9 points

One unit of Skirmishers – Kern 6 points

One Artillery piece- 9 points
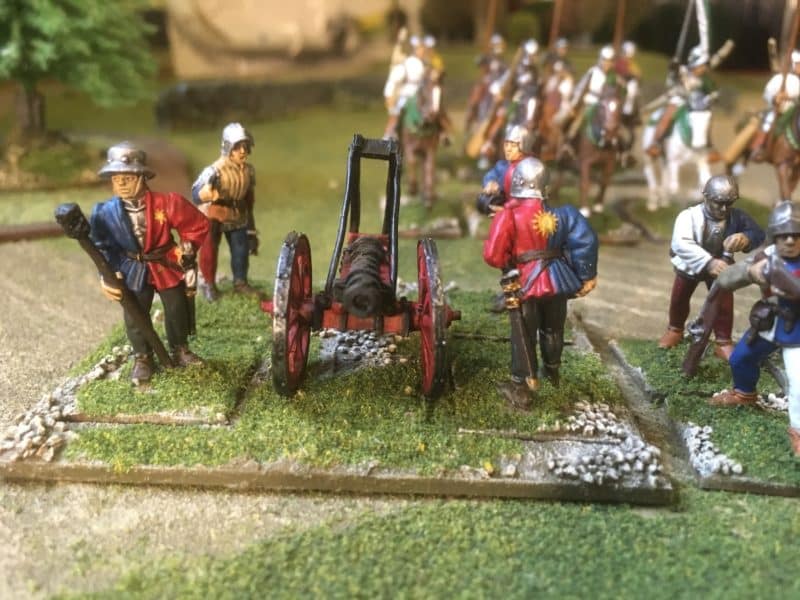
An Artillery piece is useful if deployed on the clear flank – but unsupported artillery is vulnerable!

You can of course choose to use whatever forces that you prefer. Have fun!

THE COMMERCIAL BIT

I hope that you all enjoy your hobby as much as I do – remember that our web site will have much of what you need! Click here to see our shop:

ARCANE SCENERY

We also have a category devoted to Never Mind the Bill Hooks:

NEVER MIND THE BILL HOOKS!

Happy Modelling!

A Visit to Castle Rising

The pandemic has not just curtailed my wargaming over the last 18 months but prevented me from getting out and about to visit historical sites. Any spare time out of lockdown has been used to meet with Family and Friends. However, recently, the missus and I managed to sneak away for a weekend across to Norfolk. The primary aim of the weekend was a visit to Sandringham, the Queens personal home. We had a really excellent day there, made all the better by the fantastically helpful and pleasant staff. I would thoroughly recommend a visit. It certainly far exceeded my expectations as a place to visit. However, Sandringham wasn’t on my radar as a historical site. As far as I knew, it wasn’t involved in any sieges or battles, other than the occasional fallout between Andrew and Fergie or even Charles and Diana but I’ll leave all that to fans of the TV series, the Crown….

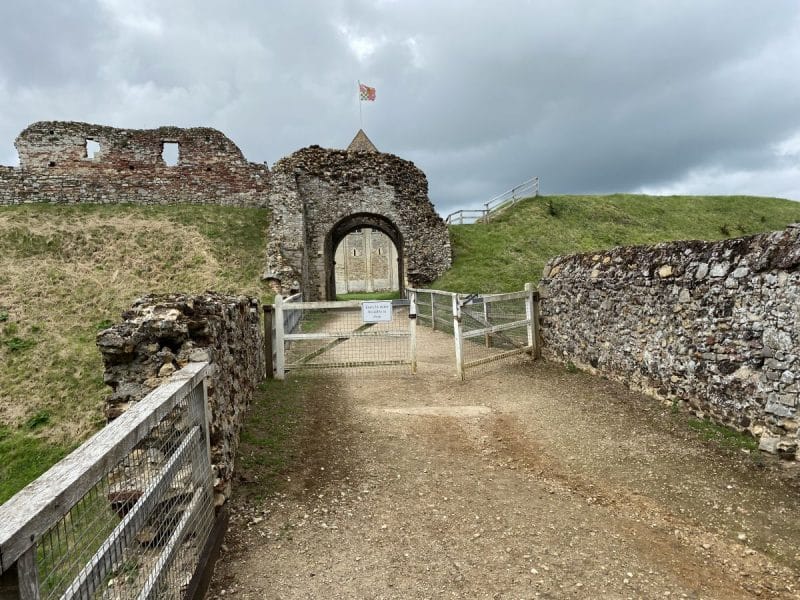
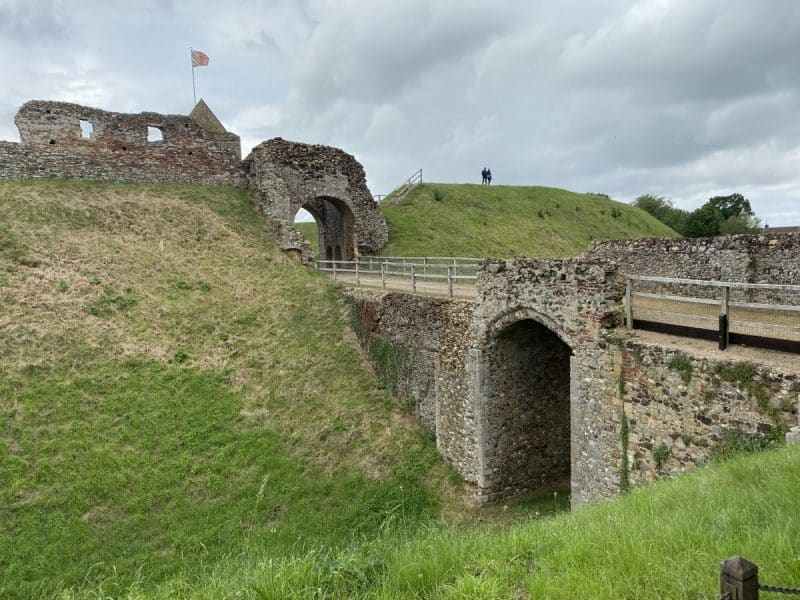
The Gate House and entrance to Castle Rising

Just down the road from our accommodation on the edge of Kings Lynn, was Castle Rising, a proper fortified castle with a long history to go with it. It was this site that interested me. At the time, I was unaware of the part that Castle Rising had played in history. I had not heard of it before my trip. I was not to be disapointed. Although the castle is now essentially a ruin, it is set in the most impressive defensive earthworks and looks everything like a castle should look! The entry fee was just £2.50 per person as there was no access to the upper ruins. Even so, I was happy to spend a couple of hours wandering around the place imagining how it would have looked in it’s prime.

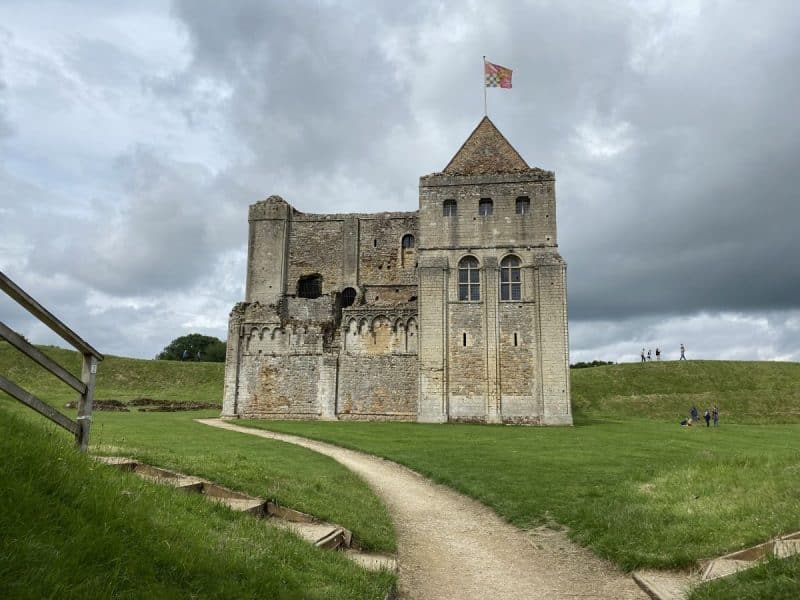
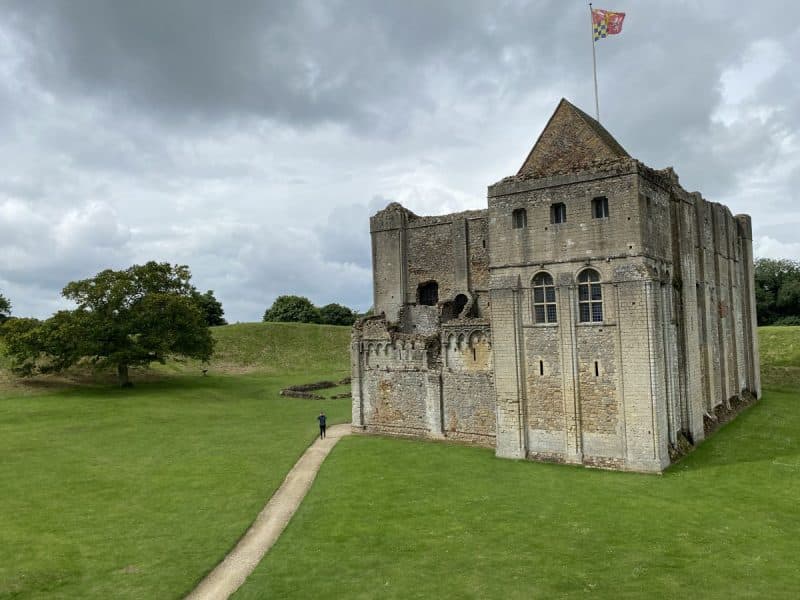
The Castle Keep

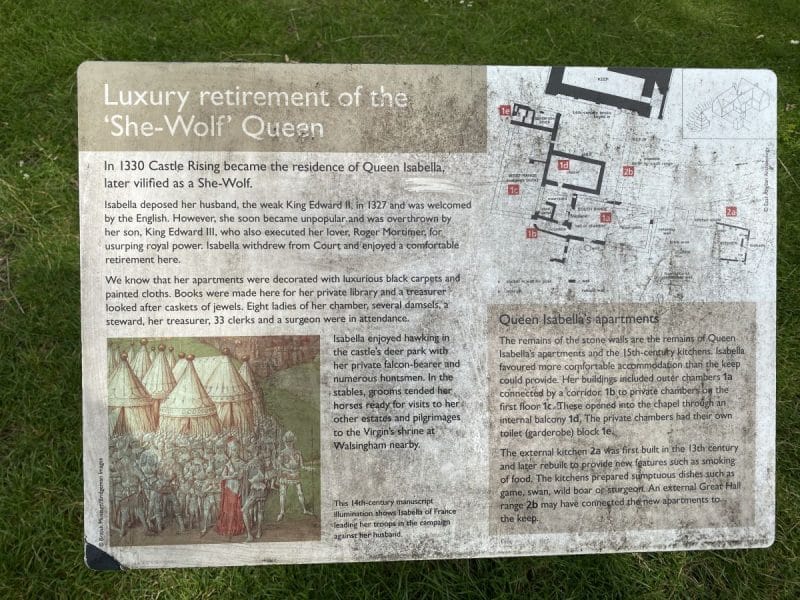
It was originally built around 1140 by William d’ Aubigny primarily as a demonstration of his wealth and power. I’ve provided some links below to the official history and guides to the castle. It seems that the main claim to fame for the location is that it became the ‘prison’ of Isabella of France. She was the wife of Edward II but after attempting to take control of the crown with Roger Mortimer, Edward III, her son, placed her in house arrest here once he had toppled Mortimer.

Story board – A brief history of Queen Isabella

Although a most formidable fortress, Castle Rising came to be of more use as a hunting lodge and was known as a prestigious location in the 15th and early 16th centuries. The castle’s military defences were mobilised in 1461 by Henry VI in the Wars of the Roses but as far as I am aware no fighting took place in the immediate area.

View from the Left

I have since learnt that the castle had another role in the Wars of the Roses. On June 24th 1469, Richard, Duke of Gloucester ( later Richard III) was staying at Castle Rising. From here, he wrote to an unknown correspondent asking for a loan of £100. The Duke, who was on his first campaign, had left London in such a rush that had not had time to ‘purvey’ sufficient money for his own expenses.

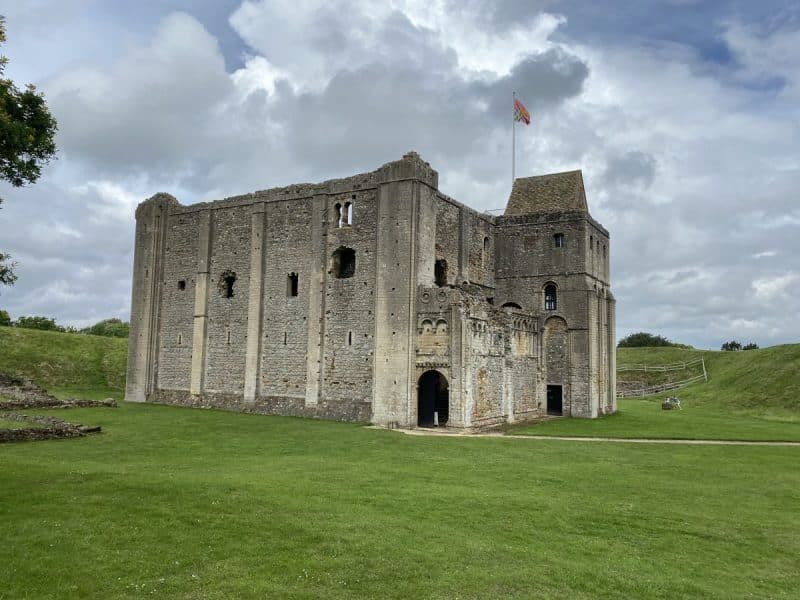
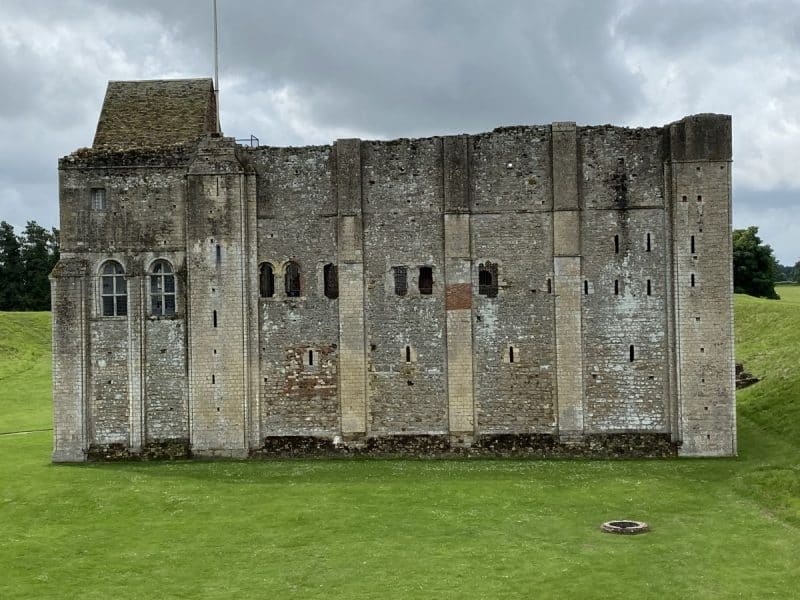
The rear of the Keep

It seems that castles played a limited role in the War of the Roses but I suspect that they were used as ‘safe havens’ throughout the war. Although there were no great set piece sieges, it seems that Castles were still important as a means of projecting power and threatening the local area until such time as the protagonists eventually met on the field of battle. I guess that other point is that neither side really had the resources for prolonged sieges and no doubt there was little point in laying waste to a castle that you hoped to inherit!

Another view of the entrance

I find Castles both fascinating and inspiring and my imagination is usually in overdrive as I wander around these places. One day I really am going to build one for my gaming table! I hope that you enjoy the pictures and perhaps have a chance to visit for yourself.

The view of the Keep from the surrounding ramparts

The official links can be followed here:

CASTLE RISING WIKIPEDIA

CASTLE RISING ENGLISH HERITAGE

CASTLE RISING CASTLES FORTS AND BATTLES

THE COMMERCIAL BIT

I hope that you all enjoy your hobby as much as I do – remember that our web site will have much of what you need! Click here to see our shop:

ARCANE SCENERY

Happy Modelling!

Beaverette Armoured Car

I’m not sure why I am so attracted to Early War British Armour. In my youth I was obsessed with the more ‘glamorous’ German Armour and the idea of Blitzkrieg. But as I’ve got older, the quirky nature of the British Armour and the ‘Dads Army’ attitude to making the best of what they had has taken a hold in my imagination. So my focus now is building a collection representing these vehicles and weapons.

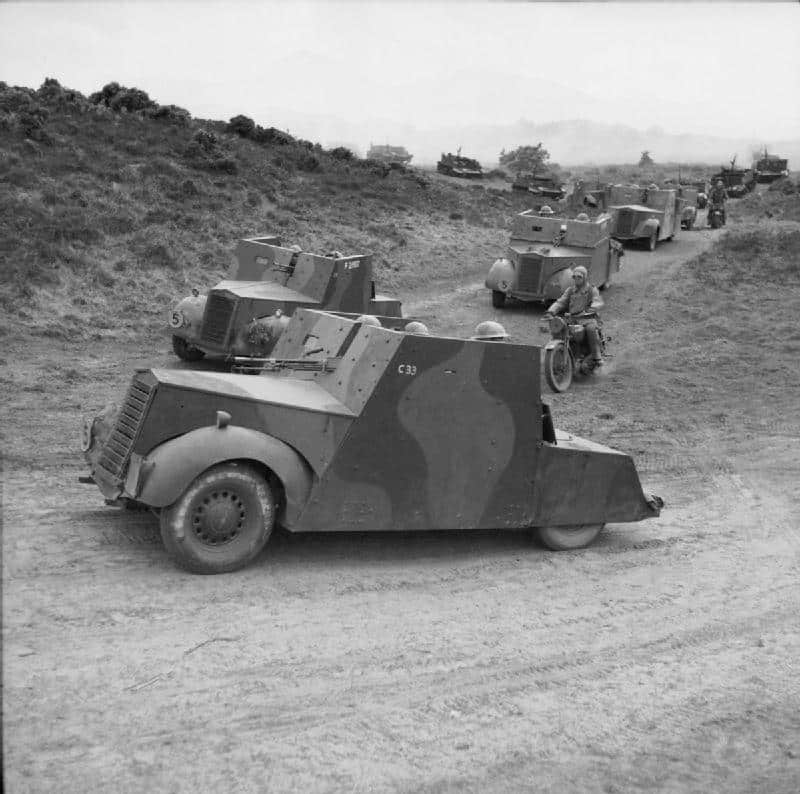
Beaverettes of 53rd Reconnaissance Regiment on manoeuvres in Northern Ireland, 1941

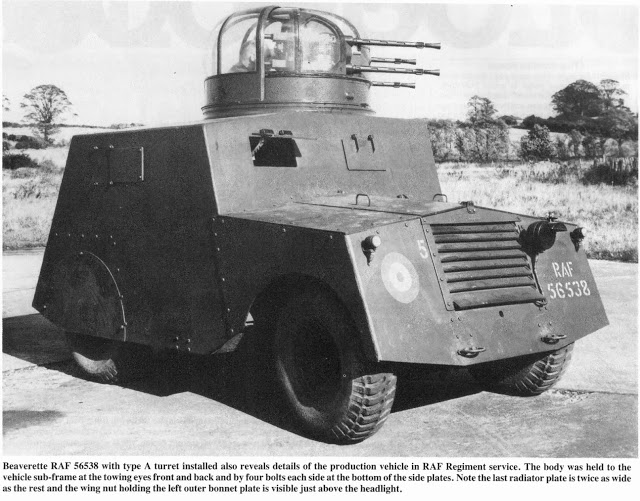
A perfect example of making the best of what you have is the Standard Beaverette Armoured Car. It really is an armoured car. That is, a car with armour bolted on to it. The first version of the vehicle was a Standard Motor Company chassis with 11mm steel plates bolted on to it. The steel was backed with 3 inch oak planks for extra protection. The driver could barely see where he was going and needed the help of an additional crew member to watch the roads. It was named the ‘Beaverette’ after Lord Beaverbrook, who was desperate to get some sort of replacement for the Armour lost in France and Dunkirk. The armament generally consisted of a Bren, Lewis gun or Boyes Anti Tank gun. Later models were used by the RAF for airfield defence and had twin Vickers or even a Turret from the Bolton Paul Defiant night Fighter.

The Beavette was never used overseas and production stopped in 1942. It was used mainly by the Home Guard and as has already been mentioned, by the RAF. Indeed, I first was made aware of the Beaverette when researching the ‘Rogation Raid’ on Torquay ( my home town), a ‘tip and run’ air raid that occurred in 1943. Beaverettes formed part of the towns Anti Aircraft defense that shot down 6 of the 21 Focke wulf 190 raiders.

I decided I had to have one for my collection.

Beaverette Armour car from 1st Corps

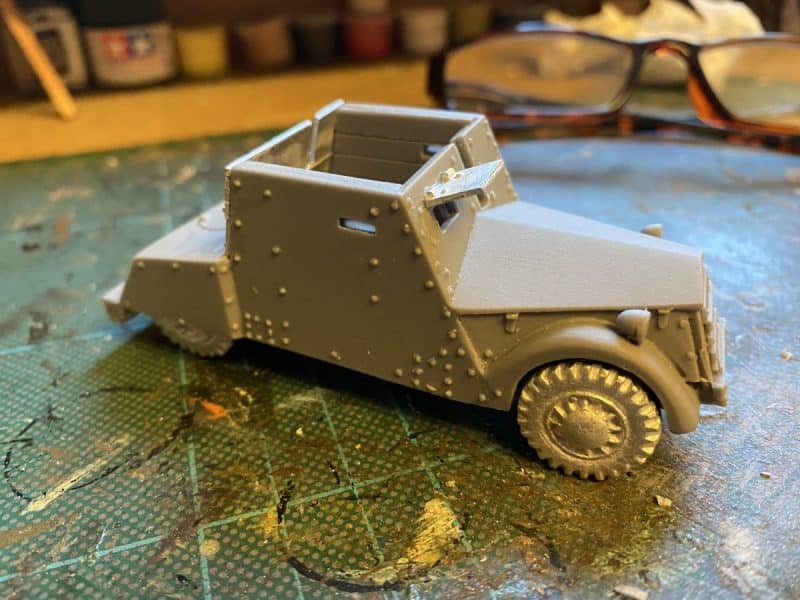
After a great deal of searching, I found that 1st Corps made a lovely model in 1/48th scale, complete with crew. The model consists of a resin body with metal Accessories – wheels, hatches and of course, the crew. It was a simple matter to wash, clean and assemble it and prime it ready for painting.

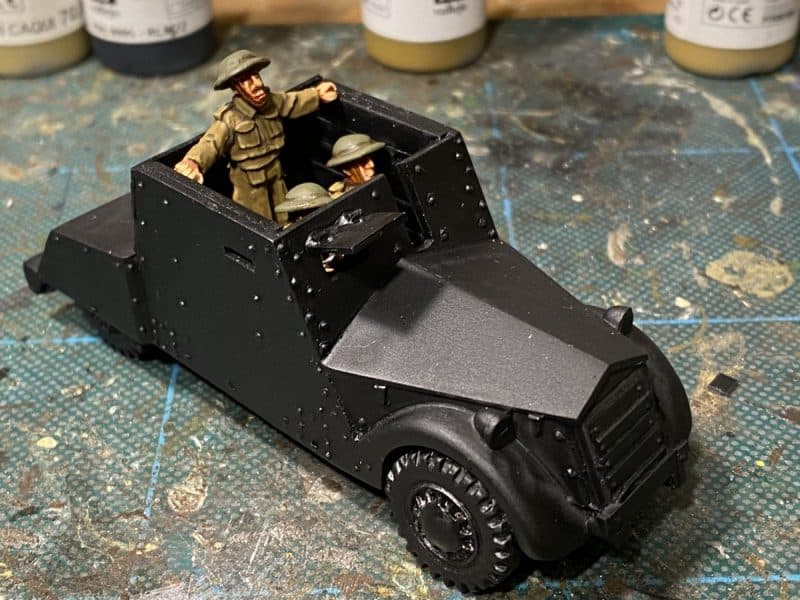
Beaverette crew painted & car primed
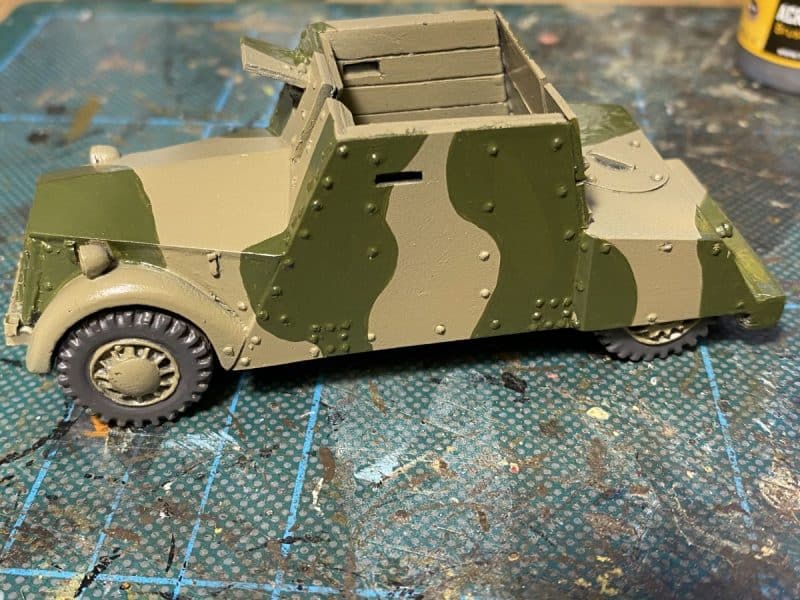
Basic colours added

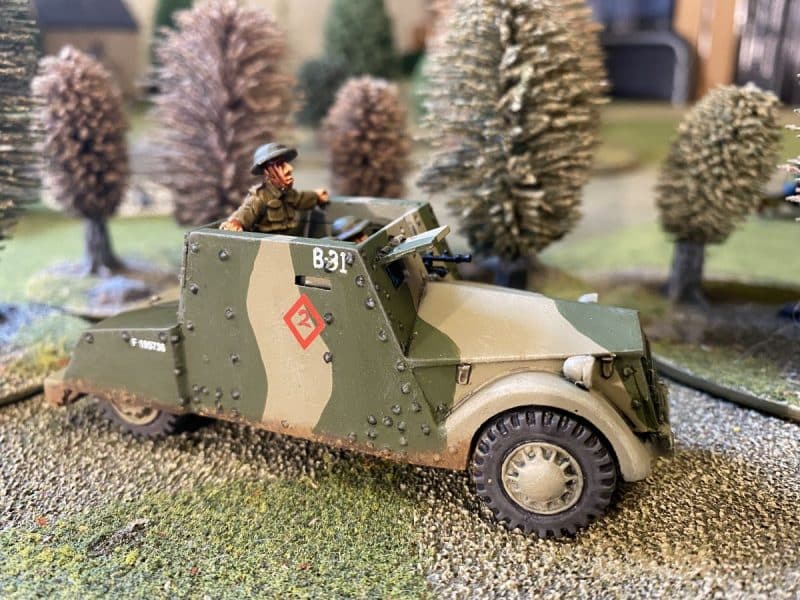
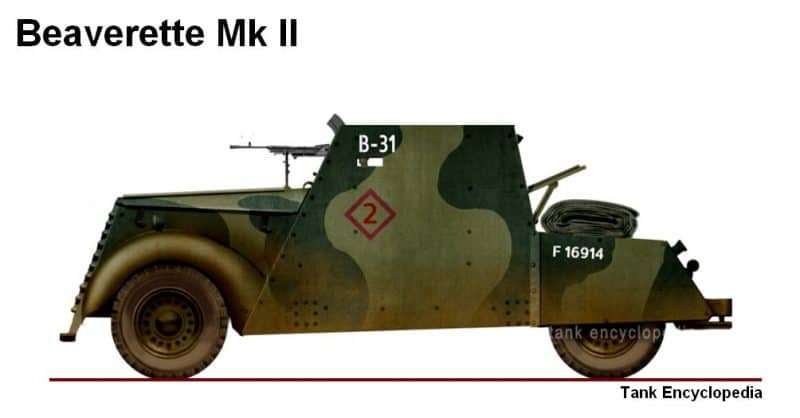
I used my airbrush to base coat the model with Mig Ammo Khaki Green (1939- 42) MIG113. I then hand painted the camouflage using British Olive Drab (1944-45) MIG0112. I should have masked off the model and used the airbrush again but I was too lazy and it seemed easier to use a brush. I wasn’t too worried about the colour either. Clearly, a 1944 olive drab isn’t going to be exactly the right shade but it gave me the effect that I wanted. In some of the reference pictures that I found, modellers had used a green/black combo but I quite liked the version below, which looks to me like the dark green on Khakhi green used by the BEF and so I based my scheme on this.

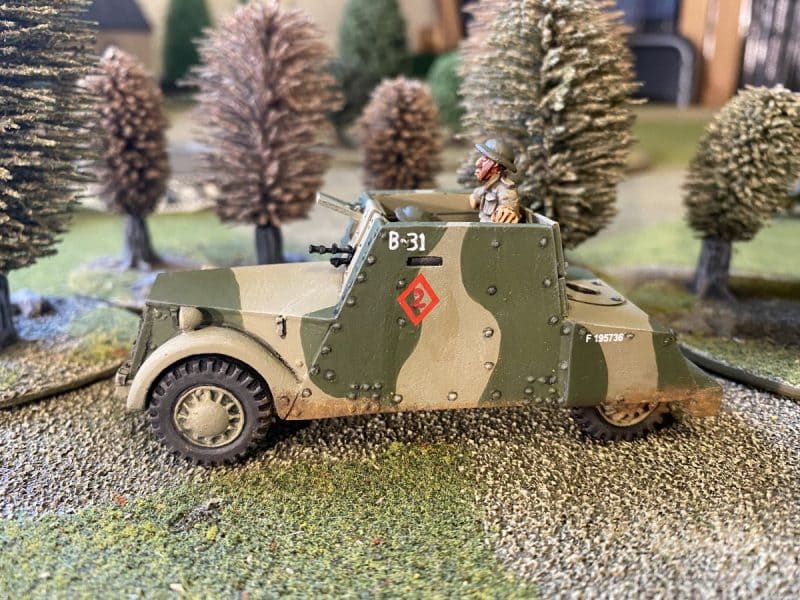
After the camouflage, I weathered the model with a pin wash of Dark tone ink around the rivets and panel lines and then I dry brushed the model using the original camouflage colours, lightened with Iraqi sand. The tyres were painted using Mig Ammo Rubber and tyres MIG0033 and darkened with a wash of dark tone. The markings were added using a combination of generic 1/56th markings that I had spare from Warlord games and I hand painted some of them. the vehicle number is ficticious. I then airbrushed the whole model with Mig Ultra matt varnish and when this was dry, I added some weathering in the form of pigments on the sides and wheel arches.

Weathering, crew and markings added
The other side!
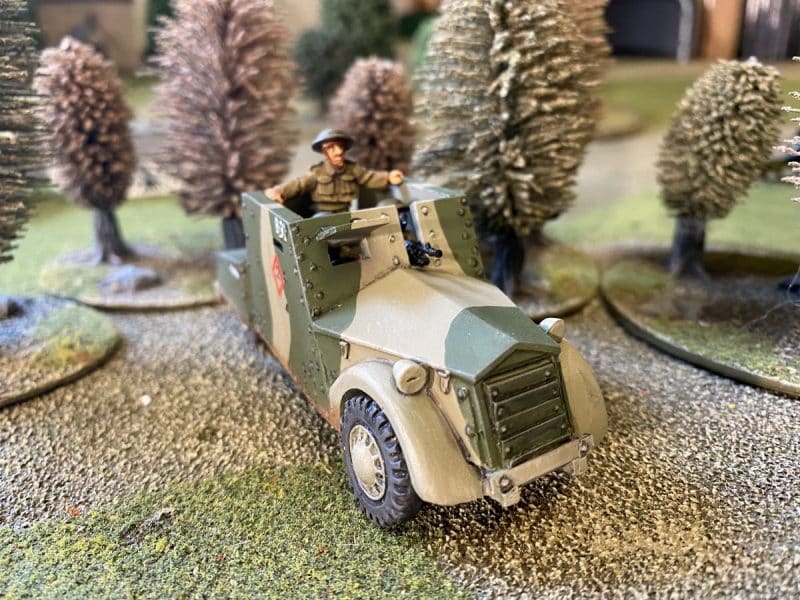
The front view!

I had previously painted the crew in normal British army Khaki and added them, together with the bren gun to complete the model. So another model goes into the cabinet!

THE COMMERCIAL BIT

Almost all of the paints, miniatures, bases, basing materials and anything that you are likely to need for your hobby are available from my shop here:

ARCANE SCENERY

You can see our range of MIG ammo paints and accessories here:

MIG AMMO

we carry a huge range of Vallejo paint and accessories here:

VALLEJO

We dont carry 1st Corps models but you can order them direct here:

1st Corps

Happy Modelling!