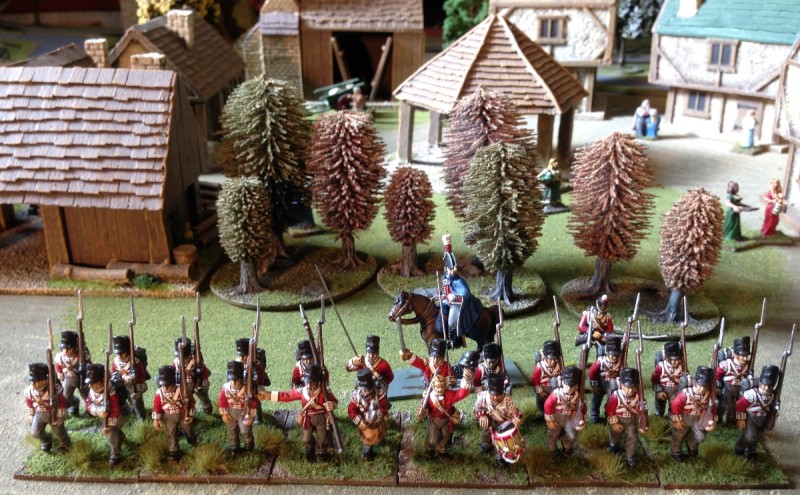
Stay Focused…Portuguse and Panzers

I don’t know about you but when I embark on a long project, I find it very difficult to stay on track. The Portuguese being a case in point. I have rather ambitiously decided to batch paint 24 models in one go to complete the 23rd Ameida Regiment before going onto the next 24 to complete the 11th Penamacor. That will give me the bulk of the Brigade that fought under Stubbs as part of Coles division at Salamanca and Vitoria. According to the little research that I have done so far, they were supported by the 7th Cacadores as well as a Battery of 5 6pounders & a 5.5 inch howitzer. All in all, a tidy little force once I have them completed.

step two in batch painting

step two in batch painting

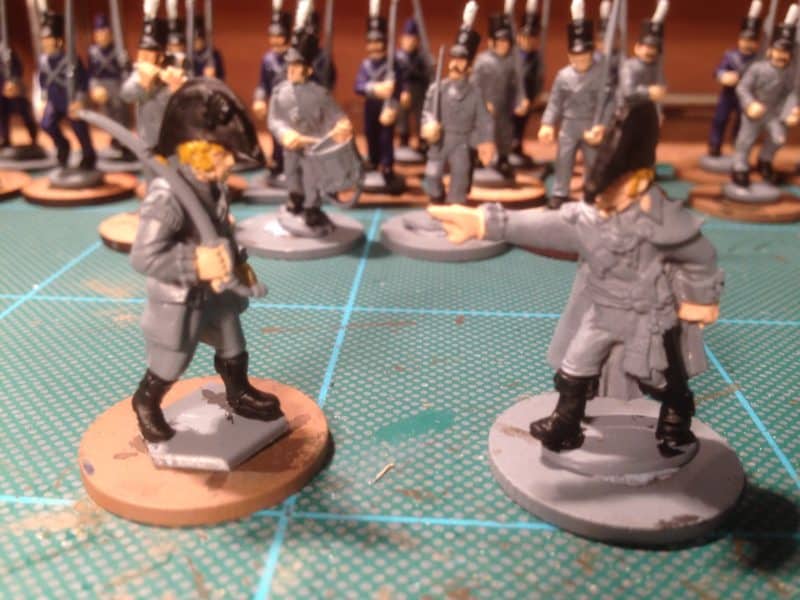
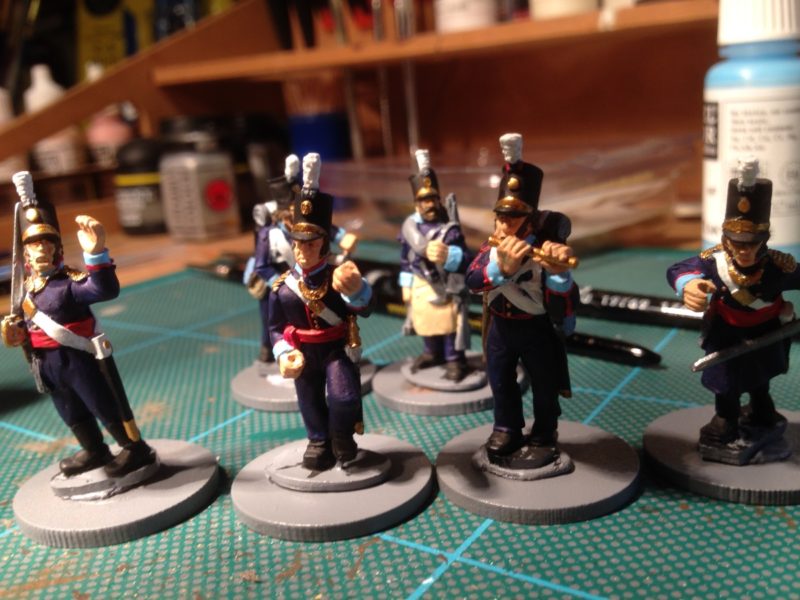
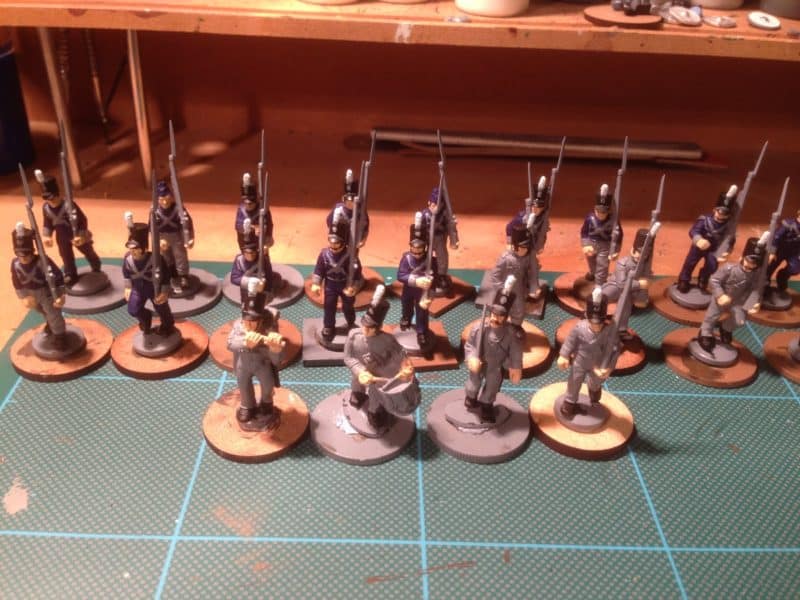
So the 24 figures are assembled, primed and on the painting bench and I am at ‘step 2’ in my batch painting process. The flesh, hats and boots are done and the dark blue uniforms are coming along. I’ve built my two English officers. One is a Warlord Peninsular officer, the other a Victrix figure that I have put together from various bits.

British Officers attached to the Regiment.

British Officers attached to the Regiment.

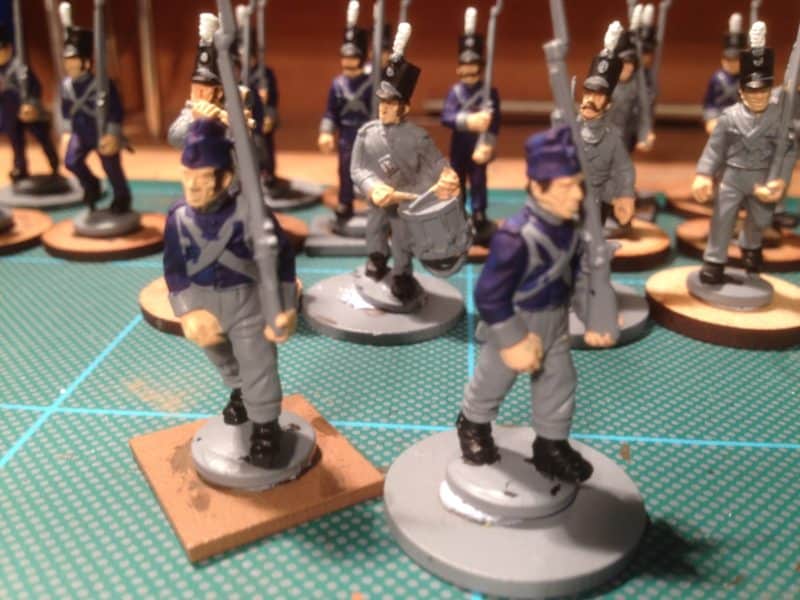
I’ve also used a couple of the field caps rather than shakos for two of the troops to add a bit of variety.

Portuguese infantry in field caps

Portuguese infantry in field caps

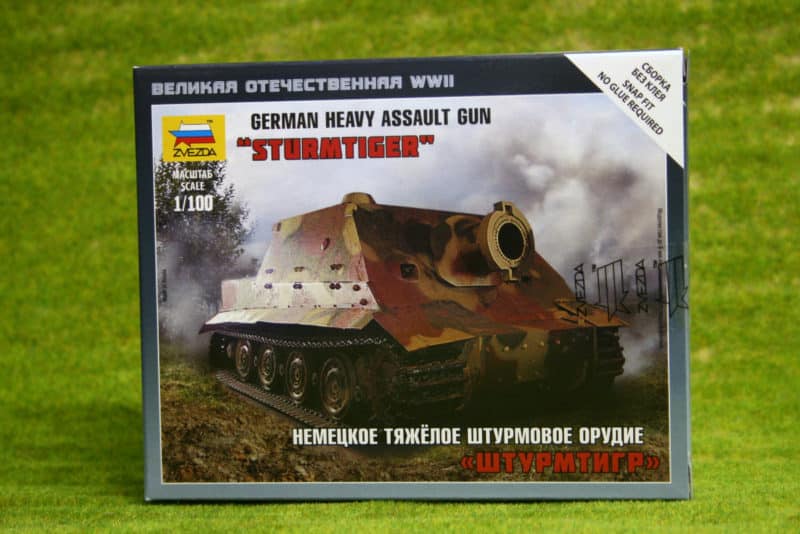
But as you can see I am a long way from completing these first 24 figures which brings me back to my opening statement. As I am working my way through these figures my mind and eye is wandering and I am constantly being drawn in other directions. This next part of my blog might sound like an advert but I am genuinely impressed with the Zvezda ‘Art of War’ range. The tanks and APC’s are all produced in 1/100th scale and just look superb when built. We have recently received the King Tiger from Zvezda, which started me drooling but this week the Sturmtiger arrived as well. It looks a lovely little model and at £2.99, whats the harm in getting one….

Tempted by the Sturmtiger!

Tempted by the Sturmtiger!

Come on now, I bet that there are loads of wargamers out there that have fancied making a little collection of all the German tanks and the variants just for fun. Well I certainly have – a nice sequence from the Panzer I through to the King Tiger, all sat on my desk, the evolution of the Panzer! Maybe I’ll mount them on a card like a sort of family tree. It’s almost possible to do this now with the range available from Zvezda. So far, I have resisted, as there lies madness BUT maybe I will just treat myself to a bit of something different once this batch of Portuguese are finished and based!


The Portuguese Project Progresses

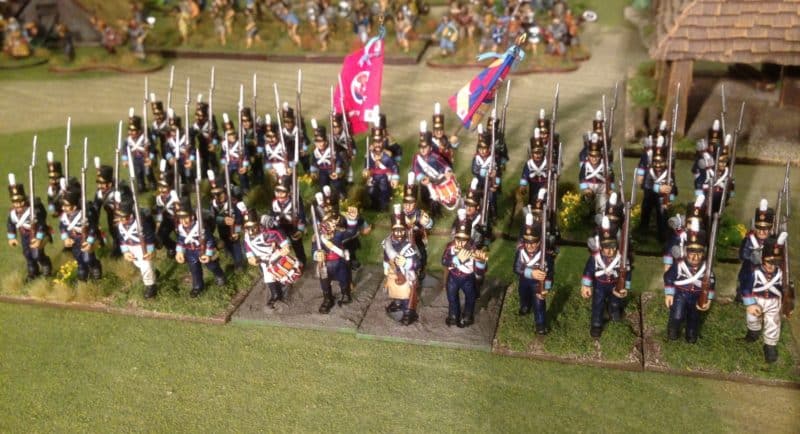
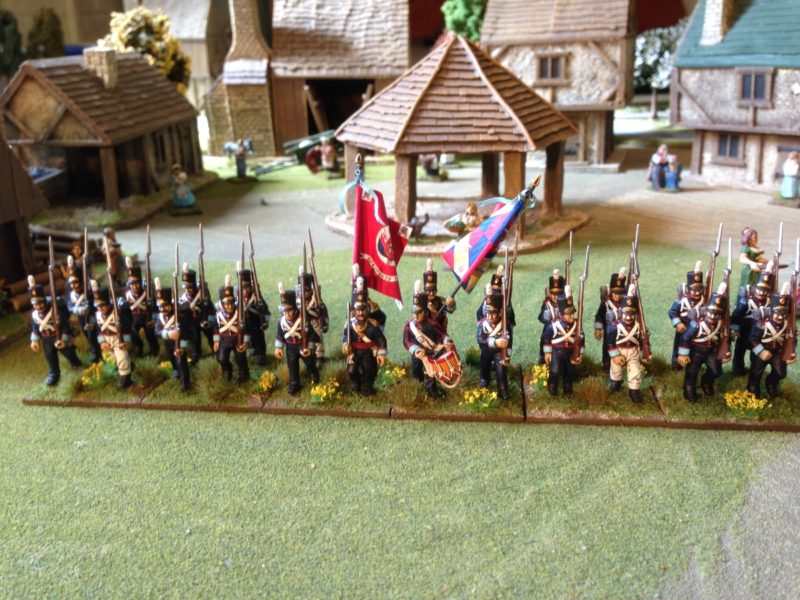
11th Penamacor Regiment

11th Penamacor Regiment

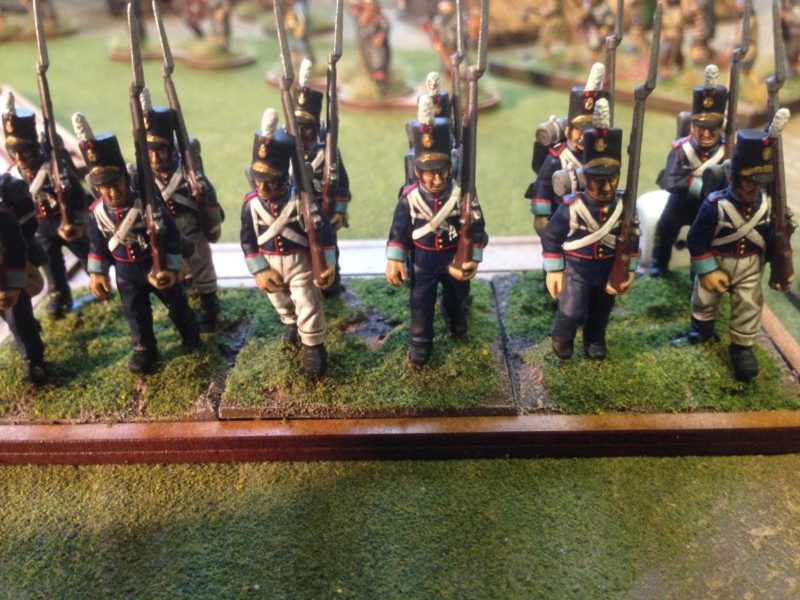
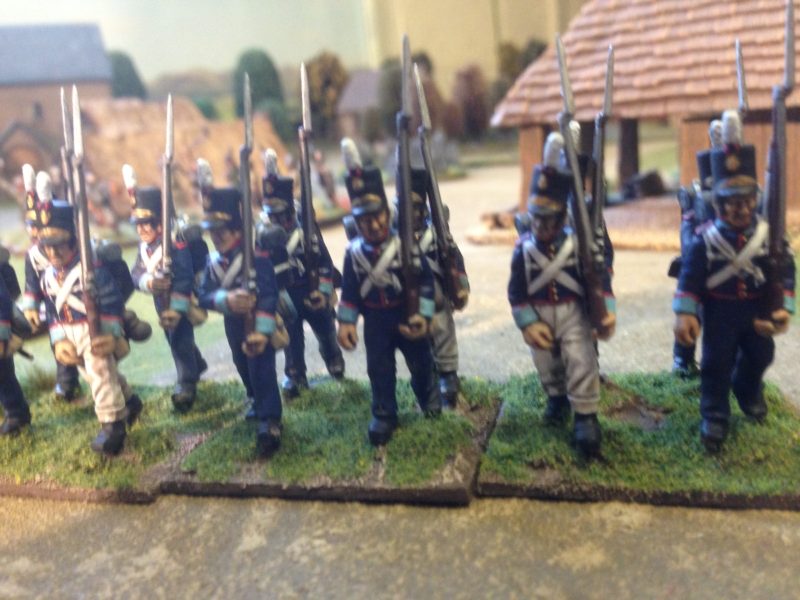
If you read last weeks blog, complete with upside down pictures (Now correct if you read this on a PC but still upside down on an mobile device…) you will know that I have committed to paint a Portuguese Brigade from the latter stages of the Peninsular War. I have spent a little bit more time researching the structure of Portuguese units and as with details of the uniforms, there is a bit of contradictory evidence out there.

The best information that I could find is as follows:

A Portuguese Infantry regiment consists of a small cadre of Head Quarters staff and two battalions of Infantry. The Battalions were composed of 5 companies of men, four of which were Fusiliers and one being a Grenadier Company. I am indebted to a contributor on TMP who has given the detail for the composition of the regiment based on a translation of the actual 1810 regulations:

A regiment composes a headquarters staff, and two battalions, each of five companies, one of grenadiers and four of fusiliers. 

 The detail which goes on from this shows the entire 36 personnel establishment for the Headquarters, identifying 24 regimental headquarters staff (including medical and musicians) plus 6 staff for each of two battalions of 1 major, 1 adjutant, 1 quartermaster, 1 sergeant major, 1 quartermaster sergeant and 1 standard bearer.  

The detail then shows the structure for each company of 4 officers, 6 sergeants, 140 corporals and soldiers and 2 drummers (a total of 152 per company).

When it came to the distribution of the flags, it seems that they had one King’s colour and one Regimental colour per Regiment. It is generally assumed that the 1st battalion carried the King’s colour and the 2nd battalion carried the Regimental colour.

This information is confirmed elsewhere, although different versions and strengths for the Companies are also given. As usual, I tend to go with the set of ‘facts’ that best fit my purpose, which is to produce a set of figures for the wargames table in general and units for Black Powder rules specifically.

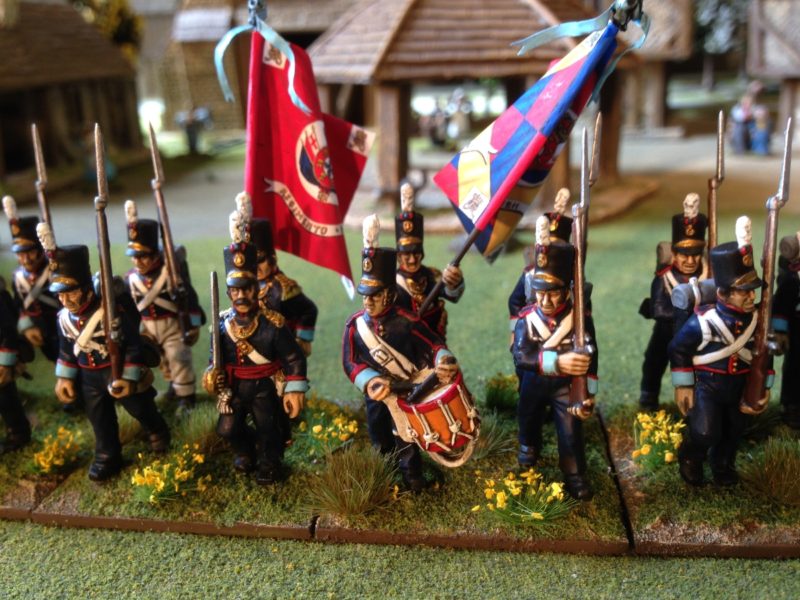
Command Group 11th regiment

Command Group 11th regiment

So, as I had previously decided, with 5 companies of 152 men per company, it seems that the theoretical battalion strength would be about 750 men, making it similar in size to a British battalion. In which case, a unit of 24 men will be about right for my Black Powder units. The composition of my Battalion units do not worry me unduly when it comes to representing individual companies or officers present. I know that some wargamers get hung up on whether they should use say, one figure for 20 men, but that all falls apart when it comes to the officers, ensigns, musicians and NCO’s. So long as these are represented in some way, I’m happy!

23rd Almeida Regiment - nearly complete.

23rd Almeida Regiment – nearly complete.

One final thought to add into the mix is that during the re construction of the Portuguese Infantry force undertaken by William Beresford, a small number of British officers and Sergeants were transferred into the Portuguese Army. This meant that there was at least one British officer at the top of the regimental command structure. On 6th July 1811 there were approximately three British officers in each of the battalions.

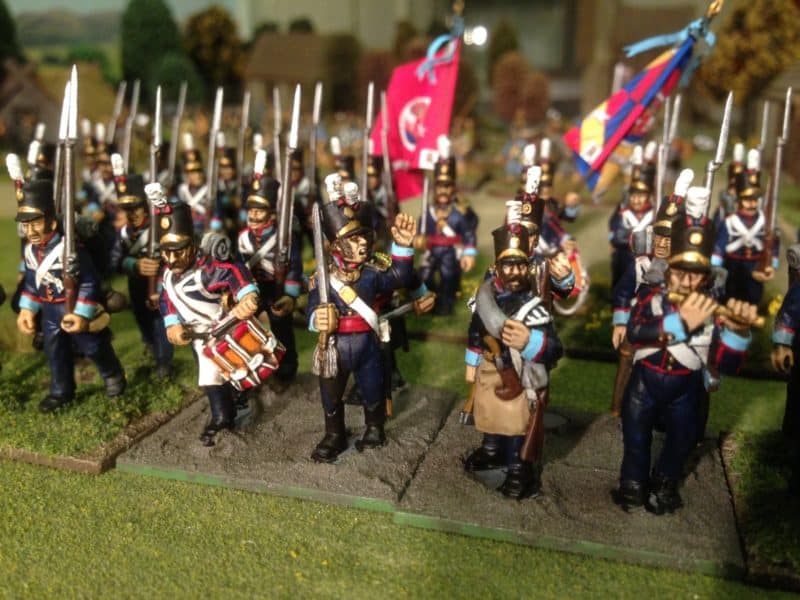
23rd Almeida Command Group - basing not quite complete.

23rd Almeida Command Group – basing not quite complete.

With all of the above in mind, my task is now to complete the modelling and painting of a typical Portuguese Brigade. As I have previously painted 24 figures for the 11th Penamacor Regiment and I am about to complete the 23rd Ameida Regiment it is just a question of adding another 24 to each Regiment to bring them up to strength. At first I was somewhat daunted by the thought of committing to this task but armed with the above information I felt that I had to complete the brigade as it would have appeared at Salamaca and other subsequent battles.

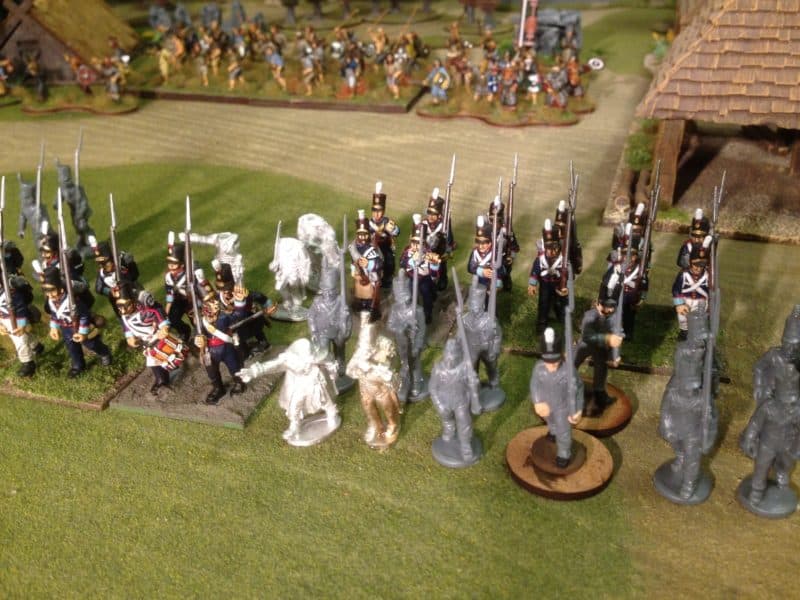
The battalion expands

The battalion expands

The good news is that there are some opportunities for adding a bit of variety. The obvious being to include a British officer with each battalion. I’ve also challenged myself to have this part of the project complete by the end of November. In next weeks blog, I’ll add some more detail to the composition of my brigade and perhaps add some detail of the Brigades exploits in the Peninsular.


Portuguese Men of War.

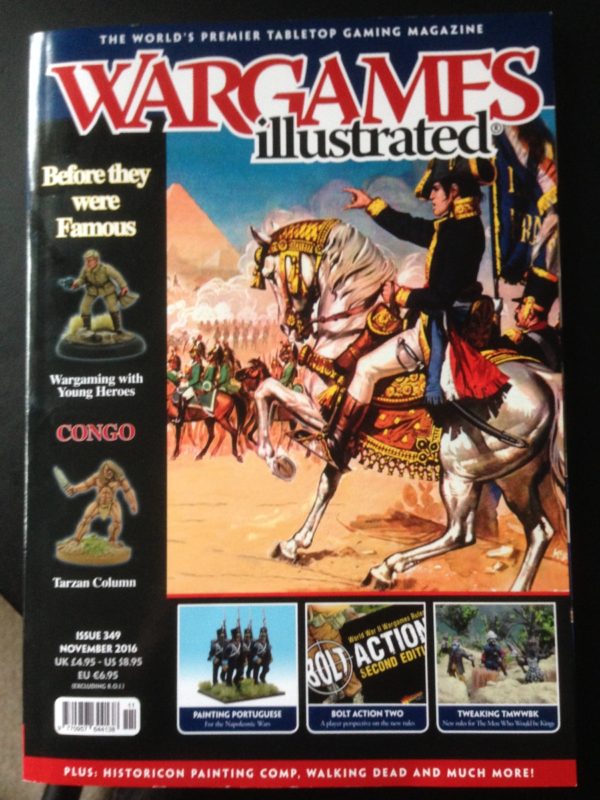
My attention has been very much on domestic and nursing duties this past week and so my hobby has taken a back seat. That said, I have still found the time to sneak off and get some painting done and so I have made some progress on my latest batch of figures, Napoleonic Portuguese Infantry. As I have mentioned previously, I have painted these for an article that will appear in this months Wargames illustrated, issue 349. If you would like a copy, it will be available, post free from my shop here:

WARGAMES ILLUSTRATED

Wargames Illustrated 349

Wargames Illustrated 349

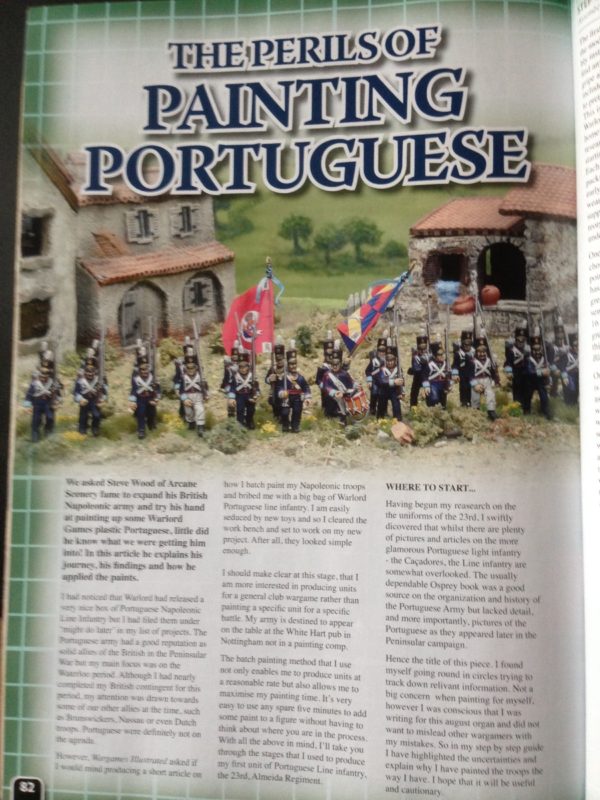
As you can see from the article, I had painted a full battalion as well as part painting another battalion to show the various steps that make up the process of batch painting these troops.

Painting Portuguese article

Painting Portuguese article

The article is entitled, The Perils of Painting Portuguese, not because the figures themselves were difficult to paint but because of the problems that I had in getting good reference materials to confirm the various colours. To find out more you will have to purchase the magazine but I am willing to share some of my references here:

https://uk.pinterest.com/horzawood/portuguese-napoleonic-uniforms/

It’s a link to my pinterest boards and if you are interested in painting some Portuguese infantry, I hope that you will find it useful. If you haven’t come across this site before it is a very useful way of gathering reference material for a project and if you check out the rest of my boards you will have a clue as to what I am interested in painting next!

So back to my work bench and as you can see, I have finished and based the Infantry:

Portuguese Line Infantry

Portuguese Line Infantry

And the command group are nearly finished. They are just awaiting the last touches of paint, a coat of quick shade, matt varnish and then basing!

Command Group still W.I.P.

Command Group still W.I.P.

I’m afraid that the pictures were taken in haste for this blog post – once the battalion is complete I’ll post some better ones! That said, Portuguese infantry may be occupying my work bench for some time to come. The reason being  is that I have decided to build the full regiments for both the 11th Penamacor from the Central Division and the 23rd Ameida Regiment which were brigaded together in the Peninsular War. Each regiment consisted of two Battalions, the first battalion carrying the Royal Standard, the second battalion carrying the Regimental flag. So in all, I will need 96 figures, which means that I have another 48 to paint. I have decided that I might as well complete these whilst I am ‘in the groove’ so to speak, rather than come back and of them later. It will also force me to do a bit more research as to which battles they fought in and who they fought alongside.

Portugese Infantry in movement tray

Portuguese Infantry in movement tray

So there will be plenty to keep me busy as we go into the Autumn and the clocks go back! My target is to have a full brigade of Portuguese, complete with Cacadores as skirmishers and some artillery support. Unless of course I get tempted elsewhere…..


Man Down!

Well actually, Woman Down! My wife, Julie has just had a Hip replacement and so I have been confined to domestic and nursing duties. It also means that we are missing both Julie and myself from the business at the moment. Fortunately, Hayley, Rob and Kevin are doing a great job holding the fort and keeping things running whilst I am away. However, I have found some time to sneak off to the garage when Julie has been resting to do some modelling, so some progress has been made with my various projects.

Sarissa Dark Age Stable

Sarissa Dark Age Stable

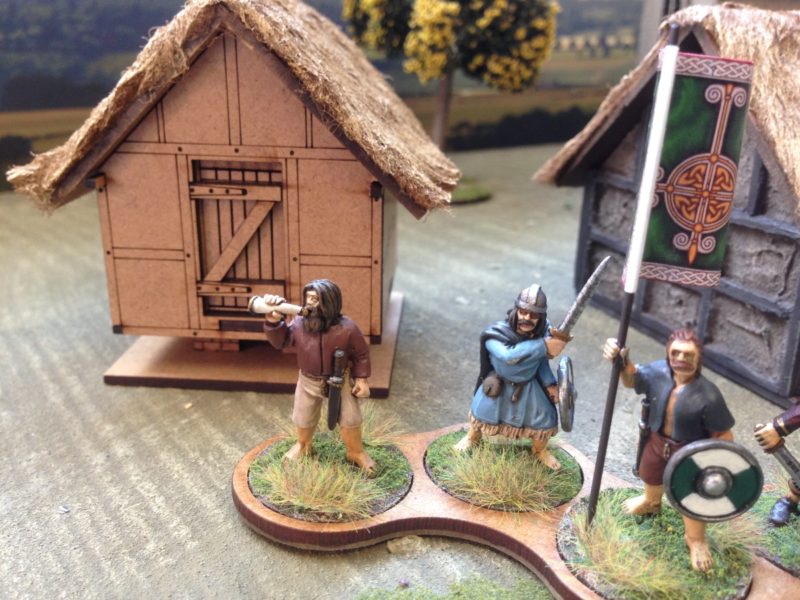
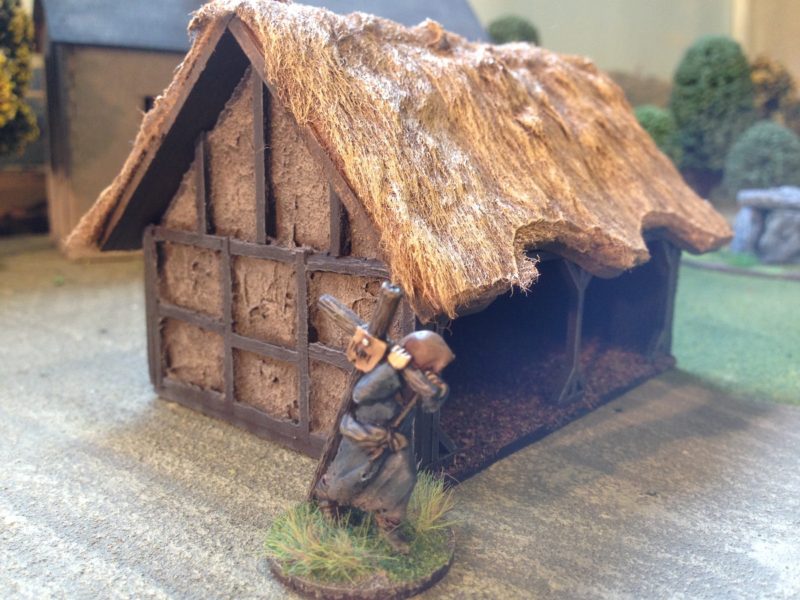
I have managed to finish another of the Sarissa Dark Age buildings for the village that will form the centre piece of my scenery when playing Saga. This building is the barn/stable J10, the third building in my collection. I have just one more building that I am keen to finish, the Grain store, although I am in no particular rush to do so. The method used to paint it was of course exactly the same as the previous buildings so that they all blend together.

Sarissa Dark age Grain Store

Sarissa Dark age Grain Store awaiting its coat of daub!

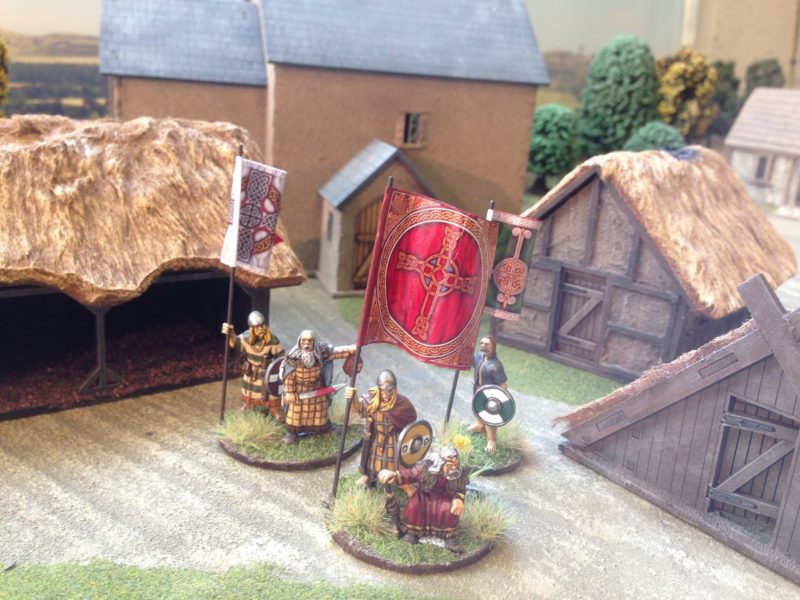
I also have a Sarissa Dark age/Saxon church that I started work on some time ago but never actually completed. As usual, I decided that painting figures should take priority and so the Church was relegated to being in the background of many of my pictures but never quite was finished. Perhaps now is the time to get this project completed as this really will give me a nice little village for my warbands to fight over!

Dark Age Village - work in progress

Dark Age Village – work in progress

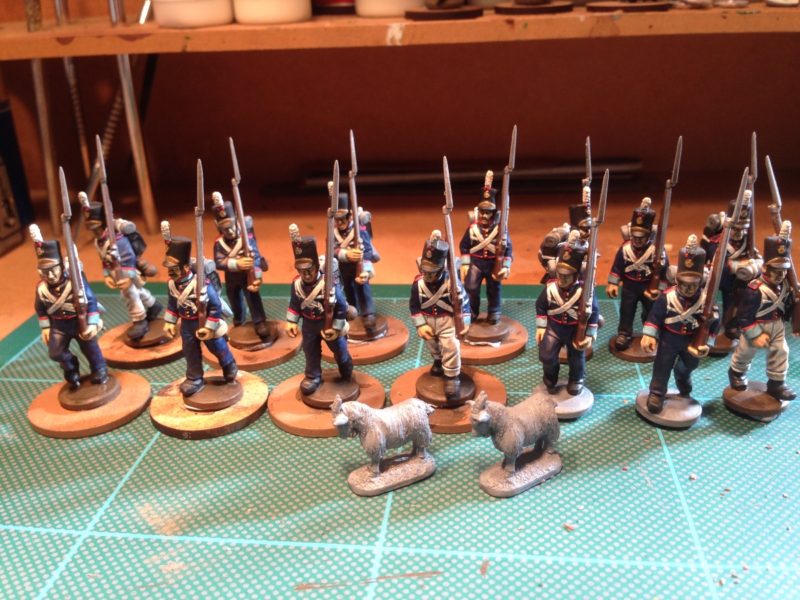
As I hinted, the lure of painting figures is always a distraction for me and I have already strayed back to my beloved Napoleonics! To be fair, the figures in question were already part finished as I had painted them for an article that will appear in this months Wargames Illustrated ( issue 349 November). The article is entitled, the ‘Perils of Painting Portuguese’ and explains step by step, how I batch paint my Napoleonic infantry units. I was using the Warlord Games Portuguese boxed set and in order to complete the article I actually painted 24 figures to completion to illustrate the main article but also then painted a further 20 in various stages so that the reader could follow the painting process. These figures have been sitting on my work bench queue for some time and I thought that it would be a good idea to get them finished. The other prompt was that I had found some of the old Victrix Portuguese metal figures in the ‘Bring and Buy’ at the recent Derby war games show. There are some really nice Officer, ensign and musician figures, so I will be using these to complete my next Portuguese battalion.

Portuguese 23rd Regiment awaiting final highlight and basing!

Portuguese 23rd Regiment awaiting final highlight and basing!

As you can see the rank and file are now completed and just require basing. Incidentally, the goats are not mascots but will be living in the dark age barn!

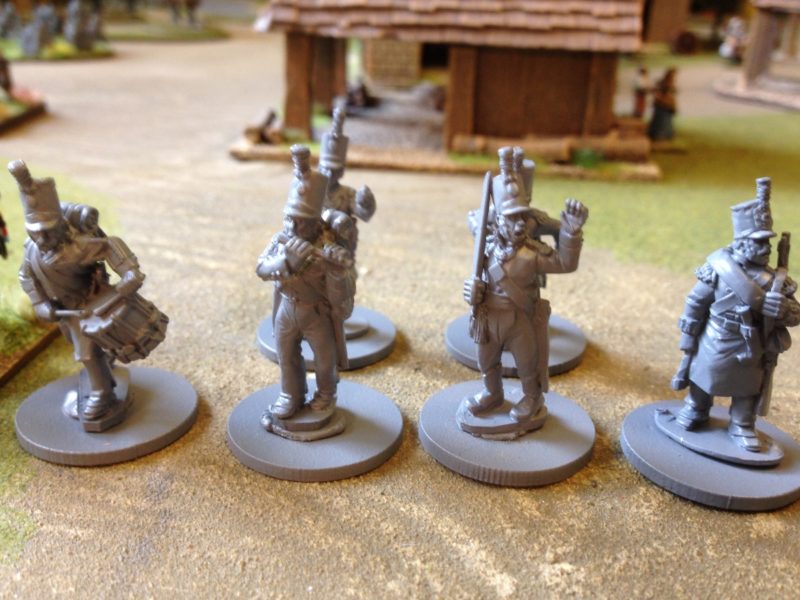
Portuguese Command.

Portuguese Command.

The picture above shows the Victrix Figures that I will be using for the Battalion command. I really like the fifer and it makes a change to have another musician present as well as the drummer. Musicians were of course a key part of the Battalion or Regimental organisation in most Napoleonic armies but the tendency is just to field drummers. Trent Miniatures make some very nice Musicians that will eventually find their way onto my paint table to flesh out my Waterloo collection! As ever, plenty to keep me busy, although, as mentioned above, my hobby time may be slightly curtailed over the next couple of weeks.


Rules for Old Wargamers with Short Attention Spans!

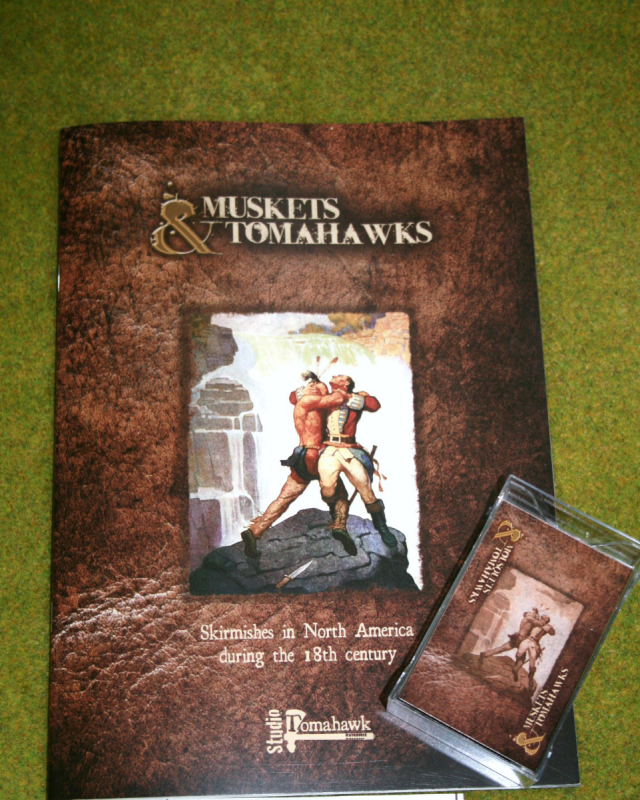
Having played Black Powder for some years now, our group has been looking for a set of Skirmish rules for the Black powder era that would enable us to game using a limited number of figures. We all have quite large Napoleonic Armies but when it comes to, say, the AWI, French Indian Wars and similar periods, some of us are still playing catch up with painting. So skirmish rules are the way to go. We had been playing Muskets and Tomahawks but in truth, the groups enthusiasm to learn a new set of rules was on the wane. The other issue was that we were playing M&T’s fairly irregularly so the rules just weren’t sticking in our brains….

muskets & tomahawks from Studio Tomahawk.

muskets & tomahawks from Studio Tomahawk.

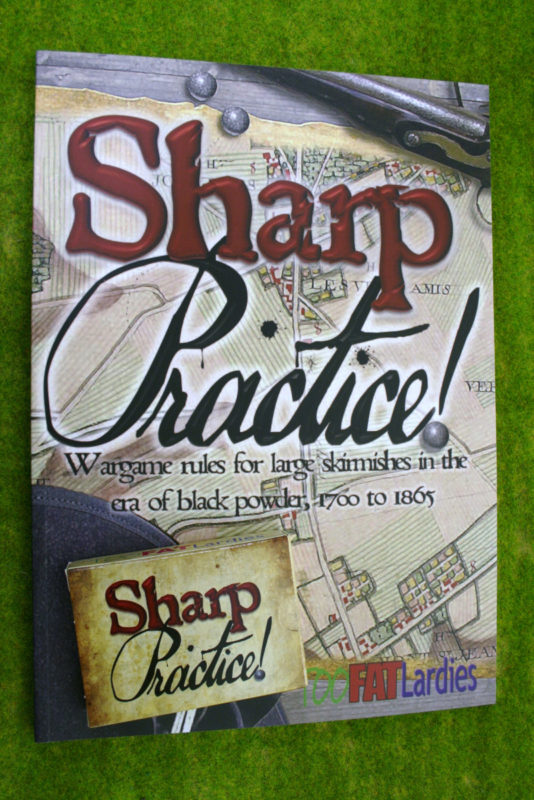
The first Skirmish game that actually introduced me to the hobby was ‘Sharp Practice’. With the launch of the new version, complete with the cards, this seemed to be the answer to our problems. The Sharp Practice rules set has a depth to it that really encourages you to develop characters and scenarios and provides a ‘rich’ game play ( no pun intended) that develops into a story line of it’s own.  Unfortunately, we encountered the same issues. Although we were familiar with the rules mechanism, the lack of experience and consistency meant that we were having to constantly refer back to the rule book to resolve queries. Of course, it didn’t help that half of our group had sort of read the new rules and the other half played in blissful ignorance, happy to do what ever they could get away with!

sharpe practiceThe group decided that we needed a simple set of rules that would allow us to play a skirmish game on a Thursday evening that would not tax the brain too much and would be something that could be read quickly and absorbed. Step forward, Andy Callan, veteran rules writer, who volunteered to put the two rules sets together and simplify them down to two sides of A4 paper. Andy has been writing rules and war games scenarios for many years. His rules set ‘Loose Files and American Scramble’ appeared in the very first edition of Wargames Illustrated ( why the hell we aren’t using these at the club is another mystery to me…..) and his current joint project with Peter Dennis is the Paper Soldiers rules sets & armies published by Helion Books that I have previewed here

The rules are not an attempt to replace the other two rules sets. In fact, I would suggest that either are a mandatory addition to war gamers collections but Andy’s rule set serves two purposes. Firstly, it is a quick, playable set of rules that will allow you to explore either a Black powder period or campaign without committing to vast numbers of figures. Secondly, the rules are a good introduction to Card driven activation games. Many players are not familiar with this style of play and are more used to the  U Go – I Go turn sequence of most rules sets. The card driven rules activate units in a random sequence on either side. This can be frustrating to players that like to implement carefully made ‘chess like’ strategies. However, if you would like a more ‘cinematic’ type of game, with tense stand offs and risky gambles, the card mechanism is one of the best ways to achieve this.  If you do like the way Andy’s abridged rules play and would like more detail, including army lists, either of the two rule sets, Muskets & Tomahawks or Sharp Practice are ideal. Once again, I would heartily endorse both!

So if you fancy a go at this style of play, the rules are contained here in a PDF in the link below. Hopefully, if I have the technology working correctly, you should be able to click the link and down load these for free. If you are worried about how to make the cards, there are a couple of simple solutions. First of all, just cut them out of card board – an empty cereal packet will do – remember to write on the blank side though… If you prefer a less ‘Blue Peter’ approach, use an old deck of cards and place stickers on them with the Officers names, and the other miscellaneous card types written on. If you don’t have an old ceck of cards, pop down to the local pound shop and get one. You should be able to pick them up for a pound….. Anyway, I hope that you will give the rules a go and have fun playing them:

SharpTomahawks


A rest is as good as a change!

I’ve had a very relaxing week away on the beautiful island of Skiathos in Greece. Time to catch a few rays and take a break from the usual routine and recharge my batteries. As well as taking a break for work I also stayed away from my hobby. So no packing up soldiers to paint for me – I even resisted taking my usual historical fact and fiction reads. Instead, I made do with a Lee Childs thriller  ‘Gone Tomorrow’ and the latest page turner, ‘Girl on a train’ by Paula Hawkins. Both exceptionally good reads. I did backslide a tad, in that having burnt through those two paperbacks I found that I had ‘Woe to live on’ by Daniel Woodrell on my Kindle. I came across it by accident and didn’t realise that I had it or even what it was until I started the introduction. It’s a terrific read and a tale of the American Civil War, in particular the war in Missouri and the conflicts between the Jayhawkers and Bushwackers, culminating in the raid on Lawrence in Kansas. The Film ‘Ride with the Devil’ is based on the book and I can recommend both if you are at all interested in the American Civil war period.

I hadn’t done any research on the Island of Skiathos itself. Being in Greece and close to the mainland , you would assume that there would be plenty of history to see, so to speak, but apart from a couple of Monastery’s the Island doesn’t seem to have much in the way of antiquity to see.  So, I hadn’t planned on any Historical research or visits to historical sites. In fact, the only excursion that we had planned was a boat trip to the neighbouring islands of Scopelos and Allonissos. The purpose of which was to do a bit of Dolphin spotting, sample the local food and of course visit some of the locations that the film ‘Mama Mia’ was filmed at – more of interest to my wife than myself.

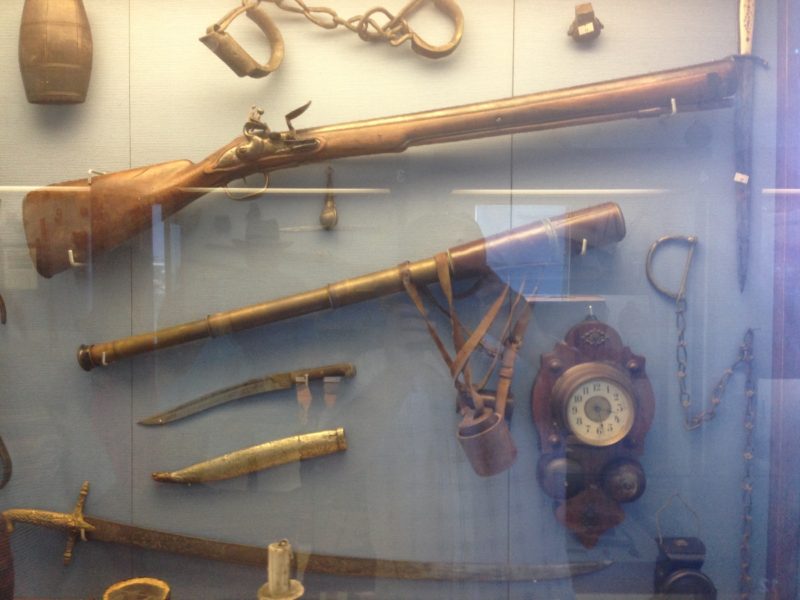
Pirates weapons on show at the museum at Allonissos

Pirates weapons on show at the museum at Allonissos

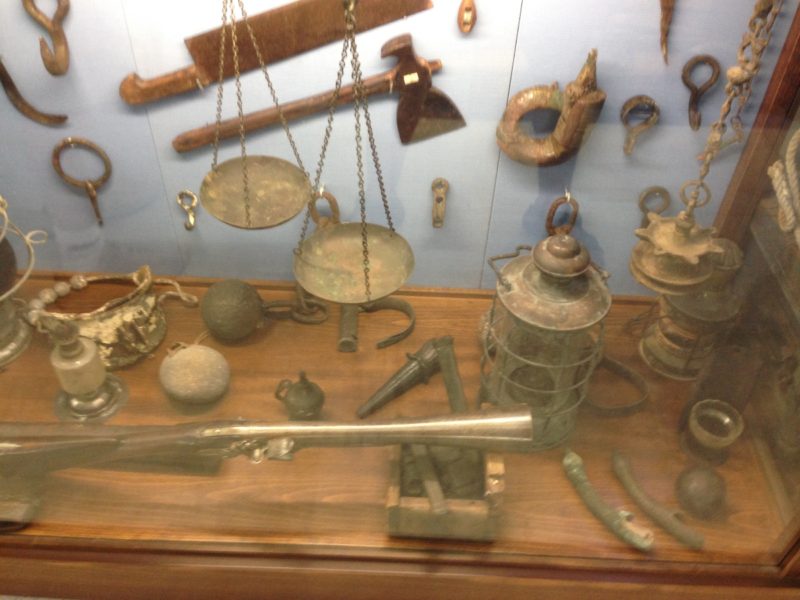
As it turned out, on one of the islands, Allonissos, there was quite a good little museum to visit. Billed as a ‘pirates’ museum, it actually had quite a nice exhibition of both pirates weapons as well as other weapons from the Greek war of independence, WW1 and more recently, WW2.

Yet more weapons!

Yet more weapons!

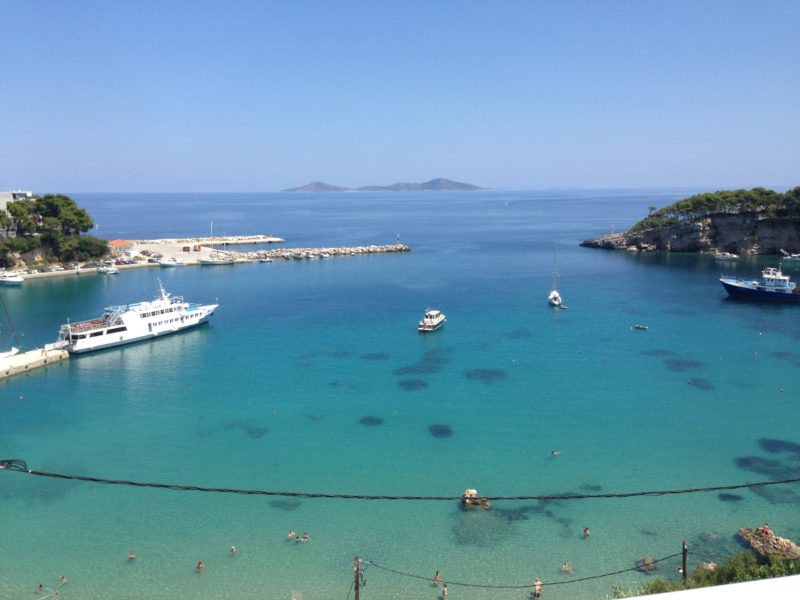
This little museum turned out to be a bit of a treasure trove of interesting exhibits and had I had more time, I would have spent much longer investigating the exhibits and taking notes for future research. As it was, we had agreed to meet back with the ladies and so time was at a premium. It also didn’t help that the museum had a superb balcony bar with the best views of the harbour! So I spent more time nursing a cold glass of beer looking out over the bay, enjoying the cool breeze than I did on any serious research…

The view over the Harbour from the Museum balcony bar.

The view over the Harbour from the Museum balcony bar.

All in all, the museum is well worth the 4 euros entrance fee and is a nice diversion on a very relaxing holiday. Back in the UK for the weekend I found that I was ready to pick up my paint brush again and for the last couple of days I have cracked on and finished my next regiment of Portuguese infantry. It has now been confirmed that they will be appearing in Wargames Illustrated Magazine so if you would like to know how I have painted them ( and indeed why I have chosen certain options when doing so) you will have to purchase the magazine. The regiment is the 11th Penamacor from the Central Division and according to my references, would have been brigaded with the 23rd Ameida Regiment ( which is the featured in the WG article)

11th Penamacor Regiment

11th Penamacor Regiment

I’ve taken a liberty with the unit size as really the regiment would have consisted of two battalions, the first Battalion having the main colour, the second Battalion having the secondary colour, in this case the red flag. So it would be more accurate to have a regiment of 48 figures in two separate battalions of 24, each with their own command and just one colour.

Command Group 11th regiment

Command Group 11th regiment

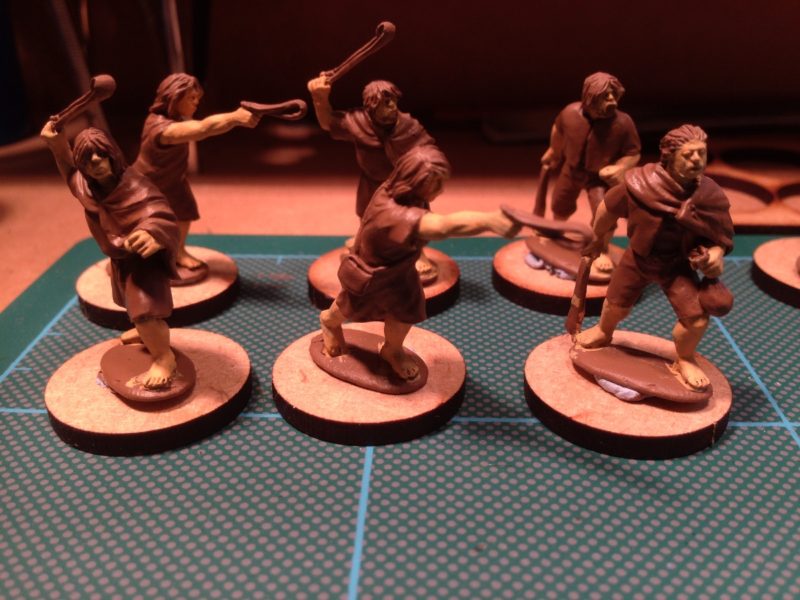
I may yet revert to this configuration. It will be easy enough to do as I have put each ensign on a different base, so it would just be a case of painting the extra figures and finding some extra officer figures or musicians to make up the command group. I say easy, it does mean painting another 24 figures in the identical facings and I am sorely tempted to paint the next regiment with the yellow facings just to be different. For now though I am having a break from Napoleonics and next up on the work bench are some Footsore Irish Slingers for my new Saga band!

Irish Slingers from Footsore

Irish Slingers from Footsore


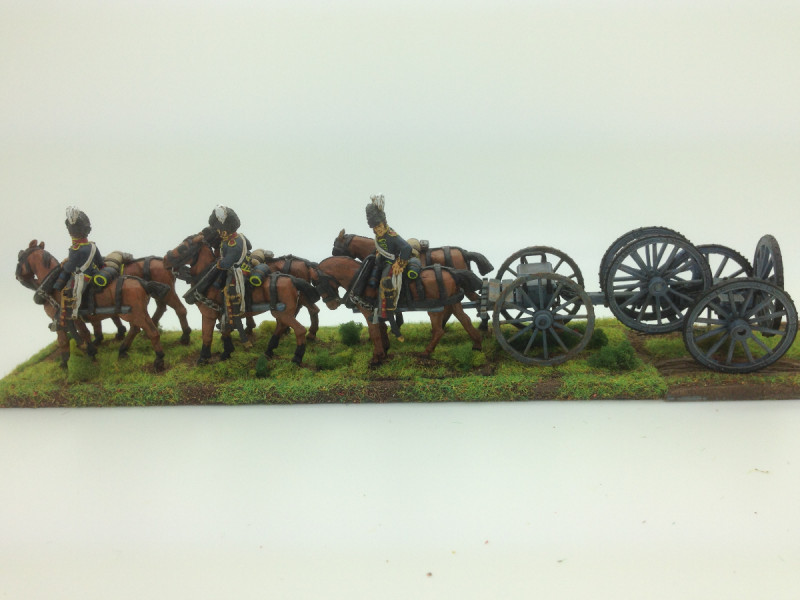
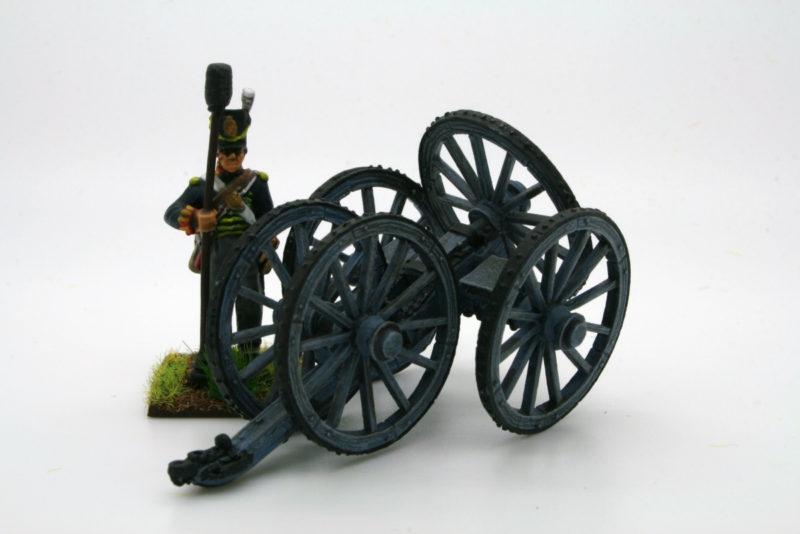
British Napoleonic Spare Wheel Wagon

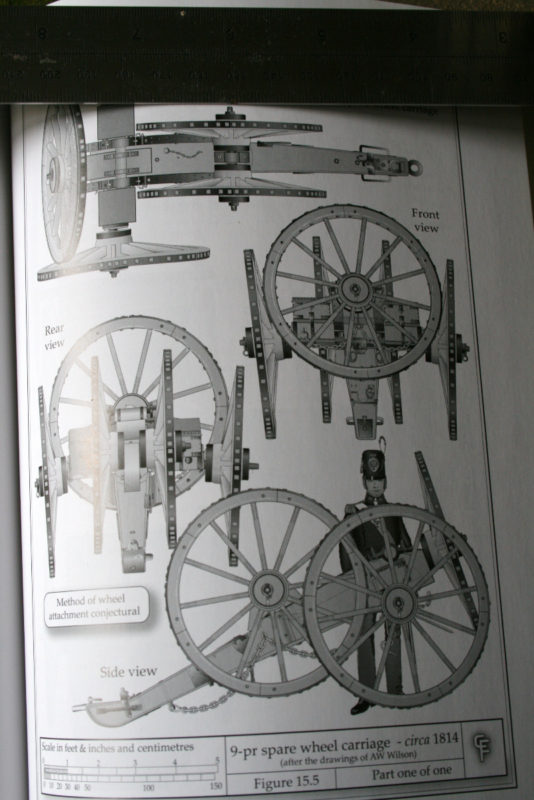
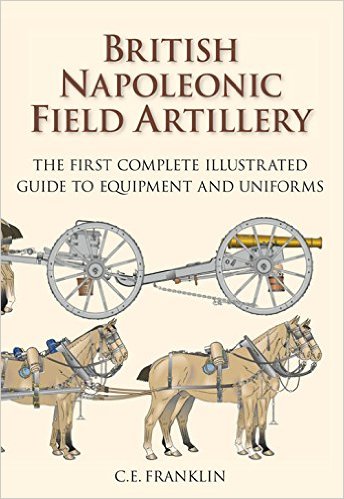
This is a conversion that I actually finished some time ago and whilst I had all the step by step pictures I didn’t get around to writing up the article. A wheel wagon isn’t going to make much of a difference to your army’s firepower but I have been fascinated by the logistics involved in getting a Napoleonic army to battle and a subject like this makes an interesting talking point. I saw the plans in Franklins superb book on British Artillery and thought that it would make a nice project. The only picture I have is from the actual book itself and I hope that showing it here will not offend.wheels carriage reference

If you dont have this book in your collection I thoroughly recommend it. It is of course available from Amazon and many good military booksellers!

franklin book0_

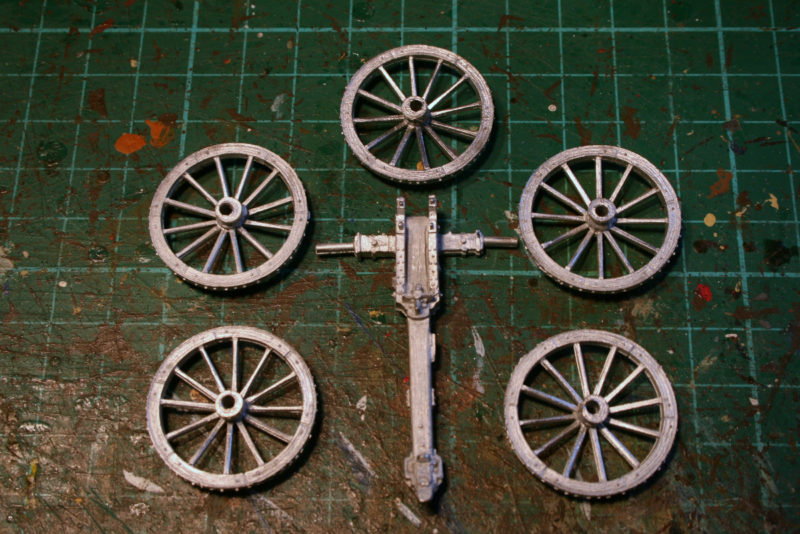
So onto the conversion itself. I used the British gun carriage from the Trent Miniatures range, pack number BA01, the British Light 6pdr and long 3pdr. You will have the barrels left over but these will no doubt come in useful for a future project! You will also need a pack of British wheels from the same range pack number EQ07. There are 8 wheels in the pack, so again, you will have some spares. Both packs are £4.99 each and are available post free from my shop at the moment, so for under a tenner you will have a nice new wagon and lots of spare parts! The wheel wagon itself consists of the carriage and 5 wheels in total:

Wheel carriage 1

The main components laid out ready for assembly

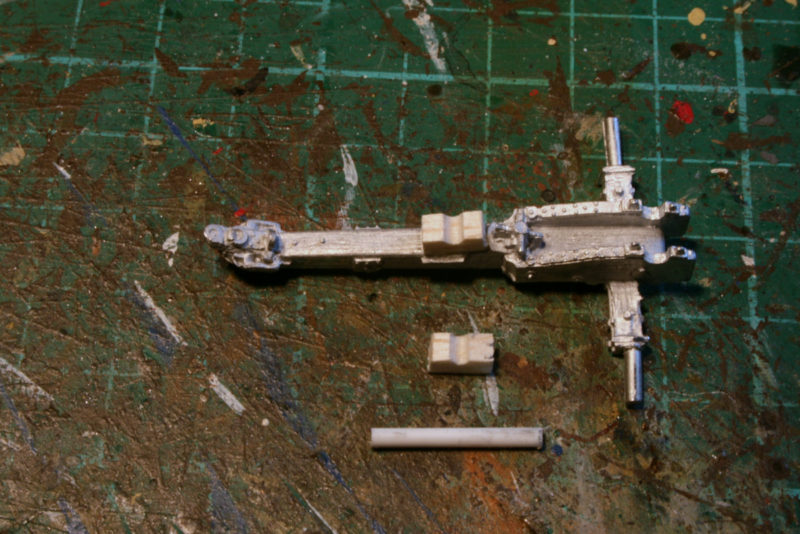
You will also need a few scraps of 1/8 inch square balsa, some evergreen plastic rod and some thin evergreen plastic strip. You will use so little of these items that rather than purchase these, a delve into your scrap box may find some bits that can serve instead. If my lack of exact dimensions for these parts is a bit frustrating, it is more to make the point that even Franklin says that the wheel fixings ‘are conjectural’ so feel free modify as you wish.

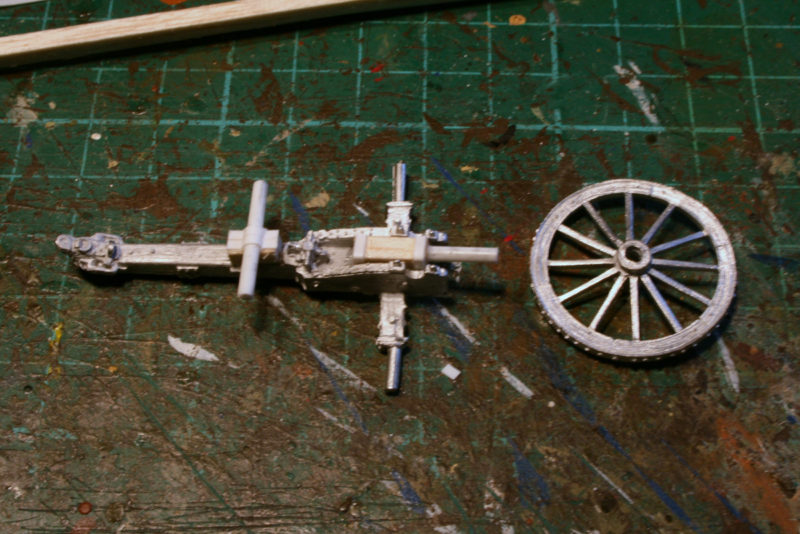
I used a small piece of balsa and a short length of rod to make the central axle that would hold the two side mounted wheels. A similar piece of balsa and rod was used to make the front axle for the wheel carriage 2

other spare wheel. Both axle holders were detailed with some thin plasticard strip. The strip is only about 0.25mm thick so is easy to bend and mould around the components. I used super glue for all the construction. It was the easiest way of gluing the various components into place but mind you dont stick your fingers together as I did!

Wheel carriage 4

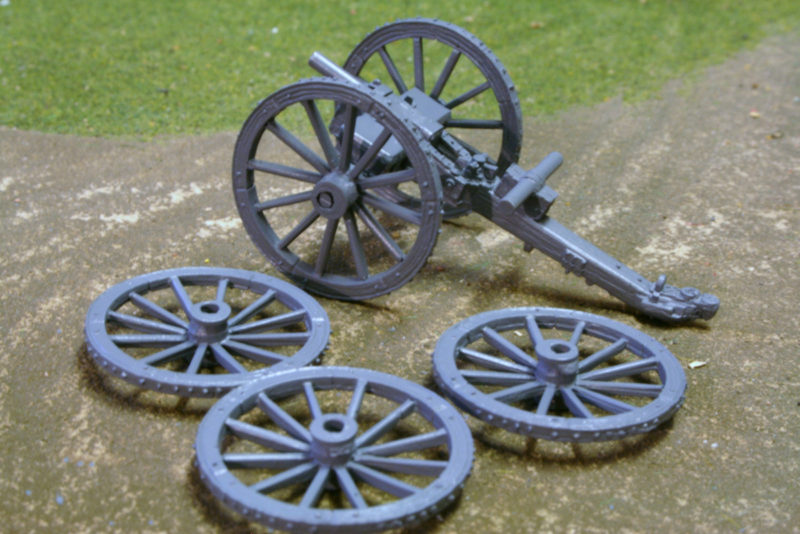
It is then just a question of adding the wheels themselves and the wheel wagon is complete. The next picture shows the main wheels on and the spare ones ready to slide into position. I have also fixed the two equipment boxes that are supplied with the gun carriage into position. As you can see, I have also primed the wagon ready for painting.

Wheel Carriage primed 1

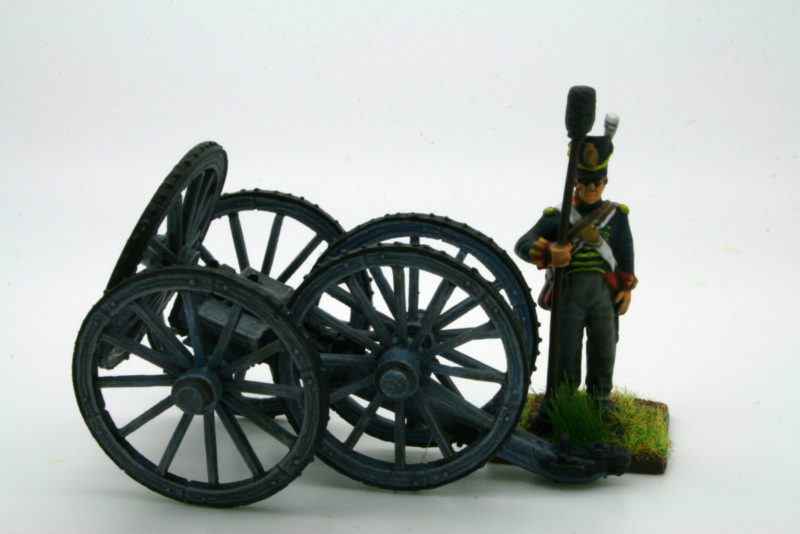
At this stage it is easier to paint the wagon before affixing the wheels. I used the British Artillery grey paint from the Foundry range. I then added white to the colour and dry brushed the whole piece to get the highlights and show the texture of the wood. When dry, I picked the metal work out in matt black and used steel to add chips & highlights, particularly on the wheel rims. I also stippled various shades of brown lightly onto the wheels to represent a bit of mud & dirt. The picture below shows the wagon as it would have been attached to a standard artillery Limber. I think that four horses might be more appropriate than six though!

Wheel wagon and Limber

Wheel wagon and Limber

As you can see in the final pictures, I added some wheel caps from small discs of plasticard to fill in the gaps on the ends of the wheels. These are easily made by punching them straight out of a plastic sheet using a button hole punch ‘borrowed’ from the wifes sewing kit! That is it, done. Another wagon to add to my growing collection.

Wheel carriage 3

Wheel carriage rear view

Wheel Carriage side view

Wheel Carriage side view

Austrian Artillery Fusilier Battalion

Austrian Artillery Fusiliers

This week’s blog is courtesy of a long standing friend of Arcane Scenery, ‘Jonas Jones’.

Jonas,  is constantly coming up with new ideas for the Trent Miniatures range using his vast knowledge of the French Revolutionary Wars. Many of the conversions that he creates just involve a simple ‘head swap’ or the addition of a weapon or piece of equipment. In this case, no converting is necessary, just a change of colour scheme.

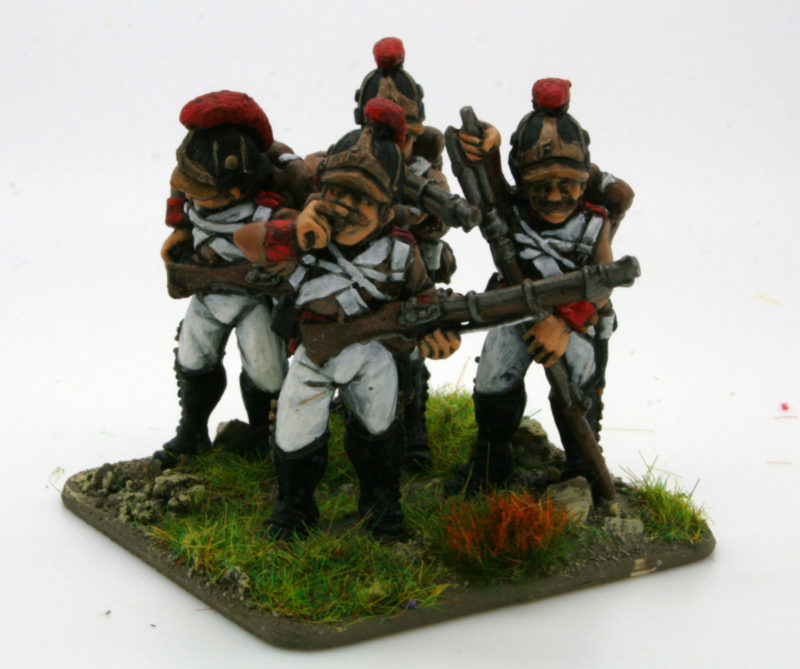
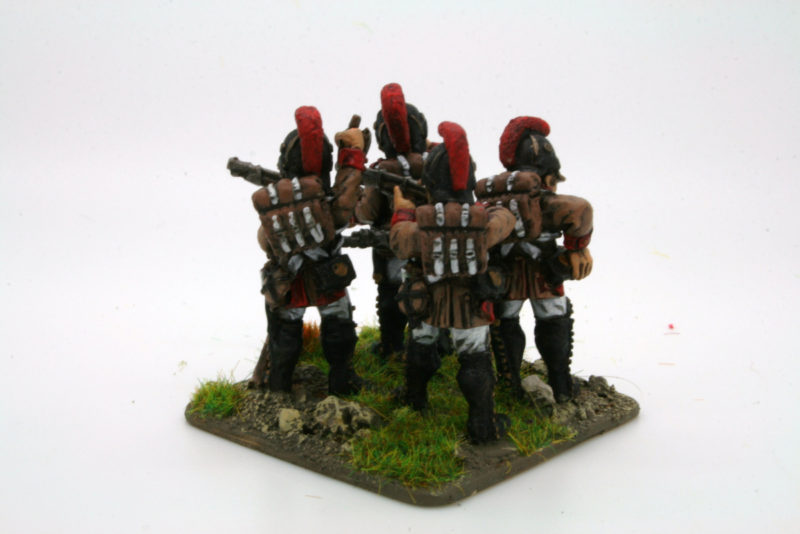
Austrian Artillery Fusiliers Firing

Austrian Artillery Fusiliers Firing

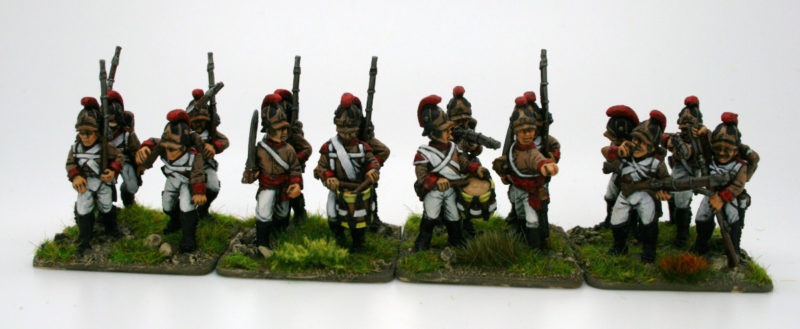
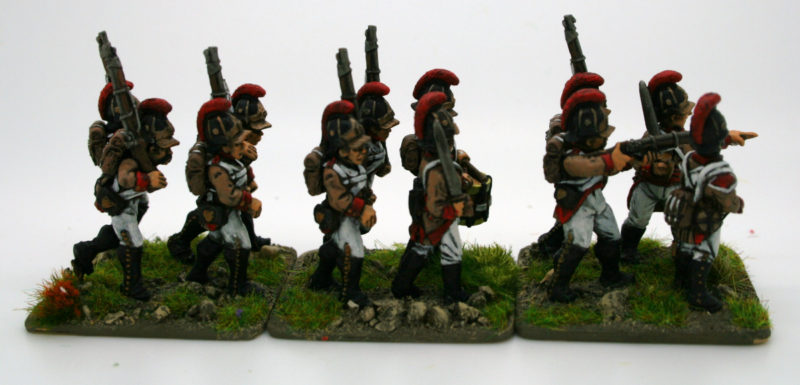
The Austrian Artillery Fusilier Battalion ,1798 – 1801 was formed specifically to support the artillery batteries of the Austrian Army. The uniform and equipment was much the same as other infantry units except that rather than white uniforms, they were brown. The photographs will give you an idea of the colours to use and for wargamers that have an Austrian Army, painting in brown will be a nice change from the Austrian ‘white-as-far-as-the-eye-can-see’!

Austrian Artillery Fusiliers Firing - rear view

Austrian Artillery Fusiliers Firing – rear view

A battalion of troops dedicated to supporting Artillery give an interesting opportunity for some tweaks to the Black Powder rules. Perhaps giving Artillery accompanied by these troops the possibility of being supported in combat ( the current rules specify that Artillery cannot be supported in combat) and some degree of supporting fire when the Artillery is threatened would give a slightly different flavour to the Austrian army list.

Austrian Artillery Fusiliers in march column

Austrian Artillery Fusiliers in march column

Jonas has let me know that if you would like to paint your own Austrian Artillery Fusilier Battalion, you simply need to use the Trent Miniatures packs AH98/01, 02, 03 and 04. The figures above were actually painted by Dave Woodward – Jonas is too busy coming up with the next conversion idea to paint!

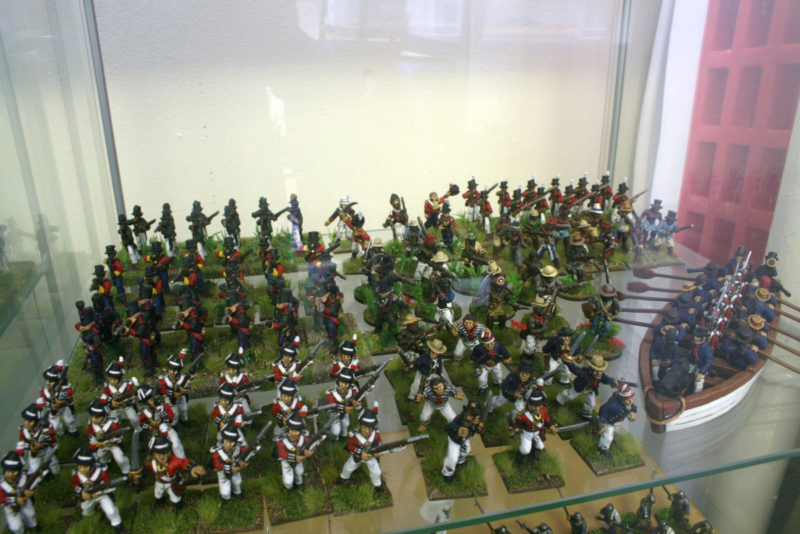
caribbean force

Changing the subject slightly…. I recently took the above picture to show a friend the extent of my Caribbean collection and surprised my self with how it has grown. There are over 100 figures in the army now, including a joint Royal Marine & Royal Navy landing force, 3 units of Black troops, a unit of 60th rifles and a substantial force of Maroons and slaves. I really must sort out some rules and get these troops on the table!

The Campaign has started!

At long last we have started our Black Powder Campaign. The idea is that the campaign will provide an  ongoing narrative to our regular Thursday night Club battles and encourage us to try out new scenarios and of course build our armies. This week there were three battles happening and to give you an idea of how the campaign works, I’ll describe the battle that my General, Sir Sydney Ruff-Diamond was involved in.

The first part of the campaign was to randomly choose one trait for each of our Commanders. Fortunately, all of my brigadiers were ‘normal’ with the exception of my Light Cavalry commander, Rowland Hill, who came up with Timid for his aggression Trait meaning that he will have a -1 when issuing a charge order. My opponent, Wayne, or rather his General, Michel Loup, the infamous French commander also had just one Brigadier with a unique trait. One of his Brigadiers, Colonel Cantona, had the High Decisive Trait giving him the option of a re roll for failed commands but failed re rolls will result in a blunder!

We were using our own points system, which although imperfect, is quick and easy to use and allows us to put similar sized forces on the table. If you would like to know more, I’ve covered this in a previous blog here:

http://arcanesceneryandmodels.co.uk/black-powder-for-club-nights/

Tonight we were gaming with about 40 points a side.

We then chose our scenario by rolling a D6. Again, we use a simple list that I have previously posted here:

http://arcanesceneryandmodels.co.uk/scenarios-for-black-powder/

Tonight’s battle would follow the ‘Off Table Deployment’ rules.

With the scene set it was on with the battle. The British started well, deploying onto the table successfully in two turns and they quickly formed into a defensive line ready for the French. Except the French failed to arrive. On the first turn, none of the French brigades deployed and it was not until turn three that the French Army was actually on the Table.
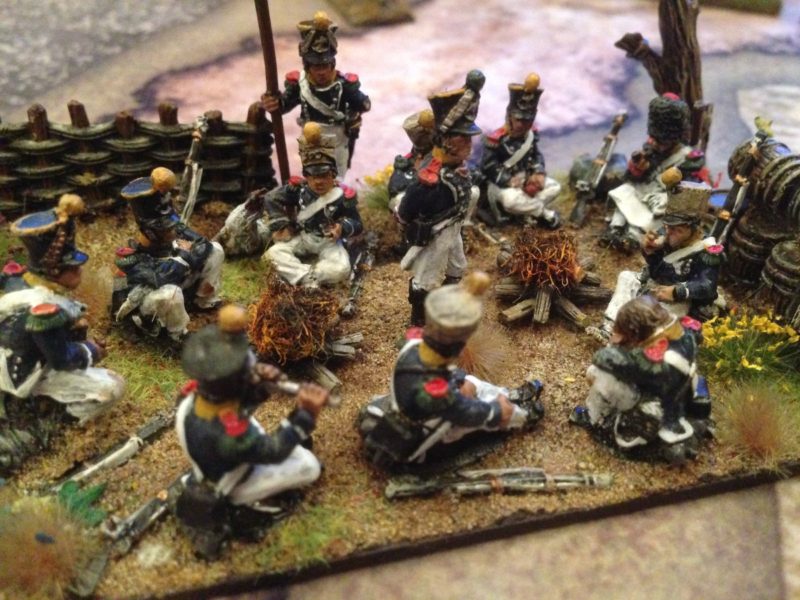
The French Army finish a leisurely meal before deciding wether to give battle!

The French Army finish a leisurely meal before deciding whether to give battle!

With the French arriving so late on the battlefield, they were unable to use their superior mobility to out manoeuvre the British but found they had to commit to a full frontal assault. To make matters more difficult, whilst they were superior in Cavalry strength and Artillery, they lacked infantry support should things go wrong. Sir Sydney Ruff-Diamond had anchored his right flank against a wood, preventing any break though here by the French. He deployed all of his Cavalry on the left flank, opposing the main bulk of the French cavalry. Although out numbered, Sir Sydney was confident that the British Heavy cavalry would be up to the task of holding the French.
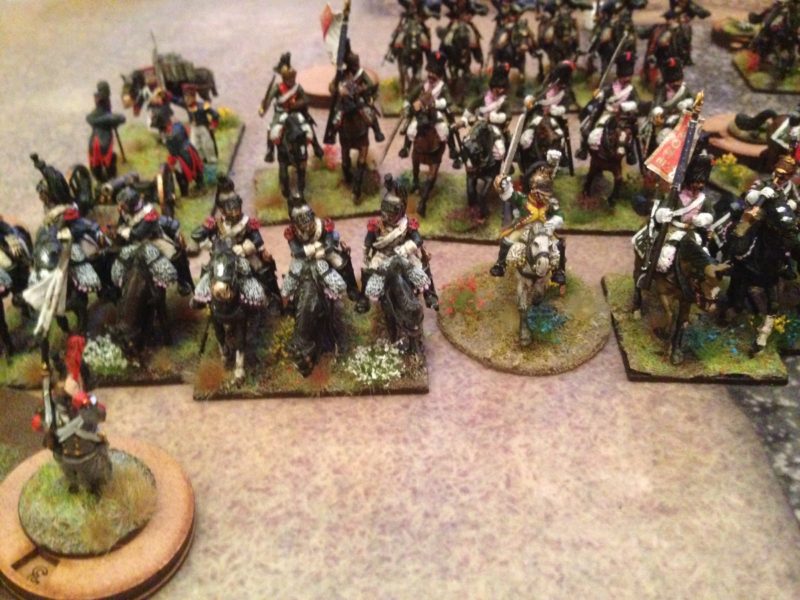
French Cavalry threaten the British left flank.

French Cavalry threaten the British left flank.

General Loup ordered his Cavalry forward but due to a misunderstanding ( failed order…) the French Light Cavalry found themselves leading the charge whilst the heavies sat back and watched. The British response was immediate and the Scots Greys charged into action, mauling the French Lights and pushing them back, masking their own artillery.

On the right, a  French Hussar unit was holding the entire British flank in position but unfortunately, despite Colonel Cantona’s decisive orders, he was unable to get his brigade into position to take advantage of the situation. So rapidly did he give orders, that eventually, some of the French blundered and moved in the opposite direction! Sir Sydney, as cool as ever, held his position, wearing the French down with artillery fire awaiting the inevitable French charge.
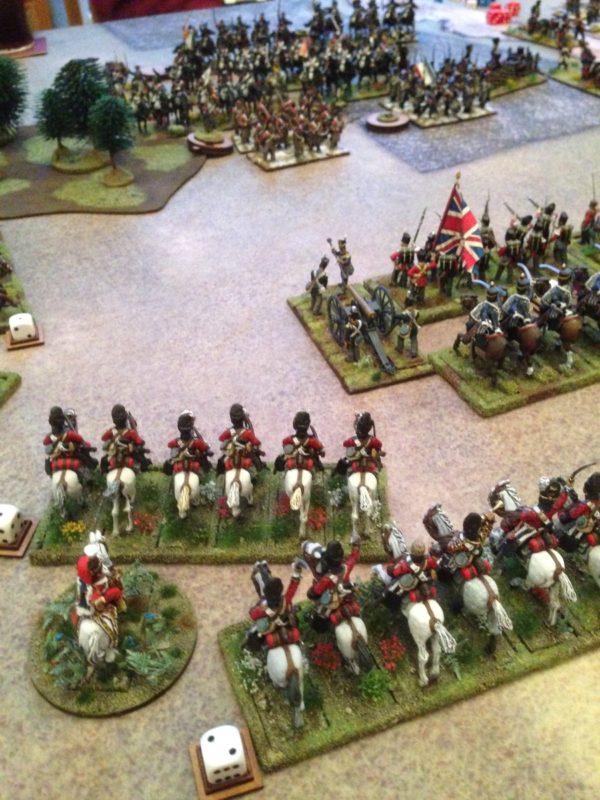
The British left holds firm.

Once again, the French Cavalry surged forwards and once again, they were met by the counter charge of the Scots Greys. The French Heavy’s had the worst of it and even though they were led in a personal charge by none other than General Loup himself, they were pushed back, the General barely surviving the combat.
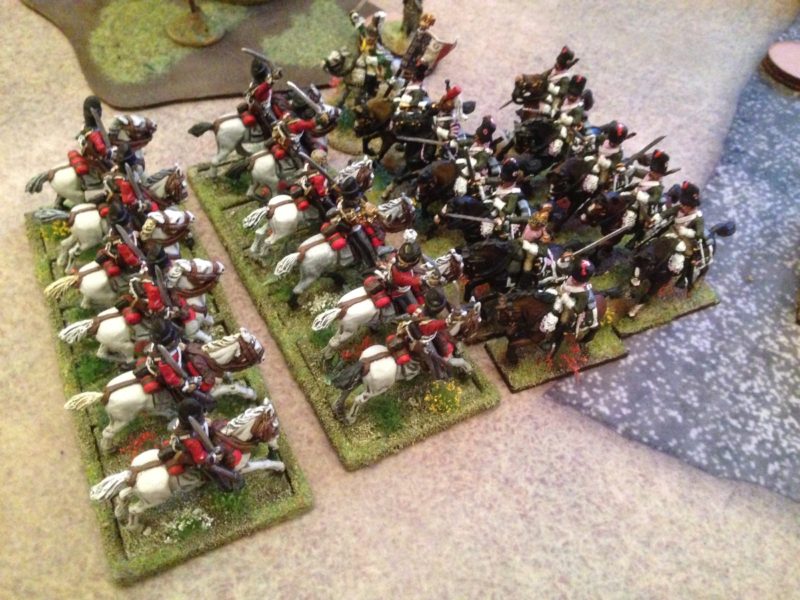
General Loup leads the French into battle only to be repulsed by the Greys!

General Loup leads the French into battle only to be repulsed by the Greys!

The British, encouraged by the success of the Cavalry began to edge forward into musket range and the French line started to take casualties. Goaded by the impertinence of the British and still still battle crazed from the abortive cavalry charge, General Loup ordered his infantry brigade to charge the British line. When a clear head is required, Colonel Cantona is the wrong man to have as your advisor. He too, ordered his Brigade to charge and the French Infantry smashed into the British. After some initial success, the French now paid the price for their lack of infantry. The British line held and the subsequent counter attacks allowed them to outflank the French Brigades, counter charging to great effect.
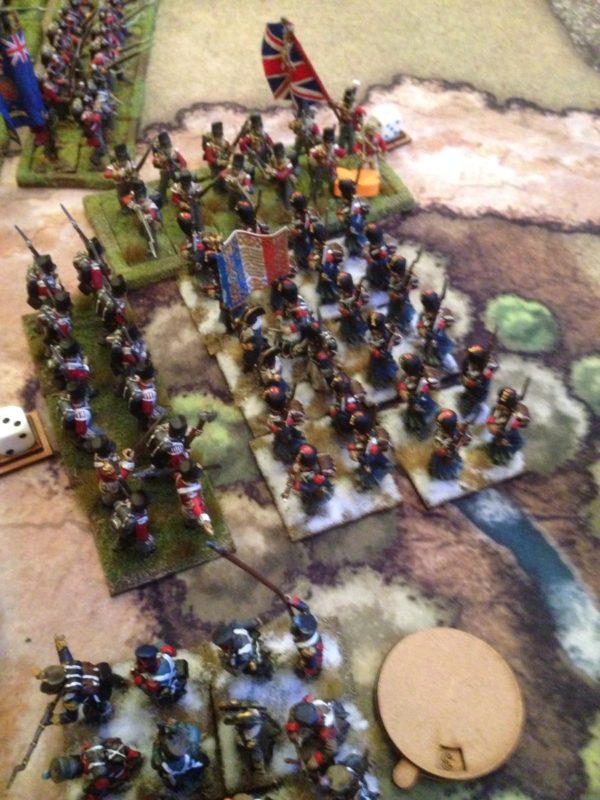
Pressure relieved as the British charge home to the flank

Pressure relieved as the British charge home to the flank

General Sydney Ruff-Diamond looked on with pride as the French were repulsed in disarray. General Loup had gambled that he could break the British line and allow his Cavalry to mop up but he had under estimated the British resolve. There was nothing left but to surrender the field.
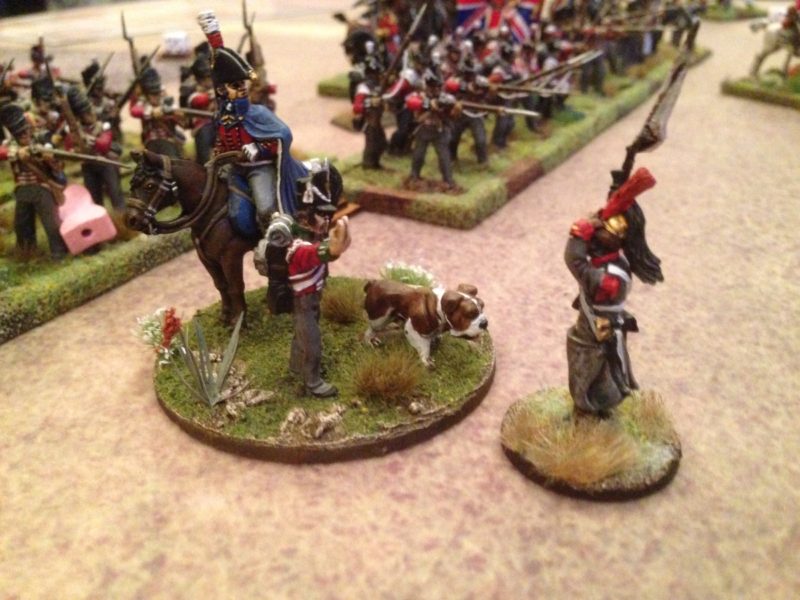
Sir Sydney gratiously accepts the French surrender.

Sir Sydney graciously accepts the French surrender.

A great start to the Campaign, with certain Commanders already making a name for themselves and in Cantona’s case, living up to the name that he had been given! Both army commanders will gain an experience point for their Army that in time will allow them to improve that traits of their commanders. The British also gained a French flag, a victory marker that will, if sufficient are accumulated, allow Sir Sydney to upgrade one of his units.

I hope that more battles will follow!


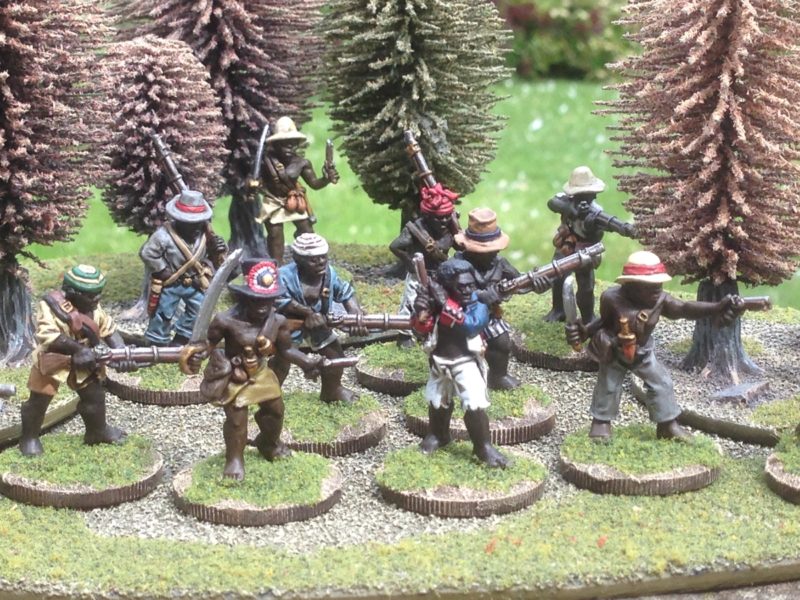
Maroons of the Caribbean

The last couple of blog posts might lead you to believe that my painting output had slowed somewhat. In fact I have been steadily working through a number of projects, one of which has been to expand my Caribbean contingent. I mentioned that I am reading the book ‘Death before Glory’ a history of the British soldier in the West Indies 1793 – 1815. The number of nations and protagonists involved in this theatre of the French Revolutionary and Napoleonic wars could keep me busy painting for years to come, not to mention the vast amount of material for wargaming scenarios with regard to both the terrain and the people involved. It certainly is an eye opener with regard to our own history and that of other nations.
My Maroon band stealthily make their way through the forest!

My Maroon band stealthily make their way through the forest!

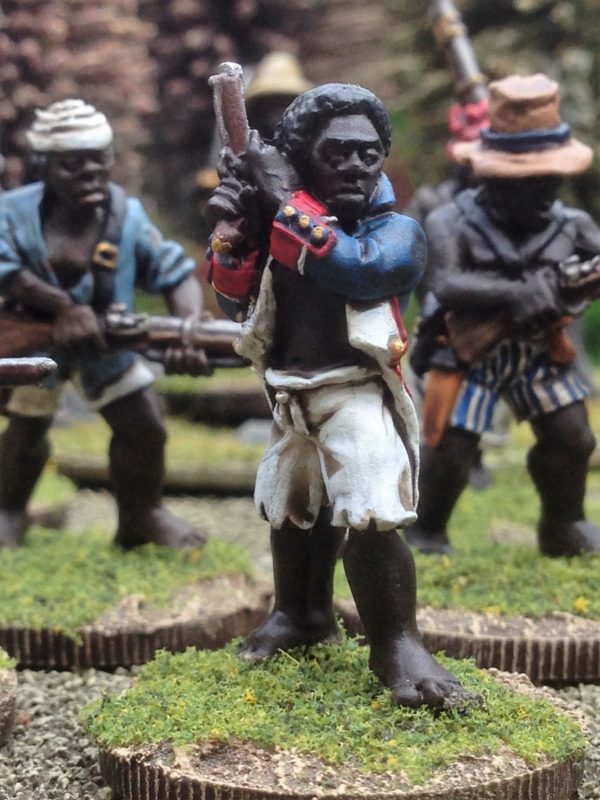
One group involved in the struggle were the Maroons. I use the word ‘group’ very loosely. In reality they were a number of disparate communities made up of runaway or freed slaves that had formed their own free communities in the wild interiors of the various Caribbean islands. In fact, there were and still are, Maroon Communities throughout the Caribbean, some parts of South and Central America and even in the USA. They were formidable warriors and expert at using the terrain to their advantage. The Maroons of Jamaica fought against the British and held the might of the British Army at bay for sometime.

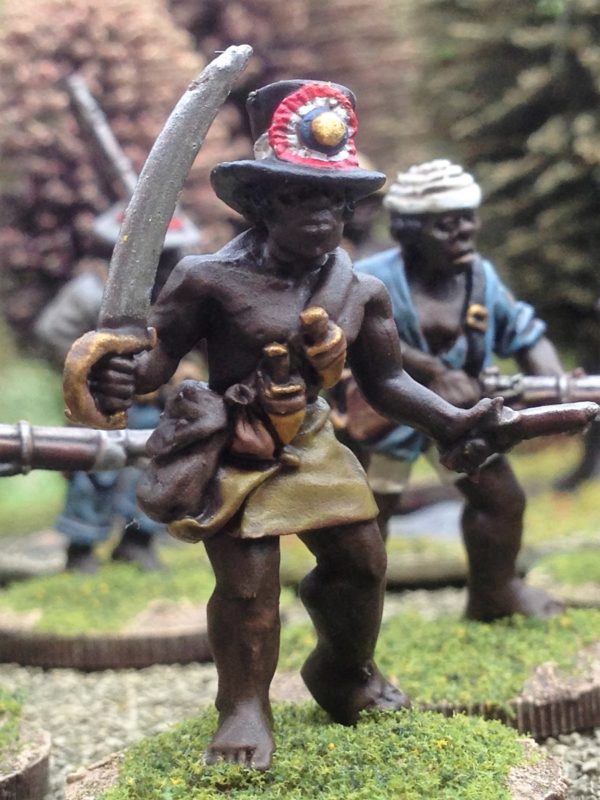
Jean Kina leads his band to attack!

Jean Kina leads his band to attack!

As well as fighting against the British, they also fought alongside them on Saint Domingue ( Now Haiti). One leader, Jean Kina, led a substantial force of freed or runaway black slaves that fought for the British and was involved in number of engagements with the French. So it was clear to me that I needed to add a unit of Maroons to my collection and of course the obvious choice was the figures from the Trent Miniatures range. I have still to finish the bases of my figures. I intend to add more plants and give them more cover to hide behind! But for now the unit is ready for use. I have been blathering on about using the Muskets and Tomahawk’s rules to game in this region and whilst it is still on the agenda ( as it has for the last couple of years) the new Sharp Practice rules look as they  may be much easier to adapt. I also think that they may give more flavour to the troops and Characters involved – who knows, I may be able to use a bit of Voodoo. Napoleonic Zombies…now there is a thought!

Voodoo Chile..you wouldn't want to mess with this guy!

Voodoo Chile..you wouldn’t want to mess with this guy!

I would very much recommend that if you are interested in the French Revolutionary and Napoleonic Wars that you research the conflict in the Caribbean. There is a wealth of material and scope for skirmish games, the history is fascinating and the characters involved may be more familiar than you expect. There is nowhere near enough time or space in a blog post to give you an idea just how much was going on out there. There were very few big set piece battles as was seen in Europe but my goodness, there were some fearsome sieges, amphibious assaults, guerrilla fighting and ambushes. The fighting seemed to be non stop across the Islands as first one side held ascendancy and then the other , with both succumbing to a terrible toll due to Yellow Fever and Malaria.

For now though, I have my Maroon Unit, next on the painting table, for this army, Cuban hunting dogs…


Campaign General Completed!

In an ideal world it would be nice to refight the battles of the Napoleonic era with all the correct forces on a wargames table that accurately reflected the terrain and conditions on the battlefield. However, the majority of my gaming takes the form of club gaming with my wargaming buddies at the White Hart pub. We turn up with fairly evenly matched armies every Thursday night and battle across a gaming cloth with a bit of scenery on it and to be honest, I’m quite happy with this state of affairs. It means that I am wargaming at least once a week and enjoying the company of like minded people.

However, there’s been talk of organising a campaign. To be fair, I’ve been edging towards producing a set of campaign rules that would allow us to link our battles together in an informal way to provide a narrative to the battles that we fight. Well, things are very slowly moving in the right direction and I have a few ideas as to how we can achieve this without it becoming a major chore as some campaigns can be. I will get to publishing some of these ideas but the first requirement is for each army to have a named commander.

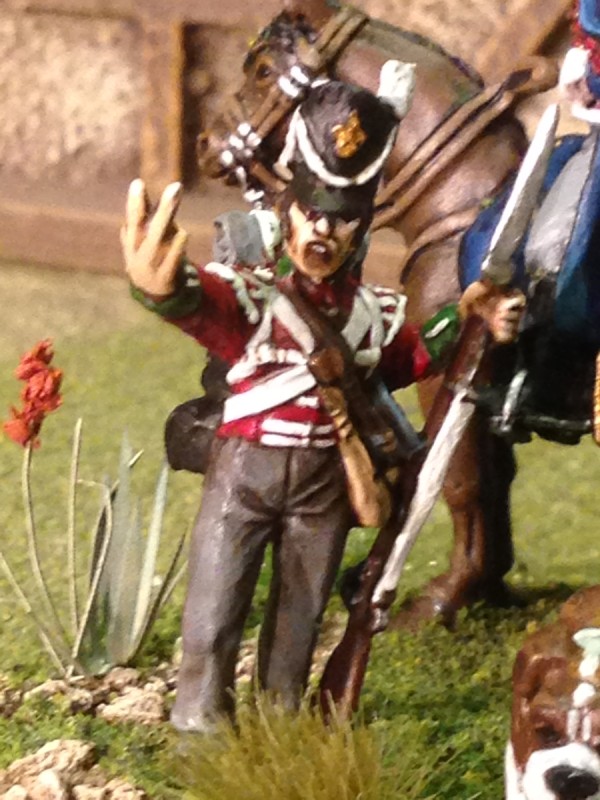
Private James Riddle shows his defiance to the French!

Private James Riddle shows his defiance to the French!

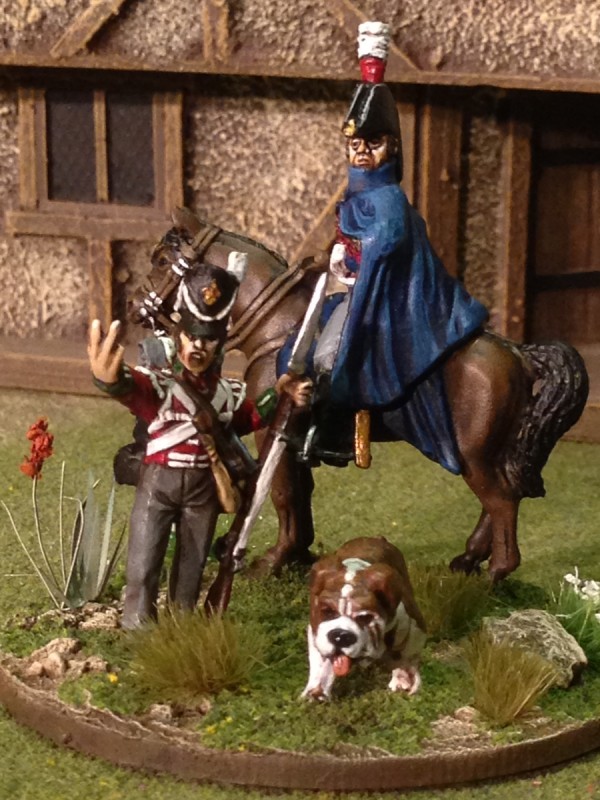
I did have a commander for my army but it wasn’t an inspiring model and I wanted something that would perhaps reflect my personality on the wargames table. So an idea came to mind when I saw a model of a British Infantry man giving the ‘victory sign’ – I’m not even sure which manufacturer produces the model – it was actually given to me. All I needed was a officer to go with the soldier and I would have my command base. When I saw the Front rank model of Rowland -Hill, I thought that he was just the sort of commander that I was looking for. The model is a superb sculpt and doesn’t immediately look like some of the other big personalities of the time. So I chose Sir Rowland -Hill as the commander. Of course, as far as the campaign goes, he will be known as Sir Sydney Ruff-Diamond!

Sir Sydney Ruff-Diamond

Sir Sydney Ruff-Diamond

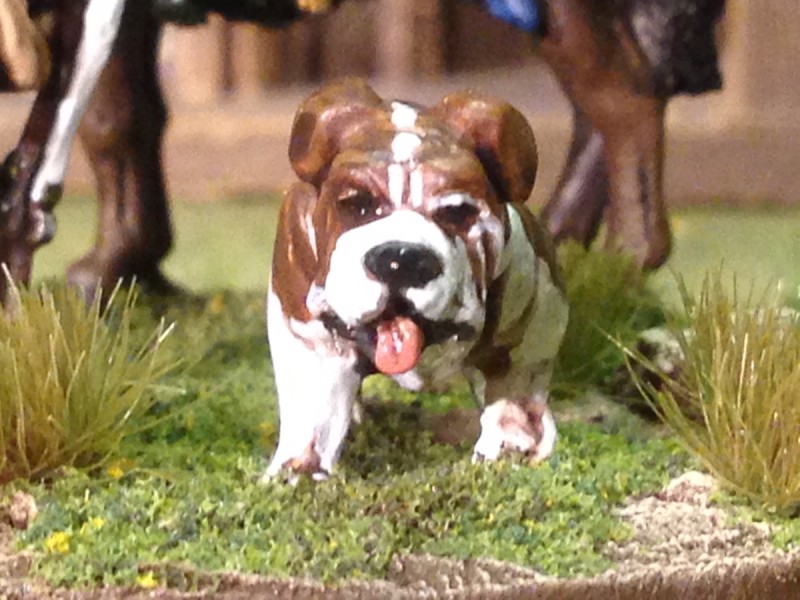
I thought that the base needed another model to balance it off, so what could be better than a British Bulldog! Fortunately, I have a great looking Bulldog in my very own DeeZee range, so there was no problem in acquiring this model!

Oh Yes! Its Churchill!

Oh Yes! Its Churchill!

So with each model painted it was then a simple matter to assemble them all together on a 60mm MDF base. I followed my usual basing techniques although I have added a little something special. The rocks and detail on the base are actually some earth straight from the Battlefield at Waterloo, so I don’t want any complaints about accuracy here! I also added a few tufts and flowers and hey presto! My new army commander, Sir Sydney Ruff-Diamond and his faithful companions, Private James Riddle and dog Churchill are ready to take to the field!

Sir Sydney Ruff- Diamond watches on as Private James Riddles rebukes the French!

Sir Sydney Ruff- Diamond watches on as Private James Riddles rebukes the French!

There will be some battle reports to follow, so keep a check on my blog to see how Sir Sydney and his companions fair on the field of battle at the White Hart!

Sir Sydney makes his debut.

It’s been two weeks since my last blog. My modelling schedule has been somewhat disrupted by the long Easter break, which coincided with two very important family birthdays and the clock going forwards, which has prompted me to do a bit more out in the garden. Despite this, I have made some progress with my painting and the 32nd Cornwall Regiment is all but ready to take to the field. The command group has been completed with the exception of the flags, which I need to order, and the basing is complete apart from adding a few tufts.

Command group for the 32nd Regiment

Command group for the 32nd Regiment

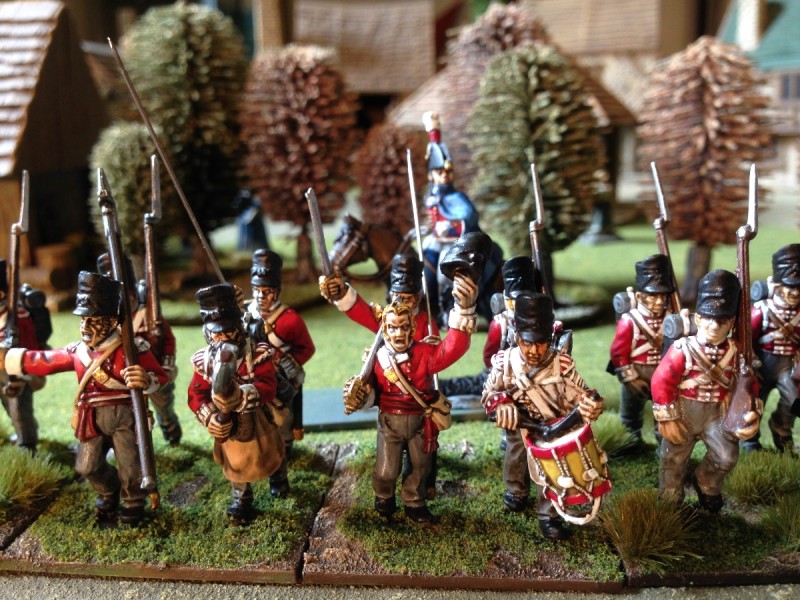
I did take a few short cuts with the painting and decided to opt for the usual block coat, quick shade, re- highlight method that I used on the troops. I’ve used a richer red for the officers coats but otherwise, everything else followed my usual colour scheme and painting routine. So the unit is now ready for the table and you can see them parading before ‘Little Bingham’, ready to march off to the wargames table!

First Battalion 32nd Regiment 'Cornwall' ready for duty!

First Battalion 32nd Regiment ‘Cornwall’ ready for duty!

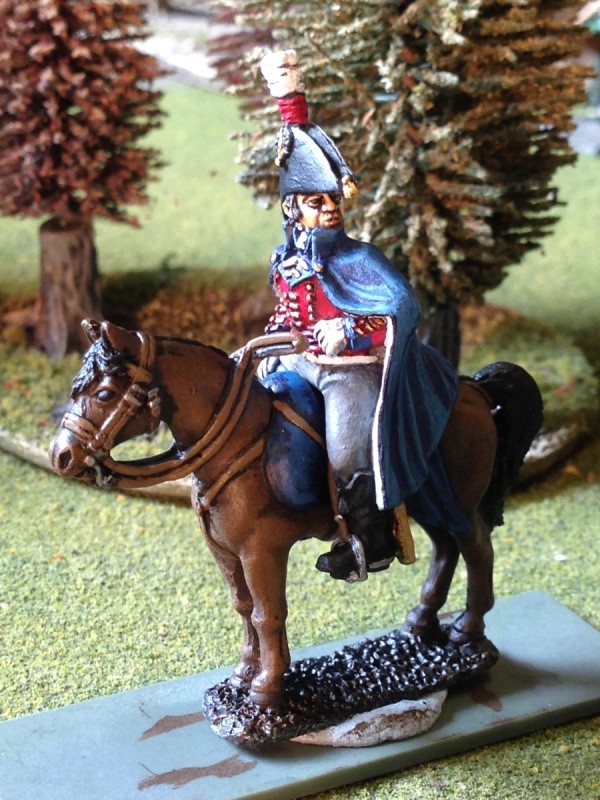
You might notice there appears to be a new commander in the background. He is none other than Sir Sydney Ruff-Diamond, my new army commander.  Sir Sydney distinguished himself on the field of Waterloo, leading the charge to the Gin cart and ensuring that his brigade had full rations throughout and after the battle. Of course his namesake and  Grandson was also a hero in the later campaigns in Afghanistan and India. There will be more to come on Sir Sydney’s illustrious career in future blog articles but for now he is still a work in progress.

Sir Sydney Ruff-Diamond

Sir Sydney Ruff-Diamond

As befits the Commander of my army, I am trying to paint him without taking shortcuts and using quick shade, so painting has been a slower than usual. The model just needs a bit more work on the horse and some of the highlights need looking at. I may have been too harsh with the grey on his boots. It would help if I had a better picture so I may give him the lightbox treatment just to help pick out the areas that need a bit of work.

Sir Sydney will be the commander of my Campaign army and when based will be the inspirational focal point for my troops. So it’s important that he reflects the true character of both my army and my approach to the hobby…Watch this space!

1 5 6 7 8 9 12