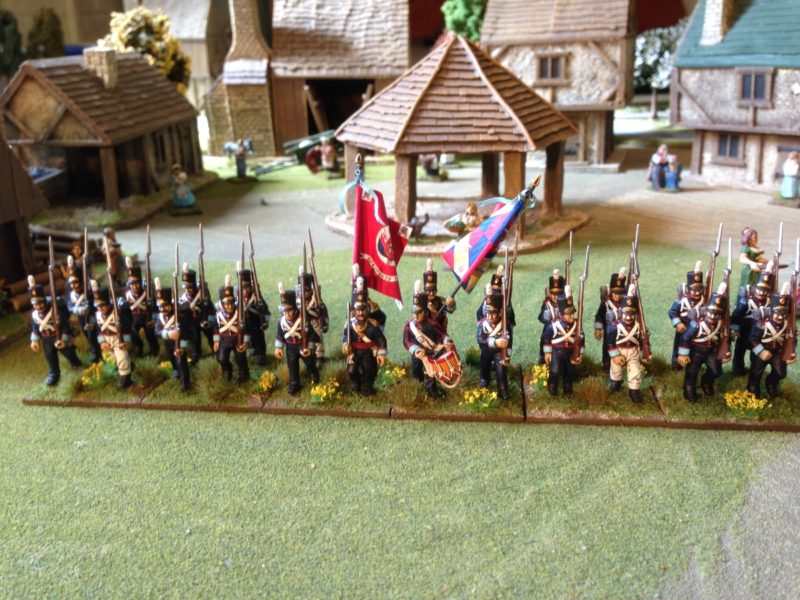
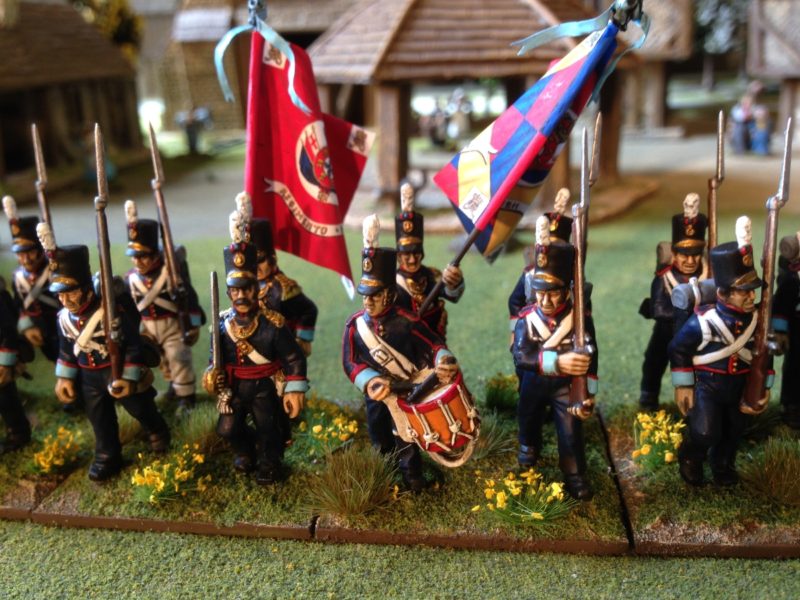
Well actually it was nearly half past six (1830) by the time we had laid out the table and decided who was battling who. As it was some six weeks since my last wargame, I was very much looking forward to a game of Black Powder and a chance to deploy my troops on the table. My opponent, Keith Tait, was fielding a force of Austrians against my usual force of British. Neither of us was particularly concerned about points and as we each had the same sized Really Useful troop boxes, we decide to just put everything on the table and commence battle. As far as deployment went, we just got on with laying out the troops as they came out of the boxes without worrying too much about what went where in relation to each other. If that all sounds a bit too casual for some, I can assure you that sometimes the best wargames can come from the worst preparation. This Battle was a case in point. As I had low expectations of the outcome I didn’t actually take any photos of the game as it unfolded so you will have to use your imagination as to how the battle looked. Fortunately, I can include some pictures of the troops involved on my army and I have attempted to draw a simple map showing the general deployment of the troops.

The map above shows the deployment with the Austrians at the top of the page, with the light blue depicting light cavalry, dark blue the heavy cavalry and the grey blocks are the infantry brigades. The British are deployed at the bottom of the page, but in this case, the red blocks are the infantry brigades. The green ovals represent woods on the battlefield.
The Austrians had superiority in cavalry, with two additional regiments and had decided that their plan would be to break through the British left flank threatening the rest of the line. In the meantime the two centre brigades of infantry would advance to engage the British centre whilst the largest Austrian brigade would secure the right flank, preventing the British Infantry brigade and cavalry from threatening.
The British plan was simply to hold the Austrian cavalry as best that they could with 4 regiments of lights facing a total of 8 regiments of Austrians. In the centre, the two infantry brigades would secure a defensive line between the two woods, with the final Brigade and heavy cavalry , holding the right flank and attempting to break the Austrians here.
Two problems arose for the Austrians. Despite their numerical superiority in cavalry, they were unable to bring their numbers to bear to any great effect and by committing both brigades of cavalry they simply got in each others way. Even worse, the heavies failed to charge home leaving themselves exposed to the british infantry and artillery fire, resulting in heavy casualties for one of the regiments, which was to break and retire from the battlefield.

The british hussars charge!
The British Cavalry were able to beat off the Austrian Light Cavalry and for once, held their discipline, regrouping to face the next charge.
In the centre, the British infantry were able to form their defensive line but a blunder fractured the left hand brigade as two battalions mistakenly moved to the left of the woods and formed square. In the event, this worked well for the British as they were able to constrict the space preventing the Austrian cavalry from maneuvering and protecting the flank of the remaining battalions. In addition, a small detachment of 95th Rifles were able to take up position in the woods to give covering fire and further harass the Austrians. Seeing that the centre needed reinforcing, the British brigade on the right flank moved across to the centre, effectively conceding this flank to the Austrians. However, the two regiments of British Heavy cavalry were able to charge the opposing Austrian infantry, forcing two battalions into square and pushing the remaining infantry further to the right, relieving the pressure on the centre. The two centre Austrian brigades pushed forwards regardless and the battle began to reach it’s climax.

Battle situation at half time!
With the Austrian Cavalry snarled up on the left Flank and the Austrian infantry brigade held up on the right flank, the decisive fight would take place in the centre. Initially, the British fire power stopped the Austrians in their tracks. The British first fire was extremely effective, causing numerous casualties and disordering many of the Austrian battalions attack. Even worse for the Austrians, the large brigade out on the right simply refused to move and remained pinned by the British cavalry and a failure to pass command rolls. Despite this, the next round of combat saw the British fail to inflict any further damage to the Austrian centre and at last the Austrians were able to charge home. The outcome remained in the balance.

British fire superiority proves effective!
The Austrians smashed into the British lines and were able to break through, breaking one British battalion and pushing back the rest of the brigade. The cost to the Austrians was to lose two of their own battalions and to take further casualties. Even as the Austrian Infantry broke through, on the left, their heavy cavalry had accumulated sufficient casualties to shake the whole brigade and to the Austrian armies dismay, they withdrew from combat. On the right flank the Austrian General was becoming increasingly frustrated with his Infantry, who, despite all attempts, refused to move to support the centre and continued to be harried by the British heavy cavalry.
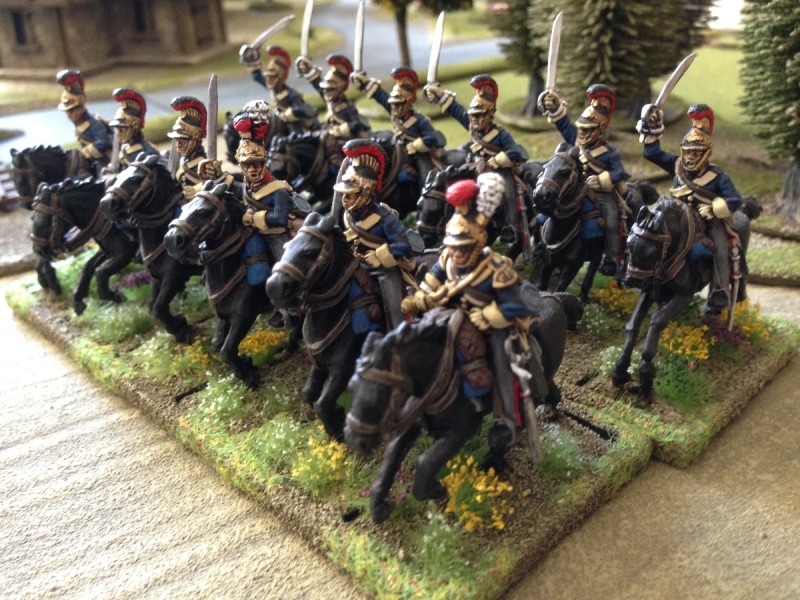
The Blues harry the Austrian Infantry!
The Austrian success in the centre was short lived. Despite being pushed back and losing a further battalion, the British had inflicted sufficient casualties on the Austrians to break the Infantry. Both sides brigades were fragmented but it was the British who had sufficient reserves to recover and reassert their dominance in the centre.

The Austrians break through but are fragmented. They are nice easy targets!
The Centre of the Austrian army had lost all impetus and was picked off battalion by battalion until the two brigades broke. This was effectively the end of the Austrian army, with three of the five brigades now broken. Victory for the British! For once, the British Cavalry had kept it’s discipline, holding both flanks whilst the infantry used the superior fire discipline to beat off the opposition. No doubt the Austrian Brigadier in command of the right will have questions to answer as to why he failed to support the centre!
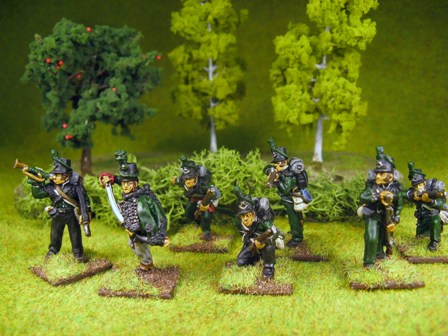
95th rifles were a thorn in the Austrians flank throughout the battle!
A most enjoyable battle for me, particularly as I had such low expectations, having been away from the wargames table for some time. Once again, I am convinced that Black Powder, whilst not the most accurate representation of Napoleonic warfare, is certainly one of the most ‘playable’ games that I have come across and as far as an evening club game, I think that you would be hard pressed to find a better rules set.