Whats on the Workbench 29th May

Gun Boat!

Gun Boat!

Oh dear! I’ve been distracted from finishing off one project by the lure of something more interesting…..

I guess it’s a common occurrence and it explains why most of us in the hobby have a ‘lead mountain’ lurking around in a secret location. A bit like the Wife’s handbag and shoe collection…

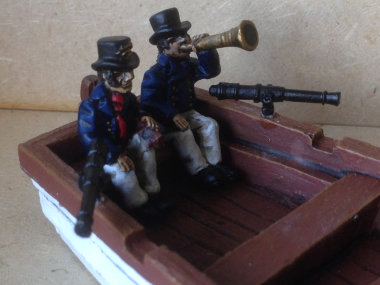
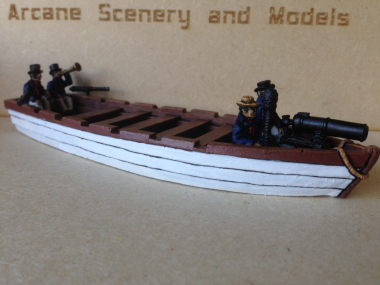
Well, last year, at the Derby war games show I saw a lovely model of a naval gunboat and thought that it would make a nice addition to my collection. I justified buying it as I could use it in the Caribbean campaign that I will one day play. Having had the instant gratification of buying it and showing it off to my mate, once home it went up onto the shelf – ‘for later’.

Well, I was tidying around in the garage this wet bank holiday weekend and came across it. What a great little project to complete, I thought. It wont take long as the uniforms are pretty straight forward to paint and they use a similar colour scheme to the Prussians, so I might as well have ago at finishing it.2014-05-25 18.01.28

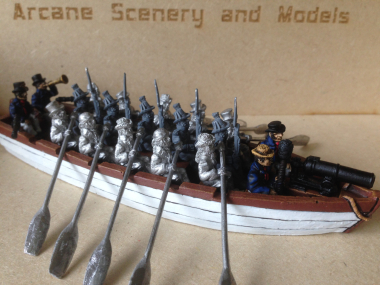
Unfortunately, things aren’t that simple. The figures weren’t quite as cleanly molded as I would like. Now I dont mind doing a bit of cleaning up, scraping down mold lines , getting rid of flash etc. – but these figures were just hard work! In fact, rather than cleaning up, it felt at times that I was re-sculpting them….Nevertheless, I persevered and I did make some progress. In fact, actually, the figures turned out to be quite nice and when put all together on the boat, do make a nice model. So the boat and the crew are finished. Just 5 marines and the ten oarsmen to go. So much for a quick project….

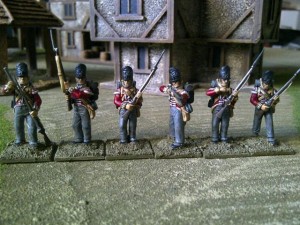
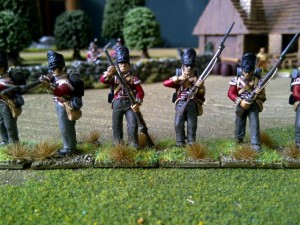
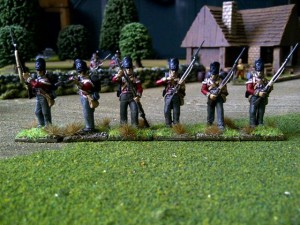
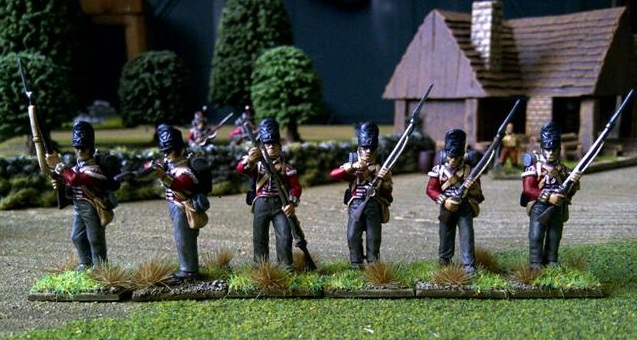
The full crew awaiting painting...

The full crew awaiting painting…

What’s on the Workbench 22 May 2014

Landwher Casualties

Landwher Casualties

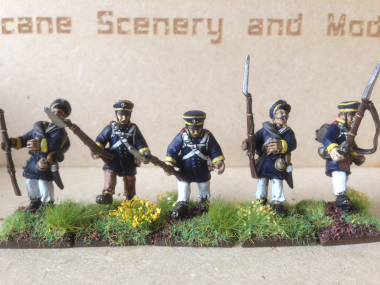
Despite a busy couple of weeks, including a short break in Belgium ( more on that later!) I did manage to finish off the 5 Prussian Landwehr casualties – not literally, of course – but they are now painted and based and ready to join their unit. The figures have been painted with the  following Vallejo Paints:

Face & hands – Flat Flesh 955; Hats & coats – Dark Prussian Blue 899; Boots, Hat detail & cartridge case – Black 950; Musket straps, packs & equipment detail – Leather brown 871; Misc. equipment – Iraqi Sand 819, Powder horns – Dark yellow 978; Musket Stocks –  Flat Brown 984; musket barrels, buttons & other detail – natural steel 864, Detail on muskets & straps – brass 801; Trousers & Straps – Off white 820; Blankets – neutral grey 992.

As these figures are from the Silesian Region, I gave them Yellow facings (yellow 953) and red shoulder tabs (Flat red 957). Technically, the colour of the tabs should vary by battalion, but I like the red & decided to go with this scheme with all my troops. The only other variations were the hair colouring – I just use a random mix of brown & blond! Oh! and one of the figures has light brown (Val929) trousers.

Once the basic colours

2014-05-22 10.14.46

were on, I painted them with Army Painter Dark tone and when this had dried for 24 hours, I sprayed them with Army Painter Anti shine varnish

I then go back and highlight some of the colours to make them stand out, notably, the white, yellow & flesh and I finish the bayonets with a bright silver ( val 997).

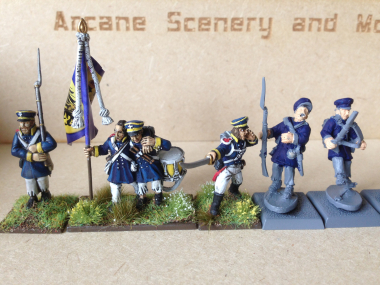
For basing, I re-based all the figures on Renedra 20mm square bases. I use a filler to level out the bases & then paint them chocolate brown. The next stage is to cover with Forest Brown scatter & then Flower field Static grass. The final step is to add some flowered and plain grass tufts for a bit of interest on the bases. The final picture shows three of the figures with their battalion as they advance into battle!

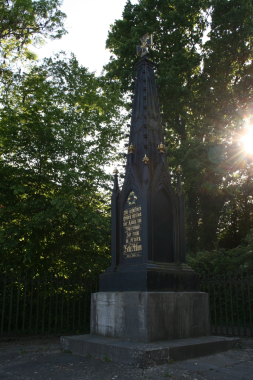
As a final thought, whilst I was over in Belgium, I visited the Battlefield at Waterloo and of course a full report will follow; but it only seems appropriate to include a picture of the memorial to the brave Prussian soldiers that fell during the battle for Plancenoit.prussian memorial at plancenoit

What’s on the workbench? 8th May 2014

It’s been a while since I have managed to to add to my blog in any regular fashion. I’m afraid that I have had other distractions that have prevented me from writing a regular blog – just finding some time to actually paint & do some modelling has been a challenge. I hope that this has now changed and I now have both the time and the facilities to keep my blog up to date. Of course as well as keeping me amused whilst writing the blog, I hope that there will be some content that is useful to anyone who is good enough to spare the time to have a look at my musings….

I thought that one way of giving some continuity to the blog would be to show just what I am working on at the moment. The danger being that some of my projects drag on as I am not the fastest when it comes to modelling & painting. As I usually have three or four projects on the go at any one time. I will perhaps alternate between a couple over the weeks. So what is on the workbench at the moment?

Prussian Landwehr Casulaties from Warlord Games

Prussian Landwehr Casulaties from Warlord Games

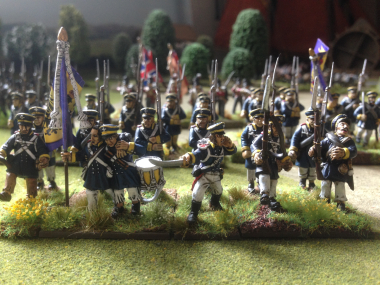
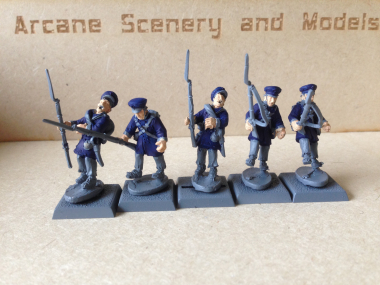
I’m working on Prussian Landwehr at the moment. I am in the process of building a Prussian Brigade for my Black Powder games and I need to add a couple of units of Landwehr to the brigade. I already have two command groups painted, as well as 30 marching troops ( The Warlord games plastic boxed set). I’ll need another 15 troops to be able to make up two battalions of 24. Rather than just buy some more of the marching troops, I thought that I would add in some Prussian Landwehr Casualties for a bit of flavour! The picture shows my progress so far. They have been cleaned up, undercoated & received the base coat of Flesh & dark Prussian blue. I’ve added a picture to give you an idea as to how they will look when they are completed an added to the unit. Of course they are on temporary bases at the moment, so they should look a bit better once the painting & basing is complete!Prussian Landwehr advance into fire!

Chasseurs Ste. Domingue – Carribean part 3!

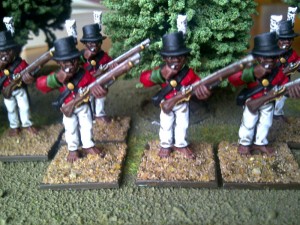
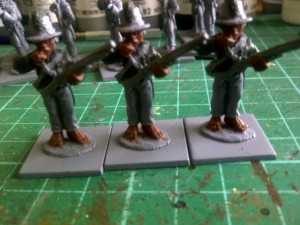
Well, having finished my first unit of Caribbean figure, the Chasseurs de Irios, I thought that I would carry on and paint the Chasseurs de Ste Domingue, also based in Haiti and of course  from Trent miniatures. The uniforms are very similar, except that the coats were red and the headwear more like a traditional shako with a white plume.

Rather than go through the stage by stage painting, I’ll just give you the colours that I used, as the process is very similar. All the paints are vallejo as usual!  The flesh is mahogany brown, 846, red, 957 for the coats, equipment  & hats were painted in black, 950, muskets were painted with flat brown 984 for the wood, 801 brass for the gun details & belt clasp  & steel 864 for the musket barrel & buttons. the facings were painted in green 968, which is probably a bit brighter than it should be but my preference is for the colours  on the facings to show! Finally the trousers were finished with off white, 820.

The other difference was that despite my previous comments, I decided to paint over a white under coat and I used the Vallejo matt white spray, which I find gives a perfect base coat to paint over provided you are patient and build the undercoat and not ‘drench’ than models to start with. The reason I usually use a coloured undercoat, is to save on painting when using quick shade. Of course, I am used to painting Redcoats with grey trousers, so it made sense to undercoat in grey. As these figures have white trousers, I’ve reverted back to a white undercoat.

Once the figures were painted, I gave them a coat of Army painter quick shade, the dark tone or black variety, and when this was dry, I sprayed them with matt varnish to get rid of the gloss effect. The quick shade does tend to ‘dirty down’ the white too much for my taste so I have repainted the plumes with a pure white, 950 and used the off white 820 to highlight the trousers.

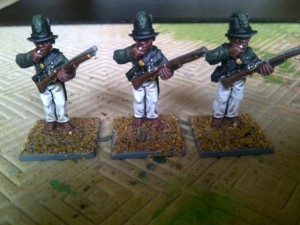
I also used the base colours listed above with a bit of Off white to give some extra highlights on the muskets, facings & hats & straps. Once again, the basing will follow exactly the same procedure as the previous unit. So here’s a picture of the finished figures just before the final touches on the basing.

 So that’s two units of twelve ready for the gaming table. The next unit on the paint station is the 60th rifles!

The products used are available in my shop and are as follows:

Trent Miniatures Chasseurs Ste Domingue Car06

Renedra 20 x 20mm bases

Vallejo Paints & white under coat

Army Painter Dark Tone Quick Shade & Matt Spray

Basing Sand

Caribbean modelling project – Part 2, Basing

Having finished painting the figures it was time to get on with the basing. This part of the project can be as important as the actual painting, the mantra being concentrate on faces, bases & flags for the best results! The main purpose is that as well as finishing the individual figures, you can give the whole unit a cohesive look by ensuring that they are consistently based. As I have previously mentioned, I wanted these troops to look as though they were fighting in the bush, so I will add a bit more vegetation than my usual basing.

The first job is to paint the sand on the bases. I used the same colour as my gaming table, which is actually an emulsion from B&Q called delhi bazaar. It might seem a bit unusual, but the advantage is that buying a tin of emulsion means that you have plenty of paint at a very good price! Ideal for basing & terrain work. Once the base coat had dried, I lightened it with Vallejo off white and dry brushed the bases to bring out the texture. Vallejo and emulsion mix suprisingly well! I then gave the bases another dry brush with an even lighter mix to get the effect below.

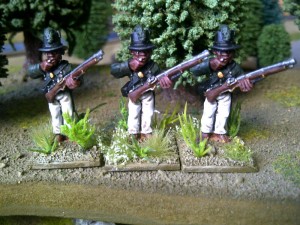
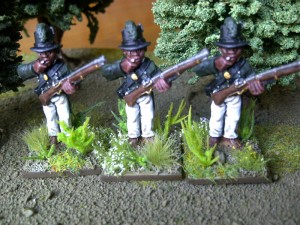
Once the paint was dry, it was time to add the vegetation! I used some plastic plants that I had in my spares box & cut them down to fit onto the bases. To ensure that they stayed fixed, I drilled the bases & used Expo super glue. I also used Army painter jungle grass tufts and for a bit of colour, the flowered fields tufts.

At this point, I felt that I had finished, but looking at the picture, I decide that the bases just need something else, so I added a few dabs of Flowered Field Static Grass and then finished off by edging the bases with Vallejo Chocholate Brown 872.

So that’s finished my first unit – next up, the Chasseurs Saint Domique!

The items used in this article:

Trent Miniatures Chasseurs de Irios

Vallejo Paints- 872

Super Glue

Expo Static Grass

Army Painter Tufts

The dehli Bazaar emulsion is available from B&Q stores in half litre tins. If you would like some of the plastic plants, I have plenty and will be happy to include a few FOC when you order anything from the Trent Carribean range, just put a note with your order.

Caribbean modelling project

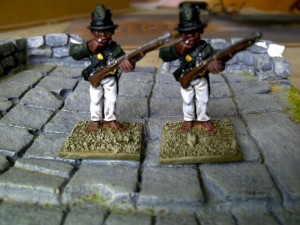
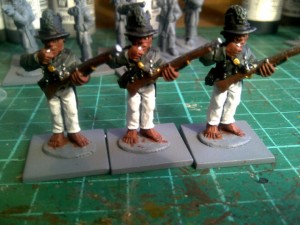
I thought that I would have a bit of a change from painting the troops at Waterloo, but I still fancied something from around the same period. So just to be different, I’m going to be painting a small group of Chausseurs de Irois. These are black troops that fought for the British out in the Caribbean – Haiti specifically.  The models are from the Trent Miniatures range – They’re  fairly straight forward to paint and I’m using a uniform reference from Osprey books.

I’m hoping to make a small skirmishing force from the West Indies as it will allow me to play some interesting battles as well as putting together a small ‘What if?’ campaign. If all goes well, I can add a bit of variety to my collection, both in terms of scenery and troops!

 The actual men that formed these units were originally slaves and as I understand it the British government paid the plantation owners £3k per slave, who were then conscripted into the army for five years and at the end of their service, given their freedom. They were  treated as per ‘normal’ troops during their time in the ranks, although this may not have been much of an improvement on their previous circumstances in some cases! These Black Battalions were vital in providing manpower for the British Empire to defend it’s Colonies. Not only was there a shortage of troops to garrison the islands but the casualty rates amoungst Europeans through sickness was appalling.  The white troops that were sent out would have to endure  a very long sea voyage  and then within six weeks many would be  dead of yellow fever. So £3k might seem  expensive for a ‘recruit’, but it was  cheaper than the alternative.

And so to the painting!

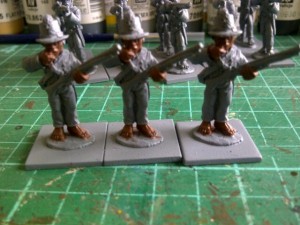
1. The first colour that I used was a mahogany brown, Vallejo 70846, to do the faces, hands and feet. You will have noticed I am painting over a grey undercoat, I quite prefer a coloured undercoat to black or white and as usual with my figures, I am going to use army painter quick shade to speed things up. However, I think I will go back over the figures and add some highlights to give them more definition.

2. Next coat of paint is Vallejo german extra dark green 70896. It’s a really dark green and seems to match the Osprey picture. This has been used to paint the coat and hat plume. Next will be the black 70951, to paint the hat, belt and scabbard.

3. The picture above shows the figures a bit further into the painting process. I have used flat brown, 70984 for the musket stocks and the handle of the machete natural steel,70864,  for the buttons and musket  and brass 70801 is used to paint the belt buckle and details on the musket.  I’ve painted the trousers in off white 70820, I think it gives a nice white without being overpowering, and unusually for me I have painted the eyes of the figures using off white, and also,  the cartridge that the figure is biting. Finally, I used Vallejo light brown 70929 to add detail to the stocks and machete handles.

4. the picture above shows the figures after the quickshade & matting have been done. I always paint on Army Painter Quickshade rather than dipping it, so that I have some control over how it looks. Make sure that the quickshade is left overnight so that it really sets nicely, and then it can be matted down with army painter anti shine matt spray. I have used Vallejo 70994 dark grey to give definition to the belt and machete cover, and I did go back and highlight the plume, and also the cuffs and arms with a bit of the original green, lightened with off white. I also redid the trousers as the dip had ‘dirtied’ them down a bit too much.  On the face around the eyes and nose and on the hands and fingers, I have used mahogany mixed with  white to highlight these features.

For basing I am planning a totally different basing scheme, As they’re fighting in the Caribbean, I’d like something a bit more jungle like. So at the moment I’ve just covered the bases in sand ready for a bit of scenic work. In the next post, I’ll show you the finished figures along with details of the basing.


The items used so far:

Trent Miniatures Chasseurs de Irios

Renedra 20mm x20mm bases

Vallejo Paints- 801, 820, 846,  864, 896, 951, 984, 929, 994

Army Painter: Matt, Quick Shade

Basing Sand


L’eau de Steve’s Wagon

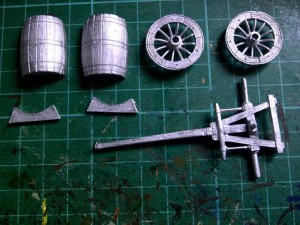
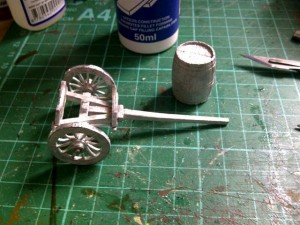
Today we are starting a new project and once again its one of my favourite topics, which is wagons and the support for Napoleonic armies. In this project, we are going to make a water wagon, or it could even be a beer wagon if you prefer! It is a simple conversion and makes into a nice model. Basically we’re taking a Gribeauval Limber from the Trent Miniatures range and we’re combining this with a Cask from the same range, to make a simple water wagon. So first off let’s just show you the components, and then it will be a question of filing them all down, making them fit together nicely and putting the parts together.

So, having laid out the components you just need to take a file and clean up any cast lines, and dry fit everything so you can see where it’s all going to go. Obviously, the two halves of the cask need to fit together, so you need to file these to make them nice and flat so that there willl be a nice join there. The two cask supports, the stands, will be stuck to the limber at either end. So file off the bottom to make sure you’ve got a nice clean fit here. Then, just tidy up the wheels with your file.

Once you’ve done that, the limber itself needs a bit of a clean up. In the middle there’s a spiky piece, which is where the French gun would be attached. You need to sand this flat, because it’s going to get in the way of the cask. Once that is sanded flat, the cask will sit quite nicely on the limber. So we can now assemble the water wagon.

First of all glue the two halves of the cask together. I use superglue, you can use epoxy resin, but I find that a thick superglue (we sell the expo variety) and some accelerant means that it will set off quite quickly, and the thick superglue will provide an element of filling. So some of the imperfections in the casting of the barrel will be taken out, and that will make life easier when it comes to painting.

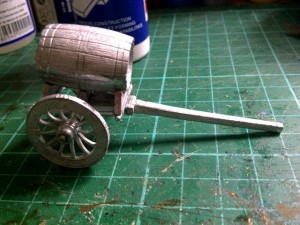
Now you’ve glued the barrel together, the next thing is to glue the supports for the cask onto the limber. I glued one support to the very rear spar of the limber, and one support to the front. Once you’ve done that, attach the wheels and the main construction is complete.

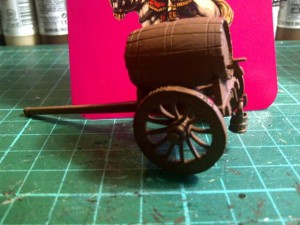
If you look at the picture you’ll see that I’ve got a separate barrel on a separate limber, but it’s a pretty straight forward job for the cask to be glued onto the top and hey presto you have what looks like a passable water wagon already. You could just stop there, a little coat of paint this would look quite nice, but I’m going to add some more detail.

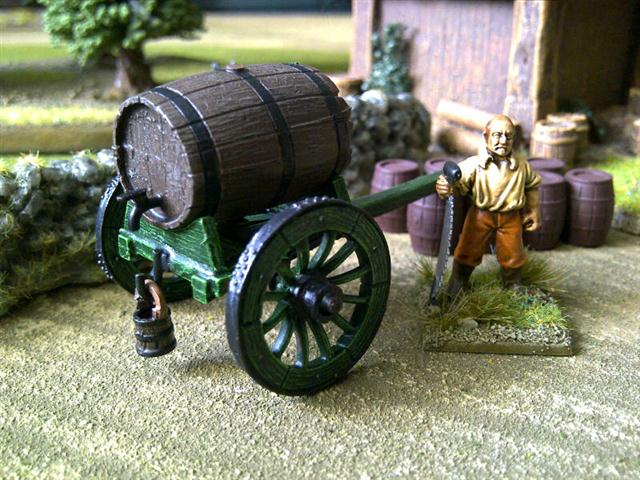
The picture shows the water wagon assembled, and as you can see I have added a few little details. On the back there’s a little tap, very straight forward to make,if a little fiddly. I’ve used some 5 core solder which I’ve bent into shape, drilled the barrel and inserted the tap into the hole. I’ve then used another piece of flattened solder to make a tap top. Then there’s a hook with a bucket on it; again fairly straight forward to make. I took a small square piece of plasticard to make a little plate, and then taken a piece of florists wire and bent that to shape, and I’ve super-glued that on to the back on the limber. There’s also a cork on the top of the barrel which is a little bit off of a plastic. The assembly is very straight forward, the key is to file it well.

I’m going to paint the Gribeauval Limber dark green as if it were French, so even if I use it with my British army I will claim it was a captured piece of equipment as I imagine many were. I won’t claim that this is an actual scale replica of a water wagon as I found it very difficult to find a picture of such a thing. However, I think that it makes a nice piece of scenery and it’s fairly convincing! No doubt it will feature in a future skirmish using the Sharp Practice rules to provide the background.

Beginners Guide to Painting British Napoleonic Infantry (part 2)

We are moving on with our flank company figures and in the last picture you saw they had just been dipped. We’ve now got to the stage where they’ve had a coat of matt varnish.
Tips when using varnish:

  • Make sure the figures get to dry for at least 24 hours, the dip will be touch dry after 1 to 2 hours, but you really want it to set hard. If you use your varnish too quickly on top of dip there is a danger you will end up with the varnish fogging.
  • You should make sure you shake your varnish. I cannot stress this how important this is.
  • When you come to use your varnish use it very sparingly.

I may need to go back to these figures a second time and matt them down a bit more as they are a bit shiny on cuffs, coats and on the hats, though I am not too worried about the hats as they would have been wearing oilskins, but the coats need to be matt.

Prior to painting the bases I have coated them in pva glue, and dipped in normal fine sand. You don’t want the sand to be too coarse as it can look a little out of scale. I have painted the bases the same colour as I painted my wargames table, using an ordinary emulsion called Dehli Bazaar. To highlight the bases I have used some Vallejo White to give a bit of contrast.

I have added also  some static  grass to the bases. I use flowered flock, Expo Static Grass Flowered Field effect, and I’m going to use some Army Painter Highland winter tufts to give the bases some more texture.


The final picture shows those six soldiers from the flank company of the 27th Enniskillens.


I am quite pleased with them. I was initially a little disappointed, because I felt the buff didn’t look as good with red as white might. I have gone back and touched up the white highlights on the shoulders because the quickshade had dirtied these down, and I have slightly retouched the buff strapping. I haven’t re-varnished the hats, and they are still a little glossy which would be a reflection of how the oil skins would be. I have gone back to the red, almost dry brushing with the flat red to improve the colour density.

I will continue with the rest of the battalion (32 figures) and at some point we will do an article on the officer, sergeant, drummer and two ensigns. We are going to paint these a little differently with more highlighting and less reliance on quickshade. I was talking to a professional painter and he said if you concentrate on the faces, bases, flags and officers and then your figures will always look good on the battlefield.

If you’ve got any modelling and painting projects you’d like to share email us at: girlfriday@arcanesceneryandmodels.co.uk

Sharp Practice – My first major skirmish!

Having started the conversion from Warhammer 40k player to historical wargamer I found that there were two major challenges to overcome. The first was, of course, to assemble and paint some models, the second was to find a rules set that suited my style of play. I had already used Black Powder and I have no doubt that I will again return to these rules, but they are written for brigade sized armies at least and are more suited for fighting battles involving large numbers of figures.

Although my painting is moving along at a reasonable pace I still only have around 100 figures completed and I wanted to get them on the war games table. It was fortunate that I happened upon the rules set written by the Too Fat Lardies, ‘Sharp Practice’. They were just what I was looking for and are ideal for playing a skirmish type game for the size of army that I could muster.

To be honest, I found that the rules were so different to what I was used to, I couldn’t make head nor tail of them. Once again, fortune smiled in the form of Mick Rood, one of the 1st Veterans club members, who, having had a background in historical war gaming, was able to show me where to start. Looking back I’m not sure why I was so confused, the rules play superbly and make for an enjoyable, relaxed game with a narrative running through that keeps you engaged throughout. After two games, not only was I hooked, but I felt sufficiently confident to come up with a very simple scenario for our third game.

So here it is, with Mick Rood fielding his French Napoleonic detachment against my British, my biased account of the battle of Chateau Chesney……

Scenario Set Up

The French were to defend Chateau Chesney and had a cannon & crew and a unit ( or group as per the rules) commanded by Major Tirez Les Brits. However, they were running dangerously low on vin rouge and so were awaiting a resupply. This was on its way with a cart full of wine, sacks of bread & cheese and reinforcements, all making their way along a walled road to the Chateau. The cart was guarded by three units of troops, all deployed in column. The officers commanding these units were Captain du Pain, Lieutenant du Vin and Sergeant Boursin! The French were aware that the British might be in the area and so were permitted to place piquets outside both of the convoy and the chateau to look out for trouble. The French were to stay in formation, with one unit in the vanguard, next the cart and then two further troop units following behind. However, once they spotted the British or heard the cannon firing from the Chateau, they could break formation and deploy as they saw fit, to chase off the Brits.

The British were to set up anywhere on the table edge and were permitted to set up as ‘blinds’ with two dummy cards to add to the French confusion. The British force consisted of one cannon and crew and a detachment of redcoats commanded by Captain Young, two groups of the 4th Kings Own, commanded by Lieutenant Carruthers Winstanley-Wormwood , a detachment of Hanoverian Verden Landwehr commanded by Sgt Barker and the Officer in charge was Major Dick Blunt, commanding a detachment of 95th Rifles and a detachment of redcoats. The British outnumbered the French by two groups (24 men) but the French had the advantage of the defensive position in the Chateau.

The rules for ‘Sharp Practice’ run according to the turn of a pre designed deck of cards. Each phase of play ends when the ‘Tiffin’ card is turned. Rather than describe each round, I’ll split the battle into 3 phases.

Phase 1 – The opening Shots 

The British had deployed in ‘blinds’ and the plan was to move quickly into position to assault the Chateau and ambush the convoy. Major Dick Blunt had decided to lead the assault on the Chateau, whilst the rest of the force would deal with the supply convoy. However, the French piquets were on the alert and quickly spotted the British, causing them to deploy before they could move. This meant that the British cannon was unable to see the French convoy and could only fire on the Chateau. As well as spotting the British, the French had made good progress along the road and with the French Voltigeurs leading the way, they were confident of completing the resupply mission.
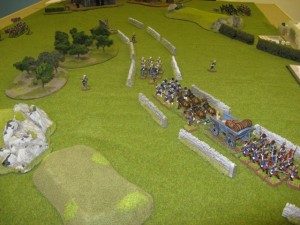
Winstanley-Wormwood led his detachment into the woods adjacent to the road and opened fire on the French Convoy. Sergeant Barker bravely led his Hanoverians to cut the road in front of the Chateau. Captain Young brought his artillery piece to bear on the Chateau but, sensing that Sergeant Barker would need support, also sent his detachment of redcoats to cut the road. The French were quite undeterred and in a brief exchange of fire inflicted sufficient casualties on Winstanley-Wormwood’s group causing them to fall back, leaving a unit of Redcoats in the trees without leadership. Furthermore, the cannon in the Chateau opened fire on the Hanoverians, causing casualties in this group as well.
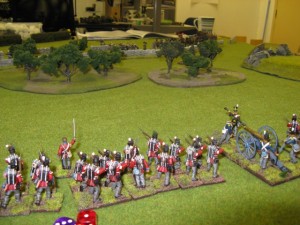
On the far left of the field of battle Major Blunt and his mixed force of Riflemen & redcoats were making extremely slow progress towards the Chateau. So slow in fact, that the French largely ignored them….

Phase 2 – It’s getting hot out there!

The only real problem that the French had at this point was that the redcoats in the trees adjacent to the convoy were still tying up Lieutenant du Pain and his unit, causing a bit of a road block that prevented the supply wagon from moving up the road. This meant that Sgt Boursin was also prevented from joining the action. Winstanley-Wormwood’s group had now left the field, although he had stayed and was shouting encouragement to his remaining troops from a distance, whilst ambling back to the action.
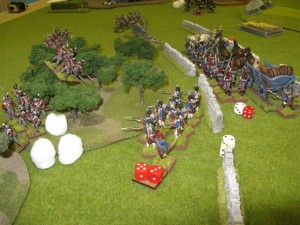
Major Blunt was still edging his group towards the Chateau and had given fire, causing the odd casualty, but was still not unduly worrying the French. In fact, they were more pre occupied with pounding poor Sgt Barker & his Hanoverians. A lesser man would have run away, but brave Sgt Barker, supported by the Artillery detachment, had moved into position to block the road.
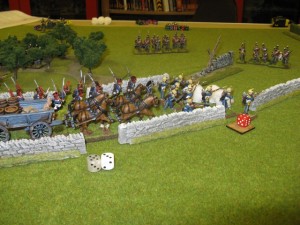
This was enough provocation for the French. Captain du Pain, leading his elite Voltigeurs, moved down the road and engaged the Hanoverians, reducing them to just seven men and pushing them back. Only the towering presence of Sgt Barker stopped them from breaking completely. Lieutenant du Vin led his unit over the wall to flush out the Brits in the trees and opened the road to allow Sgt Boursin to move his group up in support of the Voltigeurs, whilst moving the supply wagon further towards the Chateau.

All that the British artillery could do was to pound the French artillery in the hope that they would stop the guns or at least keep the French gunners’ heads down enough to spoil their aim. As the game continued the British aim improved and gradually enough shock points were inflicted to reduce the French gunners effectiveness.
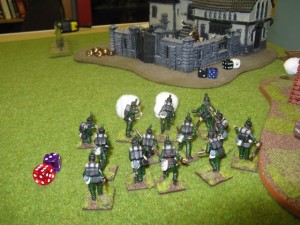
At last Major Blunt and his men reached the Chateau walls and at point blank range opened up on the defenders. After unleashing a fearsome volley of rifle and musket fire, the smoke cleared to reveal that the dastardly French had ducked behind cover and not one of them had been hit. To add insult to injury, they were now shouting rude words and making rude gestures at Major Blunt. This was just too much to take!


Phase 3 – The Finale

The last phase saw the British fortunes take a turn for the better. Winstanley-Wormwood had finally rejoined the remainder of his unit in the woods and with his encouragement their rate of fire increased to the point that Lieutenant du Vin and his unit were forced to retreat back down the road, having taken a number of casualties.

Sgt Barker had steadied his men and, reinforced by the detachment from Captain Young, had re imposed the road block and was holding Captain du Pain and Sgt Boursin at bay.

Back at the Chateau, the taunting from the French had become too much for Major Blunt to bear and he decided to resort to Fisticuffs! He led his men over the walls to assault the French. Major Tirez les Brits, although heavily outnumbered, put up a brave fight and initially resisted the assault, inflicting as many casualties as his men had taken. However, the superior numbers of the British began to count and Major Tirez decided enough was enough and left with his remaining men via the back door of the Chateau. Major Dick Blunt had won the day!
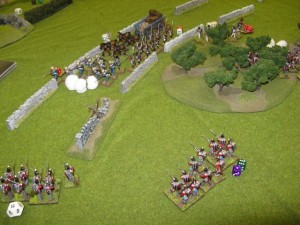
Although the supply cart was still with the French, the Chateau was captured. The British had a warm place to billet and the French went off to drown their sorrows!

On Reflection


The simple scenario worked well and gave the game a narrative to make it fun throughout. Mick was most generous throughout the game and suggested a couple of changes to the rules that made life more difficult for his French. The first was to allow the British cannon to fire as though the Chateau was soft cover rather than hard cover. This was to allow for the fact that no damage was being logged on the building and that the British could have been firing Shrapnel rather than round shot.

The second change was to remove the Tiffin card for the last round of the battle, allowing all units the chance to fight. It was this factor that allowed the British to assault the Chateau. Had the cards come in a different order the result may well have been very different. In future games we will use two tiffin cards as there were a number of turns where tiffin happened very early in the turn sequence, with the result that many units were left standing around – hence the length of time it took for the Rifles to get to the Chateau.

Other than those observations, the game was great and I am now hooked. We are  planning a larger campaign. Watch out for more adventurers of Major Blunt and his men!

Continue reading
Napoleonic Flank Companies!

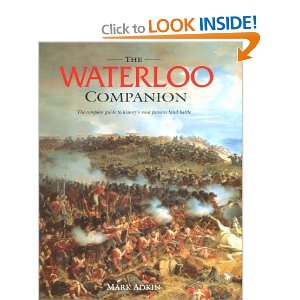
It’s been some time since my last blog on the subject of Napoleonics but I have been busy painting and my Army is steadily growing, along with my knowledge of the period. My main reference in building my army has been the superb book, the Waterloo Companion by Mark Adkin. It really is a first class reference book and if you are at all interested in the period, I suggest that you must add it to your library!

The main fighting unit of infantry in the British Napoleonic army was the Battalion. You will often hear people refer to various Regiments when talking of the units at a particular battle , for example, the 27th Inniskilling Regiment. However, the Regiment in the British army was more of an organisational title and it was the battalion that actually took to the field. Some Regiments consisted of more than one Battalion; two or three were possible, but it was unlikely that there would be more (There were of course exceptions). In this case, the battalions would be numbered, so the first battalion of the 27th Regiment would be noted as 1/27, the second, 2/27 and so on.

A battalion consisted of around 800 men when at full strength. In reality, it was extremely rare for a Battalion to be at full strength whilst on campaign. The actual numbers varied from just over 700 to as few as 500. At the Battle of Waterloo, some battalions were below this number, due to casualties suffered at the battle of Quatre Bras. Regardless of numbers, the battalion was divided into 10 Companies, each usually commanded by a Captain. Eight of the Companies would be known as Line or Centre Companies and would be numbered 2 to 9. The other two Companies were the Flank Companies. Company number one, deployed on the right of the line was the ‘Grenadier Company’ and usually formed from the biggest & bravest soldiers. Company number 10, was the Light Company and whilst usually deployed on the left of the line was also used as the skirmishers for the Battalion. These troops were usually the best shots and the smallest and fastest in the Battalion. They were often deployed well in advance of the battalion and if trouble threatened, they needed to be able to get back to their lines quickly!

Flank Companies were distinguished from the Centre Companies by the size of their Epaulets and the colour of the plumes on their Shako’s. Flank Companies have the big ‘wing’ type epaulets ( first two models on the left of the pic.) as opposed to the’ tufts’ of the Centre company’s and the Grenadier Company would have all white plumes whilst the Light company would have green plumes. In addition, the officers in the Flank Companies tended to carry a Curved Sword or sabre as oppose to a straight one.

So having blathered on long enough about the technicalities of Flank Company troops I’ll show you in the next article how I put mine together.

My First Napoleonic Skirmish!

My British Napoleonic army is steadily growing and it has now actually been on the gaming table. Even though I have only finished 40 figures, I was able to join in with a skirmish game that was played at the club that I attend. The skirmish rules were actually written by one of the club members, Richard, and worked really well, allowing us to play with a small force of Napoleonic Infantry rather than the normal large battalions. Basically, we were re-creating the sort of adventure that you read about in Bernard Cornwells’ ‘Sharpe’ novels. So we had a great game, lots of fun and I’m pleased to report that the French Army was prevented from stealing the gold from the Spanish Villagers!

On my last Napoleonic blog posting I said that I would discuss the difference between British Flank & Centre Companies and why there are different sets for Waterloo Infantry & Peninsular War Infantry. Of course if you are a veteran of the hobby you will already know the answers but if like me, you are a newcomer to Napoleonics, these things can be confusing and a barrier to starting your own army. So this is what I’ve discovered and if anyone out there reading this has any extra information or would like to correct any error that I may make, please contact me through my shop email and I will publish your email through the blog. Unfortunately, due to the huge amount of spam that I was getting through the blog, I’ve had to turn off the comments (Thank you to the Russian & American spammers and the Pharmaceutical suppliers that have contributed so far….).

So when deciding what British force that you are going to field, there is one final decision that you need to make. Are you going to model a force from the Peninsular War or do you fancy the period around Waterloo? Or to put the question another way, would you like to have your Line infantry wearing white trousers or grey? Now that’s a gross over simplification that totally ignores the historical perspective but essentially that’s the main difference between the two troop types. If you are desperate to have an army that will fight in Spain & Portugal with all the allies & enemies that go with them, then you need the guys in the white trousers. If you want to fight Waterloo and the associated battles, then grey is for you! There is one other significant difference, the type of hats worn by the officers & troops. In the peninsular, it was the stove pipe shako with the plume at the front for the troops and the Bi-corn Hat for the officers. At Waterloo, the troops wore the Belgiac Shako with the plume to the side and the officers wore the same except that the cord on the front was gold rather than white.
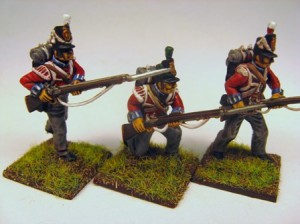
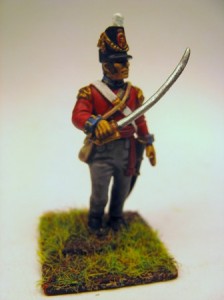
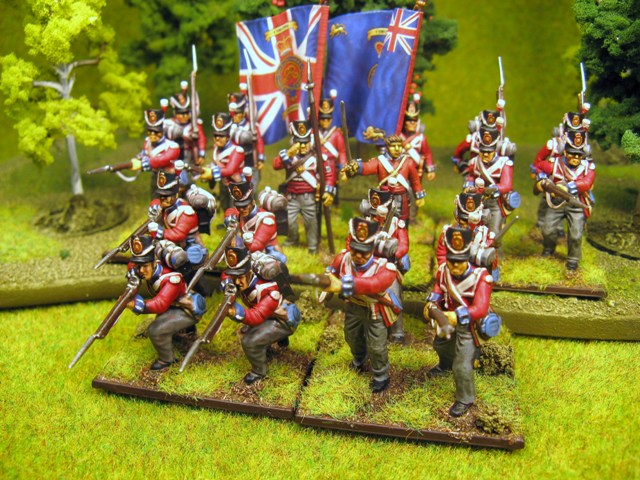
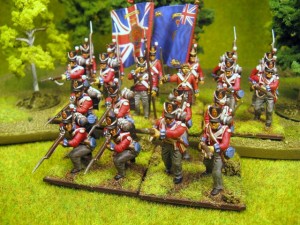
There are some other subtle differences but if you stick to the above, you will be about right. Remember, although the button counters of this world will delight in telling you exactly what shade of underwear the Coldstream Guards were issued with in 1815, we are trying to create an army that looks good on the war games table and in war time troops had a habit of improvising and adapting equipment, even in the 19th century. So you will see troops on campaign wearing a mixture of uniform in different shades and states of wear and tear. If you are happy with that simplification, join me on my next blog article on the construction of my Napoleonic Army and I will start to assemble some figures. Oh! and I’ll get back to you regarding Flank & Centre Companies!

First Choose your weapons

So here’s the next article tracking my progress in painting my first Napoleonic 28mm wargaming army. It’s designed to help beginners to the hobby or those like me who have decided to move from Science fiction to real history.

There is a bewildering choice of 28mm Napoleonic wargaming figures available, so before you dive in and buy some troops there are some fairly simple questions to answer. Firstly, do you want to have a British, French or other European army? I decided to start with the British. After all, I had been brought up on tales of Wellingtons victory at Waterloo and the heroics of Bernard Cornwell’s Richard Sharpe. And of course, although the French Army at the time was undoubtedly a fine fighting force and contained some of the finest troops ever seen, as well as a vast range of superb units and uniforms, it’s one draw back was that it was French…..   :0)

Next, do you have a preference for plastic figures or metal? Plastic figures are usually cheaper, lighter and easier to transport. Metal figures are usually one piece and so do not need assembly, they ‘feel’ more substantial and the detail can be better although the new plastics are catching up. I have no strong feelings either way. I like working with plastic and I enjoy the process of putting the models together. I also like the infinite variety of poses that you can get when assembling your army. Plastic also tends to be less expensive so buying the Troops in plastic & the character and specialist models in metal is a good compromise.

So if you are happy to be building a British Napoleonic army that will be made up of plastic and metal figures read on!

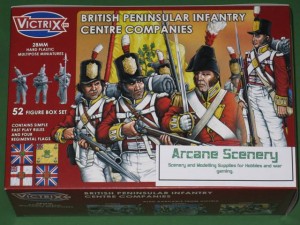
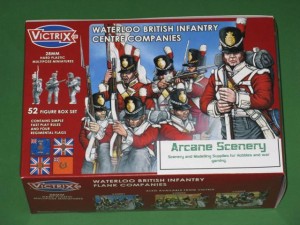
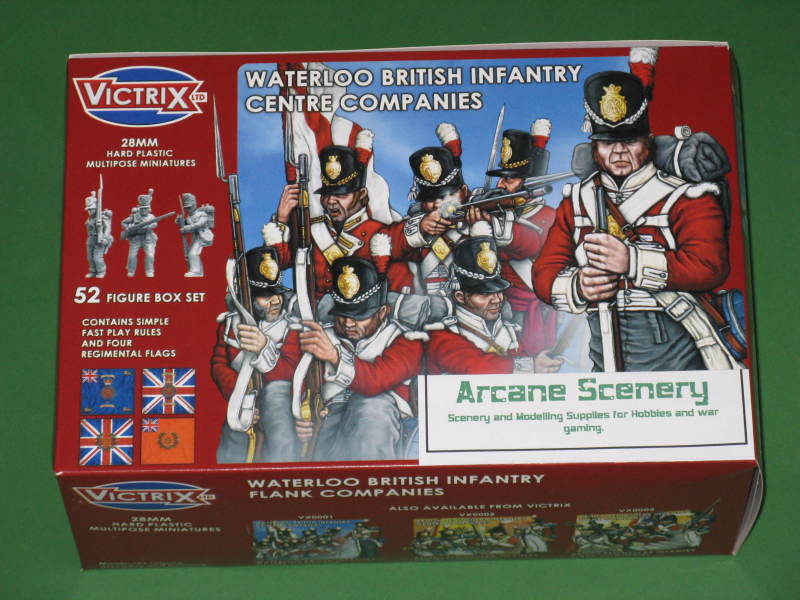
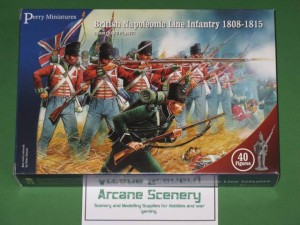
The next decision was to chose the box set. Would it be the Perry set or Victrix….If you have read my previous blogs, you will know that I am a great fan of the Perry Miniatures sets. The quality and sculpting are superb and they have cleverly put together a set that makes up into a British Battalion formed up as a firing line and includes 4 British 95th riflemen. That said, the Victrix sets are also nicely sculpted and although they are split into Flank and Centre Company sets ( the Perry’s include parts for both) you get 52 figures in a Victrix set and just 40 in the Perry set.

I chose the Victrix set to start with…I just wanted more men to start with and I figured that if I started with Victrix I would have to buy the Perry set at a later date so that I could add another regiment to my army. I know, it doesn’t really make sense but remember at this stage I didn’t have a firm plan but just wanted to build an army and start painting Napoleonics.

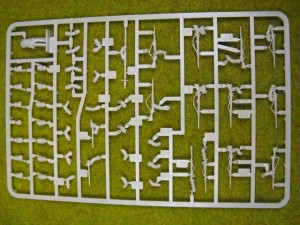
Having chosen the Victirx, lets have a look in the box . There are 8 sprues in the box. Four of these:

These sprues contain most of the soldiers torso’s. The top two bodies on the far right are for the Sergeant and drummer, the rest being normal Waterloo Centre Company troops. The rest of the sprue contains the drum for the drummer, back packs for the infantry and the ensigns or flag bearers flag.

You also get four of these:

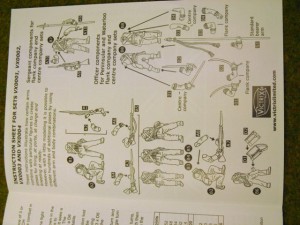
The one torso on this sprue is for the Officer and also doubles for the Ensign or flag bearer. There are also 14 different heads and lots of different arms. Fortunately, the instruction sheet is fairly clear and you should have no difficulty in putting the figures together, with a minimum of ‘cleaning up’ required.

The only issue that I had with the set was that some of the pieces on the sprues aren’t numbered very well or not at all. That said, assembly is straight forward and mixing and matching the different heads & arms is the fun bit!

If you take a close look at the heads, some are clearly Veteran Campaigners and some are more suited to the Drummer and Officer figures. Also some of the Hats ( or Belgiac Shakos to be precise!) have covers. I dont think that it matters whether you use the covered ones but I prefered to have all of my troops with the plume showing.

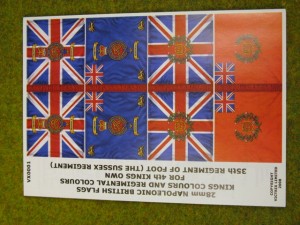
Also included with the instructions is a small flag sheet. Although there are four flags, you actually have just two regiments to choose form, this is because each Battalion carried two flags. One was the Union flag or Kings colours, the other the Regimental flag. The colour of the Regimental Flag usually determined the colour of the facings on the Troops uniforms. Or to put it more simply, a blue regimental flag meant that the collars and cuff of the troops’ uniforms would be blue. For my first regiment, I choose the 4th Kings Own, with the blue flag.

So that’s enough to be going on with now. In the next installment, I’ll have a look at the differences between Centre & Flank Companys and Waterloo and Pennisular Uniforms as well as showing you some pictures of my own version of the 4th Kings Own Regiment.

1 10 11 12