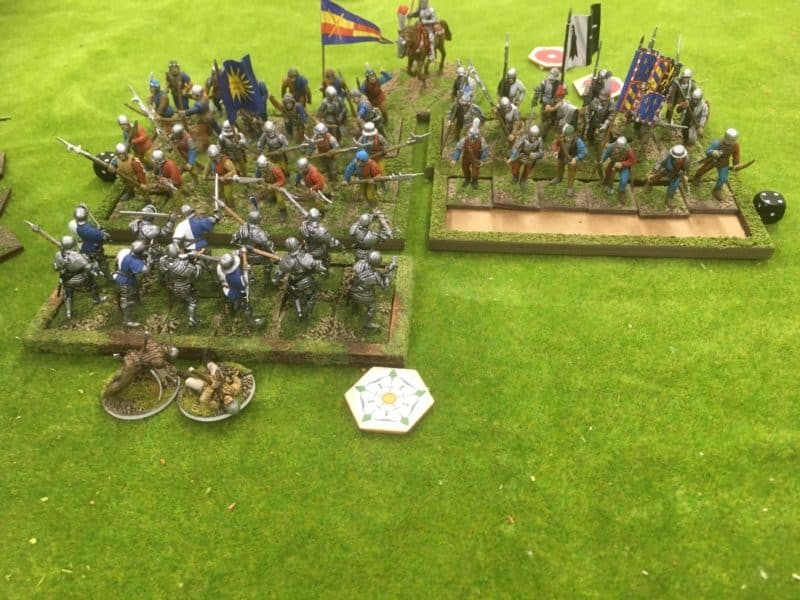
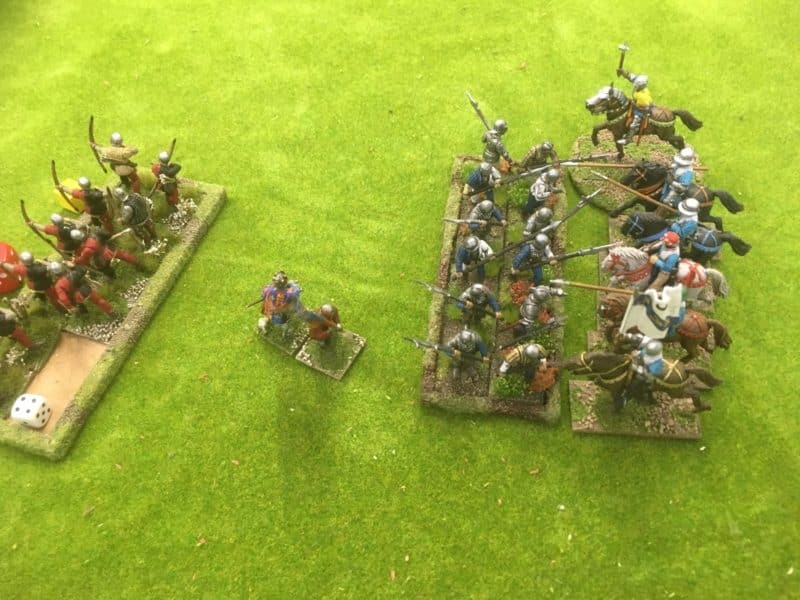
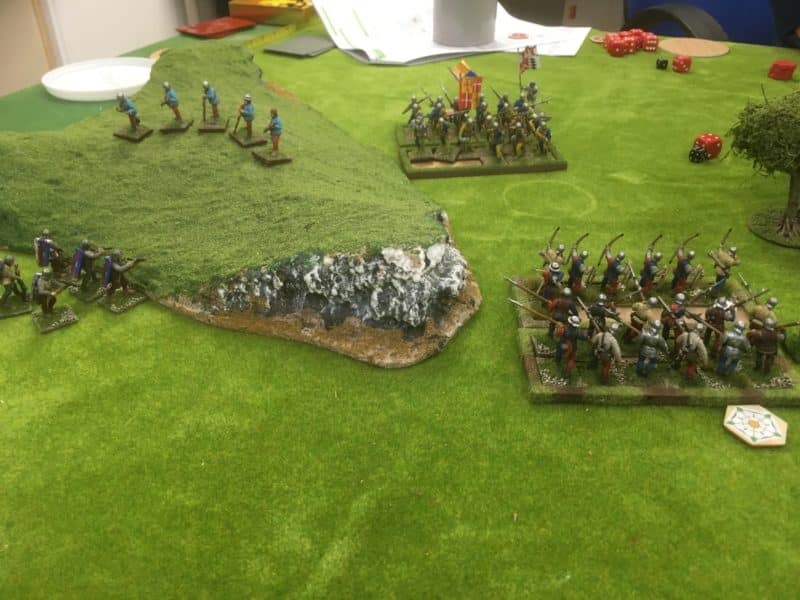
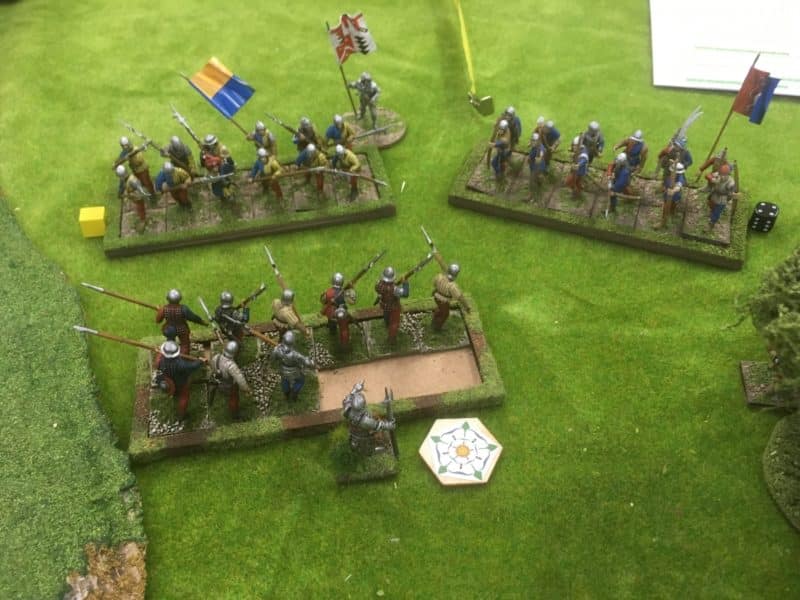
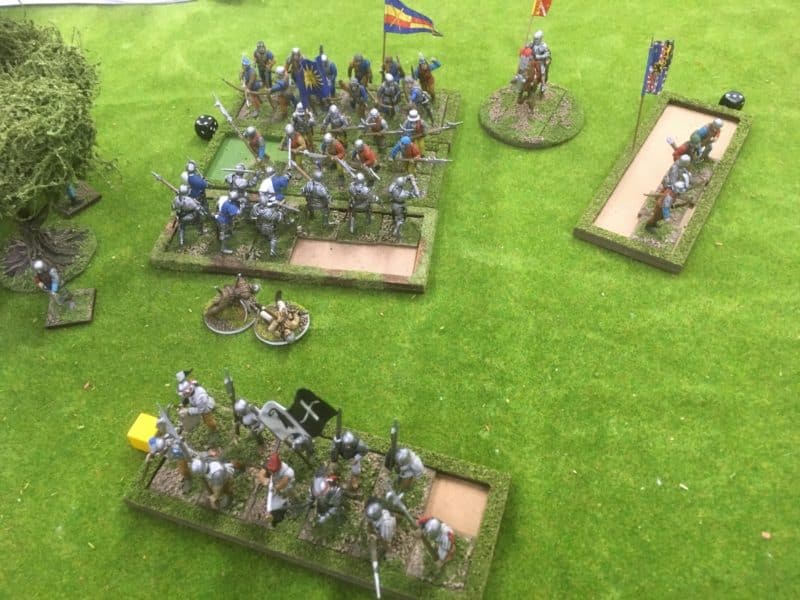
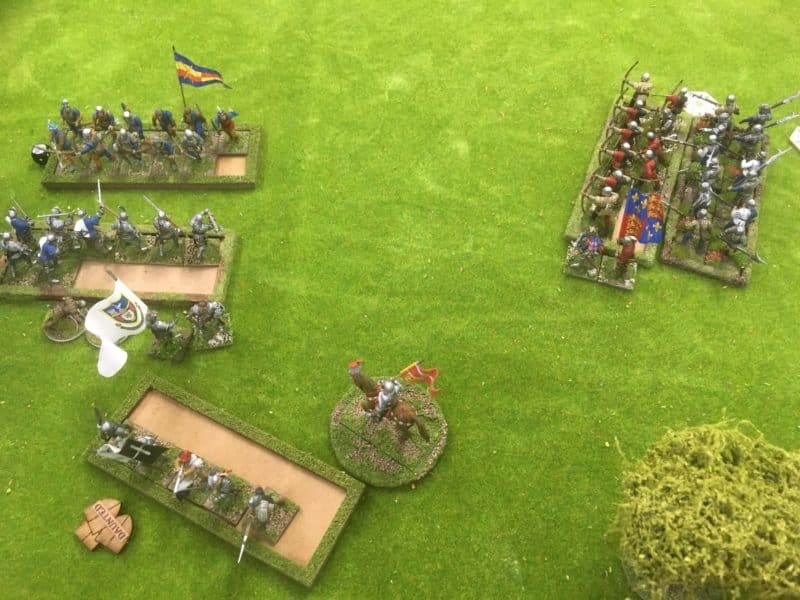
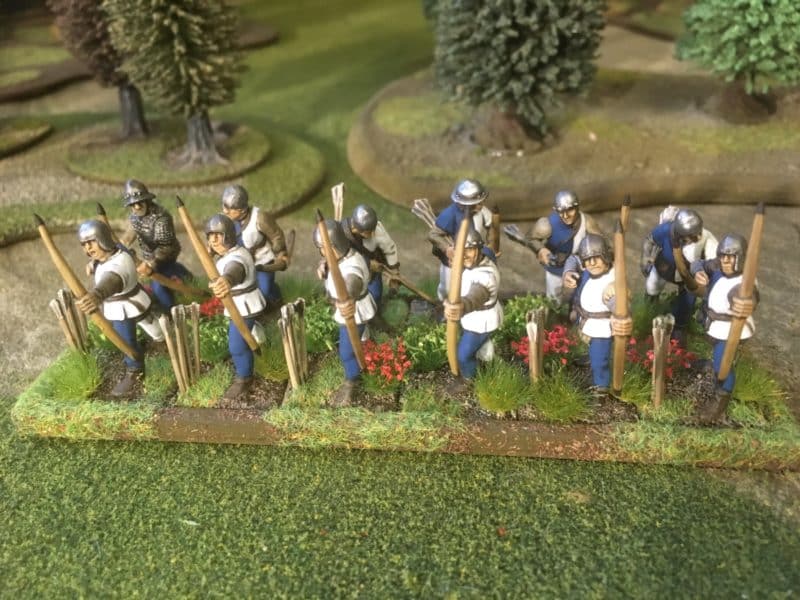
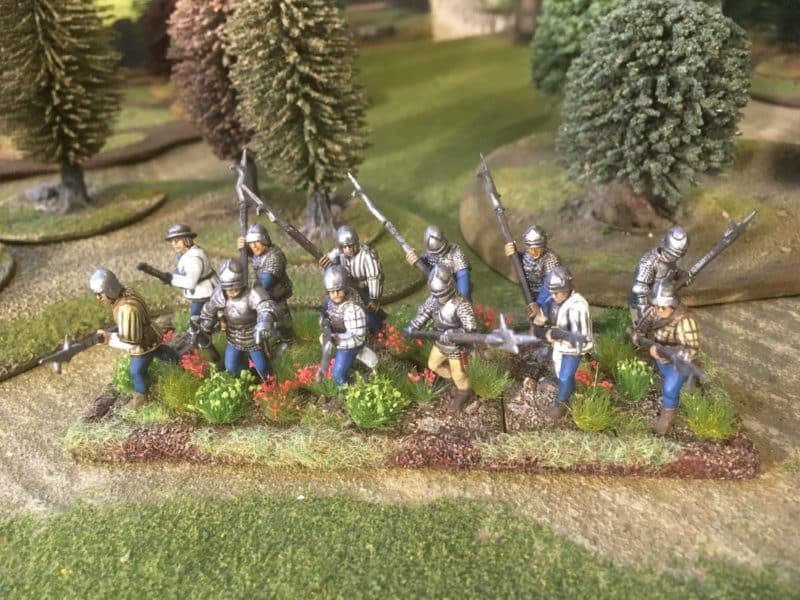
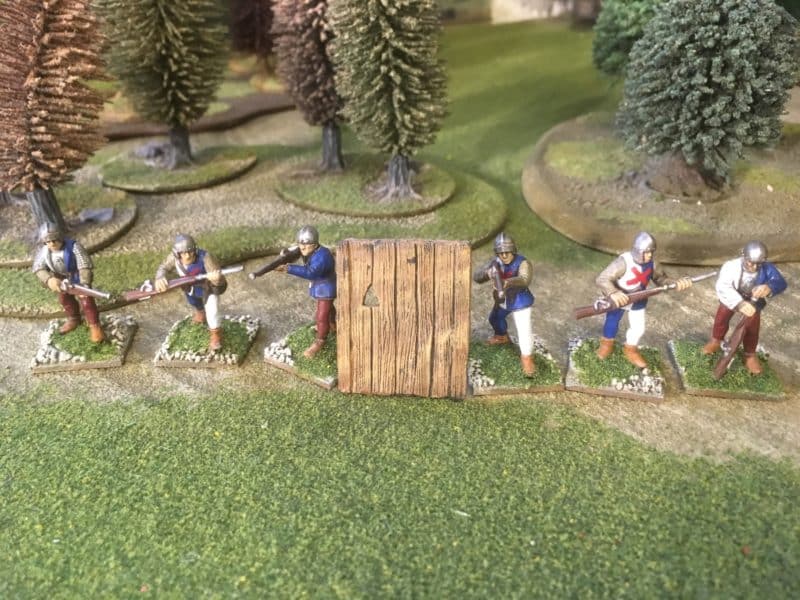
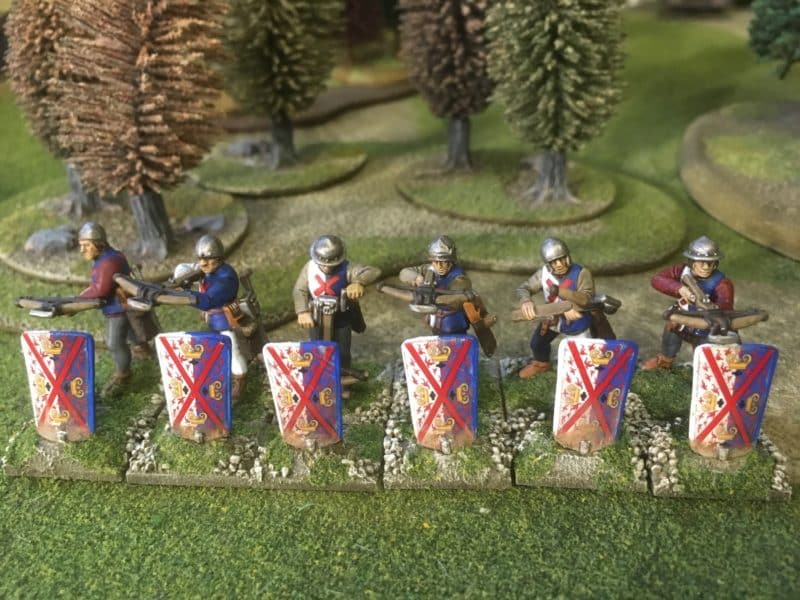
This weeks blog is just a progress report on this weeks modelling. I am somewhat consumed by my War of the Roses army but progress is slower than expected, partly because the model of the Mary Rose that I am working on has been a pleasurable diversion from ‘grinding out’ more billmen!
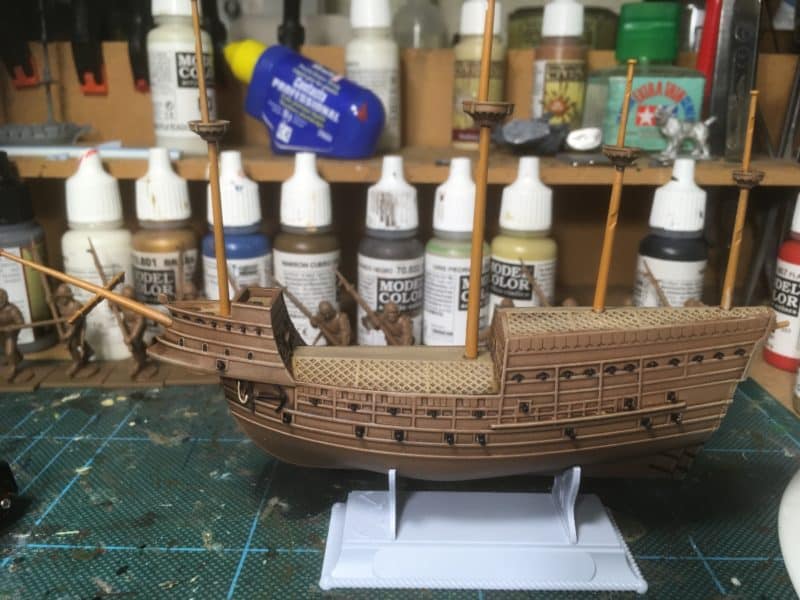
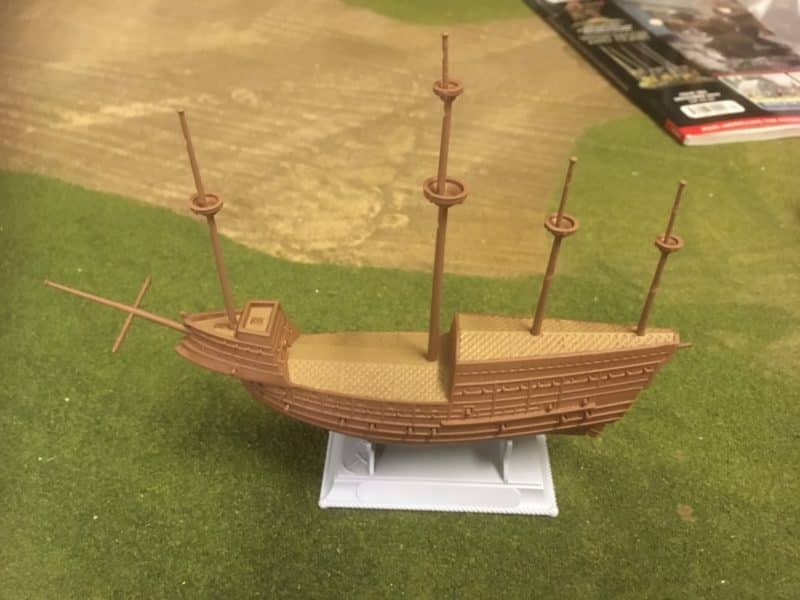
Mary Rose – washed with Strong Tone
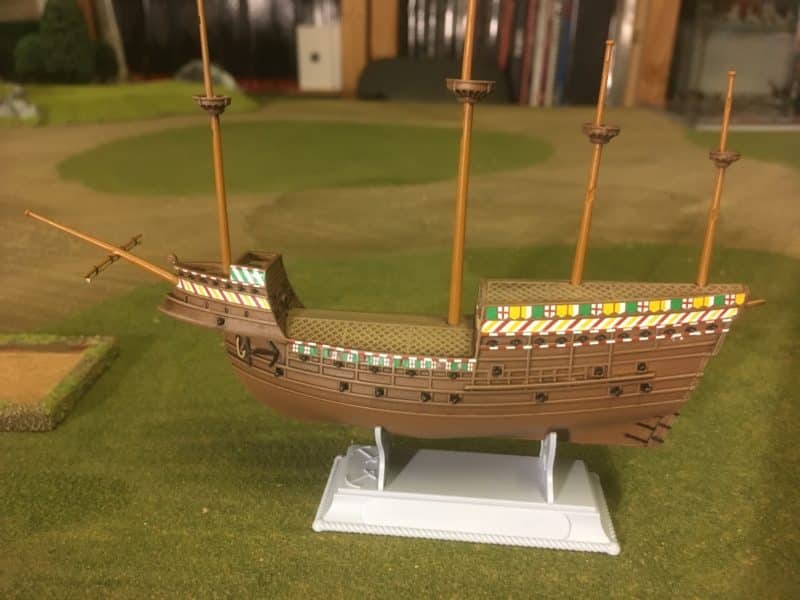
As you can see from the picture above, I have used similar techniques to paint the ship as I would one of my figures. I gave the hull a couple of light washes with Army painter Strong tone ink. Once this had dried, I gave the ‘deck’ ( it’s actually a representation of the rope grid that was there to prevent boarders – in the event it is thought that this prevented the crew from escaping when the ship capsized.) a dry brush with Vallejo Old wood, lightened with Iraqui Sand. I also gave the rest of the hull a very light dry drush with the same mix. It was then a case of carefully picking the guns out with matt black.
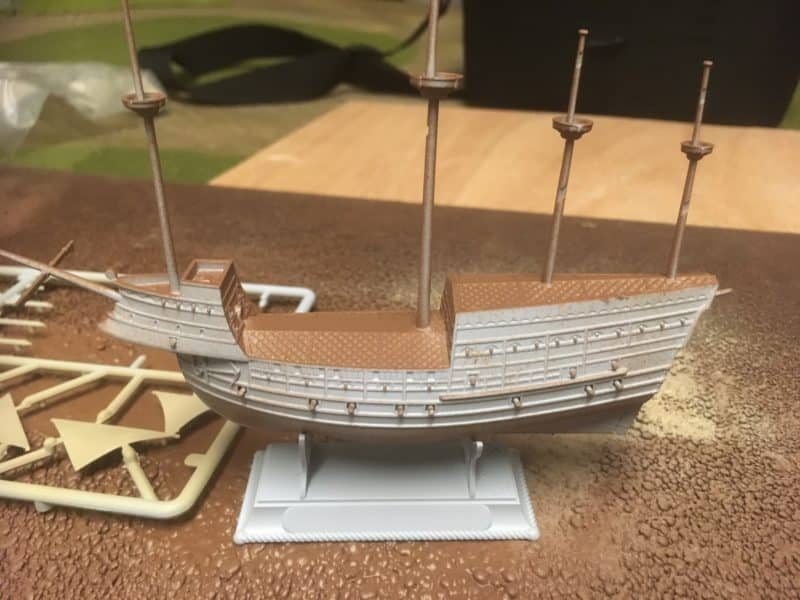
Mary Rose – Decals added
The next stage was to add the decals. Well, what a fiddly job. It took about three hours in a couple of sessions to get these on. I used the Vallejo Decal Medium and Decal fix to help with this job. There was a reason to do this job over a couple of nights – I was very concerned to make sure that one side of the ship had dried thoroughly before handling it. The decals are so small it would have been easy to unseat them whilst they were drying.
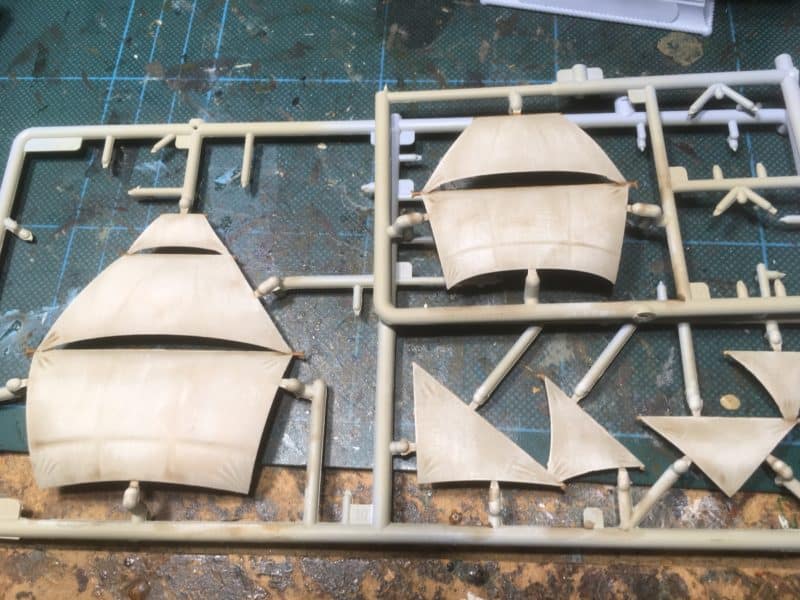
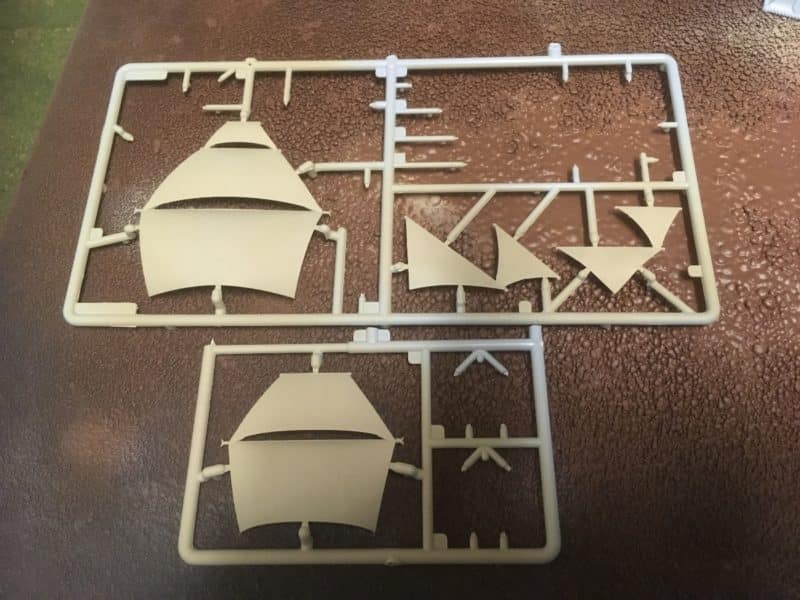
Sails – dry brushed
In between fixing the decals, I went to work on the sails. I dry brushed them with a mix of Army Painter Skeleton bone mixed with white, gradually increasing the white until I was happy with the effect. I then gave the sails a wash of Army Painter soft tone ink mixed 50:50 with the Army Painter mixing medium. The mixing medium helps to dilute the colour and helps the ink to flow over the larger surfaces of the sails. Unlike when thinned with water, it doesn’t pull away from the edges.
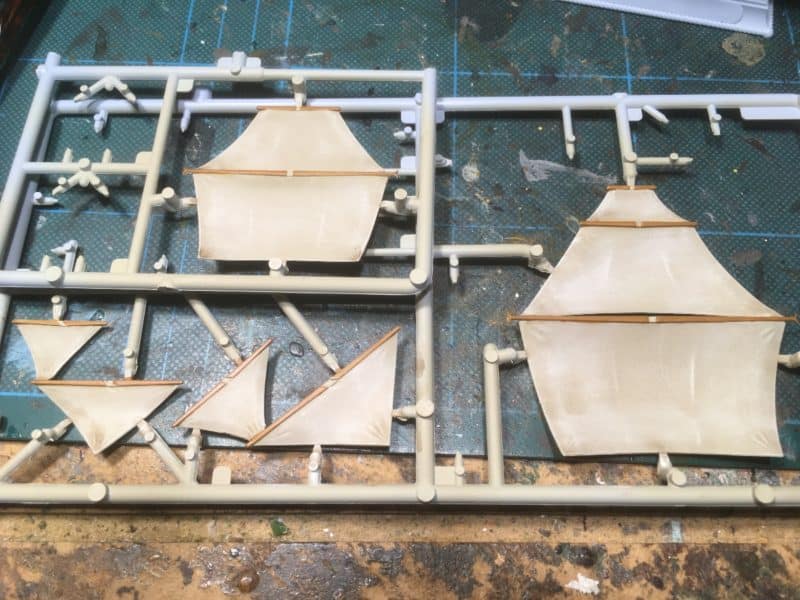
Sails – Spars painted
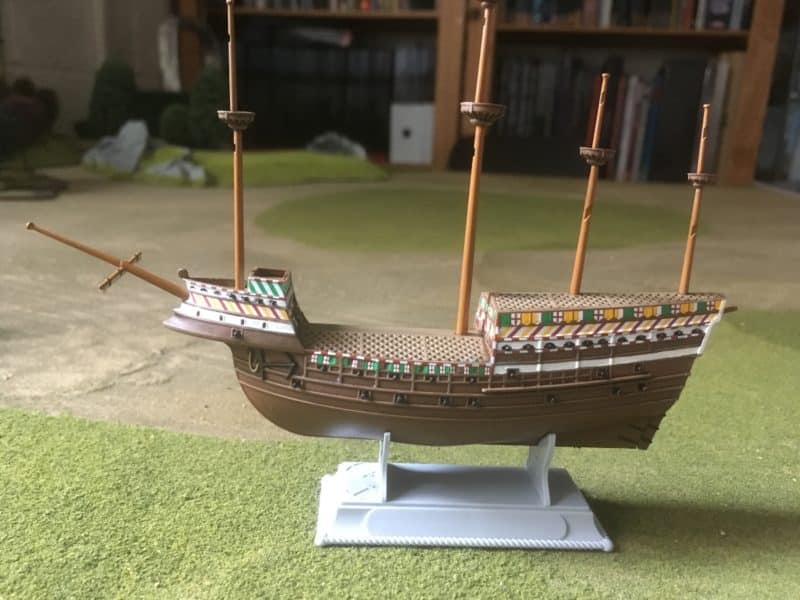
I’ve then painted the spars with Vallejo new wood and it was back to the hull. When fixing the decals I realised that parts of the hull should have been painted white. This would have been easier to do before applying the decals but as I said in a previous blog, I had tended to ignore the instructions and just did my own thing! This particularly applied to the paint scheme. I have broadly followed the picture but where it has suited me, I have used ‘artistic interpretation’ to emphasise details or just to get a nice finish.
Mary Rose – hull about finished.
So with the hull and sails about done, the next stages will involve fixing the sails to the hull, painting the stand and adding the rigging. However, I was happy to pause there as the Billmen on my work bench were glowering at me and demanding that I get back to finishing them!
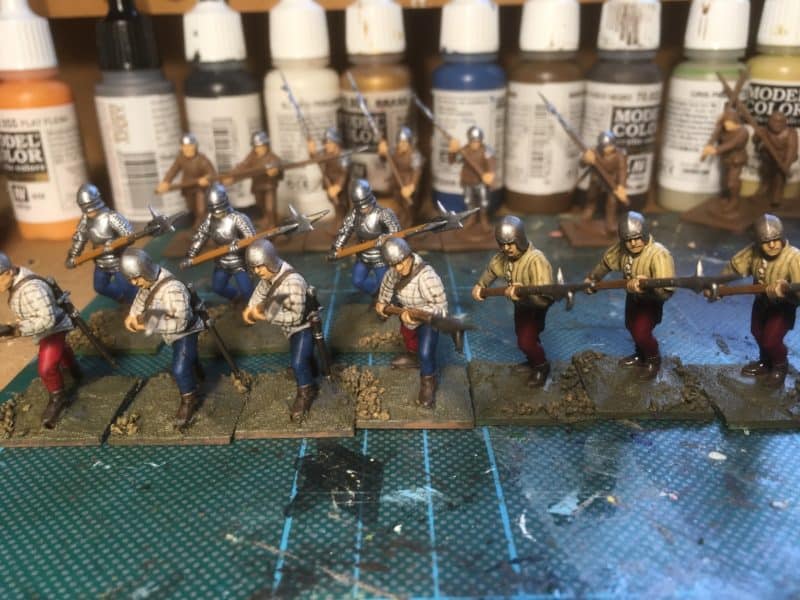
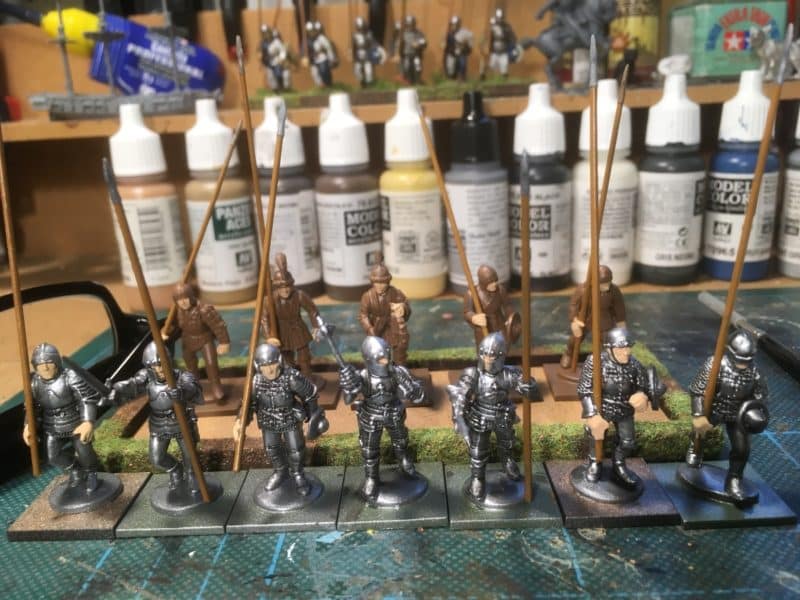
Bill men ready for basing.
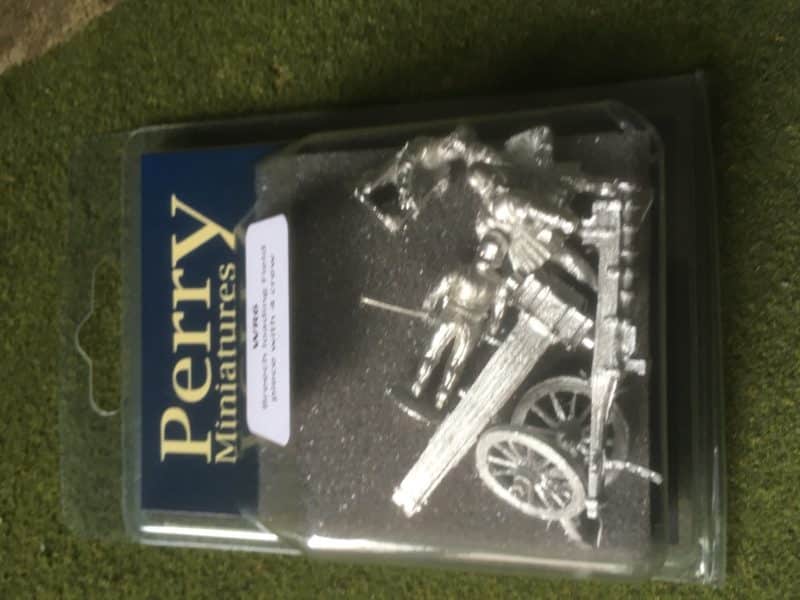
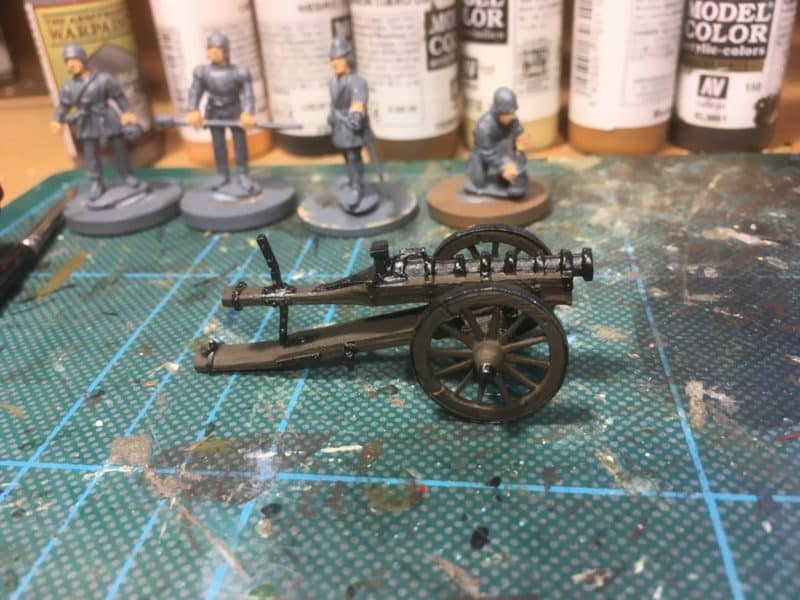
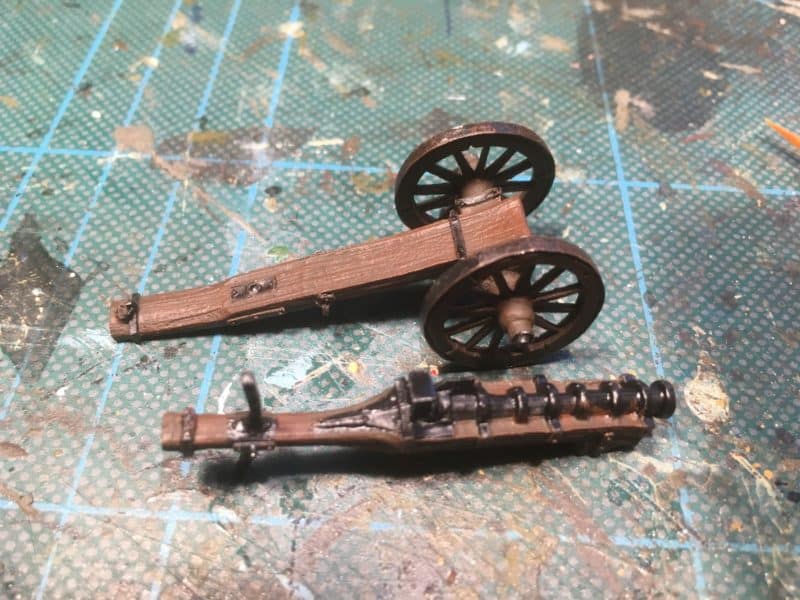
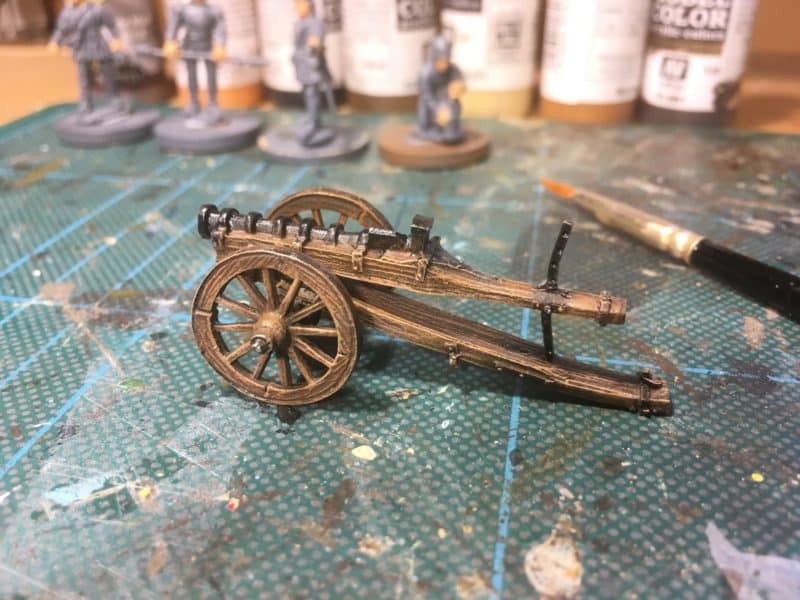
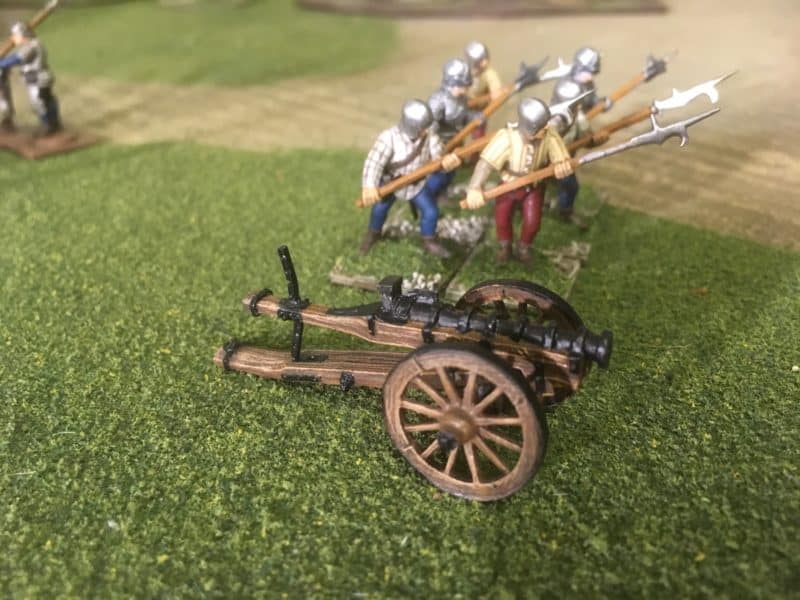
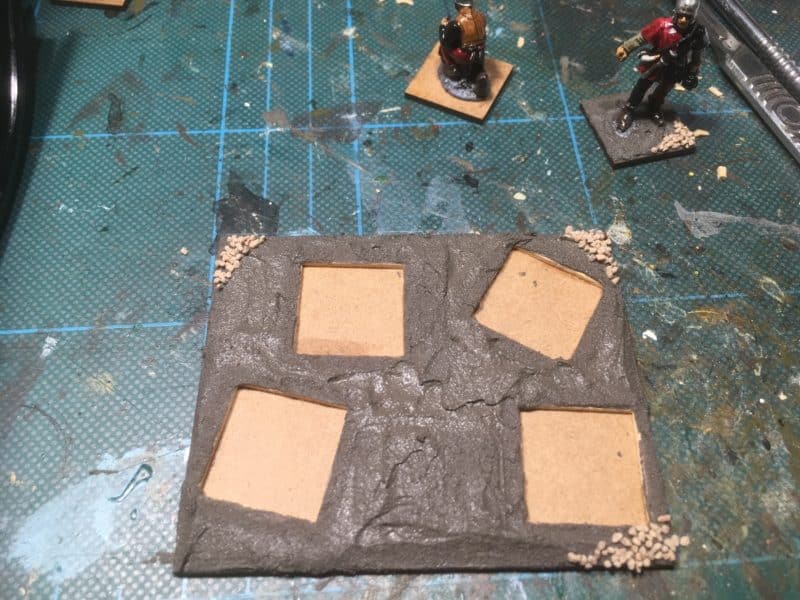
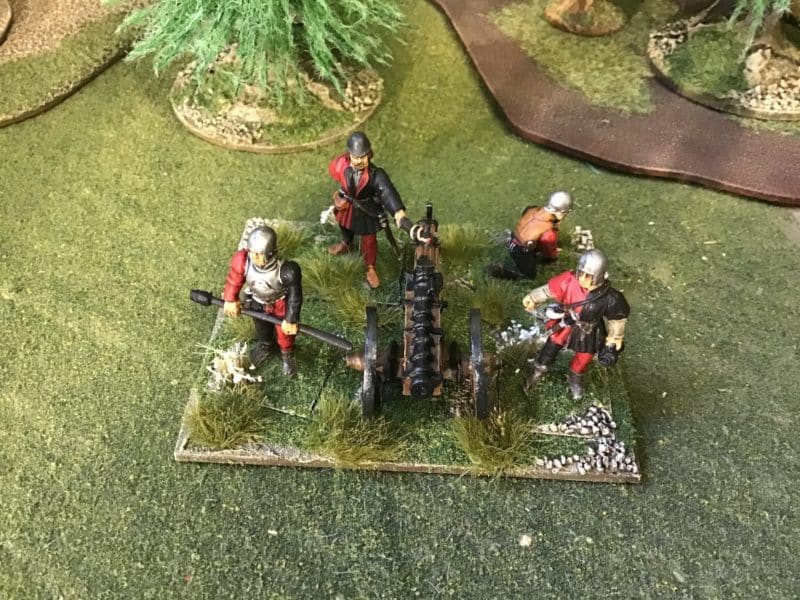
As you can see, I’ve nearly completed another unit, with another 12 underway. My army is approaching completion. To celebrate, I bought a Perry Miniatures Artillery piece…
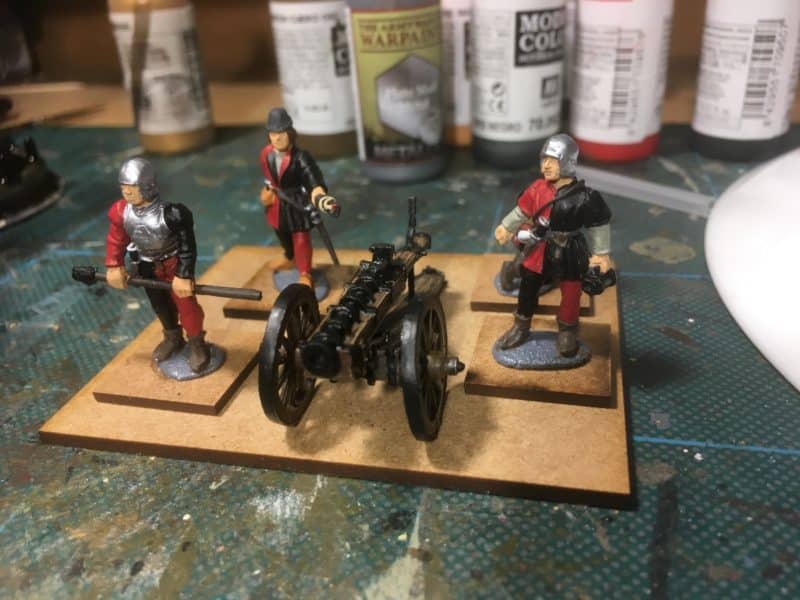
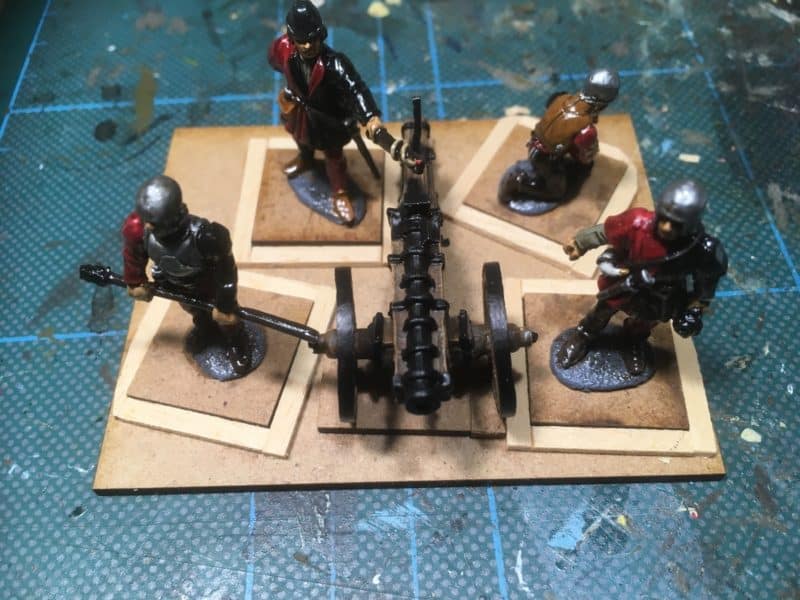
Artillery!
Once the Bill men are complete, I’ll add this to my army and I am nearly done!
THE COMMERCIAL BIT
Almost all of the paints, miniatures, bases, basing materials and anything that you are likely to need for your hobby are available POST FREE from my shop here:
It doesn’t take much to distract me sometimes. In this case, whilst on an ‘enforced’ shopping trip at Lidl, I spotted that they were selling some Airfix ship kits for just £4.99. A bargain! But could that price be an excuse for me adding another kit to my stash? Well, one of the kits was the Mary Rose and as I am interested in the War of the Roses at the moment, the Mary Rose was close enough to the period to justify my interest – and it would look nice in the display cabinet. So the Mary Rose kit, along with the ‘Victory’ (‘might as well pick it up – it could work with Black Seas… and a tenner for two kits…you cant go wrong.!’) were added to the trolley.
The Mary Rose under construction
Despite the more pressing nature of finishing my WOTR army, I decided to break away and build the Mary Rose kit. I quite enjoyed the change from making Perry’s WOTR bow and bill men and it looks as though Airfix really have upped their game. The kit went together beautifully with the minimum and sanding and no filling. In fact, I became a bit over confident and did the usual bloke thing of straying from the instructions. As a result I missed out a couple of pieces but no matter, nobody will notice…
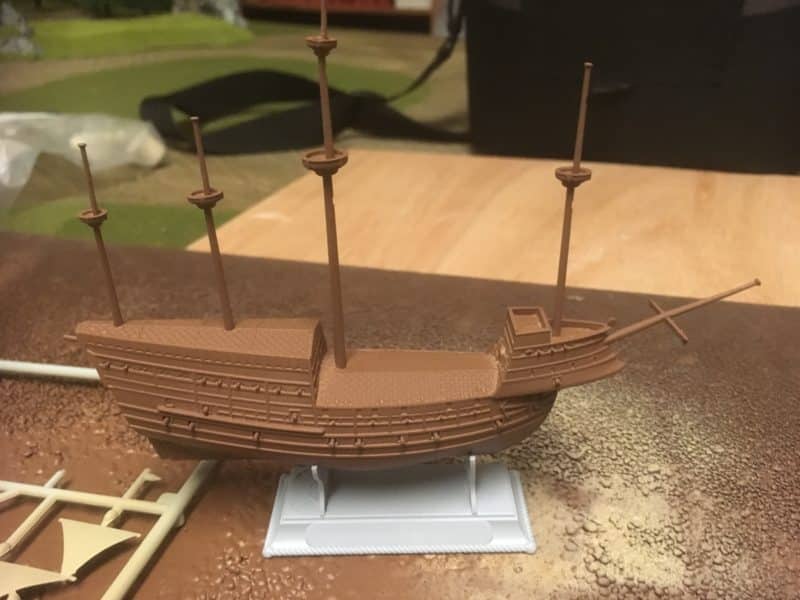
Mary Rose under coated
Once assembled, I sprayed the main hull with a Leather brown primer and the sails in Skeleton bone.
Mary Rose Sails
I then painted the decking or the deck covering with Vallejo ‘Old Wood’ and then painted the masts with Vallejo New wood. I should point out at this stage, that I had done no research regarding colour scheme, or for that matter, anything else. My only reference was the box art and the painting instructions supplied with the kit. I just fancied building a kit for a change! Incidentally, the kit does include paints, glue and a nice brush, so it’s a lovely little starter kit.
Mary Rose with decking painted.
It was at this point that I realised that I had a play test of ‘Never mind the Bill Hooks’ looming and I needed to finish off a couple of extra Archer units. So the Mary Rose was pushed to one side and it was back to the Archers!
More arrows please!
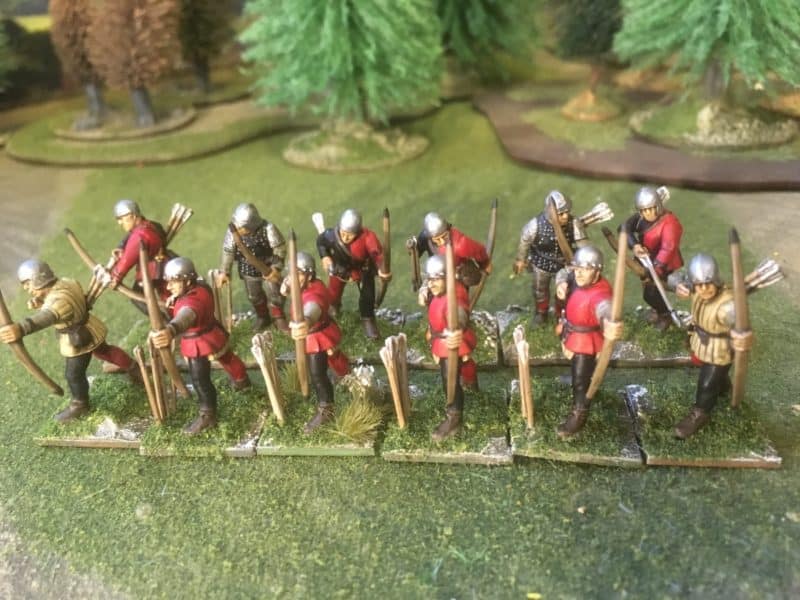
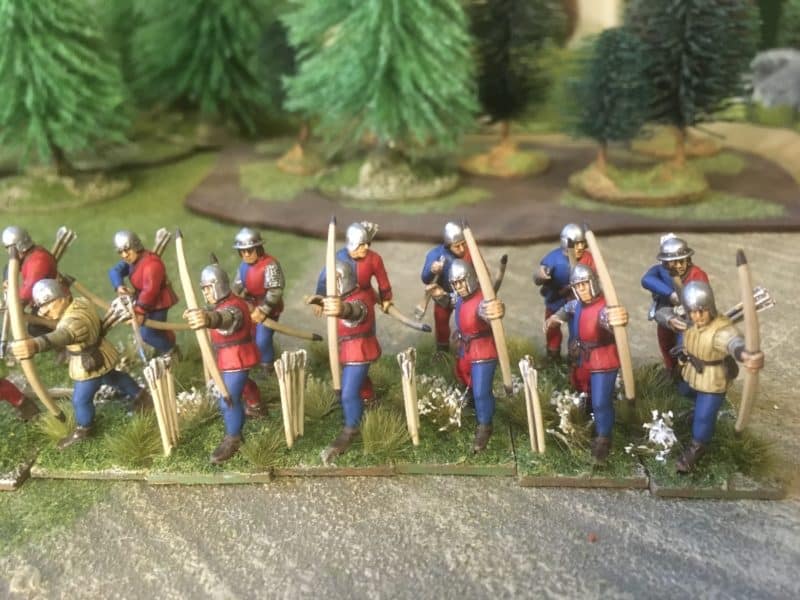
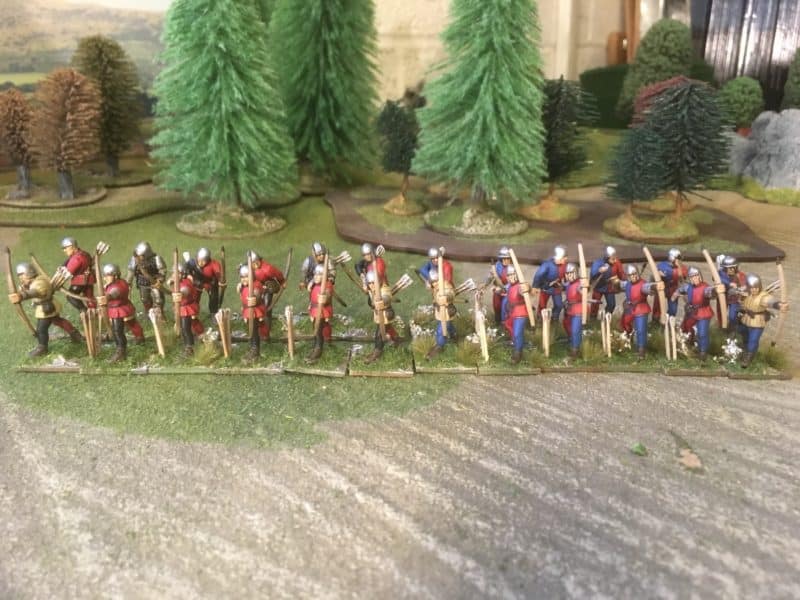
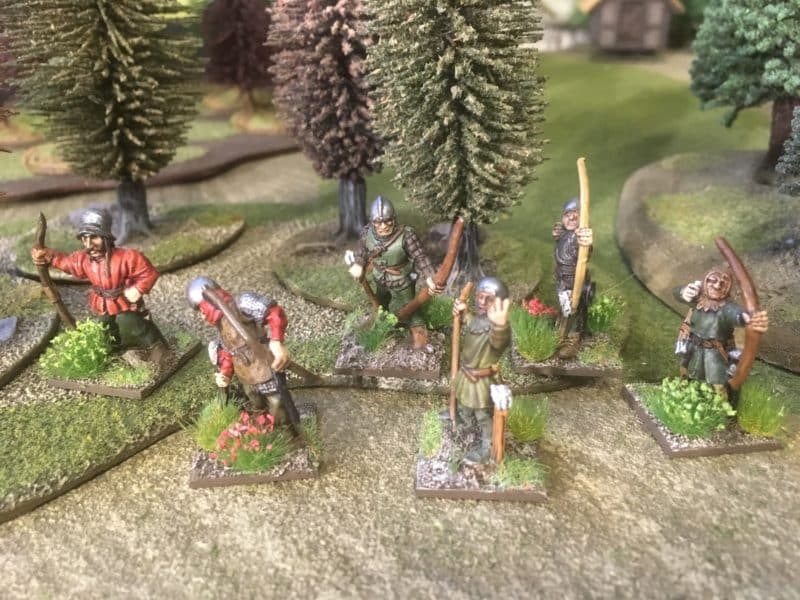
In fact I have completed two more units, making 4 Archer units for my army now.
Yet another bowman unit ready for battle!
The ‘red faction’ of my retinue!
So with a photo shoot of my army due, I’d better get on with the Billmen units. I will get back to the Mary Rose, it was fun to just to do something a little bit different during the Christmas break that didn’t require too much thought. But, I will finish the Mary Rose before I start another project – honest…..
Bill men on the work bench.
THE COMMERCIAL BIT
Almost all of the paints, miniatures, bases, basing materials and anything that you are likely to need for your hobby are available POST FREE from my shop here:
As we approach the end of 2019, it’s a good time to reflect on the year and what has been achieved or not. No doubt, there will be plenty in the ‘official’ reviews of the year to keep us entertained, one way or another. Whilst the big things in life often define the year, it’s worth reflecting on the smaller things. My hobby is a case in point. I look back at the models that I have built and painted, the games that I have played and the places that I have visited and by and large, it’s been a very satisfying year.
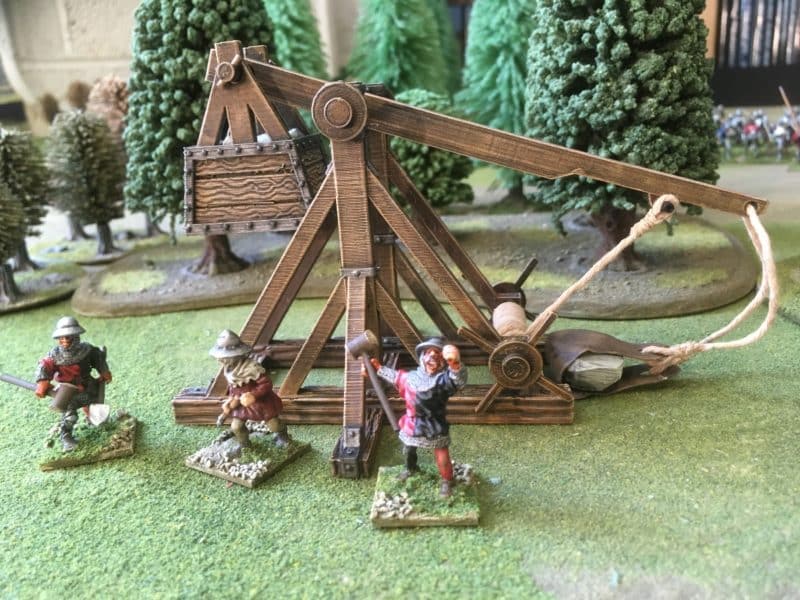
Life sometimes throws rocks! My attempt at Iron Gates Scenery Trebuchet.
The headlines are that I have added 258 painted figures to my collection; played at least 40 wargames in 8 or 9 different genres; rediscovered my love of board games; participated in two demo games and attended 8 or so wargames shows; and visited at least 6 historical sites. Add to that, the reading and research that I have done and the great company that I have enjoyed, and it’s fair to say that I have had a good year, thoroughly immersed in my hobby. So whilst there have been some ups and downs in both my personal and business life, my hobby has kept me grounded and given me something to look forward to when may be other things were going tit’s up, so to speak.
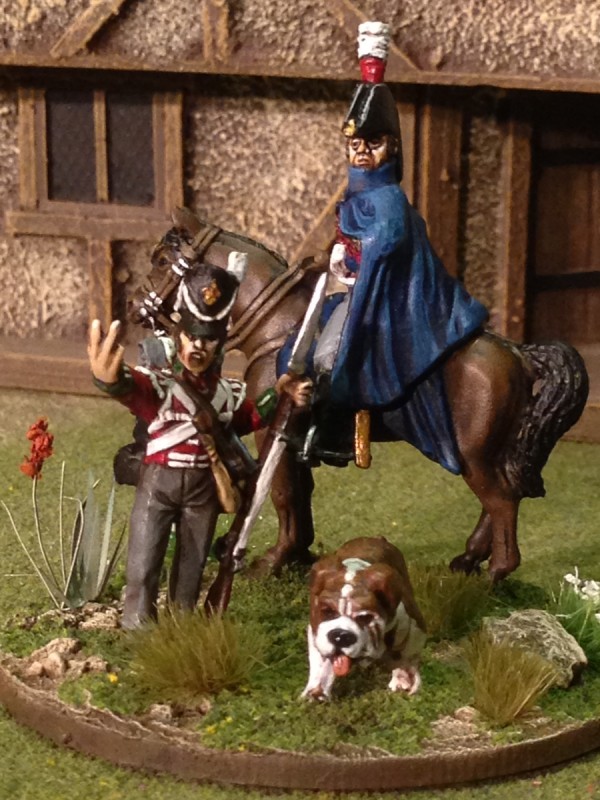
I wont bore you with everything that I have painted but here’s a few pictures of my favourite projects.
An Officer observes the launch
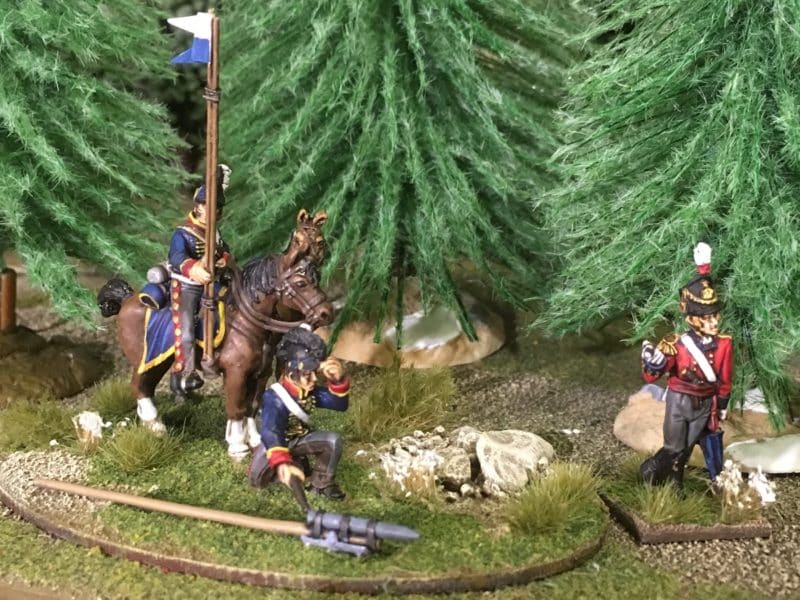
One of my favourite Vignettes that I built was the Rocket troop from Warlord Games – the horse holder is a conversion.
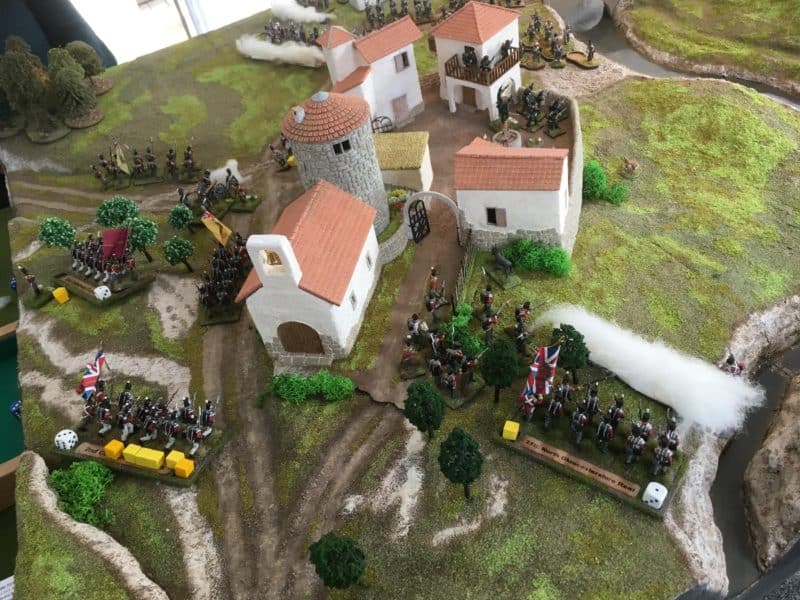
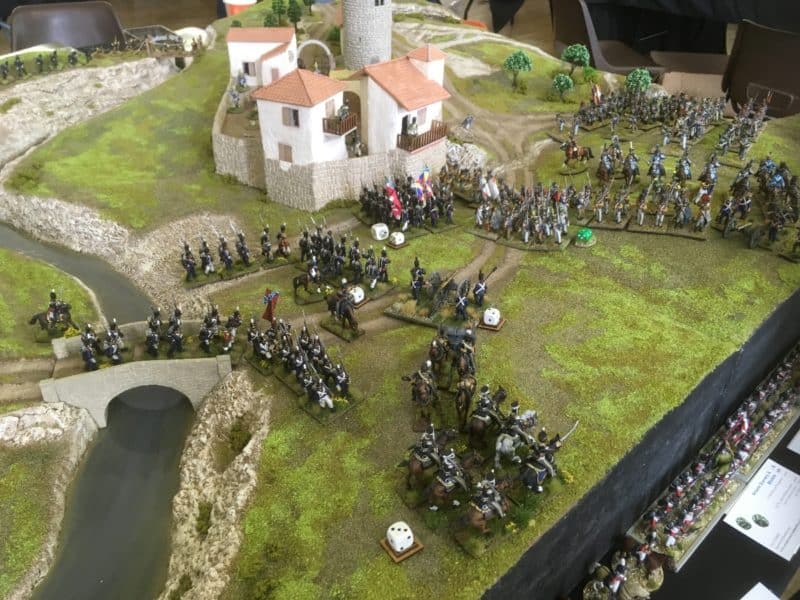
One of our Demo games – Combat at Foz D’arouce.
We used the superb table built by Pete Harris in two Demo games. Above is the version played at the Bingham Napoleonic Day, below, the game played at the Warlord Games day.
I used my Portuguese for this battle – including my newly painted Portuguese Artillery
Much of the year has been spent working on my War of the Roses Army and play testing Andy Callan’s rules set, ‘Nevermind the Billhooks’.
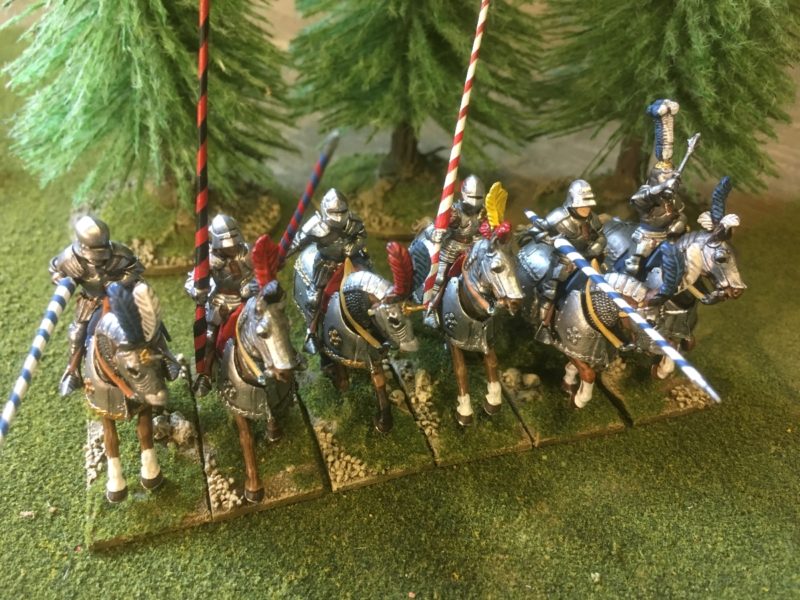
Six Mounted men at arms -the rules set that we use has units of 8 cavalry.
I very much enjoyed this project as I felt I didn’t have to be too precise with colour schemes but could use my imagination.
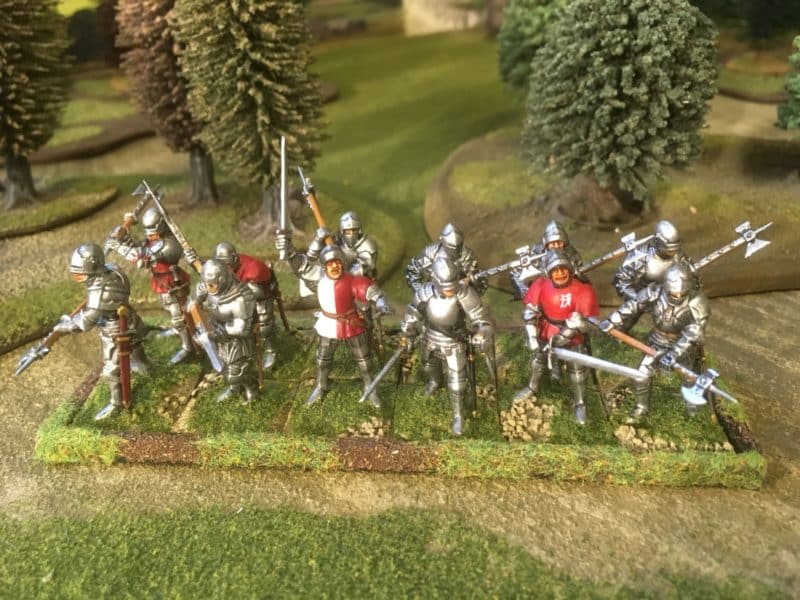
One Unit of FootKnights – I have four in the army!
The unit of Pikemen ( Crossbow men in the background) that were completed this year.
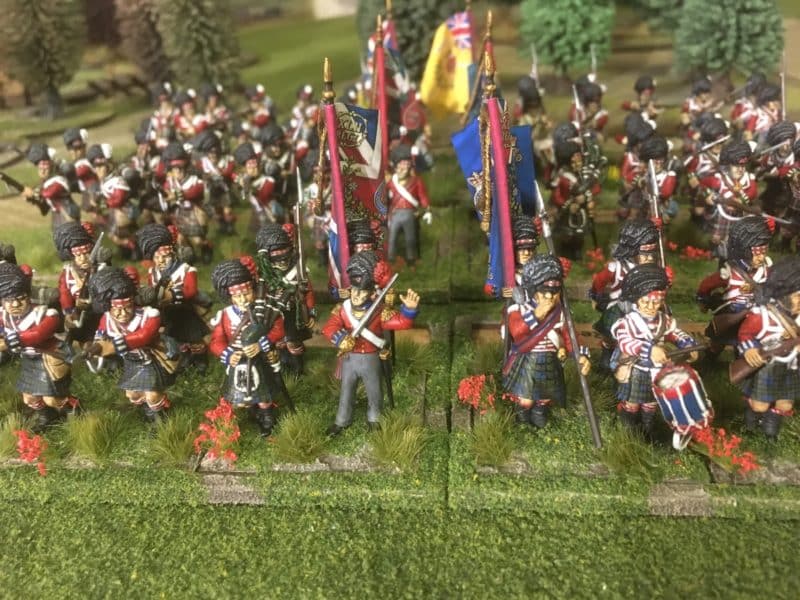
I still managed to add to My Napoleonic Army and finished the Highlander battalions that were at Waterloo.
The Black watch completes my Highland contingent at Waterloo.
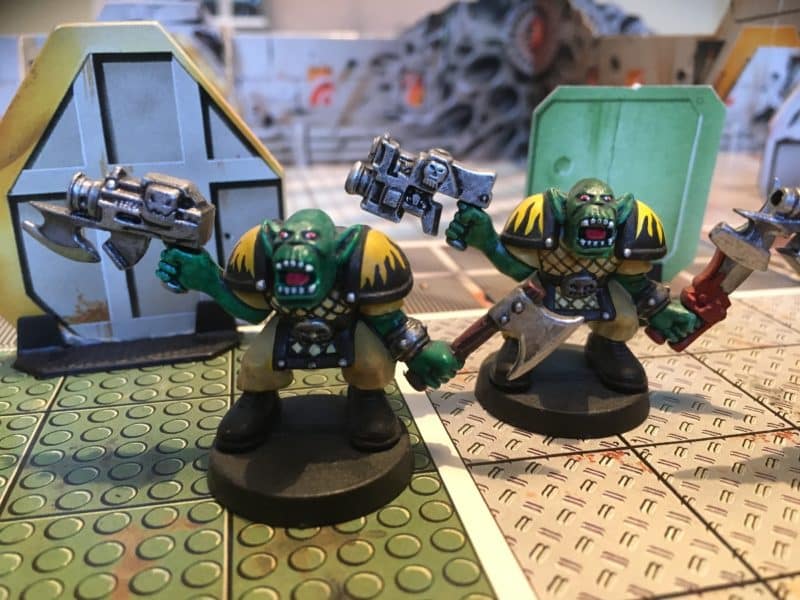
I rediscovered my enjoyment of board games and found that the modern board games such as ‘Ticket to Ride’ and ‘Settlers of Catan’ were just as enjoyable to play as the classics. However, it was a classic that provided a fun evening for my friends, who had never played Space Crusade!
Space Orks – coming to get you!
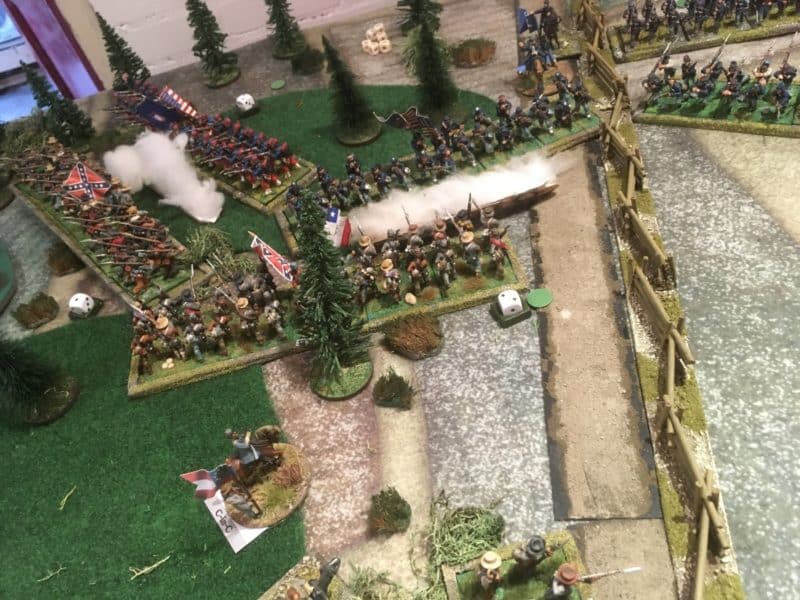
When it came to gaming, Black Powder remained a firm favourite although as a pleasant change from Napoleonics, our gaming group has been working through the American Civil war, courtesy of Andy’s ACW army.
Pour it on Boys!
Perhaps the one time when I did over indulge in wargaming was a whole weekend playing back to back games. A fantastic weekend in a superb setting with great company, the highlight being a massive Zulu game!
All is lost! The Zulus have broken through!
As the year closes, I am busily painting away in what ever spare time that I have. My focus is on finishing my War Of The Roses Army but as ever there is plenty to distract me. Whilst I don’t think that I will ever finish my Napoleonics, I will keep adding units as the whim takes me.
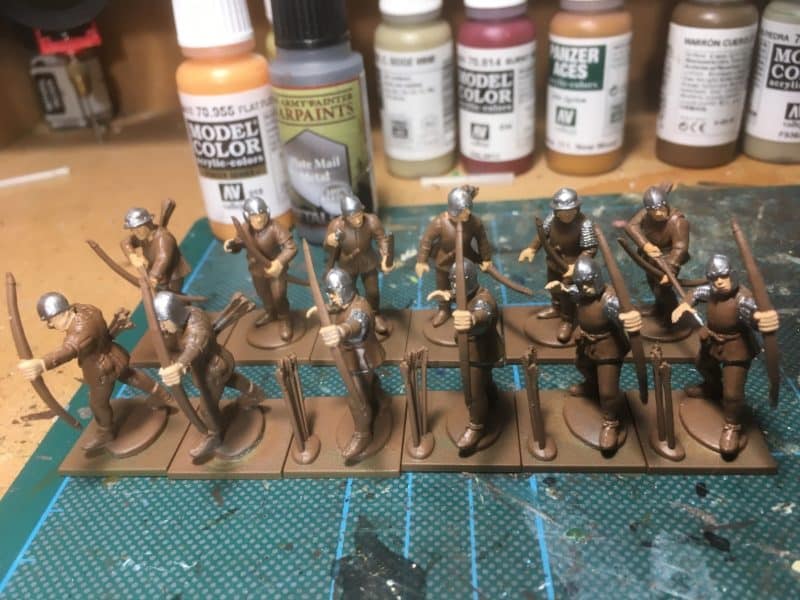
The next unit of archers on the workbench
So to close for now, I would like to hope that anyone else in this funny little hobby has as much enjoyment as I do. I wish you all a happy and productive New Year!
THE COMMERCIAL BIT
Should you wish to see more details of the projects above, just click into my blog using the link at the top of the page or just explore a section using the category headers down the side bar. You can also follow my activities in the hobby by ‘liking’ the Arcane Scenery facebook page. As well as updates on my various projects, you will find information and news of new releases and products as well as our ‘On this day in History’ feature.
If you need help in completing a project of your own we have a massive range of stock in the Arcane Scenery shop. Almost all of the paints, miniatures, bases, basing materials and anything that you are likely to need for your hobby are currently available POST FREE from my shop here:
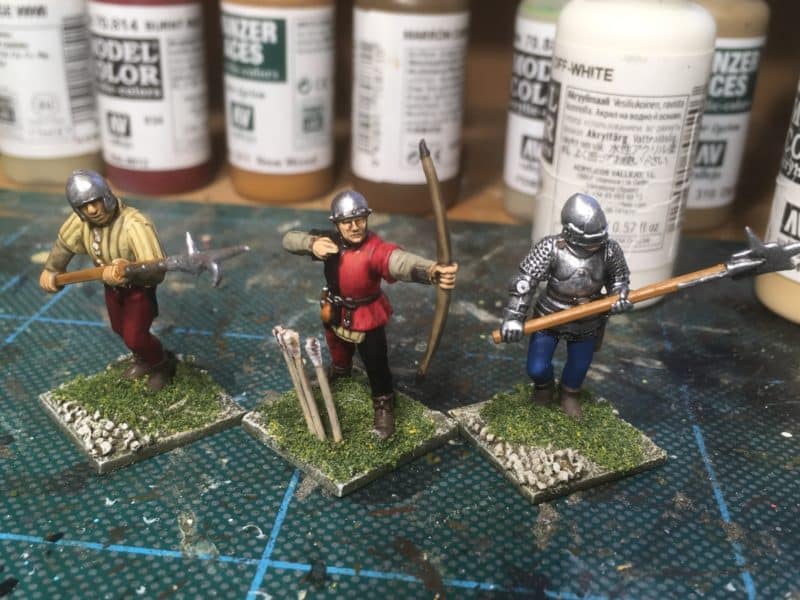
The year is fast running out and as always at this time, hobby time is at a premium as preparation for Christmas and the various social and family events move to the fore. I am also busy working on a project for the New Year, which although very much associated with expanding my War Of the Roses Army, has slowed my output. Here’s a preview of the figures that I am working on.
Billmen and Bowmen for new units!
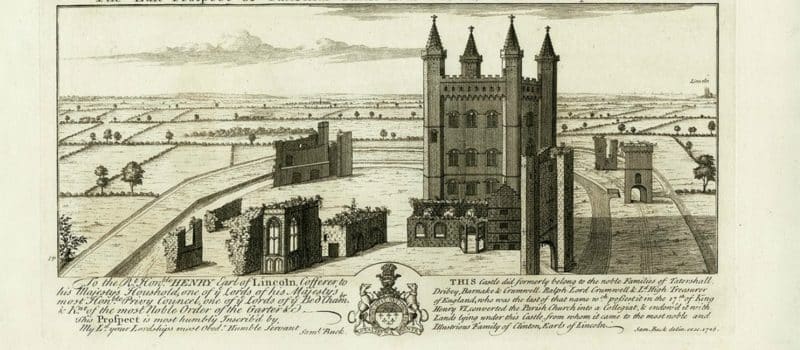
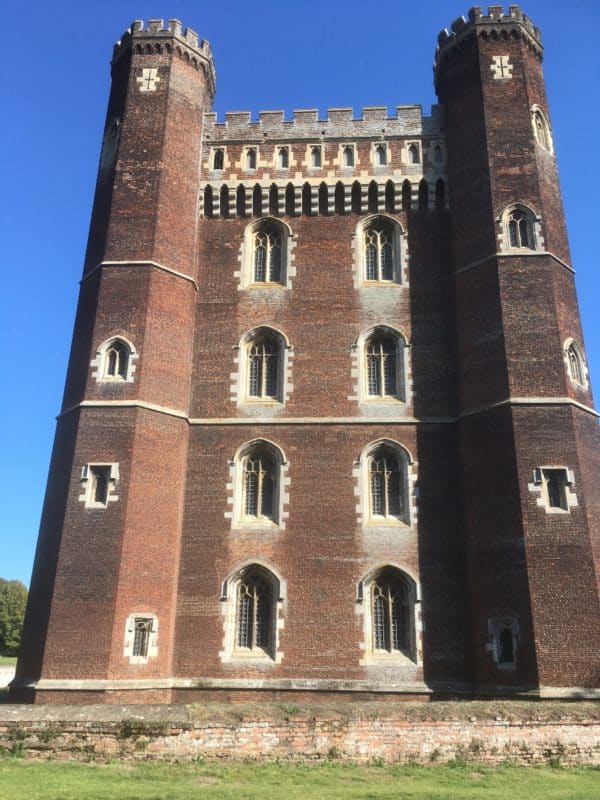
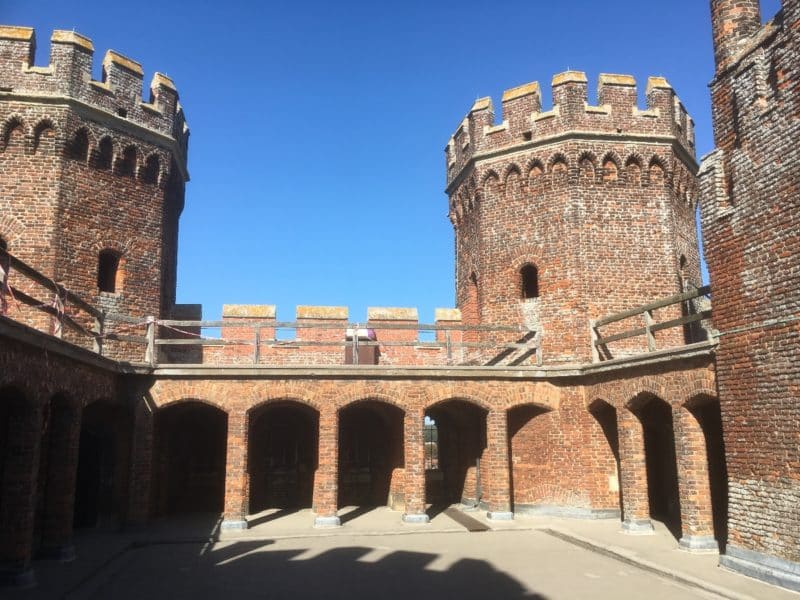
So with little to show you from the work bench I thought that I would reflect on a very pleasant trip that I took in late September to visit Tattershall Castle. Situated in Lincolnshire and now owned by the National Trust, Tattershall Castle is unusual in that it was built of brick rather than stone. It’s less of a Castle in the traditional sense but more of a simple statement of power! The Main tower dominates the flat Lincolnshire countryside making it very clear who was in charge!
Tattershall Castle
Lord Cromwell, Treasure of England in 1433 was mainly responsible for upgrading the castle to an opulent stately home. Although not directly involved in any of the fighting during the Wars of The Roses, Edward IV, Henry VII, Margaret Beaufort, Henry VIII, Henry Fitzroy and Charles Brandon all owned the castle during this time and through the Tudor period.
The top of the Tower!
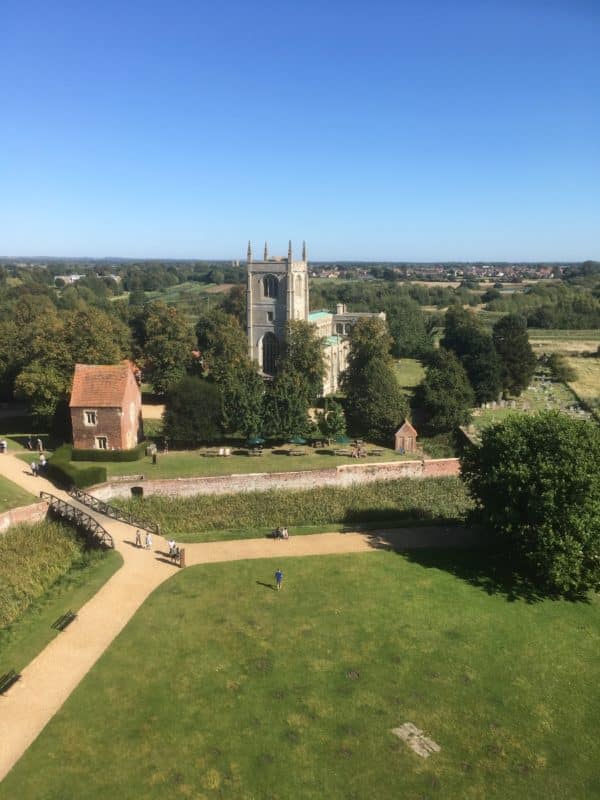
The view from the top!
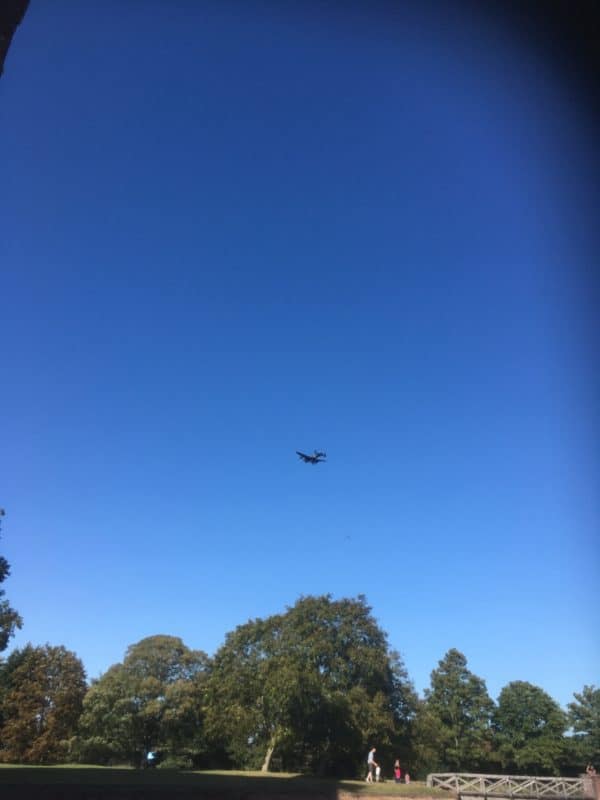
Visiting historical sites such as Tattershall Castle not only helps me to maintain my enthusiasm and interest for my hobby of wargaming but it is a great way of sharing that hobby with the Missus! We both had a lovely day out, with a nice meal in the sunshine and a bit of exercise to walk off the calories consumed! As a bonus, we witnessed a flypast from the Lancaster of the Battle of Britain flight, which is based nearby at RAF Coningsby, Lincolnshire.
Yes, that speck in the air is a Lancaster! I was too busy watching to take a better photograph!
To think that I have lived ‘down the road’ from this Castle for over 30 years and somehow neglected to visit it, is a bit of a shame. As we are at time of year when New Years resolutions begin to surface, my first will be to make sure that I spend a few more weekends visiting the many heritage site that surround me. Top of the list will be Bosworth Battlefield! To read more about Tattershall Castle and to visit the National Trust site, just click on the picture below.
THE COMMERCIAL BIT
Almost all of the paints, miniatures, bases, basing materials and anything that you are likely to need for your hobby are available POST FREE from my shop here:
Last week I said that I would detail how I painted the unit of Pikemen for my army – However, things have moved on! I have been somewhat diverted from my usual painting by the exciting news that Andy Callan’s rules set for the War of the Roses, ‘Nevermind the Billhooks’ is due to be published in the New Year. I’m afraid that I cant reveal further details at this point. I have been asked to produce a simple step by step guide to painting some figures to help to illustrate the Rules set and so this project has taken over the work bench.
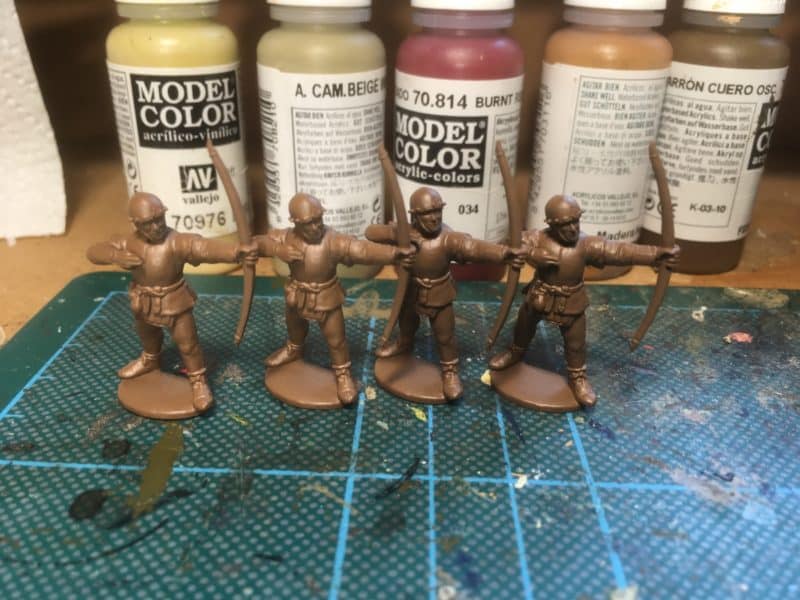
English Archers Ready!
I’m by no means a ‘pro painter’ – my focus tends to be on painting units that I will use on the wargames table. The idea isn’t so much as to show people how to paint to a competition standard, just to give some ideas as to how easy it is to muster a retinue to play the game with some reasonably painted figures.
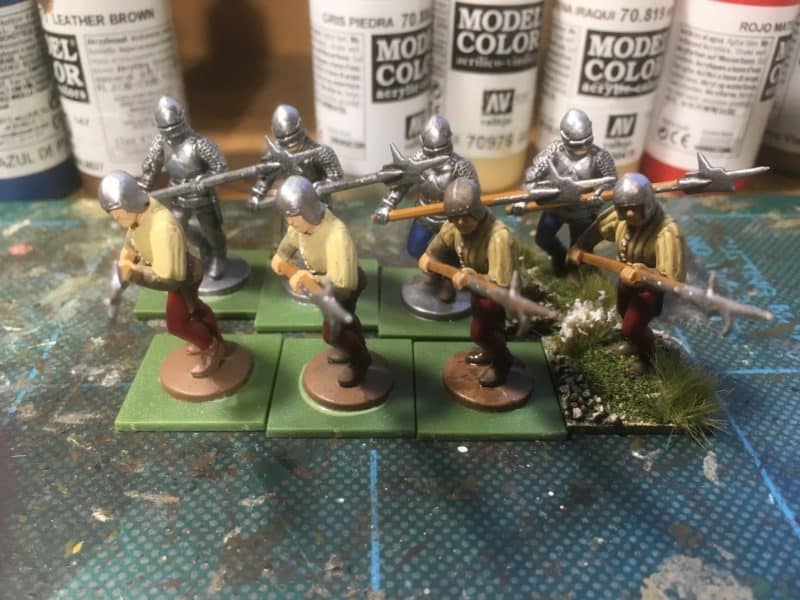
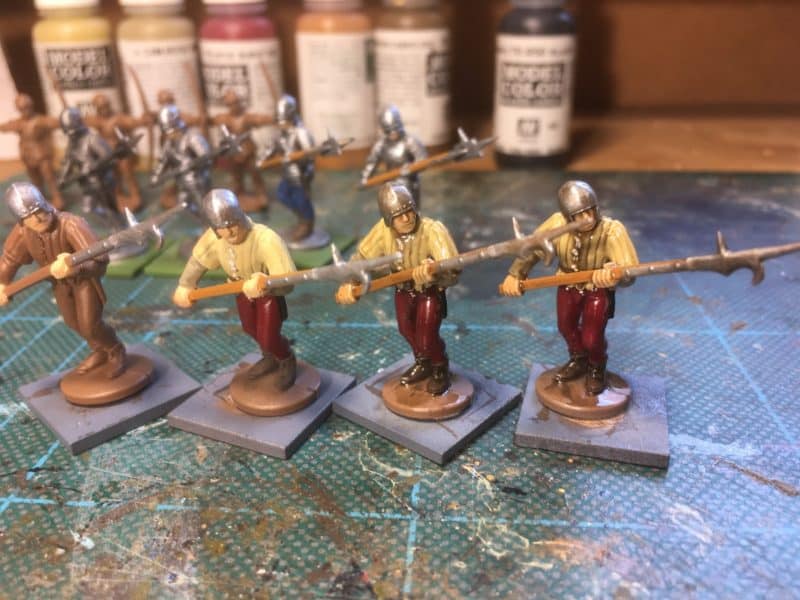
Billmen underway
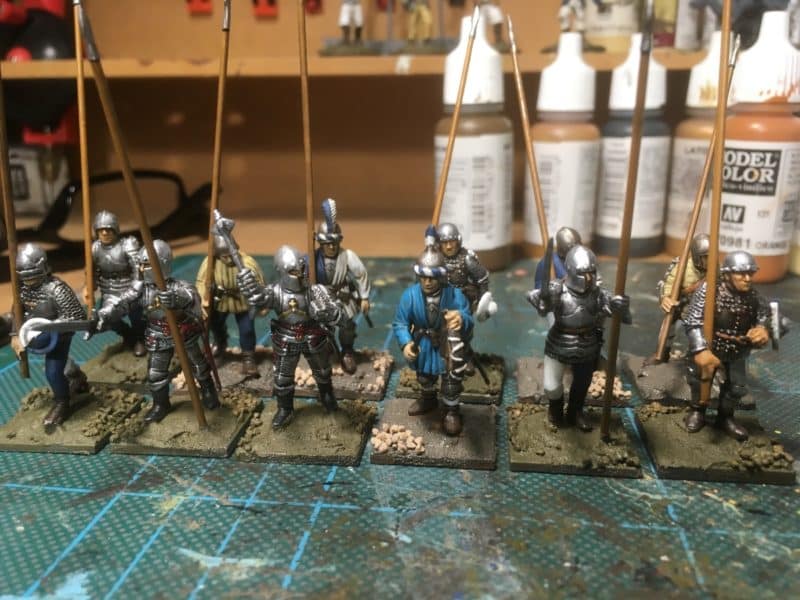
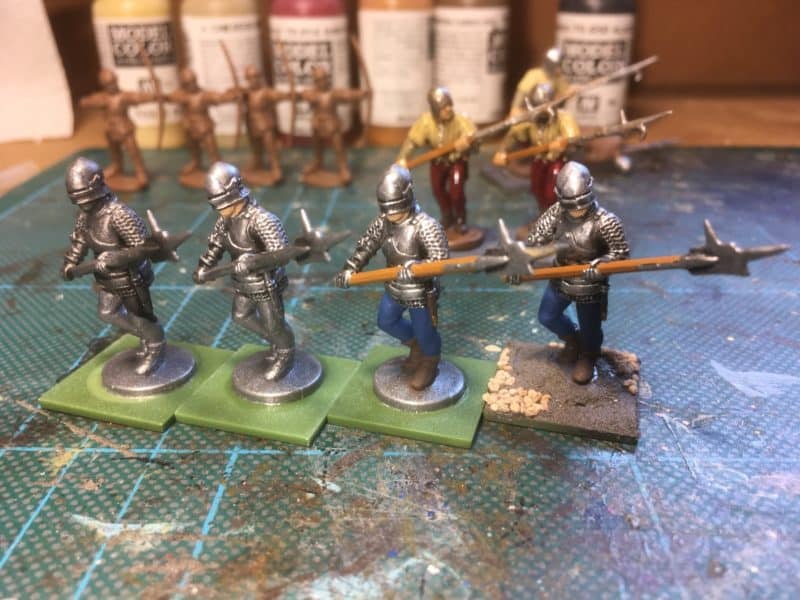
This has meant that I have had to give a bit more thought and planning my normal painting routine to show the step by step process. The result is to have partly painted figures to do this, so that they can be photographed for the article. As you can see, I decided to show three different figures and how to produce a basic paint job on each to get them ‘table ready’. This meant building four of each figure in near as possible identical poses and working out a step by step painting plan.
Armoured Billmen
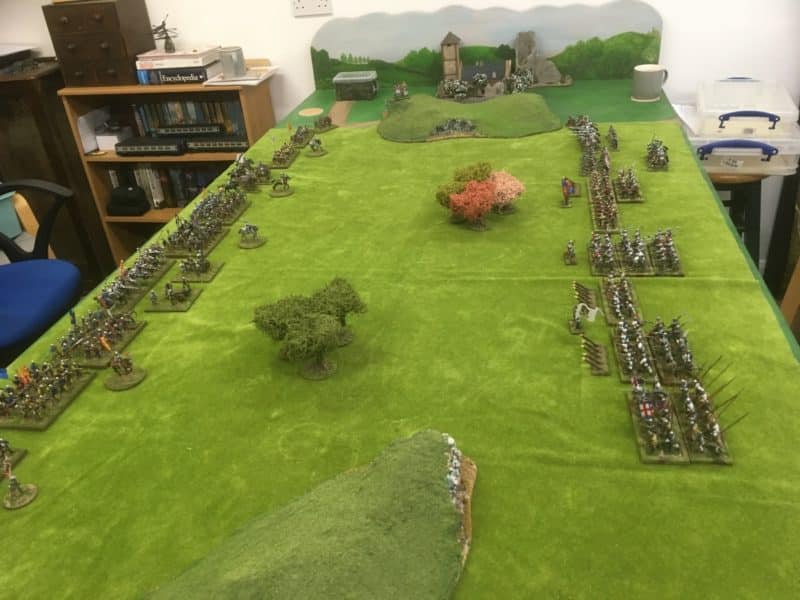
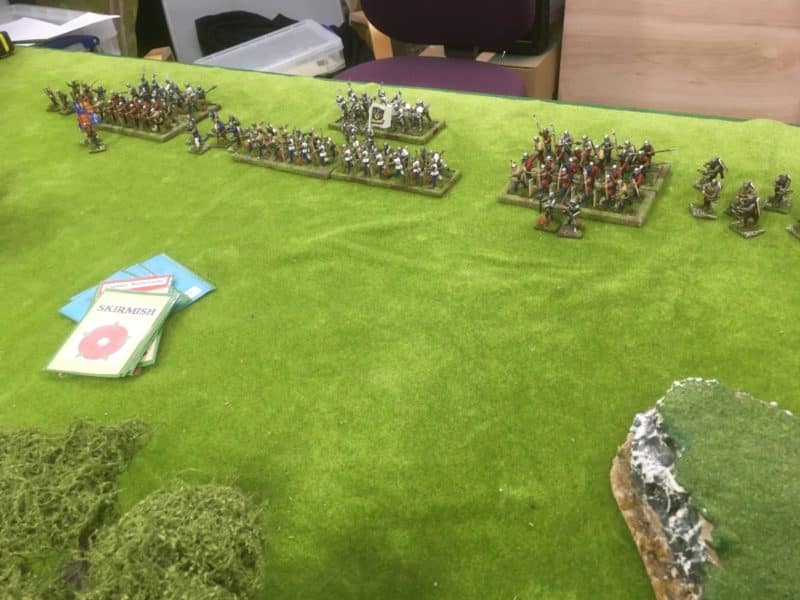
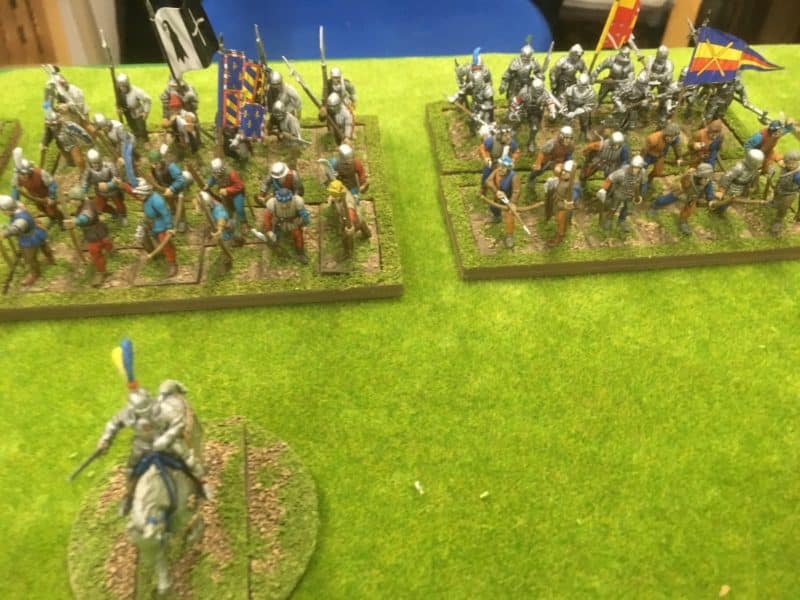
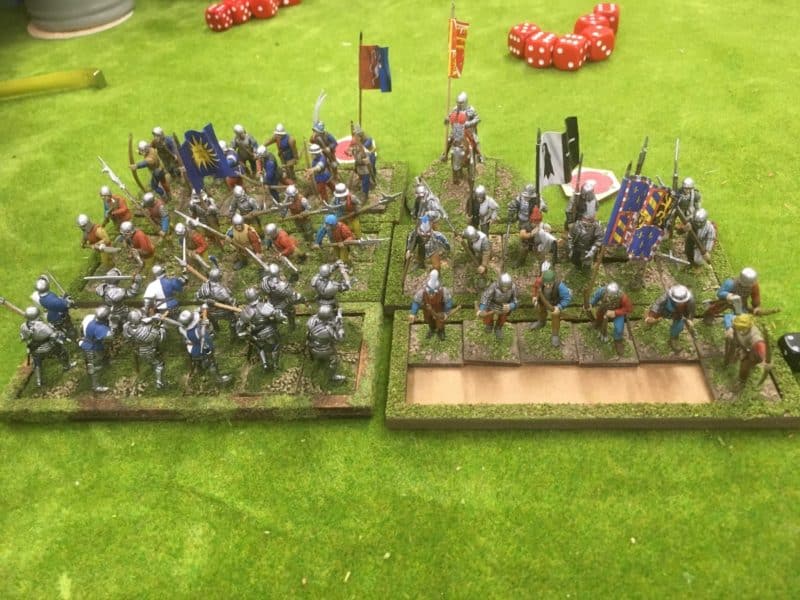
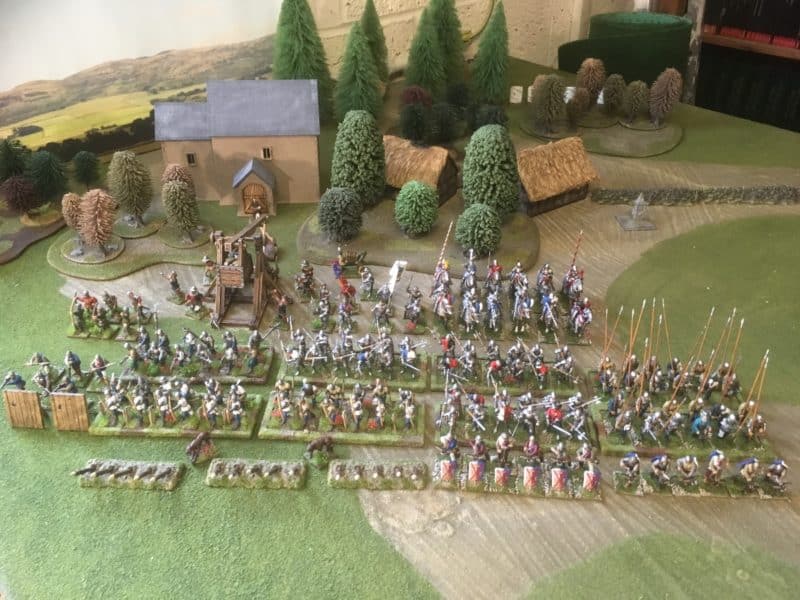
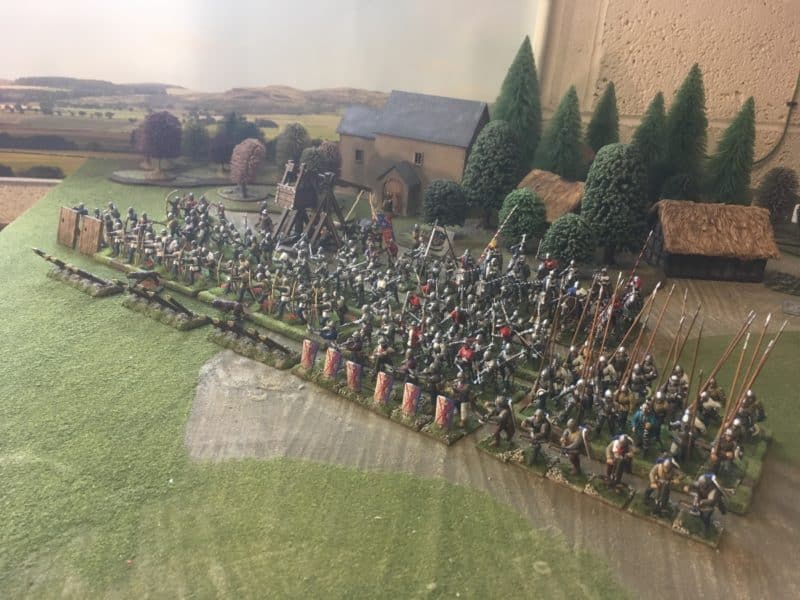
I won’t describe that process here – you will have to wait for the article! However, once these figures are photographed – assuming that they are accepted – I can then move on and complete the final units for my War of The Roses Army. Just to finish, Here is a couple pictures of the Army so far, as usual taken on my i-phone. One day, I must take some nice photos with a proper camera!
Harry Hotspurs Army!
Another view of the Retinue
THE COMMERCIAL BIT
Almost all of the paints, miniatures, bases, basing materials and anything that you are likely to need for your hobby are available POST FREE from my shop here:
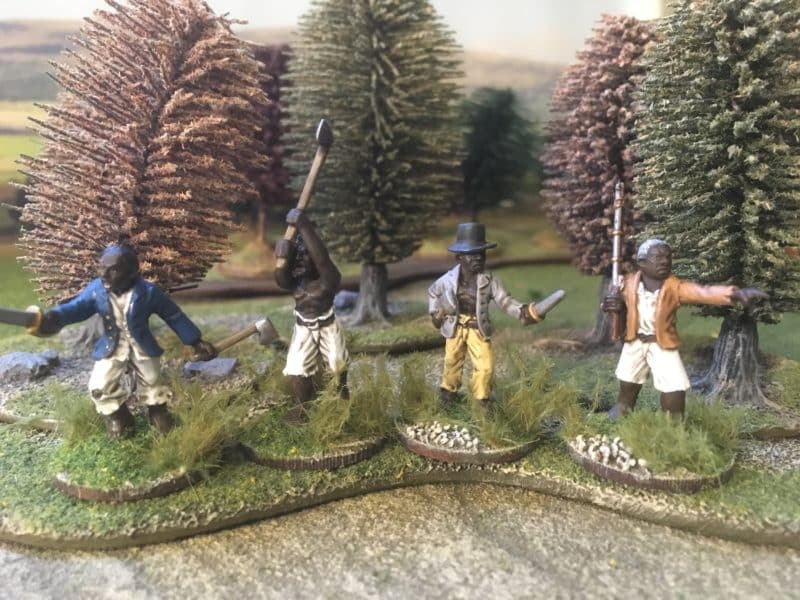
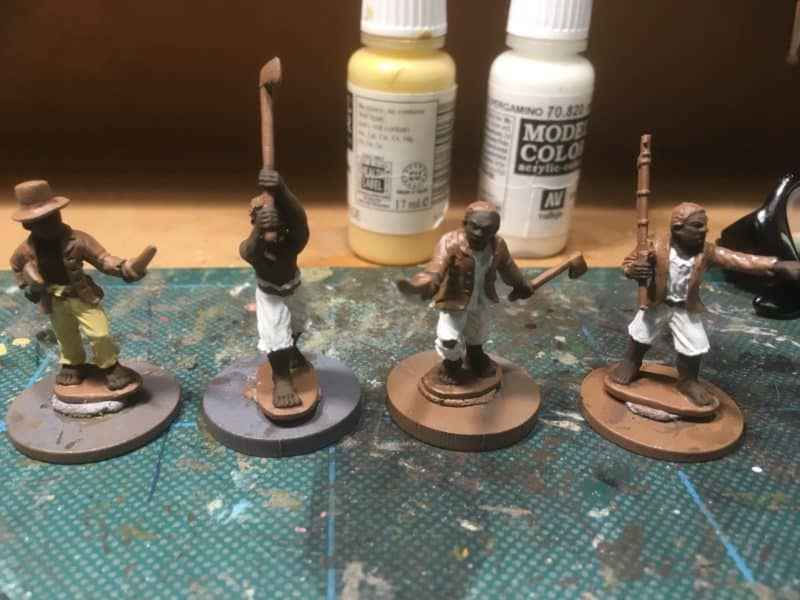
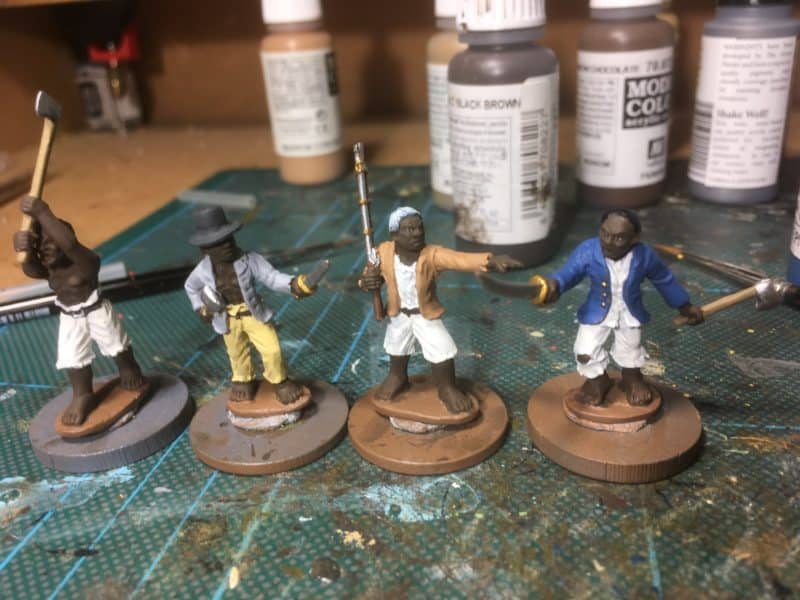
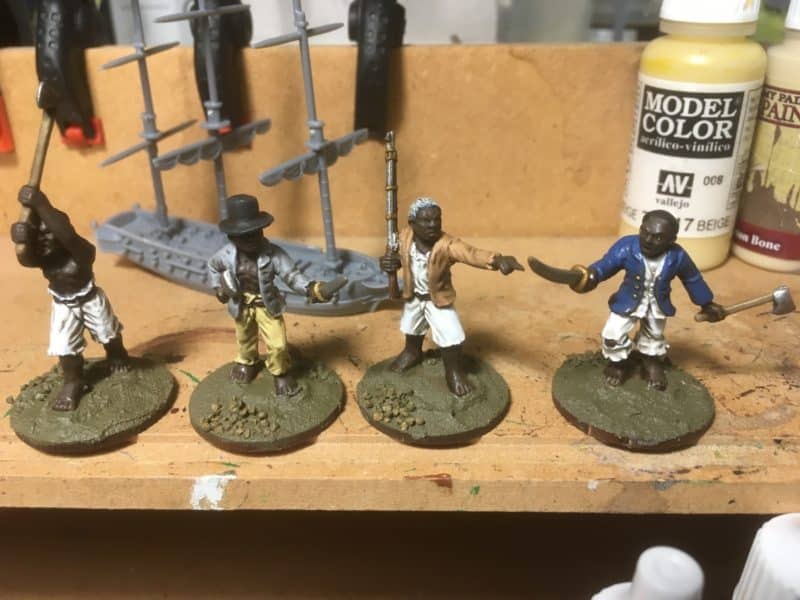
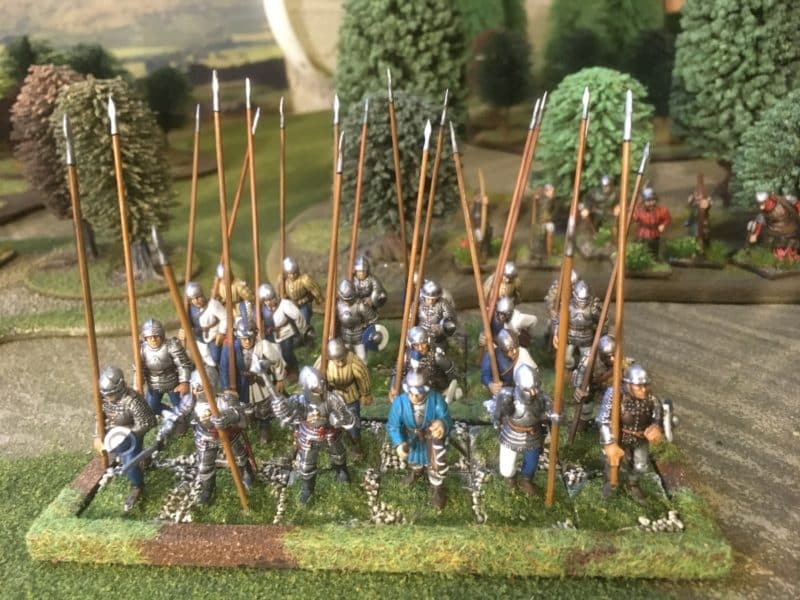
The mixed up title of the blog gives some indication of where my focus is….focus being rather inappropriate for my mind set! That said, quite a good weeks painting for me! I actually finished the unit of Pikemen that were on the work bench and also completed four figures for my Caribbean collection. Believe it or not, there is a tenuous connection between these two projects. First of all a look at the Caribbean figures. They are a relatively new pack issued by Trent Miniatures ‘Revolting Slaves arms blanche CAR04’.
CAR04 painting in progress
To paint them. once the figures were cleaned up, I primed them with army painter Leather Brown spray and started my usual block paint and quick shade method. The flesh was Vallejo Chocolate Brown and the clothing a mixture of Whites, Light browns and greys. One figure, who looks a bit like he could be a leader was given a blue coat.
Car04 block painted
I based (copied…) the colour scheme on the figures used on the web store picture. These figures were painted by the talented Dave Woodward. I very much admire his style of painting and his choice of colours and it was seeing these painted figures in the ‘flesh’ that made me grab a pack!
Car04 painted and ready for basing
Once I had finished the block painting, I painted the figures with Army painter Dark Tone quick shade. You could get similar results with the Dark tone ink but I like the tougher finish of the quick shade. I leave the quick shade to dry for at least 24hours and then paint the figures with a matt varnish. I then repaint some of the lighter colours, particularly the white to give a strong high light. It’s then on to basing, using my usual method of coating the base – in this case 25mm round MDF bases – with Vallejo Dark earth texture paste and simply plonking the figures into the paste. I draw some of the paste up around the figure to blend in the metal base and add some small ballast. The paste is strong enough to hold the figures in place, there is no need to glue them.
CAR04 ready to start the revolution!
Once the texture paste is dry, I use emulsion paint to paint and blend everything in, dry brushing this base coat to bring out the detail. Finally using PVA glue, I add the scatter and then some Gamers Grass tufts to finish everything off. They are now ready for the table.
Pike Block completed
So what is the tenuous connection to War Of the Roses pike men? Well, apart from the fact that I was using similar colours whilst painting and basing my Pike men, I have been enthused by the success of the rules set that Andy Callan has developed for our War of the Roses games. This success has made me dig out my embryonic ‘Conflict in The Caribbean’ rules set and following on from last weeks musings about what my next project will be after the War of the Roses army is complete, I am now resolved to get on and complete the Caribbean Rules set. My next play test should be this Friday. If all goes well, I hope to get the rules published in the new year. So, watch this space!
The plan is that in next weeks blog, I’ll detail how I painted the pike men but hopefully by then I will be onto the next unit. If you would like to see what I am up to I do post updates on the Arcane Scenery Facebook page. Just click like to see these in your Facebook feed.
Lets start with what’s off the work bench! I’ve finally finished the battalion of Black Watch Highlanders that I started back in September. It’s taken nearly two months to get these finished and based, although my usual painting routine has been interrupted by a holiday and other domestic events. I have had to do some decorating, although I’m sure that this qualifies as mental cruelty. Some how, gloss painting doors and emulsioning the walls and ceiling of the bathroom doesn’t have the same appeal as painting model soldiers! That said, I have been dragging my heels with this project, so it was good to get them based and in the cabinet ready for the next Napoleonic wargame. Of course I have been working on other projects – WOTR Crossbowmen and the new DeeZee cavemen, so I cant really blame the decorating for the slow turnaround of the Highlanders!
The Black watch completes my Highland contingent at Waterloo.
I will now get back to my growing WOTR army. I have just about enough figures to game using our current big skirmish/small battle rules set, ‘Nevermind the Bill Hooks’. However, I do intend to build the Army to give me a bit more flexibility and the possibility of having enough figures for two players. I have now defined exactly what I need to complete this project. My WOTR army will consist of:
One unit of 12 Archers.
4 units of 12 Archers of which two are finished.
One Unit of War of the Roses Billmen.
4 units of 12 Billmen of which only one is complete.
One Unit of FootKnights
3 Units of 12 Foot knights – all completed – actually it’s unlikely they will ever all be on the table with the army and for the time being, I’m using one of these units as Billmen.
One unit of Pikemen (Crossbow men in the background)
2 units of Pikemen to form a Pike block – one unit completed, the other underway.
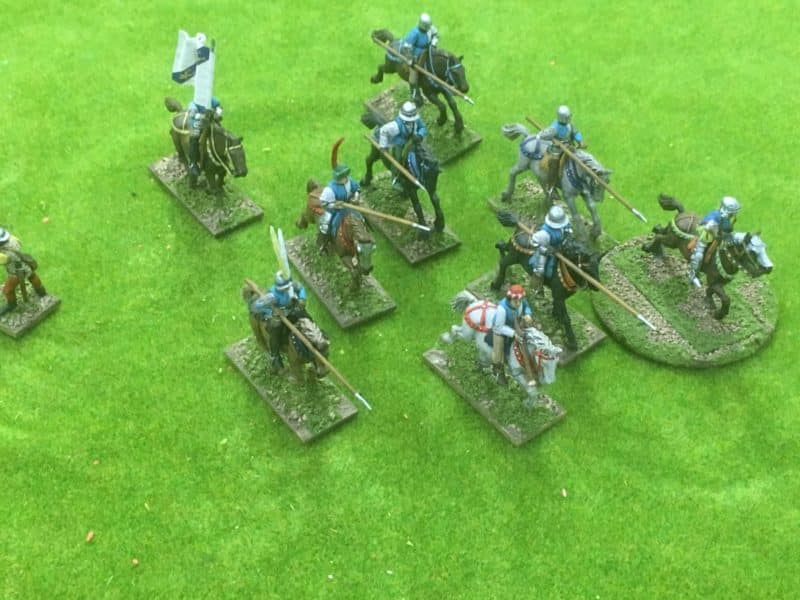
Six Mounted men at arms -the rules set that we use has units of 8 cavalry.
1 Unit of 12 mounted men at arms – Completed
1 Unit of 12 Light cavalry – yet to be purchased
The above will be deployed in units of 8’s and as with the Foot knights, I probably will have too many cavalry but will have options!
Unit of Hand gunners
1 unit of 6 hand gunners – completed
Unit of Crossbowmen
2 units of 6 Crossbowmen – Completed
one unit of Skirmishing Archers
1 unit of 6 skirmishing archers – completed
2 Artillery pieces – yet to be purchased.
Once this list is complete, my WOTR project will be more or less complete, although I suspect I will add a few character figures along with some baggage pieces and of course, some scenery. So this gives me about 84 or so figures to paint, plus the artillery.
Pikemen on the painting board
The pikemen are already on the painting table and in order to complete the unit, I’ve had to put a few men at arms with spears and command figures in the block to make up the numbers. It will just about pass though and should look good enough on the table.
So the plan is to complete this army for the end of the year, so that I can start the New Year with a fresh project. Quite what that will be I have yet to decide. I have a Napoleonic Caribbean force to get finished and I have a few Indian wars/AWI models in the lead pile. Perhaps I might finally get on with painting a few tanks for WW2…..
THE COMMERCIAL BIT
We carry the full range of Perry’s Plastic sets and supply them post free to most worldwide locations at the time of writing. You can see the WOTR sets here:
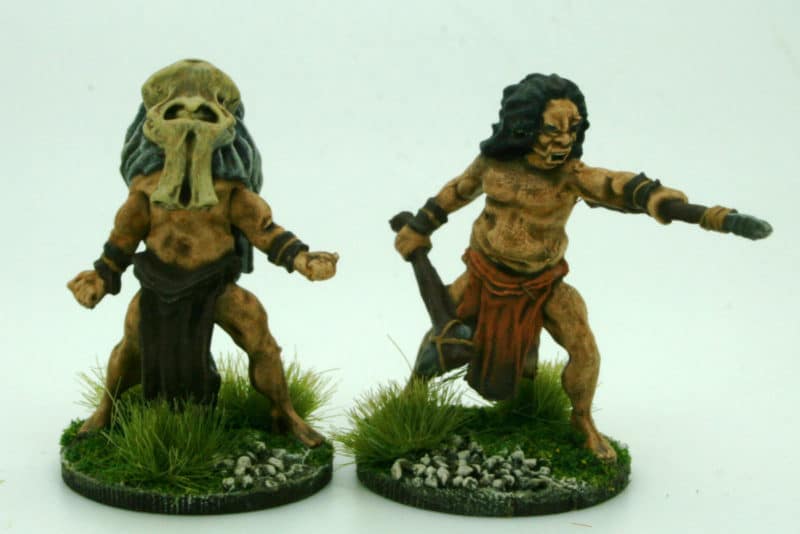
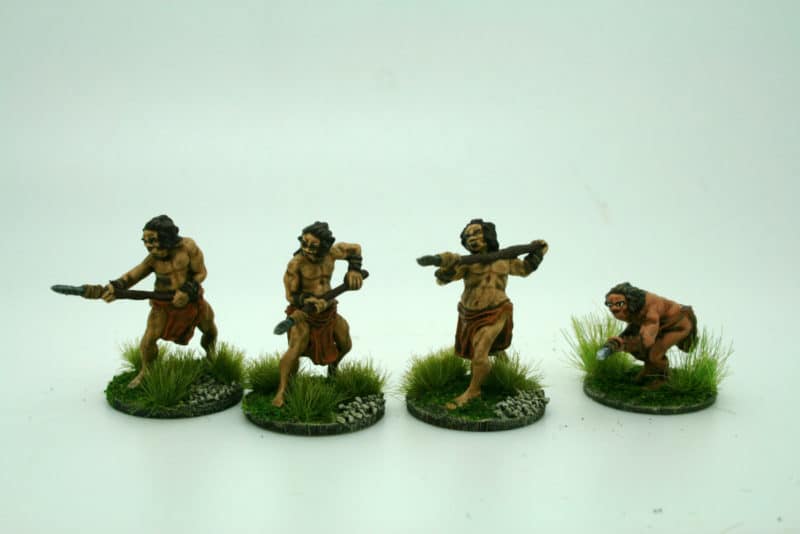
In last weeks blog, I explained how we went about producing the new DeeZee cavemen packs. In this weeks blog, I’ll show how I went about painting them. Painting cavemen was something of a welcome break from the strict colours and details of painting my Napoleonic army. I also wanted to finish them quickly as I needed some pictures for my web store, so I resorted to a ‘batch paint’ job to get the 10 different figures finished in more or less one sitting – fast for me!
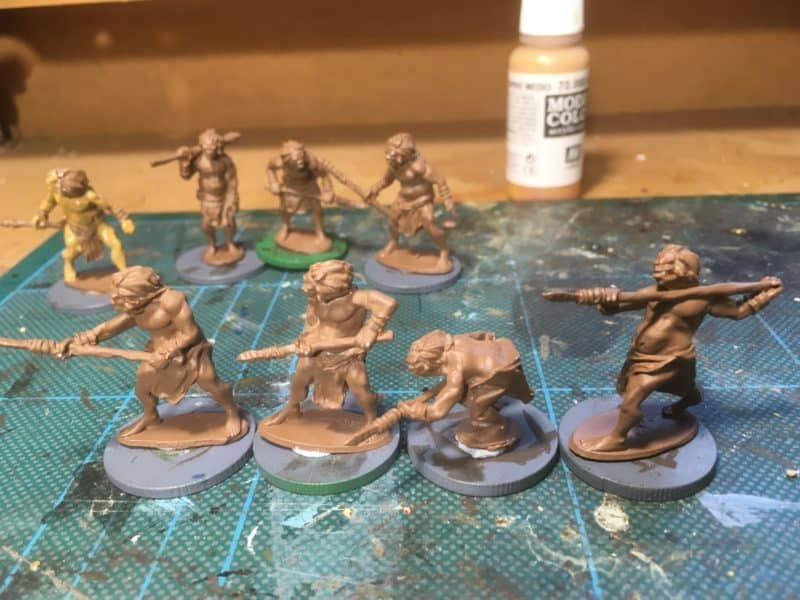
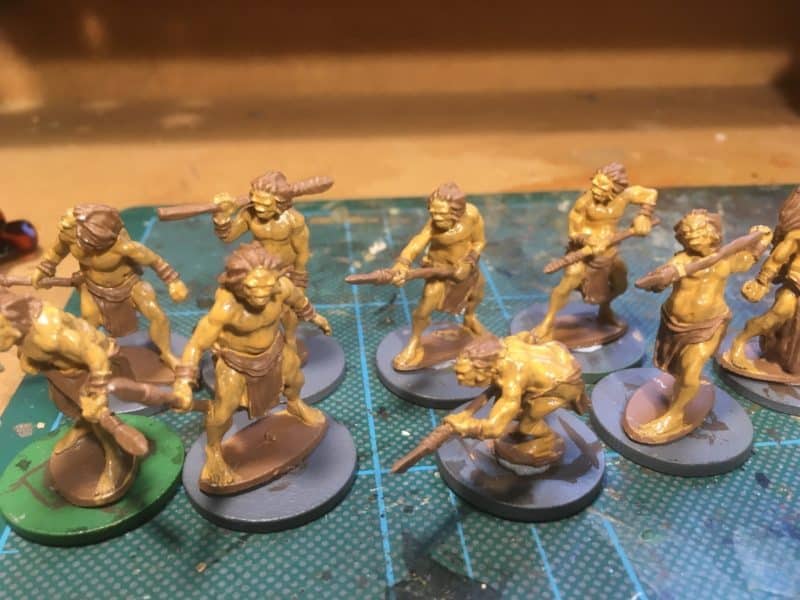
Cave men primed!
The first job was to clean up the castings, blutack the figures to their temporary bases and prime them. I used Army painter leather brown spray.
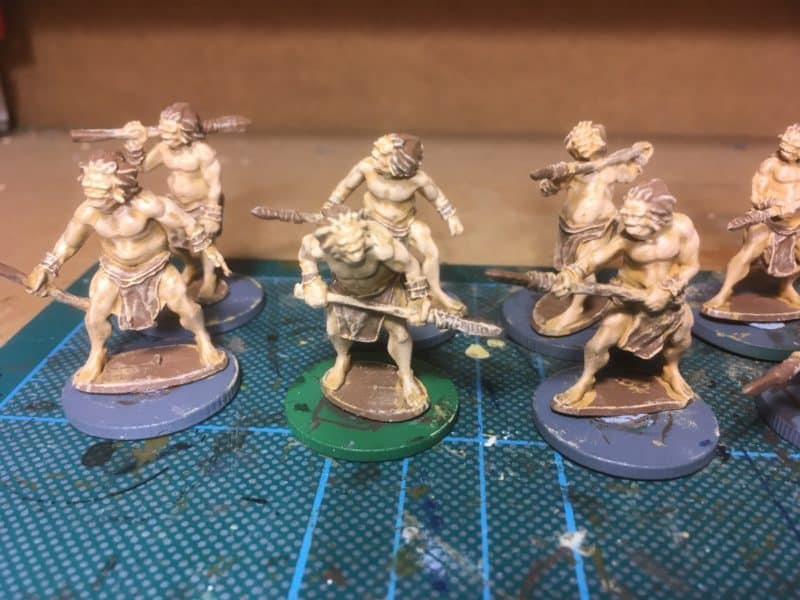
First coat of Dark flesh 70927
I decided to use the Vallejo flesh tones to paint the skin – Vallejo Dark flesh 70927 was applied liberally over the skin! I would be using quick shade at the end of the paining process to shade the models and bring out the detail. If you are not keen on this method, then I would start with a darker flesh tone, possibly a brown.
First dry brush with Basic skin tone
I then dry brushed the figures with Basic skin tone 70815 to get a contrast. With hindsight, another dry brush with 70955 flat flesh before jumping straight to the lighter colour would have helped.
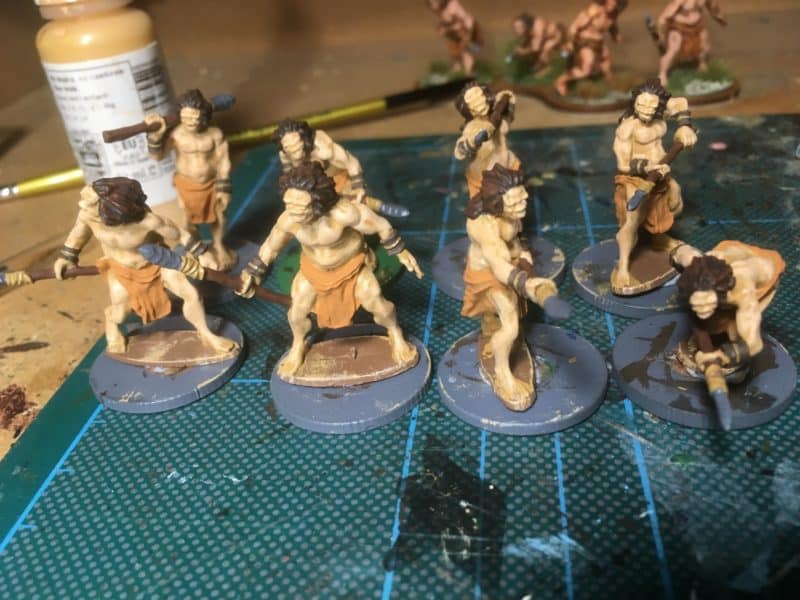
Hair and loin cloth painted
I painted the loin cloths on the figures using orange brown 70981 to represent a basic animal skin. They have all got the same loin cloths – again for speed. I think that it would be fun to add a bit of variety and I will do this on the next batch that I paint! Their hair was painted 70822 German Camouflage black brown – again no variety!
Spears painted
I painted the spear staffs with flat brown 70384, the cuff guards with 70871 leather brown and the detail and bindings with 70914 Green Ochre. I also dry brushed the hair with flat brown ( as the colour was on the pallet!) to give it some detail. The spear heads were painted 70869 Basalt grey.
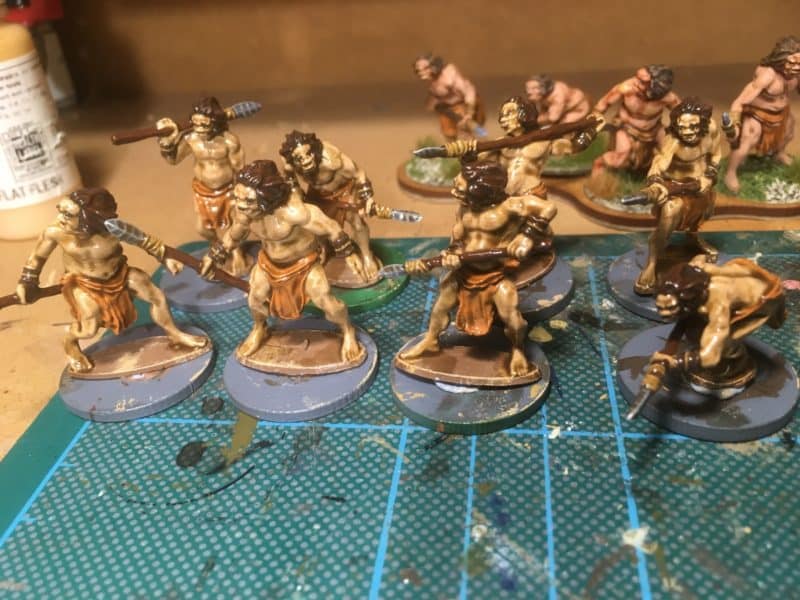
Strong tone applied
The final details were painted – I highlighted the spears by simply dry brushing with grey with white added, and finished off the very tips with off white 70820. I used off white for the eyes and then used the german black brown to paint the eyes and eye brows. Incidentally, I rarely bother to paint eyes on my wargames figures these days but I have found that using dark brown rather than black for the irises gives a more natural, less harsh appearance. The models were then brushed with Army painter Strong tone (dark brown) quick shade.
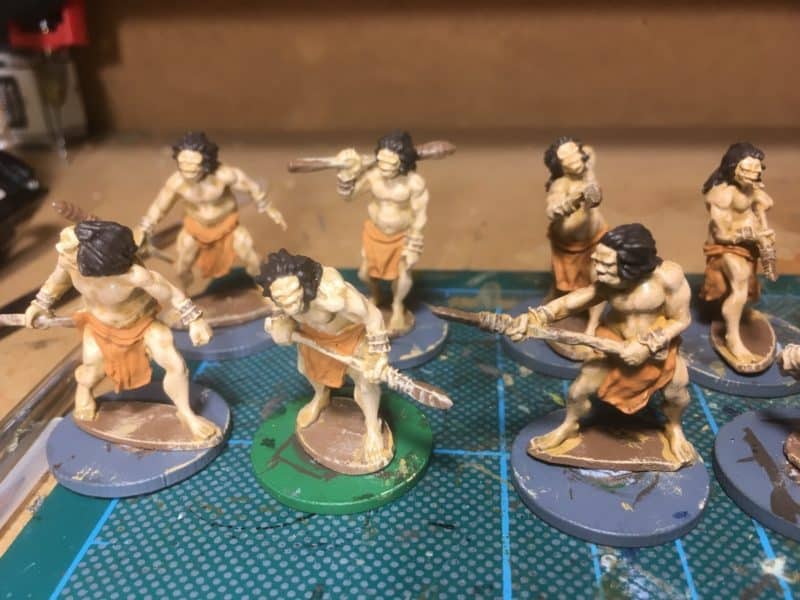
Matt varnished and based
Once the quick shade was dry (I leave for at least 24 hours to let it harden), I brushed the figures with matt varnish. As you can see, as well as bringing out the detail the quick shade has left a bit of a ‘dirty’ effect where I was a bit heavy with the paint brush! I decided to leave this, I guess cavemen were more likely to be less fastidious with bathing…
The full tribe – basing in progress
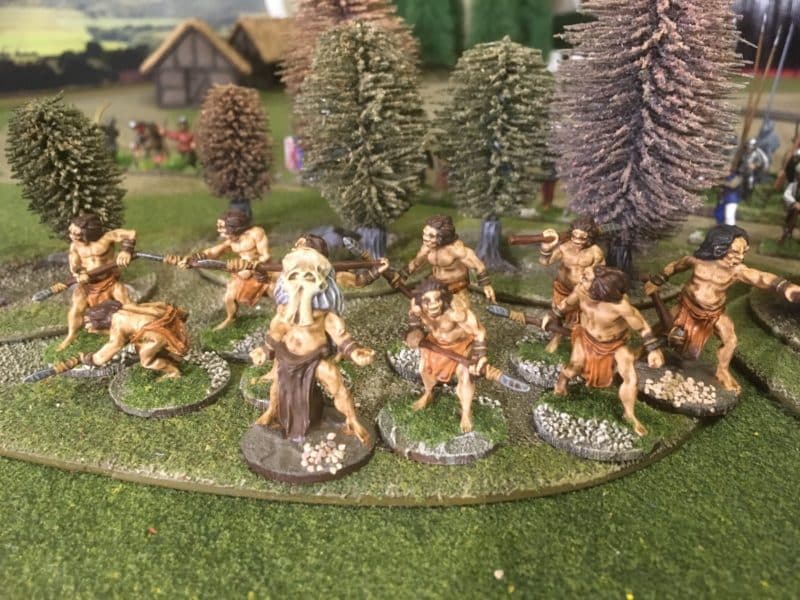
The picture above shows the basing process that I use. You can see that the Shaman is still being painted but I have put him on a 25mm round MDF base, added some Vallejo Dark earth Textured paste and then some small ballast stones from Woodlands scenic. The whole base is then painted and highlighted using my Dehli Bazaar emulsion from B&Q and highlighted by brushing with 70819 Iraqi Sand. I then add Woodland scenic Blended turf and finish off the bases with some gamers grass tufts.
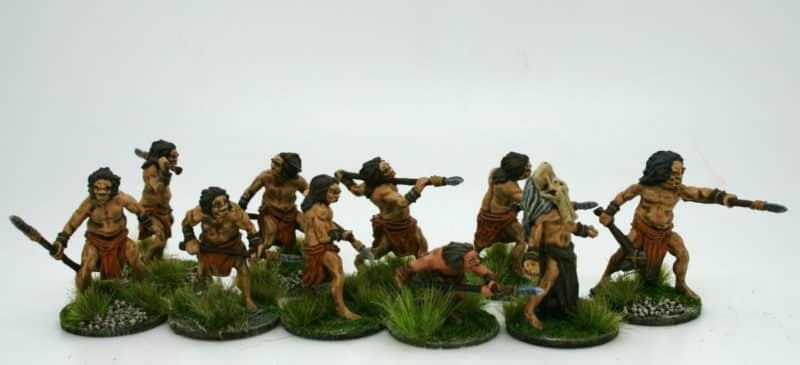
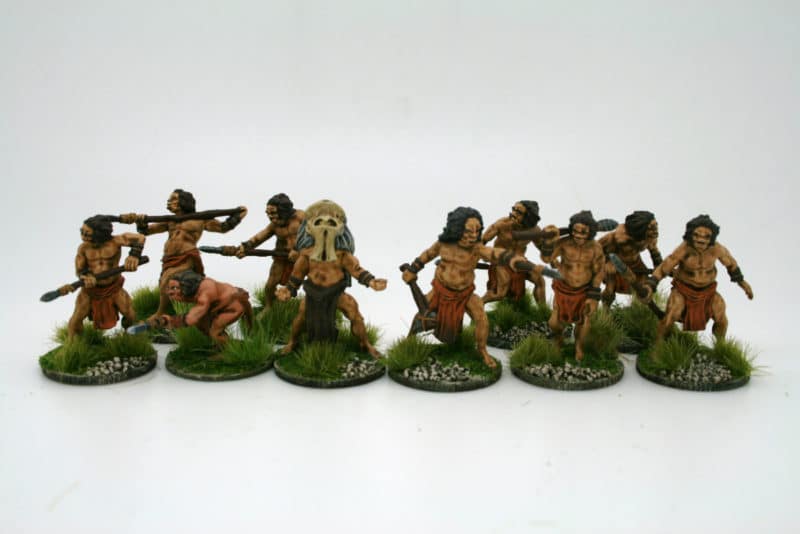
The clan!
So the first batch of cavemen are ready for the gaming table! I will be painting a few more as I will be play testing a rules set that I am writing – but that is for the future!
THE COMMERCIAL BIT
You can buy all of the DeeZee models from the arcane scenery web store and at the time of writing we supply post free to most worldwide locations!
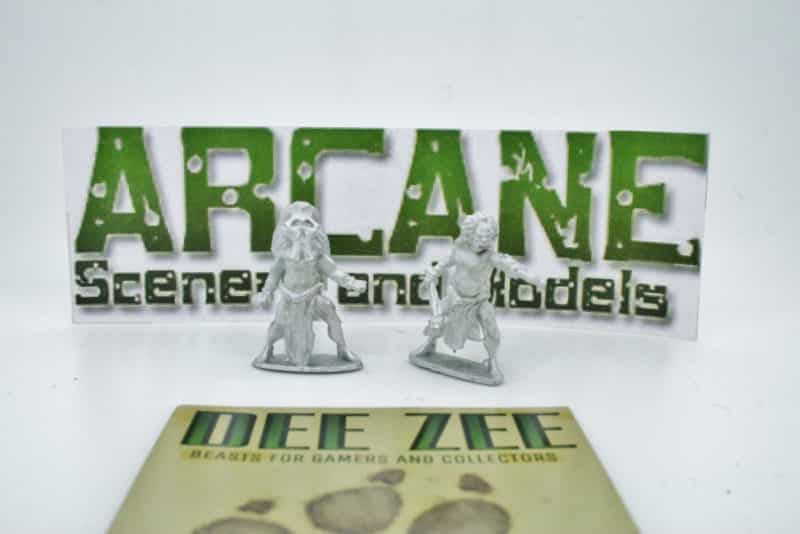
We have been planning to add some packs of cavemen to our DeeZee range for about four years now! Part of the problem was finding a sculptor that I could actually sit down with and explain exactly what I had in mind. I’m just not comfortable with communicating via skype and other such modern technology. It was important for me to be able to sit with the sculptor and talk through the process. That problem was solved when Paul Matthews (our social media consultant) was able to introduce me to Matt Sofar of Knuckle Bone miniatures. Matt already had a small range of fantasy miniatures and was looking to do some freelance work to extend his portfolio. Even better, he was happy to come in and talk through the commission and provide a sample sculpt before we proceeded with the full commission.
Shaman Leader DeeZee tm
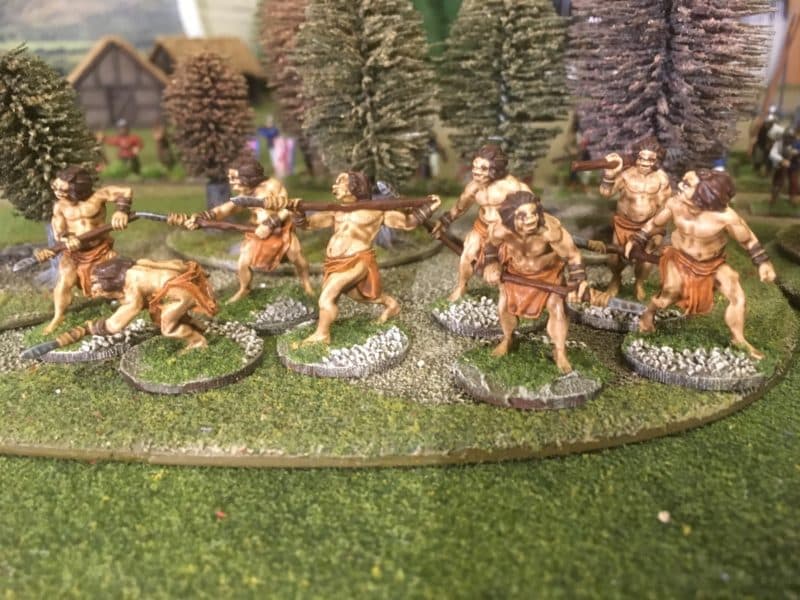
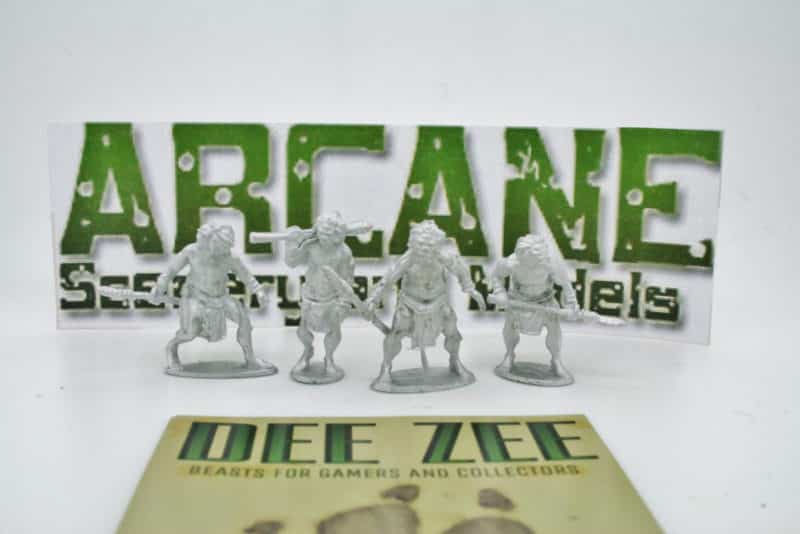
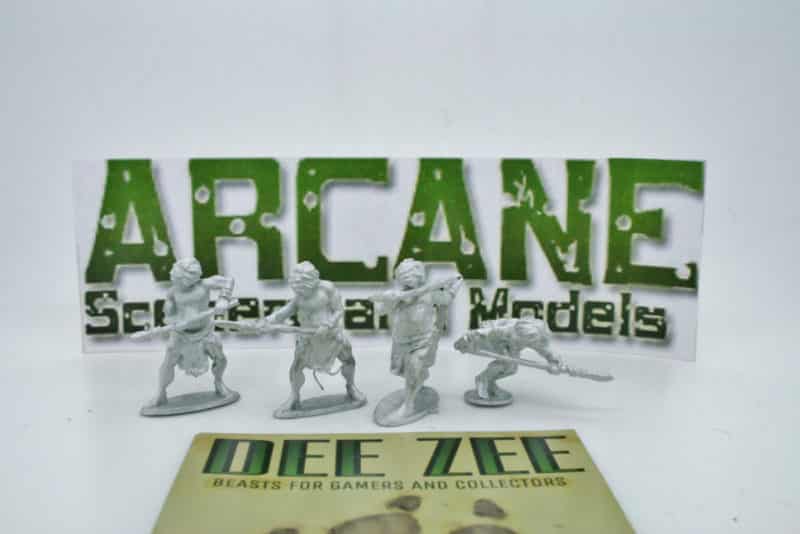
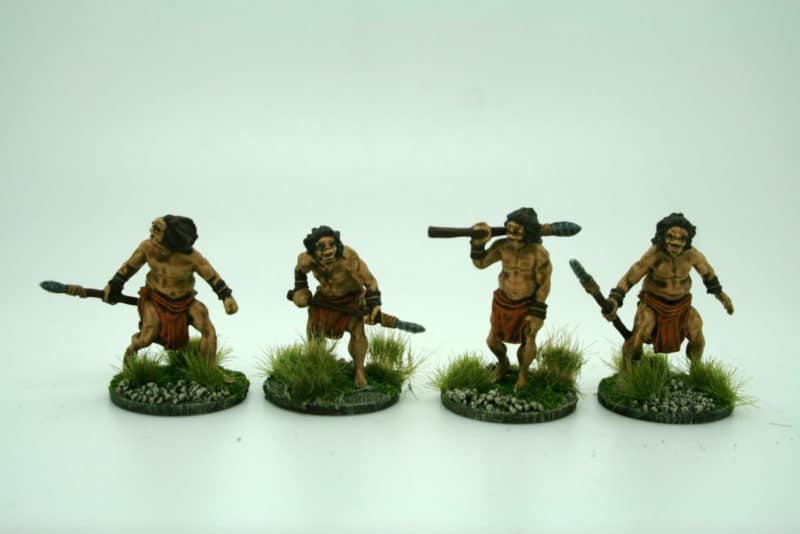
The original plan was for just 8 cave men – two packs of four but as Matt produced his sculpts we decided to go for a ‘command’ pack of the chief and Shaman and then two packs of four cavemen; ten figures in total. One pack would be hunting and thrusting with their spears, the other pack, stalking or walking as though part of the hunt. We have deliberately used a generic title of ‘cavemen’ rather than specify the type. However, I hope that it is clear that we tended towards a more Neanderthal look, both in features and clothing. If all goes well, there will be other ‘tribes’ that we will add to the range. We also wanted to avoid the ‘ripped’ look of some depictions of cavemen. I’m a great fan of Frank Frezzetta and that genre but decided that we wanted our cavemen to look as though they were living on a feast or famine diet, mainly of meat and they didn’t have access to the local gym! As my brother kindly quipped, ‘did Matt use you as the model?…’
Cavemen Ready DeeZee
The models are made to fit with the existing DeeZee range and so are on the large size for 28mm figures but they all fit on a 25mm round base – ideal for a skirmish game. I suspect that they are too tall in reality – from what we know, cavemen tended to be shorter than todays human. We also made the chief slightly larger. He needs to be big to keep his place as the boss!
Cavemen Attack DeeZee
There are embryonic plans for a rules set to be used with the figures but these are a long way from being playable, never mind published but the three packs do make sense with what is written so far. It was of course essential to have a chief or leader and we thought that he needed an assistant. I had originally thought that this would be a ‘son’ type figure but Matt came up with the idea of a Shaman. We have probably stretched reality here a bit but the model does look cool, so a Shaman was added, complete with baby Mammoth or baby Brontetherium skull.
The other two packs are the Cave men attacking and Cave men hunting. As the sculpts progressed we decide to have a pack of cavemen that were clearly engaged in some sort of activity with their spears – whether hunting or fighting; and another group that were perhaps a bit more relaxed!
Cavemen attacking
I think that Matt has done a great job with these attacking poses. These men are clearly trying to get their next dinner or fight off a rival tribe. I particularly like the one crouching down in the long grass!
cavemen hunting
The cavemen hunting are meant to be walking or stalking as they make their way to find their dinner! My favourite is the guy with his spear over his shoulder, although the one looking over his shoulder would look great in a diorama with a Smilodon lurking in the background.
The clan!
Once Matt had finished the sculpts, we went to our friends at Footsore to get the master molds and then the production molds made and the cavemen were ready to launch! The painted models above are my first attempt at painting them and I have tended to go for a simple paint job just to get them ready for the web store pictures. I’ll detail how I went about painting these in next weeks blog but in the meantime if you would like to have a go at painting them for you own ‘tribe’ just click the links below.
We do have plans for more cavemen in the future, both in terms of adding a few more characters to this tribe and producing another rival tribe. As always, much depends on how well these sell through and I am more tortoise than hare when it come to business these days…..BUT watch this space or at least follow us on Facebook to get the latest news!
THE COMMERCIAL BIT
You can buy all of the DeeZee models from the arcane scenery web store and at the time of writing we supply post free to most worldwide locations!
If it’s possible to have too much of a good thing, then I certainly achieved this with my wargaming last weekend. I had been invited to join the ‘Lancaster Boys’ wargaming weekend hosted by Mark Lodge deep in the beautiful countryside of North Yorkshire. The three hour drive up from Nottingham with Andy and Ian was very pleasant – Ian was doing all the driving (thanks Ian!) and as a bonus, we stopped off at the small town of Otley to visit a bookshop. The shop was rammed full of military books and as well treating myself to a copy of Military Dress of North America for just £4.00, Andy and Ian discovered some interesting treasures for their book collections.
I also found a copy of the board game ‘Risk’ – the 18th century version with all the minifigures for just £3.00 in a charity shop. The visit to Otley was rounded off with a most excellent sausage and bacon cob and a mug of tea and it was back on the road to head up to Marks house.
Mark has the sort of wargaming set up that most of us can only dream about. A purpose built ‘stable block’ is home to a huge custom built wargaming table and a collection of figures, scenery, books and memorabilia that had me drooling! His passion is for Hinton Hunt figures and preferred scale is 20mm but there are armies in all sorts of scales and periods. All beautifully painted, based and labeled. Mark is also the new owner of the Jacklex figure range and is in the process of revitalising this classic range of 20mm metal figures. It’s well worth a browse and you can see his web site by clicking here:
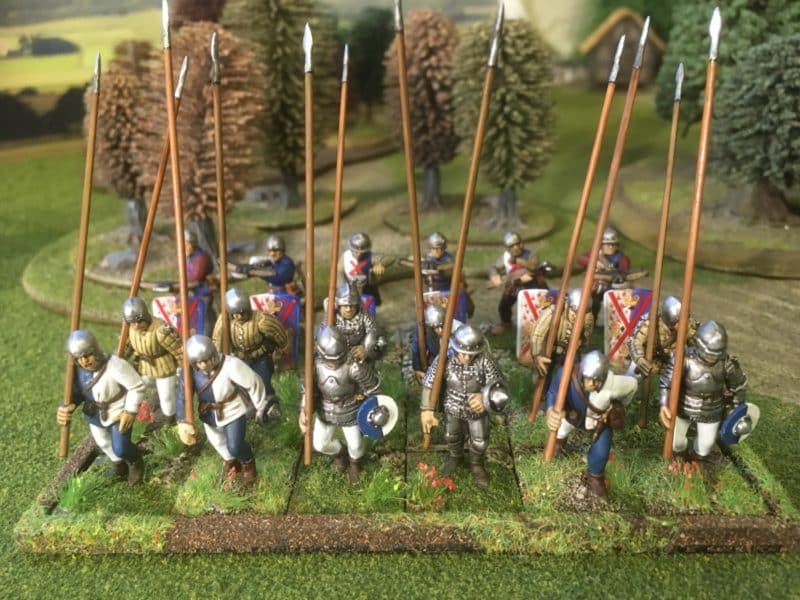
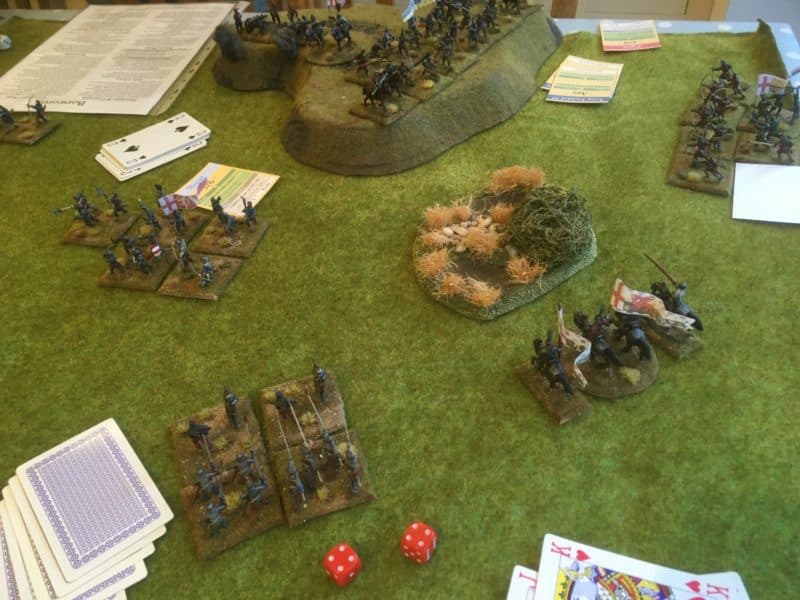
As an opener for the weekend, Tim (another founder member of the Lancaster Boys!) had downloaded a War of the Roses Table battle from the Wargames Vault. The game takes just 20 minutes or so to play. Rather than use ‘blocks’ or counters for the units, Tim had produced some lovely playing pieces using 20mm plastic figures – all beautifully painted and based. Tim had also ‘upgraded’ the reference cards that supported the game, making the game more intuitive to play and after just one game I think that I had the rules sussed! The game was based on the action at Bosworth -I played four times over the weekend winning two and losing two games, with Henry and Richard both victorious and losing equally!
War of the roses table top game underway.
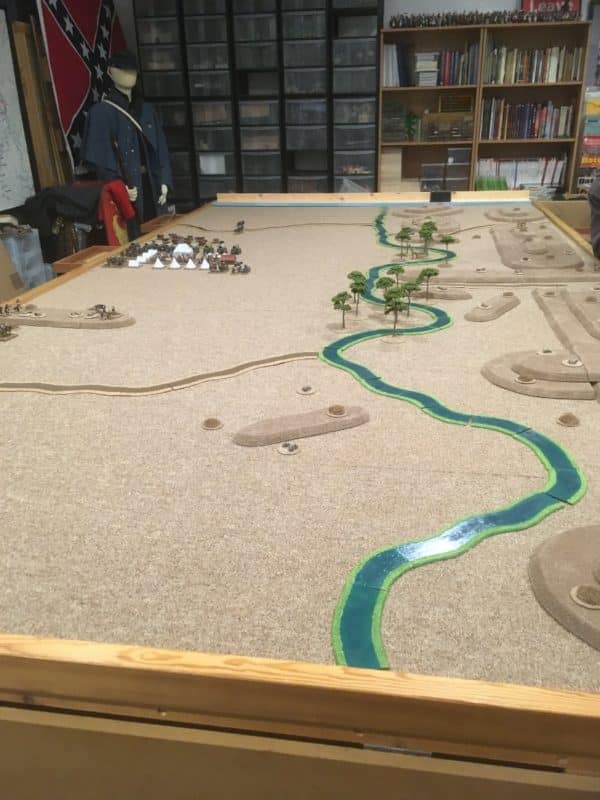
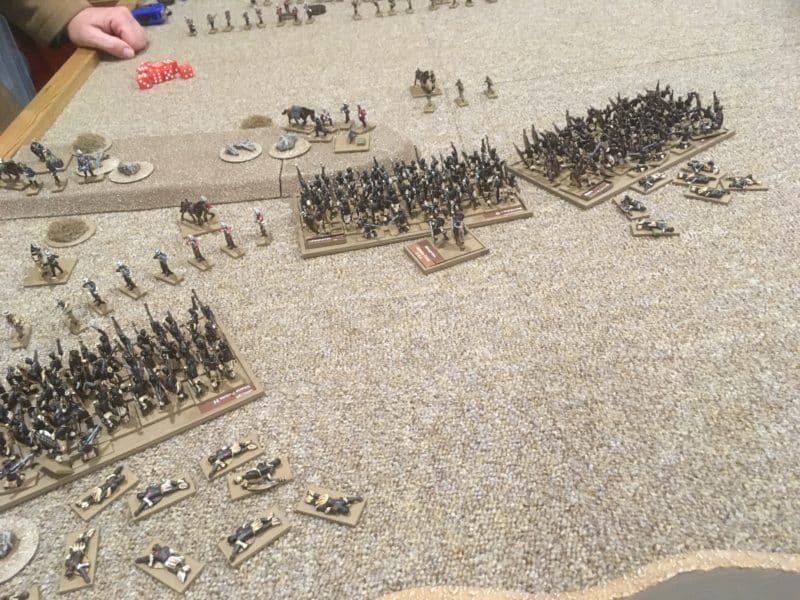
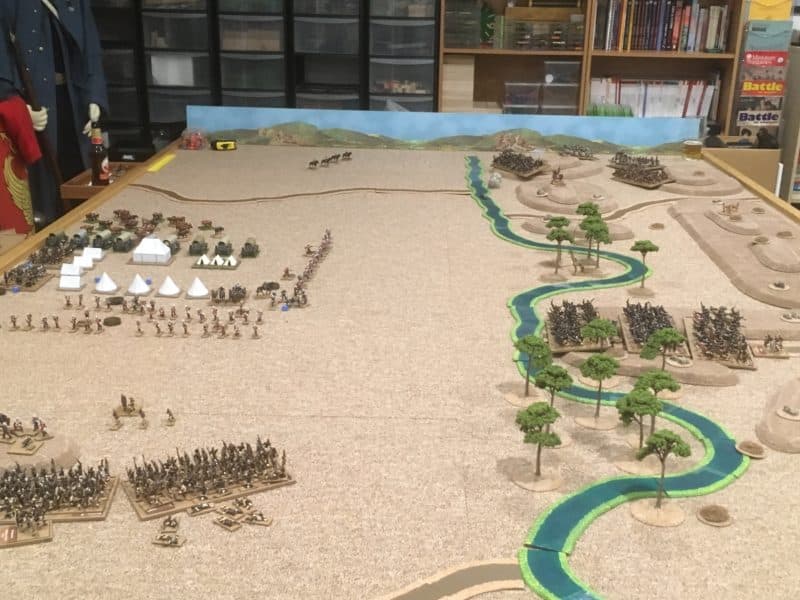
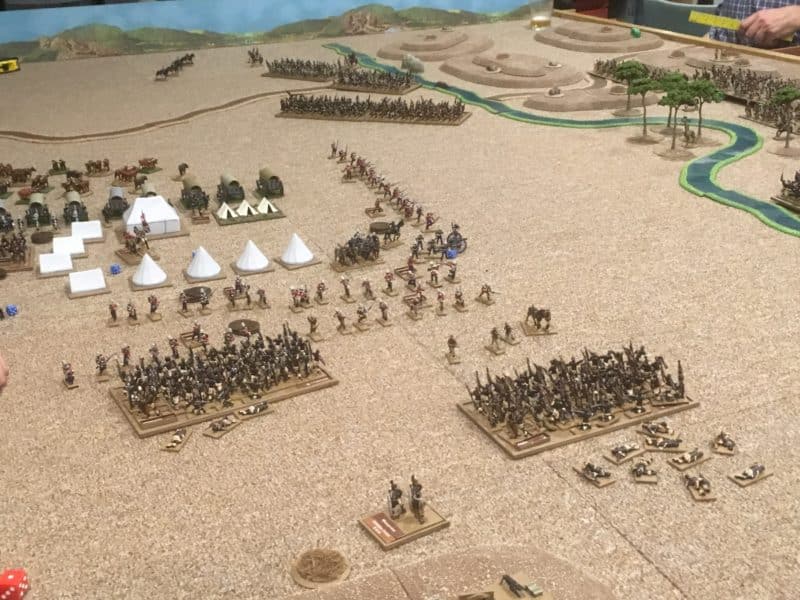
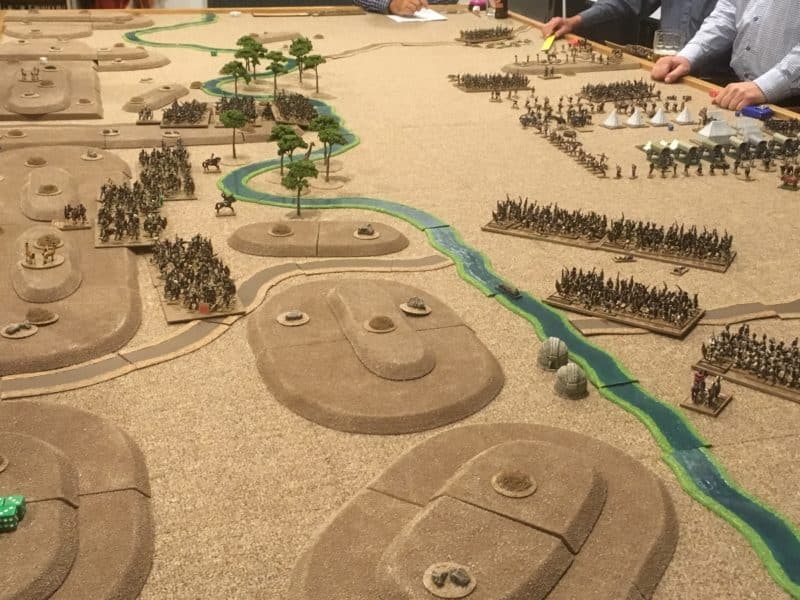
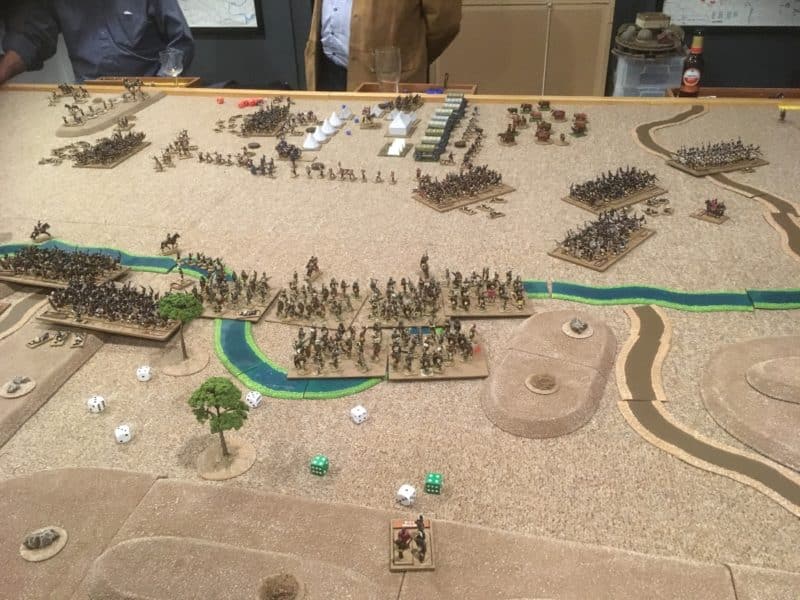
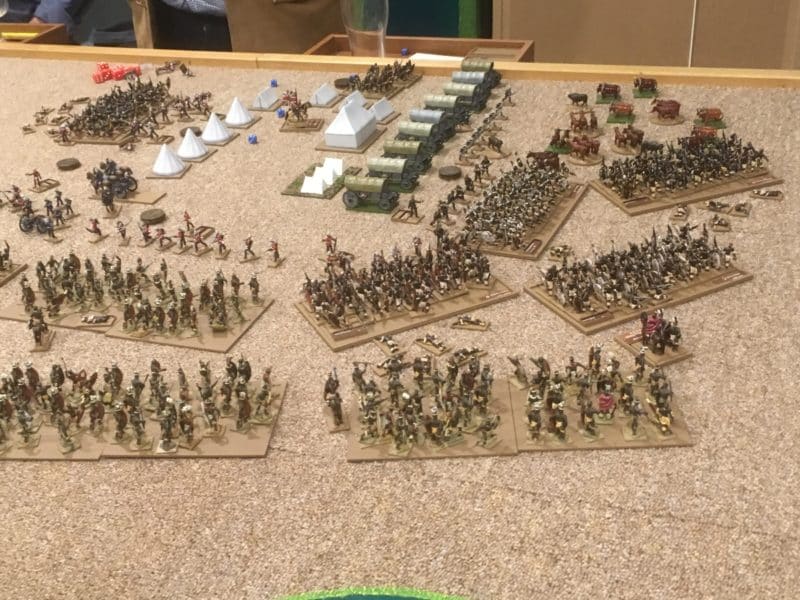
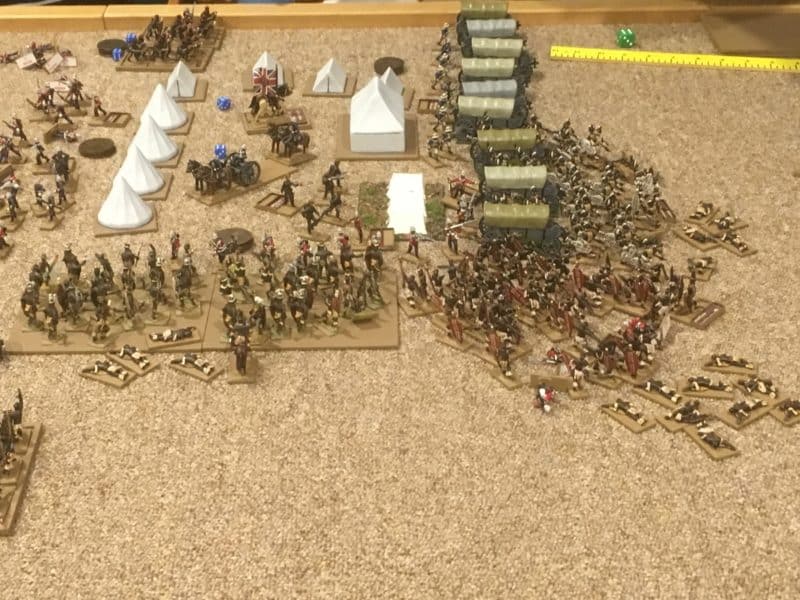
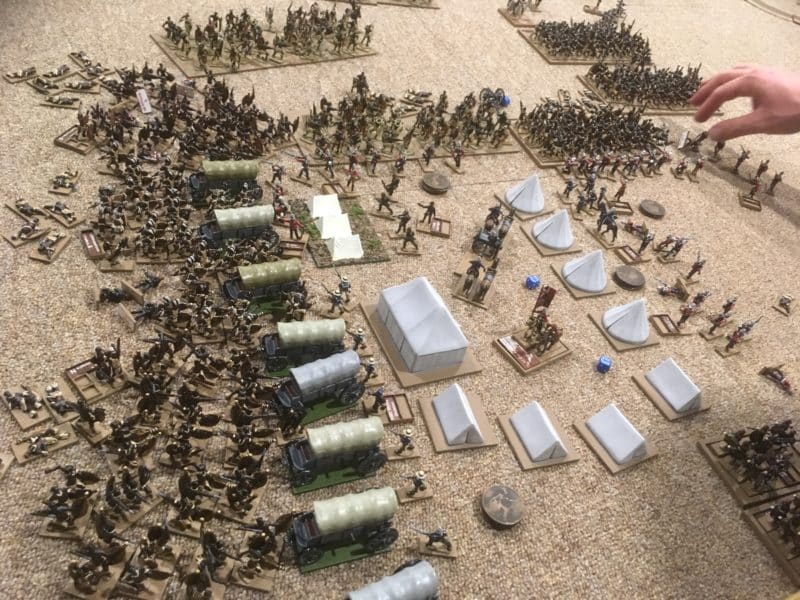
The main game of the evening was a Zulu War encounter, with rules and umpiring courtesy of Andy. I’ll let the pictures provide the narrative:
The battlefield – all is quiet!
The left horn of the Zulu army attacks first and pushes back the British piquets.
The chest and right horn of the Zulu army emerge from cover!
the Left horn charges into the British camp – in the background the right horn is advancing whilst the British are distracted!
The chest and the loins begin their advance on the camp. The right horn of the Zulu army moves ever closer whilst the struggle on the left continues.
The right horn makes contact – desperate times for the British!
The camp is completely encircled!
The Zulus on the right break through into the camp.
All is lost! The Zulus have broken through on the right and more Warriors have arrived to overwhelm the centre. It’s time to save the colours, Boys!
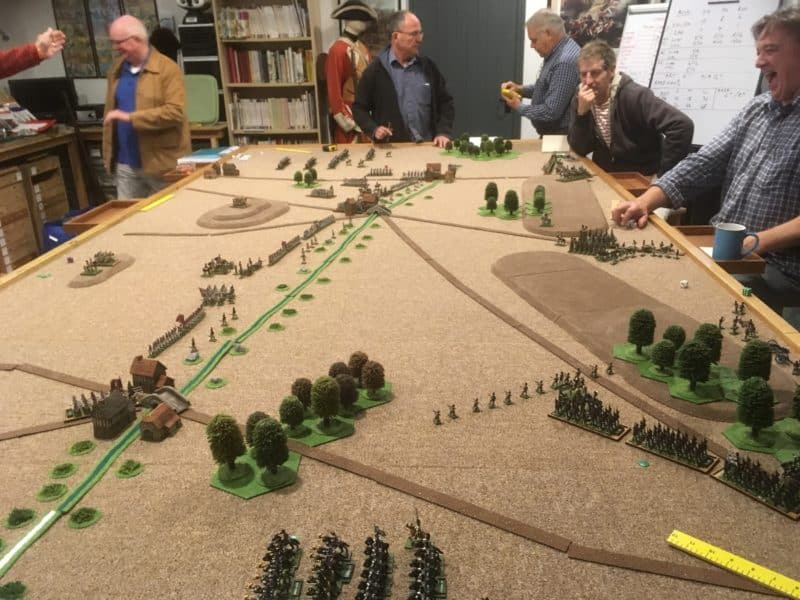
As you can see, the game ended in victory for the Zulu’s, with the British being overwhelmed as they put up a desperate defence of their camp. To be fair, the British were vastly outnumbered and it was difficult to see how they could repulse such a huge army without some sort of fortification – somebody should have laagered those wagons! As a side note, the game was actually based on the Battle of Little Big Horn but with roles reversed. Custer’s three columns were represented by the Zulus and the British camp represented the Sioux Encampment. The Little Bighorn river is seen meandering gently through the centre of the table and the Zulus were hidden in the hills above. If ever you are stuck for inspiration for the basis of a game, taking a historical scenario out of context, so to speak, is often an interesting solution and certainly worked well for this battle!
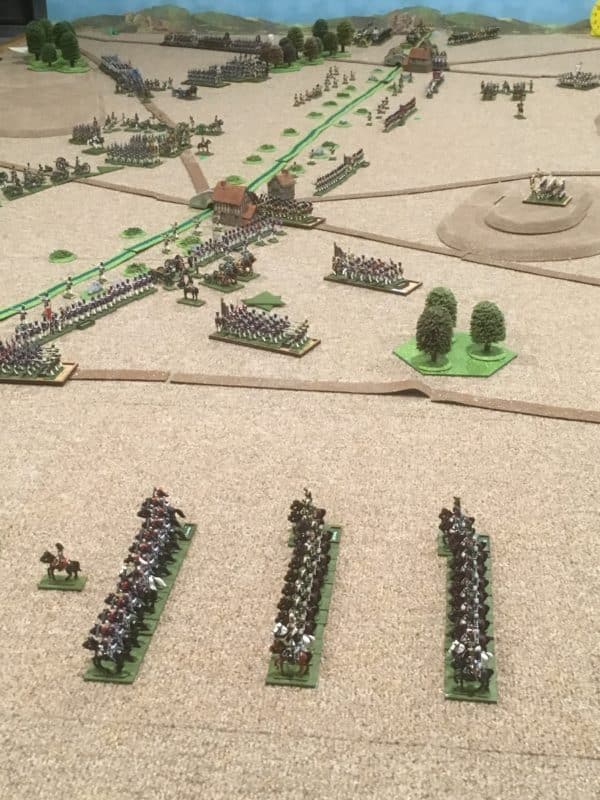
The following morning it was a Napoleonic encounter to start the day. The battle was based loosely on the early exchanges in the Battle of Leipzig 1813 and was umpired by Ashley, using another ‘home brew’ rules set. Once again, the pictures should provide a very short narrative to the Battle. I find that whilst playing, I forget to take enough pictures!
The Prussians and Russians to the right, French to the left. Let battle commence! Early deployment moves as the Allied army advances onto the table.
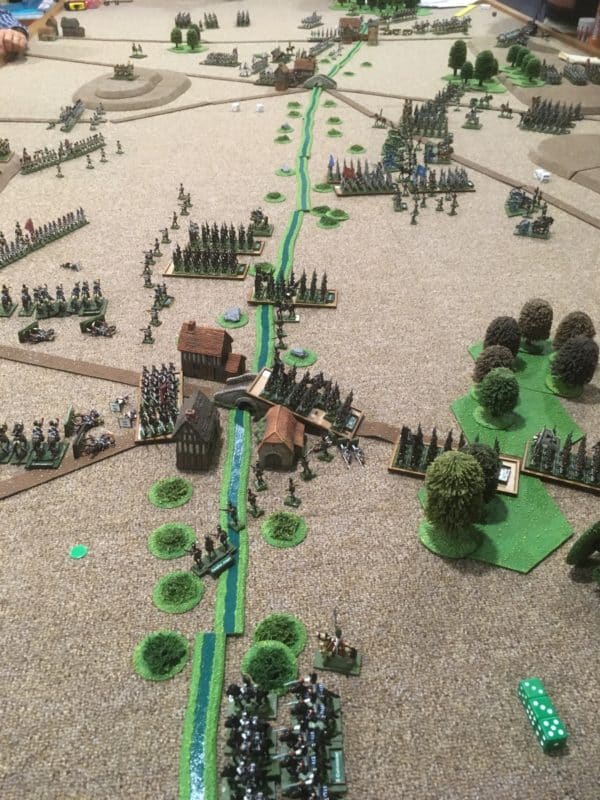
The view from the French side. The French centre and left are holding the Russians but in the distance the Prussian are making steady progress, threatening the right flank.
A decisive moment in the battle – the French are outflanked by Cavalry and the Prussian Infantry push the French from the village holding their right flank.
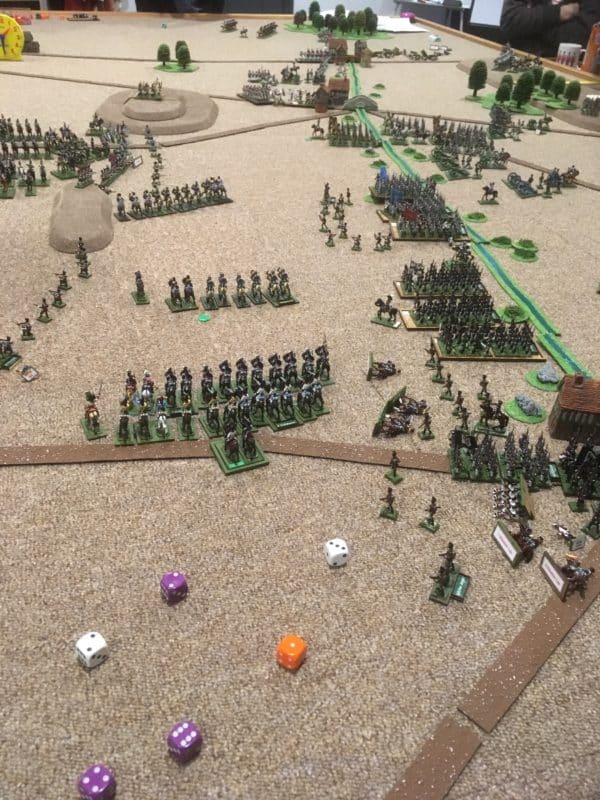
Prussians win the battle on the French right flank with the Prussian infantry pushing forward and the Cavalry routing the French infantry and over running their artillery – the French decide to pull back conceding the battle!
The day was rounded off by two other games. Unfortunately, I dont have pictures but the first was a Russian – Japanese naval battle which resulted in a draw with both Fleets suffering a hammering and the unfortunate Russians losing a ship on the last throw of the dice.
The second game was another play test of our War of the Roses rules set ‘Never mind the Bill Hooks’. I’m happy not to have pictures of this battle as I was the Lancastrian Commander that managed to make rather a mess of the whole battle. The initial deployment was not too clever and this was compounded by a rash cavalry charge that resulted in the demise of the whole unit. We used our best unit, the heavily armoured foot knights (24 points) to chase around after a unit of Irish kern (9 points) at the rear of the battle and finished things off with a forlorn charge that resulted in the death of the Army Commander Harry Hotspur – it wasn’t a good day for Tottenham fans….
Harry Hotspur on a better day!
And so with five games played in less than two days, I felt a bit ‘wargamed out’ but it had been a most enjoyable weekend. I also ought to mention that the guests included Simon from S&A Scenics. Simon had produced much of the scenery on the table and if you are looking for high quality, reasonably priced ready made scenery, head over to his web store:
Also present was Ian of Irregular Miniatures. At the time I couldn’t remember ever coming across Ian’s company, which was strange as he has one of the largest range of figures in the UK, with scales ranging from 2mm to 75mm! However, when I returned home and checked out his web site I found that I had quite a few of his models in my collection! I had bought them over the years at various shows and it was his Dad, not Ian, that had served me! Check out their web site below, there are some real gems to be found!
To close the report of a most enjoyable and memorable weekend, I must again thank the ‘Lancaster Boys’ for their invitation and in particular Mark for his amazing hospitality.
I hope that you all enjoy your hobby as much as I do – remember that our web site will have much of what you need and even better, we supply post free to most worldwide locations! Click here to see our shop:
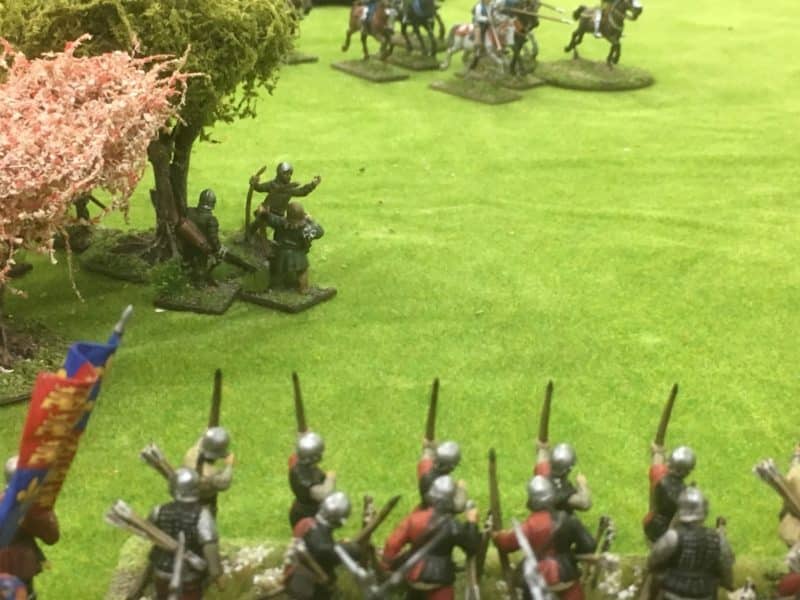
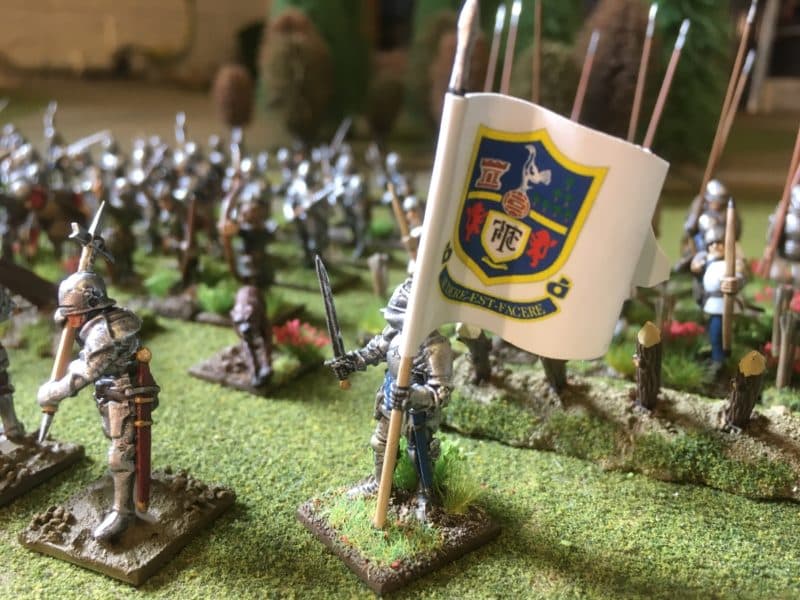
I have been working on completing my War of the Roses army and I wanted to add some crossbowmen and hand gunners to my contingent. Apparently, whilst used for sieges, there is no primary evidence that Crossbowmen actually took to the field of battle during the Wars of the Roses. I am now able to confirm that this is not the case, by providing photographic evidence of crossbowmen at the Battle of Bingham Fields 14.55. Mind you, I did put them back in the storage box at half past three, so it was only a short debut for them…
Crossbowmen in action at the Battle of Bingham Fields.
Regardless of whether they did or didn’t actually fight in the main battles of the WOTR, the Perry’s include crossbowmen and hand gunners in the Mercenary Infantry boxed set and illustrate them as Burgundian Mercenaries. It would be a shame not to complete these figures and make them available as small units for my Army. The current set of rules that we are using for our WOTR battles ‘Never mind the Billhooks’ have been written by Andy Callan and are in the process of play testing. The rules allow for small units of Skirmishers that can act independently of the main army to protect the flanks, larger units, provoke your opponent, skulk in cover and generally be a nuisance in the game without ever being a decisive force. Crossbowmen and Handgunners are ideal for this role in the game, (although bowmen and Irish Kern are also permitted) and protecting them with Pavises will also help when facing Archers or other skirmishers.
Pavises with LBM decals applied
Here is a quick guide as to how I went about painting these figures, as well as some of the assumptions that I made whilst doing so. As usual, I tend to ‘batch paint’ my figures for my wargames units and so once they were assembled, I undercoated them with Army Painter Leather Brown spray.
Crossbowmen primed and ready to paint – flesh already done.
The next step was to start the block paint process. I tend to work from the inside out and top to bottom of the figure but this is only to give some structure to my painting. I paint in short ‘bursts’, up to an hour in one sitting, so having a routine allows me to pick up where I left off without having to think too much about the next stage. Whilst painting the helmets in Army Painter plate mail, I realised that it made sense to split the 12 figures into 3 sub groups for painting as they had slightly different clothing.
Crossbowmen – plate mail added
When it came to painting the clothing, I used Vallejo 70809 Royal blue and 70820 Off White for the Sur coat or tunics. The Royal blue being a nice bright blue to differentiate the Burgundian’s from the other troops in my retinue. The rest of the clothing was painted with a choice from 70821 German Camouflage Beige, 70814 Burnt Red, 70869, Basalt Grey and 70899 Dark Prussian Blue.
Clothing on Crossbow men block painted.
When it came to the crossbows, I painted these in Vallejo Old wood 310 with the detail picked out in Dark Brown and plate mail for the metal parts. The boots and leather equipment were painted in a variety of browns. I must confess that beyond looking at the box art, I didn’t put too much time into researching ‘uniforms’. I wanted to get these figures done fairly quickly. So much so, that I stopped taking pictures of the step by step process…However, the hand gunners in the next picture will give you an idea as to how the figures look after the block painting is done. Note the crosses on the front and back of the tunic. I had been concerned that my painting wouldn’t be up to this but in the event, it was straight forward enough.
Hand gunners being batch painted.
Hand gunners – rear view
The next stage is to paint the figures with Army Painter Quick shade Dark Tone. This stuff is excellent at pulling the colours together, adding shading and bringing out the detail on the figures. I find it superior to inking the figures as it provides a hard varnish that will help to protect the figures when gaming. However, the Quick shade (and ink, for that matter) can ‘dirty’ the figures, particularly the lighter colours. It is a straight forward job to repaint these areas using the shading as a guide, this also has the effect of adding some additional highlighting.
Crossbowmen – you can see that I’ve repainted the whites.
When it came to the pavises, there are two distinct types supplied in the kit. I decided that the one’s with the spikes should be mounted separately on 15mm x 20mm bases so that I could use them for either the crossbowmen or handgunners. The Pavises without spike would be glued straight onto the other six crossbowmen figures (the ones that were loading). I used some milliput to make a mound on each base and stuck the pavises straight into it. You can also see that I have attempted to blend the LBM decals into the pavises by painting around the edges and adding some ‘mud’ to the bases.
Loaders with pavises
An attackers view of the Crossbowmen!
The pavises were simply glued onto the back of the figures. To make them look more accurate, I really should have provided straps but as I have repeatedly said, these are wargaming figures not museum exhibits. I think that they will pass muster…
I based the figures using my current basing method. Vallejo dark earth paste was placed on the bases with some ballast added to the edges. The bases were then painted and dry brushed to highlight the stones and detail before adding some woodland scenics scatter. Another three units are ready to be added to my army – ‘skirmishers’ fight in units of 6 in our rules. The opening picture to my blog shows the crossbowmen posed in front of part of my army. I’ll let you know how they fight in a future battle report!
THE COMMERCIAL BIT
Almost all of the paints, miniatures, bases, basing materials and anything that you are likely to need for your hobby are available POST FREE from my shop here:
I’m very fortunate to be in the business of wargaming, modelling and painting, in that I get to see many of the products released in the development stage and well before they hit the shelves. Black Seas is a good example of this. I had seen the ‘test shots’ of the models on Gabrio’s desk ( Gabrio, being the author of the game at Warlord) months ago. However, I try not to get too involved in every new product. And, unless it is directly concerned with my hobby, my excitement stays at a business level.
Occasionally though, something comes along that really excites me as a hobbyist. Black Seas is one of those items! I have been eagerly awaiting it’s release and I am very pleased to have obtained a retailers prelaunch pack. So here is a sneak peak at what you can expect from the Rulebook. I must say at this point that I have only played one game at the Warlord open day and whilst I thoroughly enjoyed it, I wouldn’t review the game play on the basis of that outing, so the focus of this blog is simply on the actual book. No doubt, I’ll bring you a full battle report in a future blog, once I have put my fleet together!
THE RULE BOOK
The Black Seas rule book is on my desk!
The rule book is to the high standards we have come to expect from Warlord. Black Seas is a very well produced, full colour 96 page soft back book containing the rules to the game, scenario’s, back ground information, modelling and painting guides and more. Here’s a selection of pictures from the book, captured using my iPhone, so the picture quality isn’t studio standard but gives you a idea of the book itself!
Core Rules section – a basic introduction to the game
First impressions are that the rules are clearly explained, with plenty of diagrams to help understand what is going on.
Movement explained
Once you have mastered the core rules, the additional rules broaden the game.
Additional Rules section
As well as the rules to the game there are 13 scenarios to play through to get you familiar with the game mechanics.
The Scenarios section
The advanced rules cover items such as Fire Ships, ‘Fire as she bears’, more realistic wind effects (wind effects are simplified in the basic rules), and other add ins to improve the gaming experience.
Advanced rules – Fire as she bears!
There is a very brief overview of some of the battles of the Carronade era, giving some historical context to the game. This section is illustrated with pictures from Osprey books, so there is plenty of visual reference material to use. This is a good introduction for those not in any way familiar with the naval wars of the period but I suspect that ‘old hands’ will find the section as a useful reminder of stuff they already knew!
Historical backgroud to the game.
Also for all you ‘land lubbers’ out there, there is a very useful basic guide to the anatomy of a fighting ship of the age!
The anatomy of a fighting ship
The rules have some ideas as to how you can link your battles to play a campaign, with a small section opening the possibility of linking your Black Seas games into a Black Powder campaign. This has already got me thinking of my Napoleonic Caribbean project!
Campaign Rules
And finally, advice as to how to go about rigging and painting the superb miniatures that come with the game. The ship models are at 1/700th scale and are lovely models in their own right. I will be reviewing these in a subsequent blog, as I put my sample ships together!
The Ships rigging guide
The painting guide
So, that’s just a quick look at the inside of the rule book. In my next blog, I’ll look at the other contents of the game as well of course as the ships themselves. But if you would like to see the sprues, then head on over to the Arcane Scenery shop – we still have copies of the latest Wargames Illustrated magazine which has a free sprue from Black seas on the front cover as well as an in depth look at the game.
The Frigate sprue.
THE COMMERCIAL BIT
If you are as excited as I am about the new Black seas game, you can pre- order it post free from Arcane Scenery here:
Both items will be supplied with the free limited edition figure if you pre – order.
At the time of writing we still have stocks of Wargames Illustrated issue 384 with the free Black seas sprues. You can choose either the frigate sprue:
This website uses cookies to improve your experience. We'll assume you're ok with this, but you can opt-out if you wish.AcceptRead More
Privacy & Cookies Policy
Privacy Overview
This website uses cookies to improve your experience while you navigate through the website. Out of these cookies, the cookies that are categorized as necessary are stored on your browser as they are as essential for the working of basic functionalities of the website. We also use third-party cookies that help us analyze and understand how you use this website. These cookies will be stored in your browser only with your consent. You also have the option to opt-out of these cookies. But opting out of some of these cookies may have an effect on your browsing experience.
Necessary cookies are absolutely essential for the website to function properly. This category only includes cookies that ensures basic functionalities and security features of the website. These cookies do not store any personal information.