My War of the Roses army is approaching completion. I now have most of the infantry that I am likely to need whilst playing our rules set ‘Never mind the Bill Hooks’. In fact I can actually muster two small opposing retinues if necessary. There are two gaps in the roster though; Light Cavalry and Artillery. I went for the easy option and started to paint an artillery piece. As usual, my manufacturer of choice is Perry Miniatures and as the rest of my army is made up of Perry Plastics it made sense to continue to use the same source. Of course, other manufacturers figures are available!
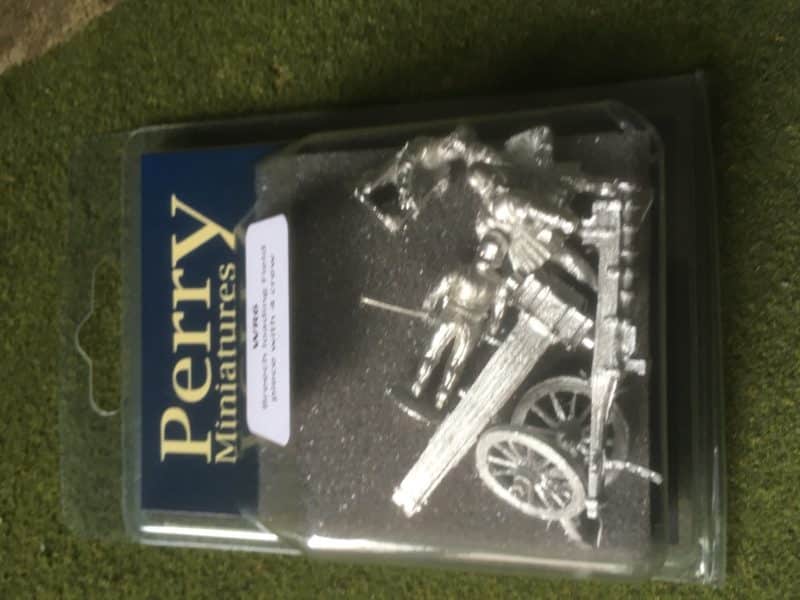
Artillery!
It was a straight forward task to file down the flash and casting lines on the pieces. Some of the Metal Perry castings can be troublesome in terms of mold lines and excess metal but this pack was well cast and not a problem. I then undercoated the gun in black primer and the crew in grey primer. To paint the wooden carriage of the gun, I followed the article for painting wood contained in the last issue of ‘Painting War #9 – Holy War’. On the face of it, it seems like a bit of a long winded way of producing a wooden effect but I think that it is well worth the effort and time and I am very pleased with the effect.
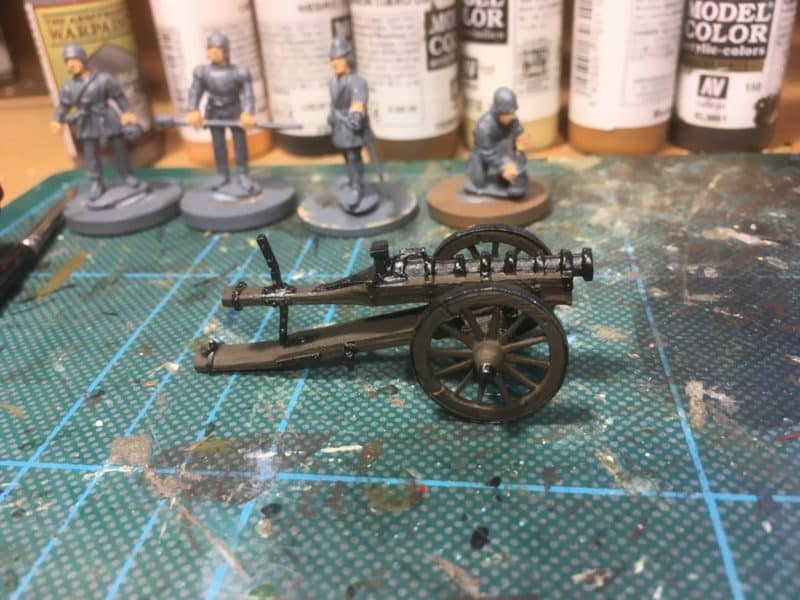
WOTR Artillery – first coat of Vallejo Chocolate brown 70872
You start by painting the wooden parts of the carriage in Vallejo Chocolate Brown using the normal painting technique and cover as much of the black undercoat as you can but where possible, leave the black metal barrel of the gun and other metal parts. Next you start to dry brush the carriage using Flat brown. This stage can be done with a fairly heavy dry brush and you will cover most of the Chocolate Brown.
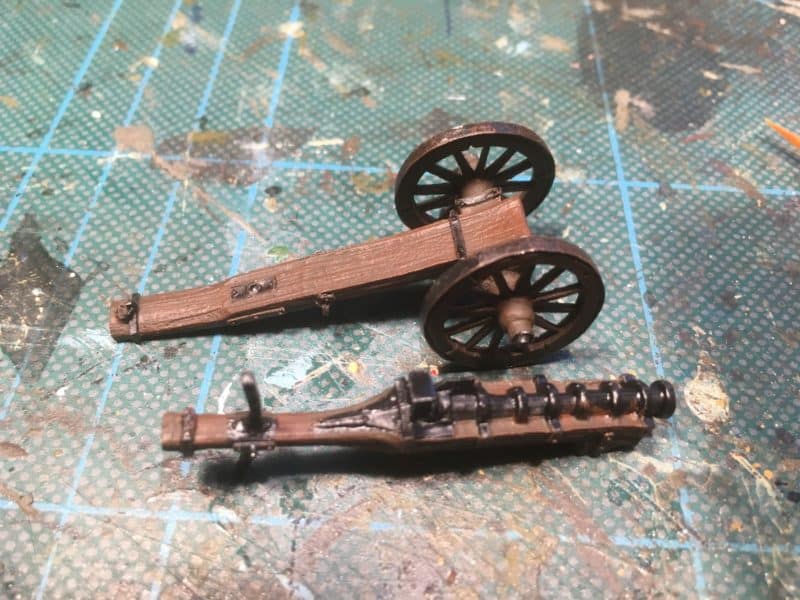
Next heavy coat is flat brown 70984
Now use Flat Earth as your next dry brush coat. This time use a slightly lighter coat and less paint on the brush. You just want to catch the details and grain of the wood. This is followed with Orange Brown. Once again, this is a light dry brush and you are just picking up the highlights.
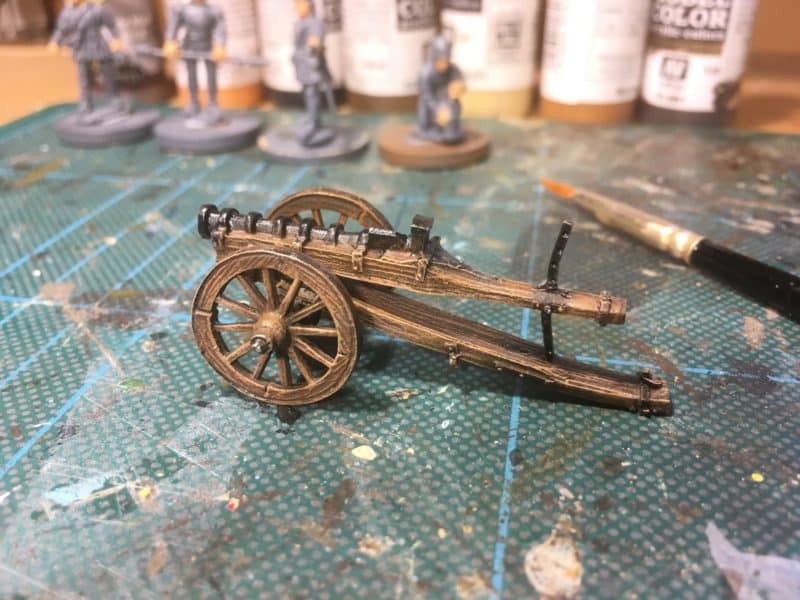
Added dry brush coats of Flat Earth 70983, Orange Vrown, 70981 and yelow ochre, 70913.
The final dry brush is done with Yellow Ochre. You need to be using a really dry brush and a light touch. I tend to focus just on the edges of the model. The magazine article suggests a further highlight using flesh as the top highlight. I decided that I was happy with the finish that I had and stopped there.
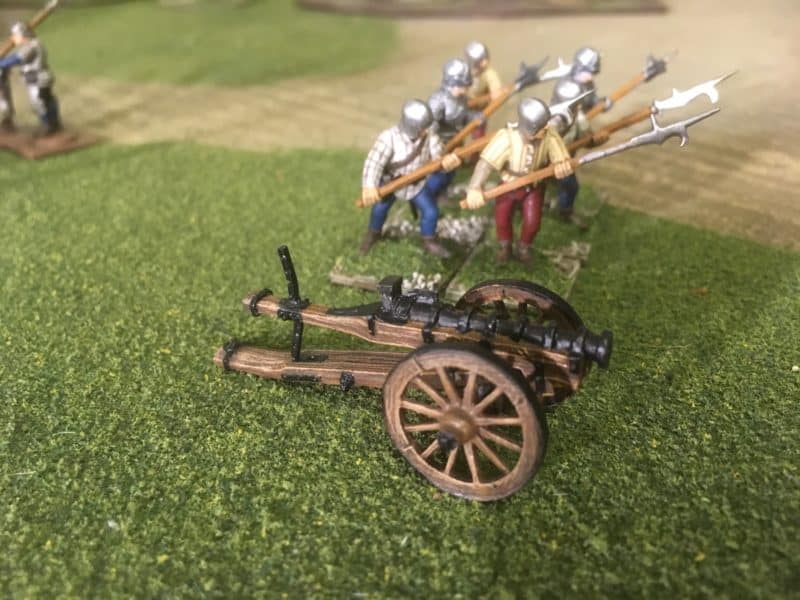
The finished gun. Black re painted – I need to go back over the wheel rims with steel.
I then went back over the barrel and ironware on the cannon with matt black to cover the over brushing that I had made whilst dry brushing. I also then gave the wheel rims a dry brush with gun metal to represent the paint chipping off these due to use. The gun is ready for action.
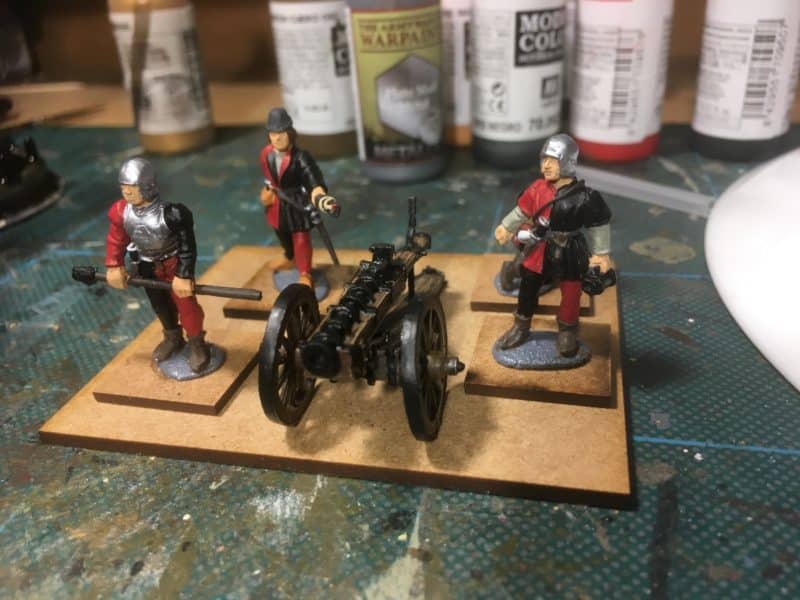
Gun crew block painted in their black and red livery.
When it came to the crew, I decided on a straight forward red and black scheme for their livery and didn’t get to hung up on the accuracy of this. I just wanted them to match my ‘red faction’ of my retinue. I did consider painting the Gun Captain in a different colour as he would probably be independent of the Lords household, but in the event, went with with the easy solution.
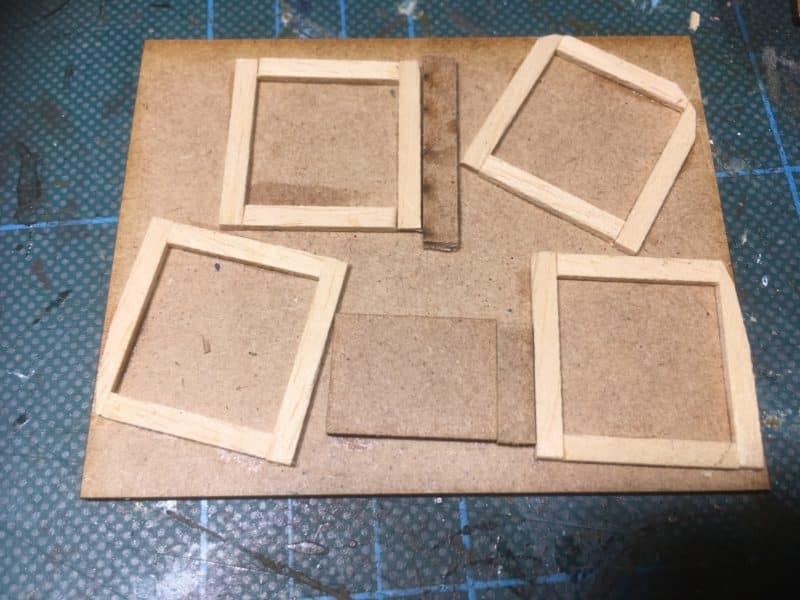
‘sabot’ base under construction
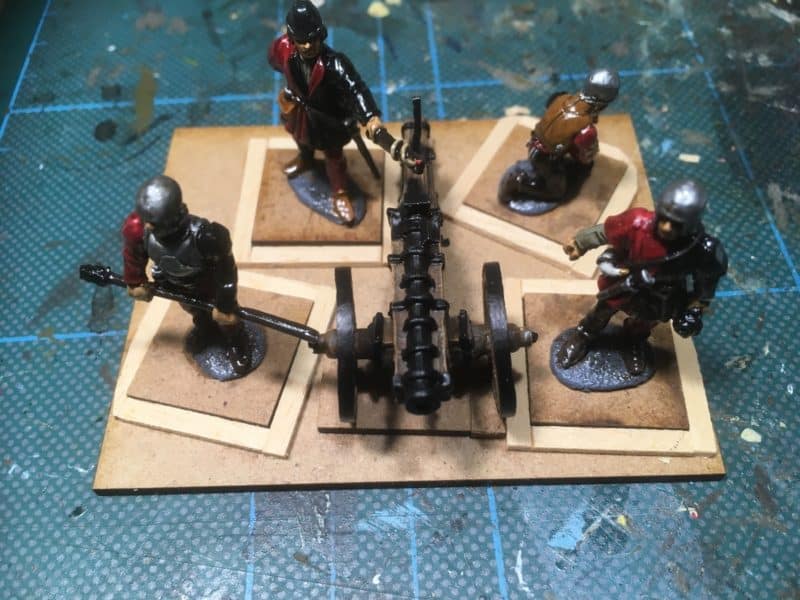
Crew in position – you can see that I’ve painted the crew with quick shade.
On to basing. I created a base that would allow me to remove the crew individually as in the ‘Never mind the Bill Hooks’ rules, this is how hits on the gun and it’s effectiveness is measured. With each ‘hit’ on the gun, you remove a crew member. So once the crew were mounted on 20mm x 20mm MDF bases, I created ‘sabot spaces’ for them on a larger 80mm x 65mm base. See the picture for details. I used some spare thin strips of wood and MDF to make the frames and super glued them into place. This is a bit lazy, I like to use PVA for gluing wood but I was in a hurry to get the base done. I did pay a small penalty for my idleness. I managed to get super glue over my fingers and as a result, even though dry, I couldn’t use the touch unlock facility on my i-phone as the glue blotted out my finger print!
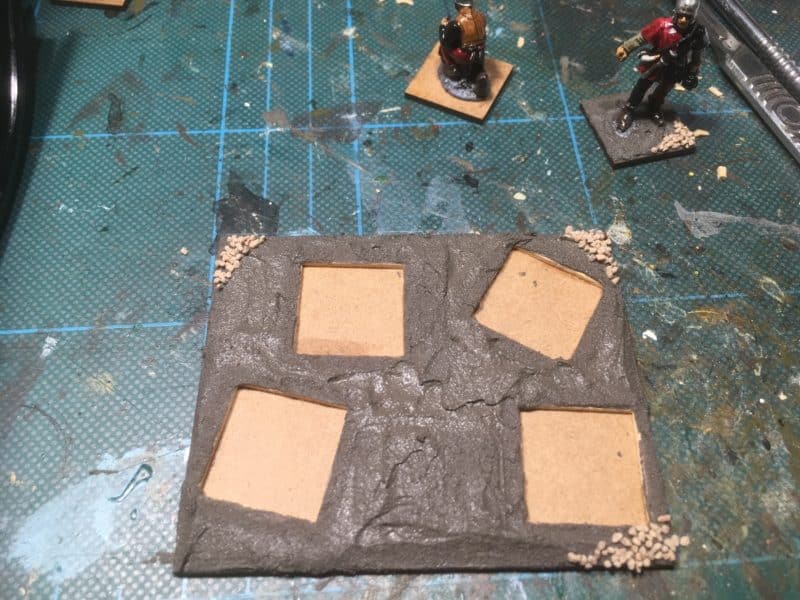
Base coated in texture paste – Vallejo Dark Earth 26219
Once the base framework was completed, I coated it in Vallejo Dark Earth texture paste and then followed my usual basing method.
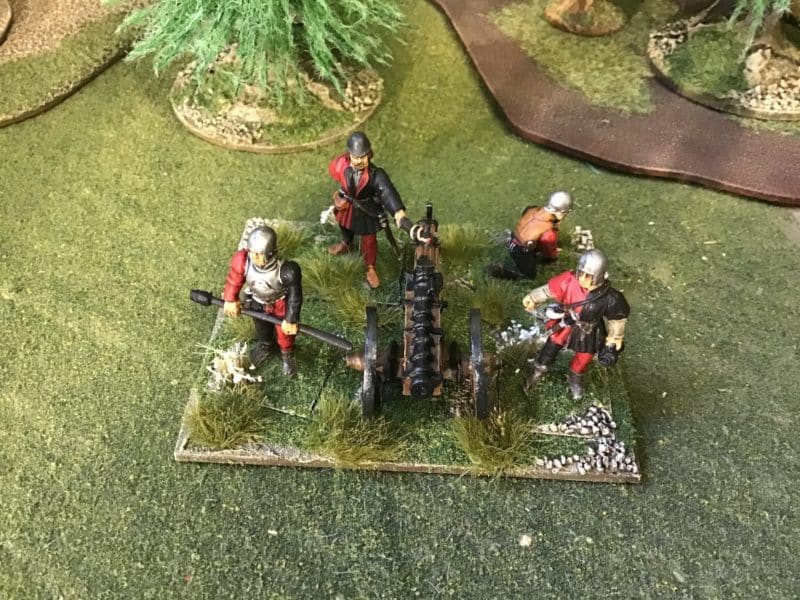
WOTR gun completed!
This involves painting the base with my favourite coloured emulsion paint ‘Delhi Bazaar’ – Vallejo is too good to waste on bases! Once dry, it is a case of dry brushing with lighter mix and then adding some scatter and tufts. If you would like to know how to get pots of emulsion to match your Vallejo colours, have a look at my earlier blog here:
So another unit is ready for my Army, next up, the light cavalry, although I suspect that they will take a bit more than a week to complete!
THE COMMERCIAL BIT
Almost all of the paints, miniatures, bases, basing materials and anything that you are likely to need for your hobby are available POST FREE from my shop here:
Perry’s WOTR plastic range are here:
You can find all the Vallejo Model colour paints here. If you don’t want to browse, just enter the paint number into the shop search bar;
You can find the Vallejo texture paste here:
‘Never mind the Bill Hooks’ will be available as a full colour supplement with the April edition of Wargames Illustrated. If you would like the current issue, click here:
You can find the Painting War magazine here:
Happy Modelling!
