A Weekend of Wargaming!

If it’s possible to have too much of a good thing, then I certainly achieved this with my wargaming  last weekend. I had been invited to join the ‘Lancaster Boys’ wargaming weekend hosted by Mark Lodge deep in the beautiful countryside of North Yorkshire. The three hour drive up from Nottingham with Andy and Ian was very pleasant – Ian was doing all the driving (thanks Ian!) and as a bonus, we stopped off at the small town of Otley to visit a bookshop. The shop was rammed full of military books and as well treating myself to a copy of Military Dress of North America for just £4.00, Andy and Ian discovered some interesting treasures for their book collections.

I also found a copy of the board game ‘Risk’ – the 18th century version with all the minifigures for just £3.00 in a charity shop. The visit to Otley was rounded off with a most excellent sausage and bacon cob and a mug of tea and it was back on the road to head up to Marks house.

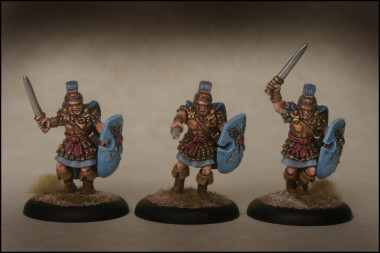
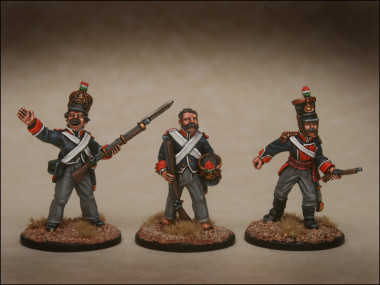
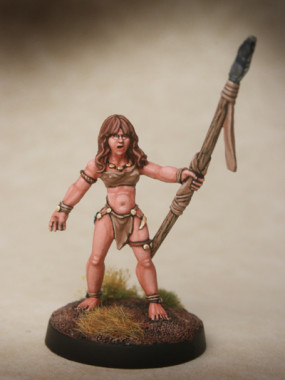
Mark has the sort of wargaming set up that most of us can only dream about. A purpose built ‘stable block’ is home to a huge custom built wargaming table and a collection of figures, scenery, books and memorabilia that had me drooling! His passion is for Hinton Hunt figures and preferred scale is 20mm but there are armies in all sorts of scales and periods. All beautifully painted, based and labeled. Mark is also the new owner of the Jacklex figure range and is in the process of revitalising this classic range of 20mm metal figures. It’s well worth a browse and you can see his web site by clicking here:

JACKLEX MINIATURES
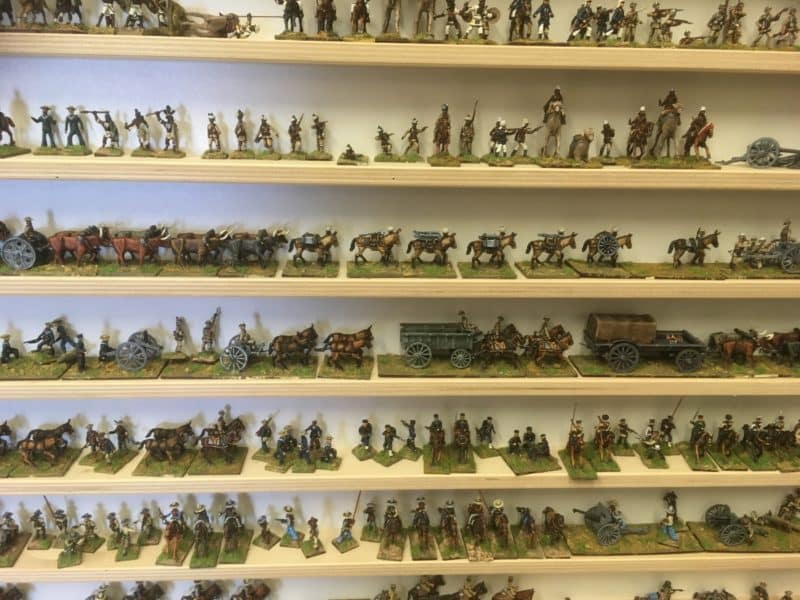
A small sample of the Jacklex miniatures range.

A small sample of the Jacklex miniatures range.

As an opener for the weekend, Tim (another founder member of the Lancaster Boys!) had downloaded a War of the Roses Table battle from the Wargames Vault. The game takes just 20 minutes or so to play. Rather than use ‘blocks’ or counters for the units, Tim had produced some lovely playing pieces using 20mm plastic figures – all beautifully painted and based. Tim had also ‘upgraded’ the reference cards that supported the game, making the game more intuitive to play and after just one game I think that I had the rules sussed! The game was based on the action at Bosworth -I played four times over the weekend winning two and losing two games, with Henry and Richard both victorious and losing equally!
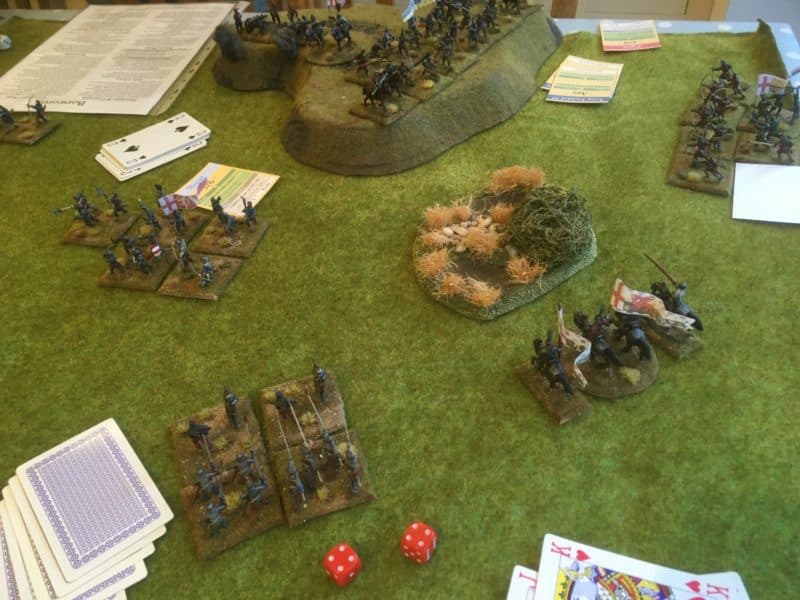
War of the roses table top game underway.

War of the roses table top game underway.

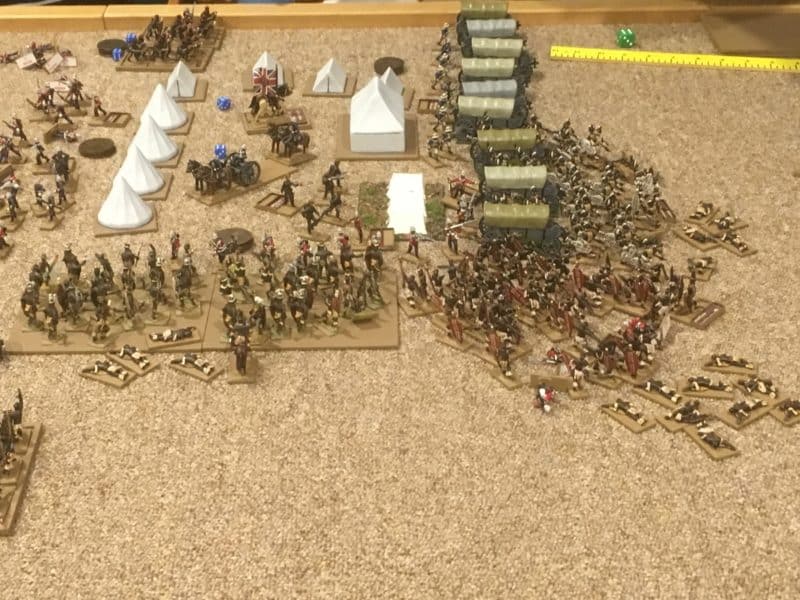
The main game of the evening was a Zulu War encounter, with rules and umpiring courtesy of Andy. I’ll let the pictures provide the narrative:
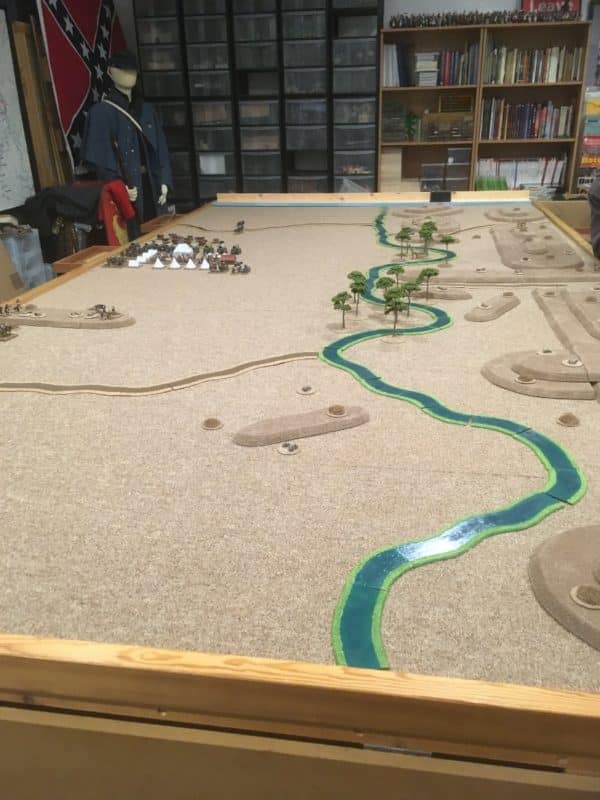
The battlefield - all is quiet!

The battlefield – all is quiet!

The left horn of the Zulu army attacks first and pushes back the British piquets.
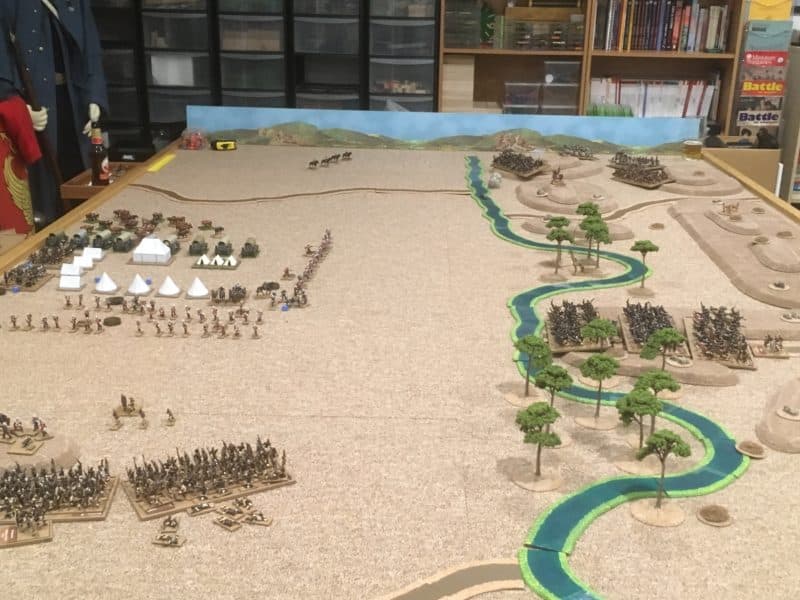
The left horn of the Zulu army attacks first and pushes back the British piquets.

The chest and right horn of the Zulu army emerge from cover!
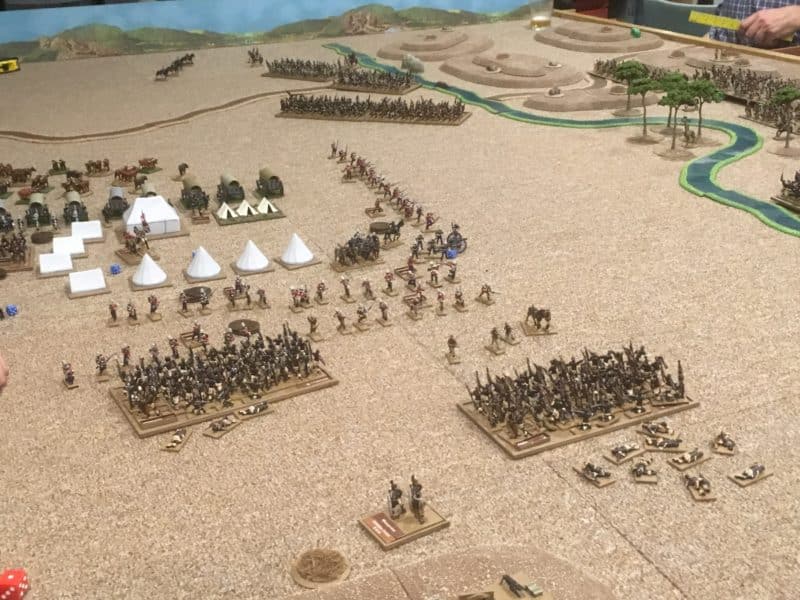
The chest and right horn of the Zulu army emerge from cover!

the Left horn charges into the British camp - in the background the right horn is advancing whilst the British are distacted!

the Left horn charges into the British camp – in the background the right horn is advancing whilst the British are distracted!
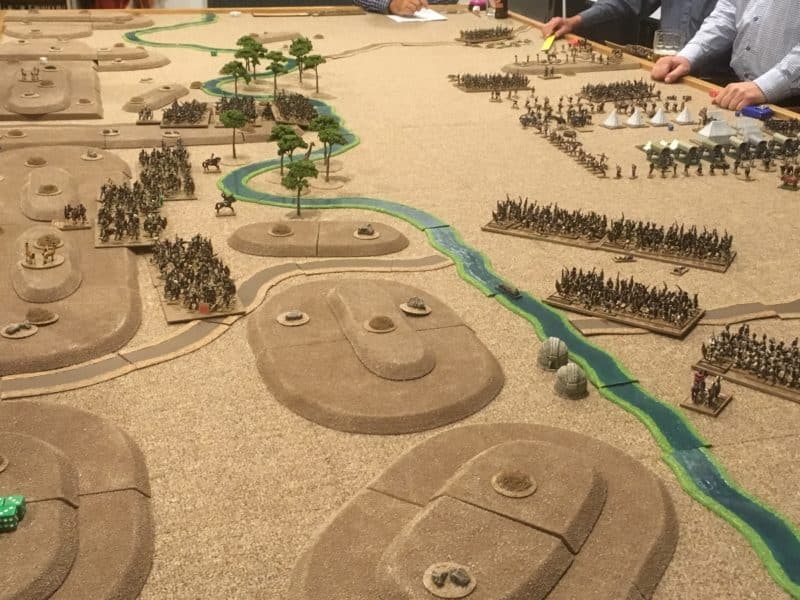
The chest and the loins begin their advance on the camp. The right horn of the Zulu army moves ever closer whilst the struggle on the left continues.
The chest and the loins begin their advance on the camp. The right horn of the Zulu army moves ever closer whilst the struggle on the left continues.

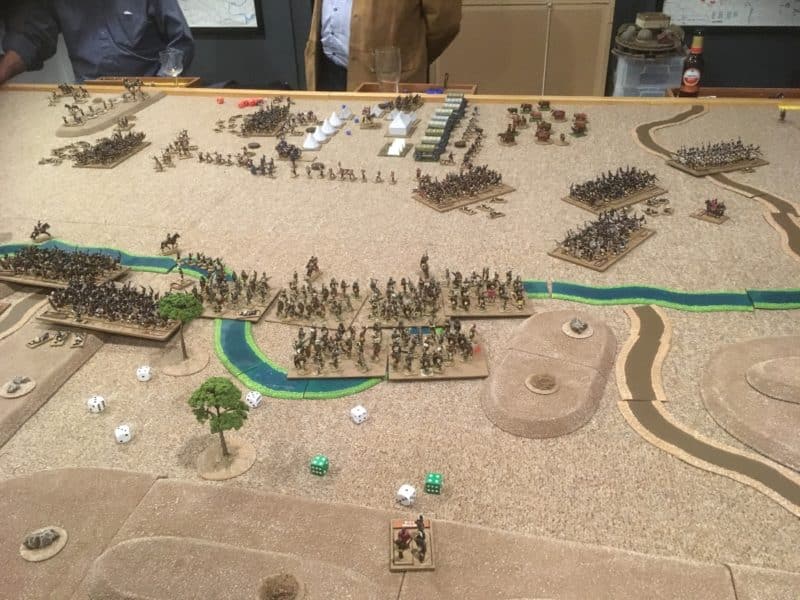
The right horn makes contact - desperate times for the British!

The right horn makes contact – desperate times for the British!
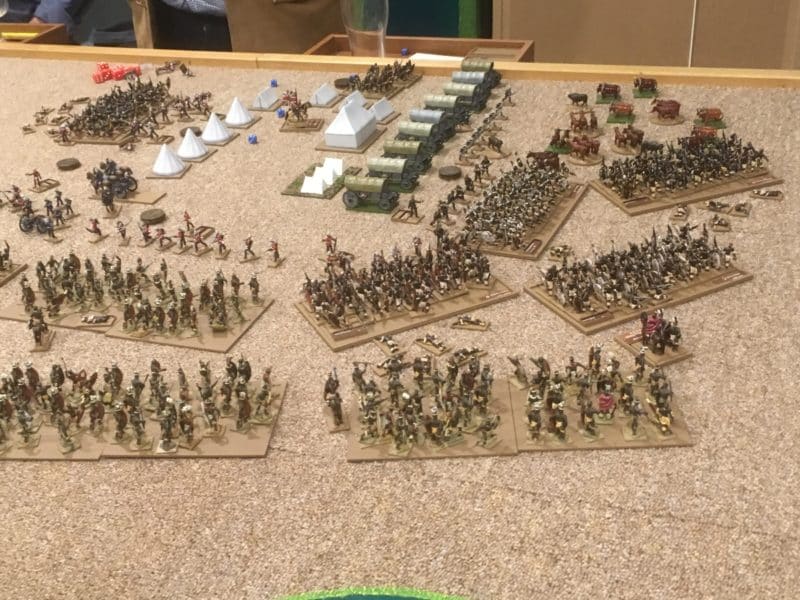
The camp is completey encircled!

The camp is completely encircled!

The Zulus on the right break through into the camp.
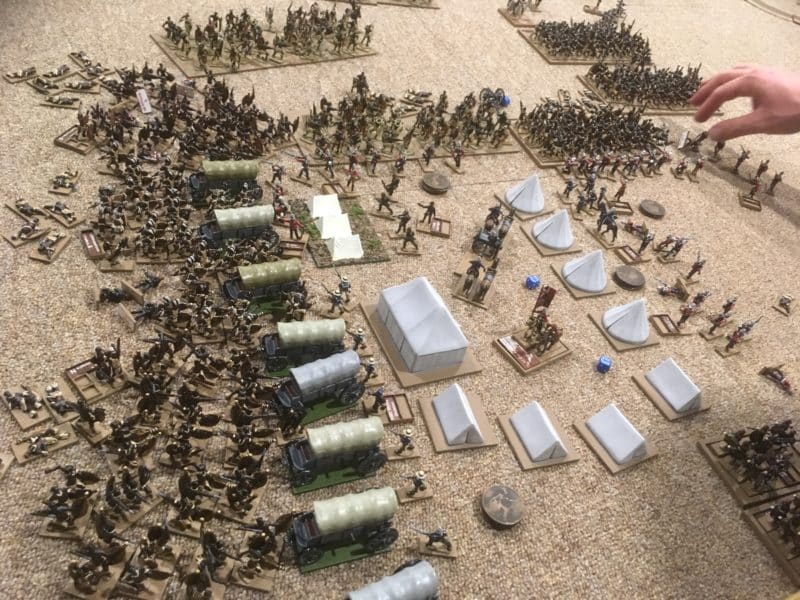
The Zulus on the right break through into the camp.

All is lost! The Zulus have broken through on the righ and more Warriors have arrived to overwhelm the centre. It's time to save the colours, Boys!

All is lost! The Zulus have broken through on the right and more Warriors have arrived to overwhelm the centre. It’s time to save the colours, Boys!

As you can see, the game ended in victory for the Zulu’s, with the British being overwhelmed as they put up a desperate defence of their camp. To be fair, the British were vastly outnumbered and it was difficult to see how they could repulse such a huge army without some sort of fortification – somebody should have laagered those wagons! As a side note, the game was actually based on the Battle of Little Big Horn but with roles reversed. Custer’s three columns were represented by the Zulus and the British camp represented the Sioux Encampment. The Little Bighorn river is seen meandering gently through the centre of the table and the Zulus were hidden in the hills above. If ever you are stuck for inspiration for the basis of a game, taking a historical scenario out of context, so to speak,  is often an interesting solution and certainly worked well for this battle!

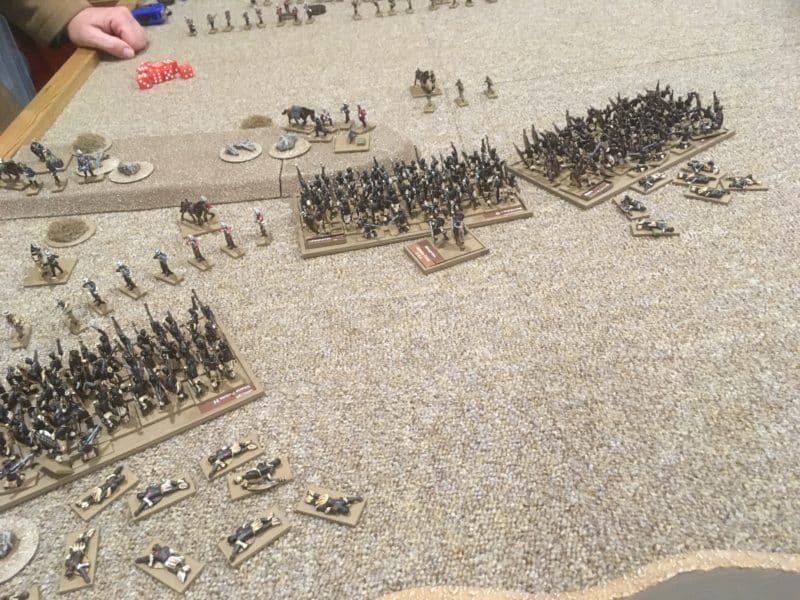
The following morning it was a Napoleonic encounter to start the day. The battle was based loosely on the early exchanges in the Battle of Leipzig 1813 and was umpired by Ashley, using another ‘home brew’ rules set. Once again, the pictures should provide a very short narrative to the Battle. I find that whilst playing, I forget to take enough pictures!
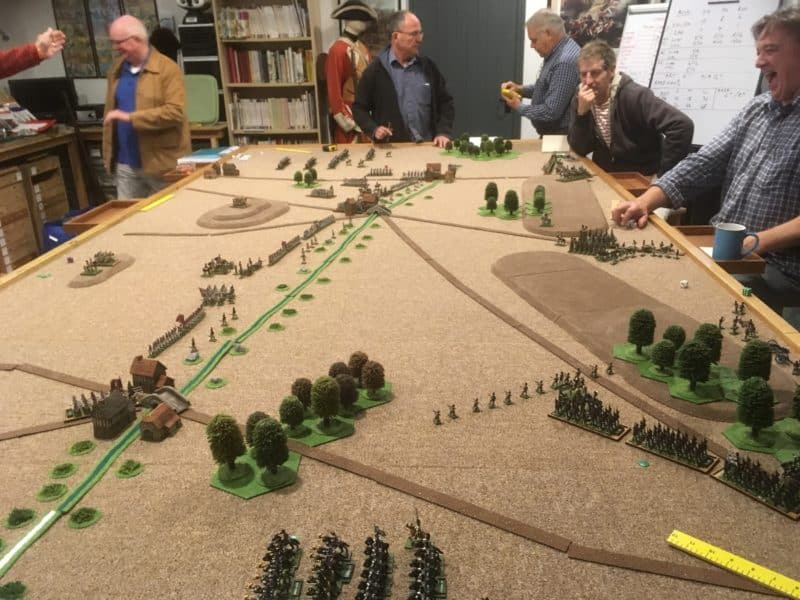
The Prussians and Russians to the left, French to the righ. Let battle commence!

The Prussians and Russians to the right, French to the left. Let battle commence! Early deployment moves as the Allied army advances onto the table.
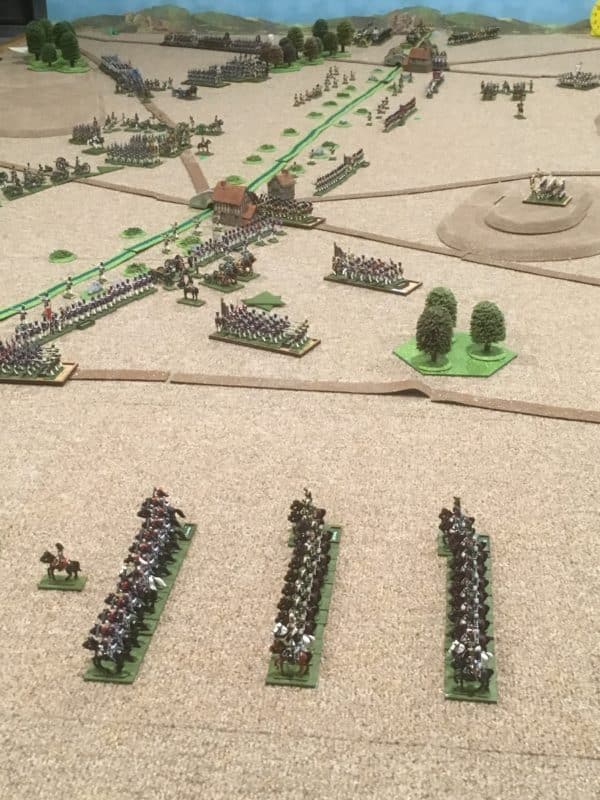
The view from the French side

The view from the French side. The French centre and left are holding the Russians but in the distance the Prussian are making steady progress, threatening the right flank.
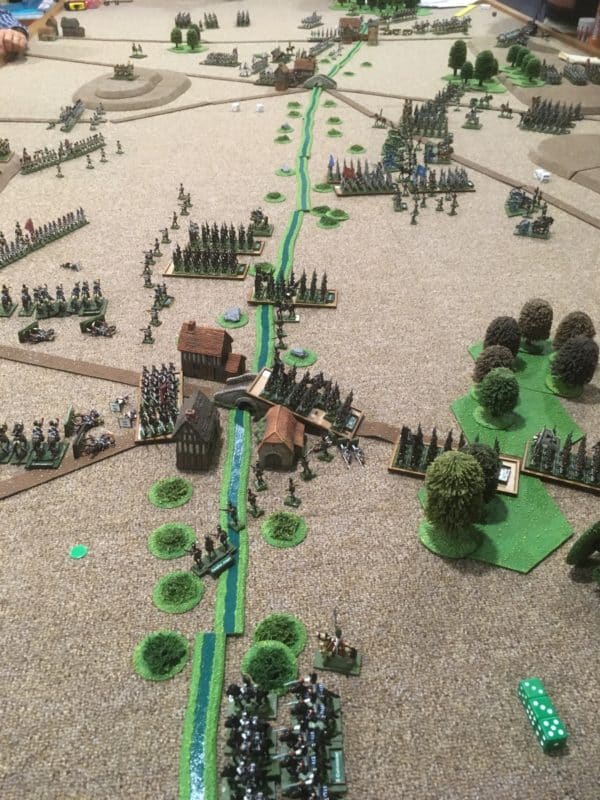
A decisive moment in the battle - the French are outflanked by Cavalry and the Prussian Infantry push them from the village holding their right flank.

A decisive moment in the battle – the French are outflanked by Cavalry and the Prussian Infantry push the French from the village holding their right flank.
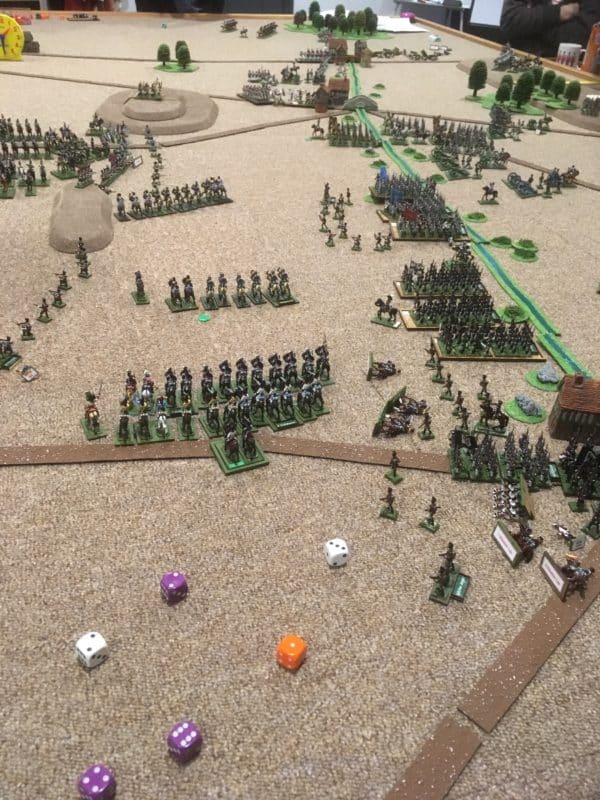
Prussians win the battle on the Frencg right flank - the French decide to pull back conceding the battle!

Prussians win the battle on the French right flank with the Prussian infantry pushing forward and the Cavalry routing the French infantry and over running their artillery – the French decide to pull back conceding the battle!

The day was rounded off by two other games. Unfortunately, I dont have pictures but the first was a Russian – Japanese naval battle which resulted in a draw with both Fleets suffering a hammering and the unfortunate Russians losing a ship on the last throw of the dice.

The second game was another play test of our War of the Roses rules set ‘Never mind the Bill Hooks’. I’m happy not to have pictures of this battle as I was the Lancastrian Commander that managed to make rather a mess of the whole battle. The initial deployment was not too clever and this was compounded by a rash cavalry charge that resulted in the demise of the whole unit. We used our best unit, the heavily armoured foot knights (24 points) to chase around after a unit of Irish kern (9 points) at the rear of the battle and finished things off with a forlorn charge that resulted in the death of the Army Commander Harry Hotspur – it wasn’t a good day for Tottenham fans….
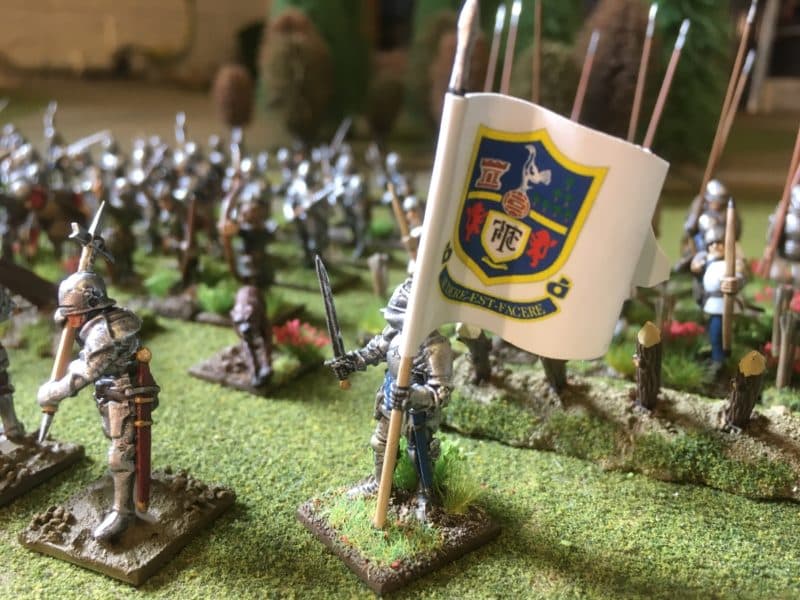
Harry Hotspur on a better day!

Harry Hotspur on a better day!

And so with five games played in less than two days, I felt a bit ‘wargamed out’ but it had been a most enjoyable weekend. I also ought to mention that the guests included Simon from S&A Scenics. Simon had produced much of the scenery on the table and if you are looking for high quality, reasonably priced ready made scenery, head over to his web store:

S&A SCENICS

Also present was Ian of Irregular Miniatures. At the time I couldn’t remember ever coming across Ian’s company, which was strange as he has one of the largest range of figures in the UK, with scales ranging from 2mm to 75mm! However, when I returned home and checked out his web site I found that I had quite a few of his models in my collection!  I had bought them over the years at various shows and it was his Dad, not Ian, that had served me! Check out their web site below, there are some real gems to be found!

IRREGULAR MINIATURES

To close the report of a most enjoyable and memorable weekend, I must again thank the ‘Lancaster Boys’ for their invitation and in particular Mark for his amazing hospitality.

I hope that you all enjoy your hobby as much as I do – remember that our web site will have much of what you need and even better, we supply post free to most worldwide locations! Click here to see our shop:

ARCANE SCENERY

Happy Modelling!
 

French Sailors in the Caribbean – some conversions

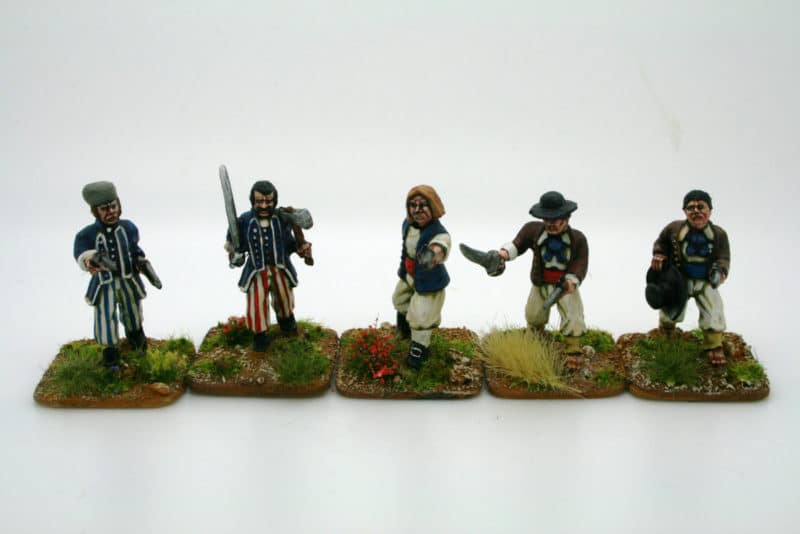
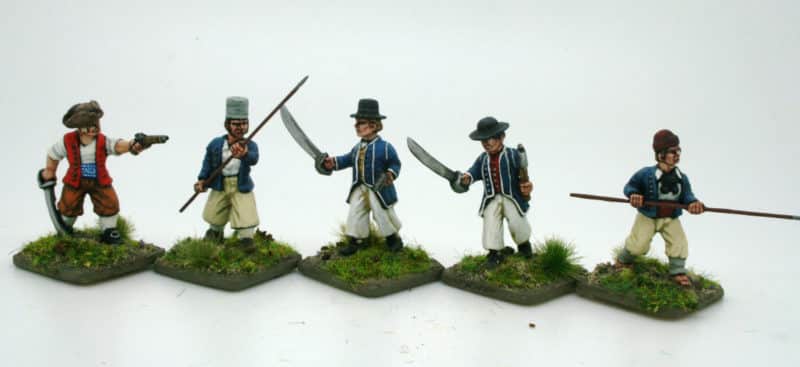
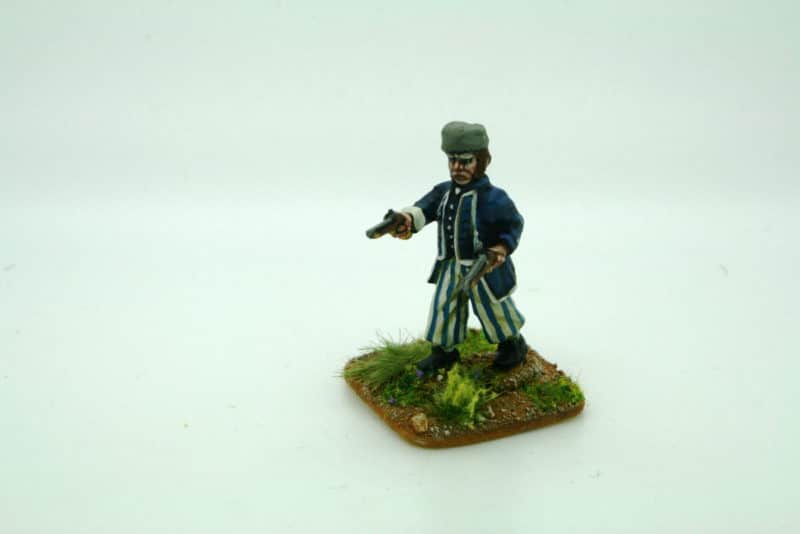
Jonas Jones has been busy with his jewellers saw and clippers to bring us some more conversions from the Trent Miniatures range. I think that there is a tendency in the hobby not to convert metal figures but Jonas shows that with a bit of imagination, some simple modifications can give quite a bit of variation. The starting point is the pack of French Sailors from the Caribbean range, pack CAR24 ( links below). A useful pack as French Sailors had no regulation uniform at this time, so these chaps could be seamen of other nationalities or augment a pirate crew.

French Sailors from CAR24

French Sailors from CAR24

The pack was produced for the Caribbean range as in June 1793, about 2000 French Sailors, led by the newly arrived Royalist Governor of St. Domingue attacked the colony’s principal port, Le Cap, defended by the Republican commissioners. In two days of savage street fighting, involving also the National Guard and several thousand revolting slaves, 90% of the town was burnt down, before the Governor and his sailors were beaten back to their ships.  Someone noted that whilst the sailors were good fighters, as more buildings having stores of liquor were ‘liberated’, so their inclination and ability to fight diminished! Perhaps building a force of 2000 French sailors is ambitious ( although we will be happy to supply them!). It does seem that a small force or unit would be very useful to have and we could see them participating in many smaller skirmishes! So without further ado, Jonas explains how he converted his latest models.

French Sailor Conversion 1

French Sailor Conversion 1

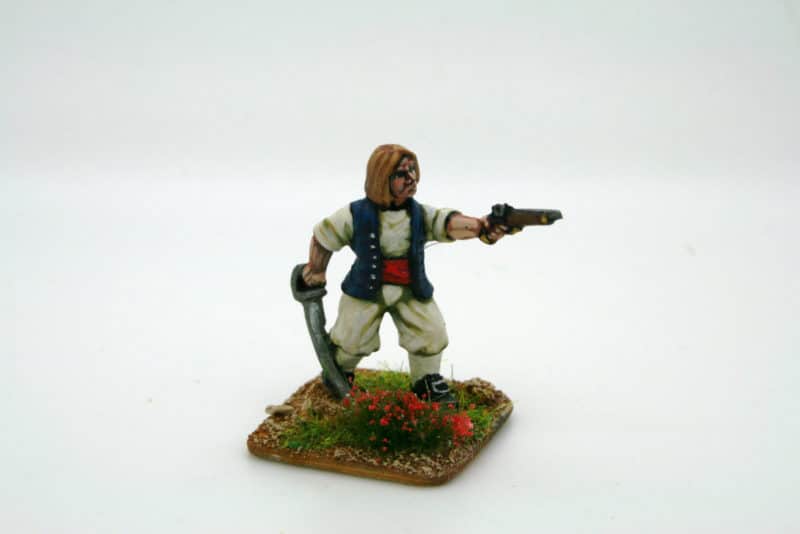
“This chap was inspired by the closing action from the Butch Cassidy and the Sundance Kid movie. I wanted a two-fisted pistoleer prepared to go headlong at the opposition. (Even braver with a pair of flintlocks rather than the six-shooters!). The figure’s right arm was clipped off with a pair of flush cutters and a right arm from the French Dragoons (Haiti) – pack Car 14 – was substituted. (About 15 seconds work with a pin vice).”

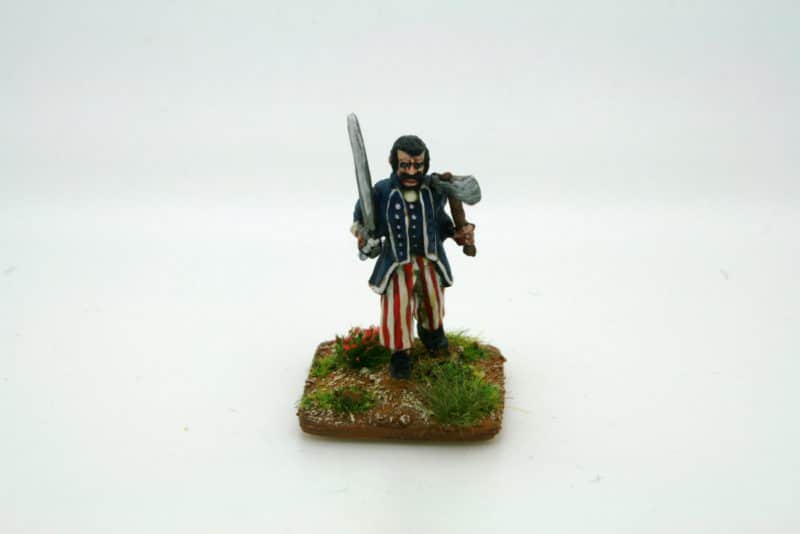
French sailor - Conversion 2

French sailor – Conversion 2

“When Israel Hands made his appearance in season three of Black Sails, the potency of a cutlass and boarding axe combination was demonstrated to perfection: four opponents despatched in about the time it’s taken to type this paragraph! Again, the right arm has been cut off and this time the shouldered sabre arm from the French Dragoons (Haiti) is substituted. The head is from the EDZ08 bare heads pack. Obviously, a man wielding two fearsome weapons would have a fairly stern demeanor; I felt that the moustache provided some “sternification”!”

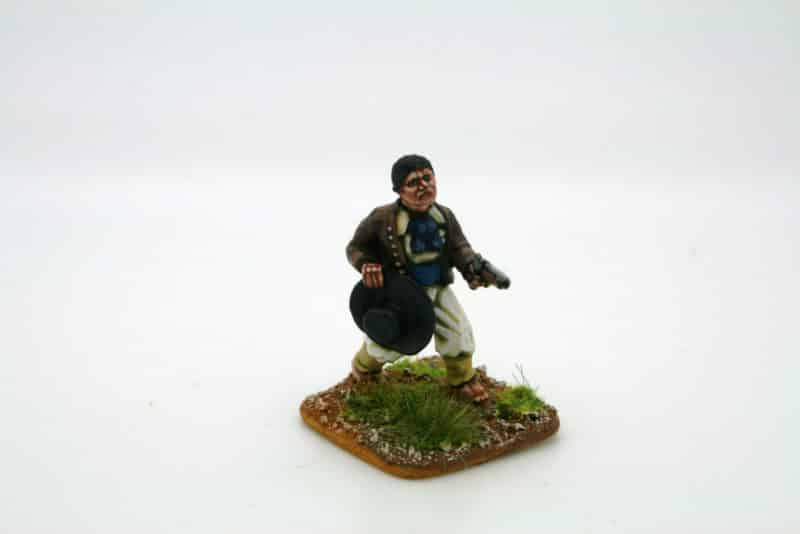
French Sailor conversion 3

French Sailor conversion 3

“You’ll remember the bit in the movie The Professionals when the Mexican bandit leader passes his hat across the front of his holster to mask drawing his pistol. That influenced this conversion. It’s one of the boarding pike figures with its left hand snipped off and replaced by the seperate left hand with pistol. The right hand was drilled through as one would for a pike, but then a cut was made from underneath and the hat superglued in. The hat is from the Car19 pack – Poles in St. Domingue. Flush cutters and a small file have removed the Polish head from underneath the hat – there are always casualties in war!”

French Sailor Conversion #5

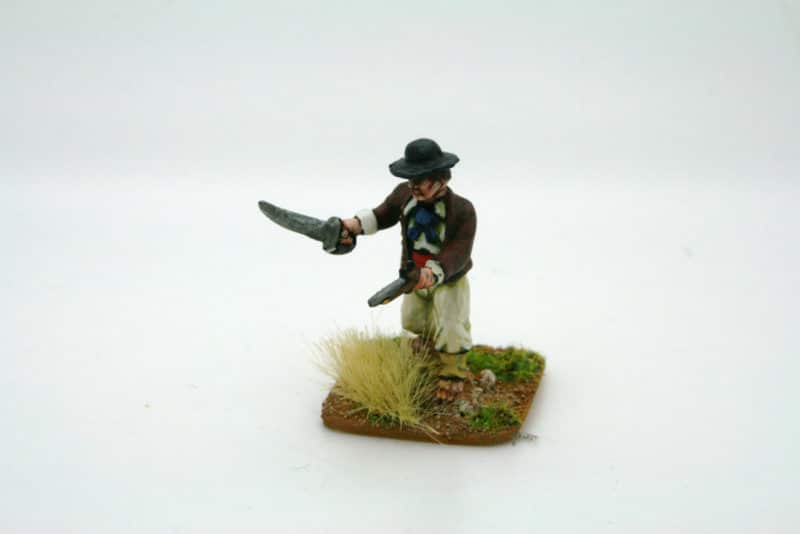
French Sailor Conversion #4

“This conversion is the other pike chap, left hand snipped off and left hand with pistol inserted as with conversion #3. The right arm has been snipped off and replaced by the sword arm from the French Dragoons pack (CAR 14).”

009

“This isn’t really a conversion; it’s just the chap firing his pistol given the priest’s head from the Chouan/Vendean Characters bis pack (FCHOU 06). I just felt that it looked right.

French Sailors conversions

French Sailors conversions

I hope the this article will give the reader some ideas as to how to go about making some simple changes to figures to get a new look. It’s surprising how a simple head or arm swap can change the look of a figure and allow a modeler to stretch one pack of five figures to make a unique band ideal for the many skirmish games that are out there. Jonas has used other metal figures to complete his conversions  but plastic bits will work just as well – I’m sure that most of us will have a decent bits box to dive into! You often dont even need to use figures from the same period – a dark age figure holding an axe could be used to provide a boarding axe!

If you are thinking of converting figures though, you will find that the Trent Miniatures EDZ range is a good place to start – plenty of options for easy head swaps.

The Commercial Bit

We carry the full range of Trent Miniatures. You can find the Caribbean Range here:

WARS IN THE CARIBBEAN

You can find the EDZ range and other equipment here:

EQUIPMENT AND ACCESSORIES

If you need a pin vice, pair of flush cutters or tools in general for your hobby, check here:

TOOLS

I hope that you enjoy your modelling!
Napoleonic Zombies!

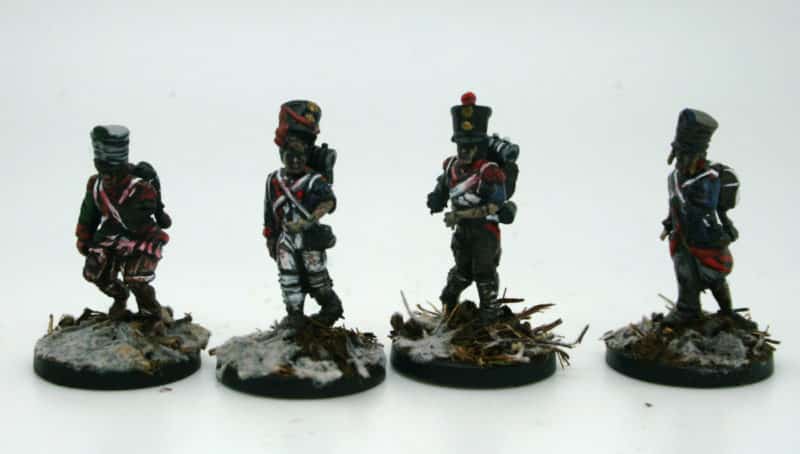
OK, I know that the purists might find this a bit difficult but I was intrigued by these models that I found in the War Banner office. I just happened to be passing by and caught sight of these conversions and I was immediately curious as to what they were.

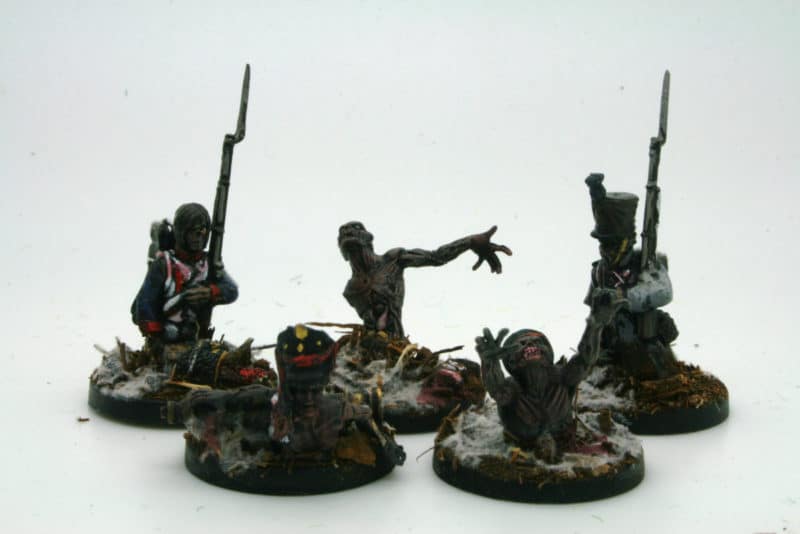
Watch out! Zombies!

Watch out! Zombies!

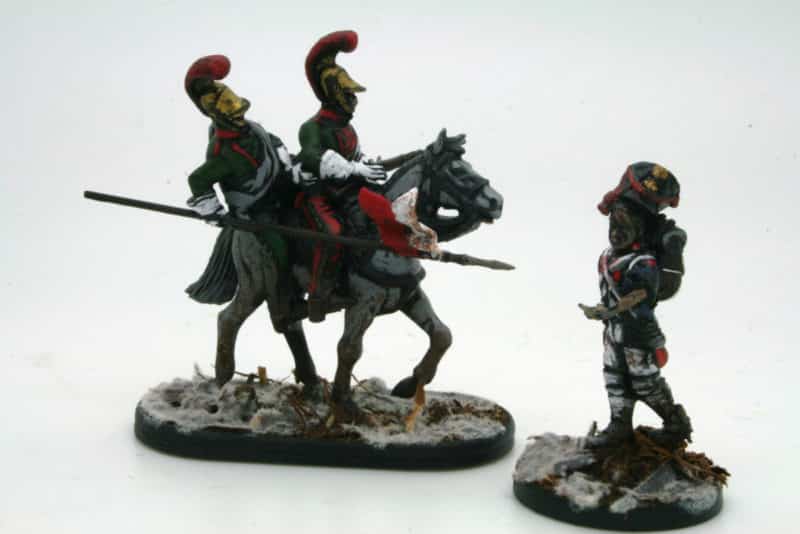
The models are made and painted by Darren Evans, co-designer of the very popular ‘Gangs of Rome’ game and so I immediately wondered if another game was in the pipeline! The short answer is no. The models were just an experiment but having a chat with Darren it was clear that there was a clever idea here for a fun game for the future. It was a great example of how perhaps people could be persuaded to have ago at Napoleonic’s without the need to invest in all the research required to turn out a Battalion of troops!

Napoleonic Zombies!

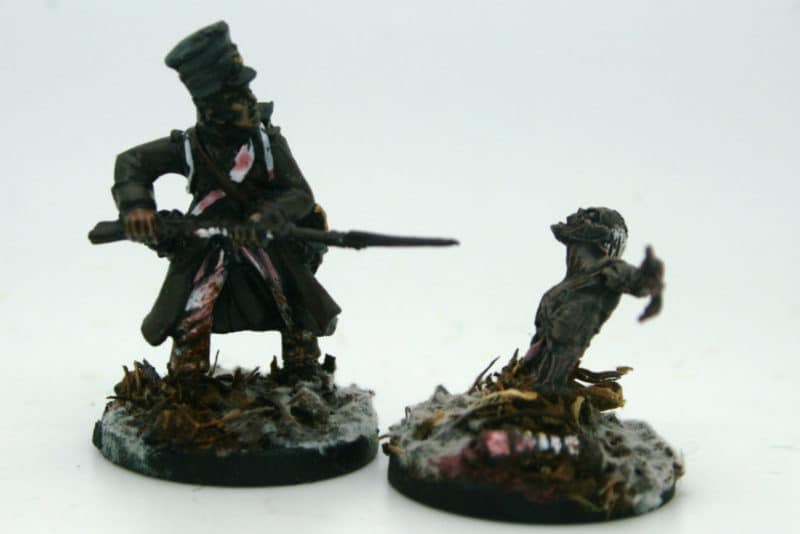
The simple back story to the idea is that during the hellish retreat from Moscow, following Napoleons disastrous attempt at invading Russia, it wasn’t just the freezing temperatures, marauding wolves and Cossack’s that threatened the French Army. Soldiers that had been driven to desperation by the cold and hunger had turned to cannibalism. Some of these poor souls, suffering a complete descent into madness, beyond all human decency had mutated into the living dead, Zombies. Refusing to leave this mortal earth they now turned on the living, caring neither whether their prey was French or Russian, just so long as it was warm…

More zombies!

And so the stage was set for a very different type of Napoleonic skirmish game. As you can see Daz hasn’t worried too much about the detail on the uniforms. I doubt very much that those involved in the retreat from Moscow were too concerned about Parade ground dress.  Which also begs the question as to why some gamers get so hung up on the ‘right shade’ for a uniform but that’s a question for another blog. As for the Zombies, they really don’t care!

Extra cold steel!

Extra cold steel!

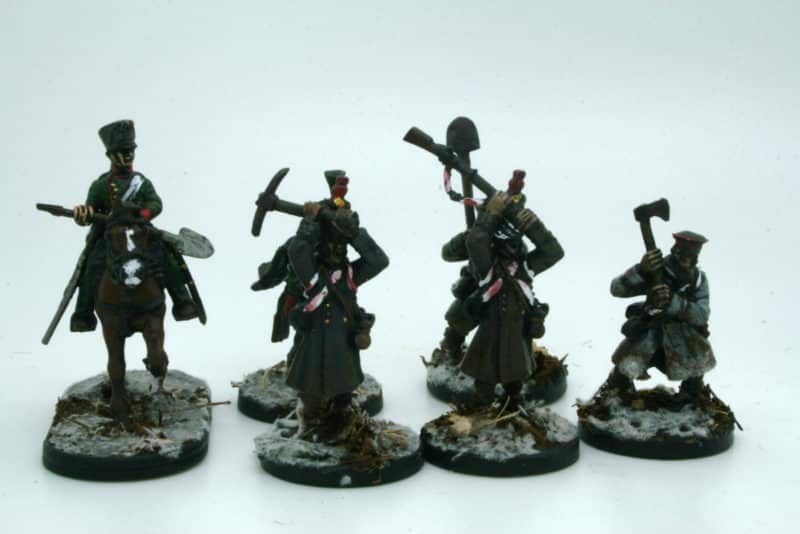
Regarding the conversions, the figures are a mixture of mainly Warlord Games Napoleonic plastics mixed up with some plastic Zombie parts or visa versa, depending on how far the contagion had taken! Daz simply took a scalpel to the figures and hacked away, adding a skeleton arm or leg as appropriate, or a uniformed arm, leg or head to a Zombie torso. There is no need to be too careful, the rough finish just adds to the overall look. When a figure is added to a snowy base, the effect is excellent and immediately evocative of the Russian retreat. It’s only when you look closely at some of the figures that you realise there is a zombie problem!

I wish we had a horse each....

I wish we had a horse each….

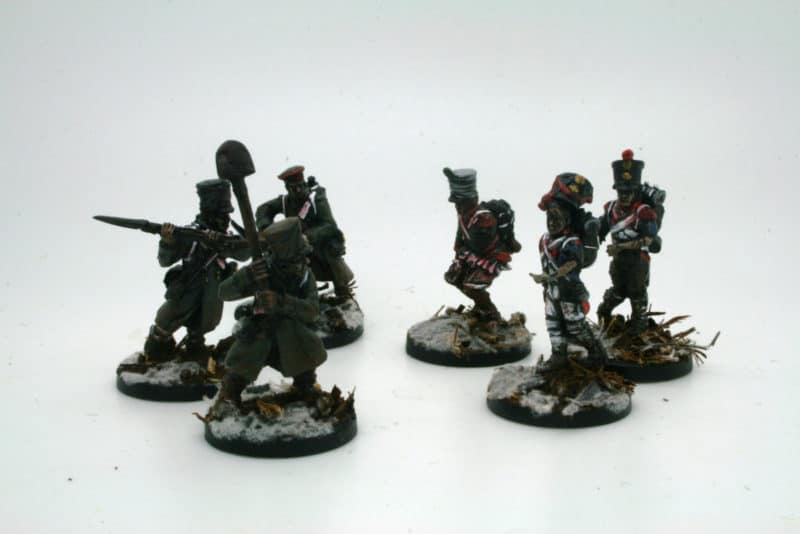
The ‘normal’ French that Darren made to fight the Zombie menace were in the main armed only with hand to hand weapons. Muskets were not reliable in the freezing conditions and the idea was to make the conflict all the more desperate. The French were just fighting their way home and trying to escape the latest sinister menace that had appeared.

The muskets aren't as effective as a shovel!

The muskets aren’t as effective as a shovel!

As I have said, there are no rules as such for a game. The models were more an exercise in imagination. That said, I suspect it would be straight forward to incorporate a batch of Zombies into one of the many great Napoleonic skirmish games out there. Sharpe Practice and Over the Hills are two that spring to mind. I’m sure that you wouldn’t want to be playing Napoleonic Zombies every week but now and then, I think that this sort of stretch of the imagination brings the fun into gaming.

Fire!

Fire!

So there you are, Napoleonic Zombies – who would have thought of that? Sometimes it’s great to follow your imagination and who knows what ideas you can come up with. I think that Darren has done a great job with these figures and to see an idea through is impressive to me. Having an idea is one thing, actually making it is quite another! It’s that side of the hobby that I really enjoy and making and converting something a bit different is certainly a break from building my never ending Napoleonic army.

Zombie horde!

Zombie horde!

But in the meantime, back to Waterloo next week and my latest batch of Nassau….

The Commercial bit

If you would like to have a go at converting, we have a vast range of tools, adhesives, paints, Basing Materials and of course figures in our shop. Just follow the link:

ARCANE SCENERY


Jonas Jones Part 3 – Napoleons Foot Guides

Napoleons Guides, converted Trent Miniatures

Napoleons Guides, converted Trent Miniatures

Once again, I’m happy to bring a guest post from a regular contributor ‘Jonas Jones’. Jonas likes to look for interesting and obscure subjects to model using the Trent Miniatures range as the start point. Now that should give you an idea of who Jonas is! Converting metal miniatures can be quite a challenge, unless you are talented with the ‘green stuff’. However, sometimes a simple head swap can lead to some interesting options. It is in this field that Jonas excels. In the first of his articles, ‘Off with his head #1’, a complete decapitation was required. OWHH#2 was more of a trepanning than a complete decapitation, but with the same end in view. In this short piece Jonas just replaces the headgear rather than the full head!

guides 2

The Trent Miniatures Legere in Mirletons (FLe01) are very nice figures in their own right, but cut (saw) off the Mirleton and replace it with a plumed Bicorn and you will have a passable likeness for Napoleons Foot Guides as they appeared in Northern Italy and the early days of Egypt. The appearance of the Foot Guides in Italy would be a bit of a ‘what if?’ as Napoleon left them behind to guard his base HQ. They were only a couple of companies strong at this point. However, at the time of the invasion of Egypt, they would have been built up into a small battalion, more than 400 strong.

guides 3

Later in Egypt, they were issued with a new uniform, like the rest of the army. For the early months they would look quite resplendent in green coats, red breeches and tall red plumes. Jonas has chosen to vary the breeches on some of the figures – a reflection of the rigors of campaigning! The plumed bicorne that Jonas has used has come from one of Toussaint Louvertures officers in pack CAR08 but a spare plastic one from a Victrix or similar set would do – you may just have to build the plume up. All of the figures shown have been painted according to information from Knotel Prints.
guides 4 So just enough of an excuse to build a small unit of guides to field with your army and confound your opponent when he questions the colour scheme of your new unit! Regardless as to whether Napoleons Guides is to your taste, perhaps there are other units that you can make with a simple head swap. Sometimes, a simple conversion is faster than waiting for you favourite figure manufacturer to produce the unit that you need to finish your army!

guides 6

All Square!

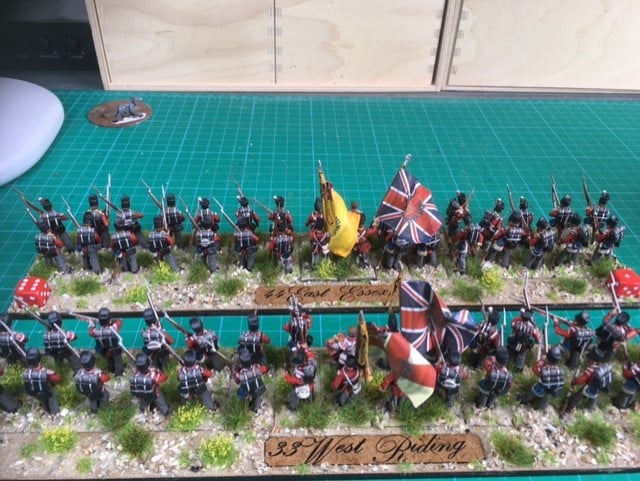
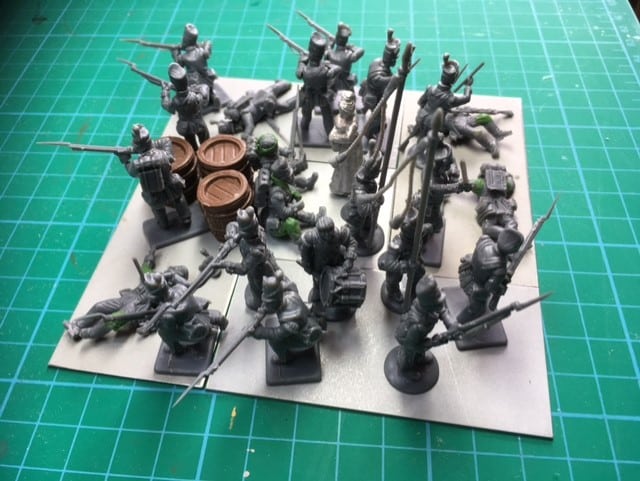
This weeks post is a guest post by the very talented Chris Kirk. Chris has recently ‘converted’ to Napoleonics and is in the process of building his army. Like most of us, he has agonised over how many men should be painted to form a Battalion and then how best to base them. There is of course no correct answers to these questions. It largely depends on what rules set you have decided to use and even then, there is usually some flexibility. After much thought, Chris had decided that he would like his battalions to be made up of 32 figures and that to make life easier on the Wargames table, he would put his figures into a movement tray, complete with Battalion name plate and space for casualty and disorder markers. We had these trays custom made for him by those clever people at Sarissa Precision and they were based on the smaller 12 man trays that I use for club night games.

thumbnail_IMG_6948


As he was building British battalions, they would spend much of their time in Line formation so the need to take them out of the tray would be mainly limited to when they were forced into square when using Black Powder rules. In the course of discussing this, Chris decided that rather than take the figures out of the movement tray, he would make some ‘generic’ square markers that could be used to replace the line if forced into square during a game.

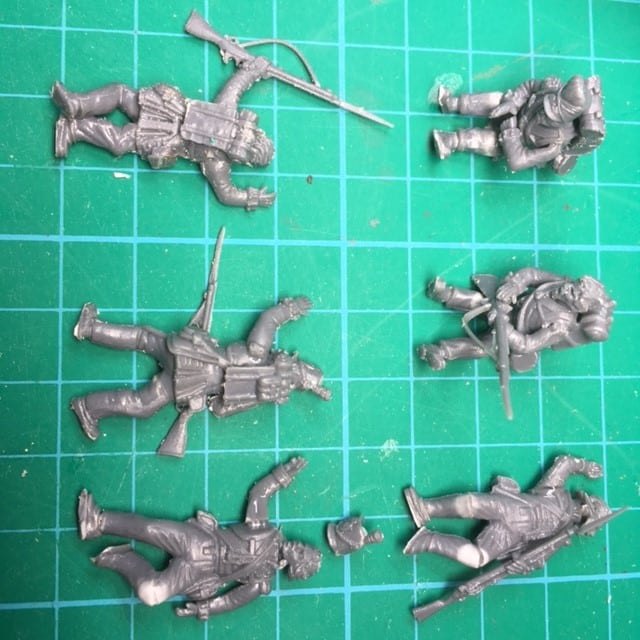
If this seems like a lot of extra work, it is, in the short term! However, Chris really enjoys his modelling and painting and the option of making some mini dioramas was too tempting for him. Rather than paint another 32 figures for each square, Chris decided on using a 120mm x 120mm movement tray to represent the area would then build & paint just enough figures and scenery to give the impression of a square. In doing so, he needed plenty of casualties and the following sequence of pictures shows how he achieved this. I hope that you find it as instructive and useful as I did. I have now added another project to my list!

casualty 1l_IMG_7008 The start point for a casualty – a Victrix standing figure.

Remove the base, leaving as much of the boots as you can!

Remove the base, leaving as much of the boots as you can!

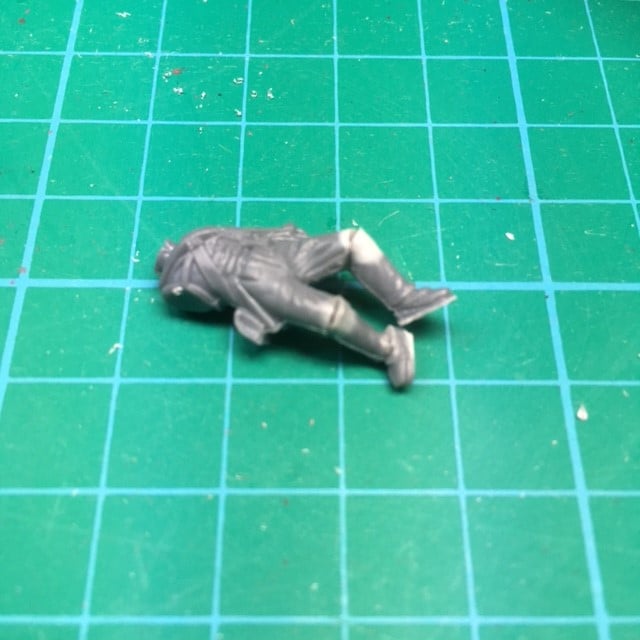
casualty 3_IMG_7013 Cut V’s into the backs of the knees. this will allow bent legs at the knees. Remove feet at the ankles to reposition as if gravity is taking over the limp body.

casualty 4l_IMG_7014 Re assemble legs and flatten the back so that the figure lies flush with the ground.

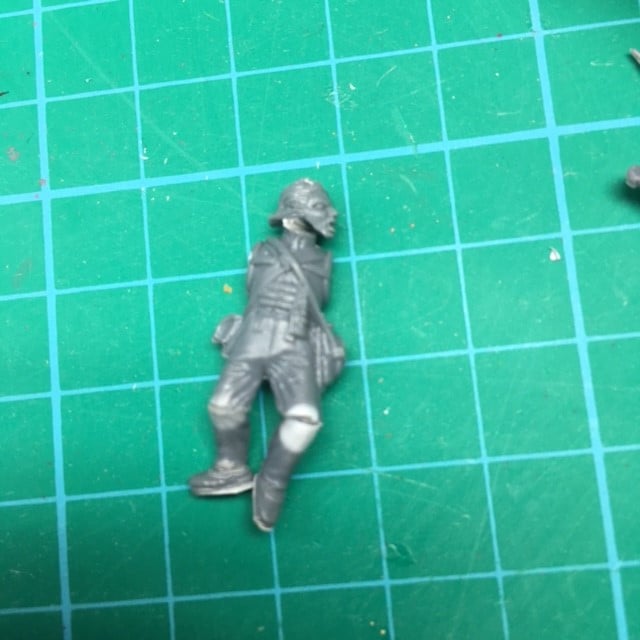
casualty5l_IMG_7017 Add a suitable head – this one is actually from a Warlord Ancient Briton set!

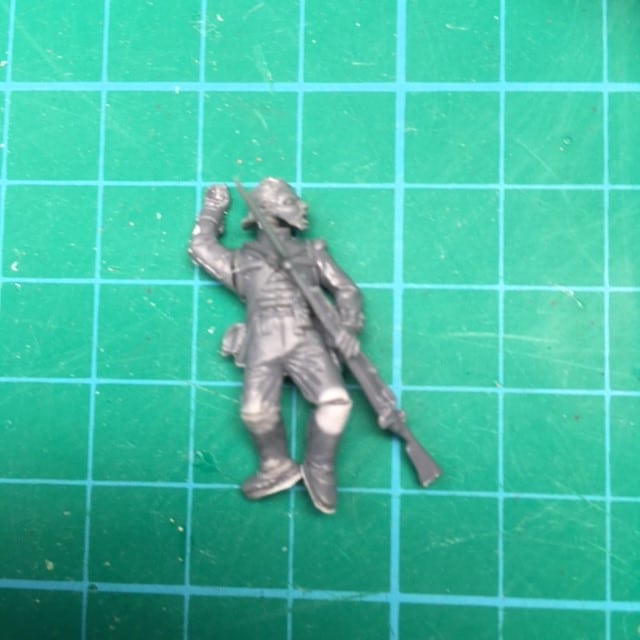
casualty 6 Add the arms – once again, gravity is king! Whilst there will still be some finishing touches, once the polystyrene cement is dry the figure will be roughly correct and ready for filling.
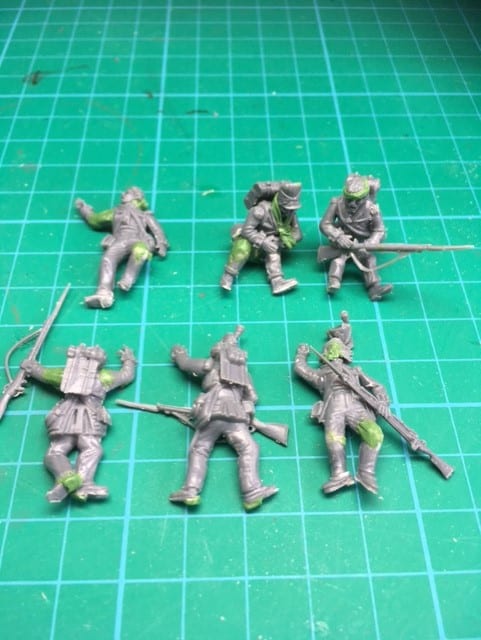
casualty 7_7020 A selection of casualties made using the same procedure. All waiting overnight for the glue to really set hard before more filing down to ensure that they are flat and any cleaning up to be done.

Green stuff on_IMG_7024 Trimmed of flashes. Green stuff applied to gaps. Heels of boots created where needed. Arm sling and head bandage added.

The Square takes shape!
The Square takes shape!

I hope that this has been useful. As you can see, it is a work in progress and once Chris gets the rest of the figures to complete the square and of course, paints them we will return with the finished article.  I think it shows how useful Plastic figures can be when it comes to making your own units. I know that some wargamers have very fixed views when it comes to plastics versus metals. I like both and when it comes to converting, I think that this article shows how plastic figures can be adapted and remodelled far easier than metals.

If you would like to try your hand at conversions, we have a massive selection of fillers and tools to browse through here:

FILLERS AND TOOLS 

You can get Victrix plastics here:

VICTRIX MODELS

and Glues and Adhesives here:

GLUES AND ADHESIVES

Jonas Jones Rides again!

The last time Jonas Jones wrote for the blog was back in 2011! But he’s back again, armed with his Jewellers saw, pin vice and super glue showing you how to make the best of the United Irish Command pack from the Trent Miniatures range. Now, without revealing Jonas ‘s true identity, it is fair to say that he is an enthusiast of the Trent Range and loves nothing more than to carry out simple conversions on the figures, if nothing else than to prove that you can do as much with metals as you can with plastics.

So in his own style and words, here is his ‘take’ on the United Irish (rebel) Command pack from the Trent Miniatures range:

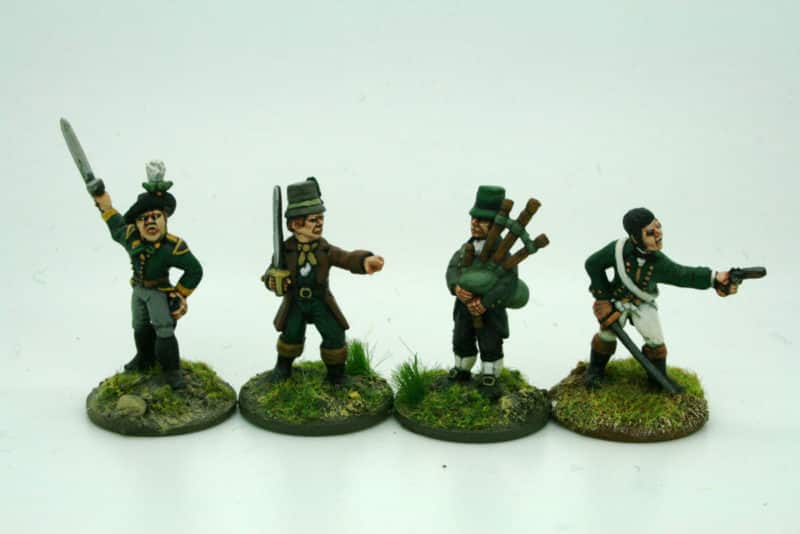
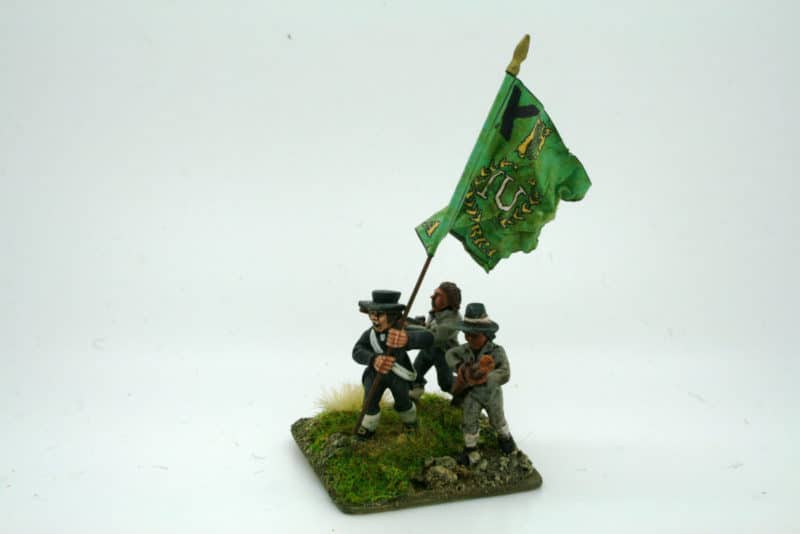
‘ Ir98/03, the United Irish (Rebel) Command pack contains four figures from five basic poses, supplied at random. Instead of one of the four poses shown in the main photo, you might get a standard bearer (That’s him leading a couple of Gunsmen in the next photo. You will need a pin vice to drill a hole through his hands, which takes just a few seconds, time that you will get back with interest by never having to stick the flag back in ‘cos it’s come out for the umpteenth time!)

IR98/03 Irish Command

IR98/03 Irish Command

Don’t panic if you don’t get a standard bearer , because of course almost any pikeman can be ‘converted’ to a standard bearer simply by giving him a standard instead of a pike! Incidentally, the standard shown is supplied by Flag Dude, one of several designs that he does for the Great Irish Rebellion.

irish standard

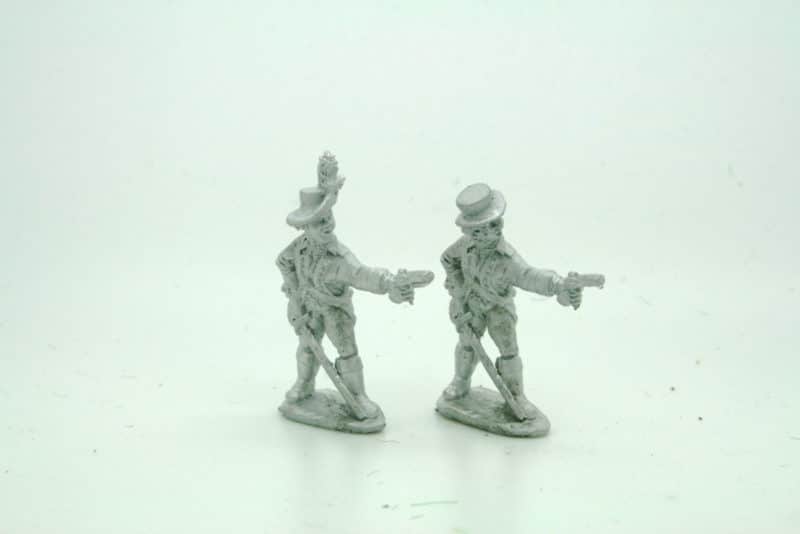
Two of the figures shown – the officer pointing and the bagpiper – come with separate heads, which are easily fixed on using superglue, and give more scope for variety. Also the guy firing his pistol has three different head variants. also supplied at random. (There’s the other two in the photo of the unpainted castings.)

Officer Variants

Officer Variants

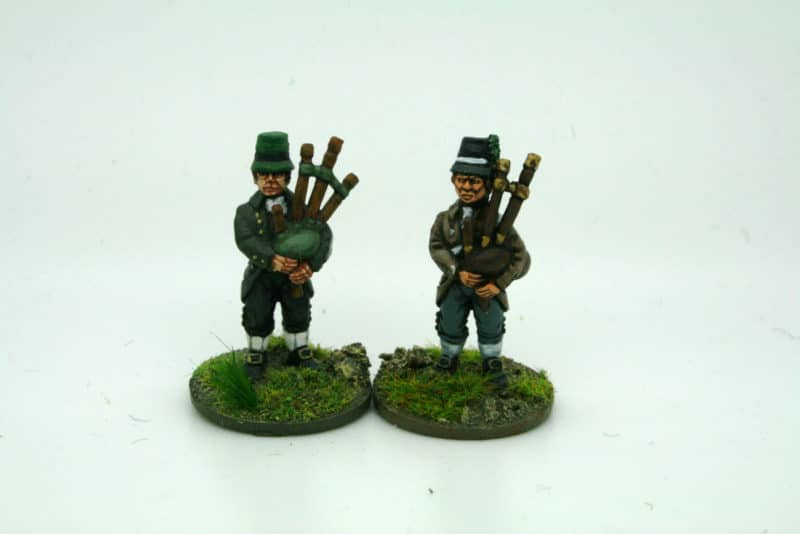
Now, re that bagpiper. We’re pretty sure that knowledgeable chaps and chapesses like our readers will know that Irish bagpipes have two drones, whilst Scottish bagpipes have three. Given the large Scottish immigration into Northern Ireland (Ulster) we feel fairly sure that both types would have been kicking around in the Emerald Isle. So we’ve opted to give our castings three drones on the grounds that it’s much easier to snip off one drone to “Irish – ise” ( remember when they are smiling) your bagpipes than it would be to add a third drone to a two -droned casting. The photo showing the two side by side should help you to differentiate your ‘Och aye the noo’ from your ‘Begoora’….

Bagpiper variants

Bagpiper variants

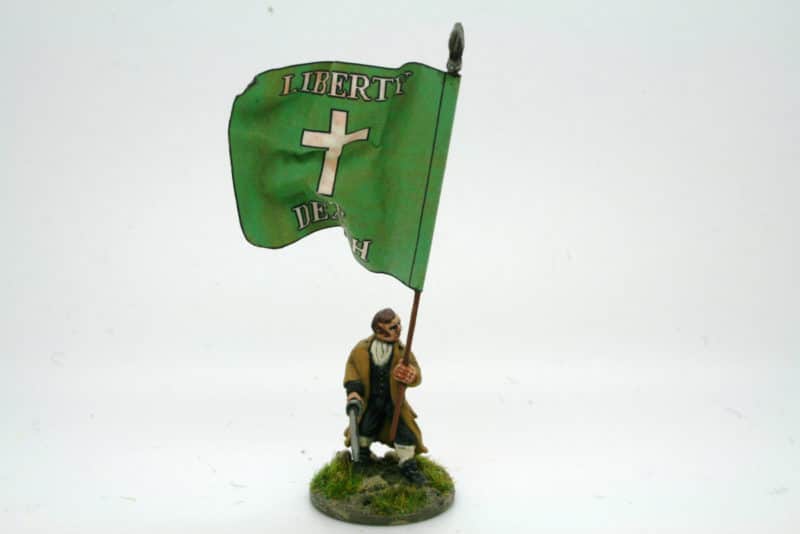
Finally, here is a picture of Father Michael Murphy carrying the very flag (Flag Dude again!) that he was carrying when cut down by canister shot at the Battle of Arklow. Trent miniatures don’t actually make a Father Michael Figure. This is a conversion of one of the pike men from pack Ir98/15. He’s had his arm removed with a fine saw. It only takes four or five seconds but if you are pushed for time, you could simply snip it off with some Flush Cut cutters in two seconds! The arm has been replaced by the sword arm from the mounted Officer (Ir98/19) who comes with a selection of four separate right arms, giving you three spares for your bits box and scope for lots of simple but exciting conversions. All you need is the aforementioned saw/cutter and pin vice & drill. Oh! and a dash of imagination and patience!’

Father Michael Murphy

Father Michael Murphy

I hope that this short article from Jonas will inspire you to look at again at the Trent Range and perhaps other metals. The next time you are about to ask ‘does anybody out there make this figure or that figure?’ perhaps the simple answer is to pick up your saw and pin vice and make it yourself. It’s surprising just what you can achieve!

If you would like to see the Trent Miniatures Range, Click here:

TRENT MINIATURES RANGE

You can read more from Jonas and see his other conversions here:

OFF WITH HIS HEAD PART ONE

OFF WITH HIS HEAD PART TWO

For all the tools that you will need, click here:

EXPO TOOLS

And finally for Super glue and fillers:

GLUES AND FILLERS


Painting flesh – Charles Baynon Style

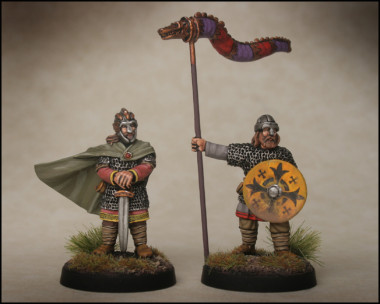
Shieldwall Berserkers Group

Shieldwall Berserkers Group

I’m very lucky to work in the wargaming industry, albeit on the peripheral of things as a retailer, but as a result I get to see some superb work by the master painters. I have a few favourites, some of whom may be familiar to you, Kevin Dallimore, Paul Cubins, Matt Parkes, Dave Woodward and Andrés Amián Fernández are just a few that spring to mind. I can only aspire to achieve the results that these guys produce. I do however, use them as inspiration and do my best to follow some of their techniques to improve the look of my figures.

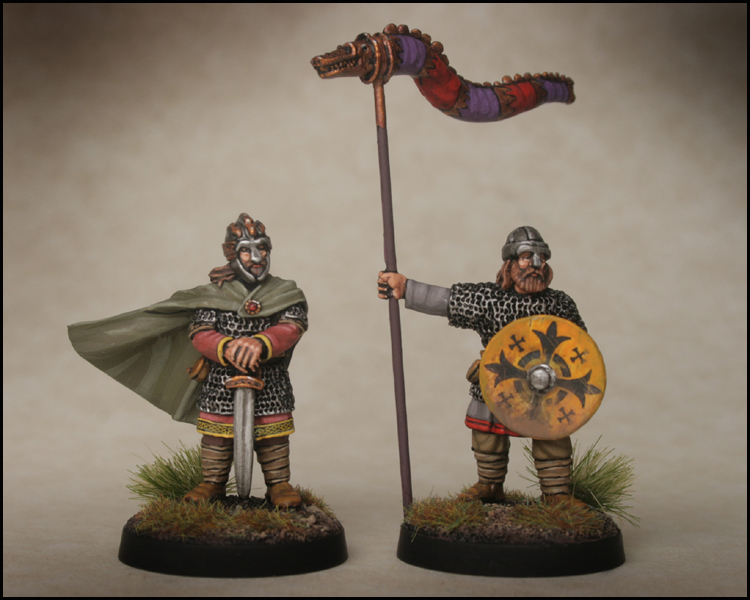
Alfred the Great - Footsore

Alfred the Great – Footsore

I can now add another name to the list of my favourite painters, Charles Baynon. Charles has been painting some figures for the Footsore web site and I was very impressed with his use of muted colours on his dark age figures that looked both authentic yet still  allowed the figure to catch your eye. I asked Charles if he would mind painting some of the Lucid Eye figures for our web store and he kindly obliged. The results were superb and it was in these figures that I could see what had really impressed me with his painting. It was his portrayal of the face and flesh. How did he do this! Well, the simple way to find out was to ask him and Charles has kindly supplied his ‘flesh recipe’ below and allowed me to share it with you.

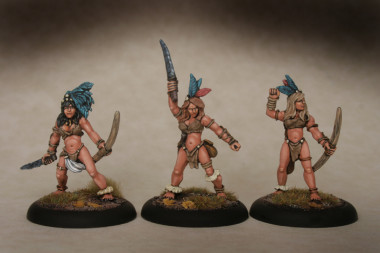
Lucid Eye Amazons Set 2

Lucid Eye Amazons Set 2

Painting Flesh The Charles Baynon Way!

“The ‘recipe’ for flesh it is pretty straightforward. I always undercoat figures black and then paint the eyes first. Having narrowed the eyes to a suitably thin sliver, I then paint around all the rest of the visible flesh with tan brown undercoat ( Foundry tan shade). The next step is to paint the bottom eyelids. This I do with Vallejo Basic Skintone. Although it is labelled ‘basic’ it is very light and makes a good highlight. The next step is to paint the rest with the base skintone. For this I use Army Painter Tanned Flesh. First I dot the tip of the nose then place two dots either side of the tip. The trick is to leave a very narrow line of the tan undercoat showing through to define these dots. After painting the bridge of the nose I paint the cheeks (being careful to leave a very thin line of the undercoat showing to separate the cheeks from the bottom eyelid) then I paint the top eyelids and forehead, leaving a very narrow line above each eye to serve as eyebrows.

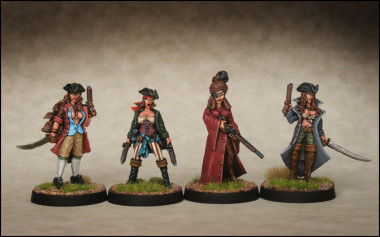
Black Scorpion Pirate Women Group

Black Scorpion Pirate Women Group

You may have gathered that it is easier to paint ‘up’ to a line than actually paint a narrow line, so it is the undercoat that serves as the lines on the face. I then highlight areas of the face with Army Painter Barbarian Flesh, namely the tip and bridge of the nose, cheekbones, forehead above each eye and, very occasionally, the chin and jawline. The Barbarian Flesh then has increasing amounts of white added to it and I further apply it to areas of the greatest highlights ie. nose, cheekbones and just above the eyebrows. Once I am happy with the result the last part of the face I paint is the bottom lip with Foundry Terracotta Light.

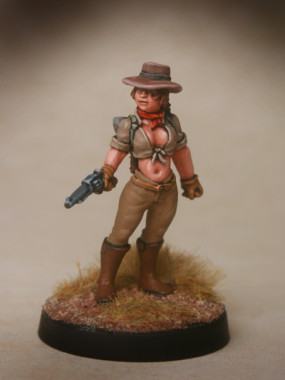
LE Female Explorer 1a

Lucid Eye Female Explorer

I use the same basic recipe for hands, the lightest highlights being the knuckles and fingernails.
For women and larger areas of flesh I tend to use a more subtle colour mix. On women’s faces I often don’t have the undercoat lines to show the wrinkles! I also dispense with the lighter Barbarian Flesh. Instead I just use Tanned Flesh and then build up the highlights by adding successive layers with more and more white added. This gives a much smoother appearance and is more flattering. It is also the technique I prefer to use if painting large areas of bare flesh eg. a Greek javelinman in short tunic etc.

Lucid Eye Atlantean Sword Trio

Lucid Eye Atlantean Sword Trio

One last thing, part of the smoothness of tone is also due to the number of times I spray varnish the figure at intervals during the painting process. I found that it was far too easy to, say, rub off the carefully painted knuckles when handling the figure. So I probably spray the figure when I have painted the flesh and then maybe another couple of times after I have completed another particular stage. Just thin coats of varnish are required. I use Army Painter Anti-Shine for this, it protects the figure but, unfortunately, it is not dead matt. The very last coat is the liquid version applied with a small brush. This really does dry to a true matt finish.”

Artizan Mexican Command

Artizan Mexican Command

I’ve illustrated this article with just a few of the figures that Charles has painted. In my last blog post I mentioned that I was trying to develop two styles of painting. My ‘batch painting’ technique for the rank and file and a more careful traditional highlight & shaded style for my Commanders, Vignettes and Characters. If I can get to anywhere near the standard set by Charles, I will be delighted. I now have some guide lines that may help. I hope that you have enjoyed looking at Charles Baynons work. Should you wish to purchase figures painted to this high standard, Charles sells his figures under the handle of cwb21 on ebay and you can see his latest figures for sale here.

Lucid Eye Harranna of Avisha

Lucid Eye Harranna of Avisha


Collecting an Army……

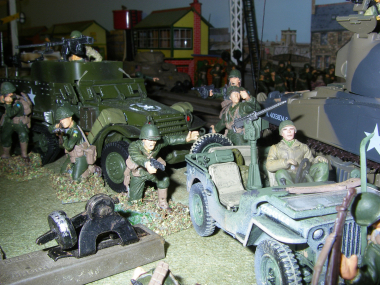
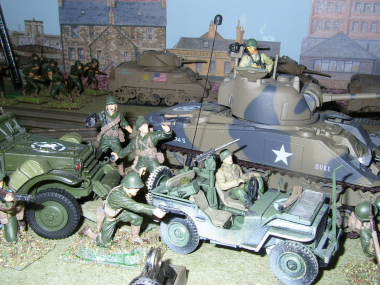
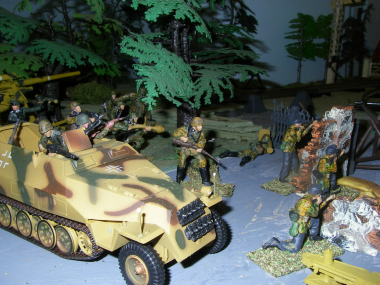
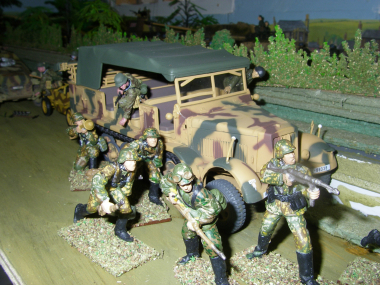
It’s always a pleasure to hear from other people in the hobby and to see what they have been up to. I recently had an email from Alan, who collects and paints 1/32 scale WW2 figures. Not only does he have a huge collection of Soldiers & AFV’s but due to space constraints, the collection has to share a table with his vintage railway. However, the result is just great and the two interests compliment each other and help to show one another off. Here’s Alan’s email detailing his collection:

‘Have had a count up, nearly 20 Shermans and Fireflies, 2 M10s, 4 US halftracks and around 150 infantrymen depicting the 29th Division from Omaha beach to the Bocage region, also 101st airbourne. Also includes support trucks. Brits are 130 Coldstream Guards and full battery of 25pounders and paras.

Germans, 160 infantry of 916th division, Omaha and Bocage complete with Stugs,  Hetzer tank destroyers, Panzer IVs and Panthers support. Also Kettenkrads and Kubelwagons with PAK 40 anti tank guns and mortar batteries and motor cycle combos.  ther are 40+ paras supported by Panthers, 50+ Panzer grenadiers supported by King Tigers, Tiger Is, halftracks and assorted light vehicles. Full battery of 88s with remnants of Luftwaffe regiment support.’

Wow! now that is a collection. Here’s just a few of his pictures:

OLYMPUS DIGITAL CAMERA

Monday Models

So we have a couple of projects we’d like to mention. That aren’t Arcane projects.

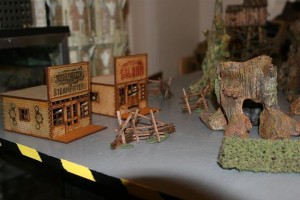
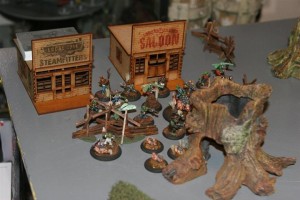
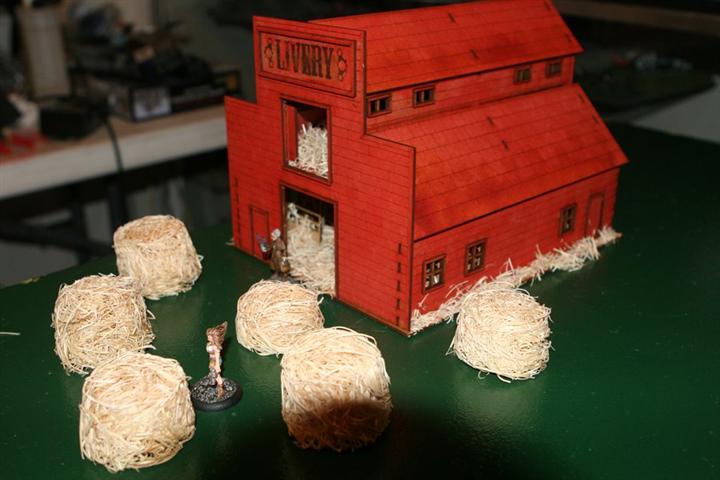
Firstly Kevin Hill from Texas again, with his Western town layout.

Kevin apparently feels he shouldn’t have painted this in that Cola red, because it looks a bit too barn like, but I rather like it. He made the hay bales using a paper cup and glue.

We’d also like to direct you toward something that we found on the internet, not one of our customers, heck we don’t even know the chap. Though we’d quite like to, because we are incredibly impressed. Curos is a modeller based in southern Spain, in Badajos, who has some AMAZING dioramas of Trafalgar and the Peninsula War. We love those ships. They are beautiful. You should take a look at both sites. Be amazed people.

Guest Modeller of the Week: Bernard Lewis

We decided that instead of just talking about Arcane and Steve’s latest projects and battles, you might like to know what other members of the modelling and wargaming community have been up to.

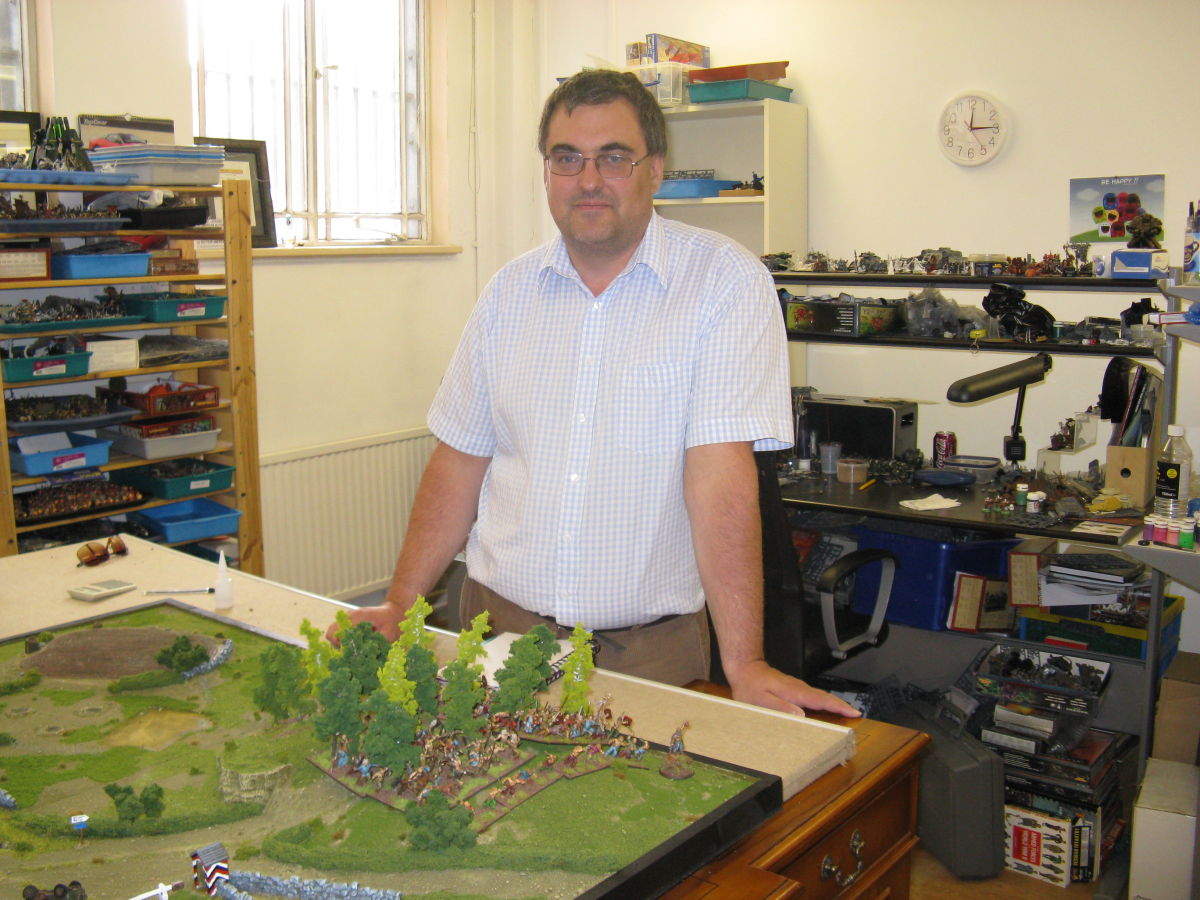
We start this week with the very affable Bernard Lewis from Mantic Entertainment Ltd.

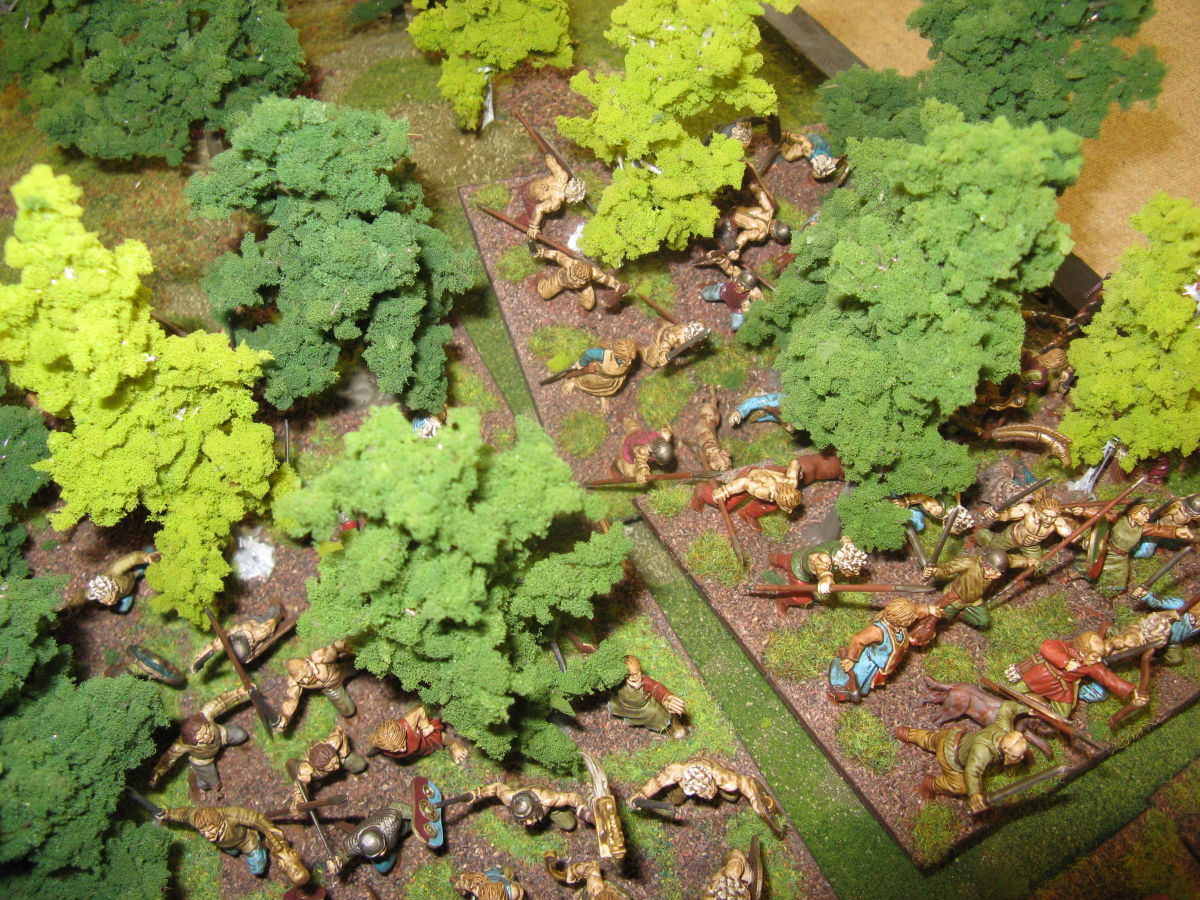
Bernard has recently been making some rather unusual Celtic base groupings for Hail Caesar which have both Celts and trees on the base.


” I used single bases because for Hail Caesar you don’t have to use individual bases, and began with putting trees on just one and found I liked how it looked” says Bernard.


As well as providing some contrast on the gaming table against other players’ bases, and providing the Celts with some hiding cover, the bases have some other advantages…


“I’m a slow painter, and this way I can get more done sooner!…It’s also good if you’re budget conscious”


Currently Bernard is working on a river crossing base to sit alongside the Celts with tree coverage, and then plans a base with Celts fighting Romans.

Obviously here at Arcane Scenery we are big fans of scenic bases, we think Bernard has done a great job of making some extra interest and we may well be [ahem] copying him soon…