Genesis of a Terror Bird

I thought that it might be interesting to show the processes involved in bringing a new miniature to the market. Arcane Scenery own the DeeZee range and since purchasing it we have been very slowly expanding the choice of models available. Buying the range was more of a whim than a serious business decision but I was intrigued by the models and the potential  – if we could build the range and revitalise it. That is not quite as easy as it sounds, as I am no sculptor and Arcane Scenery as an online retailer, has no production facilities. We do have the advantage of being right in the middle of the Nottingham ‘Lead Belt’ and as a result, come into contact with some very talented people.

We have recently started working with the guys over at War Banner and inspired by some of the awesome figures that they have been and will be releasing, I decided it was time to add to the DeeZee range. But where to start? Like many in the hobby, I had plenty of ideas and there was no shortage of suggestions from friends and colleagues. After much consideration, I decided that a terror bird would fit into the range and was commercial enough to appeal to the historical collector as well as Pulp, Fantasy and RPG gamers, meaning that we would have a chance of recouping the investment required.
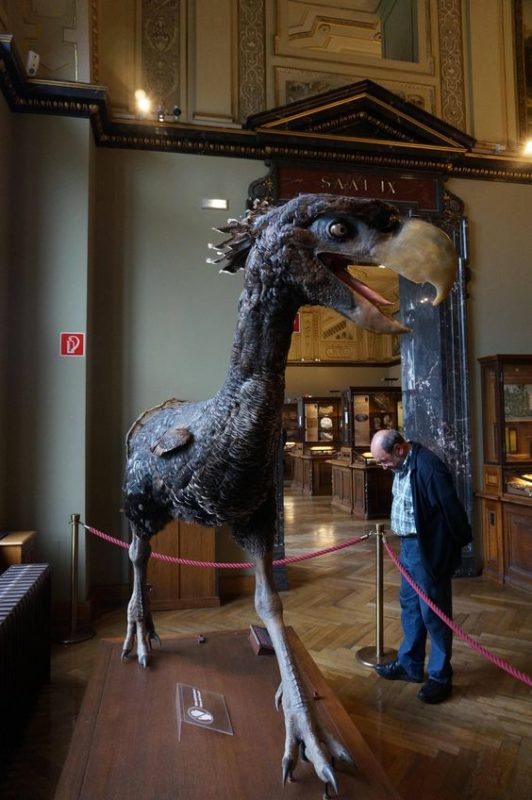
terror bird inspiration

terror bird inspiration

The first job was to find a sculptor. I had in the past been in touch with a few sculptors in the UK but circumstances at the time had stopped me from progressing with the project. So after past false starts, this time, thanks to Andy Hobday at War Banner, the very talented Stavros Zouliatis was contacted.  Stavros had sculpted the soon to be released Warring Clans Samurai figures. I had already been drooling over them as a hobbyist, so when Stavros said that he was not only available to sculpt but also very enthusiastic about the project, it was all systems go! Stavros is based in Greece but despite the distances involved, thanks to the wonders of technology (I am still amazed at what can be done, much to the amusement of the ‘youngsters’ that I work with) it was a relatively simple matter to formulate the model. Using my pinterest board as reference and Facebook messenger as a way of reviewing progress, work was soon under way.
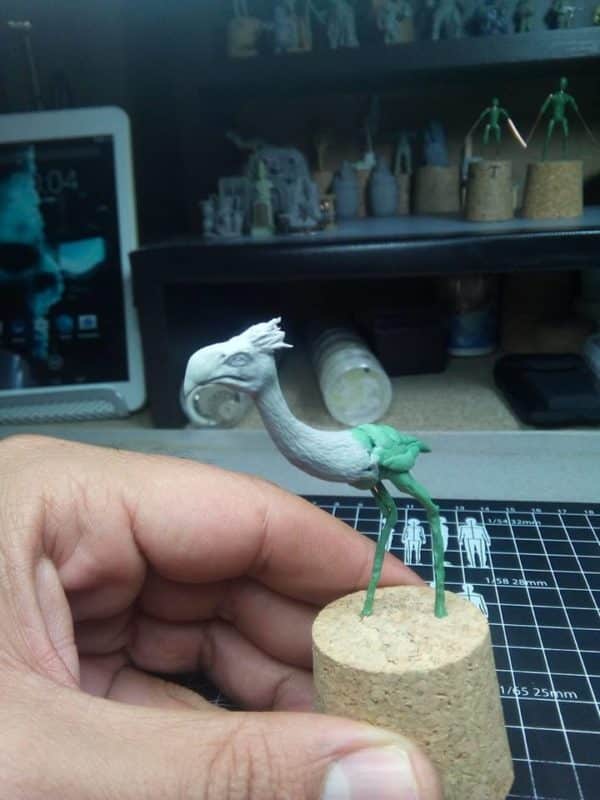
DeeZe Terror Bird being sculpted

DeeZe Terror Bird being sculpted

The picture below shows the Terror bird nearly completed – the sculpting process took about a week on and off.
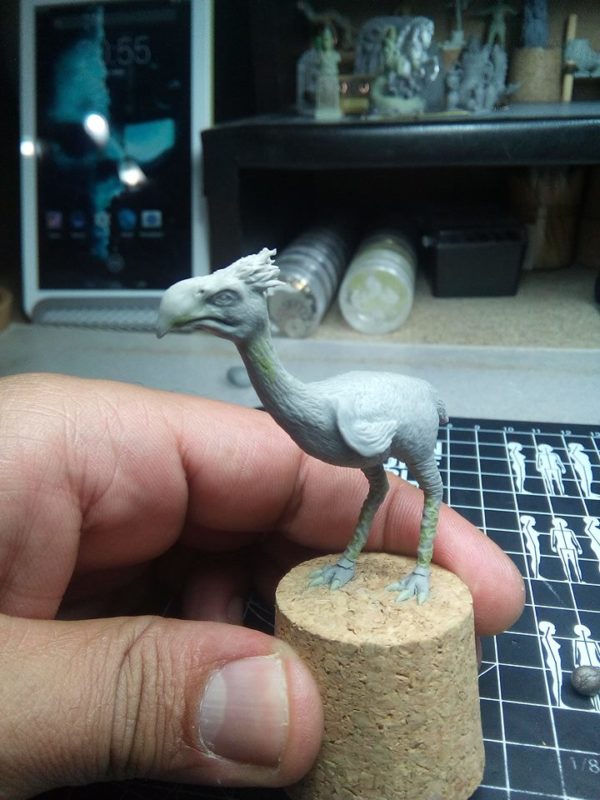
Terror Bird Complete

Terror Bird Complete

Although the sculpting process was complete, we had to give some thought as to how it would be cast. We decided that the legs would be better as separate pieces to the body and also to add a base.
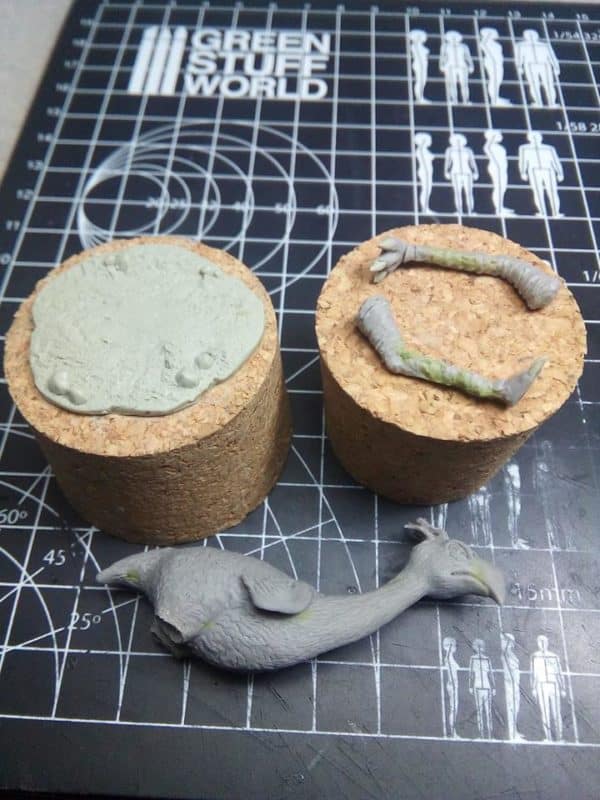
Terror Bird 'Green' comple and ready fro casting

Terror Bird ‘Green’ comple and ready for casting

The next stage was to turn the ‘green’ ( the name of the original model or prototype – usually made from green stuff epoxy clay) into a metal model.

To do this the green is pressed into a rubber mold and then cooked to produce a master mold. Ben, of War Banner games was responsible for this process. It can be quite traumatic as there is the danger that the original will be damaged by the high pressure involved. I’m happy to say that all went well – we even managed to recover the original ‘Green’, which is often lost in this process.
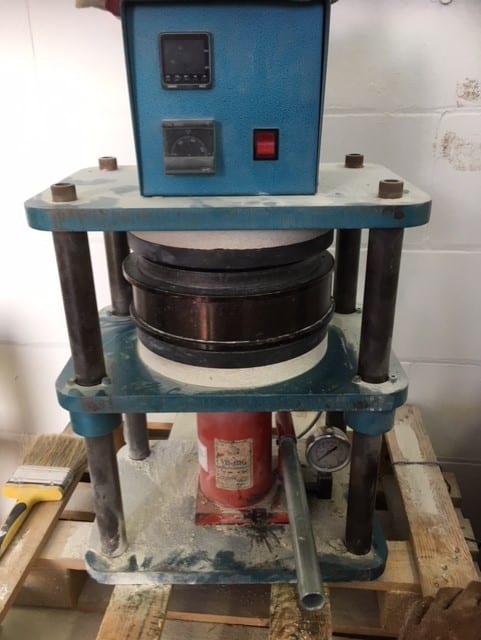
The mold press machine!

The mold press machine!

Once the first mold or master mold has been made, a number of metal models are cast to produce the production mold. In this case, we have a production mold that will ‘spin’ five models at a time. Depending on the expected demand, some manufacturers will make more than one production mold. It is the production mold that will wear out over time but more production molds can be made using the Master if needed. Part of the skill in producing the master and production molds is to decide where the ‘feeds’ run the metal into the impression of the model. The mold also needs vents to let the excess metal run through to be cut into it. Once again, Ben, from War Banner games has done a great job and the production mold is casting superb models without any flash or excessive feeds.
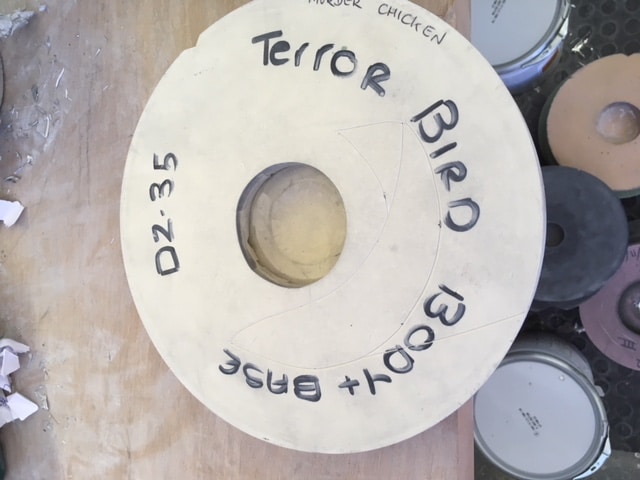
Terror Bird Production Mold

Terror Bird Production Mold – look carefully and you can see the guys at War Banner have good sense of humour….
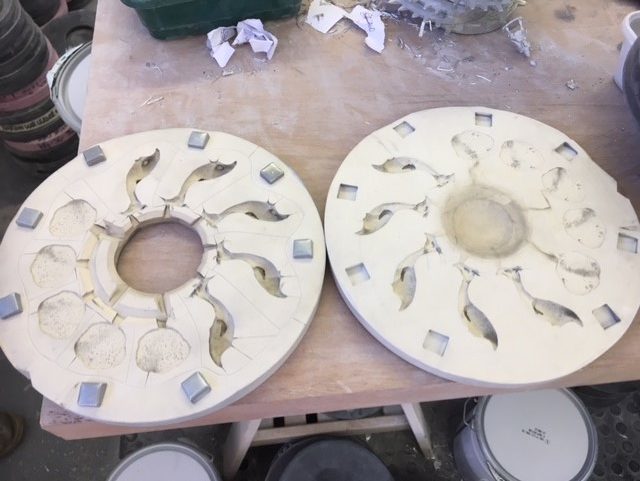
terror bird mold open - this is where the metal goes!

terror bird mold open – this is where the metal goes!

It is now just a case of ‘running’ the molds to build the stock of the model so we are ready for orders. We usually hold a stock of DeeZee models so there is no delay in dispatching orders.
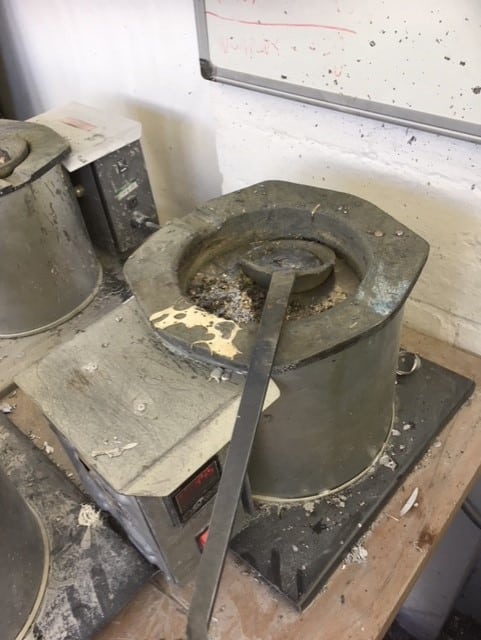
Hot metal in the Hotpot!

Hot metal in the Hotpot!

The final stage in the process was to get a model painted. Jasmine Storey-Smith kindly offered to paint the very first Terror Bird from DeeZee. I think that she has done a super job and the model looks just as I hoped that it would.
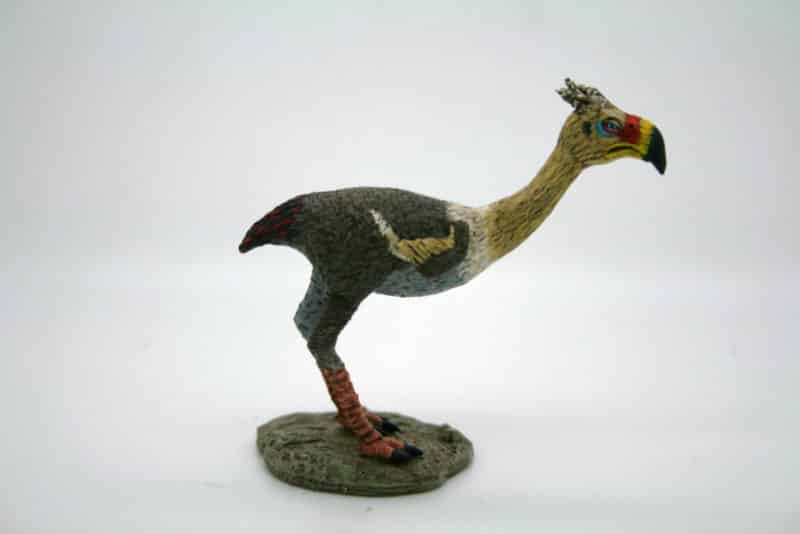
The Painted Terror Bird
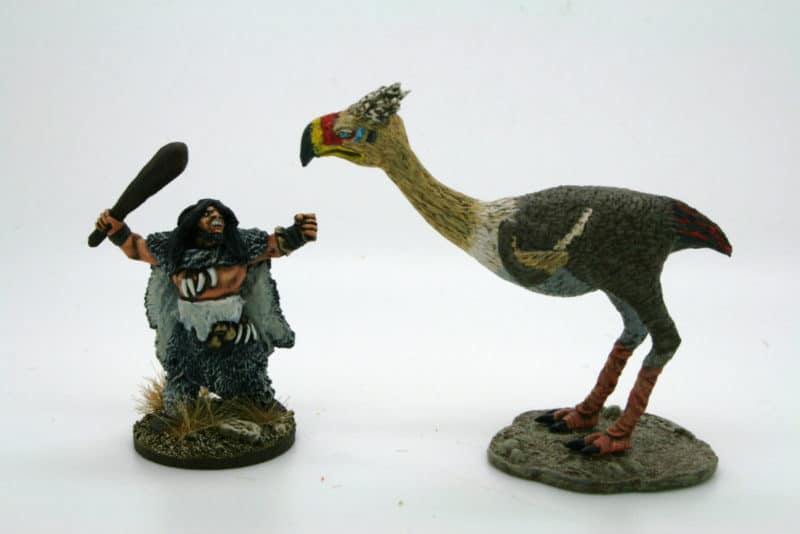
The Painted Terror Bird

Terror bird and Neanderthal

Terror bird and Neanderthal

And so the Terror Bird, DZ35 is ready to launch…Well it’s available to sell – it will never fly! It’s quite a time consuming process and has involved a number of people. As with all of these projects, the materials aren’t really the cost, it is the time and skill of those involved that have to be paid for. I must thank again, the team at War Banner, who as well as supplying their expertise and advice, have been great cheer leaders as well. If you are thinking of commissioning your own range of figures, War Banner have all the facilities, skill and enthusiasm that you will need to get your project up and running.

We certainly will add more models to the DeeZee range. Like I said in the introduction, we are not short on ideas! Who knows, we may have a rules set in the pipeline….

The Commercial Bit

If you would like to buy your very own Terror Bird, (post free at the time of writing!) you can do so here:

TERROR BIRD

You can see the full DeeZee Range here:

DeeZee RANGE OF ANIMALS

If you would like to see more of Stavros’s work or to commission a sculpt , click here:

STAVROS ZOULIATIS

If you would like help in launching your own range of miniatures or would just like to see the superb War Banner range, click here:

WAR BANNER

We hope that you enjoy your modelling!

French Sailors in the Caribbean – some conversions

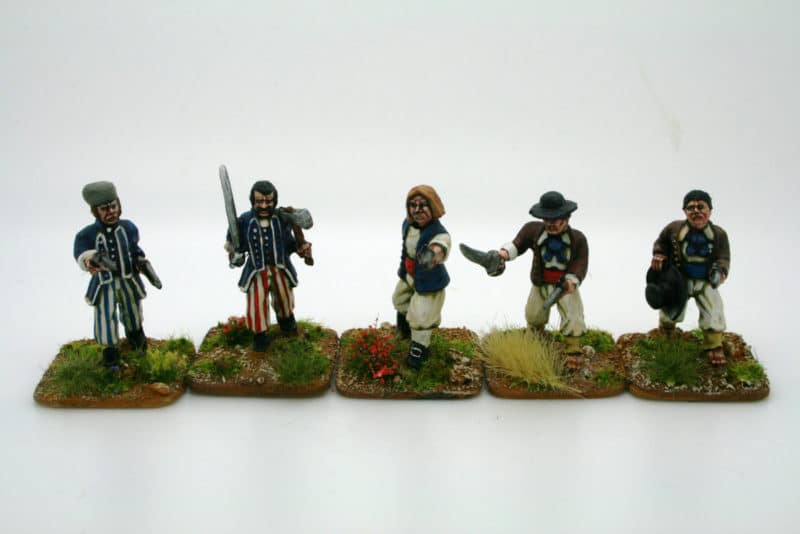
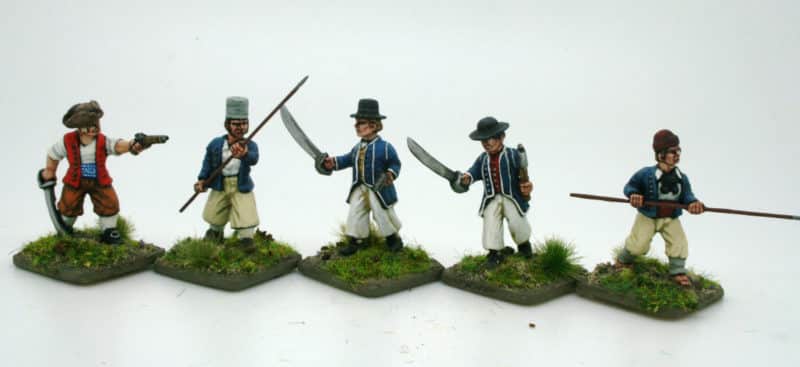
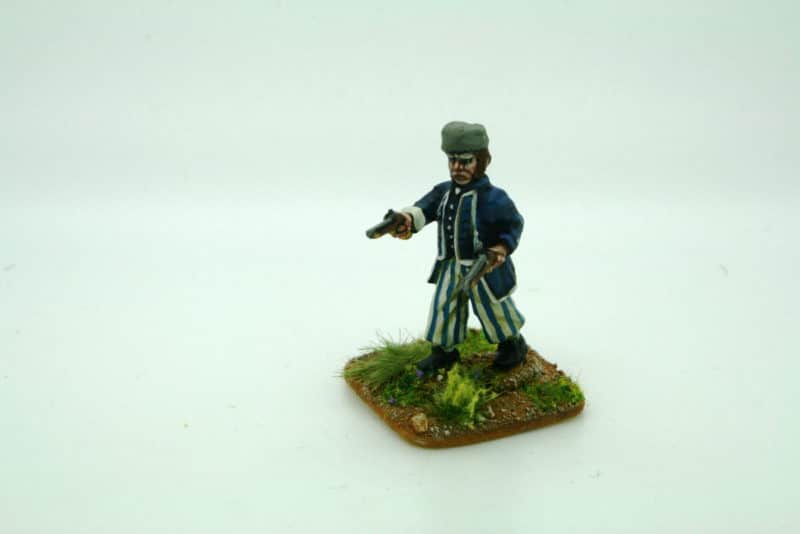
Jonas Jones has been busy with his jewellers saw and clippers to bring us some more conversions from the Trent Miniatures range. I think that there is a tendency in the hobby not to convert metal figures but Jonas shows that with a bit of imagination, some simple modifications can give quite a bit of variation. The starting point is the pack of French Sailors from the Caribbean range, pack CAR24 ( links below). A useful pack as French Sailors had no regulation uniform at this time, so these chaps could be seamen of other nationalities or augment a pirate crew.

French Sailors from CAR24

French Sailors from CAR24

The pack was produced for the Caribbean range as in June 1793, about 2000 French Sailors, led by the newly arrived Royalist Governor of St. Domingue attacked the colony’s principal port, Le Cap, defended by the Republican commissioners. In two days of savage street fighting, involving also the National Guard and several thousand revolting slaves, 90% of the town was burnt down, before the Governor and his sailors were beaten back to their ships.  Someone noted that whilst the sailors were good fighters, as more buildings having stores of liquor were ‘liberated’, so their inclination and ability to fight diminished! Perhaps building a force of 2000 French sailors is ambitious ( although we will be happy to supply them!). It does seem that a small force or unit would be very useful to have and we could see them participating in many smaller skirmishes! So without further ado, Jonas explains how he converted his latest models.

French Sailor Conversion 1

French Sailor Conversion 1

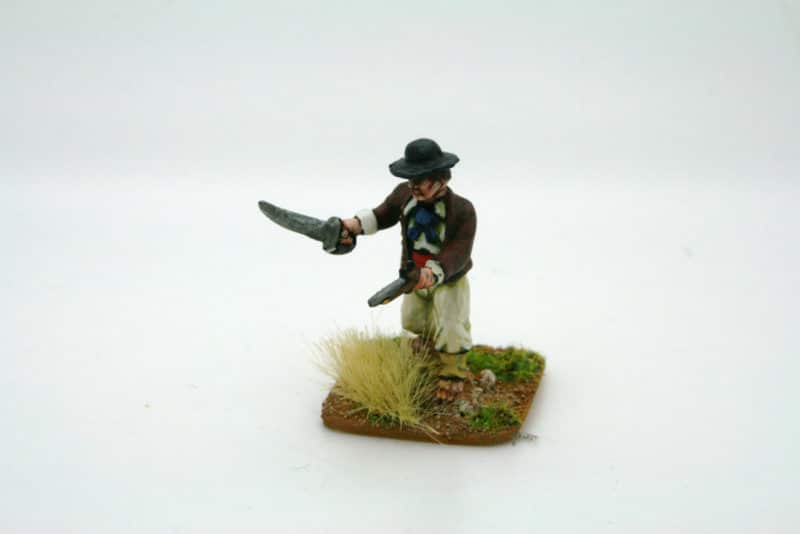
“This chap was inspired by the closing action from the Butch Cassidy and the Sundance Kid movie. I wanted a two-fisted pistoleer prepared to go headlong at the opposition. (Even braver with a pair of flintlocks rather than the six-shooters!). The figure’s right arm was clipped off with a pair of flush cutters and a right arm from the French Dragoons (Haiti) – pack Car 14 – was substituted. (About 15 seconds work with a pin vice).”

French sailor - Conversion 2

French sailor – Conversion 2

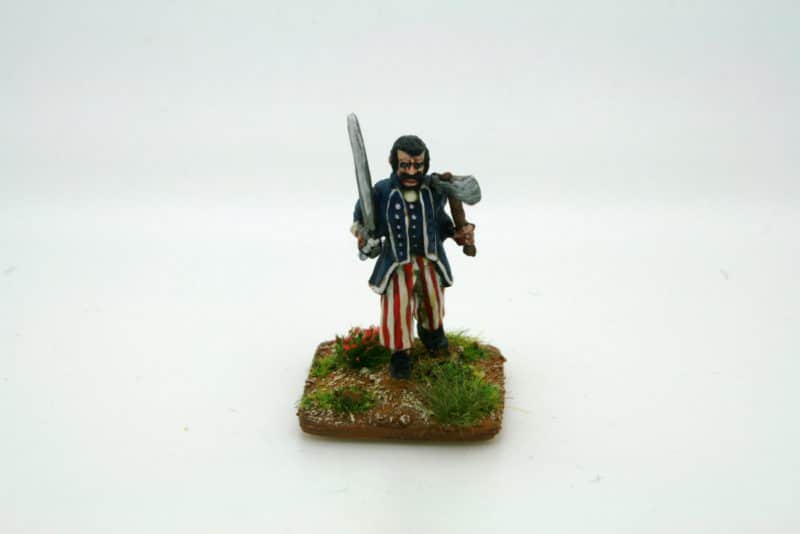
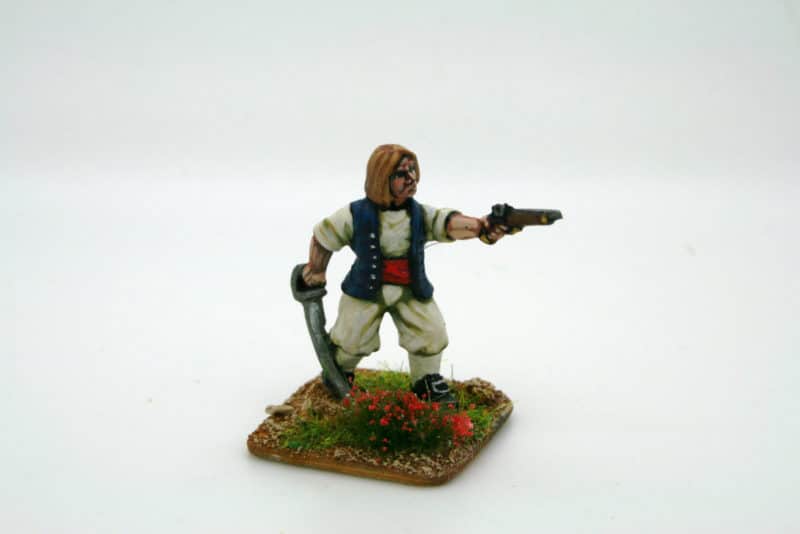
“When Israel Hands made his appearance in season three of Black Sails, the potency of a cutlass and boarding axe combination was demonstrated to perfection: four opponents despatched in about the time it’s taken to type this paragraph! Again, the right arm has been cut off and this time the shouldered sabre arm from the French Dragoons (Haiti) is substituted. The head is from the EDZ08 bare heads pack. Obviously, a man wielding two fearsome weapons would have a fairly stern demeanor; I felt that the moustache provided some “sternification”!”

French Sailor conversion 3

French Sailor conversion 3

“You’ll remember the bit in the movie The Professionals when the Mexican bandit leader passes his hat across the front of his holster to mask drawing his pistol. That influenced this conversion. It’s one of the boarding pike figures with its left hand snipped off and replaced by the seperate left hand with pistol. The right hand was drilled through as one would for a pike, but then a cut was made from underneath and the hat superglued in. The hat is from the Car19 pack – Poles in St. Domingue. Flush cutters and a small file have removed the Polish head from underneath the hat – there are always casualties in war!”

French Sailor Conversion #5

French Sailor Conversion #4

“This conversion is the other pike chap, left hand snipped off and left hand with pistol inserted as with conversion #3. The right arm has been snipped off and replaced by the sword arm from the French Dragoons pack (CAR 14).”

009

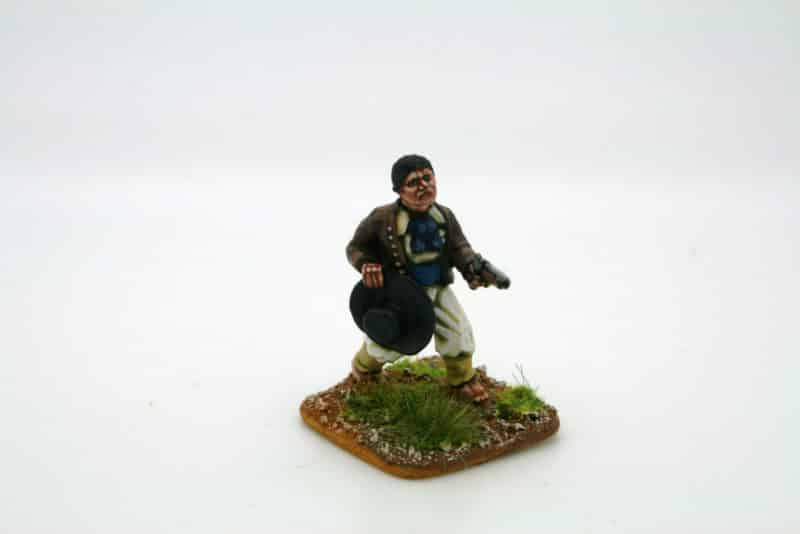
“This isn’t really a conversion; it’s just the chap firing his pistol given the priest’s head from the Chouan/Vendean Characters bis pack (FCHOU 06). I just felt that it looked right.

French Sailors conversions

French Sailors conversions

I hope the this article will give the reader some ideas as to how to go about making some simple changes to figures to get a new look. It’s surprising how a simple head or arm swap can change the look of a figure and allow a modeler to stretch one pack of five figures to make a unique band ideal for the many skirmish games that are out there. Jonas has used other metal figures to complete his conversions  but plastic bits will work just as well – I’m sure that most of us will have a decent bits box to dive into! You often dont even need to use figures from the same period – a dark age figure holding an axe could be used to provide a boarding axe!

If you are thinking of converting figures though, you will find that the Trent Miniatures EDZ range is a good place to start – plenty of options for easy head swaps.

The Commercial Bit

We carry the full range of Trent Miniatures. You can find the Caribbean Range here:

WARS IN THE CARIBBEAN

You can find the EDZ range and other equipment here:

EQUIPMENT AND ACCESSORIES

If you need a pin vice, pair of flush cutters or tools in general for your hobby, check here:

TOOLS

I hope that you enjoy your modelling!
Daimyo’s Retinue – Progress?

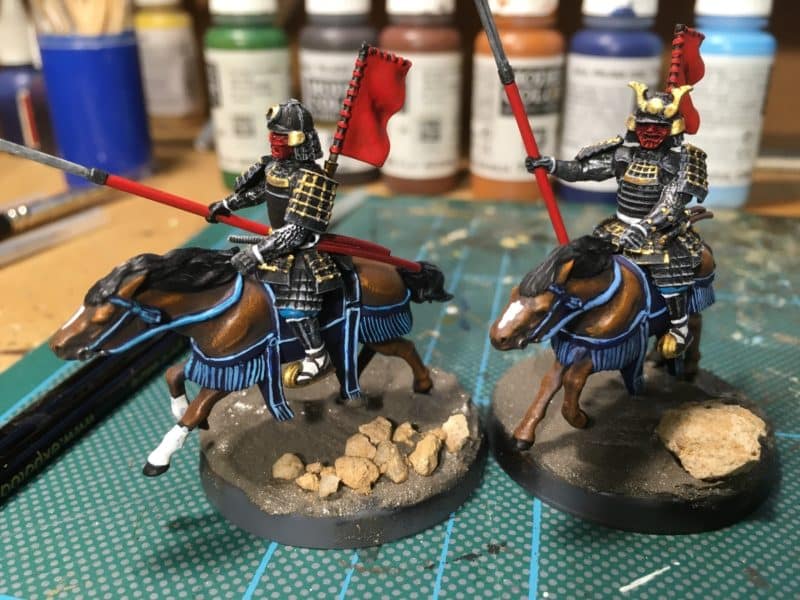
Sometimes things don’t work out the way you would like them to, and for me, that seems to be the way it is with Daimyo’s retinue. Of course, it could just be a case of familiarity causing the dissatisfaction – this is the second batch of plastic cavalry that I have painted. For some reason, I am not feeling the love for this project! I now have two of the Retinue more or less complete and painted in a similar style to my other samurai cavalry. However, they just don’t look as good as I want them to!

The first of Daimyo's retinue

The first of Daimyo’s retinue

Now to be fair, they are not yet finished. I need to complete the basing and I know that once the base has been painted and some nice grass tufts added the models will look substantially better. I also will be adding a Decal to the flags and tidying these up a bit, all of which will help.

In the meantime, I carried on with the retinue and painted the Daimyo himself. I had a clear idea in my mind as to how I wanted him to look and the colour scheme that I would use.

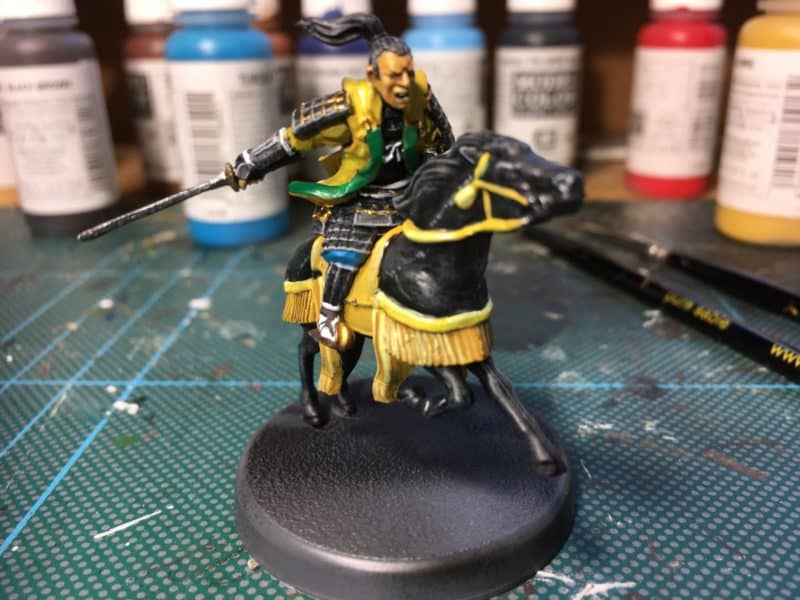
Daimyo ready for basing

Daimyo ready for basing

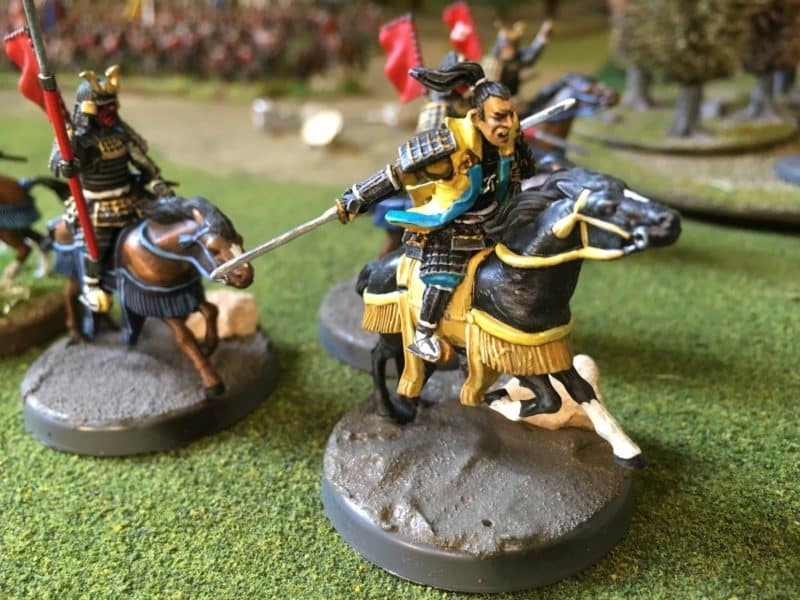
However, I am disappointed with the result! The colour scheme just hasn’t worked – he looks like he is sponsored by JCB! Once again, I have made the mistake of adding green trim to his cloak. It didn’t work when I painted my Geisha spy so why I made the same error is a mystery! I also think that yellow is a difficult colour to get right and in trying to use such a bold finish with a primary colour, I have made it difficult to achieve the look that I was after.

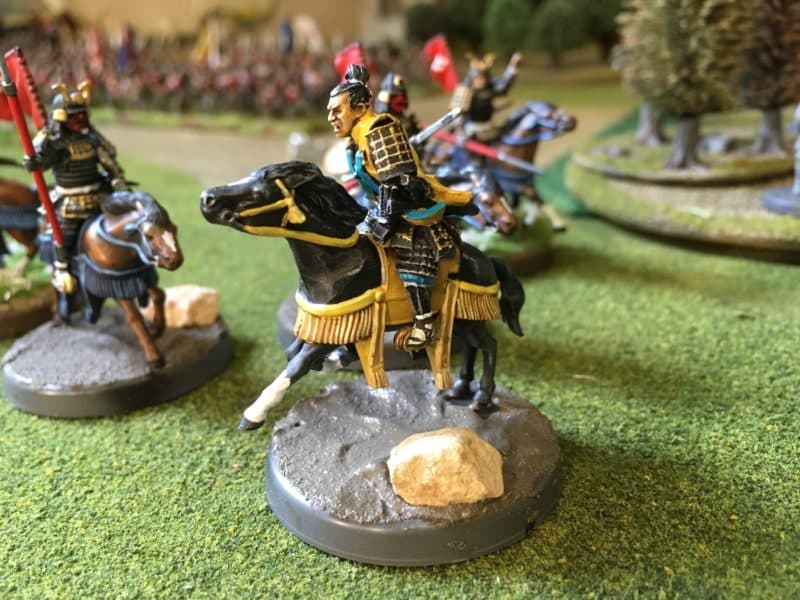
Daimyo repainted!

Daimyo repainted!

The picture above shows a few changes that I have made to try and improve the figure. The trim on the cloak is now Turquoise, to match his trousers. I’ve added some white socks to the horse and given the horse a white mark on it’s head and I’ve added some highlights to the Daimyo’s trousers. The base has the textured paste applied and will of course benefit from being painted.

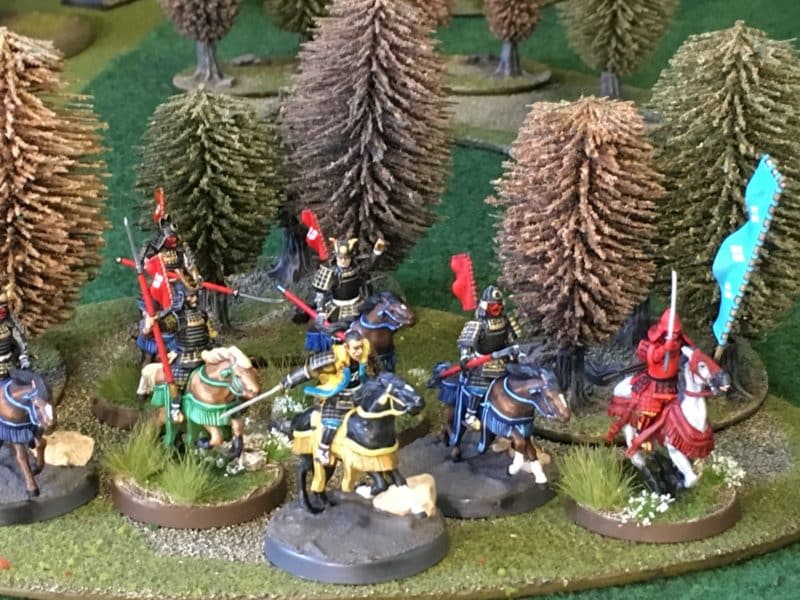
Daimyo Charge!

Daimyo Charge!

So I think that he looks a bit better but the feeling lingers that it is not quite the finish that I had in mind.

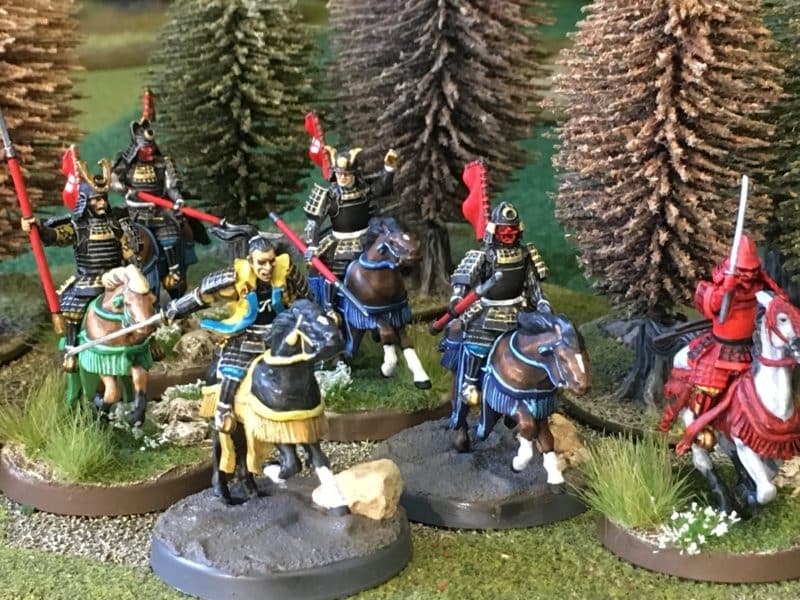
It is easy to be over critical and often the answer is to put the models to one side and come back to them a couple of days later. For now, though, apart from the basing, these are done. I console myself with the thought that these are table top pieces not entries for the Golden Demon Painting competition. They don’t look too bad with my other cavalry.

Samurai Cavalry charge!

Samurai Cavalry charge!

Daimyos Retinue grows!

Daimyos Retinue grows!

So I have another four more Samurai cavalry to paint before the set is complete. With the World Cup about to start, it will be a while before I can show you the finished result. Perhaps watching the football will give me the break that I need from painting….

The Commercial Bit

Practically all of the models, paints, bases, textures and finishes are available post free to most world wide locations in my shop here:

ARCANE SCENERY


Daimyos Retinue is on the Work Bench!

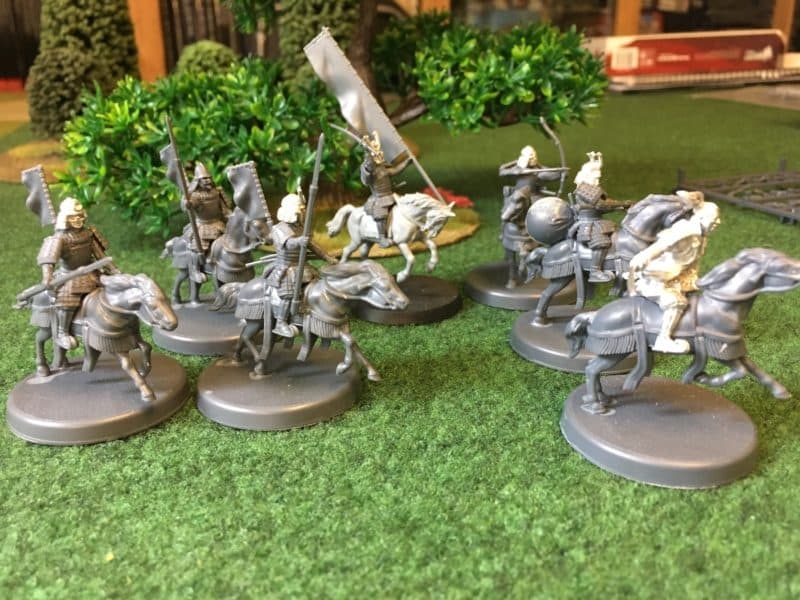
After more or less completing my Napoleonic Nassau Infantry, I thought that I would have a change of period and complete a Test of Honour Boxed set, Daimyos retinue. I had decided to build the retinue as a continuation of the other Samurai cavalry boxed set and would be using a similar colour scheme for the armour. At some point in the future I’m sure that I will start to play games with larger formations rather than just individual figures and having a degree of coherency in the colour scheme will help.

Daimyo's retinue ready for priming.

Daimyo’s retinue ready for priming.

There are actually six plastic Samurai in the set and a metal figure of Daimyo, so with only six horses, I was left with a spare Samurai. It was a straight forward option to find a spare horse in my ‘bits box’, so as you can see, there are now seven riders to paint! The spare horse is actually an old GW ‘Elf horse’ but I will add some green stuff decoration to make it a bit more Samurai. You can see that I have done this before with the other cavalry set by checking a previous blog here, so I will have 14 Mounted Samurai rather than 12, when everything is finished.

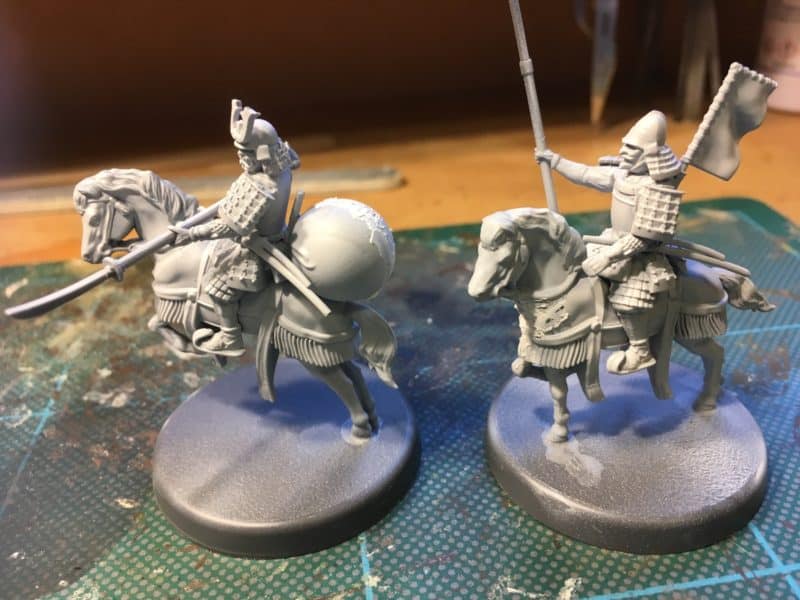
Assembly is the usual fiddly process with these plastic models but it is worth using a good plastic glue and of course with patience, the models do look nice once put together. I usually paint the riders separately from the horses but I managed to glue two of the riders onto the horses whilst test fitting everything…What was I saying about patience… To be fair, I had decided to use the arrow catcher on one of the models and it was quite tricky figuring out how it actually fitted to the model. I’m confident that I now have it right but as you can see from the picture below, once primed, it was clear that I had some filling to do before painting! I used the Vallejo putty. It’s fairly quick drying and sands well.

Rider with arrow catcher fitted .

Rider with arrow catcher fitted .

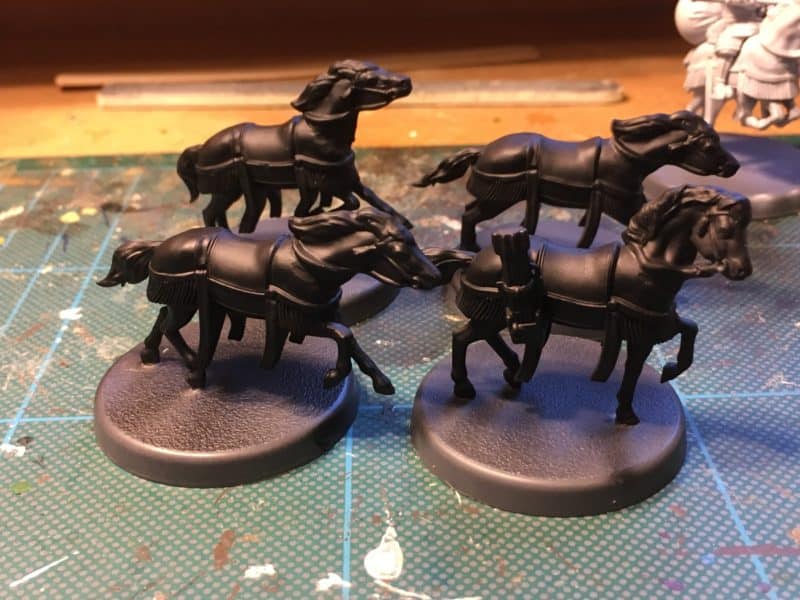
I will have to paint these as one piece models but I don’t think this will be a problem. The other models were primed in black as separate horses and riders

Horses primed

Horses primed

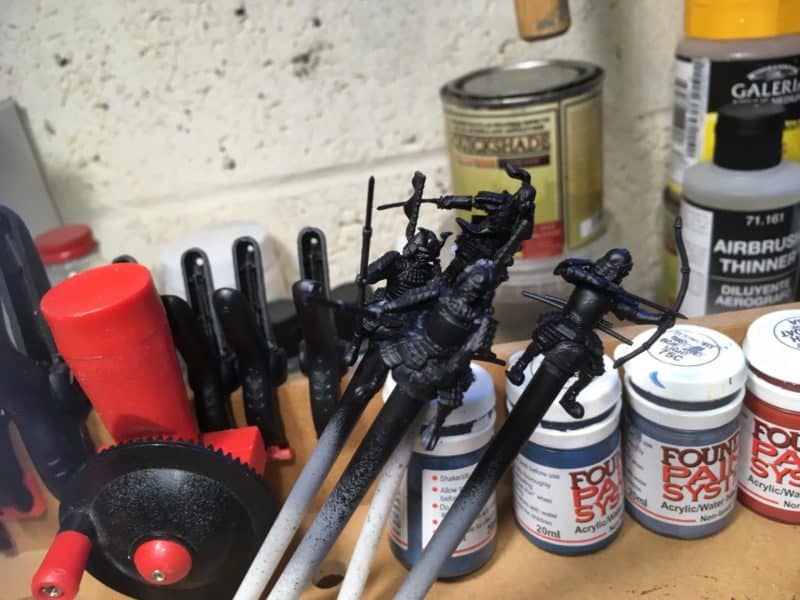
Riders ready for painting

Riders ready for painting

I used my airbrush and Vallejo primer for these models. I am still very much a novice when it comes to using an airbrush but it means that I can prime my models indoors, unlike using spray cans. To be fair, it’s just as easy, and I’m finding that I get better coverage without ‘soaking’ the model.

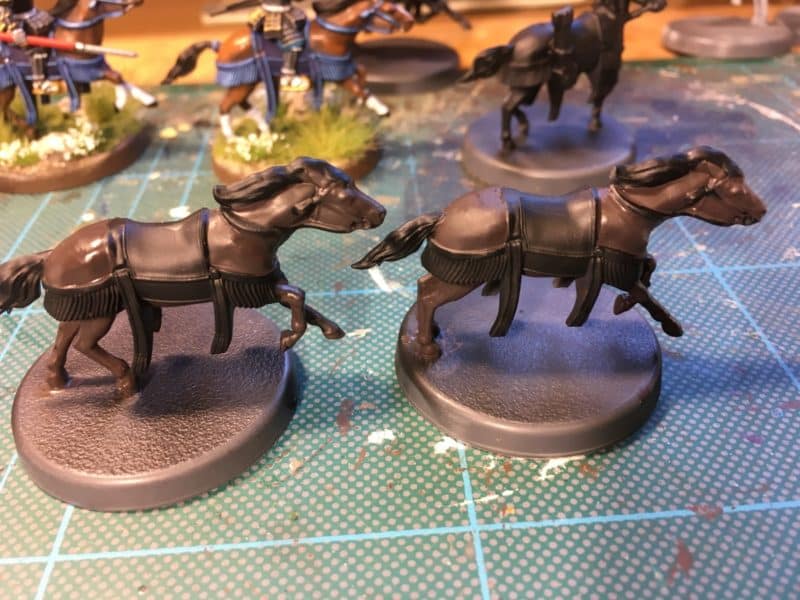
So I’m ready to start painting. I thought that I would show a step by step guide to how I paint horses. It’s not a strong point for me and there are plenty of great guides out there to help you but here goes with my method that I have put together from watching and listening to other far more talented painters than I!

German Cam. Black Brown

German Cam. Black Brown – first coat.

I use three colours layered on top of each other and as I want a brown/chestnut horse I’m starting with a dark brown, German Camouflage black brown 70822. Paint as much of the horse as you can see, leaving the saddle cloth etc. and the mane and tail.

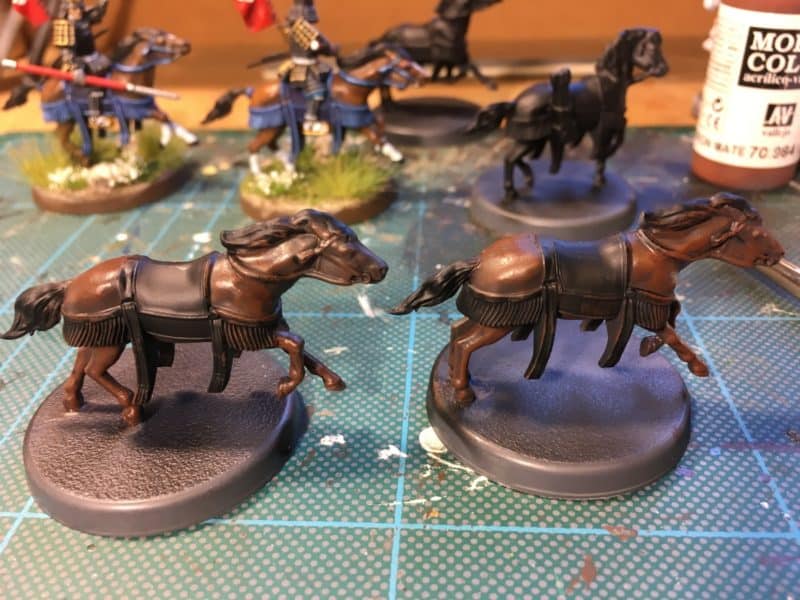
Flat brown 70984

Flat brown 70984

The next step is to dry brush the horse flesh with Flat brown 70984. It’s inevitable that the dry brush will stray onto the saddle etc -I don’t worry at this stage as it will be cleaned up later.

Orange Brown 70981

Orange Brown 70981

The next stage is a dry brush of Orange Brown 70981 – again you can see that I haven’t been too careful and over painted painted the reins. The idea is really to ensure that what texture there is modeled into the horse itself, is picked up by the dry brushing.

Mane & tail Black 70950

Mane & tail Black 70950

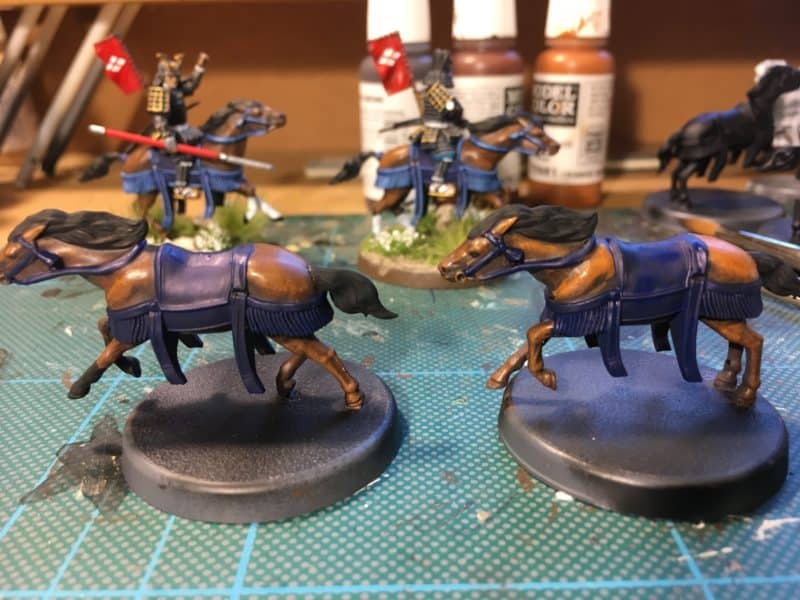
The next stage is to paint the mane and tail black. I also painted the forelegs on the left horse black as he is going to have socks! You can see that I have made a mistake with the right hand horse and been too heavy with the orange brown on his rump and by his front. The front can be tidied and I might tone down the rear with some ink but for now I’ve stuck with it!

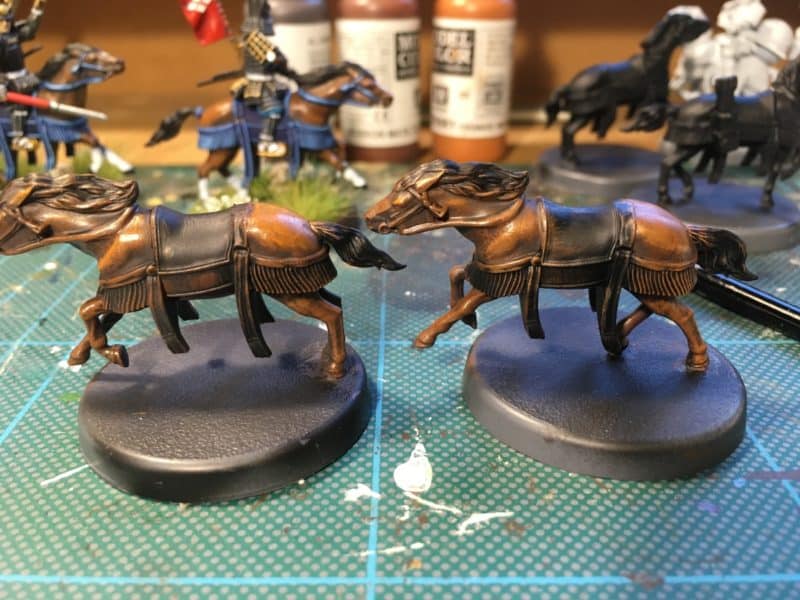
Saddle cloth and furniture Dark Prussian Blue 70899

Saddle cloth and furniture Dark Prussian Blue 70899

I’ve now painted the saddle cloth and horse furniture with Dark Prussian Blue – things are looking a bit neater now! I’ve also given the mane and tale a very light dry brush using a light grey to bring out the texture.

Highlight on the horse furniture!

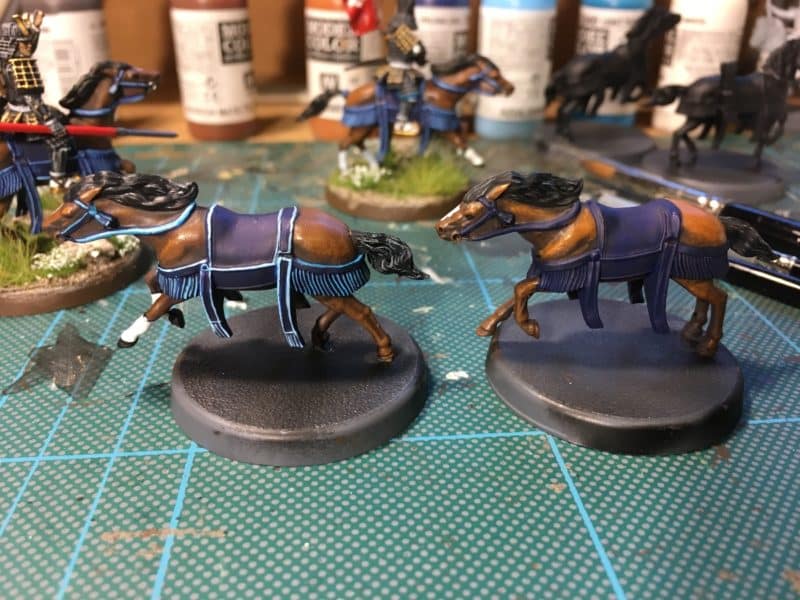
Lining on the horse furniture!

The next stage was to paint the white socks on the left horse and I added a white patch to both horses heads. I’ve also painted the eyes black. The Horse furniture is lined with a sky blue 70961. I found it a bit stark so I’ve toned it down with some of the dark Prussian blue. The effect is not subtle, particularly close up but it works for me and the lighting is exaggerating the contrast.

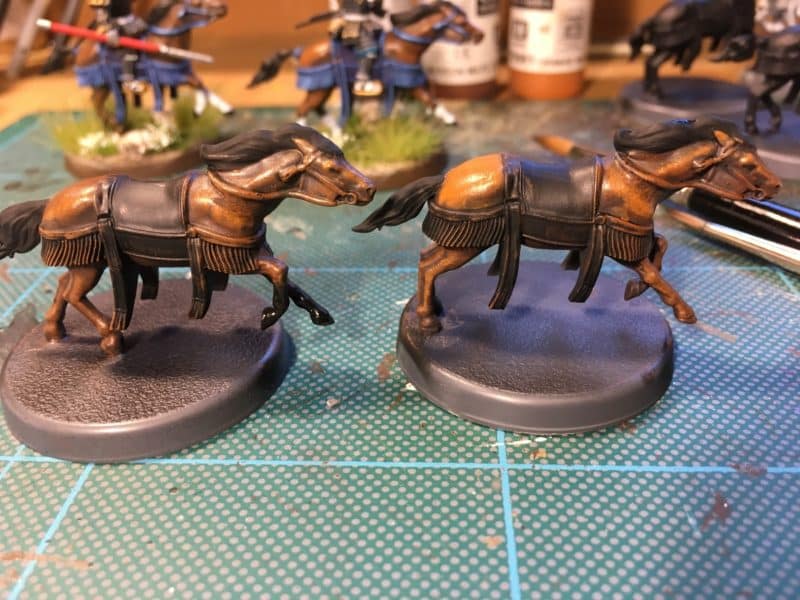
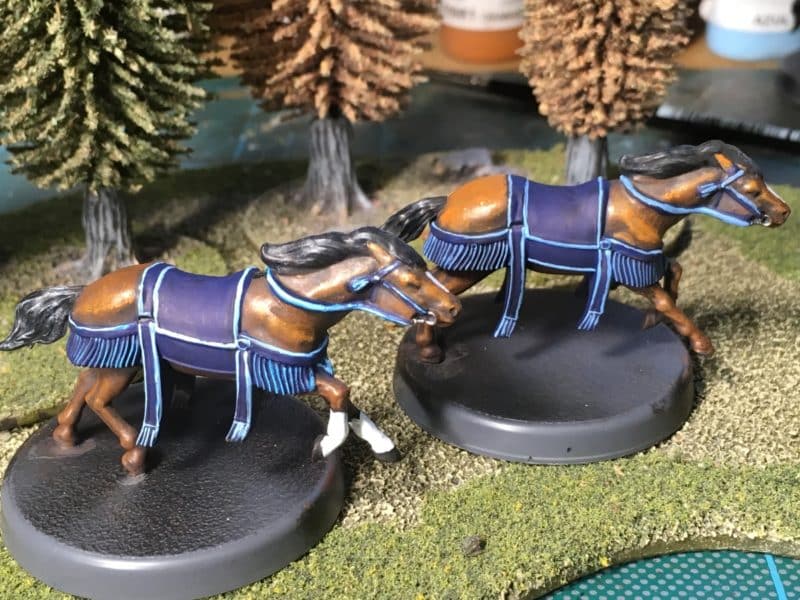
Both horses complete!

Both horses complete!

That’s just about finished for now. I’ve painted the ‘bits’ in steel and done a bit of tidying. After this picture was taken, I painted the hooves black for a bit more contrast. Once the riders are in place and the bases finished they will look fine for the table.

So that is it. I hope that you will find the article useful and it will help you with developing your own technique.

The Commercial bit

Nearly all of the items that I use in my hobby are from my shop. At the time of writing we send post free to most Worldwide locations!

ARCANE SCENERY

If you are looking for glues or Fillers:

GLUES & FILLERS

Vallejo Paints are here:

VALLEJO PAINTS

Our Samurai range is here

SAMURAI