Painting flesh – Charles Baynon Style

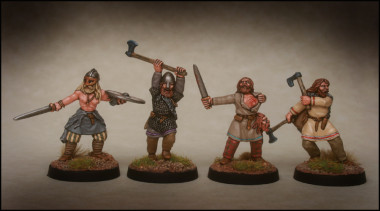
Shieldwall Berserkers Group

Shieldwall Berserkers Group

I’m very lucky to work in the wargaming industry, albeit on the peripheral of things as a retailer, but as a result I get to see some superb work by the master painters. I have a few favourites, some of whom may be familiar to you, Kevin Dallimore, Paul Cubins, Matt Parkes, Dave Woodward and Andrés Amián Fernández are just a few that spring to mind. I can only aspire to achieve the results that these guys produce. I do however, use them as inspiration and do my best to follow some of their techniques to improve the look of my figures.

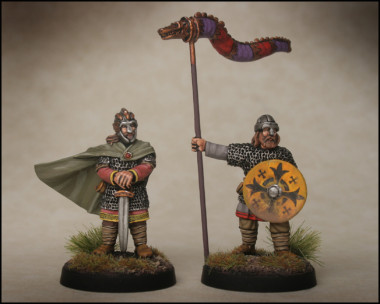
Alfred the Great - Footsore

Alfred the Great – Footsore

I can now add another name to the list of my favourite painters, Charles Baynon. Charles has been painting some figures for the Footsore web site and I was very impressed with his use of muted colours on his dark age figures that looked both authentic yet still  allowed the figure to catch your eye. I asked Charles if he would mind painting some of the Lucid Eye figures for our web store and he kindly obliged. The results were superb and it was in these figures that I could see what had really impressed me with his painting. It was his portrayal of the face and flesh. How did he do this! Well, the simple way to find out was to ask him and Charles has kindly supplied his ‘flesh recipe’ below and allowed me to share it with you.

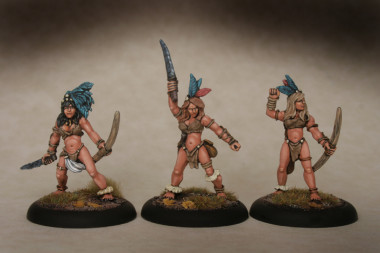
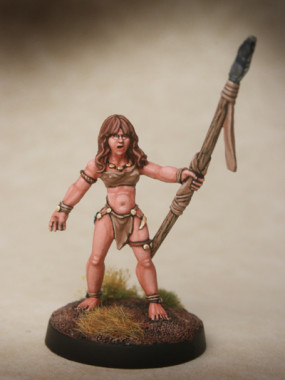
Lucid Eye Amazons Set 2

Lucid Eye Amazons Set 2

Painting Flesh The Charles Baynon Way!

“The ‘recipe’ for flesh it is pretty straightforward. I always undercoat figures black and then paint the eyes first. Having narrowed the eyes to a suitably thin sliver, I then paint around all the rest of the visible flesh with tan brown undercoat ( Foundry tan shade). The next step is to paint the bottom eyelids. This I do with Vallejo Basic Skintone. Although it is labelled ‘basic’ it is very light and makes a good highlight. The next step is to paint the rest with the base skintone. For this I use Army Painter Tanned Flesh. First I dot the tip of the nose then place two dots either side of the tip. The trick is to leave a very narrow line of the tan undercoat showing through to define these dots. After painting the bridge of the nose I paint the cheeks (being careful to leave a very thin line of the undercoat showing to separate the cheeks from the bottom eyelid) then I paint the top eyelids and forehead, leaving a very narrow line above each eye to serve as eyebrows.

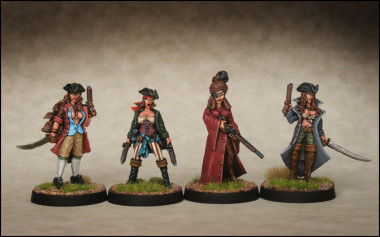
Black Scorpion Pirate Women Group

Black Scorpion Pirate Women Group

You may have gathered that it is easier to paint ‘up’ to a line than actually paint a narrow line, so it is the undercoat that serves as the lines on the face. I then highlight areas of the face with Army Painter Barbarian Flesh, namely the tip and bridge of the nose, cheekbones, forehead above each eye and, very occasionally, the chin and jawline. The Barbarian Flesh then has increasing amounts of white added to it and I further apply it to areas of the greatest highlights ie. nose, cheekbones and just above the eyebrows. Once I am happy with the result the last part of the face I paint is the bottom lip with Foundry Terracotta Light.

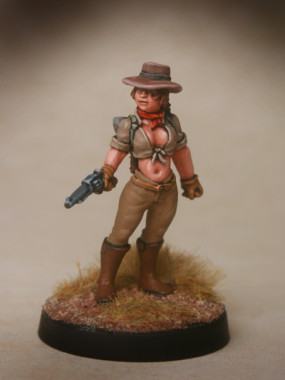
LE Female Explorer 1a

Lucid Eye Female Explorer

I use the same basic recipe for hands, the lightest highlights being the knuckles and fingernails.
For women and larger areas of flesh I tend to use a more subtle colour mix. On women’s faces I often don’t have the undercoat lines to show the wrinkles! I also dispense with the lighter Barbarian Flesh. Instead I just use Tanned Flesh and then build up the highlights by adding successive layers with more and more white added. This gives a much smoother appearance and is more flattering. It is also the technique I prefer to use if painting large areas of bare flesh eg. a Greek javelinman in short tunic etc.

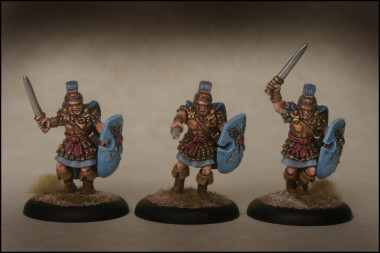
Lucid Eye Atlantean Sword Trio

Lucid Eye Atlantean Sword Trio

One last thing, part of the smoothness of tone is also due to the number of times I spray varnish the figure at intervals during the painting process. I found that it was far too easy to, say, rub off the carefully painted knuckles when handling the figure. So I probably spray the figure when I have painted the flesh and then maybe another couple of times after I have completed another particular stage. Just thin coats of varnish are required. I use Army Painter Anti-Shine for this, it protects the figure but, unfortunately, it is not dead matt. The very last coat is the liquid version applied with a small brush. This really does dry to a true matt finish.”

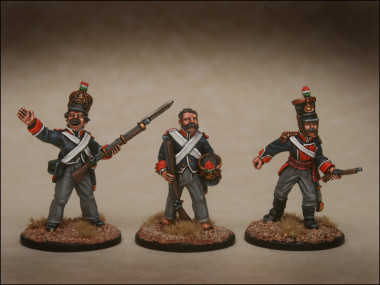
Artizan Mexican Command

Artizan Mexican Command

I’ve illustrated this article with just a few of the figures that Charles has painted. In my last blog post I mentioned that I was trying to develop two styles of painting. My ‘batch painting’ technique for the rank and file and a more careful traditional highlight & shaded style for my Commanders, Vignettes and Characters. If I can get to anywhere near the standard set by Charles, I will be delighted. I now have some guide lines that may help. I hope that you have enjoyed looking at Charles Baynons work. Should you wish to purchase figures painted to this high standard, Charles sells his figures under the handle of cwb21 on ebay and you can see his latest figures for sale here.

Lucid Eye Harranna of Avisha

Lucid Eye Harranna of Avisha


Making the mountain into a molehill.

The Lead Mountain is sorted!

The Lead Mountain is sorted!

I’ve been banging on about my lead mountain for some time now but after some steady progress, I thought it was time to sort it out once and for all! So a rainy afternoon was spent going through my collection of figures  and putting it into some sort of order. Thankfully, there wasn’t quite as much there as I thought. The first job was to get rid of all the figures that I had acquired that ‘might come in useful’ or although broken, could be repaired. These went into the spares box or the bin. No point in them hanging around.

The next category was the free figures given out at shows or exclusives given out with purchases. I am a real magpie when it comes to these figure but they dont always fit into the period that I am interested in and I have kept them because they are ‘collectors’ items. Some of them aren’t even very good figures! Well, they all went into a box marked appropriately ‘exclusives’. I cant see me painting any of these in the near future but at least I now know what is there.

Sorted by Category - Napoleonics win!

Sorted by Category – Napoleonics win!

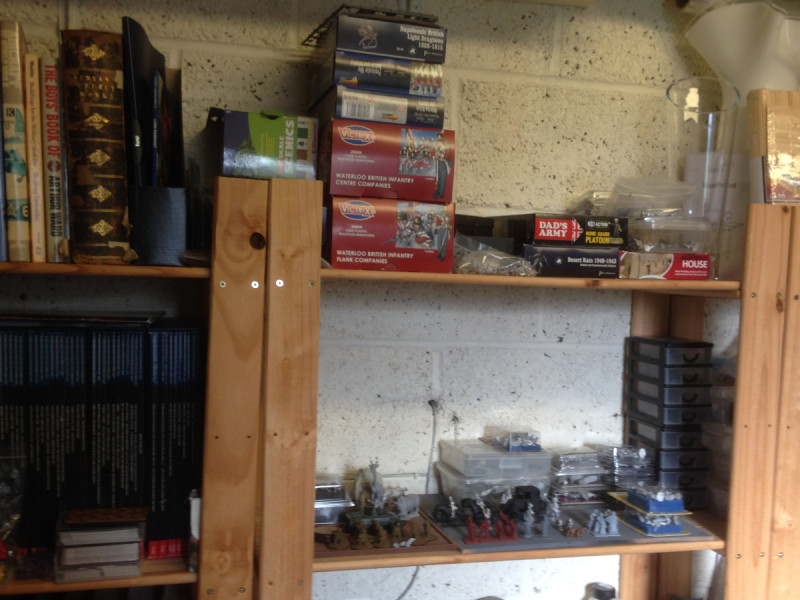
As I was going through all the odd figures, I sorted everything into rough periods. They were either ‘Ancients & Medieval’, Black powder era or World War Two. I only have a few bits & pieces for World WarTwo so it was fairly easy to box most of these up and they were the first back onto the shelf. The next category was the ancients and medieval figures. I’ve got a few Roman figures for that Legion that I will paint one day, some Dark Age Warriors that will expand my Saga Band when I get around to it and some War of The Roses Infantry to enlarge my Lion Rampant Retinue into a full army. None of which is going to happen in the next six month, so it was all carefully boxed and added back onto the shelf!

Finally, my Black Powder & Napoleonic figures. As this is my main point of interest at the moment, I sorted them out into Battalions where possible and boxed or bagged them as such. I have it in mind to paint the British 5th Infantry Division at Waterloo. It consists of The 28th North Gloucestershires (yellow Facings), The 32nd Cornwall ( White facings) , the 79th Cameron Highlanders (Dark Green Kilts!) and a detatchment of 6 companies of 95th Rifles. That said, it isn’t going to happen anytime soon, so these figures can go back on the shelf! And so it went, until everything was tidied away, in some sort of order and with some idea as to what I was going to do with each batch of figures.

Somehow, the process of sorting and tidying everything clarified what I need to do next to extend my painted army and of course reduce the unpainted stock to a manageable level. I dont expect to just keep ploughing through the pile in a set order but at least there will be some direction to my painting now. I’ve also resolved that all units will be finished using my ‘batch painting’ system. At least this way I will be able to complete 8 – 12 figures a week to table top standard, so about 2 to 3 weeks for a battalion.

However, for my ‘personality’ figures, I will try to develop highlighting and shading through the more traditional method of blending, ink washes etc. Perhaps, with practice I can raise the standard and speed of both methods.

Royal marines nearly ready for duty!

Royal marines nearly ready for duty!

In the meantime, just to show that I haven’t spent the last week dreaming of future projects, my next batch of Royal Marines are nearly complete, I’ve started on my last batch of civilians and lurking on the back of the paint station is my Shore party, primed and ready for painting.

In fact, I was so pleased with my progress and the organised state of my collection that I decided to treat myself to some new Front Rank figures. Their latest releases includes some lovely civilians that had caught my eye and while I was looking through the web store, I thought that I would have a few of their British Commanders. After all, my lead mountain isn’t that big after all…

The Marines are coming – Part 2 – first batch arrived!

Royal Marines Shore Party

Royal Marines Shore Party

What! Two blog posts in one week! After the excitement of completing the Moai I thought that I would round up my progress elsewhere. As you can see my first eight Royal marines are complete and ready to take to the table. Fortunately, my gaming buddies are very easy going and they wont object if I deploy a unit of Royal Marines along side the rest of my British Army. As I have previously mentioned they will be part of my Caribbean force although they will also see service as part of a detachment in my Peninsular army – when I get around to starting it!

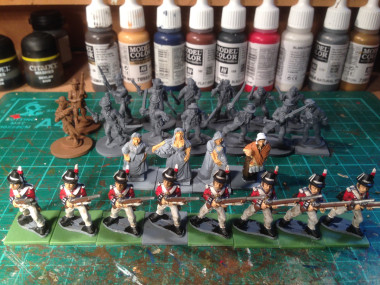
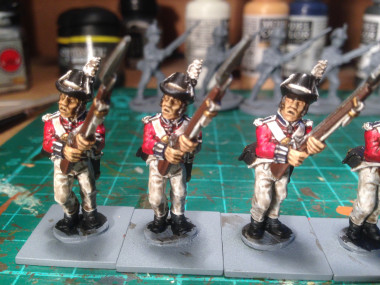
I’ve photographed the final stages of these figures being completed as part of my batch painting process. Once they were block painted, I gave them a coat of Army Painter Quick Shade.

Quick shade Dark Tone applied

Quick shade Dark Tone applied

The next stage is to give them a spray of Army Painter anti shine.

Anti Shine applied sparingly

Anti Shine applied sparingly

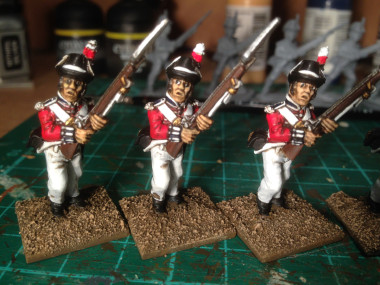
Once the Anti Shine matt varnish is dry, I add highlights to the figures. This often just entails repainting the lighter colours – white in particular, the red on the jackets and retouching the metallics with Gold & silver as they can look too dull in places. On this occasion I also attempted to paint in the eyes and added some highlights to the faces – not something that I normally worry about with rank & file troops. Looking closely at the picture, you can see why I tend to leave the eye’s… A couple will need retouching.

Highlights added & basing is started

Highlights added & basing is started

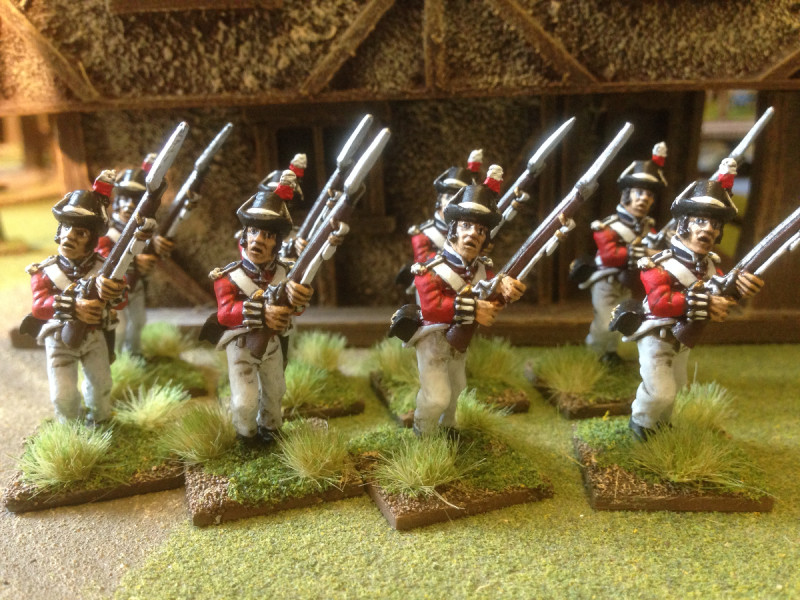
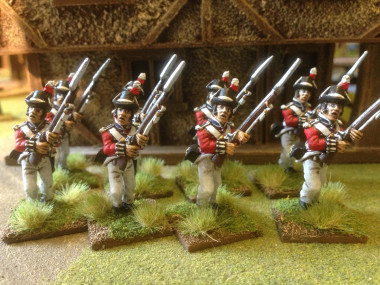
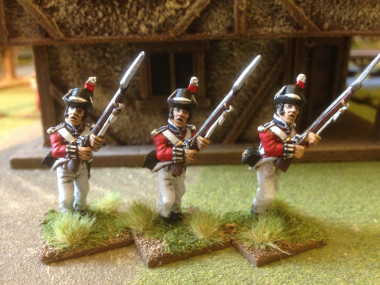
The final touch is to finish the bases. I used my usual ‘recipe’ of Vallejo Desert Sand to cover the bases. Then painted them with Vallejo Chocolate Brown, highlighted and dry brushed them with Flat earth & increasing amounts of Iraqi Sand added. I then added some green scatter & some of the new Gamers grass tufts and they are done.

Basing completed

Basing completed

The final process of repainting sounds as though it is a bit of a chore but in reality it is quite a quick job. I think that it is worth the time as it also gives you the chance to correct any obvious painting errors. For some troops, it is just as easy to leave this part out and go straight to the basing. After all, these are rank and file troops to be used on the table, not painting competition entries.  It all comes down to a matter of taste and of course, time. If you would like to read my  blog giving details of all the colours used in the early stages of painting, click here.

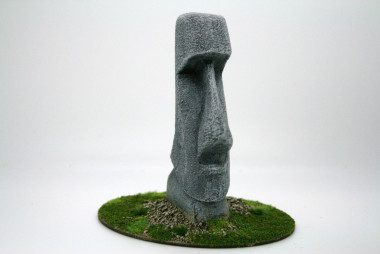
MOAI!

MoaiNo, it’s not the start of an Arcane Scenery Haka, but the first in a series of terrain pieces that are being designed for us in conjunction with Nick and Tasha, two very talented people that make up the N-FX team. N-FX have produced special effects for the TV & Film industry as well as producing custom built costumes for the Cosplay community. You can see some of their recent projects here:

https://www.facebook.com/nfx.gds

We are working with them to produce a series of terrain pieces that will compliment our DeeZee range of animals and provide interesting and different subjects for dioramas and war games scenery.

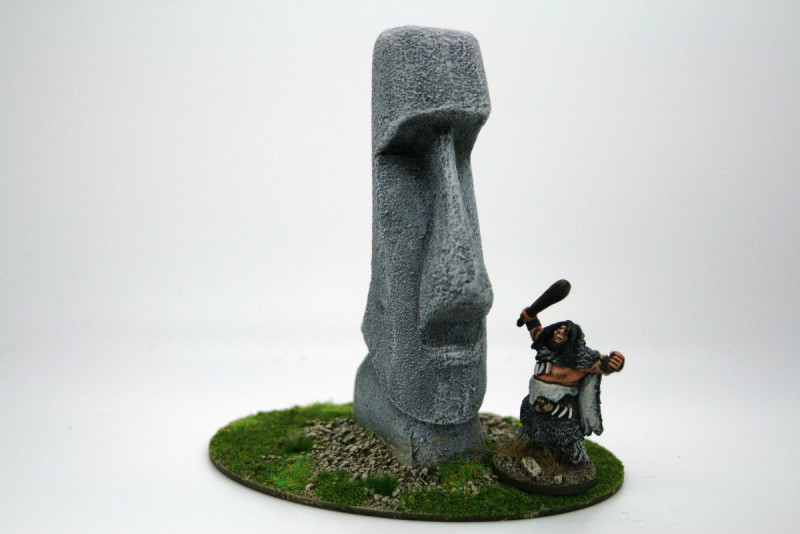
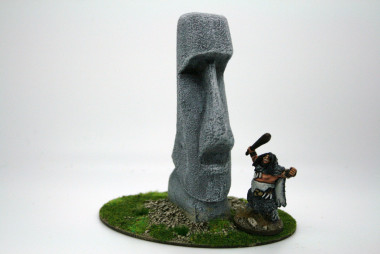
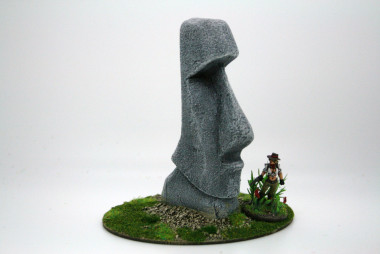
The first piece out of the moulds was this Moai, or as most people will know them as, Easter Island heads! The model isn’t designed to be a scale replica of a Moai – more of a nod in their direction… If you haven’t come across these before, there is some terrific background on Wikipedia. We thought that they would be superb background pieces in many a setting. Once I had one to ‘play with’ I wanted to get it painted and based.

Moai & Chief

It’s a very quick and straight forward paint job. Simply spray with a black primer and then when dry, use a standard dry brush technique with various shades of grey up to nearly white to bring out the texture. I mounted the Moai on the MDF base using Vallejo Desert Sand texture. It was then just a case of painting to my usual method and adding some green scatter, static grass & tufts to finish. The plan is to do a step by step video together with N-FX in future so watch this blog!

In the meantime, I’ve just placed a couple of Lucid Eye figures on the base to how effective they will look. It was great fun painting the Moai – back to Napoleonics in my next blog!

moai 2

If you would like you own moai, please visit the Arcane Scenery shop or just click here:

MOAI

The Marines are coming!

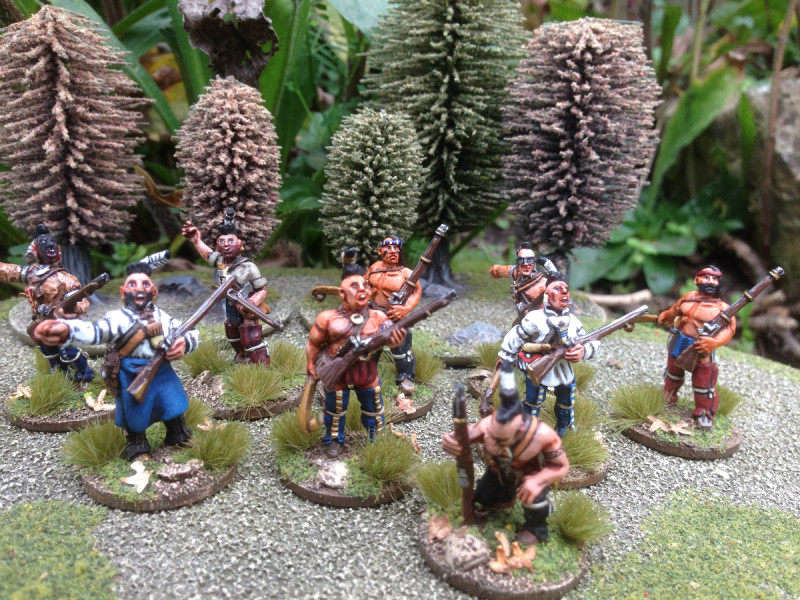
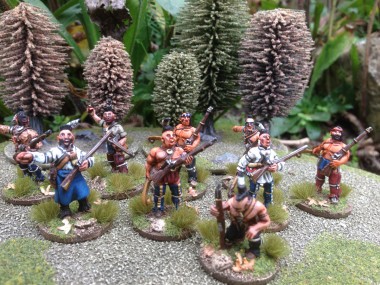
After lasts weeks adventure with Lion rampant it’s back to the painting table and the next project from the lead mountain. I have finished my small war party of Woodland Indians and they are waiting for reinforcements before they can take to the table. However, there is no rush to add to the band at the moment. Muskets and Tomahawks are on hold at the club whilst we explore a couple of other options – the Sudan is looking like the favourite at the moment!

Indian War Band

Indian War Band

Of course that can be the problem with our hobby. Too many choices and distractions with the result that you can start too many armies and not finish any of them! I will add to my Indian war band in order to finish a skirmishing army for M&T’s. My next purchase will be a couple of packs of Rodgers rangers before deciding on which regular troops to add into the mix.

In the meantime, it’s on with ‘climbing’ the lead mountain that I already have. I would like to be in a position where I have painted everything that I have bought, so that in future, when my wargaming buddies at the club decide to look at another period, I can join in with a few figures of my own fairly quickly. And here’s the point of my ramble. The reason that I have a small lead mountain is that I bought the figures with a project in mind or because I liked them. Not to paint them is just silly. So as I surveyed my collection I saw a batch of Foundry Royal Marines lurking on the pile!

I bought these marines and a naval boarding party for a couple of reasons. They sort of fit in with my plans for the Caribbean force that I have been steadily building (Use this link to bring up a few of my blog posts on this subject). I already have a few ‘Battalions’ of Caribbean troops ready for action and adding a detachment of Royal Navy Marines seems like a good idea. The Royal Navy Marines saw quite a lot of action across the world during the Napoleonic period, obviously fighting in all the major sea battles and of course taking part in all the amphibious actions, particularly in the Peninsular War. In fact on this very day, 8th October, 1806, British forces, including the Royal Marines of course, lay siege to French port of Boulogne using Congreve rockets, invented by Sir William Congreve. They were also very much in action during the war with America in 1812 ( another one of my interests), so having a detachment in my army makes sense.

I also fancied a ‘quick batch paint’ job after getting a bit bogged down painting the Indians. So with this in mind, I cleaned up the first 16 figures ( two packs) primed them with Army Painter grey and got to work painting them. I tend to paint rank and file in batches of six or eight figures. This method allows me to paint one colour on each batch of figures in a reasonable time and stops me getting bored.  Using this method I can turn out about 8 figures a week to a reasonable table top standard. As a painting guide, I used the recently published, Issue 4 of Painting War, Napoleonic British Army.

Painting_war4

That said, it was more of a colour guide and inspiration rather than a painting guide. I mentioned that I was going to batch paint these figures, which means I will block paint them with the basic colours, shade, using Army Painter Strong Tone, Matt varnish them and then re highlight the lighter colours to give a sharper finish & correct any obvious errors.

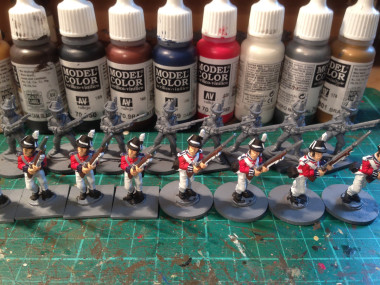
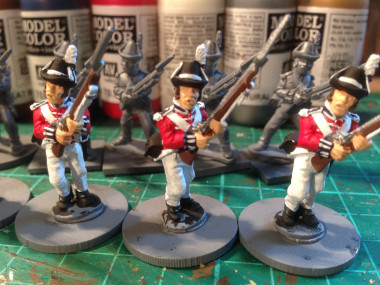
Batch Painting Marines

Batch Painting Marines

The colours that I am using are shown above. They are all Vallejo Model Color as follows:

70955 Flat Flesh – Face and hands

70950 Black – Hats, Boots, Cartridge box

70822 Black Brown – Hair

70984 Flat Brown – Musket Stocks

70864 Natural Steel – Gun Barrel, Bayonet & Buttons

70947 Red – Jackets

70899 Dark Prussian Blue – Facings ( Collars & Cuffs)

70820 Off White – Webbing, Lace, Trousers

70862 Black Grey – Gaiters & highlights on Black

70801 Brass – Webbing plate, badge on Cartridge box, detail on Muskets.

There are three other colours that I will also use for highlighting, 70996 gold and 70997 Silver to re-highlight and emphasise the metal work, 71077, Wood, to highlight and add detail to the musket stock and 70951 White, to really brighten up and highlight some of the white areas.

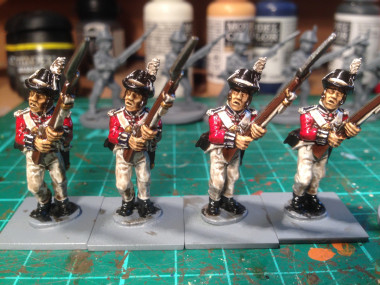
Block Painted nearly completed - just Brass to add.

Block Painted nearly completed – just Brass to add.

You can see from the pictures above how far I have got with the Marines. They look a bit bland and washed out but the Quick shade will do a lot of the work needed to add depth and detail. The other massive difference will be finishing the bases of course! More to come next week!


Lion Rampant – The Nine Bastards!

Wargames Illustrated were running a second ‘Lion Rampant’ event day at WI headquarters here in Nottingham. I had originally thought that I would be unable to attend but a last minute change in family plans left me with a free weekend. There was a place available and so it seemed sensible to sign up.
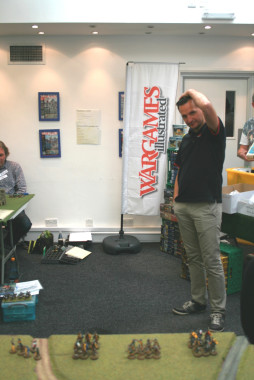
Dan, from Wargames Illustrated starts the day with a briefing and wonders how he will keep 18 gamers under control!

Dan, from Wargames Illustrated starts the day with a briefing and wonders how he will keep 18 gamers under control!

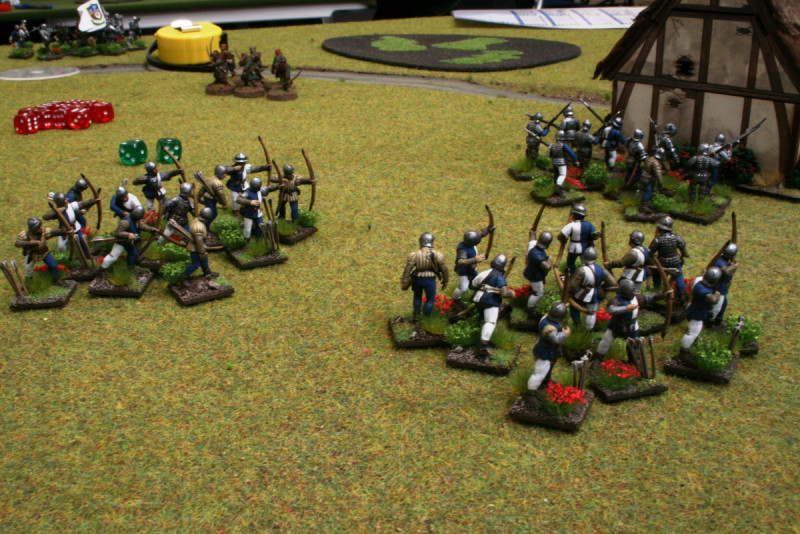
I had my retinue  ready to go and after a couple of games the week before the event, my knowledge of the rules was refreshed. My army was ready to take to the field of battle. My Retinue is based on a War of the Roses English Army and consists of:

Leader and 5 Foot Knights 6pts
Unit of 12 Foot Sergeants            4pts
Two Units of Expert Archers     12pts
unit of Bidowers                             2pts
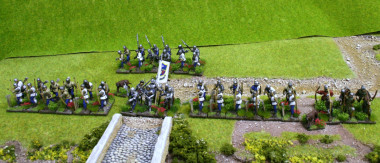
My Lion Rampant Retinue

My Lion Rampant Retinue

The army is essentially a defensive unit, that although lacking maneuverability, given the right position, can hold it’s own against the more aggressive and mobile armies that are often fielded in the game.
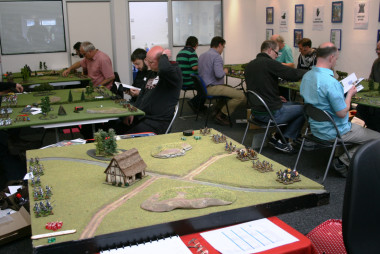
Set up complete - players now check the rules...

Set up complete – players now check the rules…

The Lion Rampant day was themed around the 9 Bastards of the previous king ‘Jeffery’ from the first Lion Rampant day and involved each of the factions doing battle with the view of conquering their opponent thereby forcing them to switch allegiance to the victors faction. There would be three battles to see who won the day and as usual, Dan from WI had built in some twists and turns to the scenarios to keep the day interesting and balanced. I represented House Wagner – it was time to join battle!
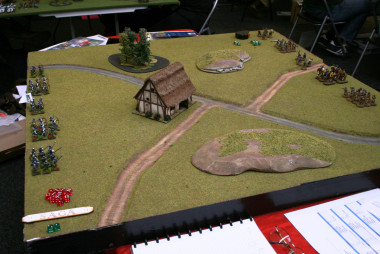
The first battle is ready to commence

The first battle is ready to commence

BATTLE 1 – BLOODBATH

My first battle was against Sir Mike who was fielding an army consisting of 2 units of Mounted Sergeants, 2 units of Crossbowmen, a unit of Foot Knights and a unit of Bidowers.

Sir Mikes’ army immediately advanced, with his mounted troops leading the way. One unit of Sergeants attempted to flank my army, the other going straight for the archers in the centre. The Crossbow men had moved up in support and his  Bidowers made for the woods on my other flank, where they would attempt to harry my army from cover. My reply was somewhat slow, having failed a couple of activations but my Foot sergeants formed Schiltron on the Left flank, effectively stopping the Mounted Sergeants in their tracks. My Bidowers charged into the woods to meet the enemy Bidowers and hold them. Whilst in the centre, My Foot Knights stepped forward under the cover of my Archers to meet the other mounted unit.
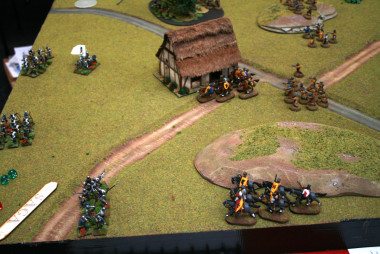
The Schiltron holds!

The Schiltron holds!

A fierce encounter ensued in the centre, resulting in the elimination of the first Unit of Mounted sergeants. Although my Foot Knights had taken casualties they turned to face the enemy foot knights who were now ominously approaching. The encounter in the woods between the two Biddower units got off to a slow start. There was a suspicion of a party going on, but obviously at some point, someones cider was spilt and the fighting started. The result being that my Bidowers were routed and killed.
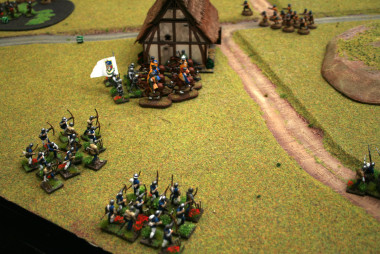
Foot Knights into battle whilst the archers await.

Foot Knights into battle whilst the archers await.

Although penned back on my start line, thing were not going too badly. I was helped by the fact that after a shaky start, my archers were now firing consistently at every turn, inflicting ever mounting casualties on the enemy. The other unit of Mounted Sergeants was destroyed by arrow fire as soon as it came into range, being no match for 24 English archers!  My fire superiority was helped by the Foot Knights, who were standing in range of the enemy crossbows, taking fire every turn but fortunately, their armour held and they shrugged this off. The only real threat now came from the enemy Foot Knights as they were determined to close with my troops. As the archers at last saw off a Crossbow unit, they turned and fired at the Foot knights, slowing them and reducing them to half strength, even killing the leader but unable to prevent combat with my Foot Knights.
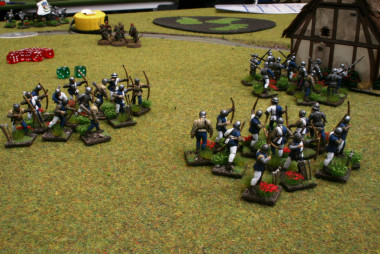
The enemy Bidowers in the back ground are feeling a bit exposed!

The enemy Bidowers in the back ground are feeling a bit exposed!

In the brutal fight that followed, my Foot knights prevailed but only my Leader, Kenneth Hotspur was left standing. He was then struck down by a final shot from the last crossbow unit – the cry went up ‘They’ve killed Kenny!’. Despite this, the archers avenged his death by forcing the last Crossbow unit to rout. Only the enemy Bidowers were left on the field and given their precarious position in the open in front of the Archers, they threw down their weapons and surrendered. Victory to House Wagner!

Battle 2 – The Messenger

Before the start of the second battle, we were given the chance to spend some of our victory points ( represented by Chocolate coins!) on small upgrades for our armies. I decide to speculate to accumulate and purchase an extra unit of Bidowers. I think these are very underrated by some players and can be quite a nuisance if deployed carefully. I had already noticed that there was plenty of cover on the tables and Bidowers and cover go well together!

The Messenger scenario involves escorting a messenger from one end of the table to the other, with the opposing player doing his best to stop you. Deployment is in opposing corners of one end of the table, with the player trying to stop the messenger allowed to deploy 6 points of his army at the far end of the table ready to meet the messenger! A further complication is that there is insufficient room in the deployment zones to get all of your army on the table, so some units start off table.

My opponent for this game was Sir Phillip, who had the following army: 1 unit of mounted Knights; 1 unit of Mounted Sergeants; 1 Unit of Mounted Sergeants with Crossbows, 1 Unit of Crossbows with Pavasis. A very mobile army but despite this, I decided to elect to be the attacker and to try and stop the messenger. I had a cunning plan…

The messenger had to be attached to the Mounted Knights, and Phillip deployed them and his two other mounted units on the table ready for the off! I sent one unit of Bidowers to the far end of the table along with my trusty foot sergeants. As the game got underway, the mounted units of Sir Phillip moved off and started their journey down the table initially leaving my foot sloggers behind. However, this soon changed as my Biddowers took up position in the Woods near to the exit point and my Foot sergeants formed schiltron, blocking the exit. As Sir Phillip desperately tried to bring up support (His Crossbowmen repeatedly failed their activation roll and stayed off table), my Foot knights found their ‘running shoes’ and had almost reached the far end of the table in support of my detached units.
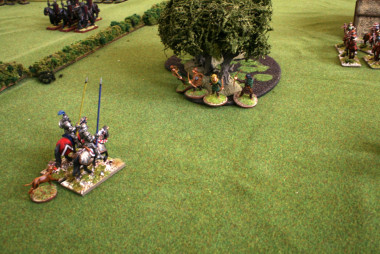
You mean we have to charge those Bidowers again?

You mean we have to charge those Bidowers again?

It was now that my cunning plan began to work. Sir Phillips mounted knights had to pass within 10 inches of the Bidowers in the woods. This would force the knight to make a ‘wild charge’ at the Bidowers. At this stage I was hoping merely to delay the messenger but my Biddowers in cover actually out diced the Mounted knights (the bonuses gained by the bidowers in cover put them on even terms with the mounted knights) causing them two casualties and making them fall back. Sir Phillip was not happy! As the Bidowers had held their nerve, they were able to fire on the mounted Knights in their turn, causing yet another casualty. Enraged, the Knights had to charge back into the woods again, only now they were down to half dice facing a group of confident Bidowers rolling twice as many dice in combat on even terms.

Once again the Knights were beaten back losing another casualty and once again, the bidowers stood firm in their woodland haven and poured arrow fire and scorn onto the Mounted Knights! Of course, whilst this was all going on, my Foot knights had gradually made their way to the scene of all the commotion and were now in striking distance of the messenger. Elsewhere on the table, Sir Phillips mounted sergeants had tried in vain to hold up the march of my archers whilst his crossbow men, having eventually appeared on the table were engaged with my other unit of bidowers ( in cover of course!) and my second unit of archers.

The killing blow was landed by the my Foot Knights, who although somewhat tired from their long march were strong enough to kill the last mounted knight and capture the messenger. Victory to House Wagner!

Battle 3 – the Final Encounter, Double Bloodbath!

The final battle saw four players fighting a last battle to secure the field for their faction. In theory, units from either player on one side could engage any opposing unit on the other side. In practice, it was a case of first deal with your immediate opposition before sending units to help elsewhere. Of course the real danger would be from missile troops who could take a shot at whatever unit happened to be in range.
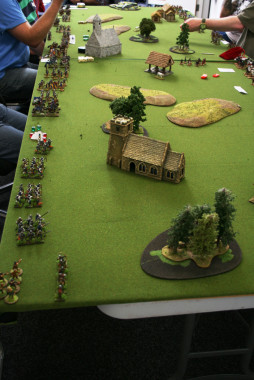
The Final Battle!

The Final Battle!

My immediate opposition was from Sir Ben, fielding an army consisting of 2 units of Fierce Foot, 2 Units of Foot Knights and a unit of archers. I was somewhat wary of the Fierce foot. They are devastating units when charging and do not suffer from being in cover or moving through rough terrain. Despite this I sent my two units of Bidowers out as bait to draw the fierce foot into bow shot where they are very vulnerable.
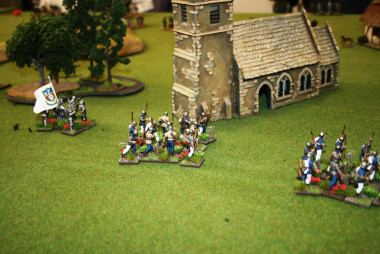
The enemy are out there somewhere.

The enemy are out there somewhere.

The game this time was somewhat stop go for me. I failed a number of activation tests and was barely able to move my army. I watched with increasing trepidation as the Fierce foot bore down on me. However, Sir Ben had allowed his army to become divided and thankfully, just as combat began, his fierce foot were unsupported. Even better, the first unit of Biddowers that he charged managed to skirmish their way out of trouble causing the now not so Fierce Foot to retreat! My archers now decided that they would join the battle and sent flight after flight of arrows into the enemy causing a rout in the enemy ranks, both units of Fierce Foot were destroyed.
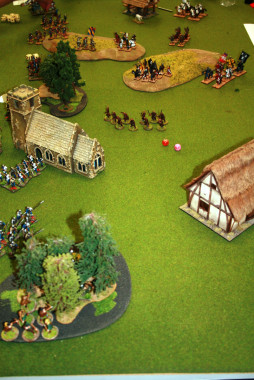
We're not moving - they'll come to us!

We’re not moving – they’ll come to us!


Although victory now looked likely, my army once again refused to move with any urgency and was unable to exploit the carnage caused. Gradually, we moved up the table and every now and then the archers would take a pot shot, wearing the enemy down. Eventually, another unit of Foot Knights were left looking like pin cushions and the opposition archers decided that they had had enough and took to their heals! Victory, albeit in slow motion, once again for House Wagner!

So three battles fought and three battles won was a good return for the day. Despite our good performance, House Wagner did not finish on the winning team or accumulate quite as many victory points as some of the other players at the event. Nevermind, though, we had a fine hoard of chocolate coins and had been fully involved in a superb day. You can read the full account of the day over at the WARGAMES ILLUSTRATED web site.

Should you have the opportunity to attend one the future WI days, I would heartily recommend that you do so. The team at WI are great at creating a friendly atmosphere in which to play the games organised and whilst there is a narrative running through the day, it is not about individual competition but on a team result. Great fun, all in all – now I’m off to eat my chocolate coins!

If you would like to try the Lion Rampant rules they are available in the Arcane Scenery shop. Even better, I’ve put together a little bundle of the rule set with a box of Perrys War of the Roses Infantry and English Foot Knights for just £50, post free, world wide of course! There are more than enough figures for you to build your own retinue. If you would prefer, Mounted knights instead of Foot knights, just add a note to your order and we will swap them over for you – watch out for wild charges though, they can get you into trouble….

LION RAMPANT BUNDLE DEAL – RULES SET plus 2 Perry Plastic boxed sets