A somewhat different subject to my Samurai collection this week! I needed a break from painting Samurai figures and so switched to another of my interests, building 1/48th scale kits. I intend to build a collection of both 1/48th scale tanks and AFV’s that have served in the British army, primarily to go with my wargaming collection. Although my wargames figures are 28mm and in theory, 1/56th scale, once based, they look more at home with 1/48th vehicles in my opinion. Of course, once I had built and painted a few tanks, I soon became attracted to the other possibilities available. I have now got a number of aircraft kits in my stash to be built one day – Spitfire, Lancaster, Fockewulfe and Beaufighter for starters! As well as these subjects I have also been long fascinated by the Nazi Super weapons of World War two. I have already built the Tamiya 1/48th scale V1 and I had in my stash a Pegasus 1/48th scale V2.
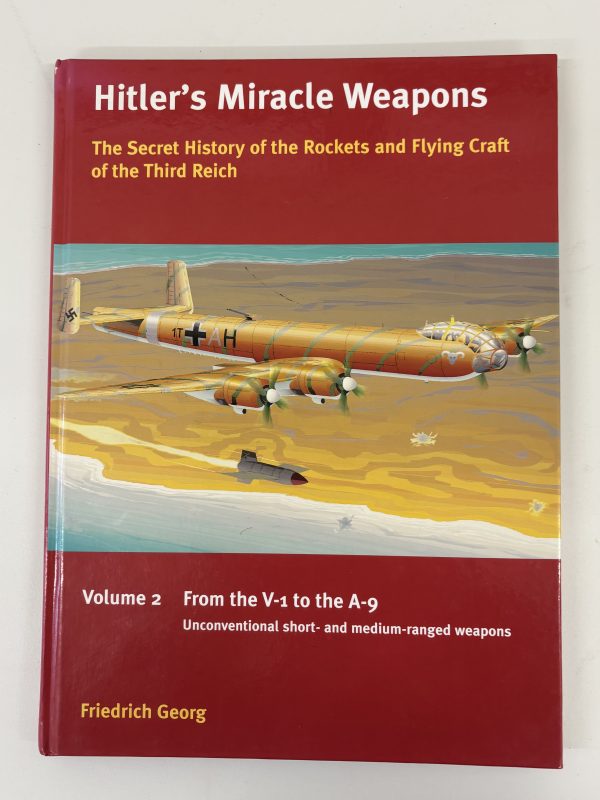
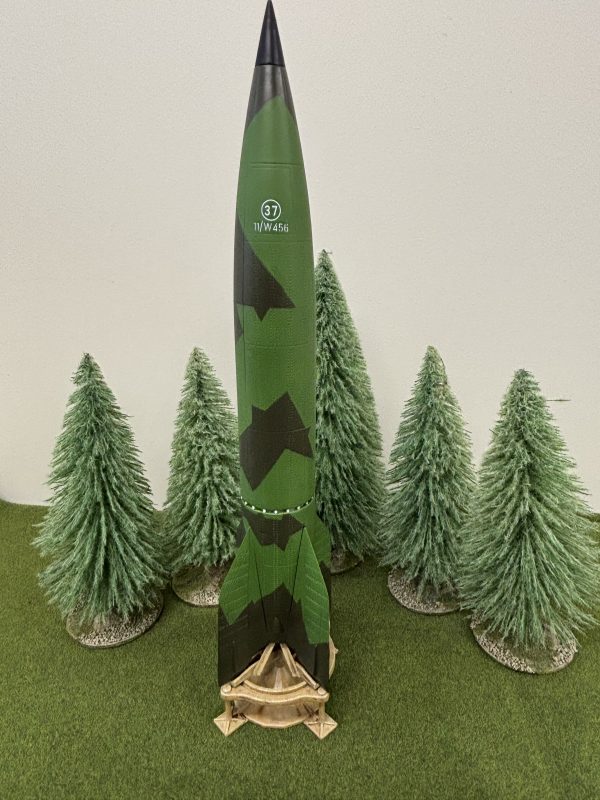
The Pegasus kit of the German V2 rocket
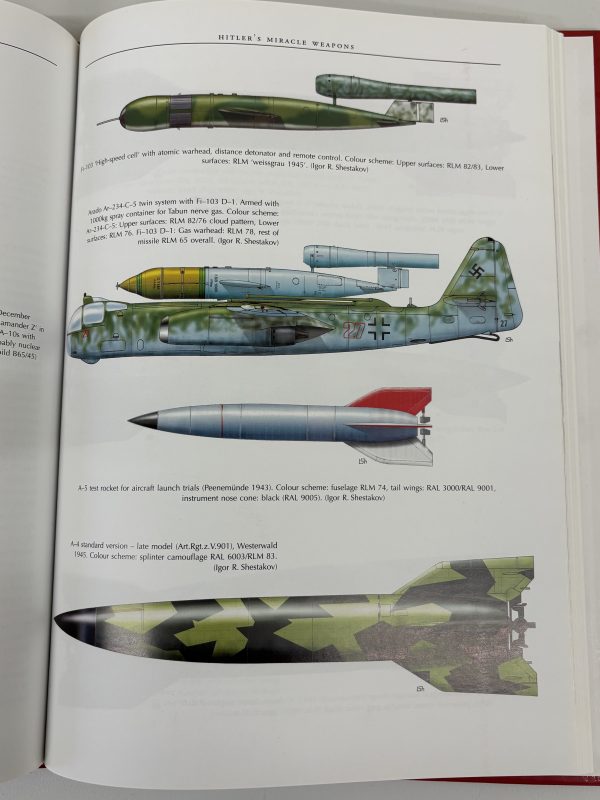
The kit was actually a clip together model and I wasn’t sure how it would go together. In the event, it was a joy to snap together, everything seemed to fit without a problem and there was very little scraping or filling that was required. The next stage was to paint it. I didn’t like the scheme shown on the box but instead went for a colour scheme that I had seen in one of my reference books. The image on the bottom right is the one that I based my colour scheme on.
I used this book as research.
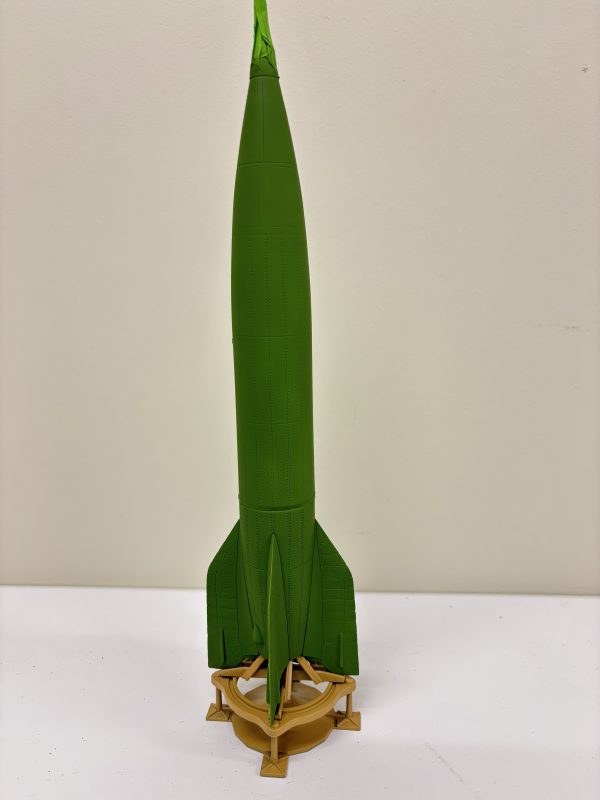
Once I had primed the model, I then used my airbrush to spray it in Vallejo 70922 uniform green for the base coat.
Base coat sprayed on. Note launching pad painted with German yellow.
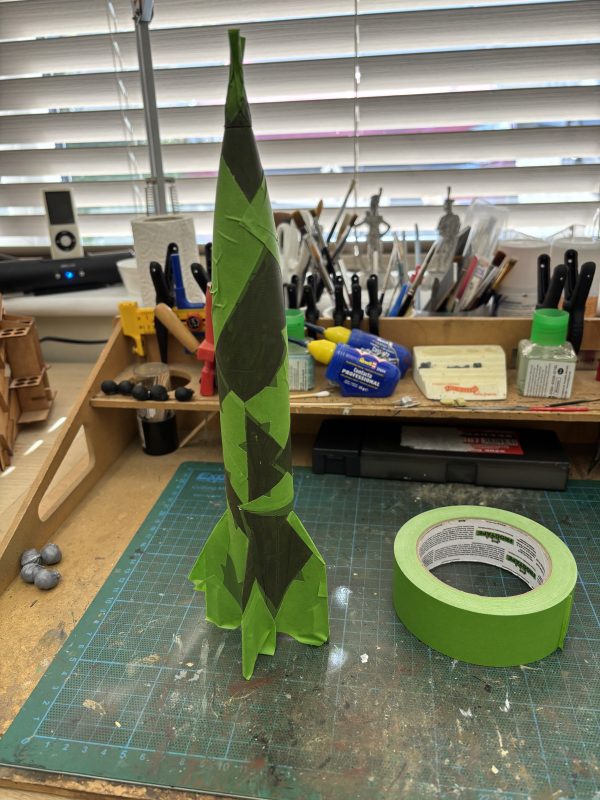
My first attempt at masking the base coat off to get the splinter pattern camouflage ended in disaster! I used Tamiya thin flexible masking tape to ‘draw’ the camouflage design onto the model and the attempted to brush paint it with the contrasting colour, Model Air 71011 Dark green. What a mess! After some thought I resorted to using Frog tape to mask off larger areas so that I could re spray the Dark Green.
V2 now masked off with frog tape – note the cut outs
The frog tape was excellent for the purpose and I used a scalpel to make some cut outs to add to the detail of the splinter camouflage pattern. Once I was happy with the result, I sprayed the nose cone matt black, added the decals and then gave the model a coat of satin varnish
The finished model
It’s fair to say that the decal is probably incorrect but looks good on the finished model. These days I am only interested in making a good representation of the subject rather than an IPMS standard model! I’m not entirely happy with the launch pad. I initially sprayed it in a desert yellow but I have then weathered it to a lighter colour. I’m not sure whether the launch pad was reused or was a one off item and I ended up with neither a pristine new pad or a well used one! Oh well! It looks good enough!
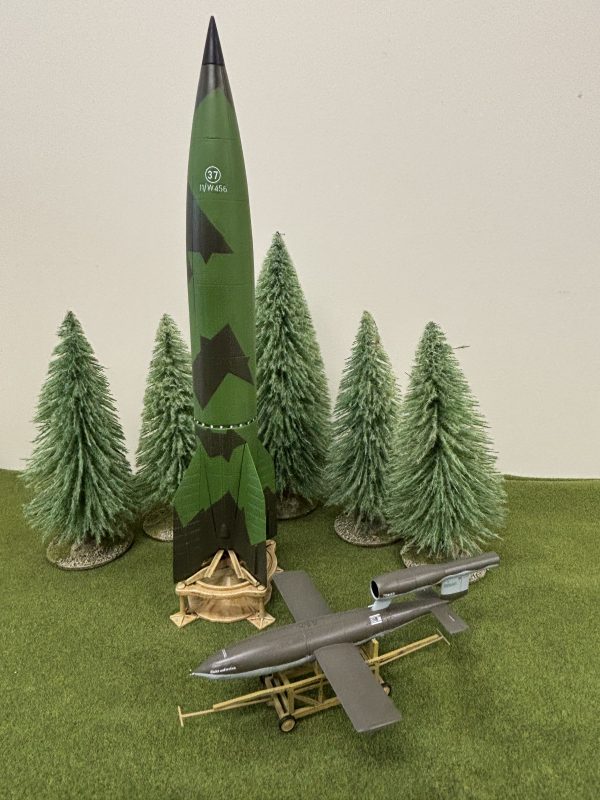
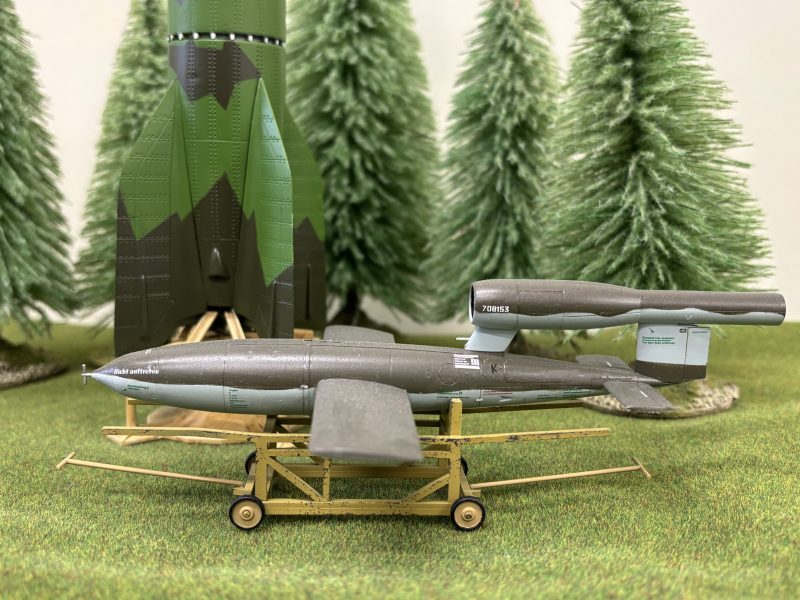
Here is the V2 along with a V1
I now have both of the main V weapons in my cabinet. I would love to add some of the German Rocket fighters and Jets at some stage but they will have to wait in the queue!
Another shot of the V1 with the V2 in the background.
So now it’s back to Samurai – I have 11 cavalry models to make and paint!
Yet another round up of projects completed rather than an in depth coverage of anything in particular. I have gotten out of the habit of writing a blog – something that I will try to address in the New year. I have been fairly busy, painting and working my way through my various projects, so in no particular order these are the completed models that have made it into my collection.
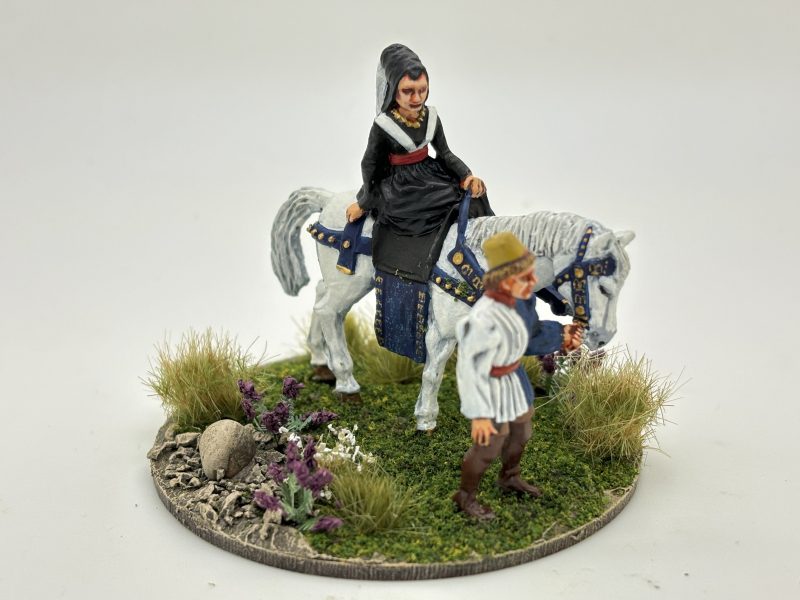
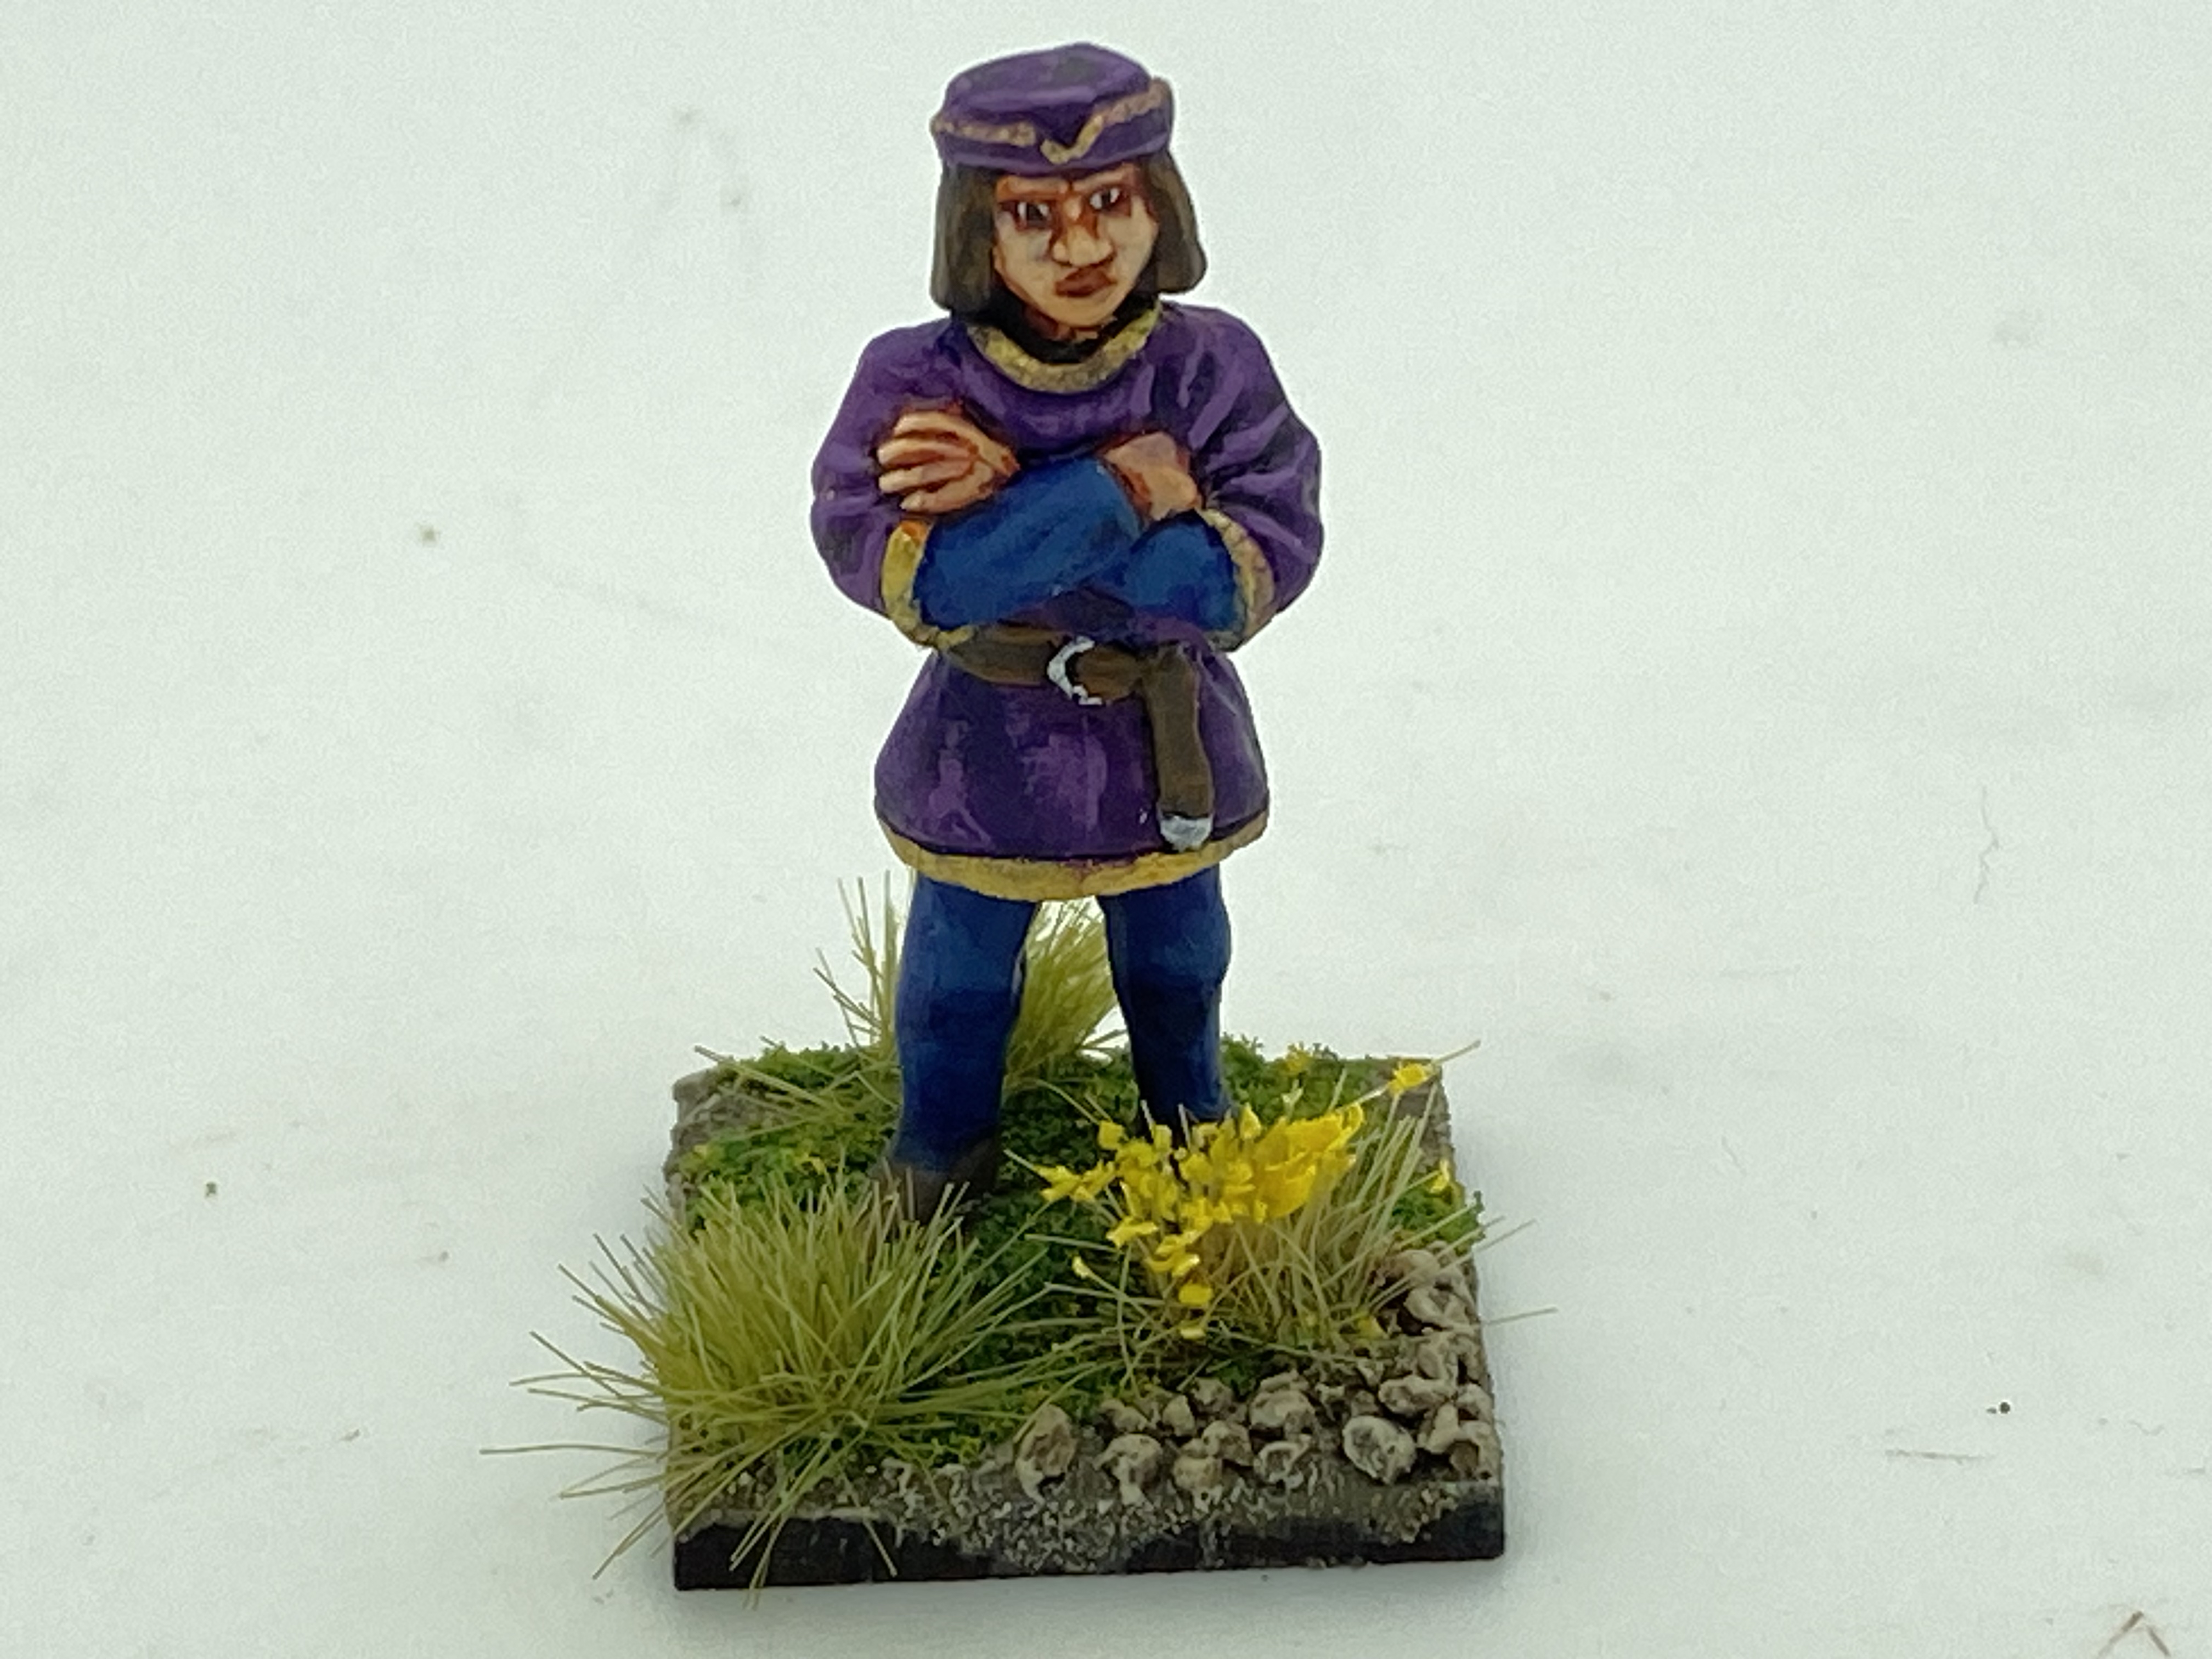
Margaret of Anjou
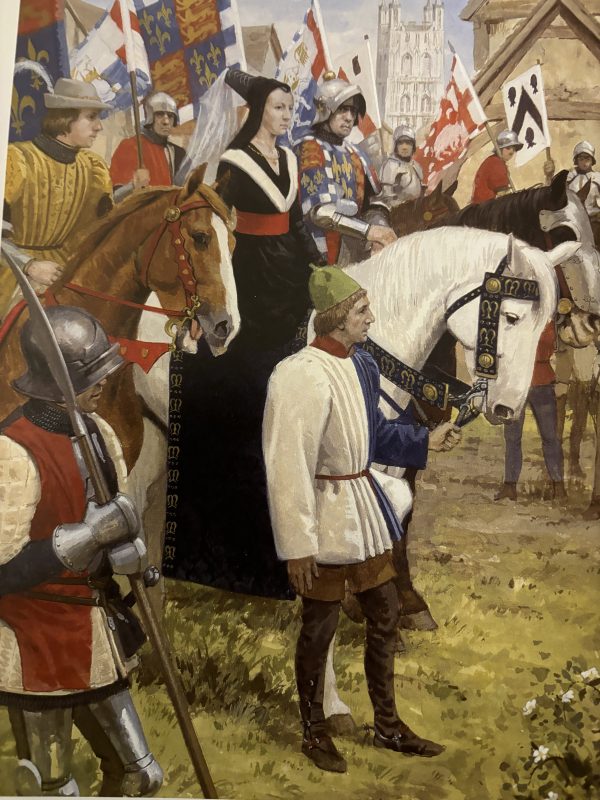
The first model is a small vignette from Athena Miniatures featuring Margaret of Anjou, Henry 6th’s wife and her page. I copied the paint scheme from Graham Turners beautiful book ‘The wars of The Roses’. Here’s a picture of the illustration form the book.
Margaret of Anjou from Graham Turners Wars of the Roses
Incidentally, I am just about to finish reading this book. As well as the superb illustrations and paintings by Graham Turner, the book is a well researched overview of the Wars of the Roses. I would thoroughly recommend it to anyone interested in the period.
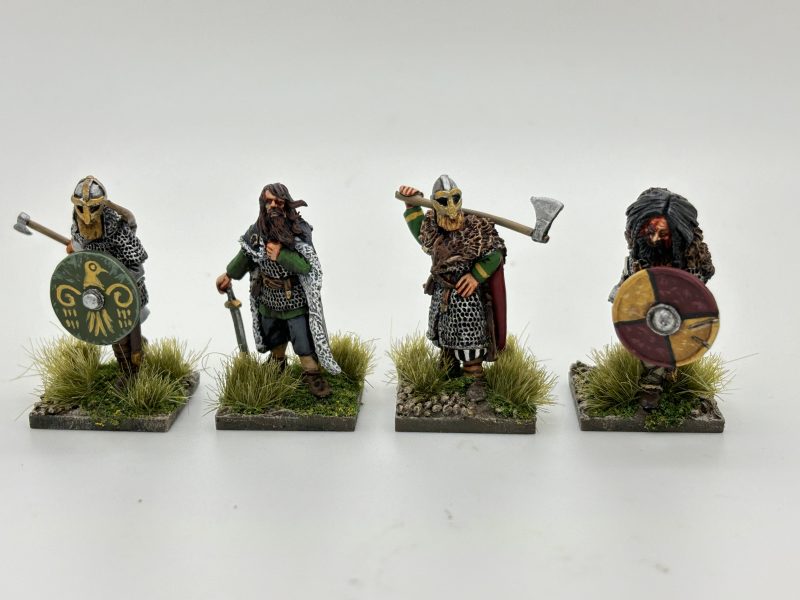
Four more warriors for my Dark Ages collection
The next project was to paint four more warriors for my Dark Ages collection. The three on the left are Footsore miniatures, the figure on the right is a limited edition figure, I think, but I have forgotten who from! Painting these figures gave me a total of 48 Anglo Danes/Vikings that I have now moved on from Saga to allow me to field 4 units for Never Mind The North Men. No doubt I will be adding more next year!
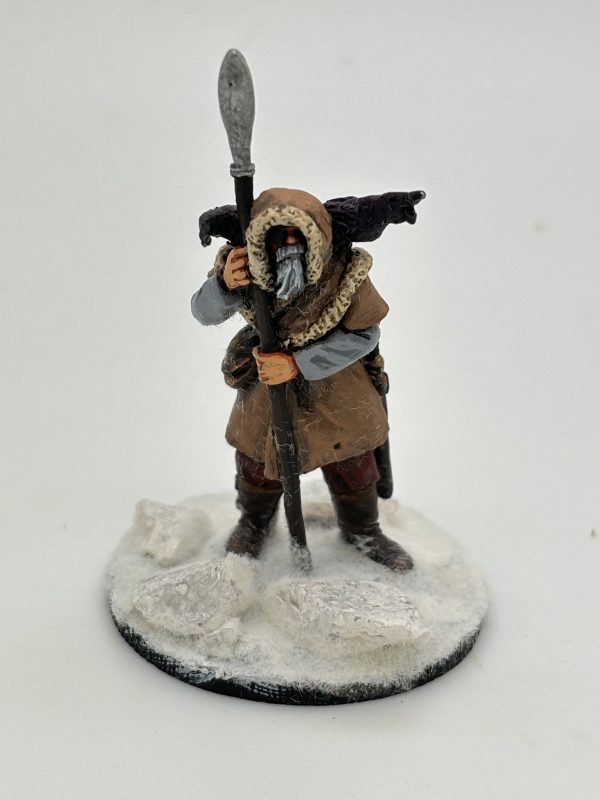
Odin!
Whilst I was painting Dark Age figures, I came across this lovely figure of Odin from Footsore Miniatures in my spares box, so I painted him up, pretty much copying the Footsore example. I’m not sure where he will fit in to an army but he looks nice!
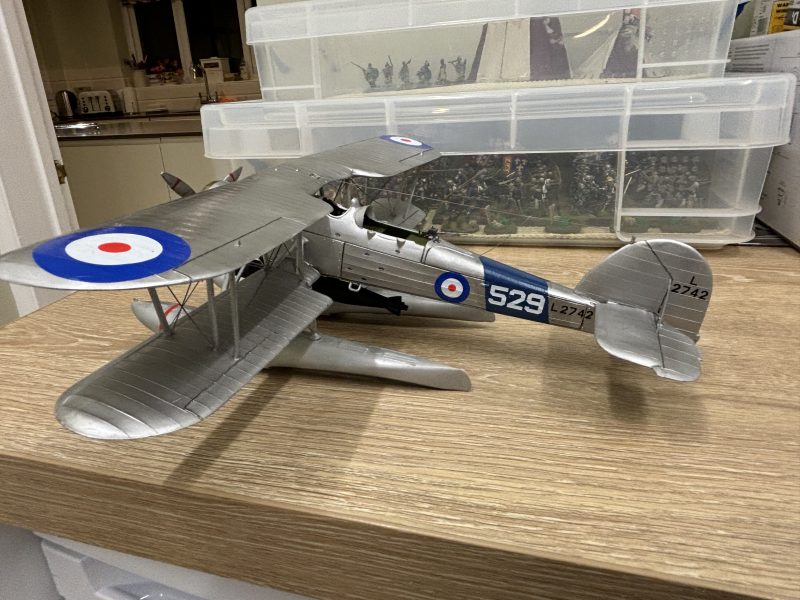
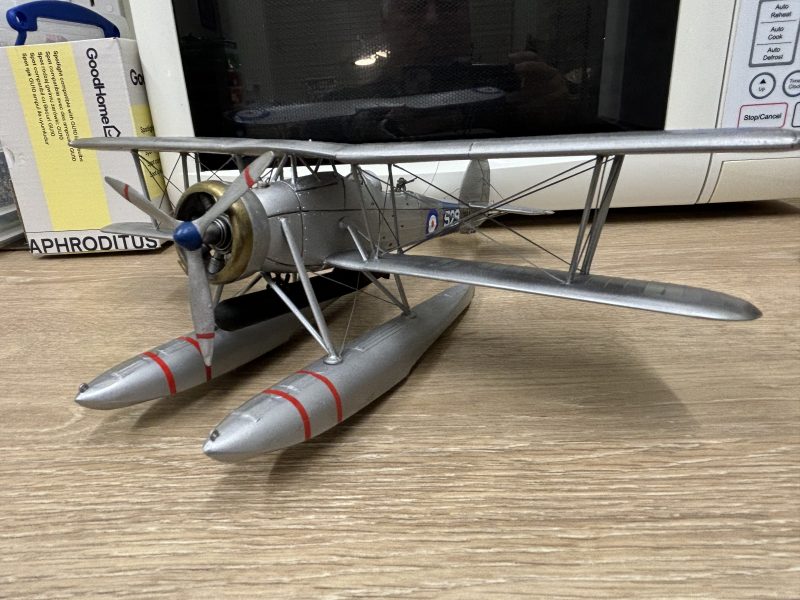
1/48th scale Swordfish
I finally finished a SMER 1/48th scale model of the Fairy Swordfish. The last part of this project was adding the rigging using stretched sprue. Very fiddly and time consuming. The swear box was in constant use but I’m pleased with the finished result.
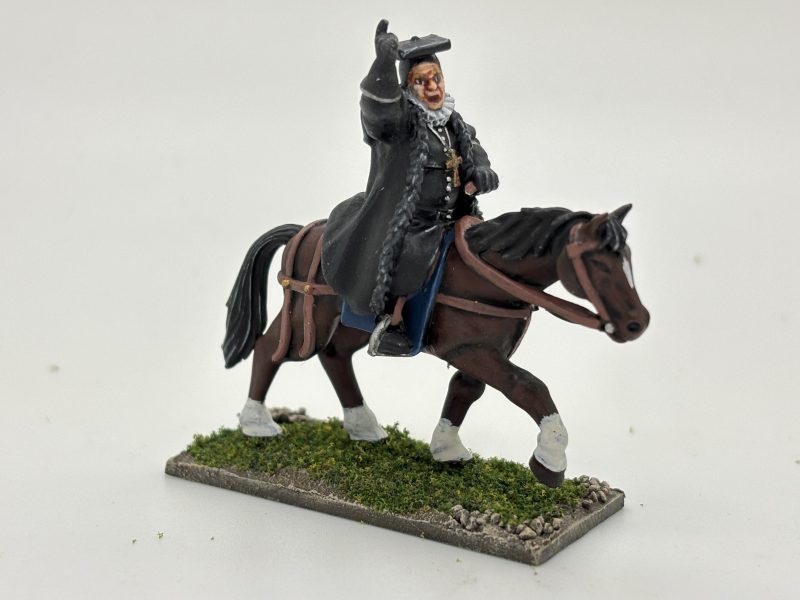
The Bishop of Bath and Wells
I had already painted a foot version of the Bishop of Bath and Wells from Battle Flag Miniatures but also had the mounted version. It seemed a shame not to finish him off as well!
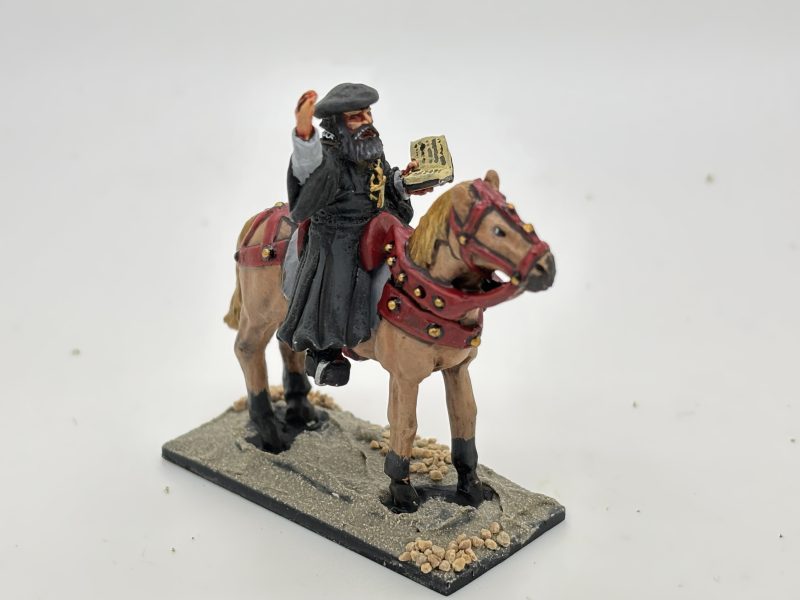
Landsknecht priest
On the subject of the Clergy, I also have a lovely Landsknecht mounted command group from Athena Miniatures. I’ve started with the easiest of them – the mounted priest or Bishop – the others are currently in progress. As you can see, I have yet to finish the basing.
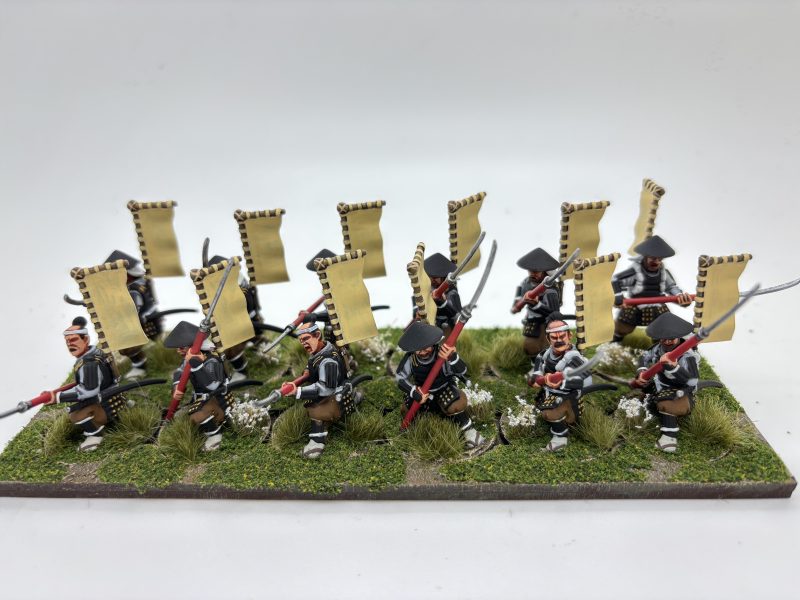
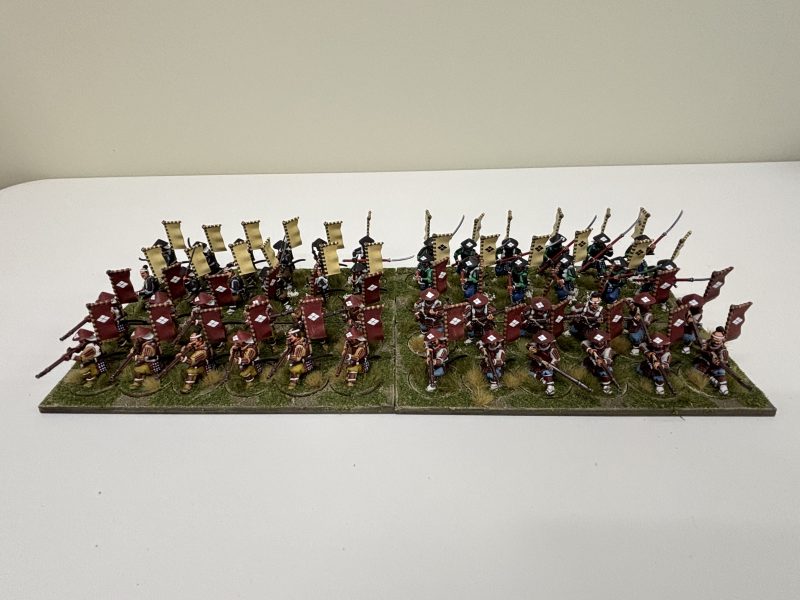
More Ashigaru!
I’ve also finished another 12 Ashigaru from Fireforge miniatures. I now have enough figures to field two Samurai forces for Never mind The Naginitas, of which 140 are Fireforge with a similar number of Warlord and Footsore minatures to oppose them!
four units of Ashigaru!
Finally, I spent some considerable time adding decals to my finished units of Samurai/Ashigaru. I used a mixture of warlord and Vene Vedi Vici decals. It took me some time to finish this task as I had 7 units of 12 to complete. So I had 12 x 3 x7 decals to apply – that’s 252 decals! Going forward, I will add the decals as I finish the unit!
Having completed my Irish Army, I dont really have a ‘big’ project on the go at the moment, except a secret one that I’ll show you at the end of this entry….
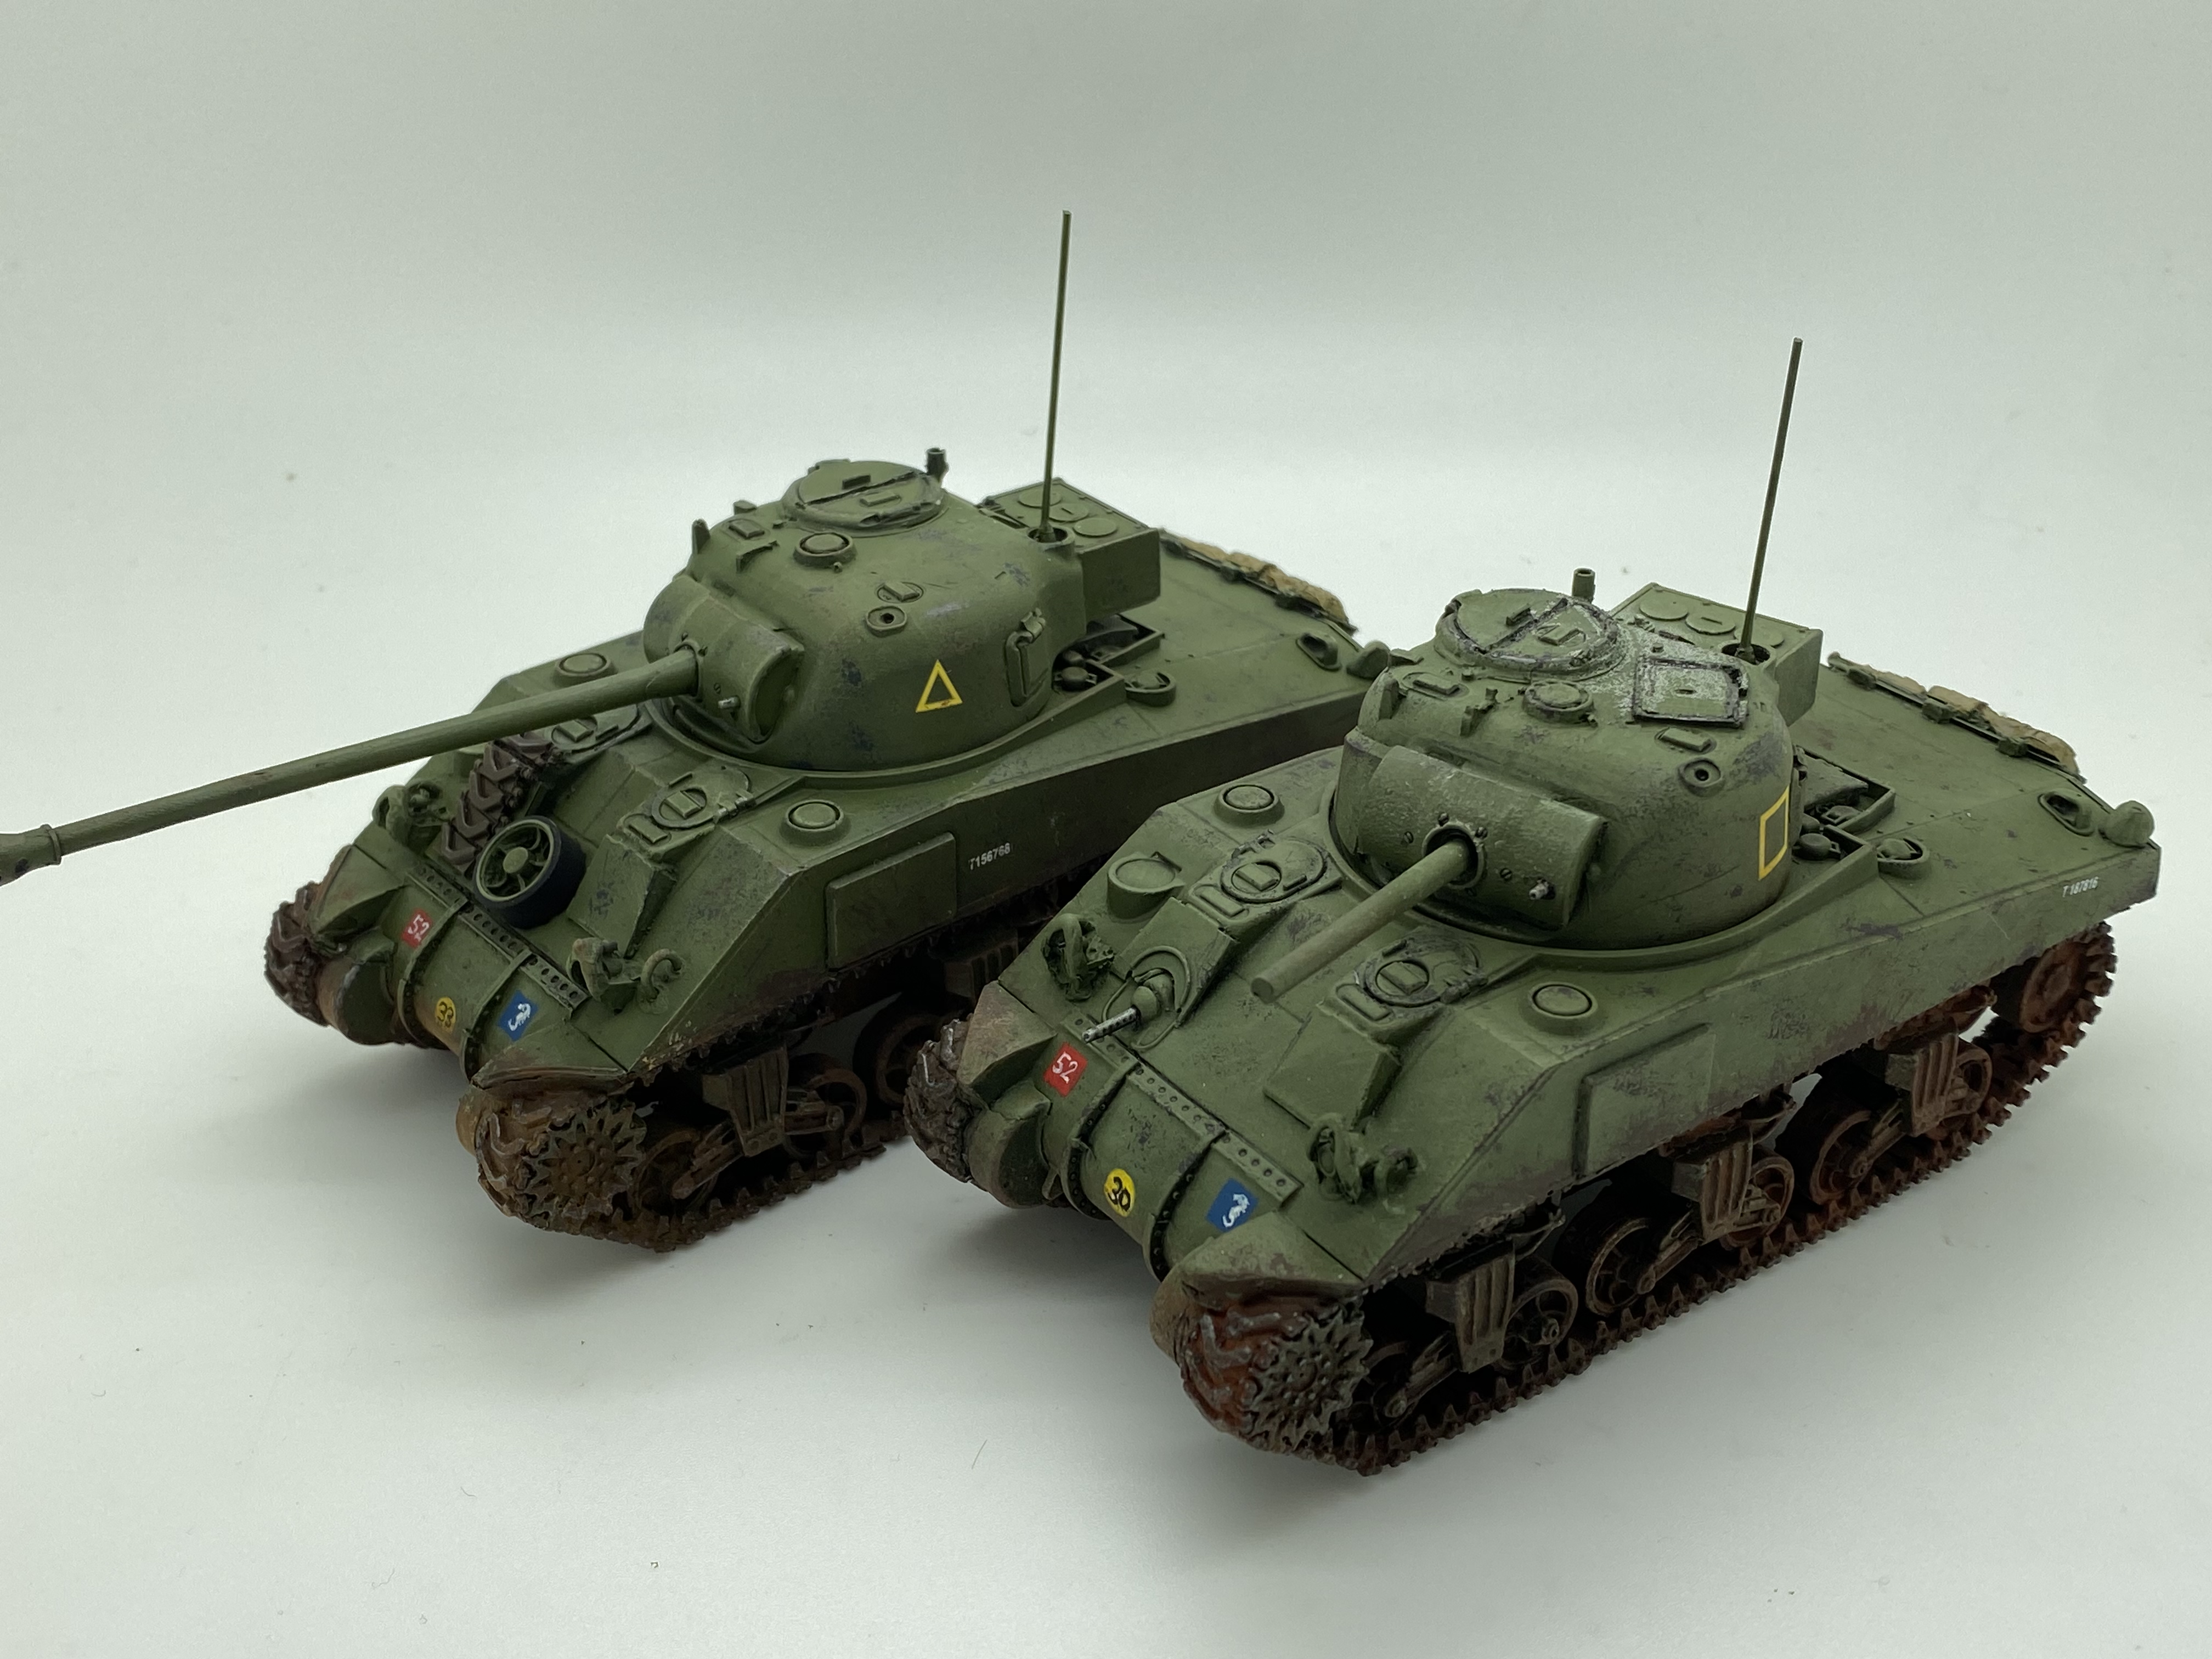
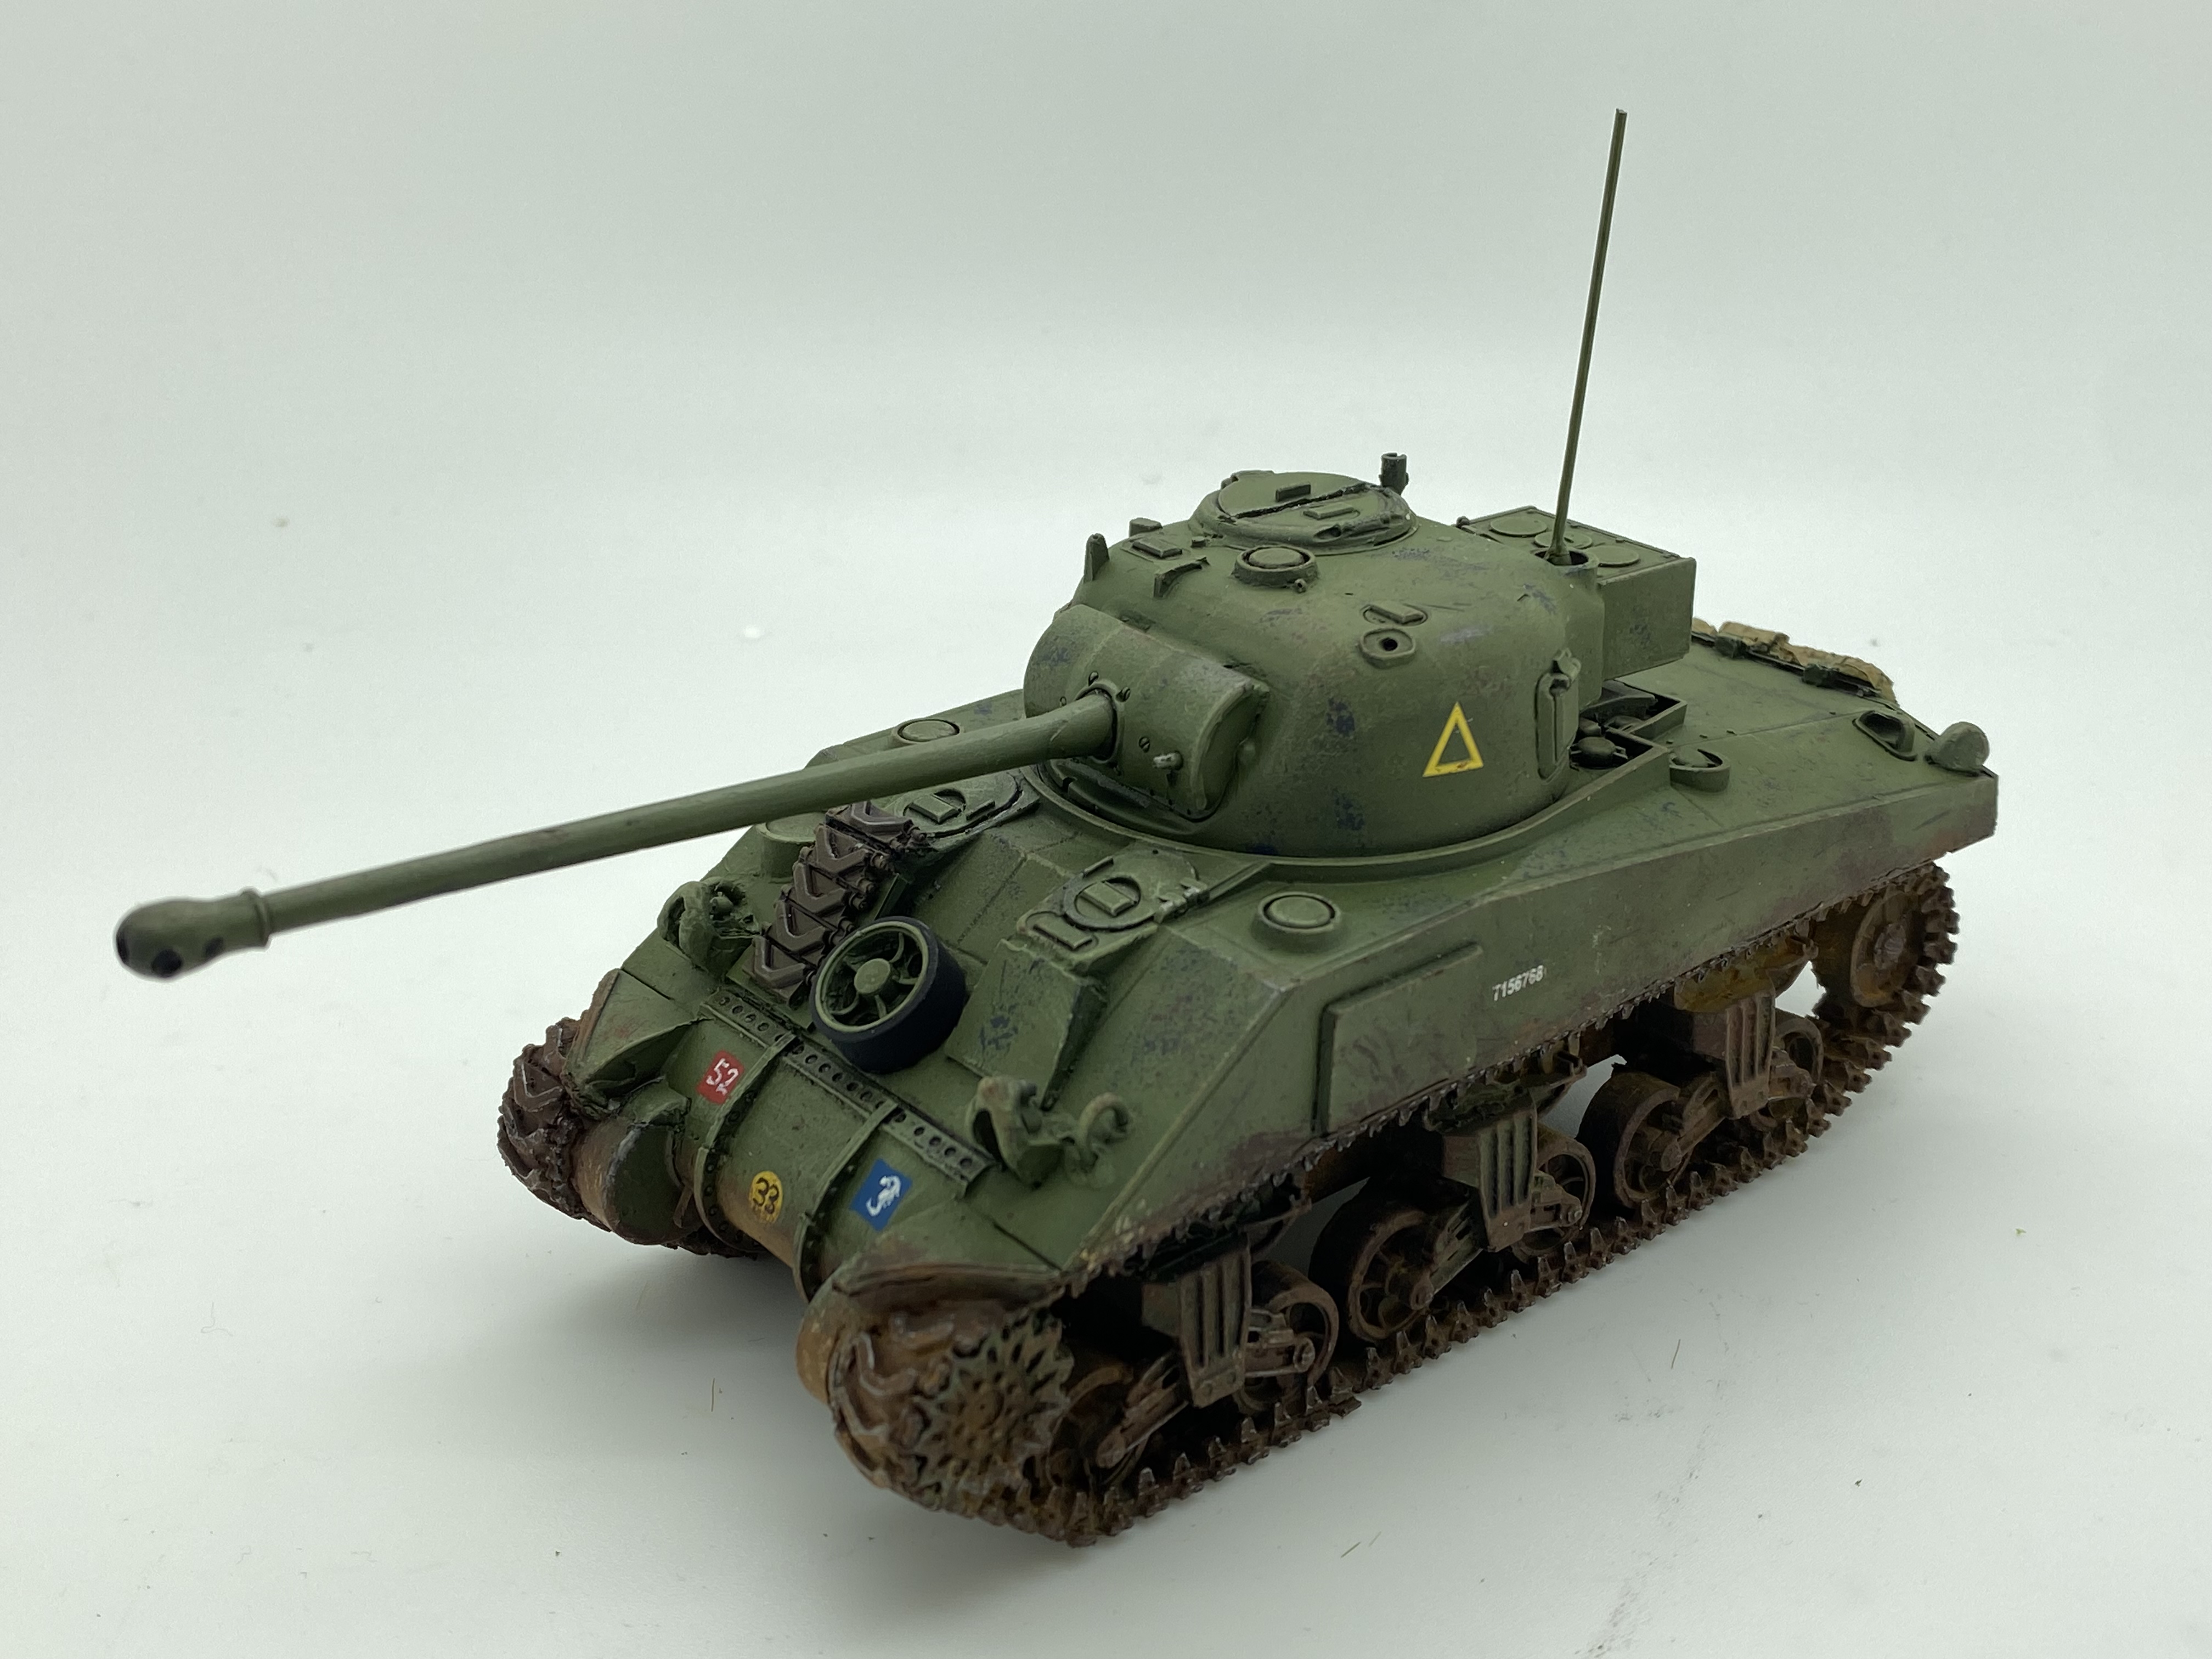
I’ve been working on a number of 1/48th scale subjects. These include an Airfix Snatch Landrover, a SMER 1/48th scale Swordfish, and a couple of Blitzkrieg models, The Firefly and an AEC armoured car. The Firefly is pretty much done, although I will be adding some extra stowage. Here’s a couple of pictures of the Firefly.
The Blitzkrieg Firefly – I think that I will add some stowageThe Firefly with the Sherman V
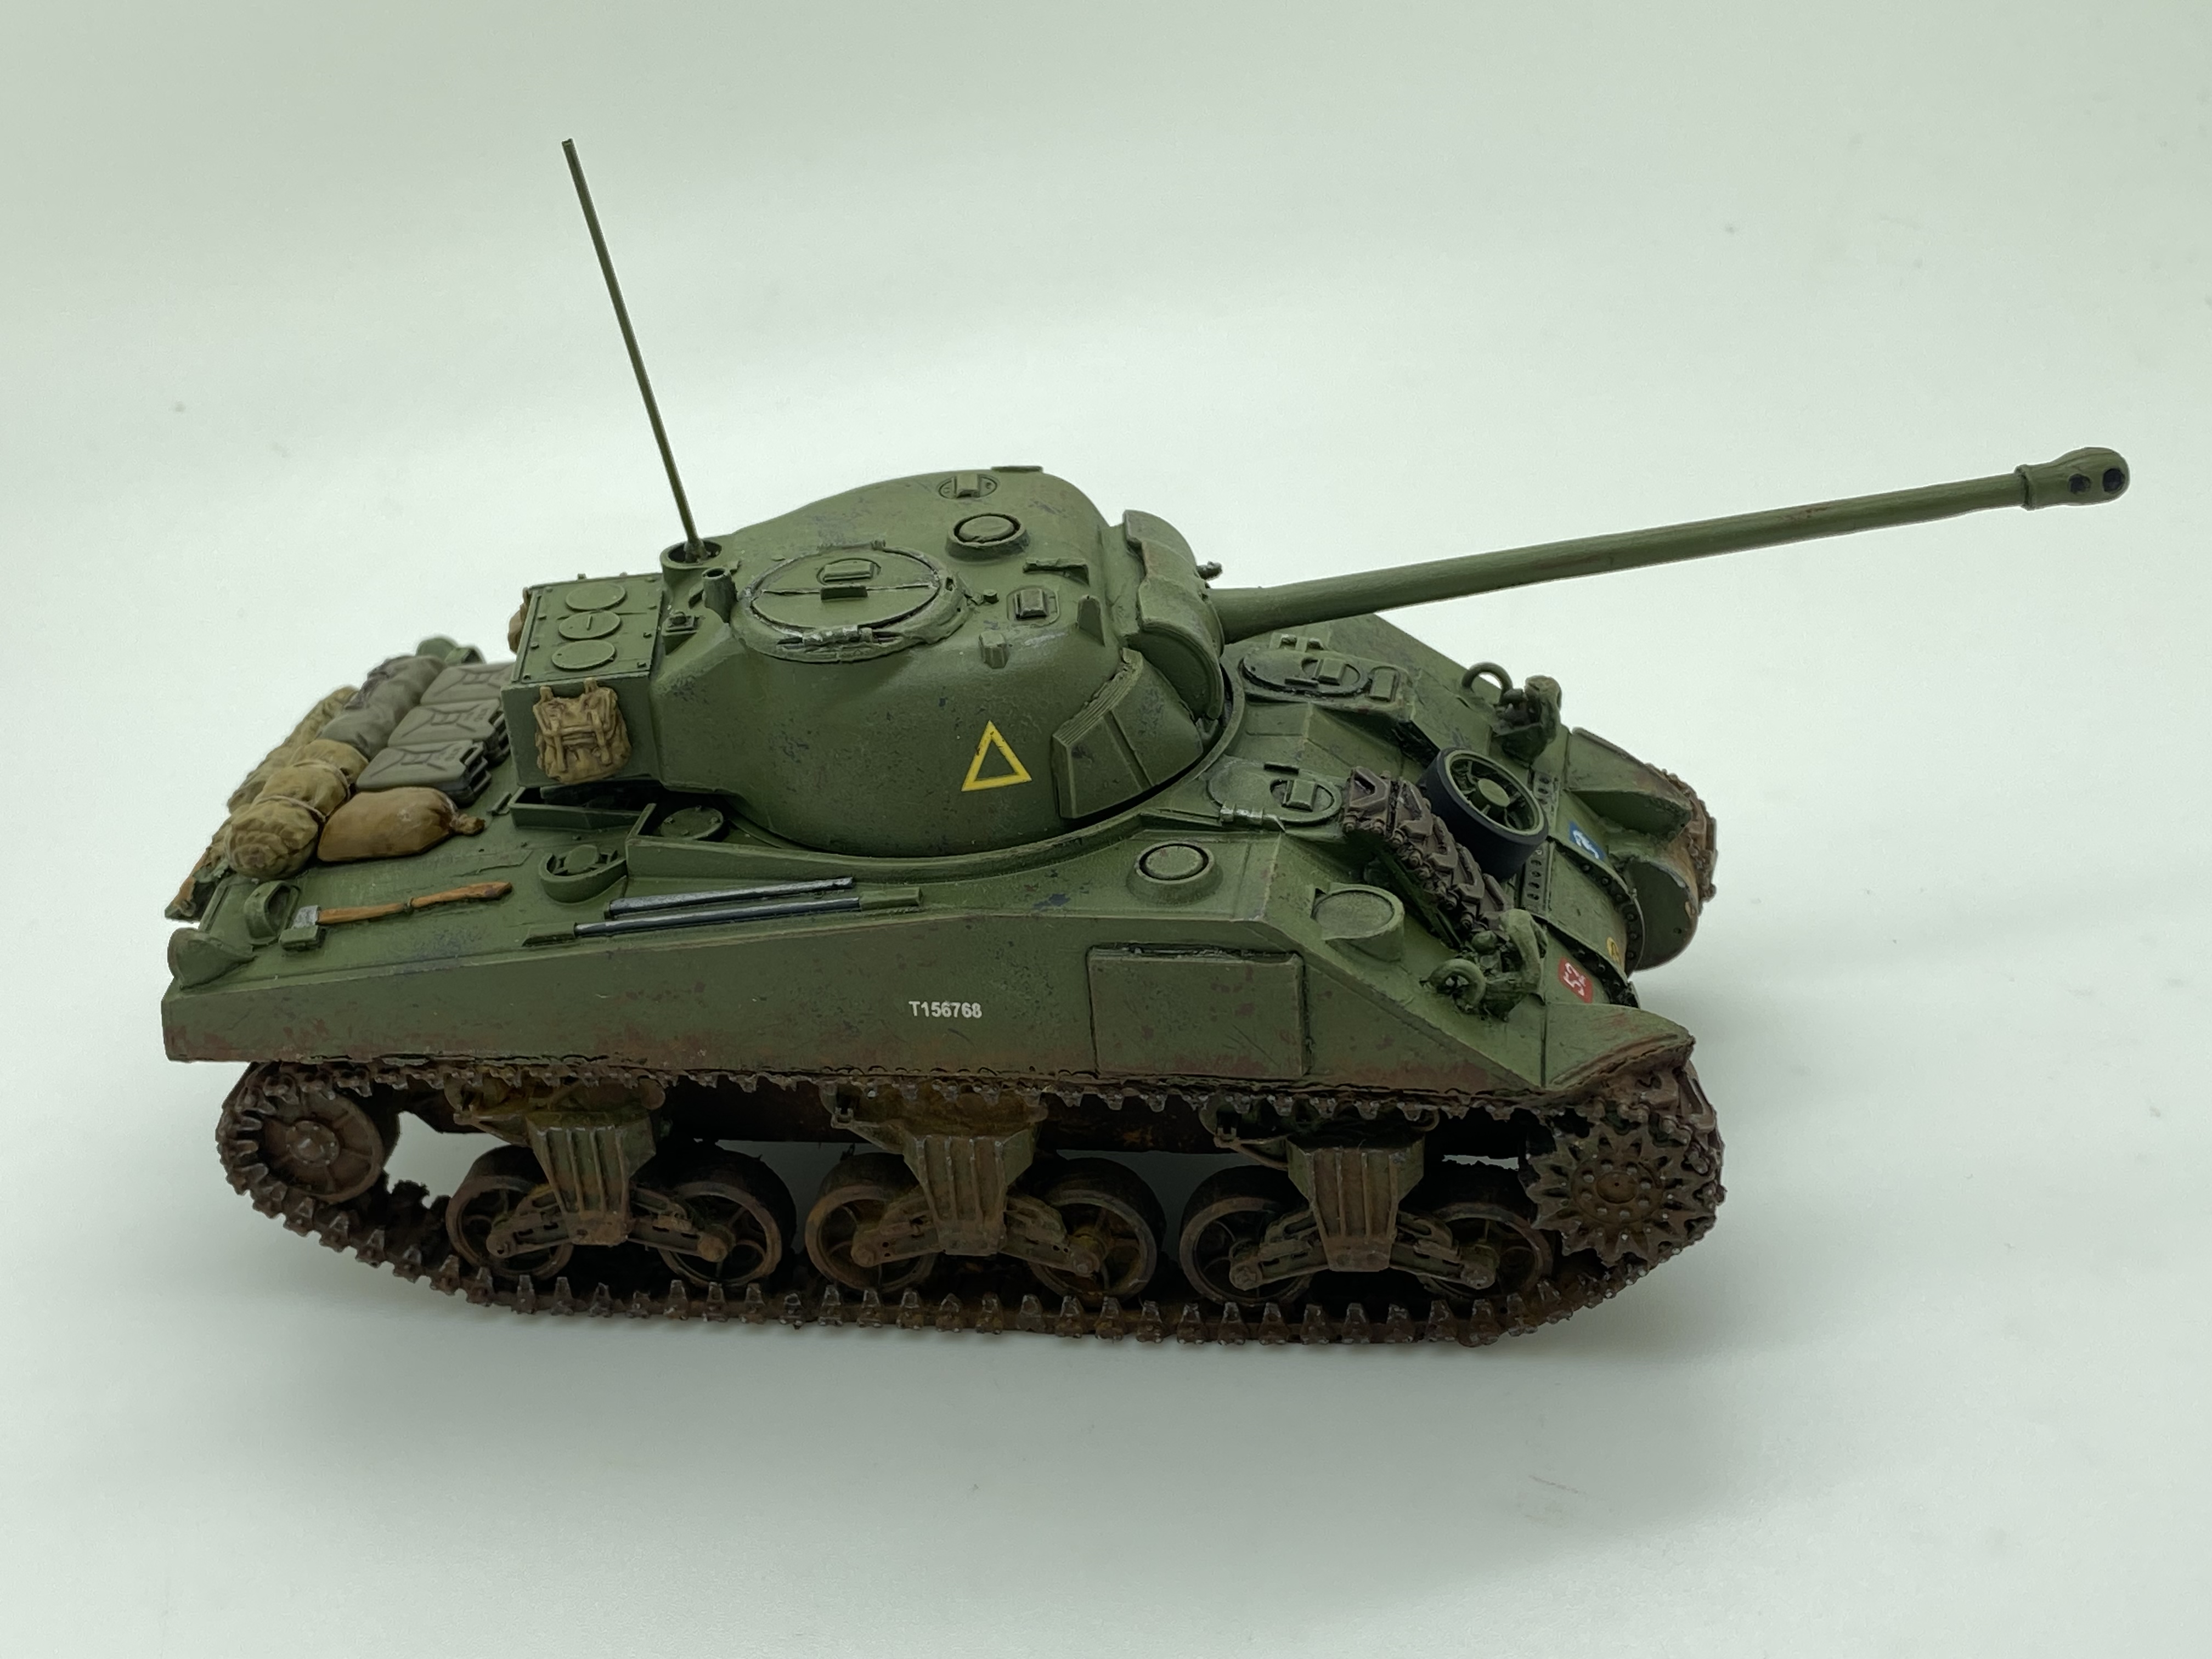
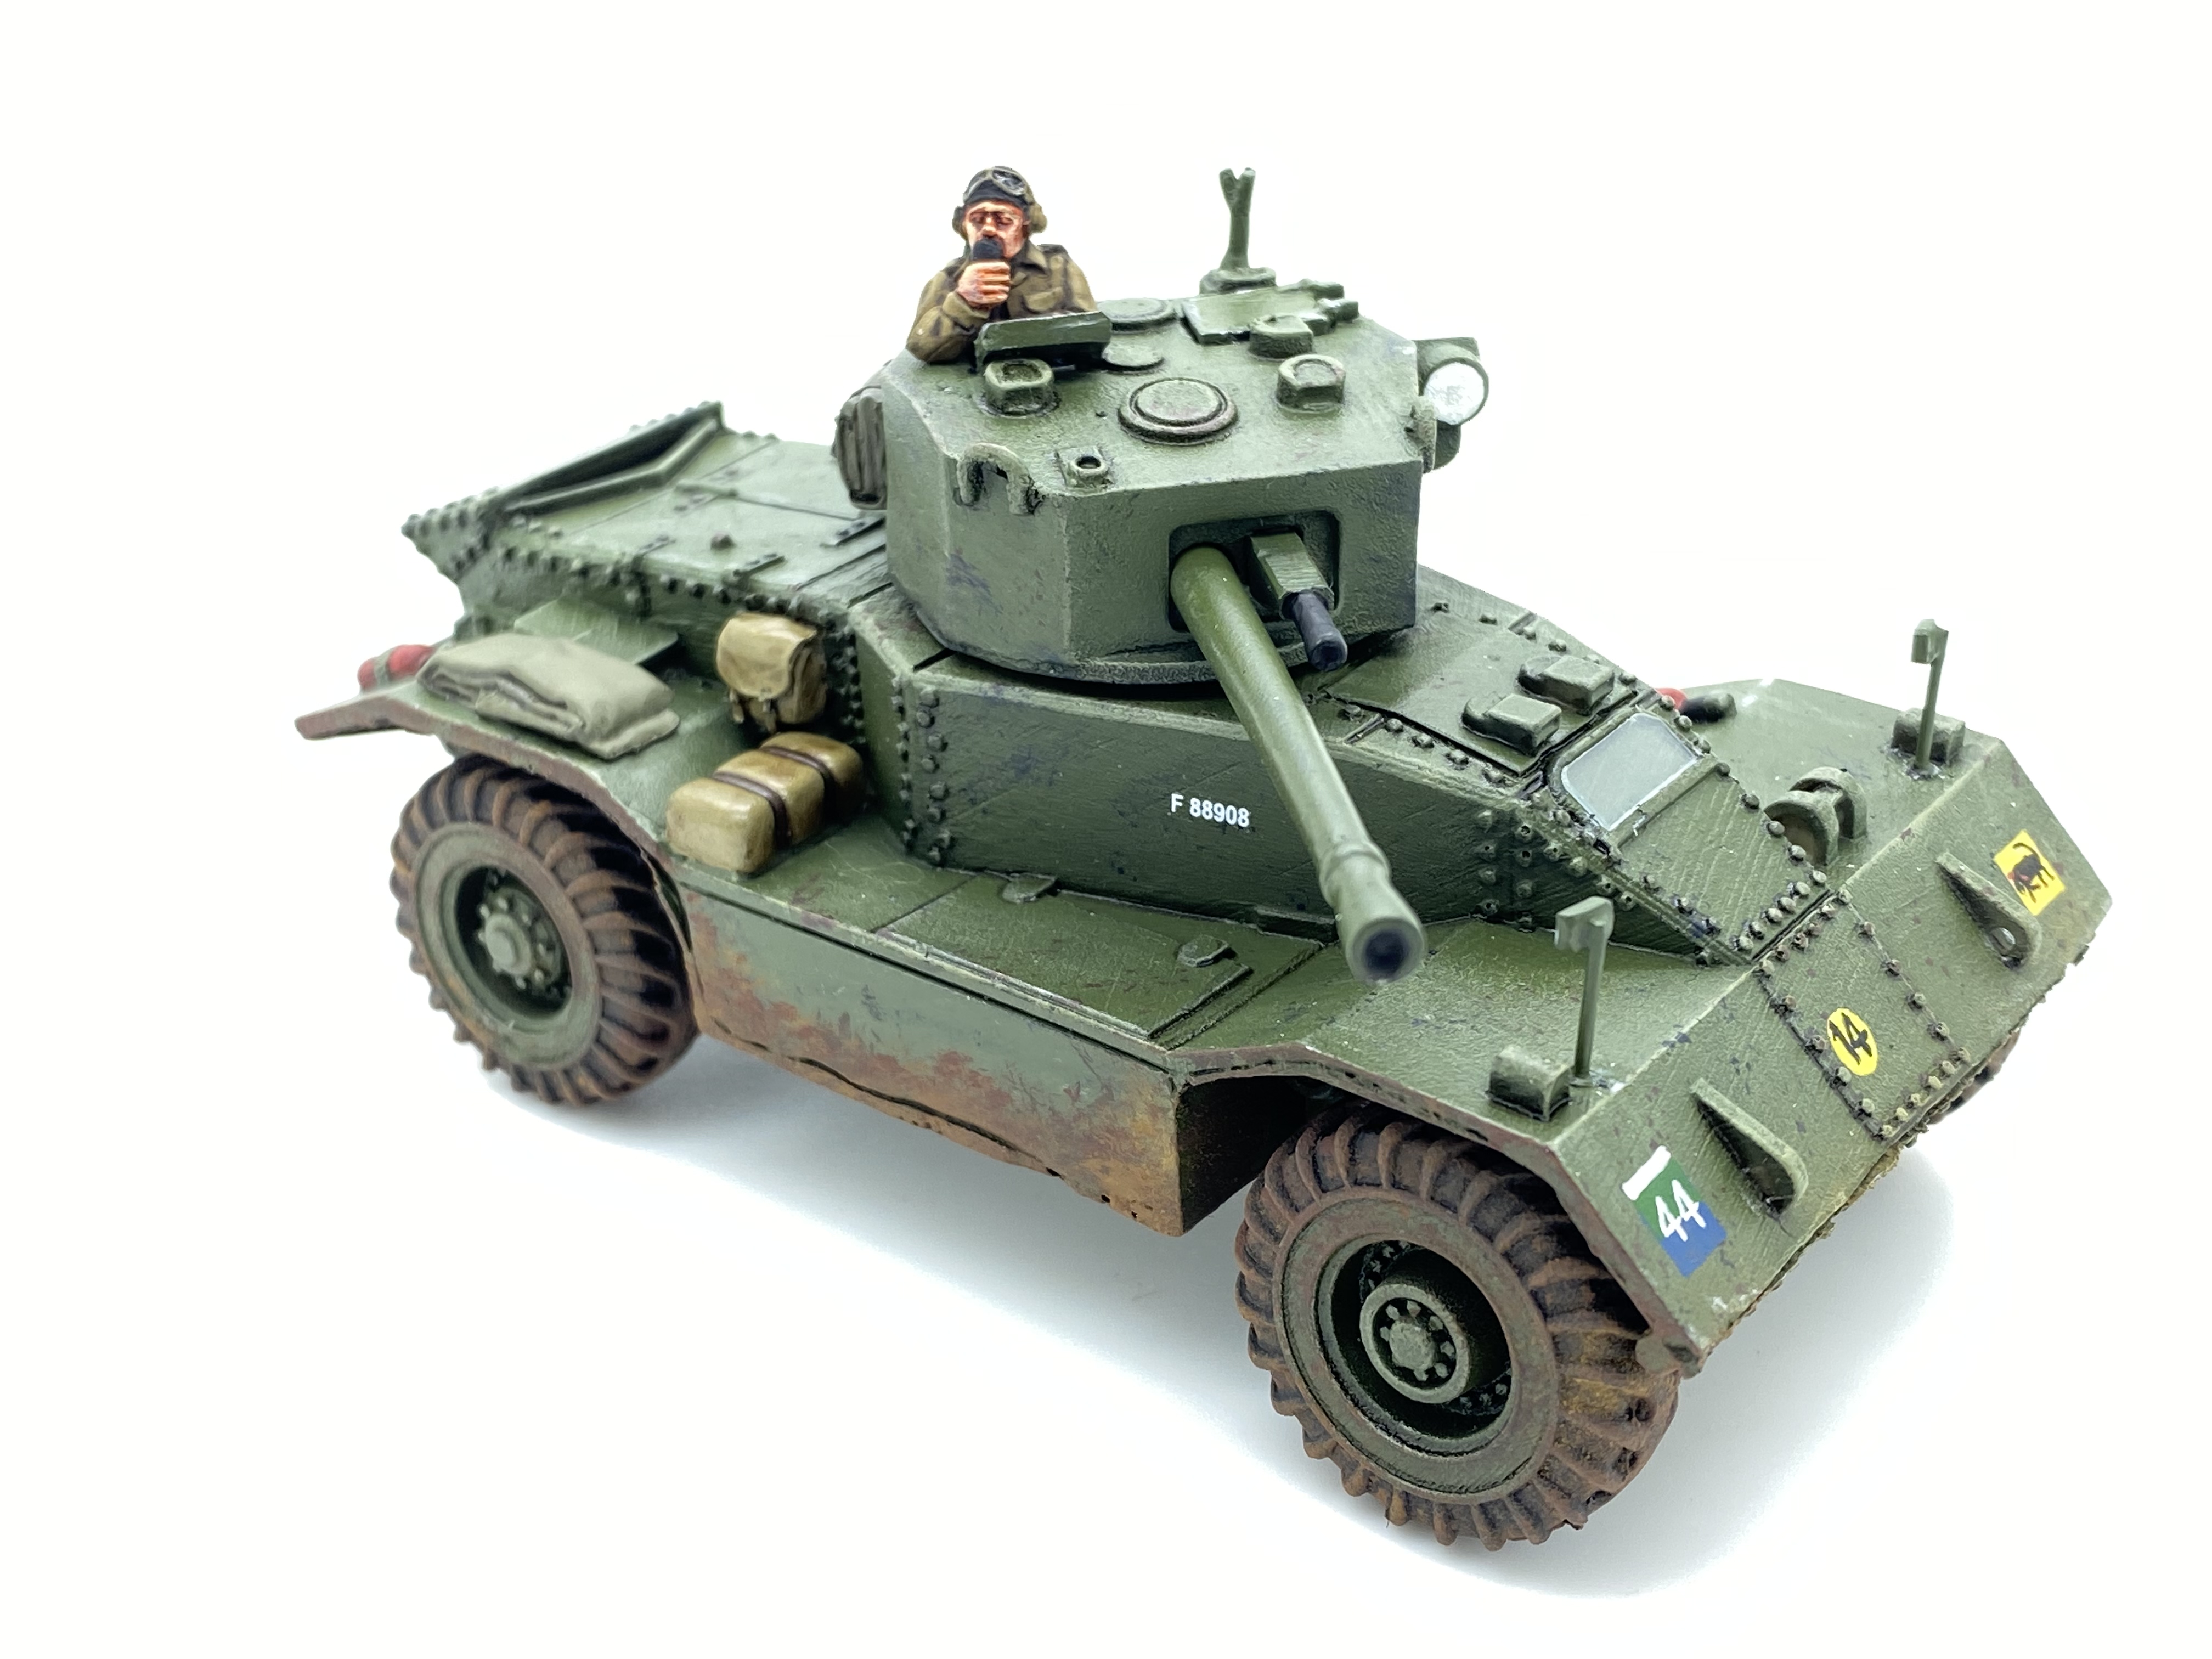
In between writing this blog and publishing it, I actually finished the extra stowage as well as the AEC armoured car. I was pleased with the AEC car. Even though it is resin, a few extras, stowage, wing mirrors, the drivers screen and a commander have brought it to life. The drivers screen was added by simply cutting an old blister pack down to get the clear plastic!
Firefly with extra stowage1/48th AEC armoured car from Blitzkrieg Miniatures
As far as my WOTR collection goes, I have already painted the Richard III figure that was available at Hammerhead 2023. The figure is a bit fat in the face for Richard, but he will make a nice addition to my collection and he’s in the cabinet rather than the leadpile!
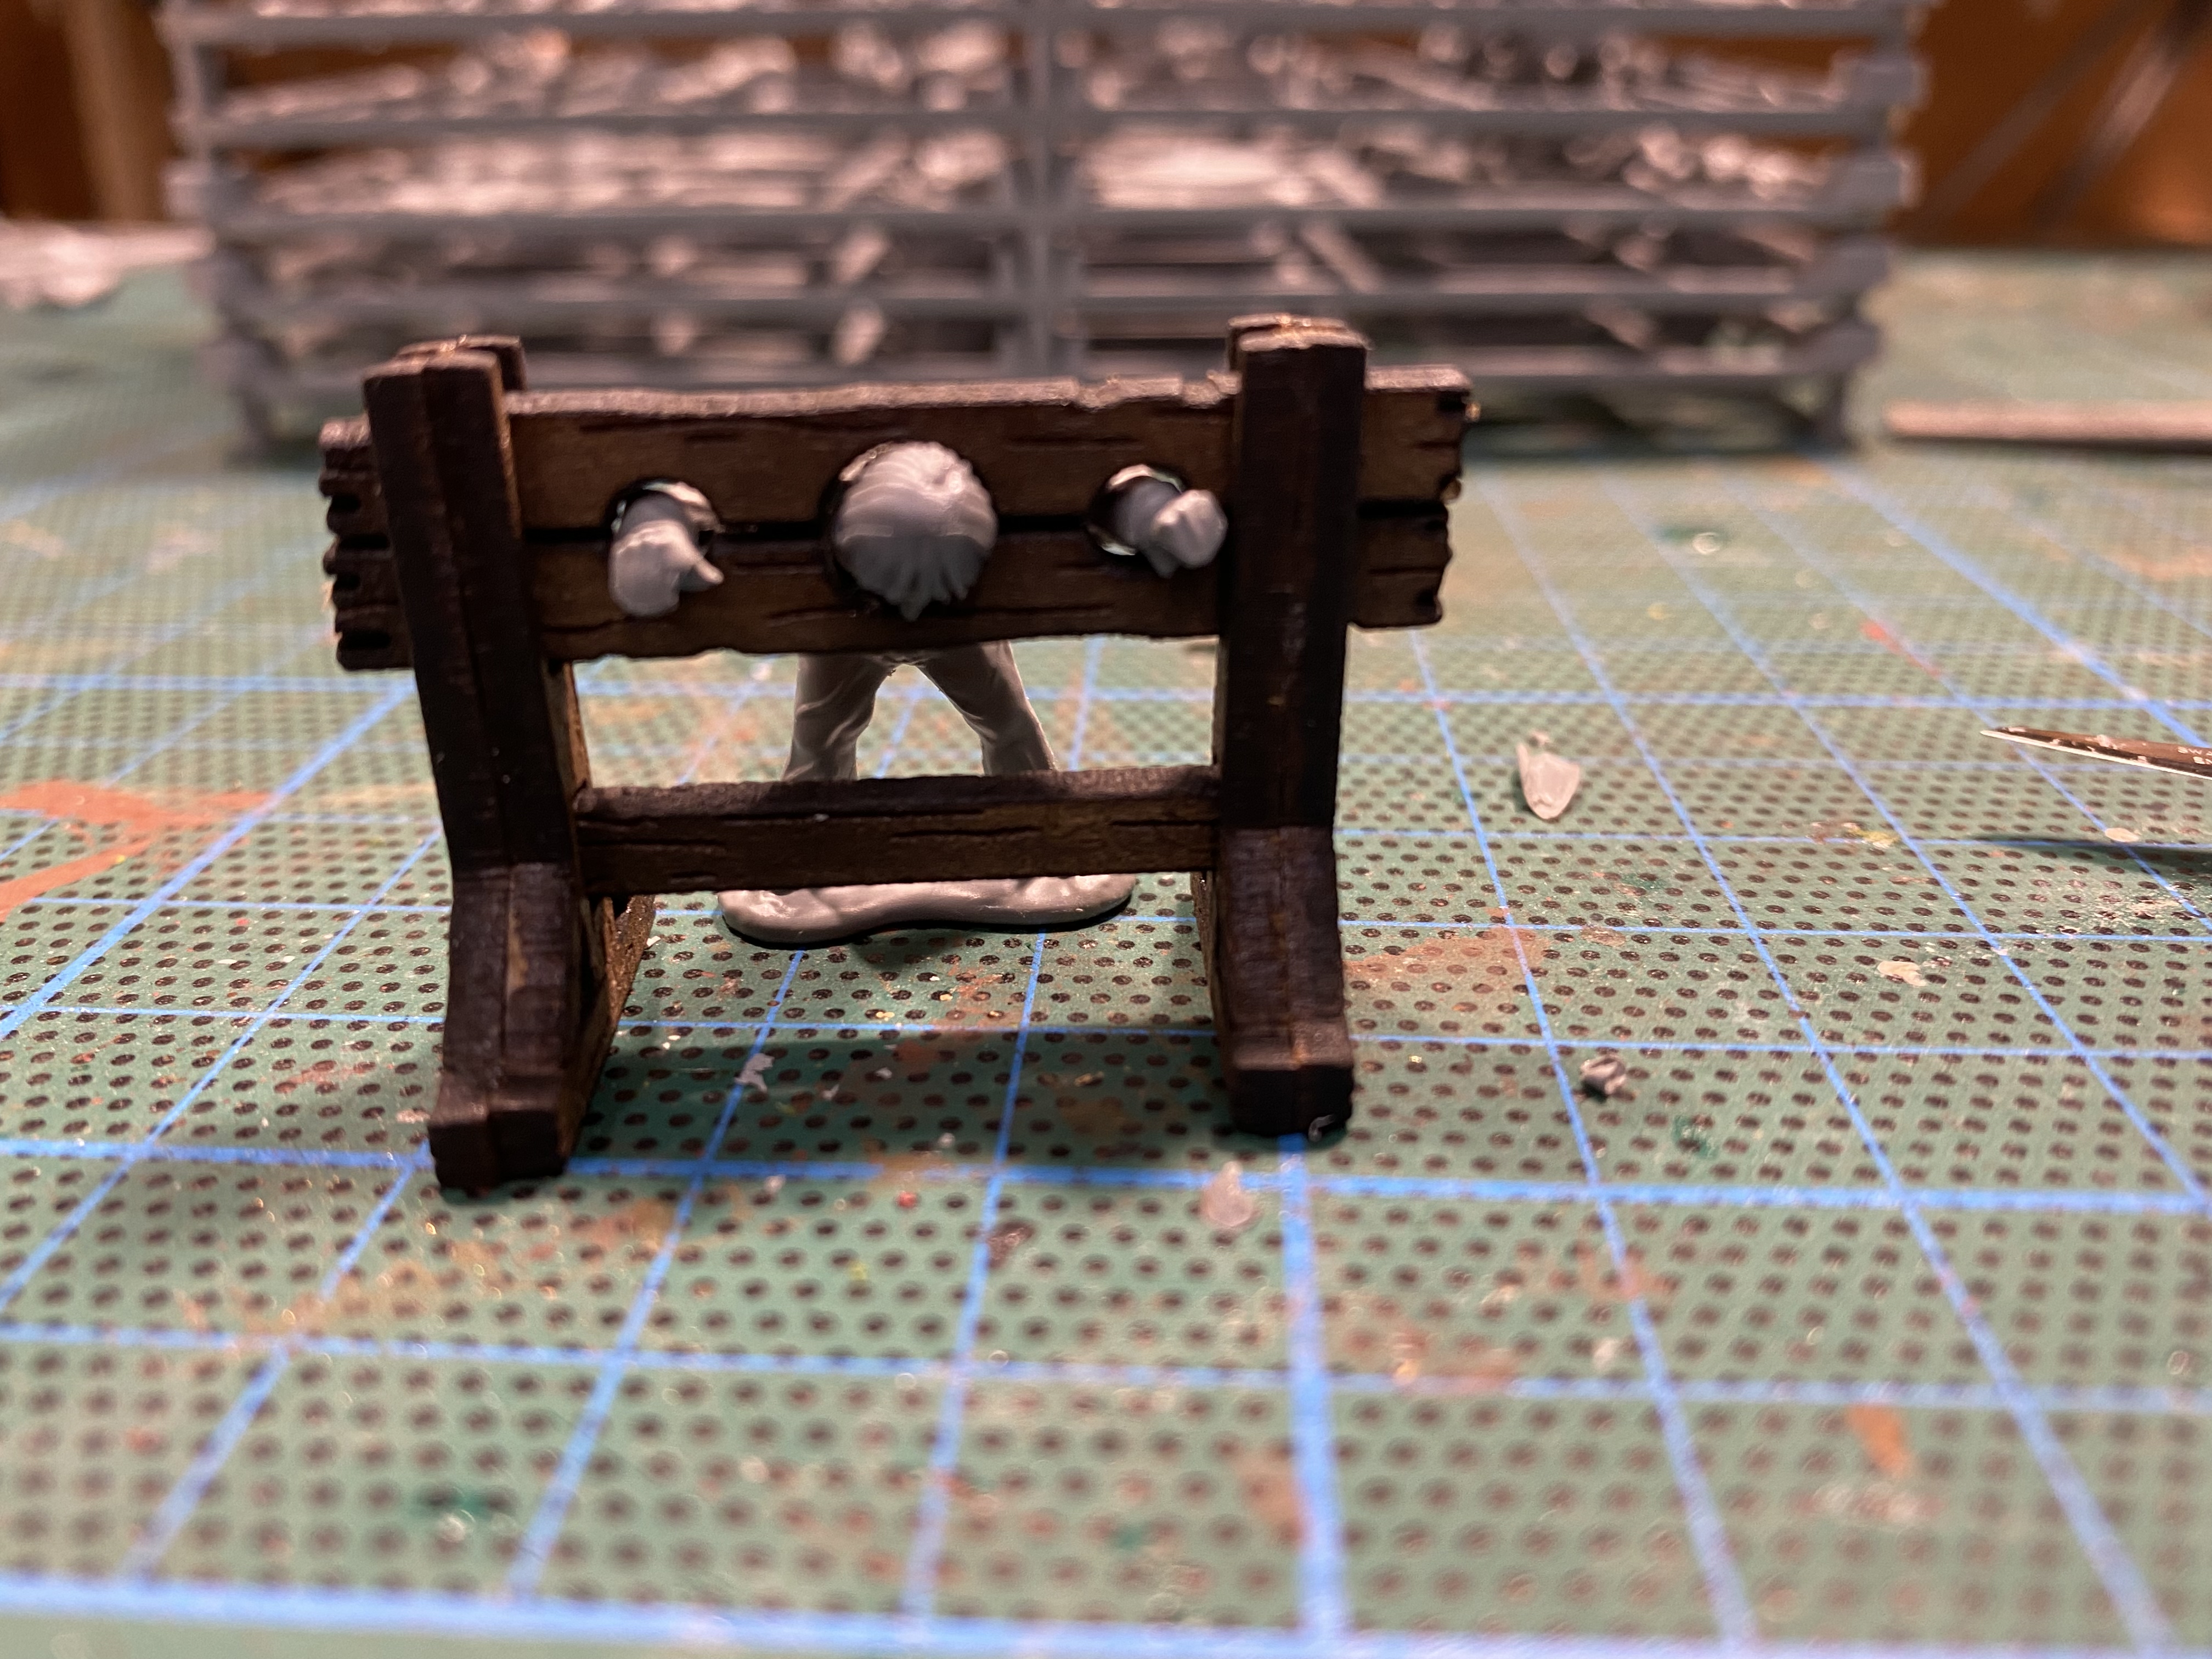
I’m also working on a small vignette. Andy Callan gave me a set of stocks for my medieval village that is progressing at glacial speed. It seemed a shame not to have a subject locked up in them so I’ve converted a Wargames Factory Celt to fit. There’s a bit more work to do, as you can see.
If you are happy and you know it clap your hands…..
So on to the secret project! Andy Callan has been working on another spin off of Never Mind The Bill Hooks. This time it is Bill Hooks Fantasia or Never Mind the Warlocks – a fantasy rules set using the basic Bill Hooks game engine. Andy had written a fantasy version some time ago for his Grand kids to play. However, Bill Hooks had moved on and the rules never made it to the table. There has been a lot of back and forth between Andy and some keen Bill Hooks players as the new rules were added.
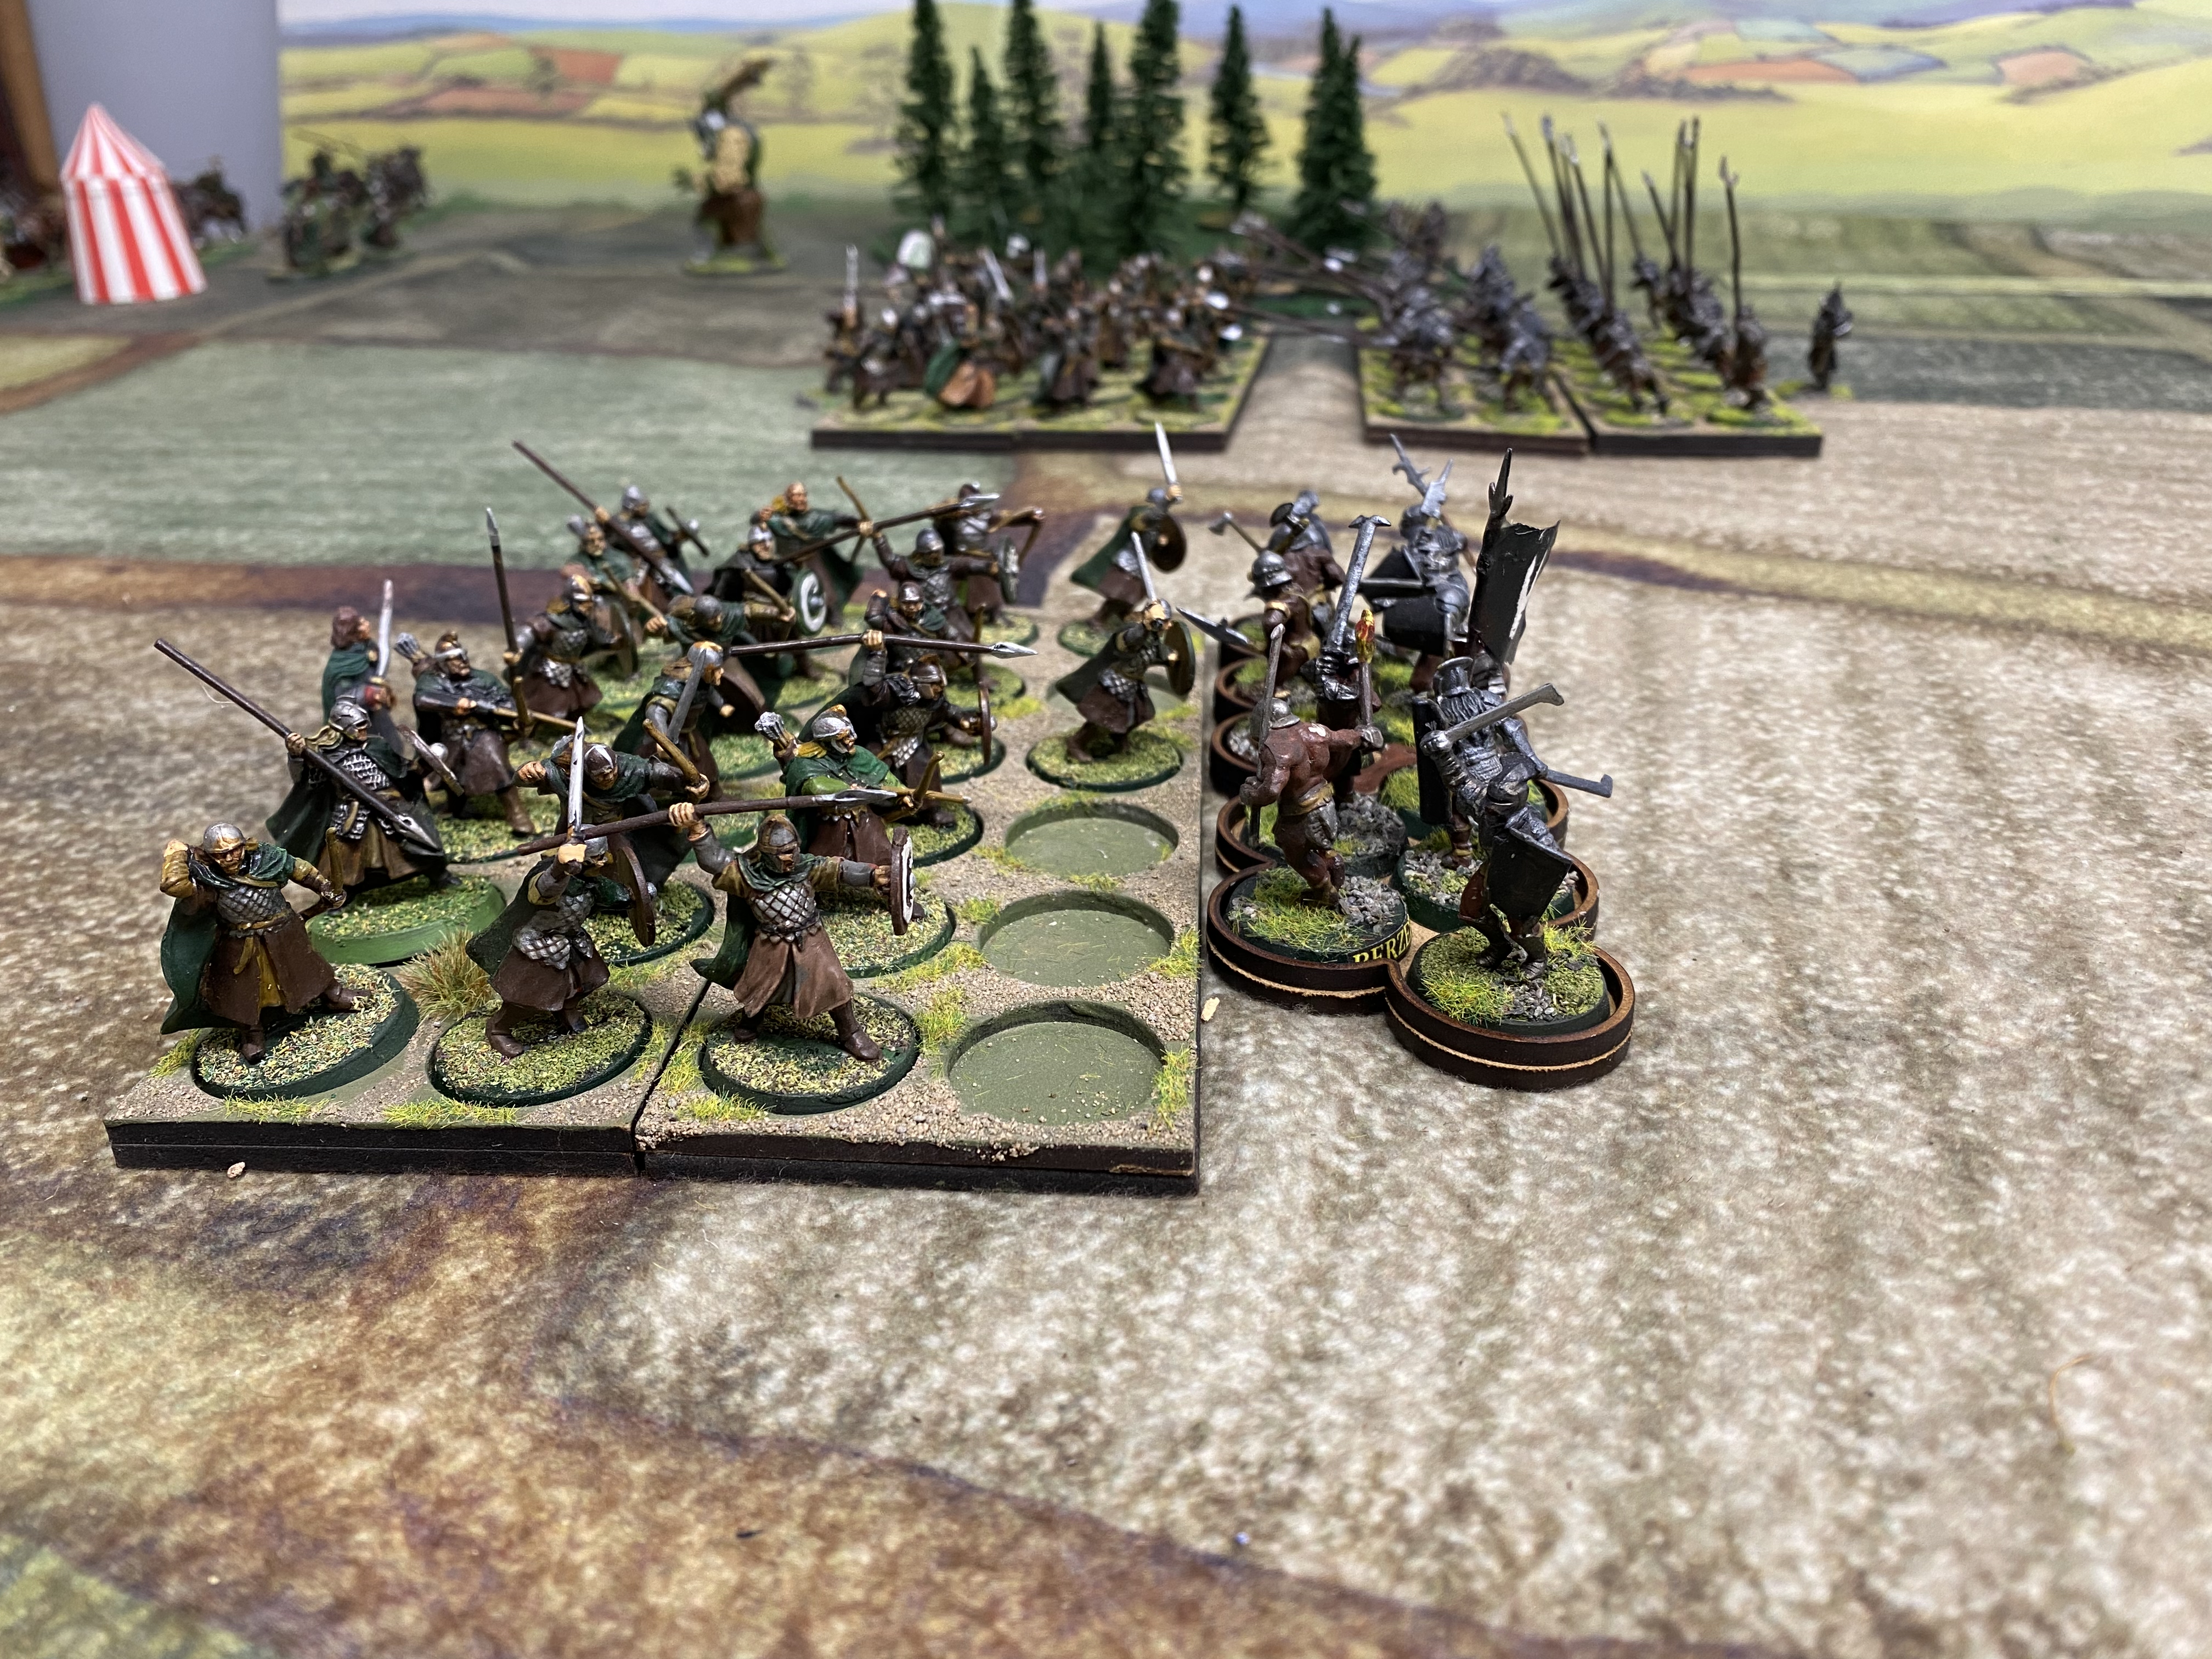
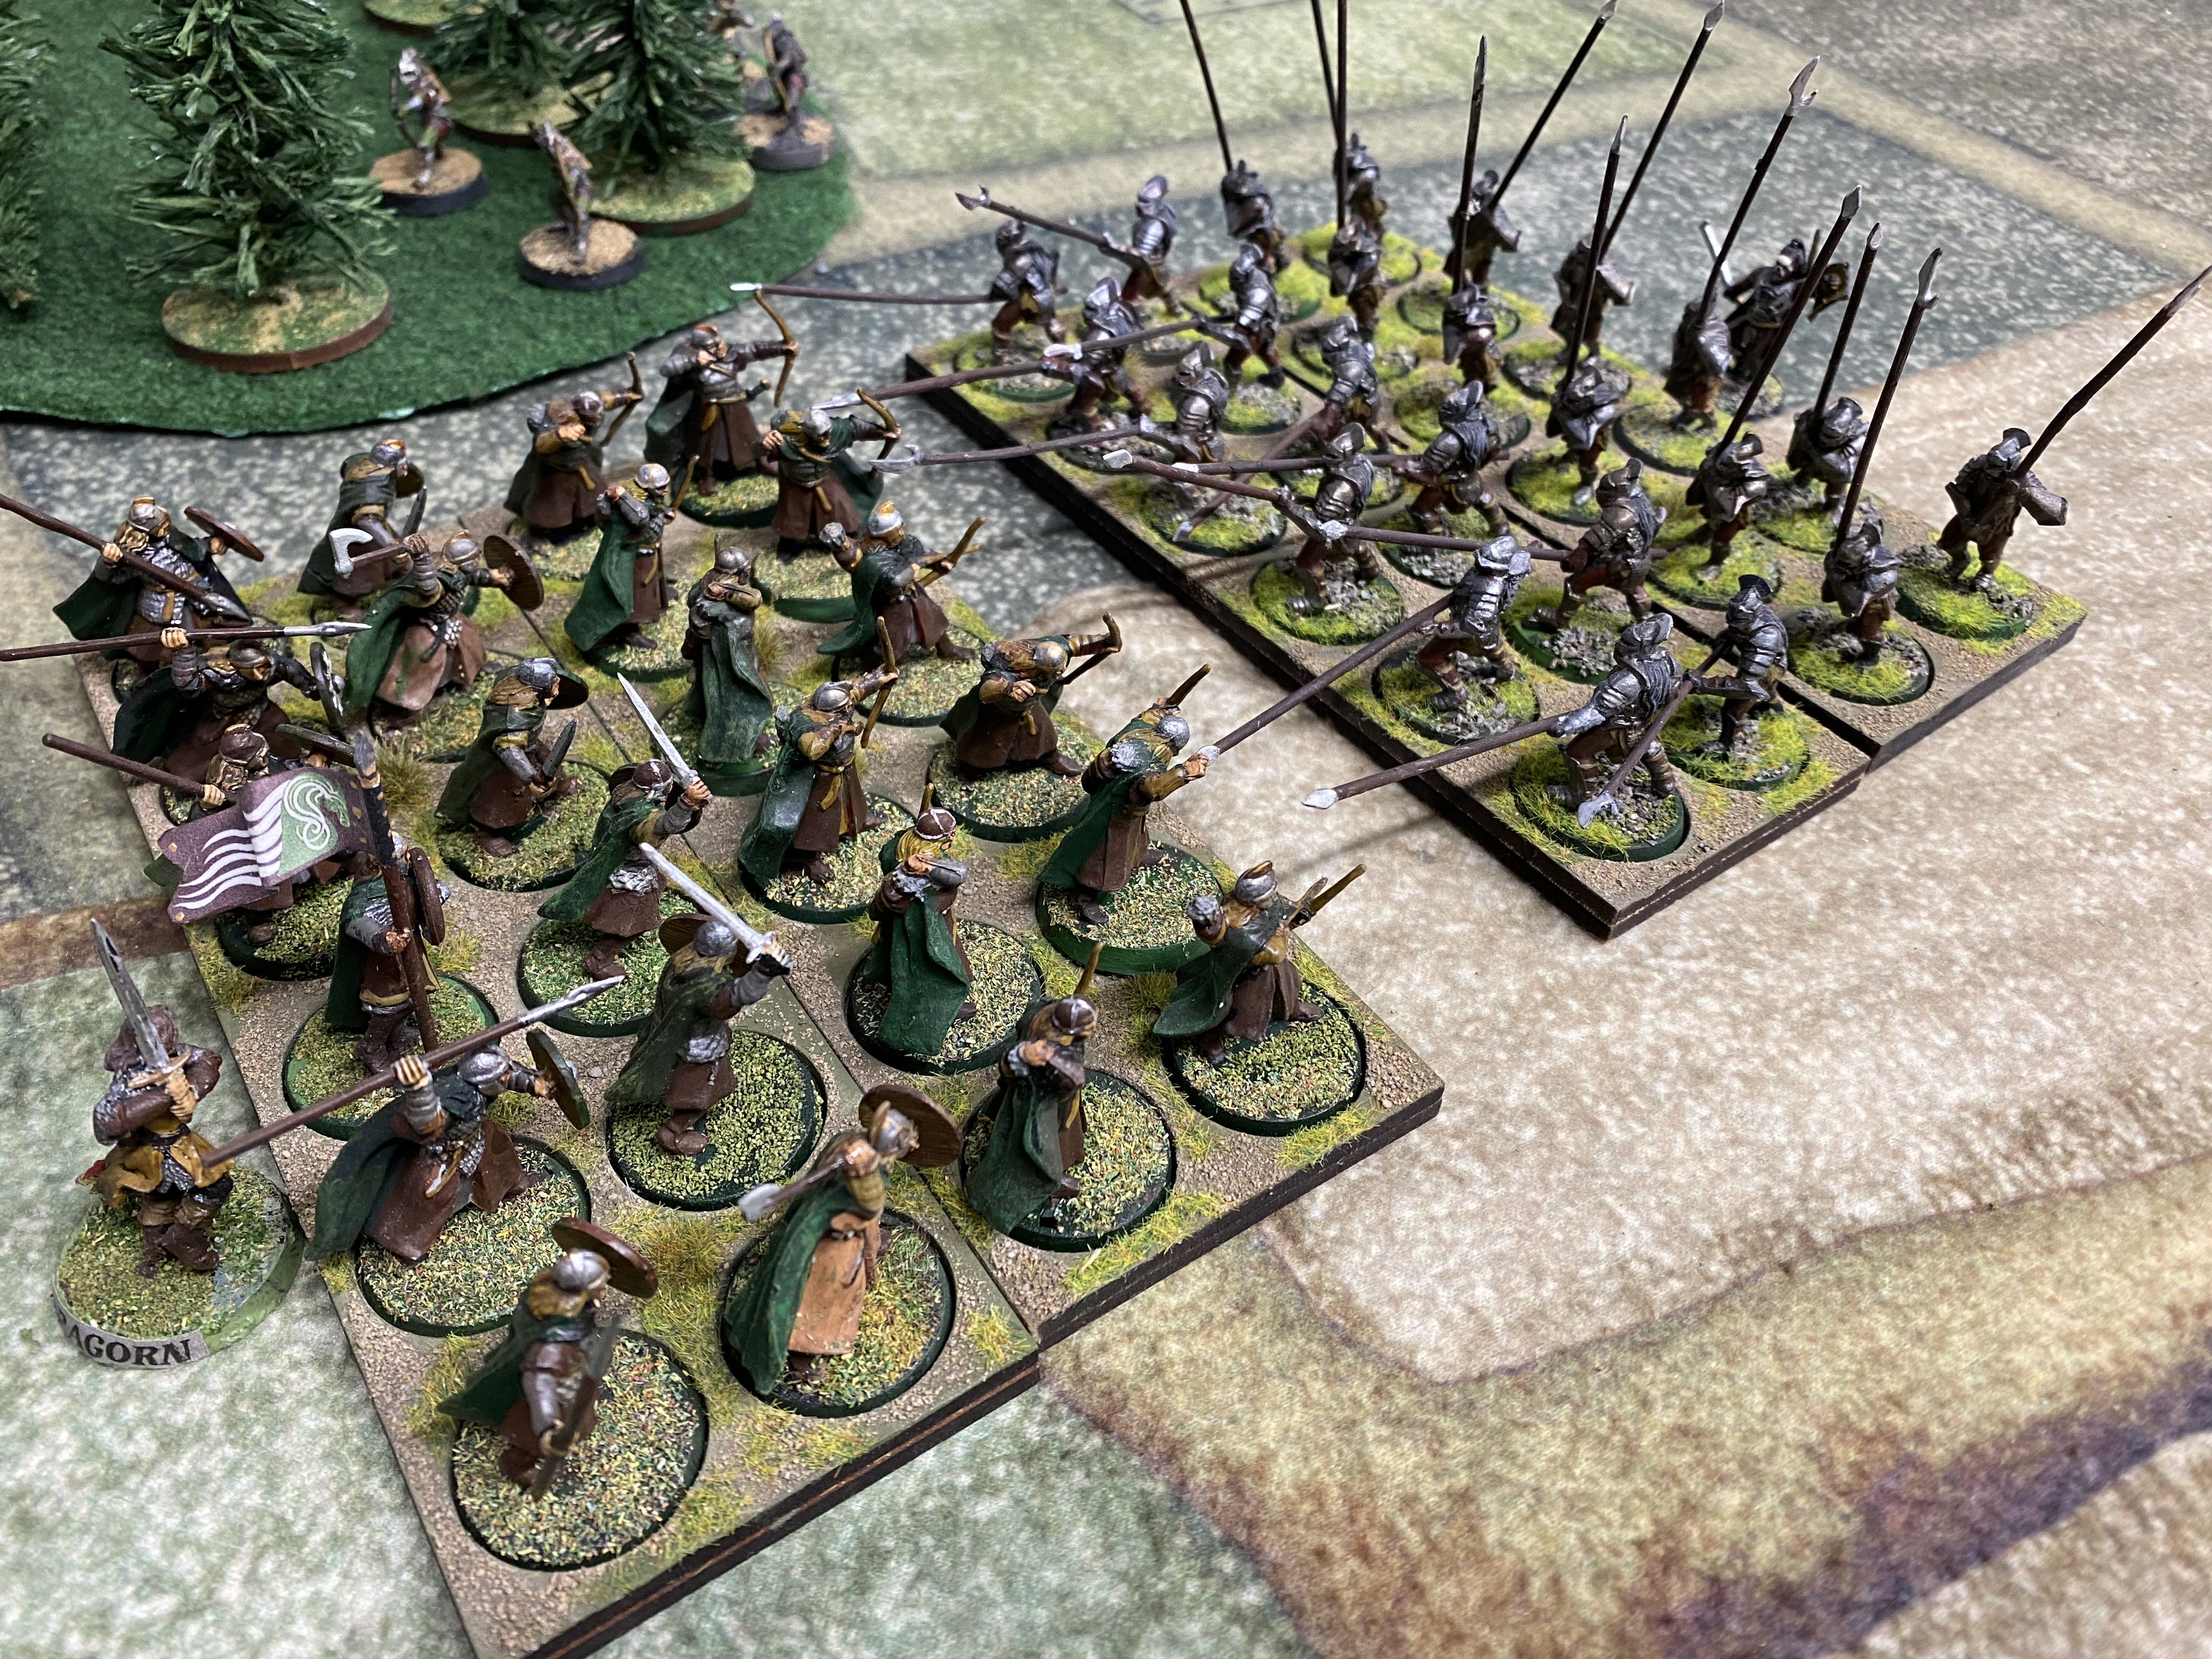
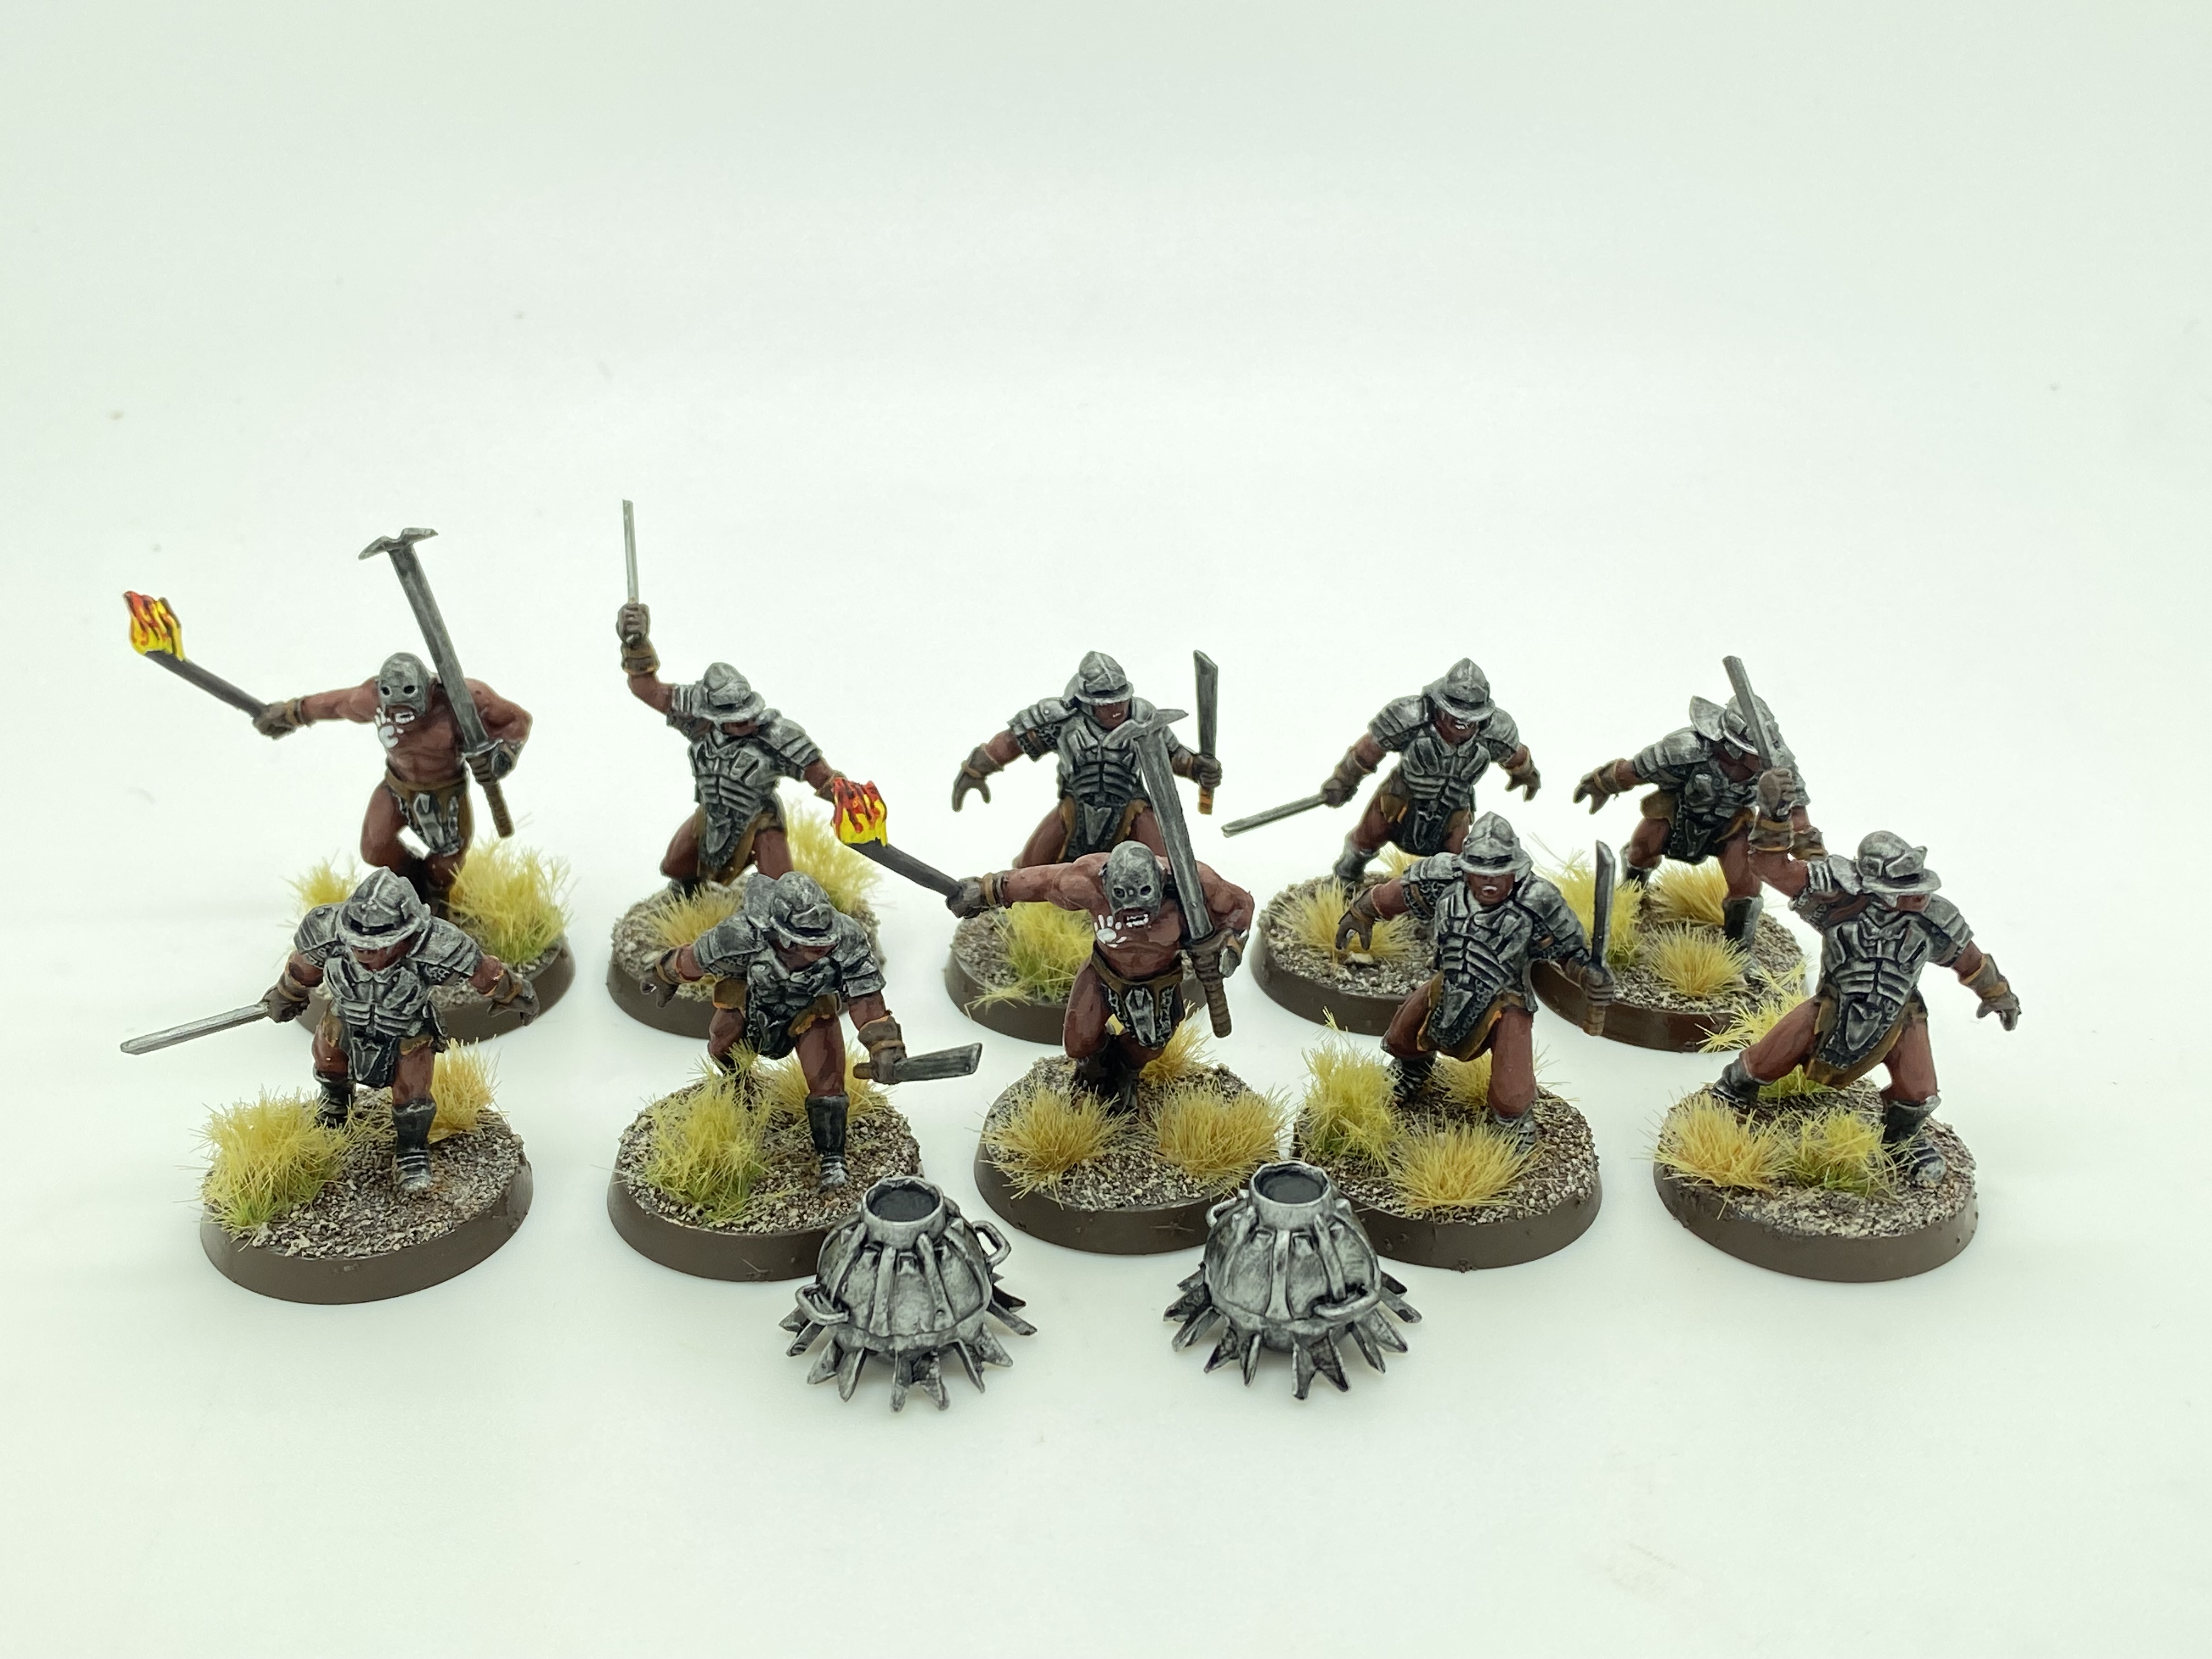
A company of Men face off against a mob of Orcs!
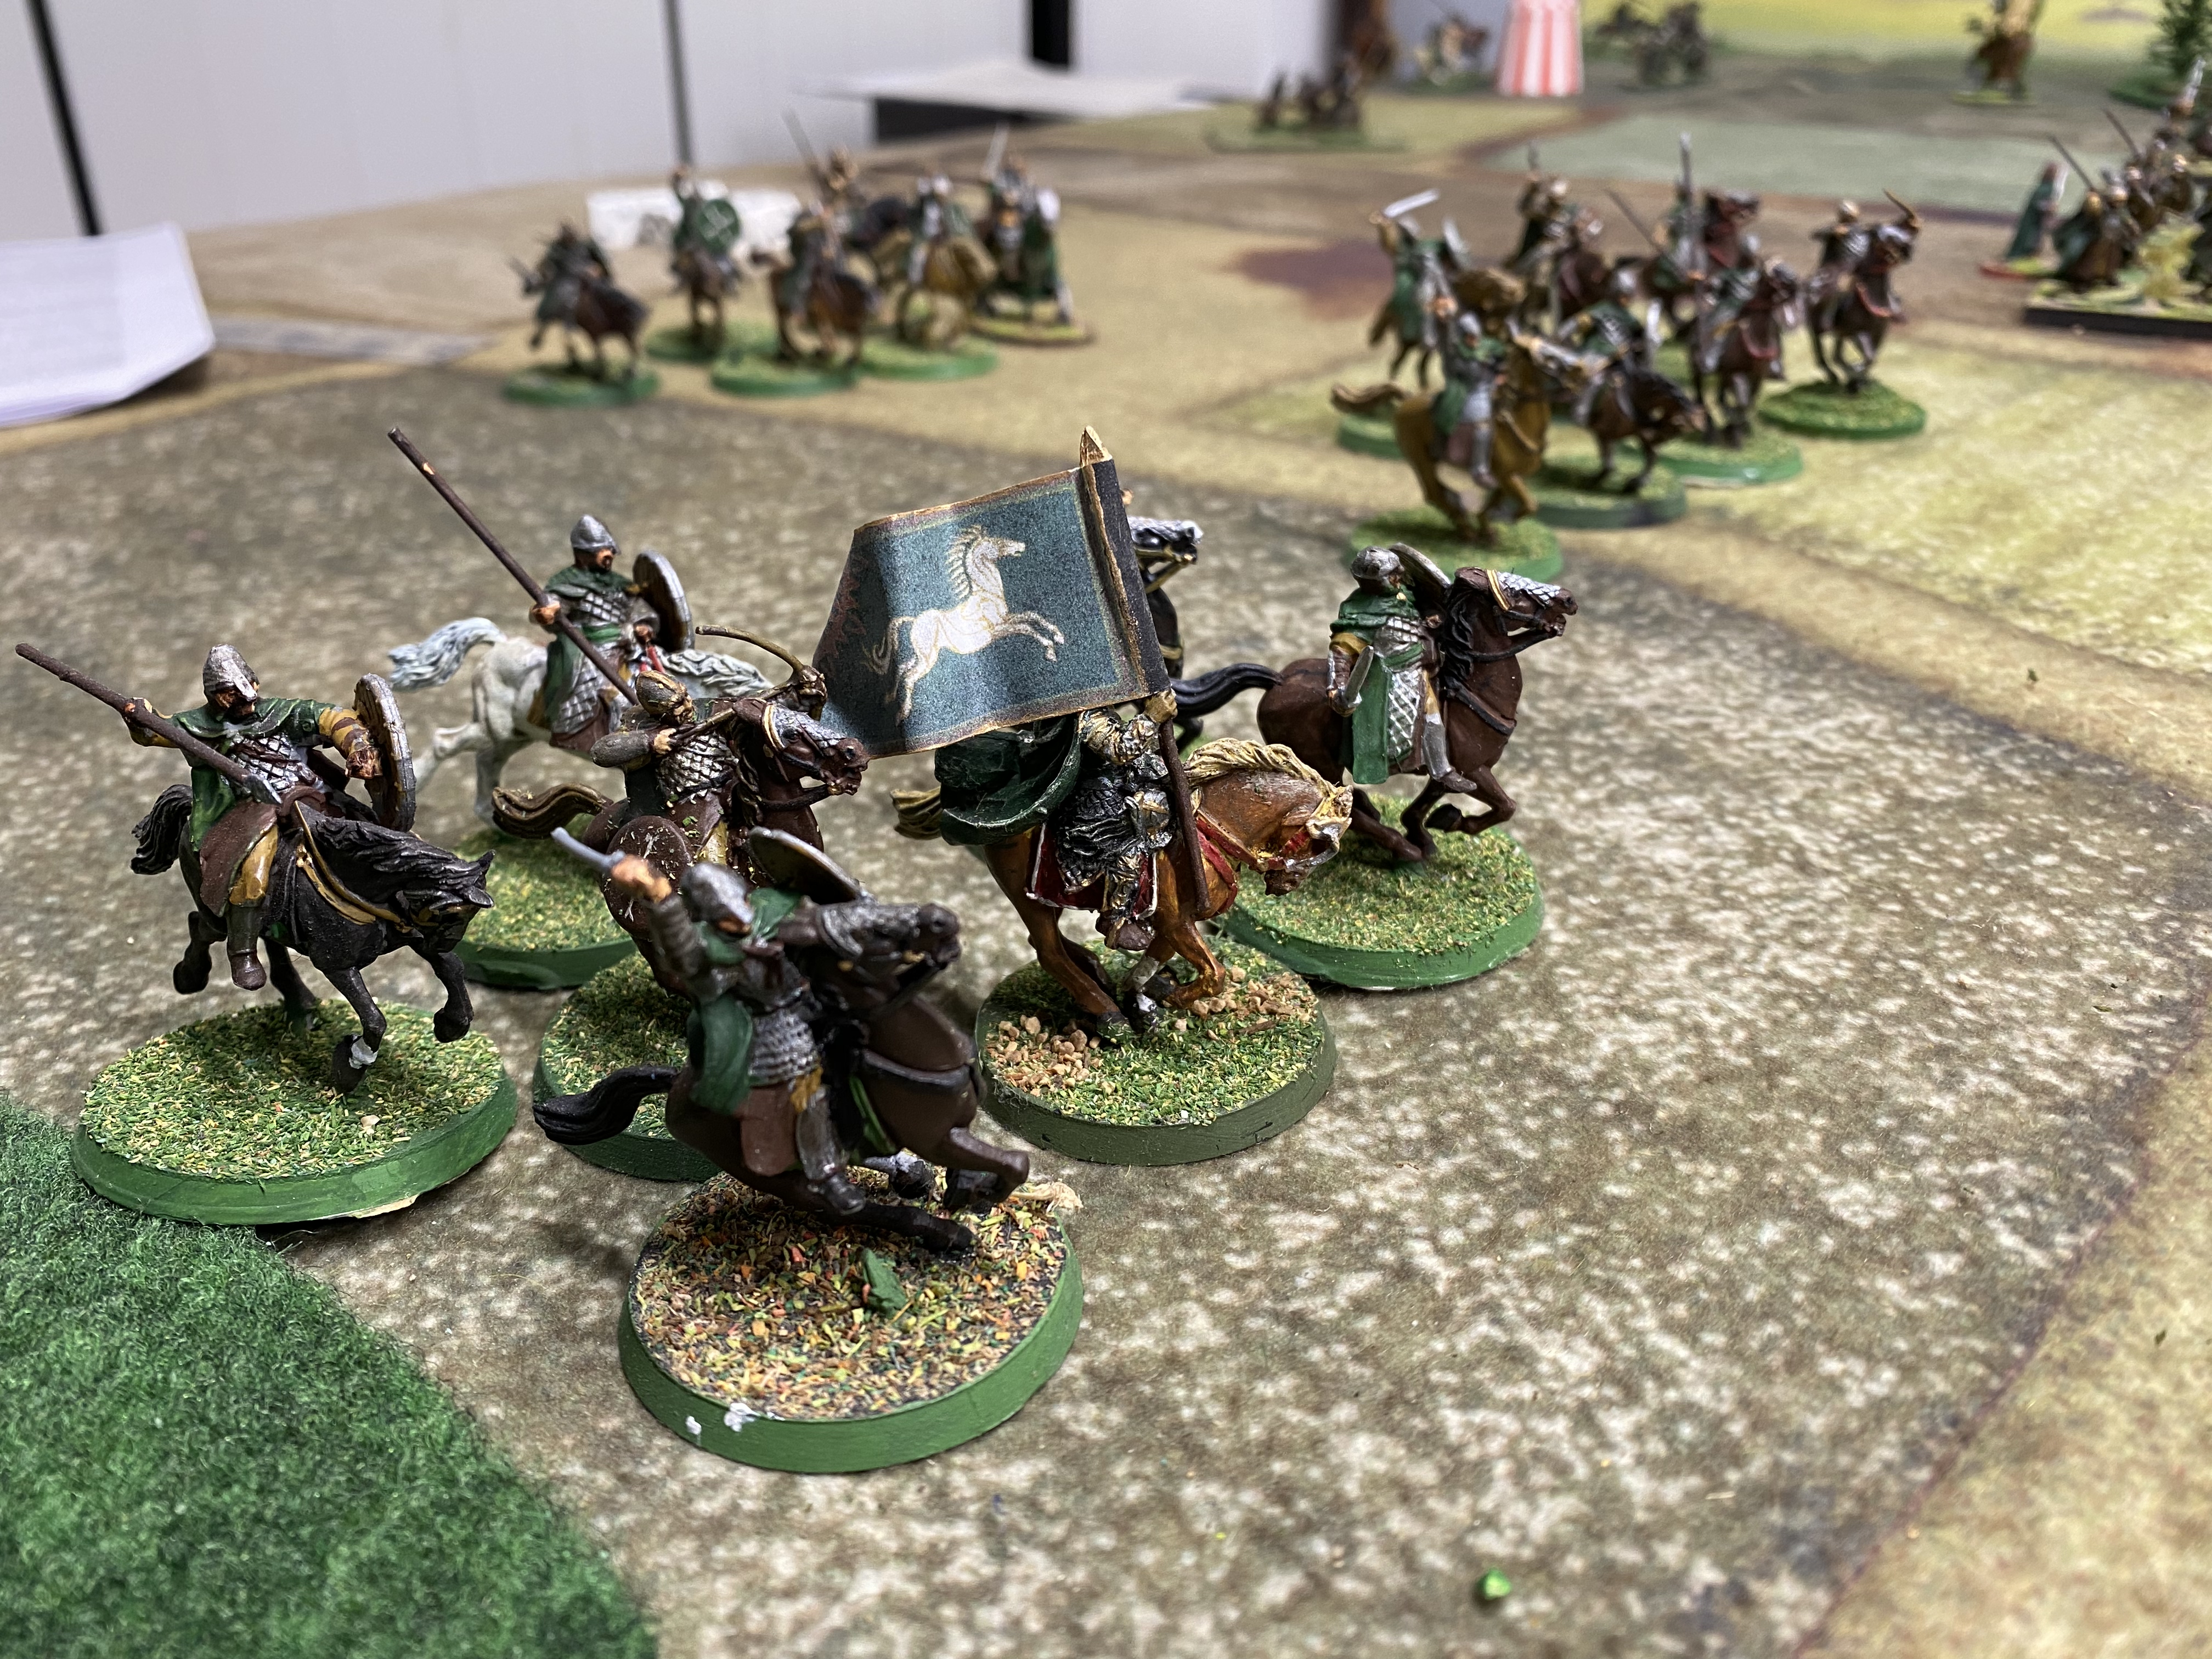
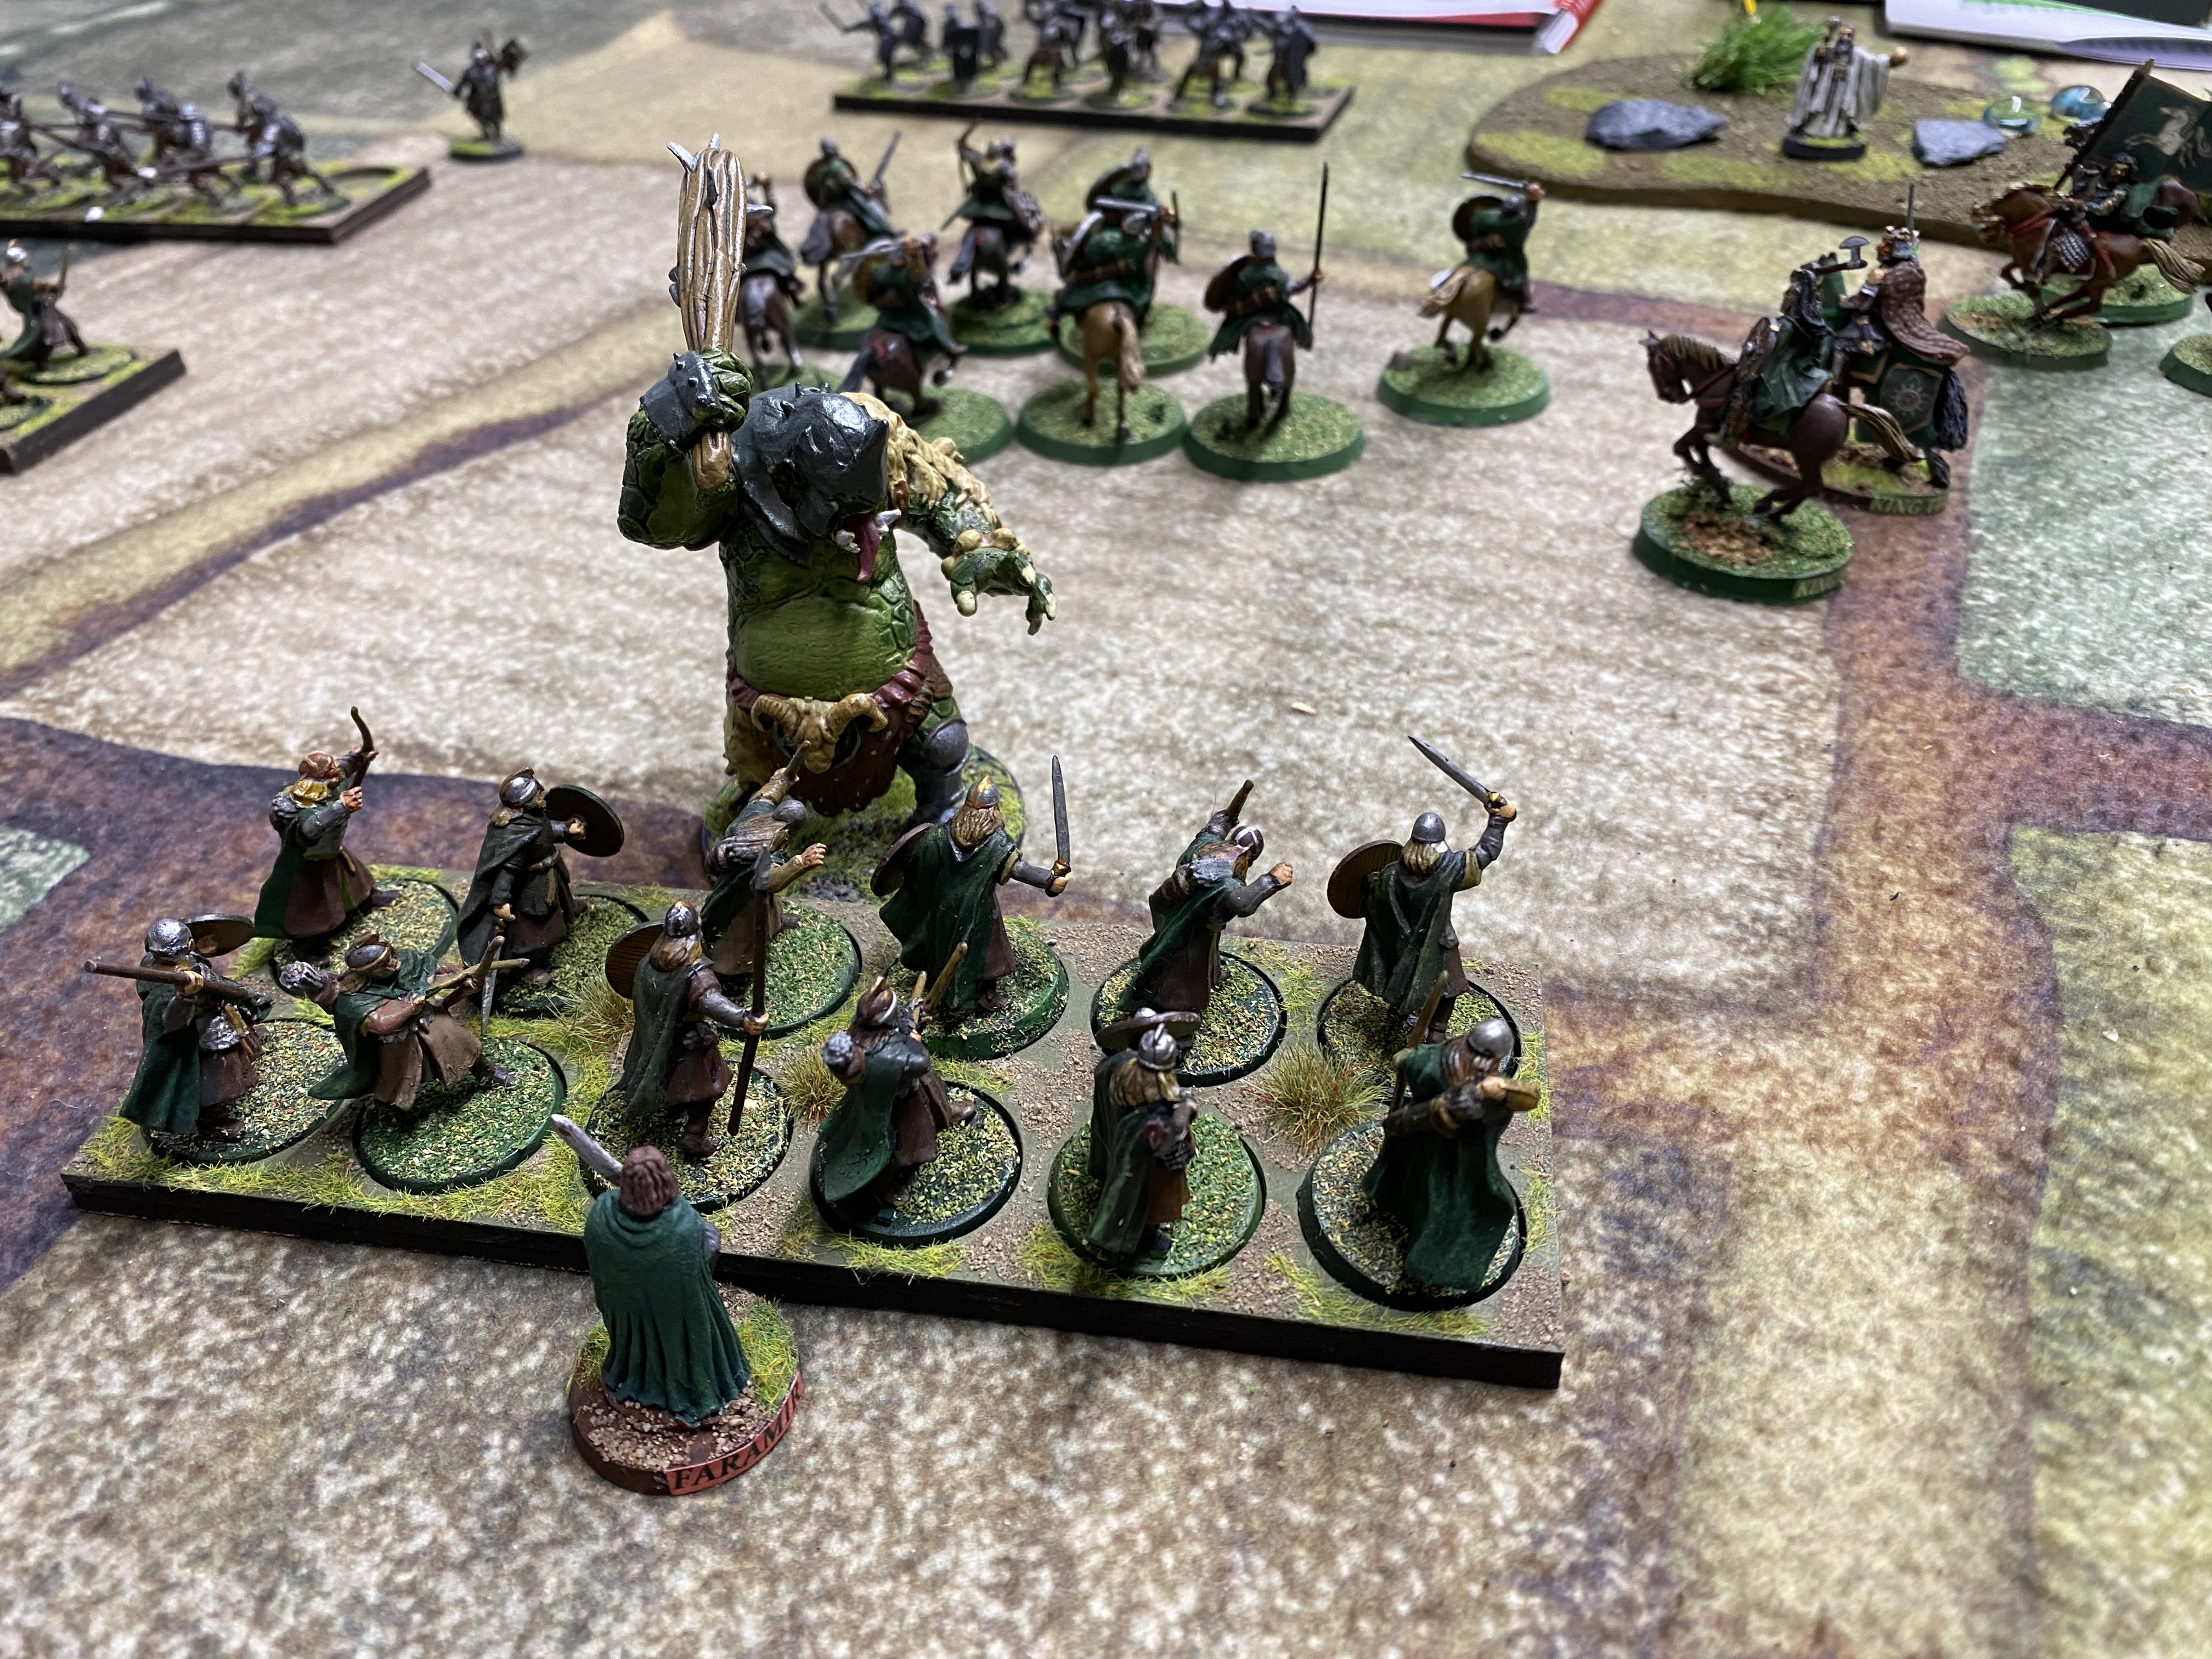
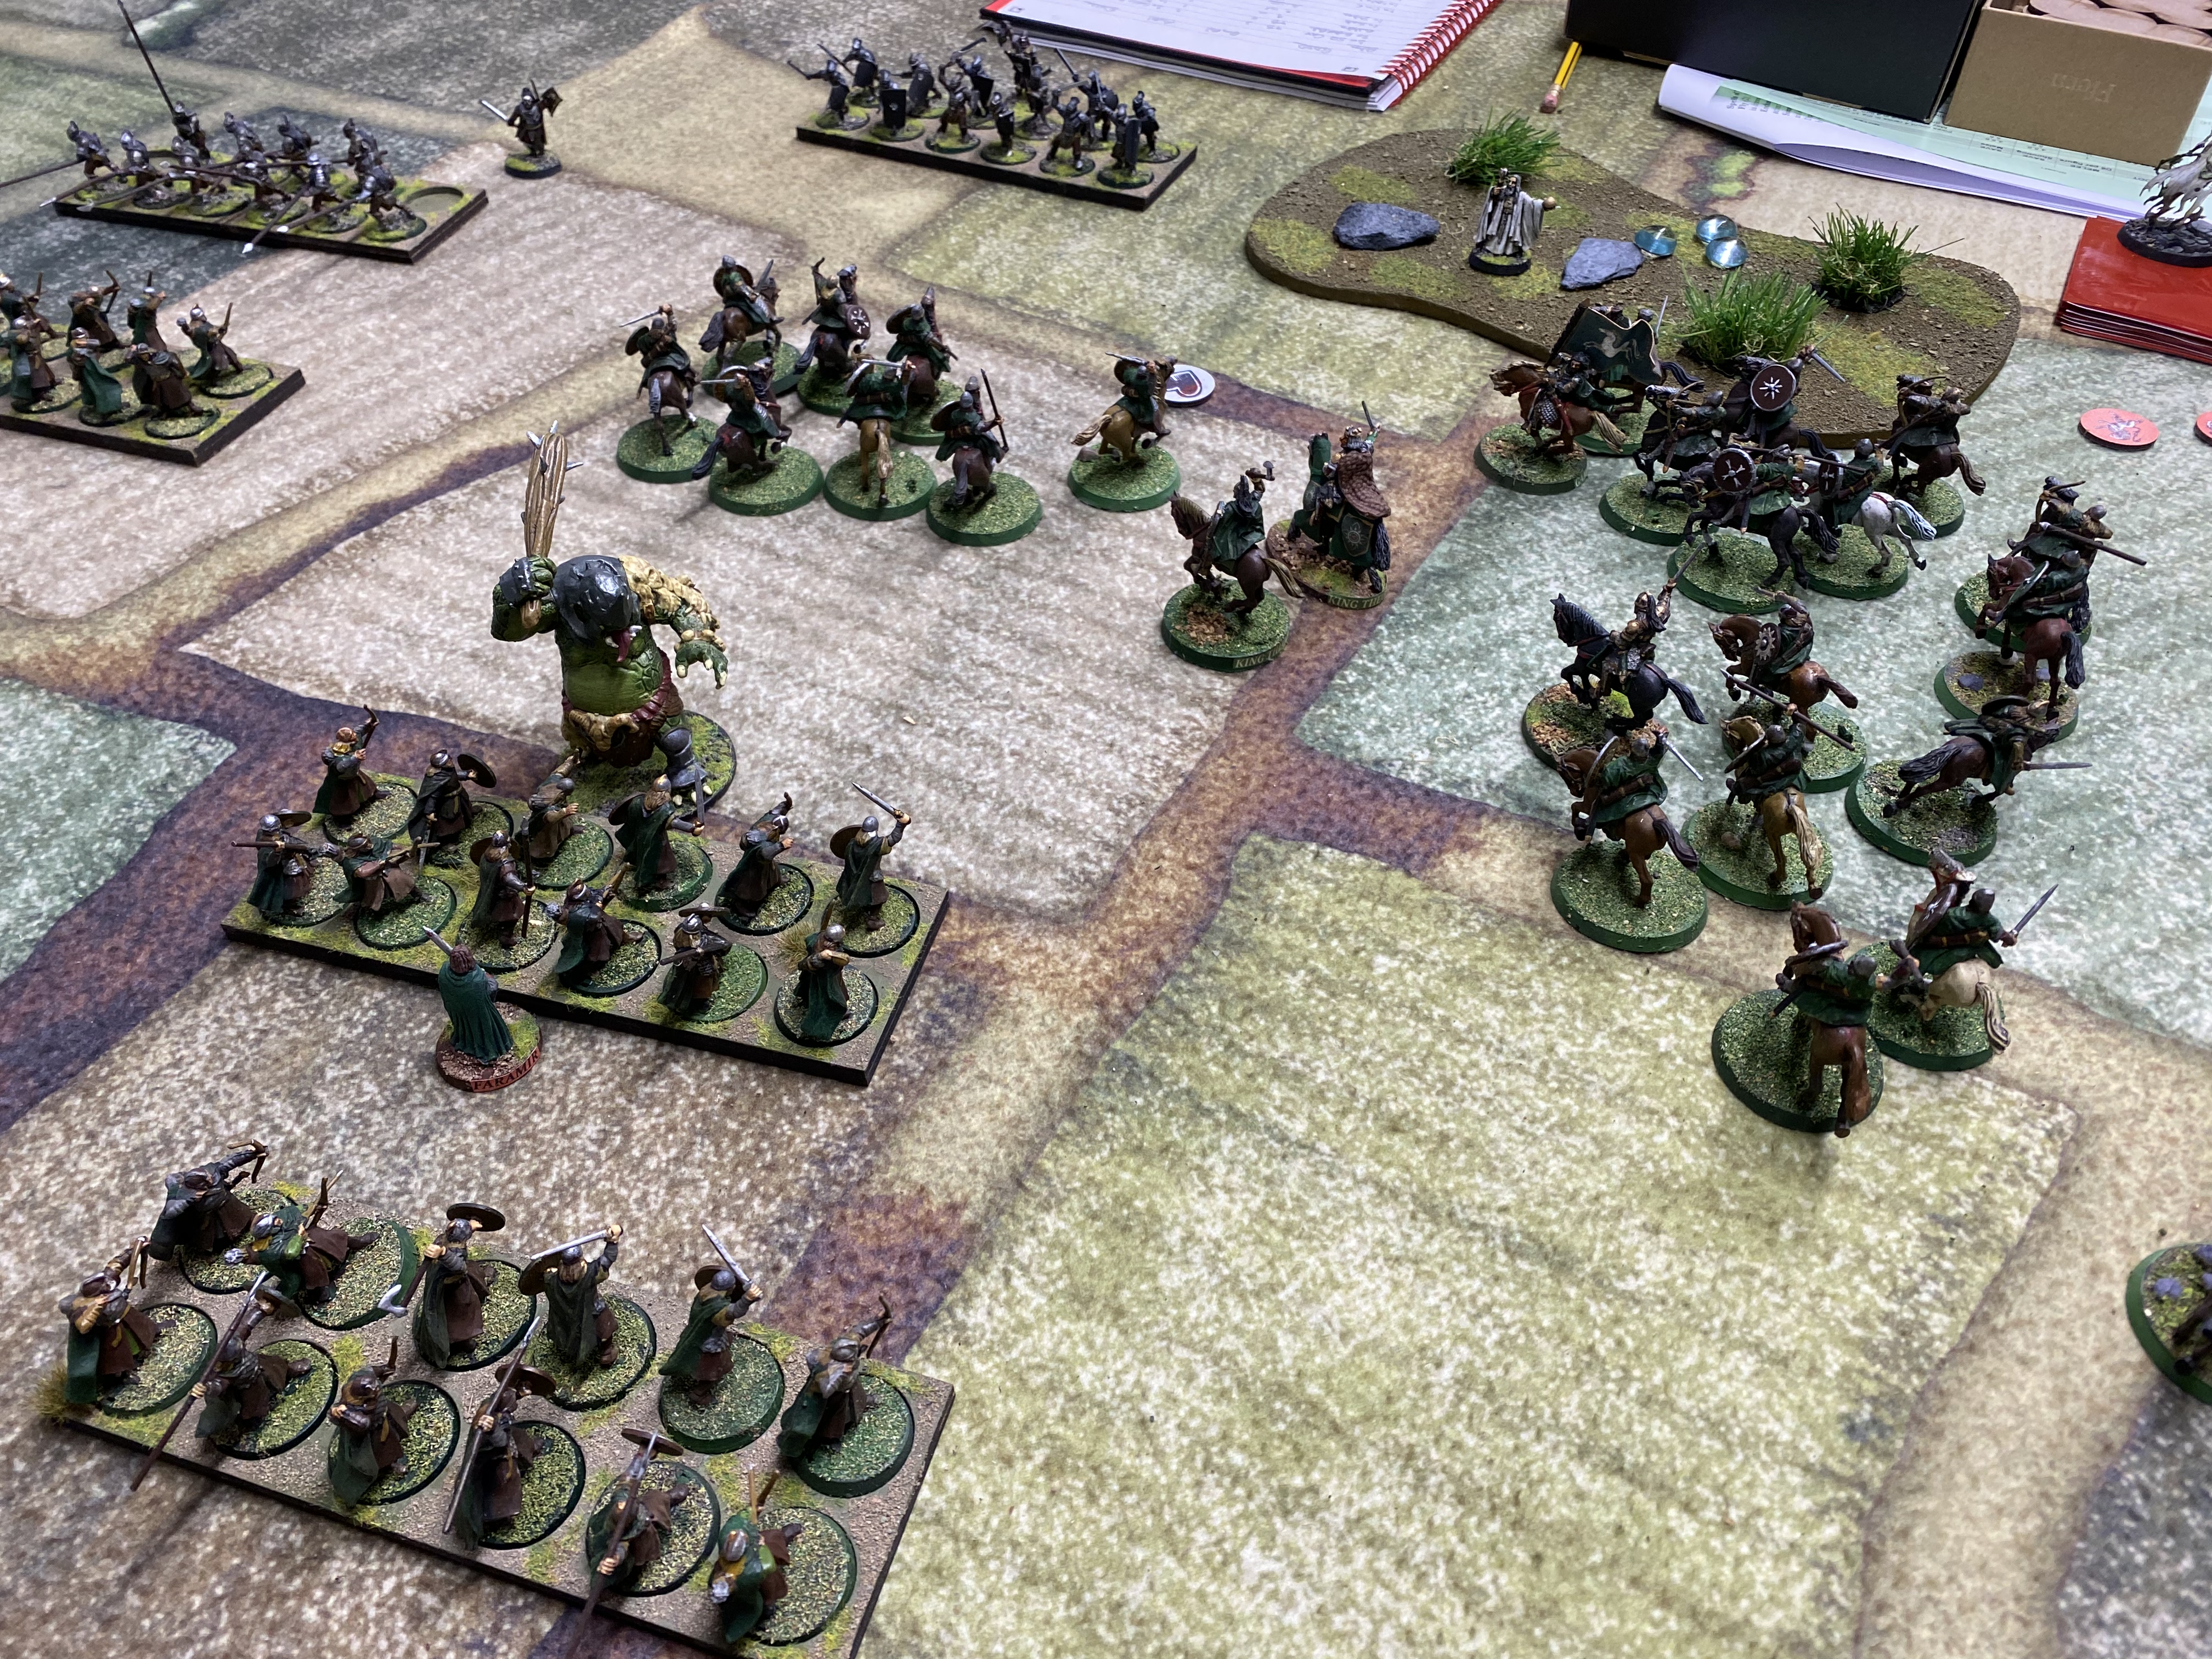
So it was time to put the rules to the test. I’m not going to go into specifics but I’m happy to report that we had an excellent game, full of cinematic cliff hangers. The Riders of Rohan pulled of a spectacular charge, repulsing a horde of angry goblins. Tony the Troll went walkabout in the woods, although we did test his effectiveness in combat. The wizard was a bit of a damp squib and the heroic infantry did what heroic infantry are supposed to do against the baddies!
Riders of Rohan prepare to charge!Orcs can form a pike block!Tony the troll does battle!Riders of Rohan breakthough and rout the ‘baddies’ A certain wizard looks on helplessly!
With the first play test out of the way and some re-assessment of the troop types and the new introductions, we are ready to go again. The next stage is to widen the player participation and see how the new mechanics will work. Watch this space!
the ‘seige’ Uruk Hai completed
So this has inspired me to get on with my LOTR painting project. I am now on issue 27 of the magazine and this came with a sprue of ‘seige Uruk Hai’. I actually have tackled two sprues as another sprue was given away later in the series. So another 10 Uruk Hai are added to my force!
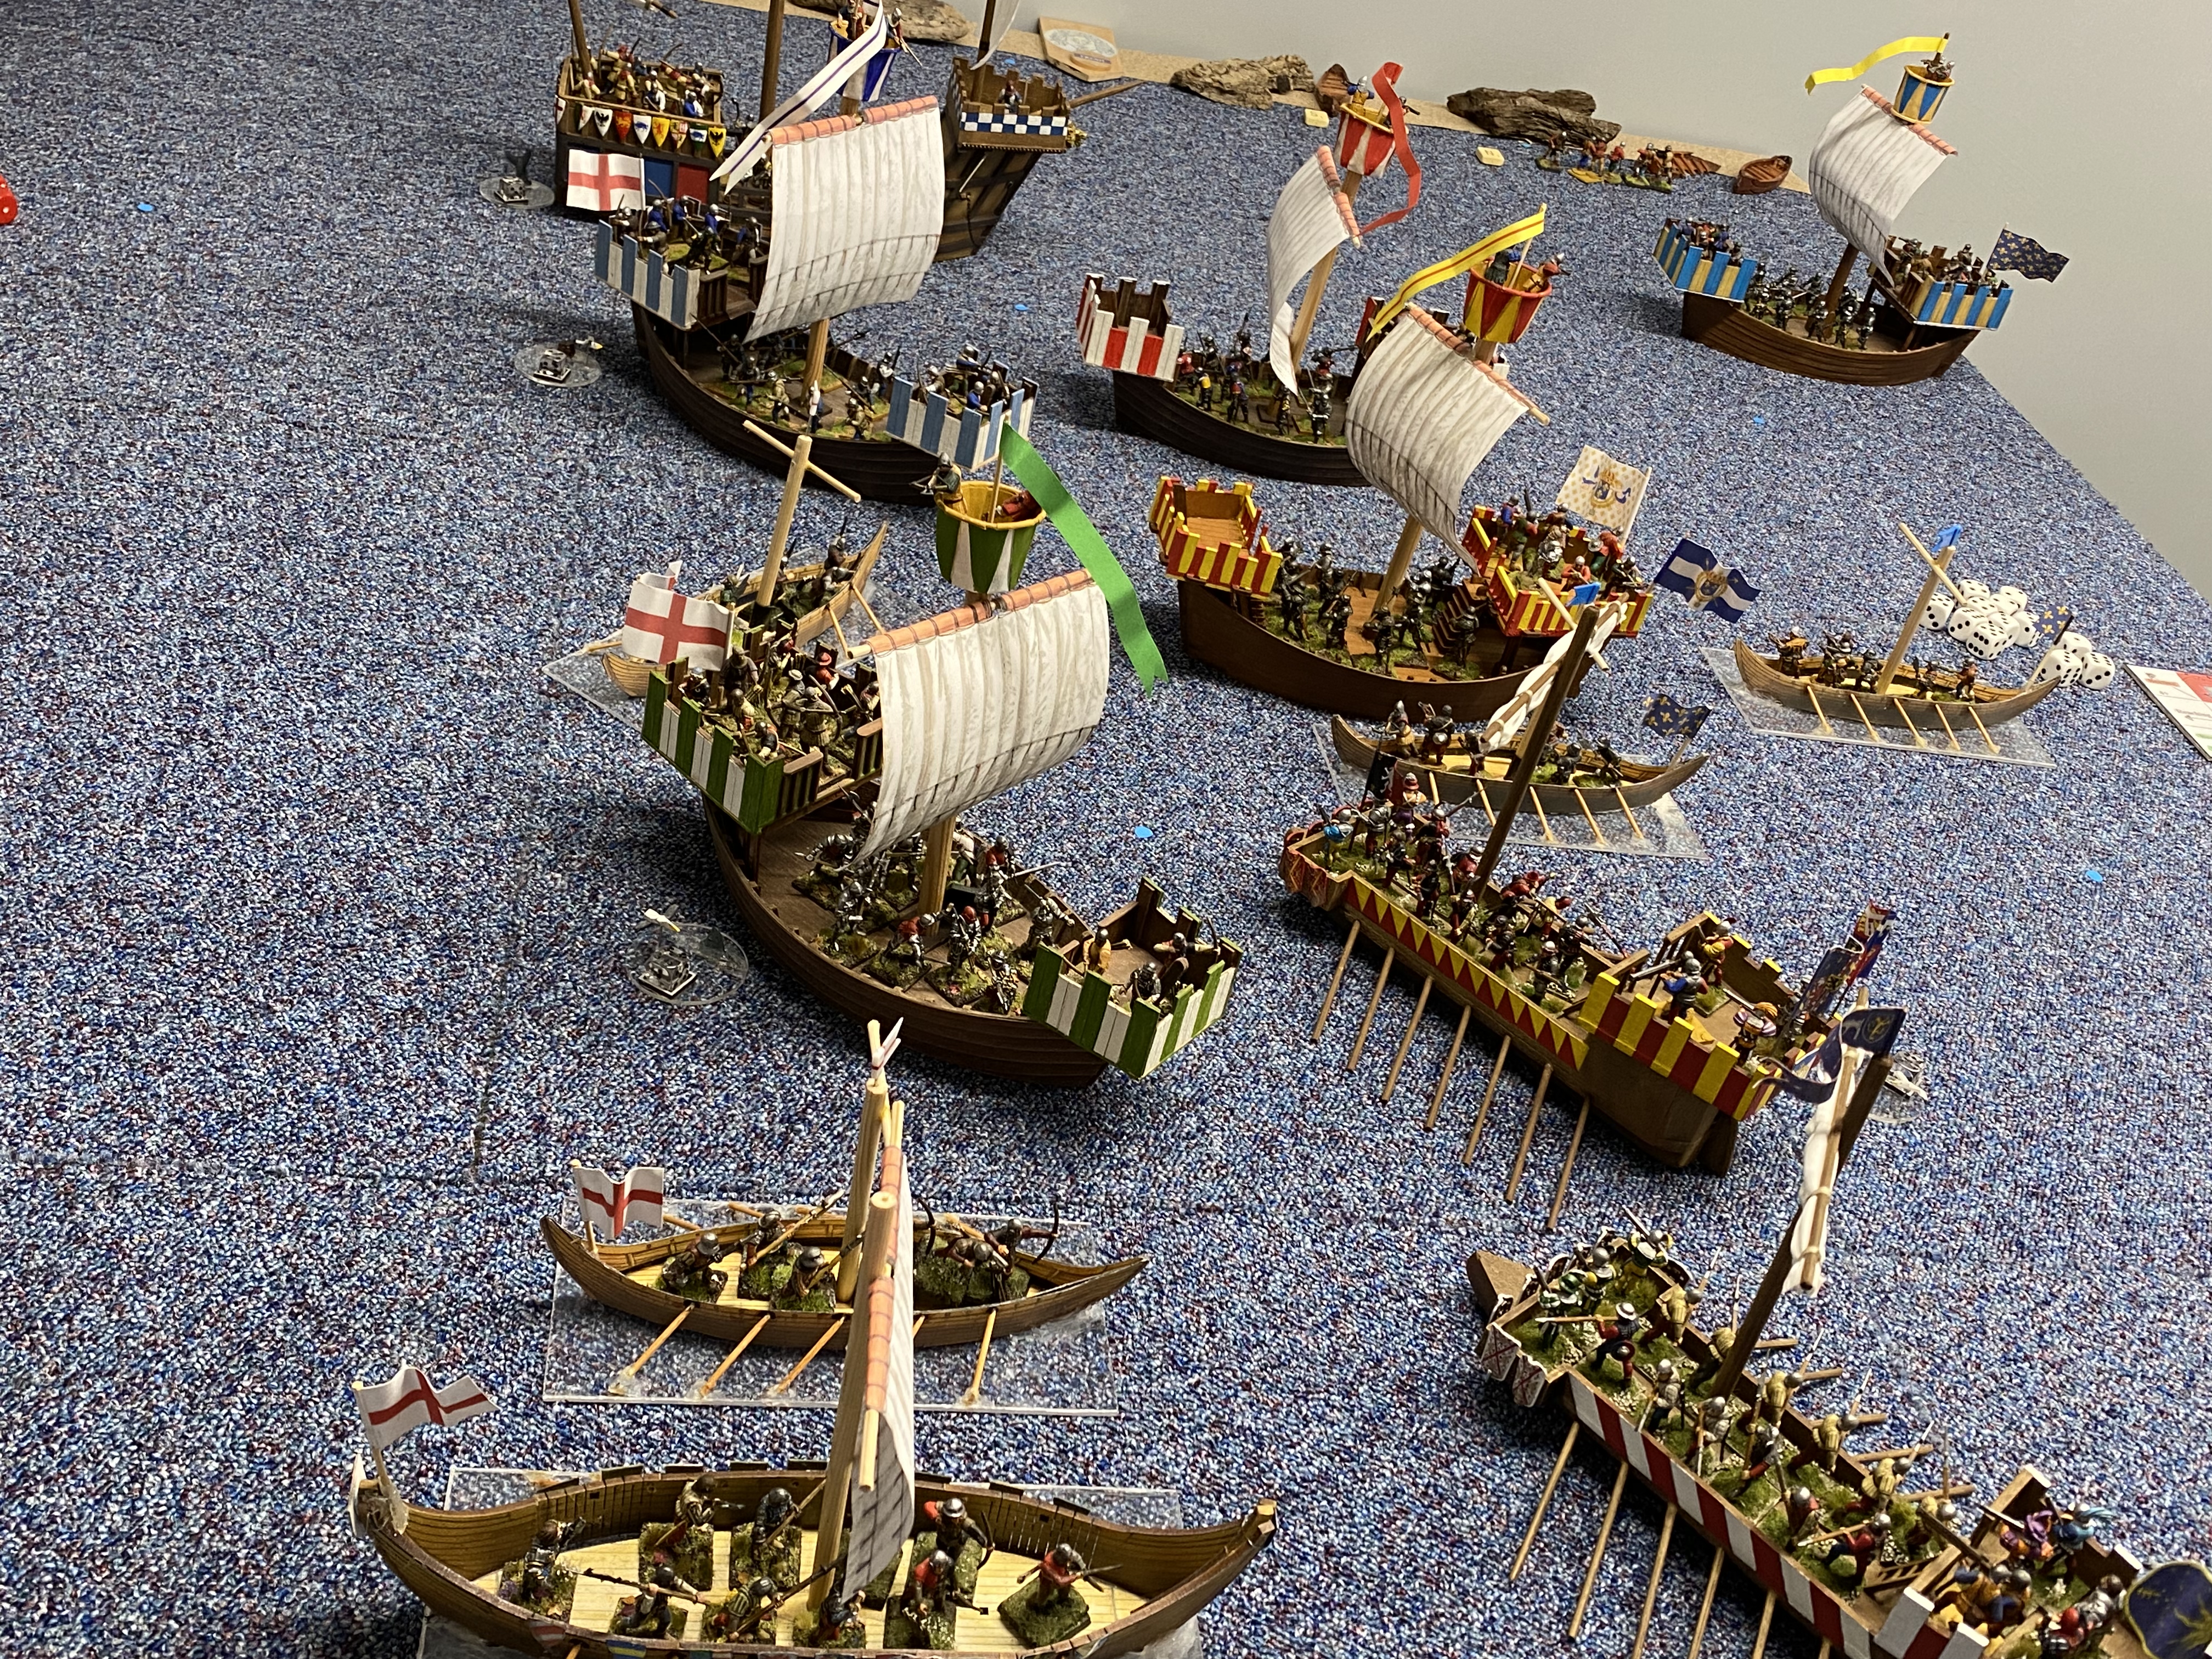
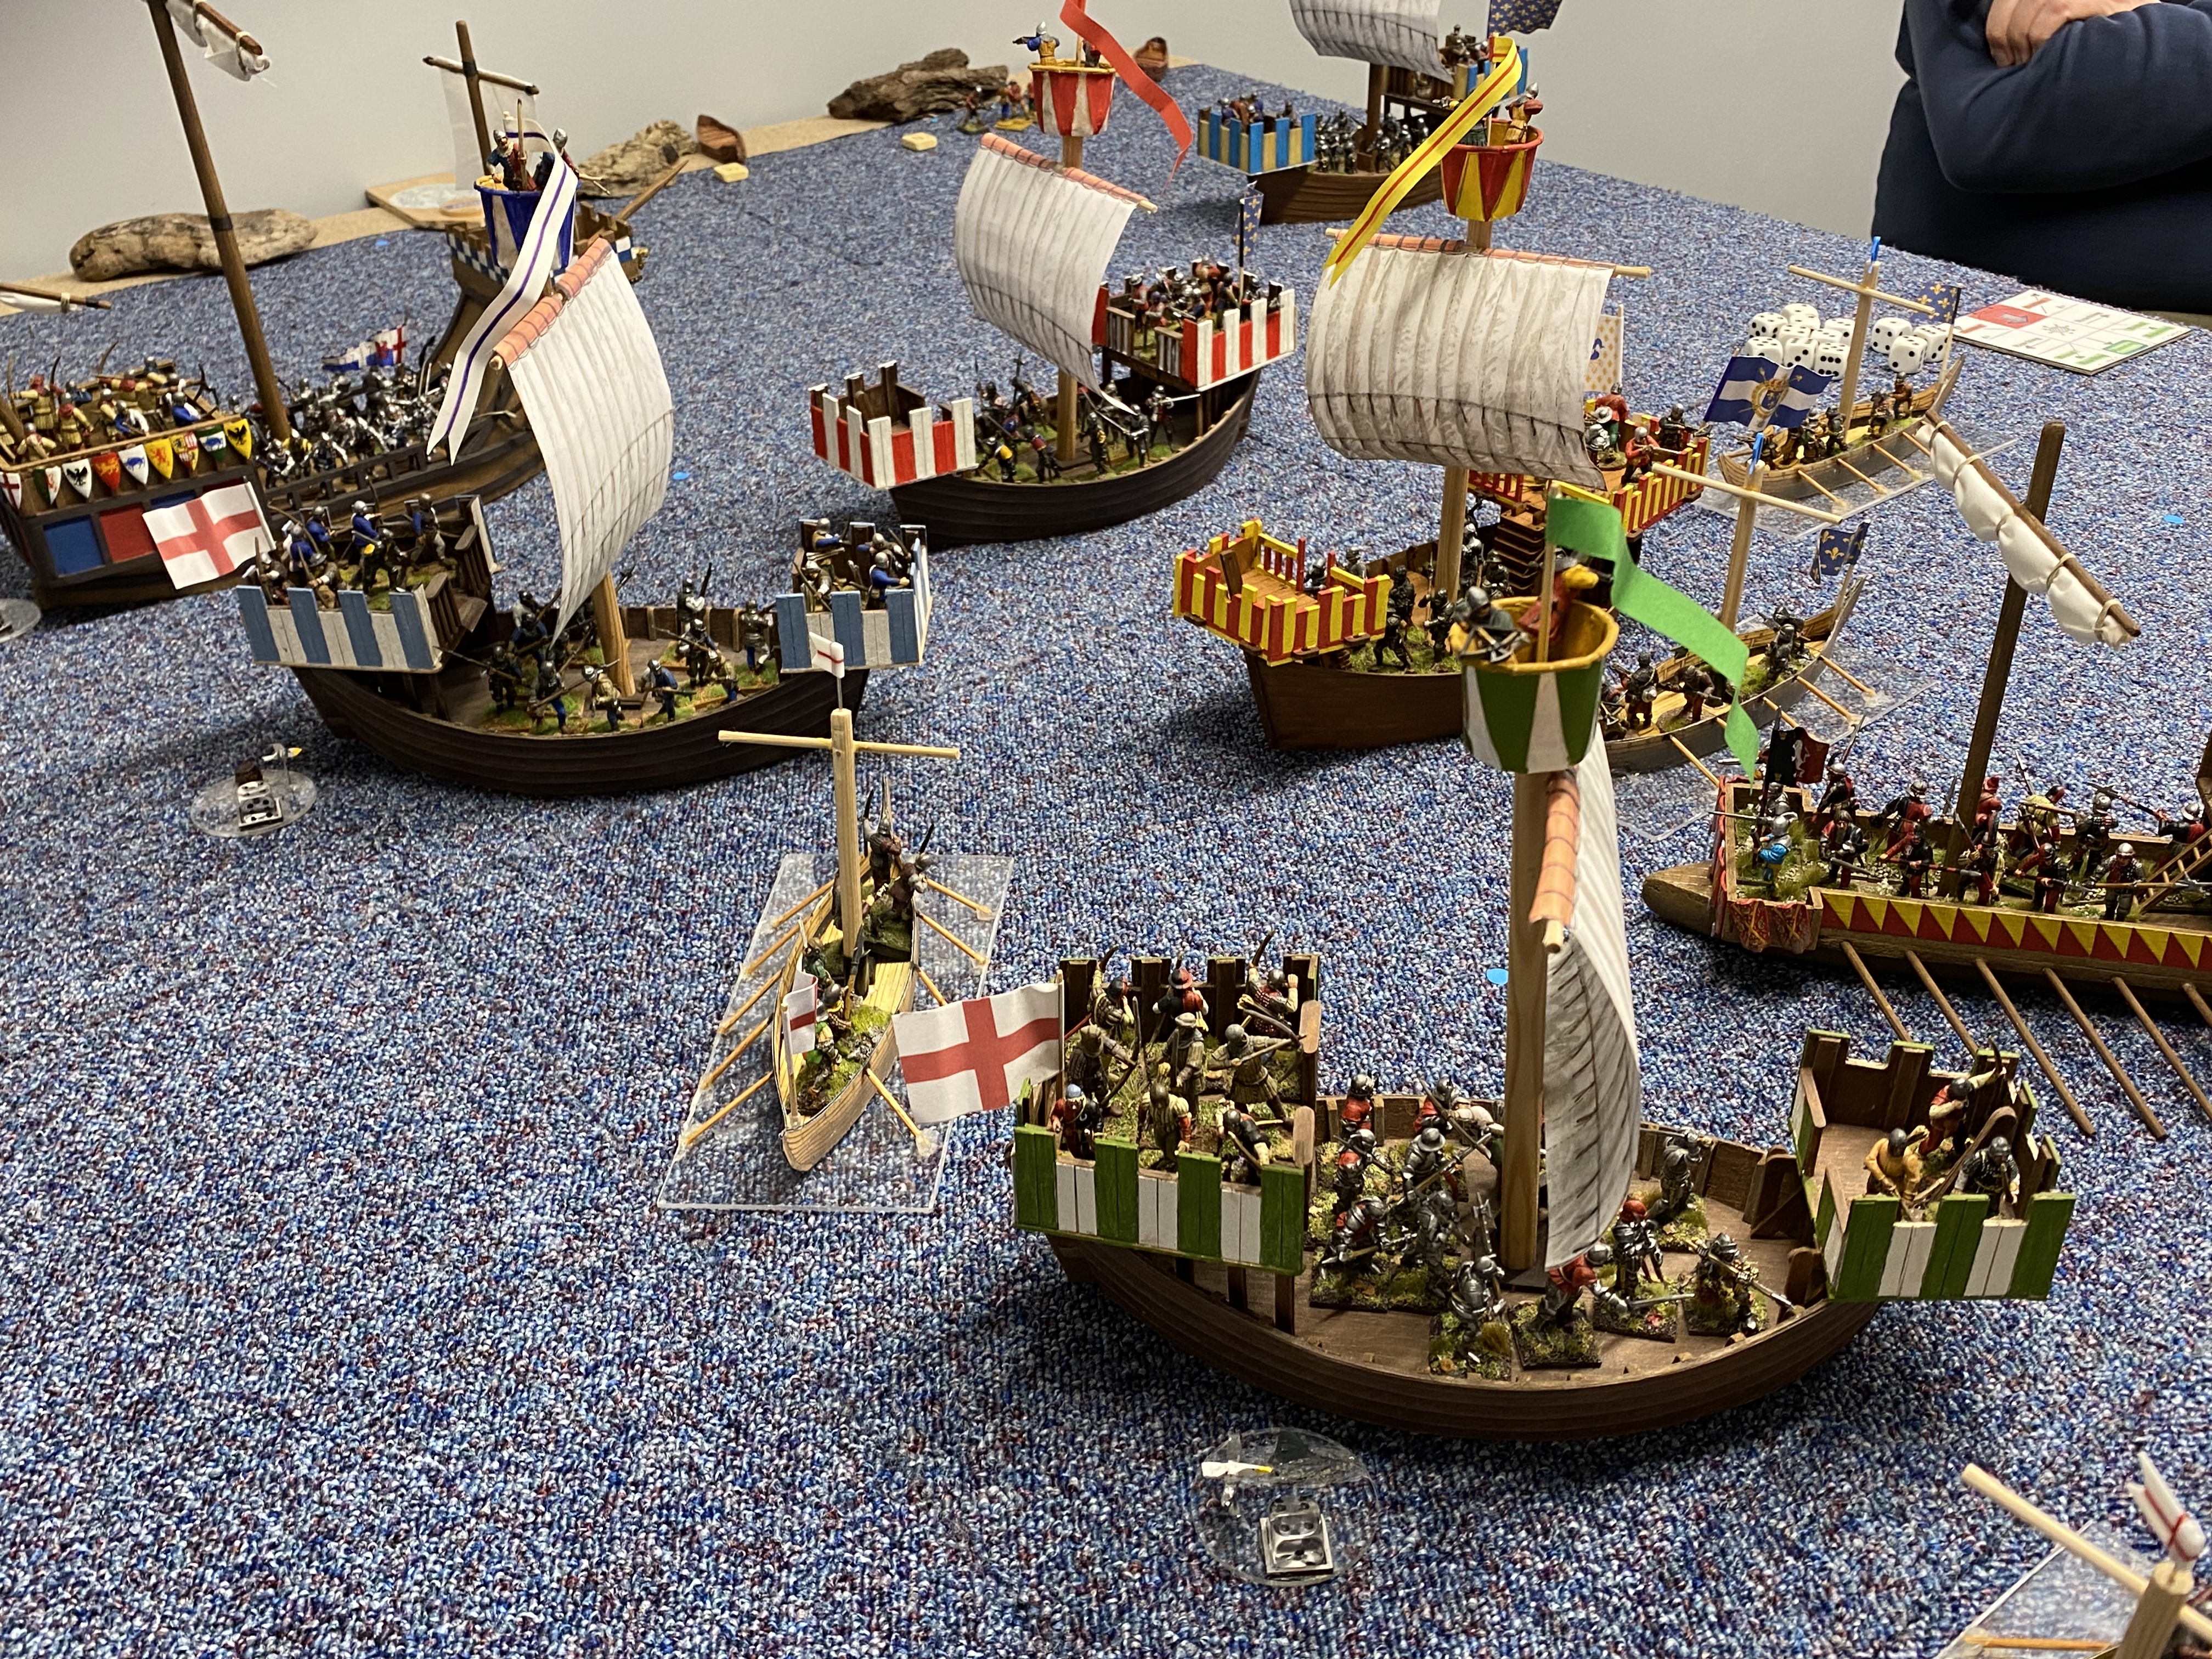
Also on the wargaming front, we played another epic game of Never Mind the Boat Hooks. There an excellent battle report on the ‘Bill Hooks’ facebook page, written by Austen Kime, chief chronicler and co commander.
My output continues at a steady pace, with my new war room and hobby station making my hobby life easier. The only issue is that there is no over arching theme to my modelling output. I continue to follow the threads from last year. So I have completed a unit of WOTR Pikemen, two characters from the Lord of the Rings collection and a Bren Carrier!
Another unit to add to the army!
The Pikemen were kindly given to me already assembled and primed ( thank you Jaz!), so painting them was straight forward. I used a white and green livery, for no other reason than I liked the combination. This Livery is mostly associated with the Welsh Tudors, although there were plenty of other Welsh houses who sided with the Yorkist cause and indeed, quite a few minor houses in England that had white and green as their colours. I’m not too concerned that my units should represent a particular faction. I’m happy to play fictional battles and scenarios rather than re-fight actual battles. So don’t be surprised if you see this unit marching with Sir Harry Hotspur!
Foundry Pikemen from Duncan’s collection
I’ve also re-based and re-touched another unit of pikemen that came from Duncan Mcfarlanes collection. I still need to add the pikes as the originals have been lost but I have replacements ready. I think that they are Foundry figures and I hope that they will continue to do battle in Duncans memory.
Ugluk of the Uruk-HaiGrishnakh – basing not quite completed in this photo
I’ve continued with my ‘Battle Games in Middle Earth’ project, painting another three character figures. Ugluk, Grishnakh and mounted Eomer are now completed and in the cabinet. Of the three, I found Eomer the most challenging. Painting his armour was quite difficult as it is fairly intricate and his horse is also a strange grey – dark grey at the back and light grey up front! I’m not entirely happy with this model but he will do for now! I’ve now reached issue 18 of the Magazine and as issue 19 came with paints rather than a figure, I am about 20% of the way through the collection. When I complete the figures with issue 20 ( more Goblins), I’ll have a round up of my progress.
Eomer – basing to be finished
The bren carrier was the next on the work bench and was bit of a trial for no other reason than my airbrush seems to have developed a fault in the compressor. I just about managed to get the basic colours on the Carrier before the compressor gave up. The model is from Curteys 1st Corps and although not as precise as, say , the Tamiya 1/48th kit, it builds into a nice replica and of course is ideal for the wargames table. The markings, as with all of my WW2 armour are conjectural and not based on an actual vehicle. I have hand painted them, apart from the vehicle serial number.
Bren Carrier
Whilst purists might not like the idea of making up markings, it’s my way of ensuring that I get models finished rather than endlessly researching them to get every detail exactly correct. For me, the models are simply a representation of their type rather than an exact replica. Whilst I have total admiration for those modellers that are able to produce museum quality replica’s, exact in every detail, I have very little time for those in the hobby who seem to know everything but produce nothing – their hobby is different to mine!
Bren Carrier side view
To be fair, it’s this attitude that allows me to get my projects off of the work bench and onto the gaming table. I have been largely cured of my desire to seek perfection by my wargaming buddies, who favour practical solutions over fancy models! A great example of this is the latest game that we are playing – Never Mind The Boat Hooks – Billhooks on the sea! Andy Callan has very cleverly adapted his rule set and produced some Medieval Cogs from wood and corrugated card board. This meant that we were play testing and having fun rather than still thinking about how to make the models.
Never Mind The Boat Hooks…coming soon… early play test
Here’s a sneak peak but in my next blog I hope to show you a bit more progress!
The Sarissa Precision Cog on my work bench.
THE COMMERCIAL BIT
I hope that you all enjoy your hobby as much as I do – remember that our web site will have much of what you need! Click here to see our shop:
I’m not sure why I am so attracted to Early War British Armour. In my youth I was obsessed with the more ‘glamorous’ German Armour and the idea of Blitzkrieg. But as I’ve got older, the quirky nature of the British Armour and the ‘Dads Army’ attitude to making the best of what they had has taken a hold in my imagination. So my focus now is building a collection representing these vehicles and weapons.
Beaverettes of 53rd Reconnaissance Regiment on manoeuvres in Northern Ireland, 1941
A perfect example of making the best of what you have is the Standard Beaverette Armoured Car. It really is an armoured car. That is, a car with armour bolted on to it. The first version of the vehicle was a Standard Motor Company chassis with 11mm steel plates bolted on to it. The steel was backed with 3 inch oak planks for extra protection. The driver could barely see where he was going and needed the help of an additional crew member to watch the roads. It was named the ‘Beaverette’ after Lord Beaverbrook, who was desperate to get some sort of replacement for the Armour lost in France and Dunkirk. The armament generally consisted of a Bren, Lewis gun or Boyes Anti Tank gun. Later models were used by the RAF for airfield defence and had twin Vickers or even a Turret from the Bolton Paul Defiant night Fighter.
The Beavette was never used overseas and production stopped in 1942. It was used mainly by the Home Guard and as has already been mentioned, by the RAF. Indeed, I first was made aware of the Beaverette when researching the ‘Rogation Raid’ on Torquay ( my home town), a ‘tip and run’ air raid that occurred in 1943. Beaverettes formed part of the towns Anti Aircraft defense that shot down 6 of the 21 Focke wulf 190 raiders.
I decided I had to have one for my collection.
Beaverette Armour car from 1st Corps
After a great deal of searching, I found that 1st Corps made a lovely model in 1/48th scale, complete with crew. The model consists of a resin body with metal Accessories – wheels, hatches and of course, the crew. It was a simple matter to wash, clean and assemble it and prime it ready for painting.
Beaverette crew painted & car primedBasic colours added
I used my airbrush to base coat the model with Mig Ammo Khaki Green (1939- 42) MIG113. I then hand painted the camouflage using British Olive Drab (1944-45) MIG0112. I should have masked off the model and used the airbrush again but I was too lazy and it seemed easier to use a brush. I wasn’t too worried about the colour either. Clearly, a 1944 olive drab isn’t going to be exactly the right shade but it gave me the effect that I wanted. In some of the reference pictures that I found, modellers had used a green/black combo but I quite liked the version below, which looks to me like the dark green on Khakhi green used by the BEF and so I based my scheme on this.
After the camouflage, I weathered the model with a pin wash of Dark tone ink around the rivets and panel lines and then I dry brushed the model using the original camouflage colours, lightened with Iraqi sand. The tyres were painted using Mig Ammo Rubber and tyres MIG0033 and darkened with a wash of dark tone. The markings were added using a combination of generic 1/56th markings that I had spare from Warlord games and I hand painted some of them. the vehicle number is ficticious. I then airbrushed the whole model with Mig Ultra matt varnish and when this was dry, I added some weathering in the form of pigments on the sides and wheel arches.
Weathering, crew and markings addedThe other side!The front view!
I had previously painted the crew in normal British army Khaki and added them, together with the bren gun to complete the model. So another model goes into the cabinet!
THE COMMERCIAL BIT
Almost all of the paints, miniatures, bases, basing materials and anything that you are likely to need for your hobby are available from my shop here:
The good news is that I haven’t lost my painting mojo, more a case of losing my blog writing mojo! I last wrote about my Lord of the Rings project but also mentioned that I had started a WW2 Cromwell tank. Well since then, I have completed the tank, I’ve also expanded my collection of Home guard weaponry with a Blacker Bombard and a Northover Projector. I’ve also painted two Medieval wagons for my WOTR project, added eight Kern to my WOTR skirmish contingent, played at least 3 games of Never Mind The Billhooks, spent a weekend gaming including a Crimean War Battle, a Zombie apocalypse and a Swiss Burgundian play test. Oh, and I have finally tracked down a Beaverette Armoured Car for my Home guard and that is on the paint station as I write.
Beaverette Armoured Car under construction!
In this blog, I’ll show you the Cromwell that I have completed.
The Cromwell is a 1/48th scale resin model from Blitzkrieg miniatures. I prefer the larger 1/48th scale models as I think that they look better with the modern ’28mm’ figures which although are nominally 1/56th scale, in reality they are not a scale at all but a size. I know that not everyone agrees but I find that the 1/56th scale tanks look too small against the figures, especially when the figures are based. I am using 28mm crew and as you can see, they look fine.
Cromwell with basic paint job
The painting process was straight forward enough. After washing the tank in hot soapy water, I primed it with Vallejo Matt black model air primer. I then used the airbrush to spray it with Mig Ammo British 1944-45 Olive drab MIG0112. I had a bit of a wobble over the colour. I started to get hung up on whether I was using the correct shade of green. In fact, the whole process of completing the tank was almost derailed by being side-tracked into trying to produce an IPMS competition standard replica rather than a representation of the tank that would look reasonable both on the gaming table and in my own display cabinet.
Inked, Dry Brushed, tracks and road wheels painted
Putting aside such pedantry, I got on with the model and having airbrushed the basic colour, I used Army painter dark tone ink to add shadows to the panel lines and around the rivets. I then gave the tank a couple of dry brushes using the original colour, highlighted with Iraqi Sand added to the green and then white to get the top lights. The road wheels were painted in black ( a mistake – I think that black grey would have been better) and then the tracks painted with gun metal. All the running gear was then heavily ‘muddied up’ with a mixture of browns daubed and dry brushed on. I also added some mud pigment to get a ‘crusty’ effect in places where I thought that the mud would accumulate.
Mud, markings and aerial added
I took pragmatic approach to the markings. I suppose I could have sent off for some decals but I used a fictional vehicle number on the turret and I hand painted the Squadron triangle symbol. The final touch was to add the aerial. I’ve painted this black because it looks black to me in the photographs but I do wonder whether it would have been the same colour as the tank.
My tank collection – Cromwell, Matilda II, Matilda I, Vickers Mk VIb
So another tank is added to my collection. It wont win any prizes at competitons but then it isn’t going to be entered into any! The important thing for me is that it looks like a Cromwell! On to the next model!
THE COMMERCIAL BIT
Almost all of the paints, miniatures, bases, basing materials and anything that you are likely to need for your hobby are available from my shop here:
Having completed the Landsknechts, I was at a bit of a loss as to what to start as my next project. I took the easy option and resorted to my Lord of the Rings collection moving onto the next issue of the Magazine ‘Battle Games in Middle Earth’. Somewhere back in April, I found the time to complete Legolas, the figure that came with issue 8. As I was absorbed in my Bombard project, I neglected to take any photos other than the one below of the finished figure, before basing was completed.
Legolas, basing still to complete
The next issue of ‘Battlegames in Middle Earth’, issue 9, came with an Uruk-Hai Scout. Issue 10 came with another sprue of 10 Uruk-Hai Warriors, so it made sense to paint all 11 figures as one batch. I cleaned up and assembled the figures and then primed them with a black undercoat. I then dry brushed them with gun metal to pick out the armour, painted the flesh using Vallejo Game Colour Dark Flesh and then the various straps and leather ‘kilts’ in either Leather brown or flat earth. The hair and spear staffs were painted in German Cam. Black brown. I then inked the armour with Dark tone and the rest of the colours with strong tone.
Uruk-Hai in progress as a batch paint job.
I went back over the colours and highlighted them using a lighter shade or simply the original colour, tidying up any obvious errors. I added the teeth and eye’s to the scout captain and based the figures with Vallejo textured paste and sand. The bases were painted with my usual emulsion paint ‘Delhi Bazaar’, and highlighted with progressive mixes of this mixed with Iraqi sand. The final touch was the Gamers Grass beige tufts.
Uruk-Hai based and ready for action!
So another 11 LOTR figures are added to my collection – next up is Boromir. Just 81 magazines to go to complete the collection!
Cromwell basic colours applied – weathering and markings to add.
As well as the Uruk-Hai, I also have been working on a Blitzkrieg miniatures Cromwell tank. Here’s the progress so far. I’ll perhaps cover the stages of this project in my next blog. I now have four British tanks in my collection and I am quite pleased with the results. I have taken the view that these are going to be used as wargaming models which has liberated me from being too picky about the details. The result is that instead of getting bogged down and never finishing anything, I am making progress. The result should be a nice collection to go in the cabinet that shows off British tank development in World War Two – and of course, should I ever get around to it, I will have a nice selection for my war gaming!
THE COMMERCIAL BIT
The magazines that I am referring to are long out of print but still available on ebay should you wish to collect them.
If you need help in completing a project of your own we have a massive range of stock in the Arcane Scenery shop. Almost all of the paints, miniatures, bases, basing materials and anything that you are likely to need for your hobby are available from my shop here:
I continue with my steady output of models during lockdown. Over the last fortnight or so, I have been working on a number of projects, none of them particularly connected to each other.
Whilst discussing how I might adapt the ‘Never Mind the Bill Hooks’ rules for use in a fantasy setting, I decided to dig out my Lord of The Rings Magazine collection. These were published weekly by Deagostini in conjunction with Games Workshop and each magazine came with a free sprue of plastic figures or a free metal miniature from the GW LOTR range.
goblins!
After 20 or so years of these being hidden away in my wardrobe, I decided to paint the figures that came with the first magazine, 12 Goblins of Moria. It was a nice break from my usual subjects and using only the magazine as a painting guide, I soon had them finished. Quite what I will do with them is another matter. For now, they are in my figure cabinet and issue 2, complete with a set of Elves and Men of Gondor is ready for me to paint, should I have the urge!
Bren Team and commander
I had also ordered some more units for my BEF force. I really liked the look of the new releases from Curteys 1st Corp and ordered myself a bren team, Officer set and a Matilda mark 1. The models are lovely and extremely well sculpted and produced. I was particularly impressed with the quality of the Matilda 1. The bren team and officer were painted up in a batch using the technique I have covered in my previous blogs. I left a link below if you would like more information.
Matilda Mk 1 and tank commanders
As well as the bren team, I also painted three tank commanders, one for the Matilda and one two for future tanks!
Matilda Mk 1
As for the Matilda, I am still in the process of finishing this model. I just need to add the markings and a flag for the aerial and touch up a few details. I have decided to use a slightly different colour scheme to my Vickers Mark IVb. Although the dark green on the Vickers tank matched the references that I have, The pictures that I have for the Matilda show a lighter green in the camouflage, so I went with this. I suspect purists will recoil at the mis match but I know that one of the two will be about right! I am at the age now that I would rather get on and paint a model rather than spend endless hours researching and never actually get anything finished.
Matilda Mk1 and Vickers MkVIb
That said, I do find myself revisiting projects and re- touching or adding bits as I think of something else or find a new piece of information. A case in point is the Medieval Church that I have been working on.
Sarissa Church
Back of the Church!
I have been working on this church on and off for some time now. There are still bits to do. I have plans to add a few graves and improve the ground work – I have asked Santa for a static Grass applicator. I also want to do something fancy for the windows. I have mounted it on the Sarissa terrain tiles – this will enable storage as I can remove the church from the tiles. I have grand plans of creating my own Medieval village and the tile system will let me ‘grow’ the village, building by building.
Winston Churchill goes to Church!
Lord Callans Merry Band!
On my conveyor belt of things to do, is the next unit for ‘Never Mind The Billhooks’. I had half a box of Perry’s WOTR infantry left over and decided customise them to produce a mixed unit of Billmen as a unit for Lord Callans retinue. All being well, I’ll cover these in a separate blog in the future.
I’m keeping busy during the lockdown and I think that the key to avoid getting stale or losing interest in a project is to keep a bit of variety on the work bench! It might seem that I spend forever out in the garage but I tend to work in short bursts of no more than a hour or so. What has increased my output has been to do something every day. I hope that you are having as much fun!
If you would like to see a step by step guide to how I paint my British World War Two Infantry, click here:
Almost all of the paints, miniatures, bases, basing materials and anything that you are likely to need for your hobby are available POST FREE at the time of writing, from my shop. The Links will open in another tab on your device.
I thought that it might be useful to document a step by step guide to painting WW2 British infantry, as much for my own reference but I hope that it might be useful for other wargamers. The figures that I am using are Crusader Miniatures British infantry. I wanted some additional troops for my growing BEF force and fancied a bit of variety from the superb Warlord BEF figures. The Crusader miniatures are every bit as good, both in terms of sculpting and casting and completely compatible size wise. However, I had made a mistake in thinking that these were early war as opposed to the Late War packs in the Crusader Miniatures range. I am by no means an expert on uniforms of WW2 but these figures are missing the gas mask pack worn on the chest, the rifle bandoleer and the entrenching tool is a two piece item rather than the earlier one piece. I suspect that this means that a purist would say that they are not suitable to join my BEF force. Fortunately, I am by no means a purist and they look great, so they are in the platoon!
The picture above shows four of the figures, cleaned up, primed with leather brown Army Painter spray, attached to Sarissa 25mm MDF bases and the first vallejo colour applied, Vallejo Flat Flesh 70955. Unless specified, all of the paints used are from the Vallejo model colour range.
All of the uniform is painted with Burnt Umber 70941.
The helmets and water bottle are painted with 70887 US olive drab.
The webbing, packs, belt and gaiters are painted with 70988 Khaki.
The rifles and entrenching tool handle were painted with German Cam. Black Brown 70822. I also paint the hair with the same colour – not that there is much to see!
The detail on the rifles, bayonet cover and boots were painted Black 70950.
The faces, hands, Helmets, water bottle and all khaki were painted over with Army painter soft tone ink. It doesn’t matter if you get some on the uniform, you will be over painting this in future steps
The uniforms were painted with English uniform 70921, leaving the burnt umber in the shadows and creases.
The Helmets and water bottles were repainted with 70887 US Olive drab, leaving some of the shading at the base of the helmet and around the webbing of the water bottle. All the Khaki, except the gaiters was repainted, again, leaving the shadows caused by the soft tone ink. I decided to leave the Gaiters a dirtier dark colour.
The Webbing and packs are highlighted with German Camouflage Beige 70821. The wood on the rifles highlighted with flat brown 70984.
The uniform is highlighted on the tops of the creases with 70880 Khaki Grey.
The flesh is highlighted with Flat Flesh 70855 and then skin tome70815. The rifles and shovel handle highlighted with 70846 Mahogany Brown.
The flesh is highlighted with Flat Flesh 70855 and then skin tone70815. The rifles and shovel handle highlighted with 70846 Mahogany Brown.
Bases painted with Dehli Bazaar Brown emulsion and then highlighted with an Iraqui sand mix. Sprinkled with Woodlands Scenics green grass T1349.
Crusader and Warlord WW2 British Infantry
And that’s another section completed – well nearly. They need a bren gun team to join them – I’ll get that painted later. Here’s a final shot of the two sections that I now have completed. On the right, the warlord figures, on the left, Crusader. They are in Movement trays for organisational and display purposes. If they ever do take to the table, the movement trays wont be in use.
THE COMMERCIAL BIT
Almost all of the paints, miniatures, bases, basing materials and anything that you are likely to need for your hobby are available POST FREE at the time of writing, from my shop here:
I’ve had quite a productive couple of weeks since my last blog, with a number of projects moving towards completion. The Vickers VIb is now more or less there. I still have to add some stowage but I have yet to find exactly what I need for this or take the time to make it from scratch. However, I have completed the weathering and added some markings. The decals are sourced from Warlord Games and supplemented with some hand painting. I also added the aerial and flag – another cut down 50mm spear from Arcane Scenery, the flag is just paper. So for now, I’m calling this one done.
VIckers VIb
Vickers VIb other side!
It’s worth pointing out that the markings that I have used are conjectural, and I have used a number of different picture references of tanks to come up with the layout. To be fair, the experts aren’t really sure of the markings used as there doesn’t seem to be a standard layout. The white squares do indicate that the tank is part of the BEF in France.
I’ve also completed the first BEF section along with a movement tray that is really just to facilitate display and to help organise my force for when I get to using them in a game
BEF section in their ‘movement tray’.
Bren Team
Also now complete and based are the HQ section comprising of a 2 inch Mortar:
2 inch Mortar Team
and the Boyes Anti Tank Gun:
Boyes AT Gun Team
The HQ is a man short, with just three figures at present. I’m on the lookout for a medic or spare man to make up the numbers.
HQ section
The last unit that I’ve added is the Vickers HMG as a support, which means that I have completely finished the Warlord Games BEF boxed set. I’m not entirely happy with the Vickers gun and may revisit it but for now, it will do!
Vickers Gun Team
I’ve also been busy basing up my Dad’s Army Home guard Platoon, using one of the ‘new’ scenic MDF bases from Sarissa. The main characters all fit into the ‘sabot’ bases that I have made and can be removed should I decide to game with them.
Dads Army on Display Base
I’ve also transferred the Vicar, Verger and Warden to renedra paved bases, so they look more at home.
Vicar, Verger and Warden
Finally, I’ve made a start on a Home guard Smith gun. The crew are complete and the gun needs weathering and the set basing.
Smith Gun for Home Guard – W.I.P.
Smith Gun (2) – the other side!
I still haven’t worked out whether I will game with these figures or I am just collecting them for my display cabinet. The thought of painting another 20 BEF figures isn’t as attractive as painting a few more tanks and weapon sets, such as the 2pdr AT gun or some of the quirky home guard weapons, the Blacker bombard and Northover projector. I suspect it will be a mixture of all three!
THE COMMERCIAL BIT
Almost all of the paints, miniatures, bases, basing materials and anything that you are likely to need for your hobby are available POST FREE at the time of writing, from my shop here:
Now that I have started my BEF force, it seemed sensible to add a tank as a support. One of the most numerous tanks supplied to the BEF at the start of the war was the Vickers VI mark B. Armed with a 0.303 machine gun and a 0.5 inch Vickers heavy machine gun and with a maximum speed of 35 mph, it was a useful recon vehicle but somewhat under gunned and under armoured compared to the contemporary German tanks that it would be facing. That aside, it is a lovely little tank, full of character and a nice subject for my collection. My first decision was to decide on what scale I would use.
The 1/48th scale Blitzkrieg Vickers VIB as supplied.
The common scale used by Warlord and Rubicon, and as a result, by many war gamers, is 1/56th scale. In theory, this should match the ‘scale’ of 28mm figures. However, I find that most war gaming figures are closer to 30mm in size and due to the manufacturing process, tend to be more ‘chunky’ than a true 1/56th scale figure would be. By the time that you mount figures on a base, I think that they look on the large size compared to the vehicles. I also have grand ideas of building a collection of 1/48th aircraft, so with all this in mind, I went for a 1/48th scale Vickers produced by Blitzkrieg Miniatures. You can see more on my thoughts as to what scale is best for your figures in a previous blog here:
As usual, the next task was to do some research on the tank and it’s colour scheme. I have quite a few old Military Modelling magazines in my collection and I was pleased to find that I had a couple of really good articles describing the tank and modelling the tank in 1/35th scale. I also had an old tank profile publication devoted to the Vickers. It is an old publication, now long OOP, I suspect. My copy still has the price of five shillings on the cover! I also did some research on the internet and there is no shortage of reference, both in terms of pictures and videos. The challenge for me was to convert this knowledge into a wargaming model rather than a massively detailed scale modelling project. The Blitzkrieg model is good enough to paint and use straight on the wargames table but I wanted to add some detail so that it looked good in the display cabinet.
Article from Military Modelling collectors edition #16
Modelling the Vickers VI in 1/35th scale from the same magazine
There were four areas where I thought a bit of detail would enhance the model. The drivers mirror is an obvious feature that is impossible to mould onto a resin cast kit. The Aerial platform at the rear of the turret is also missing. The muzzle of the 0.5inch machine gun is also not moulded onto the kit. The final ‘missing’ detail is the lack of tools or stowage – to be fair, from the pictures that I have seen, the Vickers did not seem to be carrying much in the way of stowage. Certainly not the amount that you see on tanks later on in the war.
Drivers mirror, Muzzle and aerial added to model.
My approach to modelling these details was to represent them rather than attempt to make scale replicas. So for the drivers mirror, I used a 50mm metal spear! It looked about the right thickness and is rigid enough to withstand a bit of wear and tear on the war games table. I just cut it to about the right length using the pictures as a reference. I then cut out a small bit of 20/000 thou plastic card of about the right size for the mirror, using a file to gently round the edges. I drilled the hull in about the right place and using Expo thick super glue with accelerator, glued the assembly into position.
The aerial platform – some sanding and shaping needed!
I took the same ‘cavalier’ attitude to making the aerial platform. I used a piece of 20/000 plasticard cut to about the right size and glued it to the back of the turret in about the right place. I then used another piece of the 50mm spear to make the support and again used super glue to fix it in position. To make the aerial holder/cover I cut a piece of plastic tube to about the right size, sanded the top to a curve and then filled it with Vallejo putty. Once dry, I again sanded it to the curved shape. I will add the whip aerial, using thin brass rod or stretched sprue, once I have finished the painting.
Close up of the 0.5 inch machine gun muzzle.
I then made the muzzle of the 0.50 Vickers gun using a piece of plastic rod. To get the cone shape, I put the rod into my trusty hand drill and spinning it around, used some sand paper to produce a cone shape at the end. I then cut this off and stuck it into the gun mount. This extra work took around an hour or so and would have been even quicker if I had not had to make at least two copies of the bits as I kept dropping them on the floor and losing them. I’m convinced that there’s a spider under my work bench that shares my hobby and is collecting the bits that I drop!
I’m leaving the stowage until after I have finished the painting. I’m trying to decide whether to buy some ready made stowage or just make some out of milliput and spares. I’ll probably go for the latter option but feel happy adding this to the finished model.
Model primed in Vallejo Black primer.
Onto painting. I should mention that the first job that I did was to wash the model in warm soapy water using an old tooth brush to give it a good scrub down before I started any modelling. With resin tanks, this is vital, as the silicon mold release agent will cause your paint to flake if you don’t get rid of it. For some reason, it is always a problem with resin. I never bother with plastic kits or metals and have never had an issue but resin is problematic – if you miss a spot, it will flake your paint! I then primed the model with Vallejo black primer using an airbrush.
Painting in progress. – You can see the original Olive drab that I thought was too light on the front of the tank- I’ve missed a bit when repainting!
As far as the colours go, you could write a book on the subject! Mike Starmer has written quite a few and is evidently the foremost expert in this area. Google him for more information. I took my usual pragmatic approach and used MIG Ammo colour Kahki Green MIG113, which has been designed specifically for painting British armour 1939 – 1942 with Mr Starmers input. Once again, I used an airbush to apply this coat. When it came to the camouflage pattern, I used blutack to mask off the pattern, approximating to the picture in the Profile publication. I initially airbrushed on Mig Ammo 0112 Olive Drab. This looked dark enough in the bottle but when on the model it looked too light to me. I decided to repaint this using Vallejo German Black Green 70979. I also added a couple of drops of black to make it even darker. Rather than re mask the model, I simply brush painted it over the Mig Olive drab.
Front view of the Vickers VIb
Rear view showing exhaust and aerial platform.
I then picked out some details – mirror and lights were painted silver, exhaust system Matt black, tracks, steel, aerial cover white. I have just started the weathering. A quick dry brush with the khaki green and dark green lightened with Iraqi sand just to pick up the edges of the armour and the rivets. I used army painter strong tone to run into the panel lines. And that is about as far as I have gone. I’ve now put the tank to one side whilst I order some markings and add the stowage before final weathering and ‘dirtying down’. I’ll re visit this process in another blog. For now, the Vickers VI is serviceable for the wargames table – if we get the chance to play!
Vickers VIB (almost) ready for battle!
THE COMMERCIAL BIT
Almost all of the paints, miniatures, bases, basing materials and anything that you are likely to need for your hobby are available POST FREE at the time of writing, from my shop here:
I am gradually getting to grips with the organisation of the British army in WW2, and more specifically, the BEF in 1940. I would have thought that after being immersed in the button counting world of Napoleonic’s, a more modern period would be easy to grasp. Well I don’t find it so. It doesn’t help that I have been influenced by all of the war films that I have watched over the years. In the films, the Hero – Sergeant, or who ever was in charge, always seemed to be talking to his platoon of ten or so men. I now understand that a Platoon is a much larger body of men, and it is the Section that is the building block for the modern British army.
Lieutenant and Sergeant command the platoon.
Having read various internet articles on the subject, which to me appear vague – originally eight men to a section, then eleven ( including the corporal), then may be ten later in the war, all depending on casualties, I became confused. I could have saved myself a bit of time if I had just looked at the Perry’s Eighth army plastic boxed set. They explain it all very simply in one diagram! So one full strength section comprises of 8 men with rifles ( probably) and two men that make up the Bren gun team. Ten men to a section. Three sections to a platoon. You then have a small Platoon HQ, which generally comprises of the Platoon Commander – a Lieutenant, the platoon Sergeant, a couple of runners, an anti tank gun team ( Boyes rifle or PIAT) and a 2″ mortar team. So I need to paint around 38 figures to complete a platoon. That will do for me, I cant cope with a load of if’s but’s and maybes!
The confusion that I was feeling was because a variety of extra weapons teams or transports, organised in additional Platoons at Battalion level, can be attached to or deployed with the basic rifle platoon to give it some extra muscle. So you might have an extra Vickers HMG attached to your platoon or a couple of 3″ Mortars, or even an anti tank gun fighting with the rifle sections. Also Sergeants and Corporals might be carrying a sub machine gun rather than a rifle. Just to make matters worse for me, the battalion or regimental markings are very subdued. No brightly coloured facings or flags on the modern battlefield!
BEF section – some basing still needs finishing!
The same sort of approach was taken to deploying tanks. It’s not like the cavalry of my Napoleonic army, where you model the basic regiment and line them up all together. I’m sure that there were occasions when that happened, but again, it seems as though tank platoons or companies were attached to infantry or visa versa, as the need arose. I suppose that the commanders took a pragmatic approach and allocated whatever resources they had to acheive their objectives. In the case of the BEF, particularly as the fighting got underway, things became more chaotic and deployment was more fluid. With casualty replacement less likely as the campaign progressed, the ideal section or platoon rarely existed. It’s all very different to building ‘blocks’ of men that will represent a fighting unit.
Bren Team – Section LMG
I suspect that once I have decided on a rules set, the size and type of force will become clearer. To be fair, I need to play a bit of catch up in terms of the history. Most of the books that I have read deal with the grand view of the battles rather than the specific units at platoon level. In most WW2 games, the action takes place at platoon level. In effect, one model soldier represents one soldier in history. This is in contrast with earlier historical battles where the action took place in the main at Battalion level. I guess, that wargamers moving from WW2 back to Napoleonic wargaming find it just as confusing as I do moving the other way!
In the meantime, it would be nice to finish my first section!
THE COMMERCIAL BIT
If you are looking for paints, bases or almost anything to help you with your modelling and wargaming, visit my shop below. At the time of writing, we are still offering worldwide free postage!
This website uses cookies to improve your experience. We'll assume you're ok with this, but you can opt-out if you wish.AcceptRead More
Privacy & Cookies Policy
Privacy Overview
This website uses cookies to improve your experience while you navigate through the website. Out of these cookies, the cookies that are categorized as necessary are stored on your browser as they are as essential for the working of basic functionalities of the website. We also use third-party cookies that help us analyze and understand how you use this website. These cookies will be stored in your browser only with your consent. You also have the option to opt-out of these cookies. But opting out of some of these cookies may have an effect on your browsing experience.
Necessary cookies are absolutely essential for the website to function properly. This category only includes cookies that ensures basic functionalities and security features of the website. These cookies do not store any personal information.