Workbench Update 24 November 2020

I continue with my steady output of models during lockdown. Over the last fortnight or so, I have been working on a number of projects, none of them particularly connected to each other.

Whilst discussing how I might adapt the ‘Never Mind the Bill Hooks’ rules for use in a fantasy setting, I decided to dig out my Lord of The Rings Magazine collection. These were published weekly by Deagostini in conjunction with Games Workshop and each magazine came with a free sprue of plastic figures or a free metal miniature from the GW LOTR range.
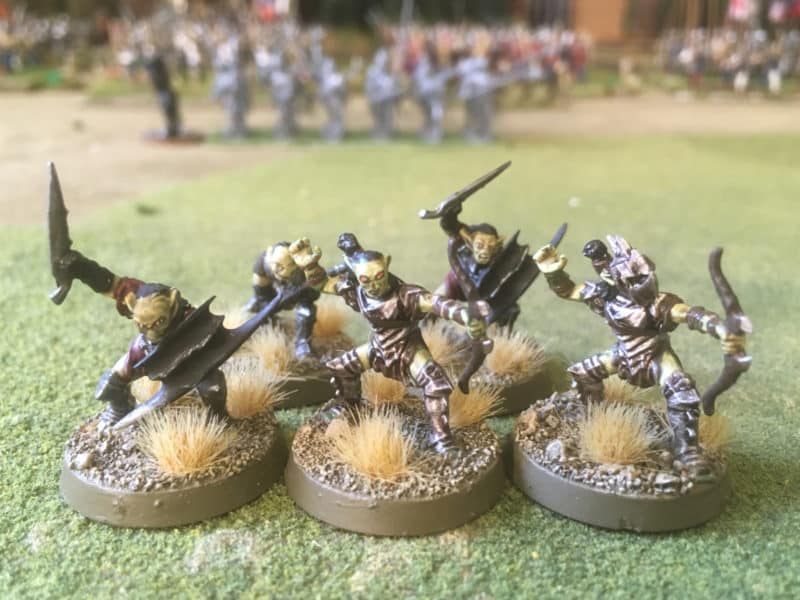
goblins!

goblins!

After 20 or so years of these being hidden away in my wardrobe, I decided to paint the figures that came with the first magazine, 12 Goblins of Moria. It was a nice break from my usual subjects and using only the magazine as a painting guide, I soon had them finished. Quite what I will do with them is another matter. For now, they are in my figure cabinet and issue 2, complete with a set of Elves and Men of Gondor is ready for me to paint, should I have the urge!

Bren Team and commander

Bren Team and commander

I had also ordered some more units for my BEF force. I really liked the look of the new releases from Curteys 1st Corp and ordered myself a bren team, Officer set and a Matilda mark 1. The models are lovely and extremely well sculpted and produced. I was particularly impressed with the quality of the Matilda 1. The bren team and officer were painted up in a batch using the technique I have covered in my previous blogs. I left a link below if you would like more information.
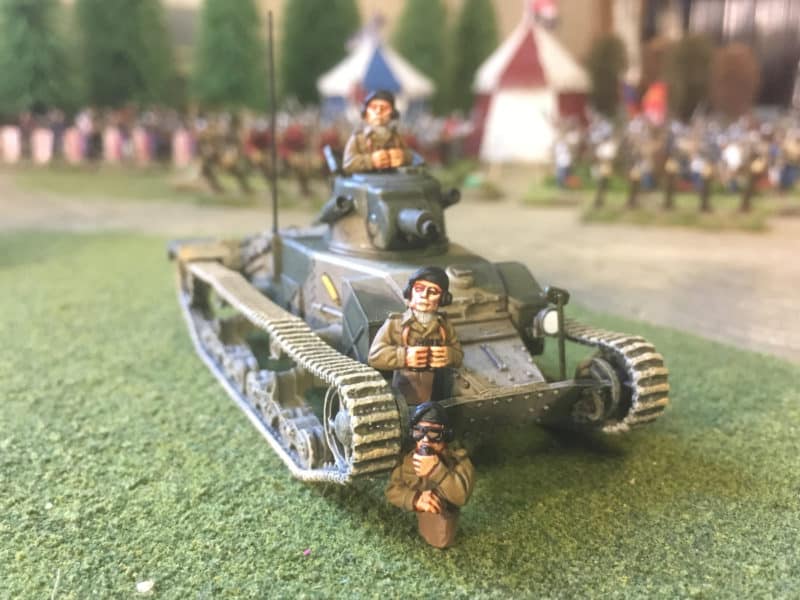
Matilda Mk 1 and tank commanders

Matilda Mk 1 and tank commanders

As well as the bren team, I also painted three tank commanders, one for the Matilda and one two for future tanks!
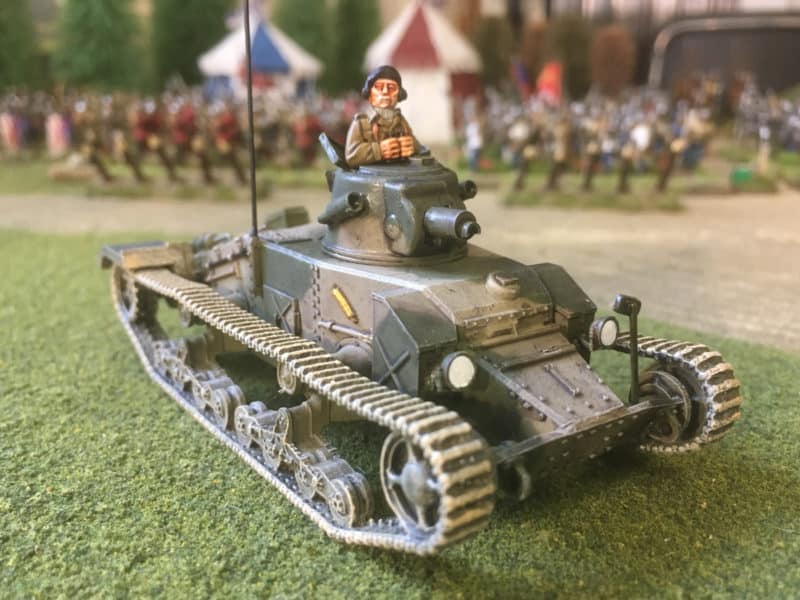
Matilda Mk 1

Matilda Mk 1

As for the Matilda, I am still in the process of finishing this model. I just need to add the markings and a flag for the aerial and touch up a few details.  I have decided to use a slightly different colour scheme to my Vickers Mark IVb. Although the dark green on the Vickers tank matched the references that I have, The pictures that I have for the Matilda show a lighter green in the camouflage, so I went with this. I suspect purists will recoil at the mis match but I know that one of the two will be about right! I am at the age now that I would rather get on and paint a model rather than spend endless hours researching and never actually get anything finished.
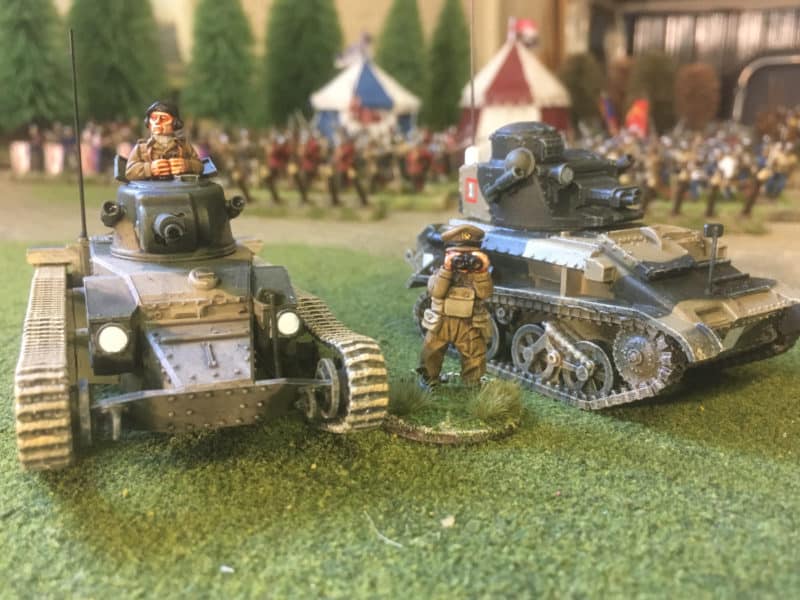
Matilda Mk1 and Vickers MkVIb

That said, I do find myself revisiting projects and re- touching or adding bits as I think of something else or find a new piece of information. A case in point is the Medieval Church that I have been working on.
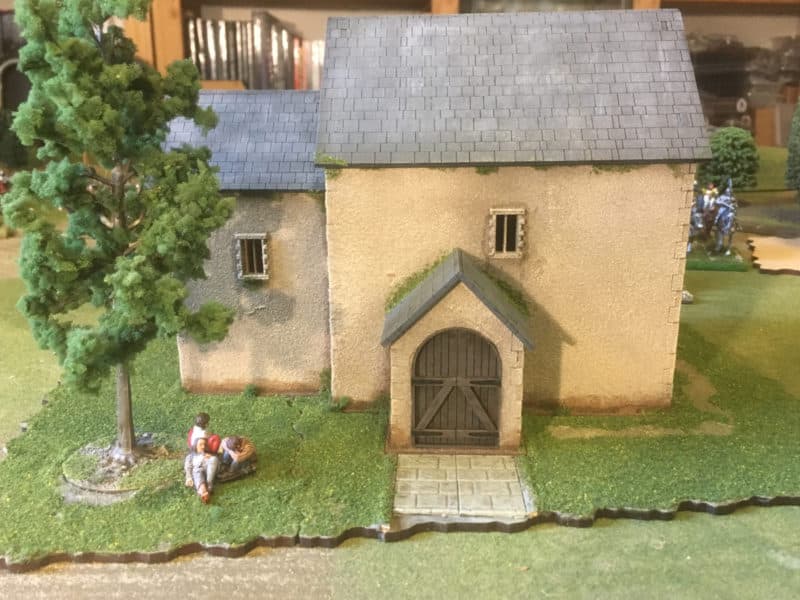
Sarissa Church
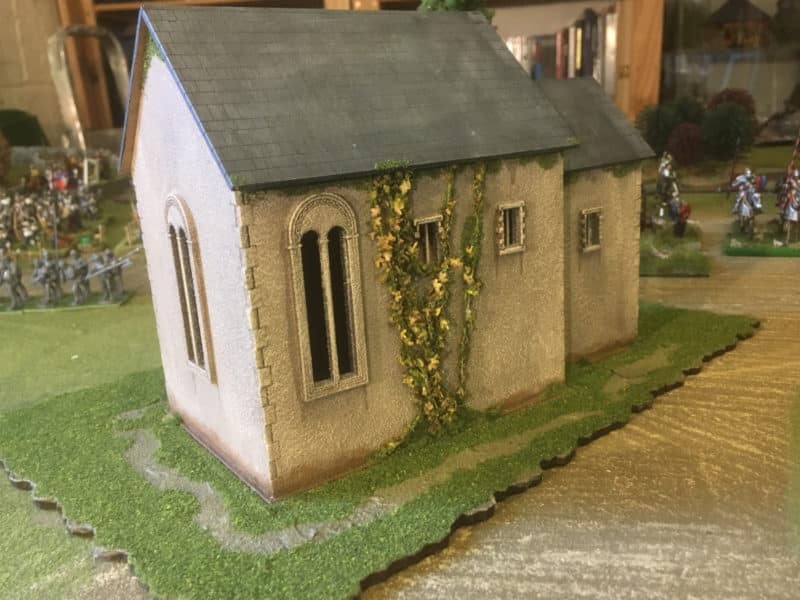
Sarissa Church

Back of the Church

Back of the Church!

I have been working on this church on and off for some time now. There are still bits to do. I have plans to add a few graves and improve the ground work – I have asked Santa for a static Grass applicator. I also want to do something fancy for the windows. I have mounted it on the Sarissa terrain tiles – this will enable storage as I can remove the church from the tiles. I have grand plans of creating my own Medieval village and the tile system will let me ‘grow’ the village, building by building.
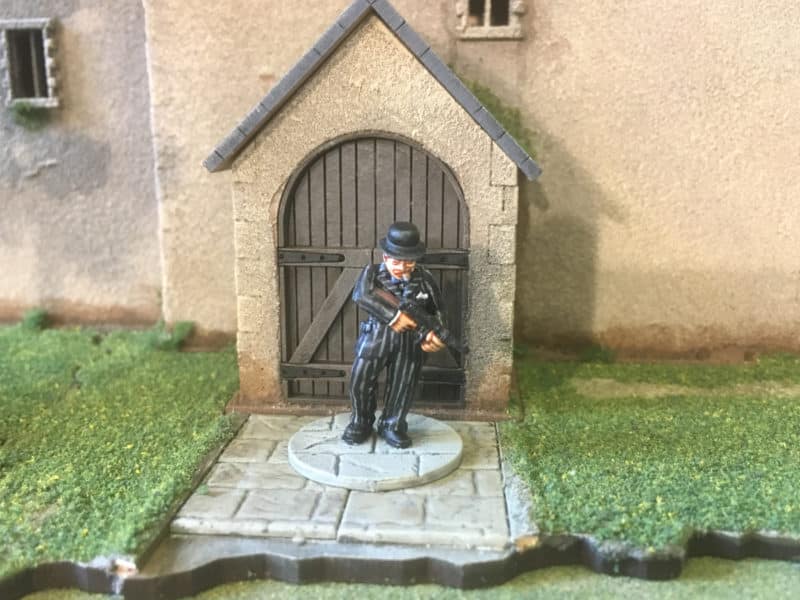
Winston Churchill goes to Church!
Winston Churchill goes to Church!

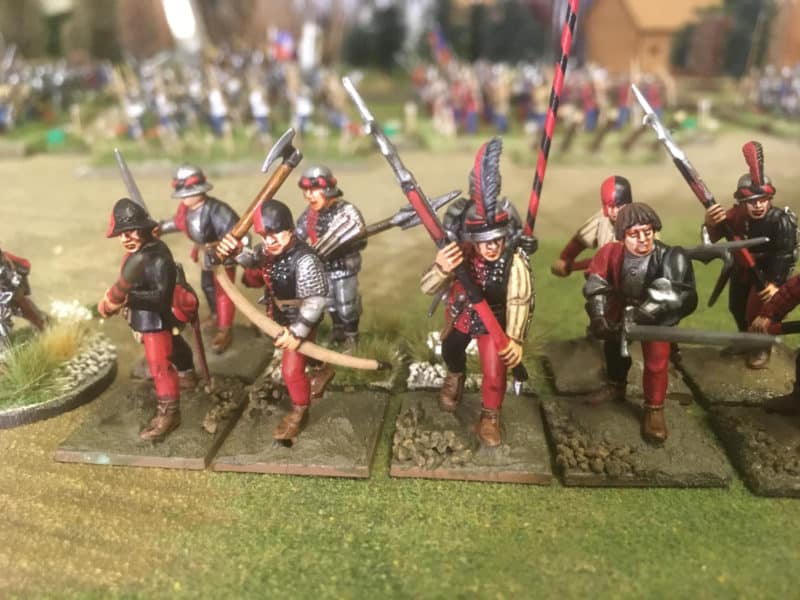
Lord Callans Merry Band!

Lord Callans Merry Band!

On my conveyor belt of things to do, is the next unit for ‘Never Mind The Billhooks’. I had half a box of Perry’s WOTR infantry left over and decided customise them to produce a mixed unit of Billmen as a unit for Lord Callans retinue. All being well, I’ll cover these in a separate blog in the future.

I’m keeping busy during the lockdown and I think that the key to avoid getting stale or losing interest in a project is to keep a bit of variety on the work bench! It might seem that I spend forever out in the garage but I tend to work in short bursts of no more than a hour or so. What has increased my output has been to do something every day. I hope that you are having as much fun!

If you would like to see a step by step guide to how I paint my British World War Two Infantry, click here:

PAINTING WW2 BRITISH INFANTRY

THE COMMERCIAL BIT

Almost all of the paints, miniatures, bases, basing materials and anything that you are likely to need for your hobby are available POST FREE at the time of writing, from my shop. The Links will open in another tab on your device.

ARCANE SCENERY

Perry’s WOTR plastic range are here, including some nice army deals!

PERRY MINIATURES

You can see our Woodlands scenics range, including water effects, here:

WOODLAND SCENICS

Gamers grass tufts can be found here:

GAMERS GRASS

Vallejo plastic filler and Milliput is available here:

FILLERS

MDF bases can be found here:

MDF BASES

You can find all the Vallejo Model colour paints here. If you don’t want to browse, just enter the paint number into the shop search bar;

VALLEJO PAINTS

The full Sarissa range can be found here.

SARISSA PRECISION

If you are struggling to find an item, use the shop search bar! For example, type Church to see all the churches that we carry….

CHURCH

Happy Modelling!

Making Medieval Tents!

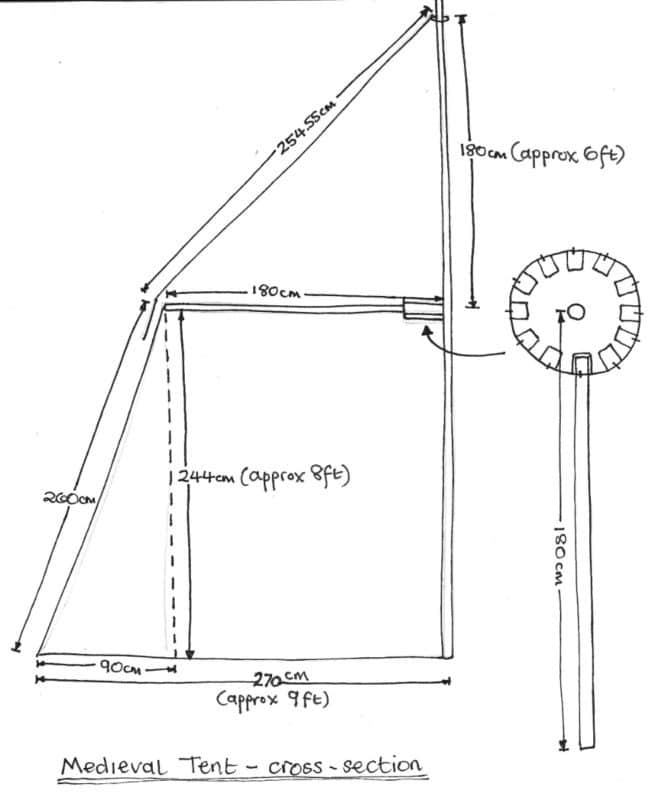
This weeks blog is a bit different – it’s supposed to be a picture tutorial as to how I made my Medieval tents for my Never Mind The Bill Hooks army. The idea of the tents, is that you store your army morale tokens in them during the battle. This means that the tents have to have removable tops and I wanted something that was fairly durable. I came up with the idea of using Pringles tubes as the core of the tent but needed a way of making the tube look more tent like! Having done a bit of research on the internet, I found a plan for a full sized Medieval tent on Pinterest, complete with dimensions. When I scaled the dimensions down to 1/48th scale ( a bit on the large size but I can handle the maths easier than working with 1/56th!), it turned out that Pringles tubes were ideal for the job!

Plan for Knights Tents - Dimensions are for a full sized tent.

Plan for Knights Tents – Dimensions are for a full sized tent.

I also found a superb youtube video showing how to make Medieval tents for Dungeons and Dragons. The video link is at the end of this article. I was all set to go but first I need to gather the raw materials and tools. I jumped right in and built the first tent in about an hour but wasn’t entirely happy with the result, so I moved onto the second tent. This took a bit longer as I was more careful with the measurements and I made some improvements to the structure. If you would like to have a go at making you own tents, you will need the following tools and materials.

Glue Gun – you can just use PVA but a glue gun is ideal for most of the work here.

Cocktail sticks

Tissues ( kleenex type)

Cardboard or Foam card.

Compass or compass cutter

Sharp knife

Clippers.

Ruler and pencil.

Set Square if you want to be precise with your measuring ( I used the markings on my steel ruler as a guide.)

Step one

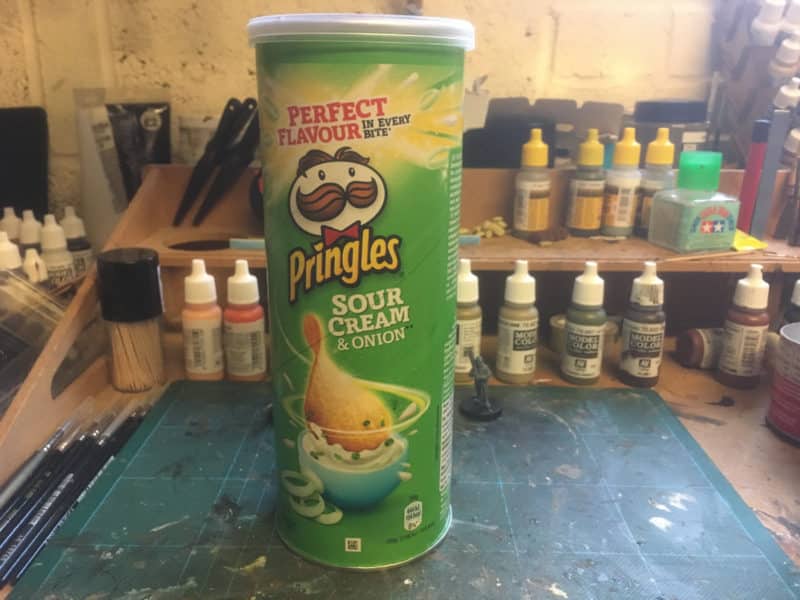
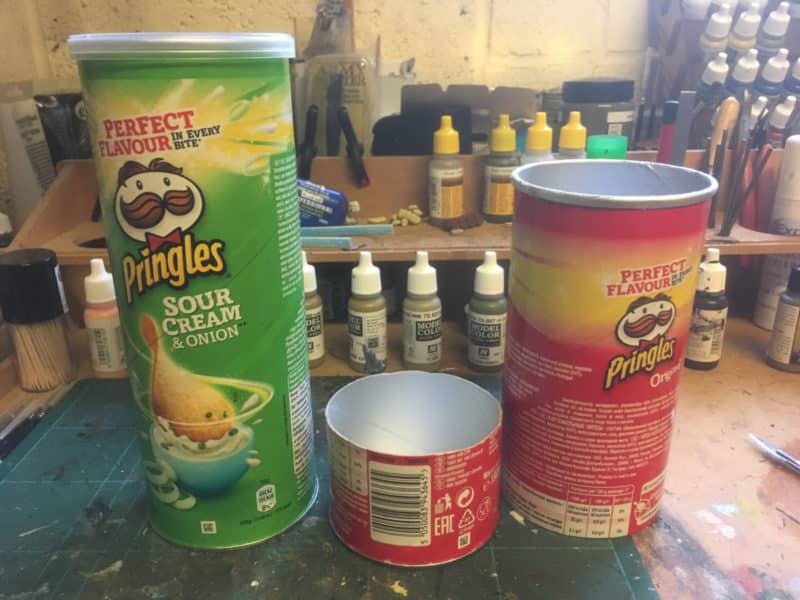
Get your Pringles, any flavour, although I like the plain and the sour cream and onions, and eat the contents.

Pringles tube! First task is to empty it!

Pringles tube! First task is to empty it!

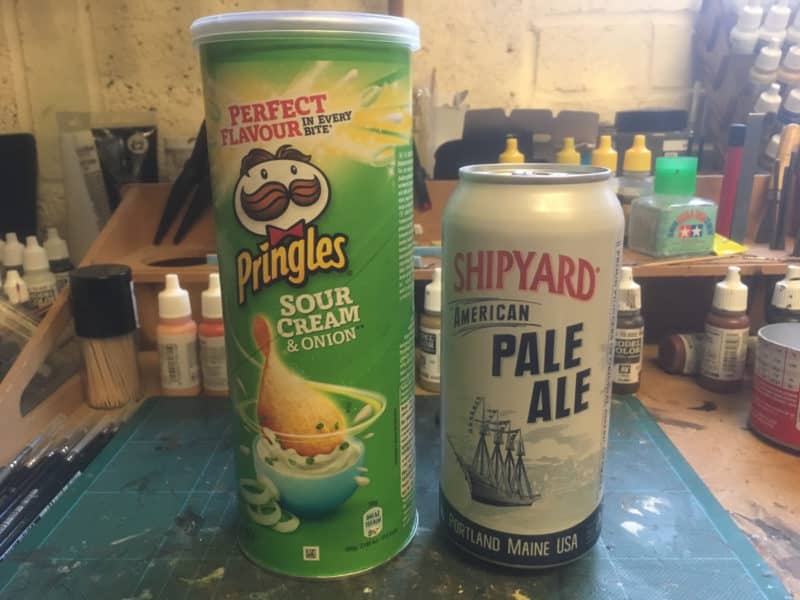
You may need some lubrication to help with the Pringles. Beer seems to work well, my current favourite is Shipyard!

You may find that you get thirsty eating Pringles!

You may find that you get thirsty eating Pringles!

Cut the base of the Pringles tube off ( the end with the metal base.) using a sharp knife. It’s tricky getting a straight cut around a tube. I used a felt tip pen blu-tacked to my work board, exactly 5cms from the side and holding the tube firmly against the edge, rotated it so that the pen marked a guide line around the tube. I then cut through the tube using my scalpel. Dont worry if you dont get an exact straight edge to your cut, the top will hide any errors.

The first tube cut down.

The first tube cut down. The height of the cut is 5cms – you can make this smaller if you prefer.

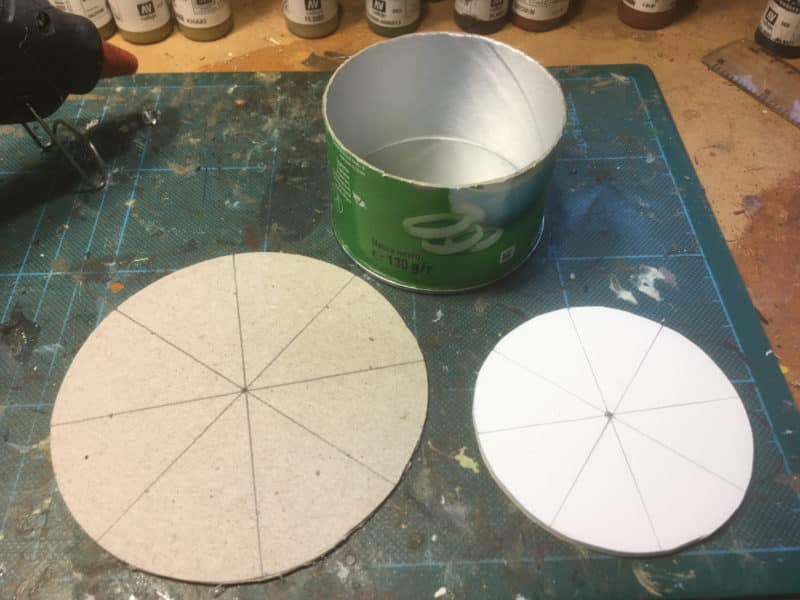
The next task is to cut out two circles. One at 11 cms in diameter will be for the base of the tent – I used a compass cutter for this task on the second tent rather than a compass and scalpel that I used for the first tent. The other circle is the same width as your pringles tube – just draw around it. The tent base is made from cardboard. The top is foam card. You could use cardboard for the top but I wanted to give the top a bit of strength.

Circles cut out - note that I have marked out the centre and divided them into eight segments with pencil lines.

Circles cut out – note that I have marked out the centre and divided them into eight segments with pencil lines.

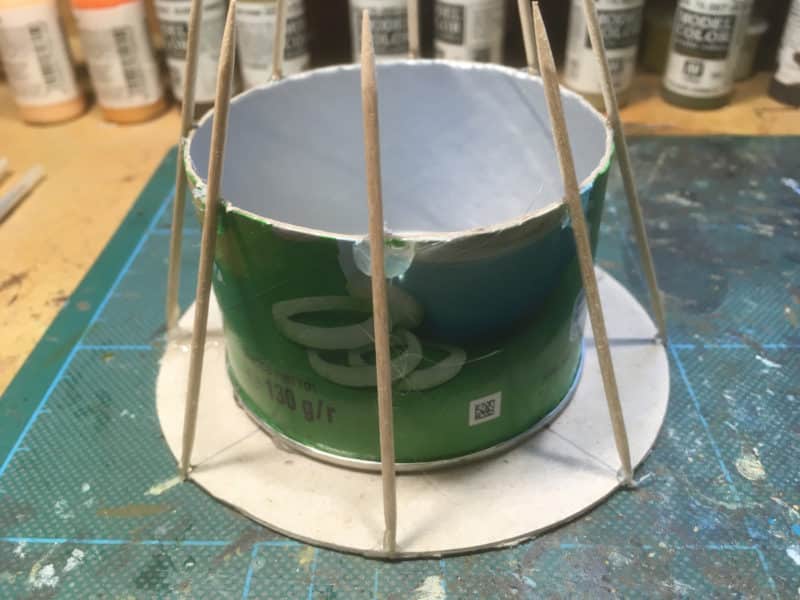
Next glue the pringles tin to the base, making sure that you have it centred as best as you can. Using the pencil marks as a guide, glue eight cocktail sticks to the base and tube as shown below.

Cocktail sticks added to form the structure

Cocktail sticks added to form the structure

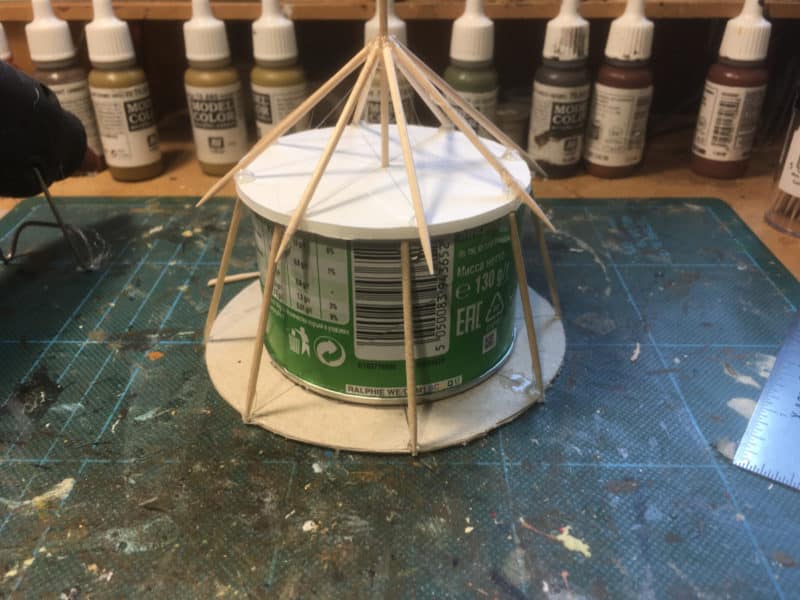
I used my flush cutters to clip off the excess length of the cocktail stick. I then took the top disk of the tent and glued a cocktail stick through the exact centre. You need to leave about 5cms of this cocktail stick as the centre pole. Using my clippers. I then cut eight more cocktail sticks( at a slight angle on one end) and glued them to the centre pole at 3.75cms up the pole and again, used the eight pencil marks as a guide.

top of the tent in place

top of the tent in place – dont glue this – you need to be able to remove it!

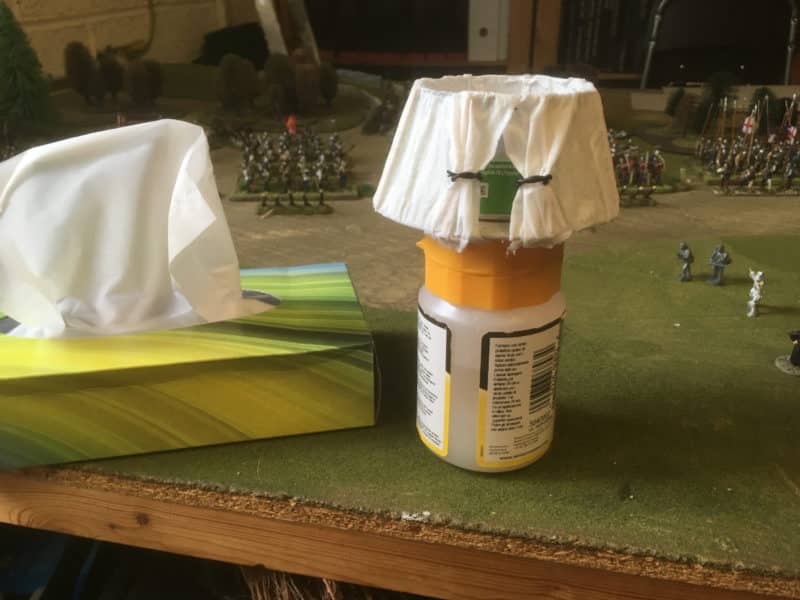
The next part of the process is both the trickiest and the most messy! I used standard three ply kleenex tissues cut roughly to size and dipped in watered down PVA to clad the base of the tent. I left one section opened and used two pieces of tissue to make the open door.

Tissue covering the main structure - complete with tie backs on the 'door'!

Tissue covering the main structure – complete with tie backs on the ‘door’!

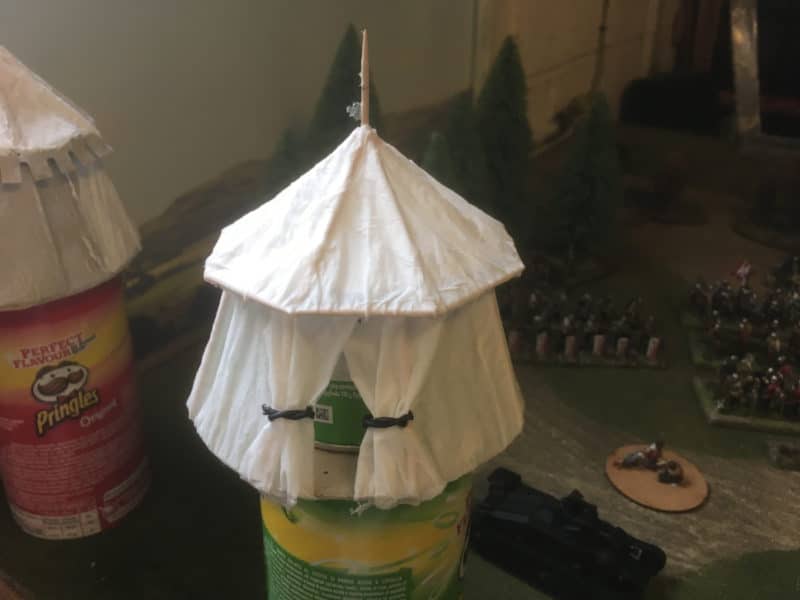
There’s no doubt that this is the trickiest part of the operation. I did find that it was easier to place the tissue on the structure and using a large brush, ‘paint on’ the PVA. With hind sight, I think that Crepe paper or perhaps kitchen towelling would have worked better as these products are stronger and less likely to rip when wet. Also, for some reason, I felt the need to explain to my wife why I was going out to the garage with a box of tissues, pringles and my iPad….


Tent with tissue added to the roof

Tent with tissue added to the roof.

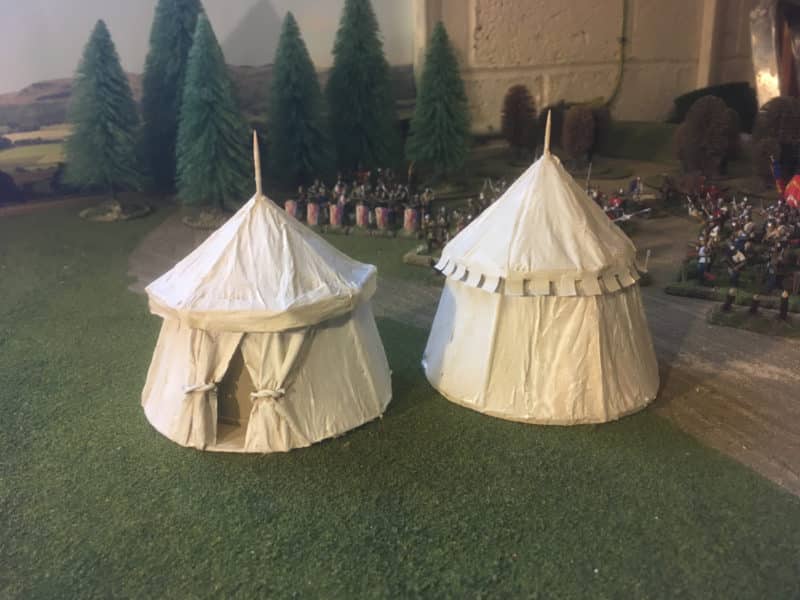
The whole structure was left to dry for at least 24hours. I then spray primed the tents with Army Painter skeleton bone and dry brushed them with white.

The two tents primed and ready for painting.

The two tents primed and ready for painting.

The tent on the right was my first attempt. I’m not entirely happy with this one as I got into a bit of a mess with the tissue and I’ve used some filler to try to hide mistakes – if you look closely you will see that I haven’t been too successful! I only used six ‘poles’ for the structure rather than eight. I’ve also added a decorative edge to the top.

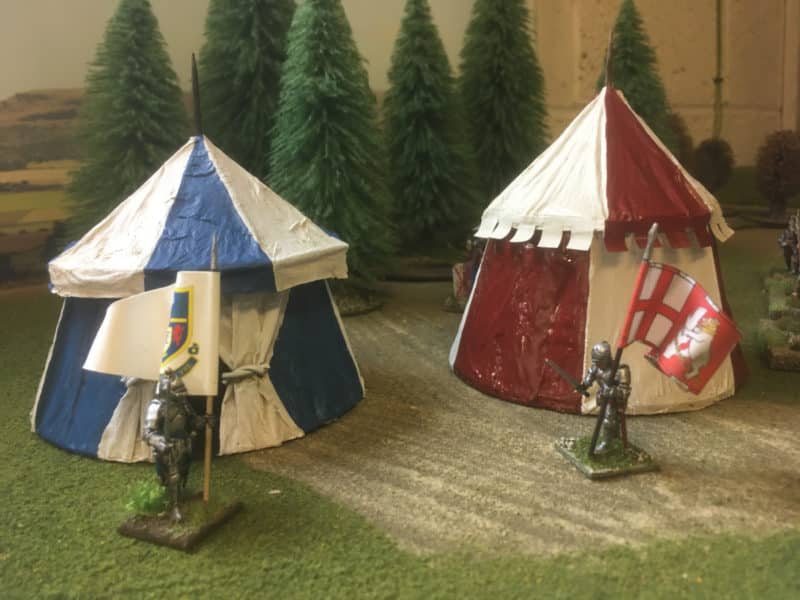
The painted tents

The painted tents

I then painted alternate segments of the tents – Prussian blue for one and Burnt red ( my new favourite colour) for the other.

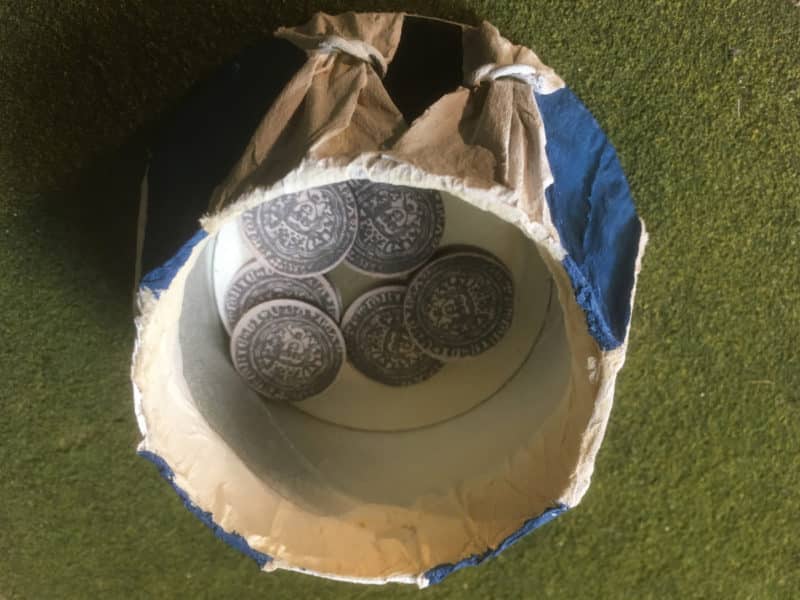
The tops are removable so that you can store your army morale tokens:

Storage section revealed! Big enough to get your hand into pick out the tokens.

Storage section revealed! Big enough to get your hand into pick out the tokens.

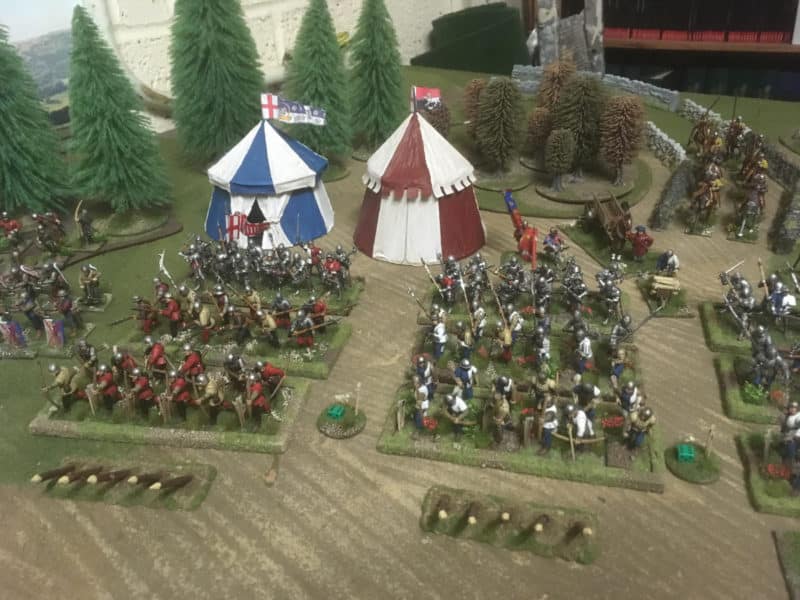
The final touch was to add a bit of dry brushing to the colour panels and to add some flags. Here are the finished tents on my wargames table.

The finished tents.

The finished tents.

I’ll be honest, they do look better from a distance than close up. I have learnt a few lessons whilst building these and in the future, I may add a few more tents to my scenery – perhaps trying crepe paper rather than tissue. But for now, they serve their purpose and function as a place to store the army morale tokens. Talking of learning, here’s a couple of really useful videos.

The next video shows where I ‘borrowed’ the idea of using tissue to make the tents. There are some amazing ideas here and I will be stealing a few more of his tips to make some different style tents in the future. The guy who makes these videos has a whole series of fantastic terrain videos that are well worth your time if you enjoy building scenery.

I hope that you find the above helps. as usual, here’s the commercial bit, although I dont sell Pringles, Cocktail sticks or Tissues….

THE COMMERCIAL BIT

Almost all of the paints, miniatures, bases, basing materials and anything that you are likely to need for your hobby are available POST FREE from my shop here:

ARCANE SCENERY

To find PVA glue, click here:

GLUES AND ADHESIVES

Perry’s WOTR plastic range are here, including some nice army deals!

PERRY MINIATURES

You can see our Woodlands scenics range, including water effects, here:

WOODLAND SCENICS

Gamers grass tufts can be found here:

GAMERS GRASS

Vallejo plastic filler and Milliput is available here:

FILLERS

MDF bases can be found here:

MDF BASES

You can find all the Vallejo Model colour paints here. If you don’t want to browse, just enter the paint number into the shop search bar;

VALLEJO PAINTS

Happy Modelling!


Hidden Ditch!

The next piece of scenery that I have made for my NMTB’s project is the ‘Hidden Ditch’ piece to represent the special event card ‘Terrain Advantage’. First I took a base – actually, it was a spare base to a movement tray and at 180mm long and 60mm wide, overlaps the length of the average unit. I wanted the ditch to look hidden, so I built up the front of the base with a piece of scrap balsa. I then added the rest of the ‘landscaping’ using standard milliput.

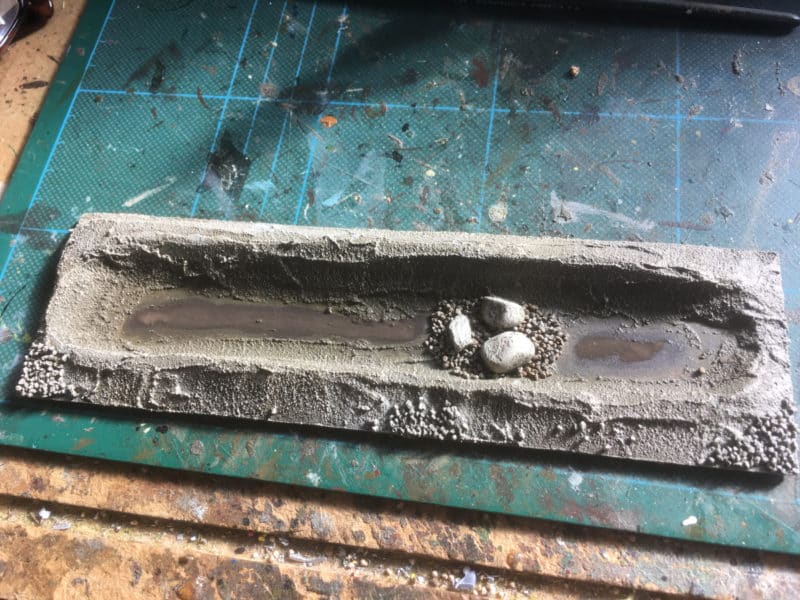
Ditch, covered with texture & rocks added.

Ditch, covered with texture & rocks added.

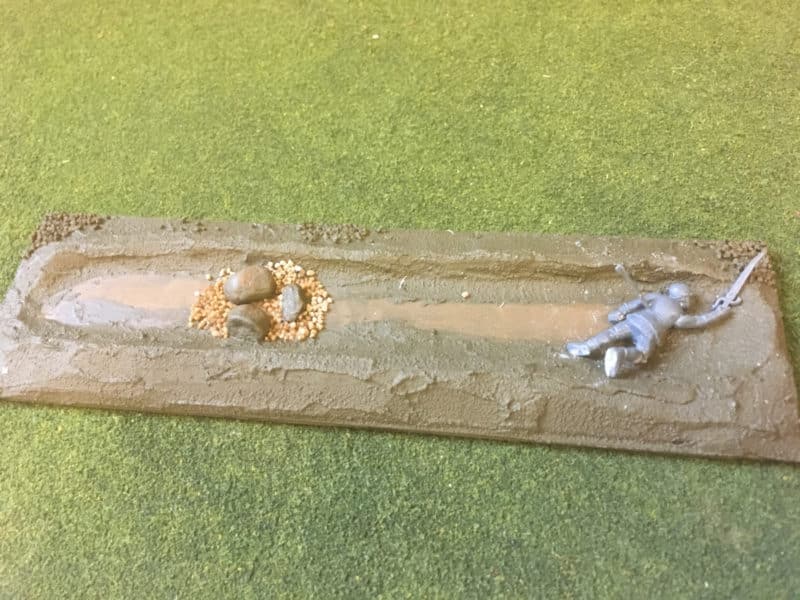
I neglected to take a picture of the base under construction but you can see the base above with the milliput and balsa now coated with a thick coat of Vallejo Dark earth texture paste to blend everything together. I’ve also added some ‘rocks’ – pebbles from my garden and some ballast for additional detail and texture. I then painted everything with my usual basing emulsion colour and dry brushed it all to bring out the different textures. The base of the ditch was left smooth and I also painted this with a darker colour to give the illusion of depth.

Hidden Ditch under construction

Hidden Ditch under construction

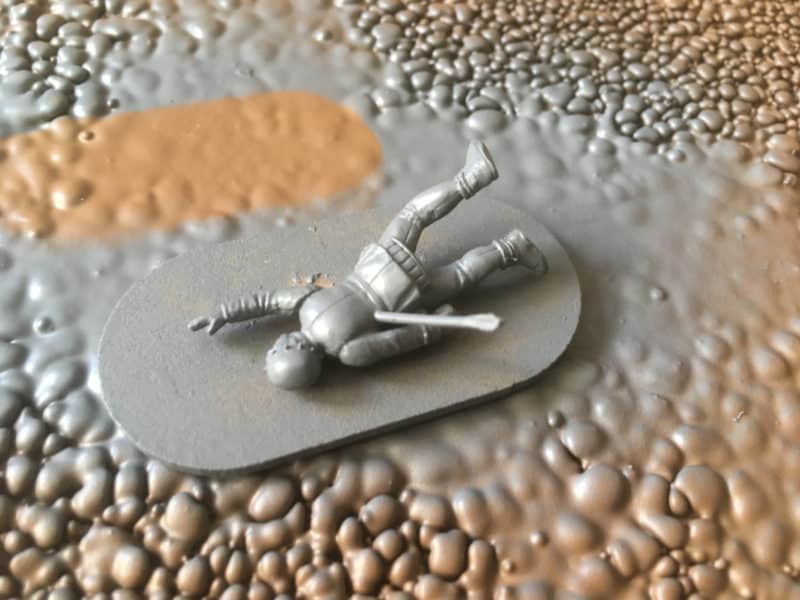
As you can see from the picture above, I wanted to add a ‘casualty’ to the scenery, so I converted a Perry’s Bill man by sanding down the front of the figure to make him lie flat in the ditch. I then cut and repositioned (with pliers! – it’s suprising how much you can bend plastic figures!) the arms and legs to make him look as though he had fallen. The arrow was carefully snipped from the arrows on the command frame and the body drilled to take the arrow.

casualty for the ditch

casualty for the ditch

Once the casualty was dry, I just retested the fit into the ditch and filled any large gaps with Vallejo plastic putty.

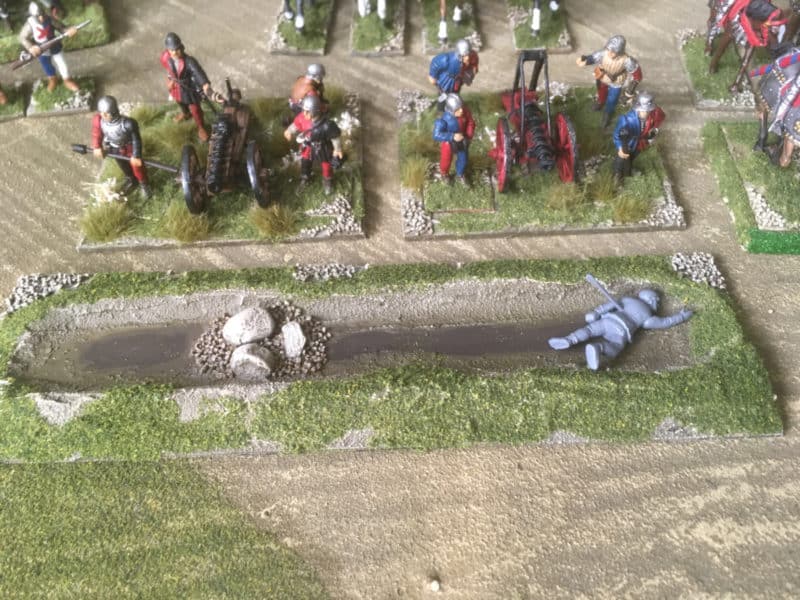
Casualty in ditch - scatter added to the banks

Casualty in ditch – scatter added to the banks

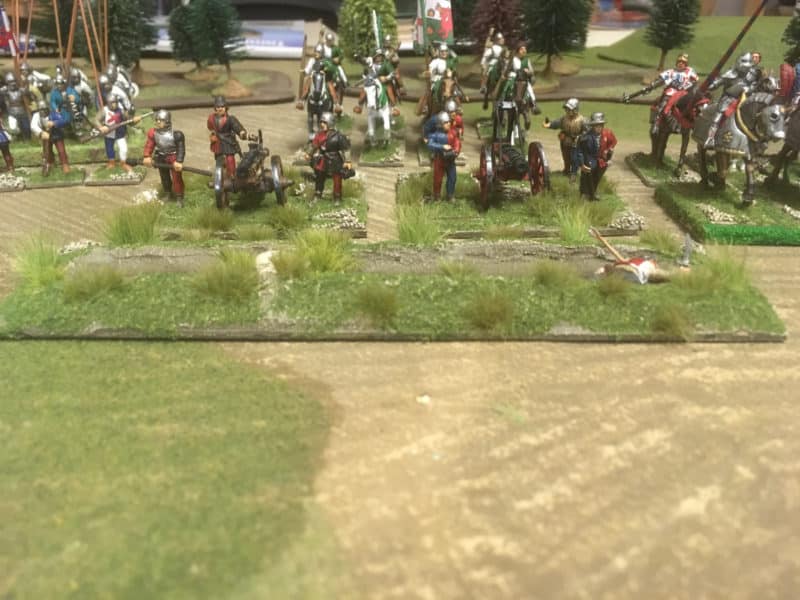
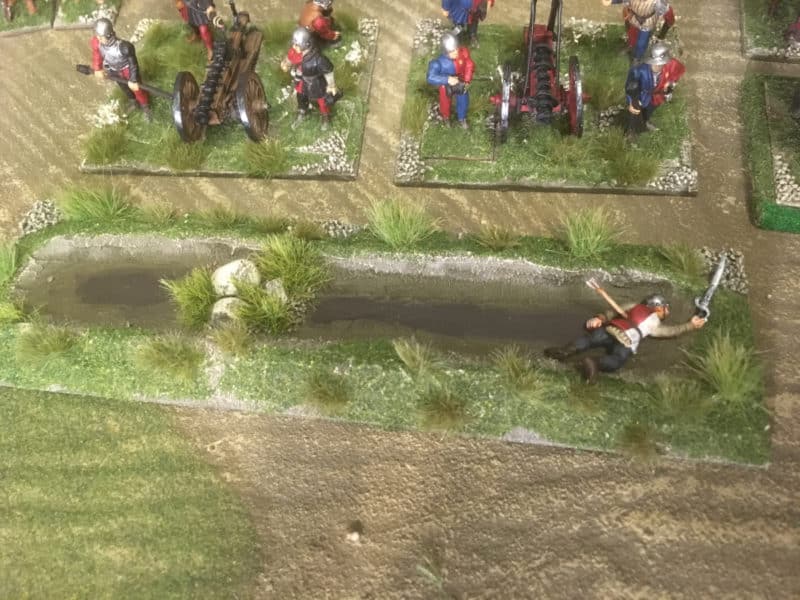
As well as the scatter, I also added a variety of Gamers grass tufts. I used a mixture of the 12mm long jungle, light green and dry green tufts as well as the shorter 6mm dry green tufts. The casualty was painted to my standard method, covered in my previous blogs. I used a red and white livery as I don’t have any of my troops in these colours!

Tufts added to the ditch

Tufts added to the ditch

I think that the effect is better when seen at table top level – you can see that there is a barrier of some sorts but not actually see the ditch. I was quite pleased with the way that this has worked out but it is not quite finished. I am going to add some acrylic ‘deep pour water’ to the ditch to make it look even more realistic. However, this product is quite expensive, so rather than purchase it just for the ditch, I intend to make a bit more scenery for my table. I am planning to make at least a couple of ponds and once these are completed, I will add the water. With another lockdown about to start, I cant see me gaming for a while, so there is no rush. Meanwhile, My next project – Medieval Tents is well underway – more on those in the next blog!

Hidden Ditch!

Hidden Ditch!

THE COMMERCIAL BIT

Almost all of the paints, miniatures, bases, basing materials and anything that you are likely to need for your hobby are available POST FREE from my shop here:

ARCANE SCENERY

Perry’s WOTR plastic range are here, including some nice army deals!

PERRY MINIATURES

You can see our Woodlands scenics range, including water effects, here:

WOODLAND SCENICS

Gamers grass tufts can be found here:

GAMERS GRASS

Vallejo plastic filler and Milliput is available here:

FILLERS

MDF bases can be found here:

MDF BASES

You can find all the Vallejo Model colour paints here. If you don’t want to browse, just enter the paint number into the shop search bar;

VALLEJO PAINTS

Happy Modelling!