Whats on the workbench?

You can tell that I am struggling to get anything finished by the title of this weeks blog. It’s been one of those busy fortnights where my painting and modelling has had to take a back seat to the other things in life. Mind you I did manage a Black powder game last Thursday, during which I was comprehensively thrashed by my opponent, Mr Grant. I wished that I had taken pictures of the game just to remind me of how one over confident move can end in disaster.

Cavalry charge!

Cavalry charge!

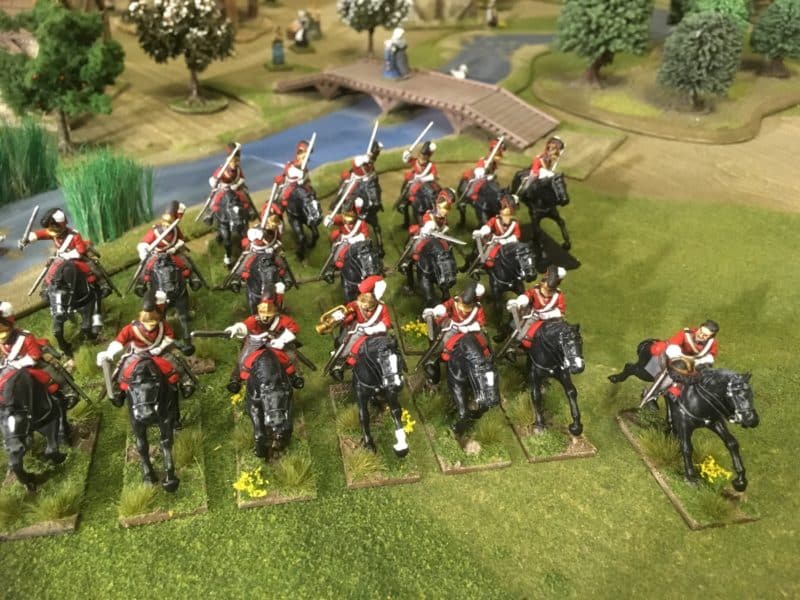
I had charged a regiment of Cuirassiers with two regiments (a brigade) of British household cavalry. The combat went very badly and both of the British regiments were pushed back leaving the Cuirassiers nicely positioned behind a brigade of three battalions of my British infantry within initiative charge move… The brigade was wiped out as they lost the one sided combat and then failed their morale tests. ‘Game over, man’ as Hicks or Hudson would have said! In future, if I have a cavalry regiment positioned to protect a flank, maybe I’ll think twice before committing it to an attack and leaving the flank so exposed!

Perry's Amunition Wagon

Perry’s Ammunition Wagon

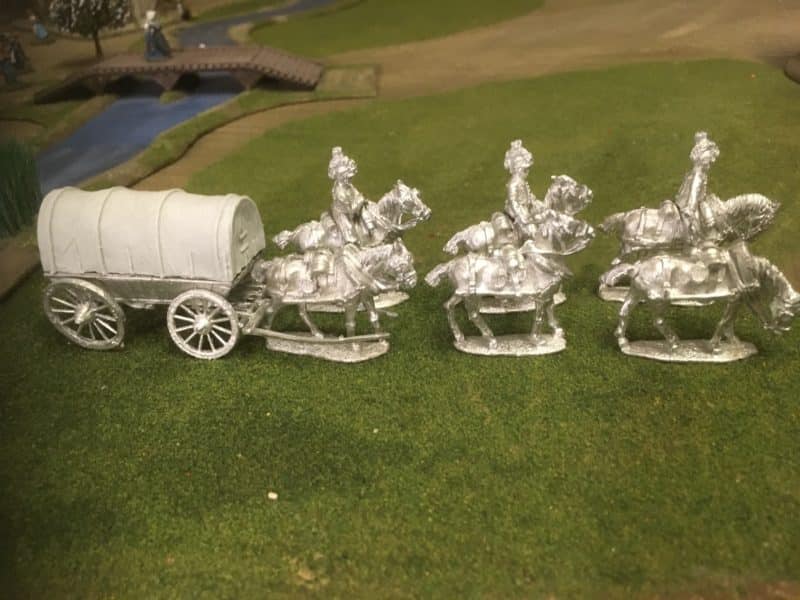
So back to the work bench. I had started work on a Perry’s British ammunition wagon. As usual, the sculpting, poses and detail on the model is superb and everything that you would expect from the Perry’s. However, the casting quality was not so good. I expect to do some cleaning up when starting a model but the amount required on this piece was considerable. In fact, after two evenings scraping and filing, the model is still not ready for priming. The annoying thing is that in cleaning up the casting, I have inevitably spoilt some of the lovely detail – the wheels and horses were particularly poor. The up shot was that I have put the wagon aside and started another model. I will get back to it when I’m in the mood for some more filing….

My next project - a small loop fpr naval engagements.

My next project – a small loop for naval engagements.

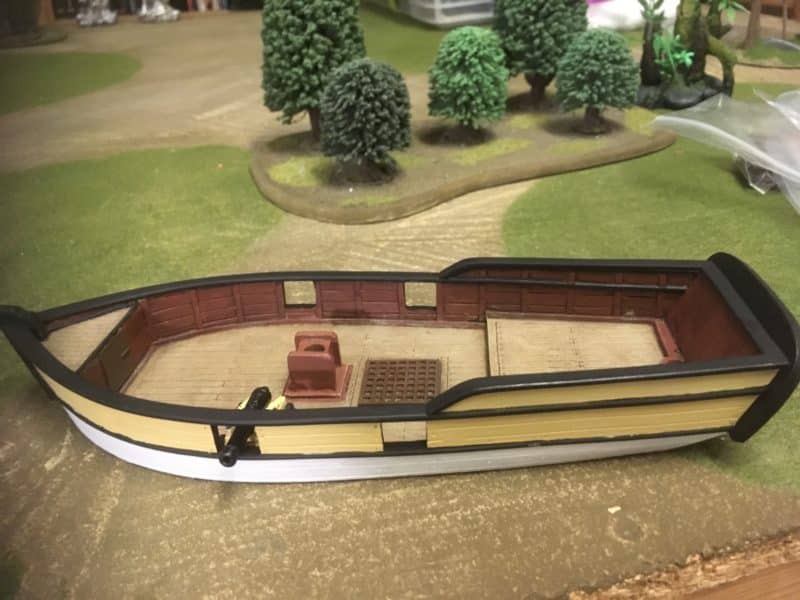
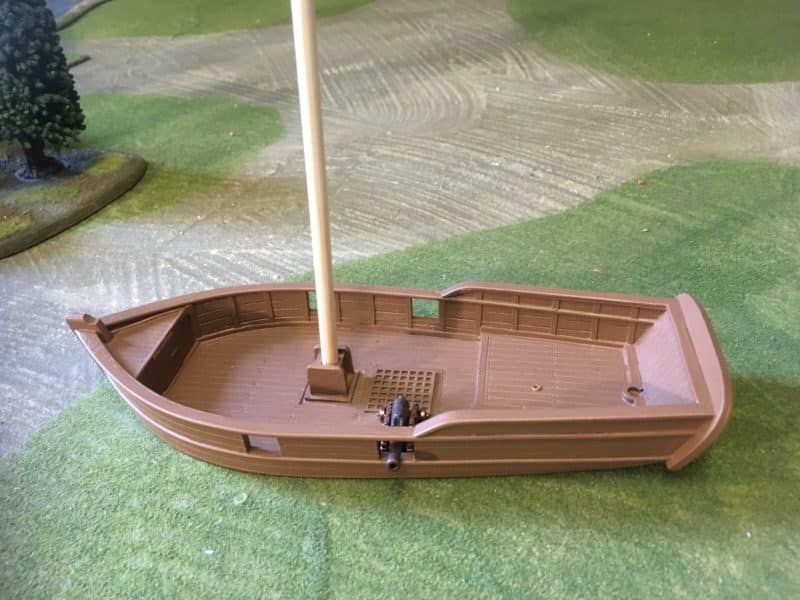
No such problems with the resin ship that I purchased from the last Partizan show. I have managed to loose the name of the company from whom I bought the model – I will find it and include it in a future blog or edit this one. The model is worth recommending! Once I had washed the model down using soap & water, I primed it with Army painter brown as you can see.

Sloop ahoy!

Sloop ahoy!

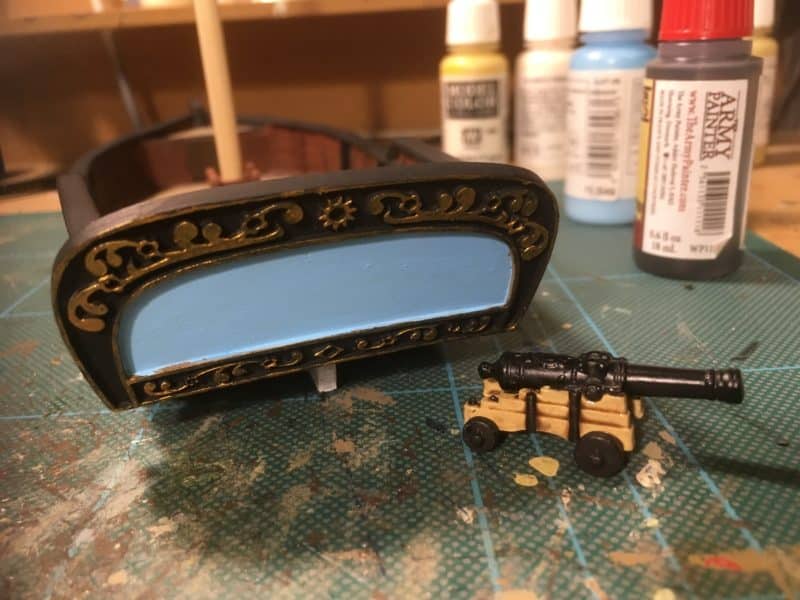
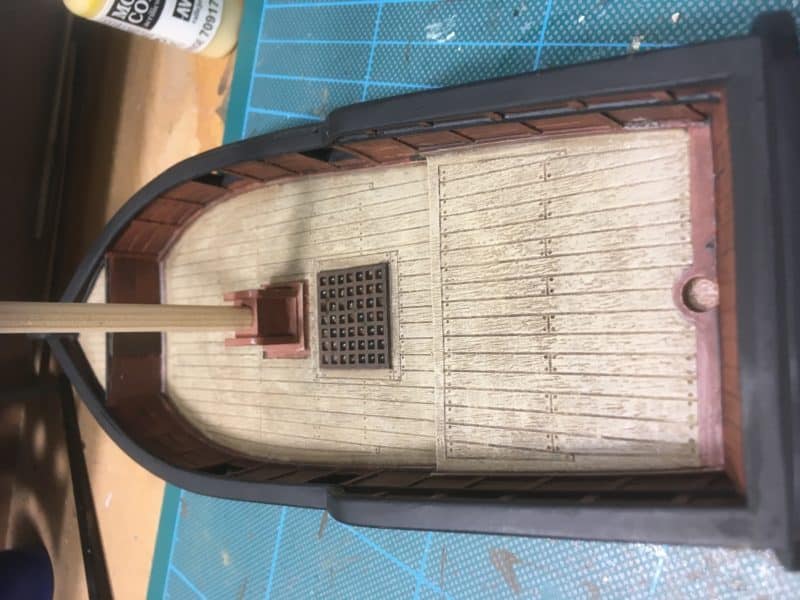
The next task was to paint her. I used Vallejo paints; Mahogany Brown 70846 for the interior woodwork, 310 Old wood for the deck, Biege 70917 for the upper hull, Off white 70820 for the lower hull and Black 70950 for the trim etc. I gave the interior, including the deck, a wash with army painter dark tone and then dry brushed the deck only with 310 old wood and then a further coat of 50/50 old wood 310/Iraqi Sand. The grating was painted in Chocolate brown and washed in Dark tone. I painted the stern panel in 70961 Sky Blue with Brass trim.

Stern of the Sloop

Stern of the Sloop

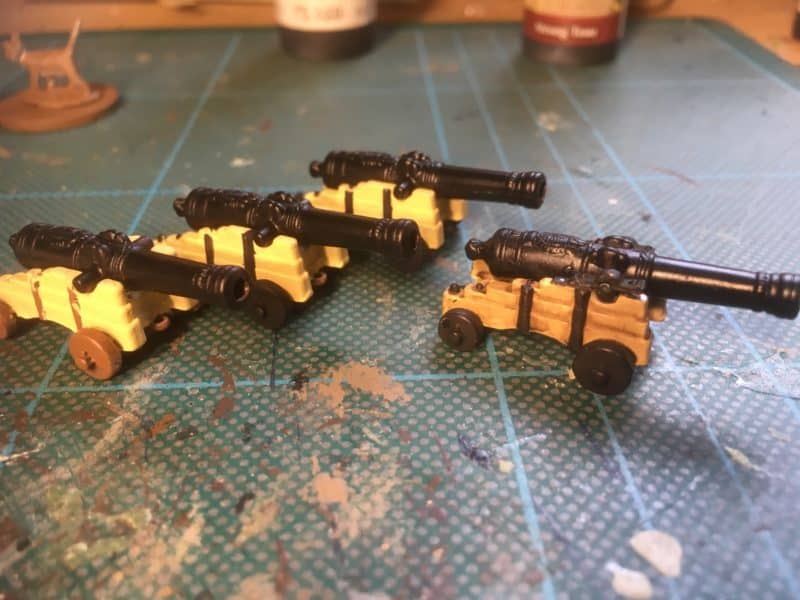
As you can see, I’ve also painted one of the cannon that will arm her. The cannon is from Arcane Scenery – the link is below. There is still quite a bit of work to do before she is ready for the table. Obviously, the mast, bow sprit and rigging will all need completion but I think that she will make a nice addition to my Caribbean collection. Incidentally, I haven’t got too hung up on how accurate the colours are. Although the sloop (?) will be crewed by the Royal Navy, it seems that even when it comes to such an iconic ship as HMS Victory, there is some controversy as to the actual colour:

RESTORED VICTORY CAUSES CONTORVERSY

So I am not going to be too precious regarding the colour scheme of a fictional boat designed to go on a wargames table! The other dilemma that I have is what to name her – I think I will resist indulging my sense of humour and perhaps steal a name from an Alexander Kent or Patrick O’Brien novel…

The view from the stern

The view from the stern

So, the next job will be to fit her out – hopefully, I’ll make a bit more progress now that the clocks are about to go back.

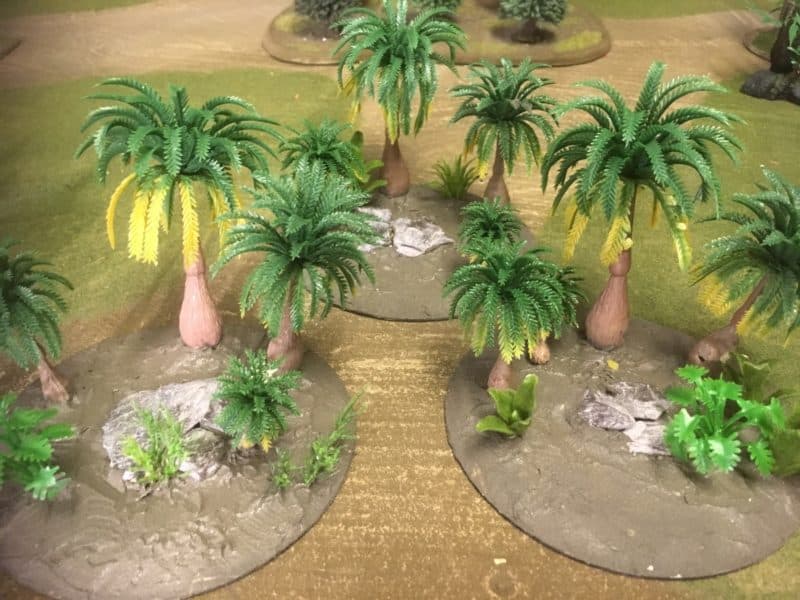
More Jungle Scenery

More Jungle Scenery

In between painting the Sloop, I’ve been making three more pieces of scatter scenery for the table using a slightly different variety of palm tree. They are waiting for a coat of paint and some scatter but are nearly complete. If you missed how I make these, check out last weeks blog ‘ Desert Island Discs’.  Although you can never really have too much of this sort of thing, I think that this will do me for the time being. I have plans to make some area bases to incorporate these pieces. If it works, I’ll include this in a further blog.

That’s it for now, here’s the usual links. Remember, if you are buying from Arcane Scenery, at the time of writing, postage is free to most worldwide locations!

SHIPS CANNON AND FITTINGS

VALLEJO PAINT & TEXTURES RANGE

PALM TREES AND JUNGLE PLANTS

STOP PRESS! I’ve just remembered the supplier of my boat. the Web site is Games Of War, you can see their excellent range of boats here:

GAMES OF WAR


Cuban War Dogs

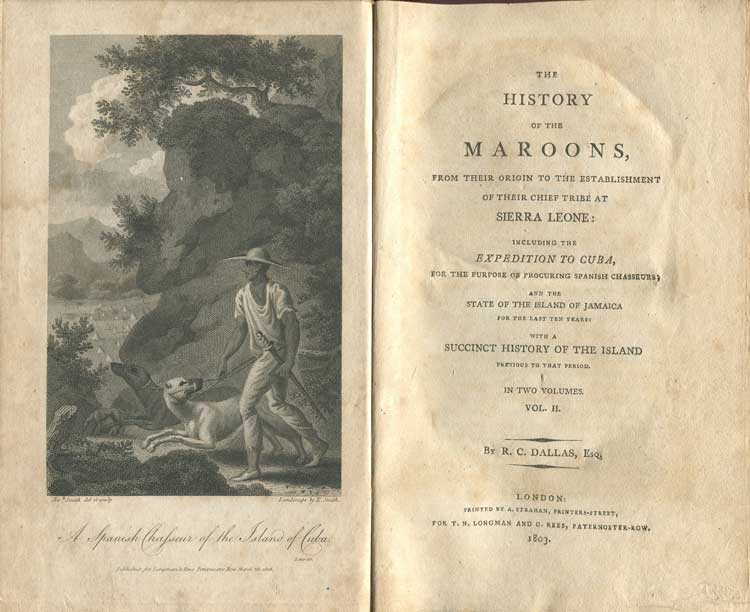
My Caribbean project continues with the addition of a set of Cuban Chasseurs with dogs to my collection. These troops, or more accurately mercenaries, were brought across from Cuba by the various combatants in the Caribbean to fight against the rebellions and revolts taking place. The British imported these mercenaries specifically to suppress the Maroon rebellion on Jamaica but I understand that they were also used on Haiti. My references have come from an account in an book by Robert Charles Dallas written in 1803, ‘The History of the Maroons’ that I found online. As well as describing the Cuban Chasseurs, he gives an account of the brutal training regime inflicted on the dogs and how they were used.

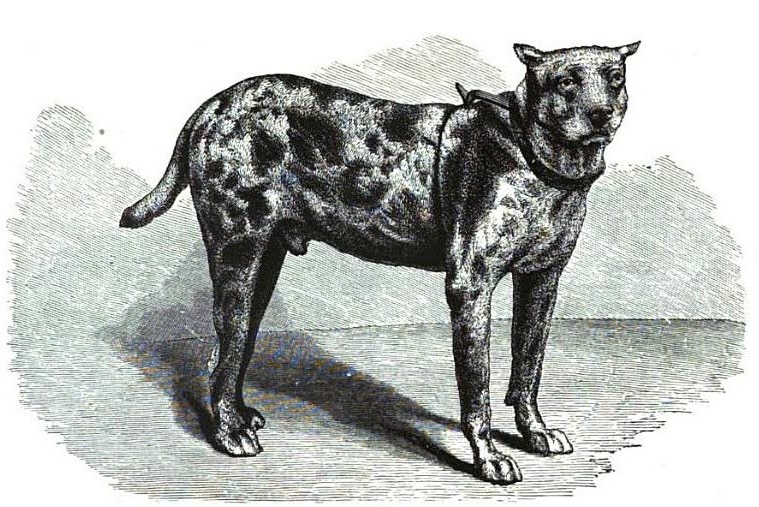
Reference: The History of the Maroons.

Reference: The History of the Maroons.

In 1795 the second Maroon rebellion took place and despite being faced by some 5000 British soldiers and militia, the Maroons held their own and fierce guerrilla warfare led to a stalemate. It is claimed that the introduction of the Cuban Chasseurs and their dogs broke this stalemate and ended the rebellion.

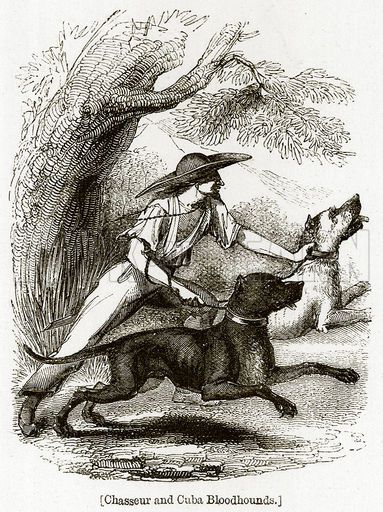
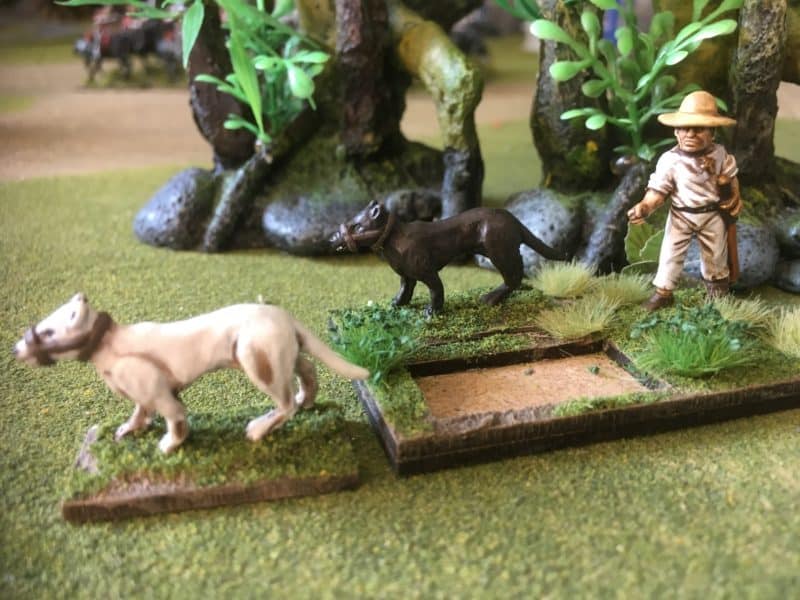
Chasseur and Cuba Bloodhounds

Chasseur and Cuba Bloodhounds

The dogs have been described variously as a cross between Lurchers and Bloodhounds, although it is possible that they were a variety of Great Dane. It could just be that the breed itself wasn’t consistent but it was the training by the Cubans that made the dogs so effective. To paraphrase from the book, ‘These people live with their dogs, from which they are inseperable. At home, the dogs are kept chained and are never unmuzzled but for attack…..The Chasseurs beat their dogs most unmercifully, using the flat side of their machetes. As a result the dogs coat is much harder as is the structure of the dog…’

spot In the book, there is an account of how during the voyage from Cuba the dogs got loose and tore apart the cattle that were also on board. On page 129, there is also an account of how the dogs were demonstrated to a commander in Jamaica to see how they would react under fire. The dogs were loosed on a small body of troops and despite a volley of musket fire being discharged (presumably blanks) the dogs charged home into the ranks of the soldiers, seizing the muskets in their jaws and causing the commander to run for his carriage to escape, before the handlers brought the dogs under control.

My understanding is that such dogs were used by the Spanish and French troops as well as the British and the Cuban Chasseurs that trained them were held in high regard. They were most effective at fighting against irregular troops in rough ground and helped to avoid ambush.

Trent Miniatures sell a pack of these ‘troops’ so I wanted to add some of them to my collection.

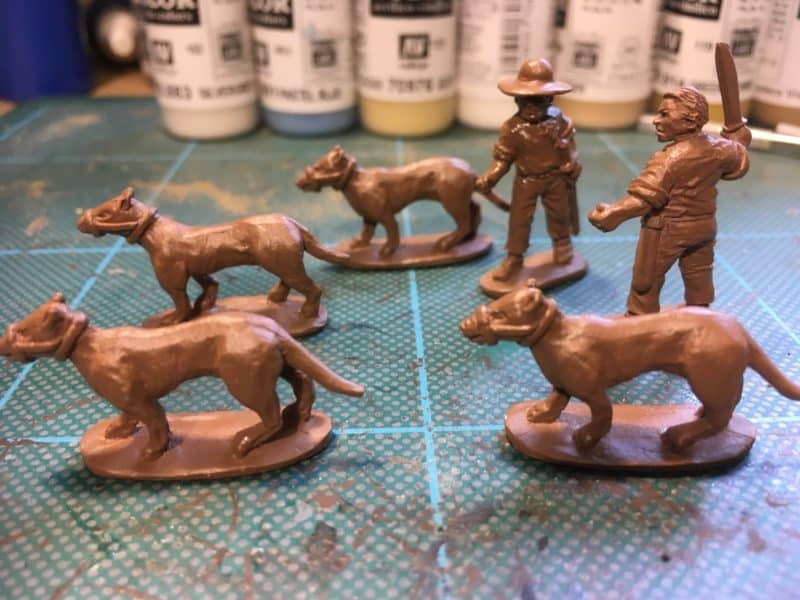
Trent miniatures Cuban Chasseurs

Trent miniatures Cuban Chasseurs

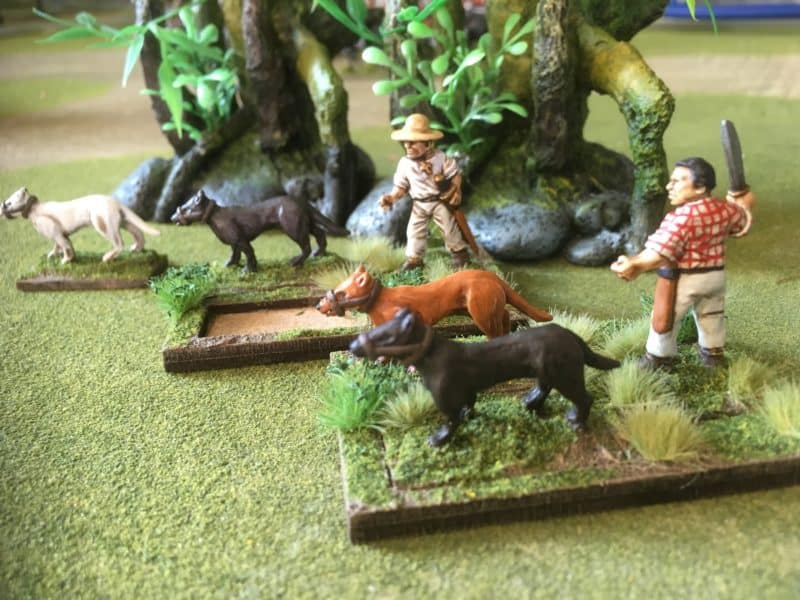
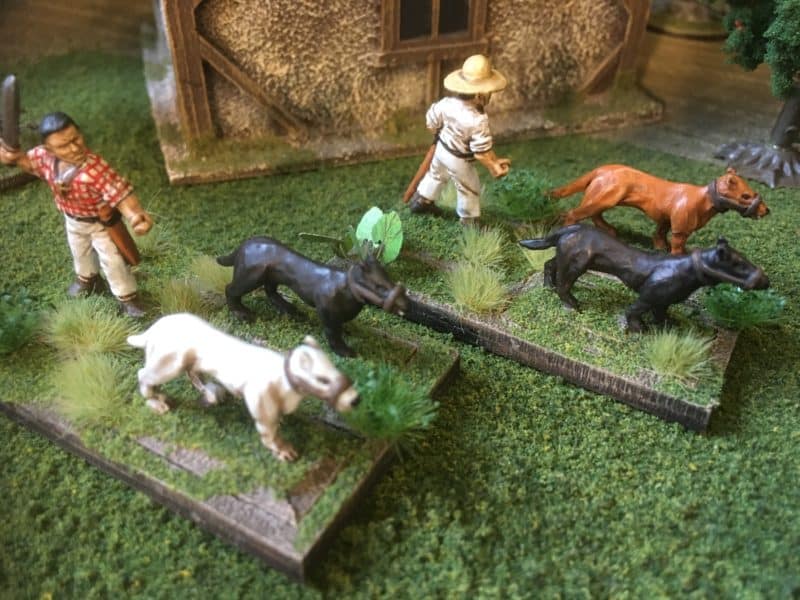
The pack includes two Dog handlers, or Chasseurs and four dogs. As you can see, I’ve cleaned them up and primed them in Army painter Leather brown. Painting was a straight forward task. It is said that the Cubans favoured a red checked shirt, so I have finished one accordingly. Using the picture from the Robert Dallas book as a reference, the other Chasseur is more plainly attired. Similarly, I have gone for a simple finish for the dogs, with one white, one light/orange brown and two Dark Brown.

Painted Chasseurs & dogs

Painted Chasseurs & dogs

The figures are based using a special ‘sabot’ style tray to enable the dogs to be unleashed during wargaming.

Unleash the dogs!

Unleash the dogs!

These bases are not yet available through my shop but if there is sufficient interest, I can have more cut. I finished the bases in my usual style with the Vallejo dark earth texture, woodland scenic scatter and Gamers grass tufts.

I have already used the dogs as a unit in wargaming as I am in the process of developing a set of rules for the Caribbean conflict. We conducted the first play test last week and although much was learnt, there is a long way to go before the rules will be ready.

If you would like to purchase the Cuban Chasseurs and their dogs you can do so by clicking here:

CUBAN CHASSEURS CAR09

Vallejo paints and textures can be found here:

VALLEJO PAINTS

Woodland Scenics Scatter here:

WOODLAND SCENICS

and Gamers grass here:

GAMERS GRASS

All are available post free at the time of writing.
Geisha Spy

I’m still very much enthused by the Test of Honour Game and my only regret at the moment is that I’m not getting enough game time in! However, I still have my Napoleonic project lumbering away and having just finished 18 British Lifeguards with another 6 about to hit the paint board, I fancied painting something different. I remembered that I had yet to paint the limited edition Geisha Spy that was released with the bundle, so I thought I would spend a few nights painting her.

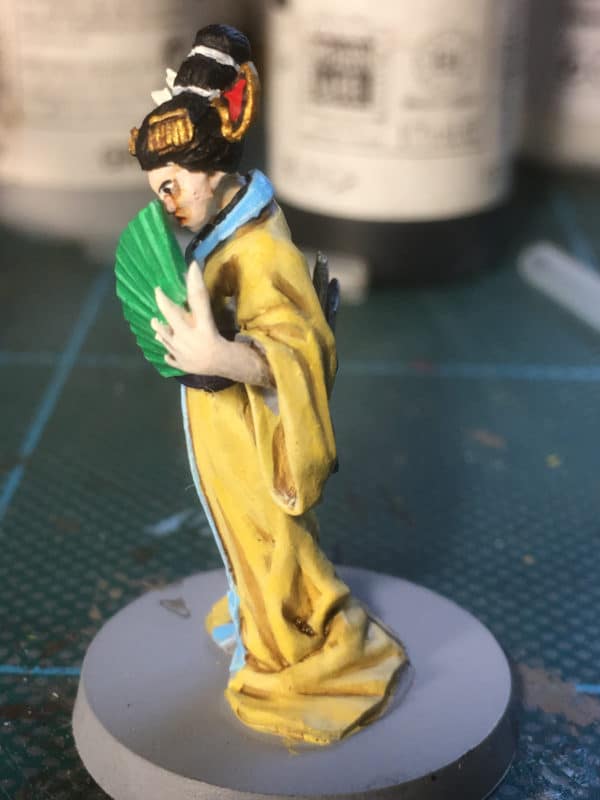
Geisha

Geisha

I had already done some research on Geishas wearing Kimonos (not the most unpleasant of tasks…) and collected some pictures onto my Pinterest board here:

SAMURAI PINTEREST BOARD

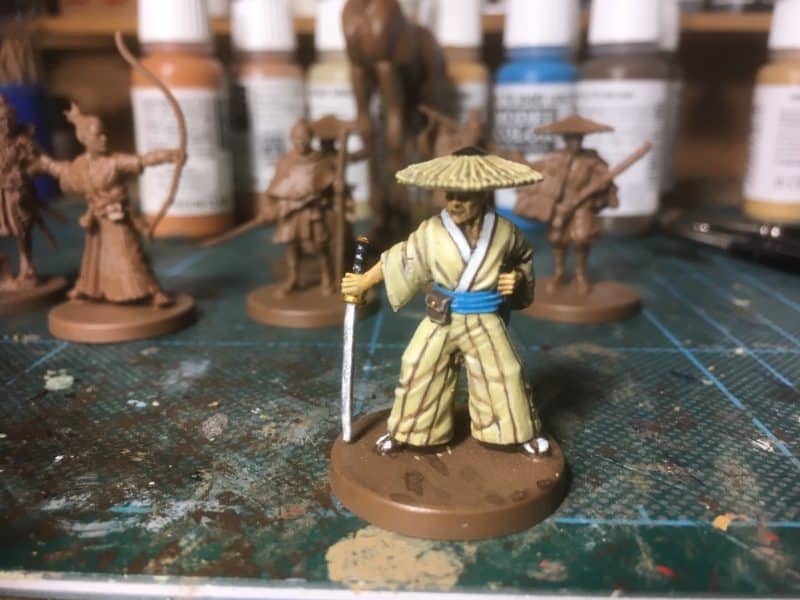
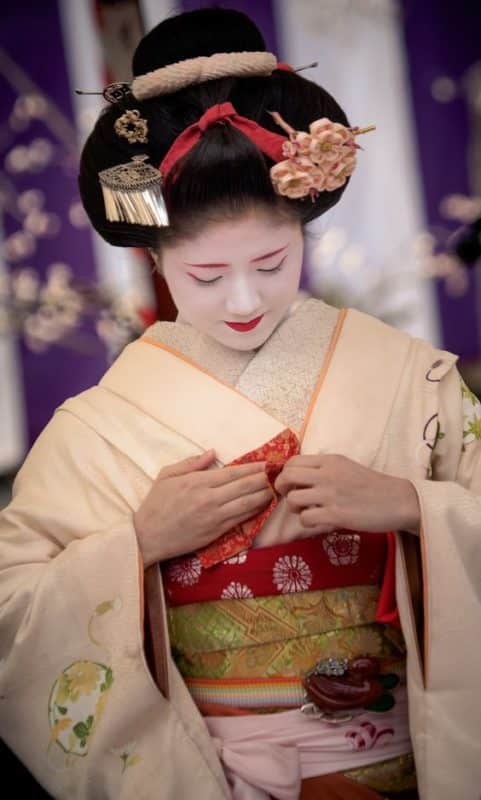
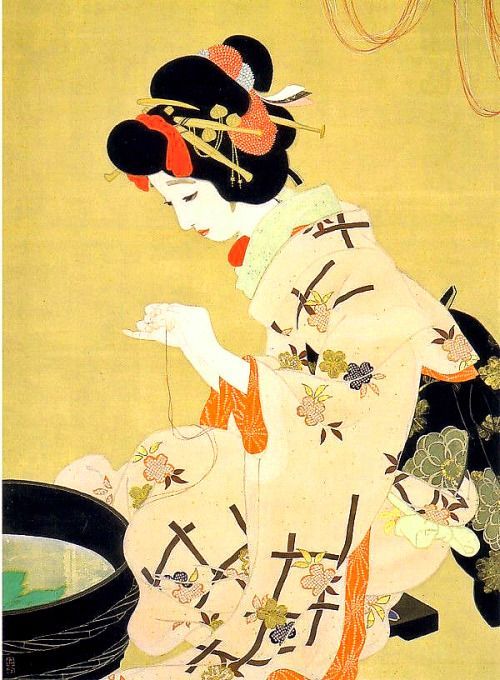
I tend to think about projects in advance and often will put together a reference board way in advance of actually painting the subjects. If you check out the rest of my boards you will guess what my next Napoleonic theme will be if I ever finish my British! I digress, the pictures are very inspiring but way beyond my painting capability. So having given the overall colour scheme some thought, I went with a similar scheme that worked well on my unarmoured samurai. They came as a pair so I thought that I would keep to the same pallet. The picture below sort of captured the look and colour scheme that I was after.

1b40b372c2d48b1e410b4a433a2f3016

So one evening was spent cleaning up the model, assembling it, filling the gaps that seem to appear around the joins on the hand and priming in a neutral grey, my preferred primer colour. The initial colour blocking was quite straight forward. The model is beautifully cast and molded so it was a very straight forward task to paint. I used all Vallejo Colours. The main kimono was painted in Sand Yellow 70916, the trim, Sky Blue 70961, the Kimono sash, Dark Prussian Blue 70899, Hair, Black 70950 and skin tone was done using Light flesh 70928. I did think about using white for the face but many of the pictures show Geishas with a pale flesh rather than the full white make up and I preferred this. The fan was painted in green…for the time being…

Geisha with first colours blocked on

Geisha with first colours blocked on

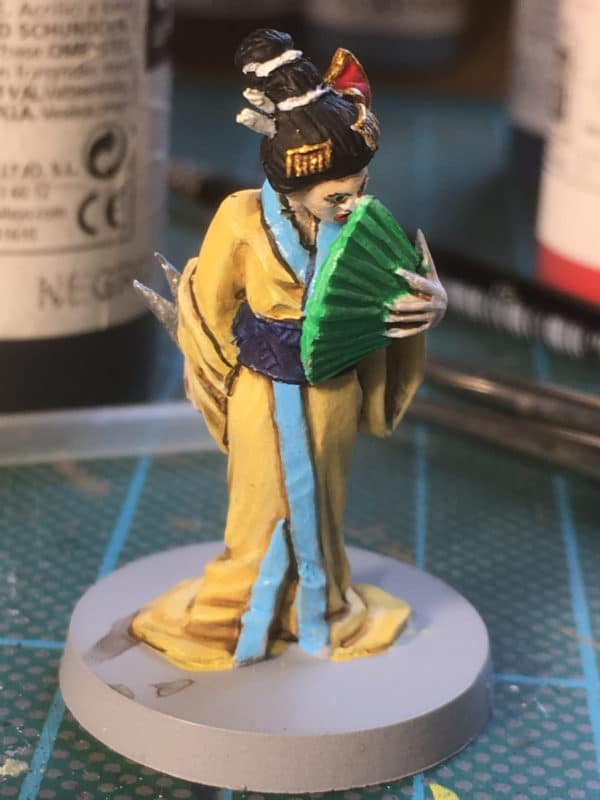
To add shadows and depth to the kimono, I gave it a wash of thinned down army painter dark tone ink. This helps me to see where the folds in the cloth lie and hence where the shadows would be. I then repainted the Kimono with the sand yellow, leaving some of the darker shadows. I then added some white to the original colour to add some highlights to the top of the folds. I also used a very fine brush to add some dark lines to the deep folds and creases and the borders of the sky blue trim. I used a skin wash to add some shadow to the face but this was watered down until it was practically clear. It just added enough shadow to the face and neck.

Black lining and details to hair ornaments etc added.

Black lining and details to hair ornaments etc added.

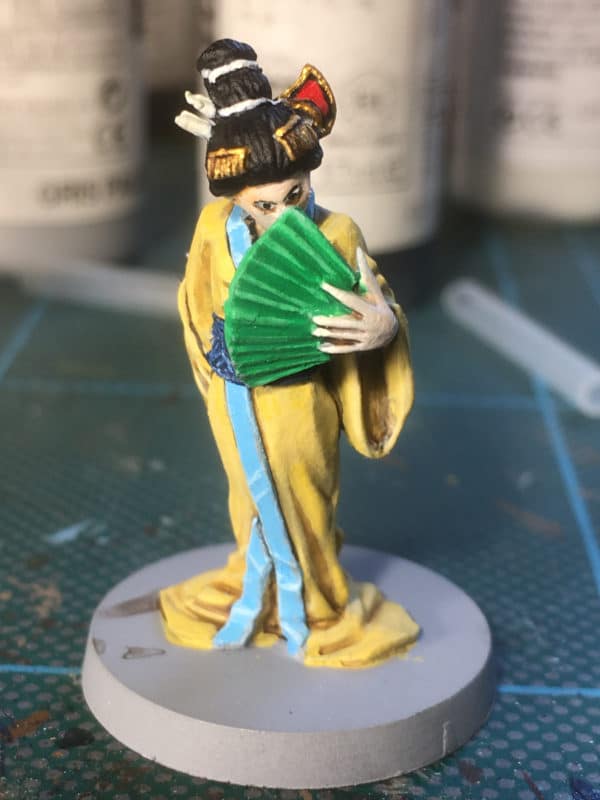
I then painted in the eyes – I’m not good at these! The next step was to thin down the black lining and shadows by over painting and to add a bit more detail to the hair ornaments. I also added some highlights to the sky blue Kimono and the sash. The sash was easier to do than I thought. I first dry brushed it to show where the detail was and then carefully painted on the ‘stripes’ in a lighter blue.

Face & eyes done. More highlights added to the trim.

Face & eyes done. More highlights added to the trim.

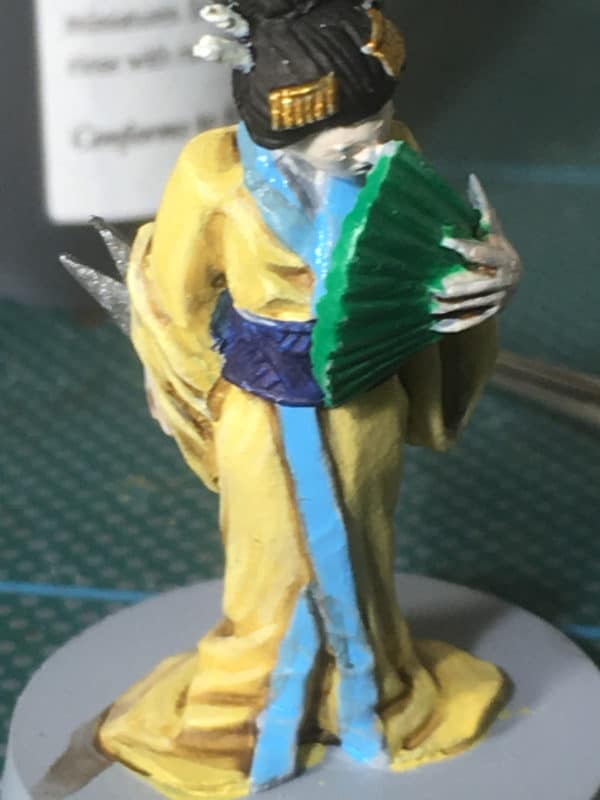
I use the photographs as a way of reviewing my work. It allows me to see the model and pick up on any obvious errors. In the next picture, you can see that I had missed painting part of her sleeve – I couldn’t see this in ‘real life’!

spot the missing paint!

spot the missing paint!

Despite constantly picking up errors and correcting them, there was still something very wrong with the figure. It some how wasn’t working. I asked Rob, a colleague at work what he thought the problem was. It was obvious, the fan was the wrong colour! The green just wasn’t working. We had an interesting discussion  on colour theory but the upshot was that I had introduced too many colours onto the model. I over painted the fan in light blue and it instantly looked better.

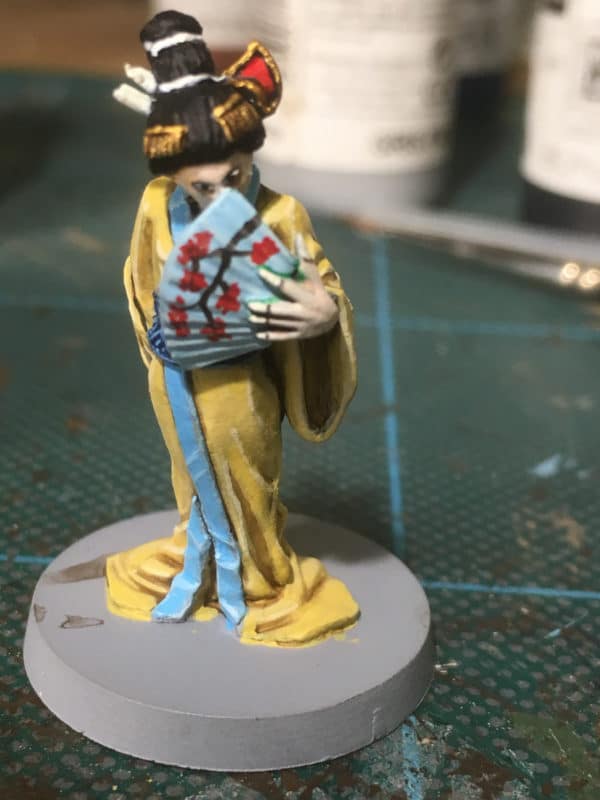
a new fan!

a new fan!

Once again, using my pinterest boards as a reference, I painted a simple cherry blossom design onto the fan and added a few further highlights to the kimono. I also added her finger nails in Ivory 70918 and touched up any more obvious mistakes.

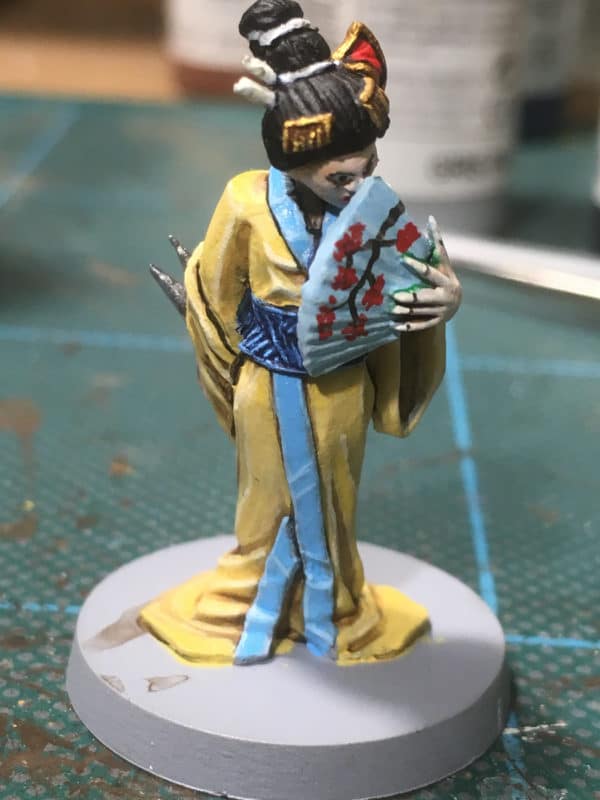
Nearly there!

Nearly there!

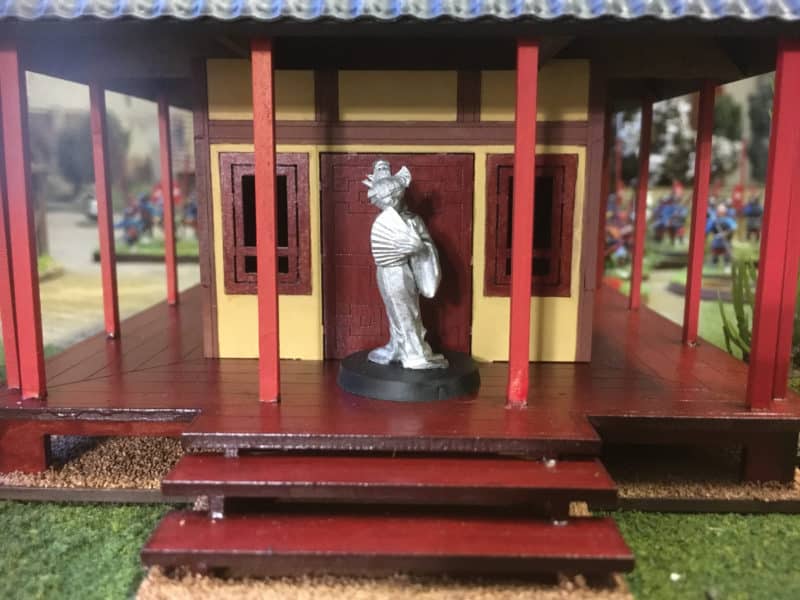
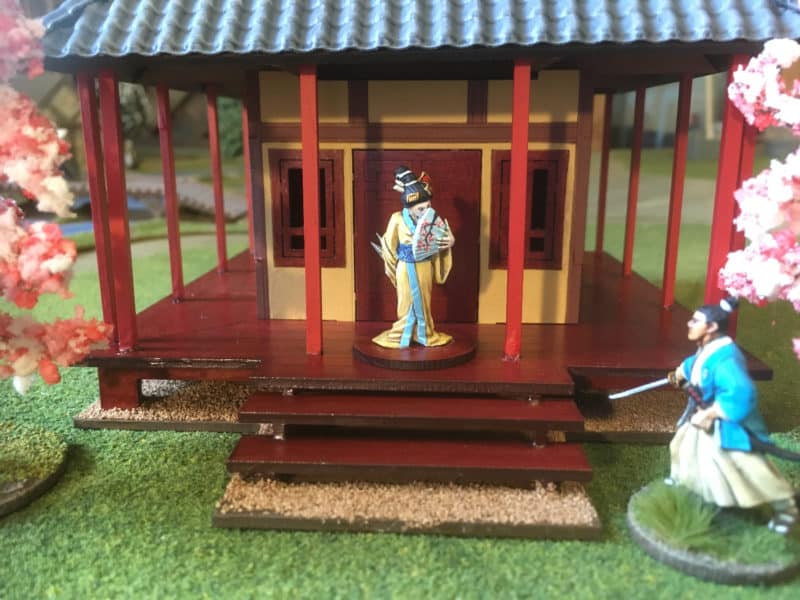
The final stage was to add some pink and white to the cherry blossom to the design on the fan and to re base the geisha on a plain MDF base that I had painted to match the Sarissa shrine that I had previously completed. My Geisha Spy was ready for the table!

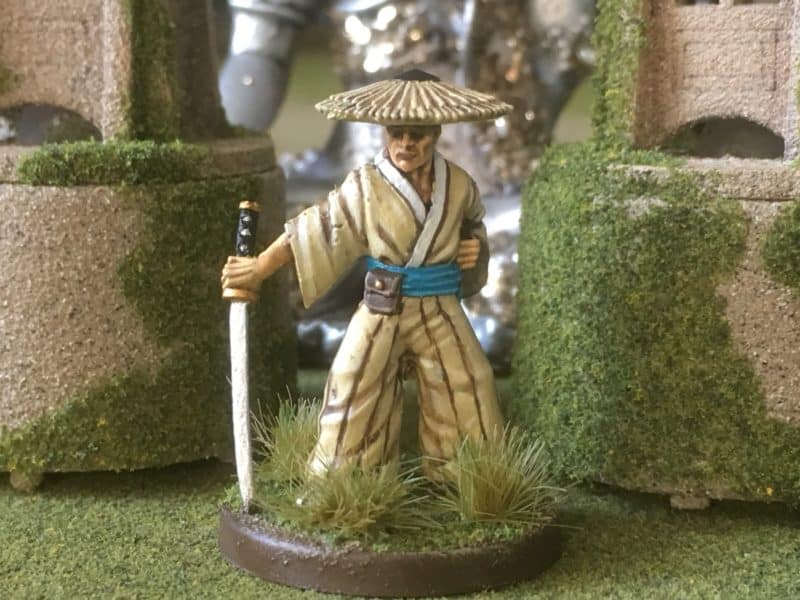
Geisha spy at the shrine.

Geisha spy at the shrine.

The geisha was a most enjoyable model to paint and certainly stretched my painting skills. It made a pleasant change from painting Napoleonic units! Although close up, there are still a few errors and the paint job isn’t as smooth as I would like,  she looks great at a distance and is a nice addition to my collection!

If you would like to join the fun with the Test of Honour game we have a full range available in our shop here:

SAMURAI RANGE

All the paints used are also available from our Vallejo range here:

VALLEJO MODEL COLOUR

Incidentally, if you are looking for a specific colour, rather than browse through all the 200+ colours listed, just put the number into the search bar. So sky blue is 70961:

Search result

Finally, at the time of writing, all products, except aerosols, are post free to most world wide locations! I hope that you enjoy your modelling!

Backwards to go Forwards

I’m afraid that my modelling and painting have been very much curtailed this week. I decided that it was time to tidy out the garage, or as it now is, my wargaming room and have a good tidy and cull of some of the ‘rubbish that I have been collecting. I think that ‘collecting’ or hoarding, to be more accurate, is a spliced on gene that most wargamers possess.
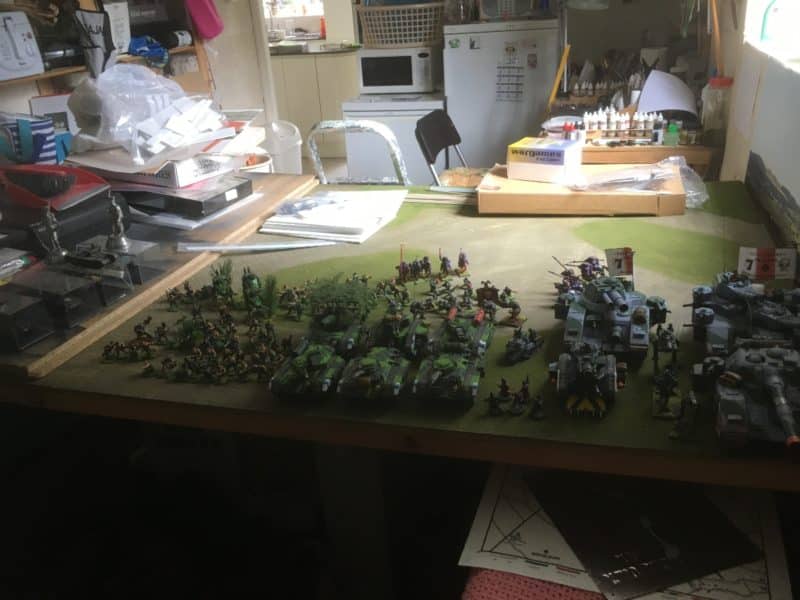
Tidying the workshop started with dusting down some of my own models.

Tidying the workshop started with dusting down some of my own models.

Fortunately, Julie, my wife, has been away for a break so I could get on with making a mess whilst sifting through some of my collection of models and spare bits. Quite why I have kept so much of it, I really cant explain. I guess you never know when you are going to need that off cut of Teddy Bear fur to do some thatching on a Dark age building and those bits of balsa are sure to come in useful one day. Some of the stuff is just weird – bits of electrical appliances, widgets from beer cans ( yes, seriously!), even deodorant bottles. I wonder what other modellers keep in their bits boxes, just in case…..

To be fair, I have been building models for some 54 years now! I’ve been through many phases, from radio control Airplanes, Boats and Yachts; Scale plastic models in all scales, Science fiction Modelling – yes, Star wars and Dr who, through to wargaming via 40K and now Historical. So, another clear out was due to make way for the next lot of useful bits that I might acquire! The biggest problem that I have is getting rid of models that I have completed. I just don’t like to sell them. As well as being a record of my hobby, they hold many happy memories. Occasionally, one gets broken beyond repair and ends up in the spares box, but by and large I have kept many of my models – here are just a few of them taken at random.

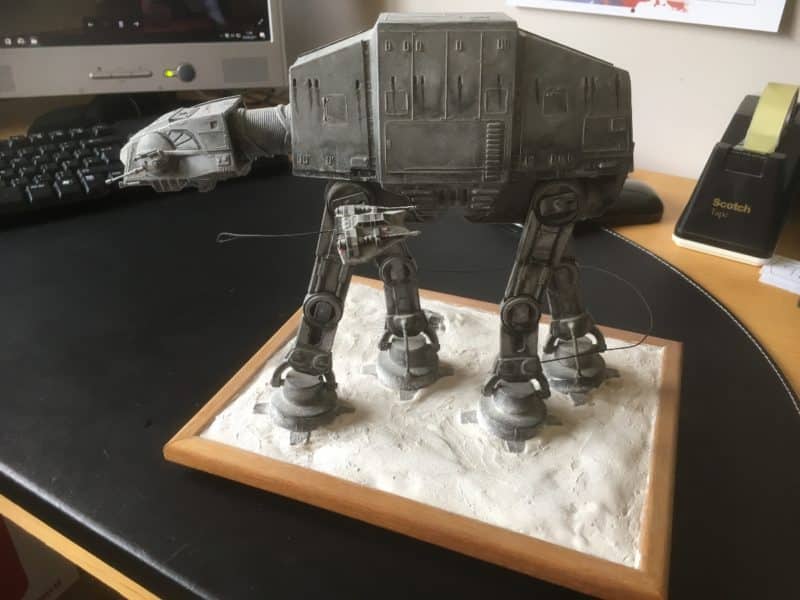
At-AT diorama

At-AT diorama

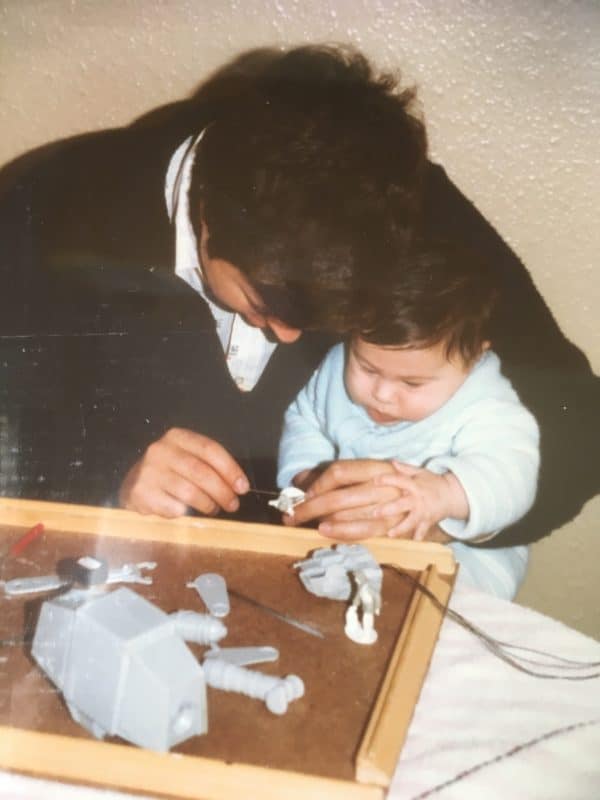
This At-At diorama was built some years ago when I was into my Star Wars phase. I think that the kit is an MPC one produced back in the ’80’s. I have a number of Star Wars dioramas that I have built – Unfortunately Jar Jar Binks cured my of my Star Wars obsession but the latest films have perhaps redeemed the franchise. Here’s a picture of me building the AT-AT with my son – as he is now in his 30’s, you can see that it was a while ago…

Building the AT-AT

Building the AT-AT – home made work board!

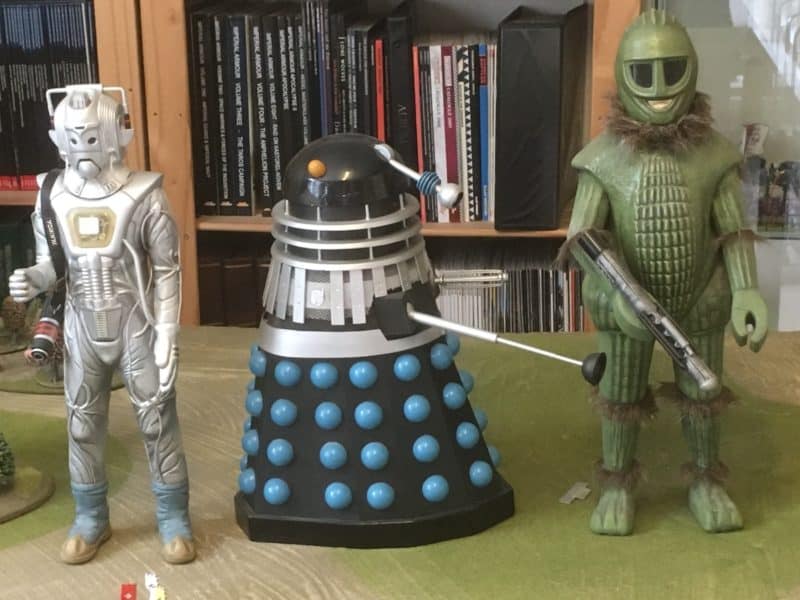
I also had a thing about Dr Who. There was a series of models made by a company called Sevans. The models were large scale and took some building as they used a variety of materials. The intention was to build a collection of characters, including the Tardis. I managed three models as below.

Cyberman, Dalek and Ice Warrior

Cyberman, Dalek and Ice Warrior

The Dalek was radio controlled and had LED lights in the ‘head’. Unfortunately, the motor interfered with the Radio control so after a few crashes I gave up on it! It did amuse the family though! I may yet get back to this collection. I have a model of Davros in the loft somewhere!

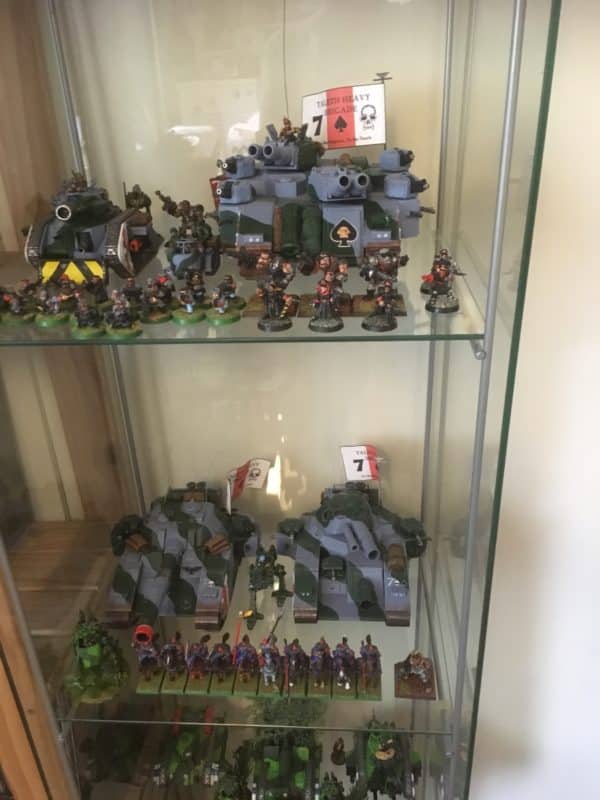
From Science Fiction modelling, it was an easy step to get drawn into wargaming with Games Workshop 40k figures. I was an early adopter of the new ‘Rogue Trader’ rules and figures. However, due to work commitments, I initially did very little gaming but spent much of my time painting and modelling. I do enjoy the process of scratch building, although at the time, a lack of both money and to be fair, availability of the models pushed me in this direction. The cabinet below contains my own scratch built Bane Blade and Variants – all made with recycled plastic card and based on plans in White Dwarf Magazine.
Taleth Heavies - just one part of my Imperial Guard Army!

Taleth Heavies – just one part of my Imperial Guard Army!

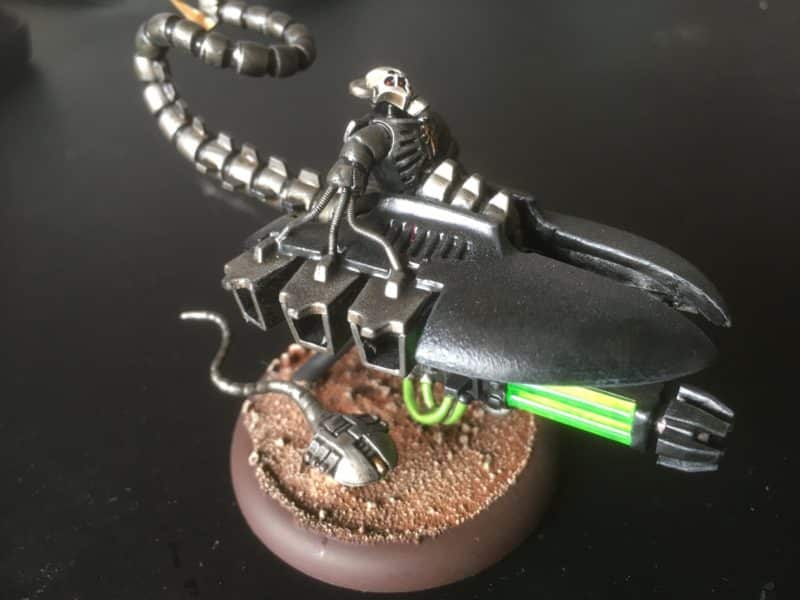
My last phase of 40K was the Necrons. A shame that I actually got tired of waiting for GW to update the Codex and release new models as I have a huge collection of Necrons – some 7000 ‘old points’ and at the time every variant that they had released. In fact, to introduce some variety into my army, I started to convert and build my own models.

Necron Destroyer variant with 'drone 'Scarab.

Necron Destroyer variant with ‘drone ‘Scarab.

I still have a soft spot for Necrons and might just add some of the later models to the collection if ever I am bored or fancy a change from painting my historical armies….

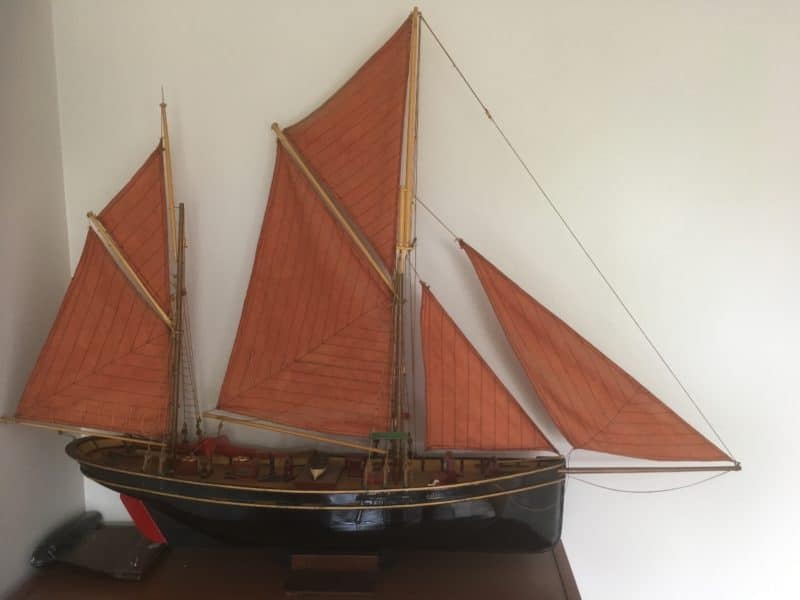
Brixham Trawler Valerian

Brixham Trawler Valerian

The model above was actually scratch built by my Dad. Its a working scale model ( in that it sails!) of a Brixham Trawler, The Valerian. It is of course very precious to me and a reminder that it was my Dad that got me into the hobby. It’s given me endless hours of pleasure and an escape from every day life and its ups and downs. I profoundly hope that your hobby does the same for you.

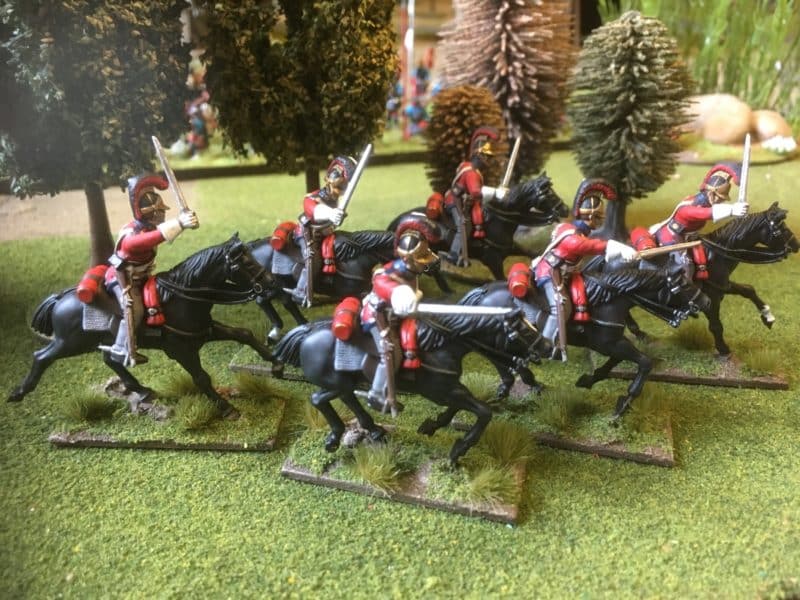
Thanks for reading a bit of a self indulgent blog this week. The Man Cave is just about finished so I should get back to painting this week. The aim is to get back to painting Napoleonics – I have a regiment of Lifeguards to finish!

British Life Guards

British Life Guards – more to come!


Scenery for Samurai

It’s funny how once you get into a groove, it’s difficult to get out of it, particularly if you are having fun! I had finished all of the original Test of Honour figures as detailed in last weeks blog and my intention was to go back to painting my beloved Napoleonics. I did mention that I fancied painting some buildings but they were going to have to wait. However, having had a couple of really fun games of TOH at the club, I decided to get on with making some scenery.

I had some plastic aquarium plants that my brother had sent me, kicking around the back of my work bench and I had long admired the Sarissa Temple Shrine so I thought that I would make both bits of scenery. It may seem like a strange combination but sometimes two slightly different projects are as fast to do as one. Whilst one piece is drying or setting, you can get on with the other. Having just two projects is about right for me as I don’t loose my concentration!

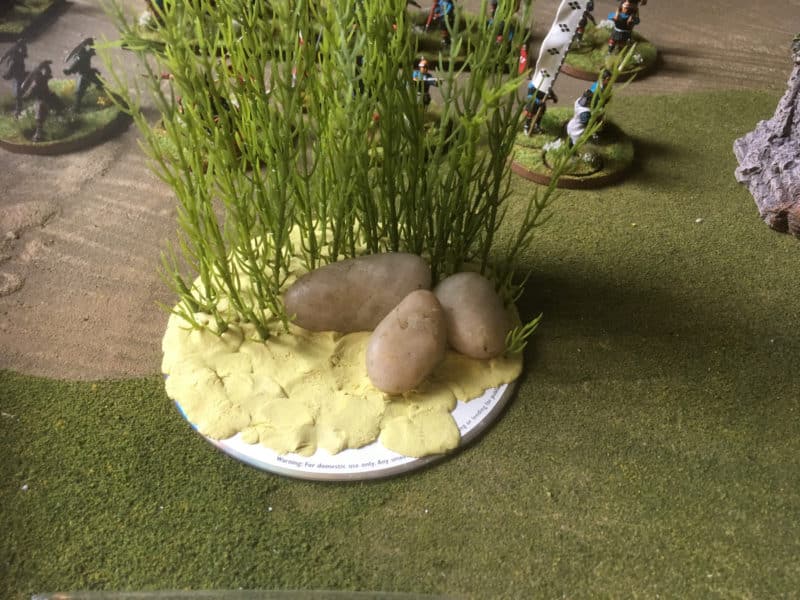
'Bamboo grove' assembled.

‘Bamboo grove’ assembled.

The ‘bamboo patch’ was the first on the work bench. I already had an idea how I would make it and stole an idea from John Grant at the club, who uses old DVD or CD’s as his bases for scatter scenery. I’ve got plenty of these kicking around as they were giving out DVD’s with some newspapers in the past. Quite why I thought I would need a documentary on Pilates escapes me now but at last it was going to be used for something useful. So using the label side as the base I partially covered it with milliput, pressed three pebbles that I had grabbed from the garden (I didn’t even bother to wash them!) and just stuck the tall aquarium plants straight into the milliput as shown above. I used some cut down pieces at the edges to taper the height but otherwise, assembly was as straight forward as it looks.

Building the Sarissa Precision Japanese Temple.

Building the Sarissa Precision Japanese Temple.

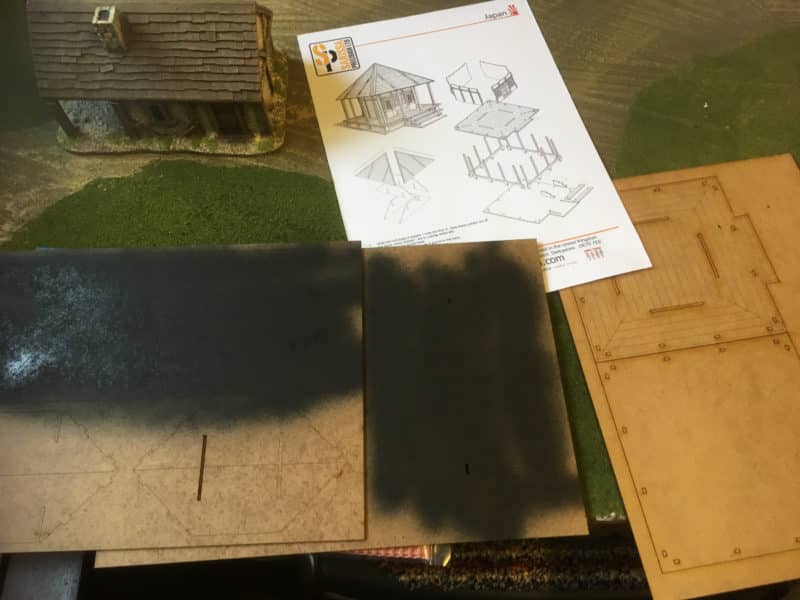
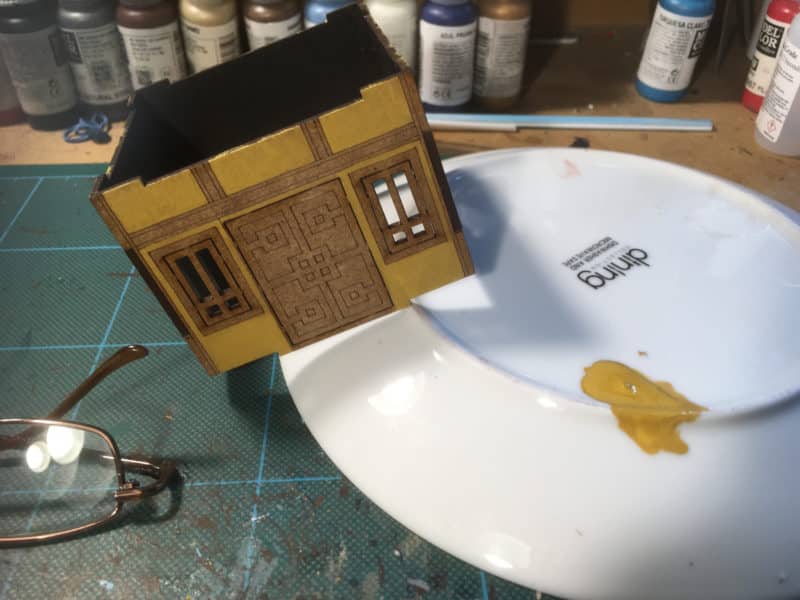
Whilst the milliput was setting, I turned my attention to the Sarissa Temple. These laser cut buildings are just superb in my opinion and actually look fantastic whether painted or not. I like to ‘pimp’ them up a bit and in this case I had decided to paint the building and add some tile effect to the roof. Before assembly, I lightly sprayed the back of the interior pieces with black primer. This was just to keep the inside of the building black as I didn’t want the MDF showing through the windows. It’s not a necessary stage but does improve the finished model. If you plan to paint the interior, now would be a good time to do it.

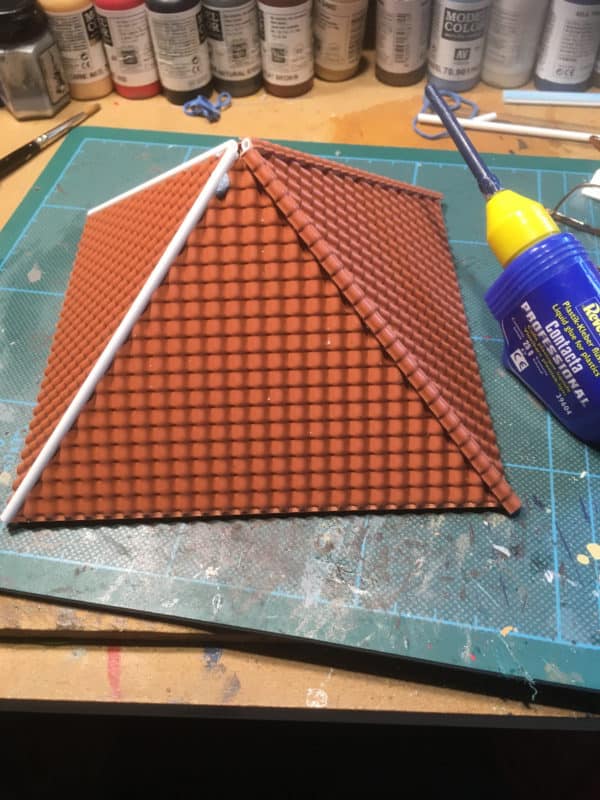
Before I assembled the roof, I used the panels as a cutting guide for the textured plastic sheeting that I was going to use. It is actually ‘O’ Scale or 1/48th scale Spanish Tile textured plastic card from JTT products. It’s thin enough to easily cut with a sharp scalpel and the only thing to bear in mind is to make sure that the tiles are running the right way on the roof, ie. downwards! I then used super glue to attach the sheet to the MDF roof pieces, although a contact adhesive would have been a better option – my tube of Bostick had dried up though, so super glue did the job. I then assembled the roof as per the kit instructions.

Tile sheets glued to the roof.

Tile sheets glued to the roof.

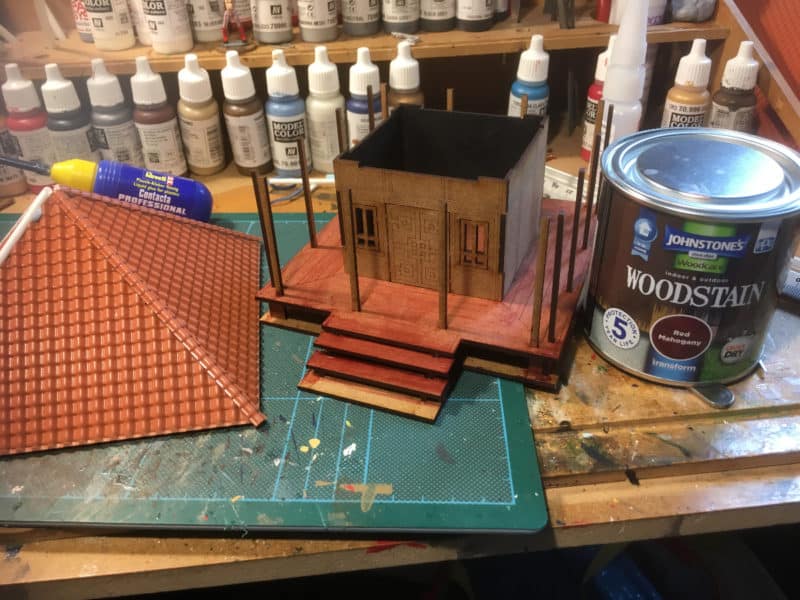
Once the roof was assembled, I used 1/8th evergreen tube pack 224 to fill the corners. The picture above shows my progress, with the tube blu-tacked into place to test fit before gluing to the tile sheet. I then covered the tube with a strip of single tiles cut from the tile sheeting. At this stage, I used standard polystyrene glue as you can see from the picture. I assembled the rest of the building but did not glue the centre to the platform so that it was easier to varnish. I used the red mahaogany woodstain shown in the picture straight from the can and applied it to the MDF without any preparation. It took around four coats to give me the gloss effect that I was looking for.
Applying the varnish

Applying the varnish

In the meantime, I got on with painting the building itself. I used a Vallejo yellow ochre although the last coat was a mix of 50:50 Yellow Ochre 70913 with Beige 70917 to lighten the effect as it looked too yellow to me. I painted the door and window with the woodstain and then the timber with Vallejo Mahogany Brown 70846.

yellow ochre applied

yellow ochre applied

In between coats drying I went back to my Bamboo scenery piece and once the milliput had dried, coated the base with Vallejo dark earth Textured paste. It was easy enough to apply using a small spatula and a brush to get in between the plants. Once this was dry, I painted it Vallejo Chocolate Brown 70872 and I was ready to start dry brushing!

Ready to dry brush!

Ready to dry brush!

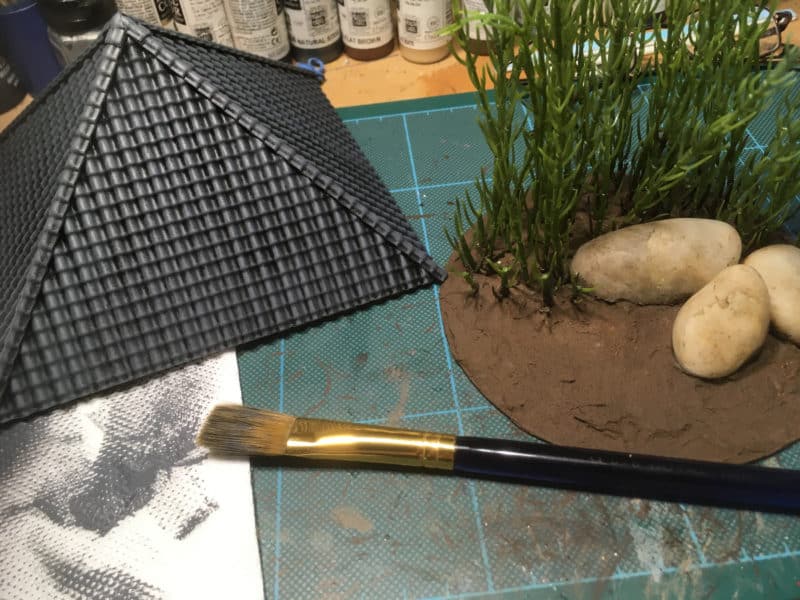
I had sprayed the roof tiles black as I wasn’t keen on the terracotta effect. With hindsight a dark grey would have been a better choice. So it was a case of dry brushing the roof with a mixture of greys and the bamboo base with a chocolate Brown/Iraqi Sand mix.

Dry Brushing complete - well not quite - more grey needed!

Dry Brushing complete – well not quite – more grey needed!

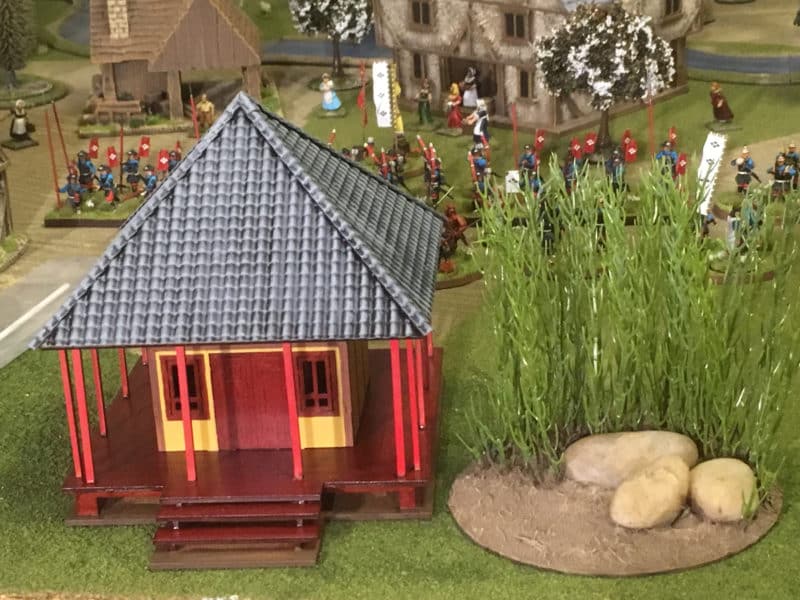
The picture above shows the shrine assembled with the posts painted a bright red 70947 to match the Tori Gate that I have previously completed. Once I had taken this photo I decided that I needed to go heavier with the grey as too much black was showing through the roof. I had also painted the base of the house in Chocolate brown ready for some scatter. The bamboo looked OK – some additional grass scatter & texture was needed.

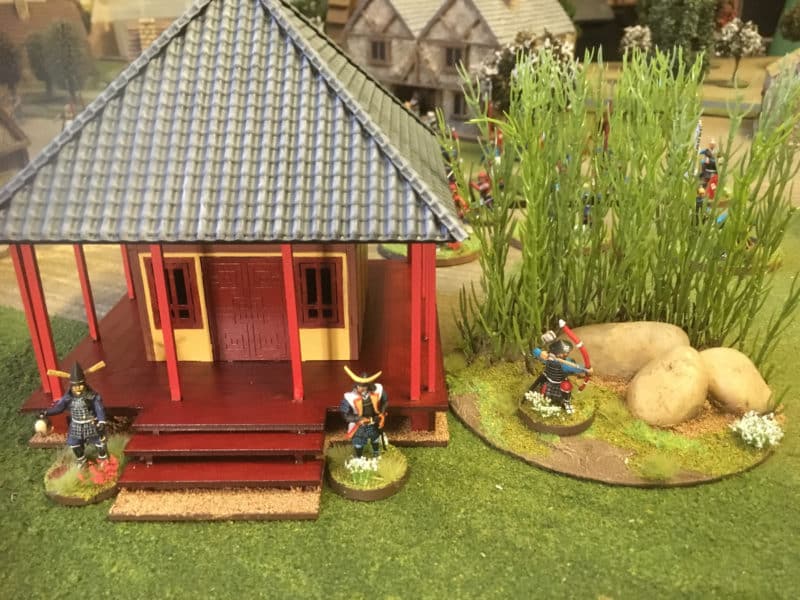
Temple & Bamboo finished

Temple & Bamboo finished

The Picture above shows the two pieces completed. I have added some brown ballast to the temple base and my usual mix of scatter & tufts to the Bamboo scenery. I perhaps will add another highlight to the roof tiles but I think that the lighting in the picture doesn’t show it at it’s best. So, now that these two pieces are complete, I really must get on with my Napoleonic Cavalry brigade. However, the Geisha would look nice as part of the shrine….

I think I have my next TOH project lined up....

I think I have my next TOH project lined up….

The commercial bit.

Most of what I have used is available post free at the time of writing to most worldwide locations from my shop. Some items may go in and out of stock – we only list what we have in stock ready to dispatch- the links take you to the correct sections in my shop but if you are having trouble finding anything  drop me a message.

For the range of Sarissa Japanese Buildings and other Samurai items, including the Test of Honour sets click here:

ARCANE SCENERY SAMURAI RANGE

For Glues and Adhesives;

ARCANE SCENERY ADHESIVES RANGE

For milliput

ARCANE SCENERY MILLIPUT

For Texture Paste

VALLEJO TEXTURES

For Vallejo paint

VALLEJO PAINT RANGE

For textured Plasticard

PLASTICARD, PLAIN AND TEXTURED

The woodstain came from Boyes hardware shop and the pebbles from my garden! I’m still trying to source bamboo!

The Last Samurai

No, it’s not a reference to the Tom Cruise film, although I do quite enjoy watching it, but an indication that I have now finished all of the models that came with the original Test of Honour boxed set. Yes, all 35 are complete as well as the limited edition unarmoured figure, that was the first model that I painted. I have to say that given the set was just £35.00, I think that I have already had more than value for money both in terms of modeling and painting time and fun had whilst playing the game. If there are awards for Wargames product of the year, then Test of Honour will get my vote. Now I do have a slightly vested interest, being a retailer of said product but given the number of products that I see, I dont think that it is an unreasonable claim. It certainly takes something special to prise me away from painting and playing Napoleonics! Anyway, enough of the frothing and on to the modelling.
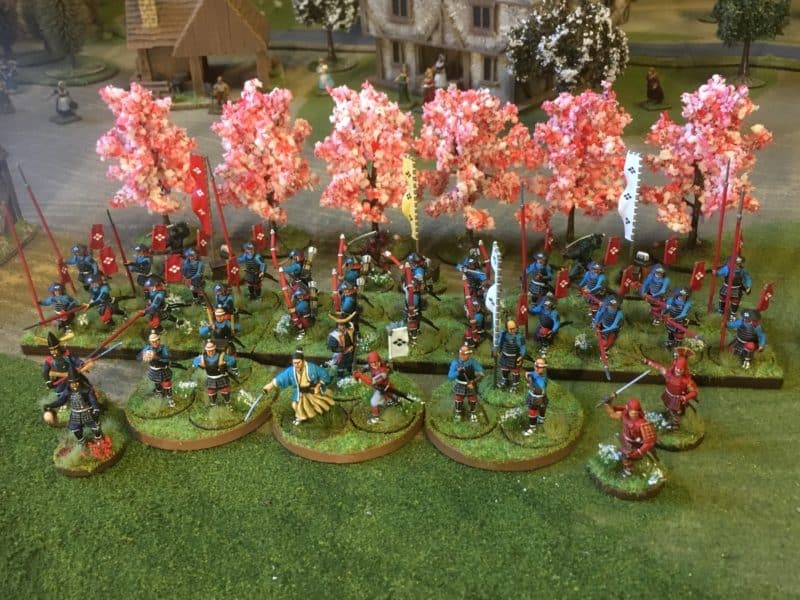
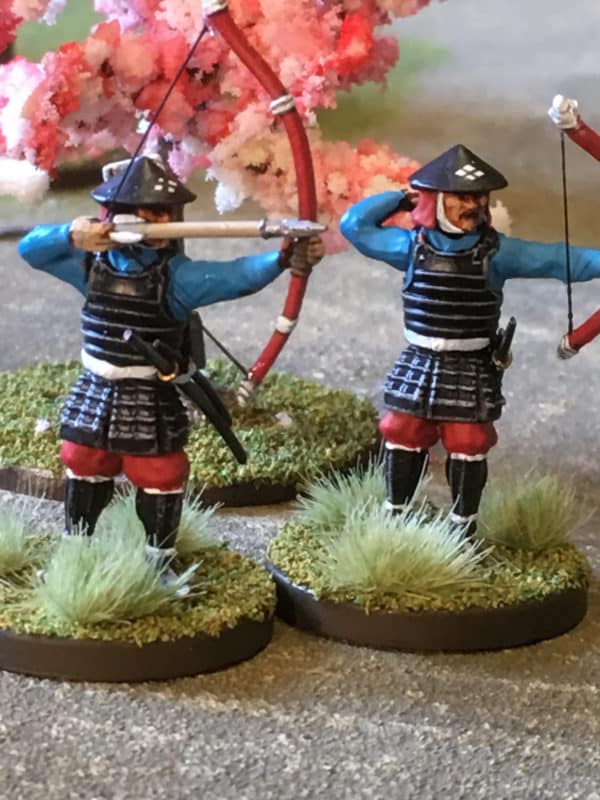
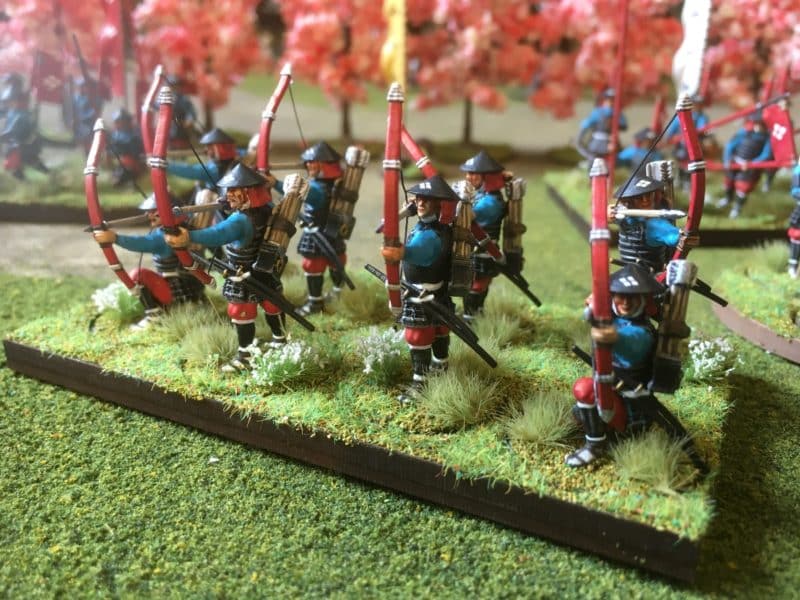
Completed Ashigaru Bowmen -Bow strings attached!

Completed Ashigaru Bowmen -Bow strings attached!

I had completed the 20 Ashigaru figures that came with the set and had been using the metal Samurai that I had painted, the afore mentioned unarmoured samurai and a free figure that came with the ‘Painting War’ Fuedal Japaness issue. I had assembled and painted one of the plastic samurai but I wasn’t happy with the result and had put the final four figures to one side.
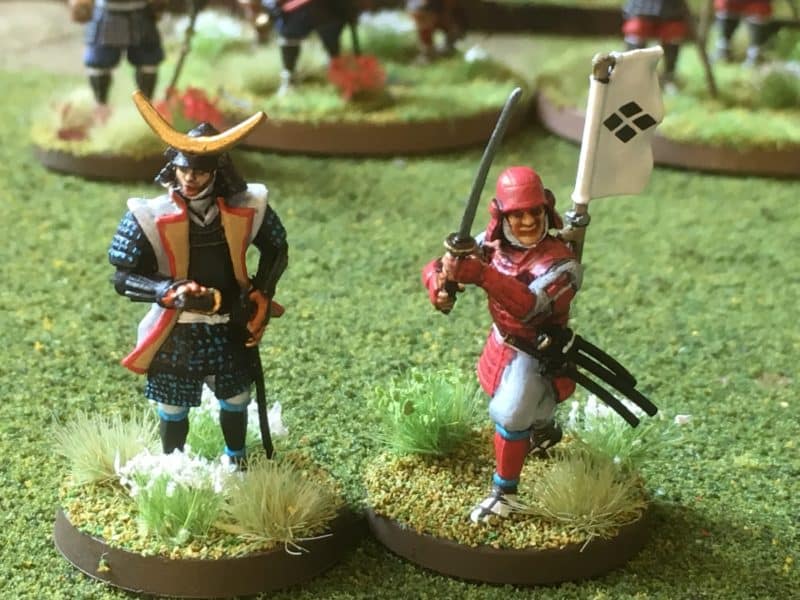
My usual Samurai Team. A Limited Edition Samurai from Painting war and one from the set.

My usual Samurai Team. A Limited Edition Samurai from Painting war and one from the set.

That changed when I was browsing through the Test of Honour Facebook site and a couple of posts had given me fresh inspiration. I then happened upon some really nice pictures on Pinterest and the combination of ideas gave me the push to build the last samurai figures in the set. That energy coincided with a bit of free time at the weekend and in record time (for me) I completed the figures.

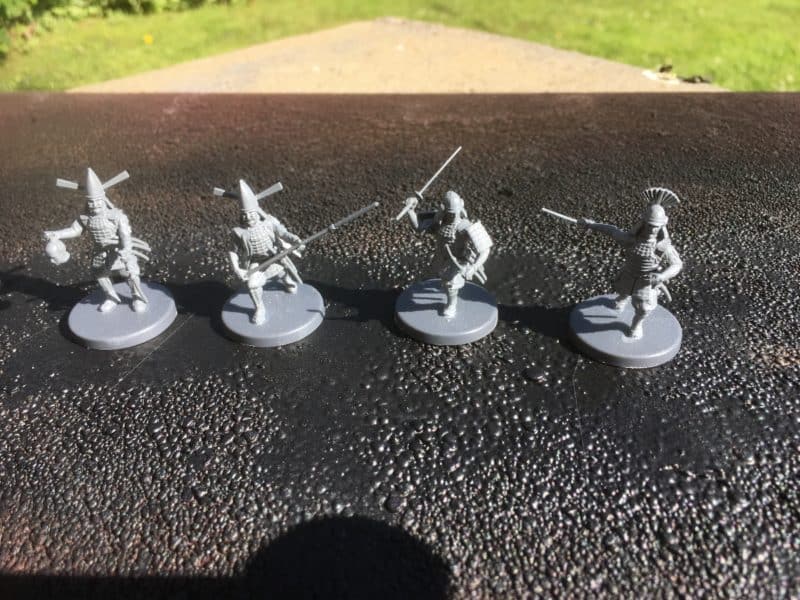
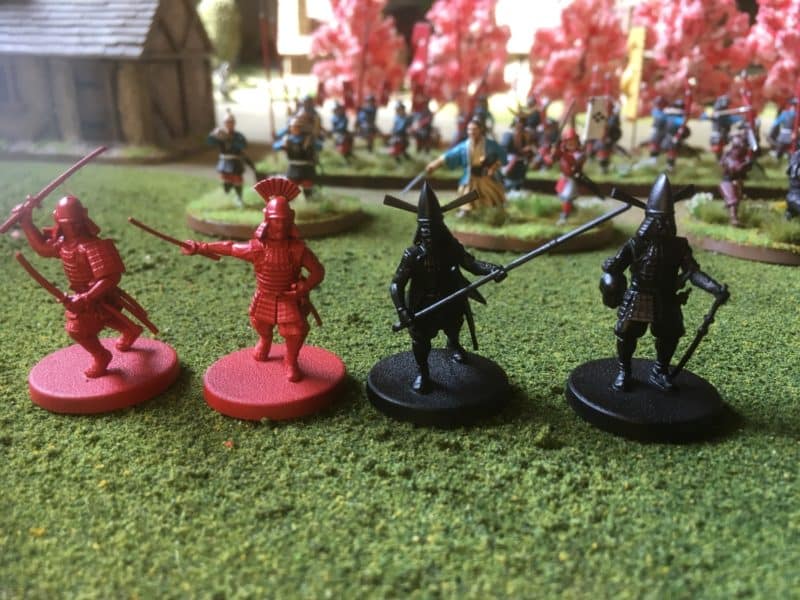
As there were four Samurai left, I decided to make them into two pairs of similar models. It would make painting easier but I could also either use them in a game as a pair or mix them up. Here’s the models assembled.

Assembled Samurai ready for Priming

Assembled Samurai ready for Priming

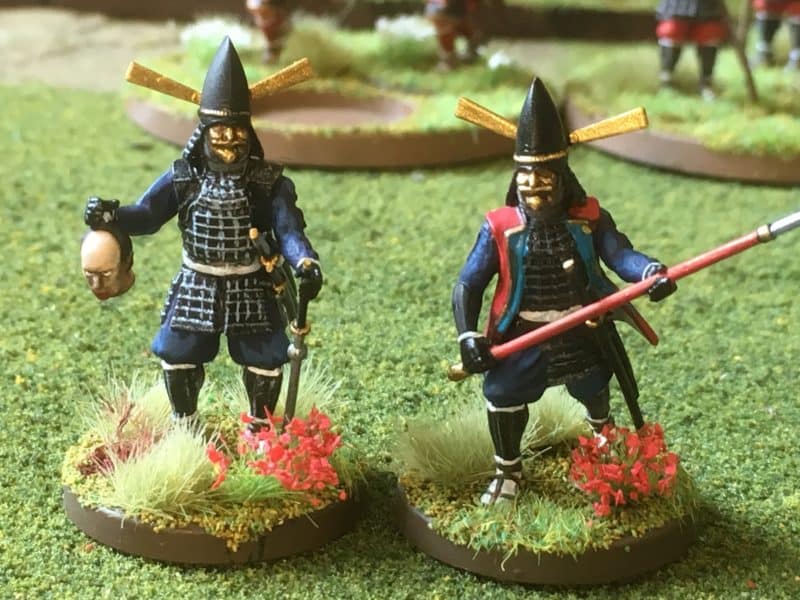
I stole the idea of one Samurai holding a severed head. It’s pretty gruesome but will make a ‘talking point’ for the army! I also liked the Samurai with the straight arm draw – again, a pose that I had seen elsewhere. I used a Black colour scheme for the two samurai with the conical helmets and red for the other two so primed them accordingly.

Primed and ready to paint

Primed and ready to paint

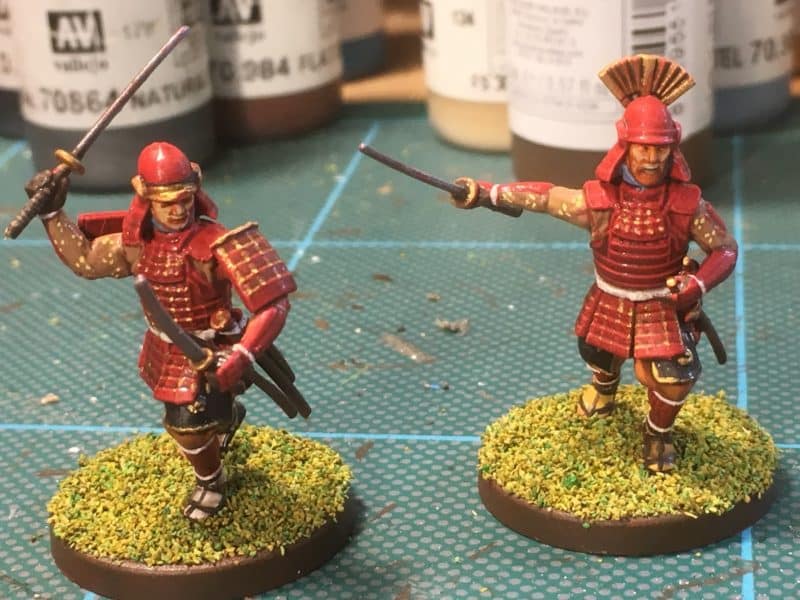
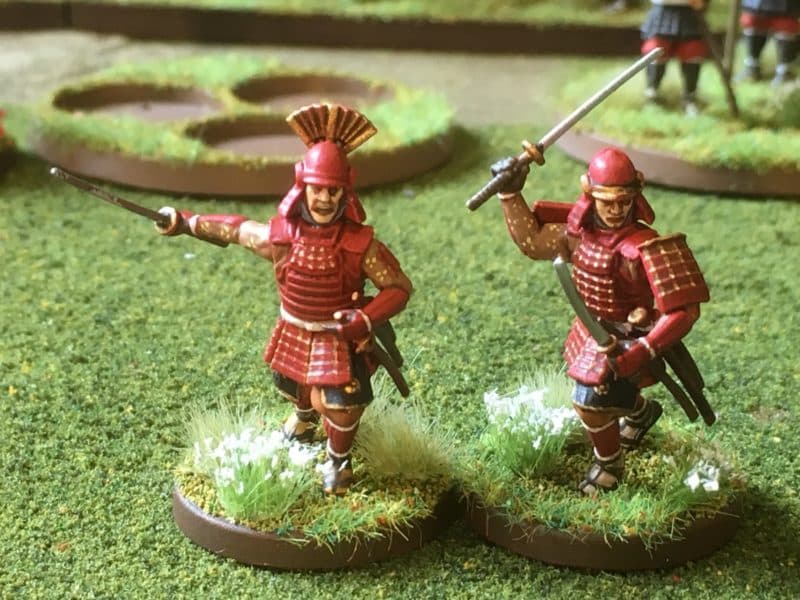
I used slightly different techniques for each pair of models. For the guys in red, I went straight to the paint and blocked out the main colours. I was using my trusty method of block paint & quickshade to bring out the detail. I wont detail all the colours other than to say I had decided that the background colour scheme would be brown, so there is about five different shades of Vallejo brown used. Once the block painting was done, I painted the models with Dark Tone quick shade to bring out the details in the armour. I’ve also tried to add detail to the plates by dotting them with gold. Close up, this looks a bit messy but from table distance I think it’s OK! While I was in the mood for painting dots, I also added some to the tunic arms as they looked a bit bland.

Red Samurai gold dots on the armour and quick shaded.

Red Samurai gold dots on the armour and quick shaded.

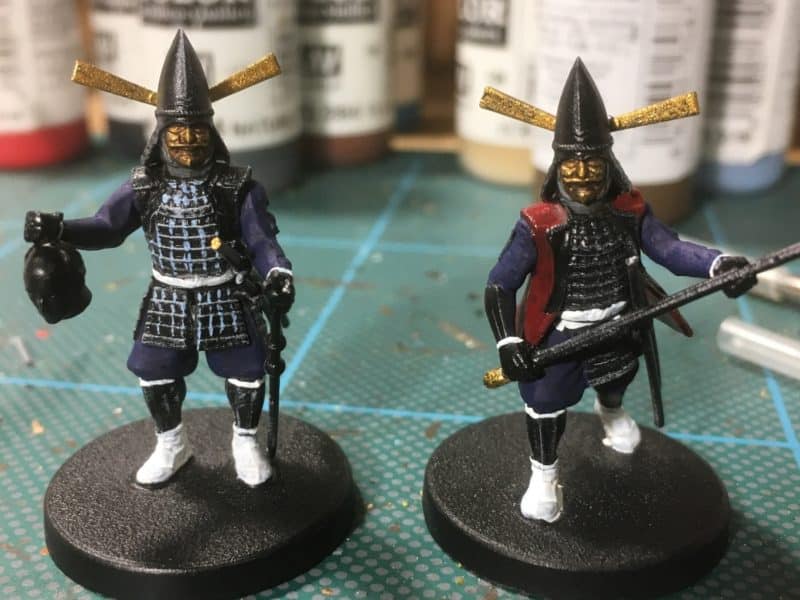
For the Black Samurai, I went back to using a dry brush technique to bring out the detail on the armour. I used quite a light grey Vallejo 70990 and tried not to be too heavy with the drying brush. I then used 70901 pastel blue to represent the stitching. Again viewed up close, it looks a bit rough but with my eyes, it was good enough!

Black Samuraio dry brushed & light blue stitching added.

Black Samuraio dry brushed & light blue stitching added.

As you can see, I only added the stitch to one of the samurai – the other has a cloak and I thought that this would be enough colour without making it look too ‘busy’.

I used Dark Prussian blue for the tunics and highlighted these with Prussian blue. I had considered using a nice dark purple but I didn’t have this to hand and so went with what I had on the paint rack. I also decided to paint the face masks in Brass just to make these Samurai different from the others that I had done. Once the main colours were done, the figures began to look ready for the table.

Nearly complete

Nearly complete

So it was just a case of touching up some of the detail and correcting any obvious errors and then adding some tufts and flowers to the base and the Last Samurai are ready to take to the table.

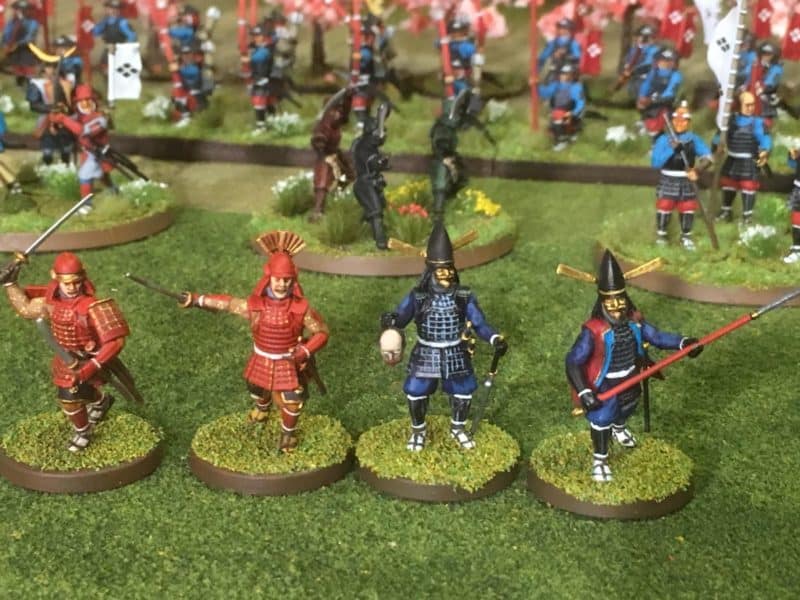
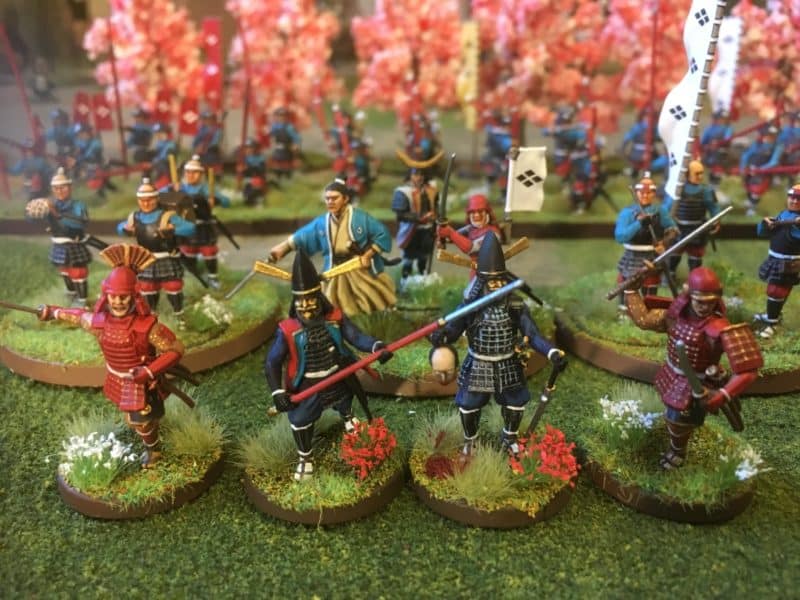
Samurai charge!

Samurai charge!

Black Samurai close up

Black Samurai close up

You may have noticed that I don’t usually paint eyes – the exception in this case is the poor guy who has had his head chopped off – it just seemed to emphasise his fate – glaring at his mates who failed to save him!

Red Samurai close up

Red Samurai close up

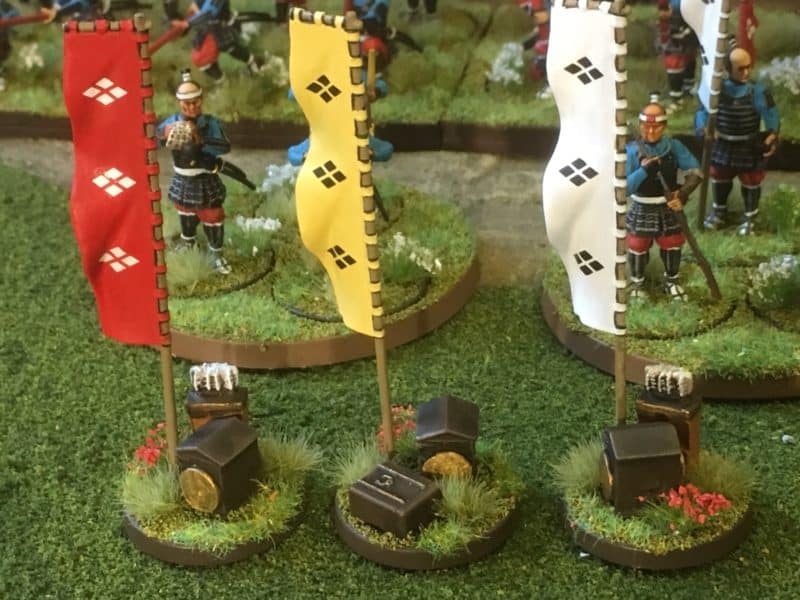
As well as the figures in the set, I also used some of the spare parts to make some objective markers – I have previously posted these on facebook but it’s worth showing them again.

Objective Markers

Objective Markers

So the full Warband looks like this.

Full Samurai War Band!

Full Samurai War Band!

My next project will be to build a bit more in the way of scenery. However, I’m going to take my time. I have a Tori gate, so the next piece will be the Temple shrine. As for figures, I think that some mounted Samurai will be next followed perhaps by the Peasant bowmen. I really enjoyed building and painting the bowmen in the TOH set so a few more wont hurt and I might just go to town converting them into more dynamic poses now that I am familiar with the kits. That all said, I have seen the next batch of figures that will be released in the TOH collection…..they are simply awesome! So the collection will continue to grow!

Ashigaru Bowmen unit

Ashigaru Bowmen unit


The commercial bit:

Test of Honour and the current expansion sets are all available from Arcane scenery, along with Cherry trees, Sarissa Scenery and other useful accessories. We also stock vast ranges of paint, glue, basing and scenic materials. At the time of writing it is available (aerosols excepted) post free to most worldwide locations. Click below to go to the Samurai section:

ARCANE SCENERY SAMURAI SECTION

To have a look at my Samurai Pinterest board click here:

SAMURAI PINTEREST BOARD

To keep up to date with new releases, my modelling blog and other projects, like the arcane scenery facebook page here:

ARCANE SCENERY FACEBOOK 

To see the rest of my blog entries regarding Samurai and Test of Honour, click here:

SAMURAI BLOG

All of the links should open a new window, so you wont lose this page. Have fun!

Ahoy there matie!

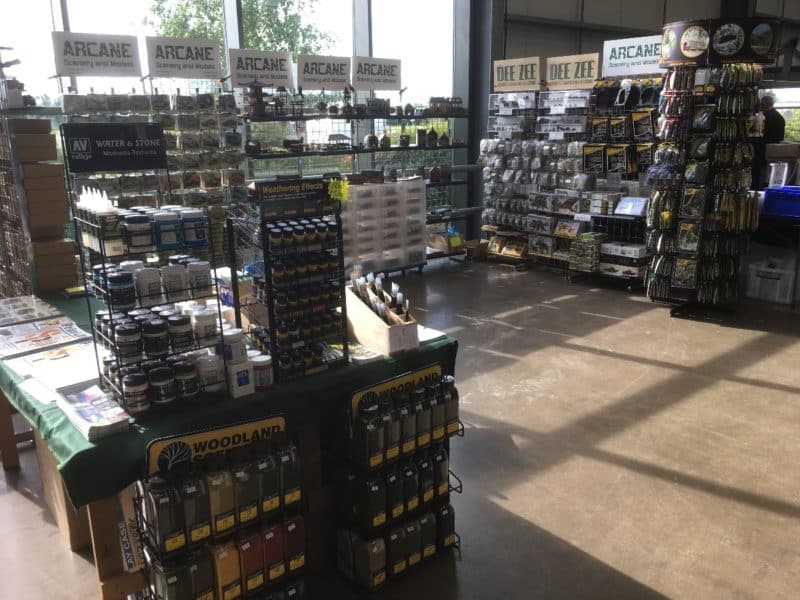
Arcane scenery at Partizan

Arcane scenery at Partizan

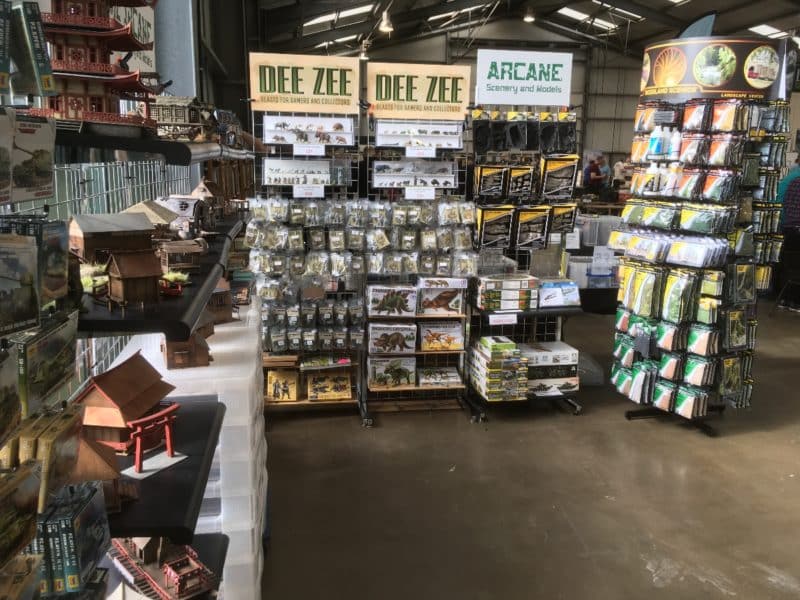
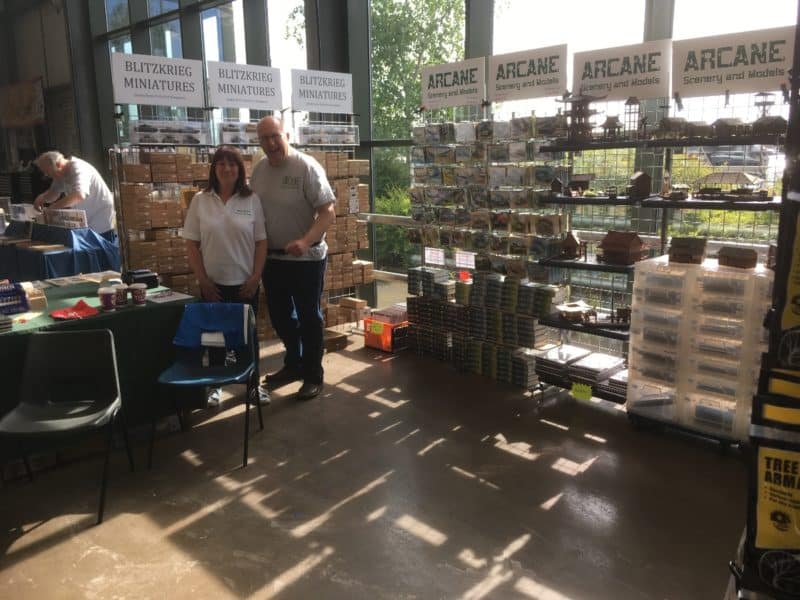
To be truthful, my modelling and painting progress has been curtailed over the last week or so. The weekend was entirely spent preparing and attending the Partizan show at Newark. Normally, this in itself would be the subject of my blog. However, we were so busy that the only time that I left my stand was to go to the toilet – I’m sure that this is too much information – but the upshot is that I have no pictures of the many great games that were on show. As you can see, I do have some pictures of our stand so you can get an idea of how we looked!

Deezee and the new Woodland Scenics range

Deezee and the new Woodland Scenics range

Our Aprentice Pete Harris with Julie. Meanwhile in the background, Duncan is laying out Trent Miniatures!

Our Aprentice Pete Harris with Julie. Meanwhile in the background, Duncan is laying out Trent Miniatures!

I would like to repeat comments that I have made in previous blogs and on social media. Partizan is my favourite show of the wargames circuit, both as a trader and on the rare occasions when I venture out from the stand, as a customer and enthusiast. The new Venue is superb. Well lit, plenty of space and a decent cafeteria and seating area for refreshments. The show team led by Laurence Baldwin, could not be more friendly and helpful. The show is neatly split into four sections; Traders, Historical Societies, Demonstration games ( look but please don’t touch) and Participation Games (get stuck in).

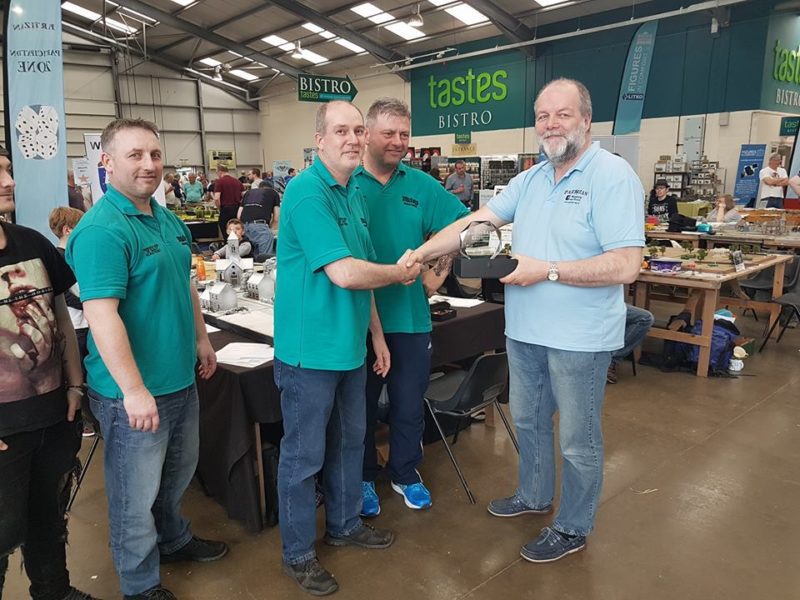
The Blitzkrieg team, Jake, Gav, Paul & Phil receive their award from Show organiser Laurence. Photo courtesy of Wargames Soldiers & Strategy.

The Blitzkrieg team, Jake, Gav, Paul & Phil receive their award from Show organiser Laurence. Photo courtesy of Wargames Soldiers & Strategy.

I was delighted for our colleagues at Blitzkrieg Games as they were awarded the prize for the best Participation game. And well deserved it was too. Their table was constantly in use and the highlight of the day was a fiercely contested battle between  Father & Son that drew in onlookers through the sheer enthusiasm of the game. A fantastic advert for our hobby. Well done to Paul, Gav, Phil and Jake for creating such an open and inviting game. Watch out for Partizan 2. In the meantime if you would like to see pictures of the day, follow this link across to the official facebook page:

Partizan Wargaming and History Show

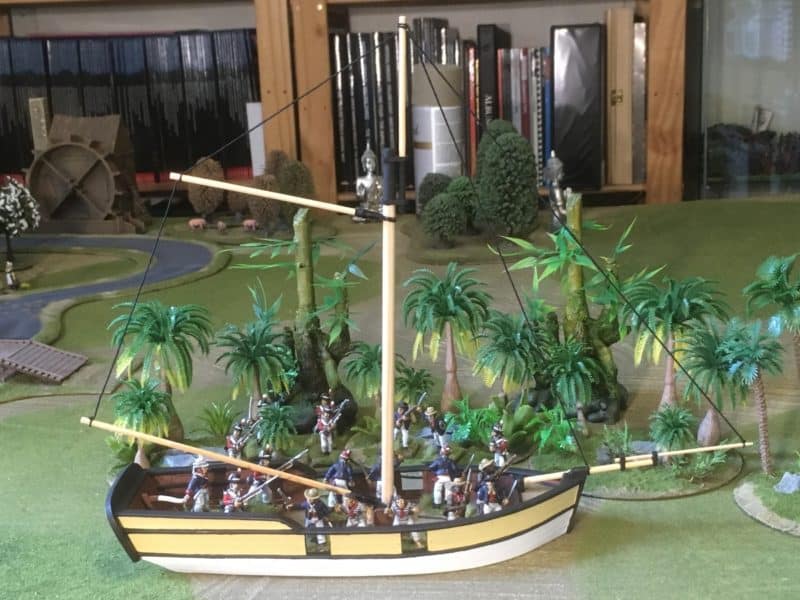
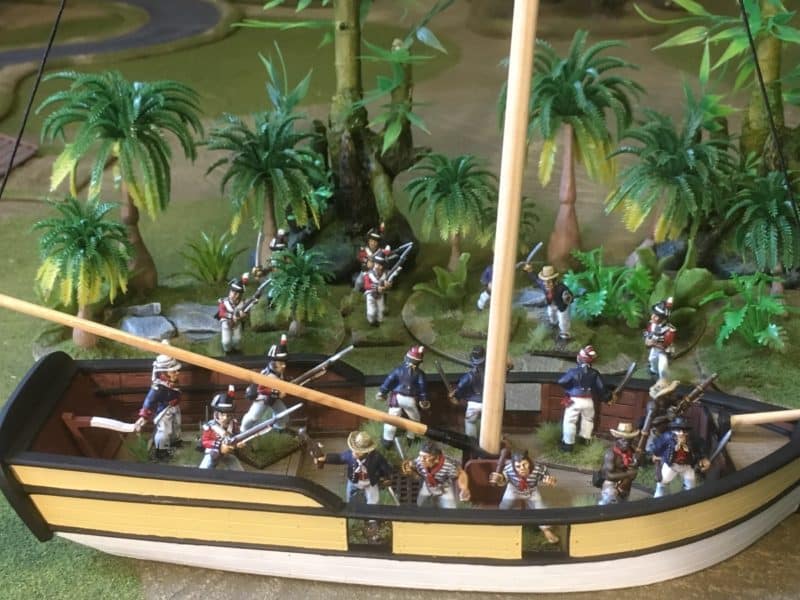
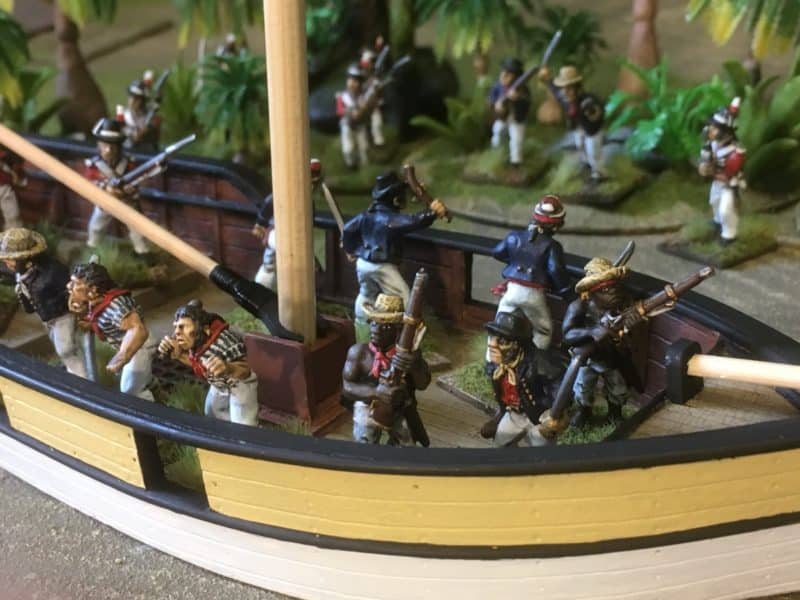
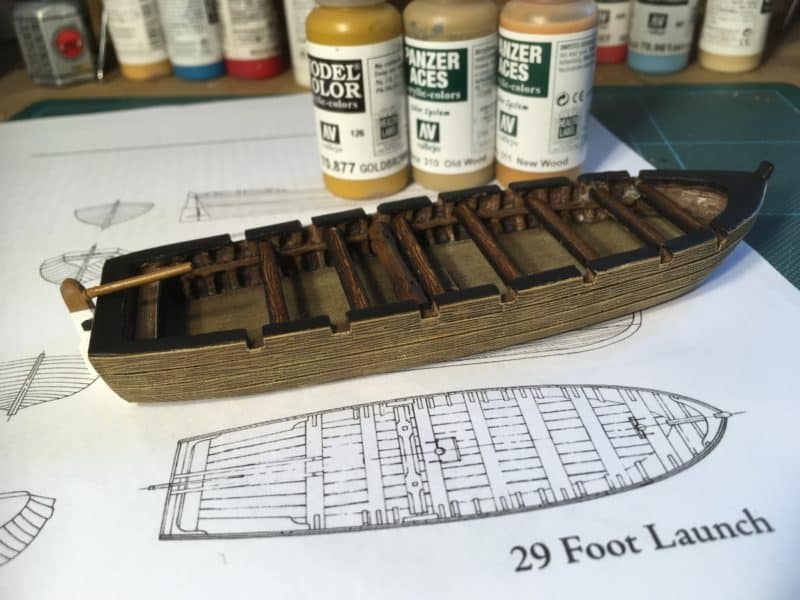
So what is the nautical title of my blog all about then? Well, once I had recovered from the exertions at Partizan, I did find time to start some modelling. I had blagged a ‘first cast’ of the new Trent Miniatures ships boat that Duncan is about to launch  (Yes, the pun was intended).  I still have ambitions to create a Napoleonic Marine landing force, primarily for use in some future Caribbean campaign and when I saw the new release on the Trent stand, next door to ours, I couldn’t help but get yet another boat for my force.

As yet there is no crew available but they will come in time. The boat is also without oars or a mast, again they will be added, either as part of the model or as a separate accessory pack. In the meantime, I just wanted to get one painted. Here’s my progress so far.

The new Ships Boat from Trent

The new Ships Boat from Trent

I have gone for a fairly basic paint job. Once I had washed the resin cast, I primed the boat with Army painter Leather brown and when dry, gave the whole boat two liberal coats of Dark tone ink to bring out the grain and detail on the planking. It was then a case of dry brushing with various mixes of Vallejo Golden Brown, New Wood and Old Wood and finishing the details in black, as you can see. Unusually for me, I didn’t really think through how I intend to finish the boat. I was just too eager to get some paint on! So I am now debating with myself as to whether I should add a mast and sail and make it a supply ship (which is my favourite option) or whether to buy or convert a crew and have it as yet another landing party.

I also have vague ideas of converting it to a rocket launching ship. The fact is, I now have the basic hull finished and I can now experiment over the coming bank holiday, weather, Family barbeques and gardening duty permitting…

Painting the Warband

An early May Bank holiday is usually an opportunity to get some painting done as the weather is generally pretty poor. This was not to be the case though. What with gardening, ‘Granddading’, and DIY, I barely managed to get to the painting desk. I have made some progress, though, and my warband is gradually taking shape. I’ve mentioned previously that I have not done any real research into Japanese Samurai other than to look at lots of pictures of other peoples models, casually flicking through my one Samurai book and putting together a Pinterest board of various Samurai images. You can see my board here:

SAMURAI PINTEREST BOARD

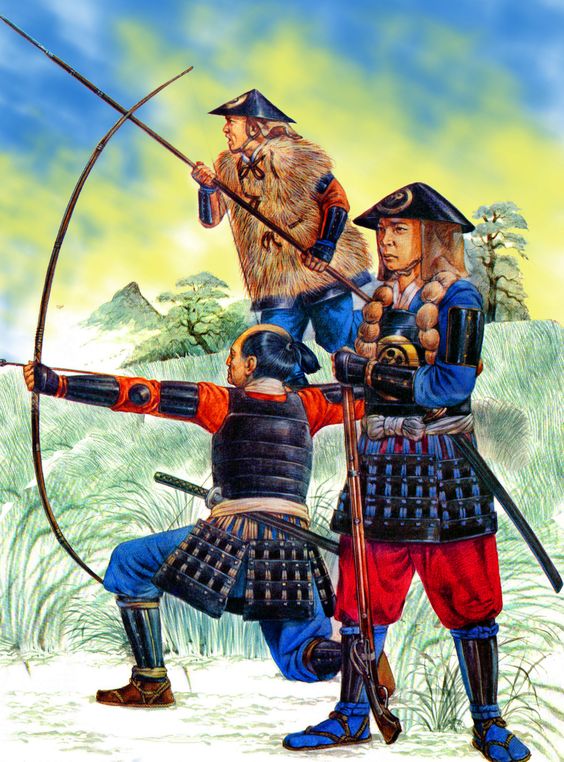
There was one colour scheme that caught my eye, the blue and red Ashigaru looked pretty good and so I based my colour scheme on this with a few tweaks.

My warband inspiration!

My warband inspiration!

The picture also helped to clarify how the various armour plates and bits of clothing were supposed to look. There are slight differences between the bowman and the musketman but I now had the general idea as to how they should look. As usual, I would take a few liberties, or as I prefer to think, ‘artistic licence’ when it came to painting the figures – usually to simplify the painting process. I also like my models to look a bit on the ‘bright side’ for the gaming table.

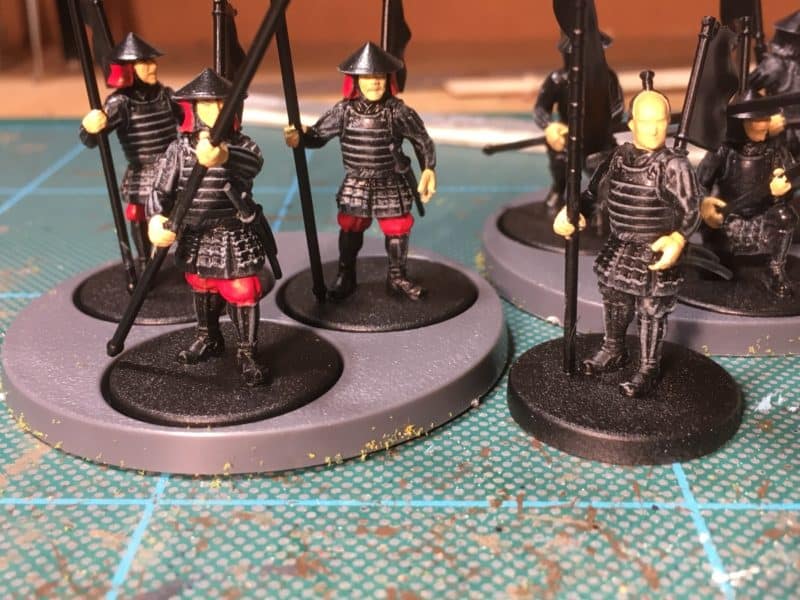
So, having assembled the figures I gave them a priming coat of Army painter black spray. I then used a size 6 brush to drybrush the figures all over. The main purpose of this was to bring out the detail on the figures so that I could see what needed painting and where. The secondary purpose was that the armour was then highlighted and the detail brought to life.

Painting the warband

Painting the warband

This was the first batch that I did – you can see that I have also painted the flesh and trousers. I used Vallejo 70992 neutral grey to dry brush these guys.

The bowmen, dry brushed and ready for painting.

The bowmen, dry brushed and ready for painting.

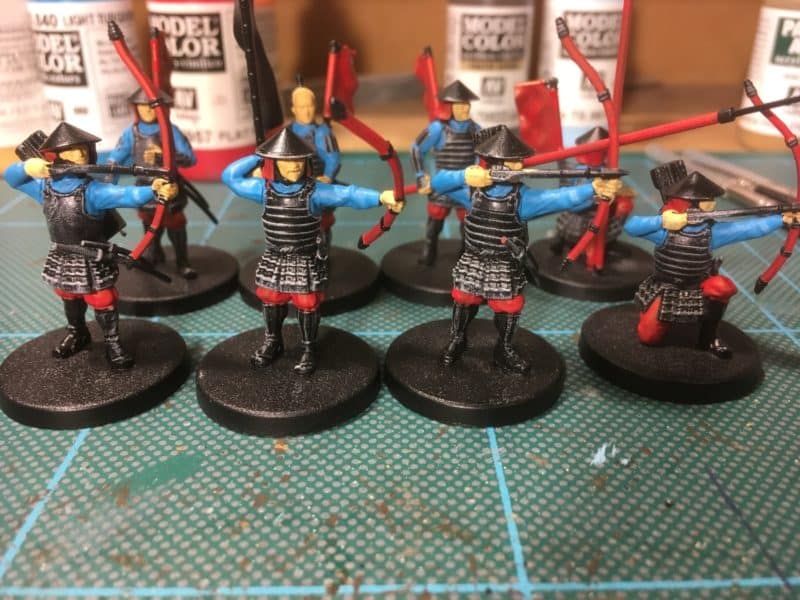
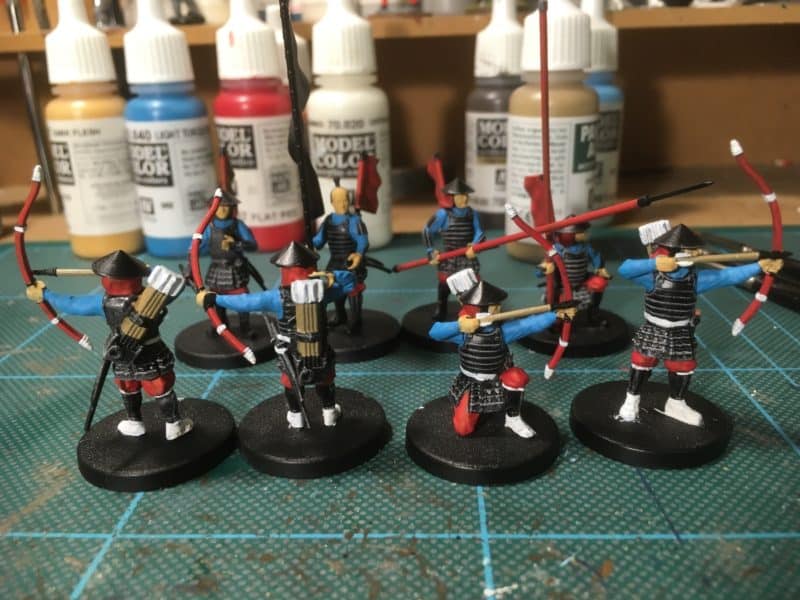
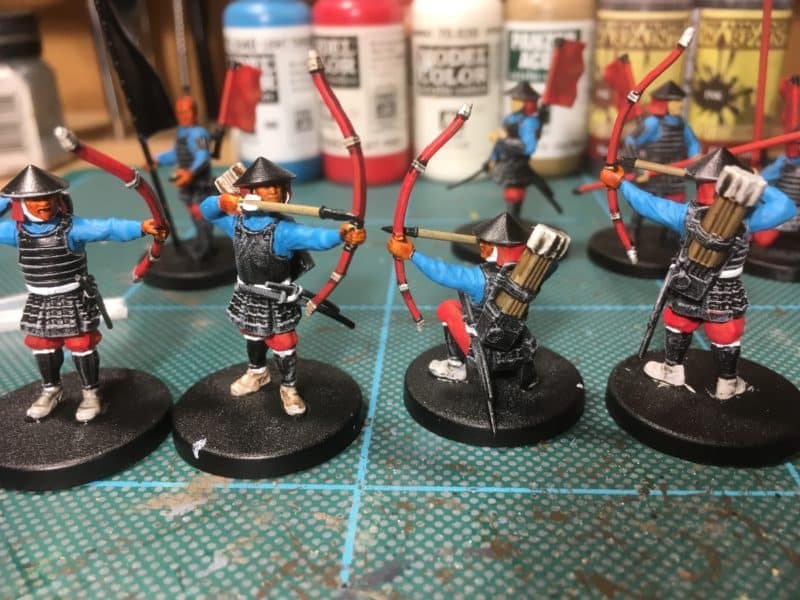
The bowmen have been given the same drybrush treatment but this time, I used a lighter grey 70870 medium sea grey to up the contrast. I think that a light blue would also work well and I might try this on the next batch! I painted the flesh with 70927 Dark Flesh, the shirts with 70840 Light Turquoise and the trousers and weapons (spears & bows) with 70957 flat red.

Ashigaru Bowmen with detail added

Ashigaru Bowmen with detail added

I then painted the ‘socks’, face scarf, ties on the legs, detail on the bows and arrow feathers in off white 70820 and the arrow shafts in 310 old wood. At this stage most of the block painting is done. However, to give a bit of definition to some areas, I have given the faces a coat of skin wash 72093 and used both army painter strong tone and Dark tone ink . The initial effect is to make things look worse.

Ink washes applied

Ink washes applied

The ink does help to define the shadows and the next job will be to carefully repaint the same colours but to leave the ink shadows in the recesses. It might sound like a bit of a faff but it does work. That is as far as I have got with the bowmen and obviously I need to finish these off but here are the Spearmen that I have completed.

2017-04-26 20.01.30

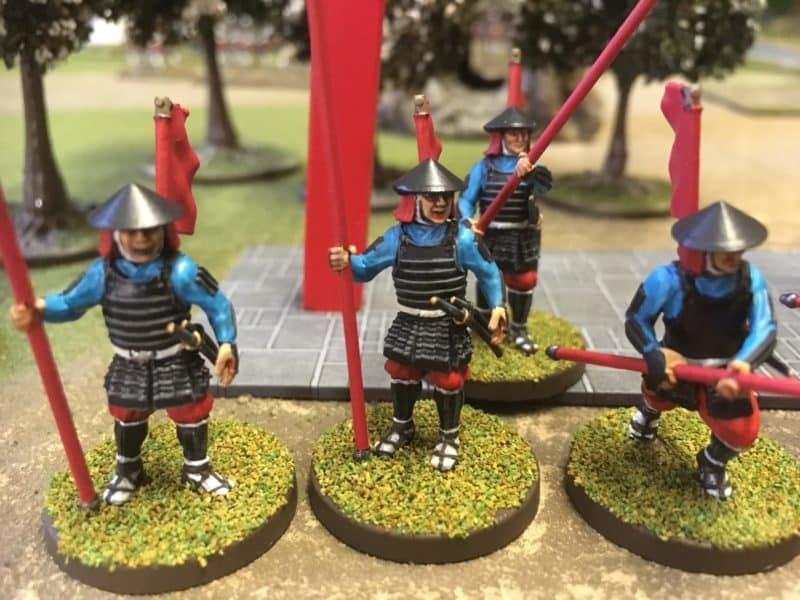
You can see that by carefully repainting the raised areas on the faces, you get a bit more character with the figures. I have also painted the sandals using 70822 black brown and added some detail to the weapons using Steel 70864 and brass 70801. I’ve also painted the hats 70862 black grey for no other reason than I wanted them to look slightly different to the armour. I’ve used 70817 scarlet and 70961 sky blue to add some highlights to the tunic and trousers. The basing is very rough at the moment. I will be adding some grass tufts and probably some flowers to make them a bit more interesting!

So that is how my warband is shaping up so far. There is still some way to go to have them completed. It doesn’t help that I tend to fuss and go back over models that I thought that I had finished as I learn how to paint the models and review the pictures that I have taken. It is also a different process to the one that I use to paint my Napoleonics. With these small skirmish warbands I like to try and have a go at painting using inks & highlights rather than resorting to quickshade.  I think that it is worth the effort though, I hope that they will be well used in battle over the coming months!

If you would like to purchase the Vallejo & Army Painter colours that I have used, you can find them in my shop here:

VALLEJO PAINTS

ARMY PAINTER PAINTS

SAMURAI RANGE

At the time of writing, with the exception of aerosols, all items are available post free to most worldwide locations.


Tori Gate

No, it’s not a headline from the Sun Newspaper regarding a scandal in the Conservative party but the first piece of scenery that I have made for Test of Honour. A very straight forward and easy piece to finish, it is the simple Tori Temple Gate from the Sarissa Precision range.

Japan-TORI-TEMPLE-GATE-SAMURAI-JAPANESE-28mm-Laser-cut-MDF-scale-Building-B002-181361053102Made from Laser cut MDF, assembly is very simple using PVA glue. Painting is just as straight forward. There seem to be a lot of questions as to how easy is it to paint MDF. The answer is very easy. I just use the same paints (Vallejo) that I use on my miniatures, unless I am painting a large area. In which case, match pots of emulsion from B&Q (other DIY superstores are available) also work very well.

Completed Tori Temple Gate

Completed Tori Temple Gate

So, once I had assembled the gate, I sanded down any obvious mis matches on the pieces to get a smooth surface.  I left the main gate separate from the base and just sprayed it with Army Painter red. The first coat will bring out any imperfections and it is easy to remove these with another sand over with fine wet & dry paper. Once this was done I just resprayed it a couple more times to build the colour and that was that. I’m not sure if it’s the right shade of red but it will do for me!

As for the base, this was just as easy. I took a fairly large brush and simply dry brushed it, with out priming, in a Dark Grey. I think that I gave it a couple of coats to cover the wood. This technique ensures that the laser etched detail is not covered. I then repeated the dry brushing with a Medium grey and then again with a lighter grey until I was happy with the effect. I picked out the etched cement between the flag stones using a small brush and a watered down pale grey to get the effect shown above. It was a simple but laborious job to follow the pattern.

Tori gate & warriors

Tori gate & warriors

So with my first piece of scenery made the next job was to sort out a playing surface. Of course I could use one of my other mats but I have a cunning plan for Test Of Honour. I think that it is an ideal club night game and my intention is to put together a ‘Pick up Set’ where by I can just grab a couple of boxes of Scenery and figures and head off to the club knowing that everything is there, ready to play. The solution to a playing surface can be found at Aldi at the moment if you are quick! For just £6.99 you can get a 1 metre by 2 Metre green Awning mat. Cut it in half and you have two ideal sized mats for Test of Honour, so if you ‘go halves’ with a mate, you pay just £3.50! Here’s mine:

Aldi Mat

Aldi Mat

OK, it’s not as glamourous as a Cigar Box mat but then at the price…If you look on the Test of Honour Face book page , I’ll post some pictures of how it looks with scenery and figures on it later. If you follow this link, you can see details of the mat online:

ALDI GRASS CARPET

You will also notice from the pictures I have some trees in Blossom. The story behind these is that I picked up a job lot of trees that were being discontinued by a supplier two years ago to sell on the stand at Salute – just £1.99 for a pack of two. Nobody wanted trees in Blossom and these were left over after the show. I decided that they would look nice on my table and here we are two years later and I cant get Blossom trees at such a price to sell for love or money…. They still look nice on my table though!

So if my playing surface and scenery box is taking shape, how am I doing with the figures. As usual for me, painting is slow but I am getting there. I now have six spearmen done.

My war band takes shape.

My war band takes shape.

The basing isn’t really finished – I need to add some grass tufts or even better flowers but I haven’t quite decided on the final scheme. I am also waiting on some decals to add onto the back banners.  They are ready for tonight’s game though. Next up, the archers and I will give a bit more information on how I went about painting my war band.

Close up of Spearmen - I'm not sure why they look so happy.

Close up of Spearmen – I’m not sure why they look so happy.

In the meantime, you can see the range of Samurai items that we have in stock, including the superb Sarissa Japanese buildings range, here:

SAMURAI RANGE

Sarissa also make a really nice range of Far East buildings that are also very suitable for more rural settings:

FAR EAST RANGE

If it is paints that you are after:

VALLEJO PAINTS

Turning Japanese!

Well, it turns out that have I succumbed to my urge for something different and my Easter present to myself was a copy of the new Test of Honour game. I am not an ‘early adopter’ by any means and get far more pleasure from deferring a purchase than actually making one! However, I had played a couple of games and had really enjoyed the simplicity of the game mechanics. The fact that I had a great deal of fun playing the game also helped – I don’t remember laughing so much in a wargame but that may have had more to do with the poor Japanese movie impersonations that were being carried out as each Samurai moved…

My first game - unpainted figures!

My first game – unpainted figures!

I had also been slightly put off by the chatter on some social media pages by the apparent problems with the Wargames Factory/Warlord plastic figures. Having seen the completed figures for myself, I thought that they looked pretty good and the painted ones that I had seen had convinced me that I could work with the figures in the set. So I grabbed a box whilst I still could and spent some of my spare time over Easter building and painting Samurai.

I wont do a full unboxing review – there are plenty on You tube and other forums but here are my general thoughts. First of all, I think you get a good deal for your money. In effect, you have a complete game for £35, including, albeit 2D, card board scenery. As well as all of the cards, tokens, rules, and markers that you will need to play, you also have the sprues & parts to make 35 Samurai and Ashigaru miniatures. All you need to supply is a Tape measure and a 3 foot playing surface. You do have to assemble those plastic figures though…

Ashigaru Archers Assembled!

Ashigaru Archers Assembled!

So first things first, yes the figures are plastic! If you don’t like plastic figures then jog on son, you’re in the wrong aisle! Metal figures are available from other suppliers and may just cost a tad more than those figures included in the game. Are they complicated to put together? I don’t think so, you’re not going to be building the Battleship Yamato. Each figure has about 7-8 pieces and there are some clear assembly sheets included in the game. You just need to take some time to look at them.

Are they fiddly to put together? Hell! Yes! I lost count of the number of heads that I dropped and even with my small fingers, the parts are a challenge to handle. Don’t even try to rush the assembly, you will get into a mess. Here’s my best advise on how to proceed.

Spearmen assembled and undercoated

Spearmen assembled and undercoated

First of all, you need to be seated comfortably, at a decent work station with a nice cup of tea and plenty of time – don’t rush!

Study the assembly sheets and match them up with the correct sprues – Spearmen, Archers and Samurai.

You need a good sharp pair of clippers, A good scalpel and a sanding sheet, whether it’s an emery board or something similar, what ever suits your budget!

For assembly, use a good polystyrene glue – I prefer the Revell Contacta glue with a needle applicator. Don’t use super glue – it may be faster but the beauty of polystyrene glue is that you will have some working time to position those fiddly parts. Because the glue melts the surfaces you will get a bit of ‘Fill’ to hide the joints and actually the bond will be better than superglue once the glue has dried. Here’s a tip, when you put the glue onto a piece, don’t immediately slap it onto the model. Wait a few moments to let the glue start to melt the plastic and then put the part into position. It will stick into place but you will still have some working time to position it to your preference.

Start with one of the simpler models. Either a spearman or bowman using the one piece torso. Once you get the hang of assembly and become familiar with the pieces you can be more ambitious and start to try different poses and combinations.

I found that the best assembly method was to stick a pair of legs together. Then attach these to a base. From there it was easier to handle the model and build the figure from the waist up.

Once you have built a few of the models, you will find that it becomes easier & faster as you become familiar with the process. The real joy of plastics though is that you will be able to customise and convert your models to make a really unique warband.

the warband takes shape

the warband takes shape

It took me about a couple of hours to assemble my first 12 models. In fairness, I was taking my time and as I became familiar with the different pieces I started to change the poses and think about conversions.

I also wanted to start to paint the models. Once again, they look to be a challenge but I am going to opt for a simple approach. For a start I don’t intend to spend too much time on research. I have one book on Samurai in my home library ( The Book of the Samurai by Stephen Turnbull)  that I have been flicking through and the rest of my information has come from the Test Of Honour Face Book Group. If you haven’t joined , then it is worth it just for the pinned post at the top of the page which has some fantastic links to resources.

TEST OF HONOUR FACE BOOK PAGE

For me the process of painting will be just to produce some gaming figures and not to get too involved in historical accuracy. If I really get bitten by the Samurai bug, I may revisit that statement but for now, my intention is to produce a couple of small warbands that I can use at the club to take a break from my Napoleonic Games. So at the moment, my ambition goes as far as painting the 35 figures in the box and perhaps building a few nice scenery pieces.

Painting the warband

Painting the warband

You can see my progress so far. I’ll use these test models to see how I get on and to figure out the best way for me to paint the models as a batch. At the moment I have simply primed them with Army painter black, dry brushed them with neutral grey, Faces and hands are dark Flesh and red for the Trousers(?). There’s a way to go yet so I’ll return to these in a future blog. In the meantime, I’ll finish this entry with a picture of the limited Edition Samurai that came with the set. I really enjoyed painting him and his ninja mates….

Banzai!

Banzai! The limited edition Samurai takes on some North Star Ninja’s!

You can see our current stock of Samurai and the Test of Honour range in our shop Here:

SAMURAI

If you need tools, click here:

TOOLS

You can get glue here:

Adhesive and Glue

At the time of writing, most of our products are available post free to most worldwide locations!

Block paint and Quickshade – Batch Painting the 28th

On with the next colour

On with the next colour

Having painted the shakos black, it is a straight forward job to paint the plumes in white – I use Vallejo off white 70820. The shako plates are painted with 70801 Brass. Notice that I will have to use these colours again, but the point about the batch paint process is that small progress is better than no progress. It is easy for me to find 10 or 20 minutes to paint the plumes and shako plates rather than block out a whole evening or part of my weekend trying to complete a whole figure or batch of figures. This is why the process works so well for me. Any spare time that I have, I use to paint a couple or more figures in one colour and the Battalion gradually takes shape. I do admire those painters that can sit and gallop through 24 figures in one sitting. However, first of all my back would seize up after a couple of hours, then my eyes will get tired, until finally, I start to make mistakes. So short sharp bursts work for me! It’s not so daunting to work through a battalion in this way, over the course of a week, you will find that the unit moves to completion.

Back to the painting. The next colour is Red 70957 for the jackets and the bottom of the shako plumes. There is a fair degree of discourse that takes place on forums as to what colour or shade British redcoats really were. Without repeating the general thread of this conversation, my view is simply to take a pragmatic approach, they were red. To be fair, the quick shade will darken and dirty this colour to a less garish red, so the effect is about right for my eyes. The other colour the I have used is Iraqi Sand 70819 for the food haversacks. These were usually made from canvass or a strong linen and although they started out as perhaps a paler shade than this, they would have been discoloured from use. If you prefer, you can use off white for these as well.

White lace and yellow facings added

White lace and yellow facings added

The picture above shows the next stage. When it comes to painting yellow, I always find it very difficult to get a decent coverage and colour. To help overcome this, I first painted the collars and cuffs ( facings) in sand yellow 70916 and then when dry, over painted this with flat yellow 70953, although the vallejo 70915 deep yellow may have been more effective. Next up, the laborious job of painting the belts, lace, collar edging and rifle strap in off white 70820. I prefer the off white as it is a softer white, but if you prefer, you can use 70951 white or the Foundation white 70919 for a brighter finish. The next colour is Natural steel 70864 for the buttons, musket barrel and bayonet. I’ve also added some detail to the muskets and at the same time painted the main buckle plate using Brass. Finally, I’ve painted the water bottle strap in Leather brown 70871. The figures are nearly complete.

Rear view & Flank Company

Rear view & Flank Company

The picture above shows the rear view of the figures with the brass painted onto Musket sling, bayonet scabbard and rear shako plate. (which keeps looking bigger…see last blog entry!) Note also that the Light Company figures have green plumes  and the Grenadiers, which are not pictured, will have all white plumes. If at this stage you think that the painting is a bit messy, bear in mind that the quick shade will cover some of the errors, I will  tidy anything too obvious and of course, the pictures tend to magnify errors. On to the backpacks!

Back packs primed in black

Back packs primed in black

As you can see, I have primed the back packs with army painter  black spray to save some time. I have also painted the water bottles with Vallejo 70901 Pastel blue, which I think is about right. If it looks too light here, it will darken down with the quickshade.

Back packs completed

Back packs completed

To finish the back packs, I used Neutral Grey 70992 for the blankets ( I also used this to tidy any overruns onto the troops trousers), off white for the straps, leather brown for the water bottle straps and miscellaneous pouches and steel for the pan. I suspect that the mess pan is far too clean for being on campaign and should be a smoky black, but it looks nice! You will notice the tidying up that I have done around the white strapping. Once again the quick shade will cover this up.

Ready for action - well quick shading...

Ready for action – well quick shading…

I’ve now attached the back packs to the troops using super glue. As we are gluing two painted surfaces together, super glue will be more effective than polystyrene cement. The main painting is now complete. The next stage is to use the army painter quick shade to add depth and definition to the models. Now you could use, either an Army painter ink or another brand – I’ve used the Windsor & Newton Ink in the past to good effect. However, I do like the finish that you get with the Army painter quick shade. I do not ‘dip’ the models as army painter advise, simply paint the model with the quick shade. I prefer the Dark tone, which is a black shade, rather than the dark brown strong tone, although some prefer to use strong tone over red. I know that there are reservations about using this stuff and to be fair I agree with many. The quick shade is too expensive, more because I have yet to completely finish a tin before it starts to ‘skin’ over. This isn’t to do with the seal on the lid but the air that gets trapped as the level in the tin goes down. The tins are simply too big. I have passed my concerns on to Army painter but I cant see them designing a new tin just for me! Having got my gripe out of the way, I have to say that otherwise the product is excellent and does do what it says on the (oversized) tin!

2017-03-19 09.38.46

Three stages of quick shade

The picture above shows the effect of quick shade. The first figure is just block painted, the second has been painted with quick shade and the third has had a coat of army painter matt varnish or as they call it anti shine. You can see that the shaded figures look as though there is more depth to them. The Quickshade does ‘dirty down’ the colours and close up this looks messy but in ‘real life’ the effect is quite acceptable.

So to recap, once the figures have been coated with quick shade, leave them to dry for at least 24 hours to harden off properly. Then spray with a good matt varnish. Matt varnish can be very temperamental and I could write a blog just on this subject – just carefully follow the instructions.

Ready to base!

Ready to base!

The final part of the painting process is to retouch some of the lighter colours. You can ignore this stage but you will find that if you carefully retouch the most prominent parts of the figure, the effect is well worth the extra effort. For these figures, I have repainted the white cross belts, tip of the shako plume, shoulder tufts and lacing on the cuffs. I have also retouched the yellow facings and finally, painted the bayonets in silver 70997, to make them shine!

The figures are now ready to be based. I will cover this in detail in my next blog. I’ll also show you the Grenadiers with their French backpacks and the completed Battalion.

If you are new to Napoleonics and would like to give it a try, at the time of writing,  we have an offer running in the shop. If you buy the set of Black Powder rules, we will add in a free box of figures. we also send post free to most worldwide locatios. Click here for details:

BLACK POWDER OFFER

All of the products mentioned above are also available from my shop here:

ARCANE SCENERY AND MODELS

Researching the Research – Batch painting the 28th Regt.

I mentioned in last weeks blog that as well as deciding on a rules set to work to, it helps to have a theme running through your figure collection. In my case the theme is the British Army at Waterloo. I do not intend to paint every Battalion that was present but I am working towards a decent representation of the units that took part. This means that I have some discipline when it comes to buying and painting units and ensures that I do not go off at a tangent. Well not much…

One of the interesting body of troops that were present at the Battle is the 8th British Brigade of Infantry led by Sir James Kempt. It was part of Pictons 5th Infantry Division and was not only in the thick of the fighting at Waterloo but was heavily engaged at Quatre Bras, two days earlier.

Lady Butlers painting of the 28th at Quatre Bras.

Lady Butlers painting of the 28th at Quatre Bras.

The Brigade is interesting to me because of the mix and variety of troops. It consisted of:

The 28th North Gloucestershire’s; a standard infantry battalion but equipped with stovepipe shakos and with yellow facings.

The 32nd Cornwall Regiment; a standard infantry battalion, Belgic shakos and white facings.

The 79th Cameron Highlanders; a Scottish regiment, green facings and of course, tartan kilts.

Six company’s of the 95th Rifles, the famous Light infantry regiment.

They were supported by the Divisional artillery, including Major Roberts Foot artillery battery of six guns.

I don’t think that you could do much better when choosing a ‘starter’ force for a Black powder army. I have already painted the 32nd Cornwalls – you can read how in these blog entries:

The 32nd ( Cornwall) Regiment of Foot

Soap Opera Painting

The 32nd Foot ready for action

So the next task was to batch paint the 28th North Gloucestershires. As usual, I consulted my favourite research sources, The Waterloo Companion by Mark Adkin, British Napoleonic Uniforms by C.E. Franklin, Ospreys Wellingtons Infantry by Brian Fosten and the most useful Mont St Jeans Website.

The Pictures on the Mont St Jean site are simply excellent to use as a painting guide:

28th North Gloucestershire Regiment Centre Companys

28th North Gloucestershire Regiment Centre Companys

Now the sharp eyed amongst you will have already spotted a discrepancy. Lady Butler has the 28th in Belgiac Shakos, whereas Mont St Jean shows them in Stovepipes – they both couldn’t be correct, could they? My first thought was that perhaps they were light infantry but I was further puzzled by the red and white standard plumes ( I thought that ‘lights’ had all had green plumes) and Shako plates – no bugle to indicate that they were light infantry. That said, the Shako plates were different to most regiments standard one piece large plate. The plot thickened….

It was time to consult the internet once again and to risk diving into the murky world of forums and social media. Those dangerous habitats of armchair painters and armchair generals, button counters and lace pendants, crusty old buggers of immoveable opinions – you get the picture. In fact even as I typed this blog, I thought that I could hear the sound of caps locks on keyboards clicking on like a chorus of safety catches on AK47s….

They were wearing STOVEPIPES!!!!!

They were wearing STOVEPIPES!!!!!

Of course I jest… just a bit.  I am actually in awe of the expertise found on the forums and generally this expertise is passed on with good grace and even better, with links back to the primary references. My usual port of call is the TMP, The Miniatures page, and the search facility can reveal some fascinating information from some very knowledgeable people. So what did I find out? Well, it seems as though the 28th had a number of differences from the ‘standard’ infantry battalion. The Shako plate was indeed as shown above and not a one piece item. In addition, there was a small plate on the rear of the Shako, awarded after the battle of Alexandria in Egypt 1801, when the front and rear ranks of the 28th were simultaneously engaged, whereby the soldiers received the order “Front rank stay as you are, rear rank about turn”. The conduct of the regiment won for it the distinction of wearing badges both at the front and at the back of their head-dress.

Bottom picture shows rear cap badge and French style Knapsack

Bottom picture shows rear cap badge and French style Knapsack

And so to the head dress. It seems that the 28th were still in possession of their Stovepipe shakos at Waterloo, although this is by no means a sure thing. Lady Butler seems to think that they wore belgiac shakos and there is at least one contemporary account that confirms this. However, there are other accounts and sketches that indicate that they definitely had stovepipes and that these were also worn by the Officers. Who knows what is really correct? I tend to go with the idea that the shakos were stovepipes based on what I have read but I am acutely aware that what I am reading is someone else’s edited research. After all said and done though, I am painting a unit to be used on the wargames table not an exhibit in a museum, so I am happy to go with the more interesting option.

28th with Trotter Knapsack....

28th with Trotter Knapsack….

The other piece of information that I turned up was that the 28th used French Knapsacks rather than the standard British Trotter knapsack. Once again, I have read conflicting evidence. One account claimed that all men in the Battalion had the French version. Another, claimed that it was just the Grenadier company. Both stories seem to come from an account stemming yet again from the Egyptian Campaign.  It is said that the 28th ‘liberated’ a French supply depot containing the superior French Knapsacks which they then adopted as their own. It strikes me that the chances of these knapsacks lasting for nearly 15 years in service, with men coming and going, are remote but I have no knowledge of how long a knapsack would last… Finally, just to add to the controversy, I have read that the whole ‘knapsack story’ was made up by a Victorian writer.

What is for sure is that the Battalion is an interesting subject with some good opportunities for some artistic licence in both modelling and painting.  I’m happy to incorporate some of these idiosyncrasies into my battalion and I’ll show you my interpretation in my next blog.


1 9 10 11 12 13 18