Napoleonic War in the Caribbean

The war in the Caribbean is project of mine that has been rumbling along in the back ground for some time and I think that I am now in the mood to move it forwards. I have been painting bits and pieces for this theatre for some time but it’s been a bit of a solo project and has taken a back seat to my other interests.

I decided that I would first paint all the variants of the Trent Miniatures Caribbean Slave packs. They are sold as random mixes but I managed to persuade Duncan to let me have one of each type. First we had to identify them!

Revolting Slaves - with firearms.

Revolting Slaves – with firearms.

Revolting slaves with hand weapons

Revolting slaves with hand weapons

There are actually 30 variants. Although the pictures show 31 figures, there is a duplicate hidden in there! I already had painted a couple of packs of the revolting slaves and also a pack of Maroons but the idea was to build a decent sized warband of these guys to represent the small detachment of men led by Jean Kina in Haiti. Jean Kina was originally a slave but now freed, who came to command a force of up to 300 men (depending on the references that you consult) and fought for the British on Haiti.

This leads me perhaps to explain some of my fascination with the Caribbean in this period. The period of interest spans from 1793 to 1815 and during this time, there was a constant conflict running across the whole of the Caribbean area, including some parts of South America. The nations involved included the usual suspects of Britain, France, Spain and significantly, the Slaves and local population but the nature of the conflict and climate meant that many disparate troops types were sent out to fight on the islands.

death before glory
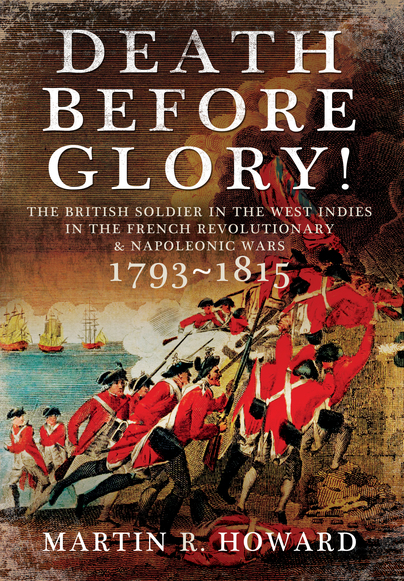
I suspect that the lack of huge set piece battles has meant that the war has not been well documented despite the fact that the stakes were so high. Britain, France and Spain, gained an incredible economic benefit from the area and these Islands were crucial to these countries ability to finance their wars elsewhere. To be clear, most of my little knowledge comes from reading just one book, ‘Death before Glory’ by Martin Howard and some web articles. However, this has been enough to whet my appetite and I am rapidly learning as much as I can whilst continuing to build my forces.

Block painted Caribbean fighters.

Block painted Caribbean fighters.

As you can see from the picture above, once cleaned up, the figures were temporarily based, primed with Army Painter Leather brown and then painted in an assortment of pale colours to represent the sort of clothing worn in the Caribbean. I used the Vallejo Black brown to paint the flesh and highlighted with chocolate brown.

Caribbean Fighters based

Caribbean Fighters based

I had decided to used Army Painter Quick shade Dark Tone to speed up painting and then rehighlighted were appropriate. The basing was my usual Vallejo Dark earth Texture paste but I added some gravel and small stones for additional texture.

Close up of basing

Close up of basing

The bases were finished by painting first with Chocolate Brown, then a Chocolate Brown/Iraqi Sand mix, finishing with a light dry brush of Iraqi Sand. Finally, I added some green scatter and some grass tufts and they are ready for the table.

Jean Kina's Fighters are ready for battle!

Jean Kina’s Fighters are ready for battle!

There’s plenty more in the pipeline! As well the land operations there was plenty of action at sea, so I will have a use for my growing naval detachment.

My next project - a small loop fpr naval engagements.

My next project – a small sloop for naval engagements.

If you would like to read more on my Caribbean project and the figures that I have painted, click here:

CARIBBEAN BLOG POSTS

The Trent Miniatures Caribbean range is available here:

TRENT MINIATURES CARIBBEAN RANGE

The Vallejo range can be seen here:

VALLEJO PAINTS AND TEXTURES


All Square – part two

Earlier this year, fellow gamer and modeller Chris Kirk showed how he intended to build an infantry square to use as a marker when playing Black Powder. You can see the first blog article here where Chris explained how he would convert the models:

ALL SQUARE – PART ONE

The model is now finished and as you can see, it looks very nice indeed!

British Infantry Square

British Infantry Square

Chris decided to paint the figures as 27th Regiment, the Inniskillings. The 27th is famous for the stand that they made at Waterloo. Towards the end of the battle, they had moved up to take position just to the left of the crossroads, some 200 hundred yards behind La Haye Sainte which had by now fallen to the attacking French. They were ordered by Sir James Kempt not to abandon their position and to hold at all costs as their presence would stop the French infantry from further penetration of the British centre.

The 27th stand

The 27th stand

This left them terribly exposed to both the French tirailleurs who had taken position on the small knoll to the side of La Haye Sainte and from the French artillery that had moved up in support. The casualty rate for the 27th was horrendous. Without moving a step the regiment lost over two thirds of it’s men, the highest casualty rate for any British Battalion that fought at Waterloo. The Battalion was commanded at the Battle by a Captain, John Hare. There were 19 officers in total, of which sixteen were killed or wounded. Of the total of 747 men in the battalion, 493 were killed or wounded in a matter of hours and yet still they stood in position, holding the line.

The Square - close up!

The Square – close up!

The lady in the model represent one of the remarkable stories of Waterloo. In the midst of the carnage unfolding in the square was a soldiers wife, who though pregnant, had refused to go to the rear and stayed with her husband. She busied herself attending to the wounded until she herself was struck in the leg by a shell splinter. Her poor husband faired even worse, losing both of his arms.

The Square holds firm

The Square holds firm

The model, as well as being a practical gaming piece will serve as a small reminder of the bravery of the 27th. The idea of such a model is that it will be used on the table and not just appear in a glass cabinet. Chris and I had quite a discussion about such ‘practical dioramas’ that allow the gamer to stray beyond just churning out regiments to fill the battlefield. The square marker is just one of these ideas – others will follow!

Safely in the Cabnet

Safely in the Cabinet


Victorious Miniatures

The launch of a new range of miniatures is always an exciting prospect. However, it’s not quite so easy as it looks and many start ups fall by the wayside once the initial enthusiasm has passed. I hope that this is not the case for the latest range that we are happy to support! Victorious Miniatures is a venture undertaken by long term wargamer and enthusiast, Keith Tait. I have often had the pleasure of facing his armies across a wargames table, so I was intrigued when he told me of his plans to launch his own range of figures.

NAPBR15 Duke of York

NAPBR15 Duke of York

My first reaction and words of encouragement were ‘are you mad..?’ I reminded him of the well known quote, oft repeated in the industry ‘how do you make a small fortune in the model soldier business? – Start off with a big one…’ Keith was undeterred. His project was to be a labour of love and he was planning to build a range of figures that he had always wanted. The commercial side was only important in as much as he hoped that the range would eventually become self financing and grow accordingly. And so Victorious Miniatures was born.

NAPBR16 Sir Ralph Abercrombie

NAPBR16 Sir Ralph Abercrombie

The initial ranges have been sculpted by the very talented Mark Simms and focus on the British Army circa 1793 – 1795 in the Flanders Campaign. The figures are compatible with Perry, Warlord and Victrix miniatures. Even better, they compliment the Trent Miniatures range, who cover a similar period and are great favourites of mine.

NAPBR01 Round hat command

NAPBR01 Round hat command

The two main commanders have been sculpted, the Duke of York, who led the expedition, and one of the Generals, Sir Ralph Abercrombie ( also spelt as Abercromby). The Line infantry is represented  by four packs: a command pack, Centre Company Infantry marching; Flank Company Infantry Marching and Skirmishing Infantry. These infantry are all wearing the round hats and long tailed frock coats of the time. In addition to the standard line troops, there are also some very nice Highlanders. Before you reach for the tin of tartan paint, fear not! The Highlanders in the Flanders Campaign were wearing standard issue trousers. So there is no excuse why you cannot have a Battalion of these in your collection!

NAPBR03 Round hat Flank coy

NAPBR03 Round hat Flank coy

Following on from the initial releases, will be British infantry in bicornes, giving another option for your growing army. Although designed for the Flanders Campaign, I think that these new figures will be useful in other settings. The troops sent to the Caribbean at this time would have been similarly equipped and I guess that they will be suitable for service in Ireland. To be fair, my knowledge of uniforms in this early period of the Napoleonic wars is still lacking, so don’t take my word for it!

NAPBR05 Highland command

NAPBR05 Highland command

However, I have just finished reading the first part of Wellingtons biography by Rory Muir ( an excellent if somewhat lengthy read). I was intrigued to find out as early as 1793, Britain had planned to invade France in support of the Vendee insurgency with a force under the Command of Lord Moira. The landing never took place due to a heavy defeat of the rebels but the possibility of ‘What if’ scenarios would make an interesting game. Sharp Practice would provide an ideal set of rules! Wellington was present in the Flanders campaign. He was Lieutenant-Colonel of the 33rd Foot. His first action was at the Battle of Boxtel where although not involved in the initial attack, his regiment successfully covered the First Guards withdrawal, repulsing a French attack ‘throwing a few cool and well directed volleys into the enemy’s squadrons, obliging him to decamp’. So I guess that I have an excuse to get my first battalion of Victorious Miniatures!

Boxca01 Chinese Dragon cannon

Boxca01 Chinese Dragon cannon

I digress! Back to Victorious miniatures ranges. Also available are some very nice Chinese cannon for the Boxer Rebellion, the next period in which Keith intends to build his range. I am very much looking forward to more of this period becoming available. That said, if I can use these for the earlier Taiping Rebellion of 1850, I will be able to scratch another wargaming itch and my special edition Flashman figure will find a use on the gaming table!

The Victorious Miniatures range is now available to purchase from both Keiths own web site here:

VICTORIOUS MINIATURES

or, from the Arcane Web store here:

Arcane Scenery/Victorious Miniatures

Please take a look at these new models and of course, if they appeal, your support will be most welcome. If you are not ready to purchase, a ‘like’ click on the Victorious Miniatures facebook page will at least help cheer Victorious Miniatures on!

Victorious Miniatures Facebook page

Keith will need all the help that he can get in building his range. I know that he has some great ideas for future releases and of course all of us here at Arcane scenery wish him the very best of luck with his new venture.


Geisha Spy

I’m still very much enthused by the Test of Honour Game and my only regret at the moment is that I’m not getting enough game time in! However, I still have my Napoleonic project lumbering away and having just finished 18 British Lifeguards with another 6 about to hit the paint board, I fancied painting something different. I remembered that I had yet to paint the limited edition Geisha Spy that was released with the bundle, so I thought I would spend a few nights painting her.

Geisha

Geisha

I had already done some research on Geishas wearing Kimonos (not the most unpleasant of tasks…) and collected some pictures onto my Pinterest board here:

SAMURAI PINTEREST BOARD

I tend to think about projects in advance and often will put together a reference board way in advance of actually painting the subjects. If you check out the rest of my boards you will guess what my next Napoleonic theme will be if I ever finish my British! I digress, the pictures are very inspiring but way beyond my painting capability. So having given the overall colour scheme some thought, I went with a similar scheme that worked well on my unarmoured samurai. They came as a pair so I thought that I would keep to the same pallet. The picture below sort of captured the look and colour scheme that I was after.

1b40b372c2d48b1e410b4a433a2f3016

So one evening was spent cleaning up the model, assembling it, filling the gaps that seem to appear around the joins on the hand and priming in a neutral grey, my preferred primer colour. The initial colour blocking was quite straight forward. The model is beautifully cast and molded so it was a very straight forward task to paint. I used all Vallejo Colours. The main kimono was painted in Sand Yellow 70916, the trim, Sky Blue 70961, the Kimono sash, Dark Prussian Blue 70899, Hair, Black 70950 and skin tone was done using Light flesh 70928. I did think about using white for the face but many of the pictures show Geishas with a pale flesh rather than the full white make up and I preferred this. The fan was painted in green…for the time being…

Geisha with first colours blocked on

Geisha with first colours blocked on

To add shadows and depth to the kimono, I gave it a wash of thinned down army painter dark tone ink. This helps me to see where the folds in the cloth lie and hence where the shadows would be. I then repainted the Kimono with the sand yellow, leaving some of the darker shadows. I then added some white to the original colour to add some highlights to the top of the folds. I also used a very fine brush to add some dark lines to the deep folds and creases and the borders of the sky blue trim. I used a skin wash to add some shadow to the face but this was watered down until it was practically clear. It just added enough shadow to the face and neck.

Black lining and details to hair ornaments etc added.

Black lining and details to hair ornaments etc added.

I then painted in the eyes – I’m not good at these! The next step was to thin down the black lining and shadows by over painting and to add a bit more detail to the hair ornaments. I also added some highlights to the sky blue Kimono and the sash. The sash was easier to do than I thought. I first dry brushed it to show where the detail was and then carefully painted on the ‘stripes’ in a lighter blue.

Face & eyes done. More highlights added to the trim.

Face & eyes done. More highlights added to the trim.

I use the photographs as a way of reviewing my work. It allows me to see the model and pick up on any obvious errors. In the next picture, you can see that I had missed painting part of her sleeve – I couldn’t see this in ‘real life’!

spot the missing paint!

spot the missing paint!

Despite constantly picking up errors and correcting them, there was still something very wrong with the figure. It some how wasn’t working. I asked Rob, a colleague at work what he thought the problem was. It was obvious, the fan was the wrong colour! The green just wasn’t working. We had an interesting discussion  on colour theory but the upshot was that I had introduced too many colours onto the model. I over painted the fan in light blue and it instantly looked better.

a new fan!

a new fan!

Once again, using my pinterest boards as a reference, I painted a simple cherry blossom design onto the fan and added a few further highlights to the kimono. I also added her finger nails in Ivory 70918 and touched up any more obvious mistakes.

Nearly there!

Nearly there!

The final stage was to add some pink and white to the cherry blossom to the design on the fan and to re base the geisha on a plain MDF base that I had painted to match the Sarissa shrine that I had previously completed. My Geisha Spy was ready for the table!

Geisha spy at the shrine.

Geisha spy at the shrine.

The geisha was a most enjoyable model to paint and certainly stretched my painting skills. It made a pleasant change from painting Napoleonic units! Although close up, there are still a few errors and the paint job isn’t as smooth as I would like,  she looks great at a distance and is a nice addition to my collection!

If you would like to join the fun with the Test of Honour game we have a full range available in our shop here:

SAMURAI RANGE

All the paints used are also available from our Vallejo range here:

VALLEJO MODEL COLOUR

Incidentally, if you are looking for a specific colour, rather than browse through all the 200+ colours listed, just put the number into the search bar. So sky blue is 70961:

Search result

Finally, at the time of writing, all products, except aerosols, are post free to most world wide locations! I hope that you enjoy your modelling!