Tori Gate

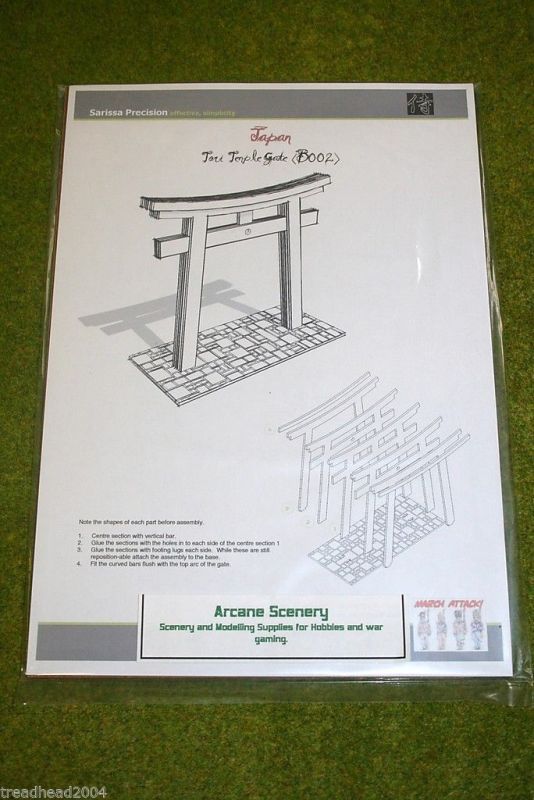
No, it’s not a headline from the Sun Newspaper regarding a scandal in the Conservative party but the first piece of scenery that I have made for Test of Honour. A very straight forward and easy piece to finish, it is the simple Tori Temple Gate from the Sarissa Precision range.

Japan-TORI-TEMPLE-GATE-SAMURAI-JAPANESE-28mm-Laser-cut-MDF-scale-Building-B002-181361053102Made from Laser cut MDF, assembly is very simple using PVA glue. Painting is just as straight forward. There seem to be a lot of questions as to how easy is it to paint MDF. The answer is very easy. I just use the same paints (Vallejo) that I use on my miniatures, unless I am painting a large area. In which case, match pots of emulsion from B&Q (other DIY superstores are available) also work very well.

Completed Tori Temple Gate

Completed Tori Temple Gate

So, once I had assembled the gate, I sanded down any obvious mis matches on the pieces to get a smooth surface.  I left the main gate separate from the base and just sprayed it with Army Painter red. The first coat will bring out any imperfections and it is easy to remove these with another sand over with fine wet & dry paper. Once this was done I just resprayed it a couple more times to build the colour and that was that. I’m not sure if it’s the right shade of red but it will do for me!

As for the base, this was just as easy. I took a fairly large brush and simply dry brushed it, with out priming, in a Dark Grey. I think that I gave it a couple of coats to cover the wood. This technique ensures that the laser etched detail is not covered. I then repeated the dry brushing with a Medium grey and then again with a lighter grey until I was happy with the effect. I picked out the etched cement between the flag stones using a small brush and a watered down pale grey to get the effect shown above. It was a simple but laborious job to follow the pattern.

Tori gate & warriors

Tori gate & warriors

So with my first piece of scenery made the next job was to sort out a playing surface. Of course I could use one of my other mats but I have a cunning plan for Test Of Honour. I think that it is an ideal club night game and my intention is to put together a ‘Pick up Set’ where by I can just grab a couple of boxes of Scenery and figures and head off to the club knowing that everything is there, ready to play. The solution to a playing surface can be found at Aldi at the moment if you are quick! For just £6.99 you can get a 1 metre by 2 Metre green Awning mat. Cut it in half and you have two ideal sized mats for Test of Honour, so if you ‘go halves’ with a mate, you pay just £3.50! Here’s mine:

Aldi Mat

Aldi Mat

OK, it’s not as glamourous as a Cigar Box mat but then at the price…If you look on the Test of Honour Face book page , I’ll post some pictures of how it looks with scenery and figures on it later. If you follow this link, you can see details of the mat online:

ALDI GRASS CARPET

You will also notice from the pictures I have some trees in Blossom. The story behind these is that I picked up a job lot of trees that were being discontinued by a supplier two years ago to sell on the stand at Salute – just £1.99 for a pack of two. Nobody wanted trees in Blossom and these were left over after the show. I decided that they would look nice on my table and here we are two years later and I cant get Blossom trees at such a price to sell for love or money…. They still look nice on my table though!

So if my playing surface and scenery box is taking shape, how am I doing with the figures. As usual for me, painting is slow but I am getting there. I now have six spearmen done.

My war band takes shape.

My war band takes shape.

The basing isn’t really finished – I need to add some grass tufts or even better flowers but I haven’t quite decided on the final scheme. I am also waiting on some decals to add onto the back banners.  They are ready for tonight’s game though. Next up, the archers and I will give a bit more information on how I went about painting my war band.

Close up of Spearmen - I'm not sure why they look so happy.

Close up of Spearmen – I’m not sure why they look so happy.

In the meantime, you can see the range of Samurai items that we have in stock, including the superb Sarissa Japanese buildings range, here:

SAMURAI RANGE

Sarissa also make a really nice range of Far East buildings that are also very suitable for more rural settings:

FAR EAST RANGE

If it is paints that you are after:

VALLEJO PAINTS

Turning Japanese!

Well, it turns out that have I succumbed to my urge for something different and my Easter present to myself was a copy of the new Test of Honour game. I am not an ‘early adopter’ by any means and get far more pleasure from deferring a purchase than actually making one! However, I had played a couple of games and had really enjoyed the simplicity of the game mechanics. The fact that I had a great deal of fun playing the game also helped – I don’t remember laughing so much in a wargame but that may have had more to do with the poor Japanese movie impersonations that were being carried out as each Samurai moved…

My first game - unpainted figures!

My first game – unpainted figures!

I had also been slightly put off by the chatter on some social media pages by the apparent problems with the Wargames Factory/Warlord plastic figures. Having seen the completed figures for myself, I thought that they looked pretty good and the painted ones that I had seen had convinced me that I could work with the figures in the set. So I grabbed a box whilst I still could and spent some of my spare time over Easter building and painting Samurai.

I wont do a full unboxing review – there are plenty on You tube and other forums but here are my general thoughts. First of all, I think you get a good deal for your money. In effect, you have a complete game for £35, including, albeit 2D, card board scenery. As well as all of the cards, tokens, rules, and markers that you will need to play, you also have the sprues & parts to make 35 Samurai and Ashigaru miniatures. All you need to supply is a Tape measure and a 3 foot playing surface. You do have to assemble those plastic figures though…

Ashigaru Archers Assembled!

Ashigaru Archers Assembled!

So first things first, yes the figures are plastic! If you don’t like plastic figures then jog on son, you’re in the wrong aisle! Metal figures are available from other suppliers and may just cost a tad more than those figures included in the game. Are they complicated to put together? I don’t think so, you’re not going to be building the Battleship Yamato. Each figure has about 7-8 pieces and there are some clear assembly sheets included in the game. You just need to take some time to look at them.

Are they fiddly to put together? Hell! Yes! I lost count of the number of heads that I dropped and even with my small fingers, the parts are a challenge to handle. Don’t even try to rush the assembly, you will get into a mess. Here’s my best advise on how to proceed.

Spearmen assembled and undercoated

Spearmen assembled and undercoated

First of all, you need to be seated comfortably, at a decent work station with a nice cup of tea and plenty of time – don’t rush!

Study the assembly sheets and match them up with the correct sprues – Spearmen, Archers and Samurai.

You need a good sharp pair of clippers, A good scalpel and a sanding sheet, whether it’s an emery board or something similar, what ever suits your budget!

For assembly, use a good polystyrene glue – I prefer the Revell Contacta glue with a needle applicator. Don’t use super glue – it may be faster but the beauty of polystyrene glue is that you will have some working time to position those fiddly parts. Because the glue melts the surfaces you will get a bit of ‘Fill’ to hide the joints and actually the bond will be better than superglue once the glue has dried. Here’s a tip, when you put the glue onto a piece, don’t immediately slap it onto the model. Wait a few moments to let the glue start to melt the plastic and then put the part into position. It will stick into place but you will still have some working time to position it to your preference.

Start with one of the simpler models. Either a spearman or bowman using the one piece torso. Once you get the hang of assembly and become familiar with the pieces you can be more ambitious and start to try different poses and combinations.

I found that the best assembly method was to stick a pair of legs together. Then attach these to a base. From there it was easier to handle the model and build the figure from the waist up.

Once you have built a few of the models, you will find that it becomes easier & faster as you become familiar with the process. The real joy of plastics though is that you will be able to customise and convert your models to make a really unique warband.

the warband takes shape

the warband takes shape

It took me about a couple of hours to assemble my first 12 models. In fairness, I was taking my time and as I became familiar with the different pieces I started to change the poses and think about conversions.

I also wanted to start to paint the models. Once again, they look to be a challenge but I am going to opt for a simple approach. For a start I don’t intend to spend too much time on research. I have one book on Samurai in my home library ( The Book of the Samurai by Stephen Turnbull)  that I have been flicking through and the rest of my information has come from the Test Of Honour Face Book Group. If you haven’t joined , then it is worth it just for the pinned post at the top of the page which has some fantastic links to resources.

TEST OF HONOUR FACE BOOK PAGE

For me the process of painting will be just to produce some gaming figures and not to get too involved in historical accuracy. If I really get bitten by the Samurai bug, I may revisit that statement but for now, my intention is to produce a couple of small warbands that I can use at the club to take a break from my Napoleonic Games. So at the moment, my ambition goes as far as painting the 35 figures in the box and perhaps building a few nice scenery pieces.

Painting the warband

Painting the warband

You can see my progress so far. I’ll use these test models to see how I get on and to figure out the best way for me to paint the models as a batch. At the moment I have simply primed them with Army painter black, dry brushed them with neutral grey, Faces and hands are dark Flesh and red for the Trousers(?). There’s a way to go yet so I’ll return to these in a future blog. In the meantime, I’ll finish this entry with a picture of the limited Edition Samurai that came with the set. I really enjoyed painting him and his ninja mates….

Banzai!

Banzai! The limited edition Samurai takes on some North Star Ninja’s!

You can see our current stock of Samurai and the Test of Honour range in our shop Here:

SAMURAI

If you need tools, click here:

TOOLS

You can get glue here:

Adhesive and Glue

At the time of writing, most of our products are available post free to most worldwide locations!

Basing the 28th North Gloucestershires

Ready to base!

Ready to base!

If you have been following the series of blog posts, you will know that from the outset, the aim has been to produce a unit for the Black Powder rules set. So deciding how to base the figures is now a straight forward task. I prefer to base my figures on Renedra plastic 40mm by 40mm bases, four figures to a base. This gives each figure a 20mm ‘frontage’. Other basing configurations can be used – the Perry’s use six figures on a 45mm by 40mm base, each figure having a 15mm frontage. To be fair, this looks more realistic, with your troops standing shoulder to shoulder. However, it would involve painting more figures per battalion and by now, you will know that I prefer to take the easier option.

The other point that I would make concerning basing is that by using a consistent 20mm per figure approach, you can get around the need for multiple basing by using movement trays. In the early days of my change to Napoleonics from Scifi gaming, I based figures individually on 20mm square bases to use them in Sharpe Practice skirmish games. It was easy enough to then change these into battalions by putting them into movement trays when I started to play Black powder.

Ready for basing Sir!

Ready for basing Sir!

I now base in fours and you can see from the picture above the start of the process. I take the Renedra 40mmm square base and cover it in Vallejo 26218 Darth Earth paste.

Splot! put figure on the base!

Splot! put figure on the base!

Then just push the figure into the paste. I don’t even glue the figures, there’s enough adhesion in the paste to hold them solidly in place when the paste dries. It even is good for metal figures. In the unlikely event that I decided to rebase my collection, it would be a simple task to gently pull the figures from the bases.

Four on a base

Four on a base

As each figure is placed on the base, I use a sculpting tool ( it could be a cocktail stick!) to bring the paste up over the figures base to blend them into the groundwork. You could at this stage, add some other detail to the bases – small rocks, logs etc – on this occasion I’ve kept it simple.

Whilst the bases were drying, I went back to the Grenadier company. I should confess – My OCD had got the better of me and I decided to change the badges on the back of the shakos. They are still slightly oversize but by using a smaller strip of evergreen, I managed to cut some slightly smaller diamonds. It was then a case of using a scalpel to slice off the larger ones and to replace & repaint the badges & any damage to the shakos. I also have decided that I would paint 28 figures for the Battalion. I thought that a full base of four grenadiers (the guys with all white plumes) would look better than just two on their own as they would have the French backpacks. I then would have four figures in the Light company (all green plumes) that I would base seperately to be used  as skirmishers. All of this will be clear when you see the finished unit.

French back packs

French back packs

To make the french back packs it was a simple task to cut the water bottle & cartridge case from a British pack pack and then glue them to the cleaned up French style packs as shown above. I then painted the packs in leather brown with off white patches – everything else was painted as standard. These were then super glued to the Grenadiers and they were finished as per the rest of the unit using the quickshade & rehighlight method described in last weeks blog.

Light company will skirmish!

Light company will skirmish!

The picture above shows the four figures from the light company on their seperate bases. The Vallejo paste has dried and I have painted it first with Vallejo chocolate Brown and then highlighted this with a quick dry brush of the chocolate brown with some Iraqi sand added to lighten the top colour.

Green scatter added to the bases

Green scatter added to the bases

The next stage is to add some green scatter, in this case I have used Woodlands Scenics Green blended turf. I use watered down PVA and apply with a small brush. Then just dunk the base into the scatter, tapping off the excess.

Grenadier Company based

Grenadier Company based

The picture above shows the Grenadier company based but there is one final touch. I like to add some grass tufts to give another layer of detail on the base. I’ve used Gamers grass Dry green tufts and attached them with a dot of super glue.

Rear of Grenadier Company - tufts added

Rear of Grenadier Company – tufts added

The Command Stands

The Command Stands

You will have noticed that the Officers & ensigns have also been painted and added to the unit. The procedure that I use is exactly the same as for the troops but I paint the Drummer & Sapper separately, rather than as part of a batch. The ensigns are carrying flags supplied by GMB, my favourite flag supplier. With the flags and tufts added, the Battalion is now ready to take to the table.

Full battalion in line ready for action!

Full battalion in line ready for action!

The Light Company will skirmish!

The Light Company will skirmish!

So another unit is completed and it’s on to the next project. I tend to have a break between Napoleonics so I’ll be painting something a bit different. However, next week, I’ll just explain how I use movement trays and how to split the battalion into two to facilitate a black powder game on a smaller table.

If you would like to have a go at painting your own unit, as I write, we have an offer in the shop. Buy the black powder rules set and get a box of Warlord figures for free. This also includes free postage. For more details Click here:

Special Offers

You can purchase the other products mentioned using the links below:

RENEDRA BASES

VALLEJO TEXTURES AND PAINTS

ALL BASING PRODUCTS INCLUDING GAMERS GRASS TUFTS

WOODLAND SCENICS

Block paint and Quickshade – Batch Painting the 28th

On with the next colour

On with the next colour

Having painted the shakos black, it is a straight forward job to paint the plumes in white – I use Vallejo off white 70820. The shako plates are painted with 70801 Brass. Notice that I will have to use these colours again, but the point about the batch paint process is that small progress is better than no progress. It is easy for me to find 10 or 20 minutes to paint the plumes and shako plates rather than block out a whole evening or part of my weekend trying to complete a whole figure or batch of figures. This is why the process works so well for me. Any spare time that I have, I use to paint a couple or more figures in one colour and the Battalion gradually takes shape. I do admire those painters that can sit and gallop through 24 figures in one sitting. However, first of all my back would seize up after a couple of hours, then my eyes will get tired, until finally, I start to make mistakes. So short sharp bursts work for me! It’s not so daunting to work through a battalion in this way, over the course of a week, you will find that the unit moves to completion.

Back to the painting. The next colour is Red 70957 for the jackets and the bottom of the shako plumes. There is a fair degree of discourse that takes place on forums as to what colour or shade British redcoats really were. Without repeating the general thread of this conversation, my view is simply to take a pragmatic approach, they were red. To be fair, the quick shade will darken and dirty this colour to a less garish red, so the effect is about right for my eyes. The other colour the I have used is Iraqi Sand 70819 for the food haversacks. These were usually made from canvass or a strong linen and although they started out as perhaps a paler shade than this, they would have been discoloured from use. If you prefer, you can use off white for these as well.

White lace and yellow facings added

White lace and yellow facings added

The picture above shows the next stage. When it comes to painting yellow, I always find it very difficult to get a decent coverage and colour. To help overcome this, I first painted the collars and cuffs ( facings) in sand yellow 70916 and then when dry, over painted this with flat yellow 70953, although the vallejo 70915 deep yellow may have been more effective. Next up, the laborious job of painting the belts, lace, collar edging and rifle strap in off white 70820. I prefer the off white as it is a softer white, but if you prefer, you can use 70951 white or the Foundation white 70919 for a brighter finish. The next colour is Natural steel 70864 for the buttons, musket barrel and bayonet. I’ve also added some detail to the muskets and at the same time painted the main buckle plate using Brass. Finally, I’ve painted the water bottle strap in Leather brown 70871. The figures are nearly complete.

Rear view & Flank Company

Rear view & Flank Company

The picture above shows the rear view of the figures with the brass painted onto Musket sling, bayonet scabbard and rear shako plate. (which keeps looking bigger…see last blog entry!) Note also that the Light Company figures have green plumes  and the Grenadiers, which are not pictured, will have all white plumes. If at this stage you think that the painting is a bit messy, bear in mind that the quick shade will cover some of the errors, I will  tidy anything too obvious and of course, the pictures tend to magnify errors. On to the backpacks!

Back packs primed in black

Back packs primed in black

As you can see, I have primed the back packs with army painter  black spray to save some time. I have also painted the water bottles with Vallejo 70901 Pastel blue, which I think is about right. If it looks too light here, it will darken down with the quickshade.

Back packs completed

Back packs completed

To finish the back packs, I used Neutral Grey 70992 for the blankets ( I also used this to tidy any overruns onto the troops trousers), off white for the straps, leather brown for the water bottle straps and miscellaneous pouches and steel for the pan. I suspect that the mess pan is far too clean for being on campaign and should be a smoky black, but it looks nice! You will notice the tidying up that I have done around the white strapping. Once again the quick shade will cover this up.

Ready for action - well quick shading...

Ready for action – well quick shading…

I’ve now attached the back packs to the troops using super glue. As we are gluing two painted surfaces together, super glue will be more effective than polystyrene cement. The main painting is now complete. The next stage is to use the army painter quick shade to add depth and definition to the models. Now you could use, either an Army painter ink or another brand – I’ve used the Windsor & Newton Ink in the past to good effect. However, I do like the finish that you get with the Army painter quick shade. I do not ‘dip’ the models as army painter advise, simply paint the model with the quick shade. I prefer the Dark tone, which is a black shade, rather than the dark brown strong tone, although some prefer to use strong tone over red. I know that there are reservations about using this stuff and to be fair I agree with many. The quick shade is too expensive, more because I have yet to completely finish a tin before it starts to ‘skin’ over. This isn’t to do with the seal on the lid but the air that gets trapped as the level in the tin goes down. The tins are simply too big. I have passed my concerns on to Army painter but I cant see them designing a new tin just for me! Having got my gripe out of the way, I have to say that otherwise the product is excellent and does do what it says on the (oversized) tin!

2017-03-19 09.38.46

Three stages of quick shade

The picture above shows the effect of quick shade. The first figure is just block painted, the second has been painted with quick shade and the third has had a coat of army painter matt varnish or as they call it anti shine. You can see that the shaded figures look as though there is more depth to them. The Quickshade does ‘dirty down’ the colours and close up this looks messy but in ‘real life’ the effect is quite acceptable.

So to recap, once the figures have been coated with quick shade, leave them to dry for at least 24 hours to harden off properly. Then spray with a good matt varnish. Matt varnish can be very temperamental and I could write a blog just on this subject – just carefully follow the instructions.

Ready to base!

Ready to base!

The final part of the painting process is to retouch some of the lighter colours. You can ignore this stage but you will find that if you carefully retouch the most prominent parts of the figure, the effect is well worth the extra effort. For these figures, I have repainted the white cross belts, tip of the shako plume, shoulder tufts and lacing on the cuffs. I have also retouched the yellow facings and finally, painted the bayonets in silver 70997, to make them shine!

The figures are now ready to be based. I will cover this in detail in my next blog. I’ll also show you the Grenadiers with their French backpacks and the completed Battalion.

If you are new to Napoleonics and would like to give it a try, at the time of writing,  we have an offer running in the shop. If you buy the set of Black Powder rules, we will add in a free box of figures. we also send post free to most worldwide locatios. Click here for details:

BLACK POWDER OFFER

All of the products mentioned above are also available from my shop here:

ARCANE SCENERY AND MODELS

New Weapons for Saga

spears

Those thrusting spears can be pretty effect!

We do carry a large range of accessories to help you get the best from playing Saga and painting and finishing your Saga warbands.

If you would like to see our range of Saga accessories click here:

Saga Accessories

On the off chance that you have followed the link from Facebook, either because you were simply curious or that you couldn’t believe that a joke could be so bad, I’d better confirm that this was an April Fools joke.  I do have to thank Nick Buxey, as it was indeed him that originally told me this tale whilst we were sat having a coffee at the Hammerhead Show at Newark. To be fair, Nick had me fooled right up to the punchline. I really did think that he had uncovered some new research and that I would have a new product for Saga.

If you have just stumbled on this by accident, here’s the story:

‘Thanks to some excellent research by Nick Buxey, Arcane Scenery is pleased to announce a new weapons option for Saga Warbands. The new rules allow Normans and Bretons to be armed with Thrusting Spears. Using these new spears will allow you to attack in close combat and should you fail to hit, you can repeat the attack. The new weapons are known as Brittany Spears.’

Ah well, as you are here you might as well watch the real thing….

Enjoy!