Whats on the workbench?

You can tell that I am struggling to get anything finished by the title of this weeks blog. It’s been one of those busy fortnights where my painting and modelling has had to take a back seat to the other things in life. Mind you I did manage a Black powder game last Thursday, during which I was comprehensively thrashed by my opponent, Mr Grant. I wished that I had taken pictures of the game just to remind me of how one over confident move can end in disaster.
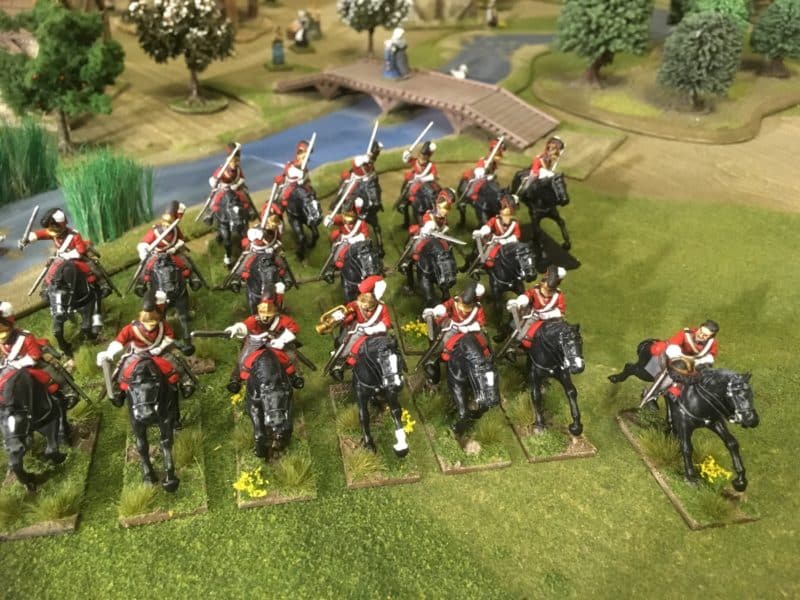
Cavalry charge!

Cavalry charge!

I had charged a regiment of Cuirassiers with two regiments (a brigade) of British household cavalry. The combat went very badly and both of the British regiments were pushed back leaving the Cuirassiers nicely positioned behind a brigade of three battalions of my British infantry within initiative charge move… The brigade was wiped out as they lost the one sided combat and then failed their morale tests. ‘Game over, man’ as Hicks or Hudson would have said! In future, if I have a cavalry regiment positioned to protect a flank, maybe I’ll think twice before committing it to an attack and leaving the flank so exposed!
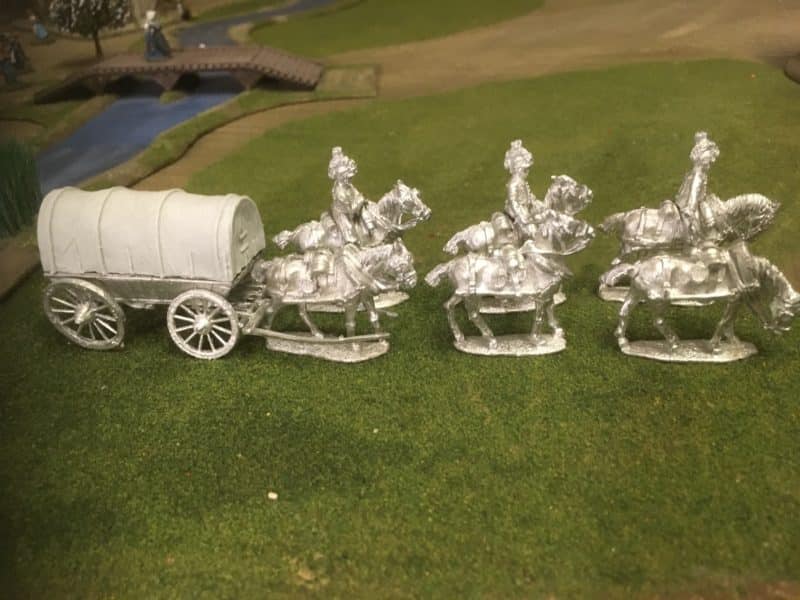
Perry's Amunition Wagon

Perry’s Ammunition Wagon

So back to the work bench. I had started work on a Perry’s British ammunition wagon. As usual, the sculpting, poses and detail on the model is superb and everything that you would expect from the Perry’s. However, the casting quality was not so good. I expect to do some cleaning up when starting a model but the amount required on this piece was considerable. In fact, after two evenings scraping and filing, the model is still not ready for priming. The annoying thing is that in cleaning up the casting, I have inevitably spoilt some of the lovely detail – the wheels and horses were particularly poor. The up shot was that I have put the wagon aside and started another model. I will get back to it when I’m in the mood for some more filing….
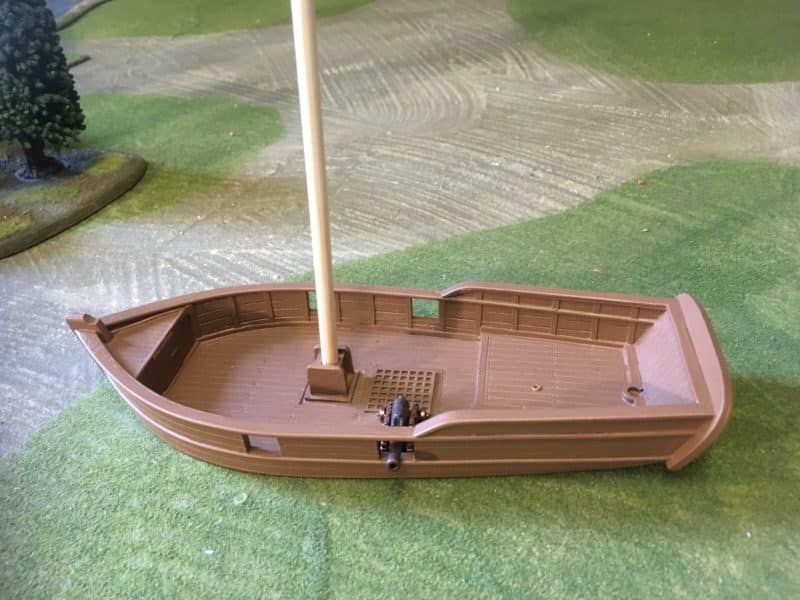
My next project - a small loop fpr naval engagements.

My next project – a small loop for naval engagements.

No such problems with the resin ship that I purchased from the last Partizan show. I have managed to loose the name of the company from whom I bought the model – I will find it and include it in a future blog or edit this one. The model is worth recommending! Once I had washed the model down using soap & water, I primed it with Army painter brown as you can see.
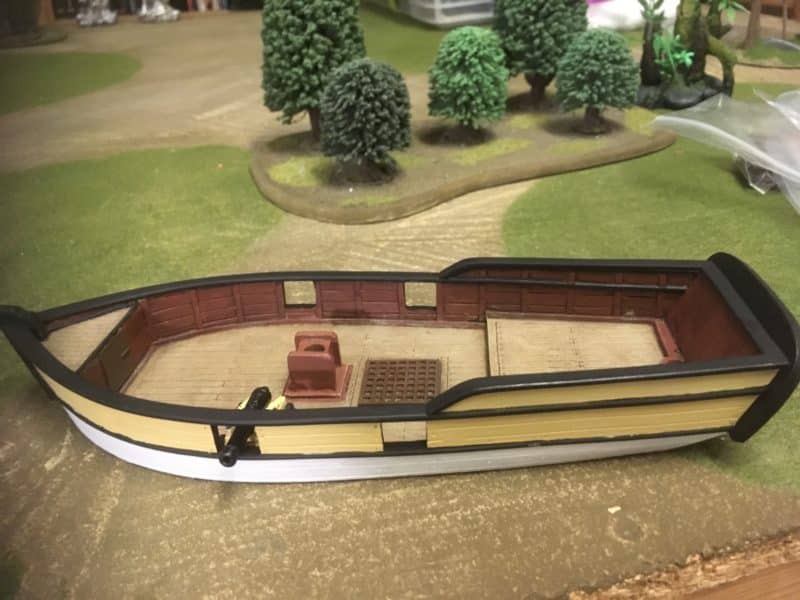
Sloop ahoy!

Sloop ahoy!

The next task was to paint her. I used Vallejo paints; Mahogany Brown 70846 for the interior woodwork, 310 Old wood for the deck, Biege 70917 for the upper hull, Off white 70820 for the lower hull and Black 70950 for the trim etc. I gave the interior, including the deck, a wash with army painter dark tone and then dry brushed the deck only with 310 old wood and then a further coat of 50/50 old wood 310/Iraqi Sand. The grating was painted in Chocolate brown and washed in Dark tone. I painted the stern panel in 70961 Sky Blue with Brass trim.
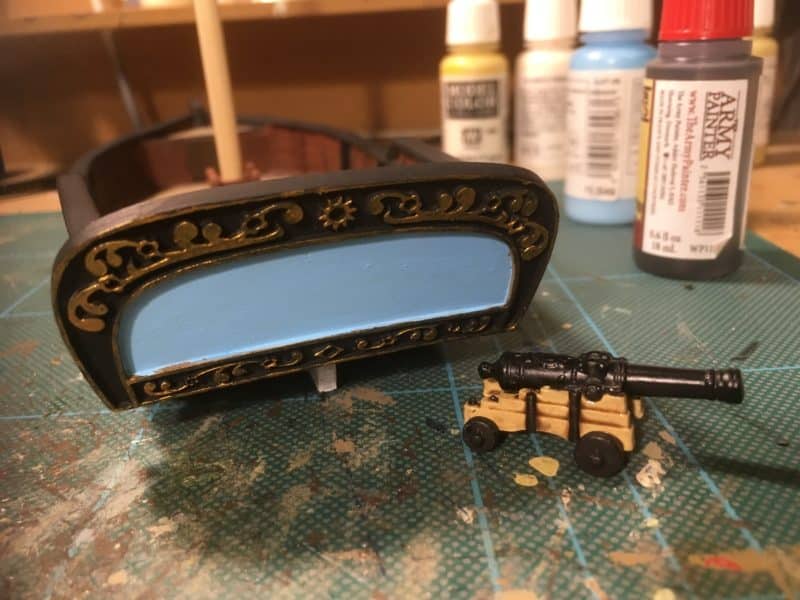
Stern of the Sloop

Stern of the Sloop

As you can see, I’ve also painted one of the cannon that will arm her. The cannon is from Arcane Scenery – the link is below. There is still quite a bit of work to do before she is ready for the table. Obviously, the mast, bow sprit and rigging will all need completion but I think that she will make a nice addition to my Caribbean collection. Incidentally, I haven’t got too hung up on how accurate the colours are. Although the sloop (?) will be crewed by the Royal Navy, it seems that even when it comes to such an iconic ship as HMS Victory, there is some controversy as to the actual colour:

RESTORED VICTORY CAUSES CONTORVERSY

So I am not going to be too precious regarding the colour scheme of a fictional boat designed to go on a wargames table! The other dilemma that I have is what to name her – I think I will resist indulging my sense of humour and perhaps steal a name from an Alexander Kent or Patrick O’Brien novel…
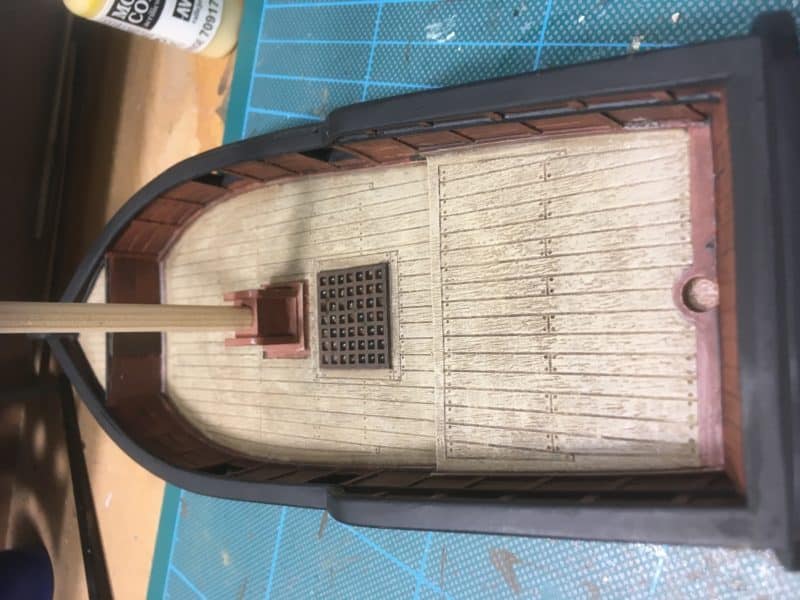
The view from the stern

The view from the stern

So, the next job will be to fit her out – hopefully, I’ll make a bit more progress now that the clocks are about to go back.
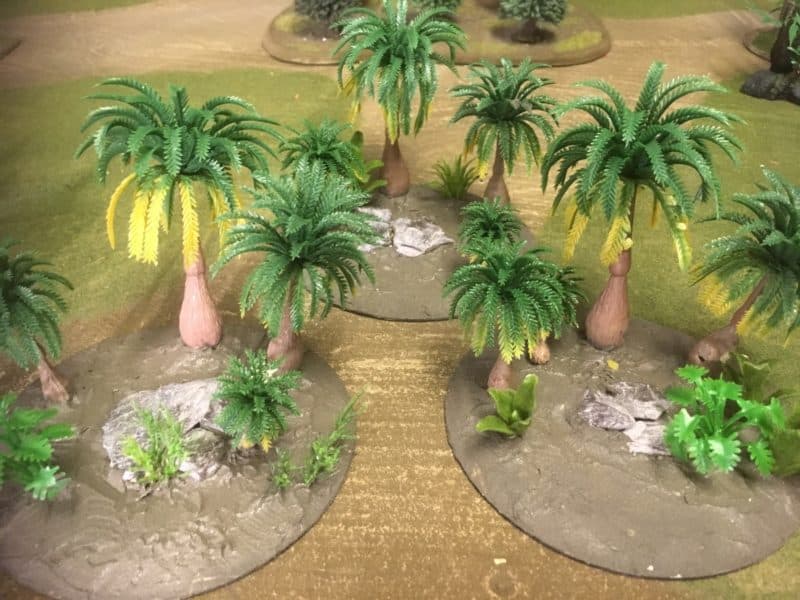
More Jungle Scenery

More Jungle Scenery

In between painting the Sloop, I’ve been making three more pieces of scatter scenery for the table using a slightly different variety of palm tree. They are waiting for a coat of paint and some scatter but are nearly complete. If you missed how I make these, check out last weeks blog ‘ Desert Island Discs’.  Although you can never really have too much of this sort of thing, I think that this will do me for the time being. I have plans to make some area bases to incorporate these pieces. If it works, I’ll include this in a further blog.

That’s it for now, here’s the usual links. Remember, if you are buying from Arcane Scenery, at the time of writing, postage is free to most worldwide locations!

SHIPS CANNON AND FITTINGS

VALLEJO PAINT & TEXTURES RANGE

PALM TREES AND JUNGLE PLANTS

STOP PRESS! I’ve just remembered the supplier of my boat. the Web site is Games Of War, you can see their excellent range of boats here:

GAMES OF WAR


Desert Island Discs

The Caribbean project is still progressing but for a change, I decided to make some scenery. It should make the games more interesting – it’s always nice to add a bit of local flavour. It also makes sense as I am now well into writing my rules set for the Caribbean and a bit of scenery will make play testing more fun.

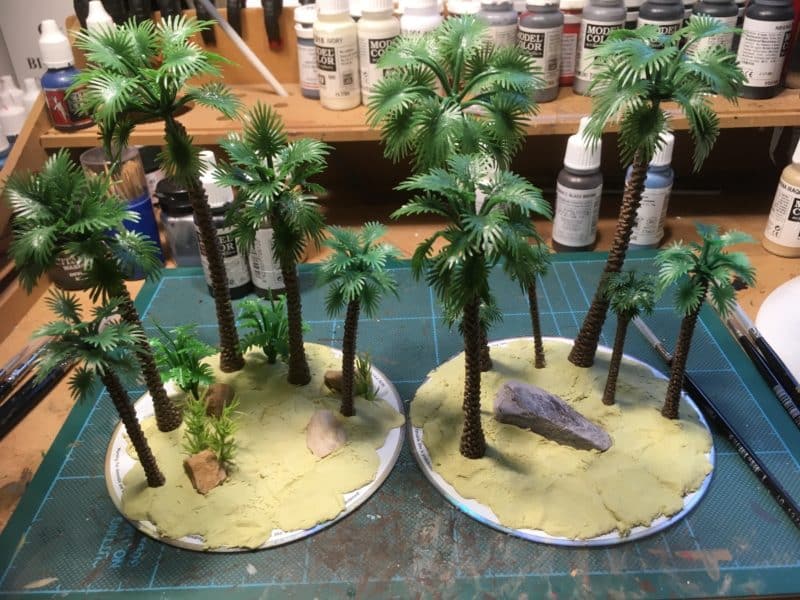
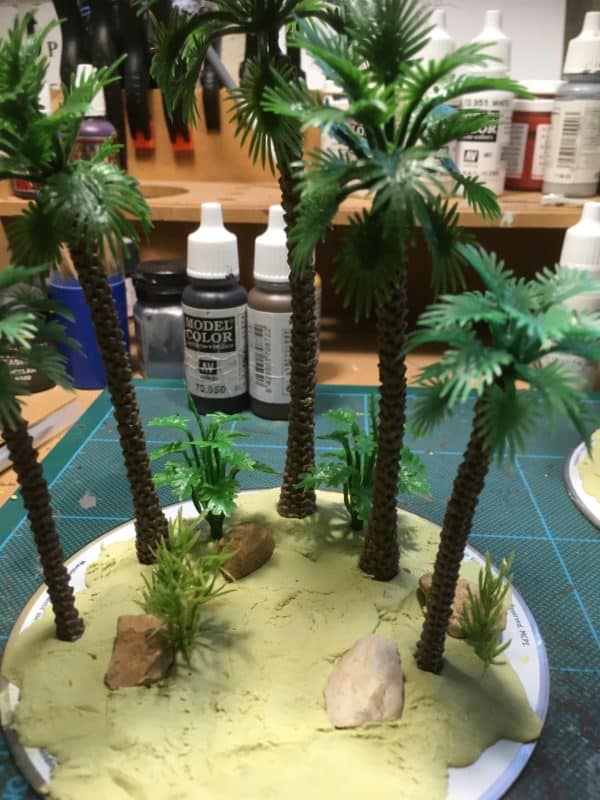
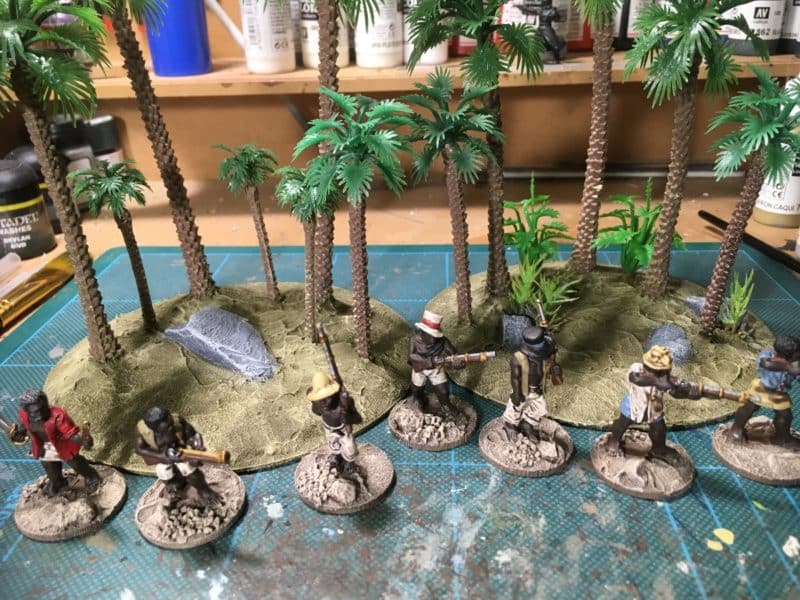
The obvious choice was to make some scenery with palms trees. It’s a nice straight forward project and requires the minimum of material. For the bases, I used an idea stolen from one of my gaming colleagues and recycled a couple of old DVD’s that I had kicking around. I simply covered them in a layer of Milliput and pressed in the palm trees – Arcane Scenery, of course! To add a bit of extra interest, I placed a few rocks and some smaller jungle plants into the milliput and then let it dry.

Jungle scenery on the work bench

Jungle scenery on the work bench

Close up of Scenery in progress

Close up of Scenery in progress

There’s no need to cover all of the disc with milliput, just enough to give some height and to secure the trees. I let the milliput dry over night.

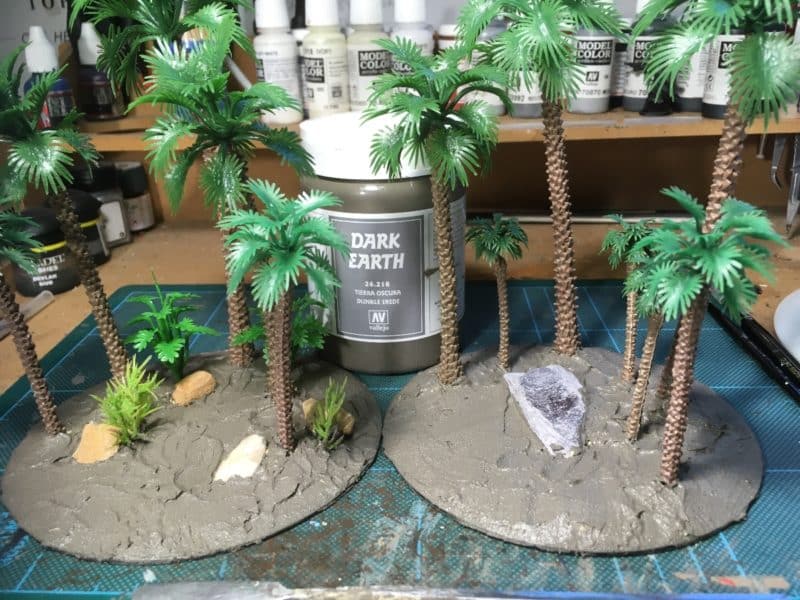
The next stage was simply to cover the base in Vallejo dark earth texture paste. I really like this stuff and use it on most of my basing. It’s quite robust when dry and because it seems to retain some flexilibity, it doesn’t crack or flake in the same way that say, Plaster of Paris or Polyfiller does. I just used a light skim and it doesn’t matter too much if you get it on the trees or rocks. It wipes off easily whilst still wet.

Vallejo texture paste added

Vallejo texture paste added

Once again, this was left to dry overnight. The next stage was to paint the bases. I have been using Vallejo paint for this job but remembered that in the past I had been using a Matt emulsion to paint my scenery. Sure enough, I still had the tin on the shelf, so the bases were painted in ‘Delhi Bazaar’! Using matt emulsion is a much cheaper way of painting war games scenery than using your best Vallejo paint. Keep an eye out for match pots at your local DIY shop. The irony is that they are more likely to be selling off the darker brown colours cheaply, as whilst these are ideal for wargames scenery, they don’t look so good on your living room wall…

There’s no problem in mixing emulsion with Vallejo though. I used a mix of emulsion and Iraqi Sand to dry brush the bases and bring out the detail – you do not need very much paint for the dry brushing stage.

Bases dry brushed.

Bases dry brushed.

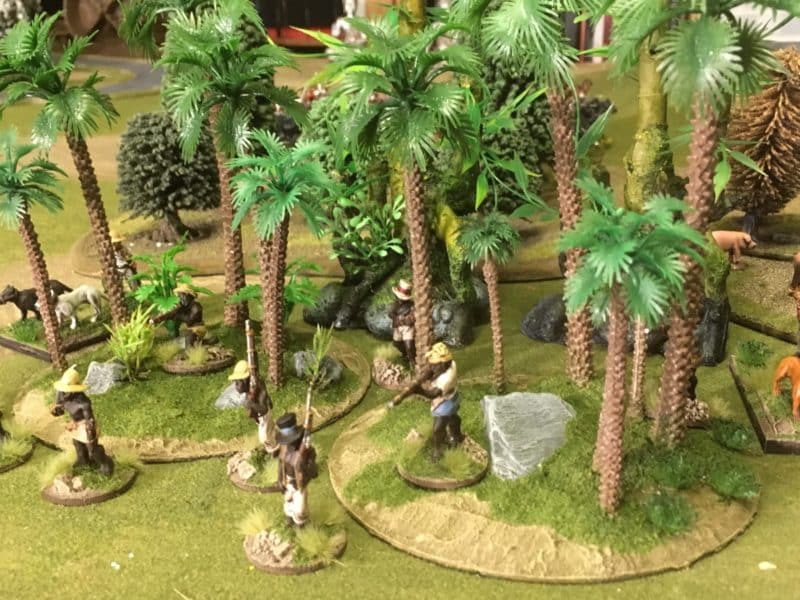
I also repainted the rocks. I often leave them in their natural state but decided to give them a coat of paint to bring out the detail. It is a simple matter to paint them dark grey and then dry brush them in lighter shades. You can also see my latest batch of Rebels that are nearly ready for the table. The nice thing about these scenery projects is that you can get on with other stuff whilst each stage is drying.

Woodland Scenics Scatter added to the bases.

Woodland Scenics Scatter added to the bases.

Once the paint was dry, I brushed on some PVA glue and added some Woodland scenic green scatter and a few tufts of grass. I kept the grass tufts to a minimum. Although a bit more vegetation would be more realistic, I wanted space on the bases for my figures when playing!

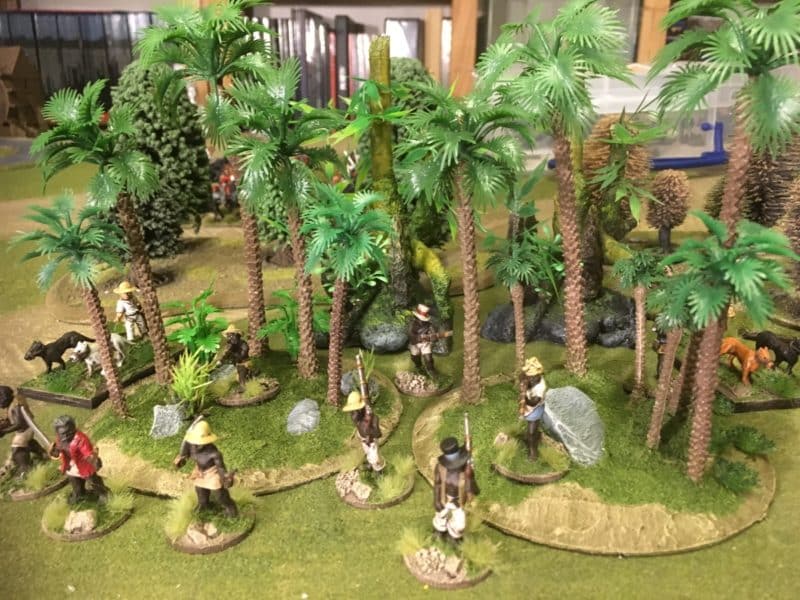
Jungle scenery ready for the table.

Jungle scenery ready for the table.

So that’s the first of my scenery done. I will add a few more of these to my scenery collection, using some of the different type of palms and trees that we have. I think that using CD’s/DVD’s is quite a good way of basing your scatter scenery, so long as you are not ruining your favourite film or TV boxed set! The effect can be perhaps a bit uniform but placing two or three together makes this less obvious. I also intend to make a few textured bases in MDF so that I can create ‘area scenery’ for the table – more on this in a later blog, perhaps.

If you would like to make some similar scenery, you will have to supply your own DVD’s but we do have most of the other items used and at the time of writing, send out post free to most worldwide locations.

Here are the links:

PALM TREES

MILLIPUT

VALLEJO TEXTURES

WOODLAND SCENICS SCATTER

PVA GLUE

TRENT MINIATURES CARIBBEAN RANGE

Cuban War Dogs

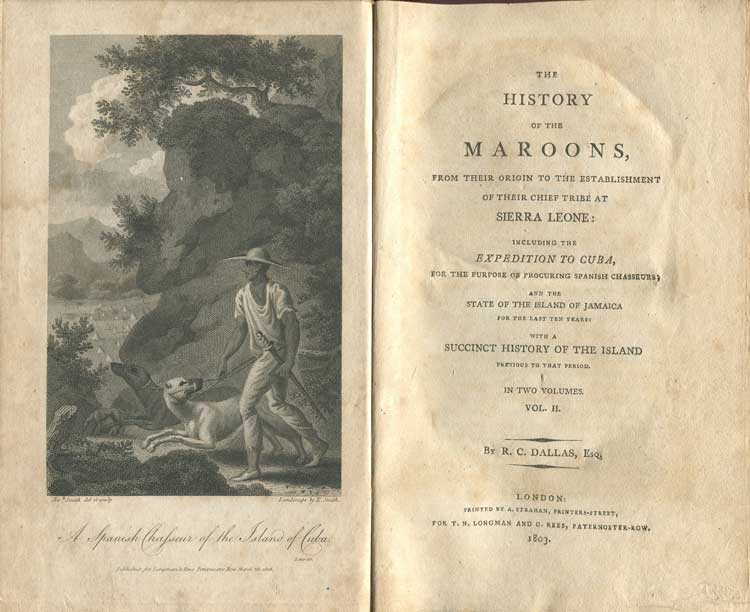
My Caribbean project continues with the addition of a set of Cuban Chasseurs with dogs to my collection. These troops, or more accurately mercenaries, were brought across from Cuba by the various combatants in the Caribbean to fight against the rebellions and revolts taking place. The British imported these mercenaries specifically to suppress the Maroon rebellion on Jamaica but I understand that they were also used on Haiti. My references have come from an account in an book by Robert Charles Dallas written in 1803, ‘The History of the Maroons’ that I found online. As well as describing the Cuban Chasseurs, he gives an account of the brutal training regime inflicted on the dogs and how they were used.

Reference: The History of the Maroons.

Reference: The History of the Maroons.

In 1795 the second Maroon rebellion took place and despite being faced by some 5000 British soldiers and militia, the Maroons held their own and fierce guerrilla warfare led to a stalemate. It is claimed that the introduction of the Cuban Chasseurs and their dogs broke this stalemate and ended the rebellion.

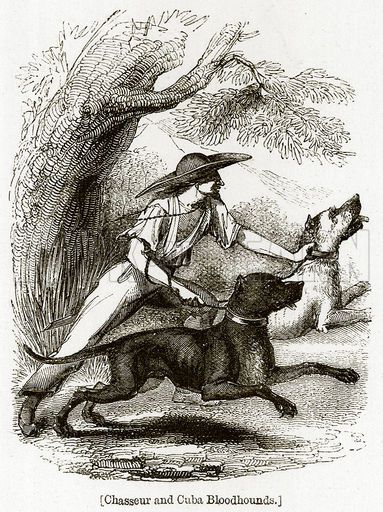
Chasseur and Cuba Bloodhounds

Chasseur and Cuba Bloodhounds

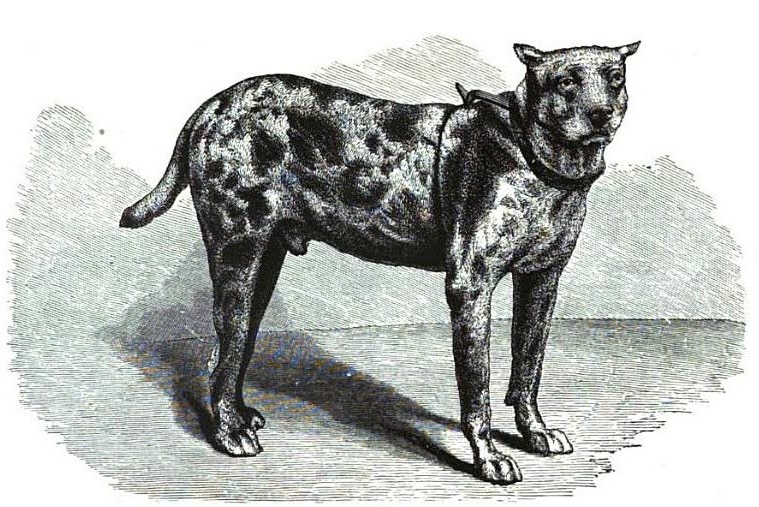
The dogs have been described variously as a cross between Lurchers and Bloodhounds, although it is possible that they were a variety of Great Dane. It could just be that the breed itself wasn’t consistent but it was the training by the Cubans that made the dogs so effective. To paraphrase from the book, ‘These people live with their dogs, from which they are inseperable. At home, the dogs are kept chained and are never unmuzzled but for attack…..The Chasseurs beat their dogs most unmercifully, using the flat side of their machetes. As a result the dogs coat is much harder as is the structure of the dog…’

spot In the book, there is an account of how during the voyage from Cuba the dogs got loose and tore apart the cattle that were also on board. On page 129, there is also an account of how the dogs were demonstrated to a commander in Jamaica to see how they would react under fire. The dogs were loosed on a small body of troops and despite a volley of musket fire being discharged (presumably blanks) the dogs charged home into the ranks of the soldiers, seizing the muskets in their jaws and causing the commander to run for his carriage to escape, before the handlers brought the dogs under control.

My understanding is that such dogs were used by the Spanish and French troops as well as the British and the Cuban Chasseurs that trained them were held in high regard. They were most effective at fighting against irregular troops in rough ground and helped to avoid ambush.

Trent Miniatures sell a pack of these ‘troops’ so I wanted to add some of them to my collection.

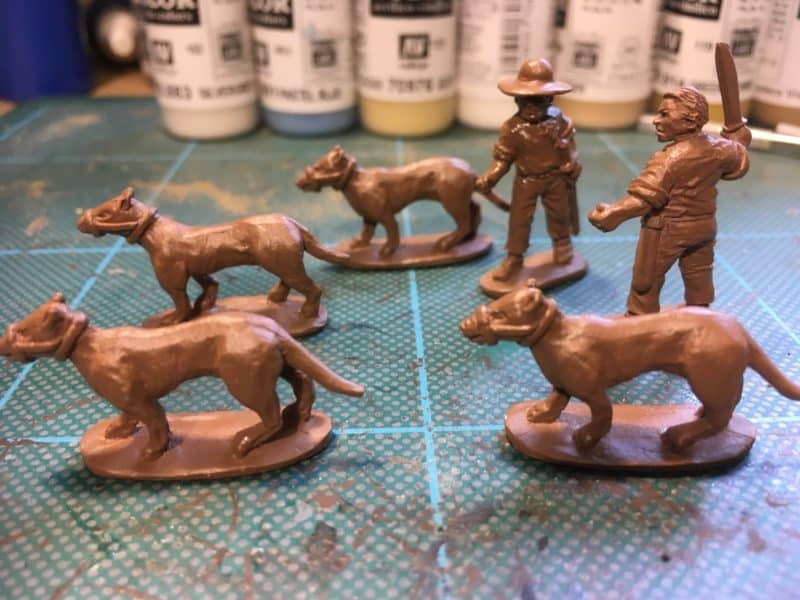
Trent miniatures Cuban Chasseurs

Trent miniatures Cuban Chasseurs

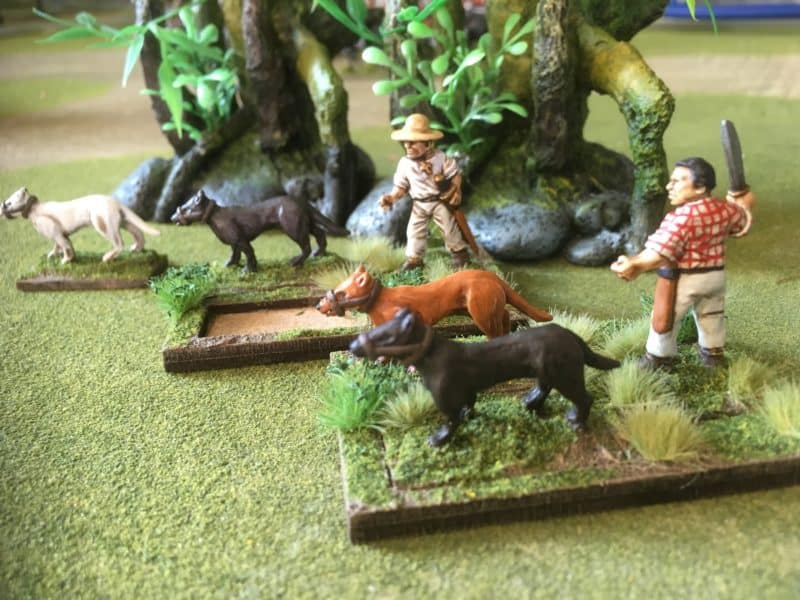
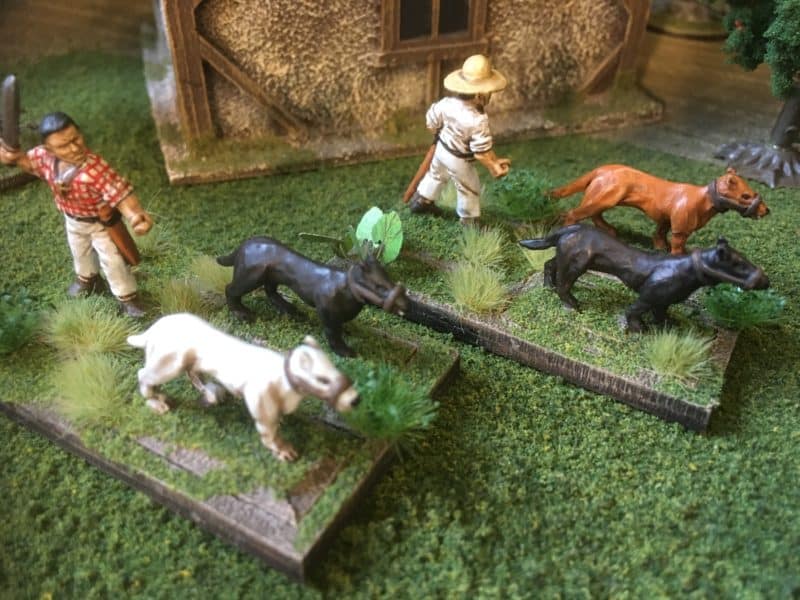
The pack includes two Dog handlers, or Chasseurs and four dogs. As you can see, I’ve cleaned them up and primed them in Army painter Leather brown. Painting was a straight forward task. It is said that the Cubans favoured a red checked shirt, so I have finished one accordingly. Using the picture from the Robert Dallas book as a reference, the other Chasseur is more plainly attired. Similarly, I have gone for a simple finish for the dogs, with one white, one light/orange brown and two Dark Brown.

Painted Chasseurs & dogs

Painted Chasseurs & dogs

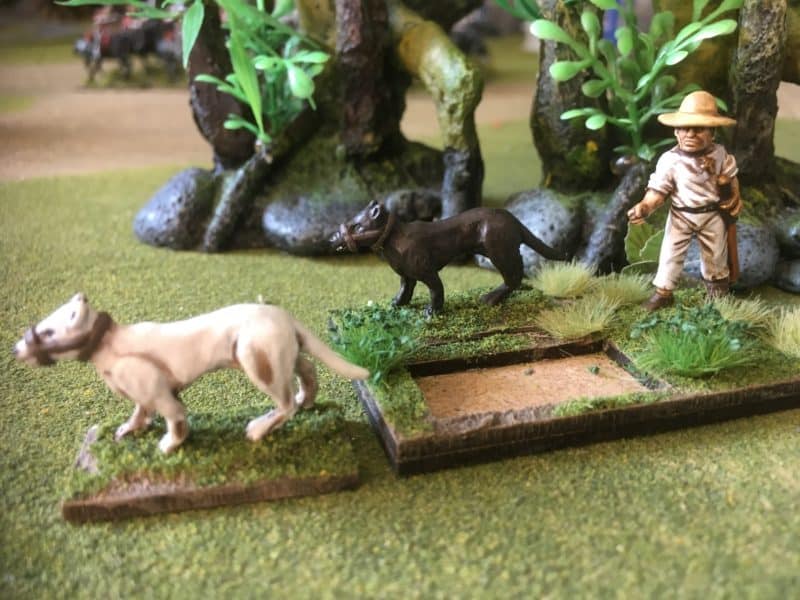
The figures are based using a special ‘sabot’ style tray to enable the dogs to be unleashed during wargaming.

Unleash the dogs!

Unleash the dogs!

These bases are not yet available through my shop but if there is sufficient interest, I can have more cut. I finished the bases in my usual style with the Vallejo dark earth texture, woodland scenic scatter and Gamers grass tufts.

I have already used the dogs as a unit in wargaming as I am in the process of developing a set of rules for the Caribbean conflict. We conducted the first play test last week and although much was learnt, there is a long way to go before the rules will be ready.

If you would like to purchase the Cuban Chasseurs and their dogs you can do so by clicking here:

CUBAN CHASSEURS CAR09

Vallejo paints and textures can be found here:

VALLEJO PAINTS

Woodland Scenics Scatter here:

WOODLAND SCENICS

and Gamers grass here:

GAMERS GRASS

All are available post free at the time of writing.