Chasseurs Ste. Domingue – Carribean part 3!

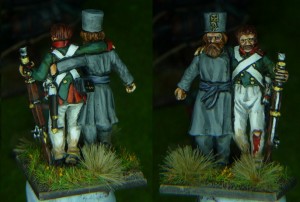
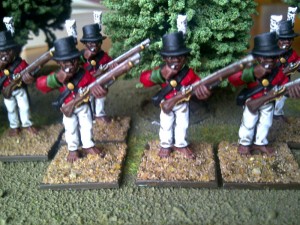
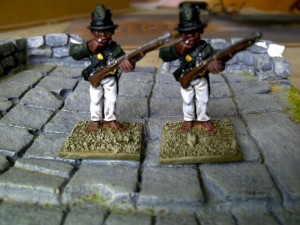
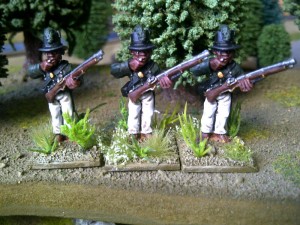
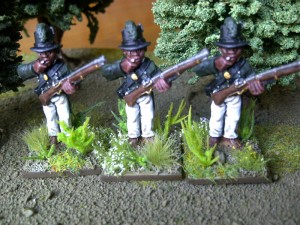
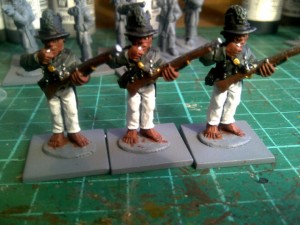
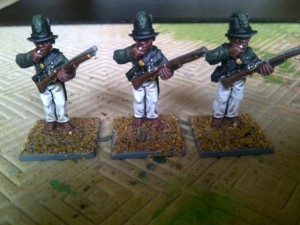
Well, having finished my first unit of Caribbean figure, the Chasseurs de Irios, I thought that I would carry on and paint the Chasseurs de Ste Domingue, also based in Haiti and of course  from Trent miniatures. The uniforms are very similar, except that the coats were red and the headwear more like a traditional shako with a white plume.

Rather than go through the stage by stage painting, I’ll just give you the colours that I used, as the process is very similar. All the paints are vallejo as usual!  The flesh is mahogany brown, 846, red, 957 for the coats, equipment  & hats were painted in black, 950, muskets were painted with flat brown 984 for the wood, 801 brass for the gun details & belt clasp  & steel 864 for the musket barrel & buttons. the facings were painted in green 968, which is probably a bit brighter than it should be but my preference is for the colours  on the facings to show! Finally the trousers were finished with off white, 820.

The other difference was that despite my previous comments, I decided to paint over a white under coat and I used the Vallejo matt white spray, which I find gives a perfect base coat to paint over provided you are patient and build the undercoat and not ‘drench’ than models to start with. The reason I usually use a coloured undercoat, is to save on painting when using quick shade. Of course, I am used to painting Redcoats with grey trousers, so it made sense to undercoat in grey. As these figures have white trousers, I’ve reverted back to a white undercoat.

Once the figures were painted, I gave them a coat of Army painter quick shade, the dark tone or black variety, and when this was dry, I sprayed them with matt varnish to get rid of the gloss effect. The quick shade does tend to ‘dirty down’ the white too much for my taste so I have repainted the plumes with a pure white, 950 and used the off white 820 to highlight the trousers.

I also used the base colours listed above with a bit of Off white to give some extra highlights on the muskets, facings & hats & straps. Once again, the basing will follow exactly the same procedure as the previous unit. So here’s a picture of the finished figures just before the final touches on the basing.

 So that’s two units of twelve ready for the gaming table. The next unit on the paint station is the 60th rifles!

The products used are available in my shop and are as follows:

Trent Miniatures Chasseurs Ste Domingue Car06

Renedra 20 x 20mm bases

Vallejo Paints & white under coat

Army Painter Dark Tone Quick Shade & Matt Spray

Basing Sand

Caribbean modelling project – Part 2, Basing

Having finished painting the figures it was time to get on with the basing. This part of the project can be as important as the actual painting, the mantra being concentrate on faces, bases & flags for the best results! The main purpose is that as well as finishing the individual figures, you can give the whole unit a cohesive look by ensuring that they are consistently based. As I have previously mentioned, I wanted these troops to look as though they were fighting in the bush, so I will add a bit more vegetation than my usual basing.

The first job is to paint the sand on the bases. I used the same colour as my gaming table, which is actually an emulsion from B&Q called delhi bazaar. It might seem a bit unusual, but the advantage is that buying a tin of emulsion means that you have plenty of paint at a very good price! Ideal for basing & terrain work. Once the base coat had dried, I lightened it with Vallejo off white and dry brushed the bases to bring out the texture. Vallejo and emulsion mix suprisingly well! I then gave the bases another dry brush with an even lighter mix to get the effect below.

Once the paint was dry, it was time to add the vegetation! I used some plastic plants that I had in my spares box & cut them down to fit onto the bases. To ensure that they stayed fixed, I drilled the bases & used Expo super glue. I also used Army painter jungle grass tufts and for a bit of colour, the flowered fields tufts.

At this point, I felt that I had finished, but looking at the picture, I decide that the bases just need something else, so I added a few dabs of Flowered Field Static Grass and then finished off by edging the bases with Vallejo Chocholate Brown 872.

So that’s finished my first unit – next up, the Chasseurs Saint Domique!

The items used in this article:

Trent Miniatures Chasseurs de Irios

Vallejo Paints- 872

Super Glue

Expo Static Grass

Army Painter Tufts

The dehli Bazaar emulsion is available from B&Q stores in half litre tins. If you would like some of the plastic plants, I have plenty and will be happy to include a few FOC when you order anything from the Trent Carribean range, just put a note with your order.

Caribbean modelling project

I thought that I would have a bit of a change from painting the troops at Waterloo, but I still fancied something from around the same period. So just to be different, I’m going to be painting a small group of Chausseurs de Irois. These are black troops that fought for the British out in the Caribbean – Haiti specifically.  The models are from the Trent Miniatures range – They’re  fairly straight forward to paint and I’m using a uniform reference from Osprey books.

I’m hoping to make a small skirmishing force from the West Indies as it will allow me to play some interesting battles as well as putting together a small ‘What if?’ campaign. If all goes well, I can add a bit of variety to my collection, both in terms of scenery and troops!

 The actual men that formed these units were originally slaves and as I understand it the British government paid the plantation owners £3k per slave, who were then conscripted into the army for five years and at the end of their service, given their freedom. They were  treated as per ‘normal’ troops during their time in the ranks, although this may not have been much of an improvement on their previous circumstances in some cases! These Black Battalions were vital in providing manpower for the British Empire to defend it’s Colonies. Not only was there a shortage of troops to garrison the islands but the casualty rates amoungst Europeans through sickness was appalling.  The white troops that were sent out would have to endure  a very long sea voyage  and then within six weeks many would be  dead of yellow fever. So £3k might seem  expensive for a ‘recruit’, but it was  cheaper than the alternative.

And so to the painting!

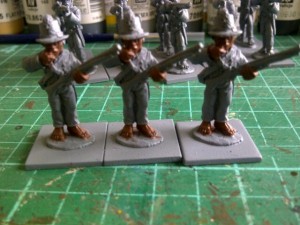
1. The first colour that I used was a mahogany brown, Vallejo 70846, to do the faces, hands and feet. You will have noticed I am painting over a grey undercoat, I quite prefer a coloured undercoat to black or white and as usual with my figures, I am going to use army painter quick shade to speed things up. However, I think I will go back over the figures and add some highlights to give them more definition.

2. Next coat of paint is Vallejo german extra dark green 70896. It’s a really dark green and seems to match the Osprey picture. This has been used to paint the coat and hat plume. Next will be the black 70951, to paint the hat, belt and scabbard.

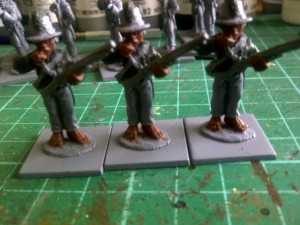
3. The picture above shows the figures a bit further into the painting process. I have used flat brown, 70984 for the musket stocks and the handle of the machete natural steel,70864,  for the buttons and musket  and brass 70801 is used to paint the belt buckle and details on the musket.  I’ve painted the trousers in off white 70820, I think it gives a nice white without being overpowering, and unusually for me I have painted the eyes of the figures using off white, and also,  the cartridge that the figure is biting. Finally, I used Vallejo light brown 70929 to add detail to the stocks and machete handles.

4. the picture above shows the figures after the quickshade & matting have been done. I always paint on Army Painter Quickshade rather than dipping it, so that I have some control over how it looks. Make sure that the quickshade is left overnight so that it really sets nicely, and then it can be matted down with army painter anti shine matt spray. I have used Vallejo 70994 dark grey to give definition to the belt and machete cover, and I did go back and highlight the plume, and also the cuffs and arms with a bit of the original green, lightened with off white. I also redid the trousers as the dip had ‘dirtied’ them down a bit too much.  On the face around the eyes and nose and on the hands and fingers, I have used mahogany mixed with  white to highlight these features.

For basing I am planning a totally different basing scheme, As they’re fighting in the Caribbean, I’d like something a bit more jungle like. So at the moment I’ve just covered the bases in sand ready for a bit of scenic work. In the next post, I’ll show you the finished figures along with details of the basing.


The items used so far:

Trent Miniatures Chasseurs de Irios

Renedra 20mm x20mm bases

Vallejo Paints- 801, 820, 846,  864, 896, 951, 984, 929, 994

Army Painter: Matt, Quick Shade

Basing Sand


Ebob and Fray Bentos

We love hearing from our readers and shoppers, and this week’s hobby post is from Ebob. Ebob has to take the award for  the speediest hobby completion, taking just a weekend from purchase to completion.

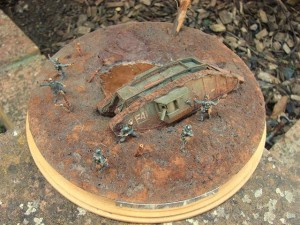
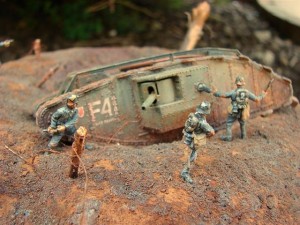
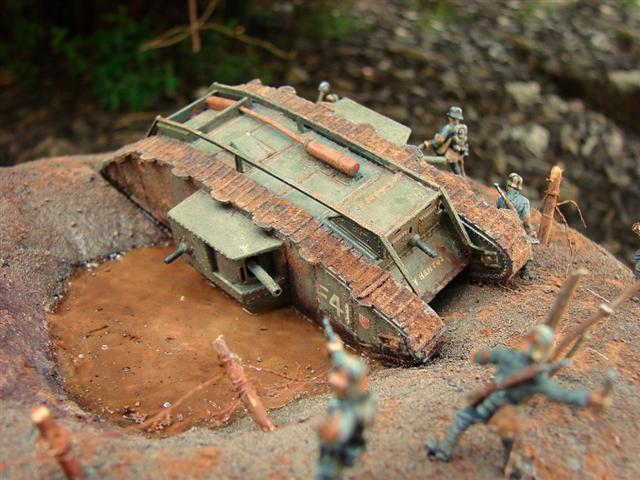
Basing his scene on the Battle of Fray Bentos, which was not a battle over unappetising pies, but a battle involving a tank nicknamed Fray Bentos in the First World War. Ebob has made use of this Emhar model, which he reports was good to put together though the rails were tricky as they are in three parts.

And this is what he has produced…

If you want to know more about the battle there’s a couple of sites that might be of use …here and here.

If you’ve got a project you’d like to tell us about please do so by commenting or using the contact form!

Monday Models

So we have a couple of projects we’d like to mention. That aren’t Arcane projects.

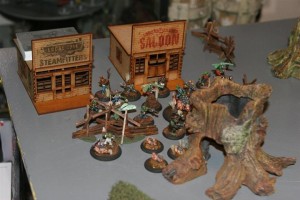
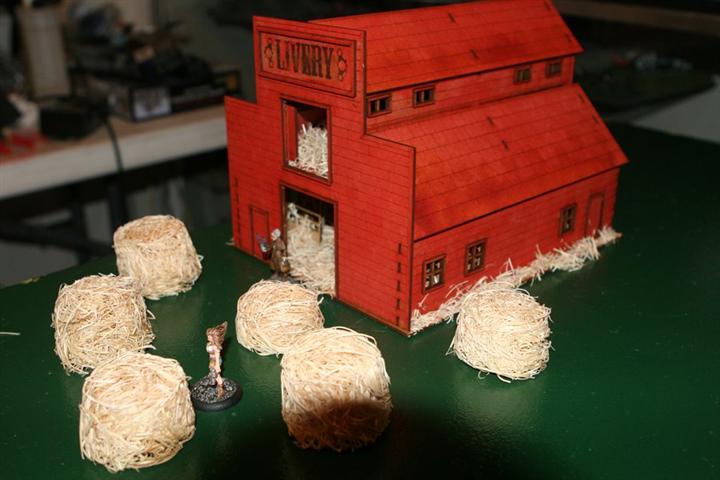
Firstly Kevin Hill from Texas again, with his Western town layout.

Kevin apparently feels he shouldn’t have painted this in that Cola red, because it looks a bit too barn like, but I rather like it. He made the hay bales using a paper cup and glue.

We’d also like to direct you toward something that we found on the internet, not one of our customers, heck we don’t even know the chap. Though we’d quite like to, because we are incredibly impressed. Curos is a modeller based in southern Spain, in Badajos, who has some AMAZING dioramas of Trafalgar and the Peninsula War. We love those ships. They are beautiful. You should take a look at both sites. Be amazed people.

Hussar Part 3 [Now with Words!]

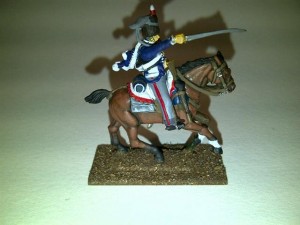
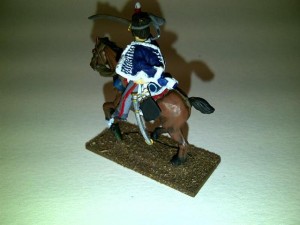
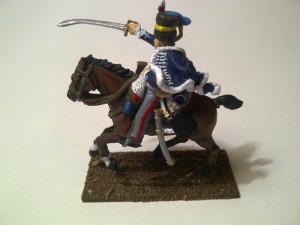
This is the painting hussars part three and its just to bring you up to date with the finished models. When we left them the model was completely base coated, and block coated and I had mounted the figure on his horse, which I had previously painted.

We will go over painting horses at some future date, as it is still a mystery to me though I am improving.

So we have a nicely finished block painted Hussar ready to go on his horse and the first thing we need to do is use some quickshade on him. I used the dark tone, which is the black quick shade, and I don’t dip the figure as the instructions say instead I paint it. Painting the dip over the figure allows me a certain amount of control, and it means that you make sure that everything get covered nicely and don’t end up flicking quickshade down my garden, as the instructions suggest. It does make me feel in control; like I am painting it rather than just dipping it in a tin and forgetting it.

Once the figure has been painted with dip and let to dry I check it. Though I do look to check the quickshade is going in the right place, the one thing is that you don’t really know until its dry, where it will go. So you have to let it settle and go in all the creases.

Once they were dry (I let the it dry at least overnight and there is an argument to let it dry longer), and then it is time to matt the figure down. The initial appearance after quickshade is “oh no I have ruined my model”, you haven’t! Carry on with the process and the next stage of the process is to use the army painter matt spray to matt the figure again. Matt varnish can be very temperamental so do make sure to shake it very very well; a good five minutes or so. I have never had a problem over shaking, but I have ruined by under shaking, and then do a quick test spray on a piece of card. This is because if you are like me and have a number of spray cans on your shelf then its so easy to pick up the wrong can, and I have heard of so many people who have sprayed their beautiful models silver…

I spray from around 20cm away in pulses, not a blast, I’d rather go back and respray rather than have it fog and mist.


The one other thing I will do is take the matt white and go back over any white that had been too dirtied down such as the fur on pelise and tuft on front of the bearskins. Also on the sword paint the edges in a nice bright silver, which gives the sword a nice shiny edge.


He is then mounted on his horse, and based.


The basing technique I use is to first of all paint base in chocolate brown or Vallejo black brown, then cover in PVA and use Arcane Scenery Forest Scatter. This gives you earth colour to start with. Then I use Army Painter tufts, and I have a thing for the meadow tufts, and on some of the bases I have used some Highland ones too. And finally some static grass, and for this I used Expo

flowered field which is a nice bright green. The basing doesn’t take too long and gives a nice effect.


On a couple of the figures I decided to go back and paint the eyes. One of the beauties of quickshade is that it can bring our the features of the faces, unfortunately sometimes this makes them look rather zombie like, so I went back and painted the eyes. Which even at this scale is an art in itself, and you may notice on if my men has rather staring eyes…


They were taken to the table last week in Sharp practice, where they managed to flank very nicely. Unfortunately a French counter charge left them under the charge of the cannon that they were attempting to charge. So not the most glorious start to their career but I hope it will improve!

Hussar…part 2

Welcome back to part two of painting my Perry hussars. As you will recall we are painting six perry hussars and have so far applied the first three colours.


The next colour I used was Dark Prussian Blue (899) to paint the pelise and the dolman. The pelise is the short jacket worn over the Hussars’ shoulders, and the dolman is the tight fitting jacket that they wore underneath with all the equipment strapped around them.
When it comes to the blue you are going to paint over lace and I don’t think that’s a problem, because when you come to paint the white lace you’ll need the blue there to show through.
The next colour I came to paint is Iraqi Sand (819), which I have used on their haversacks, which are shown in the reference pictures as an off white colour.
Having painted the haversacks, the next job was to paint the water bottles, which are a light blue. I mixed this colour myself, as I didn’t have anything suitable on my workbench.

The next issue was the colour of the lining on the pelise, which according to the Perry’s instruction sheet should be red, but in my other sources… Mont Saint Jean shows no colour; Osprey  show the pelise lining in light blue; and in CE Franklins’s British Napoleonic Uniforms, there are some very clear pictures and a table both of which are contradictory!  The table  in the book says light blue on the officers pelisse and on the troopers, white. There is a picture of an officer and the pelisse lining is light blue, but the picture of the trooper shows it as light blue too…and then I looked in the general introduction section of the book and there’s a picture of the pelise with light blue lining…so I am confused! I decided that the light blue lining looked better than Red and so went with this. The point of all this is to illustrate the discrepancies that you find when researching uniforms. I suspect that all of the lining colours are correct and it depended on the  squadron but who really knows… I took prussian blue and mixed with white, to get a nice shade of light blue and got on with the painting!

Next up was to paint the overalls a dark grey (994), the leather water bottle belt (871), steel(864) for the sword holder(?) and stirrups and red line on the overalls(947).  And so onto the most complex job – the white fur & lace!

I’ve put the white lace on as you can see in the picture above, the minute you put the white paint on the figure starts to come alive. As I am painting this colour I will often touch up the other colours, and I decided when I got to this stage I would carry on and finish the figure. So I have also done the brass on the sword hilt, the various buckles and on the sword holder- I must find out what that’s called [ed: scabbard?], and  the chinstrap. I have also painted his mustache, all my troopers will have chocolate brown mustaches…
As you can see the addition of the white has brought him together, but there are two colours missing; the yellow (953) for the cord on the hat, and the blue bag on the hat needs to be a strong bright blue (844), and I wanted it to be a different blue to the lining of the pelise.
I’ve used steel on the sword and I will paint over that with silver, and I will just brush up other colours before we use the quick shade.

So we’re nearly finished. In part three I’ll show you the finished models and discuss how I use the quickshade and how I finished basing the models.

Hussar! (Part 1)

Long term readers of our blog will know that I am gradually building a Napoleonic army, and with the release of the Perry’s  British Napoleonic Hussars set, I have the opportunity to add some cavalry to my army, and of course a chance to extend my painting experience. The following article is a step by step guide to how I paint these figures.
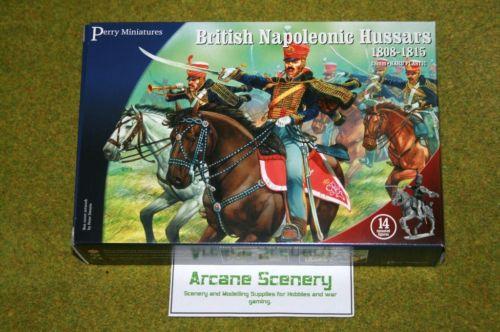

I have already assembled the Hussars, apart from the officer and trumpeter, which I will leave  for the time being. I just wanted to get on and get the 12 troopers done, which will allow me to field them in our club Sharp practice games. 

As with all  Perry figures, they are beautifully moulded, although there were a couple of challenges: the horses did not quite go together as neatly as I would have liked and also on the hussars themselves,  the fur caps had a bit of a sink hole from the moulding process,  which I had to fill.

This gives me the opportunity to talk about the fillers that we carry at Arcane Scenery. Now, most people reach for the green stuff  to fill blemishes,  but for filling plastic models, a much better solution is to use  Squadron White Putty. The beauty of this product is that its based on a plastic solvent, so it bonds very well to the plastic and it dries really quickly and smoothly, so you can get on with your model without having to wait for green stuff to set.
Now other than that, the moulding is very, very good and the actual cast lines in the figures are very light,  they need the merest of scrapes with a file or a scalpel. So  just another quick plug… we’ve recently started stocking Albion Alloys’ Flexible Files, which I suppose you could say look like glorified nail files, but they do the job brilliantly. By all means carry on using the wife’s or girl friends nail files, if you can get away with it, but I have found the flexible file to be much better.

With prep done, I continued by assembling the horses , undercoating and painting them, and then setting them aside whlst I built the Hussar riders. I’m not going to cover painting the horses in this article – painting horses will get it’s very own section!

So this means that I’ve chosen to paint the horses and riders separately, and thats not to everybody’s taste – some modellers say that the best way to deal with them is to glue the rider onto the horse and paint them as one, but I thought  that given the Hussars are quite complicated it would be better to paint them separately.

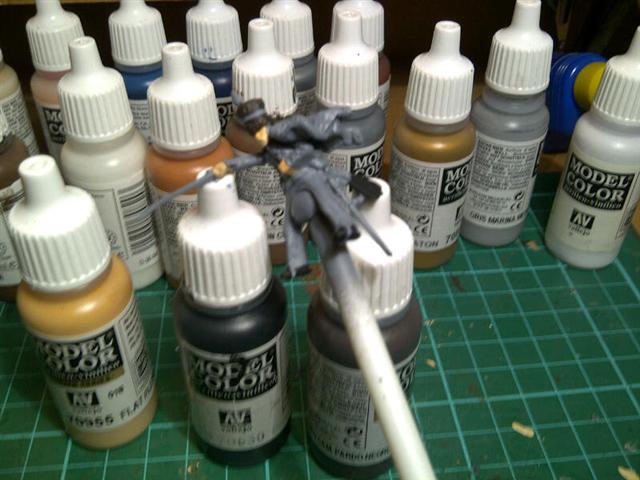
Now on with the painting…I’ve undercoated them with Army Painter grey spray paint. The hussars are difficult to handle, as they have no bases. To make this easier I have some plastic straws, that were holders for balloons  and the riders are blu-tacked to the straw  at the groin (and that doesn’t really matter because we want that clear to attach to the horse). So just to show you how that looks on my workbench we have them all lined up…
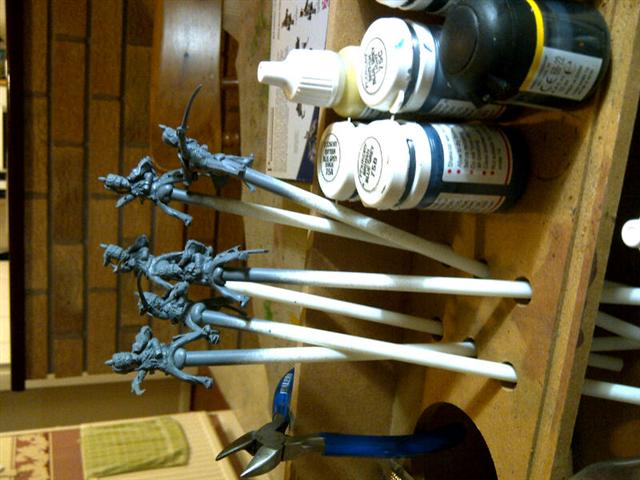
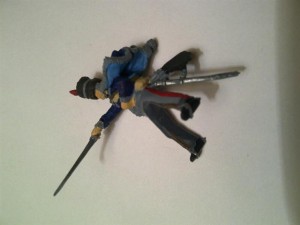
[Steve likes to live life at an angle…]
 

First 3 lots of paint on the figure as you can see from the photograph (apologies for quality I am using a phone camera)

I always start my figures with flesh, I think if you start painting the face and hands, it gives the figure some personality and its pretty clear where the colour goes (955 Vallejo). The next is Vallejo 950 black, for the boots and satchel and cartridge case, and again its a nice easy paint to use, and as you start to work on your figure you get an idea of whats to come and the sequence in which you will paint the figure. The next colour is for the hat, which is 822 German Camouflage Black Brown. The interesting thing is I am using several references,  Mont Saint Jean which is a superb website, and gives the colours for all of the troops uniforms at Waterloo . I have also got the Perry’s colour painting sheet, which is supplied with the set (and I applaud the Perry’s for doing so- it’s a rarity in the business), it shows all of the Hussar regiments in great detail;  and the final reference is from an Osprey book, Wellingtons Light Cavalry, which shows the regiment I have selected, the 18th Hussars in the 1815 period. All the pictures show the hat in a very different colour. The Osprey book: black, Mont saint Jean: a light brown (which may be due to the screen limits) and the Perry’s: a dark brown. Since two out of three are brown I am using Vallejo Camouflage Black Brown(822) which gives me the opportunity  to bring out the texture on the fur by dry brushing with a lighter brown later on.

So three colours on and its taken me about an hour, and as usual I paint six figures at a time, which means I change colours every twenty minutes or so.

The next part of the figure to paint was the Pelisse, (the slung jacket) and the dolman, (the tight fitting under jacket) and I’ve used Vallejo 899 Dark Prussian Blue.  But for now it’s time for a break…….

[Join Steve after his coffee for more painting]

Richard I

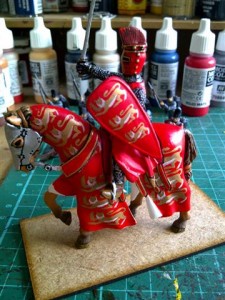
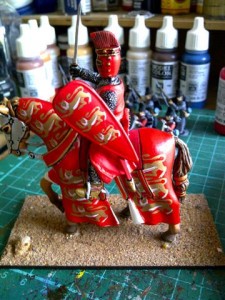
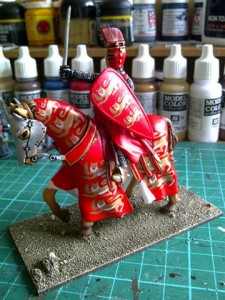
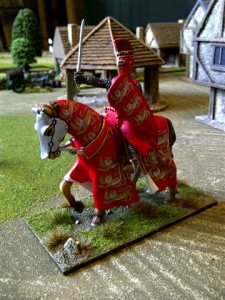
This is a basing project on one the D’Agostini knights that we sell. The knights were originally sold on the front of magazines, as part of a part work collection, we’ve managed to acquire quite a few of these, and they’re really very, very nice figures. I thought that we could make them look even better if they were on their own little base. So this is an opportunity for me to show you how simple it is to base a figure and just a few of the techniques that we use to improve the way the figure looks.

We’re starting off with a prepainted figure, its a model of Richard I looking very resplendent in his armour and red circoat. The first job is to fix him to the base; for which I’m going to use Devcon two part adhesive. Just recently, people have resorted to using superglue for almost every job, but there are other glues and we’ve done a previous article on the blog on this subject. We actually sell devcon, and epoxy adhehesive is a much better glue for this job, the thing about devcon, is that it is a two part adhesive, which will set off hard and gives a really really strong bond.

The difference between epoxy and superglue is that is that superglue is great if you’re trying to pull a joint apart – you will get exceptional strength , but it falls down on its shearing strength, when you tap it really hard. When you use epoxy resin you get an all round strong bond so even if the figure gets dropped the joint should stand, and the figure should stay in one piece.

For the base itself we’re using a wooden mdf base. We stock a vast range of bases but they basically fall into three types:
*We do the Renedra plastic bases, which I favour for my napoleonic army. These are really nice extremely well moulded bases, exactly the dimensions that they say, and are nice and thin, which means that the figures can be put into a movement tray and still look about the right size on the battlefield. These are particularly good for plastic figures.
* The next range are the plinth type plastic bases (similar to a certain large brand) these are also very good for plastic figures too, but the little plinth gives a little extra height, so I quite like these bases for hero figures. If you’ve got an officer, or a hero figure that you want to stand out, giving him a taller base is a great idea. We also have circular bases which have a little lip around them that makes it look like a little diorama and I think these are super for officer and command groups.
*Finally MDF laser cut. Absolutely precision cut bases which will allow you to put all your figures in very neat formations. I particulatly like MDF for metal figures, using expoy resin to glue them in place. For this metal figure I’m using a Sarissa Precision 100mm by 50 mm MDF base.

To use the epoxy, simply squeeze out equal amounts of the resin and hardener onto a piece of paper and mix with a toothpick. Then apply to base. It’s rapid drying, so it will be set in about ten minutes, though it probably needs about 24 hrs to fully cure, but it will be workable in the ten minutes.

Richard I has been drying for about 15 minutes, the epoxy is nice and dry and he is held firm. The next task is to cover the base in sand. You simply use watered down pva glue, a white woodworking glue. Cover the whole base in the glue, being careful not to get on the model, and once the base is covered, plunge the model into a box of sand. We sell basing sand, and I quite like to mix up the diferent types of sand so that you get a mixture of coarse and fine sand on the base.
I’ve also included a a few little pebbles to add a little extra interest. You might need to to give the base a little tap to shake off the  excess sand. We’re going to leave it a good thirty to forty minutes for the glue to dry properly.

I let the sand dry for a bit more than an hour to make sure it really was dry. The next stage is to paint the sand. To do this we use an emulsion paint rather than a modelling paint. The cheapest way of buying paint for scenery and basing is to go to your local DIY store and buy a can of emulsion. A colour that I like using is called Dehli Bazar II, which is a nice browny greeny colour. When painting over sand, use an old brush as this work can be quite hard on the brush. Bear in mind pva is water based, so paint fairly quickly, so that the watered down emulsion doesn’t take the sand off.

This first coat of paint will take some time to dry, because its watered down. So take a break for an hour or so!

Once the base coat is dry, you can dry brush the base. You take a sploge of your original paint and mix it with a lighter colour.  At this stage I am happy to use the vallejo paints and don’t worry about mixing the types of paint. As long as they are water based the paints will usually mix quite happily. I used light Iraqui Sand to lighten up the emulsion but a white or even some spare magnolia emulsion would have been fine!
To dry brush, you first load your brush with paint and then wipe most of the paint off. This means that only the detail or raised areas on the base would be highlighted, and the depths will stay the original colour. So you get a really good textured feel , and you can repeat this with increasingly lighter colours, to build up the effect.
These coats of paint will dry very quickly and you can really finish all of the highlighting in one sitting.

The next part is to add some foliage. I started with Javis coarse scatter which I splodged on using PVA, and then some Highland and Jungle tufts from Army Painter attached with superglue. I also outlined the base in a brown colour to tidy up the edge – there’s a lot of debate in our office as to whether you should edge your bases in brown, green or black. I prefer brown.

So that’s it, a nice simple project but a really efective finish. So how do you like to base your figures?

Edam good figures

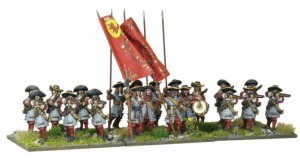
We wanted to show some newly painted figures from our favourite painter, TheStug …


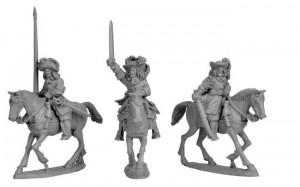
Painted as a Dutch regiment the figures are a range new to Northstar Figures,  and are sculpted by the very talented Steve Saleh. Steve also sculpted the Northstar Wazungu figures that our Steve loves so much, and  the Persian Satrap limited edition  exclusive figure that came with the most recent Great Escape rules set The Rise and Fall of Persia.

The figures depict Louis XIV’s army and the opposing forces for the period 1665 to 1680, and due to the lack of standard uniforms at that time can be used flexibly as a range of armies.

Though new to Northstar’s ever growing range, the figures are originally from a range formally called Glory of the Sun designed by Mark Copplestone of Copplestone Castings.

Since they are so flexible, we’re interested to know what armies you might use the range for…tell us in the comments!

L’eau de Steve’s Wagon

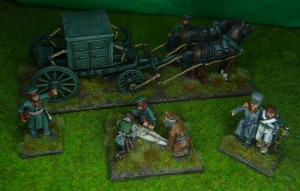
Today we are starting a new project and once again its one of my favourite topics, which is wagons and the support for Napoleonic armies. In this project, we are going to make a water wagon, or it could even be a beer wagon if you prefer! It is a simple conversion and makes into a nice model. Basically we’re taking a Gribeauval Limber from the Trent Miniatures range and we’re combining this with a Cask from the same range, to make a simple water wagon. So first off let’s just show you the components, and then it will be a question of filing them all down, making them fit together nicely and putting the parts together.

So, having laid out the components you just need to take a file and clean up any cast lines, and dry fit everything so you can see where it’s all going to go. Obviously, the two halves of the cask need to fit together, so you need to file these to make them nice and flat so that there willl be a nice join there. The two cask supports, the stands, will be stuck to the limber at either end. So file off the bottom to make sure you’ve got a nice clean fit here. Then, just tidy up the wheels with your file.

Once you’ve done that, the limber itself needs a bit of a clean up. In the middle there’s a spiky piece, which is where the French gun would be attached. You need to sand this flat, because it’s going to get in the way of the cask. Once that is sanded flat, the cask will sit quite nicely on the limber. So we can now assemble the water wagon.

First of all glue the two halves of the cask together. I use superglue, you can use epoxy resin, but I find that a thick superglue (we sell the expo variety) and some accelerant means that it will set off quite quickly, and the thick superglue will provide an element of filling. So some of the imperfections in the casting of the barrel will be taken out, and that will make life easier when it comes to painting.

Now you’ve glued the barrel together, the next thing is to glue the supports for the cask onto the limber. I glued one support to the very rear spar of the limber, and one support to the front. Once you’ve done that, attach the wheels and the main construction is complete.

If you look at the picture you’ll see that I’ve got a separate barrel on a separate limber, but it’s a pretty straight forward job for the cask to be glued onto the top and hey presto you have what looks like a passable water wagon already. You could just stop there, a little coat of paint this would look quite nice, but I’m going to add some more detail.

The picture shows the water wagon assembled, and as you can see I have added a few little details. On the back there’s a little tap, very straight forward to make,if a little fiddly. I’ve used some 5 core solder which I’ve bent into shape, drilled the barrel and inserted the tap into the hole. I’ve then used another piece of flattened solder to make a tap top. Then there’s a hook with a bucket on it; again fairly straight forward to make. I took a small square piece of plasticard to make a little plate, and then taken a piece of florists wire and bent that to shape, and I’ve super-glued that on to the back on the limber. There’s also a cork on the top of the barrel which is a little bit off of a plastic. The assembly is very straight forward, the key is to file it well.

I’m going to paint the Gribeauval Limber dark green as if it were French, so even if I use it with my British army I will claim it was a captured piece of equipment as I imagine many were. I won’t claim that this is an actual scale replica of a water wagon as I found it very difficult to find a picture of such a thing. However, I think that it makes a nice piece of scenery and it’s fairly convincing! No doubt it will feature in a future skirmish using the Sharp Practice rules to provide the background.

Beginners Guide to Painting British Napoleonic Infantry (part 2)

We are moving on with our flank company figures and in the last picture you saw they had just been dipped. We’ve now got to the stage where they’ve had a coat of matt varnish.
Tips when using varnish:

  • Make sure the figures get to dry for at least 24 hours, the dip will be touch dry after 1 to 2 hours, but you really want it to set hard. If you use your varnish too quickly on top of dip there is a danger you will end up with the varnish fogging.
  • You should make sure you shake your varnish. I cannot stress this how important this is.
  • When you come to use your varnish use it very sparingly.

I may need to go back to these figures a second time and matt them down a bit more as they are a bit shiny on cuffs, coats and on the hats, though I am not too worried about the hats as they would have been wearing oilskins, but the coats need to be matt.

Prior to painting the bases I have coated them in pva glue, and dipped in normal fine sand. You don’t want the sand to be too coarse as it can look a little out of scale. I have painted the bases the same colour as I painted my wargames table, using an ordinary emulsion called Dehli Bazaar. To highlight the bases I have used some Vallejo White to give a bit of contrast.

I have added also  some static  grass to the bases. I use flowered flock, Expo Static Grass Flowered Field effect, and I’m going to use some Army Painter Highland winter tufts to give the bases some more texture.


The final picture shows those six soldiers from the flank company of the 27th Enniskillens.


I am quite pleased with them. I was initially a little disappointed, because I felt the buff didn’t look as good with red as white might. I have gone back and touched up the white highlights on the shoulders because the quickshade had dirtied these down, and I have slightly retouched the buff strapping. I haven’t re-varnished the hats, and they are still a little glossy which would be a reflection of how the oil skins would be. I have gone back to the red, almost dry brushing with the flat red to improve the colour density.

I will continue with the rest of the battalion (32 figures) and at some point we will do an article on the officer, sergeant, drummer and two ensigns. We are going to paint these a little differently with more highlighting and less reliance on quickshade. I was talking to a professional painter and he said if you concentrate on the faces, bases, flags and officers and then your figures will always look good on the battlefield.

If you’ve got any modelling and painting projects you’d like to share email us at: girlfriday@arcanesceneryandmodels.co.uk

1 6 7 8 9 10