Do just do it and B&Q it! A guide to making a war games table.

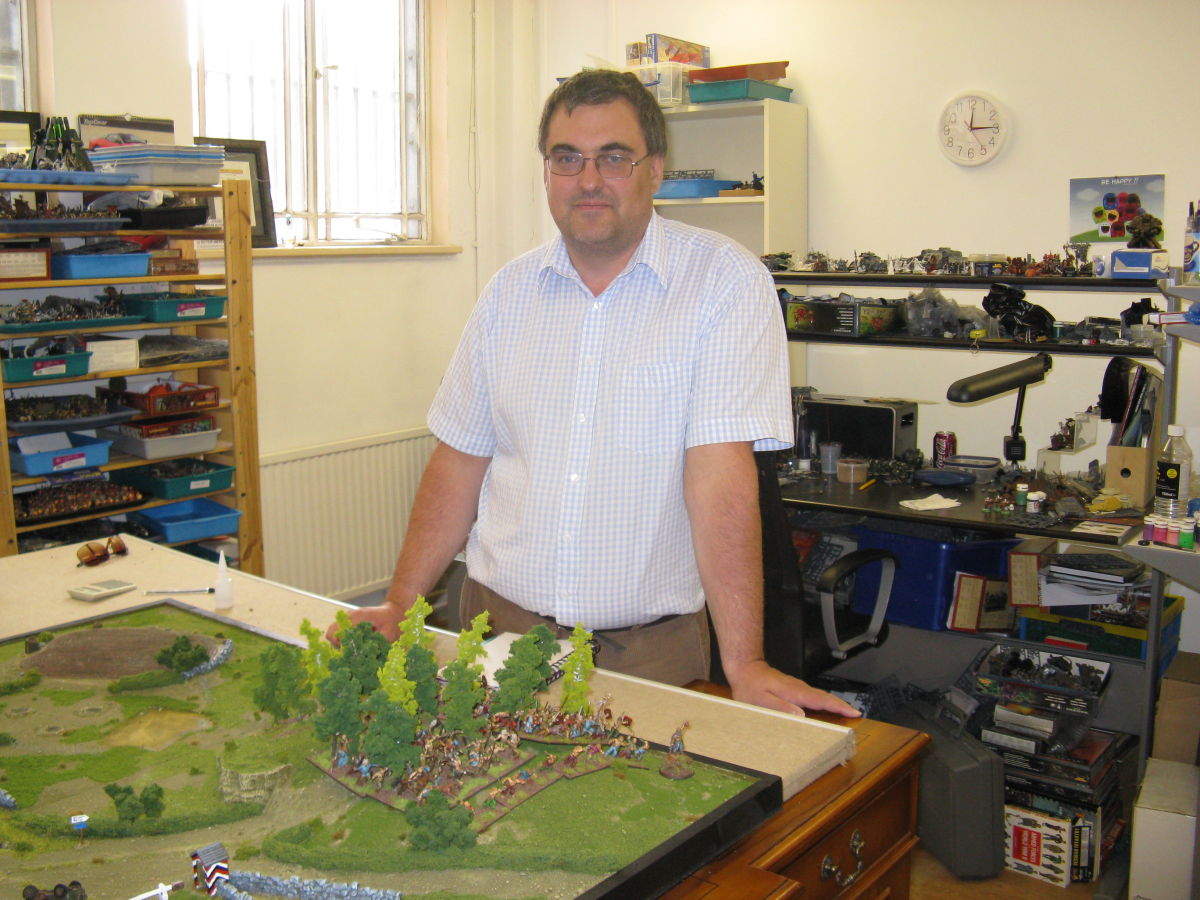
I had wanted a war games table for years but had put off making one for all sorts of reasons: it was too expensive, it was too difficult to make; I didn’t have anywhere to put it; I couldn’t make up my mind what sort of table it should be – themed for a particular period and so on which resulted in the fact that I only played war games at Warhammer world. Not a bad venue, to be sure, but recent changes in policy there left me with the feeling that it was time to be independent (to get a flavour of the GW policy have a look at the following thread……)
Continue reading

Guest Modeller of the Week: Bernard Lewis

We decided that instead of just talking about Arcane and Steve’s latest projects and battles, you might like to know what other members of the modelling and wargaming community have been up to.

We start this week with the very affable Bernard Lewis from Mantic Entertainment Ltd.

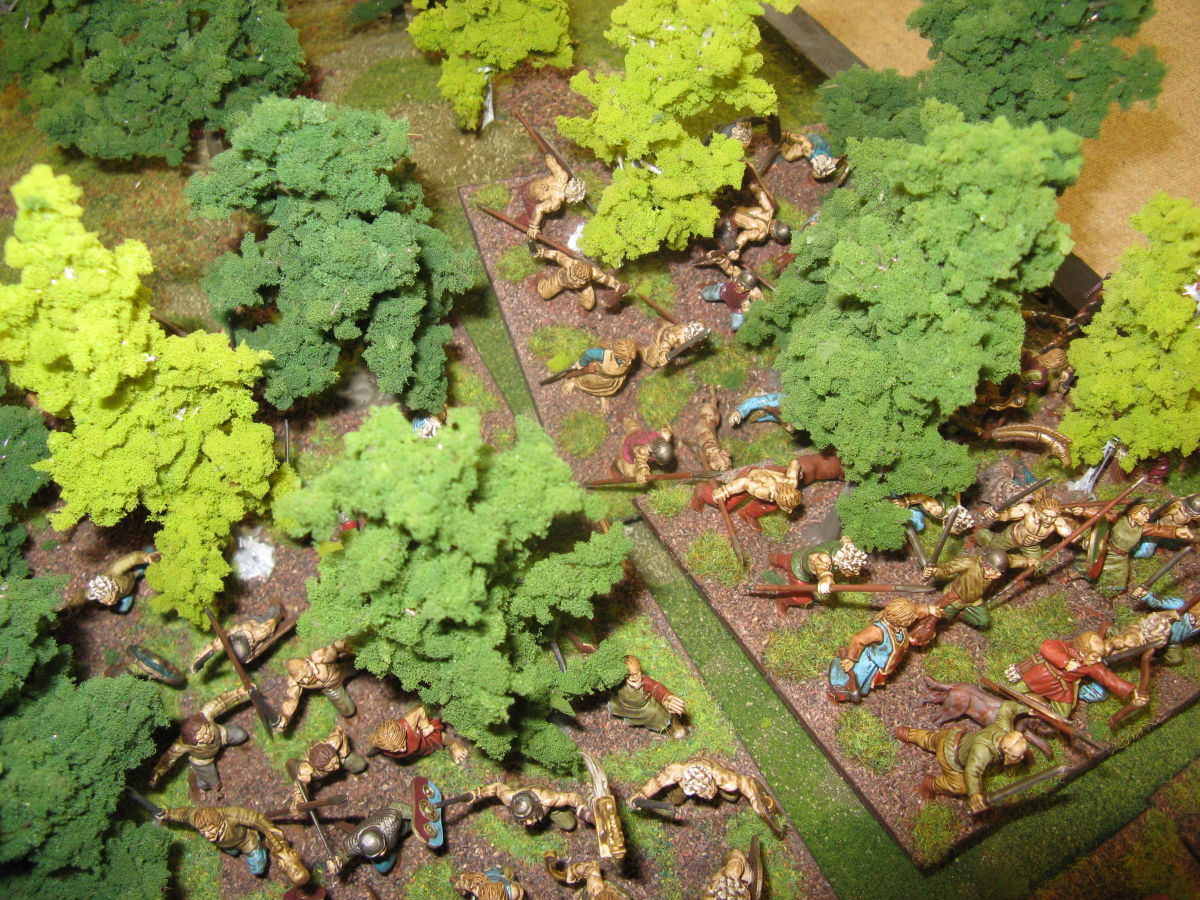
Bernard has recently been making some rather unusual Celtic base groupings for Hail Caesar which have both Celts and trees on the base.


” I used single bases because for Hail Caesar you don’t have to use individual bases, and began with putting trees on just one and found I liked how it looked” says Bernard.


As well as providing some contrast on the gaming table against other players’ bases, and providing the Celts with some hiding cover, the bases have some other advantages…

 

“I’m a slow painter, and this way I can get more done sooner!…It’s also good if you’re budget conscious”


Currently Bernard is working on a river crossing base to sit alongside the Celts with tree coverage, and then plans a base with Celts fighting Romans.

Obviously here at Arcane Scenery we are big fans of scenic bases, we think Bernard has done a great job of making some extra interest and we may well be [ahem] copying him soon…


Wagons Roll!

Although some time has passed since my last Blog I have been busy on the hobby front and so I thought that my first post should be to show you my latest modelling project. I’ll get back on stream with new releases and reviews in my subsequent posts!

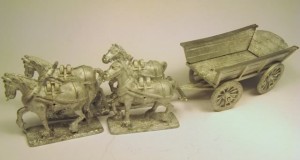
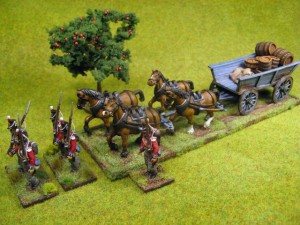
I have been gradually building my Napoleonic Army and I now have 3 battalions of infantry and an Artillery battery completed along with a few officers. I was looking for my next project when the Trent Plank sided wagon caught my eye. Although a supply wagon isn’t the most glamorous subject, I thought that every army shop should have one! I’d also been tempted by the Renedra barrel set, Again, not the most attractive model subject, but these things just appeal to me, I like to see the mundane equipment represented in my armies!

I did some very basic research and from what I could gather, it seems that the British Army was happy to requisition transport locally, so there was likely to be a big variety of wagons in service in the 1815 campaign. As the Trent Miniatures wagon is based on a Dutch Farm design, I thought that it would be ideal. Again, from the cursory research that I did, there doesn’t seem to be very much information on the colours of such wagons so I decided to make up my own background….

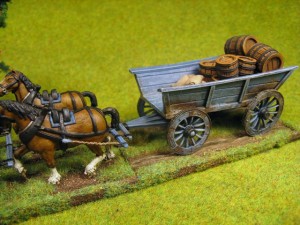
‘the wagon has been requisitioned by the foot artillery to serve as a supply cart for the battery and the officer in charge has decided to repaint it in Artillery colours to ensure that the locals wouldn’t reclaim it so that it looks part of his unit’

Now that might not be historically accurate but it’s my story and I’m sticking to it!

The wagon kit from Trent Miniatures is perhaps a bit on the big size and certainly contains a lot of metal. That said, with a bit of filing to remove the flash lines, it fits together beautifully, even without glue! I also liked that fact that the horses came with their traces to hook up with the wagon. I decided to follow convention when painting the horses and finish them as bays. I had also read that the British usually docked the tails of their horses, so I took a pair of clippers to them and did some docking myself.

Once the models had been cleaned up, and glued using super glue and accelerant, I sprayed the wagon & traces grey and the horses, brown, to give a solid undercoat and make the painting easier. The horses were then gradually highlighted using bestial brown with desert yellow added as the highlights were built up. I used straight Vallejo black for the tails & manes, highlighted with a touch of grey and used dark brown and white for the socks and face flashes. The tack was painted black with steel accessories and the traces, a shade of desert yellow with artillery grey for the wooden bits….

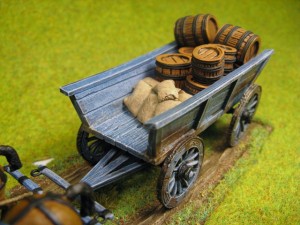
The wagon was painted using Foundry artillery grey blue and highlighted by adding in white. I tend to use a dry brush technique on large surfaces like this, as it brings out the texture of the moulding. The metal attachments were painted black, including the wheel rims and then I used various shades of brown to ‘dirty up’ the areas around the wheels and used bolt gun metal to represent paint chipping off of the metal areas.

The entire model was carefully painted with Army painter Dark tone Quick shade and when dry, varnished with army painter matt varnish. Now using army painter products is a whole blog entry in itself, but for now I confess to being a fan of this product. It’s a great way of adding shading and weathering to your models and of course also protects them. I prefer to paint the stuff onto my models rather than use the dip method as it allows me a degree of control. Not only that, I’m far to ‘careful’ (tight fisted) to be flicking excess paint down the garden! Once you’ve matted down the Quick shade the finish is superb.

The load was made using renedra barrels, assembly being very straight forward, with a bit of a cleanup and then undercoated in brown. I added highlights with lighter shades of brown and the the hoops were picked out in black. Again I finished them with Quick shade to bring out the wood grain and then they were ready for the wagon. The final bit of the load was to make some sacks out of green stuff. Just roll out a sausage of the stuff, cut it into 1cms lengths and gently flatten the bits out to make sacks. I lined the wagon with tin foil and then pressed the sacks into place to make a stack of sacks. Once they were dry, I removed them, carefully peeled off the tin foil and painted then in desert yellow, highlighting with white and then giving them the quick shade treatment.

To get the wagon ready for the gaming table, I made a basic movement tray and finished in the style of the rest of my army – that’s another blog entry….

That’s as far as I’ve got with the project and the wagon has already seen action on the wargames table but there’s still a bit more to do. I’m now working on a driver, passenger and escort as well as a few accessories to add so there’s more to follow.

All in all though, it was a most enjoyable project, so much so that I’ll be adding the Trent Miniatures ladder sided wagon to my collection soon!

Continue reading

It’s Snowing…..Yippee!

I really don’t mind the snow. Even though the days of me going out and playing in it have passed, I like the change of the seasons and snow is a perfectly natural part of this change. I’ve mentioned before, that the big advantage of snow is that my garden now looks as good as everyone else’s in the street and I dont have to feel guilty about not doing any chores outside.

Its snowing!

In fact, it’s the perfect weather for modelling! The only other downside of snow is that you have to put up with a load of busybodies telling you how to stay safe and warm, so with that in mind I’d thought that I’d put my two penneth worth in and give you my guide to modelling in extreme weather conditions…….

Wear the correct clothing

The danger of sitting down and painting when it’s a bit chilly is that you can get cold faster than usual. I find that an extra pair of socks is a good idea and always do up the front of your dressing gown to make sure that the cord doesn’t get tangled in your work board. If you have got dressed this won’t be a problem but make sure you have an old jumper on. I have lost count of the times that I’ve been told off for getting paint down my new jumper. Even better, make sure that your work station is positioned next to a radiator, preferably at your back to ensure that your kidneys are warm – this is very important – see the next point.

Keep your fluid levels up

I think that from the outset, it’s important to stress that alcohol and modelling don’t mix well. The worst thing that you can do is develop a case of beer goggles only to wake up the next day to find that the masterpiece that you were working on looks like an explosion in a paint factory. Keep the booze for later! I recommend plenty of warm drinks, tea or coffee, at least hourly, which is why your kidneys need to be in tip top shape.

Avoid extreme exercise

This means any form of DIY or household chores – you need to be fully focused on your modelling. The danger here is that the missus may get bored because she can’t get out of the house and start looking for things for you to do. Outside chores are a definite no but she may find something inside for you to repair. The answer here is to say that you haven’t got the right tool for the job and that you can’t get to the DIY shop. A sharp intake of breath followed by ‘I’ll need a retaining plunger to get that sorted, but I haven’t got one the right size’ is usually enough of a smokescreen to get out of the job. The trickier one is the decorating issue. Just point out that it says on the paint tin that the paint can’t be used in cold weather so painting is out of the question. If the question arises as to ‘how come you’re painting your models then?’ you can point out that no such warning is printed on the side of modelling paints & these are special, magical paints…..

Fatigue can be dangerous

You can have too much of a good thing and regular breaks are important. But beware, I have had a situation where I thought I’d take a break from modelling and switched on the History Channel only to find that there was a re-run of a Catherine Cookson show…Aaaaagh! Fortunately, I have an emergency DVD collection and I recommend that all modellers should at least have the following titles available: Band of Brothers, Saving Private Ryan, Zulu, Waterloo, Generation Kill, Full Metal Jacket, Platoon, Enemy at the Gates, Black Hawk Down and Master and Commander. Watching any of these is usually enough to re-invigorate me, ready for another modelling session.

Maintain the correct calorie intake

I really don’t need to give specific advice here, other than to remind you of the fourth (and most important) emergency service – pizza delivery – I’m in awe of their ability to get a pepperoni meat feast out in the worst of weathers.

So there we are, a few hints and tips to help you enjoy your modelling in the ‘Big Freeze’ or as it used to be known, Winter. Happy modelling!

28279738_10156037957730429_625224186344481111_n

Albion Alloys at Arcane Scenery

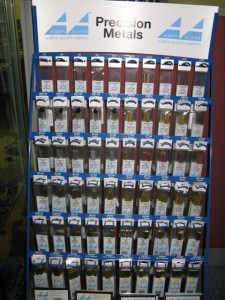
I’m very excited to receive my latest range, the Albion Alloys range of Precision Metals. On first glance, you might think, so what, it’s just metal! If you are at all into scratch building or converting models though, you will be as excited as me. The range of Albion Alloys consists of Aluminum, Brass & Copper tube, rod, sheet and channeling in various sizes. Of course, as the name suggests the pieces are precision engineered and cut to the specified sizes and they are incredibly useful for modelling projects. Primarily designed for model engineers, these pieces are incredibly useful to modellers and wargamers.

The tubes slide fit into the next size up ( telescope) to enable you to build pistons etc. The rod is ideal for pinning models. If nothing else, using the tube to replace the post on flying stands will ensure that your model doesn’t snap off during games! The micro brass tube can be used to replace gun barrels to make them look more authentic and you can even use the tube to make shell cases. The channeling is great for model Tanks, for making brackets etc.

I will be carrying a range of some 60 different types of Albion Alloys in my ebay shop as part of the Expo Tools range and I will also be adding the range to my independent on line shop in time. As well as the lines that I hold ready for instant dispatch, I am also able to order most of the Albion Alloy range, including the larger 1 metre lengths. If you would like details, please contact me through the shop email.

Napoleonic Flank Companies!

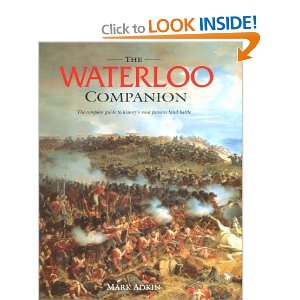
It’s been some time since my last blog on the subject of Napoleonics but I have been busy painting and my Army is steadily growing, along with my knowledge of the period. My main reference in building my army has been the superb book, the Waterloo Companion by Mark Adkin. It really is a first class reference book and if you are at all interested in the period, I suggest that you must add it to your library!

The main fighting unit of infantry in the British Napoleonic army was the Battalion. You will often hear people refer to various Regiments when talking of the units at a particular battle , for example, the 27th Inniskilling Regiment. However, the Regiment in the British army was more of an organisational title and it was the battalion that actually took to the field. Some Regiments consisted of more than one Battalion; two or three were possible, but it was unlikely that there would be more (There were of course exceptions). In this case, the battalions would be numbered, so the first battalion of the 27th Regiment would be noted as 1/27, the second, 2/27 and so on.

A battalion consisted of around 800 men when at full strength. In reality, it was extremely rare for a Battalion to be at full strength whilst on campaign. The actual numbers varied from just over 700 to as few as 500. At the Battle of Waterloo, some battalions were below this number, due to casualties suffered at the battle of Quatre Bras. Regardless of numbers, the battalion was divided into 10 Companies, each usually commanded by a Captain. Eight of the Companies would be known as Line or Centre Companies and would be numbered 2 to 9. The other two Companies were the Flank Companies. Company number one, deployed on the right of the line was the ‘Grenadier Company’ and usually formed from the biggest & bravest soldiers. Company number 10, was the Light Company and whilst usually deployed on the left of the line was also used as the skirmishers for the Battalion. These troops were usually the best shots and the smallest and fastest in the Battalion. They were often deployed well in advance of the battalion and if trouble threatened, they needed to be able to get back to their lines quickly!

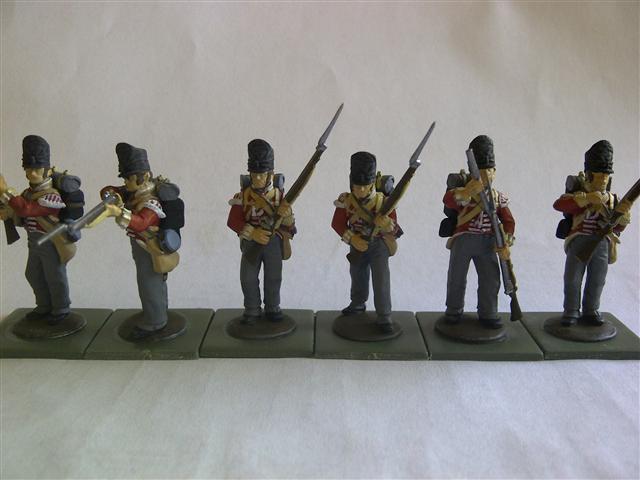
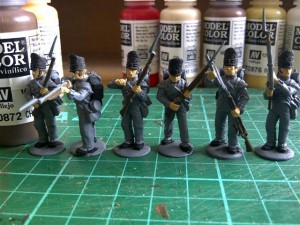
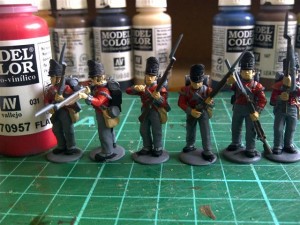
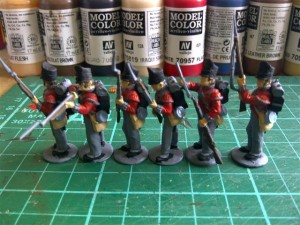
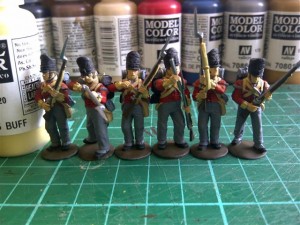
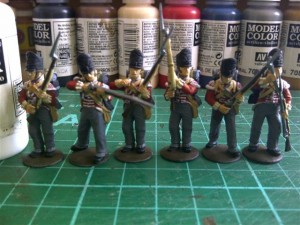
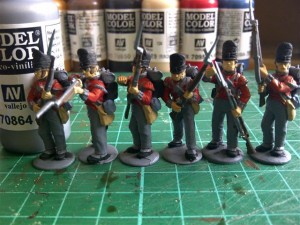
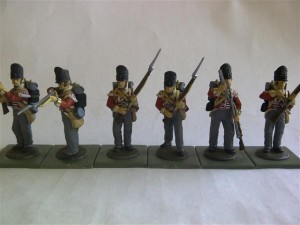
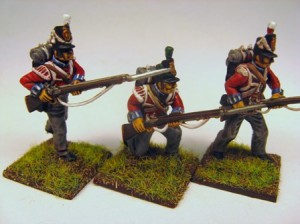
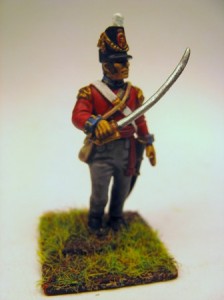
Flank Companies were distinguished from the Centre Companies by the size of their Epaulets and the colour of the plumes on their Shako’s. Flank Companies have the big ‘wing’ type epaulets ( first two models on the left of the pic.) as opposed to the’ tufts’ of the Centre company’s and the Grenadier Company would have all white plumes whilst the Light company would have green plumes. In addition, the officers in the Flank Companies tended to carry a Curved Sword or sabre as oppose to a straight one.

So having blathered on long enough about the technicalities of Flank Company troops I’ll show you in the next article how I put mine together.

German Imperial Guard!

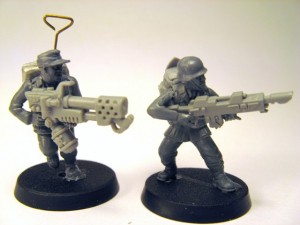
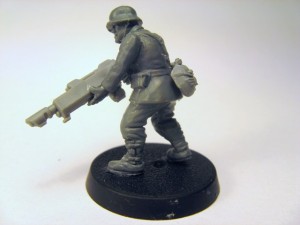
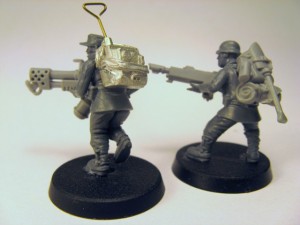
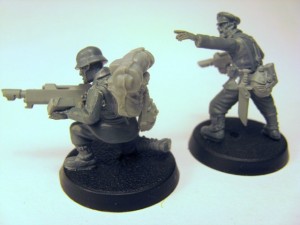
I couldn’t resist showing you these conversions. They ‘re converted from the new Bolt Action WWII German plastic set, with added Imperial Guard weapons and equipment.

I think that the guy with the flamer looks great! These are the first of what will be an Imperial Guard squad and they are going to look superb on the war gaming table. If I wasn’t so focused on my Napoleonic army & Necrons I’d have a go myself. Her’s a few more pics!

I’m already thinking that a Tiger tank in this scale would look pretty good as well. Why not a whole Imperial Guard army made from WWII Troops. Now there’s food for thought!

Super glue is great….but there are other adhesives!

I was very excited to receive a new consignment of stock last week. It wasn’t that the delivery had lots of shiny new releases but that, at last, I could offer a reasonable range of glues to my customers. The funny thing was that I was the only one that was excited, the other guys at the unit seemed to think that glue is just glue and one glue is the same as another. I suppose that it’s because I grew up making models before the invention of super glue and I’ve also been influenced by my dear Dad who was a superb model maker and always had the right tool for the job in hand. I’ve had experience of ‘improper use of glue’ ( I don’t think that this is actually an offence yet, but only because the Govt doesn’t appear to believe in making things, so they wouldn’t know…..) when I recently bought some second hand stuff from ebay. It was quite obvious that the plastic model that I had bought, had been glued with super glue and far from being the best glue for the job, it was a disaster. Fortunately, this meant that I could strip it down and re build it, but that’s another story.

So here’s a list of my four favourite glues and when best to use them!

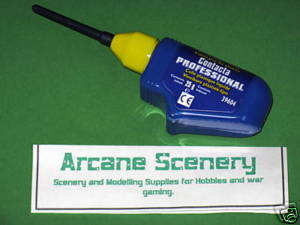
If you are making a Plastic kit, then the glue to use is Polystyrene Glue. I recomend the Revell Contacta glue shown below. It comes with a fine needle applicator so the glue goes where you want it to. In the rare event that the Needle becomes clogged (usually because the top has been left off for a while ) simply pull the needle applicator out, reverse it, give the whole thing a good shake and it will clear. If all else fails, leave the bottle hanging, needle down for an evening ( with the top on) and the glue applicator will clear. So why use Polystyrene glue on plastic? Well, the glue works by melting the plastic that it comes into contact with, so you get a really strong joint. This also means that there is a degree of filling that happens, so even if the joints aren’t perfect, as long as the two pieces to be glued are held firmly together they will ‘weld ‘ together. This does require a bit of patience, particularly for large joins but your patience will be well rewarded by a strong joint that can be carefully sanded to become invisible. I like the Revell glue because of the consistency ( it’s like water) and combined with the fine applicator, it will go exactly where you want it too without the danger of spilling or running over fine detail.

Finally, as far as Polystyrene glue goes, there are other brands and you can buy it in tubes or with a brush. The tube of glue is great for big joins but has a tendency to be thicker and you generally end up with more glue on your model than you wanted. The Glue with a brush applicator is good but it doesn’t beat the needle applicator for accuracy in getting the glue where you want it!

Next up is Epoxy resin. This is a glue that has fallen from grace ever since the arrival of super glue but it still has it’s uses and I wouldn’t be without it. My favourite brand is Devcon, although I will happily use Araldite Rapid ( but dont carry it in stock). Why Devcon? Well, most importantly it dries to a really clear finish, so much so, that you can use it to make the lenses for model headlights, glass effects and even water. It also has great filling qualities and dries quickly to a hard finish. True, it is a nuisance to mix, and you don’t get the fast grab of super glue but the finished joint is far stronger. I use epoxy to fix my metal models to their bases and for gluing the larger metal components, particularly when I am pinning them. Epoxy beats super glue for strength, particularly when it comes to shearing strength which is why when you drop super glued figures they have a tendency to break at the joints. If you use epoxy, you will find that your models are far more resilient on the gaming table. As epoxy will glue most materials, it is also useful for fixing small rocks & scenery pieces to your models as well.

Talking of basing your models, I couldn’t do without white PVA glue. It was designed to glue wood & paper products and it also dries to a clear finish. Even better, it can be thinned with water so it is ideal for fixing sand, scatter, static grass and other small scenic products to the bases of your figures. I usually water it down to make it go further. It’s very easy to use and gives a good bond and if you do get some on your model, simply wash it off with a damp brush before the glue dries. I sell the White PVA Speed bond which is good quality and dries quickly but any white PVA glue will do the job!

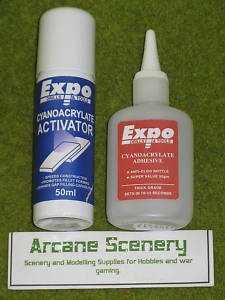
And so at last to Super glue, or as it’s sometimes known, cyanoacrylate. There’s no doubt that this is a great innovation in the world of adhesives and it seems to stick practically anything, including your skin, so be careful. As if super glue wasn’t good enough, it’s even better now that you can get superglue accelerators or activators. The activator ensures an instant bond once it is sprayed onto the super glue and has the added bonus of providing some ‘fill’ element to the join. So If you are glueing small metal components, using a thicker version of super glue and an activator gives great results. I’ve seen the guys at Ibis studios put together a set of metal figures in less time than it takes me to open the packet…..OK, I exagerate slightly but this stuff is fast! For really small components, there is a brush on activator but I tend to use the pump action stuff. I know that once I press spray, the component will stay where exactly I put it. Since I’ve been using this I have had not one case of glueing the model to my finger…….

I tend to use the thicker version of super glue as it has a slightly slower drying time which lets me adjust the bits to the position that I want until I am ready to zap them with the accelerator. The thinner super glue is more suited to invisible repairs, particularly where the joint is a clean break. So I have a bottle of the thin stuff ready for any repairs needed after a battle!

So there it is,

Use Polystyrene Glue for plastics,

Use Epoxy for big metal joints & fixing your figures to bases

Use PVA for scenery & basing products

Use Super glue & accelerator for whatever else you like……Shimples!

How to strip paint from Plastic Models safely.

I have been looking for a simple and safe way of getting paint off of second hand plastic models for some time now. Metal models are usually quite straight forward to strip down. Just put them in with some harsh solvent and you know that the paint will be removed and the metal model will be pretty safe. The only problem was that the solvent was usually quite harsh ( I know some guys that use brake fluid..not recommended!) and if you weren’t dressed in a full body chem suit there was a danger that you would disolve yourself. OK, I’m exagerating slightly but you get the point. Of course, you couldn’t possibly put plastic figures in these solvents as you would disolve your model as well.

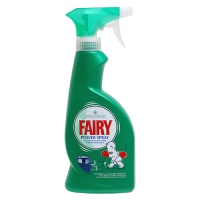
So it was with some surprise that I found the answer in the wife’s Kitchen cupboard. Well actually, I found the answer when I caught Andy from Ibis Miniatures with his hands in the canteen sink apparently doing some washing up. This was a very strange event, as the boys from Ibis only tend to wash their dishes up once a month or so, and it was only the middle of the month. ‘What’s going on?’ I asked. ‘I’m just getting some paint off of these figures’ Andy replied. ‘What, with just water……’ At that point Andy gave me one of his whithering looks he normally reserves for opponents on the wargaming table. ‘No, Ive sprayed them with Fairy Power Spray first and I’m just washing the paint off.’ Sure enough, that was what he was doing and it works beautifully.fairy power spary

It really is as simple as this to use. Place your plastic models in a plastic bowl or container. Give the models a good spray with the Fairy Power Spray, making sure that you cover each model thoroughly. Leave for 20 minutes or so. Wash off in warm water and use an old tooth brush or similar to remove the paint from the model. Let models dry. Your models will now be ready to undercoat and repaint. The Power spray is quite safe to use so long as you follow normal sensible precautions and dont do anything silly like drink it or squirt it in your eyes. Pink Marigolds are optional. It costs just

Necron Genesis or How I Built My Necron Army part 2

Some time ago I started to describe my Necron Army and started with a description of my Necron troops. Well, here’s the next installment featuring my Necron Lords or HQ choices. I started my HQ with the Necron lord that was issued at the time of the GW Apocalypse launch. The Apocalypse supplement allowed you to field huge armies and was the first real expansion pack for 40K for some time. Necrons were not given a great deal of coverage in Apocalypse and I feel that they are somewhat underrepresented but the new Lord was a nice figure and had a ressurection orb so he was chosen to be the leader of my growing army.

012

I painted him in the colour scheme that I had developed for my army with the standard terracotta basing scheme and as well as the crystals supplied with the model, I added a few of my own ‘emeralds‘ to the base.

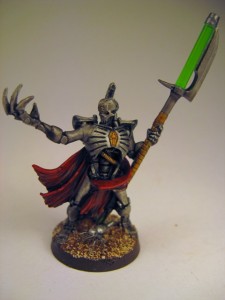
The next Lord was the Classic Lord, first issued when the original Necron Raiders supplement was published for the 3rd edition rules.009

Once again, I continued with the red, gold, silver, green, terracotta pallette so that he fits in nicely with the classic edition troops. For the sake of completeness, I then painted the original Necron Lord on foot, issued with the first full Necron Codex about 5 years ago. Yes, that’s the one that’s still in use now and well past needing an update…..rumour has it that it’s next year….we patiently wait, as all good necrons would!

010 011

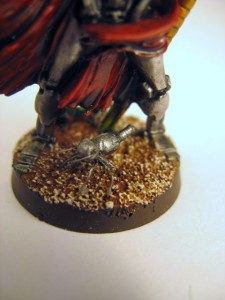
I changed the arm on this figure as I thought that having the outstretched arm palm down made him look a bit like a magician sprinkling magic dust. The new pose makes him look a bit more sinister and he looks as though he is goading his opponent to come and get some! I also made the metal ants on the base. They were supposed to be a representation of the mini or micro creatures that are mentioned in the phylactery war gear rule in the Necron codex. I had intended to start including these on the bases of other Necrons but they are very fiddley to make. They are made from a metal bead, fuse wire and the tail is a small piece of guitar string. I lost count how many times I stuck the pieces to my fingers with super glue and the whole model nearly found a new home at the bottom of the garden at one point, so I have postponed any mass modelling of the metal ants for the time being!

I had to have one of the limited edition Lords that were issued with the army deals. I managed to get one as part of a job lot of bits on ebay for a very good price. I decided to change the colour scheme slightly. This was for two reasons. Firstly, I had just finished painting the Night Bringer and I wanted a Lord that looked as though he was one of his gang, so to speak. The second reason is that in the Apocalypse Supplement there is a very good article about the Necrons that seems to hint at a Hierarchical order within the Necron hordes. I thought that a Colour change could be used to signfy his seniority.

019

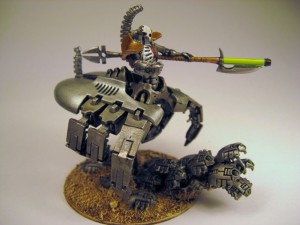
Having built all the lords on foot that are available it was time to build a lord with a destroyer body. However, I just couldn’t build the standard version, I had to have the one with Tomb Spyders legs. This is quite a common conversion and very straight forward to build. It really is as simple as cutting the Tomb spyders legs and superglueing them into the destroyer body. I also extended the warscythe by combining both types of staff supplied with the kit. A bit of a tricky operation but the result is a more imposing weapon, always a good thing ……

018015

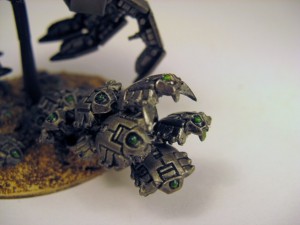
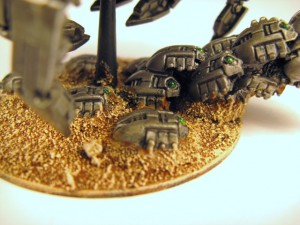
The other modification was to add the scarab swam on to the base. The swarm is based on the swarm that is supplied with the Night Bringer model and I was lucky enough to have a spare piece (again, all bought on ebay as part of the same job lot that included the limited ed. lord). To make the swarm even more impressive I added some extra scarabs and topped the swarm off with a scarab with his claws outstretched. I also used a very simple moulding technique to produce lots of extra Scarabs to add to the base itself. I’ll cover how you can make these two simple projects in a future article.

016 017

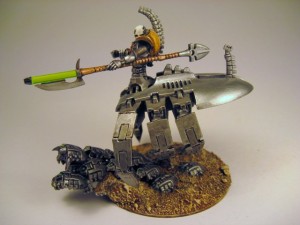
My final Necron Lord (so far….there will be more!) is a complete conversion based on a model that I had seen on a forum. It’s a necron wraith Lord that uses the parts left over from the Destroyer Lord Kit. I used Sculpy to make the body and added a few extras from my bits box and hey presto, a new Lord!

013

So that’s the HQ covered. In part three I’ll have a look at the elites that are in my collection, although I might just jump to Heavy support and show you how you can still use the Tomb Spyder body left over from the Lord conversion. I would n’t want you to think that I had just discarded it into the bits box!

James May is Spitfiretastic!

If you didn’t get to see James Mays’ Toy Stories last Tuesday then please go immediately to the BBC iPlayer site and watch it NOW!

I’m not sure how long the link will last, so in case you don’t get a chance to catch this programme, in this episdode, James May ( of Top Gear fame) explored the wonderful world of Airfix kits. He tried to convert a group of young kids to the hobby and actually did a very good job. The grand finale was putting together a life sized model of a spitfire and showing it off to Veterans from the Second World War. It was my favourite TV show of the week and not just because James did a superb job of advertising Spitfire kits!

The show was a lovley blend of humour, nostalgia and interaction between the generation that grew up building Airfix and the Generation that spends most of their time on their mobiles & nintendos! All delivered with James May’s laid back, knowledgeable charm. James explained exactly why building Airfix kits was so pleasurable to my generation; from the way that you learnt to patiently build a model and over come the challenge that each kit presented to how we used to blow them up with bangers or shoot them to bits with air rifles when we were ready to cull our collection! Oh! and you also learnt all about history along the way, as each kit came with it’s own set of written instructions and facts about what you were building. I think that I have mentioned before, the instructions in every kit started with the words ‘locate and cement…..’

So if you fancy a bit of nostalgia yourself, I have Spitfire kits in stock now.

spitfire spit stater

The starter set is a great introduction to scale modelling as the set includes the glue, Paints and a brush. The glue comes with a precision applicator to help ensure the glue goes on the kit, not on you and the paints are acrylic and they are water based, so you can wash your brush out in water. A great present for the newcomer or those returning to the hobby, suitable for age 8 upwards.

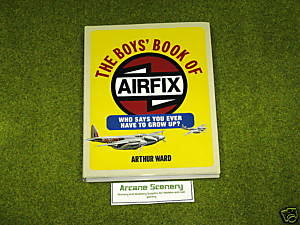
If that isn’t enough nostalgia for you, try the ‘Boys Book of Airfix’, subtitled ‘Who says you have to grow up’. I’ve reviewed this item before in a previous blog entry, you can read it here. It will make an ideal Christmas present for any fan of Airfix.

boys book

Talking of Christmas, why not do a James May yourself? How about buying an Airfix kit for one of your younger relatives and even better, sit with them on Christmas afternoon or Boxing Day and put the kit together. Make sure that you dont hog the glue and dont get too picky if theres a few badly aligned pieces! I guarantee that you both will have more fun than the usual Christmas routine of TV & snoozing on the sofa!

Mantic Games Launch Kings of War Elves!

Yes, the Mantic ‘Kings of War’ Elves range has now been launched and I’m delighted to say that Arcane Scenery is an official stockist and we will carry the full range both in our ebay shop and our webstore all despatched post free to UK addresses.

Just before I give full details of the sets that are available I thought that I would show you the Spearmen set that I started in a previous Blog entry. The last time I showed you a photo, the figures were assembled and waiting to be painted. Well, they’re now finished and waiting for reinforcements!

002 003

I’m really pleased with the final result. This is my first Fantasy unit that I’ve done in recent times. I went for a fairly straight forward colour scheme. The figures were first undercoated in black, then dry brushed with gun metal, then a second dry brush of Silver to highlight the armour and I picked out some of the detail in gold to finish off. I then painted the the faces with Flesh, the boots with graveyard brown, the hair with desert yellow and the spears with gold. All of these colours were given a quick highlight in either a lighter tone or with a dash of white added to the original colour and that was the painting done. Oh, the shields were simply painted matt white and I ‘cheated’ and used the stickers supplied with the figures. I think that they look pretty good although you could paint your own design onto the shields if you prefer.

006

The bases were finished in Bestial Brown, coated with Forest Brown Scatter and then detailed with spring colour static grass.

004 005

So I have my first unit of Elven Spearmen ready to take to the battlefield. A unit like this will cost just

1 7 8 9 10