War of The Roses Light Cavalry – part two

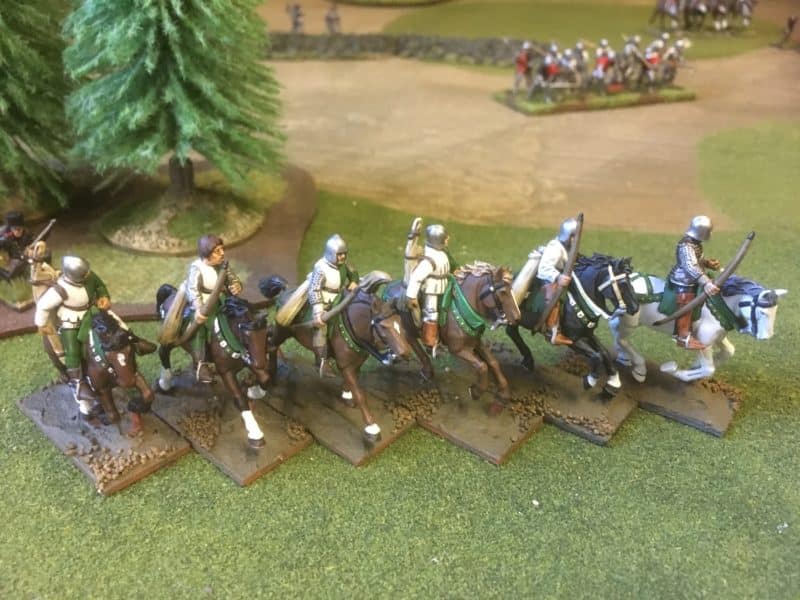
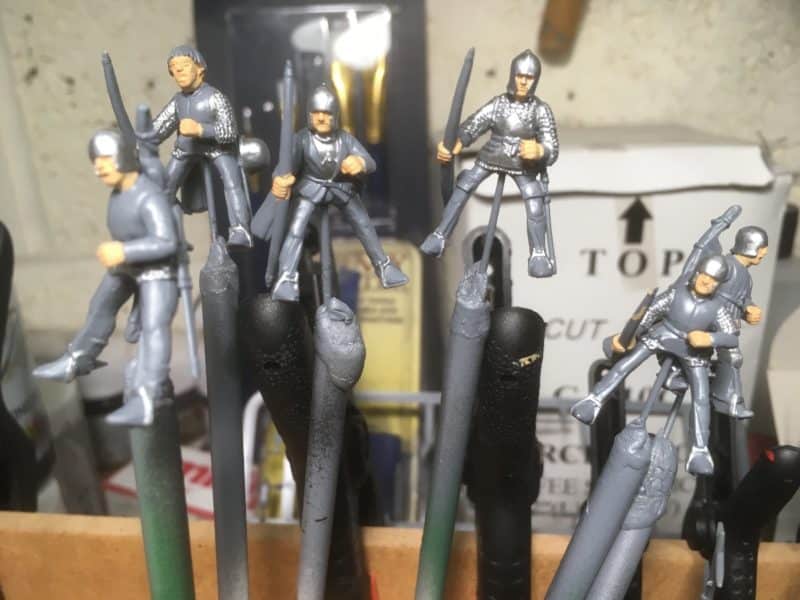
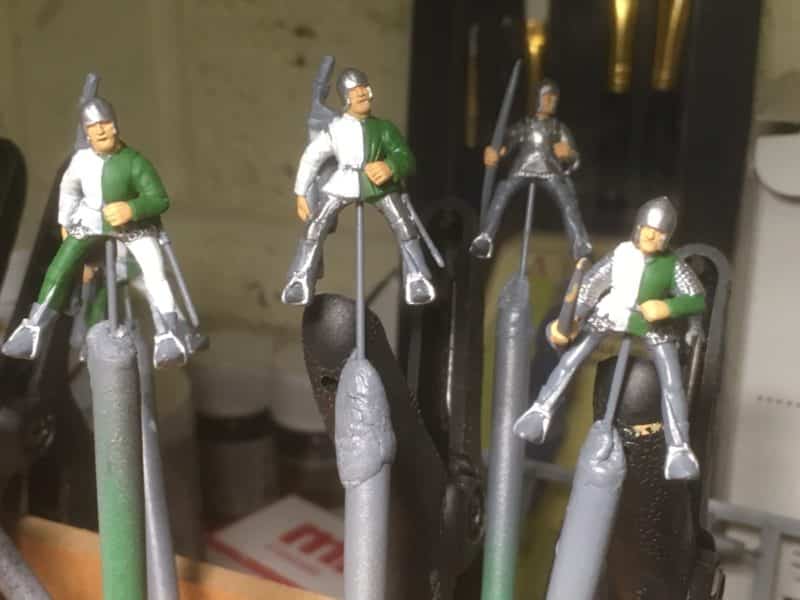
I thought that in this weeks blog that I would show the progress on my War of the Roses light cavalry and show the method that I used to paint them. Once I had assembled the riders, I mounted them on painting sticks by drilling a hole in them and mounting them onto a wire. The picture shows them primed with a grey primer and the first two colours, Vallejo flesh and Army Painter plate mail applied.

Riders primed and ready.

Riders primed and ready.

The next stage was to block in the main colours, in this case Off white and Flat green. As I mentioned in my previous blog, I have no intention of creating a specific unit or retinue from a battle in the WOTR. The idea is to create a generic army to fight club battles. So although these colours are more appropriate for Tudor bowmen, these troops may well be fighting for a Yorkist retinue!

Block painting the livery

Block painting the livery

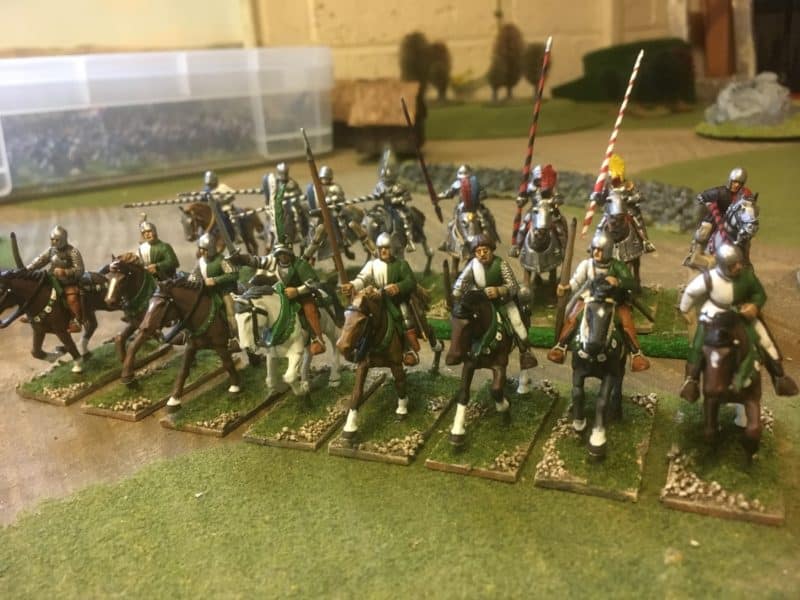
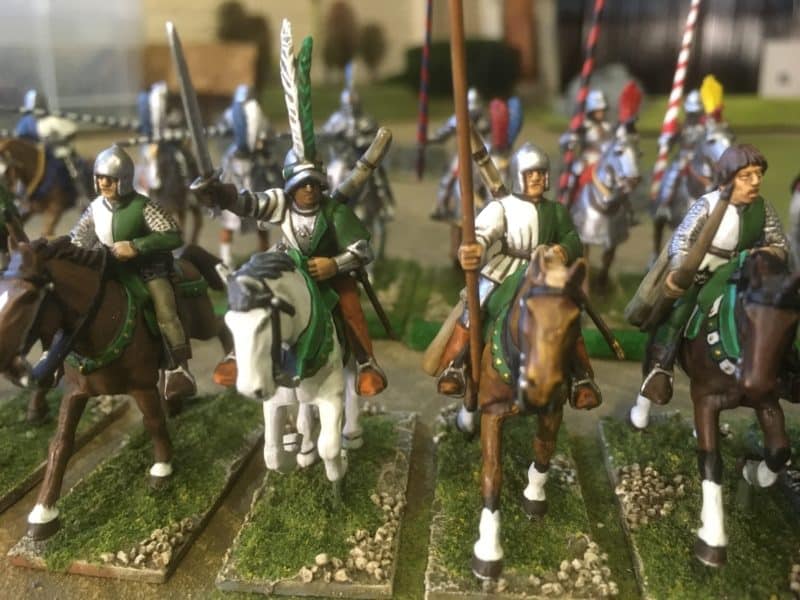
The next picture is a bit of a jump in the painting process! I finished the block painting by using a Buff/white mix on the bow covers and arrow bags; Vallejo old wood was used for the bows and the riding boots were painted with Vallejo Orange brown or light brown to mix things up a bit! The belts and accessories were painted with either leather brown or burnt red. I then brushed on Army painter Dark Tone quick shade. Once dry, the figures were sprayed with a matt varnish and then the white, flesh and metals re highlighted to give a crisp finish.

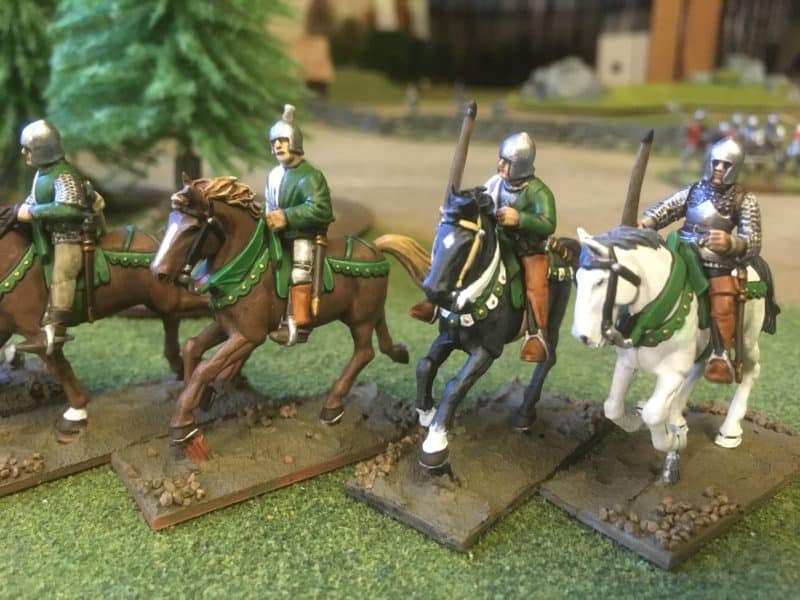
Finished figures on their horses.

Finished figures on their horses.

Close up of Light cavalry

Close up of Light cavalry

Once I was happy with the riders, I finished the basing using my usual technique that I have covered many times before in my blogs.

The completed unit of light Cavalry

The completed unit of light Cavalry

Close up of the unit - I have since been back and added some detail to the Commanders face.

Close up of the unit – I have since been back and added some detail to the Commanders face.

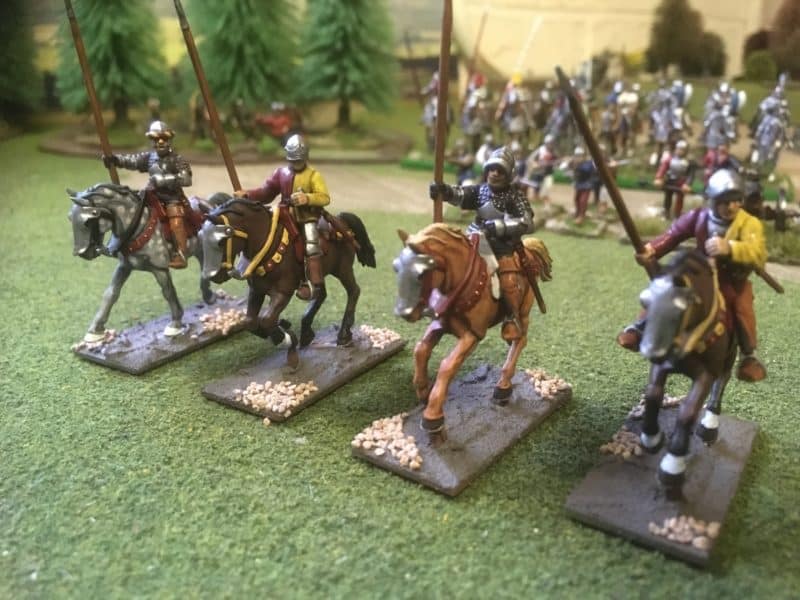
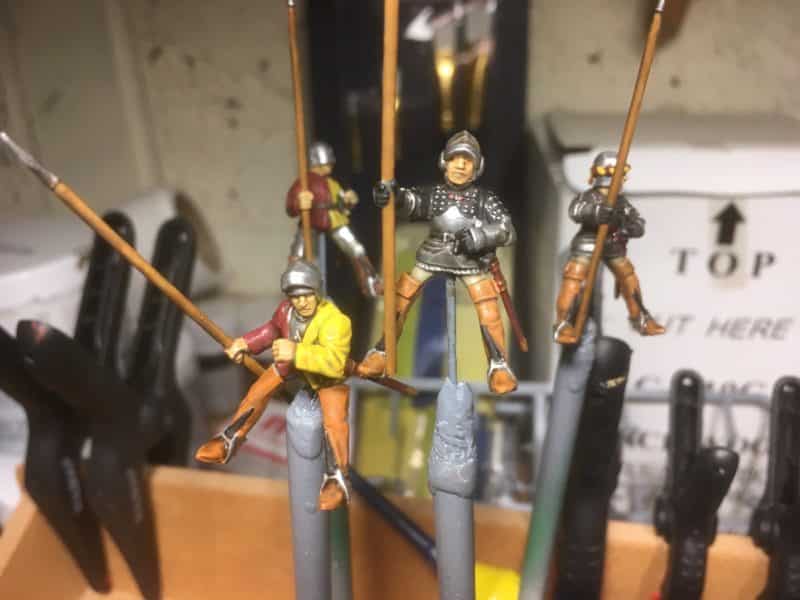
With eight mounted bowmen finished, it was on to the remaining four cavalry in the box! I have painted these as Scurrers or Prickers and again, I have chosen the livery colours at random, using burnt red and yellow. Here they are still mounted in their painting sticks!

Scurrers!

Scurrers!

Here’s the completed models on their horses. With these now finished I just need another four to make up the unit. I’m not sure whether to get some metals or see if I can just get an extra sprue. In the meantime, I’ve taken a break from the cavalry and I’m now working on some more Footknights and Characters.

Light Cavalry on the prowl!

Light Cavalry on the prowl!

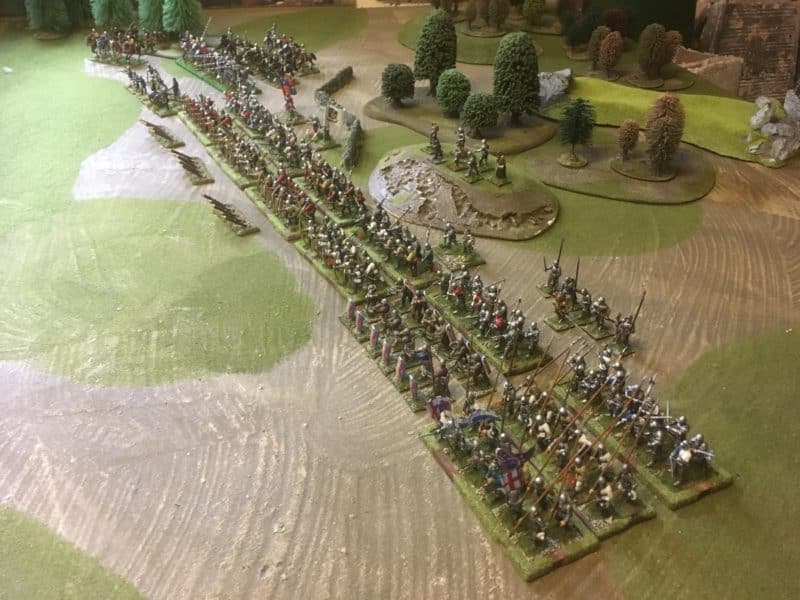
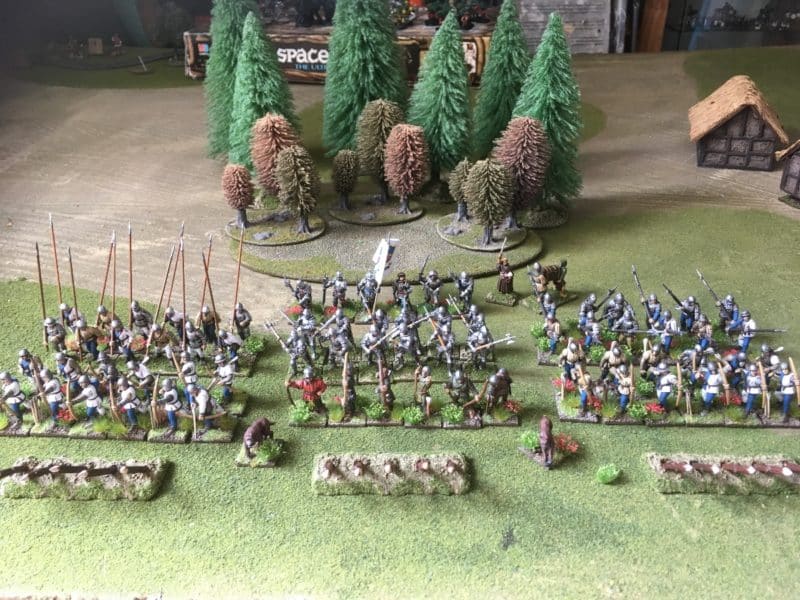
I do need to add some flags and Standards to the unit – I’ve just received some very nice standards from Citadel six flags but have yet to try them. My army is approaching completion, with some 200+ figures now painted and based. It is lacking flags though – watch this space!

War of the Roses Army

War of the Roses Army

THE COMMERCIAL BIT

Almost all of the paints, miniatures, bases, basing materials and anything that you are likely to need for your hobby are available POST FREE from my shop here:

ARCANE SCENERY

Perry’s WOTR plastic range are here:

PERRY MINIATURES

You can find all the Vallejo Model colour paints here. If you don’t want to browse, just enter the paint number into the shop search bar;

VALLEJO PAINTS

You can find the Vallejo texture paste here:

VALLEJO DARK EARTH TEXTURE

‘Never mind the Bill Hooks’ will be available as a full colour supplement with the June edition of Wargames Illustrated. If you would like the current issue, click here:

WARGAMES ILLUSTRATED

Happy Modelling!
 

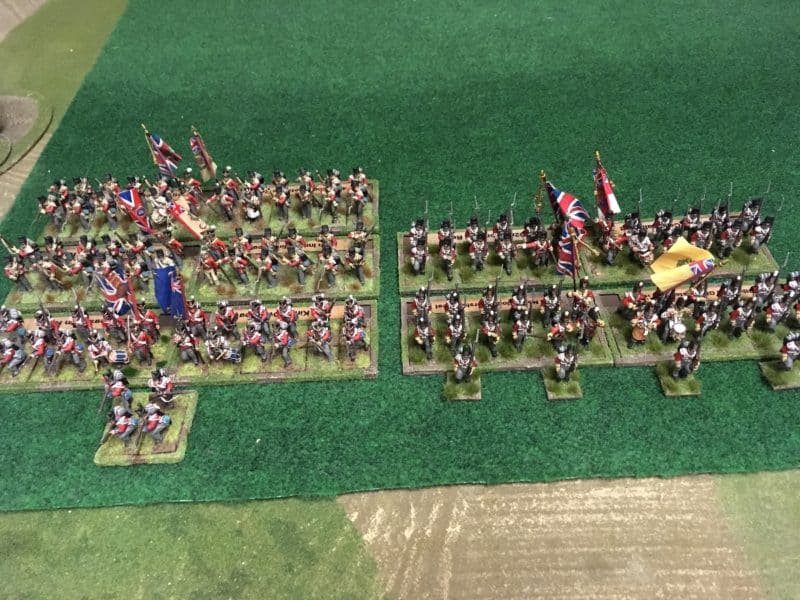
The Black Watch

To give them their full name, the 1st Battalion, 42nd (Royal Highland) Regiment of foot, or the Black Watch, is the final Highland regiment that I wanted to add to my Napoleonic collection. I am using the 100 days War order of battle as the basis for my Napoleonic Army. The Black Watch is the last Highland regiment that I need to complete and the penultimate battalion required to finish the British contingent of the 5th British Infantry Division at Waterloo. I already have the 1/28th, 1/32nd, 1/95th and 1/79th of Kempts 8th British Brigade as well as 2/44th, 1/92nd of Pack’s 9th British brigade. The two brigades together, along with the 5th Hanoverian Brigade, formed the 5th Division under the command of Sir Thomas Picton.

1/42nd Battalion Centre Companies

1/42nd Battalion Centre Companies

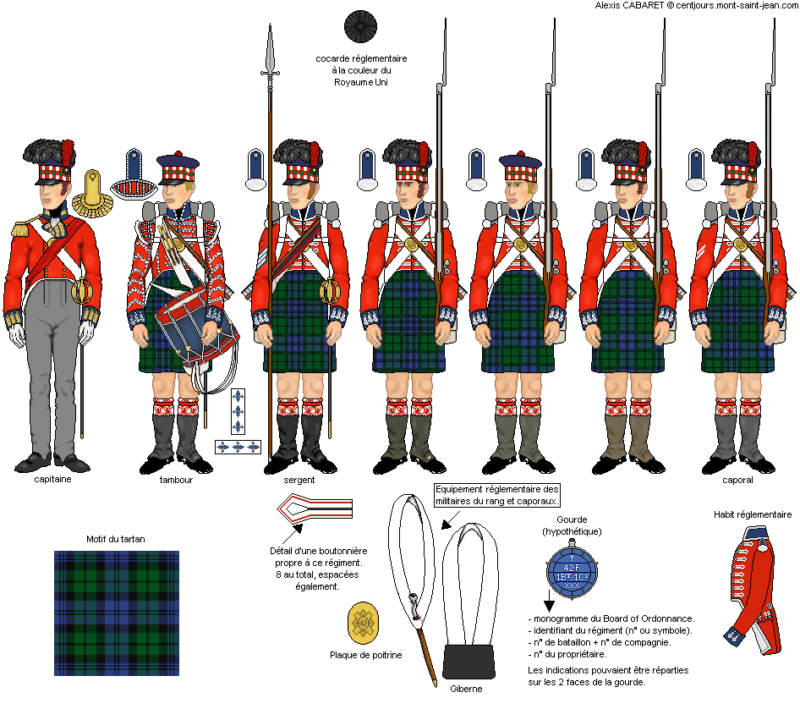
As usual, I referred to the superb Mont St John web site for painting details – I’ve put the link below. The challenge in painting Highland regiments is of course the kilts. As yet, paint manufacturers have woefully failed in attempting to produce tartan paint, so you have to do it yourself! ( That was a joke by the way – a very old one, but a joke nonetheless!) As I had already painted two Highland regiments, I was fairly confident that the Black watch would be straight forward as there are just three colours, Blue, Green and Black. My painting skills and patience are not sufficient to make an exact copy of the tartan in 28mm scale – I wanted something that looked about right for the wargames table. As is often the case, I did a ‘test figure’ before committing to batch painting the Battalion.

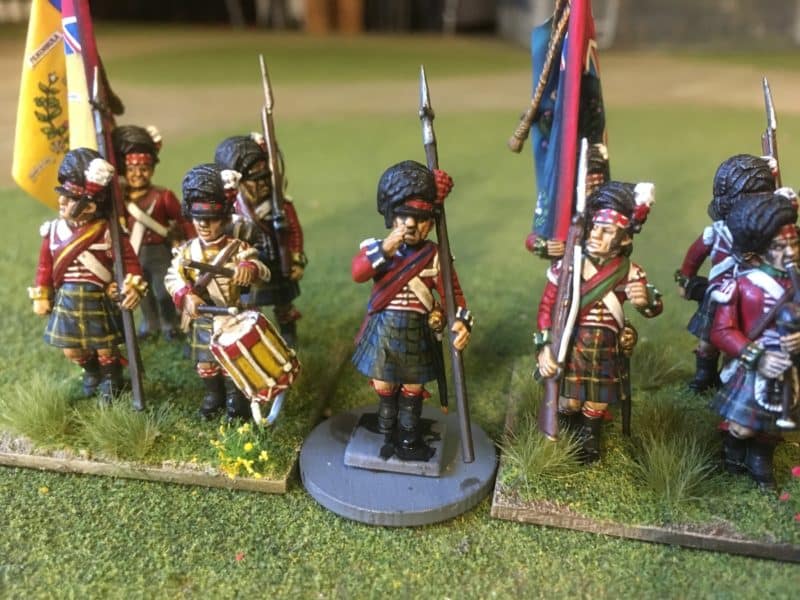
Black Watch Sergeant next to the Camerons and Gordons.

Black Watch Sergeant next to the Camerons and Gordons.

I was reasonably happy with the result but did try a figure with a slightly different, lighter green on the kilt. It made little difference and if anything, I preferred a darker look to the kilts so adding an extra black line to the design had the desired effect. Just for fun, I produced a very quick step by step guide to how I painted the tartan. It won’t be to everyone’s taste but if you are new to the hobby, it might be helpful as a place to start.

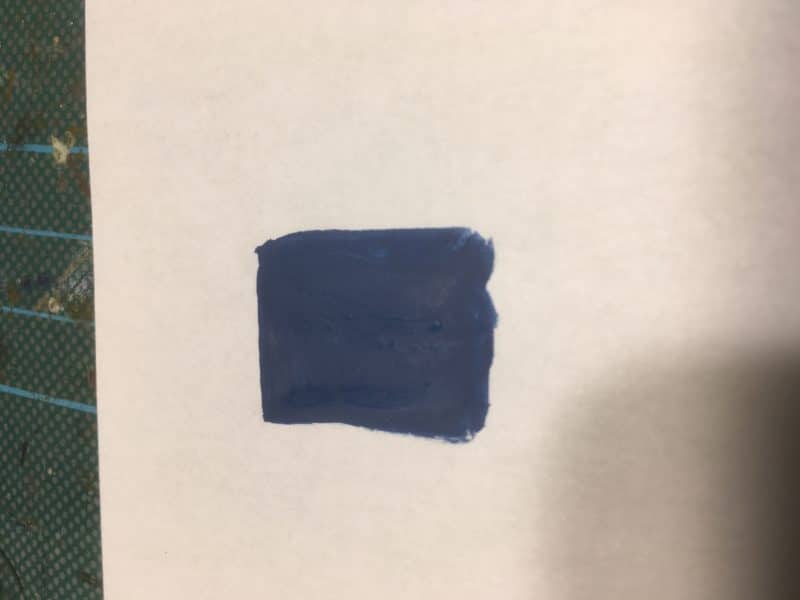
Vallejo Prussian Blue 70965

Vallejo Prussian Blue 70965

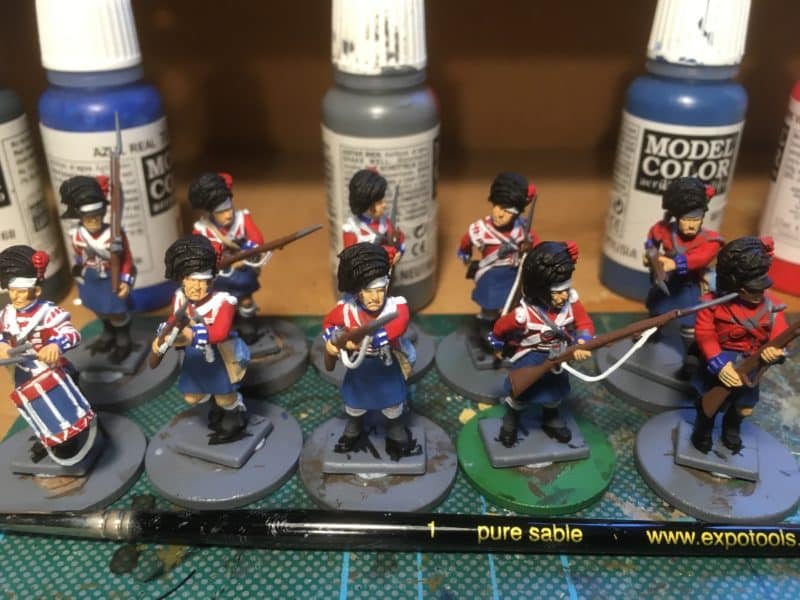
First I painted the kilts in Prussian Blue Vallejo 70965. You can see this both on the paper above and on the actual models below. For clarity, I’ll show the rest of the process on the paper only.

Kilts in prussian blue

Kilts in prussian blue

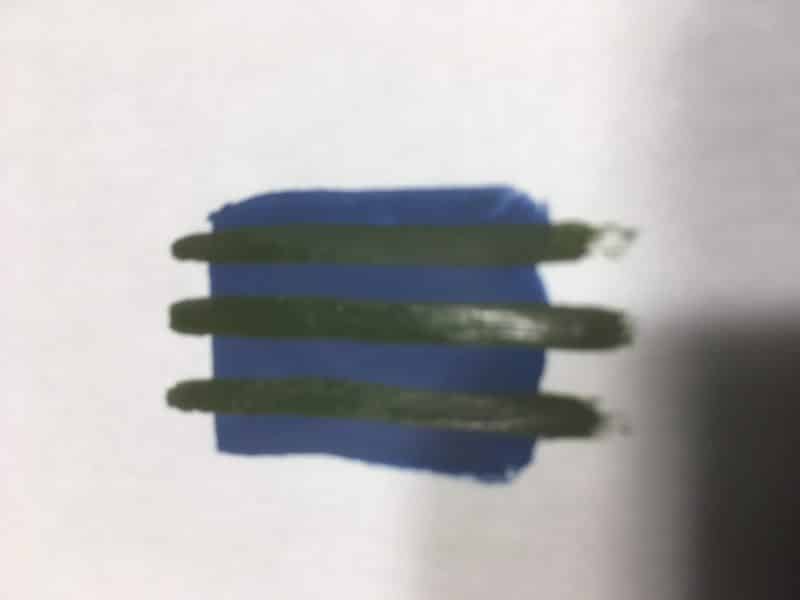
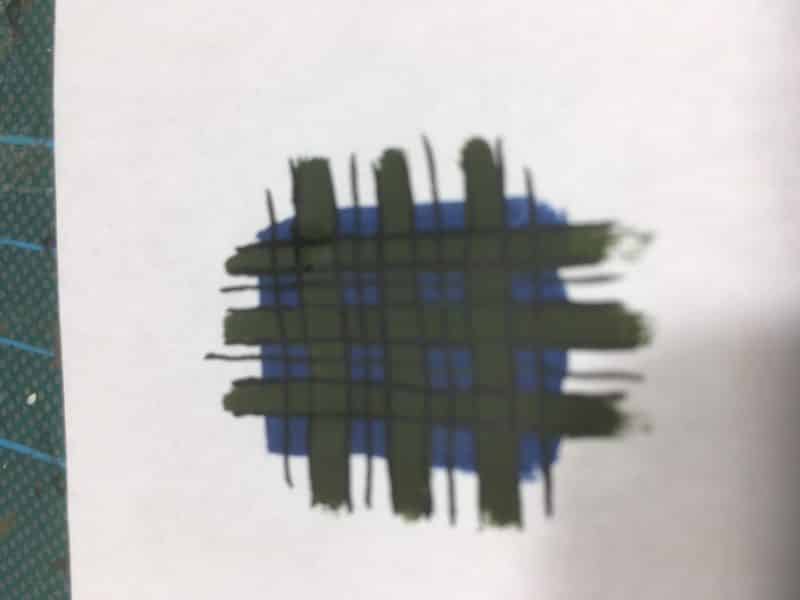
Next paint three stripes in Vallejo reflective green 70890. The trick here is to select the right sized paint brush and to make sure that the paint is flowing easily off of the brush by thinning it to the consistency of milk.

Three stripes of Green - vertically or horizontally - which ever you prefer first!

Three stripes of Green – vertically or horizontally – which ever you prefer first!

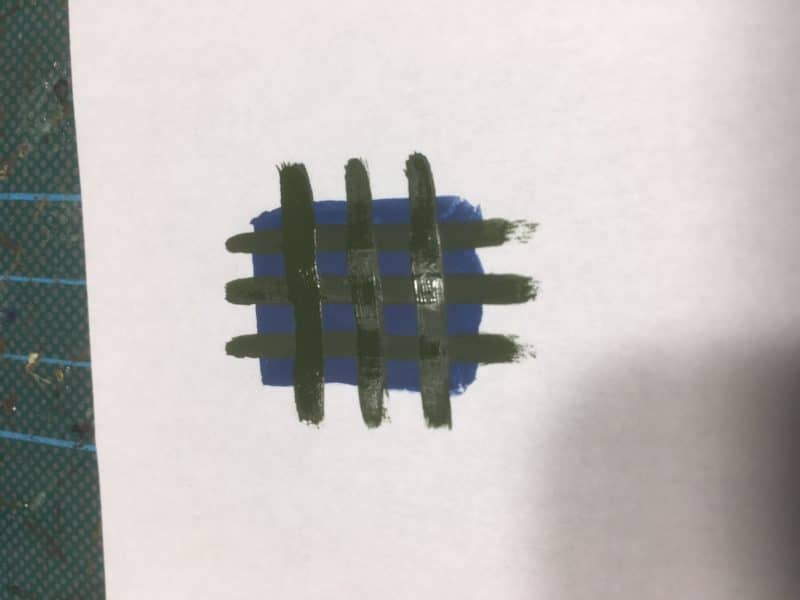
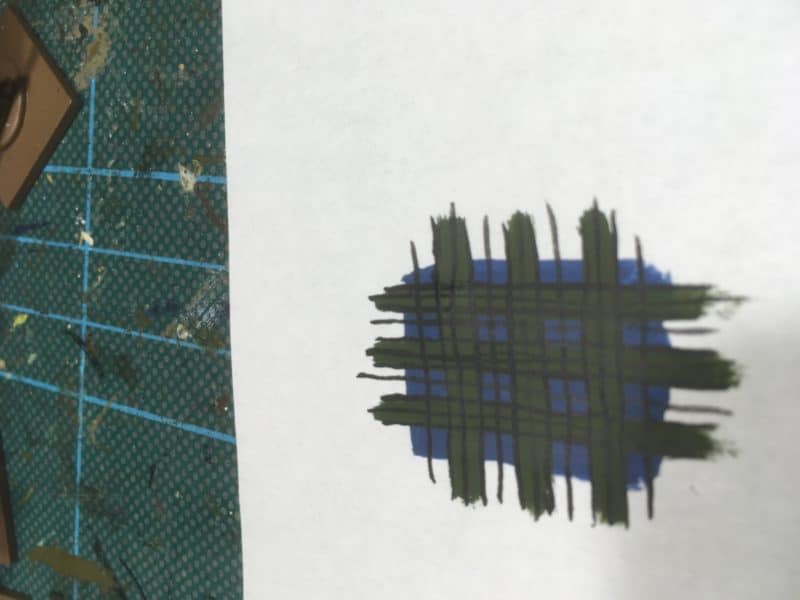
Now paint another three stripes across the first three. Again, let the brush do the work. The only other point to note is to try to space the stripes evenly at about the same width.

Reflective green 70890 cross hatched.

Reflective green 70890 cross hatched.

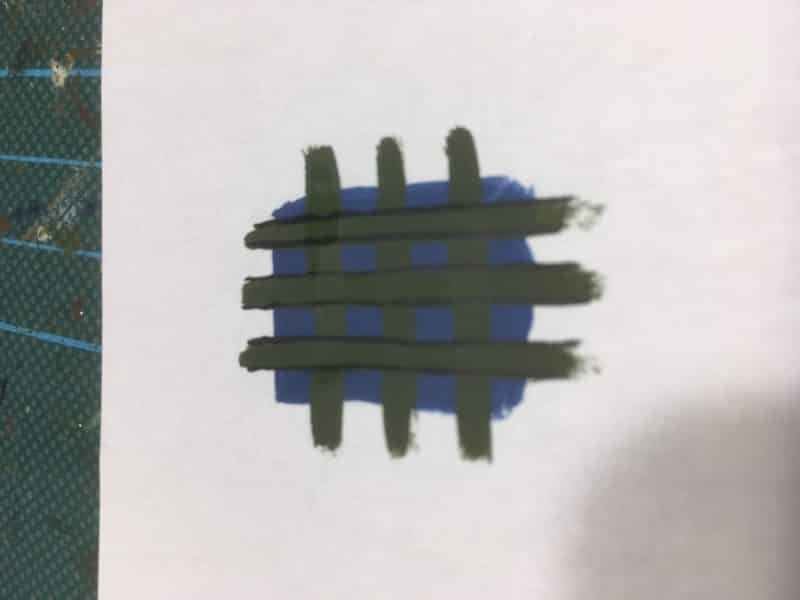
Now purists could paint the squares where the green lines cross with a slighter lighter shade. I ignore this detail – I am looking for a decent approximation of tartan, not an accurate reproduction.

Cross the lines!

Cross the lines! Outline the green lines in black.

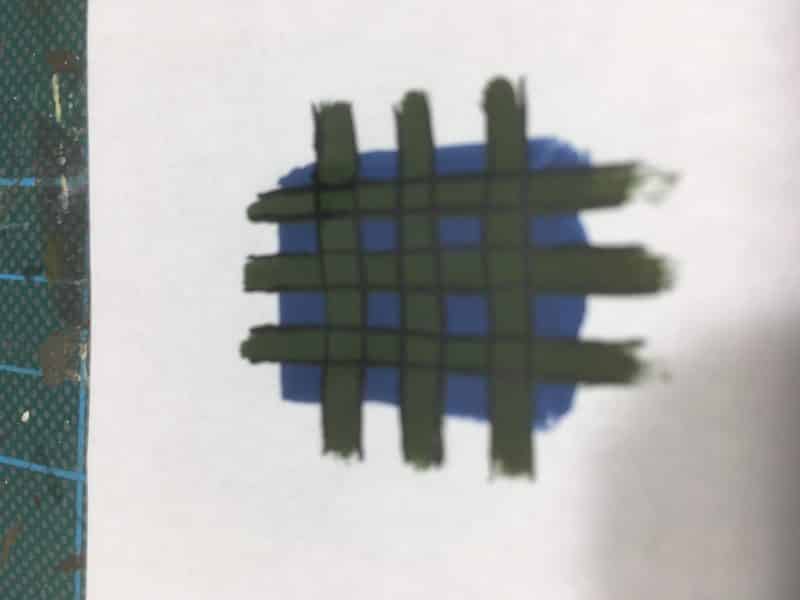
The next two pictures show that I take a finer brush and again, thinning the paint to ensure that it flows smoothly, outline the green lines in black. You can see that it doesn’t have to be perfect! A steady hand does help but you can always touch up the green lines if the black is too thick.

Outlining complete

Outlining complete

The next part is tricky and again, you will need a steady hand and importantly the paint must be thinned so that it flows off of the brush in one stroke. So paint a black line through the blue squares, both vertically and horizontally!

cross hatch through the blue squares

cross hatch through the blue squares!

Repeat the same pattern through the green lines.

Cross hatch through the green.

Cross hatch through the green.

You can see that I’ve made a few mistakes but I’m not too concerned and the next picture will show why. That said, it would be easy enough to correct with a touch of green paint. It’s worth pointing out again that you are painting a cloth pattern on a small miniature and unless you intend to enter your figures in a competition, perfection is not required.

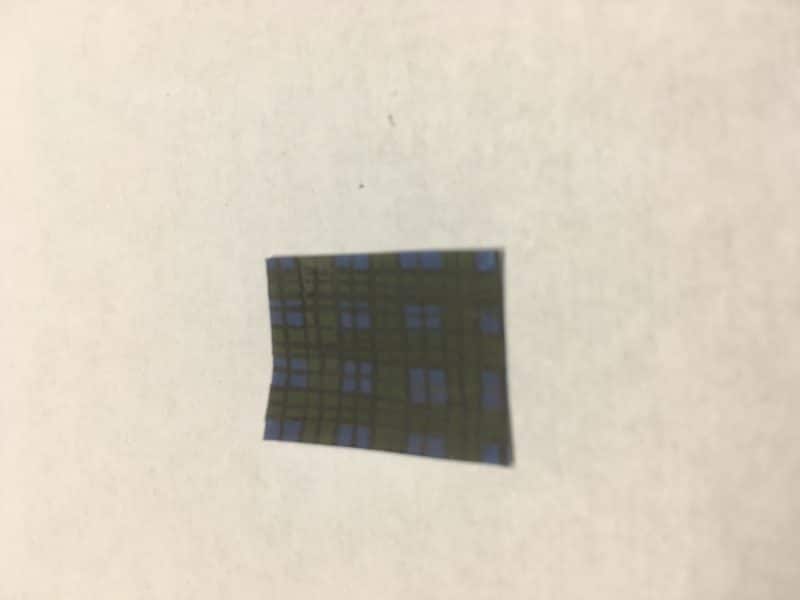
The finished pattern, cut from the paper.

The finished pattern, cut from the paper.

I did the above step by step in about 10 minutes last night just for the blog. Hence the glossy look on some of the pictures – the paint was still drying! I hope that you agree that the finished result, which I have tidied up by cutting from the paper looks fine for a battalion of wargames figures. Incidentally, I do paint straight onto the figures – this an exercise to show the method.

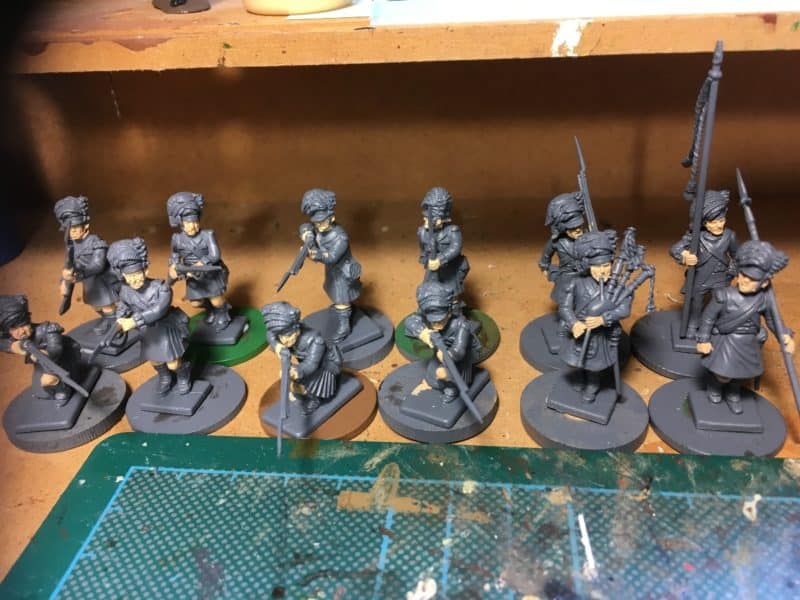
The nearly completed figures

The nearly completed figures

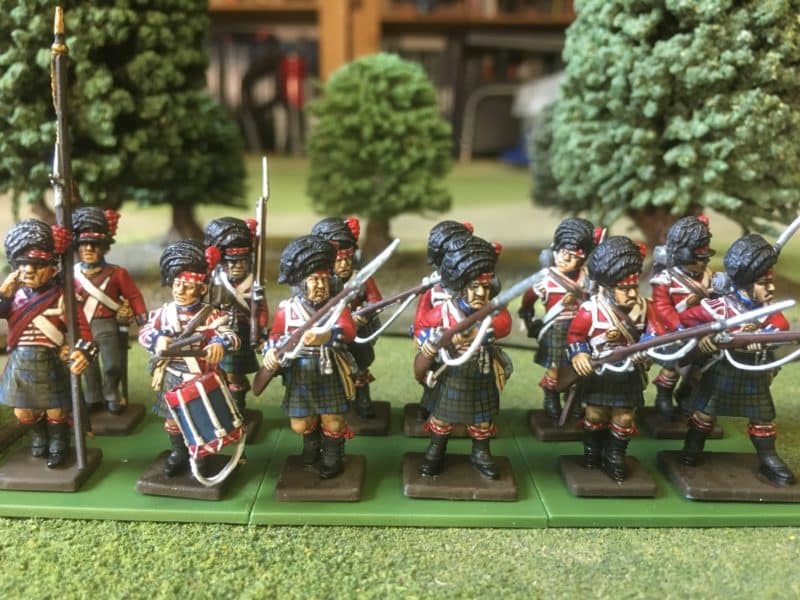
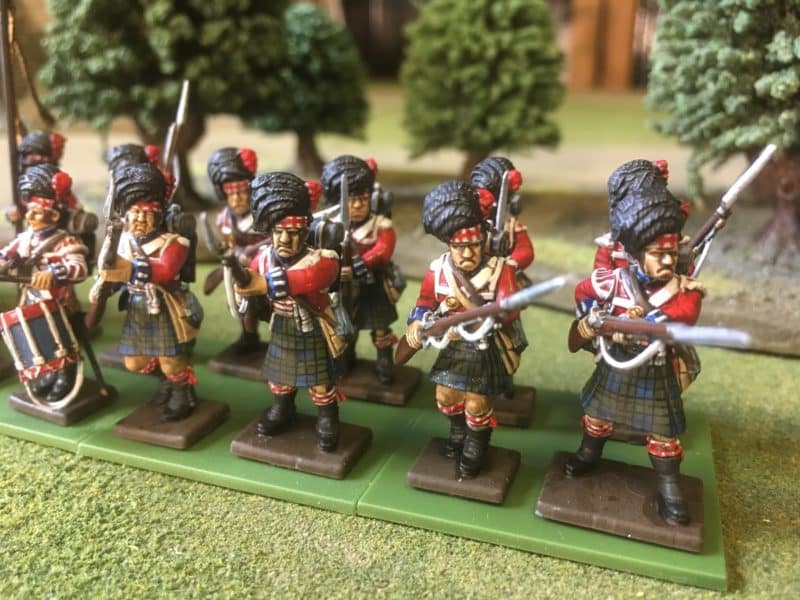
So this is how my first batch of 12 figures look at the moment. A few points to note. The Black Watch had all red tufts (hackles) on the centre company, red over green for the light company and red over white for the Grenadiers. I need to ‘dot’ in the green squares on the hat band and of course they need to be based properly. All of which I’ll do once the other 12 have been painted. I also need to go back to the test figure ( the sergeant) and add some extra lines to his kilt!

Another view of the first 12 figures

Another view of the first 12 figures

I hope that this has been useful to anyone that is wondering how to go about painting Highlanders. In the links below you can see how I went about completing the Gordons and Camerons. I’m putting these aside for a week or so, whilst I go back to my War of the Roses army – there’s only so much tartan I can paint in one batch!

THE COMMERCIAL BIT

Almost all of the paints, miniatures, bases, basing materials and anything that you are likely to need for your hobby are available POST FREE from my shop here:

ARCANE SCENERY

The Victrix Highlanders can be found in the Victrix category here:

VICTRIX MINIATURES

We carry a huge range of Vallejo, either browse the category – or to find individual paints, type the number into the search bar:

VALLEJO

You can visit the Mont St Jean site here:

MONT ST JEAN

To see another blog article on painting tartan, in this case the Camerons, click here:

TAMING THE TARTAN TERRORS

Happy Modelling!
Don’t Just Do It…..B&Q it, again!

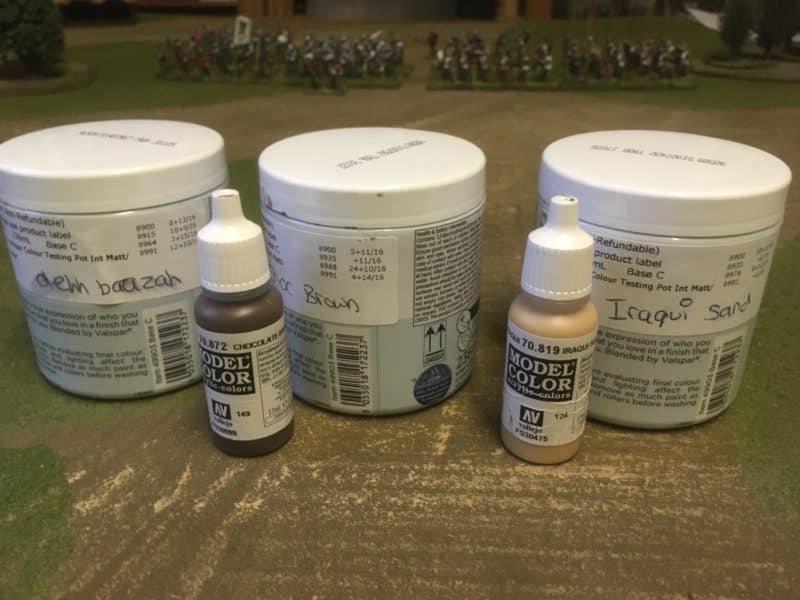
As a retailer of model paints, I’m not sure that I should be sending my customers off to the local DIY chain, B&Q, but as a hobbyist, I like to share the tips that I have picked up over the years. I’ve mentioned before that I use  DIY type emulsion for the bases of my figures. My particular favourite being Dehli Bazaar, which is a nice greeny brown colour, or as my father would have said, ‘shitty coloured dim’. I was coming to the end of the tin of the Dehli Bazaar emulsion and the dregs were getting too thick to use, even with thinning, so it was time to get a new tin.

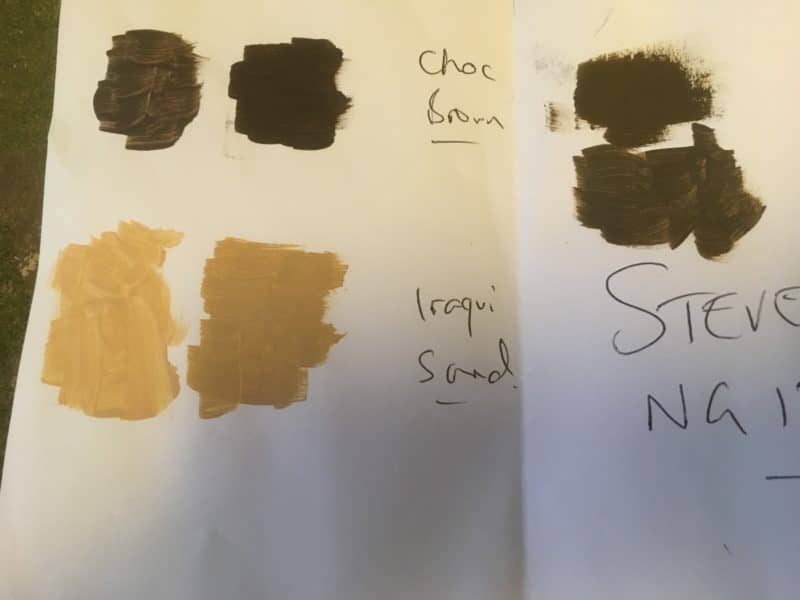
Paint samples and the originals

Paint samples and the originals

I also decided to try out the in-store colour matching facility at B&Q. Whilst I was replacing my usual basing paint, I thought that I would see if I could get some emulsion pots pots of the two other colours that I most frequently use when basing; Vallejo Chocolate Brown 70872 and Iraqi Sand 70819. I just brushed some samples of each paint onto a scrap of paper and off I went to the local B&Q. The young lady behind the counter did warn me that the colours may not be an exact match as they were using Valspar Emulsion as opposed to Vallejo pigments but she would do her best. The sheet above shows that the two vallejo colours are a bit ‘off’ and on the light side but close enough for me. After all, I will be using these for basing, not to replicate a uniform colour.

B&Q sample pots next to Vallejo for size comparison.

B&Q sample pots next to Vallejo for size comparison.

The process took about ten minutes but here’s the best bit. The cost was £3.00 a pot! Each pot contains 263mls! So for £9.00, I have enough paint to keep me basing for the next couple of years. They even kept my details on file so when I need another batch, they can just make a batch up from the details on file. Brilliant!

The beauty about using emulsion for your bases is that it is water based paint and can be thinned with tap water; you can wash your brushes in water and it seems to give great coverage over sand and basing material, even when thinned. If you need to you can mix it with with Vallejo or other actrylic paints – I often add a small amount of White to the last highlight to get a final dry brush highlight on my bases.

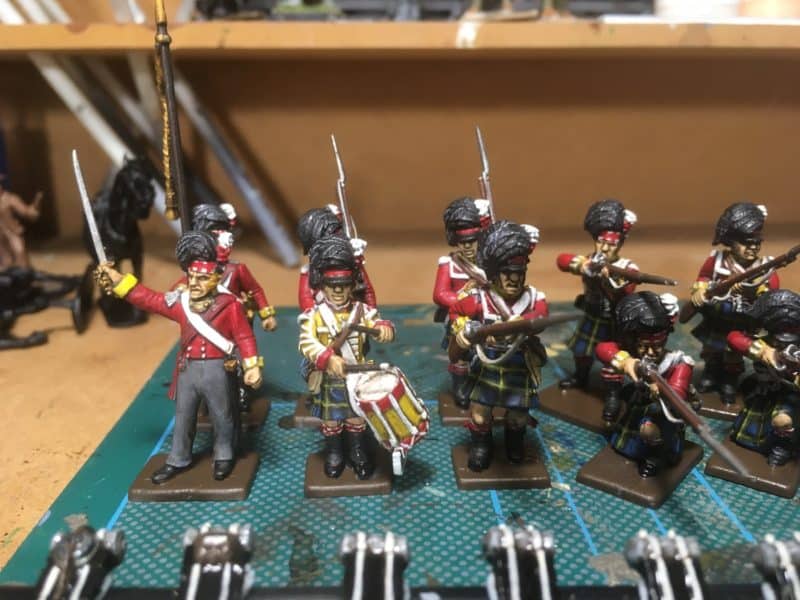
Gordon Highlanders - These are just about ready for basing

Gordon Highlanders – These are just about ready for basing

So, with my new basing paint purchased, I’m ready to finish off my next Battalion, the Gordon Highlanders. As you can see above they are just about ready for basing. I need to touch in the green squares on the hat bands and tidy up any obvious errors. You can see that the back packs are all done and waiting to be fixed on. Then it’s just fixing the flags, which I have ready to go.

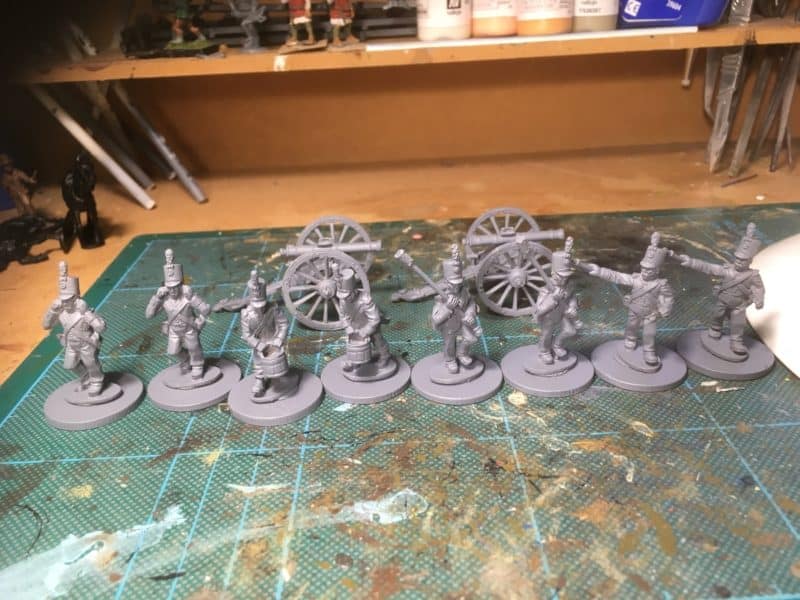
Portuguese Artillery

Portuguese Artillery

Next up, Portuguese Artillery! The painting goes on!

THE COMMERCIAL BIT!

We don’t carry B&Q paints – you will have to find your own local depot. At Arcane Scenery, we do have a range of nearly 6000 lines, most of which we will send post free to most countries in the world! You can visit our shop here:

ARCANE SCENERY

Happy Modelling!
Get them when they are young!

I often read articles that are bemoaning the lack of youngsters coming into our hobby. I dont think that there is very much truth in this – if anything, thanks to the power of the internet, the hobby is growing. I’ve been reading the same old stuff since I was a youngster myself, with the same complaint occuring some 50 or more years ago. If anyone doubts me, I have the original issues of Wargames Illustrated and  Miniature wargames Magazines and you don’t have to look far in the letters page to find evidence. Like all hobbies, it is either in your DNA or not. Wargaming is never going to be a mainstream hobby, it is a niche at best and I suspect that in itself is part of the attraction.

I will concede that Historical wargaming is now, I believe, a minority part of wargaming itself, with Fantasy and Science Fiction taking the larger share and certainly attracting the younger player into the hobby. Many will stay with this side of the hobby, a few will stray into the historical thread. In terms of introducing my children into the hobby, I have been largely unsuccessful. They did take an interest for a while, particularly my son, who was attracted to Orks in particular and 40K in general but alas, the hobby didn’t stick and he has taken up golf…. My daughter quite enjoyed the the painting and crafting side of the hobby for a while but she too is more interested in sport, specifically scuba diving and swimming. I’m not sure where they got the activity bug from – I like sport but prefer watching it these days! As for golf, I’m happy to agree with the sentiment that it is a good walk spoilt. That said, I do like a game of crazy golf at the seaside!

2019-04-19 10.50.58

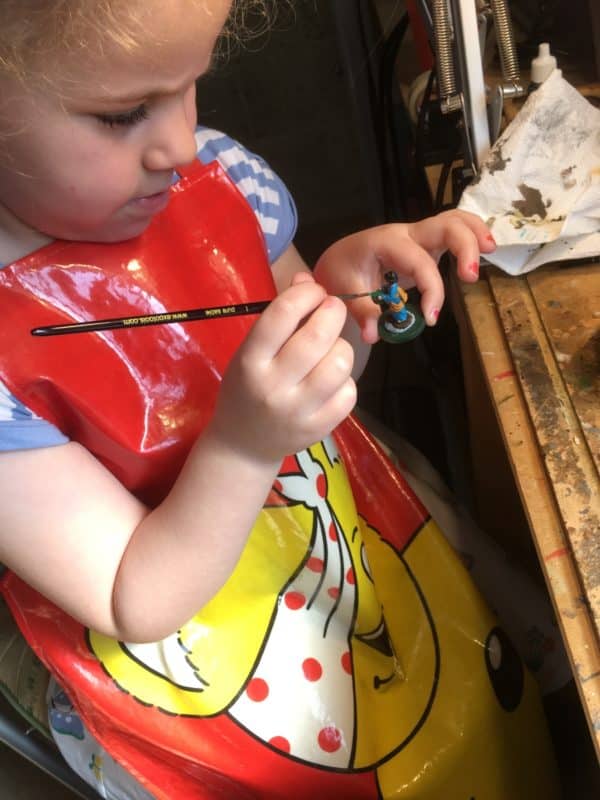
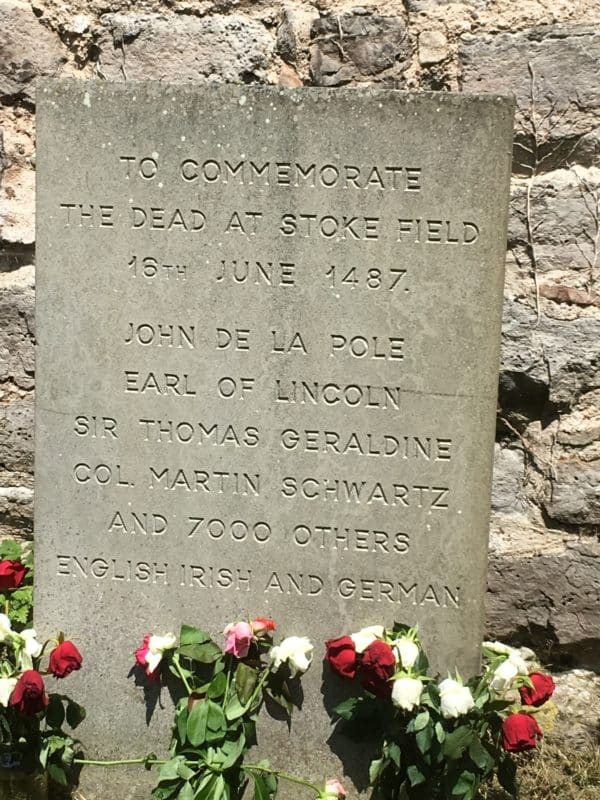
However, another generation comes along and so the opportunity comes along to try and convert the grand children into willing opponents! Emily is now 6, about the same age that I was when I started making models, so when she stayed over at Easter and asked if she could sit with me while I had sneaked off to the garage to do some modelling, I was pleased to have her company. At first she was happy to watch me working on my WOTR project and we had a nice chat about the ‘Cousins War’. She was intrigued by the story of the ‘Princes in the Tower’ and that a major battle, Stokes Field, took place just down the road from her school.

Memorial stone at East stoke Church

Memorial stone at East stoke Church

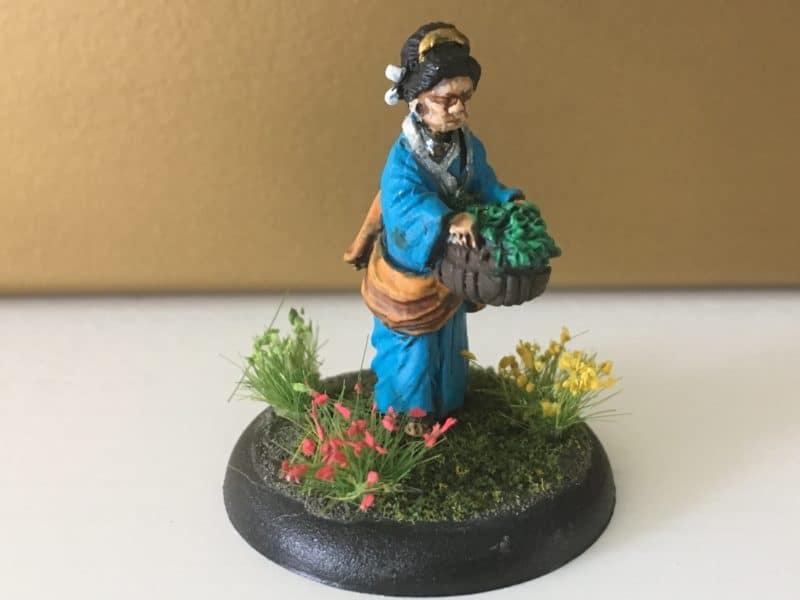
It didn’t take long before she asked if she could have a go and so I looked through the ‘lead pile’ and found a figure primed and ready to paint that might be suitable. In the past, I have been quite protective of my paints and brushes but I decided that if Emily was going to try and paint something, she would be better off using the correct tools for the job! So with gritted teeth, I gave her my best brushes and we started to paint a Japanese Peasant lady.

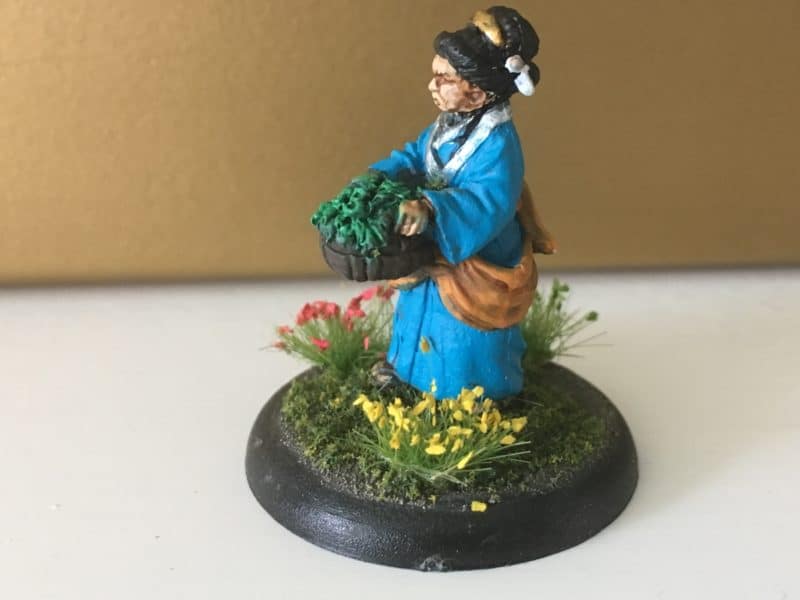
Emilys' first model

Emilys’ first model

I was surprised at just how good she was. Of course, you have to explain how to hold the brush, how to thin the paint, how to use the point of the brush, how to draw the brush over the bits that you want to paint, how to hold the figure. Gosh! I had forgotten just how much I had learnt but in teaching Emily, I remembered just how much technique there is to learn. When it came to the colour scheme, I let Emily choose which colours she preferred – I actually quite like the combination that she came up with – I’ll be using that again!

2019-04-22 09.43.24

Overnight, I did the basing for her, in that I super glued the figure onto a base and added the texture. Superglue and kids are a dangerous combination! The next day, Emily added the scenic bits and to finish the figure off, we used some washes and did a bit of highlighting and dry brushing. Again, once I explained the techniques, Emily was happy to apply the washes and paints. The result is not too bad and I am thinking about what figure Emily can do on her next visit!

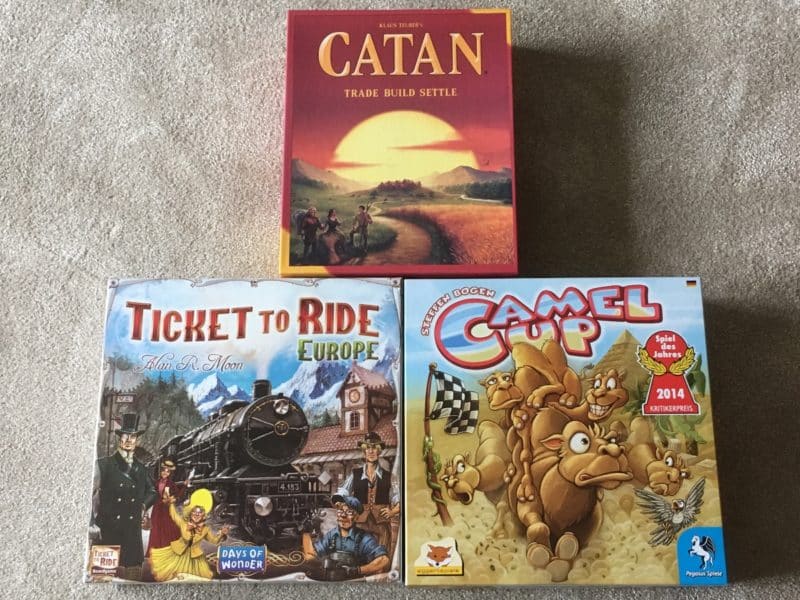
Catan, Ticket to ride and Camel Up!

Catan, Ticket to ride and Camel Up!

At six years old I think she is too young to start wargaming but she has already mastered Junior Cluedo and Camel Up so we are not too far away from a more complicated board game – say Space crusade. Another year or so and I think that I might just try her out with a simple wargame. I think a good skirmish game such as Test of Honour or Lion Rampant will be a good place to start. I may yet ensnare her into the hobby….

Painters Block – Goal setting!

I wrote the following article for Wargames Illustrated sometime ago. It’s still relevant to me – the techniques I discuss help to keep me focused – to a degree – and it seems appropriate to revisit it in my blog now as I am torn between my Naploeonic project and my growing WOTR army.

CLIMBING THE LEAD MOUNTAIN

A fairly frequent conversation that I see on social media and often have at the club with my wargaming buddies is how to avoid ‘painters block’. I think that we all get bogged down in never ending projects from time to time or just loose enthusiasm. I am fairly relentless, although somewhat slow, when it comes to painting my units for gaming but I too suffer from becoming jaded. I have a couple of strategies that help. Writing a blog is one of them. It’s very useful to document what you have achieved and what you plan to do and it was part of a business strategy that I was taught when working at WHSmiths. If you want to achieve a goal, there are four steps to work through.

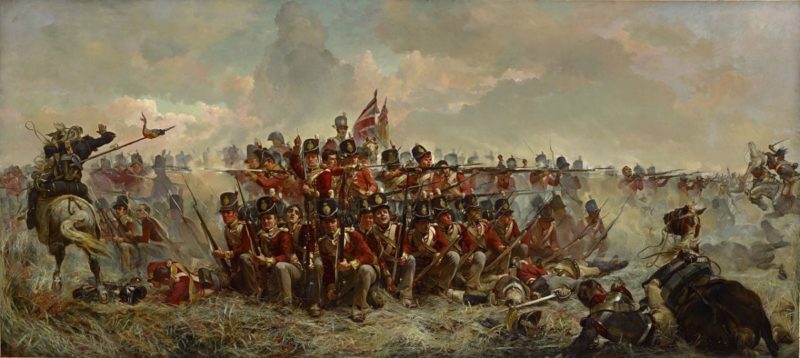
Lady Butlers painting of the 28th at Quatre Bras.

Lady Butlers painting of the 28th at Quatre Bras – an inspiration for wargamers!

STEP 1 – See it

First picture in your mind what you would like to achieve. Visualising your next project is a powerful way of getting you started. There is plenty out there to help you do that. Just pick up the latest copy of Wargames Illustrated for a start. Go to a Wargames show, visit a model shop – even an online one will help…Arcane scenery is great! BUT don’t think about the unmade product itself, focus on what it will look like when painted and finished and even better on your war games table! Check out your friends collection. The library is often overlooked these days – they may not have the exact book that you want but it’s surprising what you can find just by browsing. Talking of browsing, a morning spent in the man crèche otherwise known as Waterstones can be very rewarding.  And of course there is Pandoras box, the Internet. Google images is simply an amazing source of reference and inspiration, as are the forums, facebook groups and other peoples blogs. One of the most useful sites that I have found is Pinterest. I’ve rambled on about this site before but it’s worth repeating again. If you haven’t used it, you are simply missing out on not just an amazing collection of images but the opportunity to organise your own collection. Even better it’s free!

Demo games are a great source of ideas!

Demo games are a great source of ideas!

So no excuse for not having a clear idea of what you would like paint, model or collect  for your next project. The point is though not just to look at other peoples stuff but to visualise in your own mind how your models will look. It’s OK to dream!

STEP 2- Say it

It might sound daft but talking about your next project whether to your mates or your family is a really important step on the road to completing a project. It does help if you are talking to someone that’s interested in the subject but believe it or not, it is not essential. There are a number of helpful reasons for talking about your next project. If the person has any knowledge of the subject, you can be sure that they will be happy to share it with you. Now this can backfire…I’m sure we have all been in situations when we have started a conversation at a wargames show that has become a one sided lecture in the minutiae of a subject that barely relates to your original statement. You know, you started to talk about the fact that you were going to build an Artillery piece and have to listen to 10 minutes on the chemical composition of gun powder in the 18th century!

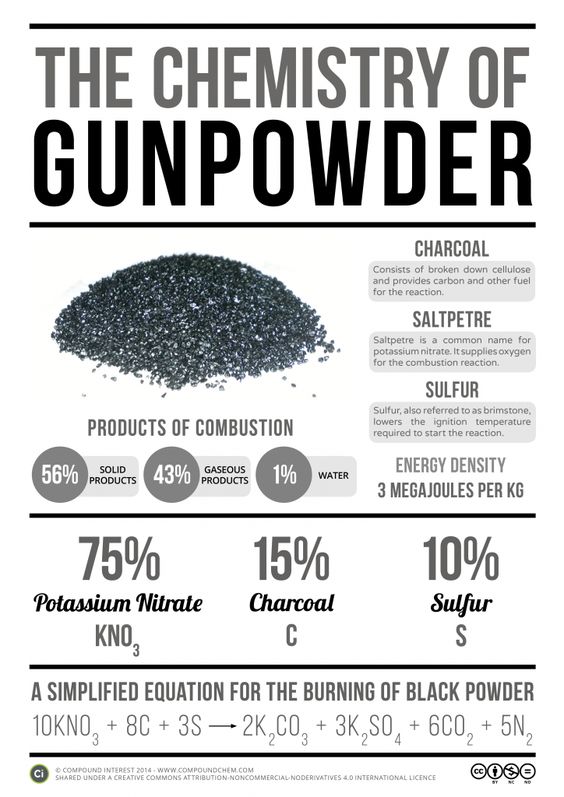
gunpowder

So strangely, talking to someone who isn’t in the hobby is often more useful than you might think. The very act of explaining to someone what you intend to do helps to organise your thoughts and will help you to plan. Even better, friends wont deflect you or put barriers in the way. Sometimes I have found that my non wargaming buddies or family have been the most helpful. They have also been great cheer leaders. Just the simple question,’how is that painting project going’ is enough to spur me on if I am flagging. It’s also nice to keep your partner informed so they have some idea of what you are specifically doing rather than just disappearing off to ‘play with toy soldiers’… One word of caution when dealing with those outside the hobby and talking about your project – watch out for eyes glazing over – you don’t want to be that guy talking about the chemical composition of gun powder!

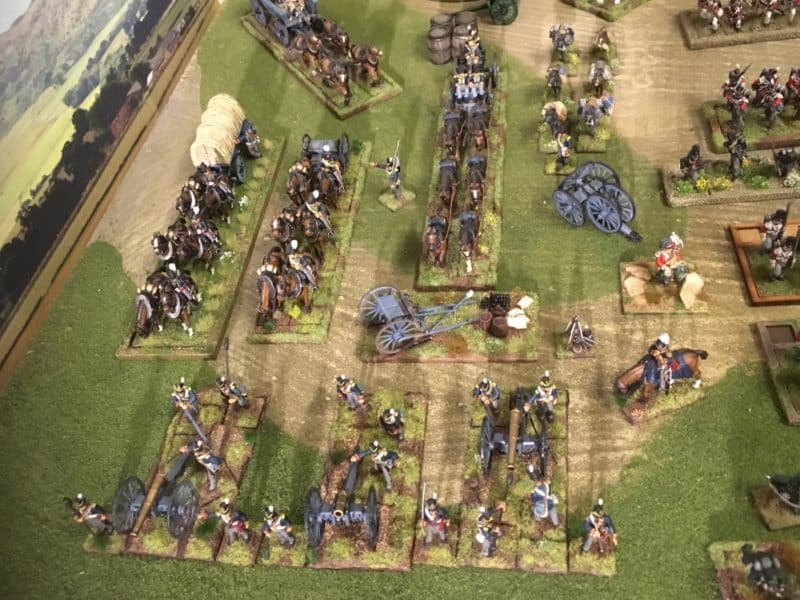
My British Napoleonic Artillery park is still growing!

My British Napoleonic Artillery park is still growing!

So ‘it’s good to talk’ but now it is important to move to the next step.

STEP 3 – Write it down

Once you commit your thoughts to paper your project starts to become a reality not a dream. I am sure that explains the popularity of blogs on the internet. The truth is that many are writing for themselves as much as any desire to let the world know what they are up to. You don’t have to start a blog though. Just getting your thoughts down on paper is good enough. And we are not looking for JK Rowling standard manuscript here! A list of things that you need to finish the project, a very rough diagram of how the diorama that you are planning might look is enough to clarify your thoughts. A list of units in a brigade that you would like to paint will keep you to your project even if you are diverted by something else. Even some post it notes marking a reference in a book will help to record that you are about to embark on a new project.

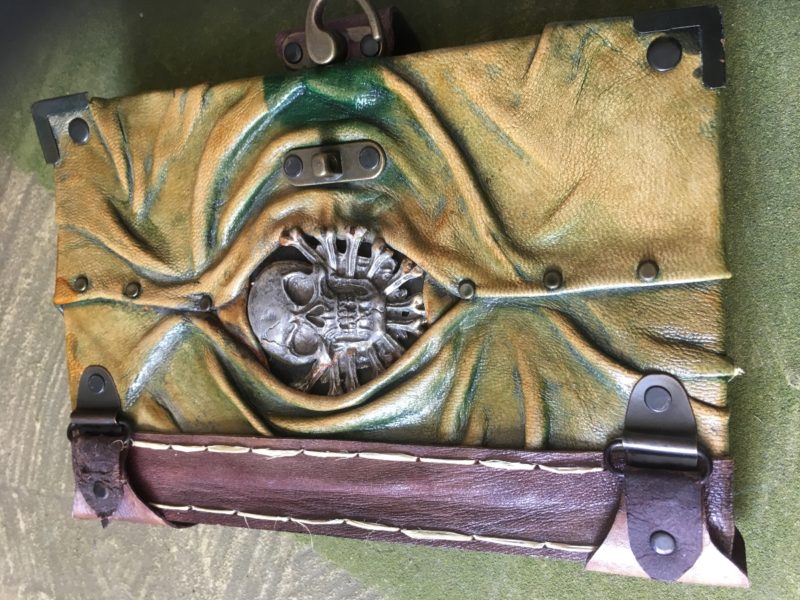
My project notebook.

My project notebook.

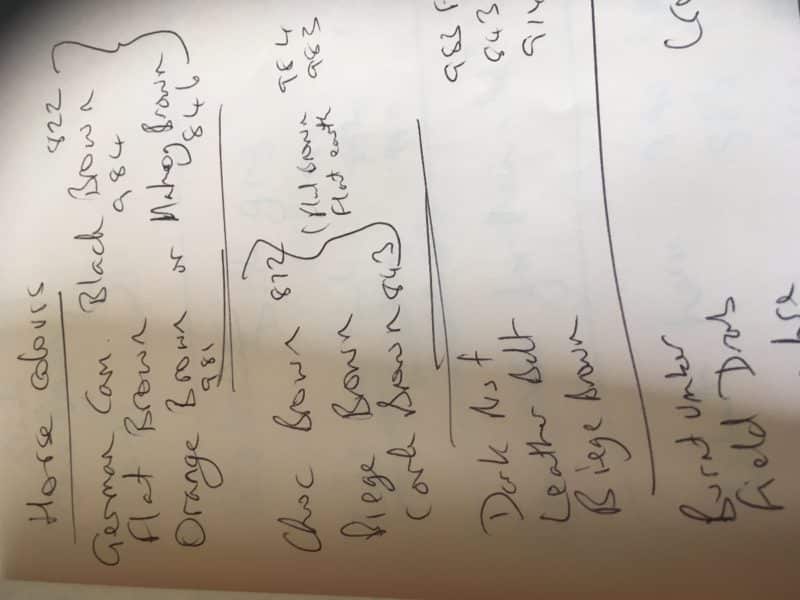
The other useful point about writing details down is that you will have a record of what you have achieved and how you did it. I cant tell you how often I go back to my reference’s for the first cavalry unit that I painted. I wrote down some ‘recipes’ for various horse colours and I refer to them all of the time. My own written notes mean more to me than going back to the original sources because as I read my own notes, I can remember exactly what I did. You will also become your own cheerleader – reading back through past projects will encourage you to get on with your new one!

Paint recipes for horses!

Paint recipes for horses!

So write it down and you will be ready for the final step.

STEP 4 – Do it!

Now buying another batch of figures or model does not count as doing it! You are just adding to your lead mountain and actually I would say that the act of purchasing a new pack of soldiers is really only part of step 1 – Seeing it. In fact, if you want to be hard on yourself, take a look at your lead mountain. The bigger it is, the bigger the dreamer you are. Harsh, I know but for me ‘doing it’ starts when the model is on the work bench, out of it’s packaging. Just start somewhere. Scrape off a few mold lines, stick some bits together, spray the model with primer, put the figure on a temporary base, just do something that starts the process. Don’t focus on the end result at this stage just on the first step that you need to take in the process. Remember, you already have a plan. You have imagined what the model will look like when it is finished, you’ve told your mates that you are working on it and you have a rough plan written down as to what you need to do.

It's a long way to go to finish three regts of highlanders but it's a start!

It’s a long way to go to finish three regts of highlanders but it’s a start!

That’s why I like to batch paint my Napoleonic units. Painting 24 figures is still quite daunting for me, even after years of painting. The thought of painting an army would stop me before I even started. But I know that I can paint the shakos of 12 figures in 30 minutes. Then I do the faces, then the back packs, then the water bottles….you get the idea. Over time, I now have an army. So ‘do it’ doesn’t mean do the whole thing in one go. Life isn’t some Nike advert where you are suddenly transformed into a painting and modelling god! It means start and once you do, you will get it finished.

My WOTR army is steadily growing!

My WOTR army is steadily growing!

So that’s it. See it, Say it, Write it down, Do it. Four steps to achieving your next goal. I hope that it works for you – it’s a technique that I use and I know that it helps me with my hobby. I hope that you find it useful too.

THE COMMERCIAL BIT!

If you need help with your project my shop, Arcane Scenery has a huge range of products from tools to paints and of course scenery and much, much more. Even better, we post free to most worldwide locations!

ARCANE SCENERY

This includes the magazine, Wargames Illustrated, as well as other wargaming magazines. You can see our current stock here:

WARGAMES MAGAZINES

You can find Pinterest here:

PINTEREST

And follow us on Facebook here:

ARCANE SCENERY FACEBOOK

Happy Modelling!
 

Rocket Man – Part Two

Well, in the song, Elton sings that ‘I think it’s going to be a long, long time’. As it turns out, I have managed to finish the diorama featuring the Warlord Rocketeer within a couple of weekends. The idea of just getting on with the model rather than spending ages researching has paid dividends. I have cut some corners, made some assumptions and used a bit of artistic licence but I am pleased with the result. Here’s how I went about the final stages of finishing and basing the figures.

Rocket troop basing plan

Rocket troop basing plan

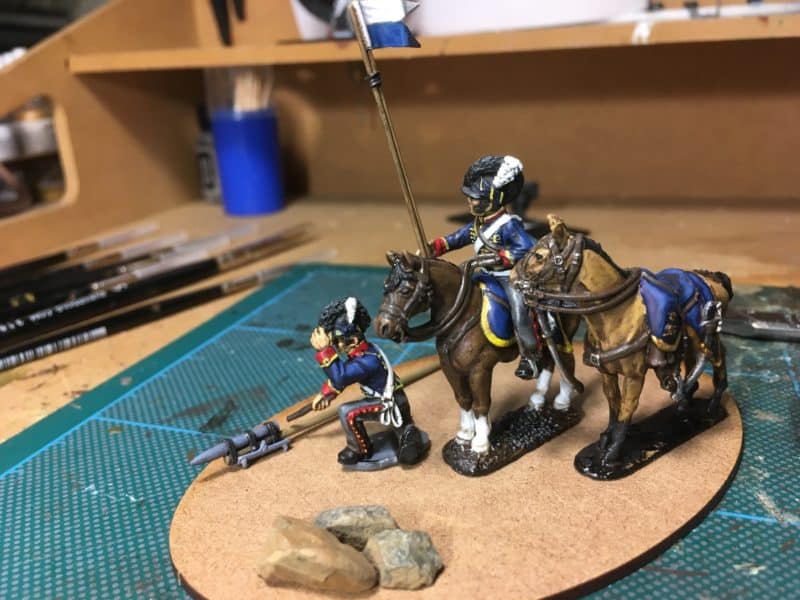
I replaced the original lances that I made from spears with some thinner 0.8mm brass rod from Albion alloys. I may have cut them a bit too long but went for an unsophisticated approach in keeping with the rest of the model  and simply guessed the ‘right length’ based on the reference pictures. The ‘string’ holding the two sticks together is some thin Florists wire wound around the rod and super glued into place. The Pennant on the sticks was simply cut from paper and painted. I used a darker blue than two of the reference pictures show, preferring this over the light blue.

View from the other side.

View from the other side.

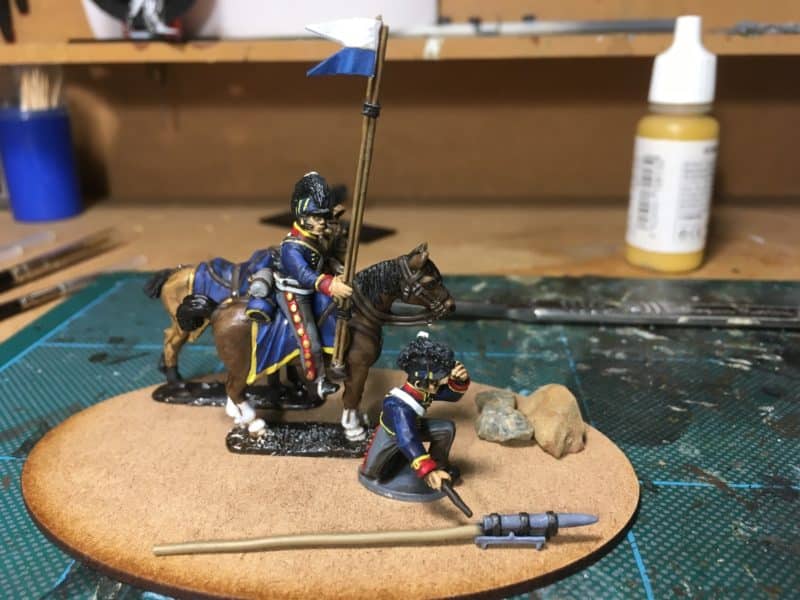
Once the painting was finished, I positioned the figures on the base that I had chosen. I prefered a smaller MDF Oval base rather than a Rectangular artillery type base. I doubt that the model will get regular use on the wargames table and the oval base looked nicer. I also wanted to keep things close together – I suspect in reality, the horses would have been a bit further away from a rocket that was being launched!

The ‘rocks’ at the front of the base are there to fill a space although they are extremely accurate, having been picked up from a certain area in Belgium!

Basing in Progress

Basing in Progress

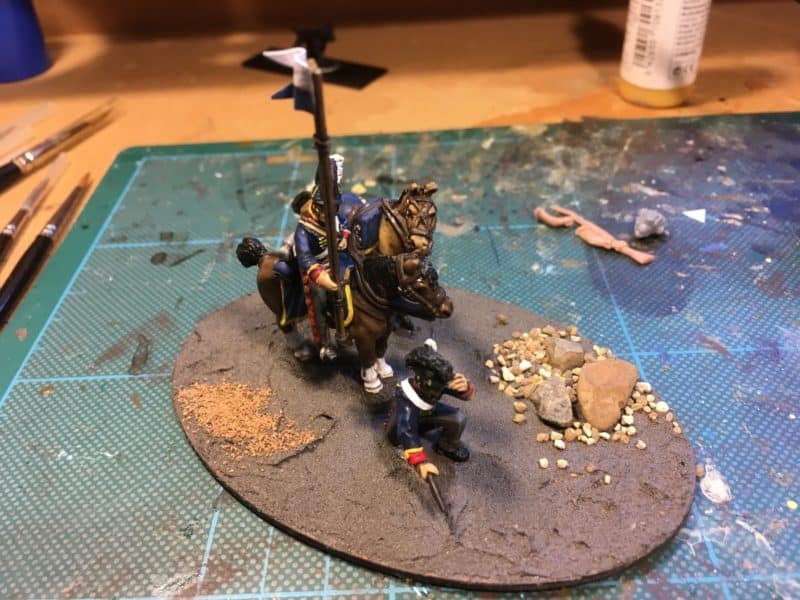
Once I was happy with the layout, I covered the base with Vallejo Dark Earth Texture paste and placed the figures into the paste. There is no need for glue, the paste will hold them securely but in the unlikely event that I decide to re base the figures, it is a simple matter to cut them free. I also sprinkled some coarse grit around the stones and some finer grit at the rear of the base to give some additional texture.

Rocket troop ready!

Rocket troop ready!

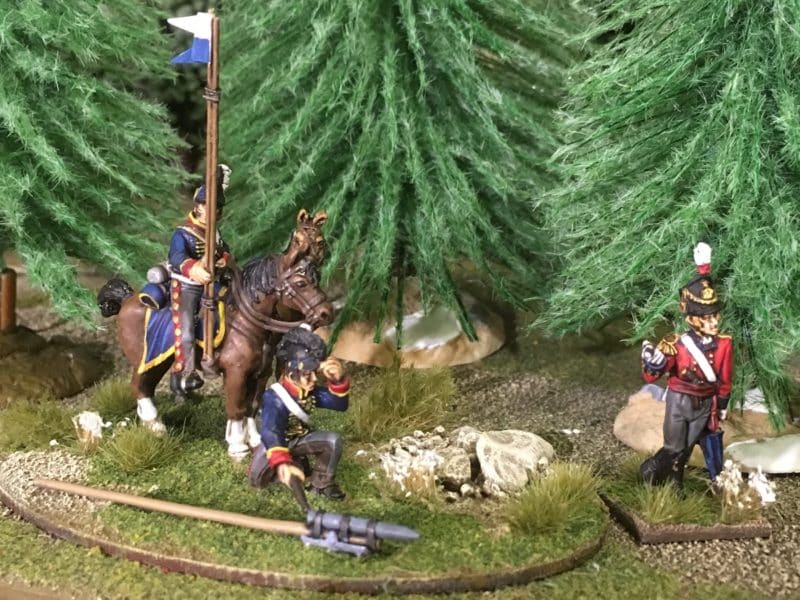
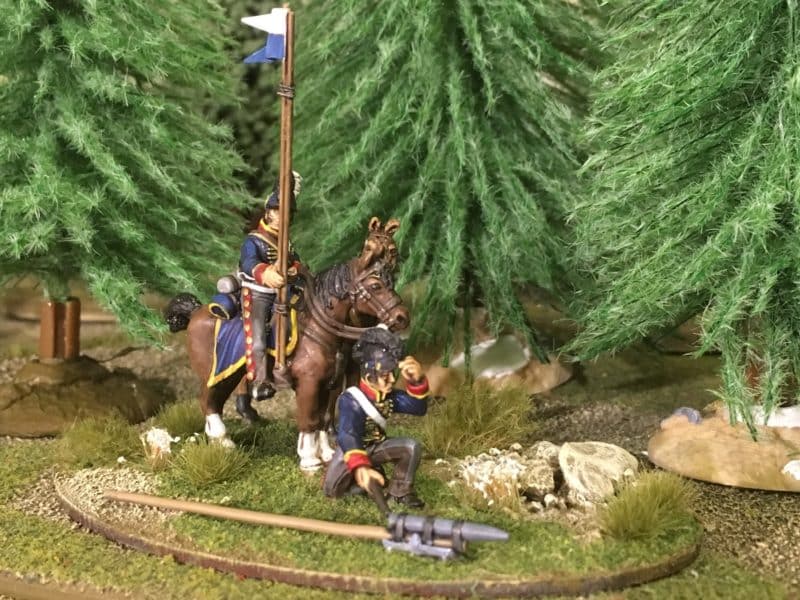
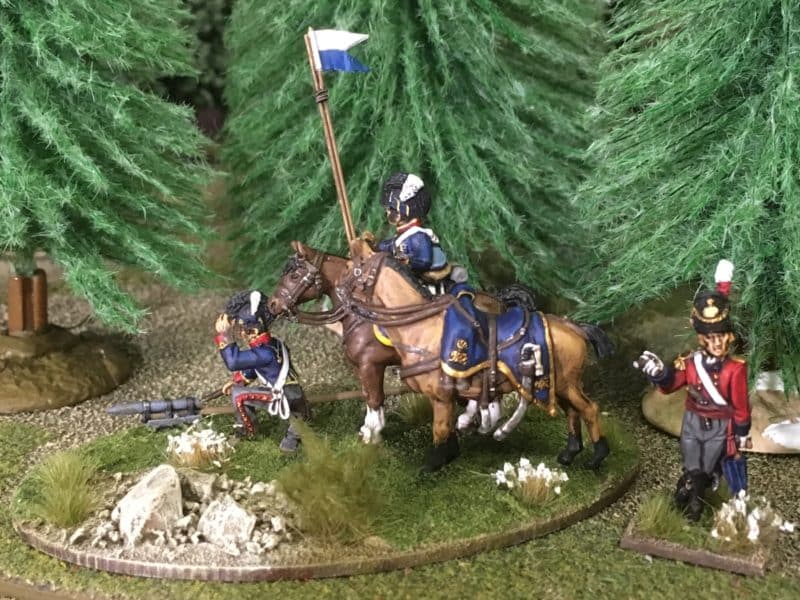
The next stage was to paint the base. I use a earth coloured emulsion called ‘Delhi Bazaar’ that I picked up from a DIY store as the first coat. I then dry brushed it with the same colour mixed with increasing amounts of Vallejo Iraqi Sand. The rocks and grit were also highlighted with a final coat mixed with white. I then added some scatter (Woodlands Scenics Green Blended Turf) and once this was dry, pressed the rocket launcher tray into place & glued the rocket in.  It was then a question of adding some nice tufts and flowers and my Diorama was completed! Incidentally, the officer in the pictures is nothing to do with the Rocketeer. He’s another Warlord figure that I finished basing at the same time.

An Officer observes the launch!

An Officer observes the launch!

View from the other side.

View from the other side.

So another project from the lead pile is complete, Next up some Peninsular War Light infantry for a forth coming Napoleonic day in Bingham – More details to follow!

THE COMMERCIAL BIT

Nearly all of the materials that I used are from my shop, Arcane Scenery:

ARCANE SCENERY

To make life easy, we post out free to most worldwide locations! You can see our range of Woodlands Scenics here:

WOODLANDS SCENICS

Vallejo Textures & pastes can be found here:

VALLEJO TEXTURES

Albion Brass rod can be found here:

ALBION ALLOYS

If you would like to get hold of a Warlord Rocketeer, you can go to their web site or contact me here:

CONTACT ME

Our web store shows live stocks, so if something that you want isn’t there, just email me and I will let you know whether we can get it and how approximately long it will take.

Happy Modelling!
Rocket Man!

I had been taking my hobby a bit too seriously at the back end of last year and getting overly concerned with ‘what is right’. Fortunately, I have my mates to sort me out and inject some common sense into the debate. When it comes to Napoleonics, detail is both a blessing and a curse. It is the details and minutiae of the uniforms that make the period so fascinating whilst at the same time providing a ‘barrier to entry’ to many in the wargaming hobby, who decide that having fun is more important than arguing about buttons and facings and so move into Fantasy or Science fiction for their hobby fix.

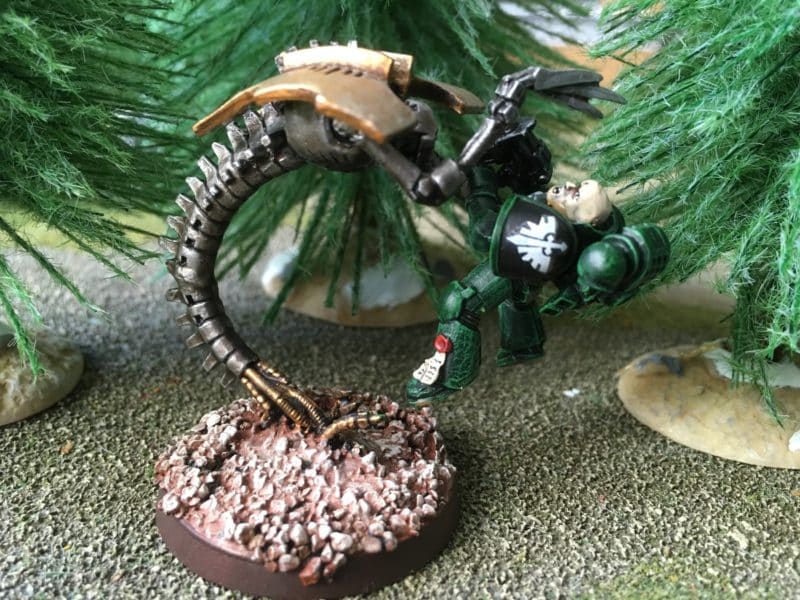
That Space marine has got the wrong colour facings!

That Space marine has got the wrong colour facings!

I had fallen into the ‘too much analysis causes paralysis’ mode and as a result some of the projects that I had consigned to the lead pile were being buried ever deeper because I was worried that I wouldn’t make a decent enough job of them. I’m not sure what happened over the Christmas Holiday period but something triggered my JFDI switch and I decided to just get on with what ever I fancied to the best of my ability and knowledge.

I'm not sure if this is the book but I have enjoyed all of them!

I’m not sure if this is the book but I have enjoyed all of them!

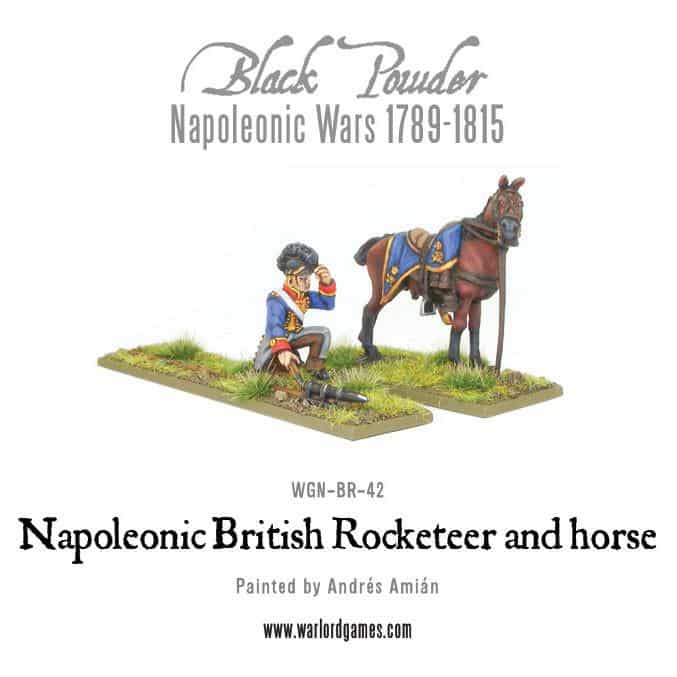
So I started on a little project that had been on my mind for a while. I actually first got the idea years ago from reading a Bernard Cornwell Sharpe novel. I can’t remember which one it was but it involved some troopers from a Rocket detachment pretending to be Lancers.  I then saw the Warlord model of a Rocketeer launching his rocket from the ground and thought that he really needed a mate to hold his horse. Put the two ideas together and you have one guy with the rocket sticks looking like a Lancer with his pennant on the rocket sticks and the Officer firing off the rocket on the ground.

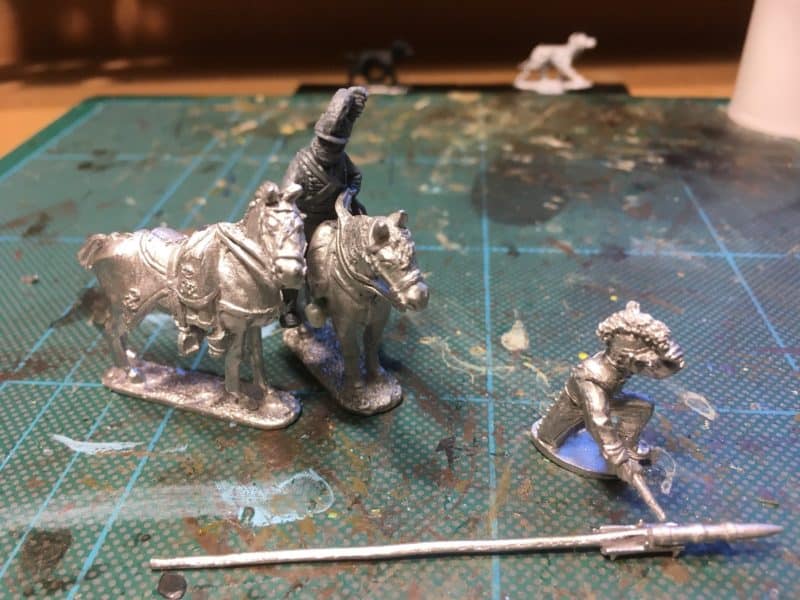
Warlord Rocketeer.

Warlord Rocketeer.

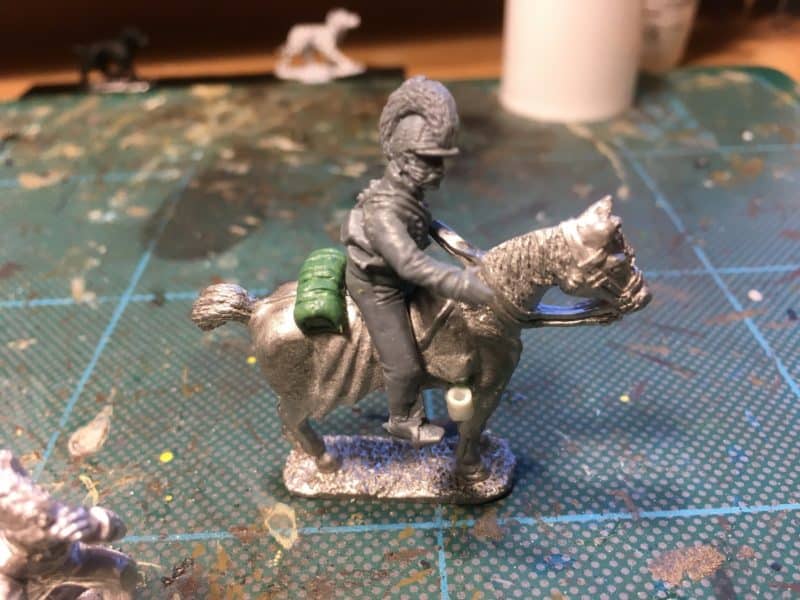
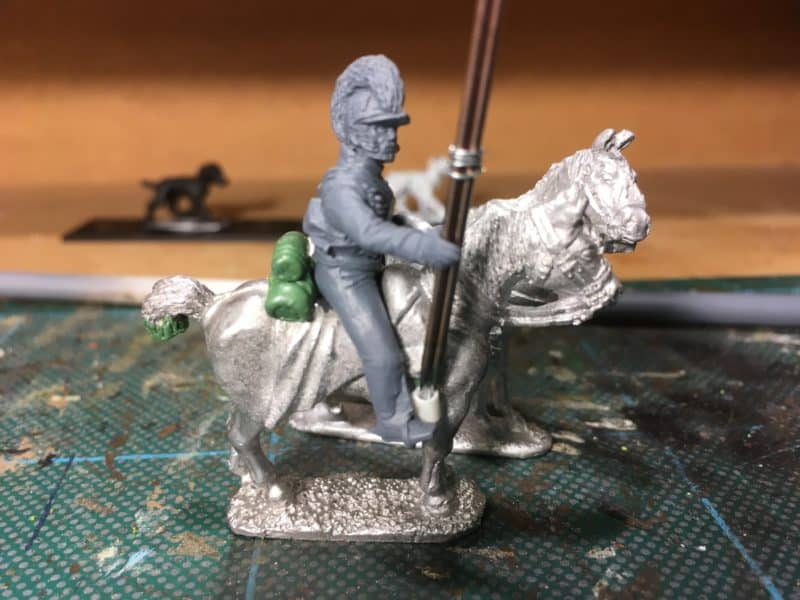
As far as I know there is no model of a Rocket detachment trooper riding with the rocket sticks so I would have to convert one myself. So in the spirit of JFDI, rather than wait to find the exact figure or horse, I went through my bits box and this is what I came up with:

Rocket trooper WIP

Rocket trooper WIP

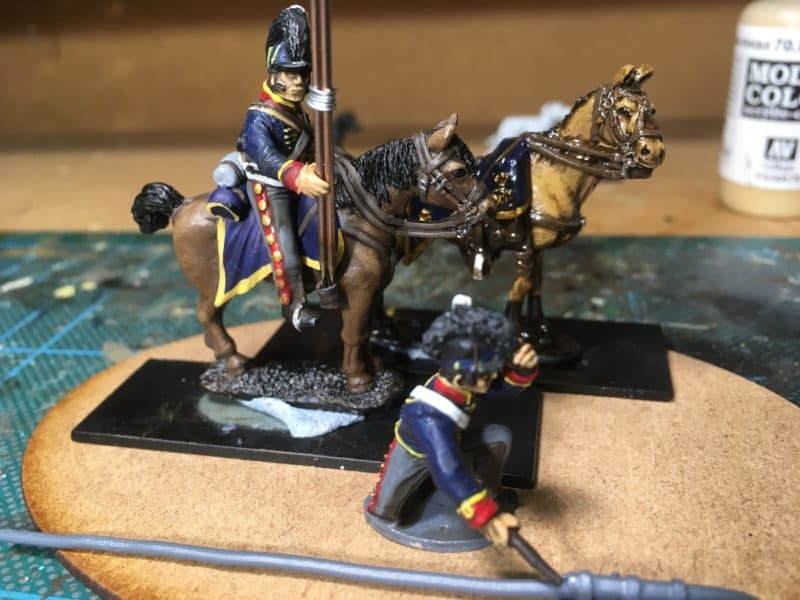
I’ve no idea where the horse is from – it just looked about right. I did have to ‘dock’ his tail though and remodel his hind quarters. I also added a saddle roll from green stuff and a cup for the rocket sticks from a piece of evergreen tube. The rider is a ‘spare’ from the Perry’s British Light Dragoons set. I have shaved off his boots, cut off his sword hand and added an open hand from a spare Victrix arm.

Rocketeer Diorama WIP

Rocketeer Diorama WIP

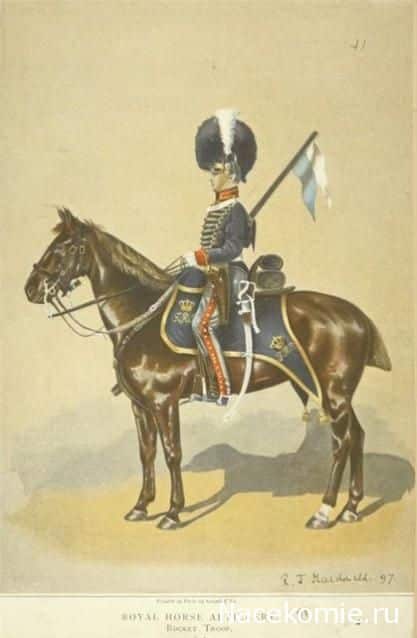
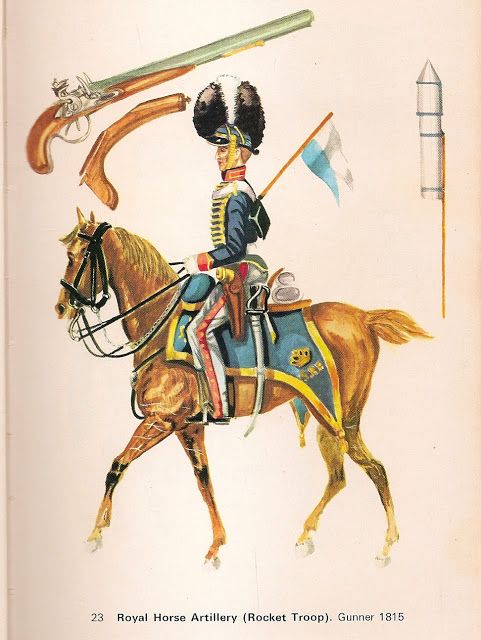
This is how the Diorama was shaping up but at this point I thought it might be worth doing some research. I found these three pictures on Pinterest and added them to my reference board.

Rocketeer Ref 1

Rocketeer Ref 2

Rocketeer Ref 2

Rocketeer Ref 3 Rocketeer reference 3.

As a result, I changed the saddle roll to two saddle rolls or valises, I also extended the docked tail with green stuff as I thought that it looked a bit short. I also made the rocket sticks from some spears and changed the pose so that the rider was now holding the spare rocket sticks.

Rocket trooper WIP 2

Rocket trooper WIP 2

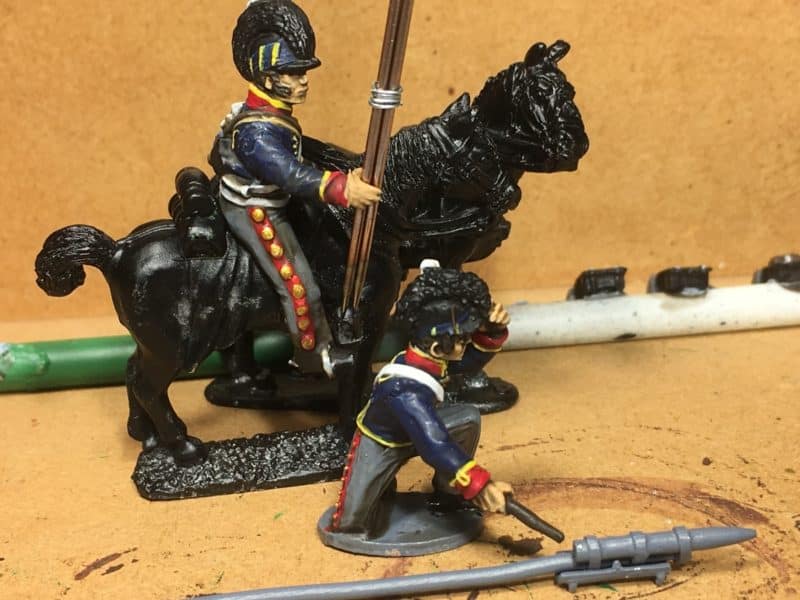
Having slept on the changes, I decide that I needed to add a stripe and buttons to the troopers’ overall. Again, a dive into the bits box and I found some Evergreen 10/000 plastic strip which I used to make the stripe and some 40/000 rod that I sliced to make the buttons. Evergreen strip is an excellent material to use and reacts well to liquid polystyrene glue, so a few coats of glue and it was relatively simple to mold the stripe to the legs of the trooper. 40/000 is the equivalent of 1mm and slicing this sized rod is a challenge for my eyes but once glued in place, a quick sanding down meant that they too blended in with the trousers. With hindsight, the buttons are a bit on the large side, as is the stripe but the job was done and if I convert another dragoon, I’ll get a smaller sized evergreen rod to slice!  I had intended to photograph the conversion in progress but stupidly undercoated the conversion in my rush to get the project moving. Below is a picture of the trooper, now painted.

Painted Troopers

Painted Troopers

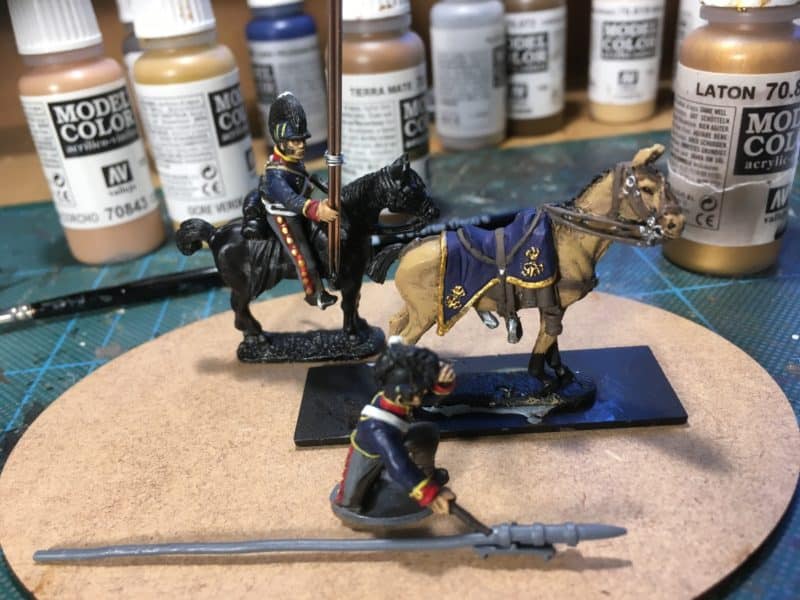
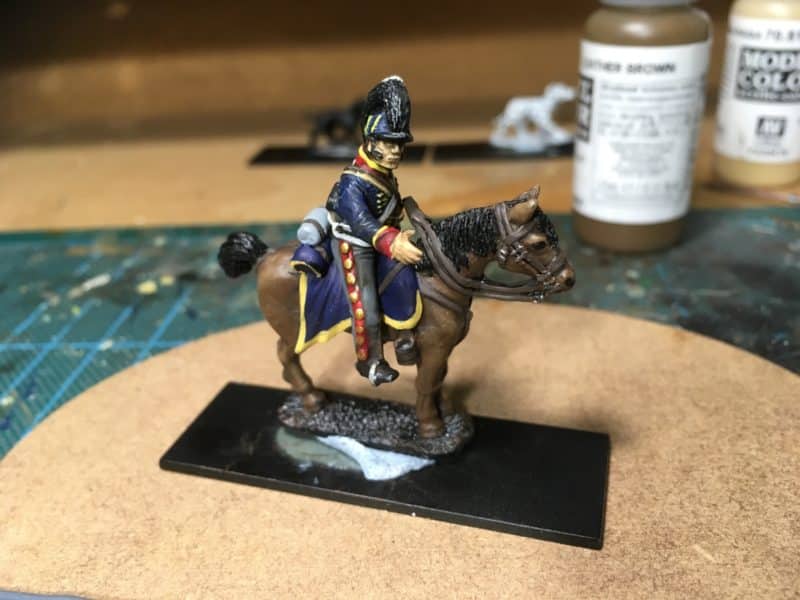
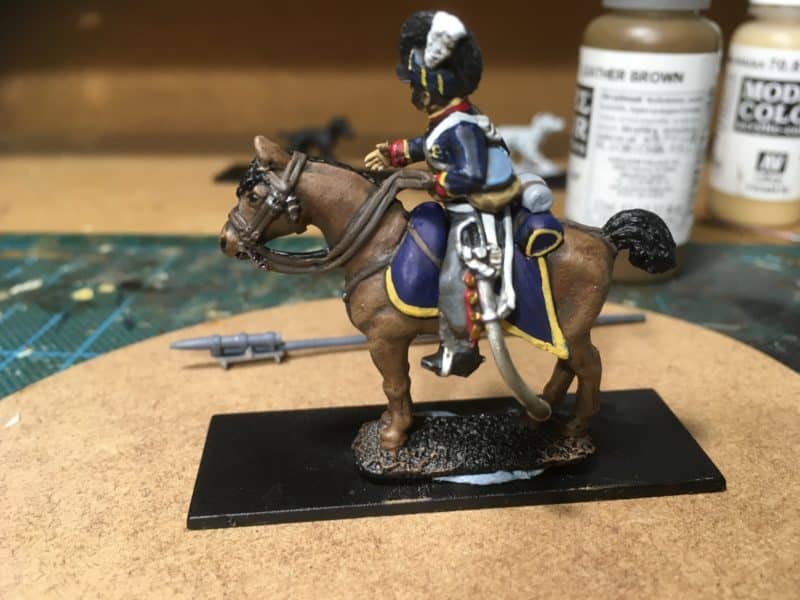
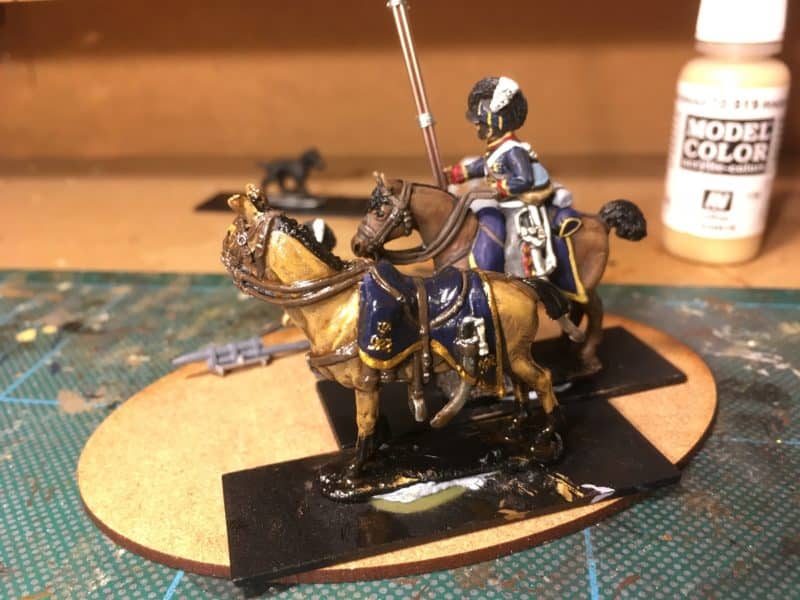
The next job was to paint the horses. I decided to change from my usual ‘recipe’ for brown horses and try a much paler brown. So the base coat was Vallejo Flat Earth, followed by Cork brown with a Green Ochre top coat/highlight. The Horse furniture was painted with leather brown, blanket dark Prussian Blue and I used Brass for the blanket detail. With the colours blocked in, I will either use a quick shade or ink to bring out the details.

Officers horse colour blocked, awaiting ink wash.

Officers horse colour blocked, awaiting ink wash.

The next task was to get the troopers horse painted. I decided on my usual triad of Chocolate brown, Flat brown and Flat earth for the horse. The rest of the model was painted as above.

Troopers horse, block painted

Troopers horse, block painted

Troopers horse, reverse view.

Troopers horse, reverse view.

As you can see, I don’t have a fixed plan of how things should look and use the photographs to modify or correct as I go along! The diorama is coming together though and in the next picture you might notice that I have decided to use a smaller oval base for the diorama and I have decided to ‘quick shade the Officers horse. I will do the same with the troopers horse using the strong tone or dark brown quick shade.

The diorama is coming together!

The diorama is coming together!

A different view - The quick shade will matt down nicely.

A different view – The quick shade will matt down nicely.

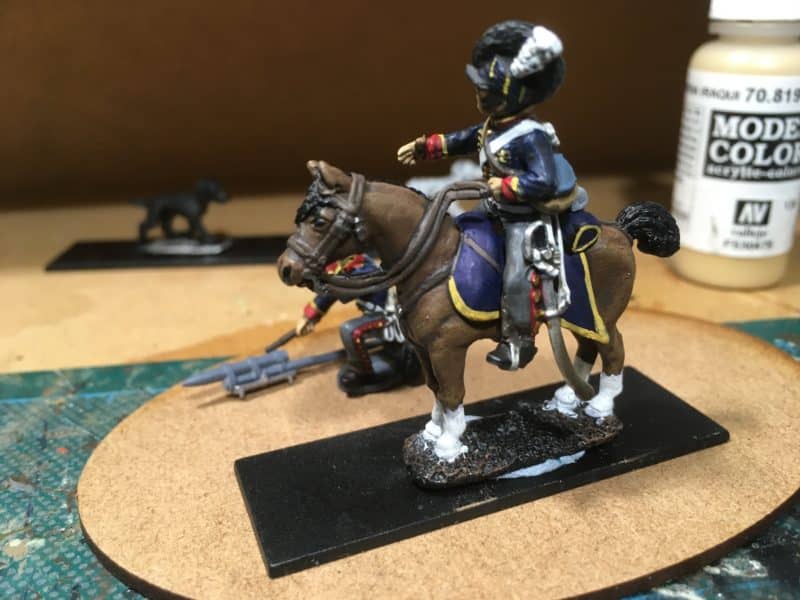
Having had a look at the pictures, I decided to add some socks to the troopers horse.

Pull your socks up!

Pull your socks up!

And that is as far as I have progressed with the project this week. I’ll quick shade the troopers horse and then Matt Varnish both horses. I’ll need to highlight some areas on the horse, specifically the blanket and possibily the leatherwork. I’ve also decide to replace the rocket sticks with some Albion Alloys Brass rod that is a bit thinner than the spears that I am currently using. The rocket also needs painting but I am nearly at the basing stage. I think that I will also add some definition to the troopers overalls just above his boots as it doesn’t show up very well.

It is a bit nippy out in my Garage at the moment and even with a heater on, when sitting still, painting, it is easy to get a chill, so my painting sessions are a bit shorter than in the Spring! However, this coming weekend should see a bit more progress – perhaps even basing!

THE COMMERCIAL BIT

Regular readers of my blog will know that most of the materials and models that I use are available post free from my shop here:

ARCANE SCENERY

It’s worth pointing you to the Evergreen plastics range this week – I find this stuff invaluable when converting.

EVERGREEN PLASTICS

The bases are from the Sarissa MDF range here:

MDF BASES

and if you would like to have a look at my references on the Pinterest site just click here:

STEVE’S PINTEREST BOARDS

Incidentally, joining Pinterest is free. If you haven’t got an account, I very much recommend it as a way of collecting reference pictures.

Happy modelling!


Happy New Year and a Cautionary Tale!


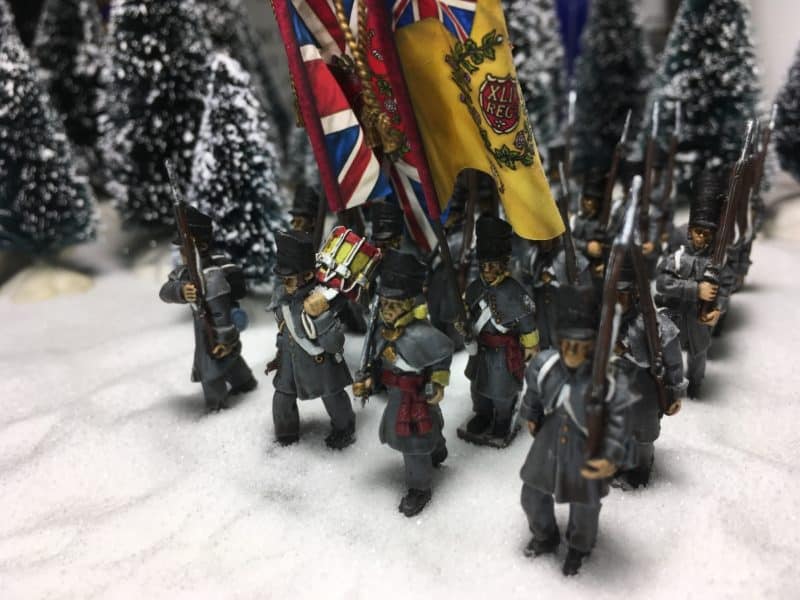
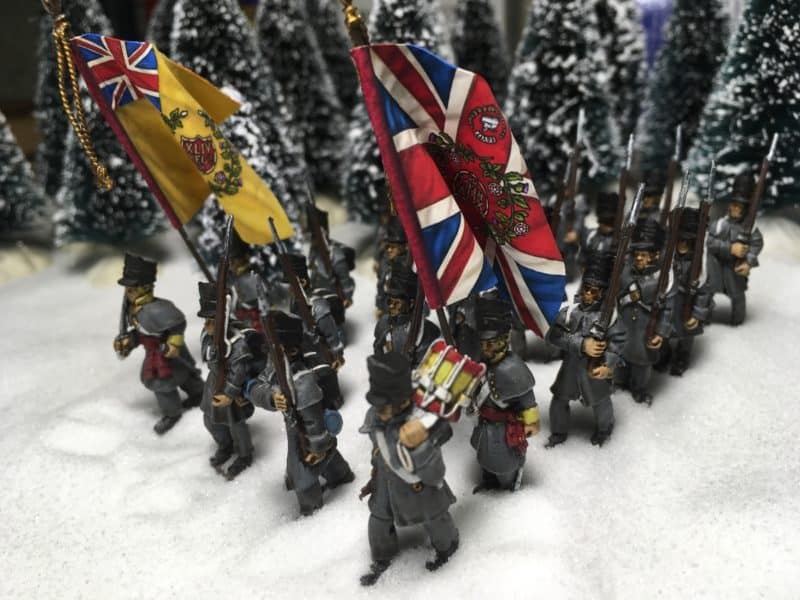
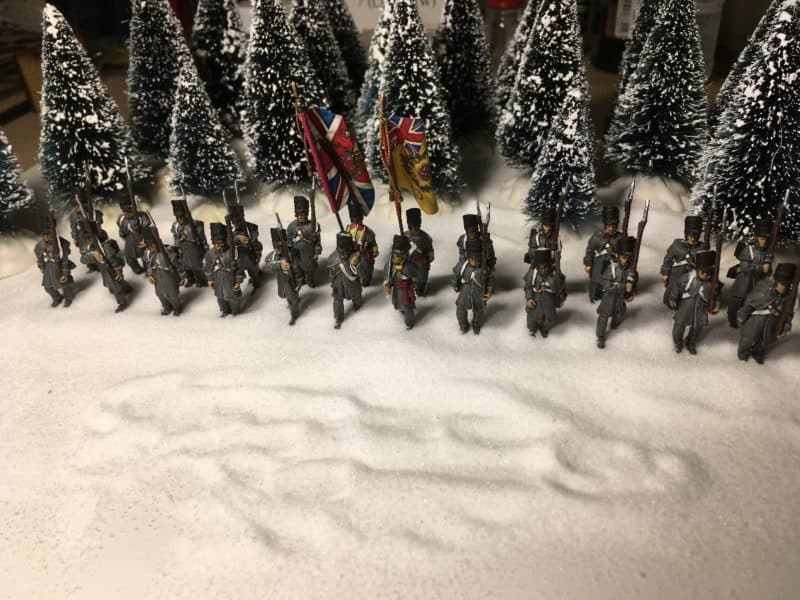
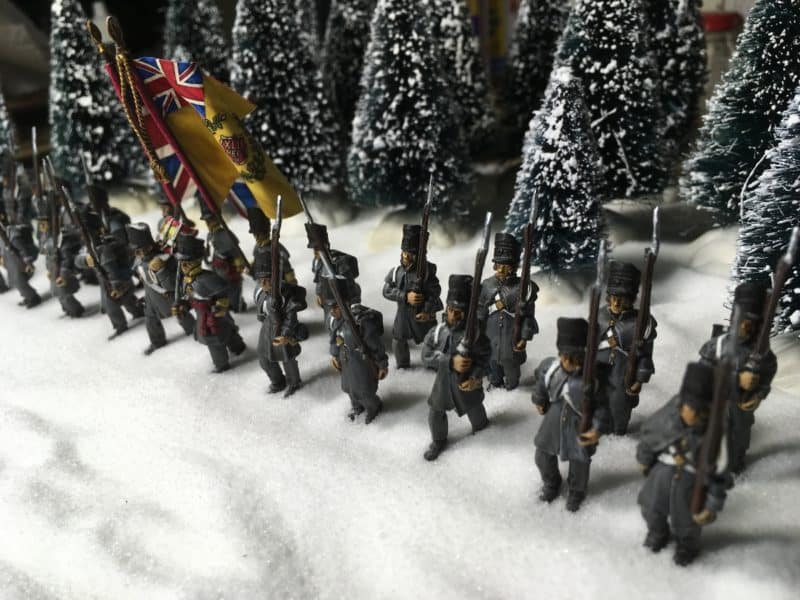
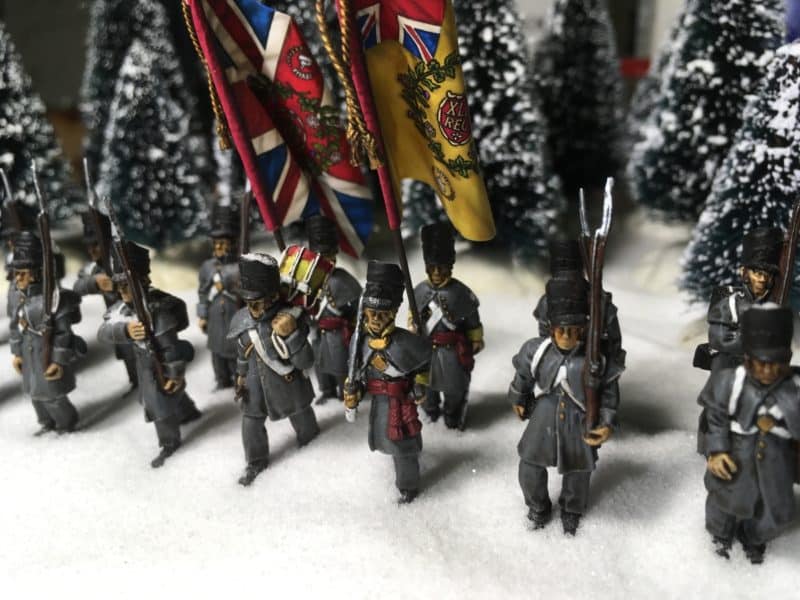
The 2/44th advance through the snow!

The 2/44th advance through the snow!

The ‘Old year’ has ended for me with a lesson that I have often experienced but have still yet to learn! When it comes to painting and modelling, if you rush you will make mistakes! I have been working on a really nice set of figures produced by Three Armies and unusually, they portrayed British infantry in Greatcoats. I was in no hurry to finish them until I had this brilliant idea of having them marching through the snow and using them as an Arcane Scenery Christmas card. As with all my Christmas preparation, I had left it a bit late but it seemed like a good idea and I knew just how I would execute it!

2/44th advance!

2/44th advance with colours on the correct side

My friend, Andy Callan had a job lot of snow covered trees – he had picked them up at a bargain price from a local garden centre last year – Andy is not only a very experienced war gamer but a canny bargain hunter! As the scene was going to be a temporary one, I needed a quick, cheap method of reproducing snow. Another of my Gaming buddies had the answer – use salt. So, a quick trip to Sainsburies and for 37p, I had all the snow that I would need.

2/44th full batalion

2/44th full batalion

I just had to temporarily base up the figures and add the flags and I was good to go!

It's cold out there!

It’s cold out there!

I had already ordered the flags from GMB, my favourite flag supplier, but I had to make the flag poles. There are some supplied with the figures but these are just plain wire, lacking the finials. Fortunately, I had some spare and using the thinner wire spears that we sell, I knocked up the poles with finials and painted them. It was then that the problems started. I was trying to attach the flags rather late in the evening – well past 11.00pm and I should have known better and waited a day but time was running out! To make matters worse, the garage where I normally do my modelling was freezing, so while the missus was tucked up asleep in bed I moved operations to the nice warm kitchen. Of course, every time I wanted a tool or paint brush, I had to go back to my workbench. Instead of cutting the flags on my proper non slip cutting mat, I used the breadboard.  So first of all, I managed to slip with the scalpel and steel rule and sliced the top of one side the regimental colour a bit short and at an angle!

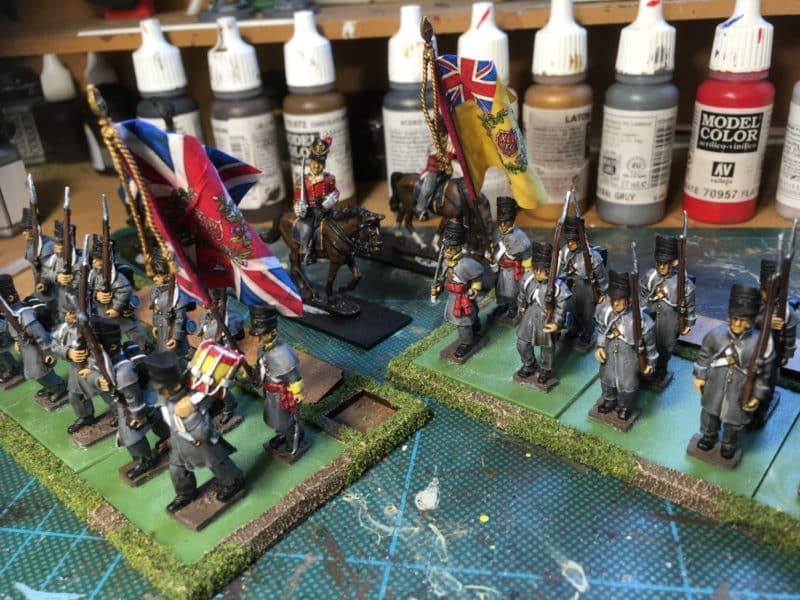
Colour party 2/44th

Colour party 2/44th

After some cursing, I managed a reasonable repair and with a bit of careful folding and a repaint job it looked OK. Next up, the Kings Colours, this time I was very careful and made a great job of cutting out. There was a bit of drama when I knocked the PVA over but it cleaned up OK and nobody saw it! I carefully fixed the Kings colour to the flag pole – perfect! Order was restored. I just needed to glue the poles to the figures and once everything was dry I would be ready to take the pictures the next day. Bugger! I had managed to glue the top of the super glue onto the bottle. Nothing that couldn’t be fixed – a pipe wrench and a pair of mole grips and I got the lid off. The fact that it would never go back on again is neither here nor there, I could super glue the flags on and get to bed. Job Done!

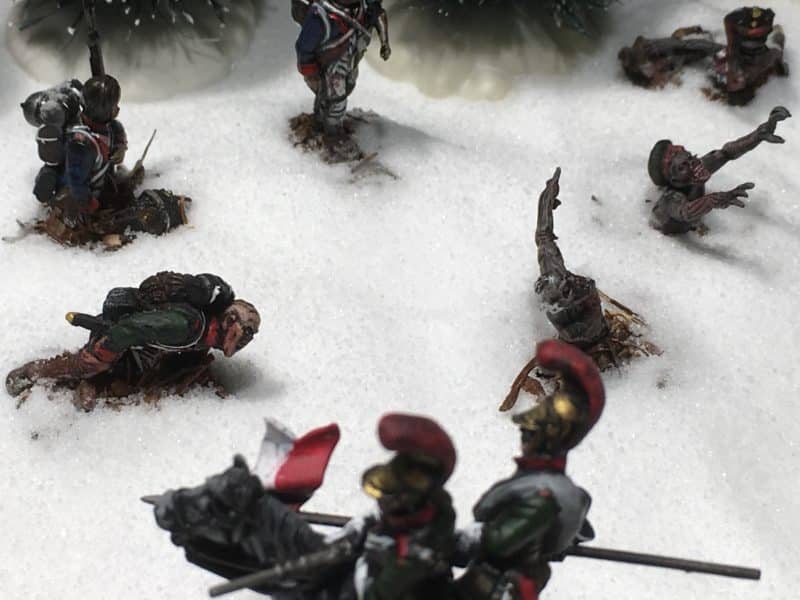
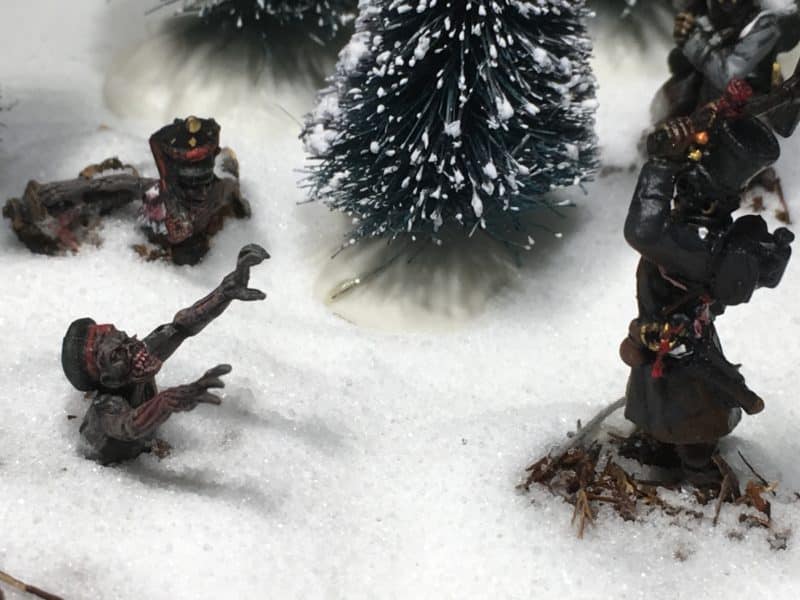
It was tough in Russia!

It was tough in Russia!

All was calm the next evening as I set up the photo shoot. I was quite pleased with the result and had some fun not only photographing my new Battalion, but also some Napoleonic Zombies that I had borrowed from Daz at Warbanner. I was so pleased with the result that I put the pictures up on Face book to get an opinion on which was the best picture to use. It was only at this point that it was pointed out that I had attached the Kings colours upside down…Bollocks!

YOU PUT THE FLAG ON UPSIDE DOWN!!!!

YOU PUT THE FLAG ON UPSIDE DOWN!!!!

Ah well, lesson learnt. Again. I have managed to soak off the flag and re attach it the right way up but as you can imagine there has been a bit of damage and I will probably replace both flags the next time I order from GMB.

The flag is now the right way up! Just the permanent basing to do.

The flag is now the right way up! Just the permanent basing to do.

So, a cautionary tale and a lesson learnt again. My New Years resolution is now sorted – I’m going to stop worrying about how long it takes to complete a project and just enjoy what I am doing without rushing. In the mean time, Happy New Year! I hope that you have fun with your modelling!

THE COMMERCIAL BIT

Unusually for me, most of the stuff featured above isn’t available from Arcane Scenery but if you do need paints bases, glue, proper fake snow and a huge range of kits and wargaming figures, they are available post free to most world wide locations at the time of writing.

THE ARCANE SCENERY SHOP

You can see the Three Armies range of figures here:

THE THREE ARMIES

The fantastic range of GMB Flags can be seen here:

GMB FLAGS

The salt is available from any decent Grocers but you do get nectar points at Sainsburys…..

Movement trays

Perhaps not the most glamorous part of our hobby but a topic that has interested me for some time. I see an awful lot of questions on social media with regards to the best method of basing figures, this is usually referring to the number of figures per base or the base size rather than the landscaping! There is of course no definitive answer to the question as different rules sets will often require different basing requirements – not only the size of bases will vary but the shape (round or square) can vary.

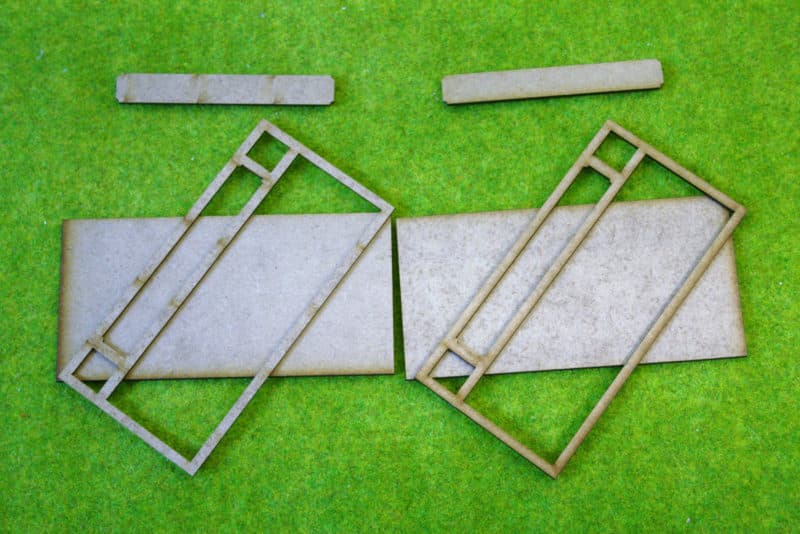
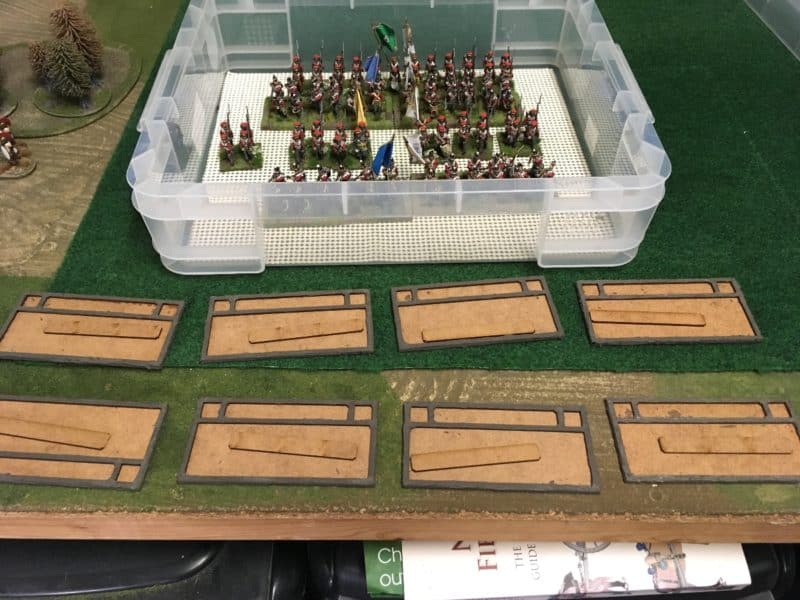
My new movement trays before assembly.

My new movement trays before assembly.

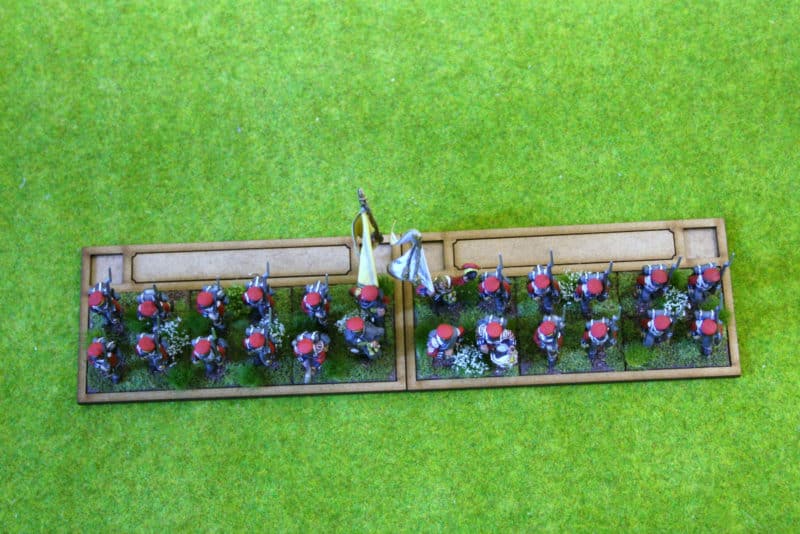
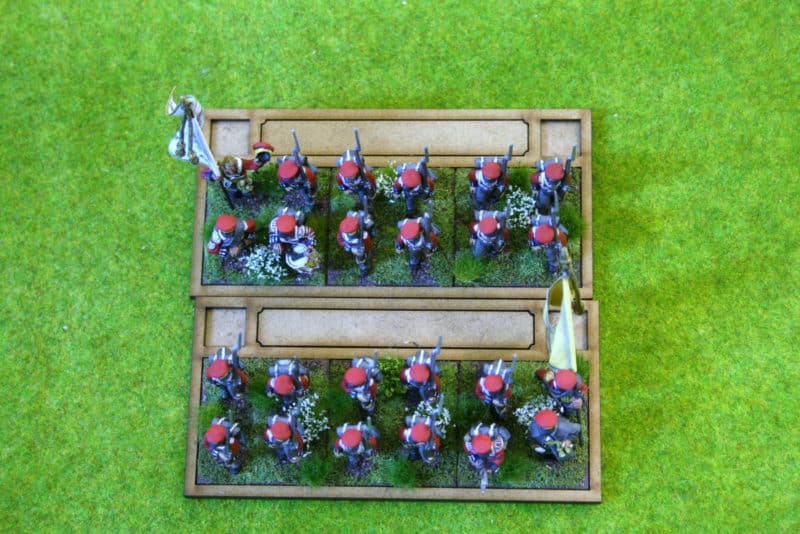
One solution is to use movement trays as a way of assembling units. This certainly helps bridge the gap between skirmish games, for example, Sharp Practice, and games that use larger units, say Black Powder. The problem is that by definition, the movement tray fixes the formation of your troops, making formation changes difficult duing the game.

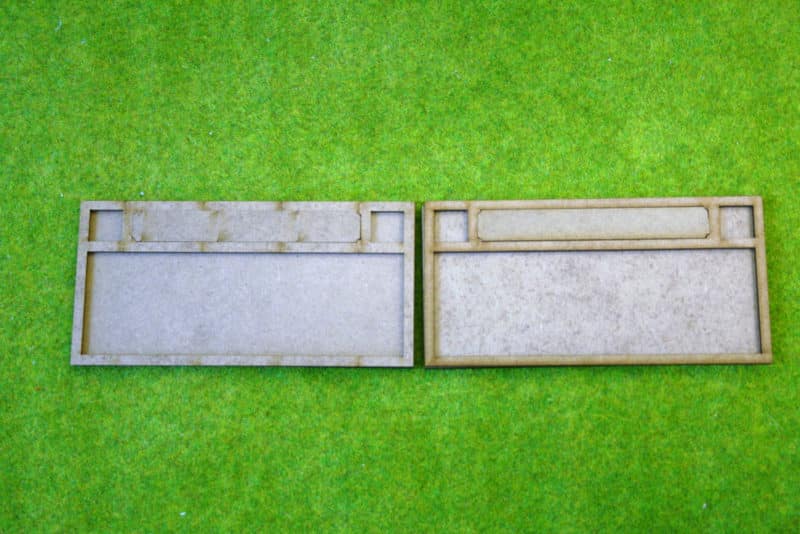
Assembled trays

Assembled trays

As my Napoleonic collection has grown, I also wanted a way of identifying the different battalions in my army. Yes, I know that they all have flags ( well most of them) but the more my battalions have grown, the harder it has become to remember who was who! So my solution was to design a movement tray system that allowed me to label my troops, but was flexible enough to facilitate different formations. The other benefit of movement trays is that they can help with transporting and organising your army.

As you can imagine, there was no simple solution and a compromise was required. This was made slightly easier by the fact that I play mostly Black Powder Napoleonic games, with the occasional foray into Sharp Practice! I came up with the following system, that has given me a degree of flexibility and solved some of the problems.

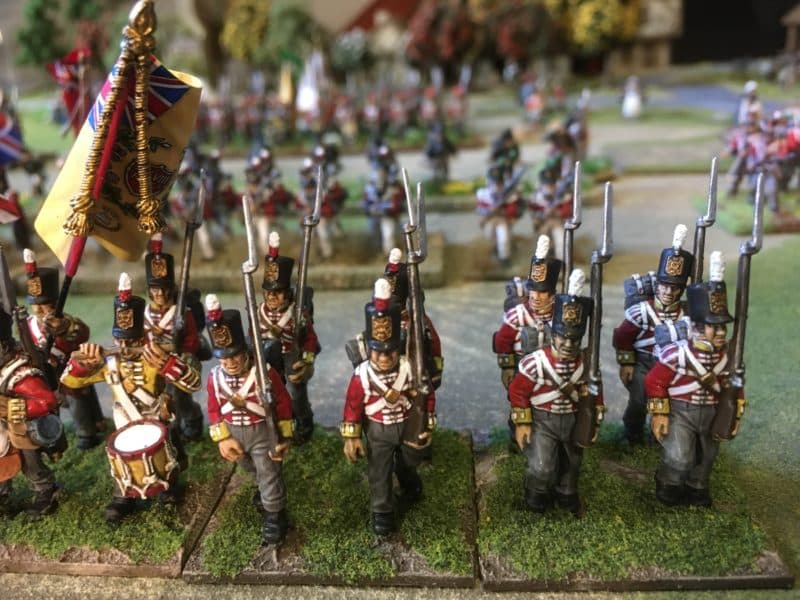
Grenadier Company based

Grenadier Company based – four figures to a 40mm square base

First I decided to base all my Napoleonic infantry on 40mm square bases, four figures to a base. That said, some of my figures, usually the flank company’s, are based  singly on 20mm square bases. This gives me some single figures to use for skirmish games if I need them. I’ve then built my Battalions in 12’s for a small unit, 24 for a standard unit and 36 for a large unit. However, the movement trays are designed to take 12 figures, so a standard unit will need two trays.

Flank Company on single 20mm square bases

Flank Company on single 20mm square bases

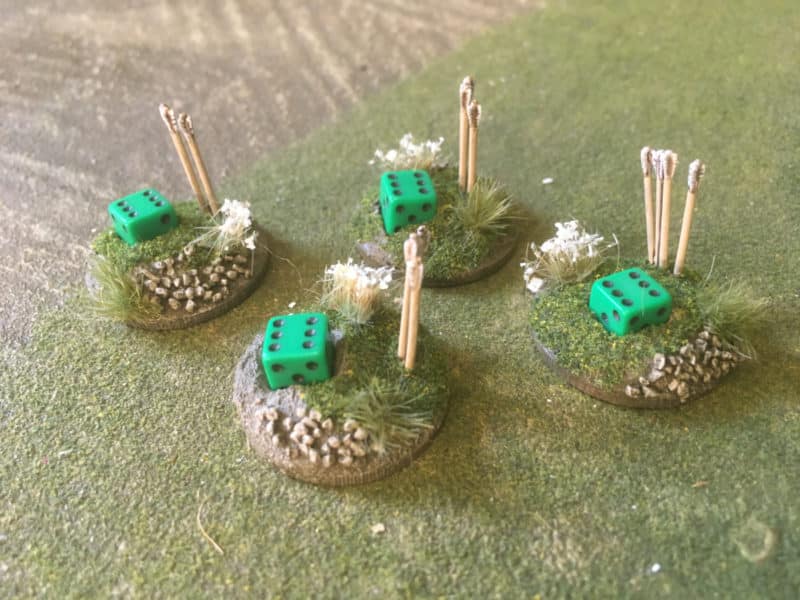
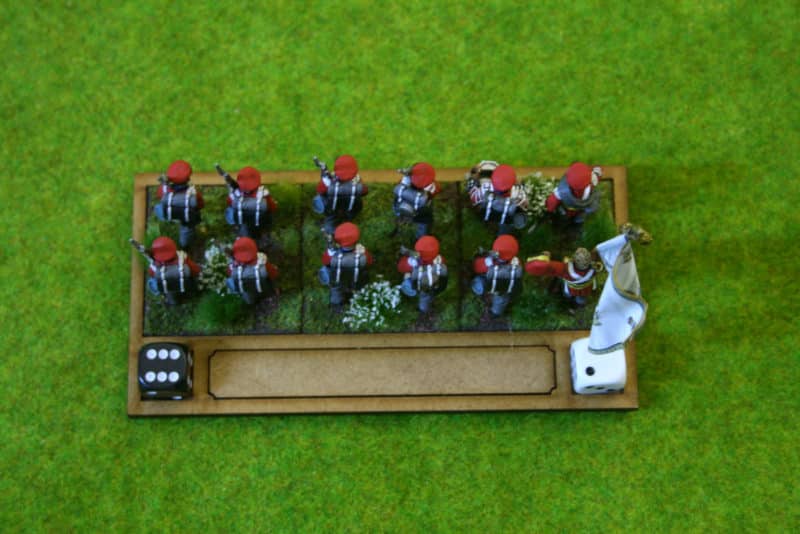
This has the benefit of allowing me to split the unit into two, facilitating most formation changes but also allowing me to field the Battalion as two units of 12 for small club night battles. My new movement trays also have a name plate at the back allowing me to label each battalion. I was lucky with the design – the name plate is exactly the same width as a Dymo electric label printer, making labelling very straight forward. There are also two cut outs per trays to use for disorder and casualty markers – a simple 12mm D6 is used, different colours can mean different results according to the game being played. This allows any disorders or casualties to move with the unit rather than get left behind on the table as is sometimes the case.

Tray showing dice used for markers

Tray showing dice used for markers

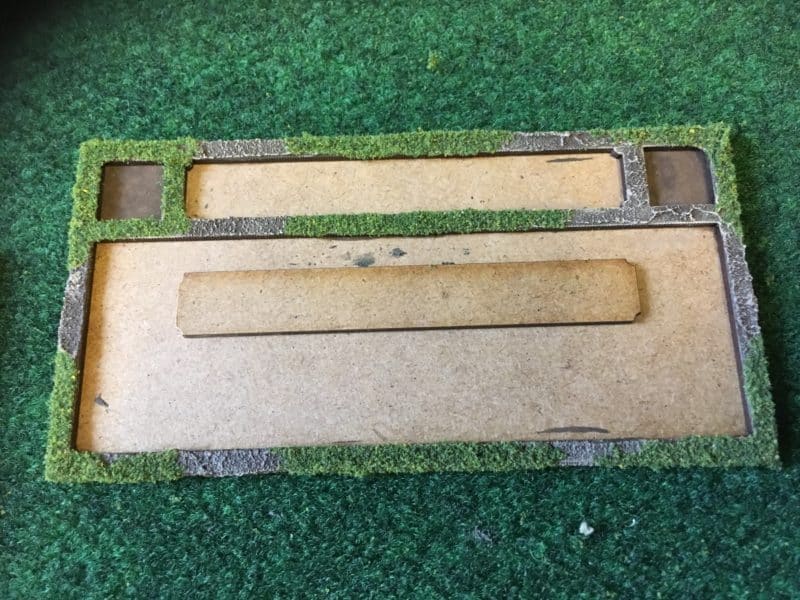
I decided that I wanted to ‘landscape’ the trays to help them blend into the gaming table. Some of my colleagues prefer to leave the trays as they are – it again is a question of taste. There is another advantage to texturing the trays. It covers any imperfections when assembled but more importantly helps to hide any differences in basing on the troops. I have been building my Napoleonic army over six years now and occasionally have strayed from my standard basing formula, which any way has evolved as I have found new products to use.

Textured movment trays

Textured movment trays

To achieve a textured effect I simply coat the assembled trays with Vallejo Dark Earth textured paste as in the picture above. Once this is dry, I just run a sharp scalpel around the edges to tidy things up and remove any excess. It is then a case of painting with your preferred basing colour ( mine is Vallejo Chocolate Brown) and then dry brushing with a lighter mix to bring out the texture. Once the painting is dry, I add patches of green scatter ( woodlands scenic is now my preferred choice) and the trays are ready for use.

Movement tray textured and ready for use!

Movement tray textured and ready for use!

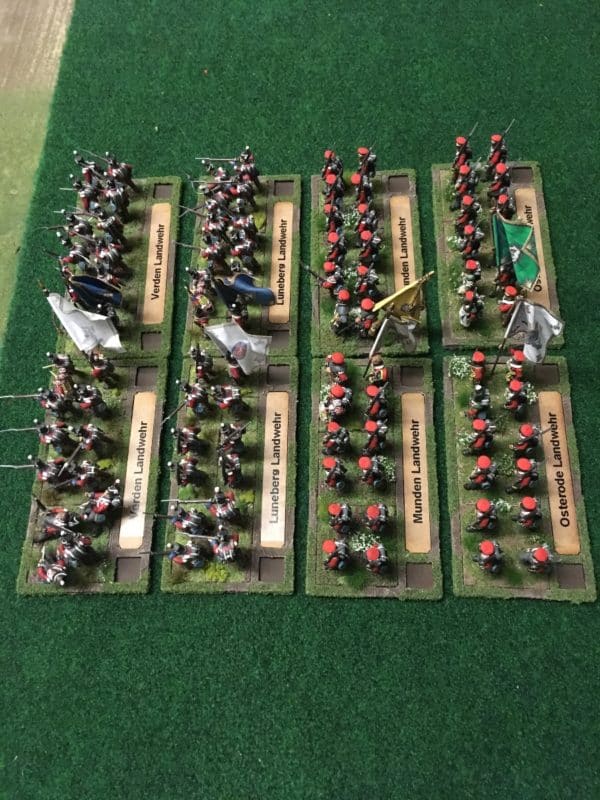
When it came to labelling, I decided on using the regiment name and number and only will indicate the Battalion number if there was more than one Battalion in service. It keeps things simple and allows me to use the largest font available for most of the labels. I used the Dymo Electric label printer to produce the labels on clear label material. As I said, I was lucky that the width matched my design exactly. The label maker was surprisingly inexpensive – just £14.99 from Aldi!

Landwehr battalions labelled ready for action

Landwehr battalions labelled ready for action

Of course the name plate is reversible, so if I decide to change the style – perhaps for a painted plate, I can do so!

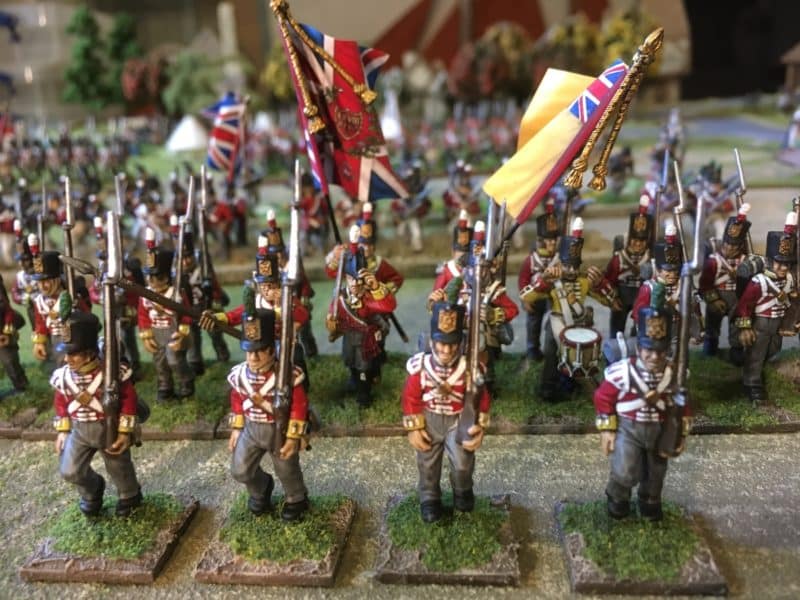
British Infantry Division labelled and ready for action.

British Infantry Division labelled and ready for action.

As you can see, from the front the name plates aren’t too intrusive, so my opponent shouldn’t be too distracted from the game. Another unintended benefit is that the name plate at the rear of the tray protects the bayonets of the units behind, helping to prevent damage.

Battalion in line!

Battalion in line!

Battalion in column - simply reverse rear tray to form square!

Battalion in column – simply reverse rear tray to form square!

So the task now is to get all of my units into these trays. With nine battalions done, I still have another nine battalions, or eighteen trays to do, but it will be a nice project to do in between painting yet more battalions!

THE COMMERCIAL BIT

If you would like to use these trays, they are available from my shop here:

BLACK POWDER MOVEMENT TRAYS

We also have quite a range of movement trays and bases here:

MOVEMENT TRAYS

For Woodlands scenic scatter and other scenic accessories, click here:

WOODLAND SCENICS

For Vallejo textures and paints, click here:

VALLEJO PRODUCTS

At the time of writing all of these products are supplied post free to most world wide locations!

Artillery Autumn – Jumping the traces…

My modelling continues to be dominated by my obsession to finish my Artillery project. I am having to use all of my self control not to be distracted by other more tempting models that I have recently acquired. So far , I’m sticking to the plan…’I’ve started , so I’ll finish’!

I had already decided but was further encouraged by some excellent feedback on TMP to add the traces to the limbers. I thought that this would be fairly straight forward and that it would be easily done once the horses were based. In my mind, I had decided that I needed the horses to be fixed in position to enable me to measure the traces accurately. This of course is true but the mistake that I made was that I should have prepared the horses before I had even started to paint them by drilling out the small holes where the traces would fit.

I also needed to make the traces. I had thought that I could use the wire used to hang pictures as this looks about right for the ropes. There was an issue though. The picture wire that I had was too thick and also would not work with the chain that I had in my spares box. I could go and either search out some narrower wire or a different sized chain but my patience was wearing thin and I wanted to get the job done. I decide to wind the rope myself, using some thin florists wire.

Wire traces in my bench vice

Wire traces in my bench vice

My first attempt at winding the rope was a bit patchy – I was trying to do the job by hand and the result was somewhat non – uniform to say the least. Regardless, I pressed on, and with ‘ropes’ the correct size, I was able to thread them through the chain to make my first trace.

The first trace!

The first trace!

It was then just a question of cutting them to the correct size and gluing them to the horses….it was at this point that I realised I should have drilled the holes first. Even with the smallest of hand drills, I couldn’t get an angle to make a decent hole and I was in danger of damaging the paintwork on the model. If a bad workman blames his tools, then I maybe not that bad after all, as it was my tools that came to the rescue. Using my Zuron flush cutters, I was able to get a perfect flat cut on the ropes and with a combination of Expo thick super glue and spray activator, I managed to get the traces to adhere to the horses.

First traces fixed to the horses

First traces fixed to the horses

It isn’t a perfect solution and if I’ve made it sound easy, trust me it wasn’t! It took about 30minutes to get the first trace in place during which time I had stuck it to myself about six times, ‘lost’ it on the floor, stuck it to the tweezers and developed a whole new combination of swear words, which is quite an achievement for me….Fortunately, to paraphrase an old movie poster, ‘nobody can hear you scream in the garage’.

Two traces done...22 to go! Two traces done…22 to go!

At that point, I gave it a rest for the evening. Overnight, I had a brain wave and remembered how to wind model rope from wire. The solution is simply to put a cup hook into a hand drill, fix three lengths of wire into the mini bench vice and then fix the wires to the cup hook and wind the drill at a steady pace – perfect traces every time!

The hand drill does it! Perfect traces everytime!

The hand drill does it! Perfect traces every time!

With the traces more uniform, I was able to make faster progress and over the course of the next two evenings, I finished making and attaching the traces. There is just one problem. Whilst the joints on the traces are quite strong when pulled, any lateral movement tends to dislodge them. So even with the reinforced Renedra limber bases the weight of the model will cause the base to flex – no problem – the traces flex and hold. But, pick up the model and accidentally press the traces and as likely as not they will snap off , as I have found to my cost. Despite this, I was able to finish the landscaping on the base and I think that I have a nice model for my cabinet.

Horse artillery Advance!

Horse artillery Advance!

So I now have a slight dilemma, do I add the traces to my other foot artillery limber and make it look nicer for the cabinet or do I leave the traces off and make it a more robust model for gaming? I think that I will add the traces but see if I can work out a way of drilling the horses without damaging them. There’s usually a simple solution to all problems. Hmmm, may be a bit of masking tape will protect the horses and give the drill something to ‘bite’ into…?

Horse Artillery Limber complete.

Horse Artillery Limber complete.

Whilst I summon up the enthusiasm to tackle the traces on the Foot artillery limber, I have decided to crack on with the crews for the guns.

Royal Horse Artillery Gun Crews - W.I.P.

Royal Horse Artillery Gun Crews – W.I.P.

At my current rate of progress it will be the end of September at least before everything is finished. I will have expanded my army collection to include a horse artillery battery of three guns and a limber and my foot artillery will have an extra 2 ( possibly 3) guns and crew as well as a new limber. With nine guns in my collection I think that I can say that I have enough British Artillery for now!

THE COMMERCIAL BIT

I have just decided to feature the three most useful tools that I used in this Project:

THE BENCH VICE

ZURON FLUSH CUTTERS

EXPO THICK SUPER GLUE

We have a huge range of tools, paints and adhesives in our range, to browse, just click into our shop using the link at the top of the page. At the time of writing, we post free to most worldwide locations.

Happy Modelling!
Limbering up…

Well ‘Artillery August’ is coming to an end and I had planned to complete some extra support for my Waterloo based army but I’m afraid that I will fall short. To be fair, my goal of completing two limbers, and five artillery pieces and the crew was very ambitious for the amount of time that I have to paint. To put this in perspective, I had planned to paint two limbers, 12 horses, four riders on the limbers, 6 outriders, 5 cannon and 20 crew in four weeks. Still lets look on the positive side. I have completed the two limbers, four limber riders, six outriders,  6 horses and 6 more are nearly complete. I also have 2 more cannon nearly ready for service, so another month should see this project finished…

British Horse Artillery Limber completed - awaiting basing.

British Horse Artillery Limber completed – awaiting basing.

So, to back track a bit and give some details of how I went about painting these lovely models from Warlord games. I have already discussed my choice of ‘grey’ for the limbers and guns in my previous blog, 50 Shades of Grey here:

50 SHADES OF GREY AND A TOUCH OF BLUE

This article was posted on TMP and as a result of some really good feedback, I’ve gone a bit heavier on the weathering of the wheels. There was quite a discussion regarding whether the wheel rims on the wagon would really be black – they were painted so for the ‘Parade Ground’ but it was felt this paint would soon rub off in service. So I think that I will re visit the weathering on the cannon and limber wheels and make the steel a bit more obvious. This then of course leads to the debate as to how much to weather equipment and uniforms. That topic in itself would be worth a blog article or two but I think that it is a question of personal taste. I am focused on producing units for wargames to the best of my ability, with the time that I have, not diorama standard figures. If you would like to have a look at the TMP thread, click here, there is some superb research in one of the links on the British Artillery.

TMP THREAD

Foot Artillery Cannon and Limber awaiting weathering and horses!

Foot Artillery Cannon and Limber awaiting weathering and horses!

When it comes to painting the horses, I am now happy with my ‘triad’ of colours method. I prefer to start with a black undercoat, and then paint the base coat, with the other two colours wet and dry brushed over the top.

Limber horses - work in progress.

Limber horses – work in progress.

You can see that the right hand horse is a bit messy from dry brushing but once the horse furniture is repainted in black, things look a bit more natural. For the Foot artillery horse I used triad of Chocolate brown, Flat Brown and then Mahogany Brown. I added a touch of Iraqui sand to the Mahogany Brown for the final light dry brush. For the Horse Artillery Limber I used a triad of Flat Brown, Flat Earth and Cork Brown for a lighter finish.

Saddle Horse for the limber

Saddle Horse for the limber

Once the detail is painted – steel chains, brass buckles etc the horses are ready to be based. I’ll also add some white or black ‘socks’ to at least four of the horses for some variation.  I don’t usually quick shade my horses but I did use army painter quick shade to finish the Horse Artillery Horses – it does make them more durable and helps with shading the saddle blankets etc.

Horse artillery limber - Lighter brown horses after Army painter quick shade applied.

Horse artillery limber – Lighter brown horses after Army painter quick shade applied.

As always, after the quick shade has been applied, I use a brushed on Matt varnish and I will usually rehighlight any whites and metallics to get rid of the ‘dirty’ effect.

The full limber on it's Renedra Base.

The full limber on it’s Renedra Base.

I have used the new Renedra specially designed Limber bases for the limber and team. These bases are a bit thicker than normal and are reinforced underneath to help support the weight of the model. I have also used a standard 25 x50mm base to raise the limber up to the same height as the horses, who have their own integral bases moulded on.

Out riders mounted for painting

Out riders mounted for painting

To paint the out riders, I use a blu-tack ‘saddle’ to mount them on Plastic tubes. They are then undercoated with a grey undercoat and block painted. I then paint on Army Painter Dark Tone quick shade and when dry, use a brush on Matt varnish. Once this is dry, I re paint the whites, leaving any shading and re highlight the metallic and lighter colours where I think necessary.

So with one limber more or less complete, the other awaiting it’s horses and both needing the basing completed it’s just a small matter of finishing the crews of the two foot artillery guns:

Foot Artillery crews ready for priming

Foot Artillery crews ready for priming

and of course, getting on with the Horse Artillery – which is what prompted this project….

Horse Artillery still in their packets

Horse Artillery still in their packets

As you can see, I have no hesitation in mixing manufacturers figures. I think that it gives a nice variety  in poses and any minor difference in size is barely noticeable on the table. I will have Victrix, Warlord and Perry Miniatures happily mixed together on the table! So Artillery August looks like turning into Artillery Autumn but once these are finished I will not be adding any more British artillery to my army for a while…..

The Commercial bit

All of the paints, tools, brushes, glues, and finishing products are available post free from my shop here:

ARCANE SCENERY

I would particularly recommend the new Renedra bases if you have a similar project:

HORSE AND LIMBER BASES

The rather superb Warlord Limbers are not held in stock but we can order them in for you and still send post free! Use the shop contact page here:

TO ORDER THE WARLORD LIMBERS

I hope that you enjoy your modelling!
French Sailors in the Caribbean – some conversions

Jonas Jones has been busy with his jewellers saw and clippers to bring us some more conversions from the Trent Miniatures range. I think that there is a tendency in the hobby not to convert metal figures but Jonas shows that with a bit of imagination, some simple modifications can give quite a bit of variation. The starting point is the pack of French Sailors from the Caribbean range, pack CAR24 ( links below). A useful pack as French Sailors had no regulation uniform at this time, so these chaps could be seamen of other nationalities or augment a pirate crew.

French Sailors from CAR24

French Sailors from CAR24

The pack was produced for the Caribbean range as in June 1793, about 2000 French Sailors, led by the newly arrived Royalist Governor of St. Domingue attacked the colony’s principal port, Le Cap, defended by the Republican commissioners. In two days of savage street fighting, involving also the National Guard and several thousand revolting slaves, 90% of the town was burnt down, before the Governor and his sailors were beaten back to their ships.  Someone noted that whilst the sailors were good fighters, as more buildings having stores of liquor were ‘liberated’, so their inclination and ability to fight diminished! Perhaps building a force of 2000 French sailors is ambitious ( although we will be happy to supply them!). It does seem that a small force or unit would be very useful to have and we could see them participating in many smaller skirmishes! So without further ado, Jonas explains how he converted his latest models.

French Sailor Conversion 1

French Sailor Conversion 1

“This chap was inspired by the closing action from the Butch Cassidy and the Sundance Kid movie. I wanted a two-fisted pistoleer prepared to go headlong at the opposition. (Even braver with a pair of flintlocks rather than the six-shooters!). The figure’s right arm was clipped off with a pair of flush cutters and a right arm from the French Dragoons (Haiti) – pack Car 14 – was substituted. (About 15 seconds work with a pin vice).”

French sailor - Conversion 2

French sailor – Conversion 2

“When Israel Hands made his appearance in season three of Black Sails, the potency of a cutlass and boarding axe combination was demonstrated to perfection: four opponents despatched in about the time it’s taken to type this paragraph! Again, the right arm has been cut off and this time the shouldered sabre arm from the French Dragoons (Haiti) is substituted. The head is from the EDZ08 bare heads pack. Obviously, a man wielding two fearsome weapons would have a fairly stern demeanor; I felt that the moustache provided some “sternification”!”

French Sailor conversion 3

French Sailor conversion 3

“You’ll remember the bit in the movie The Professionals when the Mexican bandit leader passes his hat across the front of his holster to mask drawing his pistol. That influenced this conversion. It’s one of the boarding pike figures with its left hand snipped off and replaced by the seperate left hand with pistol. The right hand was drilled through as one would for a pike, but then a cut was made from underneath and the hat superglued in. The hat is from the Car19 pack – Poles in St. Domingue. Flush cutters and a small file have removed the Polish head from underneath the hat – there are always casualties in war!”

French Sailor Conversion #5

French Sailor Conversion #4

“This conversion is the other pike chap, left hand snipped off and left hand with pistol inserted as with conversion #3. The right arm has been snipped off and replaced by the sword arm from the French Dragoons pack (CAR 14).”

009

“This isn’t really a conversion; it’s just the chap firing his pistol given the priest’s head from the Chouan/Vendean Characters bis pack (FCHOU 06). I just felt that it looked right.

French Sailors conversions

French Sailors conversions

I hope the this article will give the reader some ideas as to how to go about making some simple changes to figures to get a new look. It’s surprising how a simple head or arm swap can change the look of a figure and allow a modeler to stretch one pack of five figures to make a unique band ideal for the many skirmish games that are out there. Jonas has used other metal figures to complete his conversions  but plastic bits will work just as well – I’m sure that most of us will have a decent bits box to dive into! You often dont even need to use figures from the same period – a dark age figure holding an axe could be used to provide a boarding axe!

If you are thinking of converting figures though, you will find that the Trent Miniatures EDZ range is a good place to start – plenty of options for easy head swaps.

The Commercial Bit

We carry the full range of Trent Miniatures. You can find the Caribbean Range here:

WARS IN THE CARIBBEAN

You can find the EDZ range and other equipment here:

EQUIPMENT AND ACCESSORIES

If you need a pin vice, pair of flush cutters or tools in general for your hobby, check here:

TOOLS

I hope that you enjoy your modelling!
1 2 3 4 10