As a retailer of model paints, I’m not sure that I should be sending my customers off to the local DIY chain, B&Q, but as a hobbyist, I like to share the tips that I have picked up over the years. I’ve mentioned before that I use DIY type emulsion for the bases of my figures. My particular favourite being Dehli Bazaar, which is a nice greeny brown colour, or as my father would have said, ‘shitty coloured dim’. I was coming to the end of the tin of the Dehli Bazaar emulsion and the dregs were getting too thick to use, even with thinning, so it was time to get a new tin.
Paint samples and the originals
I also decided to try out the in-store colour matching facility at B&Q. Whilst I was replacing my usual basing paint, I thought that I would see if I could get some emulsion pots pots of the two other colours that I most frequently use when basing; Vallejo Chocolate Brown 70872 and Iraqi Sand 70819. I just brushed some samples of each paint onto a scrap of paper and off I went to the local B&Q. The young lady behind the counter did warn me that the colours may not be an exact match as they were using Valspar Emulsion as opposed to Vallejo pigments but she would do her best. The sheet above shows that the two vallejo colours are a bit ‘off’ and on the light side but close enough for me. After all, I will be using these for basing, not to replicate a uniform colour.
B&Q sample pots next to Vallejo for size comparison.
The process took about ten minutes but here’s the best bit. The cost was £3.00 a pot! Each pot contains 263mls! So for £9.00, I have enough paint to keep me basing for the next couple of years. They even kept my details on file so when I need another batch, they can just make a batch up from the details on file. Brilliant!
The beauty about using emulsion for your bases is that it is water based paint and can be thinned with tap water; you can wash your brushes in water and it seems to give great coverage over sand and basing material, even when thinned. If you need to you can mix it with with Vallejo or other actrylic paints – I often add a small amount of White to the last highlight to get a final dry brush highlight on my bases.
Gordon Highlanders – These are just about ready for basing
So, with my new basing paint purchased, I’m ready to finish off my next Battalion, the Gordon Highlanders. As you can see above they are just about ready for basing. I need to touch in the green squares on the hat bands and tidy up any obvious errors. You can see that the back packs are all done and waiting to be fixed on. Then it’s just fixing the flags, which I have ready to go.
Portuguese Artillery
Next up, Portuguese Artillery! The painting goes on!
THE COMMERCIAL BIT!
We don’t carry B&Q paints – you will have to find your own local depot. At Arcane Scenery, we do have a range of nearly 6000 lines, most of which we will send post free to most countries in the world! You can visit our shop here:
Well, the recent deluge has caught me out and I was unable to continue with my WOTR cavalry as the next six models were yet to be undercoated. Mrs W made it quite clear that spraying indoors was unacceptable, even in the garage, which is accessed through the kitchen door. So I have had to wait for the weather to brighten up before continuing.
The six completed cavalry.
As you can see, I have now completed six of the heavy mounted men at arms, so I have made some progress. I’ve also mounted the riders for the next batch on the temporary holders ready for spraying, so I am good to go once the rain stops.
Let us Spray…knights ready for undercoating.
Despite this hitch, I always have something on the work bench and so I continued with the batch paint of the Highlanders that will make up the balance of the 92nd Gordon’s. The beauty of the batch paint approach is that you can keep a unit progressing and know exactly where you are in the process, even if you have to pause to do something else.
Batch painting highlanders
So a bit more progress in a slightly different direction. The decision I have to make now is whether to crack on and finish the Highlanders or once I can get the Knights undercoated, go back to them. I’m under no real pressure to do either at the moment as I now have sufficient troops to fight club battles in both Napoleonic’s and WOTR. I am favouring the Highlanders though as now that I’ve started them, it would be good to finish them. In reality, I’ll probably do a bit of both, depending on the time I have, after all, nothing like a bit of variety to spice things up! So long as I don’t end up with tartan on my WOTR knights all will be well….
White cross straps and lacing next!
So a short blog for me – besides there’s a break in the rain – I’m off to do some priming!
THE COMMERCIAL BIT
Just a short reminder that nearly everything that I use for my modelling is available post free from my shop. You can see the huge range of models, paints, glues and accessories here:
The next additional to my WOTR army is to be a unit of Cavalry. From the little that I know about the battles in the War of the Roses, it seems that the cavalry were used as a shock unit to punch through already demoralised troops or to cut down those that were retreating. The power of the long bow and the defensive blocks of troops with Pikes or Halberds were usually able to hold Cavalry at bay. I am also told that there were very few, if any major cavalry versus cavalry engagements.
However, no WOTR army would be complete without a unit or two of light and heavy horse prowling around the flanks, looking for the opportunity to sweep away those on foot in a glorious charge!
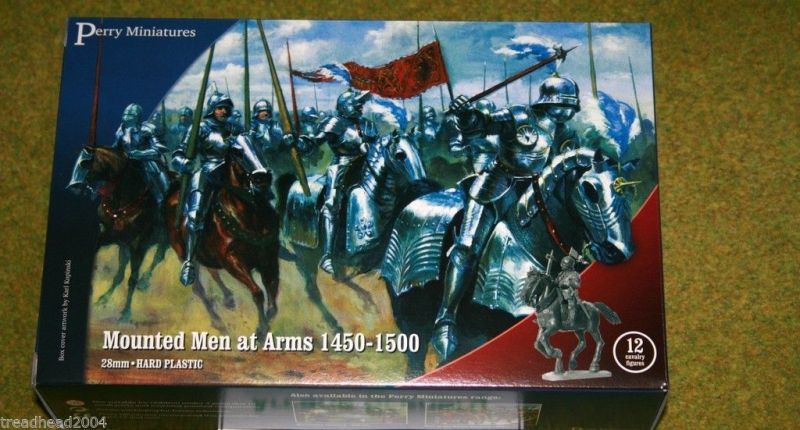
The obvious choice for my army was a box of Perry Miniatures Mounted Men at arms. I wanted to go for the ‘Heavy’ option first. To be truthful, I thought that painting armoured horses would be the easy option! As with all of the Perry Sets, assembly was fairly straight forward, with plenty of choice when it came to weapons and poses. There are seven different horses heads and the horses sides are interchangeable. There is also a choice of armour for the horses. I went for the fully armoured option in most cases, with only two of the horses, lightly armoured.
The assembled Mounted Men at Arms
As you can see, most of my Knights will be armed with lances! At this stage I decided to paint the riders separately from the horses, so they are not yet fully attached! Despite the amount of armour, I undercoated the horses in black primer and then painted the armour with Army Painter plate mail.
Horses primed ready to paint
The next stage was to paint the armour in Army Painter Dark tone.
Armour washed with dark tone ink
I then dry brushed the armour with plate mail, followed by Vallejo Silver. In the picture, you can see that I have over done this – I was trying a new dry brush out and wasn’t careful with how much paint was going onto the models! I then started to under coat the horses. I use Vallejo Chocolate brown as a base.
Starting to paint the horses.
I use three shades of Brown to paint the horses but I’m quite happy to mix things up a bit. The colours are ‘wet brushed/dry brushed’ on from dark to light and I use a light ink wash to tie things together. So the list of colours used are Chocolate brown, Flat Brown, Flat Earth, Mahogany Brown, Orange Brown, Cork Brown, Green Ochre and strong tone ink to wash. I don’t use all of those colours on one horse – just take three and layer them on. When it came to the details , I went a bit OTT with the colours. I was inspired by some pictures of miniatures that I found on the web and I have attempted to copy these. I thought that the brighter colours would look good on the wargames table, so I cannot vouch for any degree of historical accuracy!
Horse flesh done, stating to block in the details.
I’ve also added a bit more shading onto the armour with a light wash of dark tone ink. The next picture shows another two horse in progress. I decided to embellish the armour on one of the mounts with gold and add some ‘socks’ to these horses for variety. I’ve also painted the horse shoes and teeth – a bit OTT but I understand that the horses like to get involved in the fighting, using these as weapons!
Another two war horses!
With three horses done it was time to get some Knights done! I temporarily mounted them on wire and used blu-tack to hold them in plastic tube ready for priming.
Knights ready for priming
To prime them, I used Army painter Plate mail spray.
Knight primed!
I then gave them a good wash of Dark tone ink, before dry brushing them with Plate mail and then again with Silver.
Knights after dry brushing
Once again, I went for a ‘pretty look’ rather than do any real research and I have been free and easy with the few colours that are used on the knights belts etc. I’ve also copied an idea to make the lances stand out and used a spiral design on them. I stress, I have no idea how accurate this is, I just thought it looked good!
Mounted Knight completed – basing started
I used Expo 2mm flexible masking tape to get the spiral effect. If you look closely, there is some bleed on the painting as I simply brush painted the blue over the white base. The next two Lances that I painted were better as I became used to using the masking tape. It really does do what it is supposed to do – It’s flexible and it masks well without taking off the bottom coat of paint!
Three knights ready for basing
You can see that I have started to base the figures using my usual method. The figures are attached to the Renedra base ( I tend to use plastic bases for plastic figures) and then I cover with Vallejo Dark Earth Textured paste and press a few small stones into it.
Basing on the Knights completed – well, nearly!
Once the paste is dry, I paint over it and dry brush with successive layers in a lighter colour to bring out the texture and show off the rocks. It’s then just a case of adding scatter. I will be adding some Gamers grass tufts to finish things off but will wait until all of the figures are done and complete this final task for the complete unit.
So my first knights are ready to take to the table. They are perhaps a bit more suited to a Jousting tournament but I think that they will look imposing on the wargames table once all twelve are completed!
THE COMMERCIAL BIT
Nearly every thing that I use in my modelling projects comes from the Arcane Scenery shop. We supply post free to most worldwide locations!
I have some offers running on the Perry Miniatures WOTR range so that you can build an army similar to the one that I am working on. To see the range of Perry Plastics for WOTR, click here:
This website uses cookies to improve your experience. We'll assume you're ok with this, but you can opt-out if you wish.AcceptRead More
Privacy & Cookies Policy
Privacy Overview
This website uses cookies to improve your experience while you navigate through the website. Out of these cookies, the cookies that are categorized as necessary are stored on your browser as they are as essential for the working of basic functionalities of the website. We also use third-party cookies that help us analyze and understand how you use this website. These cookies will be stored in your browser only with your consent. You also have the option to opt-out of these cookies. But opting out of some of these cookies may have an effect on your browsing experience.
Necessary cookies are absolutely essential for the website to function properly. This category only includes cookies that ensures basic functionalities and security features of the website. These cookies do not store any personal information.