In last weeks blog, I showed you how I have gone about batch painting my Battalion of 79th Cameron Highlanders for my Waterloo project. In this weeks blog, I show how I went about breaking down the tartan into a process that I could cope with to produce a reasonable table top standard finish to my troops in tartan.
I am no artist, more of a paint by numbers man, so I hope that this blog is useful to other gamers that have perhaps, like me, been put off from attempting to paint this complicated pattern on their troops. The idea is to give a representation of the tartan pattern on the troops that will look nice when the unit is complete. It is entirely beyond my skill to reproduce anything other than this on a 28mm tall figure.
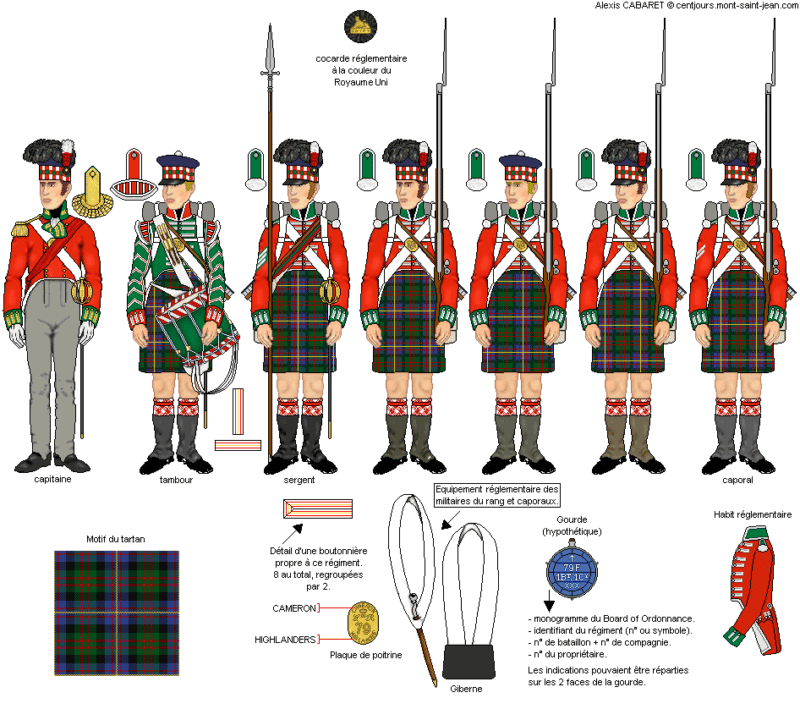
The 79th Cameron regiment of foot, Centre Companies.
I did look at a number of references for the actual tartan but decided on a simple version based on what I could actually see when I held the book away from my face rather than the close up scrutiny that would show every colour! I should also confess that I am slightly red/green colour blind, so although I can see close up that there are fine red stripes running through the cloth, my overriding impression is of blue, green and black with a fine yellow/beige stripe, so that is what I would paint!
Before I started on the figures, I tried my hand in a larger scale in my note book to see how things would work out. The base colours that I chose for the tartan was Prussian blue 70965 and Reflective green 70890. I tried painting blue over green and green over blue, but decided that I preferred the latter.
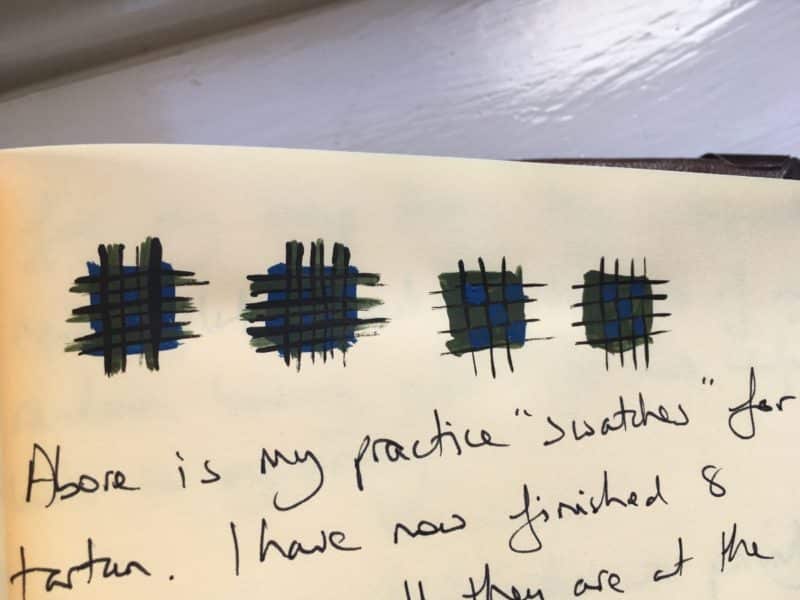
Tartan practice – just going through the process helps fix how I will paint the tartan.
Having had a little practice I jumped in and made a start. First job, paint the kilts prussian blue.
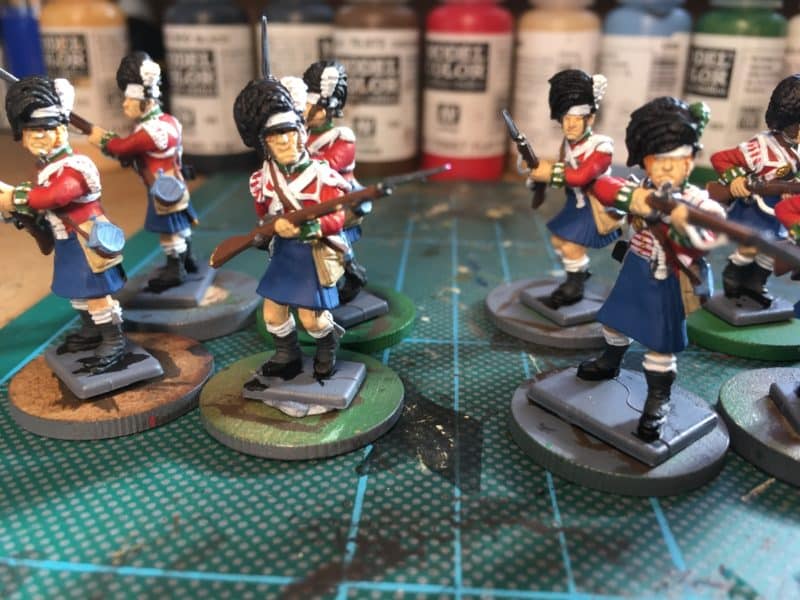
Blue kilts to start!
Next, I painted a series of vertical stripes in green.
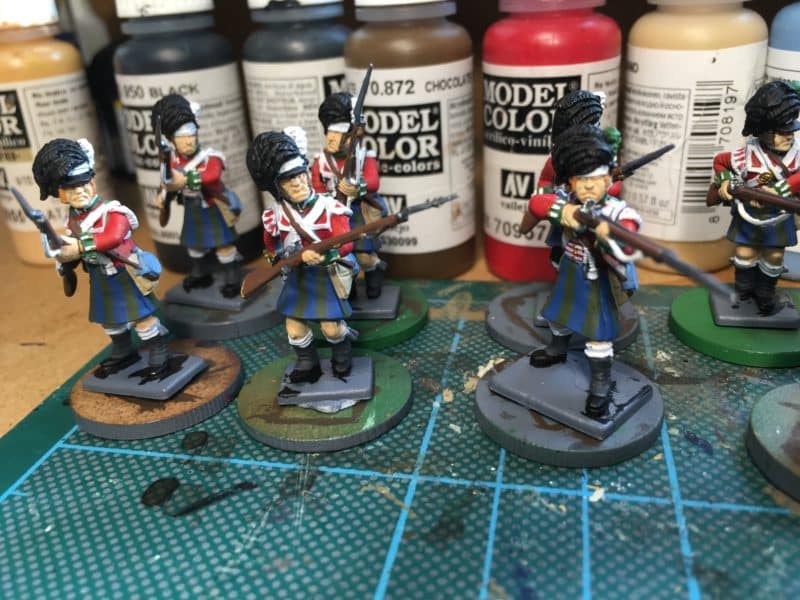
Green stripes added
Followed by the horizontal stripes. I tried to keep the stripes as uniform as possible, letting the paint brush do the work and determine the width. Having the paint thinned to a milky consistency helps.
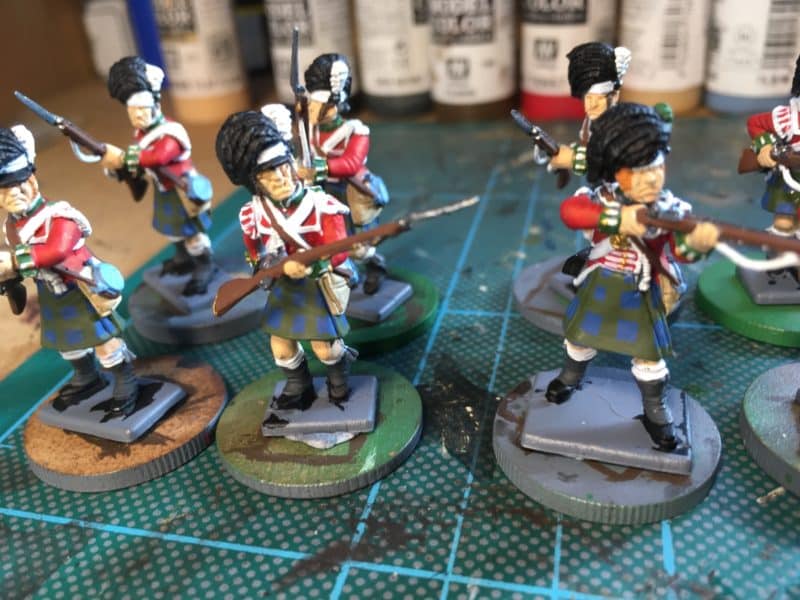
Horizontal stripes added
The next part of the process is to outline the green strips with a fine line in black. I did consider using a fine liner pen at this stage but managed with a fine brush again, thin paint helps the flow. It is obvious from the close up pictures that my brush work is a bit raggedy and the consistency in line width varies from figure to figure.
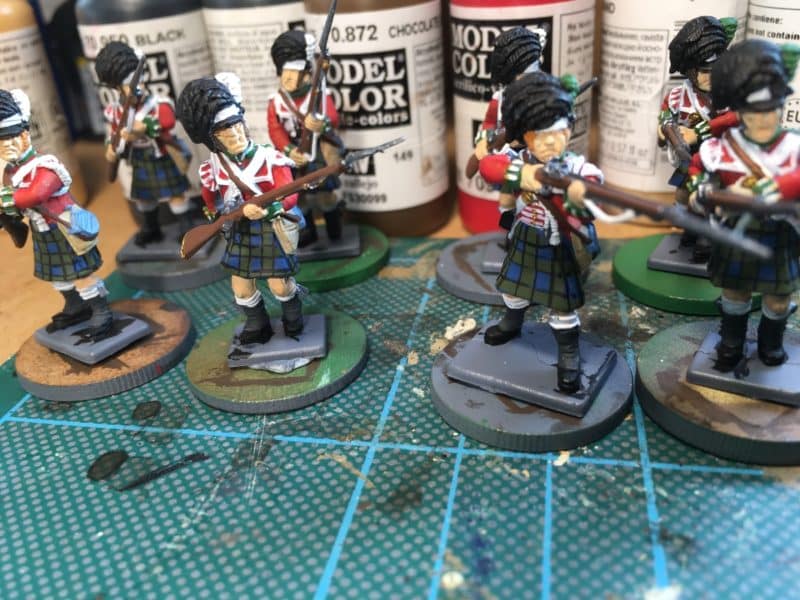
The green stripes are then outlined in black.
Finally, using 70913 yellow ochre, I painted a larger cross hatch to give the impression of the yellow thread that runs through the tartan. With the later figures that I have painted, I was a bit more careful with the placement of the yellow line, trying to ensure that it bisected the blue/green squares. I also have made the blue green squares larger to make the task easier. As I have said, I have chosen to ignore the fine red lines that are woven into the Cameron Tartan. This means that the tartan for my Camerons will be similar to the tartan used by the Gordons. Fortunately the facings are different, yellow as opposed to green, so I hope that will be enough to differentiate the units on the gaming table!
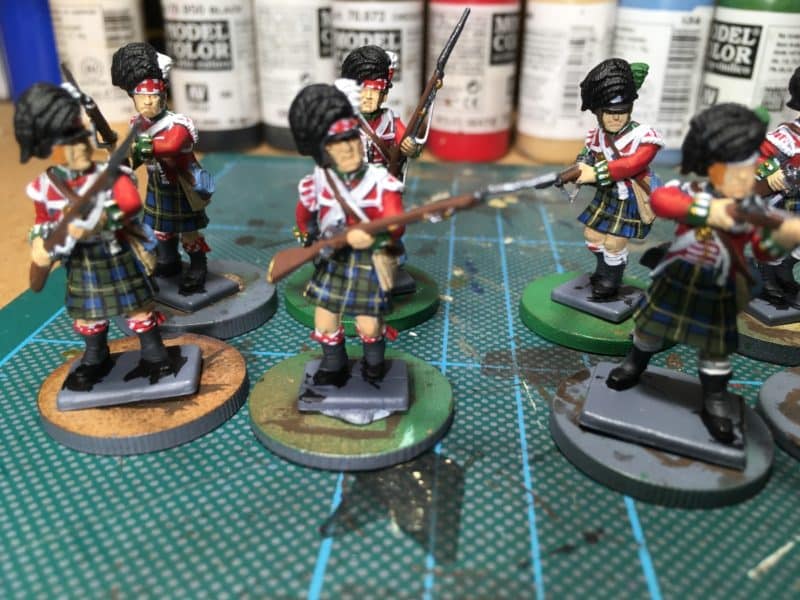
Tartan completed – or is it..?
So with the Tartan done, the next job was to paint the red cross hatching on the bonnet and the socks. Once again, I have cut corners to make life easy. The cross hatching on the bonnet should have small green squares at the junction of the checks – I’ve left these off.
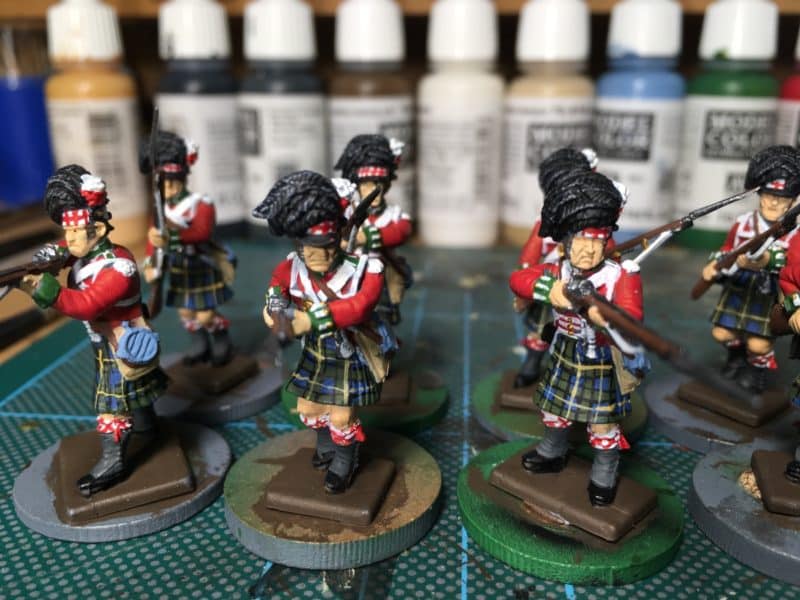
Red Cross hatching added to bonnets and socks.
The next stage was to lightly dry brush the bonnets with light grey to bring out the detail of the feathers and then I carefully painted on the Army Painter Dark Tone quick shade. This really brings out the detail on the figures, covers up some of the smaller mistakes that I have made and seals the paint onto the figures.
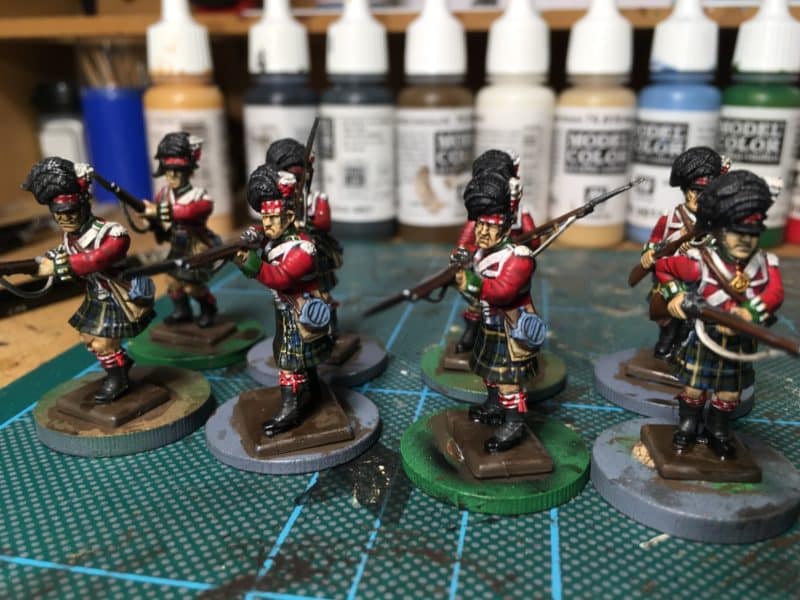
Quick shade carefully painted over the models.
Once given a coat of matt varnish, I go back and re highlight the lighter colours, particularly the white. I also paint the bayonets in bright silver and paint the bases with chocolate brown to tidy things up.
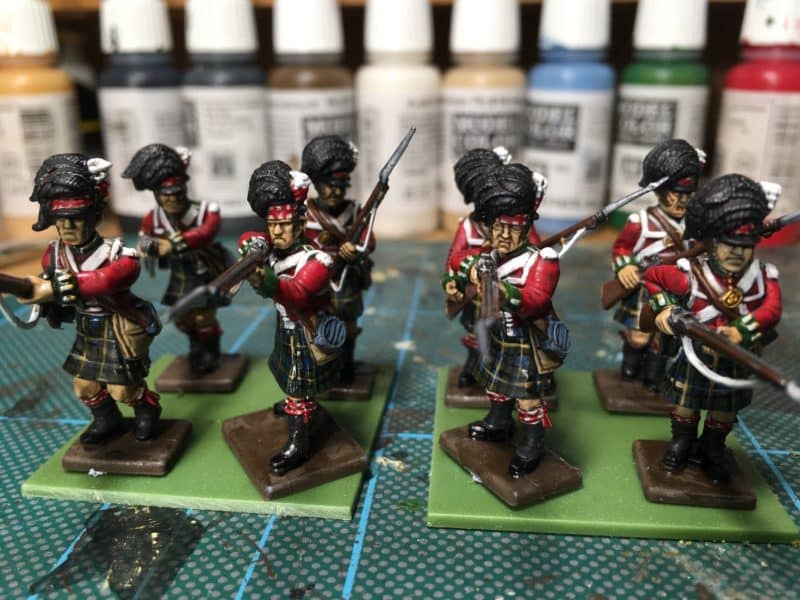
Figures retouched and white highlighted.
The figures are now ready for basing. I may need to retouch some of the figures with matt varnish in places. I tend to be sparing with the varnish as I have had too many accidents with it in the past!
STOP PRESS!
After all that I had said about ignoring the red in the kilts, my OCD circuit was niggling away at me saying ‘the Camerons were the only one’s with red in the kilts – how could you leave it out…’ I also kept thinking that I didn’t want them to look too much like the Gordons, with their Yellow square pattern.
After much thinking I decided hell, just do it, and painted a red cross hatch pattern in between the large yellow pattern. I haven’t got a picture to show the close up of the technique – I was too busy just cursing myself and getting on with the painting! I even went back over the troops that I had finished. But painting red was the same as painting the yellow stripe, just exactly in the middle of the yellow grid. The result is below. My concern was that the tartan would look a bit ‘busy’ on the small figures but I think it looks OK.
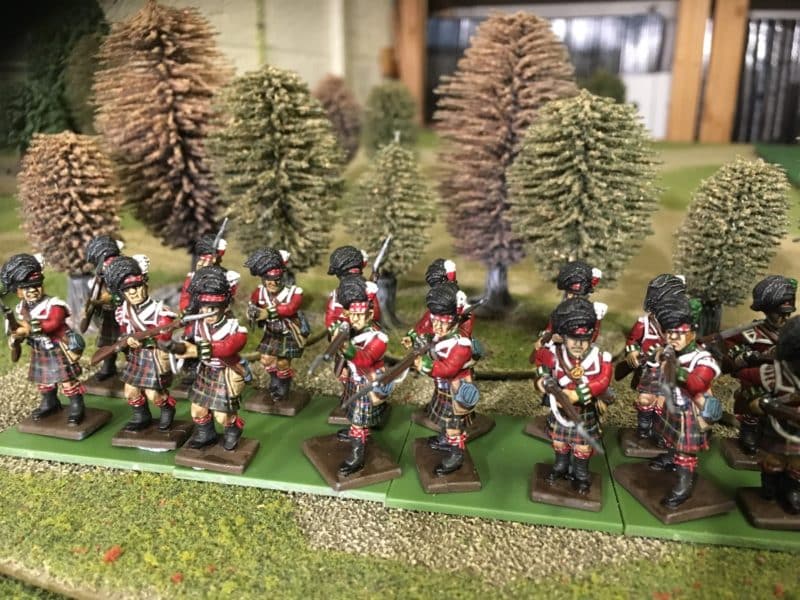
Red added to the tartan!
This is typical of my approach to my modelling! I convince myself that I cant do something and then decide to have a go any way! So, with 16 of the troops completed there is just another eight to go to finish the battalion. Having learnt how to paint tartan, I suspect that the next eight will be a bit more straight forward, especially as the officers and ensigns aren’t in kilts! Give me a couple of weeks and I’ll show you the final results with the battalion all based and ready for action.
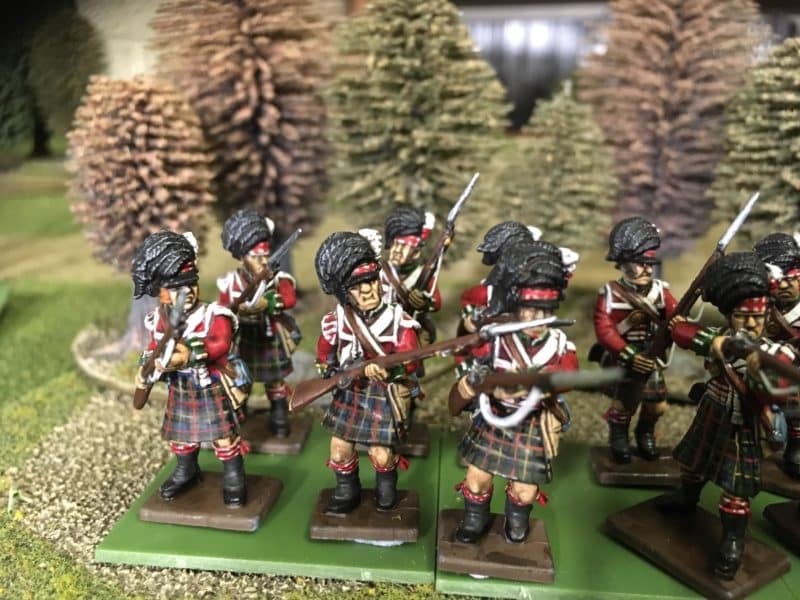
A close up of the Camerons – the red stripe is a bit broad on some figures!
Past experience has shown that once the basing is done, the figures will look even better. Having completed the Camerons, my intention is to paint the other two Highland regiments in kilts, the Gordons and the Black Watch. It looks as though the tartan for these two are actually less complicated than the Camerons and having now tackled one set of tartan, I’m hoping that these other two battalions will be more straight forward.
The Commercial Bit
Another lazy link this week…nearly everything that I use in my hobby is available post free from the Arcane Scenery shop. So Expo Brushes, Vallejo Paints, Victrix figures, Renedra bases, tools and sanding sticks – they are all there , just have a browse! Use the manufacturers category or the general category to browse products. If you want a specific paint or item, just type the number or description into the search box, hit return and it should appear!
ARCANE SCENERY SHOP
