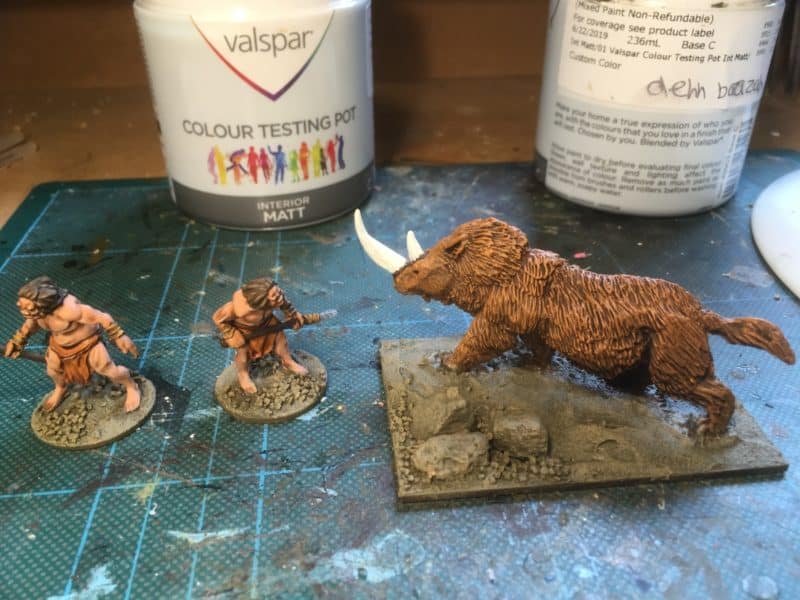
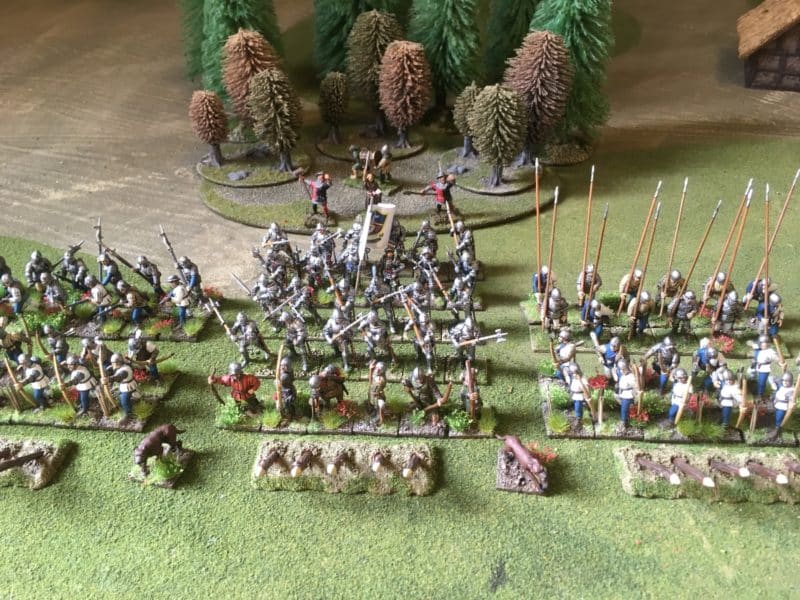
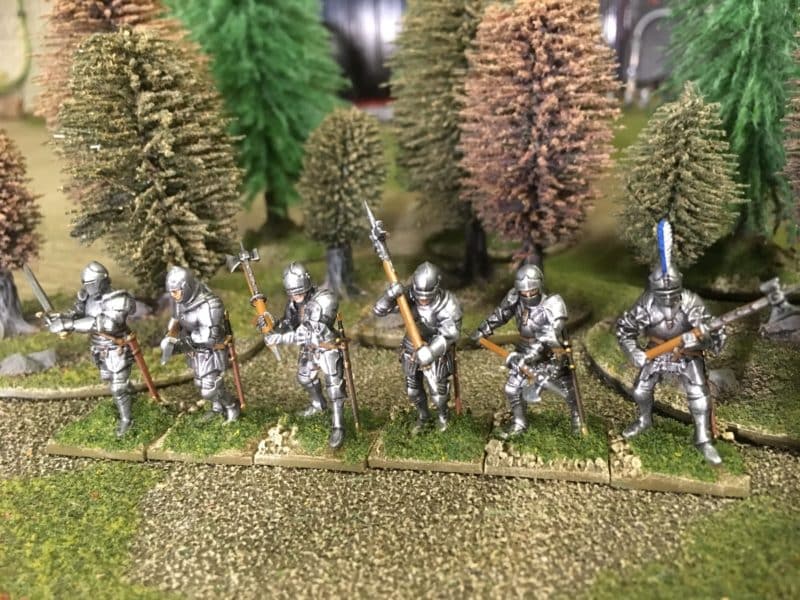
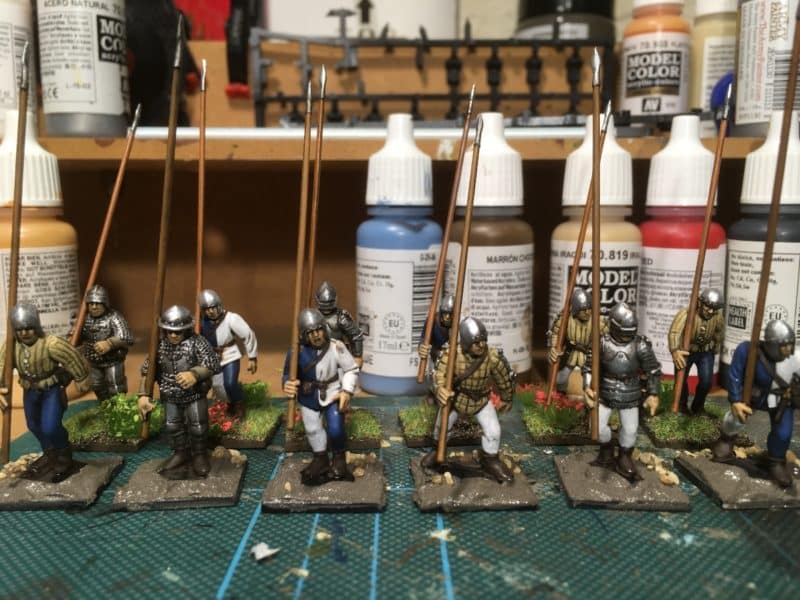
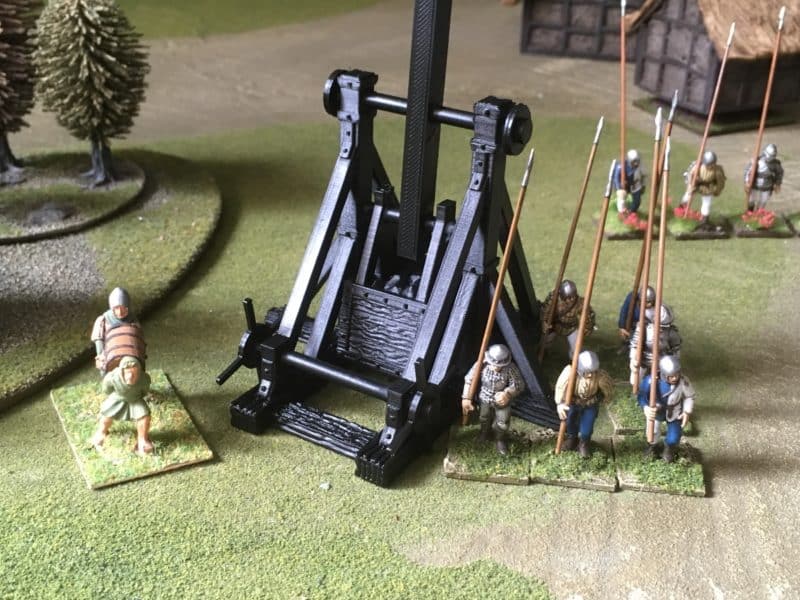
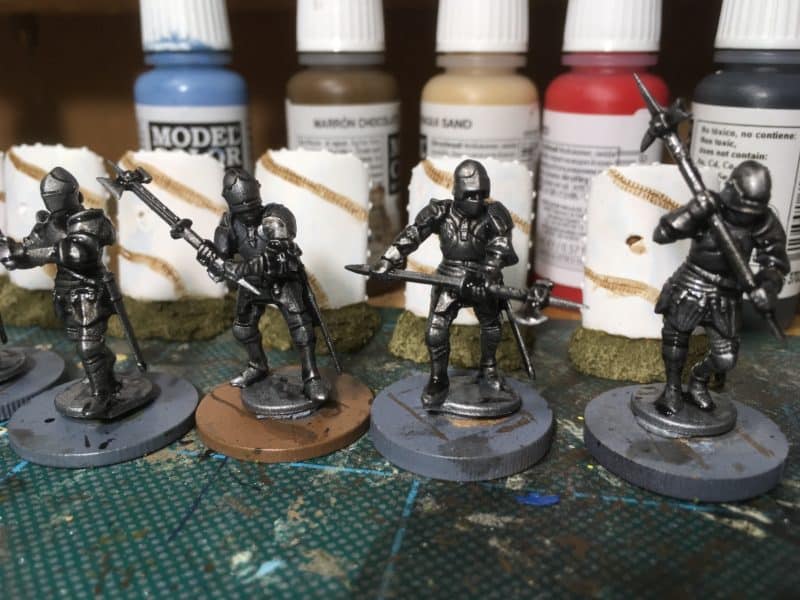
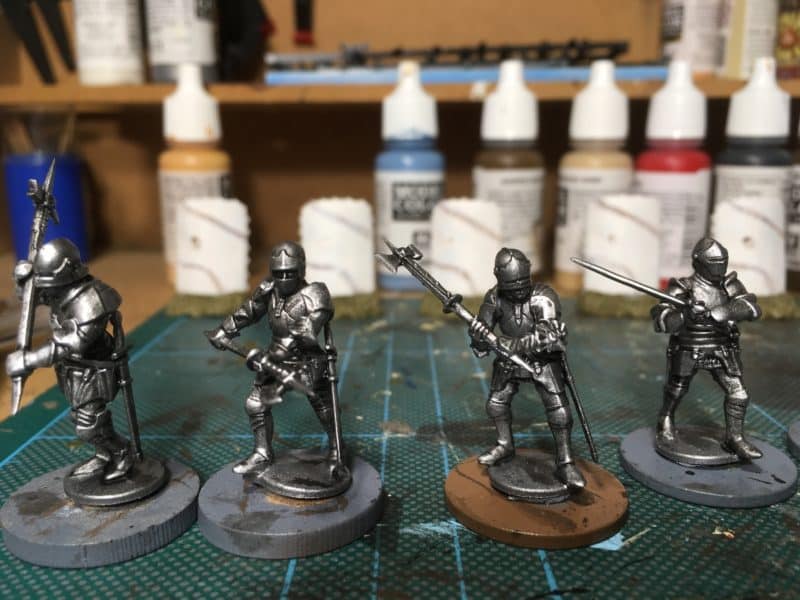
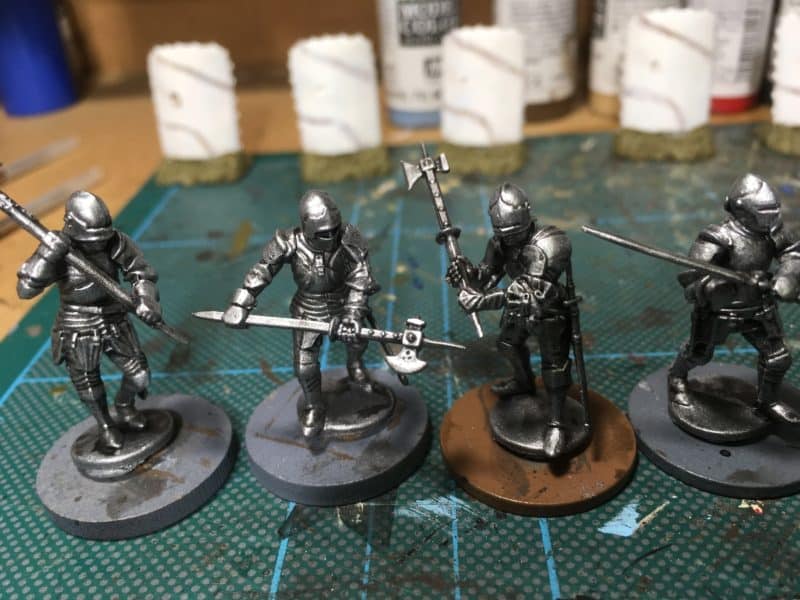
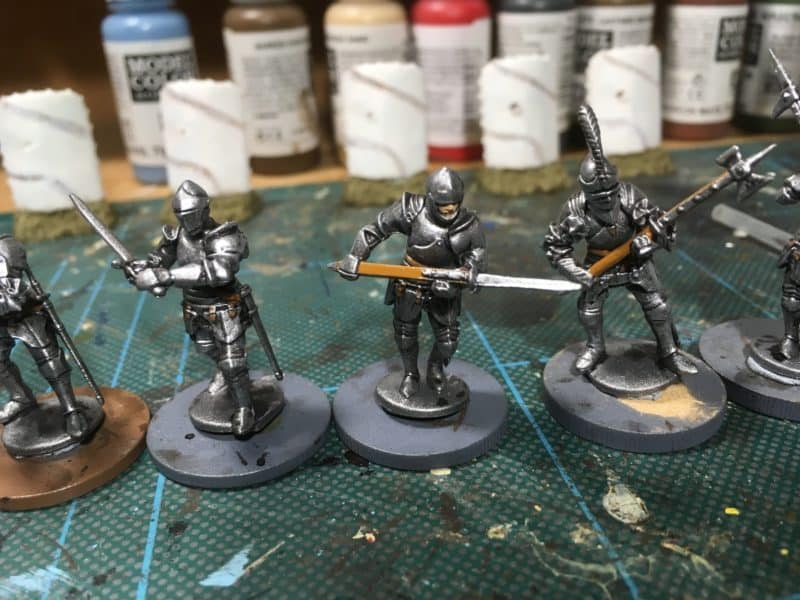
As a retailer of model paints, I’m not sure that I should be sending my customers off to the local DIY chain, B&Q, but as a hobbyist, I like to share the tips that I have picked up over the years. I’ve mentioned before that I use DIY type emulsion for the bases of my figures. My particular favourite being Dehli Bazaar, which is a nice greeny brown colour, or as my father would have said, ‘shitty coloured dim’. I was coming to the end of the tin of the Dehli Bazaar emulsion and the dregs were getting too thick to use, even with thinning, so it was time to get a new tin.
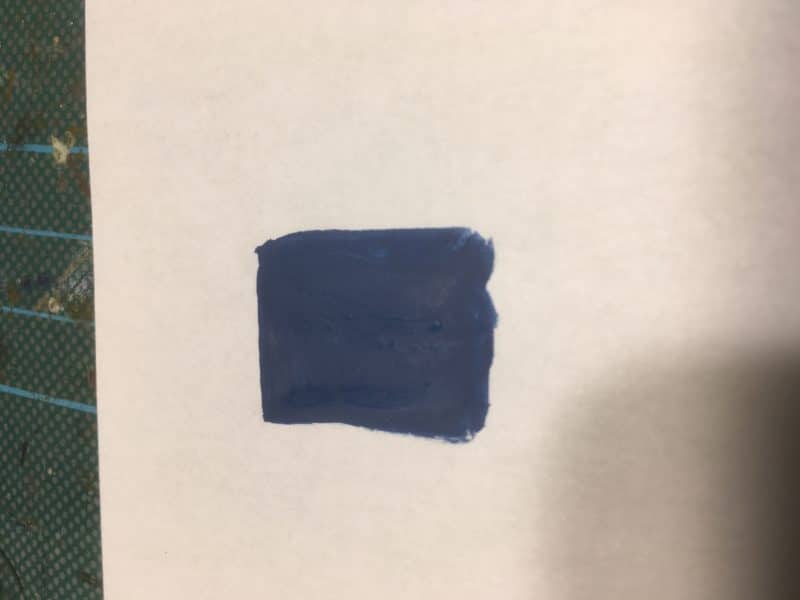
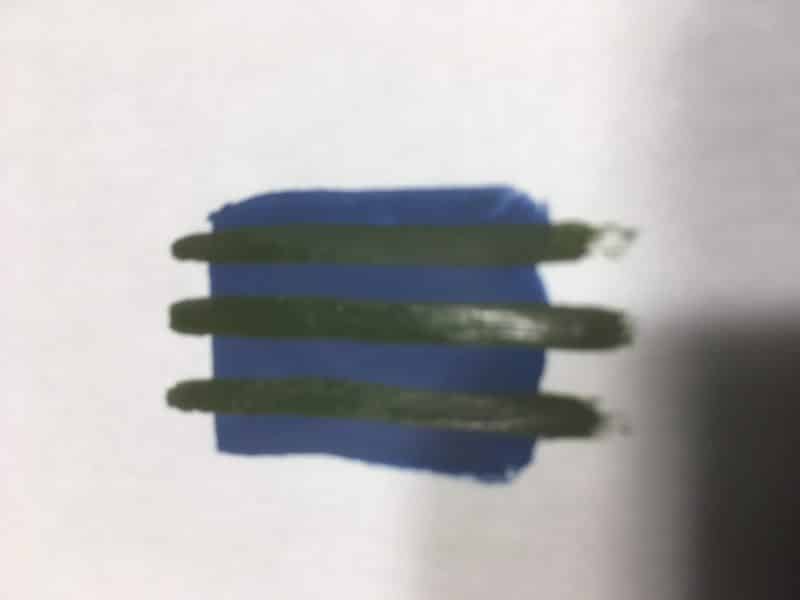
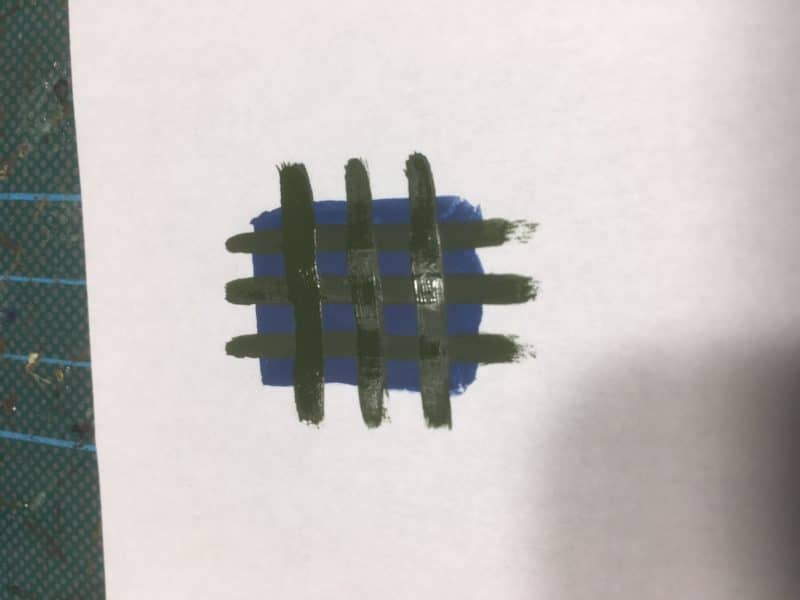
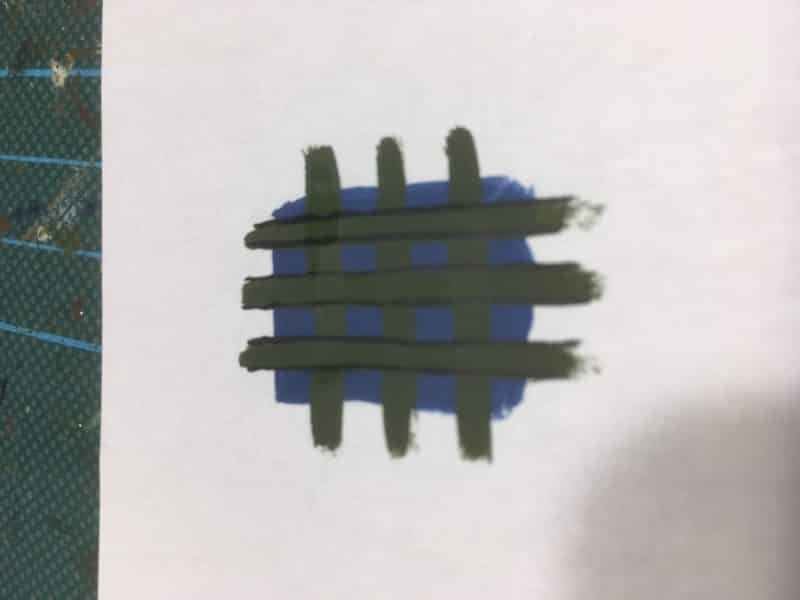
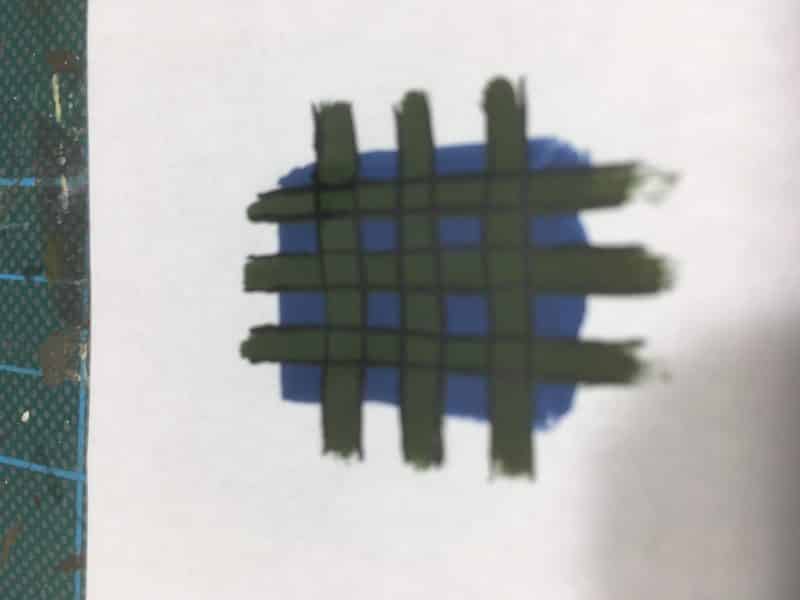
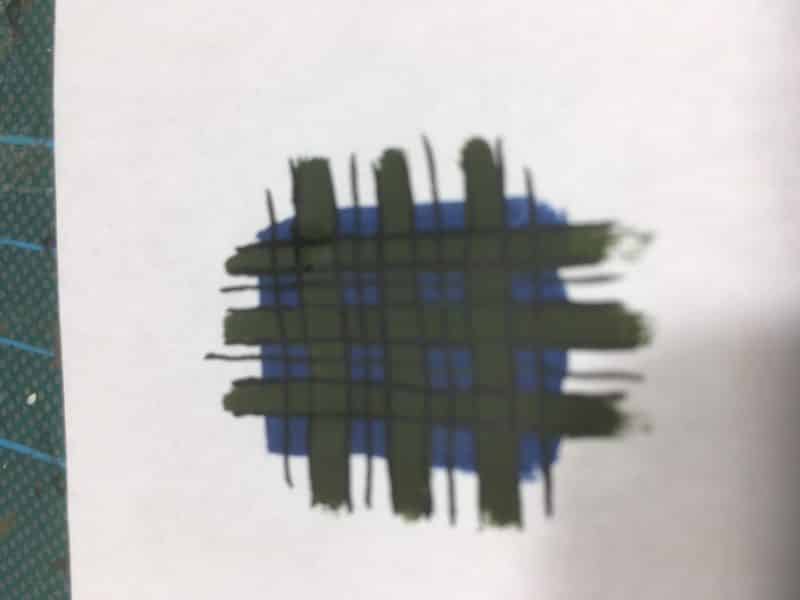
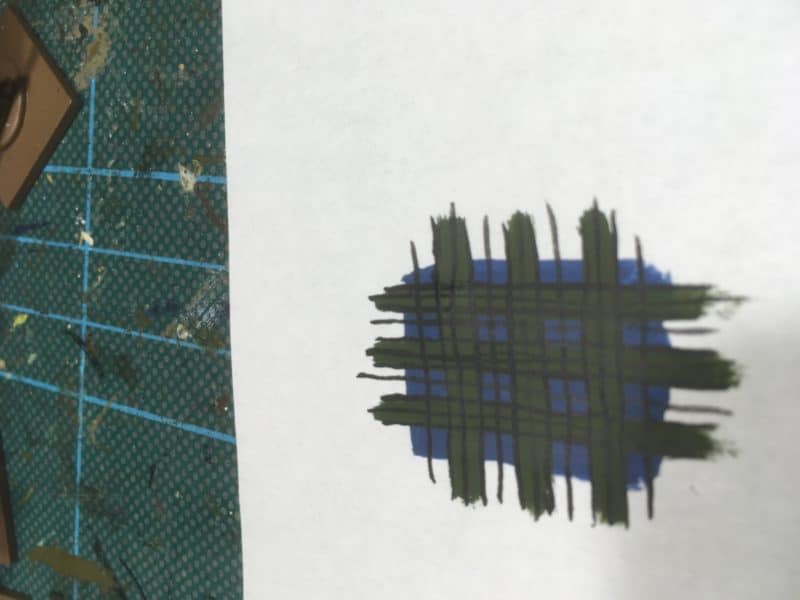
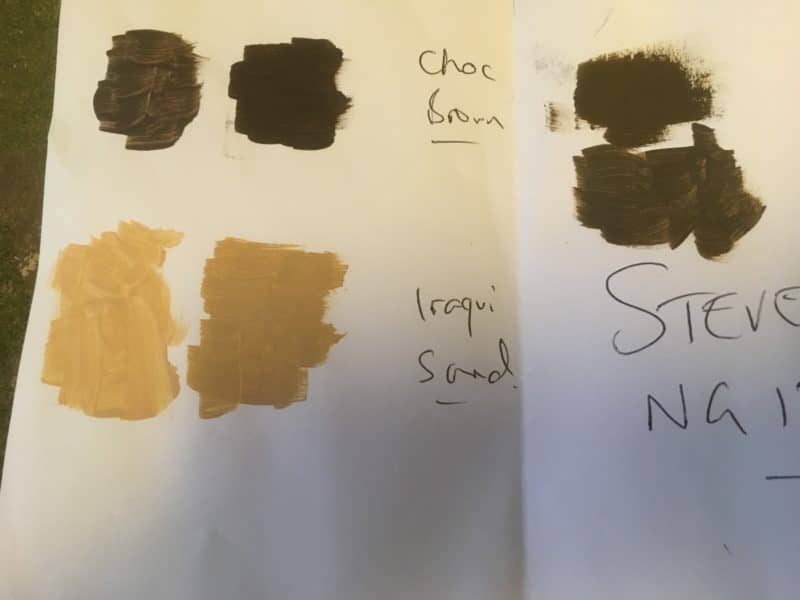
Paint samples and the originals
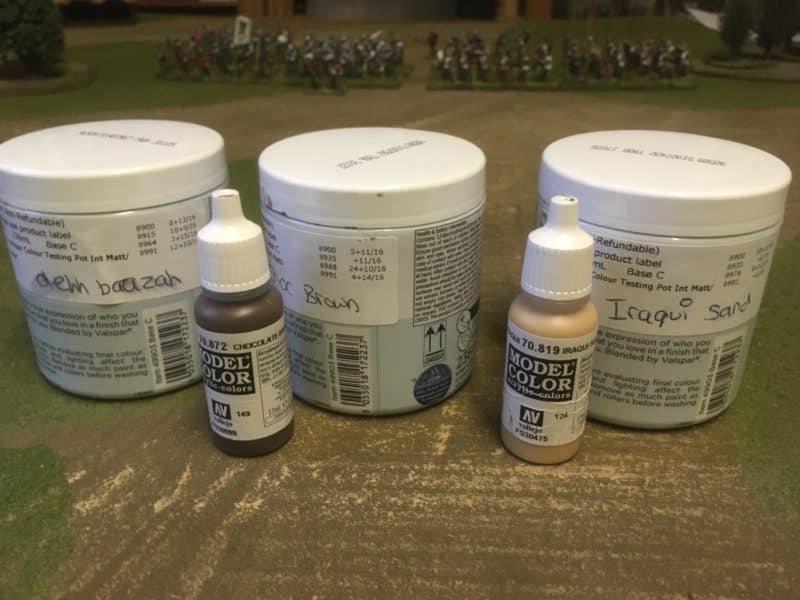
I also decided to try out the in-store colour matching facility at B&Q. Whilst I was replacing my usual basing paint, I thought that I would see if I could get some emulsion pots pots of the two other colours that I most frequently use when basing; Vallejo Chocolate Brown 70872 and Iraqi Sand 70819. I just brushed some samples of each paint onto a scrap of paper and off I went to the local B&Q. The young lady behind the counter did warn me that the colours may not be an exact match as they were using Valspar Emulsion as opposed to Vallejo pigments but she would do her best. The sheet above shows that the two vallejo colours are a bit ‘off’ and on the light side but close enough for me. After all, I will be using these for basing, not to replicate a uniform colour.
B&Q sample pots next to Vallejo for size comparison.
The process took about ten minutes but here’s the best bit. The cost was £3.00 a pot! Each pot contains 263mls! So for £9.00, I have enough paint to keep me basing for the next couple of years. They even kept my details on file so when I need another batch, they can just make a batch up from the details on file. Brilliant!
The beauty about using emulsion for your bases is that it is water based paint and can be thinned with tap water; you can wash your brushes in water and it seems to give great coverage over sand and basing material, even when thinned. If you need to you can mix it with with Vallejo or other actrylic paints – I often add a small amount of White to the last highlight to get a final dry brush highlight on my bases.
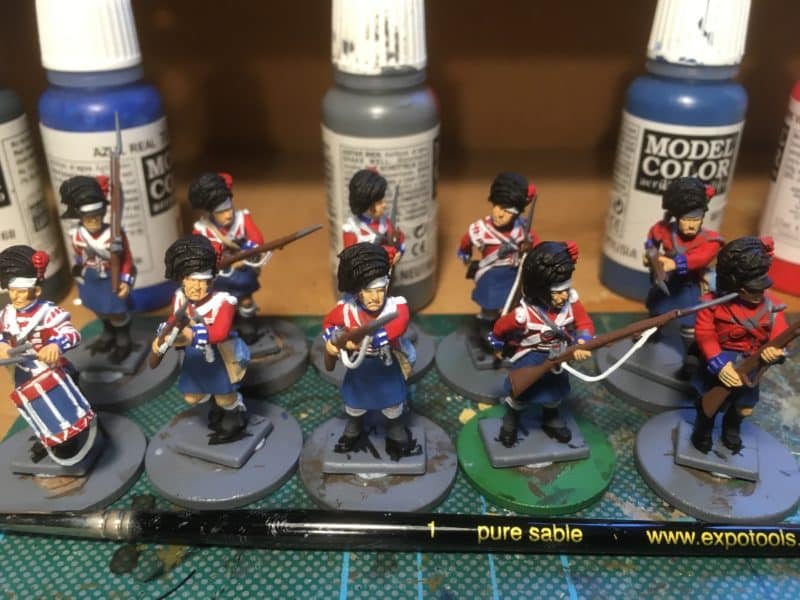
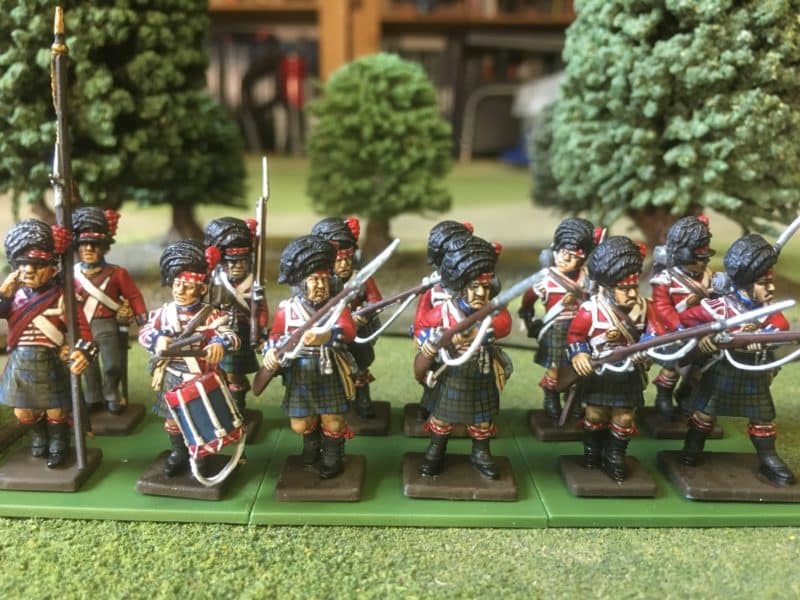
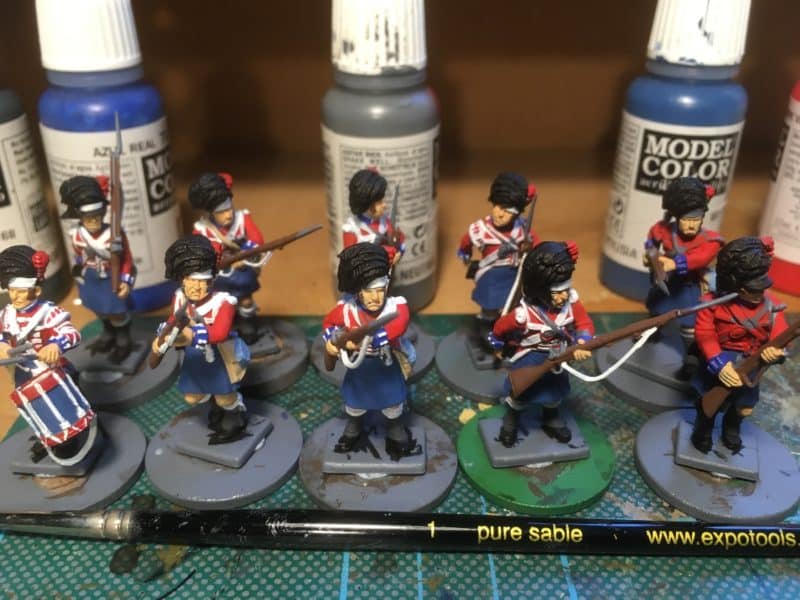
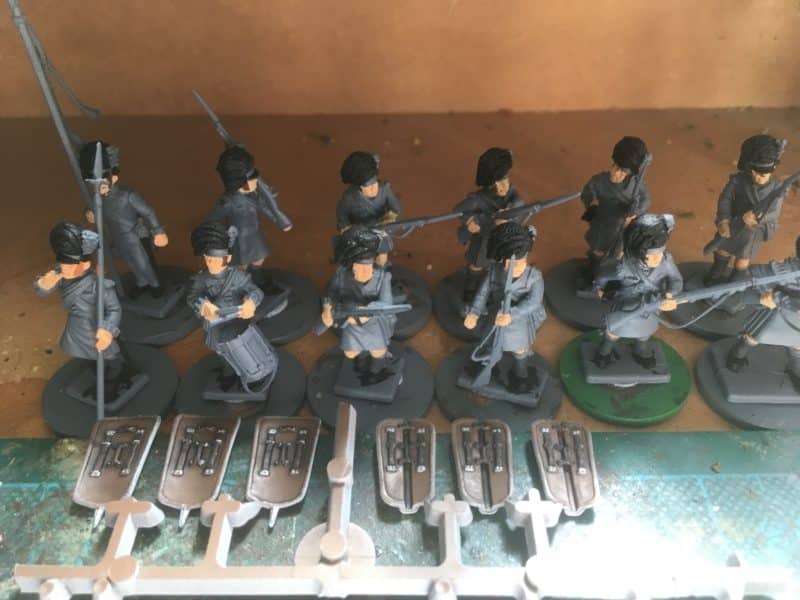
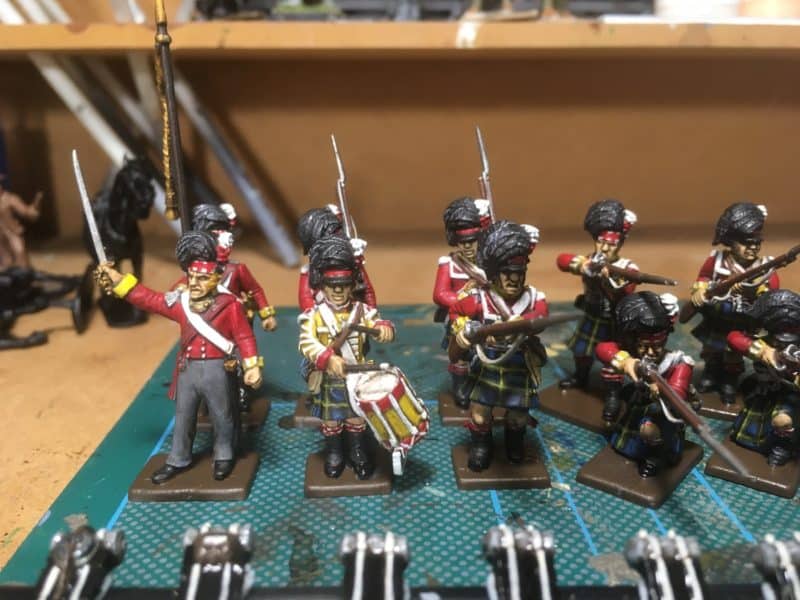
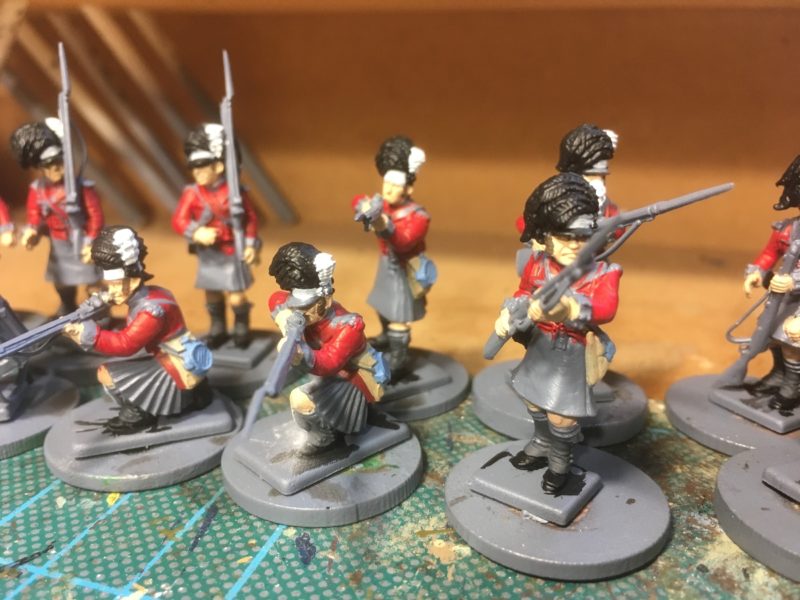
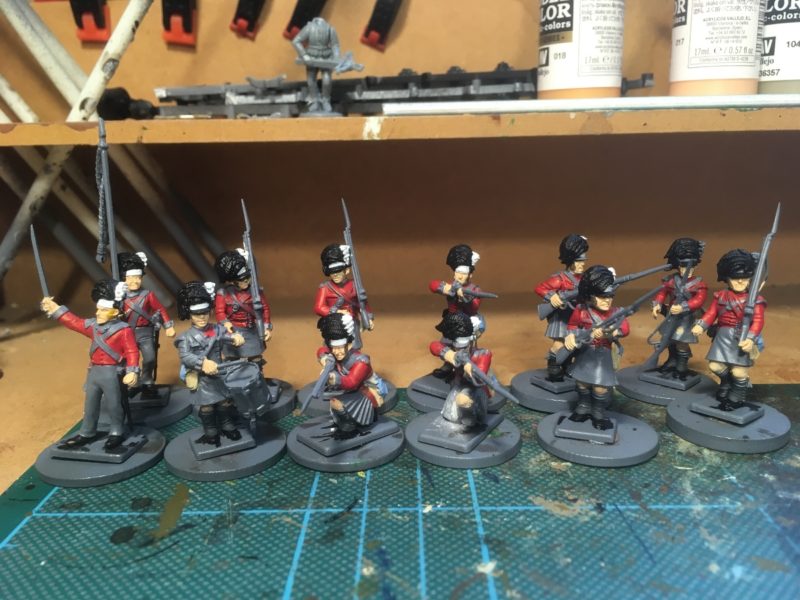
Gordon Highlanders – These are just about ready for basing
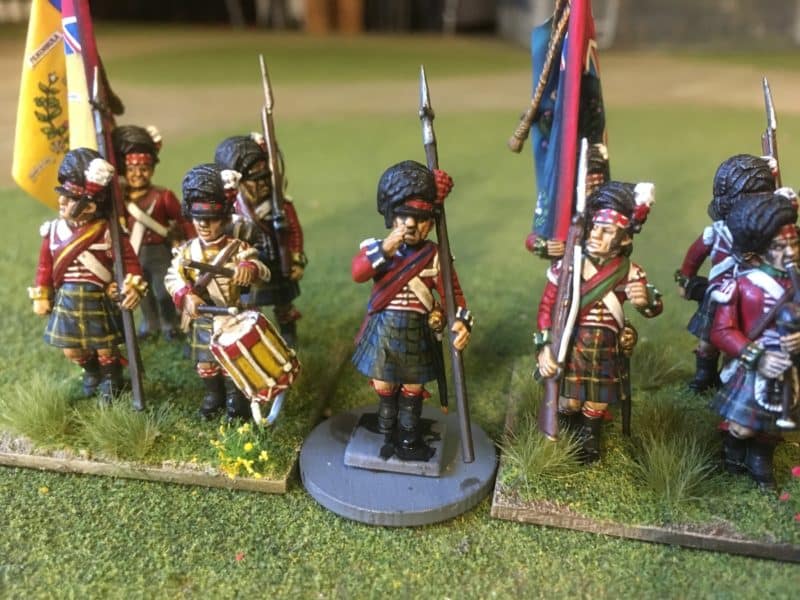
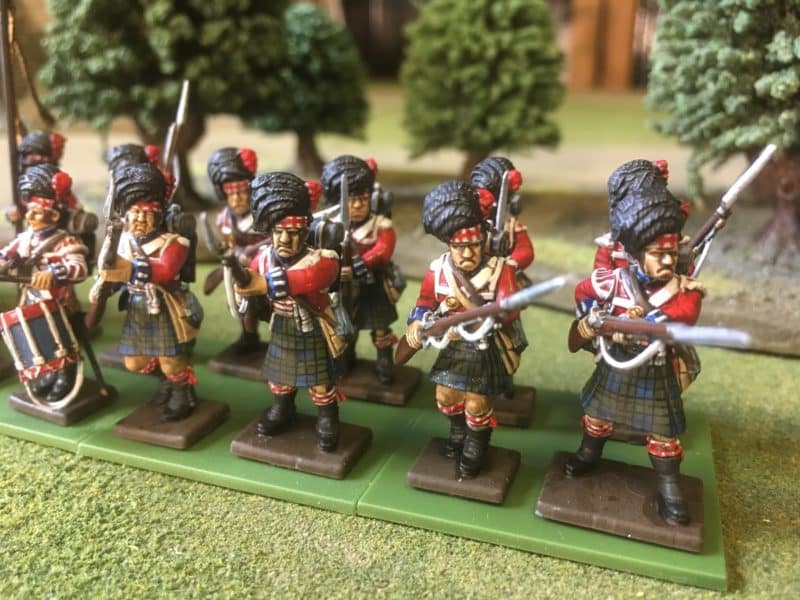
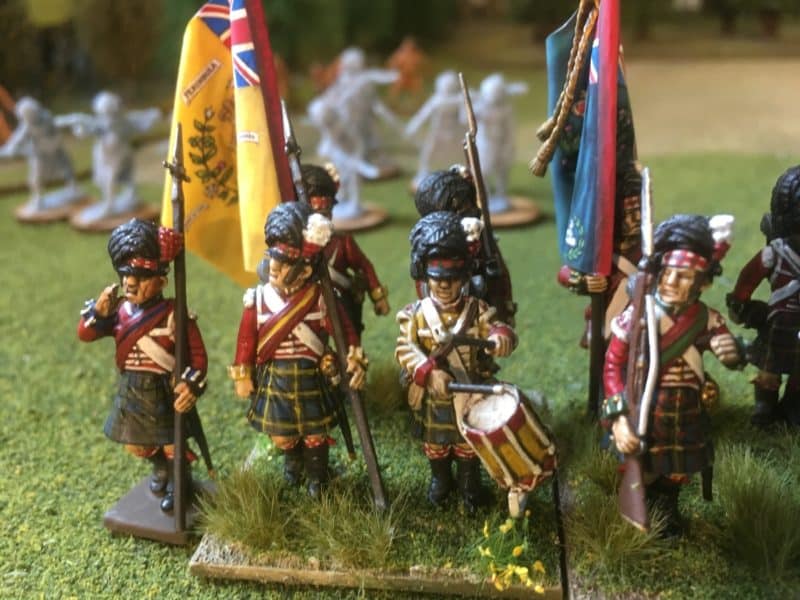
So, with my new basing paint purchased, I’m ready to finish off my next Battalion, the Gordon Highlanders. As you can see above they are just about ready for basing. I need to touch in the green squares on the hat bands and tidy up any obvious errors. You can see that the back packs are all done and waiting to be fixed on. Then it’s just fixing the flags, which I have ready to go.
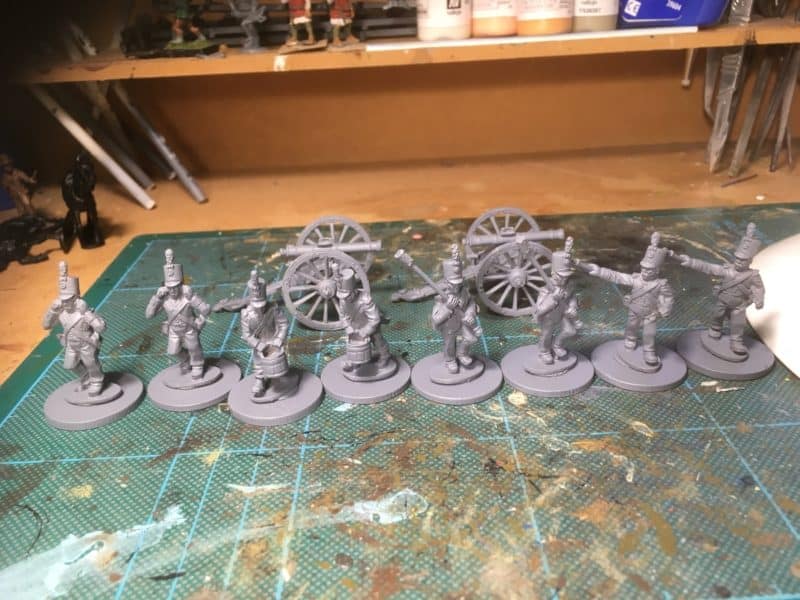
Portuguese Artillery
Next up, Portuguese Artillery! The painting goes on!
THE COMMERCIAL BIT!
We don’t carry B&Q paints – you will have to find your own local depot. At Arcane Scenery, we do have a range of nearly 6000 lines, most of which we will send post free to most countries in the world! You can visit our shop here:
Well, the recent deluge has caught me out and I was unable to continue with my WOTR cavalry as the next six models were yet to be undercoated. Mrs W made it quite clear that spraying indoors was unacceptable, even in the garage, which is accessed through the kitchen door. So I have had to wait for the weather to brighten up before continuing.
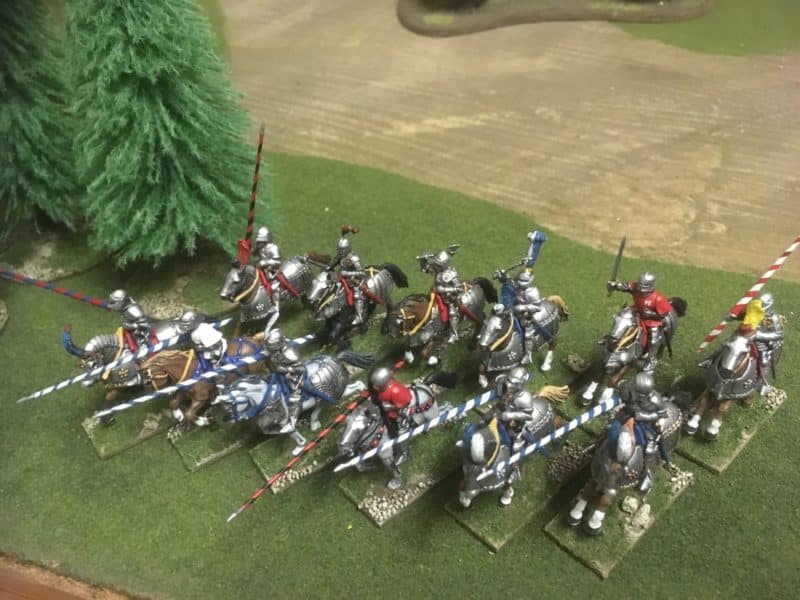
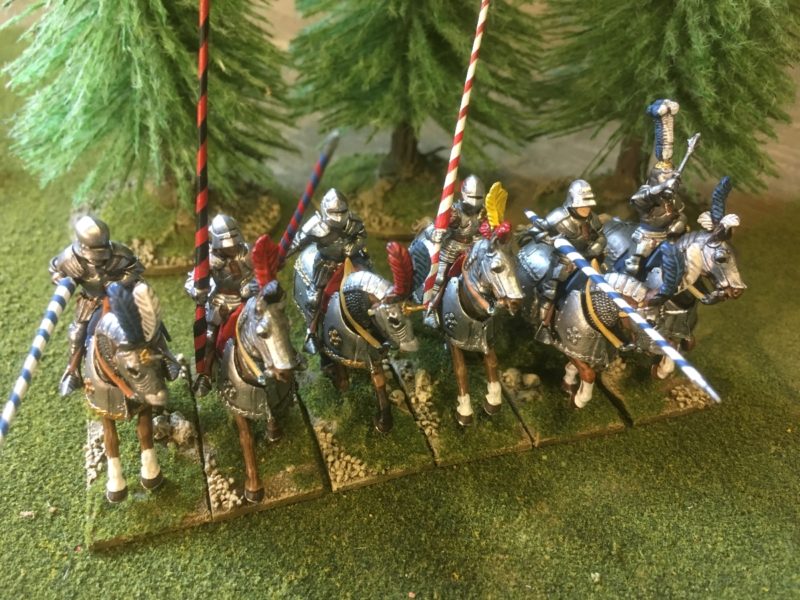
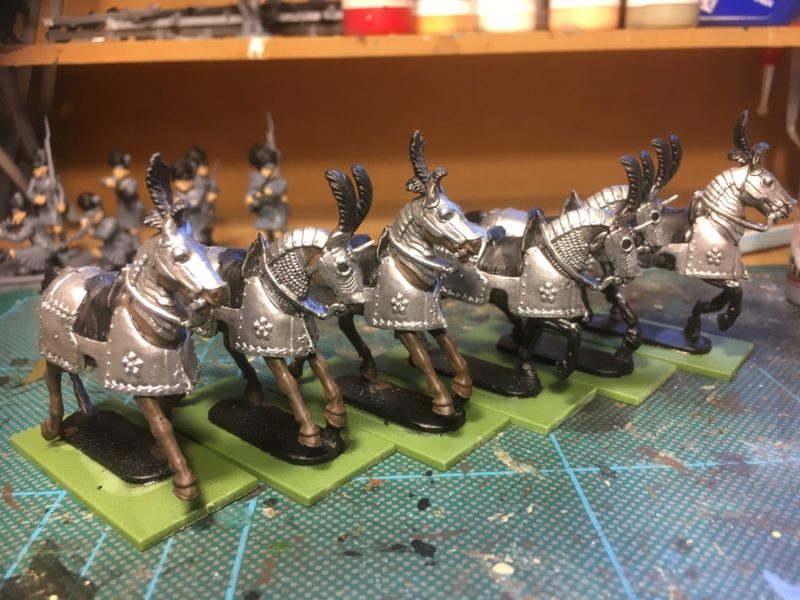
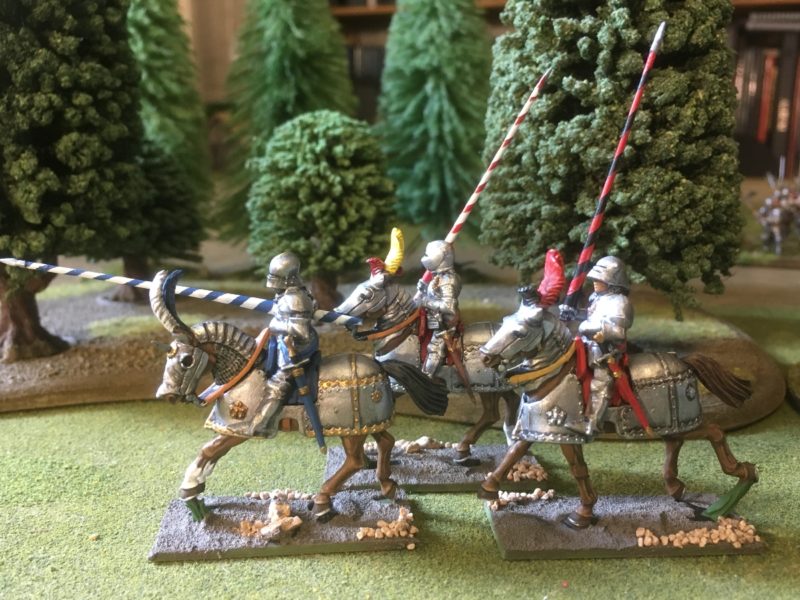
The six completed cavalry.
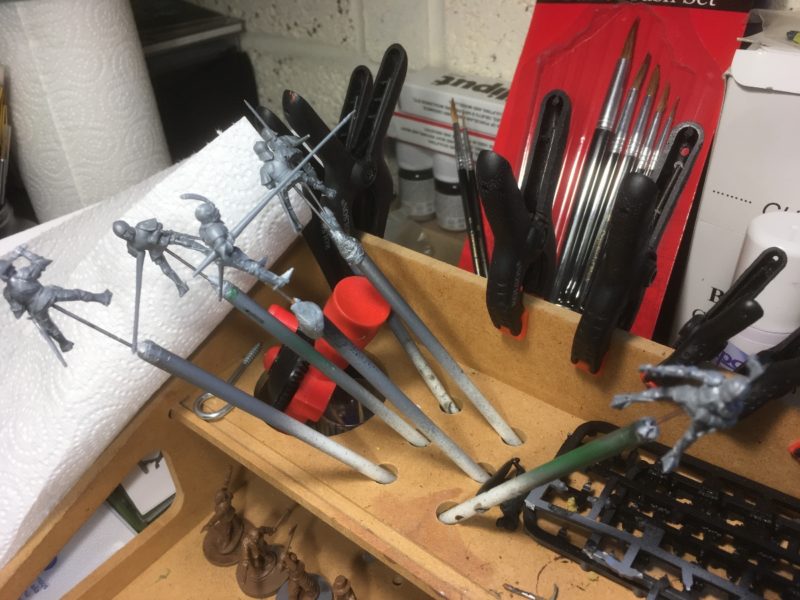
As you can see, I have now completed six of the heavy mounted men at arms, so I have made some progress. I’ve also mounted the riders for the next batch on the temporary holders ready for spraying, so I am good to go once the rain stops.
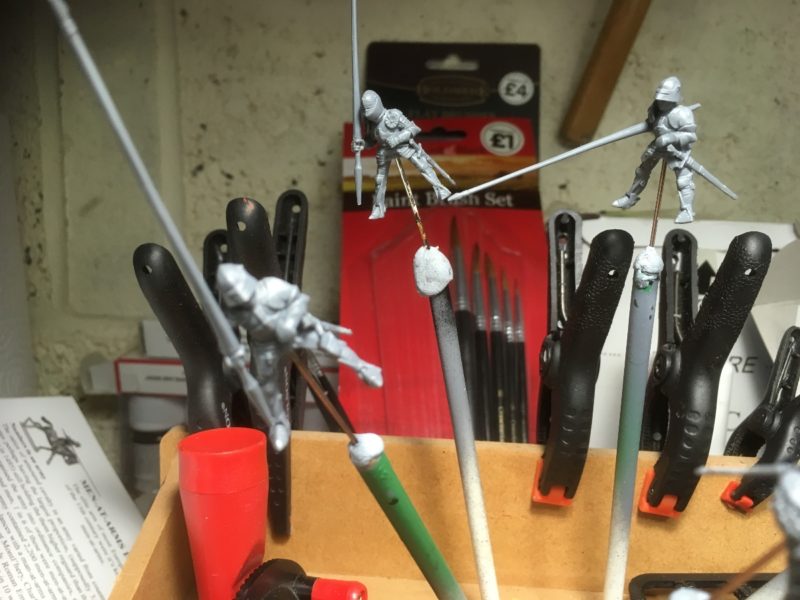
Let us Spray…knights ready for undercoating.
Despite this hitch, I always have something on the work bench and so I continued with the batch paint of the Highlanders that will make up the balance of the 92nd Gordon’s. The beauty of the batch paint approach is that you can keep a unit progressing and know exactly where you are in the process, even if you have to pause to do something else.
Batch painting highlanders
So a bit more progress in a slightly different direction. The decision I have to make now is whether to crack on and finish the Highlanders or once I can get the Knights undercoated, go back to them. I’m under no real pressure to do either at the moment as I now have sufficient troops to fight club battles in both Napoleonic’s and WOTR. I am favouring the Highlanders though as now that I’ve started them, it would be good to finish them. In reality, I’ll probably do a bit of both, depending on the time I have, after all, nothing like a bit of variety to spice things up! So long as I don’t end up with tartan on my WOTR knights all will be well….
White cross straps and lacing next!
So a short blog for me – besides there’s a break in the rain – I’m off to do some priming!
THE COMMERCIAL BIT
Just a short reminder that nearly everything that I use for my modelling is available post free from my shop. You can see the huge range of models, paints, glues and accessories here:
The next additional to my WOTR army is to be a unit of Cavalry. From the little that I know about the battles in the War of the Roses, it seems that the cavalry were used as a shock unit to punch through already demoralised troops or to cut down those that were retreating. The power of the long bow and the defensive blocks of troops with Pikes or Halberds were usually able to hold Cavalry at bay. I am also told that there were very few, if any major cavalry versus cavalry engagements.
However, no WOTR army would be complete without a unit or two of light and heavy horse prowling around the flanks, looking for the opportunity to sweep away those on foot in a glorious charge!
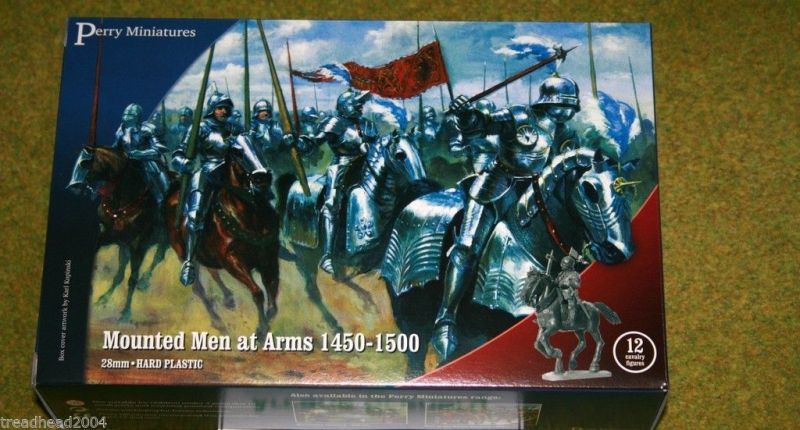
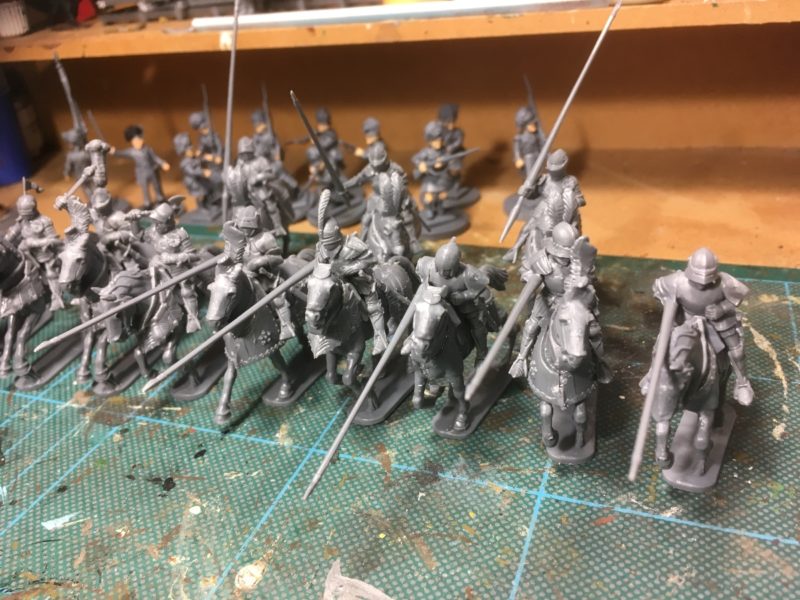
The obvious choice for my army was a box of Perry Miniatures Mounted Men at arms. I wanted to go for the ‘Heavy’ option first. To be truthful, I thought that painting armoured horses would be the easy option! As with all of the Perry Sets, assembly was fairly straight forward, with plenty of choice when it came to weapons and poses. There are seven different horses heads and the horses sides are interchangeable. There is also a choice of armour for the horses. I went for the fully armoured option in most cases, with only two of the horses, lightly armoured.
The assembled Mounted Men at Arms
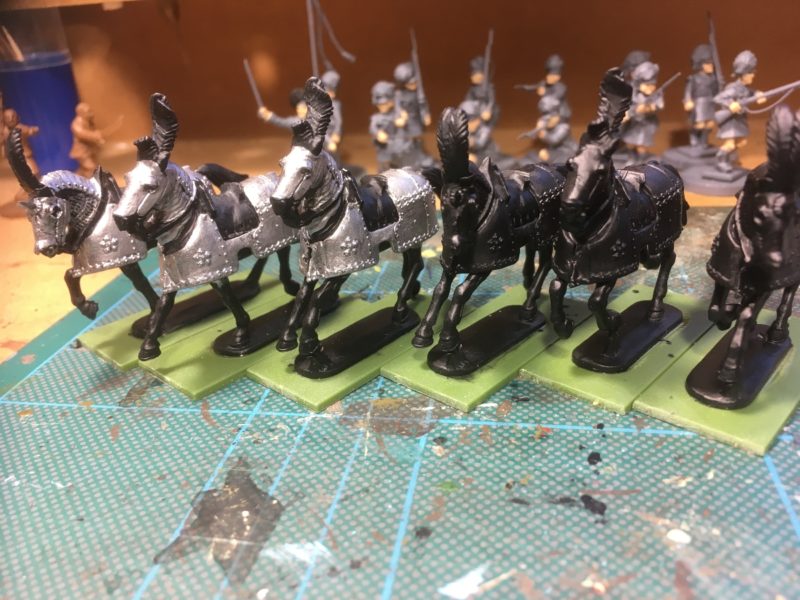
As you can see, most of my Knights will be armed with lances! At this stage I decided to paint the riders separately from the horses, so they are not yet fully attached! Despite the amount of armour, I undercoated the horses in black primer and then painted the armour with Army Painter plate mail.
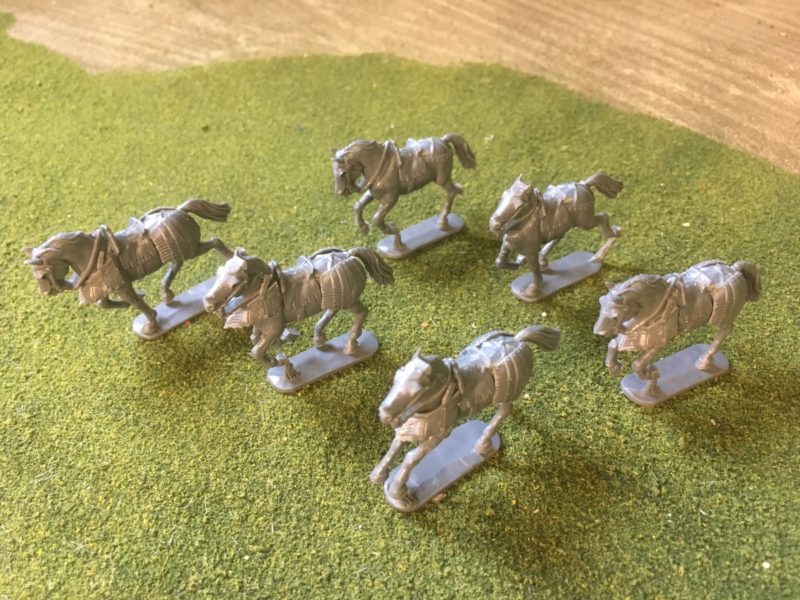
Horses primed ready to paint
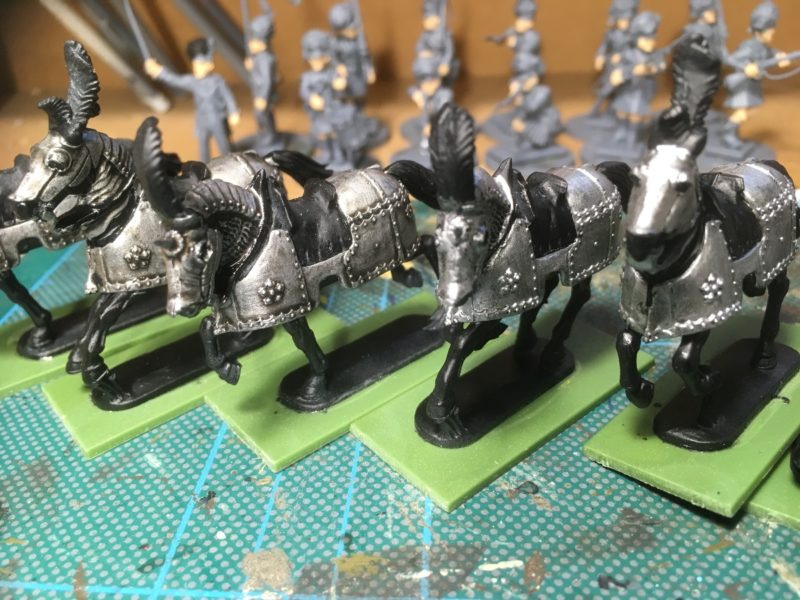
The next stage was to paint the armour in Army Painter Dark tone.
Armour washed with dark tone ink
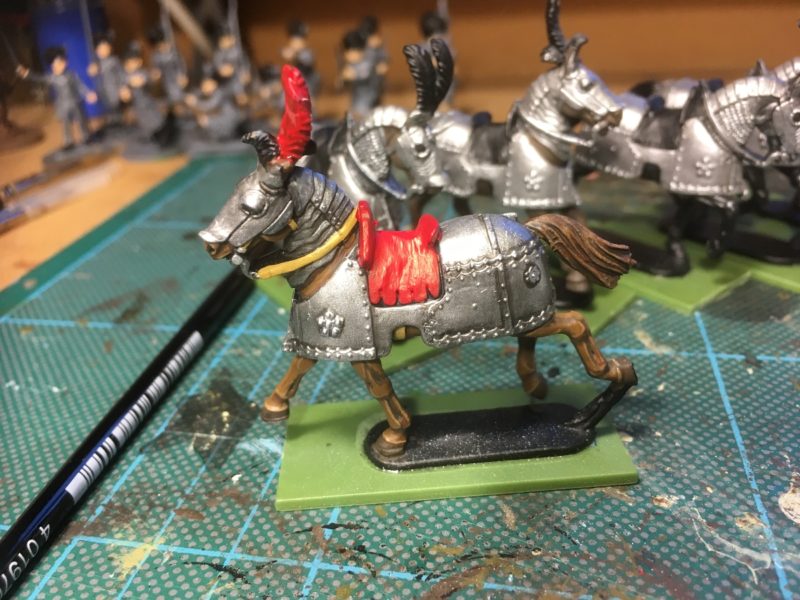
I then dry brushed the armour with plate mail, followed by Vallejo Silver. In the picture, you can see that I have over done this – I was trying a new dry brush out and wasn’t careful with how much paint was going onto the models! I then started to under coat the horses. I use Vallejo Chocolate brown as a base.
Starting to paint the horses.
I use three shades of Brown to paint the horses but I’m quite happy to mix things up a bit. The colours are ‘wet brushed/dry brushed’ on from dark to light and I use a light ink wash to tie things together. So the list of colours used are Chocolate brown, Flat Brown, Flat Earth, Mahogany Brown, Orange Brown, Cork Brown, Green Ochre and strong tone ink to wash. I don’t use all of those colours on one horse – just take three and layer them on. When it came to the details , I went a bit OTT with the colours. I was inspired by some pictures of miniatures that I found on the web and I have attempted to copy these. I thought that the brighter colours would look good on the wargames table, so I cannot vouch for any degree of historical accuracy!
Horse flesh done, stating to block in the details.
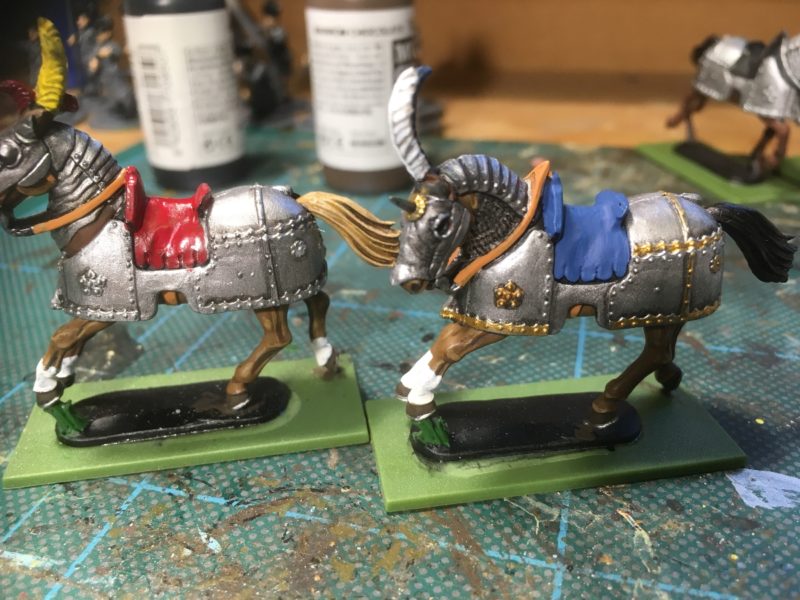
I’ve also added a bit more shading onto the armour with a light wash of dark tone ink. The next picture shows another two horse in progress. I decided to embellish the armour on one of the mounts with gold and add some ‘socks’ to these horses for variety. I’ve also painted the horse shoes and teeth – a bit OTT but I understand that the horses like to get involved in the fighting, using these as weapons!
Another two war horses!
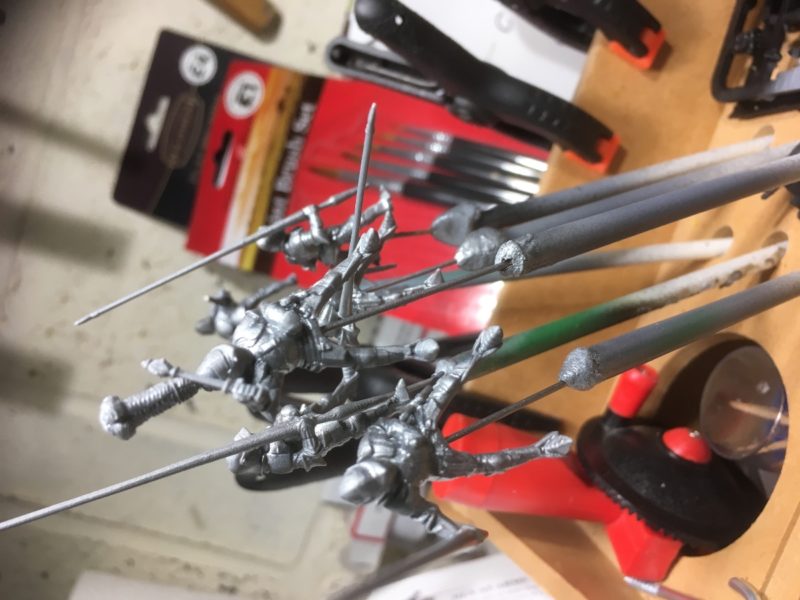
With three horses done it was time to get some Knights done! I temporarily mounted them on wire and used blu-tack to hold them in plastic tube ready for priming.
Knights ready for priming
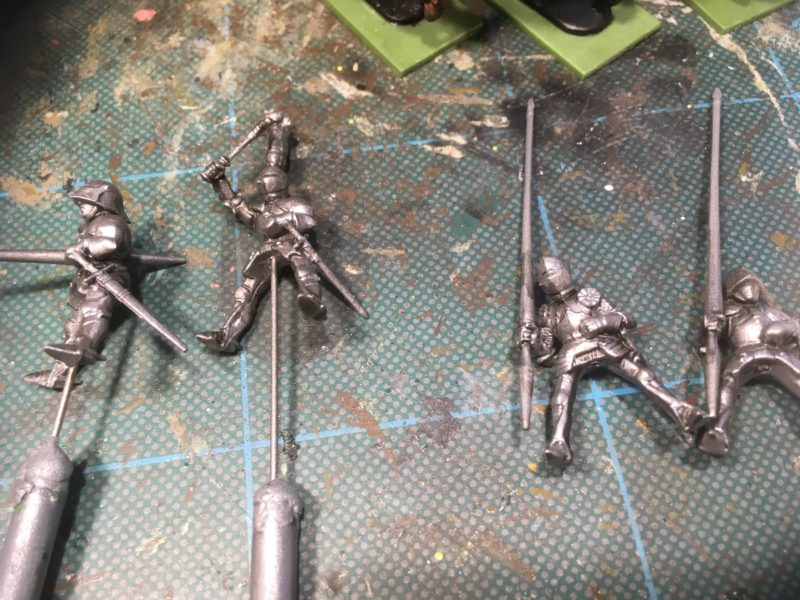
To prime them, I used Army painter Plate mail spray.
Knight primed!
I then gave them a good wash of Dark tone ink, before dry brushing them with Plate mail and then again with Silver.
Knights after dry brushing
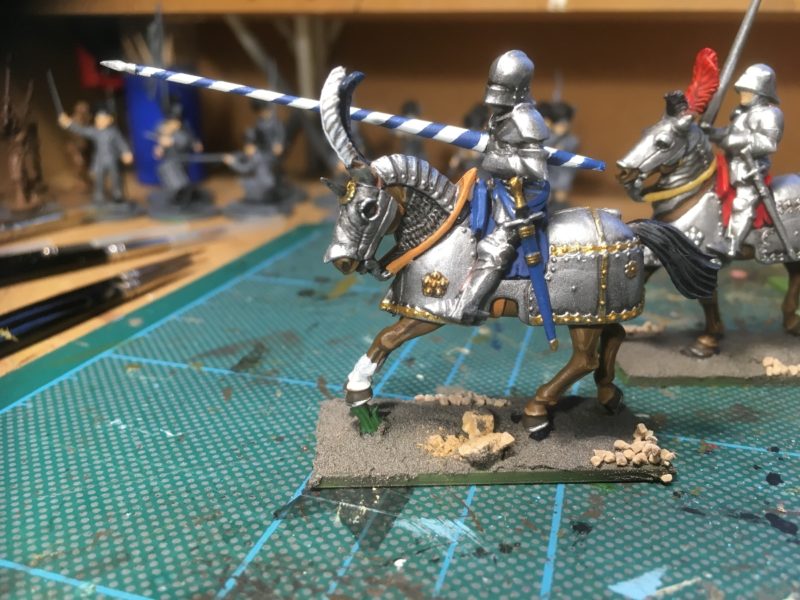
Once again, I went for a ‘pretty look’ rather than do any real research and I have been free and easy with the few colours that are used on the knights belts etc. I’ve also copied an idea to make the lances stand out and used a spiral design on them. I stress, I have no idea how accurate this is, I just thought it looked good!
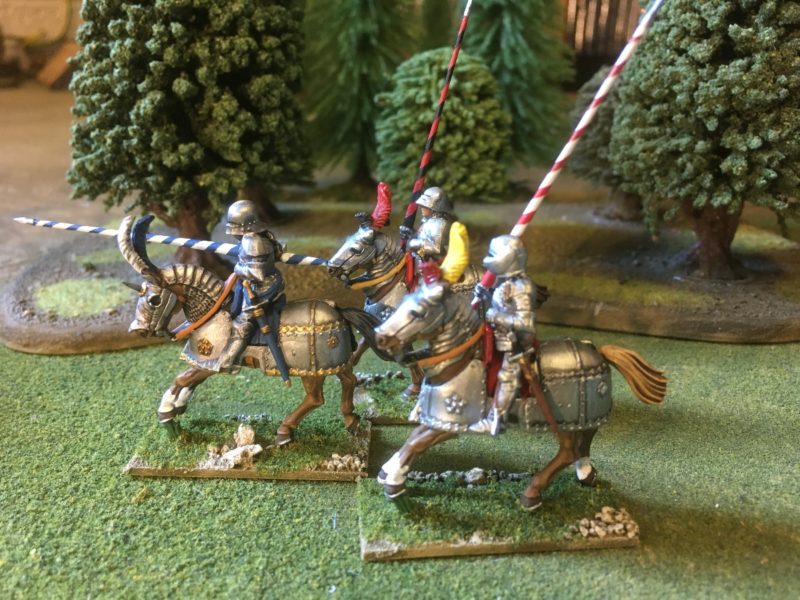
Mounted Knight completed – basing started
I used Expo 2mm flexible masking tape to get the spiral effect. If you look closely, there is some bleed on the painting as I simply brush painted the blue over the white base. The next two Lances that I painted were better as I became used to using the masking tape. It really does do what it is supposed to do – It’s flexible and it masks well without taking off the bottom coat of paint!
Three knights ready for basing
You can see that I have started to base the figures using my usual method. The figures are attached to the Renedra base ( I tend to use plastic bases for plastic figures) and then I cover with Vallejo Dark Earth Textured paste and press a few small stones into it.
Basing on the Knights completed – well, nearly!
Once the paste is dry, I paint over it and dry brush with successive layers in a lighter colour to bring out the texture and show off the rocks. It’s then just a case of adding scatter. I will be adding some Gamers grass tufts to finish things off but will wait until all of the figures are done and complete this final task for the complete unit.
So my first knights are ready to take to the table. They are perhaps a bit more suited to a Jousting tournament but I think that they will look imposing on the wargames table once all twelve are completed!
THE COMMERCIAL BIT
Nearly every thing that I use in my modelling projects comes from the Arcane Scenery shop. We supply post free to most worldwide locations!
I have some offers running on the Perry Miniatures WOTR range so that you can build an army similar to the one that I am working on. To see the range of Perry Plastics for WOTR, click here:
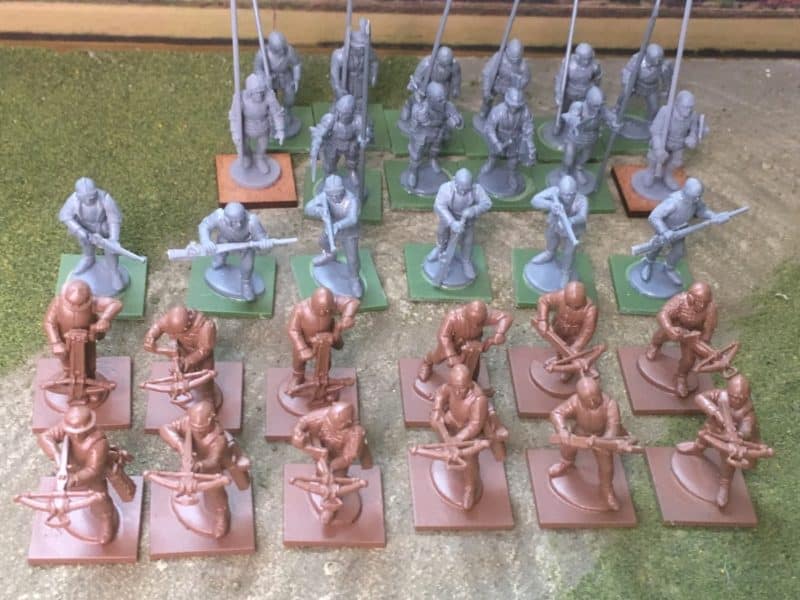
I now have about 100 figures completed for my WOTR army. Actually, completed is not strictly accurate, as six need basing and I want to revisit some of the Men at Arms to add some detail. The Foot Knights will form the core of my army and they are made from a box of Perry’s Foot knights that I have almost completed. Of the 36 knights in the box, 24 are in ‘plain’ armour and so were quite straight forward to paint. A further 12 have tabards over their armour and it was these that initially slowed me down when it came to completing them. Assembly was straight forward enough, although with one exception, I decided to go for ‘sleeved’ tabards, which reduced the choice of poses and weapons available.
Knights with tabards, assembled and ready for priming.
Incidentally, in the background of the picture above, you can see that I have also assembled the final 2 of the 38 figures in the Perry’s set – Richard III and his standard bearer – they may not make it into the army but I will complete them. Painting the figures was fairly straight forward, it was deciding on the colours of the livery that caused me a problem. Despite doing a degree of research, I reminded myself that I was initially building a generic WOTR force for our club games rather than a specific order of battle. This did simplify things in my mind and so I went with a fairly limited set of colours for the livery and I haven’t worried too much about what or who the livery represents at this stage.
Basic colours blocked in.
I followed more or less the same procedure for painting the armour. I used Army Painter plate mail, gave this a heavy Dark Tone Ink wash and then re highlighted by dry brushing with Plate mail and then Vallejo Silver. The Tabards were just block painted, although I did use soft tone ink and red ink to do some shading.
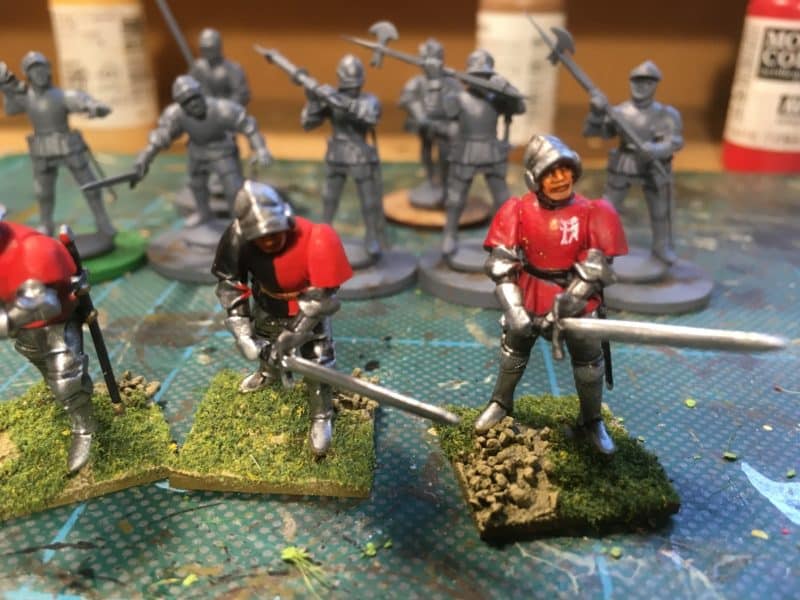
Tabards painted and figures based.
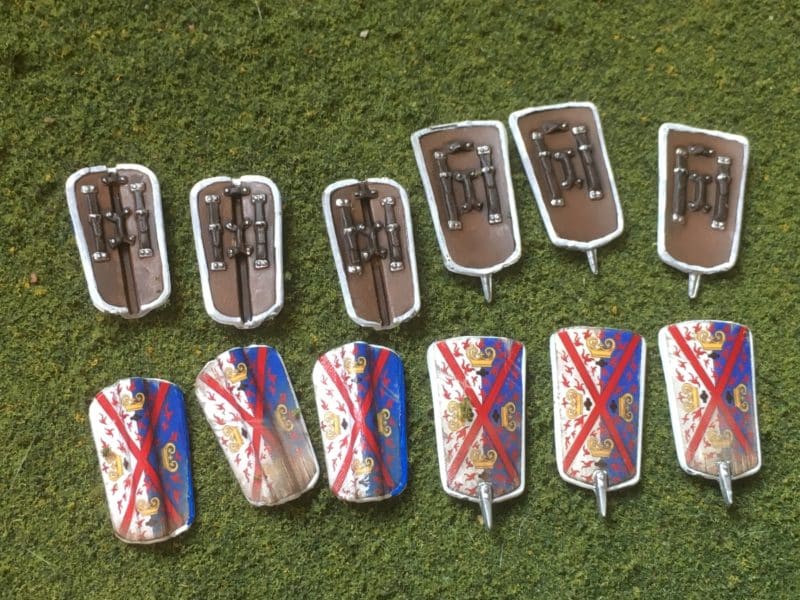
The picture above shows three of the finished figures. You can see that I attempted to paint Warwicks badge on one of the figures…It just about passes from a distance but I decided that I would leave the others without a badge until I can find suitable decals. Besides, my eye’s were at the limit of their endurance!
Foot Knights ready for action!
The final six Foot Knights are almost complete. I just need paint some of the details, add some washes and finish the basing.
The final batch on the work bench.
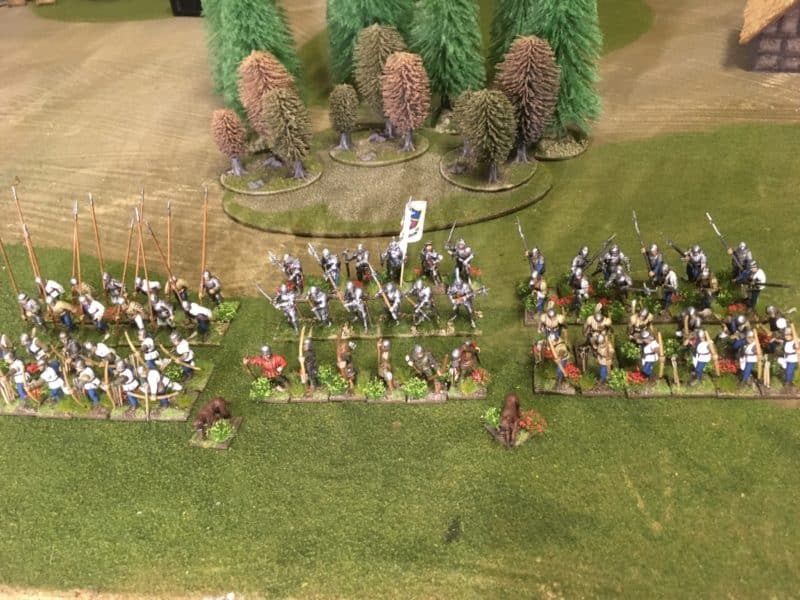
With the core of my force completed, we have already started to test our rules set and have played our first game of ‘Never mind the Billhooks’. The rules have been written specifically for generic WOTR battles by Andy Callan and played well on the first game. Once we have knocked them into shape, with Andy’s permission, I’ll put them up on the blog as a free PDF download. We plan to fight a series WOTR battles using our own House retinues over the coming year. Sir Harry Hotspur being the leader of my band. No doubt, Lord Bingham, Sir Peter of Woodborough and Lady Jasmine of Papplewick will be just as capricious at choosing allegiances as the real participants of the War Of The Roses!
Of course, my retinue is far from complete. I need a few more skirmishers and badly need some cavalry support, so I will add these in over the next few weeks. For now though, let battle commence!
THE COMMERCIAL BIT
We carry the full range of Perry’s Plastic sets. You can see the WOTR sets here:
We have a huge range of paints and basing products in stock. We carry Vallejo Model Colour and the Army Painter range. Also in stock is the full range of Renedra bases. Even better we post free to most worldwide locations!
I often read articles that are bemoaning the lack of youngsters coming into our hobby. I dont think that there is very much truth in this – if anything, thanks to the power of the internet, the hobby is growing. I’ve been reading the same old stuff since I was a youngster myself, with the same complaint occuring some 50 or more years ago. If anyone doubts me, I have the original issues of Wargames Illustrated and Miniature wargames Magazines and you don’t have to look far in the letters page to find evidence. Like all hobbies, it is either in your DNA or not. Wargaming is never going to be a mainstream hobby, it is a niche at best and I suspect that in itself is part of the attraction.
I will concede that Historical wargaming is now, I believe, a minority part of wargaming itself, with Fantasy and Science Fiction taking the larger share and certainly attracting the younger player into the hobby. Many will stay with this side of the hobby, a few will stray into the historical thread. In terms of introducing my children into the hobby, I have been largely unsuccessful. They did take an interest for a while, particularly my son, who was attracted to Orks in particular and 40K in general but alas, the hobby didn’t stick and he has taken up golf…. My daughter quite enjoyed the the painting and crafting side of the hobby for a while but she too is more interested in sport, specifically scuba diving and swimming. I’m not sure where they got the activity bug from – I like sport but prefer watching it these days! As for golf, I’m happy to agree with the sentiment that it is a good walk spoilt. That said, I do like a game of crazy golf at the seaside!
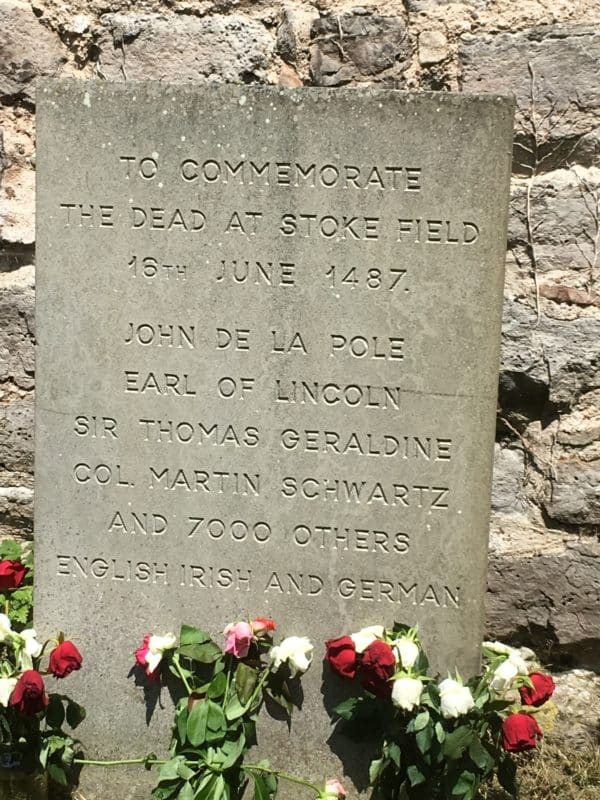
However, another generation comes along and so the opportunity comes along to try and convert the grand children into willing opponents! Emily is now 6, about the same age that I was when I started making models, so when she stayed over at Easter and asked if she could sit with me while I had sneaked off to the garage to do some modelling, I was pleased to have her company. At first she was happy to watch me working on my WOTR project and we had a nice chat about the ‘Cousins War’. She was intrigued by the story of the ‘Princes in the Tower’ and that a major battle, Stokes Field, took place just down the road from her school.
Memorial stone at East stoke Church
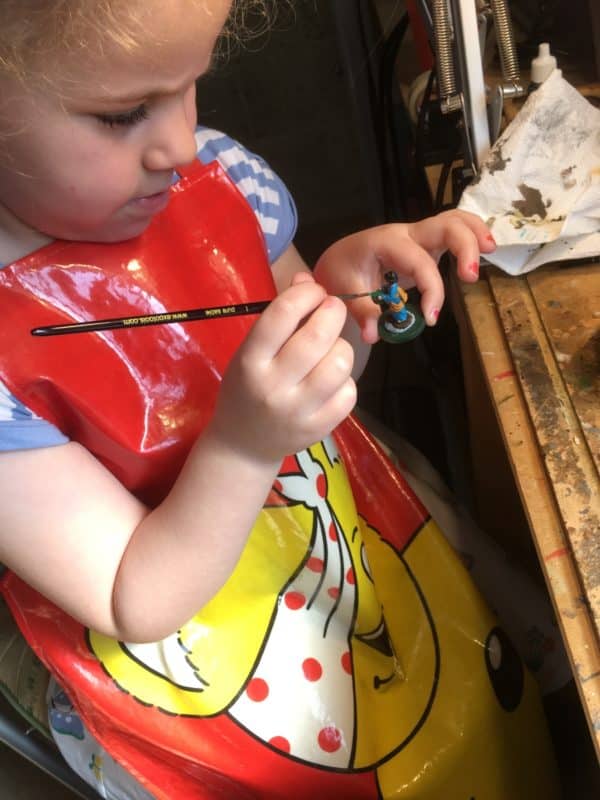
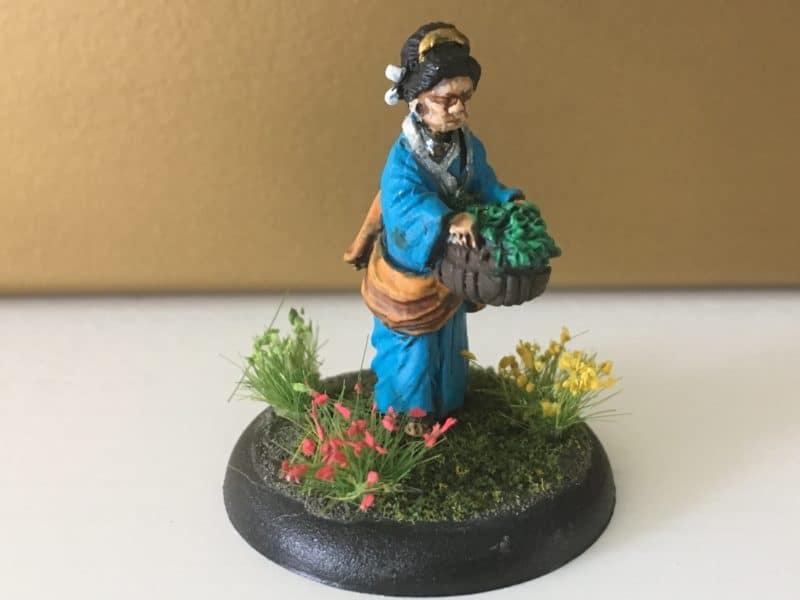
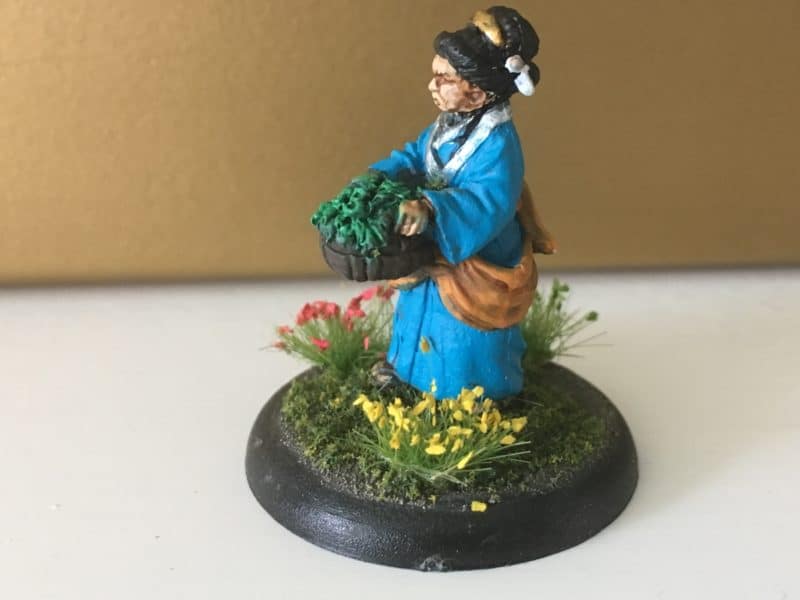
It didn’t take long before she asked if she could have a go and so I looked through the ‘lead pile’ and found a figure primed and ready to paint that might be suitable. In the past, I have been quite protective of my paints and brushes but I decided that if Emily was going to try and paint something, she would be better off using the correct tools for the job! So with gritted teeth, I gave her my best brushes and we started to paint a Japanese Peasant lady.
Emilys’ first model
I was surprised at just how good she was. Of course, you have to explain how to hold the brush, how to thin the paint, how to use the point of the brush, how to draw the brush over the bits that you want to paint, how to hold the figure. Gosh! I had forgotten just how much I had learnt but in teaching Emily, I remembered just how much technique there is to learn. When it came to the colour scheme, I let Emily choose which colours she preferred – I actually quite like the combination that she came up with – I’ll be using that again!
Overnight, I did the basing for her, in that I super glued the figure onto a base and added the texture. Superglue and kids are a dangerous combination! The next day, Emily added the scenic bits and to finish the figure off, we used some washes and did a bit of highlighting and dry brushing. Again, once I explained the techniques, Emily was happy to apply the washes and paints. The result is not too bad and I am thinking about what figure Emily can do on her next visit!
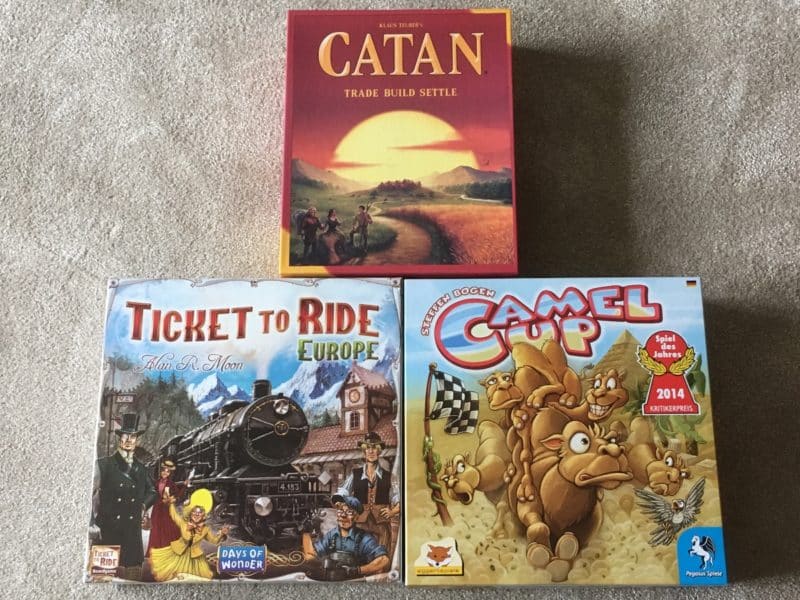
Catan, Ticket to ride and Camel Up!
At six years old I think she is too young to start wargaming but she has already mastered Junior Cluedo and Camel Up so we are not too far away from a more complicated board game – say Space crusade. Another year or so and I think that I might just try her out with a simple wargame. I think a good skirmish game such as Test of Honour or Lion Rampant will be a good place to start. I may yet ensnare her into the hobby….
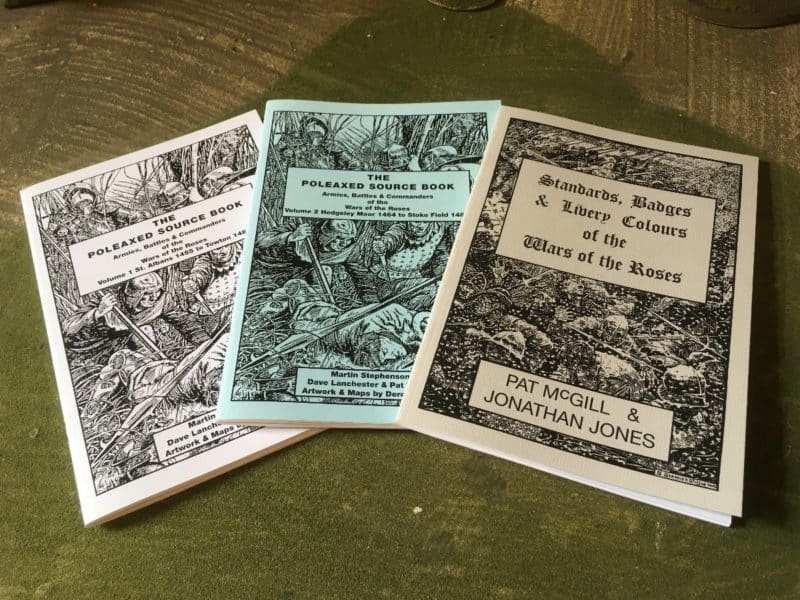
My War of the Roses project gathers pace once more and before I update you with my latest progress (and explain the quote in the blog title – not WOTR, I know!), I would like to say a special thank you to Martin Stephenson and Vexillia. Martin has very kindly helped with my research into the heraldry and in particular, the livery colours that I should be using on my troops. His web site Vexillia, is great source of reference and if any one else is embarking on a similar project, they could do no better than to visit Vexillia. I also bought three lovely little reference books from Vexillia. They are packed with information and well worth the money. Even better the service from Vexillia was first class, with both of my orders being sent out in a day and received very promptly. Thank you Martin.
Three invaluable references from Feezy Water Publications, available from the Vexilia web store.
I was also intrigued to note that two of the books have been co-authored by Dave Lanchester. I know Dave from having a stand right next to him at the Partizan shows at Newark and I had not realised how involved Dave was in the Lance and Long Bow society. I suppose the clue should have been that the Lance and Long Bow stand is usually situated right opposite us at Partizan and Daves Partner is often on the desk….Doh! I will be having a slightly different conversation with him at the next Partizan show. Instead of bugging him about books on the subject of Napoleonic Warfare in the Caribbean, it will be nice to chat about WOTR in between customers!
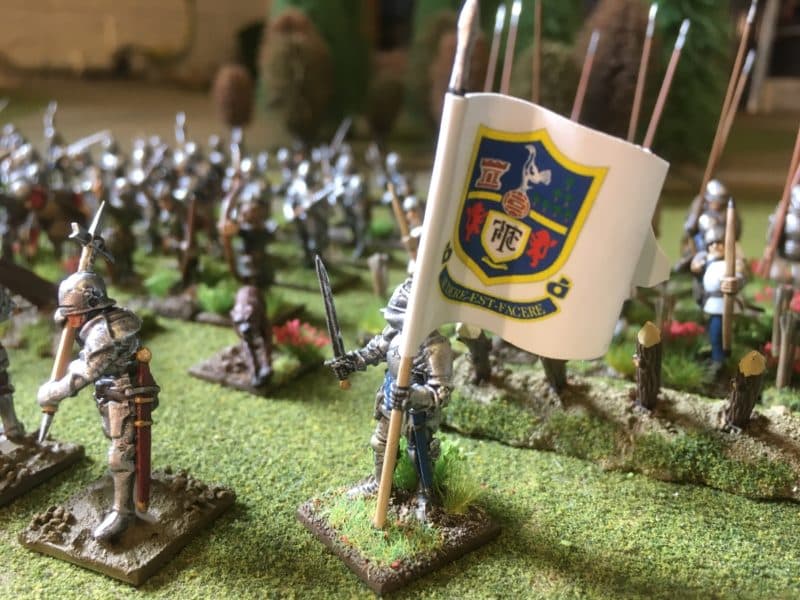
Harry Hotspur fly’s the flag!
One of the joys of my hobby is the historical research into the background of the characters and battles that took place. However, much as I take this seriously and spend a great deal of my leisure time reading, visiting battlefields and museums, when it comes to the painting and modelling, I am happy to take a less rigorous approach. My collection of figures are painted to the best of my ability to represent a generic force from the period that I am interested in rather than a specific unit or army in a specific battle. I’m just not into button counting and although I do like to get the detail as correct as my research allows, I am happy to go ‘wildling’!
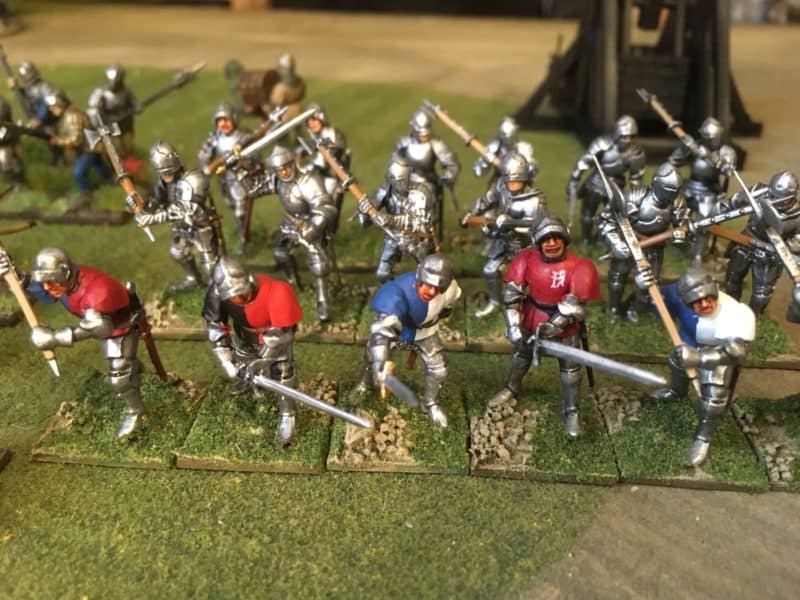
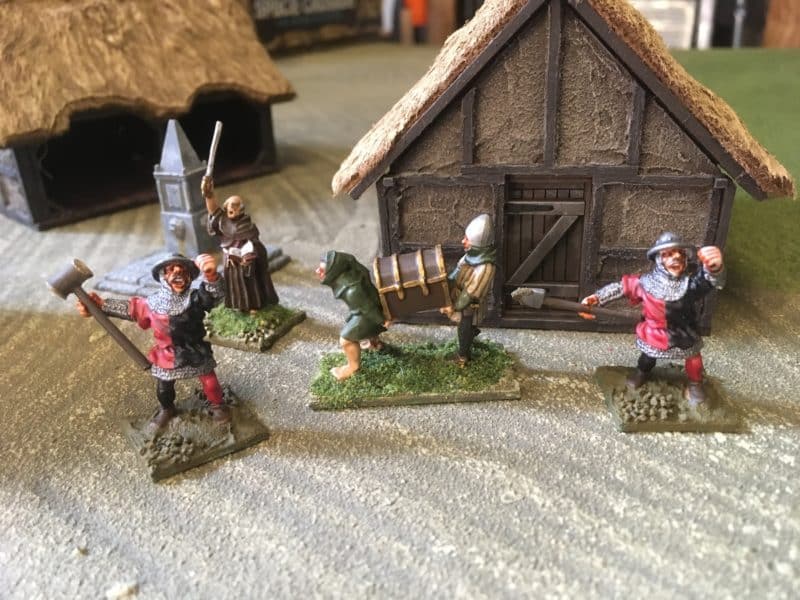
You’ve given us the wrong armour and livery!!!
The figures above are a case in point. I have recovered them from the bottom of my lead pile and repainted them to be part of a siege force that will include a trebuchet model that I recently acquired. I suspect that the armour is more suited to a period earlier than the WOTR. The livery colours are a nod in the direction of Warwick (EDIT! whoops! just rereading my books after I wrote this post and I’ve actually used Talbots livery…. Ah well, it will still do as I like the red and black!), for no other reason than there is a superb working replica of a trebuchet that I have seen in action at Warwick castle!
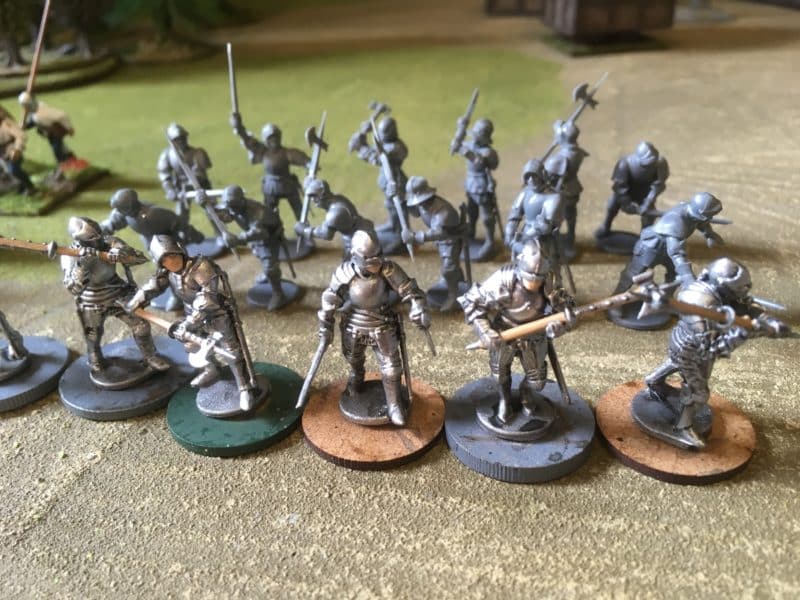
Another batch of Men at arms ready for basing.
Meanwhile, I continue to work my way through the Perry’s Foot Knight set, with another 6 Foot knights completed and waiting for the basing to be completed and six more foot knights well underway.
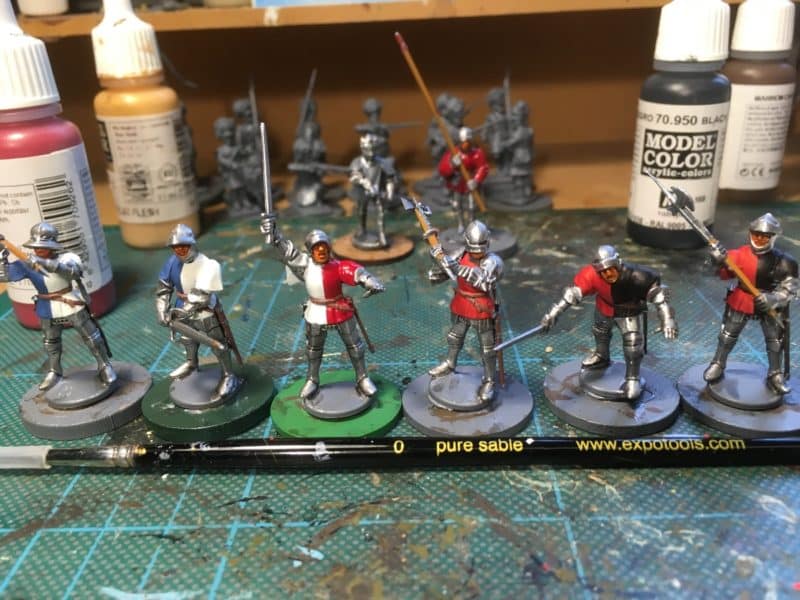
The final 6 foot knights in armour – just the detail to complete.
In the back ground of the above picture are the 12 foot knights that have tabards over their armour. Completing these will mean that I will have finished the boxed set and added 36 foot knights to my retinue. It was painting the tabards that had made me pause and do some research on WOTR livery. I have decided to paint these in a mix of colours, White and blue, Red and Black and Red ( Murray) and Blue. This should give some variety to the look of my force, now 90 strong!
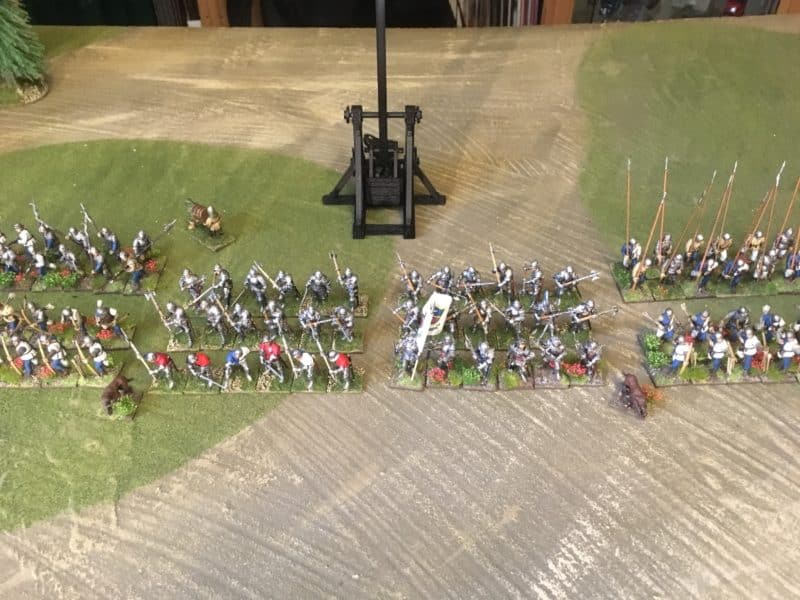
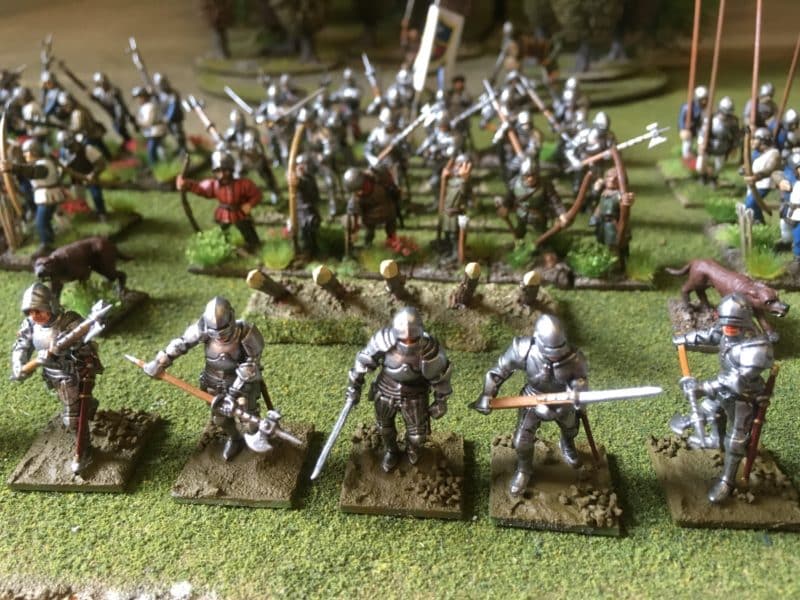
The army groweth!
If all goes well over Easter, my main force should be complete and ready to take to the table to fight against Sir Andy of Bingham, Sir Peter of Woodborough and the Lady Jasmine of Papplewick! And so to my own army, led by Harry Hotspur. If you haven’t already guessed, yes, that is the Tottenham Hotspur flag that my standard bearer is flying. At some point, as the army grows, I will add some more authentic standards to the force but for now, it’s a good day to be a Tottenham fan!
THE COMMERCIAL BIT
As I have mentioned above, if like me, you are starting out on a WOTR project, you could do no better than to visit the Vexillia site here:
We have the Perry’s plastic range in stock and at the time of writing we post free to most worldwide locations.
I have also created a new category for the blog, War Of The Roses, and gathered all of my other articles that are relevant under this category. This includes a few Lion Rampant battle reports and my visits to Stokes Field and Warwick castle, as well as how I have painted m some of my figures.
I have been thinking about building a War of The Roses Army for some time now. I have a Lion Rampant Retinue that would serve as the core of the army. I just need to expand it so that I could field a much larger force and perhaps try a new wargaming rules set. It is a bit of a distraction from my Napoleonic project but sometimes a change is required to prevent painting fatigue and I was feeling the need to try something different.
Pike men on the work bench close to being finished.
I’ve also had six assembled and undercoated Pike men on my modelling board for well over a year. They were left over from my Lion Rampant Retinue and were not needed at the time and so not finished. I had also recently bought a lovely Trebuchet that perhaps would form a nice centre piece or objective for a Lion Rampant game. The final piece in the push, was that following our recent display game at The Bingham Napoleonic Days, Andy Callan offered to revise our Napoleonic rules to make them suitable for WOTR.
The Trebuchet is also primed and ready to be painted.
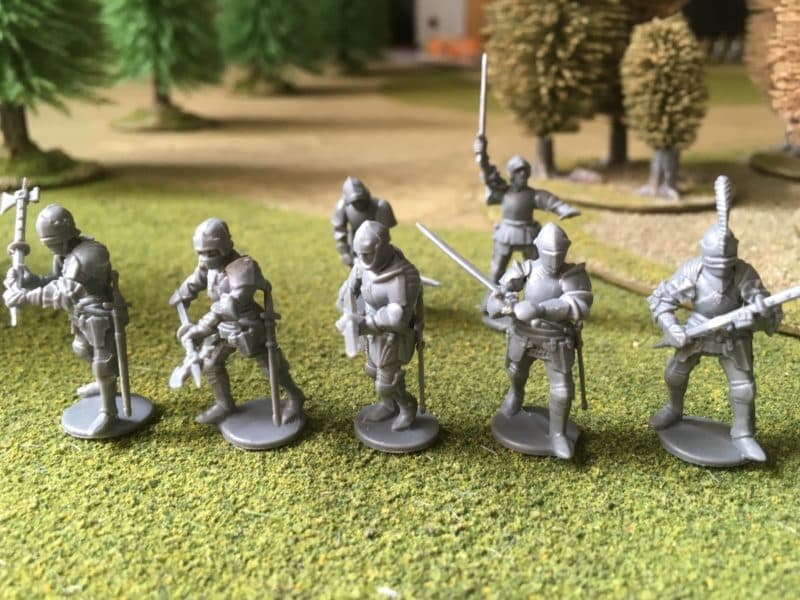
So, with all this in mind, the first job was to finish the pikemen and then decide what to add to the army. I decided that I needed to expand the core of the army – the men at arms. The Perry’s make a lovely set of English Foot Knights for the period. A box of these would give me 36 Foot knights in heavy armour, as well as a couple of Command figures. I also thought that they would be nice and straight forward to paint. I had no intention of doing any really serious research on colour schemes. The box art of the Perry’s set, Pinterest and the couple of books that I have on Medieval Warfare would do for now. I just wanted to get on with the figures and as I have commented in the past, too much analysis leads to paralysis!
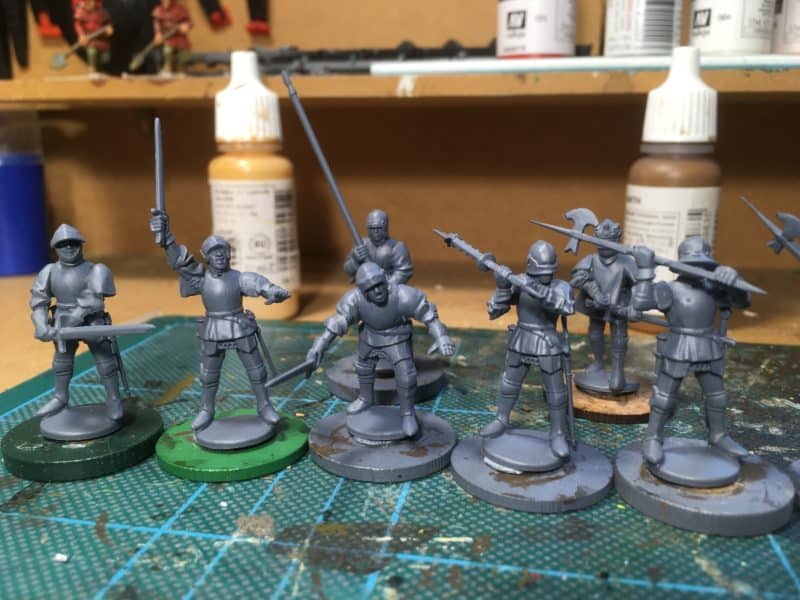
Foot Knights assembled
As four of the torso’s on each sprue of the Foot knights are modelled in full armour, research on colour schemes, could wait. I would leave the Foot Knights with Tabards for last and get on with painting! Assembling the Knights was fairly straight forward, although a bit fiddley. I could have done with a bit more guidance in the instructions but on studying them closely and looking at the box art, I soon had the hang of it and assembled my first six figures. There is little flash or mould lines to remove and to be honest I wasn’t sure that some of the mould lines were actually edges to armour plate!
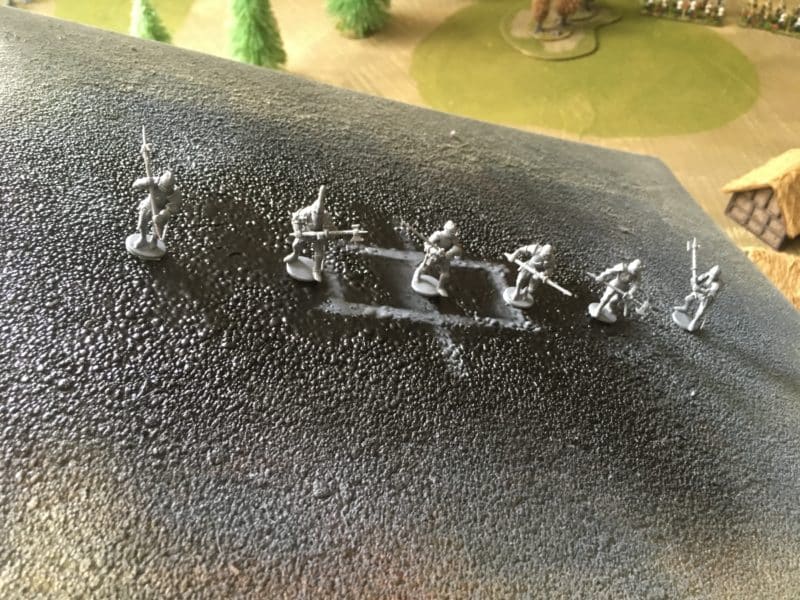
Knights ready for priming
I then blu-tacked the figures to my spray board ( an old piece of Hardboard). The picture shows how you can tilt the board and the figures stay in place whilst you spray! This means that you can get to all the places on the figures, even underneath.
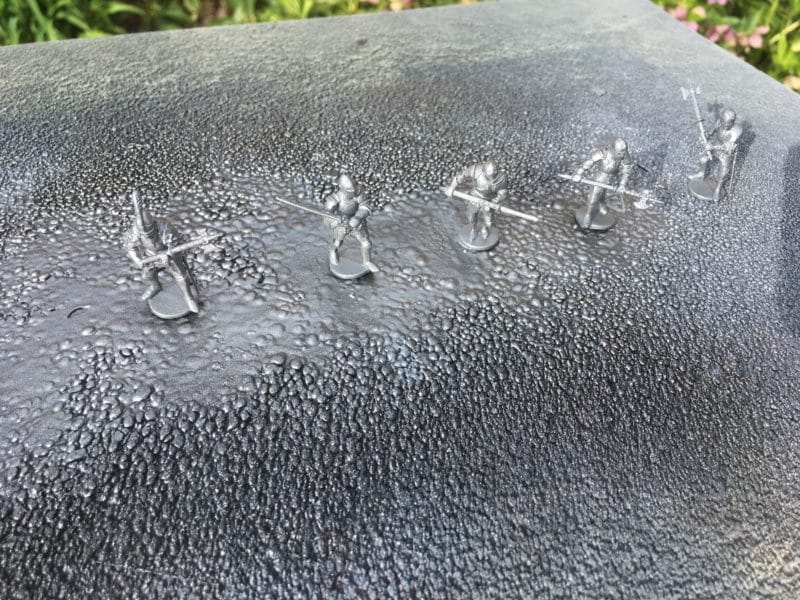
Primed! Army Painter plate mail primer.
To prime the figures I used Army Painter Plate Mail sprate. Any good silver primer will do the job but the Army painter range all works well together, so I prefer to use it. Once primed, the figures are taken off of the spray board and mounted on temporary bases. Blu-tack is used – it is fine for both metal and plastic figures and I have been using the same ‘lump’ for some years now – so is good value for money!
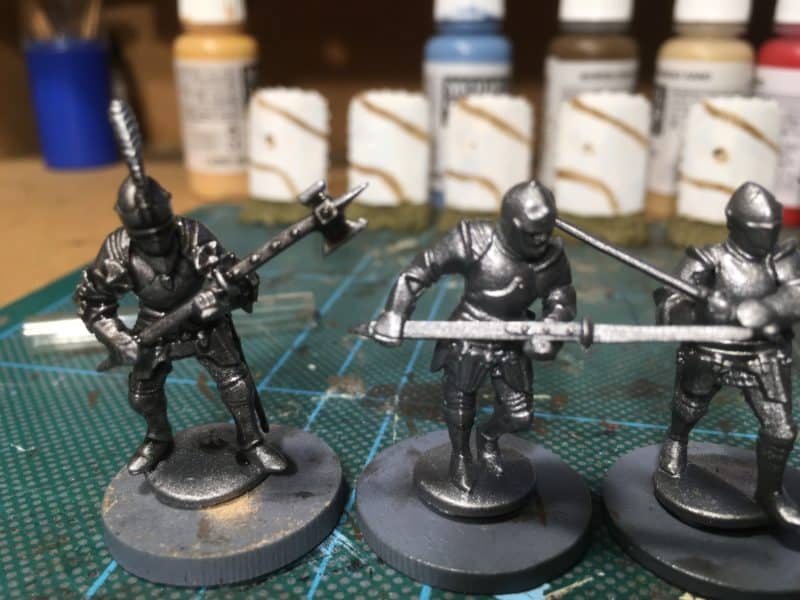
The foot knights on their temporary bases.
I then gave the figures a good wash with Army Painter Dark Tone Ink. The picture above shows the contrast achieved, with the figure on the left being inked.
Foot Knights after washing with Dark Tone Ink.
Once the dark Tone ink is dry, the next stage is to dry brush with Army Painter Plate mail paint. It matches the original primer and starts to highlight the figures, bringing out the detail.
First Plate Mail dry brush coat.
The next stage is to dry brush the figures with silver. In this case I switched to Vallejo Silver as it was what I had on the work bench. The Army painter version would work just as well.
Silver Dry Brush added
I tend to use a very light dry bush for the silver but repeated it a couple of times. I think this actually helps to ‘polish’ the top areas as the paint dries.
Time to start picking out the detail.
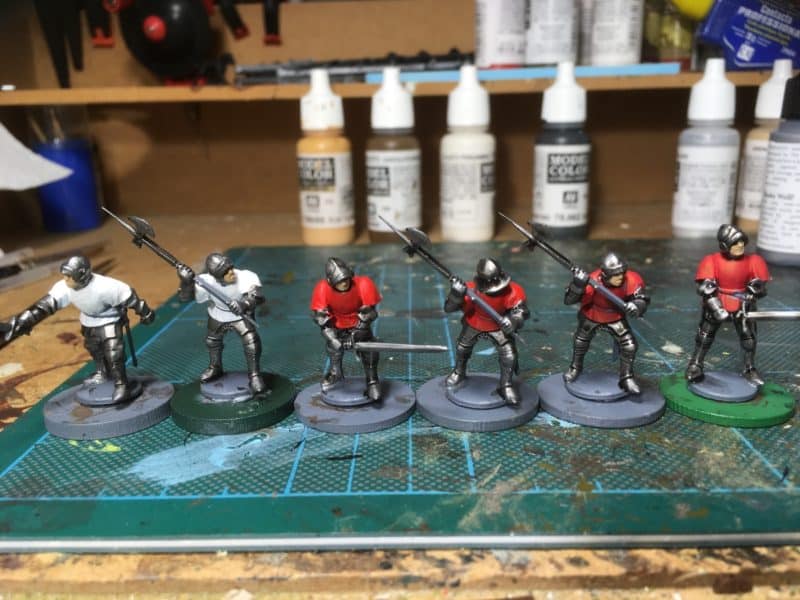
I then picked out the detail using vallejo ‘New Wood’ for the weapon shafts, Flat earth for the leather strapping, Leather brown and saddle brown for the scabards and other leather wear. I also picked out the flesh and used off white for the trousers (hose) that show at the back of the legs. Finally, the swords and scabbards were detailed with Brass and black where appropriate. As a final touch, I washed some of the areas ( Faces and leather straps) with soft tone ink and touched up any obvious errors that I could see and the figures were ready for basing.
Foot knights ready for action!
With six Foot Knights and the Pikemen added to my Lion Rampant retinue, my army is starting to take shape. I’ve sent off for a book on WOTR colours, so when it comes to painting the figures with tabards, I will have a better idea of how to approach the subject. With 18 more Foot Knights in full Harness to complete, I’ll have time for a bit of research!
The Retinue gathers.
THE COMMERCIAL BIT
As always, most of the models, paint, basing and tools that I use come from my shop:
At the time of writing, we still send out post free to most worldwide locations. Here are some direct links to just some of the categories that we have.
Of course, if you have a facebook account, you can follow me here by ‘liking’ my page. I regularly post pictures of what I am working on and you can see what is new in the shop.
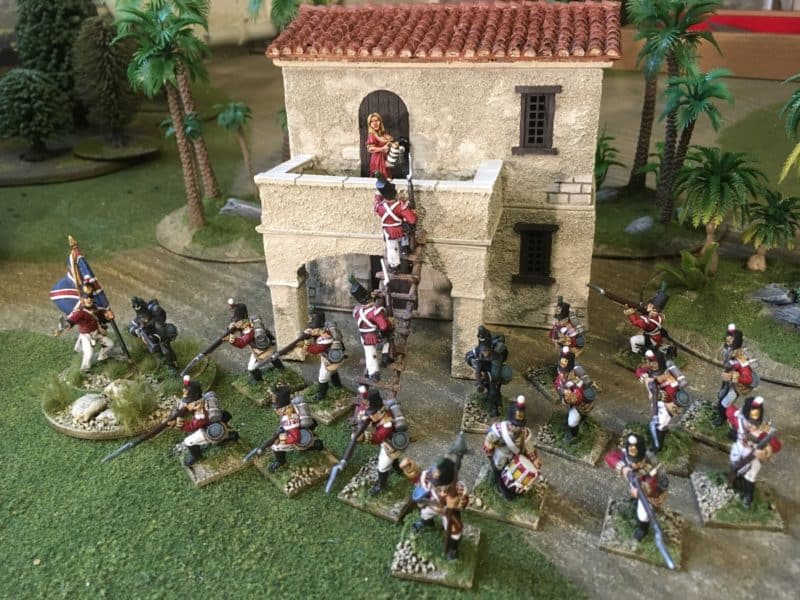
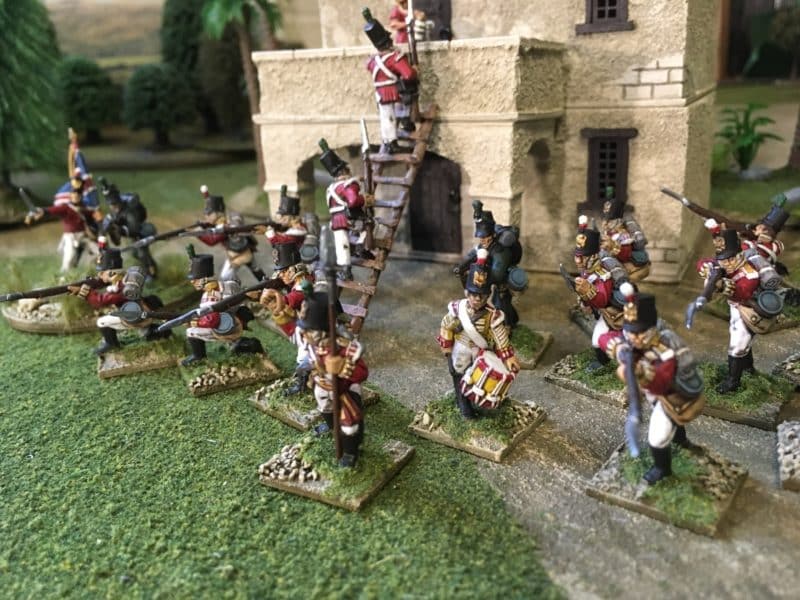
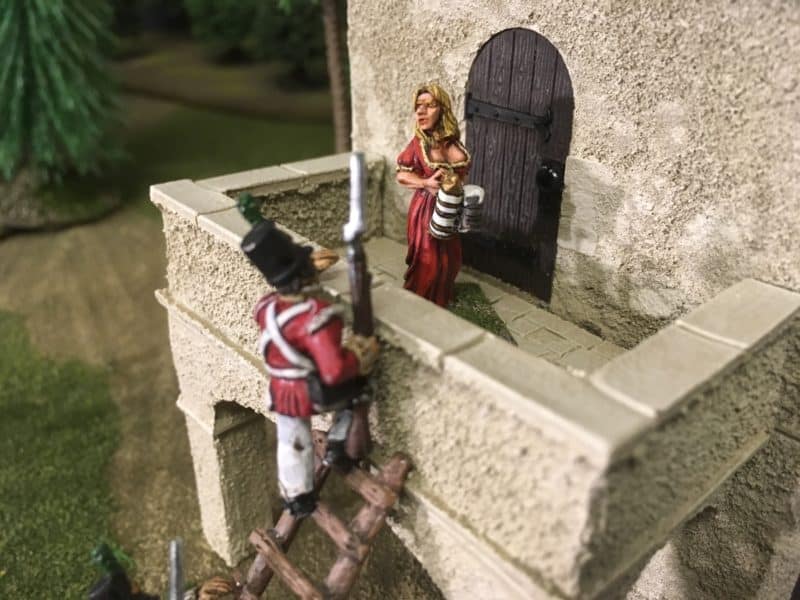
This weekend I will be attending the ‘Bingham Napoleonic Days’ event and on the Saturday, participating in a small Wargames demo game set in the Peninsular. The game scenario has been devised by Andy Callan and he has also put the rules together – they are a version of his ‘Rules for Old Wargamers with Short attention spans’. Pete Harris is building the table. The game is a skirmish around a small Spanish hill top village. My contribution is to supply the British contingent, who will be assaulting the village and driving out the French and rescuing the villagers.
Protect the pub! They still have beer!
As the game is a fictional event and is designed as much as an introduction/explanation of wargaming to a generally bemused set of non wargaming visitors, we aren’t too precious about the details of the uniforms and combatants. However, It was an excuse to dig out some of my unpainted Peninsular figures that I had accumulated and create a ‘Forlon Hope’ that would lead the assault on the village.
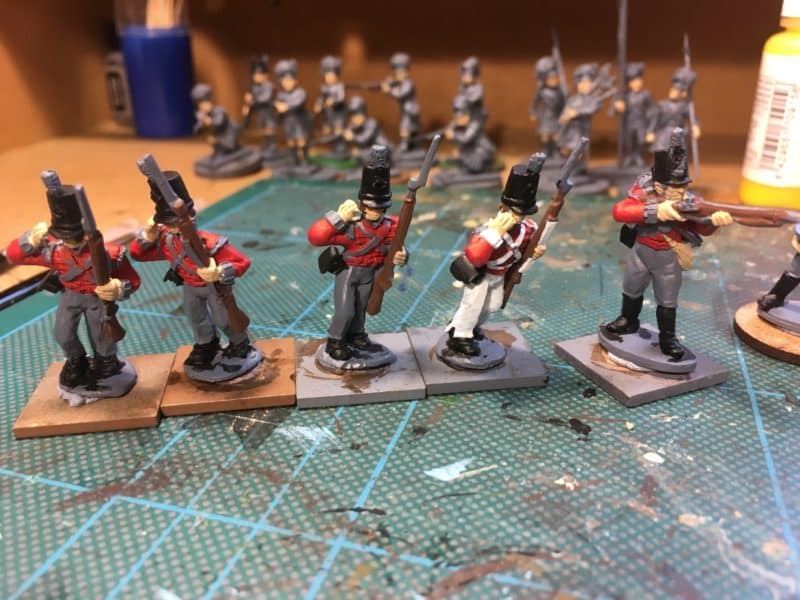
Another six figures to complete!
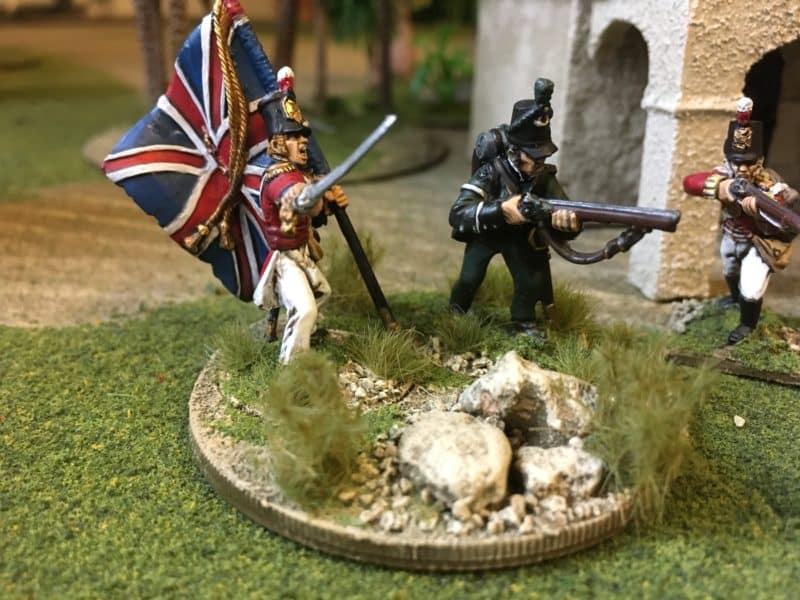
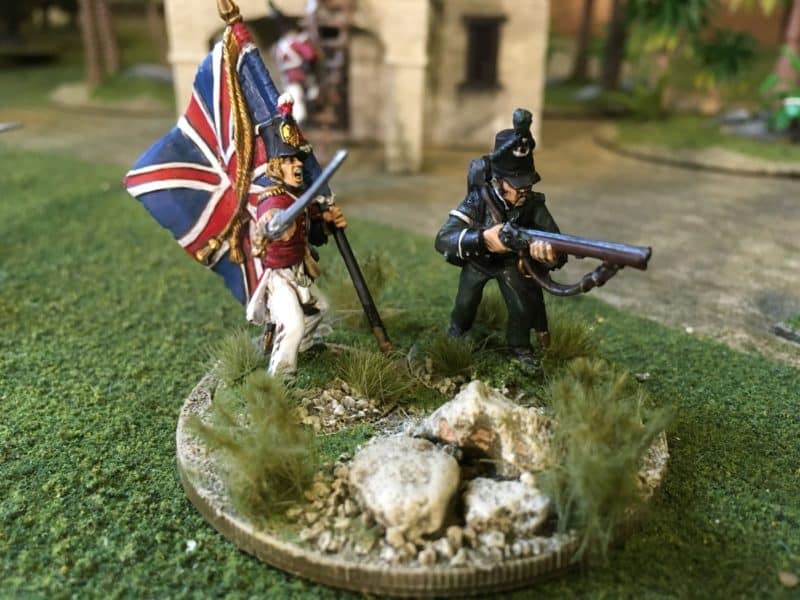
Well, I am just about there but as usual, I will still be painting and basing the last few figures on Friday night. They are not critical to the event, so if they are not finished, it wont be a disaster but it will be nice to have them done. I am quite pleased with the ‘command’ base that I have put together using the two limited edition figures that were supplied with the ‘Albion Triumphant’ supplements for Black Powder.
Albion Triumphant!
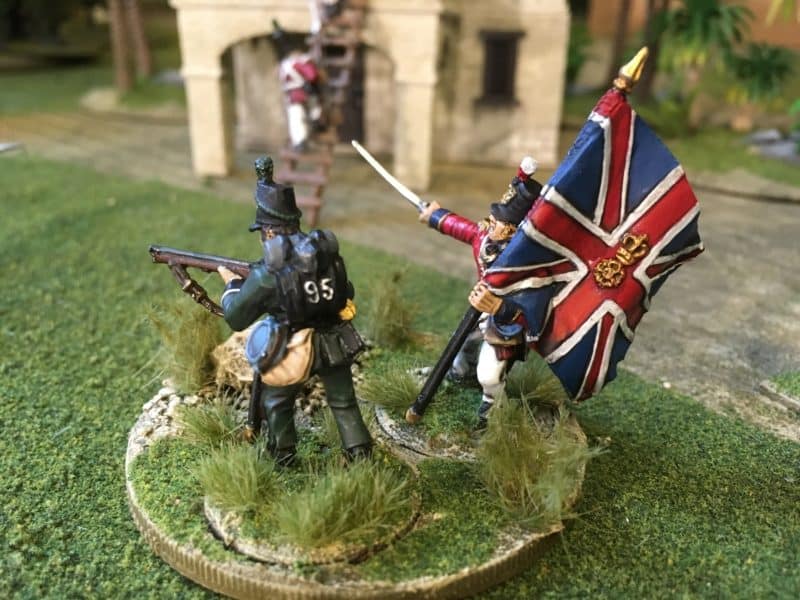
I’ve used a Sarissa Precision Bolt action gun team base that will allow me to use the figures separately if I choose to do so, or to remove them as casualties. These ‘sabot’ bases are very useful and allow a bit more flexibility than permanently basing figures in a Vignette, so that they can be used for wargaming but look nice in the figure cabinet.
Albion Triumpant rear view
Incidentally, when it comes to basing, I always try to work in three’s or five’s. Hence the little rock formation at the front of the base that’s there to ‘balance ‘ the figures. It’s something that I was taught in my earlier career in retail whilst learning how to put up window displays ( something all shops used to do in the olden days!). The idea was the everything should be grouped in threes or fives as it was more appealing to browsing customers. My wife worked in H Samuel and was taught the same trick, although they also had to set the clocks at ten to two as it gave the impression of a smiley face….I digress somewhat!
The Drummer boy is finished – just some tufts to add to the base.
You can see that I have mixed figures for the unit. There is the Warlord figures, some Foundry figures and some from Casting room miniatures ( although these are an off shoot of Foundry). The height differences are minimal and I have no hesitation in mixing and matching. The figures that are still on the workbench ( casting room miniatures) are a bit slighter than the others but a trick to hide that is to add a bit of plastic card to the base to raise them up. It will only need a millimetre or so but helps to level things up. I don’t really have a problem with the slight height differences in some figures. I know that some of my colleagues can get vexed by this but I like the variety and if anything, it is more realistic to have different sized people!
Another view of Albion Triumphant.
So I better get back to painting these last few figures. If you can get to Bingham on Saturday, you will be able to see them ‘in the flesh’ so to speak! The event is free to attend – just click on the link below for details.
Cheers! Happy Modelling!
THE COMMERCIAL BIT
The details of the Bingham Napoleonic Days can be found here:
Although the figures in this weeks blog are not available from Arcane Scenery ( I think some of them may be OOP) all of the finishing and painting products are, even better, we send post free!
Despite being busy painting, nothing is really finished! I seem to have too many ideas and not enough time, although that isn’t really unusual. So this weeks blog is as much an attempt to re focus as to show what is on my work bench. I guess that I am steadily working my way through the lead pile, although I visited the ROBIN show at the weekend and managed to add to it…more on that later.
The Forlon Hope gathers strength!
My Forlorn Hope gathers strength, with another eight figures completed. The facings are yellow, as they are supposed to represent the 29th Worcestershire’s in the Peninsular. They are all individually based as my intention is that they are for a skirmish game rather than a ‘big battalion’ game.
Ensign completed
The limited edition Warlord Games Ensign is also completed but needs basing. I’m dithering as to whether to put him onto a standard 20mm square base or to use him as a ‘big man’ and base him on a 60mm round base along with the limited addition Rifleman from Warlord. It’s the second option that appeals at the moment as I think they will make a nice contrasting pair.
Riflemen and drummer boy.
As you can see, I actually have two of the Riflemen, so basing one up separately and one with the Ensign will work nicely. I’m going to try a quick paint job on the riflemen as an experiment. I have undercoated them with Army Painter Dark Angel Green and will leave this as the base colour for the uniform, just painting the rest of the detail. Out of focus is the drummer boy for the 29th – yellow is not an easy colour to paint and there are constant queries on social media as to what the best method is. In this case, I have first painted with Vallejo Yellow Ochre and then recoated with Vallejo Deep Yellow. In reality, this is perhaps a bit bright but should show nicely on the wargames table.
Highlanders!
I’ve 48 Highlanders assembled, 24 of which are undercoated and 12 of those have made it to the back of the workbench to have their hands, knees and faces painted in flesh. At the moment, I’m distracted by other projects so these are getting a sort of deferred batch paint job! When ever I have some spare time or paint, I’ll put the next colour on – black hats next!
Napoleonic Trebuchet!
I mentioned above that I had been to the excellent ROBIN show in Nottingham. Being determined only to buy if it would help me complete an existing project, I had kept my wallet firmly in my pocket until I came across the IronGateScenery stand. Well it was loaded with goodies, all produced using 3D printers and top quality too. My will to hold onto my money was broken by the Mortars and siege ladders but then, having succumbed, I bought the rather lovely Trebuchet, the village well and some Aztec scenery – don’t ask, it all just looks fantastic…
Aztec Scenery – the finished product on the Irongatescenery stand.
To be honest, I could have spent a great deal more as the range is superb. There’s a link to their web site at the bottom of the page so go see for yourself.
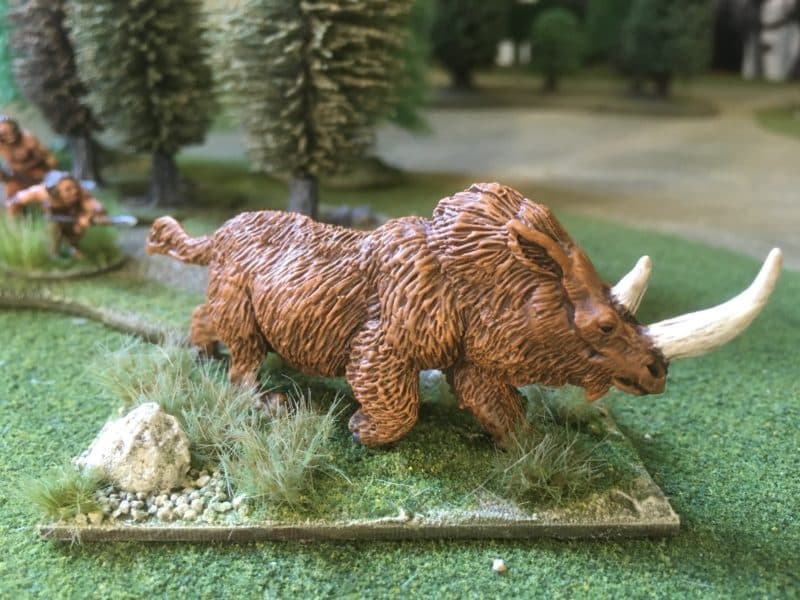
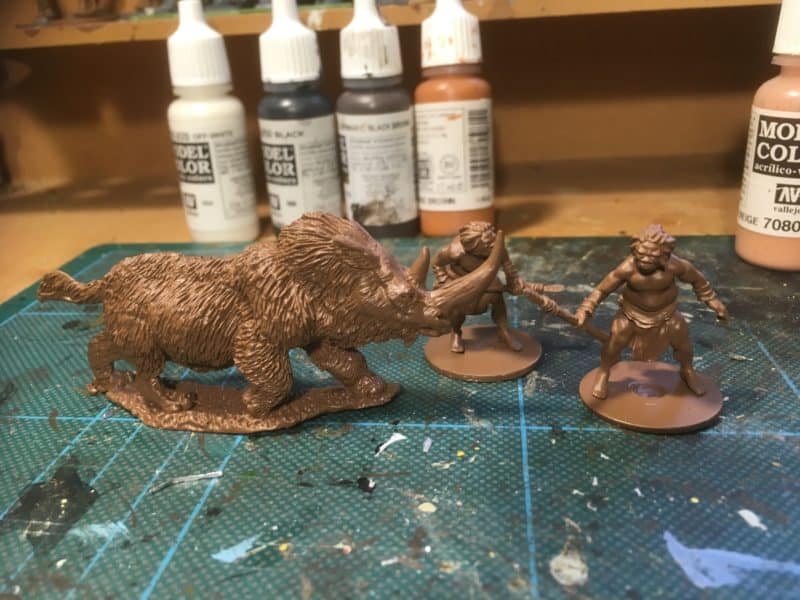
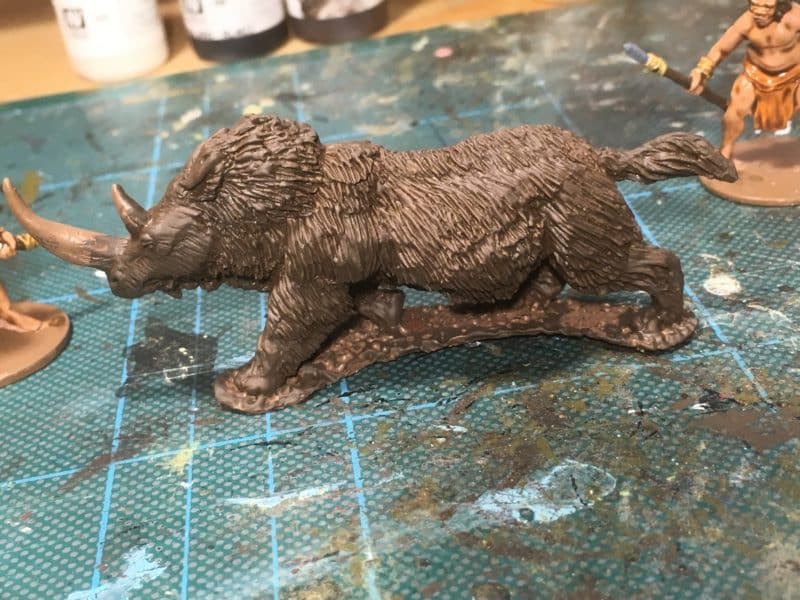
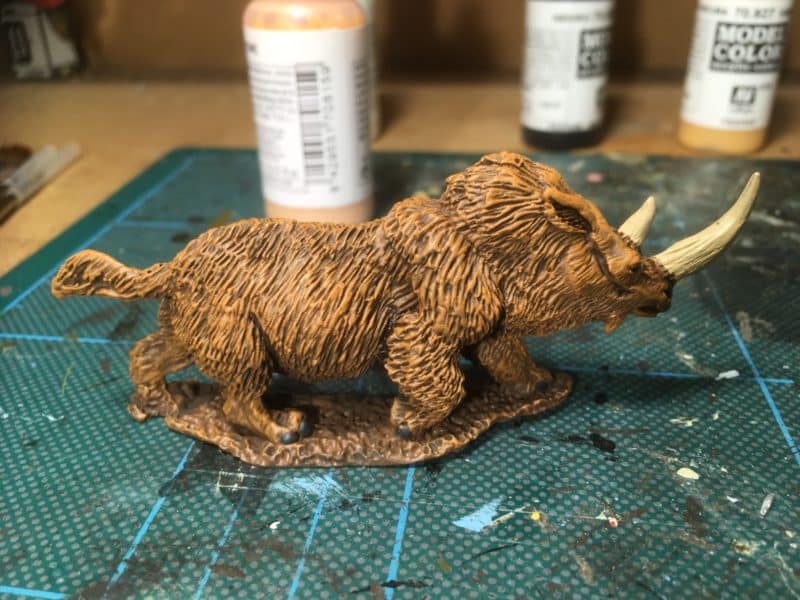
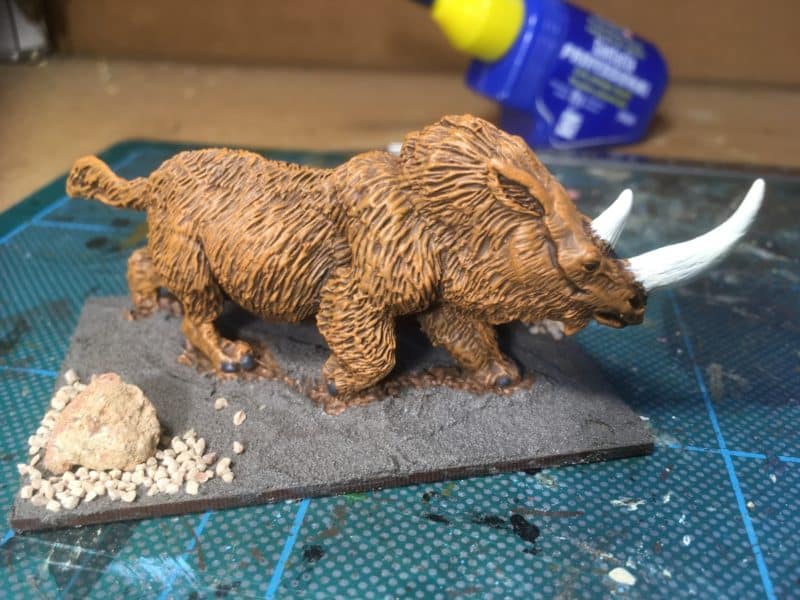
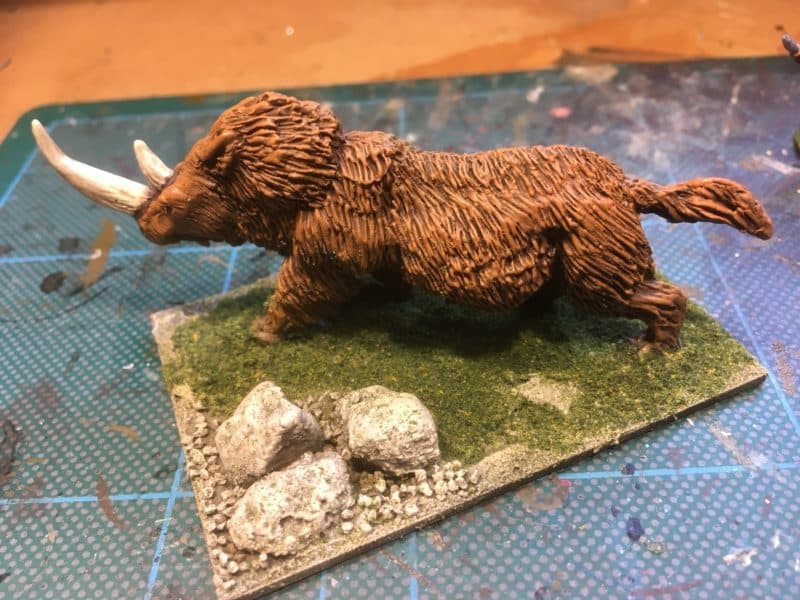
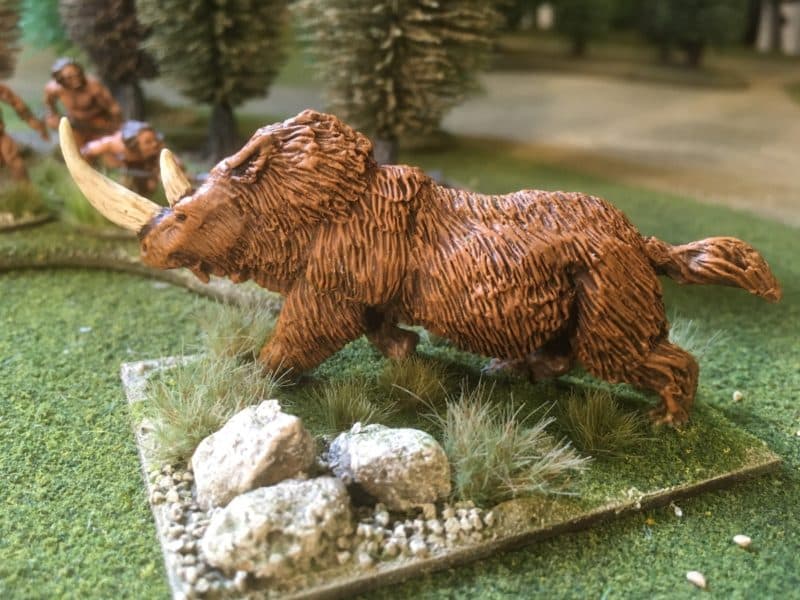
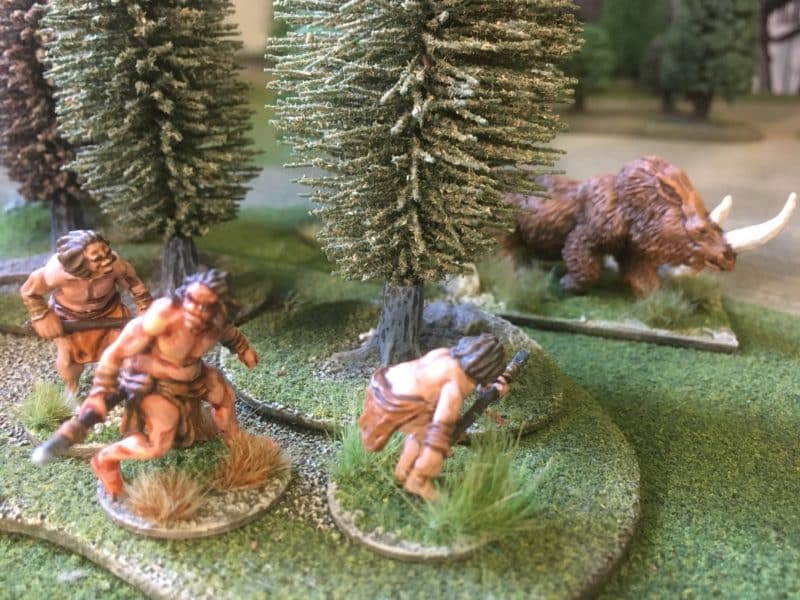
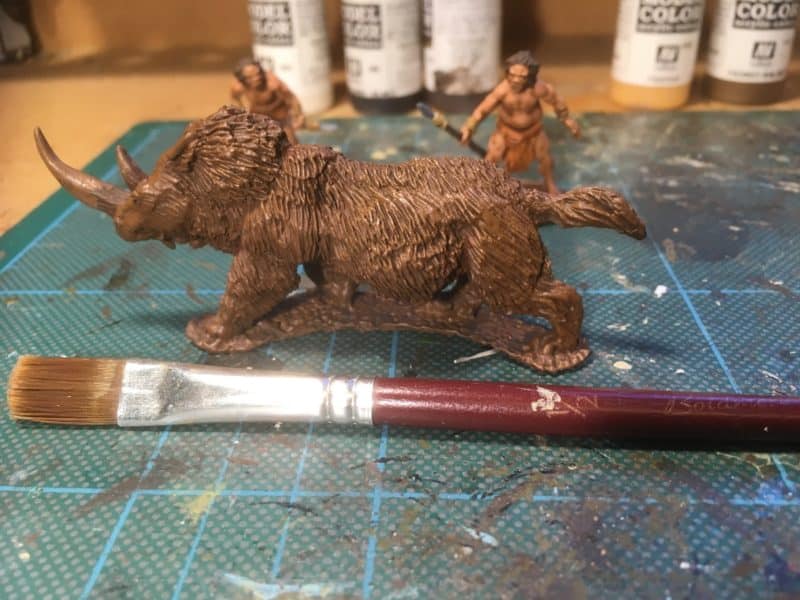
DeeZee White Rhino
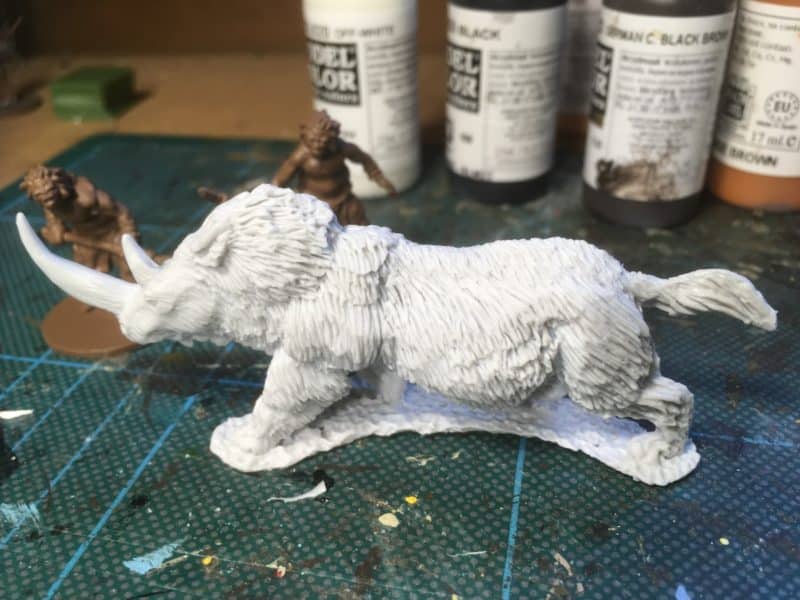
As if I haven’t got enough to do, plans are afoot to expand the DeeZee range. I would like to produce a painting guide to each one of the 37 packs ( with more to come….). I also don’t have my own painted version of this model so I’m starting with him. It’s going to be a busy year!
THE COMMERCIAL BIT
Although the figures in this weeks blog are not available from Arcane Scenery ( I think some of them may be OOP) all of the finishing and painting products are, even better, we send post free!
My painting this week has been a bit hit and miss. That said, I have still found plenty to do, sometimes you have to go backwards to go forwards. So I’ve been tidying, dusting, researching and preparing a couple of projects for the future. One of those projects is in support of the Bingham Napoleonic day to be held on 2nd March. I’ll post a link at the end of this blog to the event itself, but it involves a small Napoleonic demo game set in the Peninsular War. This was a good excuse for another dive into the lead pile to see what I had that would be suitable.
Peninsular skirmishers
I found a few Foundry Peninsular Light infantry and the limited Edition Warlord Games Ensign that came with the first Black powder supplement, Albion Triumphant ! I actually had about 20 figures but decided to focus on just eight, leaving the ensign to one side for the time being, as the rest lent themselves to a quick batch paint.
Early stages of the batch paint
I used my tried and trusted approach to painting, working from the inside out, to block paint the various colours. Flesh first for hands & face; Black hats, boots cartridge cases & bayonet scabbards; Iraqi Sand Bread bags; Pastel Blue water bottles; Flat brown for muskets. It was only during preparation that I noticed there were some differences in the figures. Four of them are clearly light infantry ( kneeling and climbing), four are line infantry but in light kit. Also, these final four are clearly very early Peninsular uniforms.
Facings done.
The early Peninsular chaps still had their hair in the ‘queue’, so I followed the colour scheme for the 29th Infantry 1808 ( Worcestershire Regt) from the book ‘Military Dress of the Peninsular War’. The others I painted as 52nd light infantry. As they are intended to be part of a ‘Forlon Hope’ assaulting a village somewhere in Spain, I’m not too worried that they will be from different regiments. In the same casual approach that I have adopted for the new year, I’m not going to get too excited about the differences in uniform. It will make a nice conversation piece at the game, should any one notice!
Figures nearly complete.
The picture above shows the figures nearly completed – at this point, I just needed to paint the lace and cross belts, brass for the buttons and buckles and touch up any obvious mistakes. The final step would be to paint them in Army Painter quick shade, matt varnish them and then re paint and highlight the lighter colours.
Completed figures awaiting basing.
The picture above shows the completed figures. Of course the next step is to base them but I am waiting to see how our demo board looks before proceeding.
Capture the house!
As you can see, the next project is to finish a house for the board. It may be that we don’t actually use the house. It was originally bought for my Caribbean project but the building looks ‘Spanish’ enough for both the Caribbean and the Peninsular, so whether it’s used or not, it will be another useful edition to my collection.
Assault on House 13!
So, I’ll go back and finish that Ensign and following a meeting planned tonight, I may need to paint a few more figures for the game. I also need to do quite a bit of work to finish the house, so the next few weeks look busy!
THE COMMERCIAL BIT
Although the figures are not available from Arcane Scenery ( I think some of them may be OOP) all of the finishing products are, even better, we send post free!
Well, in the song, Elton sings that ‘I think it’s going to be a long, long time’. As it turns out, I have managed to finish the diorama featuring the Warlord Rocketeer within a couple of weekends. The idea of just getting on with the model rather than spending ages researching has paid dividends. I have cut some corners, made some assumptions and used a bit of artistic licence but I am pleased with the result. Here’s how I went about the final stages of finishing and basing the figures.
Rocket troop basing plan
I replaced the original lances that I made from spears with some thinner 0.8mm brass rod from Albion alloys. I may have cut them a bit too long but went for an unsophisticated approach in keeping with the rest of the model and simply guessed the ‘right length’ based on the reference pictures. The ‘string’ holding the two sticks together is some thin Florists wire wound around the rod and super glued into place. The Pennant on the sticks was simply cut from paper and painted. I used a darker blue than two of the reference pictures show, preferring this over the light blue.
View from the other side.
Once the painting was finished, I positioned the figures on the base that I had chosen. I prefered a smaller MDF Oval base rather than a Rectangular artillery type base. I doubt that the model will get regular use on the wargames table and the oval base looked nicer. I also wanted to keep things close together – I suspect in reality, the horses would have been a bit further away from a rocket that was being launched!
The ‘rocks’ at the front of the base are there to fill a space although they are extremely accurate, having been picked up from a certain area in Belgium!
Basing in Progress
Once I was happy with the layout, I covered the base with Vallejo Dark Earth Texture paste and placed the figures into the paste. There is no need for glue, the paste will hold them securely but in the unlikely event that I decide to re base the figures, it is a simple matter to cut them free. I also sprinkled some coarse grit around the stones and some finer grit at the rear of the base to give some additional texture.
Rocket troop ready!
The next stage was to paint the base. I use a earth coloured emulsion called ‘Delhi Bazaar’ that I picked up from a DIY store as the first coat. I then dry brushed it with the same colour mixed with increasing amounts of Vallejo Iraqi Sand. The rocks and grit were also highlighted with a final coat mixed with white. I then added some scatter (Woodlands Scenics Green Blended Turf) and once this was dry, pressed the rocket launcher tray into place & glued the rocket in. It was then a question of adding some nice tufts and flowers and my Diorama was completed! Incidentally, the officer in the pictures is nothing to do with the Rocketeer. He’s another Warlord figure that I finished basing at the same time.
An Officer observes the launch!
View from the other side.
So another project from the lead pile is complete, Next up some Peninsular War Light infantry for a forth coming Napoleonic day in Bingham – More details to follow!
THE COMMERCIAL BIT
Nearly all of the materials that I used are from my shop, Arcane Scenery:
Our web store shows live stocks, so if something that you want isn’t there, just email me and I will let you know whether we can get it and how approximately long it will take.
I had been taking my hobby a bit too seriously at the back end of last year and getting overly concerned with ‘what is right’. Fortunately, I have my mates to sort me out and inject some common sense into the debate. When it comes to Napoleonics, detail is both a blessing and a curse. It is the details and minutiae of the uniforms that make the period so fascinating whilst at the same time providing a ‘barrier to entry’ to many in the wargaming hobby, who decide that having fun is more important than arguing about buttons and facings and so move into Fantasy or Science fiction for their hobby fix.
That Space marine has got the wrong colour facings!
I had fallen into the ‘too much analysis causes paralysis’ mode and as a result some of the projects that I had consigned to the lead pile were being buried ever deeper because I was worried that I wouldn’t make a decent enough job of them. I’m not sure what happened over the Christmas Holiday period but something triggered my JFDI switch and I decided to just get on with what ever I fancied to the best of my ability and knowledge.
I’m not sure if this is the book but I have enjoyed all of them!
So I started on a little project that had been on my mind for a while. I actually first got the idea years ago from reading a Bernard Cornwell Sharpe novel. I can’t remember which one it was but it involved some troopers from a Rocket detachment pretending to be Lancers. I then saw the Warlord model of a Rocketeer launching his rocket from the ground and thought that he really needed a mate to hold his horse. Put the two ideas together and you have one guy with the rocket sticks looking like a Lancer with his pennant on the rocket sticks and the Officer firing off the rocket on the ground.
Warlord Rocketeer.
As far as I know there is no model of a Rocket detachment trooper riding with the rocket sticks so I would have to convert one myself. So in the spirit of JFDI, rather than wait to find the exact figure or horse, I went through my bits box and this is what I came up with:
Rocket trooper WIP
I’ve no idea where the horse is from – it just looked about right. I did have to ‘dock’ his tail though and remodel his hind quarters. I also added a saddle roll from green stuff and a cup for the rocket sticks from a piece of evergreen tube. The rider is a ‘spare’ from the Perry’s British Light Dragoons set. I have shaved off his boots, cut off his sword hand and added an open hand from a spare Victrix arm.
Rocketeer Diorama WIP
This is how the Diorama was shaping up but at this point I thought it might be worth doing some research. I found these three pictures on Pinterest and added them to my reference board.
Rocketeer Ref 2
Rocketeer reference 3.
As a result, I changed the saddle roll to two saddle rolls or valises, I also extended the docked tail with green stuff as I thought that it looked a bit short. I also made the rocket sticks from some spears and changed the pose so that the rider was now holding the spare rocket sticks.
Rocket trooper WIP 2
Having slept on the changes, I decide that I needed to add a stripe and buttons to the troopers’ overall. Again, a dive into the bits box and I found some Evergreen 10/000 plastic strip which I used to make the stripe and some 40/000 rod that I sliced to make the buttons. Evergreen strip is an excellent material to use and reacts well to liquid polystyrene glue, so a few coats of glue and it was relatively simple to mold the stripe to the legs of the trooper. 40/000 is the equivalent of 1mm and slicing this sized rod is a challenge for my eyes but once glued in place, a quick sanding down meant that they too blended in with the trousers. With hindsight, the buttons are a bit on the large side, as is the stripe but the job was done and if I convert another dragoon, I’ll get a smaller sized evergreen rod to slice! I had intended to photograph the conversion in progress but stupidly undercoated the conversion in my rush to get the project moving. Below is a picture of the trooper, now painted.
Painted Troopers
The next job was to paint the horses. I decided to change from my usual ‘recipe’ for brown horses and try a much paler brown. So the base coat was Vallejo Flat Earth, followed by Cork brown with a Green Ochre top coat/highlight. The Horse furniture was painted with leather brown, blanket dark Prussian Blue and I used Brass for the blanket detail. With the colours blocked in, I will either use a quick shade or ink to bring out the details.
Officers horse colour blocked, awaiting ink wash.
The next task was to get the troopers horse painted. I decided on my usual triad of Chocolate brown, Flat brown and Flat earth for the horse. The rest of the model was painted as above.
Troopers horse, block painted
Troopers horse, reverse view.
As you can see, I don’t have a fixed plan of how things should look and use the photographs to modify or correct as I go along! The diorama is coming together though and in the next picture you might notice that I have decided to use a smaller oval base for the diorama and I have decided to ‘quick shade the Officers horse. I will do the same with the troopers horse using the strong tone or dark brown quick shade.
The diorama is coming together!
A different view – The quick shade will matt down nicely.
Having had a look at the pictures, I decided to add some socks to the troopers horse.
Pull your socks up!
And that is as far as I have progressed with the project this week. I’ll quick shade the troopers horse and then Matt Varnish both horses. I’ll need to highlight some areas on the horse, specifically the blanket and possibily the leatherwork. I’ve also decide to replace the rocket sticks with some Albion Alloys Brass rod that is a bit thinner than the spears that I am currently using. The rocket also needs painting but I am nearly at the basing stage. I think that I will also add some definition to the troopers overalls just above his boots as it doesn’t show up very well.
It is a bit nippy out in my Garage at the moment and even with a heater on, when sitting still, painting, it is easy to get a chill, so my painting sessions are a bit shorter than in the Spring! However, this coming weekend should see a bit more progress – perhaps even basing!
THE COMMERCIAL BIT
Regular readers of my blog will know that most of the materials and models that I use are available post free from my shop here:
This website uses cookies to improve your experience. We'll assume you're ok with this, but you can opt-out if you wish.AcceptRead More
Privacy & Cookies Policy
Privacy Overview
This website uses cookies to improve your experience while you navigate through the website. Out of these cookies, the cookies that are categorized as necessary are stored on your browser as they are as essential for the working of basic functionalities of the website. We also use third-party cookies that help us analyze and understand how you use this website. These cookies will be stored in your browser only with your consent. You also have the option to opt-out of these cookies. But opting out of some of these cookies may have an effect on your browsing experience.
Necessary cookies are absolutely essential for the website to function properly. This category only includes cookies that ensures basic functionalities and security features of the website. These cookies do not store any personal information.