
The next additional to my WOTR army is to be a unit of Cavalry. From the little that I know about the battles in the War of the Roses, it seems that the cavalry were used as a shock unit to punch through already demoralised troops or to cut down those that were retreating. The power of the long bow and the defensive blocks of troops with Pikes or Halberds were usually able to hold Cavalry at bay. I am also told that there were very few, if any major cavalry versus cavalry engagements.
However, no WOTR army would be complete without a unit or two of light and heavy horse prowling around the flanks, looking for the opportunity to sweep away those on foot in a glorious charge!
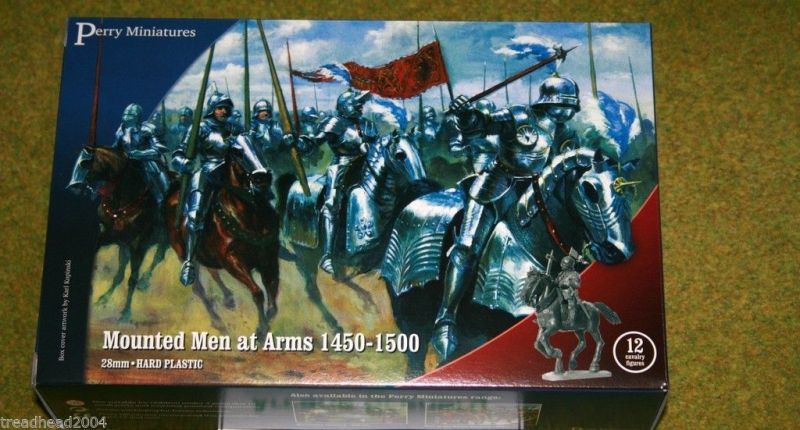
The obvious choice for my army was a box of Perry Miniatures Mounted Men at arms. I wanted to go for the ‘Heavy’ option first. To be truthful, I thought that painting armoured horses would be the easy option! As with all of the Perry Sets, assembly was fairly straight forward, with plenty of choice when it came to weapons and poses. There are seven different horses heads and the horses sides are interchangeable. There is also a choice of armour for the horses. I went for the fully armoured option in most cases, with only two of the horses, lightly armoured.

The assembled Mounted Men at Arms
As you can see, most of my Knights will be armed with lances! At this stage I decided to paint the riders separately from the horses, so they are not yet fully attached! Despite the amount of armour, I undercoated the horses in black primer and then painted the armour with Army Painter plate mail.

Horses primed ready to paint
The next stage was to paint the armour in Army Painter Dark tone.

Armour washed with dark tone ink
I then dry brushed the armour with plate mail, followed by Vallejo Silver. In the picture, you can see that I have over done this – I was trying a new dry brush out and wasn’t careful with how much paint was going onto the models! I then started to under coat the horses. I use Vallejo Chocolate brown as a base.

Starting to paint the horses.
I use three shades of Brown to paint the horses but I’m quite happy to mix things up a bit. The colours are ‘wet brushed/dry brushed’ on from dark to light and I use a light ink wash to tie things together. So the list of colours used are Chocolate brown, Flat Brown, Flat Earth, Mahogany Brown, Orange Brown, Cork Brown, Green Ochre and strong tone ink to wash. I don’t use all of those colours on one horse – just take three and layer them on. When it came to the details , I went a bit OTT with the colours. I was inspired by some pictures of miniatures that I found on the web and I have attempted to copy these. I thought that the brighter colours would look good on the wargames table, so I cannot vouch for any degree of historical accuracy!

Horse flesh done, stating to block in the details.
I’ve also added a bit more shading onto the armour with a light wash of dark tone ink. The next picture shows another two horse in progress. I decided to embellish the armour on one of the mounts with gold and add some ‘socks’ to these horses for variety. I’ve also painted the horse shoes and teeth – a bit OTT but I understand that the horses like to get involved in the fighting, using these as weapons!

Another two war horses!
With three horses done it was time to get some Knights done! I temporarily mounted them on wire and used blu-tack to hold them in plastic tube ready for priming.

Knights ready for priming
To prime them, I used Army painter Plate mail spray.

Knight primed!
I then gave them a good wash of Dark tone ink, before dry brushing them with Plate mail and then again with Silver.

Knights after dry brushing
Once again, I went for a ‘pretty look’ rather than do any real research and I have been free and easy with the few colours that are used on the knights belts etc. I’ve also copied an idea to make the lances stand out and used a spiral design on them. I stress, I have no idea how accurate this is, I just thought it looked good!

Mounted Knight completed – basing started
I used Expo 2mm flexible masking tape to get the spiral effect. If you look closely, there is some bleed on the painting as I simply brush painted the blue over the white base. The next two Lances that I painted were better as I became used to using the masking tape. It really does do what it is supposed to do – It’s flexible and it masks well without taking off the bottom coat of paint!

Three knights ready for basing
You can see that I have started to base the figures using my usual method. The figures are attached to the Renedra base ( I tend to use plastic bases for plastic figures) and then I cover with Vallejo Dark Earth Textured paste and press a few small stones into it.

Basing on the Knights completed – well, nearly!
Once the paste is dry, I paint over it and dry brush with successive layers in a lighter colour to bring out the texture and show off the rocks. It’s then just a case of adding scatter. I will be adding some Gamers grass tufts to finish things off but will wait until all of the figures are done and complete this final task for the complete unit.
So my first knights are ready to take to the table. They are perhaps a bit more suited to a Jousting tournament but I think that they will look imposing on the wargames table once all twelve are completed!
THE COMMERCIAL BIT
Nearly every thing that I use in my modelling projects comes from the Arcane Scenery shop. We supply post free to most worldwide locations!
I have some offers running on the Perry Miniatures WOTR range so that you can build an army similar to the one that I am working on. To see the range of Perry Plastics for WOTR, click here:
PERRY MINIATURES MEDIEVAL RANGE
Vallejo paint and textures are available here – use the shop search bar to find a particular colour;
The Army painter range can be found here:
You can find a range of masking tape here:
We have a huge range of scenic scatters here:
My favourite scenic range of the moment is here:
To see the rest of my WOTR articles just click on the War of the Roses category in my blog:
Happy Modelling!