The year is fast running out and as always at this time, hobby time is at a premium as preparation for Christmas and the various social and family events move to the fore. I am also busy working on a project for the New Year, which although very much associated with expanding my War Of the Roses Army, has slowed my output. Here’s a preview of the figures that I am working on.
Billmen and Bowmen for new units!
So with little to show you from the work bench I thought that I would reflect on a very pleasant trip that I took in late September to visit Tattershall Castle. Situated in Lincolnshire and now owned by the National Trust, Tattershall Castle is unusual in that it was built of brick rather than stone. It’s less of a Castle in the traditional sense but more of a simple statement of power! The Main tower dominates the flat Lincolnshire countryside making it very clear who was in charge!
Tattershall Castle
Lord Cromwell, Treasure of England in 1433 was mainly responsible for upgrading the castle to an opulent stately home. Although not directly involved in any of the fighting during the Wars of The Roses, Edward IV, Henry VII, Margaret Beaufort, Henry VIII, Henry Fitzroy and Charles Brandon all owned the castle during this time and through the Tudor period.
The top of the Tower!
The view from the top!
Visiting historical sites such as Tattershall Castle not only helps me to maintain my enthusiasm and interest for my hobby of wargaming but it is a great way of sharing that hobby with the Missus! We both had a lovely day out, with a nice meal in the sunshine and a bit of exercise to walk off the calories consumed! As a bonus, we witnessed a flypast from the Lancaster of the Battle of Britain flight, which is based nearby at RAF Coningsby, Lincolnshire.
Yes, that speck in the air is a Lancaster! I was too busy watching to take a better photograph!
To think that I have lived ‘down the road’ from this Castle for over 30 years and somehow neglected to visit it, is a bit of a shame. As we are at time of year when New Years resolutions begin to surface, my first will be to make sure that I spend a few more weekends visiting the many heritage site that surround me. Top of the list will be Bosworth Battlefield! To read more about Tattershall Castle and to visit the National Trust site, just click on the picture below.
THE COMMERCIAL BIT
Almost all of the paints, miniatures, bases, basing materials and anything that you are likely to need for your hobby are available POST FREE from my shop here:
Last week I said that I would detail how I painted the unit of Pikemen for my army – However, things have moved on! I have been somewhat diverted from my usual painting by the exciting news that Andy Callan’s rules set for the War of the Roses, ‘Nevermind the Billhooks’ is due to be published in the New Year. I’m afraid that I cant reveal further details at this point. I have been asked to produce a simple step by step guide to painting some figures to help to illustrate the Rules set and so this project has taken over the work bench.
English Archers Ready!
I’m by no means a ‘pro painter’ – my focus tends to be on painting units that I will use on the wargames table. The idea isn’t so much as to show people how to paint to a competition standard, just to give some ideas as to how easy it is to muster a retinue to play the game with some reasonably painted figures.
Billmen underway
This has meant that I have had to give a bit more thought and planning my normal painting routine to show the step by step process. The result is to have partly painted figures to do this, so that they can be photographed for the article. As you can see, I decided to show three different figures and how to produce a basic paint job on each to get them ‘table ready’. This meant building four of each figure in near as possible identical poses and working out a step by step painting plan.
Armoured Billmen
I won’t describe that process here – you will have to wait for the article! However, once these figures are photographed – assuming that they are accepted – I can then move on and complete the final units for my War of The Roses Army. Just to finish, Here is a couple pictures of the Army so far, as usual taken on my i-phone. One day, I must take some nice photos with a proper camera!
Harry Hotspurs Army!
Another view of the Retinue
THE COMMERCIAL BIT
Almost all of the paints, miniatures, bases, basing materials and anything that you are likely to need for your hobby are available POST FREE from my shop here:
The mixed up title of the blog gives some indication of where my focus is….focus being rather inappropriate for my mind set! That said, quite a good weeks painting for me! I actually finished the unit of Pikemen that were on the work bench and also completed four figures for my Caribbean collection. Believe it or not, there is a tenuous connection between these two projects. First of all a look at the Caribbean figures. They are a relatively new pack issued by Trent Miniatures ‘Revolting Slaves arms blanche CAR04’.
CAR04 painting in progress
To paint them. once the figures were cleaned up, I primed them with army painter Leather Brown spray and started my usual block paint and quick shade method. The flesh was Vallejo Chocolate Brown and the clothing a mixture of Whites, Light browns and greys. One figure, who looks a bit like he could be a leader was given a blue coat.
Car04 block painted
I based (copied…) the colour scheme on the figures used on the web store picture. These figures were painted by the talented Dave Woodward. I very much admire his style of painting and his choice of colours and it was seeing these painted figures in the ‘flesh’ that made me grab a pack!
Car04 painted and ready for basing
Once I had finished the block painting, I painted the figures with Army painter Dark Tone quick shade. You could get similar results with the Dark tone ink but I like the tougher finish of the quick shade. I leave the quick shade to dry for at least 24hours and then paint the figures with a matt varnish. I then repaint some of the lighter colours, particularly the white to give a strong high light. It’s then on to basing, using my usual method of coating the base – in this case 25mm round MDF bases – with Vallejo Dark earth texture paste and simply plonking the figures into the paste. I draw some of the paste up around the figure to blend in the metal base and add some small ballast. The paste is strong enough to hold the figures in place, there is no need to glue them.
CAR04 ready to start the revolution!
Once the texture paste is dry, I use emulsion paint to paint and blend everything in, dry brushing this base coat to bring out the detail. Finally using PVA glue, I add the scatter and then some Gamers Grass tufts to finish everything off. They are now ready for the table.
Pike Block completed
So what is the tenuous connection to War Of the Roses pike men? Well, apart from the fact that I was using similar colours whilst painting and basing my Pike men, I have been enthused by the success of the rules set that Andy Callan has developed for our War of the Roses games. This success has made me dig out my embryonic ‘Conflict in The Caribbean’ rules set and following on from last weeks musings about what my next project will be after the War of the Roses army is complete, I am now resolved to get on and complete the Caribbean Rules set. My next play test should be this Friday. If all goes well, I hope to get the rules published in the new year. So, watch this space!
The plan is that in next weeks blog, I’ll detail how I painted the pike men but hopefully by then I will be onto the next unit. If you would like to see what I am up to I do post updates on the Arcane Scenery Facebook page. Just click like to see these in your Facebook feed.
Lets start with what’s off the work bench! I’ve finally finished the battalion of Black Watch Highlanders that I started back in September. It’s taken nearly two months to get these finished and based, although my usual painting routine has been interrupted by a holiday and other domestic events. I have had to do some decorating, although I’m sure that this qualifies as mental cruelty. Some how, gloss painting doors and emulsioning the walls and ceiling of the bathroom doesn’t have the same appeal as painting model soldiers! That said, I have been dragging my heels with this project, so it was good to get them based and in the cabinet ready for the next Napoleonic wargame. Of course I have been working on other projects – WOTR Crossbowmen and the new DeeZee cavemen, so I cant really blame the decorating for the slow turnaround of the Highlanders!
The Black watch completes my Highland contingent at Waterloo.
I will now get back to my growing WOTR army. I have just about enough figures to game using our current big skirmish/small battle rules set, ‘Nevermind the Bill Hooks’. However, I do intend to build the Army to give me a bit more flexibility and the possibility of having enough figures for two players. I have now defined exactly what I need to complete this project. My WOTR army will consist of:
One unit of 12 Archers.
4 units of 12 Archers of which two are finished.
One Unit of War of the Roses Billmen.
4 units of 12 Billmen of which only one is complete.
One Unit of FootKnights
3 Units of 12 Foot knights – all completed – actually it’s unlikely they will ever all be on the table with the army and for the time being, I’m using one of these units as Billmen.
One unit of Pikemen (Crossbow men in the background)
2 units of Pikemen to form a Pike block – one unit completed, the other underway.
Six Mounted men at arms -the rules set that we use has units of 8 cavalry.
1 Unit of 12 mounted men at arms – Completed
1 Unit of 12 Light cavalry – yet to be purchased
The above will be deployed in units of 8’s and as with the Foot knights, I probably will have too many cavalry but will have options!
Unit of Hand gunners
1 unit of 6 hand gunners – completed
Unit of Crossbowmen
2 units of 6 Crossbowmen – Completed
one unit of Skirmishing Archers
1 unit of 6 skirmishing archers – completed
2 Artillery pieces – yet to be purchased.
Once this list is complete, my WOTR project will be more or less complete, although I suspect I will add a few character figures along with some baggage pieces and of course, some scenery. So this gives me about 84 or so figures to paint, plus the artillery.
Pikemen on the painting board
The pikemen are already on the painting table and in order to complete the unit, I’ve had to put a few men at arms with spears and command figures in the block to make up the numbers. It will just about pass though and should look good enough on the table.
So the plan is to complete this army for the end of the year, so that I can start the New Year with a fresh project. Quite what that will be I have yet to decide. I have a Napoleonic Caribbean force to get finished and I have a few Indian wars/AWI models in the lead pile. Perhaps I might finally get on with painting a few tanks for WW2…..
THE COMMERCIAL BIT
We carry the full range of Perry’s Plastic sets and supply them post free to most worldwide locations at the time of writing. You can see the WOTR sets here:
I have been working on completing my War of the Roses army and I wanted to add some crossbowmen and hand gunners to my contingent. Apparently, whilst used for sieges, there is no primary evidence that Crossbowmen actually took to the field of battle during the Wars of the Roses. I am now able to confirm that this is not the case, by providing photographic evidence of crossbowmen at the Battle of Bingham Fields 14.55. Mind you, I did put them back in the storage box at half past three, so it was only a short debut for them…
Crossbowmen in action at the Battle of Bingham Fields.
Regardless of whether they did or didn’t actually fight in the main battles of the WOTR, the Perry’s include crossbowmen and hand gunners in the Mercenary Infantry boxed set and illustrate them as Burgundian Mercenaries. It would be a shame not to complete these figures and make them available as small units for my Army. The current set of rules that we are using for our WOTR battles ‘Never mind the Billhooks’ have been written by Andy Callan and are in the process of play testing. The rules allow for small units of Skirmishers that can act independently of the main army to protect the flanks, larger units, provoke your opponent, skulk in cover and generally be a nuisance in the game without ever being a decisive force. Crossbowmen and Handgunners are ideal for this role in the game, (although bowmen and Irish Kern are also permitted) and protecting them with Pavises will also help when facing Archers or other skirmishers.
Pavises with LBM decals applied
Here is a quick guide as to how I went about painting these figures, as well as some of the assumptions that I made whilst doing so. As usual, I tend to ‘batch paint’ my figures for my wargames units and so once they were assembled, I undercoated them with Army Painter Leather Brown spray.
Crossbowmen primed and ready to paint – flesh already done.
The next step was to start the block paint process. I tend to work from the inside out and top to bottom of the figure but this is only to give some structure to my painting. I paint in short ‘bursts’, up to an hour in one sitting, so having a routine allows me to pick up where I left off without having to think too much about the next stage. Whilst painting the helmets in Army Painter plate mail, I realised that it made sense to split the 12 figures into 3 sub groups for painting as they had slightly different clothing.
Crossbowmen – plate mail added
When it came to painting the clothing, I used Vallejo 70809 Royal blue and 70820 Off White for the Sur coat or tunics. The Royal blue being a nice bright blue to differentiate the Burgundian’s from the other troops in my retinue. The rest of the clothing was painted with a choice from 70821 German Camouflage Beige, 70814 Burnt Red, 70869, Basalt Grey and 70899 Dark Prussian Blue.
Clothing on Crossbow men block painted.
When it came to the crossbows, I painted these in Vallejo Old wood 310 with the detail picked out in Dark Brown and plate mail for the metal parts. The boots and leather equipment were painted in a variety of browns. I must confess that beyond looking at the box art, I didn’t put too much time into researching ‘uniforms’. I wanted to get these figures done fairly quickly. So much so, that I stopped taking pictures of the step by step process…However, the hand gunners in the next picture will give you an idea as to how the figures look after the block painting is done. Note the crosses on the front and back of the tunic. I had been concerned that my painting wouldn’t be up to this but in the event, it was straight forward enough.
Hand gunners being batch painted.
Hand gunners – rear view
The next stage is to paint the figures with Army Painter Quick shade Dark Tone. This stuff is excellent at pulling the colours together, adding shading and bringing out the detail on the figures. I find it superior to inking the figures as it provides a hard varnish that will help to protect the figures when gaming. However, the Quick shade (and ink, for that matter) can ‘dirty’ the figures, particularly the lighter colours. It is a straight forward job to repaint these areas using the shading as a guide, this also has the effect of adding some additional highlighting.
Crossbowmen – you can see that I’ve repainted the whites.
When it came to the pavises, there are two distinct types supplied in the kit. I decided that the one’s with the spikes should be mounted separately on 15mm x 20mm bases so that I could use them for either the crossbowmen or handgunners. The Pavises without spike would be glued straight onto the other six crossbowmen figures (the ones that were loading). I used some milliput to make a mound on each base and stuck the pavises straight into it. You can also see that I have attempted to blend the LBM decals into the pavises by painting around the edges and adding some ‘mud’ to the bases.
Loaders with pavises
An attackers view of the Crossbowmen!
The pavises were simply glued onto the back of the figures. To make them look more accurate, I really should have provided straps but as I have repeatedly said, these are wargaming figures not museum exhibits. I think that they will pass muster…
I based the figures using my current basing method. Vallejo dark earth paste was placed on the bases with some ballast added to the edges. The bases were then painted and dry brushed to highlight the stones and detail before adding some woodland scenics scatter. Another three units are ready to be added to my army – ‘skirmishers’ fight in units of 6 in our rules. The opening picture to my blog shows the crossbowmen posed in front of part of my army. I’ll let you know how they fight in a future battle report!
THE COMMERCIAL BIT
Almost all of the paints, miniatures, bases, basing materials and anything that you are likely to need for your hobby are available POST FREE from my shop here:
You can tell that I have been distracted over the last month, as my blog has been focused as much on Battle reports and shows as it has on painting. Add to this, I have only written two blog posts since the end of July and you would be forgiven for thinking that I have had very little hobby time. My Wife would disagree! To be fair, it’s been a bit of a mixed month, with some nice weather, meaning that gardening and family barbeques have been a major part of my leisure time.
John Rattenbury takes to the seas!
However, I always find time for my hobby and the truth is that I have not been quite as focused as I usually am when it comes to churning out the next unit for one of my armies. Duncan at Trent Miniatures hasn’t helped. He keeps producing some lovely character figures for his range and often pops into the office to show me the latest release. I was very taken with the new figure of John, or Jack Rattenbury, a famous Devonshire smuggler from the turn of the 18th century. I stopped everything to finish him and add him to my collection of maritime subjects!
John Rattenbury, the lastest addition to the crew!
I’ve also been working on my WOTR army, assembling the balance of a box of Perry’s European Mercenary’s. With a bit of ducking and diving, I now have 12 crossbow men assembled and primed, 6 handgunners and 12 Pikemen ready for painting.
The next batch of my WOTR army ready for painting.
With the crossbowmen being the first on the list to complete, I painted the Pavises that go with them and used a set of LBM decals to finish them off. I think that they will need a bit more work before I add them to the figures but I was very pleased with how straight forward the LBM decals were to apply, despite making a few mistakes with positioning.
Pavises with LBM decals applied
When chatting to Duncan about my WOTR project he reminded me that the Newark Character range has a model of Sir John Savage from the Battle of Stokes Field. Well, it would be rude not to include him in my army! Once again, Everything was put aside whilst I finished Sir John!
Sir John Savage joins my retinue!
As if this all wasn’t enough, I am working on the final Highland Battalion for my Napoleonic Army, the Black Watch, or 42nd Highland Battalion. I wanted to do a ‘test shot’ of the tartan pattern that I would use and so finished off a sergeant to see how he looks next to the other battalions.
Black Watch Sergeant next to the Gordons and Camerons.
I think that I’m going to go with the dark pattern, essentially, my usual approach to painting Tartan but with more black lines! He looks a bit better in the next picture, as I have retouched the hat band and covered the grey base.
Another picture of the Sergeant of the Black Watch
As is often the case with my painting, I’ll mull over whether to change things – I’m thinking of a slightly paler green tartan stripe but I better make my mind up as the other 11 on the painting desk are moving towards completion!
42nd Battalion Highlanders!
As if all of this wasn’t enough to keep me busy, there is also the small matter of the forthcoming release of the DeeZee Cavemen. There will be 10 cavemen in three blisters and I had test shots of four of the poses to play with. As a teaser, here is a picture of my first attempt at painting them. All being well, there will be more information and details of how I painted them to follow!
DeeZee Cavemen – sculpted by Matt Sofar of knuckle bones miniatures.
So, August has passed and we are well into September and the weather here already has that Autumnal feel, with the evenings being both cooler and shorter. I doubt that I will find much more time for painting in my busy schedule but perhaps this month, I can be a bit more focused!
THE COMMERCIAL BIT
Almost all of the paints, miniatures, bases, basing materials and anything that you are likely to need for your hobby are available POST FREE from my shop here:
Well, the recent deluge has caught me out and I was unable to continue with my WOTR cavalry as the next six models were yet to be undercoated. Mrs W made it quite clear that spraying indoors was unacceptable, even in the garage, which is accessed through the kitchen door. So I have had to wait for the weather to brighten up before continuing.
The six completed cavalry.
As you can see, I have now completed six of the heavy mounted men at arms, so I have made some progress. I’ve also mounted the riders for the next batch on the temporary holders ready for spraying, so I am good to go once the rain stops.
Let us Spray…knights ready for undercoating.
Despite this hitch, I always have something on the work bench and so I continued with the batch paint of the Highlanders that will make up the balance of the 92nd Gordon’s. The beauty of the batch paint approach is that you can keep a unit progressing and know exactly where you are in the process, even if you have to pause to do something else.
Batch painting highlanders
So a bit more progress in a slightly different direction. The decision I have to make now is whether to crack on and finish the Highlanders or once I can get the Knights undercoated, go back to them. I’m under no real pressure to do either at the moment as I now have sufficient troops to fight club battles in both Napoleonic’s and WOTR. I am favouring the Highlanders though as now that I’ve started them, it would be good to finish them. In reality, I’ll probably do a bit of both, depending on the time I have, after all, nothing like a bit of variety to spice things up! So long as I don’t end up with tartan on my WOTR knights all will be well….
White cross straps and lacing next!
So a short blog for me – besides there’s a break in the rain – I’m off to do some priming!
THE COMMERCIAL BIT
Just a short reminder that nearly everything that I use for my modelling is available post free from my shop. You can see the huge range of models, paints, glues and accessories here:
The next additional to my WOTR army is to be a unit of Cavalry. From the little that I know about the battles in the War of the Roses, it seems that the cavalry were used as a shock unit to punch through already demoralised troops or to cut down those that were retreating. The power of the long bow and the defensive blocks of troops with Pikes or Halberds were usually able to hold Cavalry at bay. I am also told that there were very few, if any major cavalry versus cavalry engagements.
However, no WOTR army would be complete without a unit or two of light and heavy horse prowling around the flanks, looking for the opportunity to sweep away those on foot in a glorious charge!
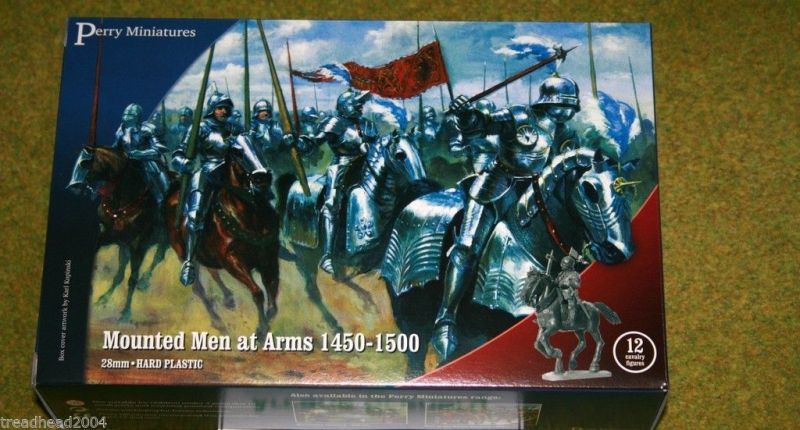
The obvious choice for my army was a box of Perry Miniatures Mounted Men at arms. I wanted to go for the ‘Heavy’ option first. To be truthful, I thought that painting armoured horses would be the easy option! As with all of the Perry Sets, assembly was fairly straight forward, with plenty of choice when it came to weapons and poses. There are seven different horses heads and the horses sides are interchangeable. There is also a choice of armour for the horses. I went for the fully armoured option in most cases, with only two of the horses, lightly armoured.
The assembled Mounted Men at Arms
As you can see, most of my Knights will be armed with lances! At this stage I decided to paint the riders separately from the horses, so they are not yet fully attached! Despite the amount of armour, I undercoated the horses in black primer and then painted the armour with Army Painter plate mail.
Horses primed ready to paint
The next stage was to paint the armour in Army Painter Dark tone.
Armour washed with dark tone ink
I then dry brushed the armour with plate mail, followed by Vallejo Silver. In the picture, you can see that I have over done this – I was trying a new dry brush out and wasn’t careful with how much paint was going onto the models! I then started to under coat the horses. I use Vallejo Chocolate brown as a base.
Starting to paint the horses.
I use three shades of Brown to paint the horses but I’m quite happy to mix things up a bit. The colours are ‘wet brushed/dry brushed’ on from dark to light and I use a light ink wash to tie things together. So the list of colours used are Chocolate brown, Flat Brown, Flat Earth, Mahogany Brown, Orange Brown, Cork Brown, Green Ochre and strong tone ink to wash. I don’t use all of those colours on one horse – just take three and layer them on. When it came to the details , I went a bit OTT with the colours. I was inspired by some pictures of miniatures that I found on the web and I have attempted to copy these. I thought that the brighter colours would look good on the wargames table, so I cannot vouch for any degree of historical accuracy!
Horse flesh done, stating to block in the details.
I’ve also added a bit more shading onto the armour with a light wash of dark tone ink. The next picture shows another two horse in progress. I decided to embellish the armour on one of the mounts with gold and add some ‘socks’ to these horses for variety. I’ve also painted the horse shoes and teeth – a bit OTT but I understand that the horses like to get involved in the fighting, using these as weapons!
Another two war horses!
With three horses done it was time to get some Knights done! I temporarily mounted them on wire and used blu-tack to hold them in plastic tube ready for priming.
Knights ready for priming
To prime them, I used Army painter Plate mail spray.
Knight primed!
I then gave them a good wash of Dark tone ink, before dry brushing them with Plate mail and then again with Silver.
Knights after dry brushing
Once again, I went for a ‘pretty look’ rather than do any real research and I have been free and easy with the few colours that are used on the knights belts etc. I’ve also copied an idea to make the lances stand out and used a spiral design on them. I stress, I have no idea how accurate this is, I just thought it looked good!
Mounted Knight completed – basing started
I used Expo 2mm flexible masking tape to get the spiral effect. If you look closely, there is some bleed on the painting as I simply brush painted the blue over the white base. The next two Lances that I painted were better as I became used to using the masking tape. It really does do what it is supposed to do – It’s flexible and it masks well without taking off the bottom coat of paint!
Three knights ready for basing
You can see that I have started to base the figures using my usual method. The figures are attached to the Renedra base ( I tend to use plastic bases for plastic figures) and then I cover with Vallejo Dark Earth Textured paste and press a few small stones into it.
Basing on the Knights completed – well, nearly!
Once the paste is dry, I paint over it and dry brush with successive layers in a lighter colour to bring out the texture and show off the rocks. It’s then just a case of adding scatter. I will be adding some Gamers grass tufts to finish things off but will wait until all of the figures are done and complete this final task for the complete unit.
So my first knights are ready to take to the table. They are perhaps a bit more suited to a Jousting tournament but I think that they will look imposing on the wargames table once all twelve are completed!
THE COMMERCIAL BIT
Nearly every thing that I use in my modelling projects comes from the Arcane Scenery shop. We supply post free to most worldwide locations!
I have some offers running on the Perry Miniatures WOTR range so that you can build an army similar to the one that I am working on. To see the range of Perry Plastics for WOTR, click here:
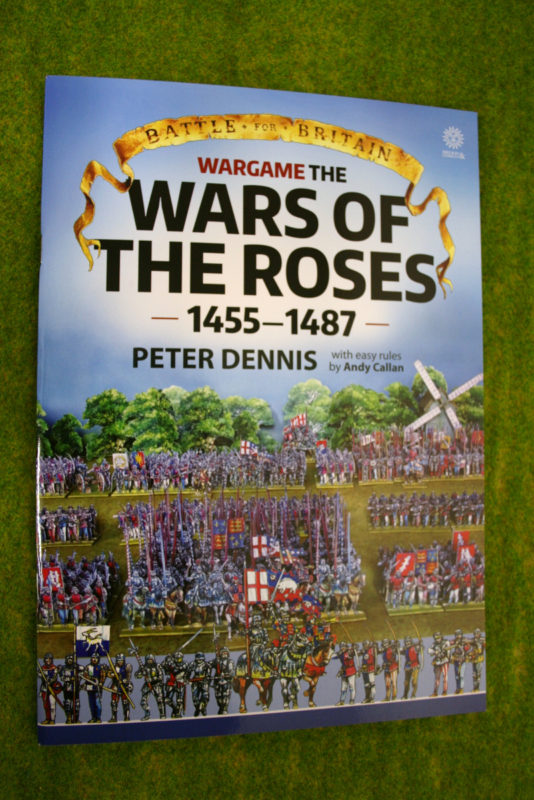
My gaming groups foray into the War of the Roses continues as we play test the rules set that Andy Callan has developed. As you can see from the title, there is a nod in the direction of the Two Fat Lardies style of play. The WOTR rules that we are using have morphed from our ‘Rules for Old wargamers with short memories’, which we used for our Napoleonic skirmishes, also written by Mr Callan. Andy has a long history of rules writing and tinkering. Indeed, his rules set ‘Loose files and American Scramble’ originally published in Wargames Illustrated back in the ’80’s (and incidentally, the only article to be republished in the magazines history) has often been copied and they are still in use today. More recently, Andy has collaborated with Peter Dennis on the ‘Paper Soldiers’ Project, with Andy writing the rules for many of the books.
Andy Callan’s rules set are included with the book.
The battle report that follows is a run through of the latest manifestation of the ‘Never mind The Billhooks’ rules. As usual, I was playing, so the report will inevitably be biased and one sided, which makes it totally authentic when compared with accounts of the actual battles in the War of the Roses as written by the chroniclers of the time…
The Battle of Bingham Fields – the set up.
The initial set up allows the players to deploy their troops as they see fit, with the army being commanded by a number of officers or characters. In our battles, the commanders are all fictitious, with my commanders named after Tottenham players, Harry Hotspur being the leader.
Sir Harry Hotspur makes ready to advance.
The Commanders are activated by drawing cards and once activated, they can give orders to the appropriate units within their command range. To speed the game up, at the start, players are able to freely move their units, one at a time, until either the first contact or shooting action. At which point the game is then controlled by drawing the cards. This allows the players to manoeuvre before battle is joined!
Skirmishers!
Skirmishers are semi independent of the control system, in that they are activated by their own card but can also be given orders if they are within range of a commander.
My cunning battle plan – go right!
My cunning battle plan was to send my cavalry (out of shot in the above picture) and one unit to the left as a feint, whilst switching the main attack to the right. This would allow me to bring the bulk of my archers to bear against Lord Binghams force. In the game, Archers have a limited arrow supply, so it is important to choose your target carefully. You can see that I had one gun to provoke the enemy into moving. Whilst Artillery isn’t too effective in the game, it does wear the enemy down if they don’t get out of the way!
Archers Loose!
With my archers screened by both the woods and skirmishers on the flanks, they were free to unleash an arrow storm on Lord Binghams forces whilst the Men at Arms advanced in the centre.
Irish Kern attack!
There was a moment of consternation when a band of Irish Kern skirmishers burst out of the woods and hit the flank of my archers. Lord Bingham had also finally managed to move his archers around the other side of the wood to threaten my flank.
Lord Bingham’s Archers – down to their last two shots!
However, The Cavalry, commanded by Lady Ravenshead were able to halt the enemies advance and Sir Harry Hotspur chased off the Irish to secure the left flank.
Hold the flank!
Meanwhile, Sir Eric Diehard had closed with the enemy, and true to form, was giving them a good kicking (you need to be a Spurs fan to appreciate the tactical nuances…), pushing Lord Bingham back.
Captian Eric Diehard secures the right flank
With Harry Hotspur now able to join his loyal Captain in the push, Lord Bingham’s force began to waver.
Harry leads his forces to Victory!
With numerical superiority established on this side of the battlefield, numbers began to tell and as casualties mounted, Lord Bingham was forced to withdraw from the field. In fact, Lord Bingham was forced to retreat across a turnip field to make his escape! He would be back to fight again once he had cleaned up his armour!
Victory for Harry!
Not quite a resounding victory for Sir Harry but a victory nonetheless!
The battle was a good run through of the rules and many lessons learnt. To be fair, my opponent, Pete, had not played this particular version of the rules before, so I was at a slight advantage. During the post battle discussion, Andy has since come up with some amendments that will allow the battle to flow more easily. As usual, with rules writing, there is a conflict between allowing the rules to reflect some of the character of the period whilst allowing the game to flow. I think that we are getting there. I haven’t described the effect of some of the ‘special cards’ that can be introduced into the game that allow for say, an arrow resupply or for a commander to waver or even change allegiance. The method of calculating a units morale is still quite cumbersome and will be refined.
I particularly like the idea of naming your characters and using them consistently over a series of games. I have found that they can take on a life of their own and add extra fun to the play. Once we have a settled rules set, with Andy’s permission, I will publish a PDF for download.
THE COMMERCIAL BIT
If you are a wargamer or modeller you will find that Arcane Scenery has a very well stocked shop that should be able to help with most of your modelling requirements. Even better, we supply post free to most worldwide locations! Click here to see our ranges:
Back in February, I picked up a Trebuchet and some other bits and pieces from Iron Gate Scenery at the Robin Show in Nottingham. Although it was a ‘generic’ model, more fantasy than an accurate scale model, it looked great and I thought that it would make a nice objective for my WOTR army.
Iron Gate Trebuchet!
As my current focus is on completing my WOTR army, I thought that I would have a break from painting figures and get on with completing the Trebuchet. I had also just picked up a copy of the latest ‘Painting War’ magazine that covered the Holy War in the Middle ages. There was a nice tutorial in this issue that showed how to paint siege engines and I decided to follow this guide to complete the Trebuchet.
The latest ‘Painting War’ Magazine
So here is the stage by stage process that I followed.
Trebuchet primed with black spray.
The first job was to prime the model using Army Painter Black spray primer. This gives a good base to work from and if I miss any of the difficult parts to get to, the black undercoat will look like shadows.
Next coat – Chocolate brown
The next stage was to paint everything in Chocolate Brown, Vallejo 70872. Use the biggest brush that you feel comfortable with. At this stage I was using a sort of ‘wet brush’ technique, to make sure that the paint covered everything and got into most of the deep cracks.
Trebuchet Stage 2 – Flat Brown
Stage 2 was to use a heavy dry brush of Vallejo 70984 Flat Brown. I covered most of the model but the dry brushing technique meant that some of the Chocolate brown was left in the recesses.
Trebuchet Stage 3 Flat Earth
Stage 3 and another dry brush with Flat Earth, Vallejo 70983. This was a lighter dry brush than before and I was careful to take nearly all the paint off of my brush before starting the technique. I found that the edges of the model picked up the paint quite quickly – a bit more care was needed on the flat surfaces.
Trebuchet Stage 4 Orange Brown
Stage 4 was to dry brush with Orange Brown, Vallejo 70981. Again a lighter dry brushing technique was used. Had I not been following the article in the magazine, I might have stopped at this stage! But onto to stage 5.
Trebuchet Stage 5 Yellow Ochre
Stage 5 and another light dry brush with Yellow Ochre 70913. I would not have chosen this colour without the guidance of the article but it certainly brought out the detail and looks very realistic.
Trebuchet Stage 6 – Basic Skin!
Stage 6 and the final dry brush with Basic Skin Tone Vallejo 70815. I would certainly never have thought of using this colour as a highlight on wood! To be honest, at first, I chickened out and only gave the model the lightest of dry brush highlights with this colour. However, I think that it works well and I have learnt something new!
Trebuchet nearly completed
The next stage was to wash the whole model with Army painter strong tone. I watered this down very slightly but the effect was to tie all the dry brush coats together and to add shade and depth to the model. I then went back and used the driest of dry brush coats with the Basic Skin to bring out the detail again. You can also see that I have picked out the iron work in Plate mail and then washed this with Army Painter Dark Tone Ink. I’ve also painted the leather pouch holding the stone with a coat of Leather Brown, Vallejo 70871. I then dry brushed this with Orange brown and a mix of Leather Brown and yellow ochre. The whole thing was then washed in Army Painter Strong Tone.
Trebuchet – almost battle ready!
Two other points to note. The stones were painted with Stone Grey, Vallejo 70884 ( currently my new favourite colour…), washed with Army Painter Dark tone and then highlighted with stone grey and a mix of stone grey and white. The string that I am using is just some parcel string that I had in my ‘spares box’. It is slightly thinner than the stuff supplied with the kit. To make it less white I dyed it in some tea…Yes, standard Yorkshire tea from the tea pot!
Trebuchet ready to fire!
The final task was to add the ‘rope’ to the trebuchet. I have taken a few liberty’s here. The model doesn’t allow for a practical firing mechanism and a close look will show that if it was fired, the stone would never release. There is also no clear firing mechanism or a convenient way of recovering the firing arm once it is released. I made my own attachment for the windlass to the firing arm from a small piece of plastic tube. That all said, it’s a wargaming piece not a museum model and I am happy with the final result.
Trebuchet ready!
Finally, an apology to any one reading this blog on a tablet or phone. I am having problems with displaying some of the pictures in the correct format. They all look fine on a desk top but for some weird reason, the portrait pictures lay on their side on other devices…. I’ll keep trying to resolve this but I hope that you can still make sense of the post!
THE COMMERCIAL BIT
With the exception of the Trebuchet itself, all of the paints and washes are available post free from my shop.
We carry a huge range of Vallejo paints. You can see them here but use the shop search box and the paint number from the article above to get to a specific colour quickly!
I now have about 100 figures completed for my WOTR army. Actually, completed is not strictly accurate, as six need basing and I want to revisit some of the Men at Arms to add some detail. The Foot Knights will form the core of my army and they are made from a box of Perry’s Foot knights that I have almost completed. Of the 36 knights in the box, 24 are in ‘plain’ armour and so were quite straight forward to paint. A further 12 have tabards over their armour and it was these that initially slowed me down when it came to completing them. Assembly was straight forward enough, although with one exception, I decided to go for ‘sleeved’ tabards, which reduced the choice of poses and weapons available.
Knights with tabards, assembled and ready for priming.
Incidentally, in the background of the picture above, you can see that I have also assembled the final 2 of the 38 figures in the Perry’s set – Richard III and his standard bearer – they may not make it into the army but I will complete them. Painting the figures was fairly straight forward, it was deciding on the colours of the livery that caused me a problem. Despite doing a degree of research, I reminded myself that I was initially building a generic WOTR force for our club games rather than a specific order of battle. This did simplify things in my mind and so I went with a fairly limited set of colours for the livery and I haven’t worried too much about what or who the livery represents at this stage.
Basic colours blocked in.
I followed more or less the same procedure for painting the armour. I used Army Painter plate mail, gave this a heavy Dark Tone Ink wash and then re highlighted by dry brushing with Plate mail and then Vallejo Silver. The Tabards were just block painted, although I did use soft tone ink and red ink to do some shading.
Tabards painted and figures based.
The picture above shows three of the finished figures. You can see that I attempted to paint Warwicks badge on one of the figures…It just about passes from a distance but I decided that I would leave the others without a badge until I can find suitable decals. Besides, my eye’s were at the limit of their endurance!
Foot Knights ready for action!
The final six Foot Knights are almost complete. I just need paint some of the details, add some washes and finish the basing.
The final batch on the work bench.
With the core of my force completed, we have already started to test our rules set and have played our first game of ‘Never mind the Billhooks’. The rules have been written specifically for generic WOTR battles by Andy Callan and played well on the first game. Once we have knocked them into shape, with Andy’s permission, I’ll put them up on the blog as a free PDF download. We plan to fight a series WOTR battles using our own House retinues over the coming year. Sir Harry Hotspur being the leader of my band. No doubt, Lord Bingham, Sir Peter of Woodborough and Lady Jasmine of Papplewick will be just as capricious at choosing allegiances as the real participants of the War Of The Roses!
Of course, my retinue is far from complete. I need a few more skirmishers and badly need some cavalry support, so I will add these in over the next few weeks. For now though, let battle commence!
THE COMMERCIAL BIT
We carry the full range of Perry’s Plastic sets. You can see the WOTR sets here:
We have a huge range of paints and basing products in stock. We carry Vallejo Model Colour and the Army Painter range. Also in stock is the full range of Renedra bases. Even better we post free to most worldwide locations!
My journey into the complications of the War of the Roses continues with a visit to the King Richard III Visitor Centre at Leicester. I have had it on my list to visit the museum ever since it’s creation and with Leicester being just a 30 minute drive down the A46, it wasn’t to much of a journey. I had closely followed the search for Richard III’s remains at the time the story was breaking. Apart from the historical significance of the story, I had spent a very happy part of my career working and living in Leicester and very much like the city and the people there.
Statue of Richard III outside the visitor centre.
As you would expect from such a new facility, the Visitor Centre is very clean and beautifully presented. I can certainly recommend the on site café for it’s quality of food and value for money – the cake was delicious!
Replica weapons on display
The centre of course, focuses on Richard III, how he came to power, his demise at the Battle of Bosworth and the search for his resting place. There is plenty of information to absorb and although I am familiar with the story of Richard III, it is still a fascinating tale of dark intrigue and betrayal. The centre covers how Richard came to power, the tale of the Princes in the Tower, his reign over England and Richard’s last desperate charge at the battle of Bosworth to hold onto his crown. Of course, with Richard now interred at the Cathedral across from the centre, the city of Leicester obviously feels an affiliation to Richard and the museum rightly asks the question as to whether Richard III’s reputation as a ‘bad guy’ is fair and justified. Having asked the question though, it leaves it up to the visitor to make their own judgement.
More weapons on display in the Battle Time line.
A large part of the exhibition is devoted to how the archaeologists tracked down Richard III’s burial place and recovered his remains. It is a superb piece of detective work and fascinating in it’s detail. The forensic ‘post mortem’ of the remains is intriguing, if somewhat gruesome. There’s no doubt that Richard III came to a nasty end, deserved or not!
Richard III Skeleton , as it was discovered.
If Shakespeare had intended to vilify Richard III for the sake of his Tudor masters, then over time, I suspect that this has not quite worked out the way that that he intended it to. I think that many of todays public will know of Richards last words as spoken by Shakespeare for him ‘A horse, a horse, my Kingdom for a horse’. Even more will remember him as the King that was found in a car park!
Yet more weapons! It is pretty obvious that these displays caught my attention!
I would definitely recommend a visit to the King Richard III Museum. It will take only a half a day at the most and you can spend the rest of the day as Julie and I did, browsing around the Leicester City Centre and it’s shops. If you are unable to get there then a visit to the web site is well worth a few minutes of your time. The 3 minute video is an excellent introduction to the centre – the link is below.
THE COMMERCIAL BIT
You can visit the King Richard visitor centre official web site here:
This website uses cookies to improve your experience. We'll assume you're ok with this, but you can opt-out if you wish.AcceptRead More
Privacy & Cookies Policy
Privacy Overview
This website uses cookies to improve your experience while you navigate through the website. Out of these cookies, the cookies that are categorized as necessary are stored on your browser as they are as essential for the working of basic functionalities of the website. We also use third-party cookies that help us analyze and understand how you use this website. These cookies will be stored in your browser only with your consent. You also have the option to opt-out of these cookies. But opting out of some of these cookies may have an effect on your browsing experience.
Necessary cookies are absolutely essential for the website to function properly. This category only includes cookies that ensures basic functionalities and security features of the website. These cookies do not store any personal information.