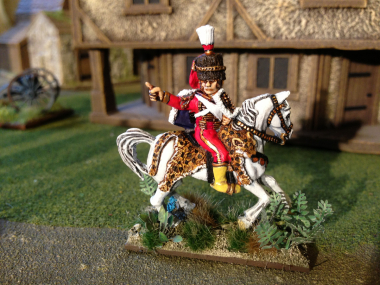
I’ve been blathering on about my Carribean force for sometime now but have yet to use it on the field of battle. There have been two problems; one, the lack of a rules set and more importantly, the lack of an opponent! I started to collect and paint the Trent Miniatures Caribbean figures because I thought they were superb models. The sculpting is of high quality with some really characterful models in the range. Add to that, the uniforms look pretty good and there is plenty of scope for all sorts of variety when putting together a force. The theatre of action, the Caribbean islands in the late 18th Century provides plenty of scope for all sorts of battles, from small scale skirmishes to full on battles, naval landings and sieges. And of course the scenery will be interesting – anything from Plantations to Jungles.
The History of the region is also fascinating, if somewhat poorly documented. As well as the fighting between the ‘Super powers’ of Britain, France & Spain, there were multiple slave uprisings, none more successful than Haiti, the former French Colony of Saint Domingue. Indeed this uprising resulted in the independence of Haiti, which was the first Caribbean nation to gain independence from European powers in 1804. Under the leadership of Toussaint l’Ouverture ( sometimes referred to as the Black Napoleon), the former slaves defeated the French army (twice), the Spanish army, and the British army, before becoming the world’s first and oldest black republic, and also the second-oldest republic in the Western Hemisphere after the United States. This is additionally notable as being the only successful slave uprising in history.
So, with all this fascinating background, a superb range of figures, never mind the possibility of adding in Voodoo, Zombies and Pirates, it’s a mystery to me as to why there isn’t a rules set for the period!
 Well, as usual, the answer was right in front of me. There is a superb rules set by the very talented Alex Buchel of Studio Tomahawk called ‘Muskets and Tomahawks’ for skirmishes in North America during the 18th Century. I could see immediately that it would be very straight forward to transpose the Caribbean forces over the North American Forces in the rules set and I could use my figures on the wargames table! Luckily there are a few players at my local wargames club that play M & T’s, so I asked one of them, John Grant (or Nice John as he is known locally!) if he would take me through the rules with a practice game. John has a terrific set up with plenty of scenery and AWI figures, so the game was great fun and confirmed my impression that the rules set would transpose to the Caribbean. The next step was to ask if I could use my Caribbean force in a game!
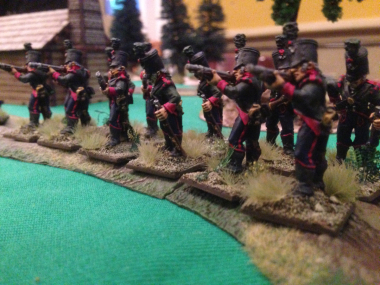
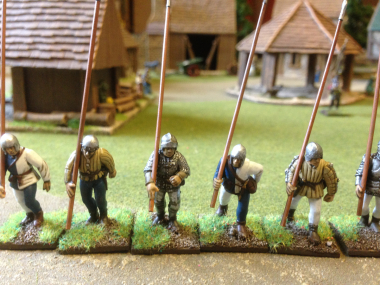
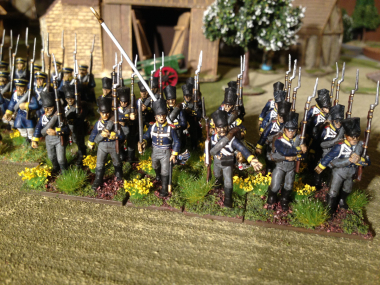
60th Rifles prepare to fire!
John was happy to oblige, and so my 60th Rifles became British Light infantry ( actually, not much of a change here! The 60th were after all founded in America…) The Black regiments became Militia and the freed slaves were used as Indians. Although this was our first ‘rough fit’ as we played through the game it became clear that we would perhaps modify some of the rules to reflect conditions in the Caribbean. So for example, the freed slaves or Maroons were given the ‘blood thirsty’ rule in combat and their shooting ability down graded accordingly. There was some debate as to the quality of the Black regiments and whether they should be re classified as normal infantry or have the same stats as ‘ Compagnies de la Marine’ from the French Army.

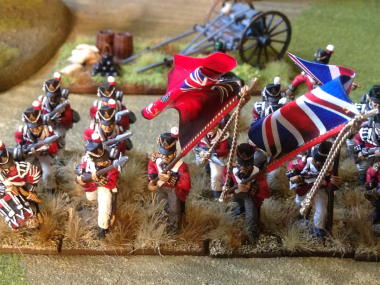
The Black Chasseurs advance!
It’s fair to say that it is early days before we get to a rules modification that suits this period but for the time being, it’s a close enough fit and I hope that over the next year or so, I can produce a stat’s board for the Caribbean and the correct cards to match. I see that Wargames Illustrated are giving away a free figure of Toussaint l’Ouverture at Historicon this year so there is obviously interest in the period – who knows, perhaps they can be persuaded to do a supplement…


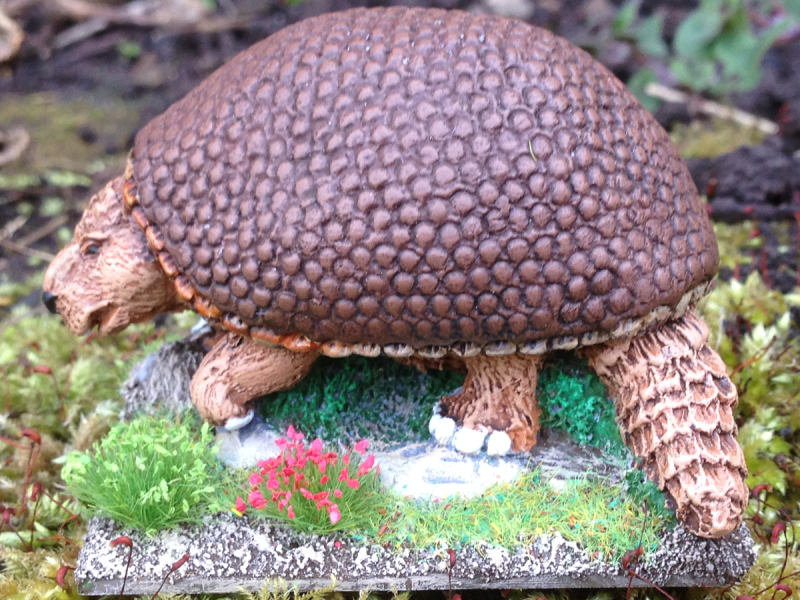
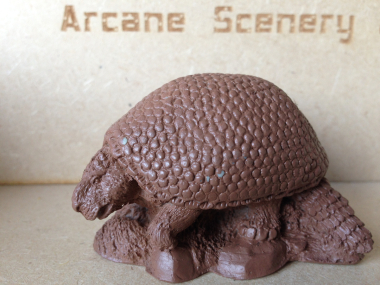
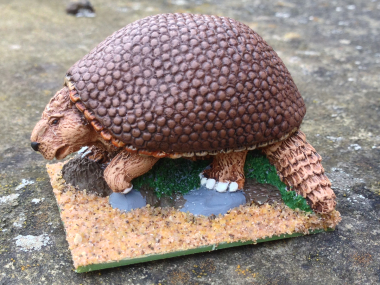
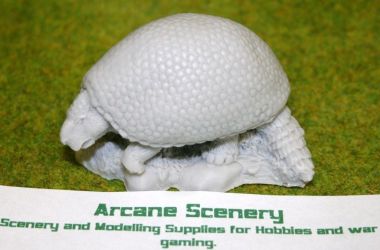 As we go into the Easter break it seemed appropriate to paint something vaguely egg shaped and as the Glyptodon had been sitting forlornly on the work bench in just an undercoat I decided his time had come!