A Visit to the Battle of Bosworth Battlefield

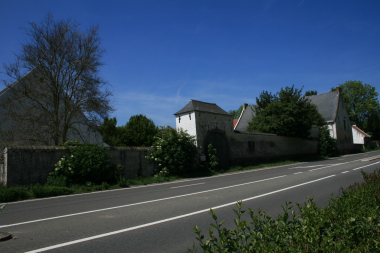
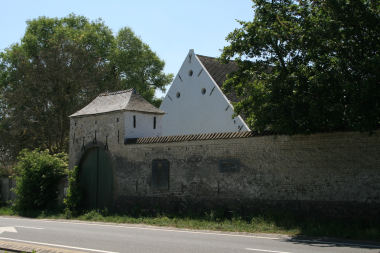
Back on the 12th March, I found myself with a free weekend – the Missus was off for a long weekend with her sisters, so it was my opportunity to visit yet another local battlefield. Accompanied by fellow Bill Hooker and war gamer, Pete Harris, we made the 50 minute drive from Bingham to the Bosworth Heritage centre. The weather was kind to us as, although a bit breezy and chilly, it was dry and sunny. We arrived at the Bosworth Heritage Centre at around 11.30am

The map of the site and battlefield.
The Visitor Centre Courtyard

I had already pre booked our tickets for both the visitor centre and the guided walk. So once we had booked in and collected our tickets, the first port of call was the Tythe barn Tea rooms for a cuppa and a sausage roll! It’s worth noting that we found all of the staff to be really friendly and helpful through out the visit. In addition, the tickets to the exhibition are valid for a year, so if I fancy another visit in the summer, I can pop back.

The Tythe Barn Tea Rooms

As you can see, the Tea rooms are very nice, clean and welcoming. The food is good too! The cakes are particularly nice…back to the purpose of the visit! Once we had finished our ‘Second Breakfast’ we started our tour of the visitor centre.

Diorama in the reception area showing the two main protagonists

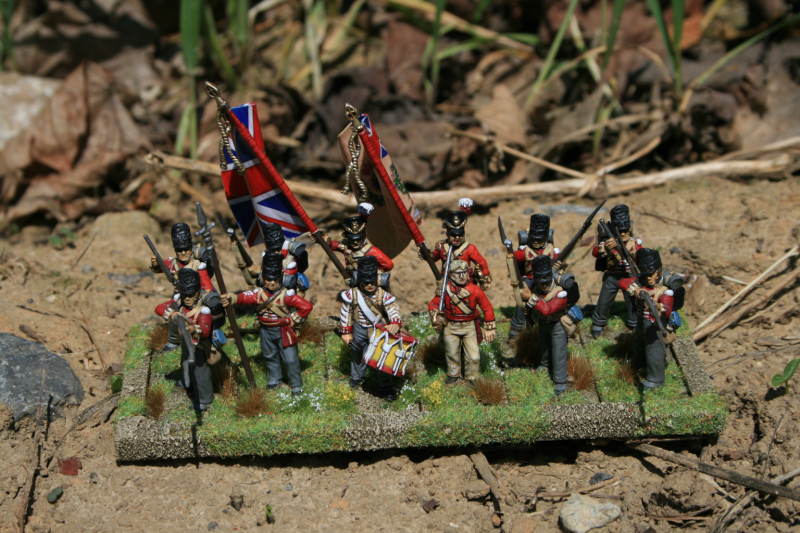
There’s two really nice dioramas in the entrance to the exhibition. The one shown above, is, I think, a 1/12th scale model of the two main protagonists, King Richard III and Henry Tudor. The model that really caught my eye, was of the medieval cog – great reference for ‘Never Mind the Boats Hooks!

A rather lovely model of the Medieval Cog that brought Henry Tudor back from France to fight for his crown.

The exibition itself was excellent, with plenty of background to the battle as well as an explanation as to why the Battlefield may have ‘moved’ from it’s original location and the research that has been done to establish what is now believed to be the correct location. Of course, of greatest interest to me was the exhibits of weapons and the likely dress of the warriors involved.

First, choose your weapon!
Typical foot soldier or bill man with Gambeson and Bill( with a passing resemblance to Robert Mitchum…)
Man at Arms in armoured Gambeson and Mail
For the richer men at arms – a full suit of armour!

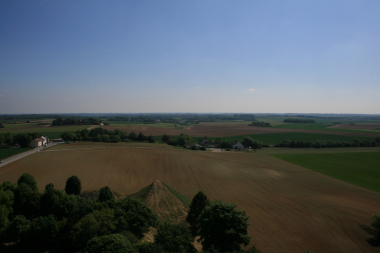
We took about an hour and a half to look around the exhibition and after another quick pit stop for lunch, it was time for our guided walk of the battlefield. The walk started from the visitor centre courtyard, with a brief overview of the two sides and then we proceeded to the site of King Richard III’s camp on Ambion hill. From here we had a great view of the area and could just about make out where Henry Tudor would have camped over night and where the Stanley Brothers set up their camp. The tour skirted around the battlefield as much of it is on private land. This meant the we kept to the public footpaths but it did mean that the walking was nice and easy!

Ambion Hill
Our Tour guide – his name escapes me.

Our tour guide was extremely well informed both about the battle and the period and explained the back ground to the battle, who the main characters involved were, the politics of the time and how events unfolded.

The fight for the crown!

Our guide was dealing with various degrees of knowledge in his audience, from those who had no idea as to why the battle had taken place to ‘smart Alecs’, like the two wargamers that were tagging along. To be fair, Pete and I kept quiet and listened! I did take part in a mini re-fight of the battle, representing William Stanley to illustrate how the combatants were positioned! All part of our guide trying to involve the audience and keep them engaged.

This monument covers the well where Richard III allegedly took his last drink.
The view across the battlefield

The tour took around and hour and a half, so it was just after 3.00pm when we returned to the visitor centre. We visited the shop and I treated myself to a book on the battle and a few souvenirs. Whilst the selection of books was very good, I was a bit disappointed with the souvenirs. I suspect that the shop was still recovering from the problems caused by COVID but the selection of post cards etc was not great. There also wasn’t any sort of guide book or leaflet that I could find. I consoled myself with another visit to the Tythe Barn and finished the day with a hot chocolate and massive cherry and almond scone! I had to replace all those calories burnt on the walk…

Back at the Heritage Centre with ‘Never Mind The Bill Hooks’.

Overall, I had a great day. We left the centre at around 4.30pm, even though it actually closed at 4.00pm, the cafe stayed open whilst we finished our drinks and snack. Once again, the staff were brilliant – there was no rush, they left us to finish up! So, if you are able to get to Bosworth, I would very much recommend a visit to the battlefield and exhibition centre. It certainly filled a day and even if you don’t sign up for the guided tour, there’s nothing to stop you wandering around the beautiful Leicestershire country side and enjoying a picnic! As I have mentioned, my ticket will last for a year, so I think that I might just pop back when one of the many events are on to have a second look around.

THE COMMERCIAL BIT

I hope that you all enjoy your hobby as much as I do – remember that our web site will have much of what you need! Click here to see our shop:

ARCANE SCENERY

To see our selection of soldiers and accessories for Never mind the Bill Hooks, the rules set designed for War of the Roses, click here:

NEVER MIND THE BILL HOOKS

Happy Modelling!

Stokes Field- The Prequel

At last, I managed to get a war game in before the latest lockdown! I joined up with Andy Callan, his brother, Ian and Mark Lodge of Jacklex miniatures for a full day and evening of wargaming this past weekend.

One of the battles that we fought during the weekend was a War of the Roses battle using the Never Mind The Bill Hooks rules. It seemed sensible to use the latest scenario that Andy had written for Wargames Illustrated, issue 394, ‘The one about the ‘Englishman, Irishman and the German’. It is based on a fictional scouting encounter just prior to the main event at Stokes Field, the final battle in the War of the Roses.

I’ve mentioned that both Andy and myself live in Bingham, just a few miles down the road from the village of East Stoke. I have visited the battlefield on a number of occasions, most recently,  just a couple of weeks ago. I doubt that things have changed very much over the intervening centuries since the battle. The River Trent may be more constrained by it’s banks now but follows a similar route. The hedgerows may have changed but the lie of the land will be much the same.

Stokes field - the view to Hoveringham and the Trent

Stokes field – the view to Fiskerton and the Trent. It’s possible that the rebels camped in the far field to the right of Fiskerton (the white dots on the left of the picture!) the night before the battle.

Ideal Marching country - not so good when you are running from cavalry!

Ideal Marching country – not so good when you are running from cavalry!

It looks like an ideal place for a battle as there are no major obstacles or hills, just a typical piece of gently rolling English countryside. You can see for miles in some spots, particularly as the ground rises away from the Trent above East Stoke. The view can be deceptive though. There are enough rises and folds in the ground to hide an army and some places where the land falls sharply is treacherous, if you are not careful. What was a minor inconvenience when you are advancing in good order would be a death trap when retreating in panic. A good example is the so called ‘Red Gutter’ where the rebels were cut down as they routed.

The drop down to the 'Red Gutter'

The drop down to the ‘Red Gutter’

The Red Gutter at Stokes Field

The Red Gutter at Stokes Field

I think that the above picture shows the entrance to the ‘Red Gutter’ – an enclosed lane at the base of the rising ground behind the battle field, on the retreat route to the safety of the Trent crossing at Fiskerton.

And so onto our game. We more or less followed the orders of Battle and additional special rules that are detailed in the article, with Ian and Mark playing as the loyal Lancastrians and myself leading the rebel Yorkist alliance!

The deployment

The deployment

I deployed my mixed contingent along the ridge line with the Irish Kern skirmishers holding the village, the archers and Gallowglass holding the centre and the German hand gunners in cover in the woods. Out of shot, Lord Lovell was leading the light Horse protecting the flank of the village. Facing them was a powerful force of Bows and Billmen as well as a unit of light horse and a group of skirmishing archers.

The Lancastrian army, a strong force of Bows and bills were massed on the baseline with their light horse facing mine. In the maneuver phase I decided to redeploy my light horse and moved them across to the right flank where there was more room to  threaten the Lancastrian foot units. I decided that the kern were well placed in the village to defend the left flank. A protracted movement phase then continued, where the Lancastrian light horse advanced to the village and then withdrew without causing any consternation. Meanwhile, Lord Lovell had led his light horse to the far right flank of the Lancastrians and supported by the now advancing German hand gunners caught the Lancastrian bows and bills in some confusion. The Light horse charged home into the flank of the Lancastrian’s, routing them and their leader from the field! Game over with out even resorting to the cards!

We started again. This time the Lancastrians were not going to be caught by a sucker punch  and they advanced to use their superior archery force to beat back the rebels!

Game number 2! The Lancastrians aren't messing now! Game number 2! The Lancastrians aren’t messing now!

This game was more of a match, with Lancastrian Archers wiping out both units of kern skirmishers, daunting a block of bows and Gallowglass and whittling down the rebel army. Once again, Lord Lovell and his light horse were able to save the day with a rather dodgy counter charge through Lovell’s own evading skirmishers…On reflection, the counter charge should not have happened, as whilst it wasn’t explicitly against the rules, it certainly pushed the spirit of them. With Lord Lovell on the loose again, the Lancastrian flank was tied up, allowing the Gallowglass unit in the centre to force a charge home against the bills and bows there.

Memorial at East Stoke Church

Memorial at East Stoke Church

Whilst vulnerable against archery, the Gallowglass are formidable in combat and they were able to carve through the centre units of Lancastrian Bows and Bills causing enough casualties to collapse the Lancastrian army morale. Another very close victory for the rebels. Unfortunately, as I became more involved in the battle, I forgot to take pictures! However, after a post battle VAR check, over a beer or three, the general consensus was that although the Rebels were deemed to have won on the night, a review of the match play meant that at least an honourable draw would have been a fairer result!

Story board from the battlefield

Story board from the battlefield

In the post battle review, the counter charge by Lord Lovells light cavalry had certainly influenced the out come of the battle, perhaps unfairly so. Also mixing English bowmen and Irish Gallowglass in a block, whilst again, within the rules, is probably stretching things even though they were obliged to follow the ‘Brexit rule’ to check if they could pass through each other! It’s a point that will be addressed in the expanded rules and I wont cover it here. That said, the lack of initiative and undue caution by the Lancastrians caused many of their own problems. There were opportunities to kill off units that were just not taken. The archery proved to be dominant in the early stages of the battle but some units ran out of arrows and perhaps Mark was a tad unlucky at one point when rolling 30 dice needing a 5 or 6, he only managed 4 hits…Damp bowstrings I think!

Great fun though – next time I’ll take more pictures!

THE COMMERCIAL BIT


Almost all of the paints, miniatures, bases, basing materials and anything that you are likely to need for your hobby are available POST FREE from my shop here:

ARCANE SCENERY

Perry’s WOTR plastic range are here, including some nice army deals!

PERRY MINIATURES

Happy Modelling!


Maiden Castle

One of the pleasures of the hobby, that I spend most of my time so immersed in, is the different facets that can be enjoyed with other people, family and friends. We are very lucky in this country to be surrounded by history that is very accessible and often set in the beautiful English countryside. So a casual walk with the family can still be a source of inspiration for my hobby.

A walk in the country

A walk in the country

We were in Dorset to celebrate my Brothers 60th Birthday and after a nice meal, a few drinks and countless games of Pool on the previous night, a nice walk to blow away the cobwebs was required. Pete had discovered that Maiden Castle, the largest Iron age hill fort in the country, was just a stones throw away from where we were staying. Even better, although being looked after by English heritage, entry is free!

2018-09-15 11.18.10 Rather than include the history of the castle here, I’ll add some links at the end of the blog so if you are interested, you can start your own research. In the meantime, here’s a pictorial tour of the castle from my perspective. I’ve added in pictures of some of the story boards, so you can see the official commentary.

The View as you approach the Western Entrance

The View as you approach the Western Entrance

As you approach the Entrance to the Castle, the scale and size becomes more apparent. In it’s time, Maiden Castle must have dominated the area as a seat of power.

How the Western Entrance might have looked

How the Western Entrance might have looked

Maiden Castle - the view from the top

Maiden Castle – the view from the top

The views of the surrounding countryside were certainly impressive on a clear day!

Maiden Castle - story board 3

Maiden Castle – story board 2

The fort started out as a Neolithic gathering place and over the course of the years, developed into the massive complex that we see today. There are stories of the Romans laying siege to the hill but it seems that there is no firm evidence to support this. I certainly would not have fancied trying to climb over the mounds and ditches whilst the locals were throwing sticks, stones and harsh words!

Maiden Castle - the complex banks and ditches protecting the summit.

Maiden Castle – the complex banks and ditches protecting the summit.

Maiden Castle - Burial Grounds

Maiden Castle – Burial Grounds

Maiden Castle -The Eastern Entrance Story Board

Maiden Castle -The Eastern Entrance Story Board

Whether the Romans fought their way into the fort or defeated the occupying people in battle elsewhere isn’t clear. What is for sure is that the Romans did take over here in Dorchester and the hill fort became the site of one of their Temples.

Maiden Castle - Roman Temple Ruins

Maiden Castle – Roman Temple Ruins

Maiden Castle Roman Temple

Maiden Castle Roman Temple

Maiden Castle - an Aerial View

Maiden Castle – an Aerial View

An aerial view of the castle shows it’s complexity and size. As I walked around it, I couldn’t help but think of the history and events that had taken place there. I have ambitions to build a Roman Army and I have been very tempted by the Victrix range of Imperial Romans available. Like wise, the Footsore Romano – British range would make a lovely warband. I’m sure that if King Arthur did exist, he would have at least ridden by this area!

King Arthur - Footsore Models

King Arthur – Footsore Models

The Commercial Bit

First the links to:

ENGLISH HERITAGE – MAIDEN CASTLE

WIKIPEDIA _ MAIDEN CASTLE

If, like me you are tempted to build a Roman army, a great place to start is with the new Victrix range:

VICTRIX RANGE

For an even more comprehensive range, you cant go wrong with the Warlord Hail Caesar range:

WARLORD GAMES – Hail Caesar 

For a later Roman or Romano British army, the footsore range contains some beautiful models:

FOOTSORE

At the time of writing, items are supplied post free to most world wide locations!

Happy Modelling!

Waterloo Men

The beauty of our hobby is the many facets that can absorb you. I spend a good deal of time modelling and painting (too much according to my Wife!), I game at least once a fortnight and I spend many a happy hour researching, either on the internet or reading. I am currently reading John Hussey’s book on the 100 days Campaign. Actually, it is in two volumes but lets get Volume 1 read first! There’s another facet that I also enjoy, visiting battlefields or historical sites. I have fulfilled one ambition by visiting the Battlefield at Waterloo. You can read about some of my impressions in early Blog articles here:

BATTLEFIELD VISIT – LA HAIE SAINTE

THE HEROIC STAND OF THE INNISKILLING

Cossall Church

Cossall Church

Grand excursions like this are few and far between. However, there is plenty to keep me occupied closer to home in Nottingham. I had come across the story of Corporal John Shaw of the life guards in quite a few accounts of the Battle of Waterloo. I have written a small piece on John Shaw for Wargames Illustrated when putting together a painting guide to the Warlord Games Household Cavalry boxed set.  Shaw was from Cossall, a small village to the north of  Nottingham and I was aware that there was a monument to him in the graveyard at St Catherine’s Church at Cossall but had yet to pay a visit. So this weekend, I combined a trip to Cossall Church with a errand to go out an buy some Wall Paper for the bedroom that we are decorating . Fortunately my Wife was focused on the wall paper, whilst I was day dreaming about Waterloo!

Memorial plate at Cossall Church

Memorial plate at Cossall Church

As it turned out, the monument, erected in 1877, is a memorial to three Waterloo veterans, John Shaw and Richard Waplington both of the Life Guards and Thomas Wheatley of the Light Dragoon Guards. The latter intrigued me. I thought that there were only Light Dragoon Cavalry Regiments not Light Dragoon Guard cavalry regiments. According to the references that I have so far found, Wheatley was in the 23rd Light Dragoons. I’m not sure if it is of significance and will do some further research. Was the memorial stone creator being generous in awarding Wheatley Guard status? Whatever, Wheatley survived the battle and lived the rest of his life in Nottingham once discharged from the Cavalry.

Cossall Memorial

Cossall Memorial

Memorial inscription

Memorial inscription

I was unable to locate his grave in the graveyard although I did find other Wheatleys’ buried there – it seems likely that there is a family connection and although a recent web article speculates that the memorial is built on his grave, I am unable to confirm this.

Detail on Memorial

Detail on Memorial

Unfortunately, the church was closed and so I was unable to find further information but I will go back over at some point to see what else I can discover.

Wheatley family grave

Wheatley family grave

In the course of telling one of my wargaming buddies, Andy,  about my excursion he said ‘of course, you do know that there is a Waterloo man buried in Bingham Churchyard?’ Well despite the fact I have lived in Bingham for some 27 yaers, I had no idea! So I had a wander around the local Church yard and sure enough found the grave of Richard Holt, who served at Waterloo. Initial information indicates that he was with 40th Foot but I have yet to confirm this. If it was so, he not only fought at Waterloo but was across the Atlantic, fighting the Americans in the war of 1812. I had a chat to the Church warden but he was unable to tell me any more about Richard Holt. He did say that he had a relative called Grey, who served in the artillery at Waterloo and who was also buried in the Church Yard but the grave was now lost.

Richard Holt a Waterloo man buried in Bingham

Richard Holt a Waterloo man buried in Bingham

All in all a most rewarding weekend. I’ve commented before that History is often very close to home – it’s just a question of knowing where to look. I find it all fascinating and the stories surrounding the individuals help to bring the past alive. I do love my hobby!

If you would like to read more about the Cossall Memorial to Waterloo, click here:

WATERLOO: THE COSSALL MONUMENT


Wars Of the Roses Part 2 – Stokes Field

After the light hearted look at history at Warwick castle, my next outing was to Stokes Field, just South of Newark and only ten minutes up the A46 from my house! It was here that the last battle of the War of the Roses was fought, on 16th June 1487 some 2 years after Henry Tudors earlier victory at Bosworth Field. The occasion was the 530th anniversary of the battle and the event was hosted by Foundry Miniatures, who are themselves based at East Stoke village. The battle is somewhat of a footnote to the Wars of the Roses but was a major engagement, possibly involving more participants than Bosworth. The casualty count was certainly higher, due to the fierce, drawn out close combat and the ensuing rout where most of the Yorkist elite were slain. If you are unfamiliar with the battle, it is worth checking out the Wikipedia article here:

THE BATTLE OF STOKES FIELD

The Battlefield tour was led by Mike Ingram, an extremely knowledgeable and affable guide. Mike explained the background to the battle, who was involved and why. I was particularly impressed that Mike was happy to give more than one possible version of what had happened and why this should be. Events that occurred 530 years ago are never going to be completely documented and so I quite like the uncertainty being made clear.

The march to Stokes Field

The march to Stokes Field

And so on a very hot Saturday, we set off to walk the Stokes Field battlefield, accompanied by some of the reenactors. It was sweltering just wearing jeans and a T-shirt. Quite how the guys in armour coped I’m not sure but they marched with us! Much of the battlefield is now on privately owned land so I felt privileged to be able to get access to the site. In fairness, you can understand the farmers reluctance to having Joe public trampling his crops but it is a shame that the site is not more accessible to the casual visitor.

That said, there isn’t a great deal to see other than the beautiful countryside. You really needed a guide to help you imagine how the battle was fought

Stokes Field - The Kings men are coming over that hill!

Stokes Field – The Kings men are coming over that hill!

Hold the high ground boys

Hold the high ground boys – That’s the old A46 fosse way to the left of the picture.

Having reached the top of the battlefield and surveyed the landscape, we walked back down the hill in the direction of the defeated Rebel army. Our first port of call was the stone that marked  where Henry VII planted his standard after the battle.

The stone that marks the place that Henry VII placed his standard.

The stone that marks the place that Henry VII placed his standard.

It was over this field that the rout and pursuit of the rebels took place as they tried to retreat back to the ford over the Trent.

The view towards the Trent

The view towards the Trent – no rebels , just barley.

We made our way back to the Church at East stoke were the following memorial can be found.

Memorial stone at East stoke Church

Memorial stone at East stoke Church

As you can see from the inscription, the rebel force comprised of a large contingent of both Irish fighters and German Landsknecht mercenaries as well as the English rebels. They must have made an interesting bunch on which to base a wargaming army. The Irish were very lightly armed in the main, referred to as Kerns, and would have looked somewhat like a Dark ages army. They suffered terribly at the battle from the concentrated archery of the Lancastrian  army. The Landsknechts would have cut a colourful sight, in their distinctive costumes. Although armed with pikes and the latest handguns, they too found it difficult to combat the trained archers that they were facing. Indeed, it is said that their bodies were ‘filled with arrows like hedgehogs’. Gunpowder had yet to dominate the battlefield.

Landesnecht re enactor

Landsknecht re enactor

The English Contingient

The English Contingent

From East Stoke Church it was a short walk to inspect the ‘Red Gutter’, a cutting that leads down towards the River Trent, where hundreds of rebels stumbled into it and were slaughtered. From there it was back to Foundry HQ for well deserved refreshments. This also gave us an opportunity to take a look at the wargame that had been put on by the ‘Like a Stone Wall’ club.

The Battle of Stoke field

The Battle of Stoke field

Another view of the action.

Another view of the action.

We were also able to wander amongst the Reenactors encampment, once again, I found them to be very generous with their time and expertise. Unfortunately, I had run out of charge on my phone so I have no more pictures to show you. A quick walk around the stands at Foundry HQ and it was time to go. I now feel enthused to get on with my War of the Roses Army, so perhaps in between the next Napoleonic unit I’ll paint a few more pikemen.

If you would like to visit the battlefield, you are able to walk around the East Stoke Church and wander down to see the ‘Red Gutter’ and of course, I am sure that the guys at Foundry will be pleased to see you, the shop is open Monday to Saturday, details are here:

WARGAMES FOUNDRY 

You wont be able to get to the ridges on which the battle started but you will certainly get the ‘feel’ of the battlefield from the lanes below. I’ve put links to the local TV and Newspaper  coverage of the event that might be of interest – it might take a time to load but is worth the wait. I hope that you find the two blogs have been useful – perhaps they will inspire you to have a go at this fascinating period in history.

NOTTS TV NEWS COVERAGE

THE LOCAL PAPER REPORT – NEWARK ADVERTISER


History surrounds us.

I haven’t lifted a paint brush or done any modelling for nearly a fortnight now. It’s been one of those fallow periods that you go through from time to time. There are other things happening in life that draw you away from your hobby. We are having a new kitchen installed that has caused a bit of chaos and, of course, my hobby den, AKA the garage has been used as a dumping ground for the new units coming in and then the old ones going out. This means that I couldn’t get to my workbench if I wanted to. There was some good news though. I have had a new light installed in the Garage as well as a couple of new power sockets, so when I do get access ( next week…) the facilities will be much improved.

I also had to return to my home town in Torquay to conclude some family business. Sadly, my father passed away back in March after a long illness, and I have been travelling back & forwards to Torquay from Nottingham for the last few months. My Dad was a big influence on my hobby. Of course if it wasn’t for him I would probably never have got involved with building models. Dad was an enthusiastic model airplane and model boat builder and was more concerned with building a working model rather than the ultimate replica. He taught me the practical skills that I needed to build models, how to use the various glues, filler & materials and of course how to use the tools & techniques to produce a good model.

The Slipways at Torquay

The Slipways at Torquay

His other passion was for fishing – sea fishing of course, being in Torquay. The great advantage of sea fishing over coarse fishing ( apart from the fact that you usually eat what you catch when sea fishing!), is that you don’t have to be quiet and so you can have a conversation whilst you are watching your float. During our fishing trips to Torquay harbour, my Brother & I  would be asking Dad about the various buildings and structures and it was surprising how many of the unusual buildings around the harbour were actually defensive structures from the Second World war, now modified for everyday use. This inevitably led to stories from the second world war. Dad was only a young boy during the war but he witnessed the Terror raids on Torquay, ( My Mum was bombed out of her house in Babbacombe and my Aunty was nearly killed when a Fockewolf crashed where she was taking shelter – stories to be told in later entries in my Blog) and of course the build up to D Day. The Americans were billeted at the bottom of Dads Road in Upton Park.

It was from these stories that my love of history grew, and if you put an interest in history together with a passion for modelling, a wargamer and military modeler is sure to emerge! The strange thing is that whilst at school, although we learnt the dates of the big battles and wars, when kings came & went and the political background behind the conflicts, we were never taught what happened in our own town. Recently,  the town has recorded that the two slipways that I fished from as a child were built as loading ramps for the LCTs that went off to Normandy on D-Day. Now I reckon that kids today would be just as interested to hear these stories now as I was then. So check out your local history, if you don’t already know, there will be lots of history stories all around you. If nothing else, they will no doubt inspire you fro your next modelling project!  Here’s a few pictures of the plaque erected in memory of the D-Day ramps in Torquay.


2014-08-02 16.52.512014-08-02 16.52.37

The Heroic Stand of The Inniskilling, 27th Regiment of Foot

Inniskilling memorial at Waterloo

Inniskilling memorial at Waterloo

In last weeks post, I gave a brief description of La Haie Sainte Farm House and my observations from the battlefield visit to Waterloo. This week, I thought the I would take a look at a different part of the battle. When we were planning to visit Waterloo, it seemed appropriate that we would take some of our figures to the actual battlefield. I had been inspired by the stoic bravery of the 27th Regiment of Foot, the Inniskillings, during the battle and had painted one of my Battalions to represent them. It just seemed right to take them to the Battlefield.

The Inniskillings had been held in reserve during the battle until around 3.00pm when they were ordered up to defend the crossroads. Following the loss of La Haie Sainte, they were ordered to form square. This wasn’t so much a response to any imminent cavalry threat but such a formation would allow them to deliver fire to the side towards the Brussels road as well as to the front, over the ridge towards the french advance.

The densely packed ranks of such a formation made a tempting target for both the French Guns and the many French skirmishers – a target that they could hardly miss. As a result, the battalion, commanded by Captain John Hare, suffered terrible casualties, losing 66% of it’s men and officers. Of the Nineteen officers with the Battalion, sixteen were killed or wounded, leaving many of the Companies to be commanded by Sergeants.  The memorial reads:

Inniskillings on memorial

Inniskillings on memorial

In Memory of the heroic stand by the 27th (Inniskilling) Regiment of Foot at the Battle of Waterloo on 18th June 1815 when, of the 747 Officers and men of the regiment who joined the battle, 493 were killed or wounded. A noble record of endurance. Of them, the Duke of Wellington said, ‘Ah, they saved the centre of my line’. Erected by their successors, The Royal Irish Rangers (27th Inniskillings, 83rd,87th) 18 June 1990.

My act of remembrance was to take the regiment that I had painted to the battlefield – here they are on the memorial once again, facing out across Waterloo.

The models are Perry miniatures from the plastic box set. I have painted them with Buff facings and with buff cross straps. I am not sure if this is entirely correct. Some pictures show the troops with the standard white belts, others with buff. I have also painted the officer with buff trousers or coveralls. I suspect that this is incorrect as the Officers would have worn Grey trousers as was standard for campaign duty. However, I had seen a picture showing an Ensign in buff trousers and according to a reference in C.E. Franklins British Napoleonic Uniforms, the Officers wore Buff breeches – however, I think that this is the dress uniform rather than campaign. That all said, Officers were responsible for their own uniforms and given the haste with which the British Army moved out to Waterloo, may be this officer stayed in his dress uniform… Regardless, I just wanted the unit to look a bit different on the gaming table. Finally, here is a close up of the models actually on the Battlefield of Waterloo, roughly in the position that the real Troops would have made their Stand.

Inniskillings 2014

Inniskillings 2014

Battlefield Visit – La Haie Sainte – Waterloo

La Haie Sainte Farmhouse

La Haie Sainte Farmhouse

I mentioned a while back that I had been over to Belgium for a short break to visit the Waterloo Battlefield. I went with my war-gaming buddy, Pete Harris. We spent a couple of days visiting Ypres looking at WW1 museums and then went on to spend a couple of days at Waterloo.  It’s surprising how much you can fit into a few days if you are well prepared – there isn’t space in a short blog article to cover everything that we saw, so I thought that I would put together a few short pieces reviewing various facets of the trip.

The great thing about visiting the actual battlefield is that you can see for yourself just how things were, how the land really lies and gain true perspective on the size of objects & the distances involved. You can also walk in the footsteps of the combatants and try to imagine just what they would have seen and how they would have felt. I have been reading about the Battle of Waterloo since I was 15 – I still have the first book that I read ‘Waterloo – A Near Run Thing’ by David Howarth. Interestingly, it is David Howarth who has written the Official Guide to the Battlefield that is sold in the Battlefield Gift shop.

So although I had seen many pictures of the battlefield, read many accounts and looked at the maps, it was only when I actually saw the battlefield did I begin to really grasp what may have happened. Incidentally, one of my favourite quotes from Wellington is as follows:

The history of a battle, is not unlike the history of a ball. Some individuals may recollect all the little events of which the great result is the battle won or lost, but no individual can recollect the order in which, or the exact moment at which, they occurred, which makes all the difference as to their value or importance.

The Crossroads & La Haie Sainte

So with that in mind, here are a few pictures of La Haie Sainte with some of my observations. The photograph at the top of the article shows La Haie Sainte as we look to the west from the Lion Mound. The first thing that struck me was how big the Farm was. It more of a large complex than I had imagined and although set well forwards from Wellingtons main defensive line, nestled down on the side of the valley, it made an impressive defensive position. The photograph to the right shows the position of La Haie Sainte in relation to the crossroads. Any attack on Wellingtons Centre would have to pass by this strong point.

La Haie Sainte - Road view

La Haie Sainte – Road view


The next picture shows the western side of Farm and the road as it is now. This road runs straight on to to the cross road and from there to Brussels. The slope on the road is about right – it’s not me with a dodgy camera angle! It just goes to show that the area wasn’t flat ( I think that wargamers prefer nice flat tables but it doesn’t really reflect reality!) The other thought that struck me was how tall the walls were. It wasn’t going to be easy to climb over those in full kit, especially with the Kings German Legion defenders inside doing their utmost to stop you!


One of the mysteries of the battle is why the french didn’t use artillery to breach these walls. I just wonder if because of the position of the farm in the landscape, none of the French Commanders could see how difficult it was to breach these walls. The main gate was particularly defensible and the higher walls could probably be left unmanned as unless the troops had ladders, there was no easy way over. Of course, the buildings face into the farm complex, presenting the sheer sides to the outside – the owners built this farm to keep out intruders! The picture below show the Main gate and part of the higher wall that runs down the West side.la Haie Sainte gate & wall

La Haie Sainte was eventually taken by the French during the battle. At around 6.30pm, exhausted and practically out of ammunition, Major Baring, leading the defense, ordered the remnants of his command to retreat to the British lines. Only about forty of the 360 defenders made their escape – a terrible toll to pay in the defense of the farm.

For the French, any sense of victory would have been tempered by the fact that although they had captured the Farm house, the British lines remained intact further up the slope.

Even worse, the Prussians were coming!