Battle Report – Waterloo 2014

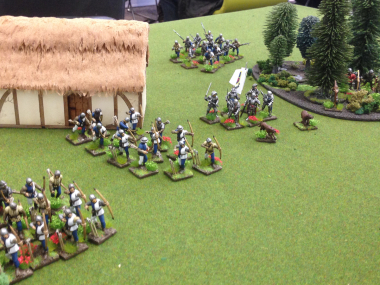
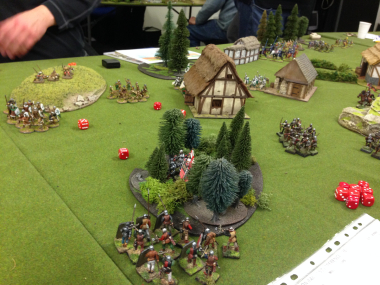
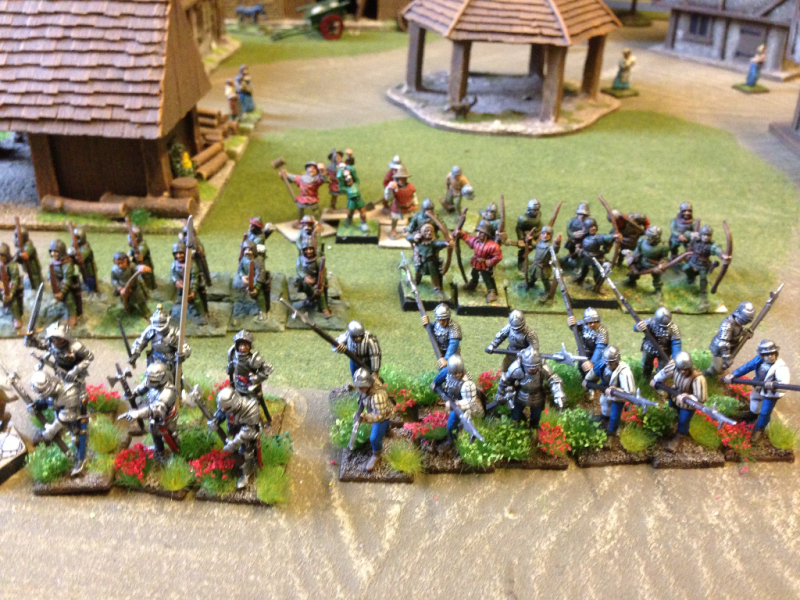
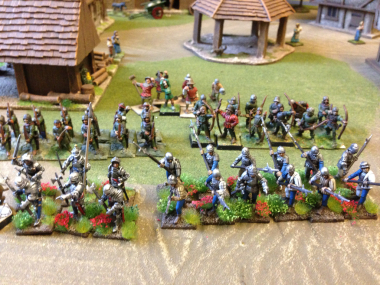
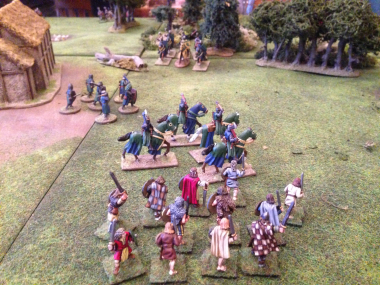
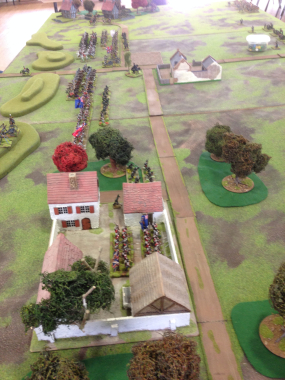
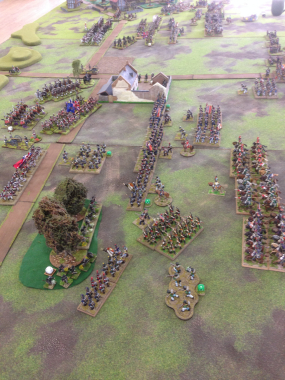
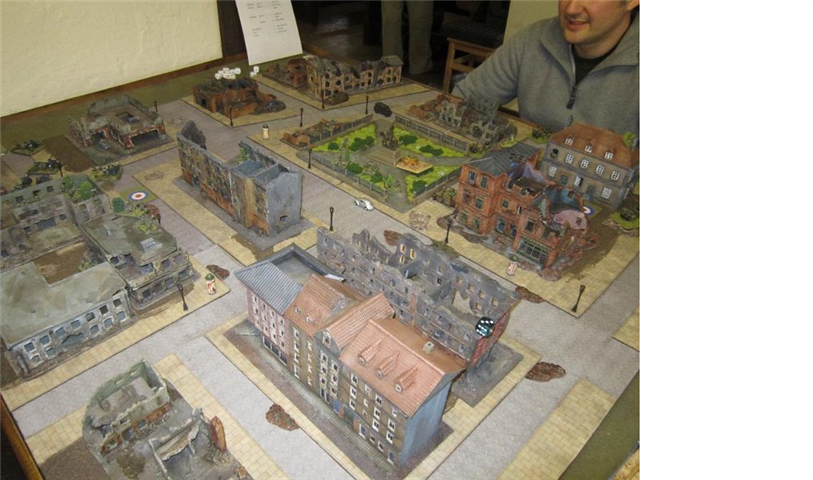
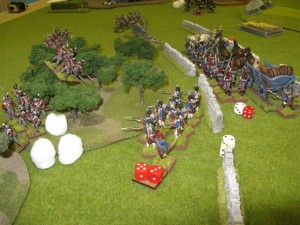
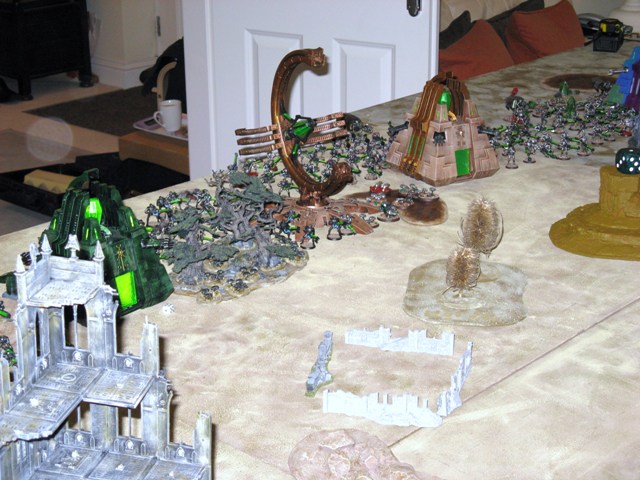
The Allies deployment -Hougoumont in the foreground.

The Allies deployment -Hougoumont in the foreground.

As we were approaching the 199th anniversary of the battle of Waterloo I thought that it would be fun to fight a large battle in the style of Waterloo. The plan was to put as many of our troops on the table and fight a scenario that paid homage to the battle rather than attempt to recreate it exactly. To this end The British and her Allies would be defending a line that ran from a small village ( ‘Papelotte’) on the left, along a road to a walled farm house on the far right (‘Hougoumont’), with another farm house (‘La Haie Sainte’) at a cross roads in the middle of the board. Just behind the road was a line of hills that would allow the British to place defensive artillery – not quite accurate but a nod in the direction of the reverse slopes that gave the British infantry cover during the battle!

The French troops were massed on the opposite side of the table and whilst they outnumbered the Allies significantly to start with, had no cover or defensive position. Their mission was simply to drive the British from the field before the Prussians arrived. The simple mechanic that we used to simulate this was that on turn 3 the Prussians would enter the table form the right on a dice throw of 6, turn 4, a throw of 5 and so on.

The rules that we used were the Black Powder Rules, without too much in the way of ‘extras’ from the recent supplements. I very much like the original rules and find that there are too many extras in the supplements that can both distort and over complicate the original rules set. That said, we do have a few of our own ‘house’ modifications and even with a large 12 foot by 6 foot table, still prefer to use shortened movement & ranges, basing everything on 66% of the original distances.

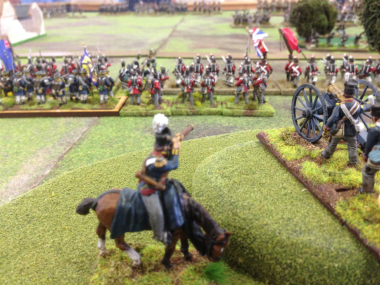
Mercer observes the French advance!

Mercer observes the French advance!

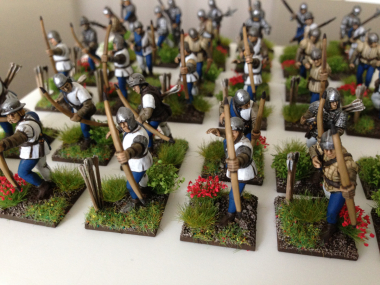
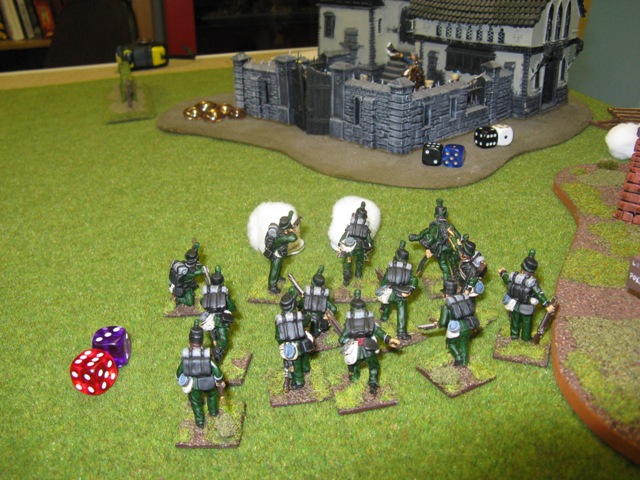
Our troops were a bit of a mixed bag, as we were short on the British side, so close scrutiny of the pictures may revel that the Allies consisted of a few Bavarian & Austrian troops! And so with the troops deployed, the battle got underway with the British advancing in line to take position just in front of the road. The 95th Rifles dashed forwards to garrison La Haie Sainte and form a skirmish line whilst the KGL rifles moved into the woods in front of Hougoumont.

In reply, the French moved to attack the village of Papelotte, set up the Grand Battery,  and they advanced towards the British Right Flank. Hougoumont was largely ignored, although there was a sharp exchange of fire between the skirmishers in the Woods in front of the house.

Turns two and three saw the French batter away at the defenders in Papelotte but to little effect. To relieve pressure on this sector, the British advanced past the road to attack the advancing French Columns, stopping them with a fearsome volley! ( or as the French General would say , some dead jammy dice rolling…how many 6’s!)  To add to the French woes, the Grand Battery was having trouble deploying effectively – a blunder sending them in the wrong direction. Add to this, the Centre also refused to move and so despite fierce fighting around La Haie Saint, the British right wing was holding it’s own, with the garrison in the farm house stubbornly holding on.

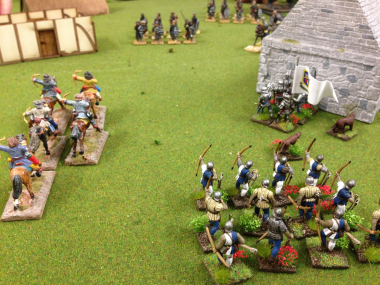
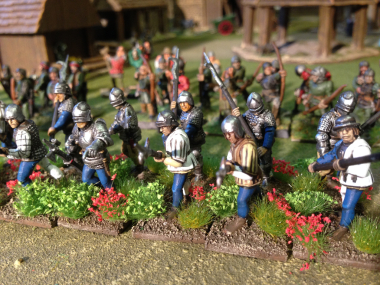
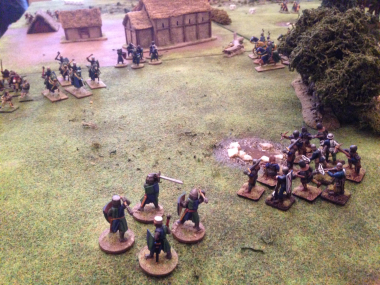
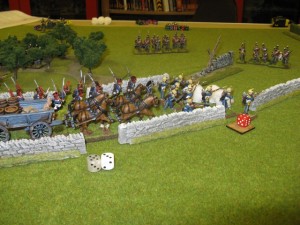
Fighting around La Haie Sainte

Fighting around La Haie Sainte

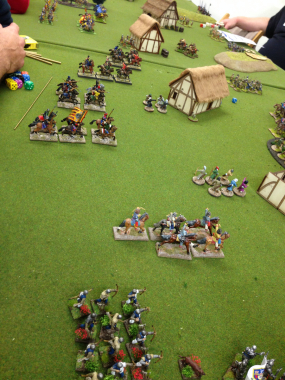
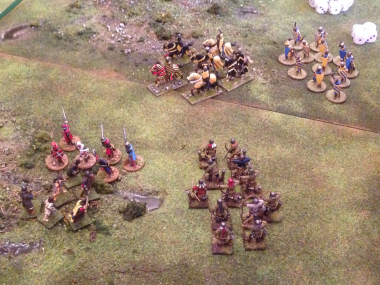
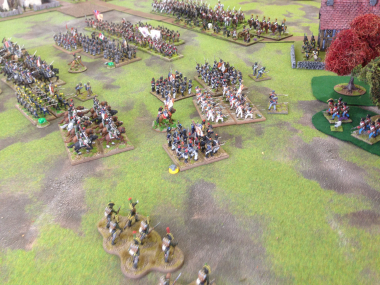
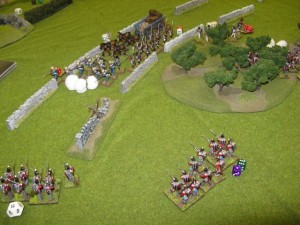
The French right wing attacking Papelotte

The French right wing attacking Papelotte

Turn 4 saw the British inflicting heavy casualties on the French left flank. The French Guard were soaking up the punishment but finding it difficult to make further progress. Faced with the Cold-stream Guards and taking heavy fire from both the Howitzer and the rocket battery on the hills, the French were beginning to waver. To add to their woes, the skirmish around Hougoumont had been won by the KGL and they were now advancing from the Chateau and threatening to out flank the French. The French centre still stubbornly refused to support the Guard and was becoming entangled with the small garrison at La Haie Saint.

At Papelotte, the Prussians were yet to arrive and the French were gradually making progress. However, the odds were that the Prussians would soon make an appearance and so rather than being able to exploit their stronger position, the French were forced to make provision for the threat to their flank.

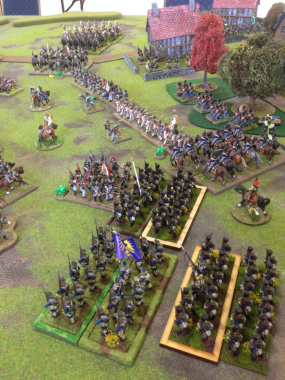
The Prussians have arrived!

The Prussians have arrived!

Sure enough, on turn 5, the Prussians began to filter onto the battlefield putting the French in front of Papelotte in dire trouble. To add to the French worries, the Guard brigade attacking the British Right flank had begun to crack and was falling back…

By Turn 6, the inevitable happened, and the French position became untenable. The Prussians drove into the flank, breaking the French Brigade attacking Papelotte and flanking the next French Brigade that was being held by the British Left.

Around La Haie Sainte, The French Guard Brigade had broken, and despite attempts to support it with the cavalry and troops from the French centre, it was now in retreat. The French had become entangled around the farm house and despite their best attempts could not shake the Rifle Companies defending it.

The ineffectiveness of the Grand Battery was overshadowed by the British Howitzer fire and amazingly, the Rocket battery, which scored 4 direct hits, causing mayhem!

Although the French had largely ignored Hougoumont, this time La Haie Saint had been their undoing, tying up too many troops and causing congestion in their lines. Strangely, the Cavalry on either side had been fairly ineffective. The British Cavalry had managed one charge but although they had caught a French Infantry battalion in the flank, they failed to do any significant damage. The French cavalry had also done very little. When called upon, they had failed their orders and refused to charge, lurking behind the infantry…

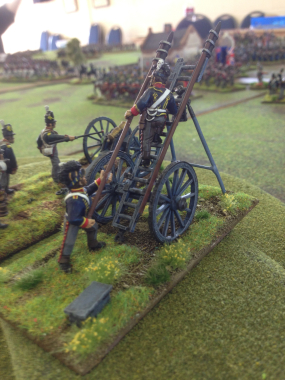
British Rocket Battery!

British Rocket Battery!

The star on the British side was the Rocket battery. With 4 direct hits, including a double hit on an advancing French Guard unit they had undoubtedly been the most effective artillery unit on the board! So a most enjoyable game (especially for the British!) – no doubt that the French will be back again!

Many thanks to Pete & Quentin for being such good sports and for doing the hard work in setting it all up!

Monday gaming post

By Mick Rood

Hello and welcome to the Sturm Uber……………. Blog, a periodical visit to the Flames of War tournaments held at Maelstrom games in Mansfield and strongly supported by Arcane scenary through providing prizes such as the MDF buildings in our range and particularly the popular Zvesda 1/100 vehicles from the ‘Art of Tactic’ game. Not specifically intended for Flames of War but the scale of the vehicles and aircraft is perfect for the game. Sadly, the infantry being at 1/72nd scale aren’t appropriate, unless of course you play FOW at that scale. Just in case you didn’t know Flames of War covers WWII battles mainly intended for 15mm scale but playable in most scales although probably a bit unsuitable for 28mm where more skirmish/squad level rules would be appropriate. The Flames of War ruleset is supported by the vast Battlefront range of figures and army books covering a large part of the 1939-1945 conflict, the book and figure releases come hard and fast.

Sturm Uber………….was originally set up by the lads at Maelstrom when they supported the Battlefront range but some trade differences meant that stopped temporarily. Whilst Maelstrom had a business difference they knew FOW was very popular amongst its club members and wished the players should continue. They invited Myself and Tommy Brown, regular ‘Flames’ players, to maintain their FOW competitions on their calendar. So the ‘ReluctantConscripts’ were born and our first venture was Sturm Uber Europa set in the Mid War (1942-1943) period covering the War in Russia, Western Desert, Tunisia and Early Italy/Sicily.

Considering the theatres and terrain is a considerable part of the pleasure of Flames of War. It has simple but comprehensive and effective terrain rules that allows players to enjoy good detailed terrain without loss of playabilty. Potentially a competitor can find themselves on the open desert or in the claustrophobic horror of Stalingrad. The ideal, of course, is to have the right mix of opponent in the right theatre but competitions tend to spread history somewhat so that isn’t guaranteed.

Sturm Uber Europa in June 2011 was Mine and Tommy’s first joint effort and our aims were to maintain the quality of the Maelstrom events and appeal to the wide competition circuit. Saturday morning saw 30+ players landed at Maelstrom for the weekend and 5 full games. The day always starts with briefing and doughnuts as the draw is concluded. It is always the intention not to have, so called, ‘Blue on Blue’ games where you play the same nationality as yourself. The quirks of army choice don’t always mean a perfect balance but the lads feel that the best enjoyment comes out of historical faceoffs where the uniqueness of each nation/force is brought to the fore. Flames of War cleverly brings out the traits of each nations fighting style, this is further enhanced with particular unit traits.

Maelstrom sorted out the food for us with their expanding kitchen facilities and looked after the drinks side with the very busy bar. I would like to add in a thank you to Maelstrom at this point, not only is the venue excellent for this type of event, the staff on food, at the bar and in the shop are always there to help with Gary Moore and all of them working their b**ts off to look after us.

The event includes awards for best sportsman and best painted army, the competition for these prizes was very close and shows the ethos of most players to make the experience enjoyable for BOTH players. The painting standards were excellent and the skills of all the entrants to be admired. We don’t allow unpainted/unrepresentative figures except in the most exceptional circumstances. Take some time to check the pics of the various forces.

Fierce fighting ensued and here are pictures of some of the excellent armies showcased at Sturm Uber Europa.

Strum Uber Deutschland.

November saw the second outing and Sturm Uber Deutschland continued the WWII story covering the Late War (Late 1943, 1944) with terrain for Normandy, Italy, Russia and Poland. Although this period of the war saw vast distances quickly covered, the hardest fighting had bogged down into city ruins, Normandy bocage and Italian hills and vineyards. The big breakthroughs often came after weeks of gruelling fighting. This can produce some fantastic terrain where the detail is increased as the terrain closed down for these bitter fights.

Sturm Uber Deutschland saw an increased turnout and once again the sponsors had been very generous allowing us to give prizes and a free raffle so that everyone left with something.

Once again, Gary and the Maelstrom crew excelled themselves.

So that was the Sturm Uber series in 2011. We will repeat the June and November events as Mid War and Late War but will start the series in March with Sturm Uber Dunkirchen. The first Early War competition to be run by the Reluctant Conscripts and at Maelstrom

STURM UBER DUNKIRCHEN MARCH 2012

36 Players from all over the UK journeyed to Mansfield to take part in our latest Early War event. It was a great weekend, great players, great atmosphere and great food. This was our swansong to version 2 of the Flames of War rules and it saw us out in great style. We had Polish cavalry demolishing artillery parks, trains chugging up and down tracks, hordes of Italian & British tanks and the surgical strike force of the German Heer.
Steve Charlton won not only Best General but also Best Painted Axis army with his lovely grey panzers. Kevin Brewin won Best Axis General and Jez Evans won Best Allied General. Ian Mann ran away with Most Sporting while Mark Mainwaring won Best Painted Allied and Richard Heath deservedly won Best Play Provided Table with his Warsaw board including poster booths and cars.


Shown above and below are road sets provided for us by Arcane Scenery and they also stock the river shown and the buildings below, manufactured by Sarissa Precision…

The Panzers batter the Allied defence lines

Richard Heath’s fantastic Warsaw city scape

NEXT EVENT JUNE 9/10 2012

The Only Wargamer in the Village

I have been fortunate to find that I was not the only wargamer in the village, and there is now a small band of wargamers in Bingham that meet once a month.

This month we were guests of Andy Callan, a very experienced wargamer and historian. Andy was the inspiration that led me to build my own wargames table. It was after i saw him set up that I realised I could build me own wargames room in my garage (see previously).

Andy had set up this months’s game to be a refight of the Battle of the Byne, and using his own in house rules and figures, with Andy acting as umpire, the Protestant Army of king Billy once again attempted to cross the Boyne and defeat the catholic King James.

Without taking you through a blow by blow account of our battle, the game pretty much followed history. Once again the Elite Dutch guards (commanded by Dave King this time around) forced a crossing at Oldbridge to capture the village, whilst the Williamite cavalry were eventually able to cross the Boyne and hold back the Jacobite cavalry, forcing the Jacobite army to retire in good order.

The pictures show the various phases of the battle.

Also of note are the figures being used. Andy is still a great fan of 20mm or 1/72nd scale plastics, meaning that he has amassed the most amazing collection of armies as a result.

He is able to field comprehensive armies from most of the recognised historical periods.

So, if you are thinking of starting in the hobby, don’t think that 28mm is the only scale. You can build huge armies using 20mm figures and the result is just as much fun as battling in 28mm.

Sharp Practice – My first major skirmish!

Having started the conversion from Warhammer 40k player to historical wargamer I found that there were two major challenges to overcome. The first was, of course, to assemble and paint some models, the second was to find a rules set that suited my style of play. I had already used Black Powder and I have no doubt that I will again return to these rules, but they are written for brigade sized armies at least and are more suited for fighting battles involving large numbers of figures.

Although my painting is moving along at a reasonable pace I still only have around 100 figures completed and I wanted to get them on the war games table. It was fortunate that I happened upon the rules set written by the Too Fat Lardies, ‘Sharp Practice’. They were just what I was looking for and are ideal for playing a skirmish type game for the size of army that I could muster.

To be honest, I found that the rules were so different to what I was used to, I couldn’t make head nor tail of them. Once again, fortune smiled in the form of Mick Rood, one of the 1st Veterans club members, who, having had a background in historical war gaming, was able to show me where to start. Looking back I’m not sure why I was so confused, the rules play superbly and make for an enjoyable, relaxed game with a narrative running through that keeps you engaged throughout. After two games, not only was I hooked, but I felt sufficiently confident to come up with a very simple scenario for our third game.

So here it is, with Mick Rood fielding his French Napoleonic detachment against my British, my biased account of the battle of Chateau Chesney……

Scenario Set Up

The French were to defend Chateau Chesney and had a cannon & crew and a unit ( or group as per the rules) commanded by Major Tirez Les Brits. However, they were running dangerously low on vin rouge and so were awaiting a resupply. This was on its way with a cart full of wine, sacks of bread & cheese and reinforcements, all making their way along a walled road to the Chateau. The cart was guarded by three units of troops, all deployed in column. The officers commanding these units were Captain du Pain, Lieutenant du Vin and Sergeant Boursin! The French were aware that the British might be in the area and so were permitted to place piquets outside both of the convoy and the chateau to look out for trouble. The French were to stay in formation, with one unit in the vanguard, next the cart and then two further troop units following behind. However, once they spotted the British or heard the cannon firing from the Chateau, they could break formation and deploy as they saw fit, to chase off the Brits.

The British were to set up anywhere on the table edge and were permitted to set up as ‘blinds’ with two dummy cards to add to the French confusion. The British force consisted of one cannon and crew and a detachment of redcoats commanded by Captain Young, two groups of the 4th Kings Own, commanded by Lieutenant Carruthers Winstanley-Wormwood , a detachment of Hanoverian Verden Landwehr commanded by Sgt Barker and the Officer in charge was Major Dick Blunt, commanding a detachment of 95th Rifles and a detachment of redcoats. The British outnumbered the French by two groups (24 men) but the French had the advantage of the defensive position in the Chateau.

The rules for ‘Sharp Practice’ run according to the turn of a pre designed deck of cards. Each phase of play ends when the ‘Tiffin’ card is turned. Rather than describe each round, I’ll split the battle into 3 phases.

Phase 1 – The opening Shots 

The British had deployed in ‘blinds’ and the plan was to move quickly into position to assault the Chateau and ambush the convoy. Major Dick Blunt had decided to lead the assault on the Chateau, whilst the rest of the force would deal with the supply convoy. However, the French piquets were on the alert and quickly spotted the British, causing them to deploy before they could move. This meant that the British cannon was unable to see the French convoy and could only fire on the Chateau. As well as spotting the British, the French had made good progress along the road and with the French Voltigeurs leading the way, they were confident of completing the resupply mission.

Winstanley-Wormwood led his detachment into the woods adjacent to the road and opened fire on the French Convoy. Sergeant Barker bravely led his Hanoverians to cut the road in front of the Chateau. Captain Young brought his artillery piece to bear on the Chateau but, sensing that Sergeant Barker would need support, also sent his detachment of redcoats to cut the road. The French were quite undeterred and in a brief exchange of fire inflicted sufficient casualties on Winstanley-Wormwood’s group causing them to fall back, leaving a unit of Redcoats in the trees without leadership. Furthermore, the cannon in the Chateau opened fire on the Hanoverians, causing casualties in this group as well.

On the far left of the field of battle Major Blunt and his mixed force of Riflemen & redcoats were making extremely slow progress towards the Chateau. So slow in fact, that the French largely ignored them….

Phase 2 – It’s getting hot out there!

The only real problem that the French had at this point was that the redcoats in the trees adjacent to the convoy were still tying up Lieutenant du Pain and his unit, causing a bit of a road block that prevented the supply wagon from moving up the road. This meant that Sgt Boursin was also prevented from joining the action. Winstanley-Wormwood’s group had now left the field, although he had stayed and was shouting encouragement to his remaining troops from a distance, whilst ambling back to the action.

Major Blunt was still edging his group towards the Chateau and had given fire, causing the odd casualty, but was still not unduly worrying the French. In fact, they were more pre occupied with pounding poor Sgt Barker & his Hanoverians. A lesser man would have run away, but brave Sgt Barker, supported by the Artillery detachment, had moved into position to block the road.

This was enough provocation for the French. Captain du Pain, leading his elite Voltigeurs, moved down the road and engaged the Hanoverians, reducing them to just seven men and pushing them back. Only the towering presence of Sgt Barker stopped them from breaking completely. Lieutenant du Vin led his unit over the wall to flush out the Brits in the trees and opened the road to allow Sgt Boursin to move his group up in support of the Voltigeurs, whilst moving the supply wagon further towards the Chateau.

All that the British artillery could do was to pound the French artillery in the hope that they would stop the guns or at least keep the French gunners’ heads down enough to spoil their aim. As the game continued the British aim improved and gradually enough shock points were inflicted to reduce the French gunners effectiveness.

At last Major Blunt and his men reached the Chateau walls and at point blank range opened up on the defenders. After unleashing a fearsome volley of rifle and musket fire, the smoke cleared to reveal that the dastardly French had ducked behind cover and not one of them had been hit. To add insult to injury, they were now shouting rude words and making rude gestures at Major Blunt. This was just too much to take!


Phase 3 – The Finale

The last phase saw the British fortunes take a turn for the better. Winstanley-Wormwood had finally rejoined the remainder of his unit in the woods and with his encouragement their rate of fire increased to the point that Lieutenant du Vin and his unit were forced to retreat back down the road, having taken a number of casualties.

Sgt Barker had steadied his men and, reinforced by the detachment from Captain Young, had re imposed the road block and was holding Captain du Pain and Sgt Boursin at bay.

Back at the Chateau, the taunting from the French had become too much for Major Blunt to bear and he decided to resort to Fisticuffs! He led his men over the walls to assault the French. Major Tirez les Brits, although heavily outnumbered, put up a brave fight and initially resisted the assault, inflicting as many casualties as his men had taken. However, the superior numbers of the British began to count and Major Tirez decided enough was enough and left with his remaining men via the back door of the Chateau. Major Dick Blunt had won the day!

Although the supply cart was still with the French, the Chateau was captured. The British had a warm place to billet and the French went off to drown their sorrows!

On Reflection


The simple scenario worked well and gave the game a narrative to make it fun throughout. Mick was most generous throughout the game and suggested a couple of changes to the rules that made life more difficult for his French. The first was to allow the British cannon to fire as though the Chateau was soft cover rather than hard cover. This was to allow for the fact that no damage was being logged on the building and that the British could have been firing Shrapnel rather than round shot.

The second change was to remove the Tiffin card for the last round of the battle, allowing all units the chance to fight. It was this factor that allowed the British to assault the Chateau. Had the cards come in a different order the result may well have been very different. In future games we will use two tiffin cards as there were a number of turns where tiffin happened very early in the turn sequence, with the result that many units were left standing around – hence the length of time it took for the Rifles to get to the Chateau.

Other than those observations, the game was great and I am now hooked. We are  planning a larger campaign. Watch out for more adventurers of Major Blunt and his men!

Continue reading

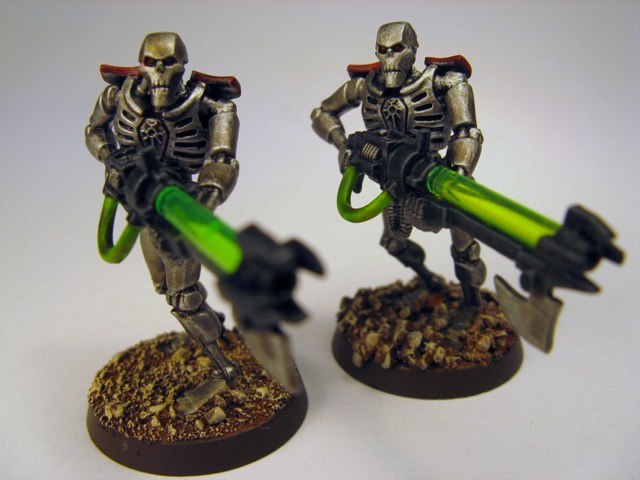
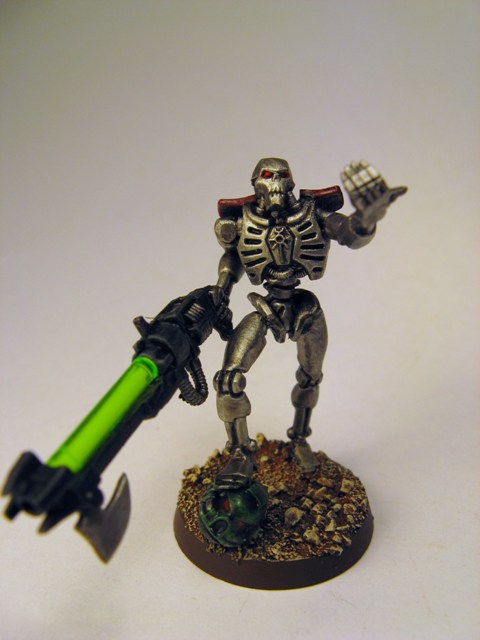
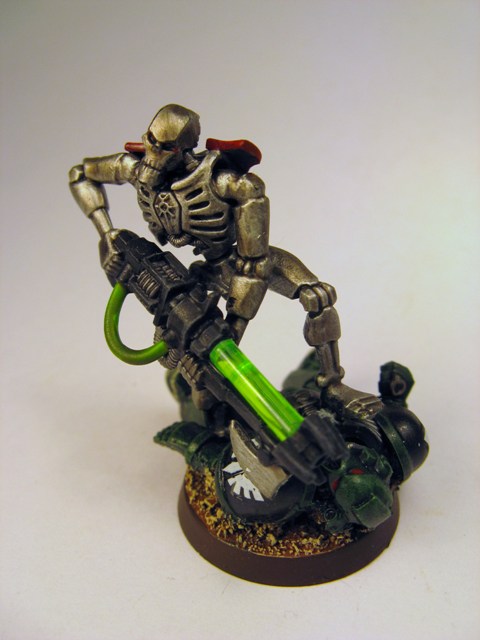
NECRON APOCALYPSE!

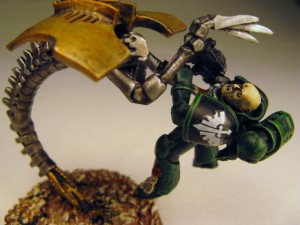
I can’t believe that it’s nearly a month since my last Blog entry. It has been a very busy time, both in my ebay shop and on the hobby front, so it’s not as though I haven’t got plenty to write about. I should really catch up with all the new releases that I been listing and those that are due to be released, but instead I thought that I would tell you about my latest exploits with the Necrons!

I had been invited to play in an Apocalypse size game over at a friends house. Pete had a ‘free’ weekend as his Missus was away and given the choice of tiling the Bathroom or playing toy soldiers he did what any sensible person would do and organised a battle! We had decided to play 4000 points per person, so with 4 players, there would be 16000pts of figures in the game. Our opponents, John & Ritchie were playing with a mixture of Dark Angels Space marines, Imperial Guard & Sisters of Battle. Pete & I had 8000 points of Necrons.

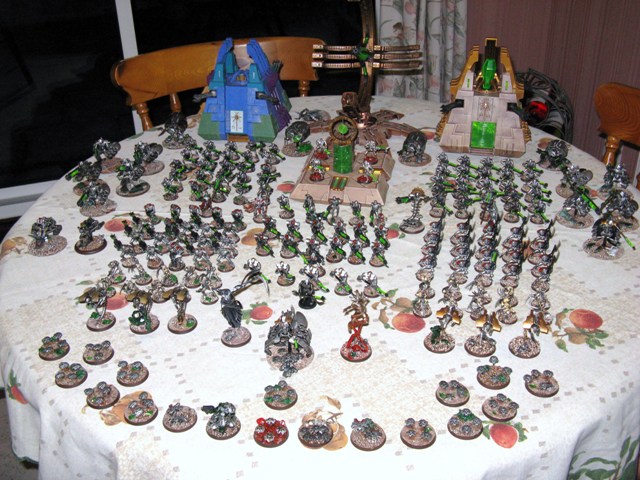
The evening before the Battle I laid out my entire Necron force to decide exactly what I would take. The Kitchen Table isn’t exactly the most glamorous of setting for the army but it allowed me to see exactly what I had. The Blue Monolith is awaiting a repaint job, I’ve been meaning to do this for a while but the Wife found the Fairy Power spray that I use to strip paint and used it all cleaning the kitchen…….

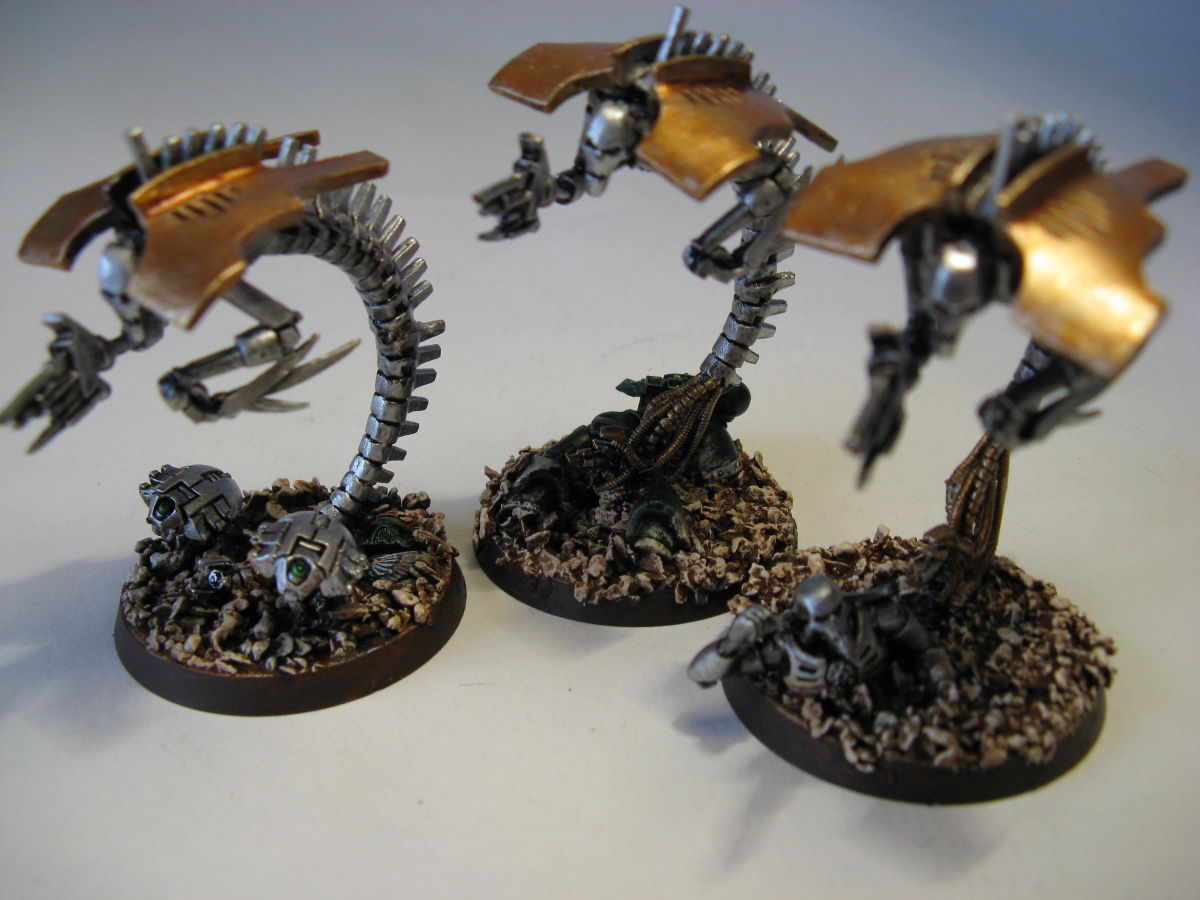
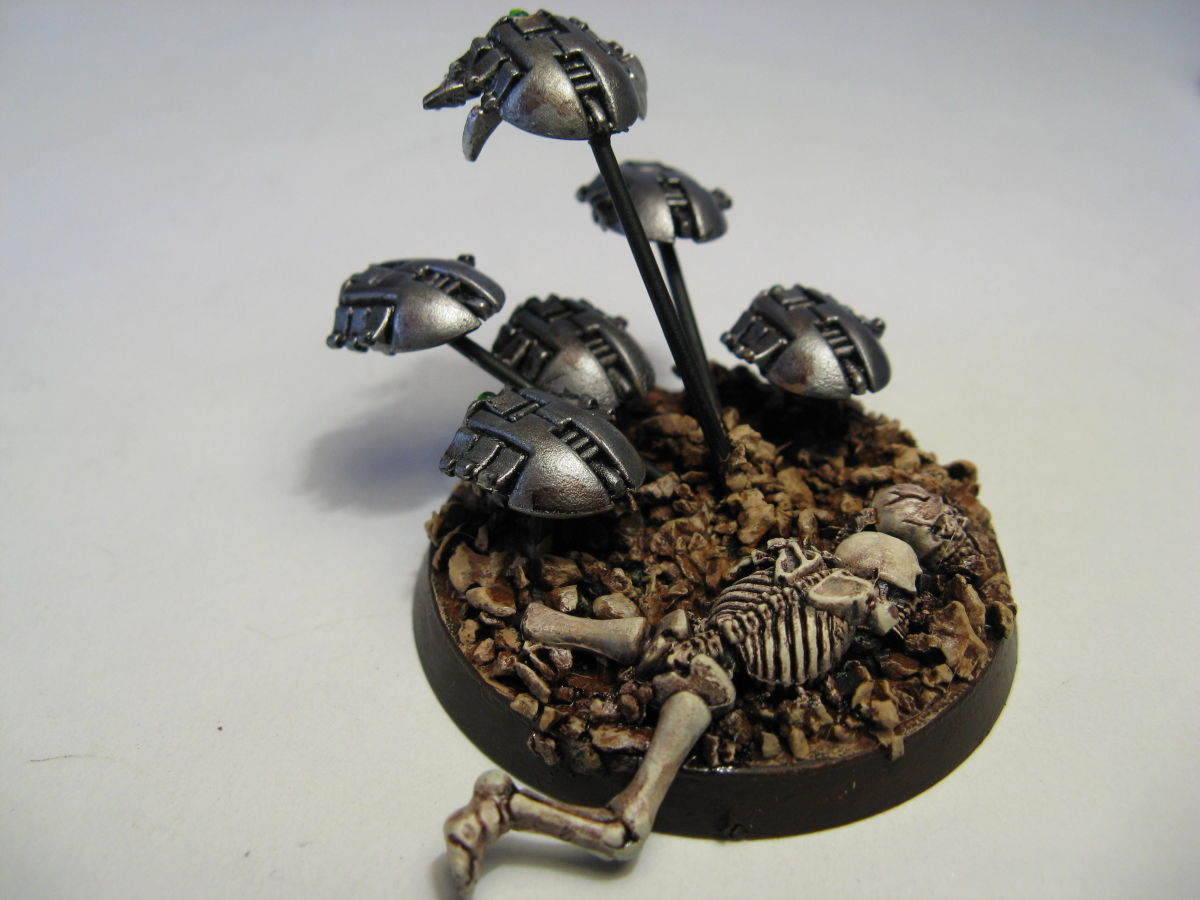
I digress, back to the Army selection. In the end I went with the advice that I had been given by Rob, an experienced 40K player, and kept things fairly simple. The basic force was the Necron Pylon, 2 Monoliths, 80 warriors in four big squads, two Lords & res orbs, the Wraith Wing plus a tooled up Destroyer Lord, 5 Tomb Spiders, 4 Heavy Destroyers and lots of Scarabs. Pete went for a slightly more exotic force and included plenty of Immortals, Destroyers, Heavy destroyers, a Monolith and The Night Bringer. He also had a few units from a Tempus Fugitive rules set (and I will return to these in a later blog) but for now, the units were Dark Destroyers and Tomb Guard.

I don’t have the details of John & Ritchie’s army but suffice to say that there were 2 super heavies to contend with as well as plenty of other Tanks & Special Characters…it was going to be a tough game. The board was set up in Petes lounge and was about 8 foot by 16 foot with plenty of scenery. To make life simple we agreed on a pitched battle deployment with an 18inch deployment zone on each table side. We lost the roll off for deployment and so set up first. The pictures that accompany the article are all of the initial deployment. Unfortunately, I had flat batteries in the camera…Doh! Again, to simplify the battle, we didn’t use either stratagems or strategic assets. We thought that there was enough going on with the size of the forces deployed. As it turned out, this was a good idea, as it was my first apocalypse battle and I really wasn’t up to speed with all of the special rules. In fact, before the game had started I had made a serious mistake. I had allocated 700 points for the Necron pylon….stupid boy! The Pylon is actually only 420 points, I could have had another squad of Immortals!

So with the deployment completed the Battle started at around 10. 30 ish. Once again, we managed to loose the roll off for first turn, so the Imperial Army started to move & fire….and fire…..and fire! I won’t go through every turn in detail, it would take far too long, but here are some of the highlights & low lights from a necron point of view.

Actually, the first turn was fairly low key with much long range shooting, even more movement but little in the way of casualties. Most of the big Guns were either shooting at the Pylon, which eventually took a hit and lost a structure point, or targeting the Monoliths, which seemed equally resilient. The biggest threat to my side of the battle came from two drop pods containing dreadnoughts, one of which was an Iron clad. That said, my first experience of an Apocalypse battle turn was scary. For about half an hour I was just taking fire from those big pie plate templates and making saving throws. At last it was our turn to shoot back and with a Hellhammer threatening the Centre of our Line, a Stormblade to the right and the Dreadnoughts to the left,there was plenty to aim at. The Pylon hit the Hellhammer and joy of joys, blew it to pieces with its first salvo! I also managed to kill one of the dreadnoughts and attacked the Iron clad with my Destroyer Lord & the Wraith wing. A big mistake, as although they didn’t get killed, they stayed locked in combat with the Dreadnought for the next 5 rounds! The Lord managed to chop off the dreadnoughts’ combat arms but he just could not kill it, even when a Tomb spyder joined the fight! Over on the right wing, Pete’s Necrons were delivering a huge volume of fire but were either missing, or seeing their hits saved. It was a case of fire & fall back.

Turn 2 started again with a huge volume of fire from the Marines, the Storm Blade was keeping it’s distance though. Having seen what happened to it’s fellow super heavy, the Stormblade lurked far out on the right of the battlefield, out of LOS. That apart, the onslaught continued with the Marines in rhinos & landraiders advancing to fill the gap in the centre and another wave of drop pods to my left. Just to add to our woes, 5 large squads of bikes were turbo boosting at us, threatening to over run our lines. The Necron Pylon was disabled for a turn and this time , even with the ‘we’ll be back rolls’ the casualties started to mount. Our Monoliths were absorbing a huge amount of fire and despite using the Particle whip, were ineffective at inflicting hits on the opposition. The necrons were also suffering from the short range of the Gauss weapons and so were unable to deal with the long range Las Cannons & Devastator squads. Shooting again was ineffective on the right and apart from suppressing the Drop pod attack on the left, the Necrons made little progress.

If Turn 2 was all about shooting, the Turn 3 saw the start of the assault phase of the battle. However, before the close combat started the Necron Pylon was blown to pieces by a well placed lascannon strike. Just to add insult to injury, about 20 Necrons were blown up in the ensuing explosion…..that hurt! The right wing was also beginning to cave in from the pressure from the Stormbalde and the huge bike squad. In the centre, the Landraider had reached our lines and had discharged a huge Squad of tooled up assault Terminators who were ready to inflict grevious damage on the defending Necron Warriors. However, they had failed to spot that concealed behind the nearest Monolith was none other than the NightBringer. Just as they declared their charge, he used his Etheric Tempest to push them back 2D6. They were now sitting targets for the majority of the Necron army! Meanwhile elsewhere on the board combat was raging between Flayed ones & Sisters of Battle, Wraiths & Marines and Scarabs and Marine Bike squads. The Imperial side won most of the fighting, but at a cost. The exception was the scarabs, who managed to hold up two squads of Marine bikes for a turn!

Turn 4 saw the Necrons making some progress on the left wing with the first wave of marines and their drop pods now battlefield debris. The Necrons had also realised that the most effective use of the Monoliths was to use the portal to transport any threatened squads out of harms way. This also had the added bonus of giving casualties a second we’ll be back roll and re -deploying the squad to enable them to rapid fire the nearest threat. Add to this the fire from the Gauss Flux arc and the Monoliths were earning their keep. They had also absorbed a fearsome amount of incoming fire without even a scratch. Even better, in the Centre the Nightbringer had polished off the Terminators and was munching his way through the following squads. However, there was still the small matter of the Stormblade on the right wing that was beginning to rumble forward and smash everything in it’s path.

The game finished at Turn 5, simply because we had run out of time. The threat on the right wing had continued to grow and by now our Necrons in this this sector had collapsed into the centre and were being ground down by the Storm Blade & the accompanying bike squad. The good news was that the Centre was holding and led by the Nightbringer, our formations were beginning to advance having destroyed all of the major units that had attacked here. The left wing was in the balance. The Necrons had caused as many casualties as they had taken but the next wave of bikes were about to hit. If the Necrons could hold in combat, then they would carry this sector, as Ritchie was running out of troops. The question was never answered….

So who won the battle? On balance it felt like an Imperial victory was likely, although it would be a close run thing. John & Ritchie still had a super heavy on the table and seemed to hold the initiative on both wings of the battlefield. They also held more territory. That said, the Necrons had held out under a ferrocious onslaught and still had a potent fighting force on the table. If they could reorganise their centre and stop the advance on the right wing, the day would be theirs!

My first Apocalpse Battle had been great fun. Apocalypse feels more like the 40K universe as decribed in the background books. This is no place for individual soldiers, this is a battle of heroic characters, battle formations & huge tanks and engines of war. The whole feel of the game is different to a standard 40k game. I think the size and duration of the game lets you forget about winning or losing and allows you to focus on just playing and enjoying the game and of course the Company of your fellow gamers!

Necrons appear to be well suited to the game. Their durability means that they are capable of standing up to most of the weapons that they will encounter (so long as there is a res orb close by). The only shortcoming is the lack of range of the weapons available. The one exception to this is the Necron Pylon, so a note to myself, next time I wont deploy it right in the middle of the battlefield but somewhere else where the 120 inch range will be useful……

So thank you to Pete for his hospitality and letting us use his house for the Battle and for supplying the superb battlefield and scenery. Thank you to John and Ritchie for being such great opponents and making the game such a pleasure to play. I can’t wait for the rematch…..WE’LL BE BACK!

Losing a Battle isn’t all bad.

You often learn more from your defeats than you ever do from your victories. Lets be fair, if you are anything like me, when you win you are too busy celebrating, taking the aplause from onlookers, and patronising your vanquished opponents with phrases like ‘well you did have some really unlucky dice rolls’ to remember anything other than the fact that you won. I mean, let’s be fair about it, keeping the smug look of your face whilst your opponent packs up his defeated army is tough enough.

But when you lose, that’s when you learn and that’s when you find the energy to change your Army list or think about new tactics. That’s when you vow to think a bit more about your troop deployment before the battle starts or to figure out the best tactics for each unit in your army. How do I protect the more vulnerable units and how do I commit the big hitters?

Well my results of late have taken a bit of a dip. I’ve had a draw against Chaos Space Marines that I should have won. ( My necron Lord flew into a building and killed himself….not his finest hour); a draw against Space Marines, (that was a good result, a very tough battle); a loss against Dark Eldar ( the rot had set in, curse those Talos); a victory against Imperial Guard ( flattering, it was a new army, still in development) and the most recent battle, a loss against Chaos Marines. It was the most recent battle that has prompted me to revise my list again. Here’s why.

I was playing against Studge at the Warhammer World Club and he had brought along 1500 points of Chaos Space Marines, consisiting of 3 large Squads of tooled up possessed Space Marines in three Rhinos, 2 Defilers, A Demon Prince ( with lash of course) and Fabius Bile. The set up was Dawn of War and we were fighting over 4 objectives. As Studge only had 1500 points, I had to trim my army, so out went the Pariahs, 2 Immortals & a Scarab swarm. For the rest of my army, see my previous battle reports. I had first turn and so deployed two squads of Necron warriors to defend the two objectives on my side of the table. Studge went for a very aggressive set up with 2 squads of possessed marines & the Demon Prince as close in as he could get.

004

Learning point number one. Why was I so concerned to defend the objectives from turn one? I’ve got at least five turns to get to the objectives. Turn one should be about getting in position to cause the enemy the most problems, not give him a clear target! What was I doing committing both troops choices that I had so early?

Just to rub the point in, Studge rolled a six to steal the initiative and immediately sent his chaos horde rampaging forward. The Demon Prince lashed the nearest necron squad straight into combat with the biggest Possessed Marine squad. The necrons lost combat and were wiped out. I now only have one squad of Troops left and they’re next on Studges hit list. It was fair to say that I was rattled. In my turn, I had some luck with my Heavy destroyers. They rolled an eleven to give them night fighting range to see the demon prince and then rolled 3 hits and three wounds, none of which were saved. The Immortals also opened up on the Demon Prince and that was the end of that bad boy! However, my triumph was short lived. I then charged his Marines with the Necron Lord and two wraith squads. Just for good measure I piled in with the scarabs as well. This was a great way to snatch defeat from the jaws of victory. I had forgotten that his Marines were drugged up to strength 6, so they gained instant kills on the scarabs, which put me three wounds down for every base killed. The result being that I lost combat with three of my Waiths down, all of my scarabs dead and my Necron Lord running away. It would seem that rather than drinking from the cup of Victory I would be enjoying a taste of that infamous American whine….’it’s game over, man’!

Learning point(s) Number two: Don’t panic, if things have gone wrong the worst thing that you can do is commit units for the sake of it. Choose your targets, The scarabs are to be used against units to either tie them down , draw fire or divert the enemy. They may be a cheap unit but don’t throw them away. Of course, it goes without saying that charging against a unit that will instant kill you is just a waste of time.
001

Studge then started his turn two. With no Demon Prince to lash my necrons he had to foot slog it towards them ( I forgot to mention that in the last turn, the surviving necron squad had made a tactical withdrawal, AKA ‘run like hell, there’s a monster coming’!) Fortunately, his defilers were on the other side of the table, so they were alternating between firing & running and not hitting much. His rhino’s were also still at the back of the table and worried about the Heavy destroyers shooting them up and so were moving cautiously towards my side of the board. The real action was back with the Possessed marines. They piled into the Necron Lord again and wiped out the remaining Wraith squad. However, all this was at a cost and gradually they were being whittled down by combat and dying from O.D.’ing on combat drugs.

By the end of turn four I had wiped out the two squads of possessed marines in the centre through combat and fire from the immortals, destroyers and the remaining Necron squad. The Necron Lord was the real hero. He was at his tubthumping best doing his Chumbawamba chant ‘I get knocked down, but I get up again……’ The Flayed ones had made an appearance and were threatening the Chaos Rhinos with the last Marine squad and Fabius Bile and one of the defilers was blown to pieces. The end game was going to be tight!

Learning Point number Three: The battle isn’t over until the last man is down! Keep fighting with what you’ve – focus on knocking out his best units and ignore the rest.

002

So the last squad of Chaos marines had to charge the Flayed ones. They just couldn’t ignore the threat that the Flayed ones posed, which meant my last squad of troops were in the clear. Well nearly, Fabius Bile charged into them but joy of joys, they not only held but valiantly fought back. The Flayed ones died under the attack from the chaos Marines but caused enough damage to allow the Heavy destroyers to wipe them out in the next round aided, once again, by the Necron Lord. The last Defiler had raced across the table and engaged the immortals. They were always going to lose that fight but they held for a turn.

If things were tight at turn four they were right on a knife edge at turn six. By now the necrons had killed every thing in the Chaos Army except the last defiler. The battlefield was littered with the wreckage of three rhinos’ , a defiler, the bloated drug ridden bodies of some 30 Chaos Marines and even Fabius Bile was history. I had taken one of the objectives with my necron squad and the enemy had nothing left to threaten it. The problem was that I was two necrons away from phase out and I had let my Heavy destroyers get too close to the defiler. With one last charge, it ambushed the destroyers and killed two. Fortunately, they were within range of the Lords Res orb and so on my turn I was able to roll the we’ll be back save & both got back up. Hurrah! I then charged the Necron lord into Combat. Surely with his warscythe he would save the day….He rolled one penetrating hit and one glancing hit….I just needed a 5 or a 6 to win the game. I rolled a 1….bugger! I was more fortunate with the glancing hit and immobilised the Defiler but with his last attack he killed three destroyers and this time there was no ‘we’ll be back’.

The Necrons went into phase out and the game was lost. To be fair, they took the view that their job was done and it was time to get back to the Tomb for some Necron R&R. Well, that’s the way I saw it.

Learning point number Four: Destroyers have got a range of 36 inches. Keep them out of combat, they’re for moving and shooting!

003

So the game was lost but in a most enjoyable way. Studge was a great opponent and we had a lot of laughs through the game as it ebbed and flowed. I also enjoyed the narrative that the game played out. Even the ending seemed appropriate. How am I going to revise my list? Well you’ll have to wait for the next battle…

Learning point Number Five: The best games are the ones that are fun regardless of who wins.

Wraith Wing conquers again!

Once again I find myself gloating over a Necron victory. That’s two in a row now and I’m beginning to believe that the Necrons aren’t such an uncompetitive army as I had first thought. The Necron Wraith Wing was pivotal in the victory and this time they were still standing at the end of the battle despite being in the thick of the fighting.

My opponent, Adrian, was fielding a Dark Angel Space Marines and this time the army size was 1750 points. So how did I spend the extra 250 points? Well I gave the Necron Lord even more wargear in the shape of a phase shifter and Warscythe making him a 210 point character. ( Just about legal, the codex says that the Lord can replace his Staff of light with a warscythe and have 100 points of war gear). I also added a squad of three heavy destroyers to deal with any heavy armour and I swapped out a squad of 10 Necron warriors for 5 Pariahs. I had a few points left so I was able to increase the scarabs to a squad of 8 to make a total of 1747 points.

pariahs

Now the most debatable change to the list was the Pariahs. They’re expensive and they’re not Necrons so they dont have the ‘we’ll be back rule’. They also affect the phase out number adversely, so the general advice is dont take them. Well I ignored this because on the positive side they have the same fire power as immortals but they carry warscythes so they can be devastating in close combat and they push down the enemies leadership to seven whilst being fearless themselves. On that basis, I thought that I would give them a chance.

The enemy consisted of 1750 points of Dark angels, which as I remember consisted of the following: 2 razorbacks with two 5 man combat squads embarked, 2 dreadnoughts, 5 terminators, An assault squad led by a Chaplain, A six man bike squad with an attack bike, a devastator squad and a spare squad of marines. The mission was a three objective spearhead set up so rather than go through turn by turn I thought I would take you through how each squad did.

To start with the scarabs did what they do best, turbo boost straight at the enemy gun line finishing just about 14 inches away so that it’s clear they cant be assaulted but licking their lips at the prospect of jumping the devastator squad. Well that sort of thing tends to concentrate the mind, so my opponent had little choice other than to try and shoot the little buggers before they chewed him up. So half of his army opened up on the scarabs. They survived , of course and piled into his devatators. They weren’t going to win the combat but they were going to tie the squad up for a couple of turns and stop them knocking over my troops.

While this was going on my Heavy destroyers stayed well out on the flanks picking off his armour. During the course of the battle, they accounted for one of the dreadnoughts, a razorback and two terminators for no loss to themselves.

The two squads of necrons were holding two of the three objectives, whilst the Immortals & Pariahs advanced on the third objective. They cleared the marines from this objective with shooting alone but I was holding them back as I expected the terminators to deep strike into the rear of my army. I wasn’t disapointed and on turn three in they came. It was at this point that the battle would be won or lost. The situation was that The wraith wing had jumped the marine assault squad and were gradually chewing through them, the Dark angels bike squad were engaged in close assault with one of my necrons squads on one objective and the other objective was now threatened by the terminators and a marine squad in a razorback. Fortunately the terminators scattered towards the Pariahs so Adrian had a simple choice. Shoot at the necron squad and clear the objective but then be assaulted by the Pariahs or try to kill the pariahs first. He went for the Pariahs & killed two and the remainder failed their morale check and so retreated from the battlefield…not so good. However, this left the Terminators open to rapid fire from the necrons. So all my unengaged necrons opened fire, That’e 16 shots from the Necron squad, 20 shots from the immortals & three shots form the heavy destroyers. Under this weight of fire the terminators were wiped out. Even better, on my turn the flayed ones came on and wiped out the bike squad in combat! The crisis was over for the Necrons. They continued to hold two objectives and the Flayed ones and the wraith wing & necron lord were going through the Marines squad by squad in close combat. One of the Wraith squads was assaulted by the last Dreadnought but even under this fearsome attack, the wraiths survived, their high initiative and invulnerable saves saw them gradually dismantle the dreadnought piece by piece…nice!

wraith 1

So will I keep the Pariahs? For the time being, yes. Although they were easily shot to pieces, they posed such a threat that they attracted fire whilst the rest of my army could get on with the job of killing everything else. That said, I might be tempted to substitute them for another tooled up Necron Lord……….

Douglas Bader tactics work for Necrons too!

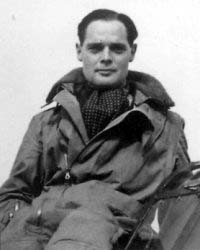
Ok for those of you who haven’t heard of Douglas Bader, he was a World War Two spitfire ace with 22 victories to his credit. Incredibly, Bader had lost both of his legs in a flying accident in 1931 but despite this set back, recovered, retrained and fought in the Second World War with ‘tin legs’. A truly remarkable man who overcame incredible obstacles throughout his career. If you want to know more, have a look at Wickopedia on the subject. I like the summary of his character:

“Bader was considered to be an inspirational British hero of the era. His brutally forthright, dogmatic and often highly opinionated views (especially against authority) coupled with his boundless energy and enthusiasm inspired adoration and frustration in equal measures with both his subordinates and peers.”

Douglas_Bader

Sounds like my sort of hero! So whats all that got to do with Necrons? Well avoiding bad jokes about his tin legs qualifying him as an honorary Necron, Bader was a believer in the ‘Big Wing’ theory, which basically meant that instead of sending Spitfire squadrons up piece meal to attack the incoming German raids in hit and run style, you should send up everything at once in a large formation and hit the enemy in one big battle. So with this in mind, I had decided to rewrite my necron Army list. I was going to be playing a Tau Army and I wanted something nasty to cause problems in the Tau firing line. I had heard that the ‘big wing’ formation for the Necrons is two squads of Wraiths, led by a Destroyer Lord with Res. Orb.

new lists 094

So the complete army of 1500 points was Destroyer Lord + Res. Orb, 2 squads of three wraiths, a unit of 7 scarabs, 3 squads of 10 Necrons, one squad of 10 flayed ones and 10 Immortals.

The theory being that the scarabs turbo boost towards the enemy attracting suppressing fire ( their turboboost & swarm size give them a 2+ cover save….nice!), the Lord & Wraith squads also charge forward in concert, the lords Resurrection Orb providing protection from heavy fire & the Wraiths 3+ invulnerable save keeping enough of them alive for the next round. Add to that, the flayed ones are going to flank attack, so if my opponent is sitting at the rear of the board there’s a good chance that they are going to pile into his gun line. Of course, while all of this nastiness is going on, the 3 Necron squads will be advancing implacably, ( all within 6 inches of each other, so we’ll be back means that even if one squad goes down, there’s still another nearby for casualties to join) whilst being supported by the Immortals.

So how did it all work in practice? It worked beautifully. As I said, I was playing a Tau army and the set up was Dawn of war with each of us defending and objective. The Tau seized initiative & went first but this turned out to be an advantage as it let me see their disposition and took the sting out of the first round of fighting. The Tau have little to shoot at, so they whittle away at the nearest Necron squad & knock down 6, of which 2 get up. Necrons to move. So Scarabs turbo boost towards the Fire warriors, The Big Wing of Wraiths move out towards the core of his army, everything else moves and then runs under the cover of darkness……

Second turn, the Tau open fire but there’s too much to shoot at! The scarabs are already about to assault, the Big wing of Wraiths looks very threatening and the Necron Phalanx has made it clear that it’s going to take the opponents objective. So the Tau open up with everything but I get very lucky with the saving throws on the scarabs & Wraiths and only lose a squad of necrons.

Half of which get up and join the nearest unit to form a mega squad of 13 necrons. Second move for the necrons, Scarabs into combat with a squad of Stealth suits, Big Wing of wraiths now right into the Tau army ( with hind sight I should have turbo boosted these as they would have been into assault by now), Necron Phalanx move & fire and the nearest Kroot are either dead or running and joy of joys, the flayed ones are on assaulting the nearest broadside battle suit. To paraphrase Corporal Jones, the Tau ‘dont like it up ’em!’

Tau turn three and the Tau finally focus everything on the Big Wraith Wing. helped by three crisis suits that have turned up in deep strike, 4 Wraiths go down and the Lord suffers two wounds, leaving him vulnerable to further rail gun hits. One small problem for the Tau through, The Necron Phalanx is untouched and so to turn three for the Necrons. At this point I made a mistake and split the wraith wing. Of the four that went down, two got up again and so I sent two wraiths to deal with the Crisis suits whilst the lord and two wraiths assaulted a fire warrior squad. As it happens, the crisis suits beat the wraiths in combat and the Lord was left with just one Fire warrior to deal with after the nearby Necron phalanx had rapid fired so by splitting my Big Wraith wing I caused it’s demise. I’ll never do that again! However, the Flayed ones had skinned their first broadside and were now advancing on the second, whilst the necron Phalanx had dealt out a fearsome amount of firepower, killing another kroot squad & a firewarrior squad.

Tau turn four and now things are looking bleak. The Necrons are tying down some of his best units in close assault, limiting the amount of fire power at the Tau’s disposal. Add to this, the fact that the Necron phalanx is close enough to choose to assault or rapid fire and there’s no where to hide and the Tau are beginning to crumble. If there is a Tau Corporal Hicks you would hear him saying ‘it’s game over man, we’re history’ in true Aliens style. So the Tau try to redeploy and fire with what they can. The last of the Wraiths go down, along with the Lord and just a couple of warriors and a couple of flayed ones. Necron turn four, the lord gets up again! so it’s back into combat and into the Tau commander! Meanwhile, down go a squad of Pathfinders under fire from the Necron Phalanx. The Phalanx is also now taken the enemy objective and pushed or killed all the Kroot & firewarriors defending it. The Flayed ones have caught up with the last Broadside suit and the scarabs, which have finished chewing up the stealth suits have launched a cheeky assault on the squad of crisis suits!

new lists 092

So to Tau turn five…….nothing left to fire other than a Hammerhead & the burst cannon on the remaining devil fish. Time to try a desperate attempt to contest the objective by flying the devil fish into the danger zone. Necron turn five and the devil fish is toasted leaving the last five fire warriors sitting outside the wreck. The Tau commander is history although the scarabs have now been killed. The Immortals aving safely shepherded the Necron warriors to the enemy objective manage to stun the Hammerhead. The Tau are in big trouble and hoping for no turn six…….unfortunately there is a turn six, so after a pretty ineffectual turn of shooting & the resolution of the remaining assaults, theres not a lot for the Necrons to do other than mop up that last fire warrior team and the game ends with a resounding Necron victory!

necron lords 012

Well it’s about time that I had a win with my Necrons, having spent the last month getting beaten to a pulp. So I will bask in my victory for the rest of the week! The new army list worked a treat and although the Wraith Big Wing didn’t actually kill very much, it attracted so much fire that the rest of the army could advance and do it’s job….relentlessly killing the opposition. To be fair, it’s an army designed to beat the Tau. How it will fair against troops with a tougher assault capability remains to be seen. That said, I’ve learnt my lesson, dont split the big wing, overkill is better than no kill and if the Wraiths get pulled out of position, they have a 24 inch turbo boost move to get back to the battle. So the Douglas Bader Big Wraith Wing flys again!

Weird Boys & Immortals

Sometimes I think that my choice of Necrons as my Warhammer 40K army is a mistake. I’ve won the odd battle and I’ve badly mauled opponents but I’ve never enjoyed a really good massacre until I’d played Andy’s Orks. The last time that we met in battle at Warhammer world I thrashed him. So when he suggested a return battle I was looking forward to shedding another load of greenskin blood!

The battle was over three objectives with a dawn of war start, Necrons up first. No problem, protect the objective on my side of the battlefield, make a dummy attack on the left flank but sneekily use the veil of doom and Monolith to shift my army and take the objective on the right. What could go wrong…..

The orks came charging across the table as usual, looking to swamp me in close combat. Some devasting fire from my Destroyers took down one ork bike squad the other ran into a Tomb spider which took out the Ork nob and held the rest. Meanwhile the Necrons started their shuffle across the back of the table to set up the next firing line. Easy.

The Andy had the look of a beaten man already, his bottom lip was just beginning to quaver and his morale wasn’t helped by the ineffectual shooting of the Ork boys. Then he rolls for his Weird boy & gets frazzle or frizzle or some rock hard strength 10 attack. He aims at the monolith, it’s an auto hit but I am not too worried, he needs a 5 or 6 to penetrate. He gets a 5. Well he still need a 5 or 6 to do any serious damage. He rolls a 5…..bugger! My Monolith is toasted.

The unbeatable Monolith

Ah well all is not lost, carry on with the plan, I’m going to have to take a hit from two ork trucks loaded up with boys but I expect to hold and I’ve got more tomb spyders to counter attack with & plenty of fire power to shoot them down as they come out of combat.

Andy now declares a truck is going to ‘Tank shock’ my Necron Lord and Squad of 10 Immortals. Yeah right, like thy’re are going to fail their leadership test. Well actually they did, not only did they fail but they ran off the table, ALL of them. As Hudson or was it Hicks in Aliens said ‘it’s game over man’. Now who’s bottom lip was a quiver. I’d just lost over 600 points in a couple of turns and fade out beckoned. Well at least Andy was happy…….who needs tactics & strategy when you’re an Ork!

These Immortals are now demoted and renamed the ‘badly oiled retreat donkeys’………

Run, Run, theres a Nasty Ork in a big bad truck.......

1 4 5 6