Having started the conversion from Warhammer 40k player to historical wargamer I found that there were two major challenges to overcome. The first was, of course, to assemble and paint some models, the second was to find a rules set that suited my style of play. I had already used Black Powder and I have no doubt that I will again return to these rules, but they are written for brigade sized armies at least and are more suited for fighting battles involving large numbers of figures.
Although my painting is moving along at a reasonable pace I still only have around 100 figures completed and I wanted to get them on the war games table. It was fortunate that I happened upon the rules set written by the Too Fat Lardies, ‘Sharp Practice’. They were just what I was looking for and are ideal for playing a skirmish type game for the size of army that I could muster.
To be honest, I found that the rules were so different to what I was used to, I couldn’t make head nor tail of them. Once again, fortune smiled in the form of Mick Rood, one of the 1st Veterans club members, who, having had a background in historical war gaming, was able to show me where to start. Looking back I’m not sure why I was so confused, the rules play superbly and make for an enjoyable, relaxed game with a narrative running through that keeps you engaged throughout. After two games, not only was I hooked, but I felt sufficiently confident to come up with a very simple scenario for our third game.
So here it is, with Mick Rood fielding his French Napoleonic detachment against my British, my biased account of the battle of Chateau Chesney……
Scenario Set Up
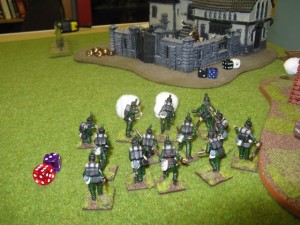
The French were to defend Chateau Chesney and had a cannon & crew and a unit ( or group as per the rules) commanded by Major Tirez Les Brits. However, they were running dangerously low on vin rouge and so were awaiting a resupply. This was on its way with a cart full of wine, sacks of bread & cheese and reinforcements, all making their way along a walled road to the Chateau. The cart was guarded by three units of troops, all deployed in column. The officers commanding these units were Captain du Pain, Lieutenant du Vin and Sergeant Boursin! The French were aware that the British might be in the area and so were permitted to place piquets outside both of the convoy and the chateau to look out for trouble. The French were to stay in formation, with one unit in the vanguard, next the cart and then two further troop units following behind. However, once they spotted the British or heard the cannon firing from the Chateau, they could break formation and deploy as they saw fit, to chase off the Brits.
The British were to set up anywhere on the table edge and were permitted to set up as ‘blinds’ with two dummy cards to add to the French confusion. The British force consisted of one cannon and crew and a detachment of redcoats commanded by Captain Young, two groups of the 4th Kings Own, commanded by Lieutenant Carruthers Winstanley-Wormwood , a detachment of Hanoverian Verden Landwehr commanded by Sgt Barker and the Officer in charge was Major Dick Blunt, commanding a detachment of 95th Rifles and a detachment of redcoats. The British outnumbered the French by two groups (24 men) but the French had the advantage of the defensive position in the Chateau.
The rules for ‘Sharp Practice’ run according to the turn of a pre designed deck of cards. Each phase of play ends when the ‘Tiffin’ card is turned. Rather than describe each round, I’ll split the battle into 3 phases.
Phase 1 – The opening Shots
The British had deployed in ‘blinds’ and the plan was to move quickly into position to assault the Chateau and ambush the convoy. Major Dick Blunt had decided to lead the assault on the Chateau, whilst the rest of the force would deal with t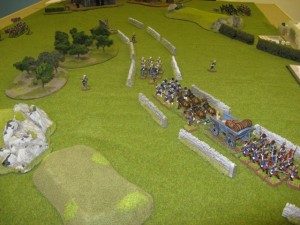 he supply convoy. However, the French piquets were on the alert and quickly spotted the British, causing them to deploy before they could move. This meant that the British cannon was unable to see the French convoy and could only fire on the Chateau. As well as spotting the British, the French had made good progress along the road and with the French Voltigeurs leading the way, they were confident of completing the resupply mission.
Winstanley-Wormwood l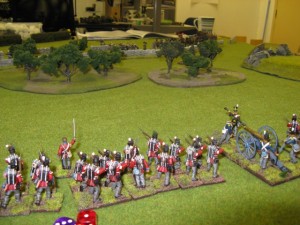 ed his detachment into the woods adjacent to the road and opened fire on the French Convoy. Sergeant Barker bravely led his Hanoverians to cut the road in front of the Chateau. Captain Young brought his artillery piece to bear on the Chateau but, sensing that Sergeant Barker would need support, also sent his detachment of redcoats to cut the road. The French were quite undeterred and in a brief exchange of fire inflicted sufficient casualties on Winstanley-Wormwood’s group causing them to fall back, leaving a unit of Redcoats in the trees without leadership. Furthermore, the cannon in the Chateau opened fire on the Hanoverians, causing casualties in this group as well.
On the far left of the field of battle Major Blunt and his mixed force of Riflemen & redcoats were making extremely slow progress towards the Chateau. So slow in fact, that the French largely ignored them….
Phase 2 – It’s getting hot out there!
The only real problem that the French had at this point was that the redcoats in the trees adjacent to the convoy were still tying up Lieutenant du Pain and his unit, causing a bit of a road block that prevented the supply wagon from movi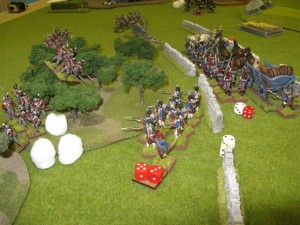 ng up the road. This meant that Sgt Boursin was also prevented from joining the action. Winstanley-Wormwood’s group had now left the field, although he had stayed and was shouting encouragement to his remaining troops from a distance, whilst ambling back to the action.
Major Blunt was still edging his group towards the Chateau and had given fire, causing the odd casualty, but was still not unduly worrying the French. In fact, they were more pre occupied with pounding poor Sgt Barker & his Hanoverians. A lesser man would have run away, but brave Sgt Barker, supported by the Artillery detachment, had moved into position to block the road.
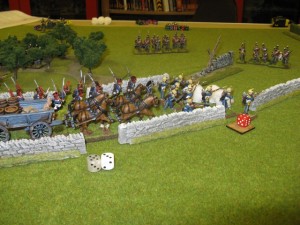 This was enough provocation for the French. Captain du Pain, leading his elite Voltigeurs, moved down the road and engaged the Hanoverians, reducing them to just seven men and pushing them back. Only the towering presence of Sgt Barker stopped them from breaking completely. Lieutenant du Vin led his unit over the wall to flush out the Brits in the trees and opened the road to allow Sgt Boursin to move his group up in support of the Voltigeurs, whilst moving the supply wagon further towards the Chateau.
All that the British artillery could do was to pound the French artillery in the hope that they would stop the guns or at least keep the French gunners’ heads down enough to spoil their aim. As the game continued the British aim improved and gradually enough shock points were inflicted to reduce the French gunners effectiveness.
At last Major Blunt and his men reached the Chateau walls and at point blank range opened up on the defenders. After unleashing a fearsome volley of rifle and musket fire, the smoke cleared to reveal that the dastardly French had ducked behind cover and not one of them had been hit. To add insult to injury, they were now shouting rude words and making rude gestures at Major Blunt. This was just too much to take!
Phase 3 – The Finale
The last phase saw the British fortunes take a turn for the better. Winstanley-Wormwood had finally rejoined the remainder of his unit in the woods and with his encouragement their rate of fire increased to the point that Lieutenant du Vin and his unit were forced to retreat back down the road, having taken a number of casualties.
Sgt Barker had steadied his men and, reinforced by the detachment from Captain Young, had re imposed the road block and was holding Captain du Pain and Sgt Boursin at bay.
Back at the Chateau, the taunting from the French had become too much for Major Blunt to bear and he decided to resort to Fisticuffs! He led his men over the walls to assault the French. Major Tirez les Brits, although heavily outnumbered, put up a brave fight and initially resisted the assault, inflicting as many casualties as his men had taken. However, the superior numbers of the British began to count and Major Tirez decided enough was enough and left with his remaining men via the back door of the Chateau. Major Dick Blunt had won the day!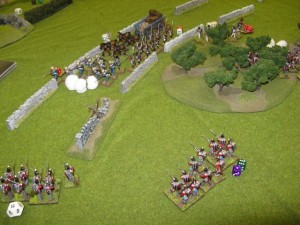
Although the supply cart was still with the French, the Chateau was captured. The British had a warm place to billet and the French went off to drown their sorrows!
On Reflection
The simple scenario worked well and gave the game a narrative to make it fun throughout. Mick was most generous throughout the game and suggested a couple of changes to the rules that made life more difficult for his French. The first was to allow the British cannon to fire as though the Chateau was soft cover rather than hard cover. This was to allow for the fact that no damage was being logged on the building and that the British could have been firing Shrapnel rather than round shot.
The second change was to remove the Tiffin card for the last round of the battle, allowing all units the chance to fight. It was this factor that allowed the British to assault the Chateau. Had the cards come in a different order the result may well have been very different. In future games we will use two tiffin cards as there were a number of turns where tiffin happened very early in the turn sequence, with the result that many units were left standing around – hence the length of time it took for the Rifles to get to the Chateau.
Other than those observations, the game was great and I am now hooked. We are planning a larger campaign. Watch out for more adventurers of Major Blunt and his men!
Shameless Plugs
I’ve thoroughly enjoyed playing ‘Sharpe Practice’ and would recommend it to any wargamer that enjoys social wargaming and would like to recruit you to the lighter side of the hobby!
The figures used in the photos are a mixture of Victrix, Foundry and Perry Miniatures. Many of these are available from my on line and e bay shop.
The supply cart is a plank sided wagon by Trent Miniatures also available from either ebay or my online shop.
Of course I sell ‘Sharp Practice’ in book form and it is also available as a PDF download from the Too Fat Lardies site. The card set is available for free from the Too Fat Lardies yahoo group. It is also available to print as a word document ready sized from here.
I also sell a comprehensive range of walls, hedges and scenery as well as bases, scatter and movement trays, click here to see more.
All the British figures and the cart were painted by me, using Vallejo paints and the army painter dip and varnish system and guess what, I sell that too… click here to see the range.
If I can help with any queries, please contact me through the shop email. I hope that you enjoy modelling and gaming as much as I do!

