Slow Progress with the conversions…..

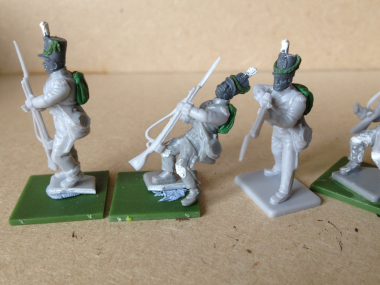
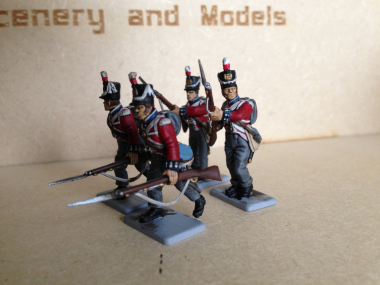
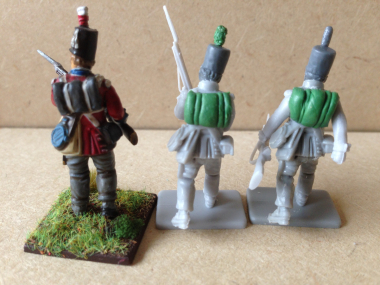
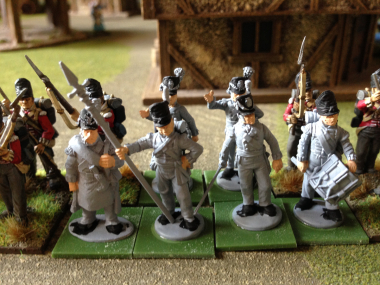
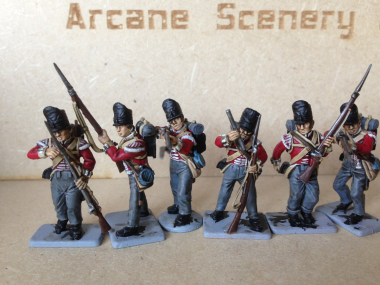
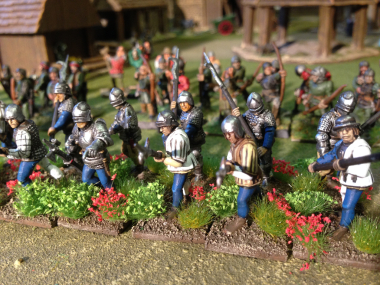
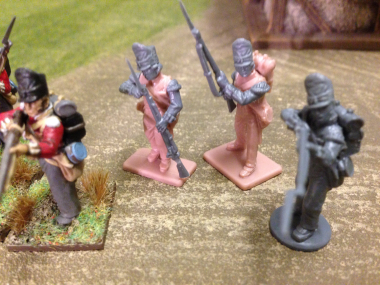
Hanoverians work in progressThe title of this weeks blog says it all! Progress has indeed been slow and I am stretching my  ‘sculpting’ ability and patience to their limit. The Hanoverians are the problem. I’m trying to match the conversions that I have done to the original Victrix models that I had painted. The first task was to make some blanket rolls to go on their backs in the place of packs. I have actually cheated with a couple of the models and despite saying that I would cut the british packs off of the ones that I had put on in error, I decided to leave a few on. May be those guys had picked a few spare packs up from Quatre Bras! Anyway, modelling the blanket rolls was not too difficult, although a bit time consuming, as I am not used to working with green stuff. You can see the result in the picture above – I think that once they are painted they will be fine.
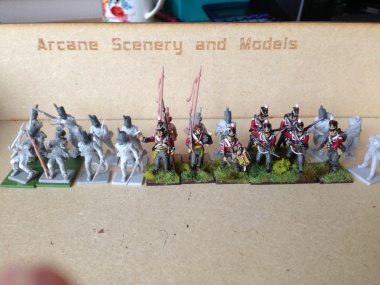
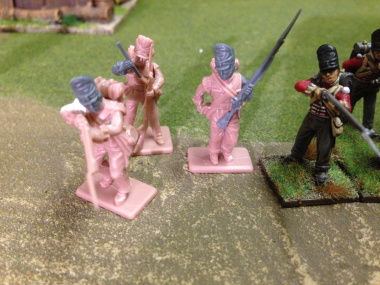
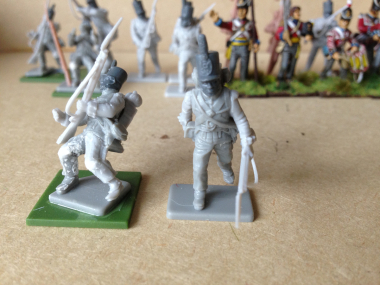
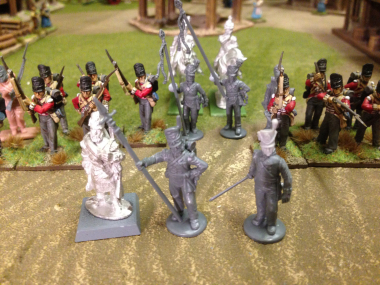
The real problems came when I tried to modify the shako’s. The first thing that I changed was the plumes which are a bit long and thin. I simply trimmed these down and then used a tiny amount of green stuff to thicken them up. Well, that took forever, partly because I managed to get the green stuff to stick to my scalpel more effectively than the model! Again, if you look carefully at the picture above, you can see the difference it makes. The model to the left has the original plume, the centre model has the the modified one and the right hand model the thin tall plume that I want to replace. After a while of fiddling around I thought that I might just either cut the plumes from some other Shakos & replace them or perhaps just try some filler.

While I had the green stuff mixed though, I thought that I might try and make the cords for the shakos. To do this, I carefully rolled out a very fine ‘sausage’ of green stuff, cut it to the correct length and then attached it to the first shako. Or rather I tried and tried and tried and failed!!! I just could not get it to stick to the model. It stuck to my scalpel, it stuck to my needle. I tried using water to dampen the tools but it still would not stick to the model. After 20 minutes of this I gave up and I think it is back to plan B – using cotton. It may be that the green stuff that I am using has gone off a bit – it has been kicking around in my model box for sometime now. So I may have another go with a fresh batch. At this rate though, it will take me a fortnight to get to the priming stage with these models!

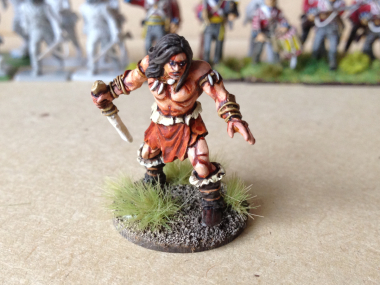
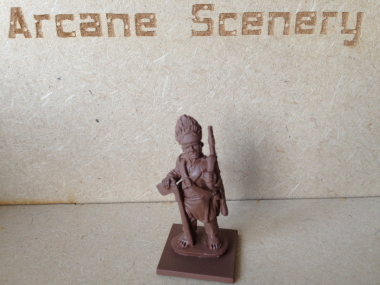
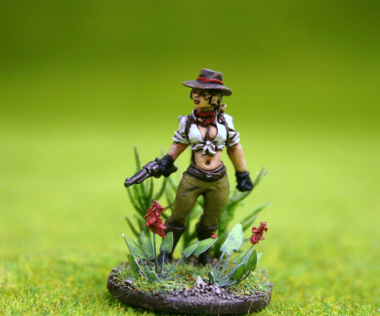
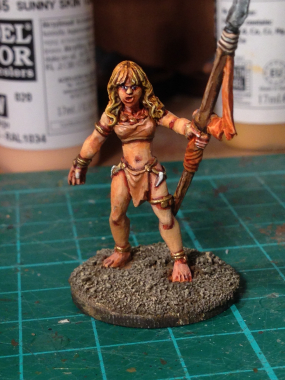
As if that wasn’t frustrating enough, the other project on my work bench hasn’t gone too well either. Having painted Lucid Eye’s Ke-Zhor, I thought that I would paint his mate, Harranah. I think that this was a case of trying too hard as I just could not get the finish and flesh tones that I wanted. Nevermind, I guess you learn more from your mistakes and maybe I’ll give the model another go later. In the meantime, She’s done and going in the cabinet once the basing is finished! Checkout Facebook later for some more scenic pictures of her in perhaps a more sympathetic setting!

2015-02-15 17.27.15

Whats on the Workbench – More Hanoverians!

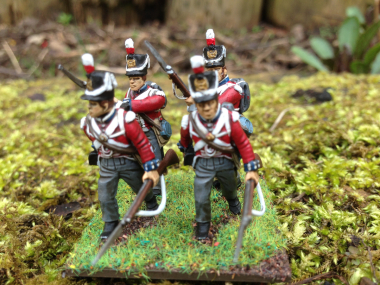
Hanoverian LandwehrHaving finished the Lion Rampant Campaign, it’s back to painting my Napoleonic Army. I’m still working on the British 6th Division at Waterloo and having completed the English Regiments, I’m back on the Hanoverian contingent. There were four Hanoverian Landwehr units in the Division, Verden, Lunberg, Munden & Osterode and so far I have painted two of them. So on with the third unit now. First of all a disclaimer! I have decided to model two of the units wearing Stove pipe shakos and two wearing the flat field hats for no other reason than they will look nice on the wargames table. Actually finding accurate descriptions of exactly what the Hanoverian Landwehr really wore is difficult to say the least, with the usual conflicting advice from various sources and experts.
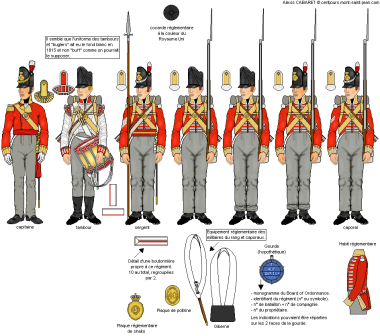
Broadly speaking, the Hanoverian Landwehr were dressed as British Redcoats but with stovepipe shakos rather than the new Belgiac shakos and with a blanket rather than the usual haversack & kit. The stove pipe shakos also seem to have the cords that weren’t present on the original ‘Peninsular’ Stovepipe shakos. Just to add to the confusion, the Hanoverian Field Battalions, or regulars were dressed more or less as British regulars and did have Belgiac shakos & all the kit! As for the officers, they were drafted in from the KGL or other British regular units so could be wearing any Regts uniform although they probably adopted the yellow sash of the Hanoverian Army.

I suspect that the general principle was that the regular field units were kitted out in the ‘latest’ British uniforms whilst the Landwehr had the cast off’s from the Peninsular campaign and anything else that was kicking around the quartermasters stores when they were called up!

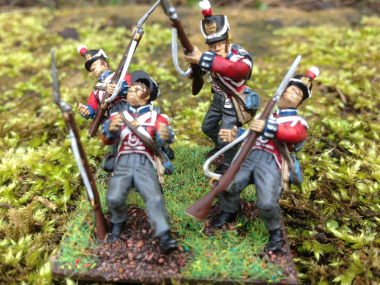
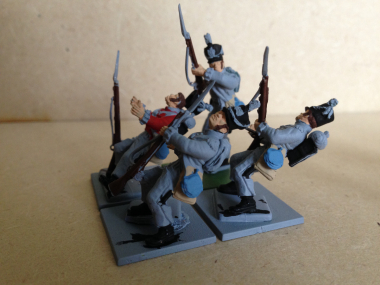
To add to my modelling woes, whilst Victrix used to do a nice set of conversion heads that I used for my first unit, they have now been discontinued, so some conversion work will be required! I already had 8 extra figures left over from my first go at painting Hanoverians so I would incorporate these into the new unit. The picture at the top shows how the new Battalion will look when finished. I decided to use the running figures from the Vitrix set as I had some of these left over from previous projects. Rather than have a lot figures in the same pose, I thought that Iwould convert them to look as though the unit was taking casualties. I like to have different poses in my units and try to have a bit of a story going on. I know that some wargamers prefer a uniform look and like to see all of the figuresin a unit in the same pose. Whilst it does make life easier, I find it tiresome painting the same pose over & over again. Besides, I like to do a bit of modelling for a change!

Landwehr Conversions

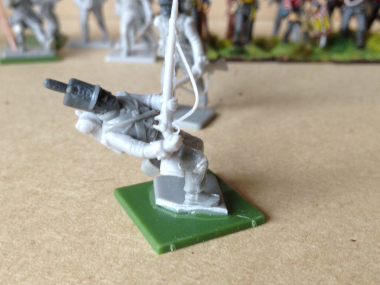
The close up above shows the original running figure on the right and the conversion on the left. To get the figure to look as though it is falling it was simply a matter of cutting through the back of each leg and bending them backwards. Once the glue had set, I put some filler into the gap on the front of the knees and I had my falling casualty. I then used a couple of standard arms from the set and the head is a spare peninsular head from the Perry boxed set. I’ve actually made an error by adding the back packs, so these will come off and be replaced by a simple blanket made using green stuff. The shako’s aren’t correct either, as they are missing the cords. So the plan is to carefully shave down the badge plate and either use cotton thread, thin wire or green stuff to make the cords.  I suspect that modelling the shakos will be the biggest challenge & somewhat time consuming but it will mean that the models in the unit will look about right. When they are painted , I’m sure that they will all blend in.

2015-02-12 11.47.24

As you can see, for a few small cuts, you can get a very different and dynamic pose!

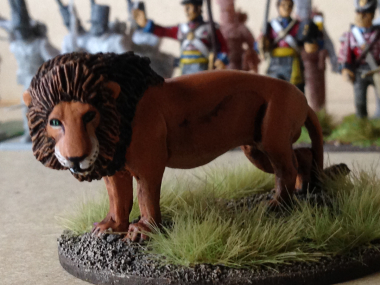
So there is my next project under way, a total of 14 more Hanoverians to finish modelling & painting. Meanwhile, I’ve been busy with the paint brush as well. I finished off the DeeZee standing Lion:

2015-02-12 11.49.58

and I couldn’t resist painting Ze-Khor, Lord of the Jungle, from the Lucid Eye range. These are just quick pictures. I’ll get some better ones up on face book later!

Ze-Khor, Lord of the Jungle

Whats on the workbench 15 January 2015

Too much! Well, it’s the start of a New Year and the time when New Years resolutions are made. As usual, weight is involved, only in my case as well as trying to shed a few pounds from the usual over indulgence during the Christmas break, I have resolved to shed a few pounds of lead from my hobby stash this year… I suspect that this may be as successful as my attempts at dieting, as I cant help but binge on new models as they are released! But to try and keep me on the straight and narrow, I’ve developed a few themes from last year that I intend to try to stick to and to be fair, the current back log on my work bench does reflect this!

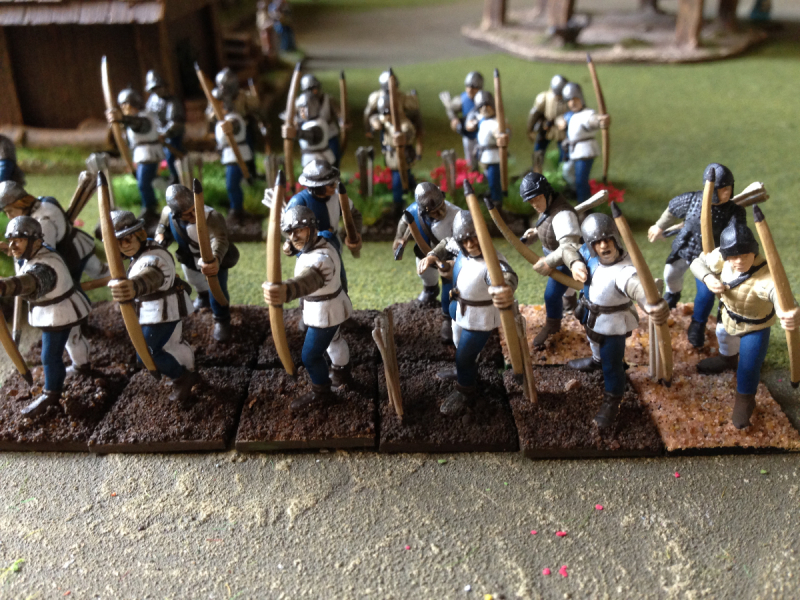
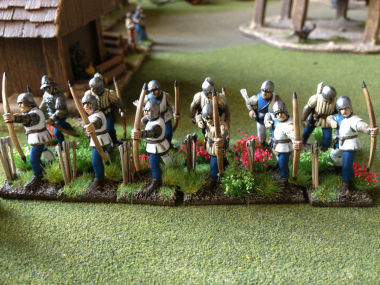
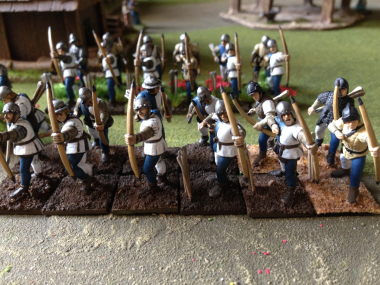
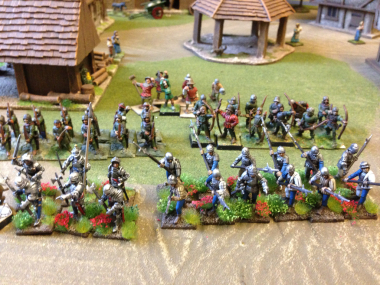
I’m just putting the finishing touches to my Lion Rampant Retinue. The following two pictures show progress on my Expert Archers.

Expert Archers - Perry Plastics

Expert Archers – Perry Plastics

The first unit is complete and ready to go into battle! I’ve chosen the blue and white colour scheme as a nod towards my favourite football team, Tottenham Hotspurs! It’s a shame that it doesn’t coincide with the original Hotspur’s colours, the Percy family’s Harry Hotspur, who used red & yellow. Blue and white are also the colours of Richard, Duke of York, so they wont be out of place when I use them to build my War Of The Roses Army. I guess that means I am committed to the Yorkist cause, but as Richard III was found in a car park just down the road in Leicester, I’m happy to represent his family on the War games field.

Expert Archers - Work in progress

Expert Archers – Work in progress

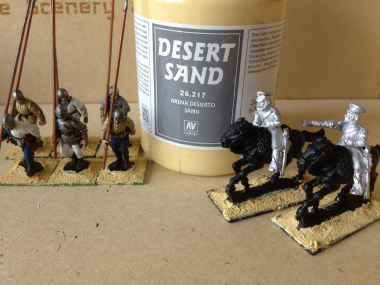
The second picture shows my second unit of Expert Archers. As you can see they are not quite finished. The picture does give you an idea of the painting & basing process that I use. The archers to the left with the dark brown bases are nearly finished. I just need to highlight the blue leggings and to brighten up the helmets and they will be there. The final stage is to dry brush the base with a couple of highlights of chocolate brown & Iraqui sand mixed. Then I’ll just add my usual assortment of grass & bushes. The archers to the right with the lighter bases have just been block painted and the bases sanded. They’ll need  a coat of quick shade and then the same treatment of highlighting and basing. All being well, the units will be done for this weekend.

40th Battalion Somersetshires Work in progress.

40th Battalion Somersetshires Work in progress.

Next on the work bench, the 40th Battalion is just missing it’s command group. I’ve got as far as painting the flesh & black and they are on their Renedra bases. My Napoleonic army will continue to grow this year. I plan to paint a further 5 battalions of infantry, 3 cavalry regiments and at least two more artillery batteries. Getting these done before June is a bit of a push, given my painting speed and other interests but so long as I keep pushing on, I will have a decent force to fight our planned Waterloo re-enactment!

DeeZee Lion standing

DeeZee Lion standing

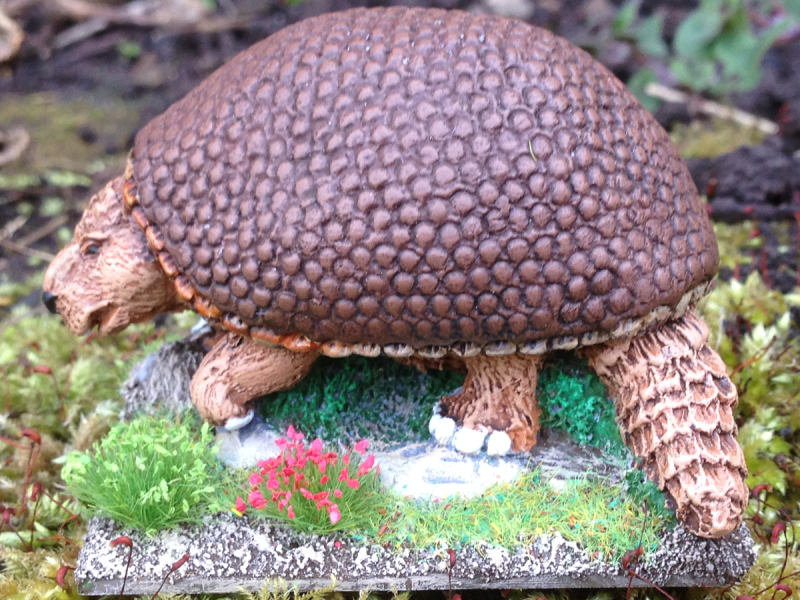
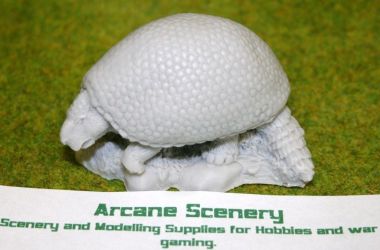
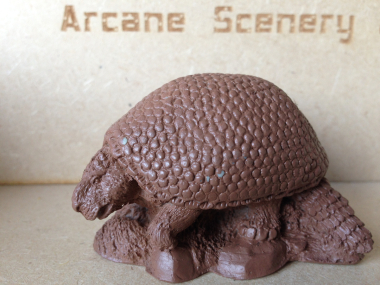
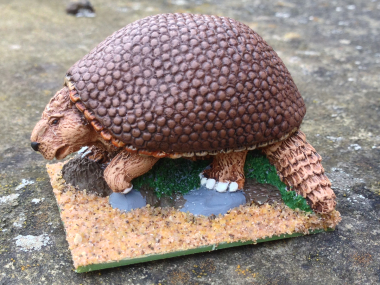
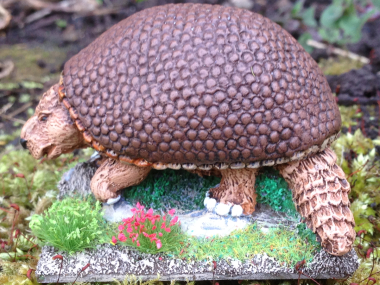
DeeZee Glyptodon

DeeZee Glyptodon

DeeZee Pterodactyls

DeeZee Pterodactyls

The next project on the work bench is painting my DeeZee range. We have just released the standing lion and the pterodactyls so it makes sense to paint up some for display at Salute! The Glyptodon is an older model but the painted version that I have is showing signs of wear and tear, so I could do with another one to replace it.  I like to paint a variety of subjects and I also think that it’s good to paint my own products so that I can understand how best to go about it! However, the truth is that I just like the models, which is why I have the range in the first place. I’ll prepare a blog article explaining in depth what is happening with the DeeZee range and our plans for the future. As well as the Deezee range, I am also working my way through the Lucid Eye range of cavemen, lost tribes and explorers. Next up are the Cro-magnon, but I am just waiting for the new pack of hunters to be cast before I start on these!

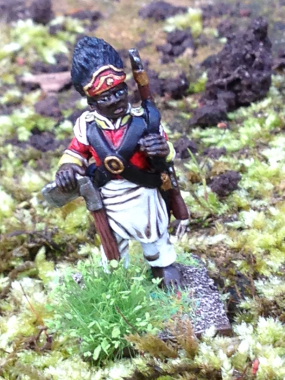
So that brings me to my final project. Muskets and Machetes in the Caribbean. This is a bit of a ‘sleeper’ but I add the odd model in now and then in the vain hope that we will sort ourselves out and adapt the Muskets and tomahawks rules set to allow our gaming group to explore the battles that took place out in the Caribbean. There is plenty of scope for Jungle skirmishes, beach assaults, small sieges as well as full battles. Well Duncan from Trent Miniatures has just commissioned this superb Chasseur Pioneer of the St Dominique Regt and let me have one of the first castings! The figure will eventually form part of a Command group  but in the meantime I had to have one to add to my Caribbean force!

Trent Miniatures Chasseur Pioneer

Trent Miniatures Chasseur Pioneer

So that’s it for now, on with the painting!

More tales from the Jungle!

simian

I mentioned that I had been distracted by the new releases from Lucid eye. Here’s one of the reasons! This figure is Simian Alpha. Although he has a passing resemblance to a certain character from a  monkey film genre, he is actually the leader of the much feared Simian tribe that inhabit the Savage Core. He is the first of a small range of Simian warriors that will terrorize and hunt down those careless enough to stray into their Jungle territory.

As you can see, he is beautifully sculpted and was a real pleasure to paint. After undercoating the figure in black. I dry brushed him in various shades of grey for the fur, and used vallejo rose brown for the chest & nose. The face was done with off white, with the marking added in red.

As well as the various tribes that will inhabit the Savage Core, there will be a variety of ‘Lost Explorers’ or Characters. The first of these to be sculpted is ‘Annalisse’, an intrepid female explorer ready to take on the perils of the jungle. This figure couldn’t be further from my current obsessions but sometimes a change is as good as a rest! So I took time out from my Napoleonic army and Lion Rampant retinue to paint her.Analise

Once again, the quality of the sculpt means that it is very straight forward to paint Annalisse. I just went for fairly muted safari colours – off white for the shirt, Green Ochre trousers & leather accessories. She’s based with a few Jungle plants & flowers ready to take her place in the Jungle. I’m not quite sure what I will be doing with these figures yet – at some stage a rules set for the Savage core will be available but in the meantime, I’m dusting off my copy of tooth & claw to see if I can adapt them for some Jungle Action!

With my range of DeeZee jungle beasts, I should have the basis for an interesting game. Of course it will also give me an excuse to keep painting the rest of the Lucid Eye range!

The Somersetshires take shape!

2014-11-27 13.17.24

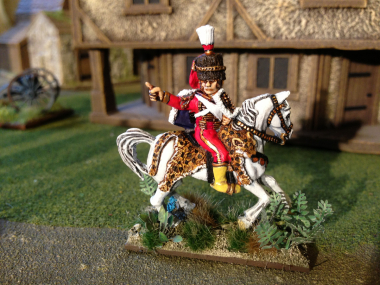
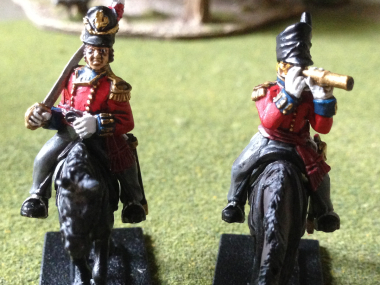
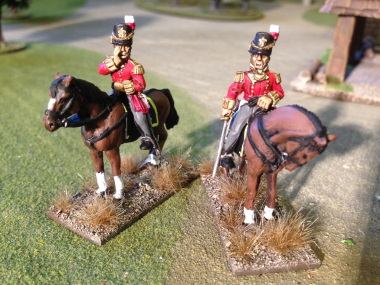
With one eye on the coming 200th anniversary of Waterloo, I am still adding units to my Napoleonic Army. Work is progressing slowly as I am being distracted by the need to finish my new Lion Rampant Retinue for a games day on 31st January and the steady stream of releases from Lucid eye and DeeZee. More of the latter in another post. Back to Napoleonics, though and as you can see from the picture, I have painted the two Mounted Colonels from Victrix as commanding officers for the 1/27  and 1/40 battallions. As both these units had buff facings, the officers would probably had the same, although as ever, it depends which reference that you look at. Some show a dark blue facing on the uniform and from what I have read, some officers customised their uniforms according to their own taste. Still, they look pretty enough for the wargames table, so they will do for me!

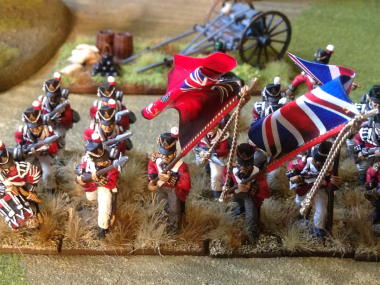
The rank and file for the 1/40 are in progress, with the six men representing the two flank company’s almost completed. Here is a picture of them, work in progress, just having been sprayed with matt varnish after coating in army painter strong tone. They now need basing and I will retouch the lighter colours and metallics to enhance the highlights. So it is just the command group to finish and another battalion will be ready for the table!2014-12-11 09.55.34

What’s the use of Bidowers?

2014-11-27 13.16.33Well that was the question I asked myself when putting together my Lion Rampant retinue. With just 6 men in the unit, an armour value of  1 ( 2 when shot at) and a points value of 2, I couldn’t see why I would bother having these in my retinue. The fact was that I had never heard of a Bidower before, come to that, neither has Wickipedia. A google search revealed the following link, which was sort of useful:
Bidower

So why would I have them in my Lion Rampant retinue. Well, after a number of battles facing these units, I realised that despite their cheap cost, they were very useful indeed. For a start, they move on a 5+, and they move quickly, 8 inches a turn and are not slowed by rough terrain. Add to this that they can Skirmish ( shoot and move), cant be targeted from over 12 inches and have the ability to evade. If they do get caught in hand to hand they are going to be slaughtered by most units on foot. However, in rough ground they can hold their own against mounted men at arms, even dragging them into combat ( on a Fierce Charge) on equal terms.

I soon learnt that they were very useful indeed, particularly after they had badly mauled my unit of Foot knights and killed my Leader ( now named Kenny, as he seems to die in every battle) before I could close with them and finish them off. The result is that I have now included a unit of Bidowers in my army. OK, it’s another 6 men to paint but it will give me just a little bit more flexibilty in battle.

And flexibility is badly needed in my retinue. Having chosen the later English retinue from the Lion Rampant rule book, I have found that although they are good in a pitched battle, they can only fight in a tight defensive formation. The bowmen need protecting from any marauding foot or cavalry units by my Foot Knights & Sergeants. So I have made the Foot Sergeants a standard unit ( allowing them to form Schiltron) to save the 2 points need to add the Bidowers. I’ll still need to fight on the defensive & try to lure or goad my opponents to advance within arrow range but once the two expert archers get to fire they cause mayhem among most of the opposition units.

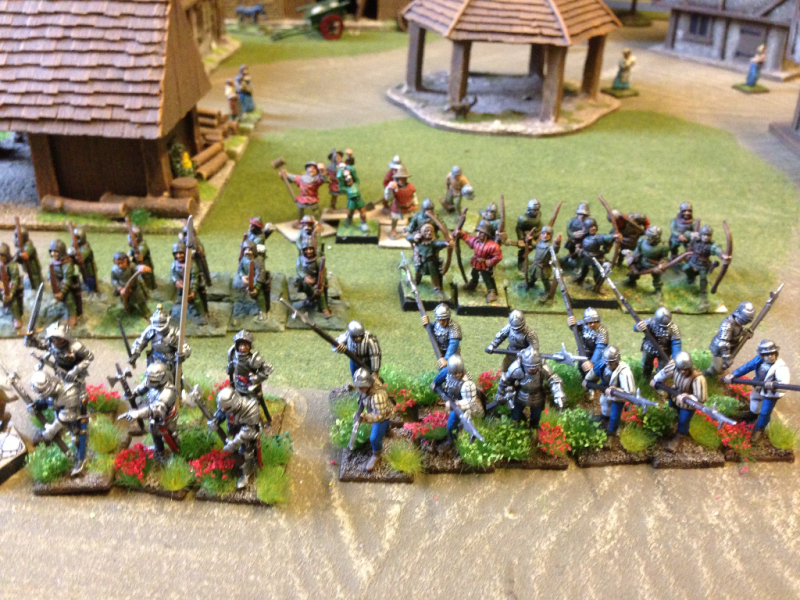
So it’s back to the battlefield tonight with my new look army to see how it can cope with the new tactics that I have planned! The picture at the top of the page shows my latest finished unit, the Foot Sergeants and here is the army that I will field tonight. The archers & bidowers are still temporary units made up from some very old figures that were kicking around in my spares box! They will need rebasing & touching up before they become permanent additions. However, the plan is to replace them with archers from the Perry’s boxed set. The next batch is on the work bench as I write!

2014-11-27 13.28.19

Whats on the Workbench 20th November 2014

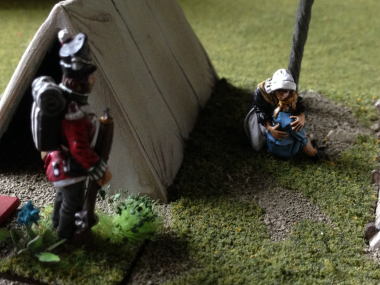
Much as I am committed to my Lion Rampant retinue, I couldn’t stop work on my Napoleonic Army. I intend to  complete the 6th Division as it appeared at Waterloo ( with some artistic licence, of course). Having added another Hanoverian Battalion, I decided to go back to the British. I had already painted the 1/27th Inniskillins, and the 1/4th Kings Own, so the final British battalion in the Division was the 1/40 2nd Sommersetshires. This battalion has buff facings and so is very similar to the 1/27th. Fortunately, when I assembled this unit from the Perry boxed set, I made all of the figures, so in effect I had 12 extra men already finished in buff facings. It is now just a question of adding the command group of 6 and 6 figures to represent the flank companies and another battalion is ready for battle.

Infanterie40(centre)

As usual, I will use the Mont St Jean web site for reference when painting, but for the time being, here are a few pictures of the additional models being assembled & made ready! As you will see, the easiest way of making the command group was to order a spare command sprue from the Perry web site. I’ve slightly altered the Officer and used a head from the Victrix set to make him different from the 1/27th officer. I’ve also added in a Sapper from a Victrix metal command set. As a side project, I’ll also paint the mounted Colonels that the Sapper came with as Officers for the Battalions, which will use up the whole pack and reduce my lead mountain reserve slightly! The rest of the command are assembled as usual.

2014-11-05 20.19.57

For the Flank Companys’ I have used a mixture of Perry’s & Victrix parts to make the six required figures. Here’s the Left flank:

2014-11-05 20.20.18

And here is the Right Flank:

2014-11-05 20.20.41

As you can see, the Perrys (grey plastic) and the Victrix (Light Brown plastic), mix very well and there is very little difference in the size of the figures so they are quite compatible. Mixing sets is a very simple way of making conversions and giving variation to the troops in a unit. So it’s just the painting now….

The Lion is Rampant – Again!

Lion_rampantI mentioned in my blog earlier that I had signed up for the Wargames Illustrated Magazine’s Lion Rampant day, to be held on 31st January 2015. Although it seems some way off, I thought that I better start putting my retinue together and of course practicing the game. As I am somewhat focused on collecting English Armies (and their Allies!), I thought that I would start with a typical English Warband. In the LR rules this breaks down to: a unit of 6 foot men at arms; a unit of 12 ‘expert’ foot sergeants and two units of 12 ‘expert’ Bowmen; a total of 42 figures to assemble and paint.

I could save a bit of painting time by having two units of 6 foot men at arms but this will make the army quite fragile. However, in the short term it will speed the process of having my own retinue finished. The beauty of the English Retinue is that I think that I will be able to build most of the figures using the Perry’s Wars of The Roses Plastic boxed set, which has 40 figures, a good mix of which are either archers or Bill men (foot sergeants). So for an outlay of £12 for the rules and £20 for the figures, I’m in the game!Perry-Miniatures-WAR-OF-THE-ROSES-INFANTRY-1455-1487-28mm-plastic-boxed-set-380871945137

For those of you not familiar with Lion Rampant, it is one of the Osprey Wargames mini rules, written by Daniel Mersey. It’s one of those clever rules sets that does what it says, it really is straight forward and simple to learn, easy to play and has enough subtlety to keep players engaged. As I have previously noted, this type of skirmish game is a great way to explore a historical genre before you pile in and build a huge army. Even better, the small war bands allow you to mix & match different troop types. So if my English Army doesn’t work for me or if I fancy a change, it wont take too much effort to produce, say, a Templar war retinue.

The game itself is a bit like Saga Rules, but without the Saga board – all the action takes place on the table and combat is resolved quickly by rolling either 6 or 12 dice. A simple attack & defence mechanic determines how many casualties are inflicted and then it’s down to morale – which unit has the stomach for a fight! The fog of war comes in the order system, you roll a dice to see if a unit will activate or not. If it activates ( Moves , Attacks etc) then you go to the next unit. If not, your opponent gets the turn. This soon opens up opportunities or causes problems, depending on which side of the table that you are on! Of course, the other fun comes from the scissors, rock, paper effect of matching one type of troop to another.

So, I have painted my first unit, the foot men at arms. It’ a bit of a motley crew -4 of the figures are Perry plastics, and two are spare metal figures that I had lurking in my lead mountain! In fact I think that both were figures given out at past Newark wargames shows, one of which I painted some years ago & just needed rebasing. Painting was fairly straight forward, I spray undercoated the figures in Plate mail, gave them a dry brush with silver, painted the cloth & leather bits ( Scabard & belts etc) blue or red for a bit of colour, and gold for the sword pommels, brown for any wood. Then a good wash of black ink, brought out the detail before re highlighting the armour. Basing is done using Sandy paste to level up the figures on the renedra 20mm  plastic bases, then extra sand added & painted in chocolate brown & highlighted & dry bushed with Iraqi Sand. I finished off with a liberal dose of tufts and flowers…. Here’s the first unit :2014-11-05 20.20.53

Whats on the Workbench 23 October 2014

2014-10-23 10.19.08Well I am just about going to scrape in with my objective of finishing a Hanoverian unit by the end of October! As you can see the officers are close to being finished – final highlights need to be applied. The only figure that needs painting now is the Drummer and I will then have my unit of 24 finished. The next stage is to base them and then finally the add the flags. Ah! the flags….

The problem here is that I cant find any reference to flags used by specific regiments of Hanoverian Troops at Waterloo, particularly the Landwehr units. Indeed, it is possible that they did not carry any into battle. But that wont do for a war games unit – my aim is to make a representation of the unit for the war games table and they look prettier carrying flags! As I have already stretched history by giving my unit the flat peaked caps, it wont hurt to use a bit of artistic licence when it comes to the flags, so I think that I am going down the route of using a conjectural Hanoverian Battalion flag and a Blue Kings Colour for the other ensign.

If there are any of the ‘fashion police’ or ‘button counters’ out there twitching at the liberties that I am taking with this unit, dont worry, I’m twitching with you! One of the dilemmas of historical wargaming is deciding whether you are trying to build an entirely accurate scale representation of the units involved in a particular battle or a general representation of the units that were around at that point in history. Of course, the further back in history you go, the more difficult it is to be sure of who wore what and when. Even the modern day infantryman appears to supplement his uniform by purchasing kit from ebay! It always amuses me that we are told exactly what style of armour/helmet/weapons various ancient tribes used when after a battle, the first thing that the winners did was loot the dead of their possessions.

You can just hear the conversation now. ‘Oi Ulrich, there’s no way you’re wearing that Saxon Helmet, you’re a Viking, so put it down, besides, you’ll make us look silly when Osprey come to take our picture…..’

It seems I digress, but you see the problem. Regardless, this weekends task is to finish painting the drummer, re highlight the officers and then get the whole lot based up and another Hanoverian unit can join my growing British Napoleonic Army!

Whats on the workbench 16th October

2014-10-16 13.13.31
Sometimes it’s difficult to fit painting miniatures around all the other jobs that need doing! The last week has been no exception. However, I have managed to finish the second pack of Neanderthals and I’ve also finished those Jaguars that were undercoated about three weeks ago. I’m happy with the Lucid Eye neanderthals. They are superb sculpts and that always makes it a pleasure to paint miniatures that have so much character. As regards the paint scheme, I used a variety of browns for the furs, from Vallejo of course! The colours were:

822 German Cam. Black brown, 872 chocolate, 984 Flat Brown, 871 Leather brown, 877 Gold Brown, 914 Green Ochre, 819 Iraqui sand, 918 Ivory plus white & off white. I painted the flesh using 804 beige red and flat flesh. I also used a few ink washes of various strengths , both strong tone brown & Vallejo black shade. The basing was straight forward. Just some Vallejo Sandy paste to level things up and then a coat of basing sand painted with Vallejo chocolate brown highlighted with Iraqi sand. To finish, just a few highland tufts!

2014-10-16 13.16.29The next project was the Jaguars. I’m not sure that I am happy with the finished result. Painting and highlighting black is a devilish business! I’ve tried using blue rather than grey or white and in the end it was a mixture of both but I haven’t got the effect that I was looking for. I also used white to paint on some whiskers & for the teeth but it all looks a bit stark. the standard of photography isn’t too good either!The yellow eyes have just about worked. I think that when they are properly based, with plenty off jungle cover they may look OK. So that’s it for this week. Next up, back to Hanoverians – the officers this time.

Whats on the Workbench 9th October – Neanderthals & Hanoverians!

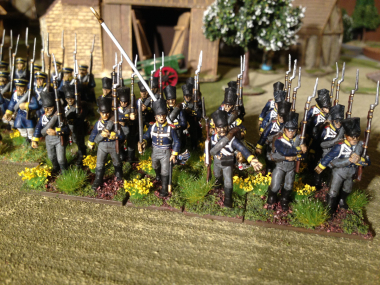
2014-10-09 09.37.11A strange mix of subjects on my workbench at the moment! I’ve just about finished painting 18 rank & file Hanoverian Landwehr. As you can see from the picture, they’re all based and ready for the table. There are of course 6 figures missing – the officers, ensigns & sergeants. They are undercoated and ready to paint, so they should keep me busy for the next few painting sessions. I will then have a nice unit of 24 figures representing the Munden Landwehr battalion. As far as finishing the figures went, once I had painted them with Army painter Strong tone, I gave them 24 hours to dry and then sprayed them with Army painter Anti shine. I tend to use a light coat and if the figures are still a bit shiny in places then I use vallejo matt varnish, just brushed on, to finish off.

The next job is to go back over the lighter colours to make them stand out. So I repaint the white straps, yellow hat bands and any metallics. The bayonets get a coat of silver to make them stand out on the battlefield! It sounds like a long process but it doesn’t take too long. The idea is just to highlight these colours, so if you miss a bit then it just looks as though the area has been shaded.

Basing is then completed. Again, I have gone for a quick basing finish. The first task was to mount each 4 figures on a 40mm square renedra base. I then used Vallejo sandy paste to blend the figure bases into the renedra base to get an even surface. When this was dry, I painted this Vallejo chocolate brown to gice a dark base on which to work. I prefer a brown edge to my bases rather than green or black, which are also favoured by painters. Next up, I coated the bases in PVA and covered with a forest brown scatter. This in turn, had patches of Javis green scatter added and then I detailed the bases with smaller patches of Expo flowered field static grass. The final touch was to add some Noch summer grass tufts and of course my ‘trademark’ flowers – in this case, Noch white flower clumps.

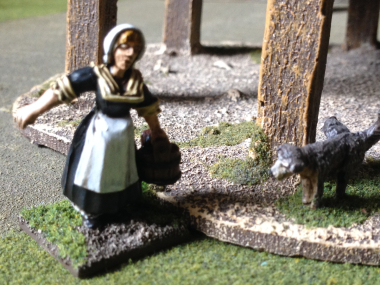
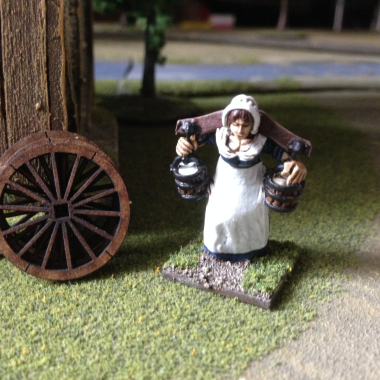
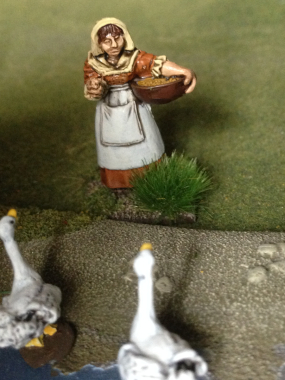
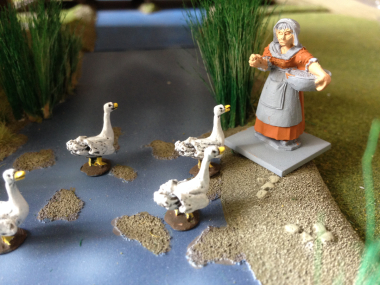
In the picture you will also see that I have painted a female admirer waving the Hanoverians off to battle! It’s a bit of a nod to the Warlord box art and she will of course take her place in little Bingham, the town on my war games table. Without getting too commercial, all of the items that I use are available in the Arcane Scenery shop and if anyone out there reading this needs some help, call us and I will be happy to talk through the materials & techniques used.

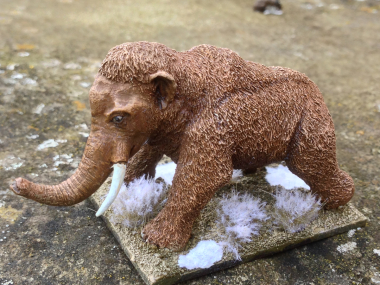
2014-10-09 09.46.44The other project that has leap-frogged up the painting queue is pack two of the Lucid Eye Neanderthals. Arcane Scenery are now stocking the Lucid Eye Range and of course the Neanderthals go really well with some of the Ice Age DeeZee miniatures that we produce. The Mammoths, Cave Bears & Smilodons for starters! So I’m working on getting a little band of Neanderthals ready for a Hunting party. One is just about finished, except the basing, the other two are just awaiting the fur pelts to be highlighted & the detail picked out. The techinique that I have used for these is slightly different from my usual style. Rather than using ‘dip’ to shade, I am shading and highlighting using inks, dry brushing and mixing lighter & lighter shades of the base colours. It’s a bit more time consuming for me but gives a nice result, particularly when the figures are so well sculpted. Here’s the progress so far. I’ll spend a bit more time in my next blog detailing the colours used.

2014-10-09 09.40.09

Whats on the Workbench 25/9 & Deezee Miniatures

2014-09-25 11.06.22Progress on the Hanoverian battalion continues, albeit at a snails pace. I had started to paint a batch of 18 figures but progress was too slow and so I decided to finish six off just to get to see how they would look. The picture shows the first six block painted according to the colour scheme from the Mont St Jean site ( see last weeks blog for link). The next stage will be to paint them with army painter quick shade – I’ll use the strong tone or black shade. This will give me the shading to bring out the detail, particularly the faces and trousers. It will also give a clear outline to the equipment and lacing, making them stand out. Once the quick shade has dried, I’ll highlight the figures by repainting the lighter colours, particularly the webbing & lace and I’ll highlight the metals with either silver or gold as appropriate. This will really make the Buttons & bayonets stand out on the battlefield. Of course the most important finishing touch will be the bases! I just need to think about the colour of the flowers that I will use….. Hopefully by next week I will have at least these six finished. One final thought on painting these models. With hindsight, I should have painted the three individual pieces that make a figure separately. It would have made painting the detail much easier, so I will give this a try when I paint the next 18 figures.

Changing the subject completely, I mentioned in a previous blog that I was working my way through the Deezee range. Well, next on the workbench is a couple of Jaguars! One of them is not yet in production but we are edging ever closer to sorting this out! All being well, we will change the pack on the Jaguars so that you will get two different animals rather than two the same. The bear cubs should be in production by next week and we will have a couple of brand new packs of dogs! Here’s the Jaguars, just undercoated. I will be trying to paint them both as Black Jaguars, the sort that appeared in Apocalypto. On the face of it, that is the simpler option as opposed to the spotted type of Jaguar. However, painting & shading black is quite difficult – I’ll show you how I get on when they are finished. 2014-09-25 11.07.26

1 15 16 17 18