Rain Starts Play!

2015-07-25 12.10.45

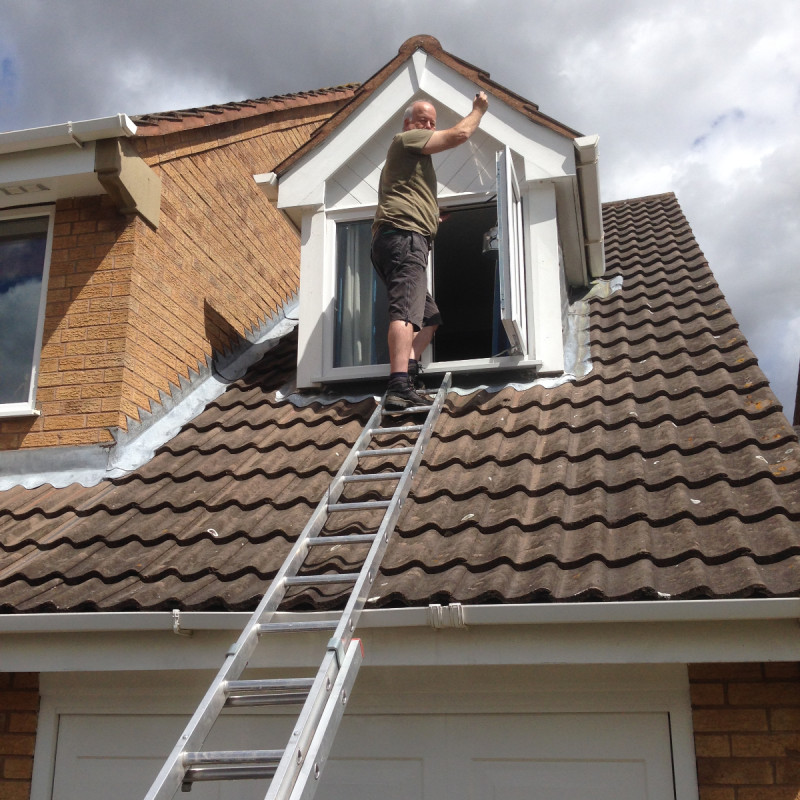
I have been doing quite a bit of painting this last week. Unfortunately, it was with a four inch brush and a can of Dulux Weather Shield. As you can see, I have been up a ladder, painting the exterior of the house, so the important job of adding to my Napoleonic Army was put on hold. Fortunately, that all changed on Sunday, when the weather turned and the rain came down all day. No doubt, many people were dismayed but not me! It gave me a break from the chores and a chance to get on with the last regiment of Hanoverian Landwehr, the Osterode Battalion.

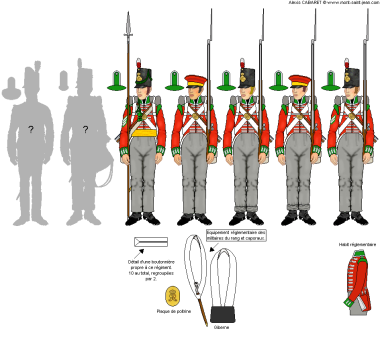
Hanoverian Landwehr Osterode painting guide from Mont St Jean

Hanoverian Landwehr Osterode painting guide from Mont St Jean

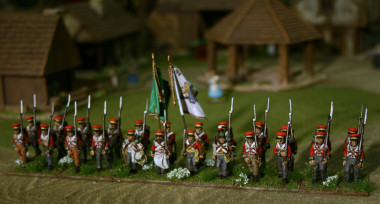
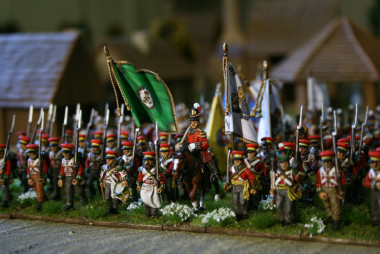
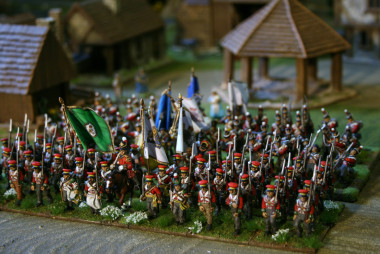
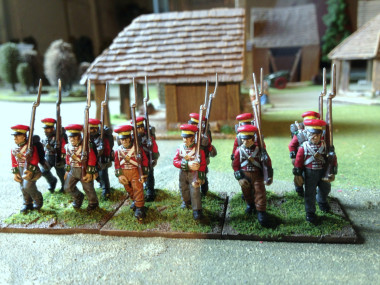
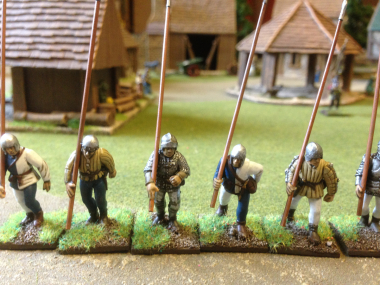
As you can see form the pictures below, the first 12 troops are done which is half the regiment. I followed the colour scheme on Mont St Jean, which may be incorrect but as I said in my last post, the chance to paint a slightly different looking unit was too good to miss.

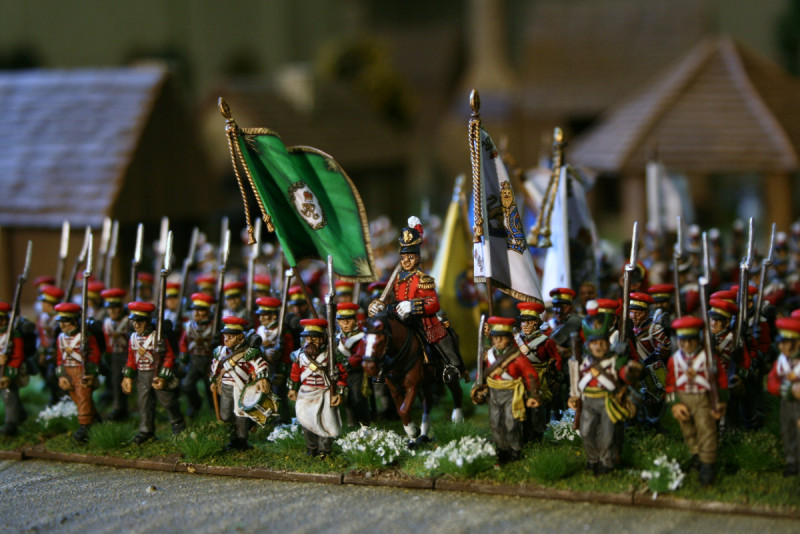
Hanoverian Osterode Landwehr

Hanoverian Osterode Landwehr

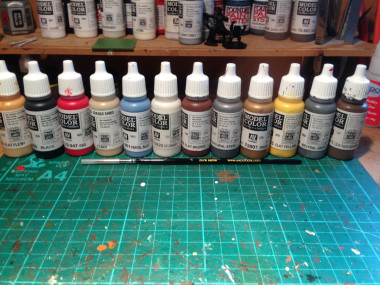
The colours that I used are shown in the picture below. I followed my usual procedure of block painting everything and then used Army Painter Dark Tone to provide the shading.  Once the dark Tone had dried for 24 hours, I used the Army Painter Anti shine to matt the figures down. I then repainted some of the lighter colours to give a better highlight. So the red, Yellow, white, green and metallics were all touched up. This last stage is not really necessary but does help the brighter colours to show up on the wargames table.

Vallejo Model Colour

Vallejo Model Colour

The basing scheme was my usual method of Vallejo Sandy Paste, over painted with Chocolate brown, highlighted with Iraqi Sand for the ground work. I’ve added the basic green scatter but will also add some tufts & flowers and static grass for a bit of interest once the whole battalion is complete.  With another 6 troops and the officers and ensigns still to paint, it will be at least another week before the battalion is ready for the table. This will definitely be my last batch of Hanoverian troops for some time now!

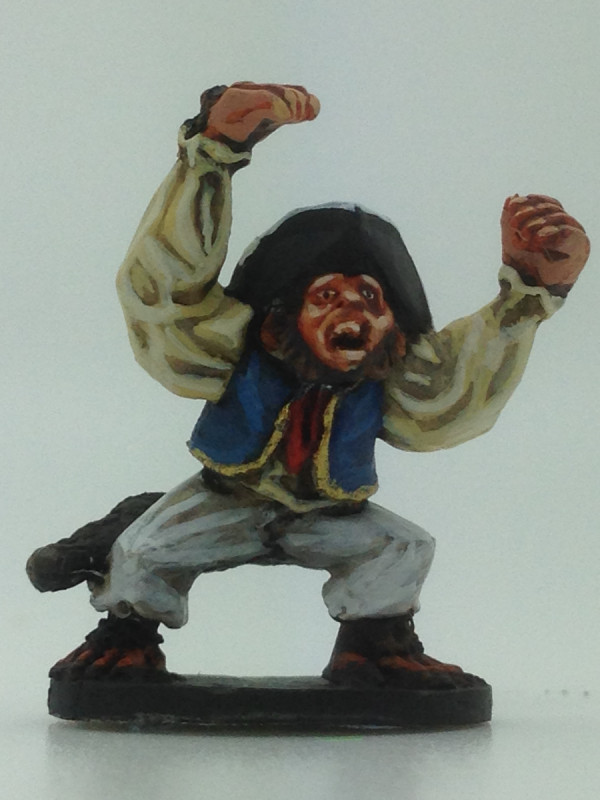
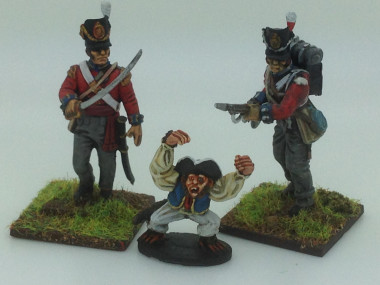
I’ve got a number of small projects lined up once these are done, most of them small dioramas that wont really add to my Army but will add a bit of interest to my collection and provide a bit of ‘flavour’ on the occasional big set piece games. These projects include a spare wheel wagon, Napoleons Coach, a Prussian mule train, a Vivandiere, and a tribute to the Hartlepool monkey.

All I need to get these finished is a few more rainy days……

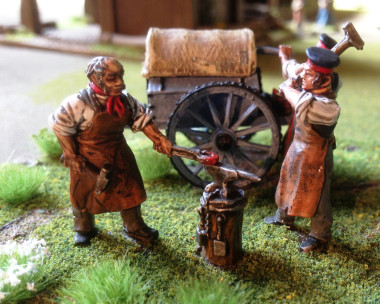
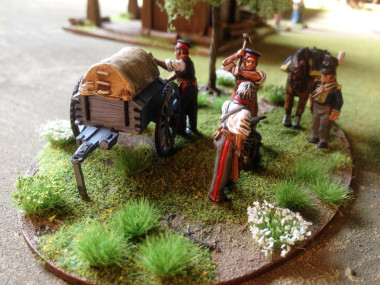
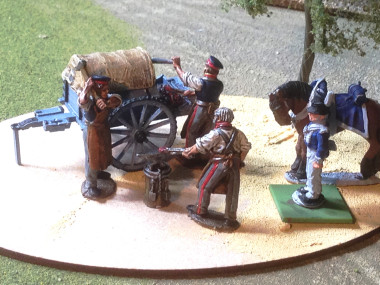
Napoleonic Field Forge completed!

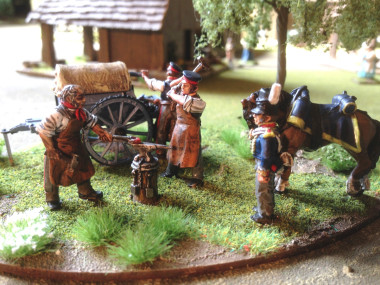
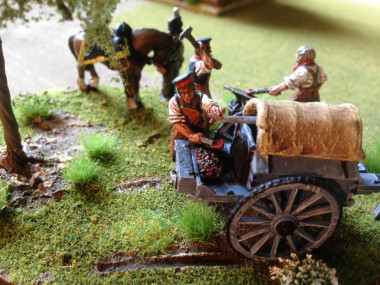
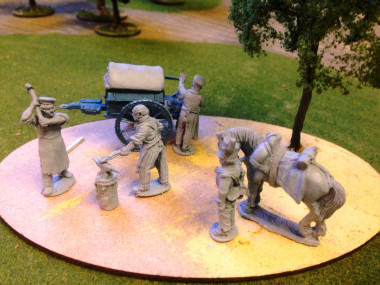
Napoleonic Field Forge - Perry Miniatures

Napoleonic Field Forge – Perry Miniatures

My Napoleonic Army continues to progress and the field forge completes another mini diorama that will eventually build into my Artillery Park. I have always been fascinated by the support units that ensure that an Army is able to fight. It is a shame that the rules systems that I have come across fail to take into account the logistics required to get an army into battle. I have just finished reading about Wellingtons Peninsular campaign and it seems to me that the battles were won because of Wellingtons attention to this area. The French seemed to have lost the campaign because of their decision to live off of the land rather than have a supply train in place. They were unable to continue to press any advantage gained because they ran out of provisions. This is best illustrated by the problems that Massena experienced when Invading Portugal. Held in check by Wellingtons defensive lines of the Torres  Vedras before Lisbon, Massena saw his army dwindle away due to starvation and sickness.

I wouldn’t expect ‘club Night’ games to reflect this logistics problem in every game but there is certainly room for a scenario or two here! Just to give you an example of the logistics involved, a Brigade of Infantry required about 150 mules to carry supplies. A troop of Horse Artillery required some 205 mules to carry supplies. And these were only the Commissariat mules. In addition, every unit had it’s own beasts to carry camp kettles, reserve ammunition, pay chest, medical stores and tents. Whilst all of these beasts were left in the rear during the major battles, I suspect that there were times when they were present ‘in the thick of it’ or certainly close to the action.

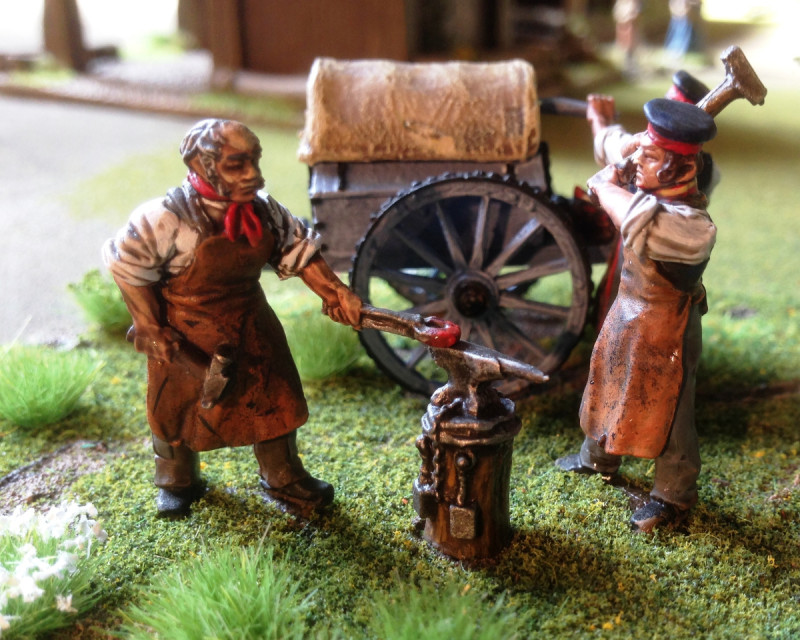
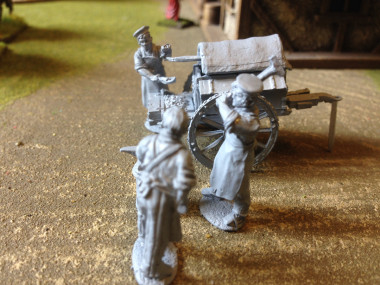
Blacksmith close up

Blacksmith close up

I digress, back to my field forge. It is from Perry Miniatures, although I have added a spare artillery man & officers horse to fill out the base. As usual, I have used Vallejo paints to complete the figures. I could find very few references for details of the clothing , So I painted the figures as Foot artillery in shirt sleeve order! The leather aprons were my first attempt at painting raw leather and I used the Vallejo Orange brown as the highlight and wash over the actual leather brown paint. I then just stippled some black on the aprons to represent the burns that would be there from working. I think that it has worked quite well.

Detail on Blacksmith aprons

Detail on Blacksmith aprons

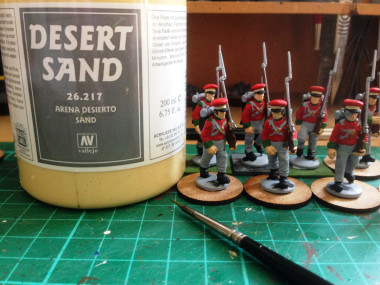
For the base and ground work, I used Vallejo Sandy Paste. I actually have a pot of the desert coloured paste that was left over from another project, so I am working my way through this, being too mean to buy either the plain or brown that is available. I am a great fan of this product. It is ideal for blending your figures into the base and has sufficient texture when dry to enable a quick dry brush to bring up the detail.

Field Forge Ground work detai

Field Forge Ground work detail

Once the paste was dry & painted, I used a green scatter to represent the grass as well as some static grass dotted around to add some different texture & colour. I then added a few Grass tufts ( I like the ones from Noch) and flowers and the basing was complete.

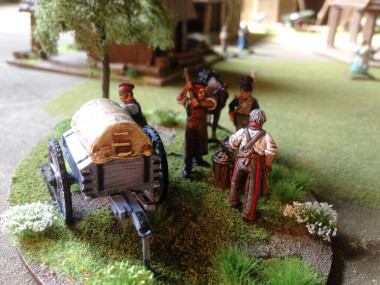
The field Forge takes it's place in Little Bingham!

The field Forge takes it’s place in Little Bingham!

So although my Field Forge is unlikely to change the course of any battle that I fight, it will make either a nice objective or simply add to the scenery. It was of course a pleasant distraction from painting the rank and file….Talking of which, next up are my final battalion of Hanoverian Landwehr, the Osterode Battalion, More on those next week.

Work in progress - More Hanoverians! And my new favourite basing material...

Work in progress – More Hanoverians! And my new favourite basing material…


Summer madness….

The weather has somewhat curtailed my painting over the last week. It’s a bit hot to be sat in my garage painting when other activities beckon. You know the sort of thing, burning meat on the barbecue, sampling the odd cold beer and the occasional gardening task which can be put off no longer. I have made some small progress on the Napoleonic field forge. The forge is finished, the crew are at the final stage of highlighting and the two other figures need about an hours work on them. What will really make the difference is the basing, which as you can see is nowhere near finished.

2015-07-02 10.26.05

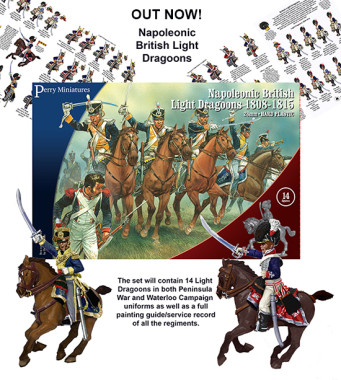
Just to add to my agonies over my lack of progress on painting, the Perry’s have only gone and released their new British Light Dragoons boxed set! Well, I expect to receive it into the shop tomorrow, so watch facebook for confirmation. I’ve been drooling over these ever since they announced the release at Salute.

Light_dragoon_advert_550_revised

With fourteen figures plus loads of extras, I cant wait to get my hands on a set! Those Hanoverians that are sat on the work bench might just get pushed down the painting line! Of course, my mind then goes into overdrive. If I bought three boxes, I could do the whole 4th British Cavalry Brigade at Waterloo. It comprised of the 11th Light Dragoons (Light Buff plastron & facings); 12th Light Dragoons ( Pale yellow plastron & facings) and the 16th Light Dragoons (Scarlet plastron & Facings). Even better, if I keep to 12 models per regiment, I will have 6 spare, so I could get some of the Perry Metal Dragoons and have an extra regiment, say from the KGL. Of course then there is all of the spare Tarleton heads that I’ll have. Just thinking about the conversion possibilities is giving me a head ache! Tarletons were worn by horse artillery and rocket troops and of course the Out riders on limbers etc, so a quick search in my spares box and I bet I could soon find the bits that I would need to build a few of these…
And there lies the madness! In the time that it takes to sink a cold beer, I have convinced myself that I can have 48 Cavalry figures painted and based in the next couple of weeks and meanwhile the other project of completing the Infantry brigade has been put to one side. Whats the betting that just before I finish the Light Cavalry Brigade another new release will set me off on the next project! I guess it is what makes the hobby interesting and gives us all something to talk about whilst we are gaming!

But I’m still going to get those Dragoons!!!

Prussian Artillery Ready For Battle

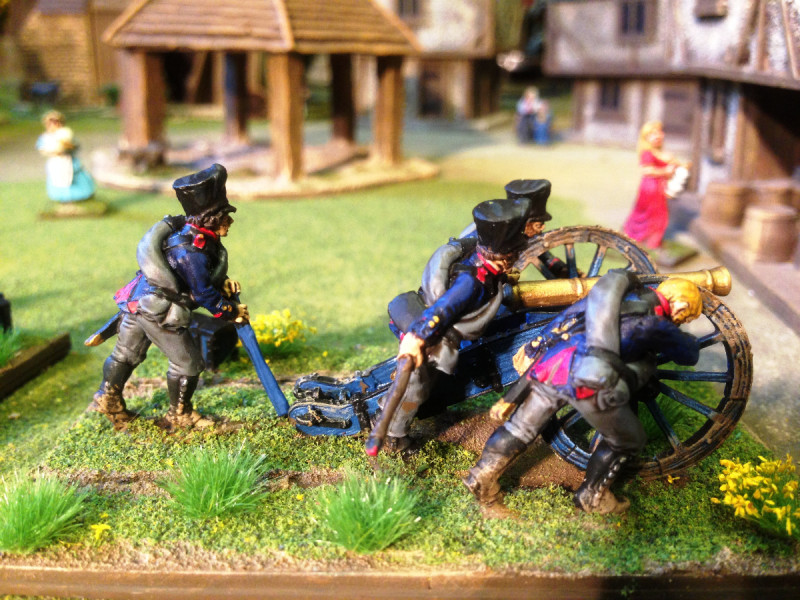
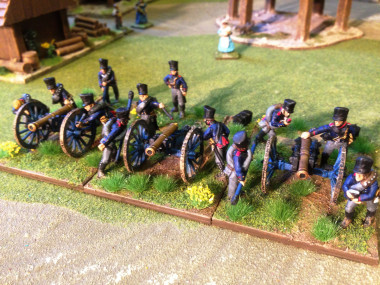
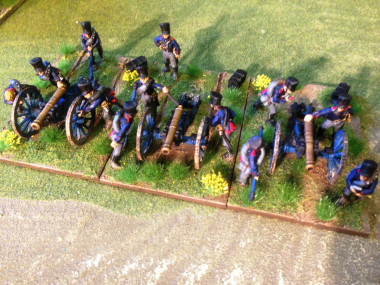
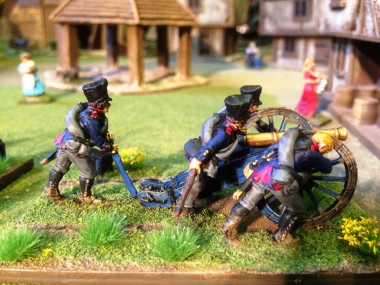
The New Prussian Artillery at drill in Little Bingham!

The New Prussian Artillery at drill in Little Bingham!

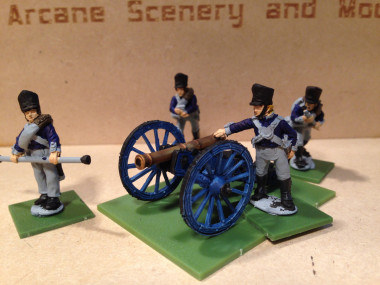
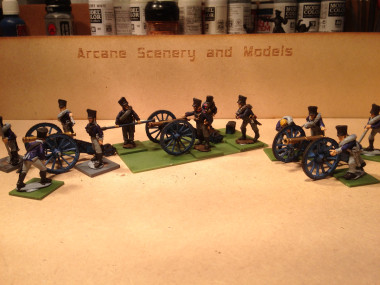
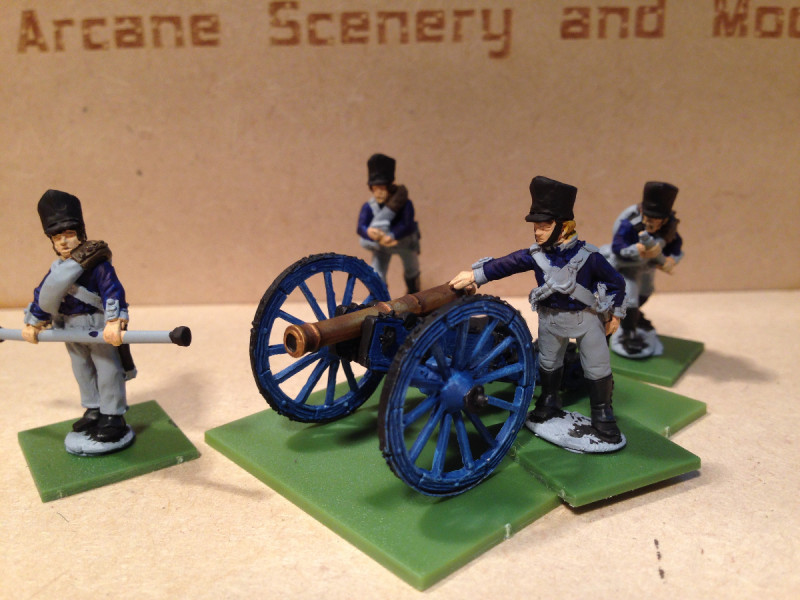
After all the excitement of the previous weeks Waterloo spectacular, my painting output has  slowed down again. However, I have finished my Prussian Artillery Battery, so I wont be quite so out gunned in the next battle. I’ve changed my basing size for these. I’ve used 60mm by 90mm  for each gun. It allowed me to get the full crew onto the bases and to be fair, it was a way of using up some spare 60mm x 45mm Renedra bases that I had – I just glued two of them together. To strengthen this arrangement, I glued them onto  a piece of 40/000 thou plasticard. It means that the bases are a bit thicker than normal but they now look better along side the troops, who are normally in movement trays.
The other slight innovation for me was to use the Vallejo paste for the ground work. In the past, I have used this but then painted over it and then added sand for texture. With hindsight , this was totally unnecessary! The Vallejo paste has more than enough texture when it has dried, so all that was needed was to paint it – Chocolate Brown, then highlight and dry brush with Earth brown and then Iraqi sand added in to highlight further. It was actually very quick to do and will be my basing method of choice for the future.

Prussian artillery from above showing basing.

Prussian artillery from above showing basing.

To finish off the bases, I added some green scatter and my usual assortment of grass tufts and flowers. The yellow flowers match the bases on the rest of my Prussians and add a bit of color to what is otherwise quite a dark paint scheme. Incidentally, I think that the pictures are a bit on the blue side! In real life, the figures look a bit darker to me. Oh! I haven’t mentioned that they are from the Perry Metal range. One last point about basing. I actually finished painting the figures and then fixed them to the bases. When I painted the ground work on the base, I also carried the colour up onto the guns & the figures to give the impression of mud.
'utching up the guns according to Peter Harris....

‘utching up the guns according to Peter Harris….

So another project is complete, the next is on the work bench! I’ve decided that now there is less pressure on me to turn out battalions, I will alternate between painting units and painting special projects. I already have a painting plan in place but the first project is a little diorama of a field forge. It’s from Perry Miniatures, although the Artillery man & horse are out of my ‘spares’ box. Here is a rough layout of how it will look, I’ve started to paint the forge and the tree is already fixed in place with Vallejo desert sand paste.

Field forge work in progress.

Field forge work in progress.

Whilst I am painting this diorama, work still continues on the troops! My next (and final) battalion of Hanoverians are being prepared. These will be the Osterode Hanoverian Landwehr battalion, with green facings & shoulder tufts. Once these are done, I will have a representation of  the full Hanoverian 4th Brigade which in turn, with the 10th British brigade ( already finished), will complete the 6th British Infantry Division!

Osterode Landwehr Battalion advance to the work bench....

Osterode Landwehr Battalion advance to the work bench….


Prussian Artillery 11 June 2015

Prussian Artillery - Work in Progress

Prussian Artillery – Work in Progress

With the 200th anniversary of the Battle of Waterloo fast approaching. I’m desperately trying to finish another unit for our ‘Grand Battle’ planned for this Saturday. It’s not going to happen though! I’ve fallen into the trap of trying to do too much and not actually finishing anything that I’ve started.

The ‘Grand Battle’ planned for this Saturday will be our annual tribute to Waterloo. We don’t actually re-fight the battle as such. It’s more a case of that we put as many troops as we can muster on a battlefield that has some similarities to Waterloo. After spending an hour or so admiring the scene and having a chin wag over a cup of tea, we then roll some dice and play a huge game of Black powder. It takes all day, and the result is largely immaterial, but it is great fun and the random results of the dice throwing usually causes some merriment and some good talking points. You can see last years battle report here http://arcanesceneryandmodels.co.uk/battle-report-waterloo-2014/

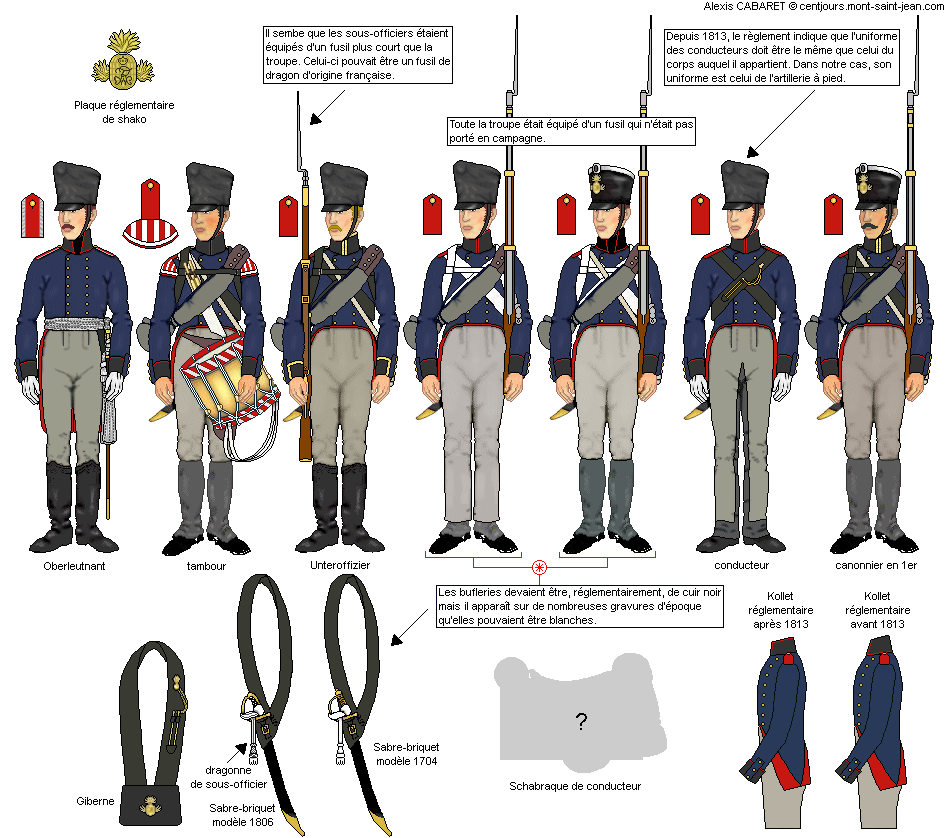
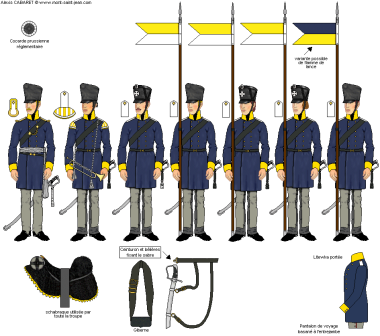
with the need to field more artillery, I thought that I would crack on with my next Prussian unit, a battery of three guns, 6pdrs to be precise, made by the Perry’s. The first task was to do some research as to what colours to paint the guns and the Uniforms of the crew. My usual quick source, the superb Mont St Jean web site gave me this picture to use.

alternative text

I always use this website as a starting point. That and of course, and the Manufactures’ own painted examples. You can be fairly confident that they have done their research when producing the models and the pro painters will be following their own research. I also consult my collection of Osprey books and various other references that I have and then finish off with a trawl through the internet – google images is a good source! By the time I have done all of this, I have a picture in my mind as to how I want the figures to look. The are always discrepancies and contradictions in the material. For example, I have found pictures showing the short sword scabbard in both brown and black. And the blanket covers & straps in both dark grey and leather. At the end of my research, I just make a decision as to what I think will look the best for me, no doubt to the horror of some purists!

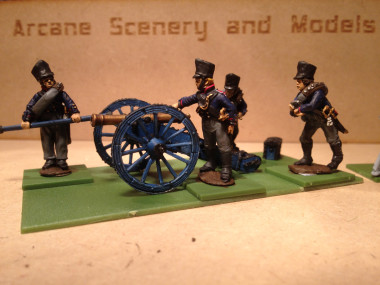
So onto painting! The guns were painted in Vallejo Prussian Blue, with the ironwork in black and the gun barrels in brass. The crew in Vallejo Dark Prussian blue jackets, Neutral Grey trousers, Black Grey gaiters, red turn backs & facings, Black collars, cuffs & boots, much as the picture above. The first gun and crew are now almost finished, the the other two not far behind but they are not going to be ready for Saturday!

Prussian Artillery - nearly complete!

Prussian Artillery – nearly complete!

Prussian Artillery Battery - still much to do!

Prussian Artillery Battery – still much to do!

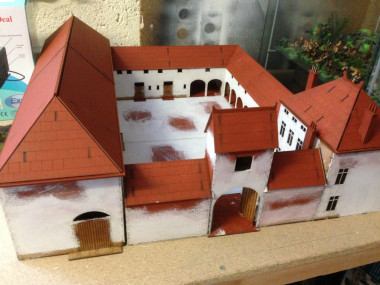
I could possibly rush them, but in reality I know that I have at least three more ‘sessions’ to go before they are ready for the battlefield. Even the first gun will need a final highlight & tidy up, and then there’s the basing. Rather than cut corners, I’ll wait – they will be ready for next year! What really caused the problem was that I was diverted and panicked into trying to finish another project that has been sat around on the bench – Papelotte Farm! Talk about biting off more than you can chew! I started to paint this as well and again, it is nowhere near finished….

Papelotte Farm - Under construction!

Papelotte Farm – Under construction!

It will end up on the table – even in this state it will be OK but it’s not quite what I had in mind. And just to show how I have engineered my own failure, whilst preparing the Prussians I decided that it would be a good idea to get this Field forge ready for painting…

2015-06-11 09.28.43

Never mind, at least the Cavalry are now finished and ready for battle!

Prussian Cavalry ready for battle!

Prussian Cavalry ready for battle!

Prussian Landwehr Cavalry 28th May 2015

Prussian Landwehr Cavalry

Prussian Landwehr Cavalry – Nearly finished!

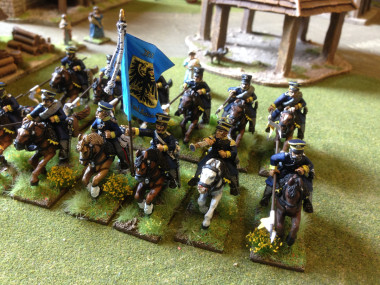
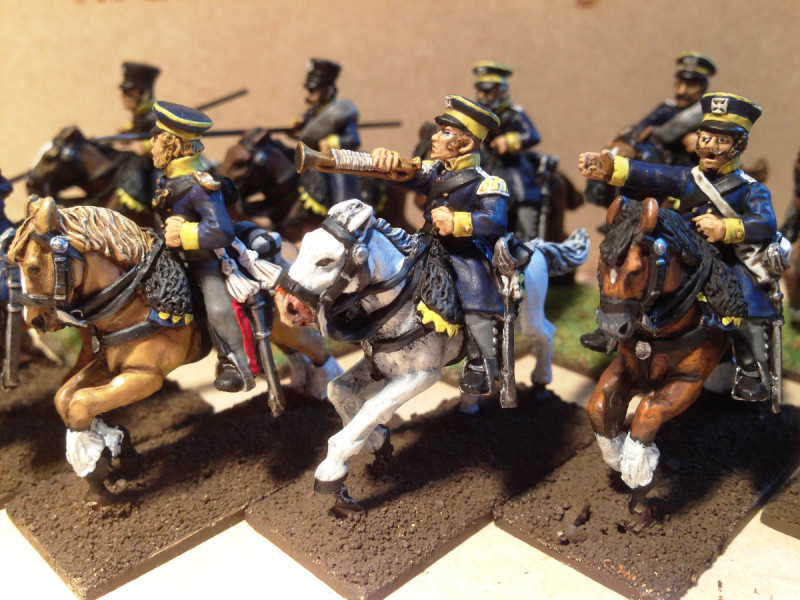
It’s been a slow week or so for painting but at last, my Prussian Landwehr Cavalry unit is nearly ready to leave the work bench. As you can see, the command group is just about finished, with just the bases to highlight and detail. I’ll finish these off with a quick dry brush with an Iraqi Sand and Chocolate brown mix, and then a final highlight with pure Iraqi Sand. Once that is dry, I’ll add the Static grass ( I prefer the flowered field mix) and then my usual mix of grass tufts & flowers. I find that a bit of colour on the base will tend to lift the figures, particularly when they have a dark uniform. It will also unify the army if the basing is similar.

Prussian Landwehr Command Group

Prussian Landwehr Command Group

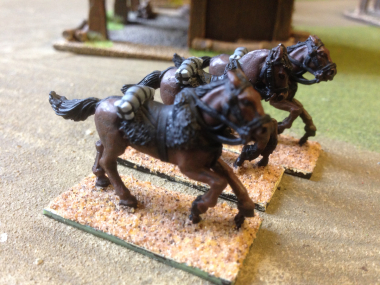
I’m quite pleased with the way that the horses have worked out – see my last blog post for details of the paint ‘recipes’ used. I’ll have a last look over the figures as I base them to decide whether to add any further highlights. It’s always difficult to know when a unit is really finished.  There’s always a compromise between producing my best possible finish or moving on to the next unit. Do I spend another session adding a few more highlights to the uniforms and a bit more ink to add shadows to some of the equipment or do I just get them on the table?

Regardless of the above question, the final job will be to add the lances and pennants and the flag for the unit. I have these ready to go, you can just make out the first two Lances added to the figures in the background and it will be another evening session, to finish that job – so these boys are about two evenings away from the war games table…

Close up of the Trumpeter

Close up of the Trumpeter

Actually, there is one other job to do before they are ‘table ready’ and that is to make the movement trays. I could use a ready cut MDF tray but will probably make my own as I have a different style that I prefer to use rather than a normal tray. It’s a straight forward job and I think I’ll show how I do this in another blog post.

So my Prussian brigade now consists of 2 Battalions of Regular Infantry, 2 Battalions of Landwehr Infantry, a Command base and a Regiment of Landwehr Cavalry, all in Silesian colours, making a total of 110 men and 14 horses painted. Next up, some Artillery – now can I get them finished for the 13th June, the date of our next big battle…..

Painting Horses – Prussian Landwehr Cavalry

Prussian Landwehr Cavalry - Work in Progress

Prussian Landwehr Cavalry – Work in Progress

I guess that you can make painting horses as easy or as difficult as you like, from just a brown coat to the more complex spotted greys. I have tried quite a few of the different techniques over the years but I’ve been trying to improve my results to make the horses look a bit more interesting without spending too long on each horse. It’s also been a good way of practicing highlighting and shading, without relying on Quickshade or Inks.

There are two techniques that I’ve been trying with this latest batch of horses. Both are very similar and both are based on using the three colour; shade, main coat , highlight technique that the professionals, such as Kevin Dallimore use to such good effect. Lets be clear, I’m a long way from that standard and I’m still set on producing regiments for wargaming rather than high quality figures for photography. However, practice makes perfect, as they say, and learning a particular style will help me speed up my painting process.

If any one is interested in seeing a master class in how to paint horses using this method, then I recommend this youtube video by Toby of Art Master studios – it’s an hour and a half of watching paint dry but still better than 90% of the stuff on TV these days! There are some great ideas here and I’ll just summarise them, as much for my own reference, although I hope that it will be useful for other wargamers.

First choose your colour pallet for your horse – using three colours will allow you to get variation on horses, even when using the same colours on a batch of horses. Here’s a few of my favourite recipes using Vallejo paints! All of them are used over a black undercoat.

For Browns:  German Cam. Black Brown,70892, Flat Brown,70894, Orange brown 70891 or Mahogany Brown 70846. Be careful with the mahaogany brown, it is quite red and adding white to it will make your horse look pink so if you want to lighten it, use a Light brown, 70929. Another useful combination is Chocolate Brown 70872, Flat Brown,70984, Cork Brown 70843.

For a light brown or cream horse, try Flat earth 70983. Cork Brown 843 and Green Ochre 70914. Or try  gold brown, 70877 as the mid colour.

For black horses, use Black 70950, Black Grey, 70862, and highlight sparingly with light grey,70990.

For Grey horses, Dark grey 70984, Neutral Grey 70992, Light grey 70990.

And for White horses ( still Grey really!) Light Grey 70990, Sliver grey, 70883 and Off White 70820.

So that’s the horses body done. I stress that these are just some of my paint combo’s that I have tried. There are plenty more out there but using three colours in combination will give you plenty of variety. I mentioned that I was trying two techniques when painting. The first one is to carefully paint one colour over the other building up the highlights by picking out the muscles on the horse. This is the most time consuming and if done well gives superb results. The other method is to use a dry brush technique with the the colours. This is much faster and the results are still pretty good but you will need to go back over the harnesses etc as the paint will cover them if this method is used.

Prussian Landwehr Lancer on Brown horse

Prussian Landwehr Lancer on Brown horse

Next up, is the detail on the horses. The obvious ones are the mane & tail. You can either paint these in the same colour as the body of the horse or use black or green ochre to give variation. On the Cream horses, Biege 70917 looks good and on the greys, either a dark grey or white mane & tail looks fine. As these areas tend to have more texture, using an ink and then dry brushing with a light shade or even white will really bring the detail out.

The next area to look at are the legs – painting white or black ‘socks’ on one, two, three or four legs is fine and will  give variation in your regiment. Finish off the legs with the hooves. I paint them either black or a dark brown, it just tidies them up. You can also paint the horse shoes in steel if they are showing but it’s something that I tend to leave as a detail too far – besides , my thought is that they will be covered in mud…..

The last thing that I paint is the head. Again, a bit of variation here can make all the difference. I usually paint a white ‘blaze’ on the horses head. You can leave the muzzle the same colour as the horse or paint it black, dark grey or even a dark flesh colour. The eyes are painted black, although I will sometime use gloss black for this to get a shine.

The final bit is to paint the horse furniture and that is dependant on your Regiment and an article for another time. I have mentioned variation in horse quite a bit. Some of the elite cavalry regiments would of course ensure that the opposite was true. For example, the Household cavalry would be mounted on all black horses but I think that other regiments were less fussy and of course when on campaign or in battle, so long as the horse had four legs, it would do!

Work in progress - light brown horse

Work in progress – light brown horse

The pictures in the article show my latest regiment, Prussian Landwehr Lancers. As you can see they are yet to be finished, with some based with riders & some still not quite painted fully and none of them with their lances yet! I tend to paint horses in batches of three using one colour combo and then finish with the command group. As the trumpeter usually rode a grey and the officer would have had his own ‘posher’ horse, I leave these until last of all. Once they are all painted, I’ll go back over them all adding a few last quick highlights, correcting any obvious paint errors and of course detailing the bases with a few tufts and flowers.

So that’s my take on painting horses – Cheers!

The latest resident in LIttle Bingham - just the basing to finish!

The latest resident in Little Bingham – just the basing to finish!


Pikemen, Prussians and Pterodactyls

It’s been one of those weeks when life has got in the way of my hobby! So I haven’t been able to spend as much time as I would like to have done with my various painting projects. The result is that nothing is actually been finished although things have moved on. One of the benefits of having a dedicated hobby area means that if I have just a spare five minutes, I can do a little bit here and there – add some static grass to a base, undercoat a figure even slap some paint on!

Perry Pikemen

So the six Pike men for my Wars of The Roses army are very close to being finished, just a bit of extra detail needed for the bases – a few tufts & flowers! the plan is to have at least one unit of 12 pike men for my army, probably two, but as the next Lion Rampant Day is not until September there is no rush to complete the unit. I have a box of the plastic Perry Mercenaries and the plan is to make two blocks of Pikes, a small unit of mercenary Crossbow men and the remainder as hand gunners.

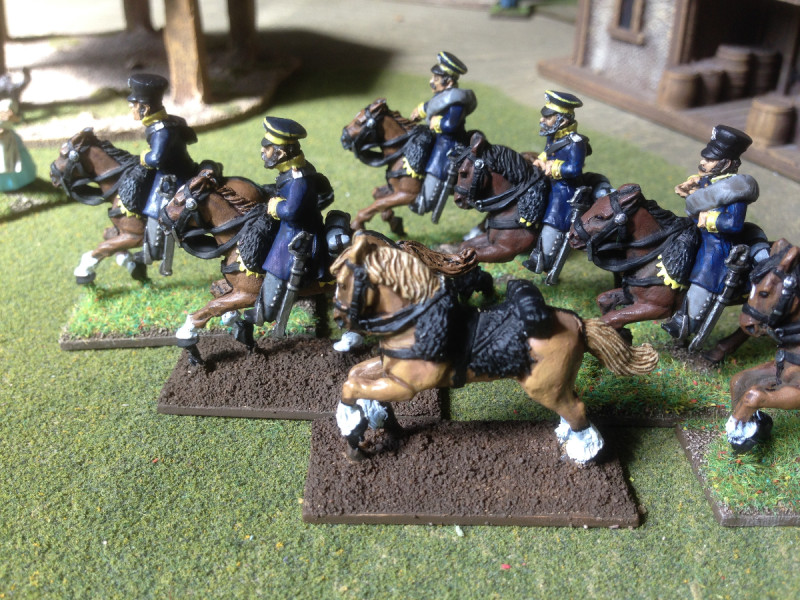
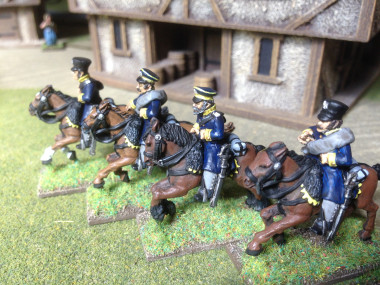
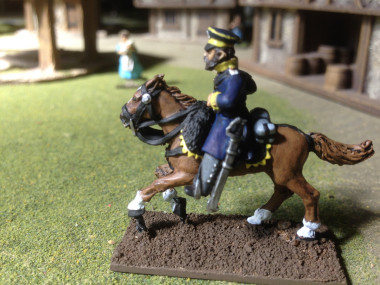
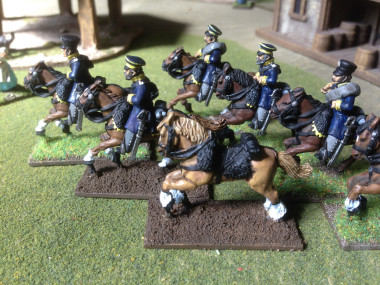
I also started on my Prussian Landwehr Cavalry. There will be 12 in the unit and they are all prepared & undercoated and I am painting the horse in batches of threes. Here the first batch nearly complete. The difficulty I have had with this unit has been trying to find details of the uniform. The figures are from foundry and whilst they are very nice, they seem to have different head gear to my Mont St Jean Reference:

CavLandwehrSilesie01

Just to add to my confusion the detail on the sheepskin saddle cloth is showing as a Yellow trim ( makes sense if they are Silesian) but other pictures and references give the colour as Red regardless. In fact the reference material for Landwehr Cavalry is thin and as usual contradictory. I think that I will have to overcome any ‘button counting’ tendencies and go for what I think looks best – in this case yellow trim to match the yellow facings! So here is the progress so far:

2015-04-16 09.34.30

As you can see, still plenty to do!

Pterodactyls

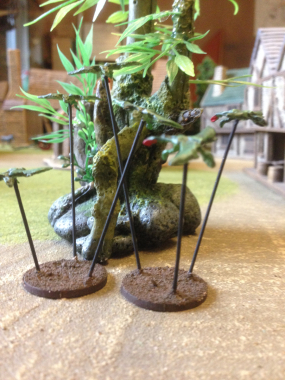
Finally, the Pterodactyls are nearly completed! This is all part of my project to get one of each of the DeeZee codes done. The pterodactyls are certainly straight forward to paint but detailing them is a challenge that is beyond my eyesight & patience these days! I just gave them a spray on top with dark green & a spray underneath with light green. Then a quick couple of dry brushes to try & bring out the detail, followed by a brown wash. They are mounted on a 25mm MDF base using thin wire. The final stage is to detail the bases and I may have a go at painting the eyes……They are only 15mm or so wingspan so no one is ever going to look that closely but as a group of 10 they look quite impressive and will add chacter to a model.

It’s All About the Base……

Bases, Faces and Flags – these are the key areas for ensuring that your war gaming figures look the best on the table top according to top commission painter Dave Woodward. Well,  I’m a great believer in the first and last of these but painting faces on my rank and file troops is not really going to happen. I’m afraid that I rely on a quick wash or shade over a basic flesh coat and that is about as far as it goes for the troops. I will spend a bit more time on the officers and characters and add a bit of a highlight to the nose & cheek bones – I’ll even attempt to paint the eyes, although as often as not my figures look as though they should definitely go to spec savers….

2013-10-06 15.20.45

Foward with the Colours!

As for the flags, it goes without saying that if you can add these, your unit will certainly stand out on the table. Part of the attraction of painting Napoleonic troops is the flags and with so many good suppliers out there – the Flag Dude and GMB designs, to name but two – it’s a shame not to ensure that your unit has a flag or two!

Sir Stapleton Cotton - a bit of a Dandy!

Sir Stapleton Cotton – a bit of a Dandy!

So for me, it’s all about the bases. And so we enter another realm of controversy or taste… If you are in the Dan Faulconbridge (Wargames Illustrated)  school of basing you will like a straight forward non fussy finish. This view is based on the notion that the figures should blend into the table top – it makes for better pictures don’t you know! I tend to prefer a nice bit of vegetation on my bases – I cant resist adding a few clumps of flowers! It does mean that my units have to drag the scenery around the table and my opponents usually ask where the park keeper is, but I like to amuse! There is also the matter of what colour to paint the base sides. Leaving them black used to be the fashion, then the there is the green edge following, whereas I prefer a brown edge to my bases.

The Prussian advance was halted when the Park keeper shouted 'get off them flowers!'...

The Prussian advance was halted when the Park keeper shouted ‘get off them flowers!’…

Whatever your taste, I think the guiding rule on bases really is to ensure that you stay consistent with your army and that it really is worth a bit of time spent on finishing your bases off with a bit of detail. One last tip, I have spent ages trying to blend figures onto bases and I have ‘discovered’ the product that I find easiest to use is the Vallejo Grey Pumice paste or the coloured textured pastes from the same Company.

Grey Pumice

Grey Pumice

I’m working my way through a pot of Desert Sand at the moment. It’s really easy to apply and will ensure that your figures blend nicely onto the bases without an obvious  ‘edge’ showing. The textured paste will take a coat of paint with out undercoating and a quick dry brush will enhance the detail. I still prefer to add sand or a scatter and just use the paste to blend the figures on to their bases. Here’s my next batch of figures on the work bench. The pikemen just need the bases finishing and they are ready for the table. The Prussian Cavalry need a bit more work!

2015-04-09 11.02.37


Glyptodon and Mammoth clear the work bench!

DeeZee-Miniatures-GLYPTODON-Adult-DZ18-28mm-Wargames-380655342625As we go into the Easter break it seemed appropriate to paint something vaguely egg shaped and as the Glyptodon had been sitting forlornly on the work bench in just an undercoat I decided his time had come!

He is nicknamed the ‘kinder egg’ by the Arcane team due to his rotund shape but there’s plenty of detail in the casting that can be brought to life with a bit of dry brushing. I had hinted that I would use an airbrush to finish him but that will be a project for another day. I have put off buying an airbrush for now. Although I can see that it will be invaluable when painting Tanks and larger subjects like Mr Glypto, I am not quite in the right frame of mind to learn a whole new skill, particularly when I am still learning to paint with a brush! That said, I am of a mind to jump in to this mysterious world and who knows, I might just treat myself for Easter…..

Anyway, I digress, back to painting the Glyptodon. I had a quick look on Google for some inspiration and colour schemes and was pleasantly surprised at how many pictures there were! In the end, I went for a fairly safe option using a variety of browns in various combinations. To be specific, Vallejo light brown 70929, Flat brown 70984, Chocolate brown 70872 and to lighten them, Iraqi Sand 70819.

DeeZee Glyptodon

DeeZee Glyptodon

There was a slight problem when I started to paint. I had failed to follow my own advice and I had not washed the model before priming. The result was that the primer had started to flake off due to the release agent still on the casting. I confess, I was too lazy and impatient to start again, so I re primed the model with Model Mates Light grey primer. I have started to use this brand more often recently in favour of my usual Army Painter primer. It seems to be a much more effective primer and in this case, solved the flaking problem. However, lesson learnt, next time I will wash a resin model before painting! For the sake of 5 minutes, it will save time and heart ache in the long term!

So back to painting. The shell was done in the flat brown and then dry brushed with a couple of coats of the flat brown & light brown mixed. The fur was done with light brown, dry brushed with light brown and Iraqi sand. I picked the detail out around the shell with Iraqi  sand  and then I then gave it all a wash over using a dark tone ink. As with all these things, you have to fiddle around until you get the general effect that you are looking for and even now, I’m not sure whether to go back and add another lighter coat to the shell. The next task was to pick out his eyes, nose using black & claws using ivory and to paint some of the detail on the base. I then mounted him onto a renedra base and blended the model to the base using Vallejo Desert sand paste. If you haven’t tried these pastes from Vallejo, give them a go – they are superb for basing and once dry you can paint straight over the paste as there is sufficient texture. I like to add sand to give even more detail.


Glyptodon painted - working on the base

Glyptodon painted – working on the base

I finished off the base by adding some detail to the rocks, painted the tree stump and painted the grass and of course the sand. This was all done using virtually the same pallet of Chocolate Brown and Iraqi Sand, with plenty of dry brushing of lighter combinations of these colours – the final dry brush was done with some white added in. To finish off, I added some Static grass and of course a few clumps of flowers! I’m reasonably happy with the result for now – as I said, I may add a final lighter coat to his shell but he’s off to the cabinet.

The finished Glyptodon!

The finished Glyptodon!

I often find that it’s difficult to know when a model is finished so sometimes it’s best to put it to one side and then have a look after a week or so. If I’m still not happy then I might try a bit of retouching. This was the case with the baby mammoth. I just wasn’t happy with the way he looked, so he has sat on the paint table whilst I decided what to do. In the end it was a case of cutting down his tusks – they were too big even for a baby Mammoth – and giving him another even lighter dry brush to add detail & adding some ink to bring out the shadows. I also gave him a snowy base with some frosted tufts. I’m still not entirely happy but he is looking better for now. Perhaps I’ll have a go at another one – I have a diorama in mind that involves a nasty Sabre tooth……

DeeZee Mammoth Calf

DeeZee Mammoth Calf

Little Bingham Population Explosion!

Little Bingham is the name of the Town that occupies my war games table when it is not being used for war gaming. To be fair this is most of the time – I get my ‘fix’ at the local club, The White Hart Gamers, every week almost without fail. So the table is more like an over-sized diorama that doubles as a photo back drop as well as a reserve work bench!

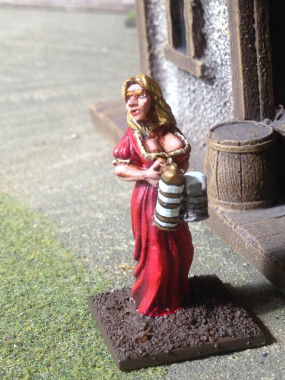
In the last work bench post I hinted that I was a bit fatigued with painting red coats so I decided to have a sort of a break from painting Regiments and picked a few bits from my ‘stock’ of unpainted figures. In the last week I managed to paint four new occupants of Little Bingham, all female, and here they are:

Fetching the water!

Fetching the water!

Milk Maid!

Milk Maid!

Feeding the Geese!

Feeding the Geese!

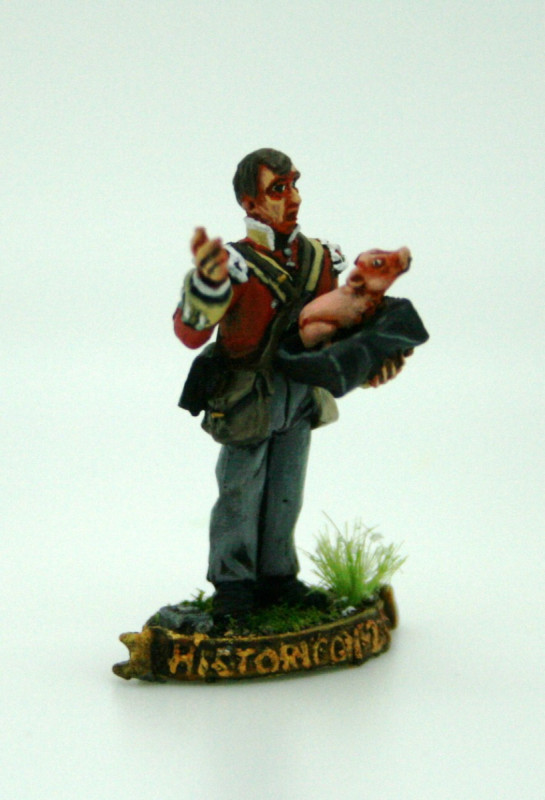
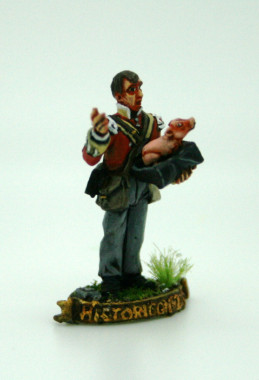
The final figure is part of a mini diorama that I am slowly making. It’s an army encampment that will be part of  ‘Little Bingham’. The tents are by Renedra and the figure is an spare one – a Frontline, I think.

Comforting her son!

Comforting her son!

As well as these civilians, I also finished the Black Sapper for my Caribbean contingient. Apparently there will be a Caribbean Game at Salute this year and Wargames Illustrated Magazine will be giving away a Toussaint Louverture figure, so I may yet get to use my Caribbean force in battle soon. I based the colour scheme for this figure on an Osprey print of a Chasseur Pioneer of Saint Dominque.

Chasseur Pioneer St. Dominque 1797 ish!

Chasseur Pioneer St. Dominque 1797 ish!

Finally, I managed to paint two mounted officers for my Sixth Division at Waterloo – they will be seconded to the lead Hanoverians into battle. I’ve yet to finish the horses, so these are the next models to be finished. Although I’ve only painted seven figures over the last couple of weeks, I’m still pleased with my progress and I have been busily preparing and priming the next batch of figures for painting.

Mounted Officers - work in progress.

Mounted Officers – work in progress.

So that’s it for this week. The only other thing that springs to mind is that I must apologise for the quality of the pictures. They are taken with my i-phone and it is all to easy to take a quick picture with my phone rather than set up a proper shoot. It’s something that I need to address, but for now I suppose a bad picture is better than none at all!

Climbing the Lead Mountain!

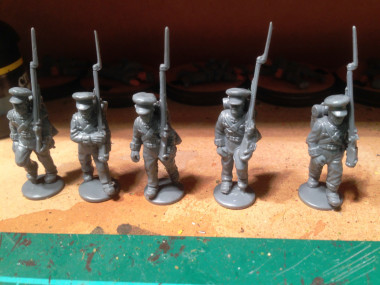
Hanoverians AdvancingHanoverian casualties


I find myself in somewhat of a dither this week! As you can see the Hanoverians are all but finished, just a bit more work on the bases to do ( some flowers or tufts to brighten them up!), Flags to add ( not yet ordered!) and some nice bright silver highlights for the bayonets and it’s time to move onto the next project. The trouble is, I cant decide what it should be. It seems that I have temporarily lost my painting mojo and I think that I know why. I have plenty of subjects that need painting but none that I feel in the mood to do.

Mounted OfficersThe next Battalion that I should be painting is the final Hanoverian Landwehr Regiment, The Osterode, but even the excitement of finding that they have green facings and shoulder tufts hasn’t convinced me that another 24 red coats is a good idea at the moment. Then there’s my lack of officers in my army – I’ve got a nice pack of Warlord mounted officers to finish…red coats again though.

Pikemen

I’ve got some more Wars of the Roses infantry to paint. I’ve started to put together the Perry’s plastic boxed set of Mercenaries and I really like the pikemen but then again, it’s all gone quiet on the Lion Rampant front at the club so there’s no urgency here.


GlyptodonThen I have my own Deezee range that I am supposed to be painting. I’ve got a bit stuck here as I have undercoated a Glyptodon but I think that I should try to airbrush him rather than paint him, so he’s been relegated to the back of the table along with some Pterodactyls that I have started but cant quite visualize how I am going to base them. Along with the Deezee, I have some superb models from Lucid eye and I really like the look of the new Cromagnons but I was disappointed with my last efforts with Ze-Khor & Harranna so I’m not in the mood for painting these.

And there are plenty more models on my lead mountain – Prussian Lancers, British Field Forge, Royal Marines, Caribbean Sapper, even some nice Artizan World war two British! So what is going to get me back in the groove. It’s times like this when rather than focus on completing the projects that you have planned that you can be tempted to start a whole new Army. I mean, why not treat myself to that 1/48th scale Mauss that I have been so impressed with – I could do a little project on German super weapons of World War Two. Ooh!  I know, I could get that nice Pegasus V2 rocket in 1/48th scale and then there’s the Tamiya V1 and Sarrisa are going to do an MDF version of the launch site……Maus

Well, I do have plans for all of the above but lets try and stick to the projects that I have already started. So whilst I try to get my painting mojo back I have remembered one of the rules that I set myself. If you haven’t finished the models you bought from a show last year, you cant buy anymore at the same show this year! And the next big show coming up is Salute 2015. So what did I buy at last years salute? I bought some civilians for ‘Little Bingham’, so I have started a couple of these. At least there’s no formal uniform to follow- I can paint them how I want to and I can add a few more townsfolk to my gaming board. It’s not the most exciting subject, but I bought them for a reason and whilst I’m painting these I’m sure I’ll get back into the Napoleonic Groove again – after all there’s that anniversary coming up and I have an army to finish!

Civilians in Bingham


1 14 15 16 17 18