I was very excited to receive a new consignment of stock last week. It wasn’t that the delivery had lots of shiny new releases but that, at last, I could offer a reasonable range of glues to my customers. The funny thing was that I was the only one that was excited, the other guys at the unit seemed to think that glue is just glue and one glue is the same as another. I suppose that it’s because I grew up making models before the invention of super glue and I’ve also been influenced by my dear Dad who was a superb model maker and always had the right tool for the job in hand. I’ve had experience of ‘improper use of glue’ ( I don’t think that this is actually an offence yet, but only because the Govt doesn’t appear to believe in making things, so they wouldn’t know…..) when I recently bought some second hand stuff from ebay. It was quite obvious that the plastic model that I had bought, had been glued with super glue and far from being the best glue for the job, it was a disaster. Fortunately, this meant that I could strip it down and re build it, but that’s another story.
So here’s a list of my four favourite glues and when best to use them!
If you are making a Plastic kit, then the glue to use is Polystyrene Glue. I recomend the Revell Contacta glue shown below. It comes with a fine needle applicator so the glue goes where you want it to. In the rare event that the Needle becomes clogged (usually because the top has been left off for a while ) simply pull the needle applicator out, reverse it, give the whole thing a good shake and it will clear. If all else fails, leave the bottle hanging, needle down for an evening ( with the top on) and the glue applicator will clear. So why use Polystyrene glue on plastic? Well, the glue works by melting the plastic that it comes into contact with, so you get a really strong joint. This also means that there is a degree of filling that happens, so even if the joints aren’t perfect, as long as the two pieces to be glued are held firmly together they will ‘weld ‘ together. This does require a bit of patience, particularly for large joins but your patience will be well rewarded by a strong joint that can be carefully sanded to become invisible. I like the Revell glue because of the consistency ( it’s like water) and combined with the fine applicator, it will go exactly where you want it too without the danger of spilling or running over fine detail.
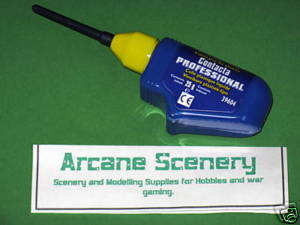
Finally, as far as Polystyrene glue goes, there are other brands and you can buy it in tubes or with a brush. The tube of glue is great for big joins but has a tendency to be thicker and you generally end up with more glue on your model than you wanted. The Glue with a brush applicator is good but it doesn’t beat the needle applicator for accuracy in getting the glue where you want it!
Next up is Epoxy resin. This is a glue that has fallen from grace ever since the arrival of super glue but it still has it’s uses and I wouldn’t be without it. My favourite brand is Devcon, although I will happily use Araldite Rapid ( but dont carry it in stock). Why Devcon? Well, most importantly it dries to a really clear finish, so much so, that you can use it to make the lenses for model headlights, glass effects and even water. It also has great filling qualities and dries quickly to a hard finish. True, it is a nuisance to mix, and you don’t get the fast grab of super glue but the finished joint is far stronger. I use epoxy to fix my metal models to their bases and for gluing the larger metal components, particularly when I am pinning them. Epoxy beats super glue for strength, particularly when it comes to shearing strength which is why when you drop super glued figures they have a tendency to break at the joints. If you use epoxy, you will find that your models are far more resilient on the gaming table. As epoxy will glue most materials, it is also useful for fixing small rocks & scenery pieces to your models as well.

Talking of basing your models, I couldn’t do without white PVA glue. It was designed to glue wood & paper products and it also dries to a clear finish. Even better, it can be thinned with water so it is ideal for fixing sand, scatter, static grass and other small scenic products to the bases of your figures. I usually water it down to make it go further. It’s very easy to use and gives a good bond and if you do get some on your model, simply wash it off with a damp brush before the glue dries. I sell the White PVA Speed bond which is good quality and dries quickly but any white PVA glue will do the job!

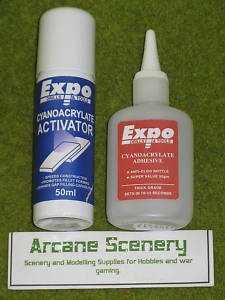
And so at last to Super glue, or as it’s sometimes known, cyanoacrylate. There’s no doubt that this is a great innovation in the world of adhesives and it seems to stick practically anything, including your skin, so be careful. As if super glue wasn’t good enough, it’s even better now that you can get superglue accelerators or activators. The activator ensures an instant bond once it is sprayed onto the super glue and has the added bonus of providing some ‘fill’ element to the join. So If you are glueing small metal components, using a thicker version of super glue and an activator gives great results. I’ve seen the guys at Ibis studios put together a set of metal figures in less time than it takes me to open the packet…..OK, I exagerate slightly but this stuff is fast! For really small components, there is a brush on activator but I tend to use the pump action stuff. I know that once I press spray, the component will stay where exactly I put it. Since I’ve been using this I have had not one case of glueing the model to my finger…….
I tend to use the thicker version of super glue as it has a slightly slower drying time which lets me adjust the bits to the position that I want until I am ready to zap them with the accelerator. The thinner super glue is more suited to invisible repairs, particularly where the joint is a clean break. So I have a bottle of the thin stuff ready for any repairs needed after a battle!
So there it is,
Use Polystyrene Glue for plastics,
Use Epoxy for big metal joints & fixing your figures to bases
Use PVA for scenery & basing products
Use Super glue & accelerator for whatever else you like……Shimples!
