Man Down!

Well actually, Woman Down! My wife, Julie has just had a Hip replacement and so I have been confined to domestic and nursing duties. It also means that we are missing both Julie and myself from the business at the moment. Fortunately, Hayley, Rob and Kevin are doing a great job holding the fort and keeping things running whilst I am away. However, I have found some time to sneak off to the garage when Julie has been resting to do some modelling, so some progress has been made with my various projects.

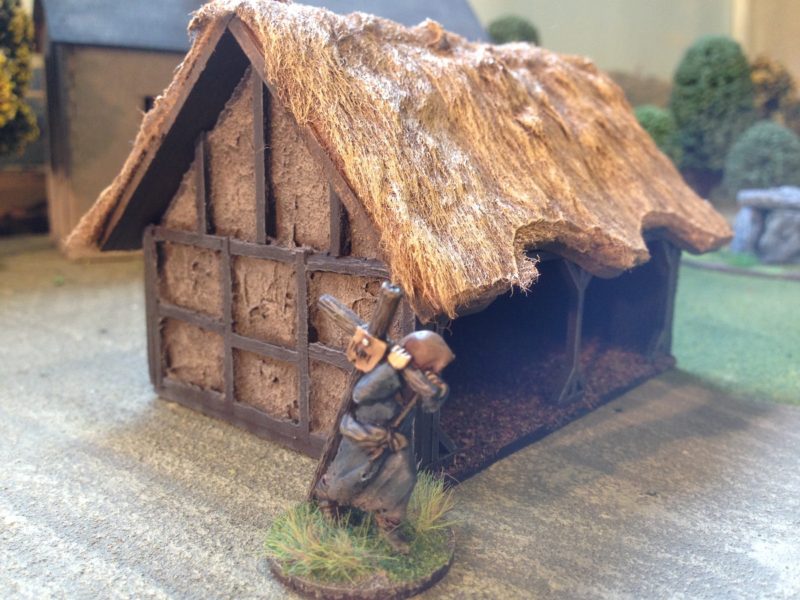
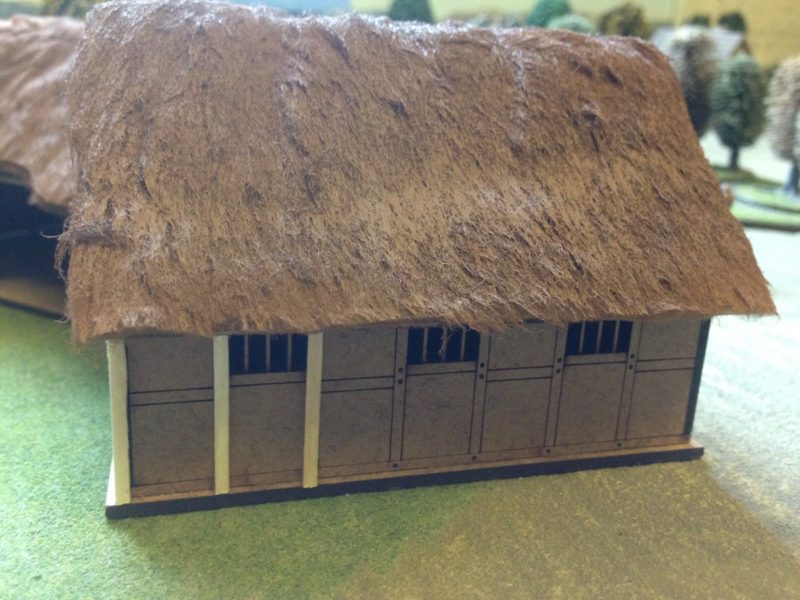
Sarissa Dark Age Stable

Sarissa Dark Age Stable

I have managed to finish another of the Sarissa Dark Age buildings for the village that will form the centre piece of my scenery when playing Saga. This building is the barn/stable J10, the third building in my collection. I have just one more building that I am keen to finish, the Grain store, although I am in no particular rush to do so. The method used to paint it was of course exactly the same as the previous buildings so that they all blend together.

Sarissa Dark age Grain Store

Sarissa Dark age Grain Store awaiting its coat of daub!

I also have a Sarissa Dark age/Saxon church that I started work on some time ago but never actually completed. As usual, I decided that painting figures should take priority and so the Church was relegated to being in the background of many of my pictures but never quite was finished. Perhaps now is the time to get this project completed as this really will give me a nice little village for my warbands to fight over!

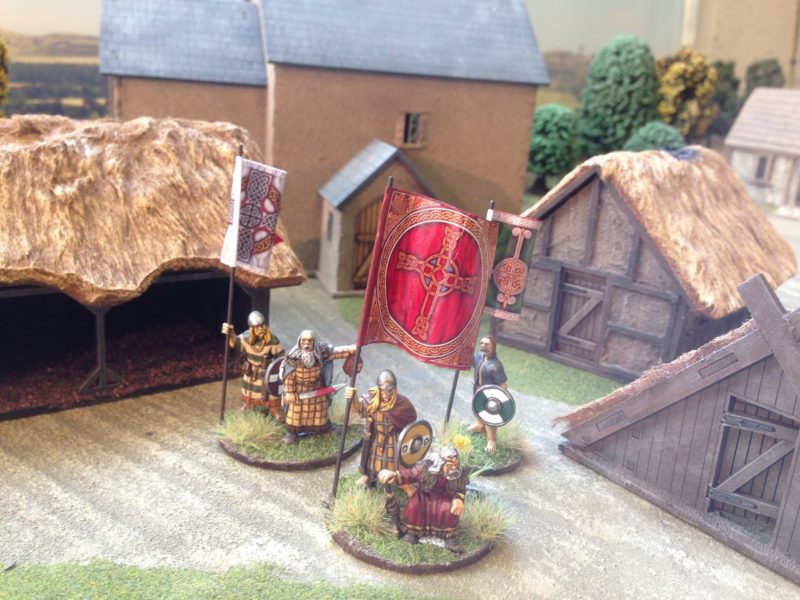
Dark Age Village - work in progress

Dark Age Village – work in progress

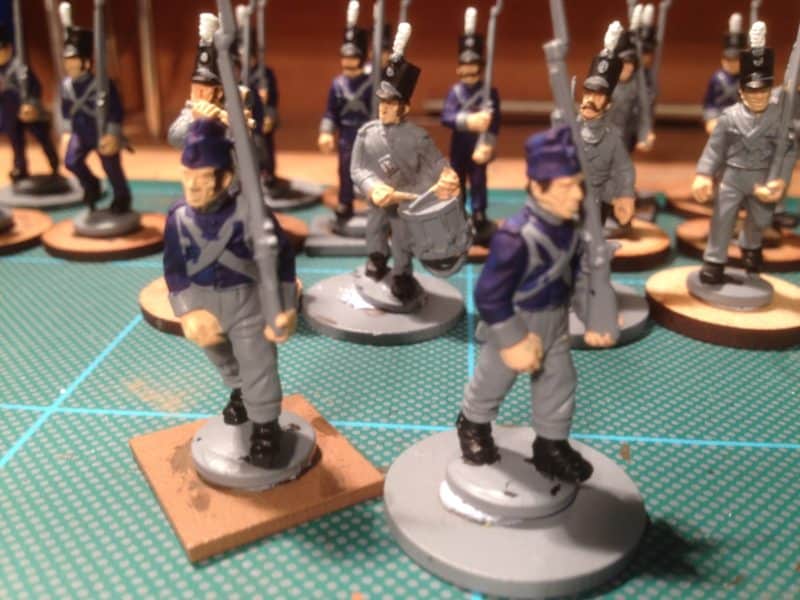
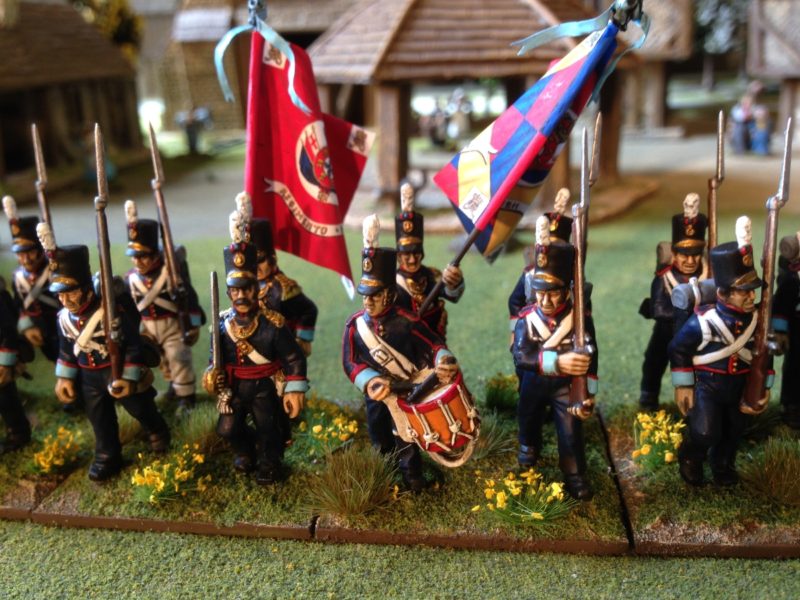
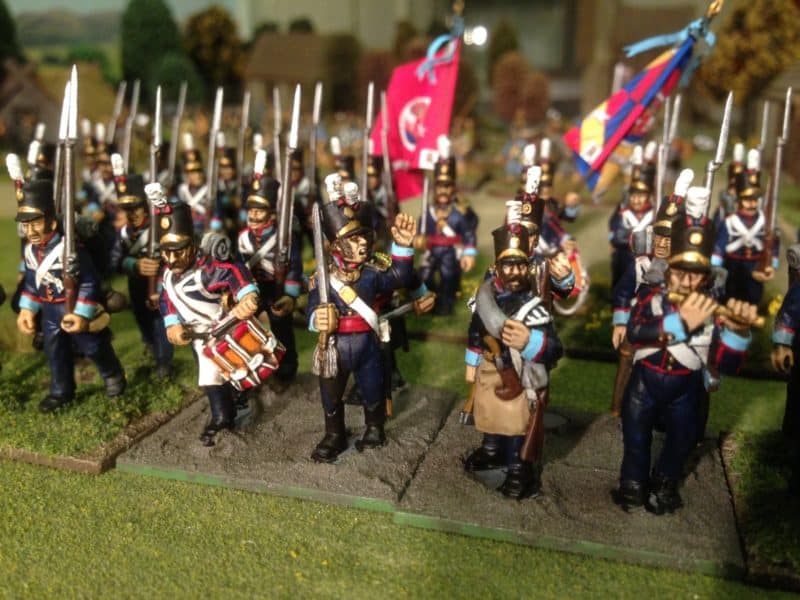
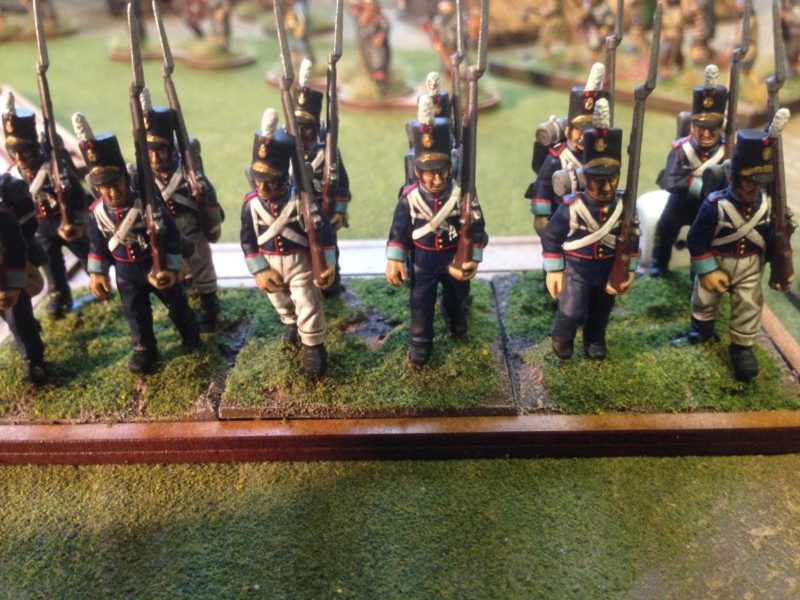
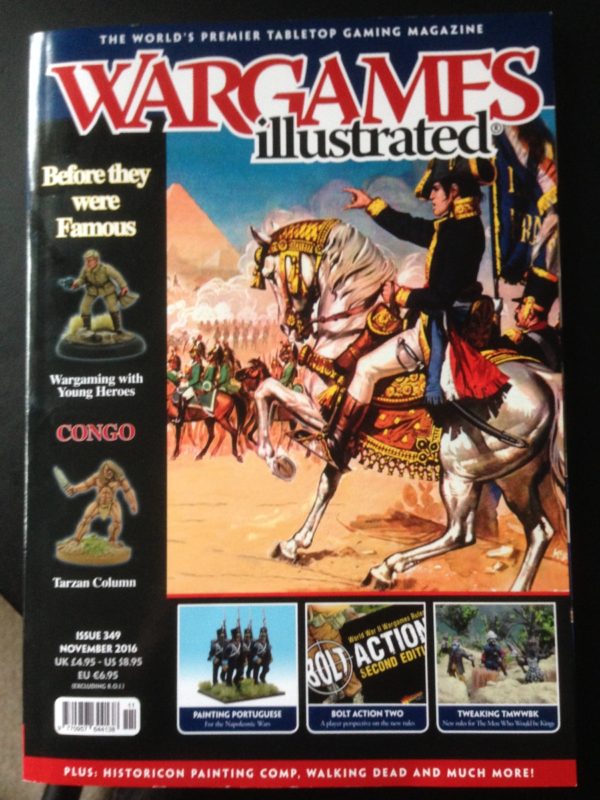
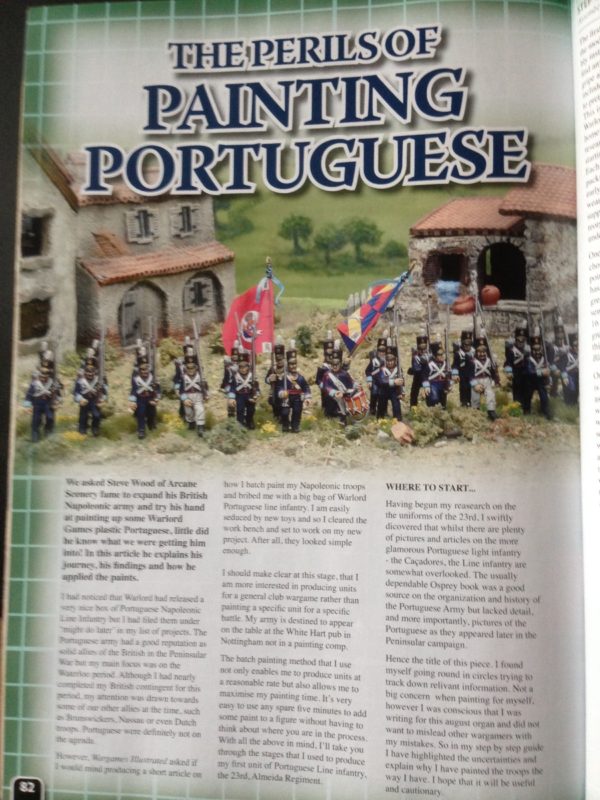
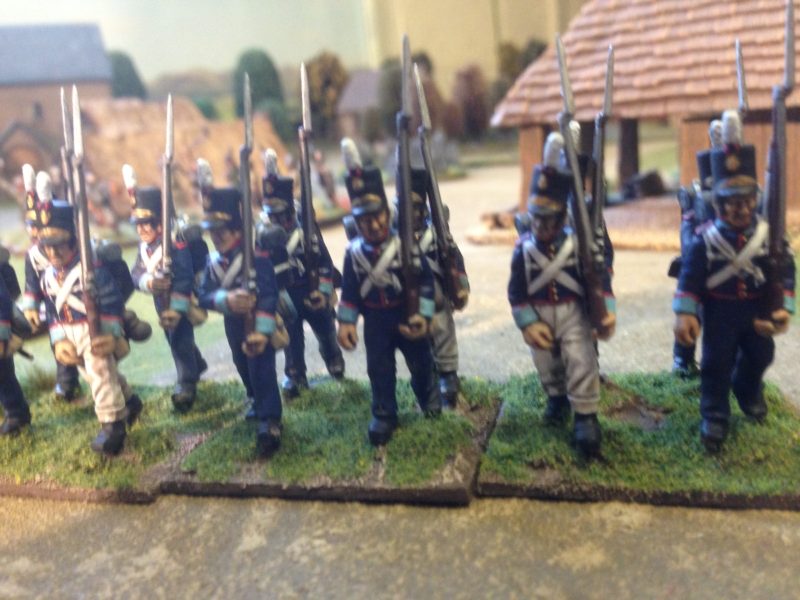
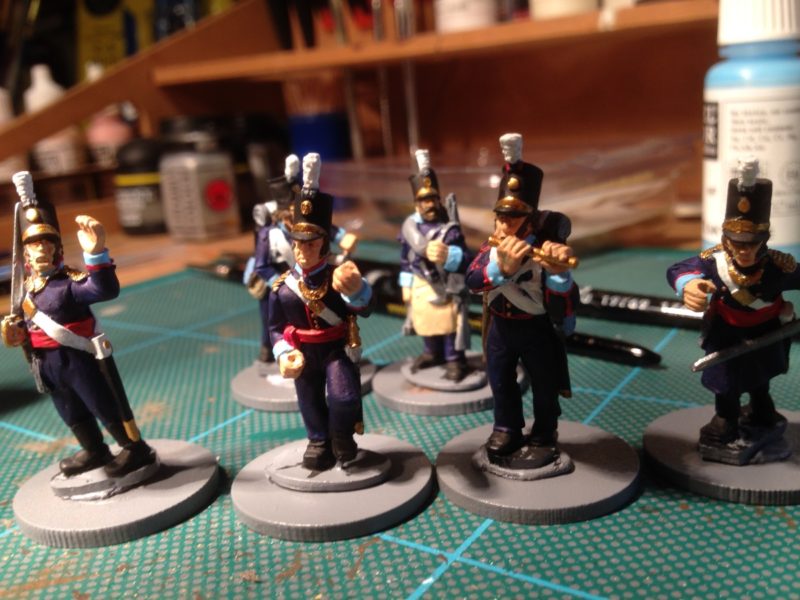
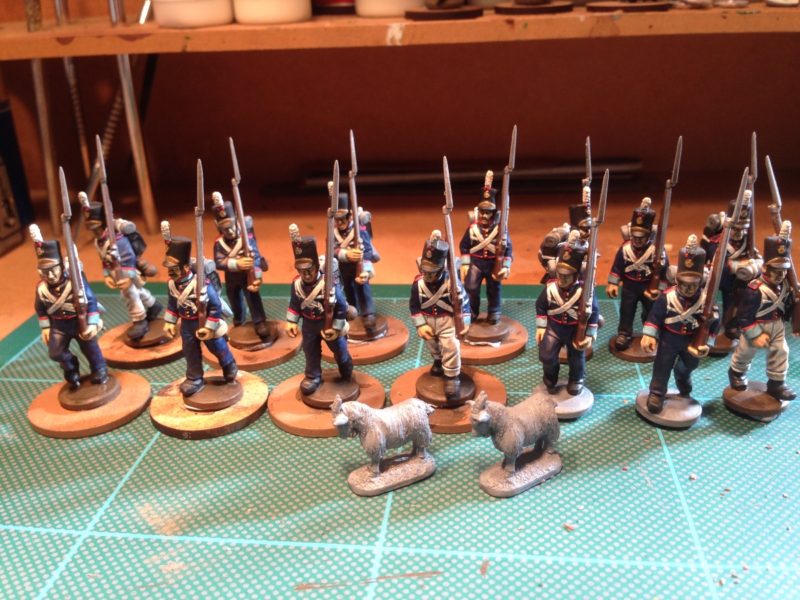
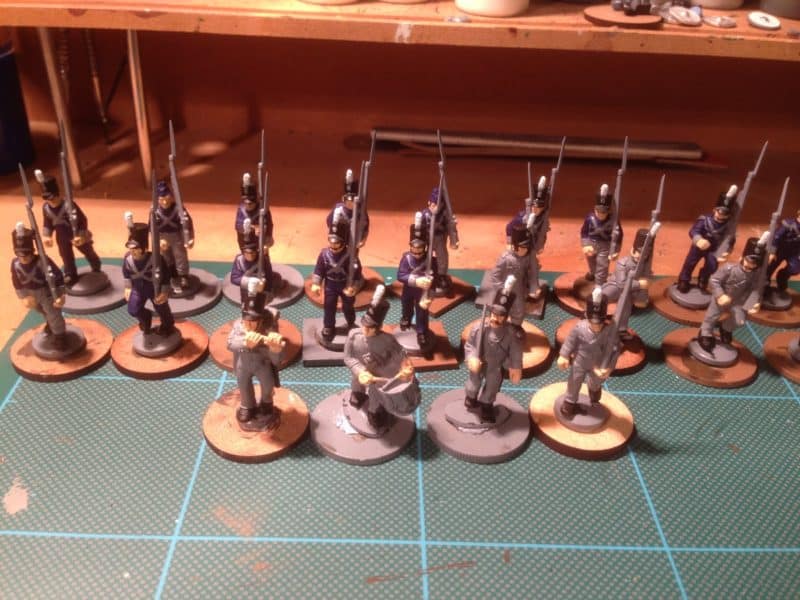
As I hinted, the lure of painting figures is always a distraction for me and I have already strayed back to my beloved Napoleonics! To be fair, the figures in question were already part finished as I had painted them for an article that will appear in this months Wargames Illustrated ( issue 349 November). The article is entitled, the ‘Perils of Painting Portuguese’ and explains step by step, how I batch paint my Napoleonic infantry units. I was using the Warlord Games Portuguese boxed set and in order to complete the article I actually painted 24 figures to completion to illustrate the main article but also then painted a further 20 in various stages so that the reader could follow the painting process. These figures have been sitting on my work bench queue for some time and I thought that it would be a good idea to get them finished. The other prompt was that I had found some of the old Victrix Portuguese metal figures in the ‘Bring and Buy’ at the recent Derby war games show. There are some really nice Officer, ensign and musician figures, so I will be using these to complete my next Portuguese battalion.

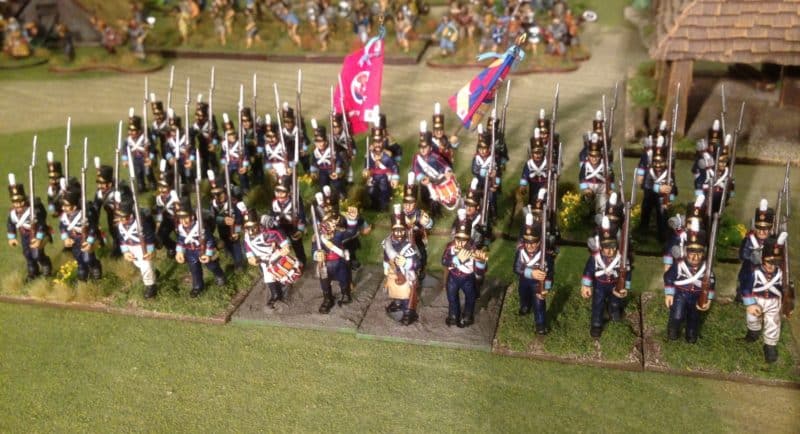
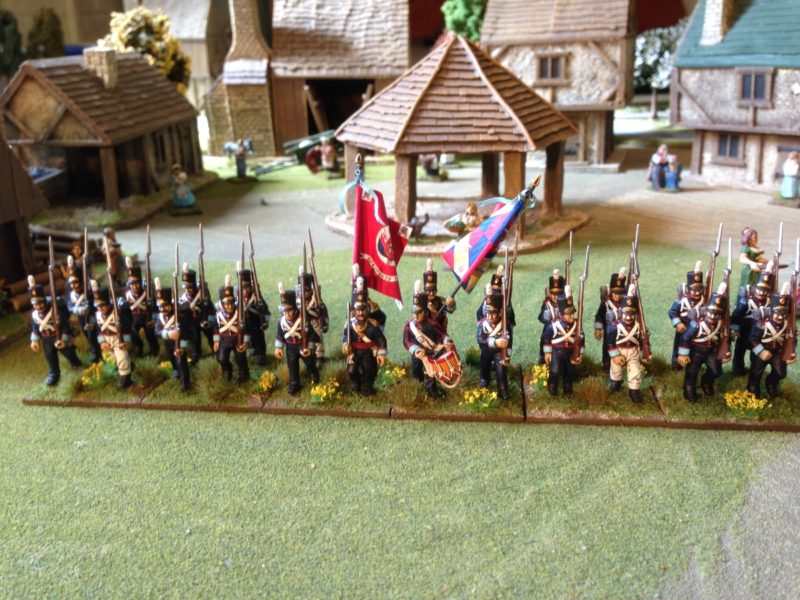
Portuguese 23rd Regiment awaiting final highlight and basing!

Portuguese 23rd Regiment awaiting final highlight and basing!

As you can see the rank and file are now completed and just require basing. Incidentally, the goats are not mascots but will be living in the dark age barn!

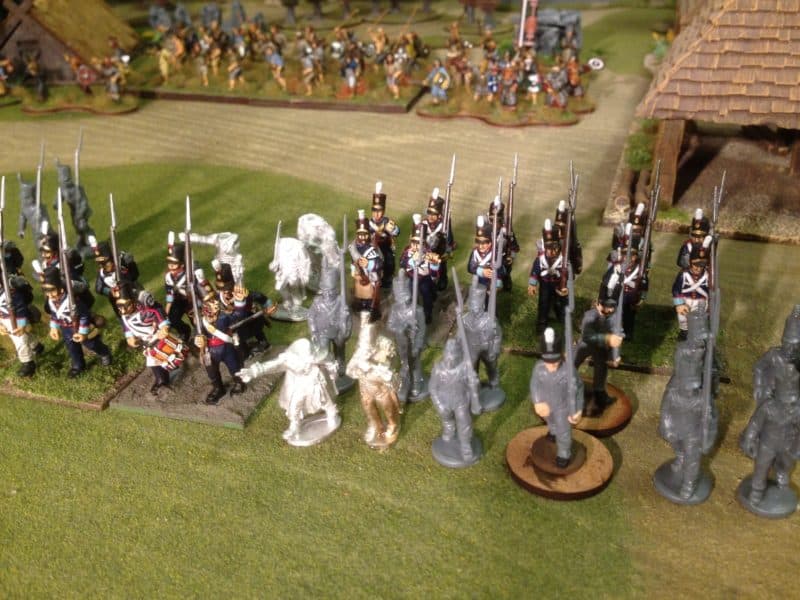
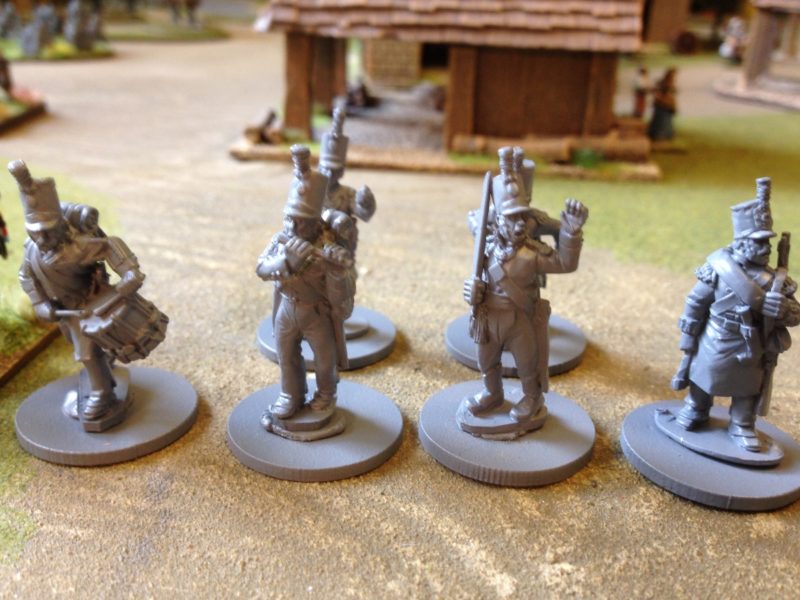
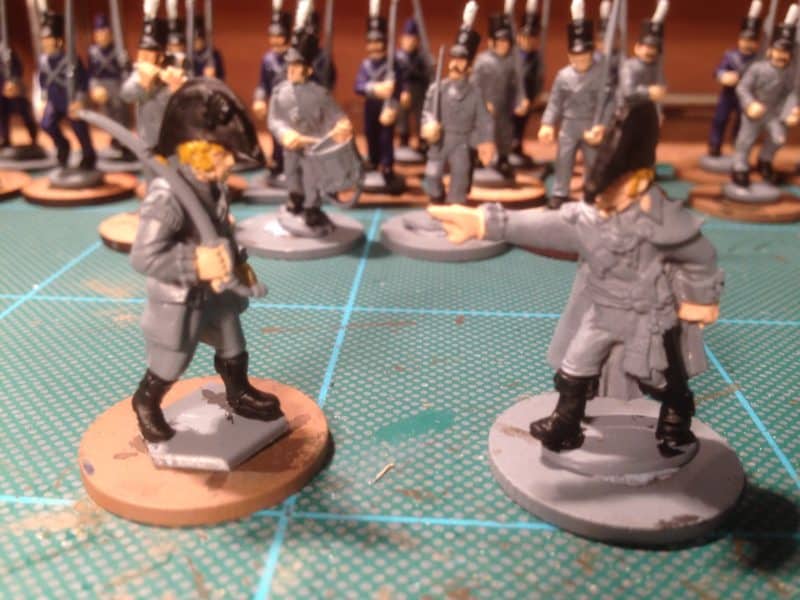
Portuguese Command.

Portuguese Command.

The picture above shows the Victrix Figures that I will be using for the Battalion command. I really like the fifer and it makes a change to have another musician present as well as the drummer. Musicians were of course a key part of the Battalion or Regimental organisation in most Napoleonic armies but the tendency is just to field drummers. Trent Miniatures make some very nice Musicians that will eventually find their way onto my paint table to flesh out my Waterloo collection! As ever, plenty to keep me busy, although, as mentioned above, my hobby time may be slightly curtailed over the next couple of weeks.


Doing Up The House.

Following the completion of my Irish Warband it was time to move on to a new project. I planned that this would be some scenery for my Saga games and rather than dive into the next pile of miniatures that are waiting on the painting table, I thought that now would be a good time to try my hand at some scenery making. The goal is to have some generic scenery for each period that I am gaming in, so that when I am off to the wargames club, I can just pick up the appropriate boxes and I’m ready for battle. I also thought that having some nice scenery would also improve the look of our games. I dont expect to reach Wargames Illustrated standards but having scenery that is relevant to the game will improve the visual appeal. I have some nice Sarissa Precision Dark Age buildings that I am working on at the moment. Previous blog posts have shown the first of these buildings that I have completed, the A frame Hut,  in the background of my Irish figures.

Fiana, Kern and A frame house.

Fiana, Kern and A frame house.

My next building was to be the Timber Framed House J14. I covered the roof in ‘Teddy Bear Fur’ thatch, to match the A Frame hut and then coated the fur in PVA glue to flatten it down and stiffen it up. Teddy Bear Fur is just one way of making roofing for these buildings. Gary, from March Attack, the designer for the range, prefers to use pan scourers as roofing and they look just as good, if not more effective. Other choices include flannel cloth or even coco fibre hanging basket liners. I think that it is a question of taste as they can all look realistic. I went with the teddy bear fur primarily because I had some to use up! I think that it’s worth pointing out that the Sarissa Buildings look very good with just a coat of paint, I just fancied trying a few ideas to pimp them up! So having covered the roof, the next stage was to add the timber framing.

To do this I used some standard matchsticks. I didn’t actually use the headless hobby variety – we do sell these in the shop in bags of 2000 for just £2.99 – but as I was at home, I resorted to a box of Swan Vesta’s that were handy! I  used the etching on the building as a guide and cut them to the right length. It is then a simple matter to glue them to the building using PVA glue.

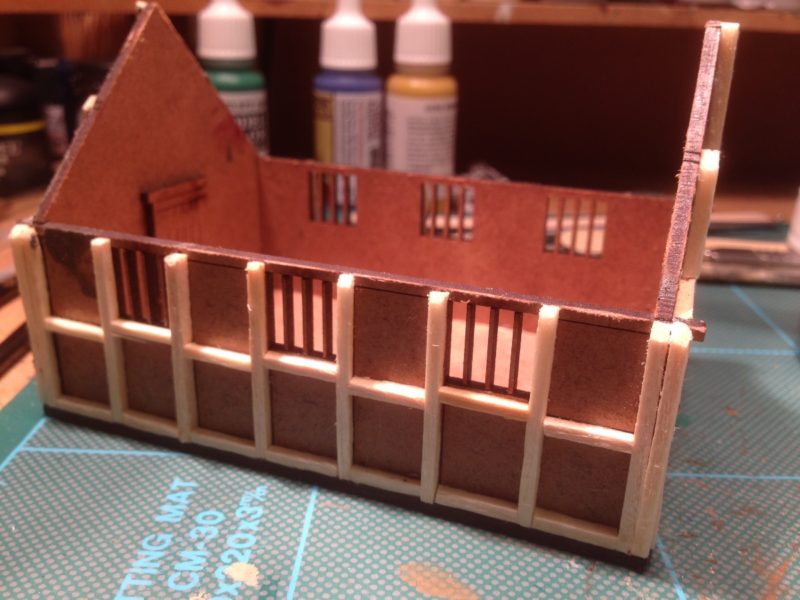
Sarissa Dark Age House j14 with framework added

Sarissa Dark Age House j14 with framework added

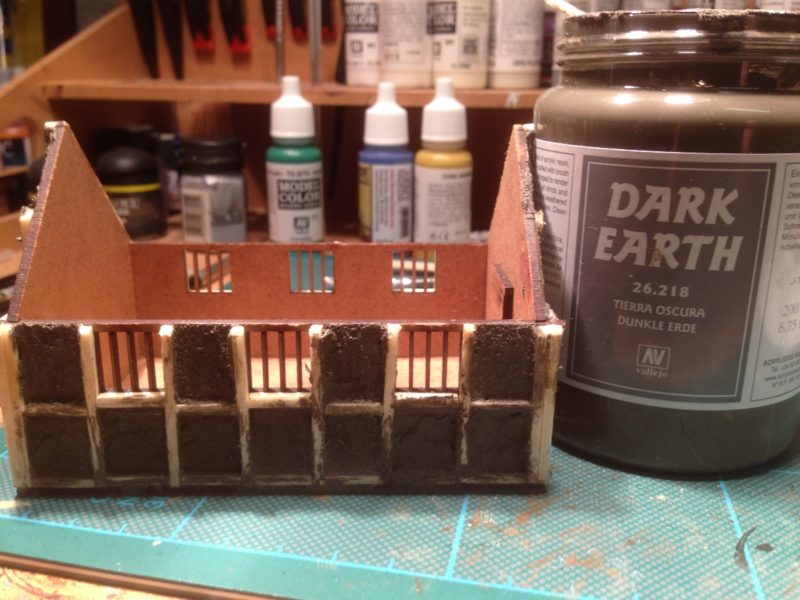
You need to gently sand down the tops to let the roof fit nicely but it is a relatively simple job to do. Once the frame work was glued into place and dried I used Vallejo Dark Earth Paste to represent the mud or daub filling in the panels. Actually, you can use any of the Vallejo pastes as you will be painting over them At a push Polyfilla or a similar product will do! I used a squared off coffee stirrer to apply the paste, leaving the frame work showing. You can see that I used the stirrer to roughen up the paste to get more of a texture.

Applying the daub!

Applying the daub!

Once the paste had dried the next stage is to paint the building. I confess that I had made a slight mistake here. It would have made more sense to paint the inside of the building black before assembly or even afterwards, before I started to add the framework. As it is. I forgot and it doesn’t really show.

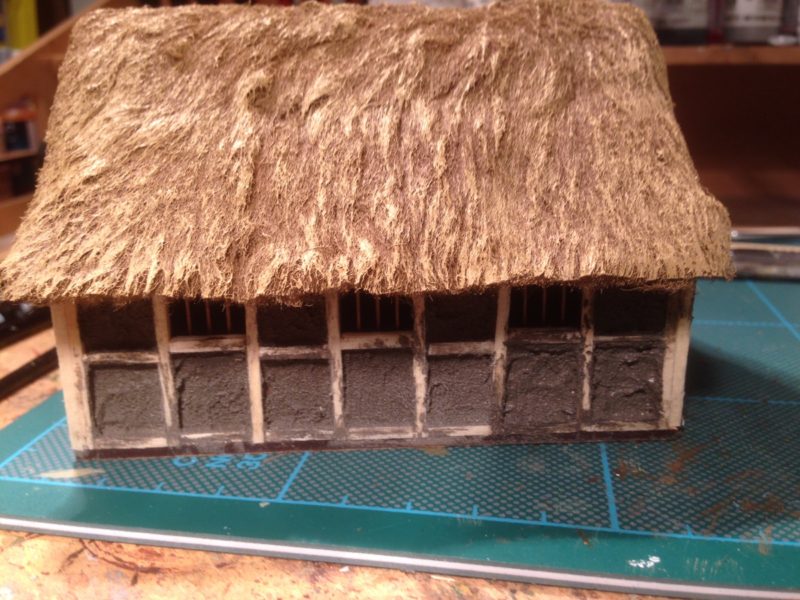
Dark Age house with daub

Dark Age house with daub.

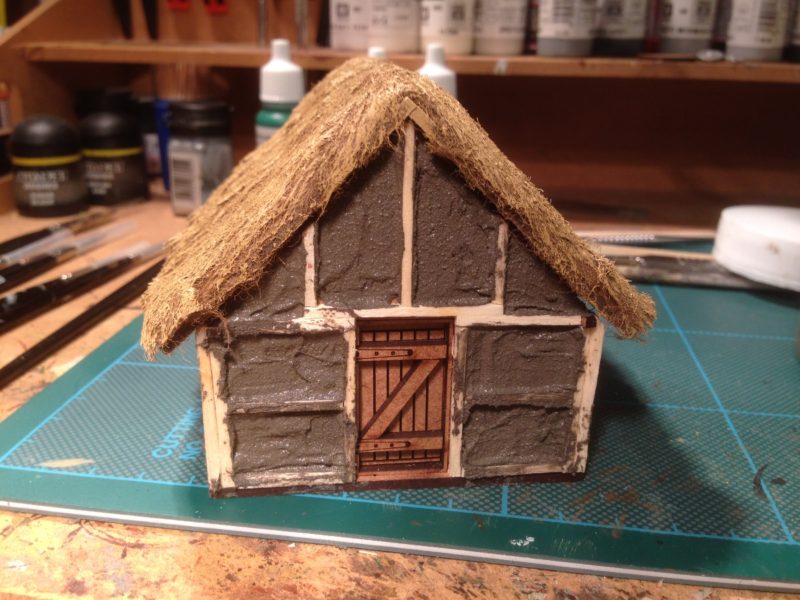
The picture above shows the effect achieved before painting and the picture below show how the building looks from the end with the door.

Dark Age house viewed from the end - note door is left unpainted at this stage.

Dark Age house viewed from the end – note door is left unpainted at this stage.

Once everything was dry, I painted the building with my favourite brown, Vallejo Chocolate Brown, including the door. I then dry brushed everything with a couple of lighter coats, using Iraqi Sand to lighten the brown on the panels of mud. Now, I’m no expert on Dark age buildings, so I wasn’t sure whether to paint the panels in a lighter colour or even whitewash them but I decided that they were best left a dry mud colour – this village hadn’t received a visit from the travelling Dulux Salesman! The next step was to paint the timber framing. I choose a very dark brown. Vallejo German Camouflage Black Brown was a good contrast. I used a light grey to lighten this and then gave the building, in particular, the timber frame, a gentle highlight using the dry brush technique. The final task was to pick out the door hinges with black and to  add some black & grey to the smoke hole in the roof.

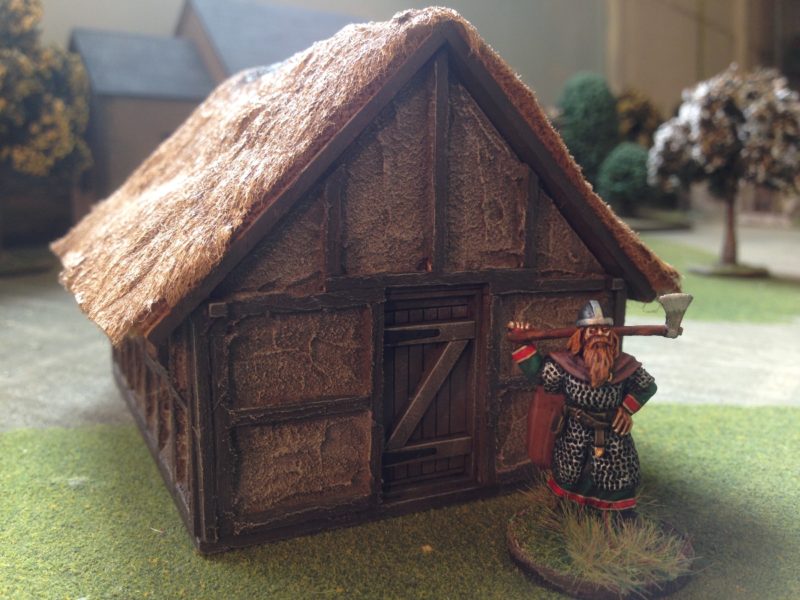
The finished dark age house, complete with new owner.

The finished dark age house, complete with new owner.

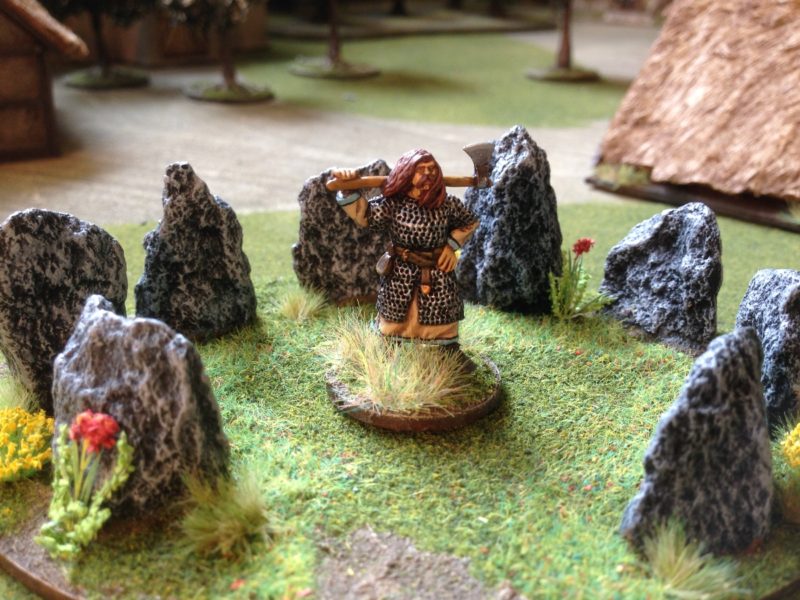
The building is now ready for the table and my village now consists of two houses. I have a couple more to finish in a similar style and that should give me a nice little settlement for my Dark Age war bands to fight over! Whilst I was thinking about other scenery that I could use, I remembered that Arcane scenery has it’s own small range of Neolithic monuments. Although not specifically designed for the dark ages, they seem to be useful additions to the table top and will add a bit of atmosphere! Here’s a couple of the pieces:

Neothithic Stone Circle

Neolithic Stone Circle

Neolithic Burial Chamber

Neolithic Burial Chamber

If you are interested, the DeeZee scenery range can be found here: DeeZee Scenery

So, my aim of building some new scenery for my wargames has moved forwards. If you would like to undertake a similar project, I would recommend that you visit the March attack site for some very useful Tutorials of how to get the best from the Sarissa Precision MDF buildings. Just a very simple paint job will give superb results as Gary demonstrates in these PDF’s

http://www.marchattack.co.uk/Painting%20Building%201.pdf

http://www.marchattack.co.uk/Painting%20Laser%20Cut%20Terrain.pdf


Sons of Dana are ready for battle

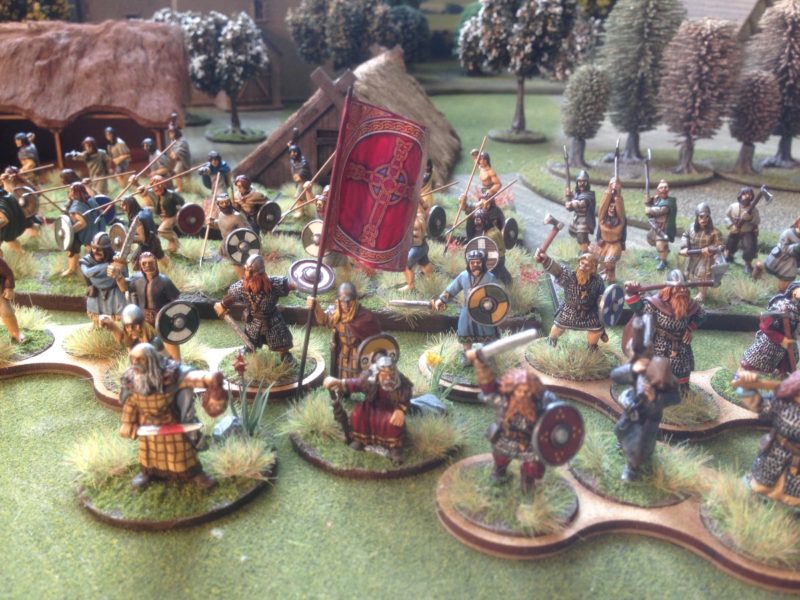
The Warband Gathers

The Warband Gathers

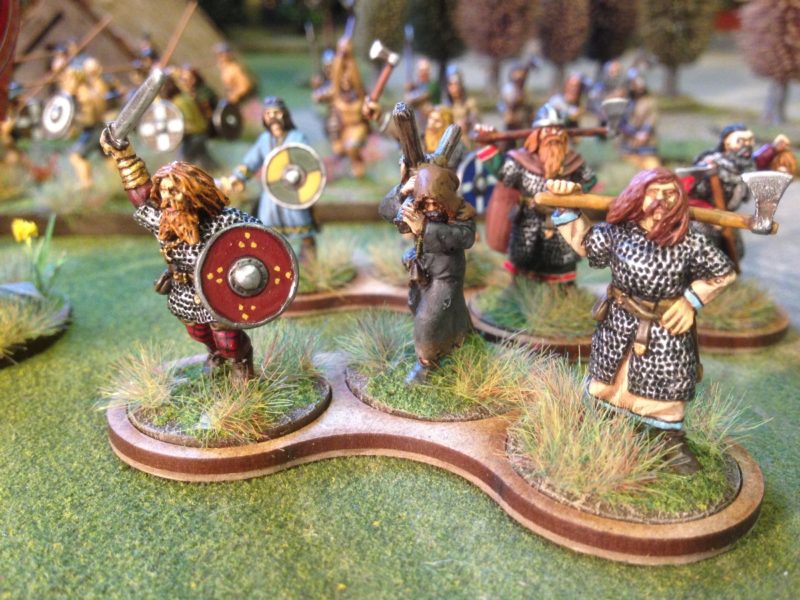
It seems like I have been painting my Irish warband for half the year but at last they are complete and ready to take to the table. I actually started to paint them in July, so it has taken me some time to finish the warband. It didn’t help that I had decided to paint the complete collection of Irish warriors from the Footsore range. I had actually finished enough Hearth Guard, Warriors, and Levy to field a warband some time ago but the Heroes in the Footsore range are such lovely sculpts I had to add them to the band. So I now have Ulf The Quarrelsome ( no you don’t…who said that..); Brian Boru, the High King of Ireland; a Priest; Standard Bearer and enough assorted heroes to give me the flexibility to easily field up to 6pts and more, in a Saga game.

The Heroes all took a bit longer to paint than the standard rank and file troops. I wanted them to be wearing more decorative clothes. However, I did stick to a limited pallet of paints and tried to avoid really bright colours. I agonised over how to finish the shields. I couldn’t make up my mind whether to use shield transfers or whether to paint them free hand. I decided to go down the free hand route but as I am no artist, I have kept the designs very simple. I had the same conflict when it came to producing the banners. Despite my concern that the Dark Age Irish would not have access to a graphic designer, I decided that the Little Bigman Studio Banner transfers were too nice not to use…

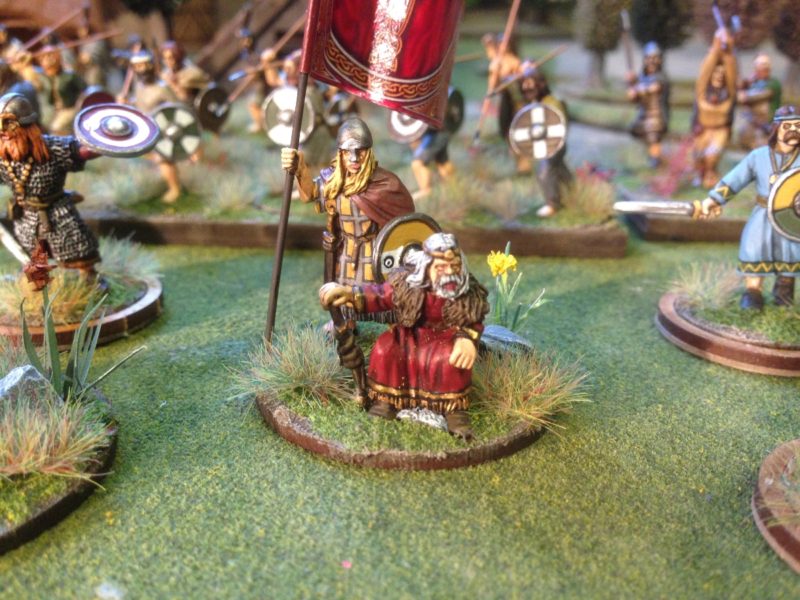
Brian Boru surveys the battlefield.

Brian Boru surveys the battlefield.

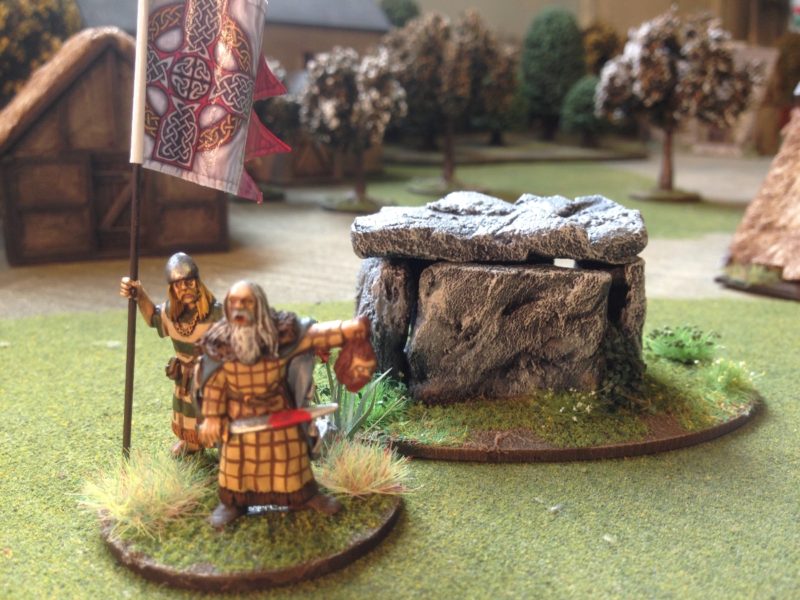
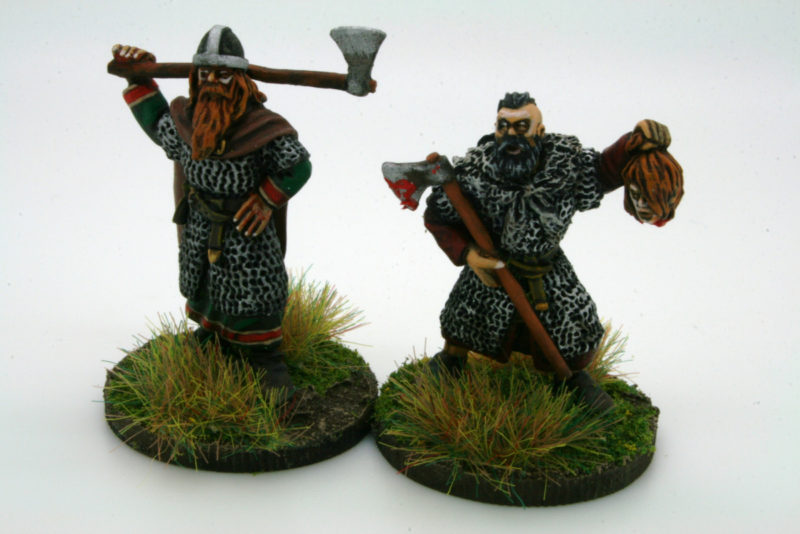
When it came to basing up the figures I put all of them onto 25mm round MDF bases, with the exception of Brian Boru and my ‘reserve Warlord’ – these went on 40mm bases. Although the Footsore Brian comes as a set of three figures, I decided that I would just mount him and the standard bearer on a 40mm round base. I also swapped out the Footsore Warlord with the mean looking guy from the Irish Command set. I think that he makes a better warlord, so the other figure has been relegated to Hearth guard status! So I have the luxury of two warlords to play. If I use Brian Boru, although he is ‘free’ in terms of points, his effectiveness as a warrior may be a challenge. Generating three saga dice and costing no additional points is a great bonus but his combat abilities are very limited – he will need protecting!

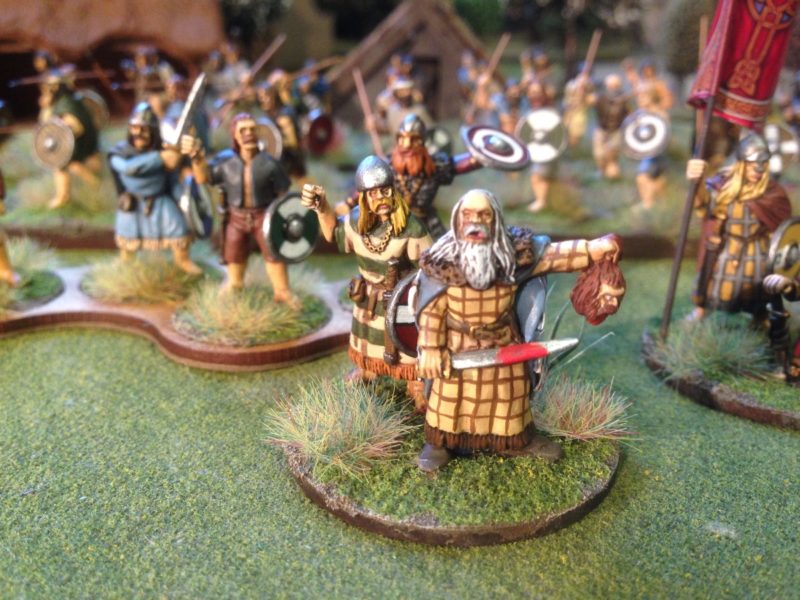
My newly promoted warlord displays his latest victim!

My newly promoted warlord displays his latest victim!

I mentioned that all the other figures are separately based on 25mm MDF bases. This gives me the opportunity to field these figures as separate units or even add them to another warband. I think that the heroes armed with Dane Axes will be quite at home in an Anglo Dane army.

Ulf The Quarrelsome, Priest and Hero

Ulf The Quarrelsome, Priest and Hero

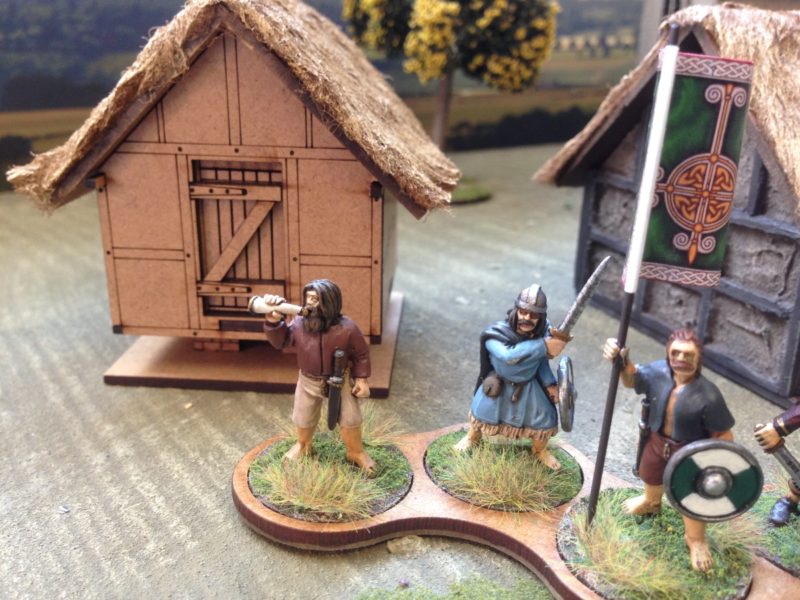
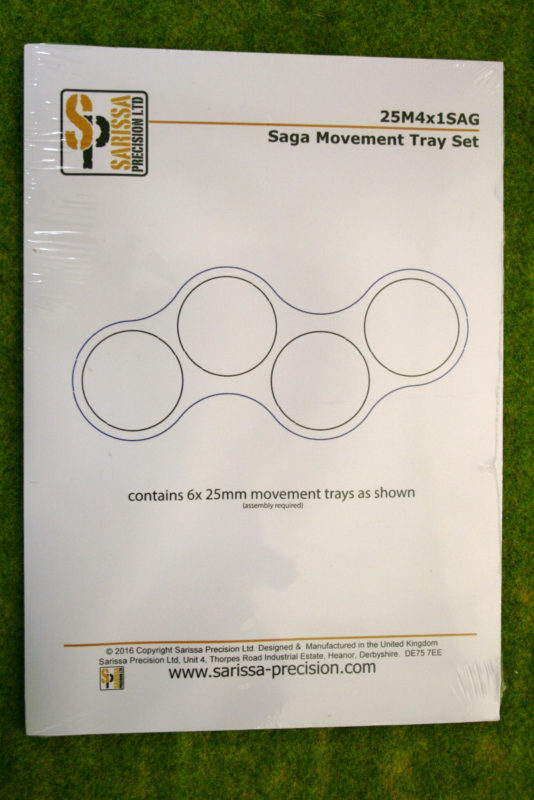
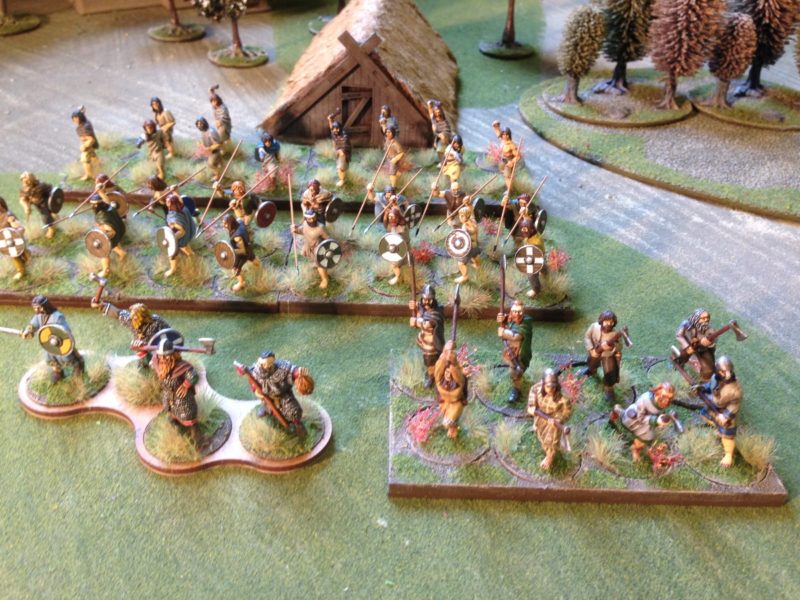
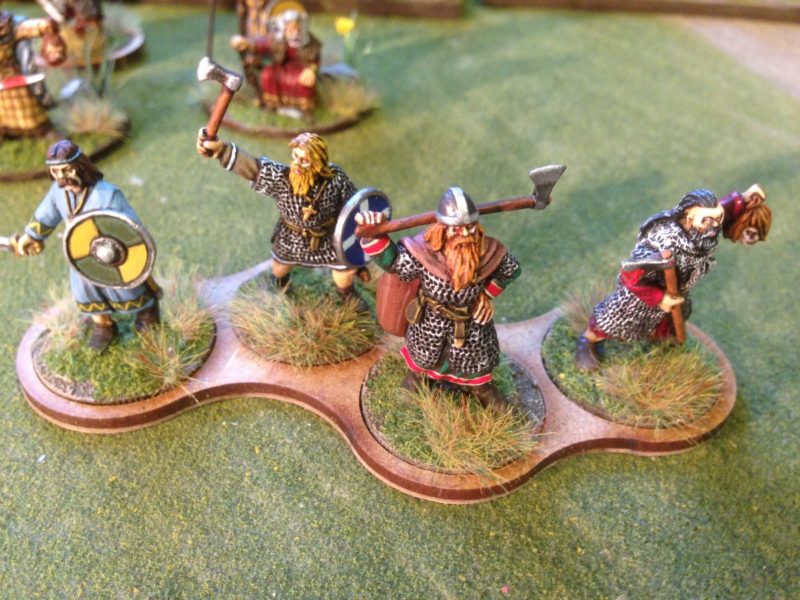
I’ve also been playing with movement tray design for Saga. Whilst my rectangular trays ranked my figures up nicely for display purposes, I didn’t think that they would look so good on the table. I was messing around with some other options and found these smaller skirmish trays that were designed for fire teams in bolt action by Sarissa. A quick conversation with those very helpful people and they produced a Saga Movement tray set. You can put four figures in the tray, allowing you to deploy units of 4, 8 or 12 very simply. The way in which they wrap around each other means that you can change the shape of the unit from a ‘clump’ to a line fairly easily. Of course when you get to combat, it will make sense to take the figures out of their tray but it will make the initial moves in a game easier. They are also good for transporting your army.

movement tray for Saga

movement tray for Saga

My intention is to use some Vallejo paste on the trays to make them blend with my basing scheme, but the picture does show how they might work. So the sharp eyed amongst you will see that I am two war banners short and those with long memories will be asking where are the dogs that you were going to make? Well the banners are ready, I just didn’t have the time to fix them to the poles before I took the pictures. As for the dogs, they are at the back of the work bench. My next project beckons…time to do some scenery!

If you would like to have a go at building your own Irish Warband, Footsore do a 4pt warband (26 figures) for just £36.00. Even better if you purchase before the end of the month through my shop, we are supplying free bases and spears for the warband. Just add the code WARBAND in at checkout. Even better, if you enter SEPT5, you will get an additional 5% discount and of course free postage. Free postage is worldwide, so yes, that does include USA and Australia… Click here to purchase your Warband:

Footsore Irish Warband

If you would like to buy the Saga movement trays that we have designed with Sarrisa, just click the photo:

saga-trays

By the way, the trays also include the 25mm bases, so you will have some spares!

If you would like quick links to my other saga articles for details of the paints used and the basing scheme, just click here:

Saga Articles

Right! I’m off to fight a battle!

What did the Romans ever do for us?

In my last blog entry, I mentioned that I had visited the Roman Army Museum which is ‘twinned’ with the Vindolanda Fort just behind Hadrians wall. First of all, lets be clear, I am no expert on the Roman army. What ever knowledge that I have comes from the various films & TV series that I have watched ( yes, including Life of Brian…), the fictional books that I have read and the sort of casual knowledge that you pick up when your hobby is wargaming. However, at some point in the near future I intend to start to build an Imperial Roman Army. It’s an itch that needs scratching and I have had the itch ever since I bought my first box of Airfix Roman soldiers! So my visit to Northumberland and Hadrians wall was yet another ‘reconnaissance mission’ to start to immerse myself into the period.

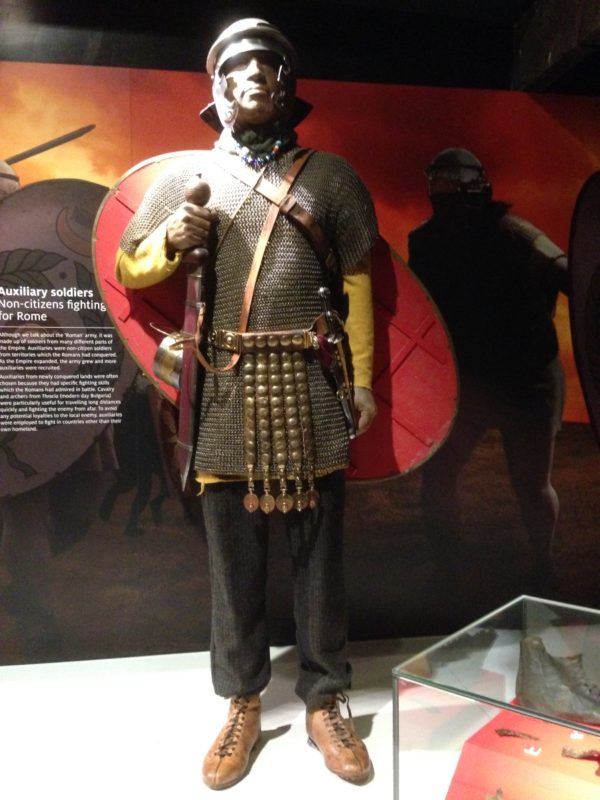
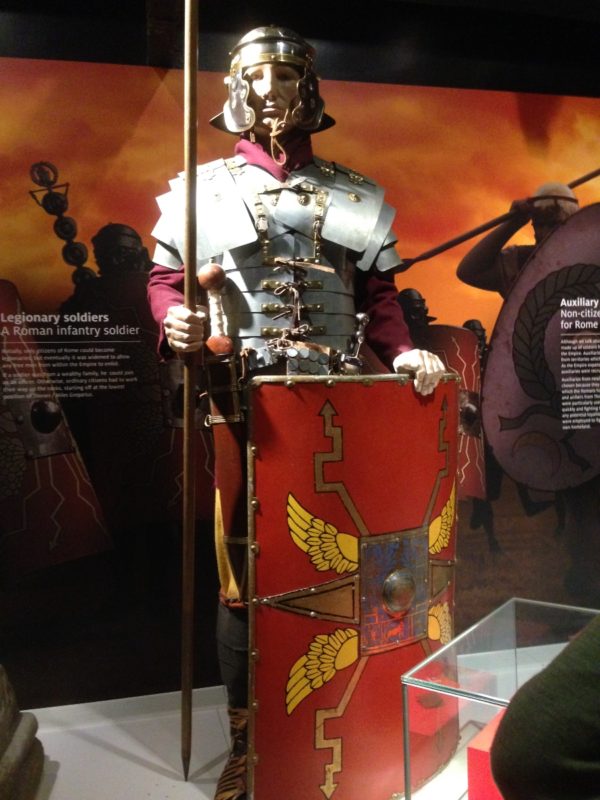
Roman Auxilliary

Roman Auxilliary

The Roman Army Museum at Hexham does not disappoint. The museum gives a clear picture of what the Roman army was like: how it was organised; how it was armed and how it fought. The film presentations are amongst the best that I have seen at a museum. The main film in 3D ‘Edge of Empire’ is very well done and gives an insight into how the soldiers lived and died on the wall. There are two or three other short films around the museum that give more detail of how the Romans lived and occupied Britain. There is also one of the best and succinct explanation of how the Roman army was organised that I have come across. I have borrowed it from youtube to show here.

https://youtu.be/wCBNxJYvNsY

There is plenty more to see at the museum other than these films. As I have already shown, there are plenty of exhibits of the soldiers and their armour and weapons. There are of course, actual artefacts recovered from the nearby Fort of Vindolanda as well as a brief history of the life of Hadrian, the wall builder!

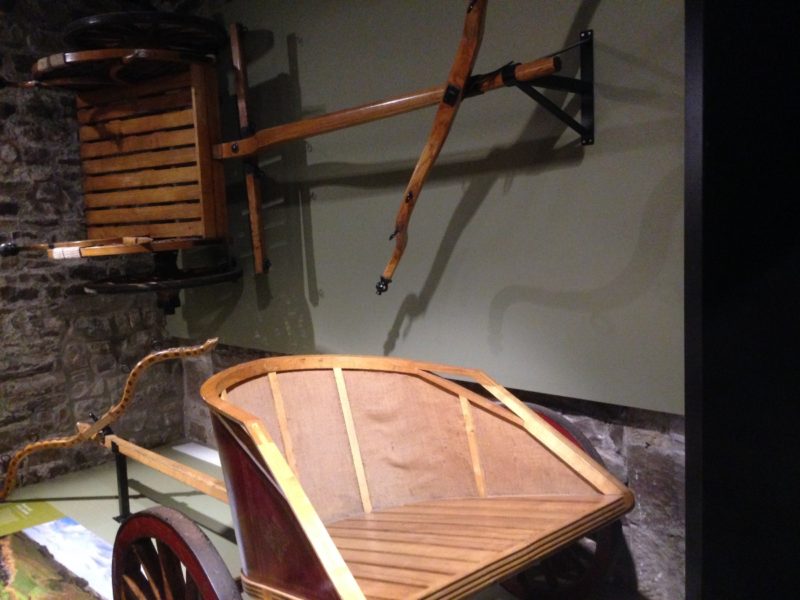
Reconstruction of Roman and Celt Chariots

Reconstruction of Roman and Celt Chariots

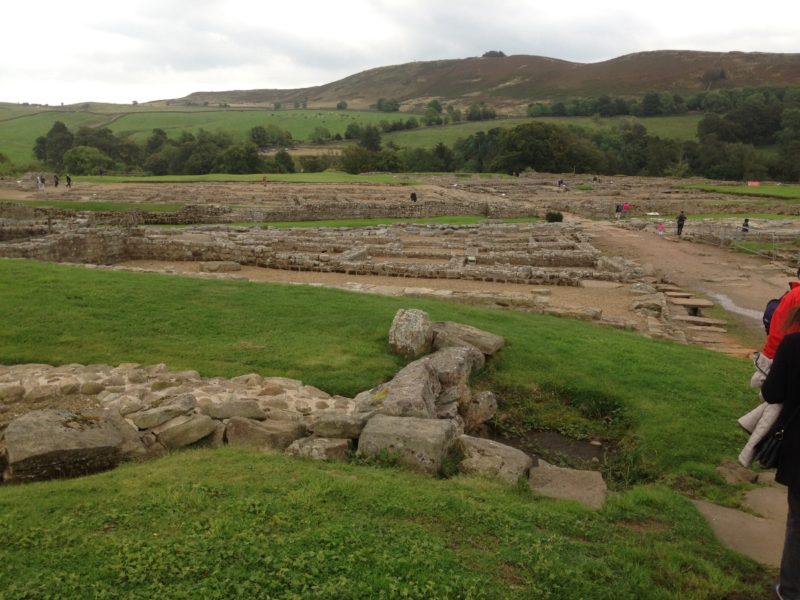
Once we had toured the Museum and spent a few bob in the excellent shop, it was a quick drive down the road to the Roman Fort of Vindolanda. The site itself is beautiful, surrounded by the rugged hills of Northumberland. The weather for us was a bit damp but didn’t stop us enjoying the day. In fact we only stayed for the afternoon as we were due to travel home that day but I could easily have spent a day wandering around, soaking up the atmosphere.

Vindolanda

Vindolanda

As well as the fort, there is another very good museum explaining how the excavations are progressing and of course displaying the various finds at the site. The most important being the writing tablets that have been recovered and deciphered. The detail that has been gleaned from these actual records of the fort are fascinating. It is no wonder that they are considered to be so important as they bring the past to life. It is mind boggling to me that they have the actual birthday party invitation from Claudia Severa to Sulpicia Lepindina written in AD100. I half expected to find out that Biggus Dickus was on the guest list…

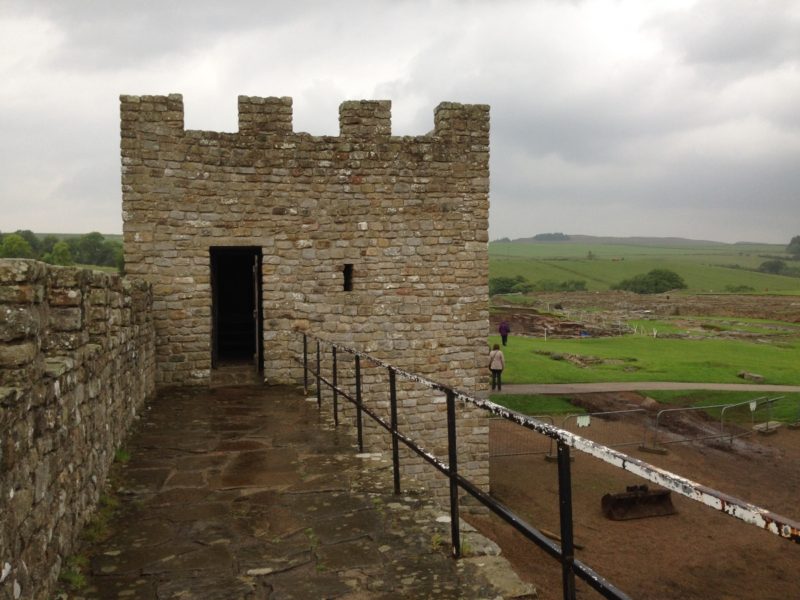
Hadrians Wall Reconstruction

Hadrians Wall Reconstruction

As well as the ruins of the fort, there are reconstruction’s of the Wall, in both stone and timber, and also of  various Roman temples.  So there is plenty to see and to think about. My overriding thought as we drove away was that the real power of the Romans was their organisational abilities. The fort at Vindolanda was laid out in exactly the same way as the fort at Segedunum. Both were obviously ideal as defensive positions but also as small centres of administration and commerce. They both had all the amenities that were required to keep a small garrison functioning and as comfortable as they could be in what was then the frontier of the Empire. Clever blokes, them Romans!

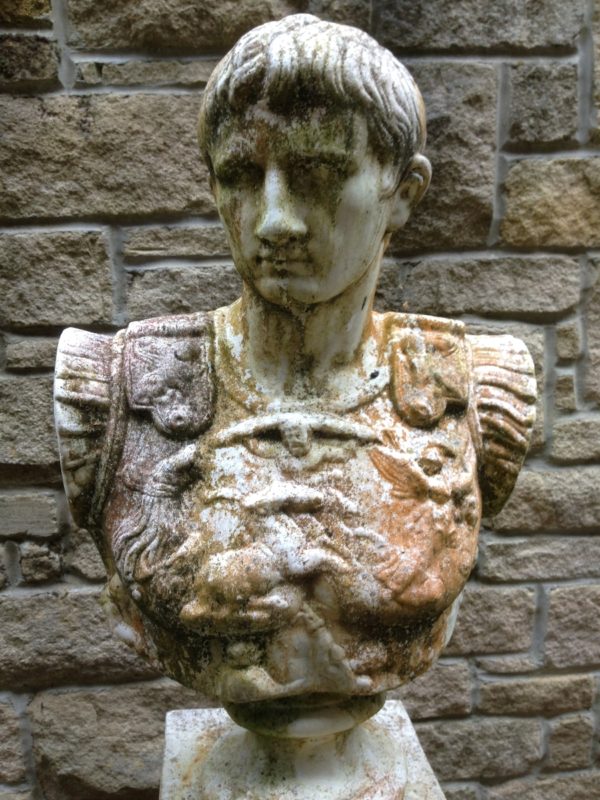
Roman Statue

Beyond the Wall.

Winter is coming, of that there is no doubt but first we have Autumn and happily, a few more days of sunshine.  Together with a group of War gaming buddies, Pete, Jaz, John and Josie, Julie and I  were lucky enough to enjoy some superb weather as we took a short holiday break and ventured North above the wall (Hadrian’s, of course) to the Coast of Northumberland. The Wildlings proved to be very friendly but have been keeping a secret from the rest of the country. Far from being a bleak, barren place, this part of the country is simply beautiful. Of course, if you enjoy visiting historical sites and looking at castles, you are spoilt for choice. As an added bonus, the food and beer is pretty good as well.

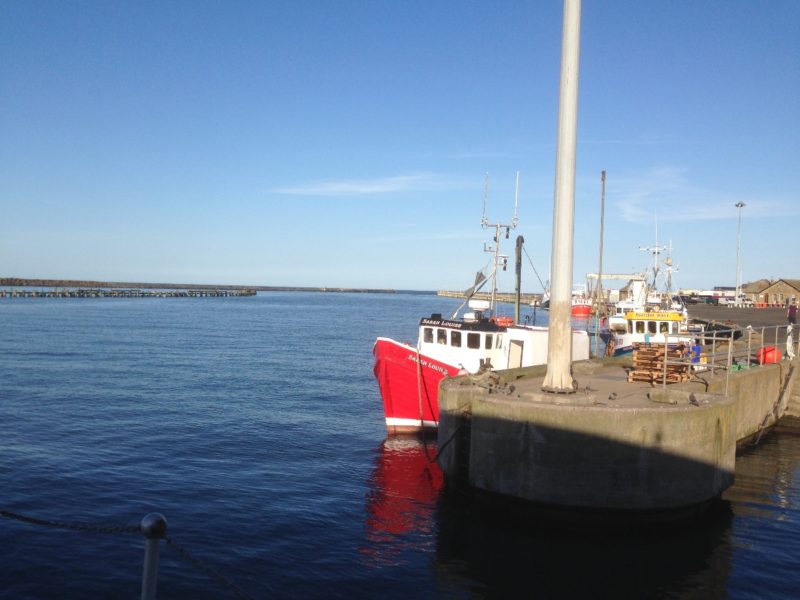
Amble Harbour

Amble Harbour

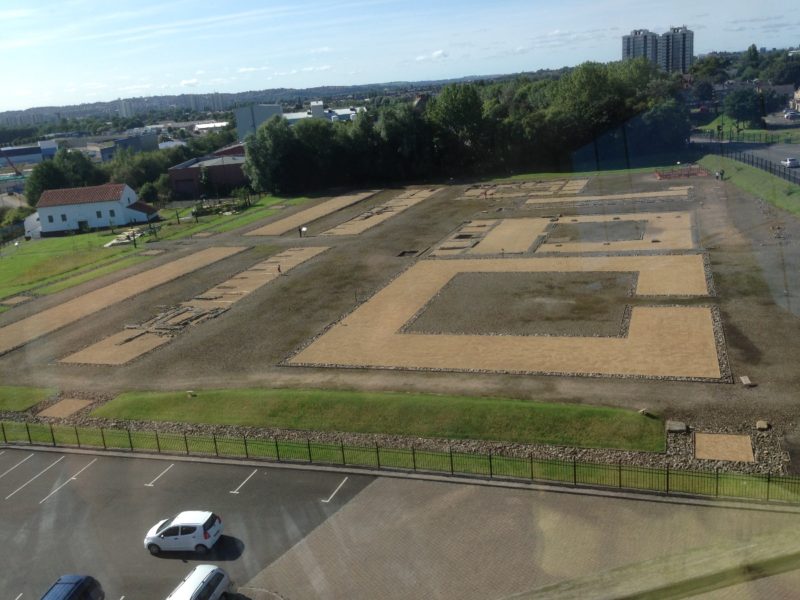
We stayed at Amble, a small fishing village just south of Alnwick. The picture doesn’t do it justice but it does show how lucky we were with the weather! On the way up to our accommodation, we stopped of at the appropriately named Wallsend,  and called into Segedunum, the small Roman fort that was built to guard the eastern end of Hadrians Wall. The fort is well excavated and thanks to the viewing tower, you can have a birds eye view of the layout. As well as the fort, there is a recreation of a Roman bath house and of course a small museum that explains the history of the fort. If you would like to know more here is the link to the official site:

Segedunum

Segedunum Roman Fort

Segedunum Roman Fort

The museum and fort are well worth a visit and were a great introduction to Hadrians Wall. Once we had passed Segedunum we were in the county of Northumberland and if the Romans found it a struggle to survive North of the wall, there were plenty that came after that were up for the challenge! All you needed to stay safe was a great big castle – and there are plenty to be found! Warkworth Castle, Alnwick Castle and Bamburg were just three that we visited and all close to where we were staying. To be fair, we didn’t go into all of them, there just wasn’t time but it was great fun touring around and visiting. My photos just don’t do these places justice, so here are some from the web!

Warkworth Castle

Alnwick Castle

Bamburgh Castle

As you can see, all very impressive and inspiring! My favourite was of course Bamburgh Castle, home in fiction to Uthred of Bebbanburg and a most imposing structure built right on the coast. It doesn’t take much imagination to visualise this Castle in ancient times, dominating the landscape and the people around it, keeping them safe from the various marauders from the Vikings through to the Border Reivers. Alnwick Castle may be more familiar to people as Hogwarts from the Harry Potter novels. Not my cup of tea but more evidence of just how cinematic these places are. In fact whilst we were in the area, there was a team filming the new Transformers movie. Goodness knows what Transformers are doing up in Newcastle and on Bamburgh Castle but I’m sure that it will all be done in the best possible taste!

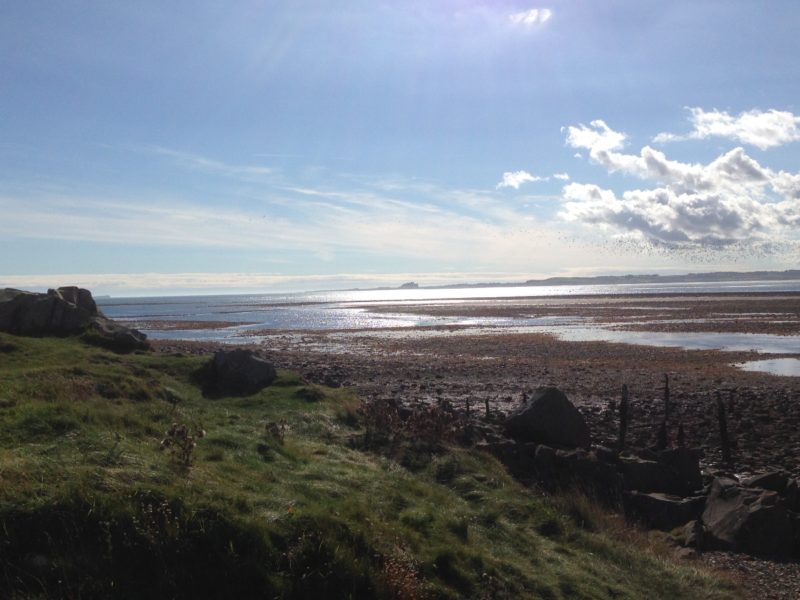
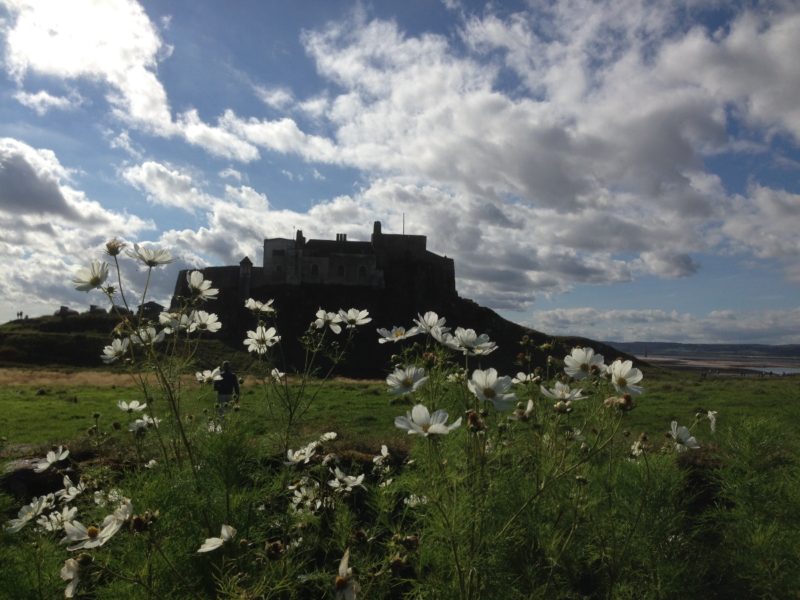
The other ‘must visit’ area is of course that well known holiday destination for the Vikings,  Lindisfarne or as it is sometimes known as, Holy Isle. The day that we visited, we were fortunate to have a full day of sunshine and so the views of the coastline and landscape were spectacular. Here are just a couple of pictures of the coastline and castle at Lindisfarne.

The view from Lindisfarne across the bay to Bamburgh Castle

The view from Lindisfarne across the bay to Bamburgh Castle

The Castle, Lindisfarne

The Castle, Lindisfarne

As well as the landscape, there is plenty of wild life to see. We met these two on the causeway as we made our way back to Amble after a lovely day.

Grey Seals at Lindisfarne Causeway

Grey Seals at Lindisfarne Causeway

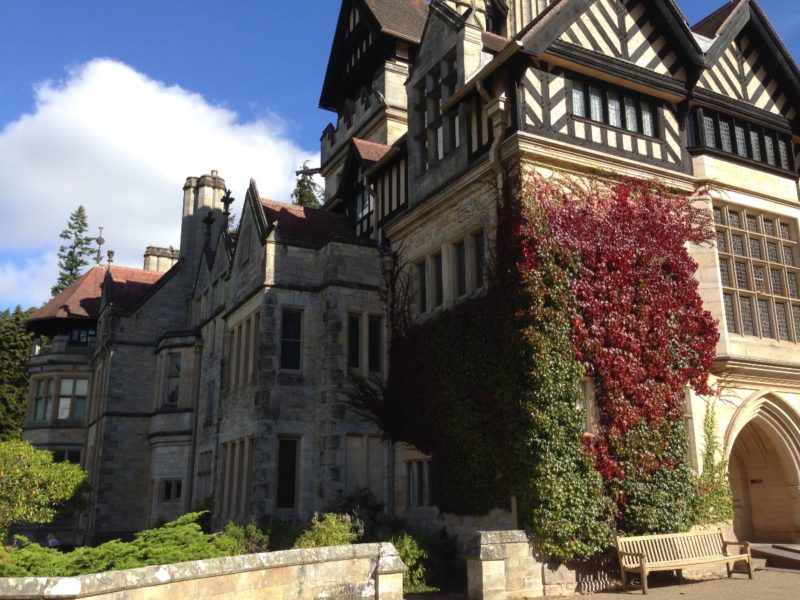
We also visited Cragside, a more recently constructed house of the Victorian times and built by the famous Victorian Industrialist, Lord Armstrong. He is credited with inventing modern artillery and he founded the Armstrong Whitworth manufacturing company and specialised in the development of hydraulic power. His house, Cragside, is set in beautifully landscaped gardens and one of the largest rock gardens in Europe. The place is stunning.

Cragside

Cragside

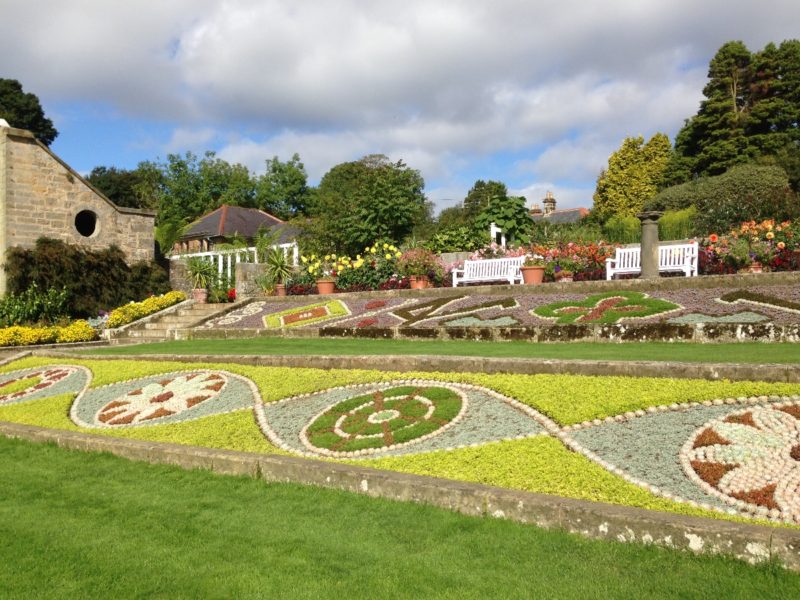
The formal gardens are pretty good, once again, teeming with wild life as of course, is the rest of the estate. Although Cragside isn’t as steeped in history as some of the other sites that we visited, it certainly was one of the most beautiful.

Cragside formal gardens

Cragside formal gardens

Before we knew it, our break was over and it was time to return home. However, as we crossed back over the Wall, we stopped off at perhaps the best place that a wargamer could visit up here, the Roman Army museum and the Roman fort and museum at Vindolanda. I’ll just put a teaser of a photograph up for now and in my next blog post I’ll add some more detail and pictures.

The Roman Army Museum

The Roman Army Museum

All in all, a lovely holiday break, as usual, too short at just five days but we packed a lot into those five days and I intend to return and spend a bit more time at some of those castles! As well as discovering the delights of Northumberland I also found a new way to enjoy my hobby, for now I’ll call it social model making but more of that in a later blog. Back to work now!

Yet more Irish!

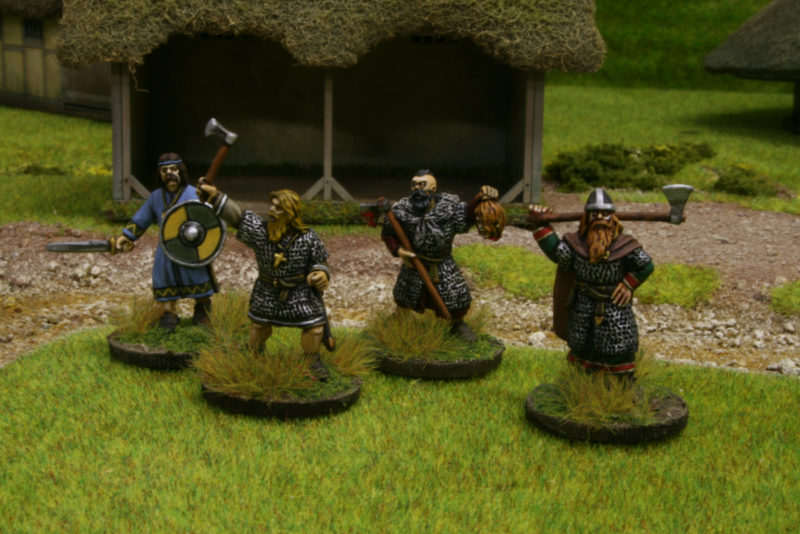
I have just about completed enough troops for an Irish Saga warband but the OCD part of my personality has taken over and I’ve decided to finish painting the rest of the figures in the Footsore Dark Ages Irish range. I did need to complete a warlord figure and was trying to decide between the Brian Boru set, The Irish warlord and Standard bearer or the Irish Command group. In the end I decided to paint all of them and have done with it! I also have a priest to add in, so there is another eleven figures on the work bench.

Irish Command ready to paint.

Irish Command ready to paint.

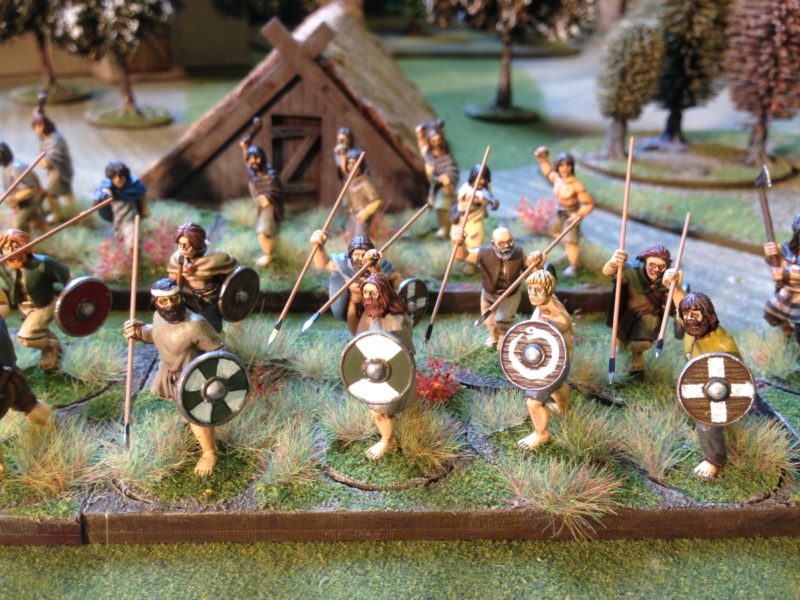
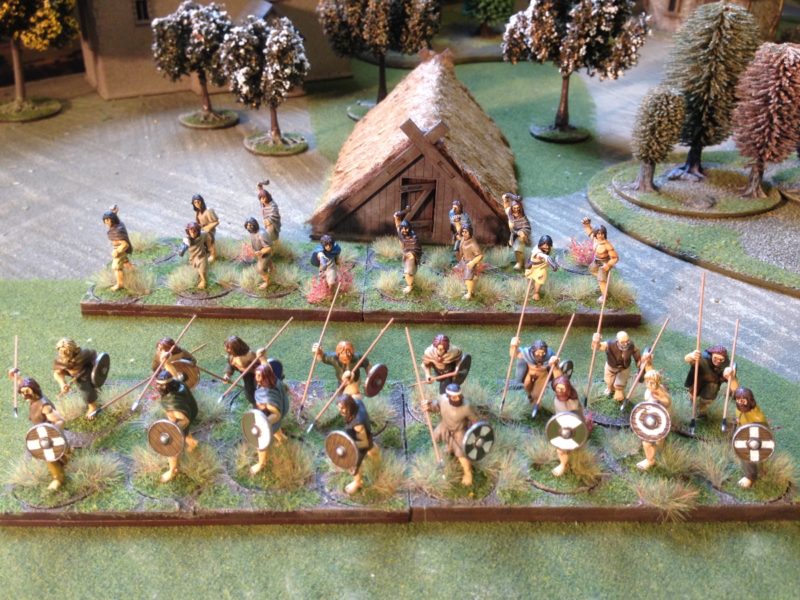
As you can see, there is plenty of work to do! With the Standard Bearer block painted and the chain mail dry brushed on the other figures, it will be a couple of weeks before these are table ready. As well as cleaning these figures up ready for painting, I have been busy elsewhere. I mentioned that there were another eight warriors to finish and these are now complete and based. If you read my post last week, you would have noticed that there was something missing from the first unit of warriors – Shields! Well these are now painted and attached and my war band is close to completion.

 Irish warriors ready for battle

Irish warriors ready for battle

Here is a view of both units with the Slingers in the back ground.

Irish warriors and Slingers

Irish warriors and Slingers

I’ve kept the shield designs fairly simple for these boys but I am thinking of going with shield transfers for the Lords so that I can give them a more affluent look! I also may resort to a decal for the banners. There’s no doubt that they look superb. My only concern is that in the days of Dark Age Warriors, graphic design and silk screen printing was not a skill set possessed by the local banner maker! So I may rely on my own free hand designs, which, whilst they will be more primitive, may look more appropriate. I suspect that I will use both methods. Perhaps use the decals for the Brian Boru and Irish Command set and my own freehand design for the Saga warlord. The next photograph shows my war band as it is now.

Dark Age Irish Saga warband

Dark Age Irish Saga war band

You may notice that I have used a slightly different tray for the four Irish Heroes. I’m thinking of using this style of tray in the game. I know that once combat is joined it makes more sense to move your figures individually, but these trays may be useful at the start of the game to make the movement faster & keep unit cohesion. So with 12 Slingers, 16 warriors and 8 Hearth guard armed with Dane Axes, I can comfortable muster a 5 point Saga war band. The additional 4 Hearth guard ( Irish Heroes) that I have painted can either double up as another Hearth Guard unit or as two Curadh and the Warlord. Once the leaders that are on the work bench are complete, I will comfortably have 6 points, more than enough for the average club game. I haven’t forgotten that the Irish are allowed to take war dogs! That is another unit on the back burner though. I have the dogs, I just need to get them converted and painted.

Finally, I mentioned last week that I was working on some scenery. I have another three Sarissa dark age buildings that I am working on. Although not specifically Irish, the idea is that they will represent a small settlement so that I can use them with either my Anglo Danes, Irish or the next Army that I plan to do, Anglo Saxons. I wanted to add to the MDF finish to make them look a bit more well worn, so as with the A frame hut that I have completed, I have added the teddy bear fur roofs. I also intend to add detail to the timber and daub walls and have started to detail the walls. However, my focus has been on painting, so I have not made very much progress. My plan is to complete the figures in the war band and then I will build the scenery. It’s going to be a busy September!

Sarissa Building with roof added and detailing started.

Sarissa Building with roof added and detailing started.

The Boys are Back in Town!

Well, the boys are on the painting table. As the last few blog posts have been about the gaming side of the hobby I thought it was time to return to the workbench and show you the progress with my latest project, my Irish Saga Band. Progress, as usual, has been rather slow but I have finished the four Irish heroes that I could use either as Curadh or as an extra unit of Hearthguard. When it came to choosing a colour scheme for these figures I was very much influenced by the Footsore web site and of course, in particular, the figures that were painted by Charle Baynon. I have also used some references from elsewhere and I am now finding that the Pinterest site is quite useful in this respect. The following link will take you to my Dark Age Irish and Celts board that I am building.

Dark Age Irish and Celts

There are some good references on this board and it shows what can be done these days with technology. In the past I would have been scratching around in books and magazines to find such images and it would have been quite impractical to have them at the painting table. Now I can just load this page onto my i-pad and it is there right in front of me when I am painting. So with these four heroes to add to my band, it is starting to take shape:

026

Footsore Irish heroes take to the table!

I also took some close up pictures of these figures in my light box. It’s interesting to see some of the ‘blemishes’ that you don’t see when the figures are on the table and I suspect it is the ability to be more careful in blending at this level that makes the professionals so good at what they do. My lads look a bit dark around the eyes!

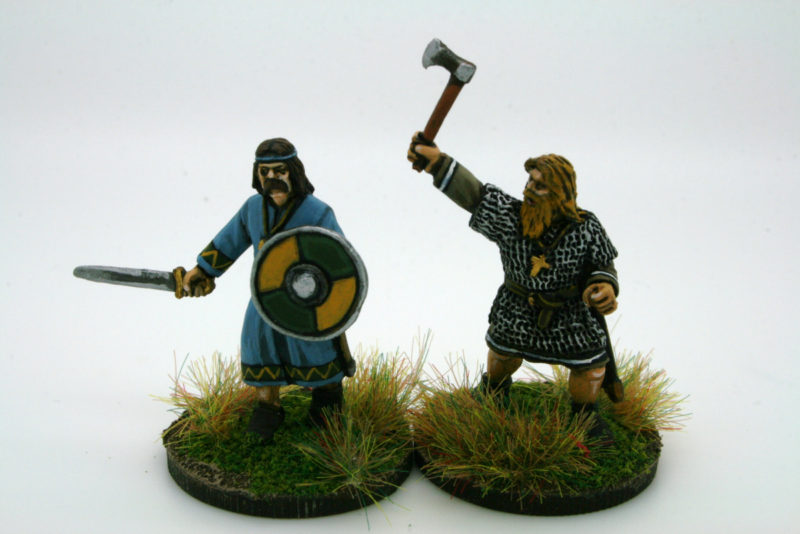
Irish Heroes with Dane Axes

Irish Heroes

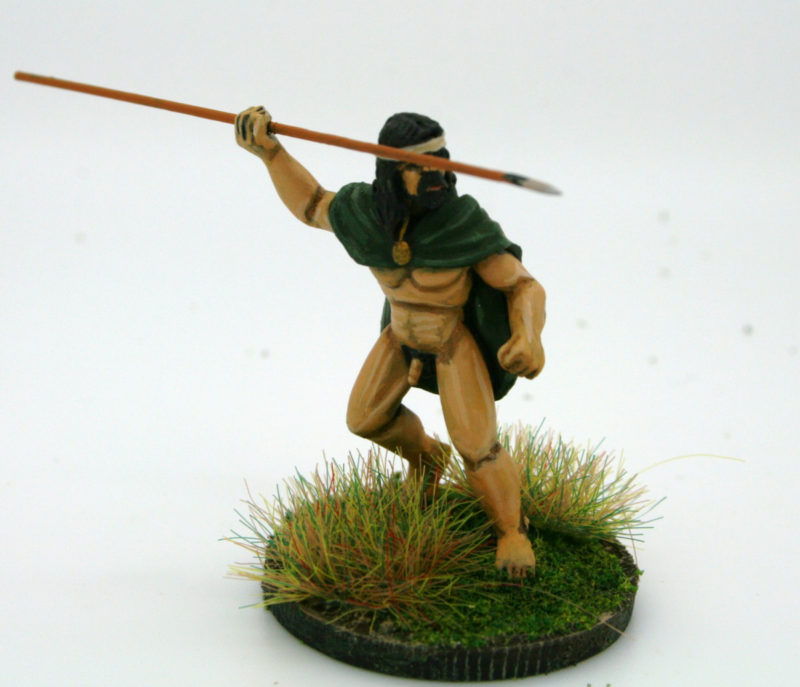
So having painted Irish heroes with big choppers it was time to move on to the Irish Warriors with … I think Bill Thornhill must have modeled this one on his own physique!

Irish Warrior with Javelin

Irish Warrior with Javelin

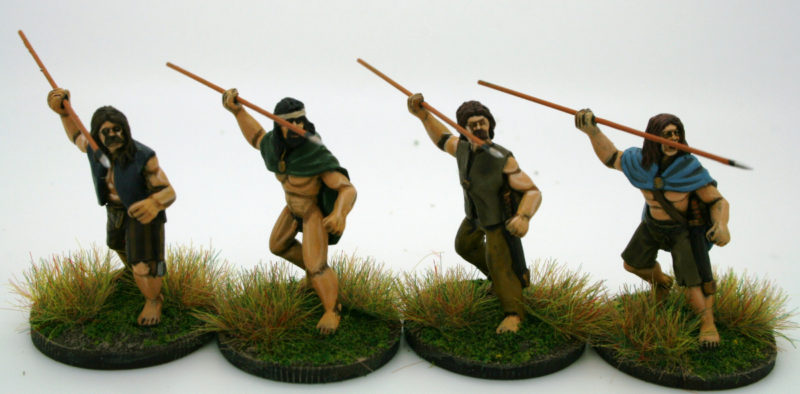
Enough of the smutty jokes. I have now painted a full unit of eight of these Javelin armed warriors with another eight following closely behind on the work bench. So by the end of this week I will have at least 5 Points for my saga army. The main unit that is missing is a warlord or commander.

Footsore Irish Warriors armed with Javelins

Footsore Irish Warriors armed with Javelins

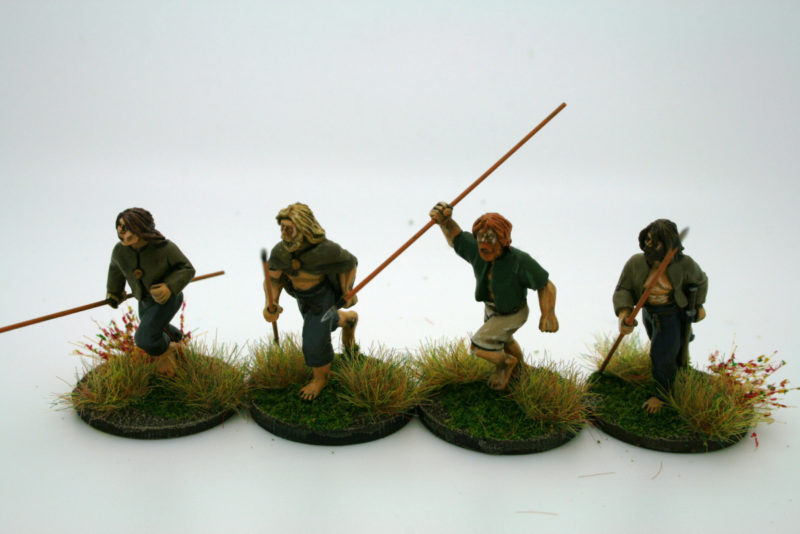
The second rank! Javelins at the ready!

The second rank! Javelins at the ready!

I haven’t given too many painting details in this article but by and large, I have stayed with the limited pallet that I used for the Irish Finah and other Irish figures. To see the details, just click on these links to the relevant blog articles:

THE SAGA CONTINUES.

FOOTSORE IRISH SLINGERS – DONE!

AN IRISH SAGA

I’ve also made good use of my own technique of block painting the basic colours, then applying a dark tone ink wash, then repainting with the original colours, leaving the shadows and adding just a few highlights where I think that they are needed. I’ve also copied Charles Baynons idea of using multiple layers of light matt varnish between coats to protect the finish.

So that’s it for this week. Next week I will show the complete army and I hope to show you some of the scenery that I have also have been working on.

The Retreat from Fort Josephine, St. Ailleurs 1810.

I couldn’t resist posting another battle report using the Sharp Tomahawks rules set that Andy Callan had produced for the club. It was one of those battles that had plenty of talking points and had us both chuckling at the situations created. Afterwards, I drove home with a big smile on my face, thinking this is why I enjoy this daft hobby of ours! As usual, Andy had written a short scenario to set the game up, here it is:

THE ISLAND OF ST. AILLEURS

East Of Madagascar, December 1810.

After the fall of Ile de France (Mauritius) and Ile Bourbon (Reunion), earlier in the year, the surrender of the isolated French garrison on the remote island of St.Ailleurs was only a matter of time.

The small inland post at Fort Josephine has been under a desultory siege by British marines and irregulars loyal to the Sultan of Zanzibar (the former ruler of the island). Now word of the general surrender of French forces in the Indian Ocean has arrived with orders for all regular troops to march back to the island’s capital, Port George (formerly Port Bonaparte), the British to return to their ships and the French to embark for re-patriation.

The prospect of leaving this god-forsaken hell-hole has been welcomed all round and everyone concerned is looking forward to a return to the fresh air on the coast. The former Austrian Grenz soldiers – reluctant servants of the French Emperor- have even raised their old flag in honour of the occasion. (our usual French figures weren’t available!)

But the Zanzibaris are not so happy. They were expecting rich pickings from looting the fort and its garrison and now it seems the perfidious British are planning to annex the island for their own purposes. The alliance is over. Death to the unbelievers!

Capitaine Vachequirit and Colonel Cheshire will have to put aside their former differences and work together to fight their way out.

The French (Capitaine Vachequirit – he cannot order British troops)

2 companies of the 124e regiment de Ligne (@12 figures) (rated “Average”)

2 companies of the 15e provisional colonial battalion (ex-Austrian) (@ 12 figures) (Average)

Mule train (carrying the garrison’s pay chest, powder supply and rum rations). It moves down the road whenever a “Special Event” card is drawn.

The British (Colonel Cheshire and Captain Lester : roll 4+ to give orders in French)

Marines (12 figures –Elite)

Naval landing Party (12 figures – Average)

The Zanzibaris (all troops start off hidden- randomly deployed, with dummies – in woods)

Osama bin-Liner, Mustafa al-Qorbyn

4 x bands of Irregular Skirmishers @ 10 figures (rated as “Raw” troops)

1 x band of Pygmy (25mm!) tribesmen @ 10 figures (rated as “Indians”)

Special rule : Any Zanzibari unit that routs will immediately be replaced by a fresh unit on the baseline for a roll of 4+. An individual unit can only be “resurrected” once in this way.
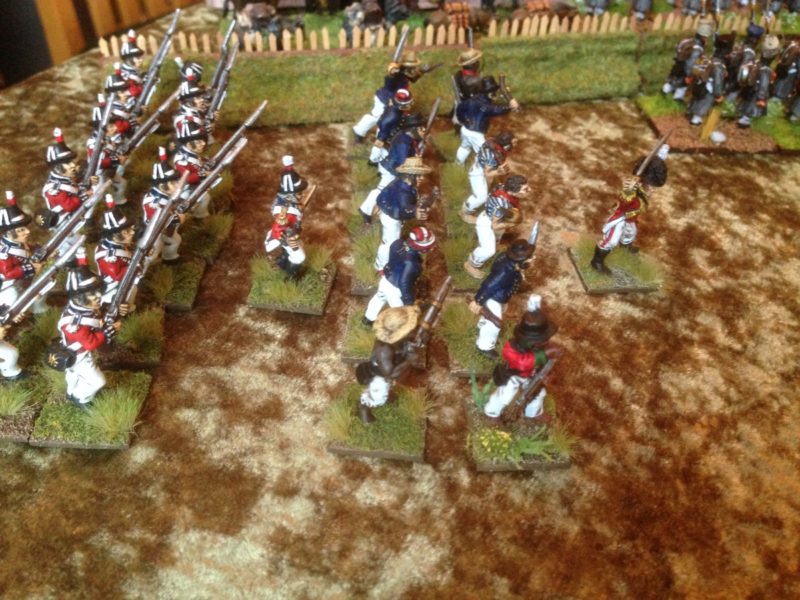
British forces gather to start the retreat.

British forces gather to start the retreat.

We started the game with a new idea. Instead of drawing the cards. Each side was allowed to move one unit in turn until contact or the first exchange of fire was made. This meant that the game moved along at a faster pace whilst units took up their positions. For my part, I started to organise my column, the French were assigned to escort the mule train, whilst the British would act as the vanguard, dealing with any threats that emerged from the jungle. Andy had a different set of problems to solve. Although he knew where his commanders were, his troops were deployed at random on the table. Each location was marked by a scrabble tile and to activate the troops, the commander had to move into command range of the tile. The problem for Andy was that the tiles with consonants had no troops, vowels indicated that troops were there. So initially, Mustapha al- Qorbyn was running around the table like a man looking for an empty seat on a crowded train.

Eventually, he was able to muster his band and the action started with a flank attack on the Austrian troops guarding the mule train. To add to the drama, the pigmies charged out of the jungle to engage the rear of the formation.
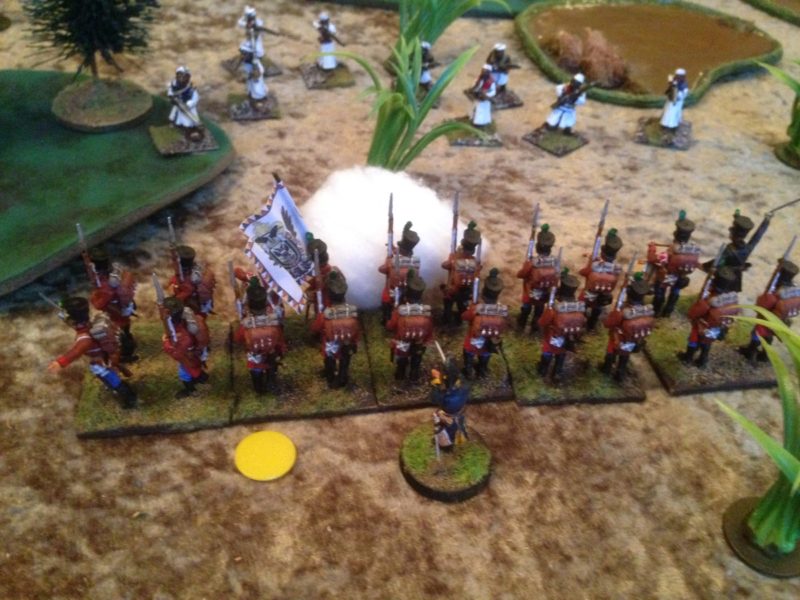
The Austrian Grens fight off the first attack!

The Austrian Grens fight off the first attack!

Although the Austrians were able to shake off this attack and repulse the Pigmies, they had suffered a few casualties and to make matters worse the pigmies had disappeared back into cover still intact! It wasn’t clear to Captaine Vachequirit where they had disappeared to but the grass was shaking ominously out on the flank again! Meanwhile, the mule train had moved off down the road with the British contingent acting as vanguard as planned. All went well until they reached the bridge over the stream. At this point, Osama Bin Liner ordered his troops forward to engage the Brits and capture the Mules.
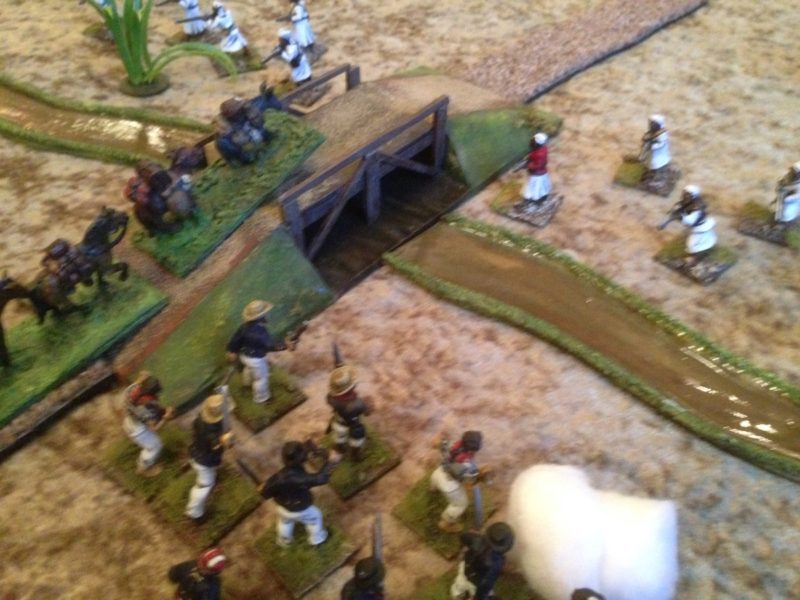
Ambush at the stream!

Ambush at the stream!

Bin Liners Zanizibaris were no match for Captain Lesters Marines or the shore party commanded by Colonel Cheshire and they were soon chased off. There was just one problem…the mule train was panicked and started to stampede down the road on it’s own. With the French and Austrians engaged to the flank and spooked by the Pigmies, and the British busy engaging the Zanzibaris at the stream, no one had taken control of the mules…
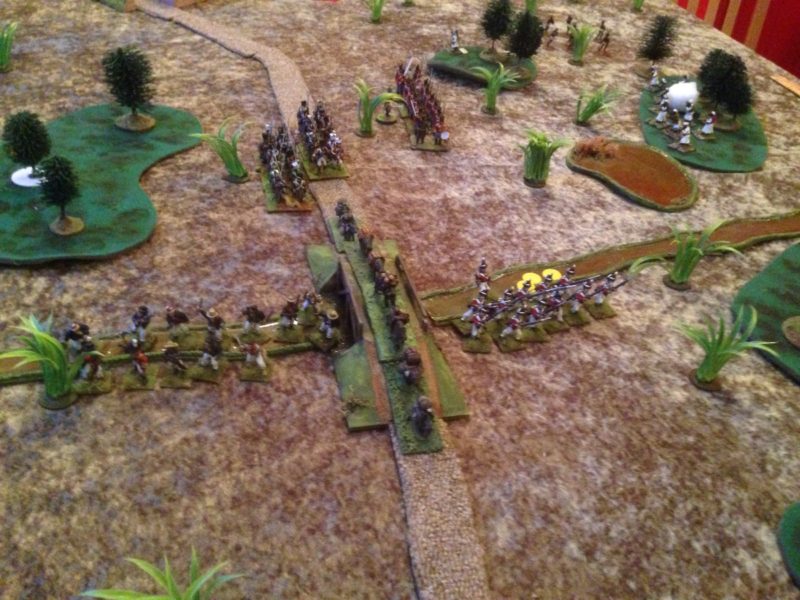
Somebody stop those mules!

Somebody stop those mules!

With Osama Bin Liner rallying his troops to the front and Al- Qorbyn causing problems on the left, the column was suddenly in trouble. The French and Austrians were ordered to cease fire and try to catch up with the column, whilst Colonel Cheshire ordered the shore party to catch up with the mules. The Zanibaris took full advantage of the lull in the firing to close once again with the Marines under Captain Lester. In a fierce fire fight he was badly wounded and although able to continue, he was only able to command of his own troop of Marines. Those pesky pigmies had also reappeared and were once again threatening the mules!
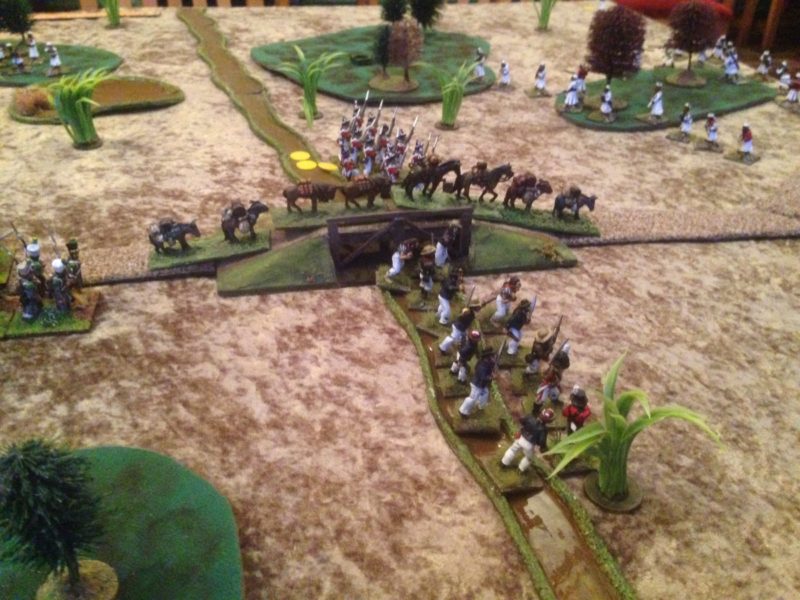
Theres more trouble ahead!

There’s more trouble ahead!

In a desperate attempt to save the Mule train, Colonel Cheshire threw caution to the wind and led his troops the front of the column. Immediately, he was set upon by a large band of Zanzibaris and a ferocious melee took place. Despite his best efforts, Captain Lester was unable to come to the aid the brave Colonel –  and the shore party was overwhelmed.
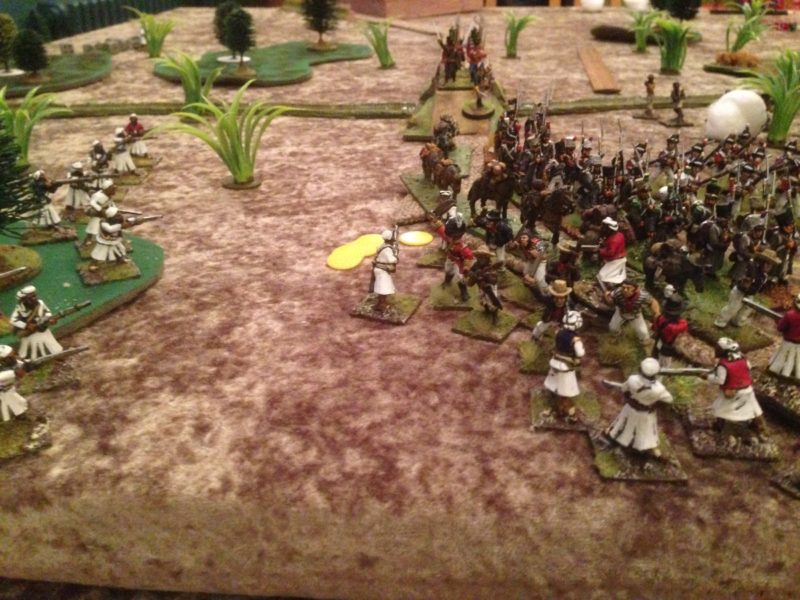
A desperate fight for the mule train!

A desperate fight for the mule train!

Captaine Vashequirit, managed to bring up reinforcements but the damage had been done. The shore party was no more and the Marines had suffered terrible casualties, even the gallant Captain Lester was wounded. Although the Mule train was now back under control, there was nowhere for it to go. The Zanzibaris vastly outnumbered the survivors. Bin Liner and al Qorbin were triumphant! Terms were called for. The Zanzibaris agreed to let the survivors continue back to their ships so long as the Mule train and it’s spoils were left behind. So with their dignity still intact, the Allies continued on towards the safety of the harbour. What was that though…a rustling in the bushes… the damn Pigmies were still out there!

If you would like to have a go at using Andy’s rule set, the latest version is available her in PDF format for you to download:

SharpTomahawks

To make life a bit easier, here is todays scenario, also as a PDF:

St.Ailleurs

and if you enjoy it, here is last weeks scenario, ready to download:

Scenario

If you look at the last couple of weeks blog entries there is a bit more information as to how the rules were put together and how you can use them. I hope that you enjoy them as much as we have.
 

Rules for Old Wargamers with Short Attention Spans!

Having played Black Powder for some years now, our group has been looking for a set of Skirmish rules for the Black powder era that would enable us to game using a limited number of figures. We all have quite large Napoleonic Armies but when it comes to, say, the AWI, French Indian Wars and similar periods, some of us are still playing catch up with painting. So skirmish rules are the way to go. We had been playing Muskets and Tomahawks but in truth, the groups enthusiasm to learn a new set of rules was on the wane. The other issue was that we were playing M&T’s fairly irregularly so the rules just weren’t sticking in our brains….
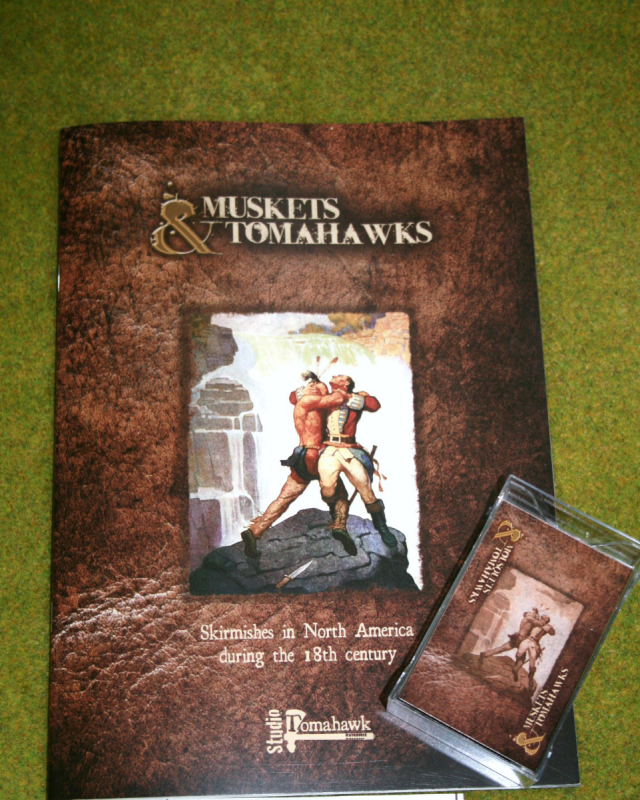
muskets & tomahawks from Studio Tomahawk.

muskets & tomahawks from Studio Tomahawk.

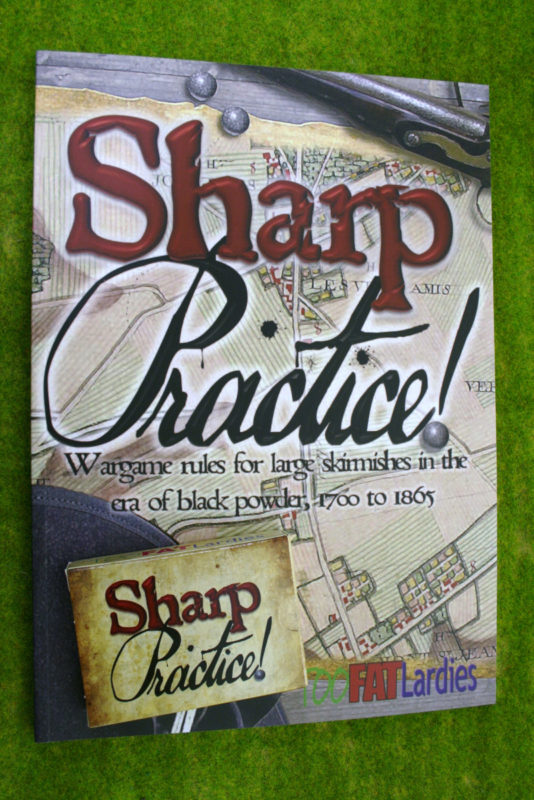
The first Skirmish game that actually introduced me to the hobby was ‘Sharp Practice’. With the launch of the new version, complete with the cards, this seemed to be the answer to our problems. The Sharp Practice rules set has a depth to it that really encourages you to develop characters and scenarios and provides a ‘rich’ game play ( no pun intended) that develops into a story line of it’s own.  Unfortunately, we encountered the same issues. Although we were familiar with the rules mechanism, the lack of experience and consistency meant that we were having to constantly refer back to the rule book to resolve queries. Of course, it didn’t help that half of our group had sort of read the new rules and the other half played in blissful ignorance, happy to do what ever they could get away with!

sharpe practiceThe group decided that we needed a simple set of rules that would allow us to play a skirmish game on a Thursday evening that would not tax the brain too much and would be something that could be read quickly and absorbed. Step forward, Andy Callan, veteran rules writer, who volunteered to put the two rules sets together and simplify them down to two sides of A4 paper. Andy has been writing rules and war games scenarios for many years. His rules set ‘Loose Files and American Scramble’ appeared in the very first edition of Wargames Illustrated ( why the hell we aren’t using these at the club is another mystery to me…..) and his current joint project with Peter Dennis is the Paper Soldiers rules sets & armies published by Helion Books that I have previewed here

The rules are not an attempt to replace the other two rules sets. In fact, I would suggest that either are a mandatory addition to war gamers collections but Andy’s rule set serves two purposes. Firstly, it is a quick, playable set of rules that will allow you to explore either a Black powder period or campaign without committing to vast numbers of figures. Secondly, the rules are a good introduction to Card driven activation games. Many players are not familiar with this style of play and are more used to the  U Go – I Go turn sequence of most rules sets. The card driven rules activate units in a random sequence on either side. This can be frustrating to players that like to implement carefully made ‘chess like’ strategies. However, if you would like a more ‘cinematic’ type of game, with tense stand offs and risky gambles, the card mechanism is one of the best ways to achieve this.  If you do like the way Andy’s abridged rules play and would like more detail, including army lists, either of the two rule sets, Muskets & Tomahawks or Sharp Practice are ideal. Once again, I would heartily endorse both!

So if you fancy a go at this style of play, the rules are contained here in a PDF in the link below. Hopefully, if I have the technology working correctly, you should be able to click the link and down load these for free. If you are worried about how to make the cards, there are a couple of simple solutions. First of all, just cut them out of card board – an empty cereal packet will do – remember to write on the blank side though… If you prefer a less ‘Blue Peter’ approach, use an old deck of cards and place stickers on them with the Officers names, and the other miscellaneous card types written on. If you don’t have an old ceck of cards, pop down to the local pound shop and get one. You should be able to pick them up for a pound….. Anyway, I hope that you will give the rules a go and have fun playing them:

SharpTomahawks


‘Sharp Tomahawks!’

Sharp Tomahawks

Sharp Tomahawks

Last week, following our game of Muskets and Tomahawks, our resident rules writer Andy Callan went away to see if he could come up with a simplified version of the game. Here is Andy’s explanation of how he went about the task :

‘The Nottingham White Hart wargamers regularly play a number of different games – Sharpe Practice and Muskets & Tomahawks amongst them. Whilst these are games we can enjoy playing, we don’t play them often enough for the rules to get fixed in our minds and we often find ourselves getting the two sets confused and then wasting time trying to find stuff in the rule books.

So, I set myself the task of taking inspiration from these two sets and coming up with something that we would have a chance of remembering (two sides of A4, tops!). I was aiming for a set of hybrid rules with a card-driven turn sequence and simple but consistent rules for Firing and Hand to Hand Combat.  The cards would be usable in any “Black Powder era” setting and the “stripped-down” rules would serve as a core set to which any “period-specific” bells and whistles could be added, on a game by game basis. Army lists and scenarios could either be made up or adapted from published sources.

The result is “Big Skirmishes/Small Battles – rules for old wargamers with short attention spans”  (or “Sharpe Tomahawks”, if you like…).

See what you think…’

Andy not only produced a simple set of rules but also went to the trouble of designing a Scenario that would let us put the rules to the test. In this weeks blog, I’ll show you the way the scenario played out with a short battle report. Next week, I will include the rules that we used along with some clarifications, so if you fancy giving it a go yourselves, you can download the rules and scenario. First of all, the players briefing from Andy:

The Emmenemmthal Valley, Austrian Tyrol, 1809

A long battlefield, dotted with woods, with a road and a stream down its length, crossed by a stone bridge at the half way point. The game is played end to end, down the length of the table.

A French foraging party has been sent up the valley to seize stocks of the local cheese and whatever else they can lay their hands on. Their commanding officer, Capitaine Vachequirit, has a sideline acting as an agent for Marshal Murat, with orders to “liberate” any fine artworks suitable to decorate the new royal palace at Naples.

Apart from its cheese, the valley is famous for a jewel-encrusted statue of the Virgin Mary (known locally as “the Madonna with the big rubies”), so the godless French have seized her and slung her in a wagon along with all the looted food and schnapps.

Having accomplished their dirty deeds, they are now making their way back down the valley, somewhat encumbered by an over-loaded, ox-drawn wagon. But the church bells are ringing out and armed men can be seen gathering on the hillsides…

Cast list :-

The French : Caporal Camembert, Sergeant Rocquefort, Lieutenant Brie, Capitaine Vachequirit.

The Austrians : Corporal Strudl, Sergeant Schnitzl, Leutnant Lauda, Captain von Trapp.

The French column advances, receiving fire from the defending Austrians in the woods.

The French column advances, receiving fire from the defending Austrians in the woods.

The Battle 

The initial Austrian deployment was hidden from the French at the start of the game. As the French column moved down the road, Tyrolean Landsturm skirmishers opened fire from the woods on the head of the French Column. The French response was to send their Skirmishers into the woods in an attempt to drive the Austrians out.

Skirmishers engage at the woods edge.

Skirmishers engage at the woods edge.

Despite the bravery of Sergeant Rocquefort, the French were repulsed by the gallant Corporal Strudl and the Austrians held their ground. However, enough time had been bought to allow the French Convoy to by pass the woods. Once again the French were surprised by the appearance of Sergeant Schnitzl leading the Tyrolean Landwehr who was concealed in the village. They took up position by the road and attempted to halt the column.

Austrian Militia take up position

Austrian Militia take up position

The Militia bravely stood against the elite French Grenadiers led by Corporal Camembert but despite their best efforts the French bullied their way past with the convoy, mauling the Austrians in the process.

The French convoy presses forwards

The French convoy presses forwards

It appeared that the French were in the ascendancy, Capitaine Vachequirit was licking his lips at the thought of all of the Cheese that he would be enjoying. However, Austrian reinforcements were on the way! First of all a Cavalry Regiment led by Leutnant Lauda galloped onto the field, threatening the French Flank.

Hussars!

Hussars!

The Austrian optimism was somewhat short lived, Leutnant Lauda was somewhat of a dullard and despite a gallant charge, failed to press home a decisive attack. The French were shaken and the Militia were gradually taking a toll of the French Column. Although the French had now reached the bridge, yet another Austrian reinforcement column had arrived in the shape of  Captain von Trapp and two units of regular line infantry.

The French crest the bridge

The French reach the village

With the light fading ( literally, the room in the pub could do with a few extra light bulbs!) the French convoy had finally made the bridge and French Skirmishers were in possession of the village. The bad news was that open road lay before them and three fresh units of Austrians, including the rifle armed Tyrolean Jagers were patiently waiting. With a somewhat weakened force and the Austrian militia snapping at their heels, the French were feeling vulnerable.

The French gain the Village

The French gain the Village

A truce was called and it was agreed that the French could leave the valley with their Arms and honour but the Cart Stayed! With terms agreed, the commanders retired to the bar to discuss the game!

Post match analysis!

For a first run through the game played very well. As a result of some of the play, Andy has modified the rules slightly, to make the cavalry a bit more effective when charging and to tighten up the hand to hand combat rules. As with all Skirmish games, too many players can slow things down and with six of us involved there were times when players were left with too little to do. The rules set certainly has the advantage of being straight forward and I think will be an ideal ‘Beer & Pretzels’ rules set for an evenings relaxed gaming. In next weeks blog, I’ll publish the full rules , along with the full scenario details.

The Scenario is broken!

I desperately want the Rules set, Muskets and Tomahawks, to work. I see it as a key part of my Gaming toolkit. The idea is to have a number of rules sets that both myself and my wargaming buddies are familiar with that will allow us to play games across the Historical breadth of the hobby without having to spend too much time having to refer to the rules whilst actually playing. In theory, as we are all building armies, it makes sense to start with a set of skirmish rules and grow from there So we have graduated from Sharp Practice to Black Powder for Napoleonics, We have Saga for Dark Ages (none of us yet have a huge collection of Dark age figures), Lion Rampant for Medieval and WOTR and the idea was to use Muskets and Tomahawks as an alternative to Black powder  for the Indian Wars and the War of Independence. These are the main periods that we are collecting, although there is talk of American Civil War, the First & Second Afghan war, 55 days in Peking and so on! That is the nature of wargamers, never enough figures! But I digress…

Muskets and Tomahawks set up.

Muskets and Tomahawks set up.

We have successfully played a number of large scale games using the M&T’s rules, very much thanks to the fact that ‘Nice John’ at the club has been able to provide some superb scenery and placed his AWI figure collection at our disposal. However, we thought that rather than play another one of the large games, we would try a smaller scenario using a limited number of figures with even sides and just two players involved. The rest of us would look on and learn how to play the game properly! Jaz had kindly chosen the scenario, an Indian raid on a settlers homestead, From the M&T’s rule book and had evenly pointed up the opposing forces, provided the scenery and set us up all ready to go. The two sides comprised of four small Indian warbands on the ‘American side’ versus one friendly Indian war band and two units of British Militia.

All is peaceful as the villagers tend to their farm, unaware of the Indians sneaking up!

All is peaceful as the villagers tend to their farm, unaware of the Indians sneaking up!

The first couple of moves or so went without too much action. The Indians began to close in on the homestead, using all of the available cover to sneak into range. A two pronged attack was planned. Three bands of Indians would advance directly towards the houses, engaging the militia if necessary, whilst the fourth band would circle from the flank to engage the traitorous Mohawks that were aiding the British!

The Indians stealthly approach the Village.

The Indians stealthly approach the Village.

The Militia immediately responded by moving through the Village to take up a defensive position near to the houses. However, in the initial exchange of fire it was the Militia that were pushed back and the Indians that appeared to have the upper hand.

Militia take up position to defend the houses

Militia take up position to defend the houses

On the flank it was the Indian raiders that were getting the better of the bow armed Mohawks, and they too were forced back under fire.

The musket is more than a match for bows!

The musket is more than a match for bows!

Emboldened by their initial success, the Indian raiders pushed on towards the settlement, ready to put it to the torch. The only concern was that they had now left the cover of the surrounding woods.

The Indians race towards the houses ready to loot and burn!

The Indians race towards the houses ready to loot and burn!

At this stage, the Indian chief realised that there was a problem. Not only had he lost cover but he was running out of cards to activate his units…. The result was inevitable, the Militia poured volleys into the exposed Indians who immediately turned tail and ran. Game over man!

Militia open fire!

Militia open fire!

And as they say, that’s when the real fighting started! Well, actually it was more of a friendly debate. Could the Indians actually get to the settlement and burn it to fulfil their mission? We ran through the scenario again, with different players and even more cover for the Indians. The result played out the same – once the Indians attempted to get to the houses they were shot to pieces. The debate continued. Was the card activation the problem? We turned to the rule book and it seems as though we had made up the deck correctly. However, there was an imbalance. The Indians only had 4 cards. The British had 8. However, whilst this meant that the Indians had 16 activations, (4 cards x 4 units), the British only had 12 ( 4 cards x 1 unit and four cards x 2 units). The view was though, that the more frequent activations of the British side gave them an advantage in being more flexible to threats and more likelihood of being drawn to activate before the Indians. It was pointed out that this probably was a fair reflection of what happened when trained local militia came up against an Indian war party. Whether this was true or not, it does make it difficult to persuade someone to play the part of the Indians in a club game!

The result of all this was that we began to question the rules in general and the card activation process in particular. I’m not sure that we have used all the options for the Indians and would need to play through the rules a few more times to ensure that we are using them correctly. For the time being though, the consensus at the club was to come up with our own variation of the rules and so our Veteran Rules writer has gone away to polish up his version of ‘Sharp Tomahawks’. I’ll keep you updated!


The saga continues.

On the face of it, painting a war band for Saga shouldn’t really take a month. After all, around 40 figures is all that is required. I suspect that some painters out there could knock these out in a couple of days, if not faster. I know of some wargamers who will paint in concentrated bursts to complete an army and then spend a month or so without painting anything. For me it is a case of slow and steady gets there and so having completed my band of levy, the next job was to paint 8 Fiana or hearth guard.  I tend to paint in short sessions of just an hour or so but manage to get at least three of these sessions in a week.  My method means that there is always something on the painting table and when I get a spare 10 minutes, I move a project on. So although I have been spending time on the Fiana, whenever I have had a spare few minutes I have been preparing and researching the next batch of models.

2016-08-03 08.44.34

So back to the painting table and my unit of Fiana. As you can see, they are all armed with Dane Axes, which makes them pretty lethal in combat, reducing your opponents armour by one. Used at the correct time in a game, these boys will crush the opposition with their ferocity. There’s just one problem, their own armour is reduced to 4, making them a bit of a one hit wonder when faced with equal opposition.  As with my Irish Levy slingers or ‘Kerns’ I have used a fairly limited palette of earthy and drab tones. As these figures represent Hearth guard though, I have painted them with a bit of decoration on their clothes. The basing followed my usual practice of using the Vallejo Dark Earth paste, painted and dry brushed to bring out the texture. I then added some green scatter. I have also made some movement trays for my saga units. I wont be using these in the game but it makes a convenient way of storing and transporting the models. They also look a bit more organised in the figure display cabinet. ( refer to my previous Blog post ‘Round Base, Square hole’ )

Footsore Fiana in their movement tray

Footsore Fiana in their movement tray

Of course I also added some tufts to the bases to give them a bit more texture. Again, I have kept with the Javis Tufts to give the army a cohesive look.

The finished unit of Fiana, complete with tufts!

The finished unit of Fiana, complete with tufts!

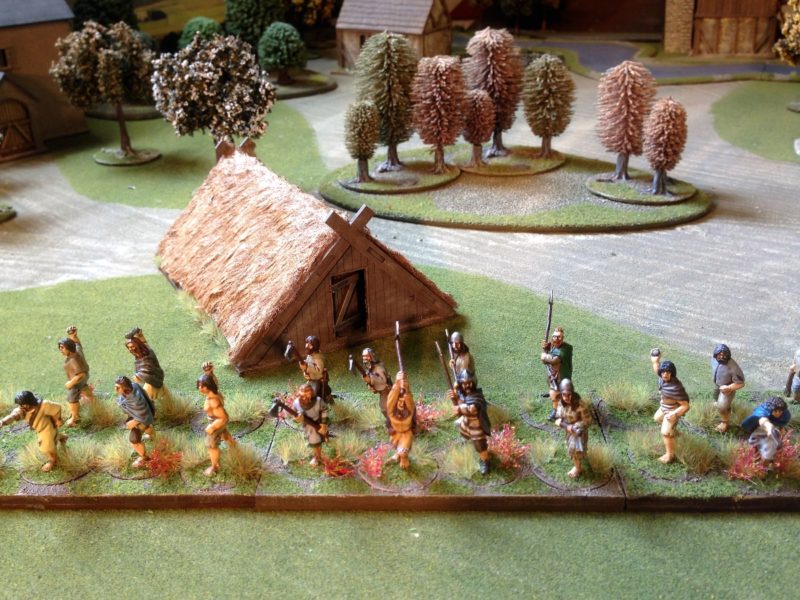
I have also completed work on the Sarissa Dark Ages A frame hut. You can see it in the background of the top picture. Here is a better picture of my Irish Warband, based and in their movement trays defending their one and only hut!.

Fiana, Kern and A frame house.

Fiana, Kern and A frame house.

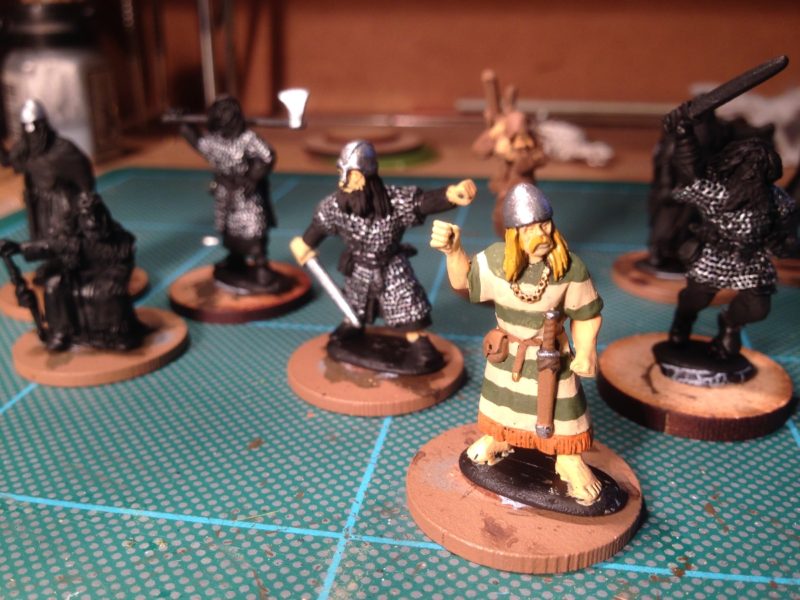
You will see that I have painted 8 Fiana to count as Hearth guard, these will count as two points in my Saga band. However, the plan is to paint at least two other Hearth Guard, that will serve as Curadh. These are used as single warlords and are detatched from their parent unit of Hearth guard to operate as ‘Champions’, generating their own Saga dice, benefiting from the Warlords ability and generally able to cause mayhem! The Footsore pack of Irish Heroes with Dane axes look like good candidates. Although I will use them as ‘standard Curadh’ armed with javelins in the actual game, these models look like they are the Champions that they are supposed to represent. Here they are undercoated and ready for painting.

Footsore Curadh ready for painting

Footsore Curadh ready for painting

You can see that I have use a black undercoat for these figures as the chain mail will be easier to paint by simply dry brushing with Vallejo steel. There are three figures in the photo. The one on the far right will be my Pack master for the wolf hounds that I intend to use as one unit of warriors. Now as regards the Wolfhounds, I am going to take a bit of a liberty and use the Irish Wolf hound from my own DeeZee range. He comes as part of a the ‘Large Dogs’ pack and is a very big model as you will see from the pictures below. I realise that he is out of scale but I don’t think that this will matter for the purposes of the game. I wanted my dogs to look like they really could pull down a fully armoured warrior!  You can just imagine the warriors of the time talking about their encounters with the wolfhounds…’You should have seen them Aeflaed, they were as big as ponies, ‘orrible great things that would rip your throat out!’

Irish warrior wolfhounds!

Irish warrior wolfhounds!

I’ll have to do a bit of conversion work on these as I would like to have at least three different poses. If they look the part, I’ll see about getting them cast as a pack as part of the DeeZee range, so it might be a while before these are ready. In the meantime, I have plenty more to paint!

A final note. Last weeks blog was an account of my day at the Saga Ironman Day at Wargames Illustrated. There is now a very nice video that shows how the day went and as I am in it, it seems appropriate to include a link here: