Beginners Guide to Painting British Napoleonic Infantry

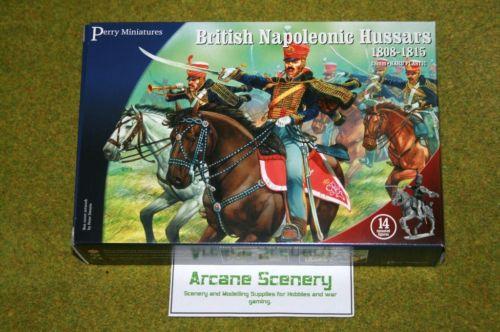
This is a painting project with 27th Enniskillens from the Waterloo period. I am painting a set of Perry Miniatures plastic models, building them straight from the box, using the different components to produce a British firing line.

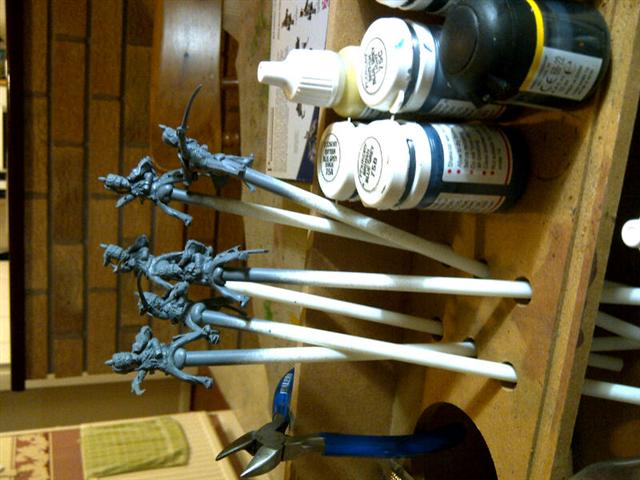
To build the models I’ve simply given them a good clean up, with a scrape of a scalpel and used a sanding board where necessary, and assembled them using my favourite glue, Revell Contacta Cement which comes with a the needle type applicator. Once they were all put together I have sprayed them with army painter grey paint,so they are prepped and ready for painting.

Just a few words about the colours I’m going to use. I intend to just produce a very basic finish for wargames standard. I’m not trying to produce the sort of standard you might see in a magazine, and certainly not the standard you might see in a millitary modelling magazine, where some of the painters are creating works of art. These are figures that are going to be used on the table, but I obviously want them to look good enough to sit in my cabinet when not in use!

I’m using basic colours and am not going to get too hung up on the exact shade of colour for a particular item, as long as they’re a reasonable approximation of what you might expect to see. So for example, I know that on some blogs and forums there is great debate about the actual colour of the British Redcoats; whether it was really a brick red, or a dark red, or was it really a pink because they were faded… I don’t really want to get into all that, because I just want my redcoats to have red coats. So when it comes to it I will use a red paint and the same principle goes for the other colours.

Because I am producing a regiment, I won’t paint in intricate detail. For instance I am using chocolate brown for the hair, every now and then I do use a different colour, to give a bit of variety but by and large they’ll all get the same brown colour hair. I’m not too worried about highlighting colours. I will do some highlighting later on, but basically I am just trying to paint the basic colours in block and will use army painter quickshade to provide the shading. Some people don’t particularly like quickshade, and some people think it is the best thing ever. I like it because it allows me to produce figures to a reasonable standard, relatively quickly, with the emphasis on trying to produce a wargaming unit rather than a piece that would go into a competition.

I tend to paint as neatly as I possibly can, and I work from the inside of the figure out. So that I know that the next colour I am going to apply will go over the colour that went before it. For example on the rifles, I’m not too fussy about how I paint the brown stocks, because I know that if I go over the barrels, when I come to the next colour, the gunmetal, I can correct any errors I have made. Where I do try to be careful is when I’m coming up against a colour I have already painted. So when I am coming up against the flesh of the hand on the barrel I try to be as neat as I can there.

I am not a fast painter. I do know people who can turn out figures very quickly, but for me it takes approximately, 20 to 30 minutes a colour for each six figures,  depending on what colour I am painting. So bearing in mind I’ve got twelve colours we’re talking about six hours work to paint these six figures. A point I would make about painting, when it comes to painting units, obviously paint the number of figures you feel comfortable with. I like painting about six at a time, as it just about keeps my attention. I do get frustrated as we get towards the end and feel as though I’m not making any progress,but six figures I’m comfortable with. Some people paint more, and manage to knock out whole units of thirty.

So I started first of all with Vallejo 955 set flesh to paint their faces and hands.

Next up is vallejo 950 Matt Black and again very straight forwardly you paint the hats, the backpack, the cartouche and of course the bayonet scabbard under the bread bag.
So that’s the first two colours done and that’s about an hours work.

And we’re now about to start with a brown and we will use Chocolate Brown 872 to paint their rifles and also to paint their hair.

The next colour will be to do the bread bags which is Iraqui Sand colour 819. Once the breadbags are painted with the Iraqui sand, which is basically an off white colour next up is to paint the redcoats and the colour I have chosen is 957 Vallejo Flat Red.

Vallejo colours come in a very nice convenient bottle, all you need to do is pick it up and give it a good shake – it always helps to shake the bottle to make sure the pigment is mixed, and then squeeze out a little dob onto your palette. The palette can be almost anything. I use an old tea plate that I ‘stole’ from my wife when she wasn’t looking, and I’ve had it for about twenty years. Also, I always have a tub of water next to me and tend to dip my brush into the water almost every time I use the paint, so that the paint is nice and thin and goes on easily.  The disadvantage is that you might need to do more than one coat – this is particularly true of red. I don’t know what it is about red but it doesn’t appear to be a particularly well pigmented colour, no matter who manufactures it. The Vallejo is one of the best, and goes on quite nicely, but I often feel a second coat makes it look a little bit better. So although I’m only telling you about one coat, I will go back at some point and do a second coat particularly on the sleeves and the bits that obviously show. The other thing about the painting the red is that I do tend to paint over the whole torso, even the parts where the lace and strapping will be. I can come back to those later and touch those up. Don’t be too worried if you go over the lace, because it’s very difficult to paint inbetween the lace or where the lace will eventually be.

Next up is the water canteens. From what I can see the British used a light blue and as it happens I don’t actually have a light blue on my paint selection at the moment, but it is not very difficult to mix. Take a bit of light grey, put a bit of prussian blue in it and if necessary lighten up with a bit of white. I know mixing colours can sound a bit daunting because you might not get the right colour, but on a figure of this size as long as you get a light blue it won’t really matter too much.

I mentioned painting the barrels of the guns in gunmetal, I think that historically speaking, if we were to be absolutely accurate, the barrels of the brown bess were a darker colour or even a dark brown, but I take artistic license and like to see that my gun barrels are gunmetal. It makes them stand out, adds a little life to the figure, and makes them look a little bit more pleasing on the gaming table. If you want to be strictly accurate you may have to research the colours more, but for me, seeing the gunmetal barrels glinting on the battle field just pleases my eye. I take the same liberty with other colours. For example when it came to painting my Kings Own Fourth Regiment, they have blue facings. Strictly speaking, that should be a very dark blue bordering on black, but I just wanted the facings to be obviously blue, so I tended to use a mid colour blue, which would make it clear that they had blue facings. Again that won’t be to everybodys taste but I want to be able to tell my regiment on the table even if they are not near the Ensign!

Having put the gunmetal on the barrels, the next colour I am going to use is brass and I’m going to put a bit of detail on the guns, the trigger guards the butt plates and also the brass belt plates on the figures. This will finish the metallics that I will use, which is a really good time to change the painting water. The reason we do that is that metallics can leave a little residue in the water, so I would always recommend changing the colours when you have used metallics.

The next colour is to do the facings. On the 27th Enniskillen regiment the facing colour was buff, so this also meant that the straps were usually buff as well. It depends where you look to see the colours, in some books I have seen the straps as white, but I have used British Napoleonic Uniforms: The First Complete Illustrated Guide to Uniforms, Facings and Lace: A Complete Illustrated Guide to Uniforms and Braids  and the Mont St Jean website, and from what they show, it is buff all around.
The vallejo colour is 976 buff, and we’re going to paint the facings, the cuffs, the collars, the turnbacks on the redcoats and all the strapping, with the exception of the water canteen strap and some of the extra strapping on the haversacks.

The next colour that I will put on is the white, and that is obviously to do the lace. I will start at the top and edge the buff colours, we do the white epaulets and because this is the flank company, they have the larger ‘swallow’s nest’ type, then the lace on the cuffs, pick out the lace on the redcoats as best you can, pick out the lace on the bottom edge of the jacket and then edge round the facings on the turnbacks. The figures are now very close to being finished.

The final colour I will put on will be the brown strapping on the water canteen, and am just going to use Vallejo 871 Leather brown for those bits.

The last picture shows the figures pretty much finished. I will be to use Neutral Grey 992 to touch up the trousers and the napsacks (the dip will add texture and you will see that in later the pictures) and at that point we’ve nearly finished the block colours. For detail I will use a natural steel to paint the buttons on the cuffs.

I’m going to leave them overnight, to dry and also because you can spend so long looking at the figures that you miss the obvious. So tomorrow morning I will have a look at them and correct any obvious mistakes. I will go back to the red and give that another coat to make it a bit brighter, and then that’s the block painting finished.

I’ve given the hats a very light dry brushing with grey to bring out the detail. At this stage it is evident that when you get close up to the figures that there is a lack of shading and texture. Its the quickshade that is going to provide these shadows and it will smarten up the painting providing an ‘edge’ to the different areas of the figures.

In part two we will show you the finished figures…

Friday round up

Bonjour mes amis ou mes armées…

Last week we skipped the Friday round up, sorry chaps.

We do have some new and forthcoming items to make up for no round up last week…

Not new, but reissue is the Warlord Roman batallion/starter set; this reissue offers a great bargain at a penny under £60 you get:
60 Plastic Legionaries
20 Plastic Praetorians
20 Plastic Veterans
24 Plastic Auxiliaries

Also from Warlord there is…*deep breath* Dacian Commander, Roman Casulties, Bonnie Prince Charlie, the Duke of Cumberland,and Imperial Harquebusiers.

From the Plastic Soldier Company we have two 15mm Sherman Tanks, in umm wet and dry

We now carry all the Artizan Wild West range…

And from AFV we have some ammo  and tracks 


Saws…we have saws (yes that’s saws not sores…) from Expo we have the ultra thin razor saw and the jewellery saw

AND forthcoming we will be stocking some more Tamiya items and from Zvedza we will have the 38T tank and the Reconnaissance group forthwith…

If you’re on Facebook why not befriend the Arcane mascot/valet Louis or become a fan on our page


The Only Wargamer in the Village

I have been fortunate to find that I was not the only wargamer in the village, and there is now a small band of wargamers in Bingham that meet once a month.

This month we were guests of Andy Callan, a very experienced wargamer and historian. Andy was the inspiration that led me to build my own wargames table. It was after i saw him set up that I realised I could build me own wargames room in my garage (see previously).

Andy had set up this months’s game to be a refight of the Battle of the Byne, and using his own in house rules and figures, with Andy acting as umpire, the Protestant Army of king Billy once again attempted to cross the Boyne and defeat the catholic King James.

Without taking you through a blow by blow account of our battle, the game pretty much followed history. Once again the Elite Dutch guards (commanded by Dave King this time around) forced a crossing at Oldbridge to capture the village, whilst the Williamite cavalry were eventually able to cross the Boyne and hold back the Jacobite cavalry, forcing the Jacobite army to retire in good order.

The pictures show the various phases of the battle.

Also of note are the figures being used. Andy is still a great fan of 20mm or 1/72nd scale plastics, meaning that he has amassed the most amazing collection of armies as a result.

He is able to field comprehensive armies from most of the recognised historical periods.

So, if you are thinking of starting in the hobby, don’t think that 28mm is the only scale. You can build huge armies using 20mm figures and the result is just as much fun as battling in 28mm.

Do just do it and B&Q it! A guide to making a war games table.

I had wanted a war games table for years but had put off making one for all sorts of reasons: it was too expensive, it was too difficult to make; I didn’t have anywhere to put it; I couldn’t make up my mind what sort of table it should be – themed for a particular period and so on which resulted in the fact that I only played war games at Warhammer world. Not a bad venue, to be sure, but recent changes in policy there left me with the feeling that it was time to be independent (to get a flavour of the GW policy have a look at the following thread……)
Continue reading

Tuesday Roundup…

Yes it’s a few days delayed, sorry folks, but here’s what’s new at Arcane Scenery…

We’ve restocked on Renedra products and now have the full range in stock.

New from Renedra is the Pontoon bridge.

A great accessory for wargamers allowing them to biuld either a pontoon bridge or a simple footbridge. Theres lots of potential to use the pontoons as seperate items and conversions. The bridge is of a type used through many historical periods.


We’ve had an Expo Tools restock, so good availability on all these products. New to us is the Glue & glaze. A specialist product that allows you not only to glue clear plastic components without ‘fogging ‘them but also allows modellers to glaze small windows ( such as on airline models, ship kits etc) as well as headlights on cars, tanks etc. This expands our specialist adhesive range and we have many different glues for different tasks. Please check out our previous blog article ‘super glue is great…. but there are other adhesives!

Restocks on Emhar with more 1/35th scale WW1 infantry & artillery now available, although this is selling fast and some lines have already sold through! We will get more.
We have also received many more of the Conflix scenery range buildings in. These are amoungst the best value ready painted buildings on the market and look great on the war games table. 


New Warlord releases are in. Favourite is the Napoleonic Vivandiere, as she would have been with the troops. After all , what soldier could resist a woman offering him a beer…..Mind you she comes armed with a pistol so beware!

Also released, Scottish casualties for pike & shotte and new German army Command, Flak 43 and Leig18 infantry gun.


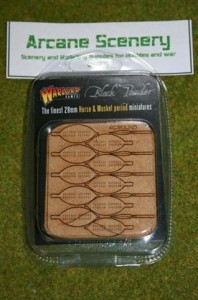
Finally, for now, we have just received new laser cut MDF movement trays. These allow you to make perfect trays and finish them to your own basing colours.

Guest Modeller of the Week: Bernard Lewis

We decided that instead of just talking about Arcane and Steve’s latest projects and battles, you might like to know what other members of the modelling and wargaming community have been up to.

We start this week with the very affable Bernard Lewis from Mantic Entertainment Ltd.

Bernard has recently been making some rather unusual Celtic base groupings for Hail Caesar which have both Celts and trees on the base.


” I used single bases because for Hail Caesar you don’t have to use individual bases, and began with putting trees on just one and found I liked how it looked” says Bernard.


As well as providing some contrast on the gaming table against other players’ bases, and providing the Celts with some hiding cover, the bases have some other advantages…


“I’m a slow painter, and this way I can get more done sooner!…It’s also good if you’re budget conscious”


Currently Bernard is working on a river crossing base to sit alongside the Celts with tree coverage, and then plans a base with Celts fighting Romans.

Obviously here at Arcane Scenery we are big fans of scenic bases, we think Bernard has done a great job of making some extra interest and we may well be [ahem] copying him soon…
 

How to shop with Arcane Scenery: the eBay store

Okay first of all for many of you this is going to be a case of female grandparents and chicken foetuses, and if so, you can probably toddle off to skirmish. But for those who find eBay a world of bafflement hold on, we’re going to explain (or at least try)…

When shopping on the Arcane Scenery eBay store, on the left hand side of your screen you will see a search box and a list of shop categories. If you are looking for a specific item, simply type the name into the shop search box. For example, if you are looking for a Tiger Tank, you can type ‘Tiger’ into the search box and all of the different types of Tiger tank will be displayed.

If you are just wanting to browse, to find something that takes your fancy, you can use the categories which are located below the box. The Arcane Scenery store uses two types of category:

  • CAPITAL LETTERS are for the different Manufacturers that are currently stocked. So if you would like to view just AIRFIX KITS, click on this category and all of the Airfix kits currently in stock will be displayed. You will also see that the sub categories are then revealed. So you can now look at the sub category that interests you by clicking the sub category. If you want to look at Airfix planes, just click on this sub category and only these will be displayed on your screen.
  • In the lower half of the shop categories list, the items can be sorted by Period or type. So if you would like to see all of the Napoleonic era items from all manufacturers, simply click on Napoleonic Wars and they will be displayed. When you click on a category, a set of sub categories will be revealed to enable you to browse by scale. So you can now choose to look at just one scale of Napoleonic figures by selecting from the list displayed.

The historical periods that are listed are somewhat simplified. The Ancients & Romans will cover anything from cavemen right through to around 1066 and the Normans & Anglo Saxons.

Medieval Wars will go from 1066 through to around 1600 and for simplicity, takes in the Renaissance as well. Pike & shot features the English Civil wars and runs to about 1700. Horse & Musket runs from 1700 through to 1780 and then it is on to Napoleonic Wars which only feature the wars of Napoleon.

And this week we have a new category especially for all you Flames of War fans:- “15mm, FOW Compatible Kits etc” which can be found in the historical section under The Second World War.


Arcane Scenery’s little secret

For some time we’ve been keeping a little secret from our blog readers. Sorry, but once you see the secret, you’ll forgive us, we’re sure.

Arcane Scenery now stocks a range of beautiful wooden buildings suitable for wargamers. These intricate creations are currently available as a range of Western buildings for y’all cowboy fans, and WWII buildings suitable for Flames of War fans. We’re going to tell you about them in more detail in another post, but in the meantime here’s a preview… And, just because we kept a secret from you, here’s the range now available

Friday round up…

This week we have some great new releases and restocks…

First of all some treats for all you Flames of War fans…We are now stocking some lovely buildings, which will be discussed in more detail on Monday, suitable for town and village settings. There’s also some new Zvezda WWII items, such as this 1/100 Russian BT-5, which snaps together rather than being glued. Helpful for those with bigger fingers, or a tendency to glue themselves…


We also have new Zvezda Spartans


And this week brings restocks on Pegasus items.

The most exciting new stock this week is the Roden Rolls Royce Armoured Car from 1914.   It is 1/35th scale and recreates one of the earliest armoured cars from the British military. The cars, which were use in World War I and the first part of World War II, used the chassis from Silver Ghosts and added space for a Vickers turret. They were used in both Western front theatre and in the Middle East.  This is a lovely model which would work well in any First World War scenario…


Friday round up

It was yet another bank holiday this week so not many releases…

The new  PzKpfw IV Ausf H Panzer IV 1/72 scale Revell kit 3184 is now in stock ready for WWII battles

The armoured fighting vehicle Pzkpfw. IV formed the backbone of the German tank units in World War II. Between 1933 and 1945 it was built in greater numbers than any other German battle tank of the period. The H version, which for the first time was equipped with side skirts to increase armoured protection, was built from 1943 to 1944.

Model-details:
– Authentic surface details
– Movable turret with stowage lockers
– MG 34
– Side aprons
– Injection moulded tracks with individual links and segments
– Decals for two German versions
No. of parts 204
Length 97 mm
 

ummm and that’s about it on new releases this week. However, Italeri have a forthcoming new release that we thought you might like to know about…1/35th scale Lend Lease U.S. Truck with ZIS-3 Gun


The US6 transport lorry, developed by Studebaker at
the beginning of World War II for the American armed
forces, was created with an initial lot of 200,000 in a
good thirteen versions to meet a variety of logistical
needs: troop and material transport, refuelling, and
heavy-trailer hauling. The US6 was a 2.5-Tonne class
with petrol engine and integral traction in the dual
6×6 and 6×4 configuration, guaranteeing excellent
off-road performance.

Despite the vehicle’s incredible characteristics, it was used in a limited fashion by the American armed forces. The Soviet armed forces, on the other hand, used it extensively, having received from the American government in 1942 (to assist in fighting the Germans), over 105,000 vehicles in the 6×6 version and 90,000 of the 6×4’s. In Russia, this
vehicle was widely used as a tractor for anti-tank ZIS-3 cannons and other OBC. Furthermore, a “Katiusha”
multi-missile launcher was added to the US6 frame.

This vehicle should be available some time in the next month, but rest assured we will let you know as soon as it is here…

Welcome Back WarGames Factory

For sometimes I have been unable to get hold of stock of the WarGames factory range. There have been various rumours and rumblings as to why this should be, but the good news is that WarGames Factory are back and available.

It’s a nice range of figures with some interesting subjects. All of the figures are produced in hard plastic meaning that they are great value for money and convertible.

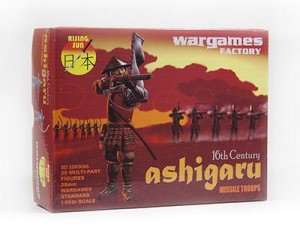
Before looking at the figures I must mention the packaging. As an internet business the majority of items I sell are sent through the post, and the new packaging provides a significant improvement of the polythene bags of old that provided little to no protection. However, though more sensible and protective the new boxes are not especially attractive and do not show these wonderful products off to their best. So please don’t let the boxes put you off!

In the same vein, I am not normally critical of other people’s painting because I know how much hard work goes into producing a model figure, and often these matters come down to a question of taste. However, the figures on the front of the War of Spanish Succession do not do the full product justice. Indeed, it looks as though there’s a regiment of Dick Turpins marching down the road!
Fortunately the painted models (pictured) on the back of the box are much better and do show what can be produced from the contents.

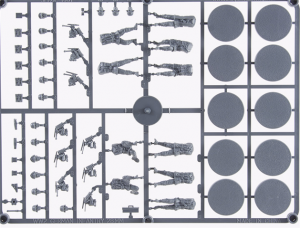
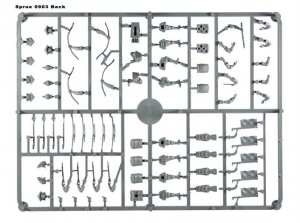
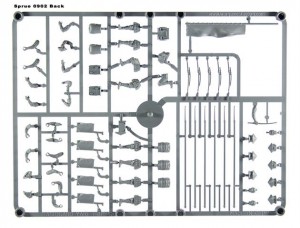
Here’s a picture of the sprues in the Spanish Succession box. They are nicely moulded with plenty of detail and there are three basic poses.

One of the figures has a split torso allowing you to produce either an officer, drummer or sergeant figure. There are also parts to allow you to make a flag bearer or ensign. The quality of the moulding is excellent, with plenty of crisp detail that should make painting a joy.

With a total of 15 different head variants, spare arms to give you a firing or marching pose, there’s plenty of scope for conversions and variety in the box. With a total of 36 figures for £16.49, the box is excellent value.

We’ll take a look at the other boxes available from WarGames Factory at a later date, but here is a list of the one’s that we stock:-


So a very welcome return by this manufacturer, hopefully the problems are now resolved and we look forward to many new releases.

Persian Infantry

Zombie Hoard

Horse and Musket

Friday Round Up

We have received in our restocks of Expo Tools, for those of you who aren’t familiar with this range, Expo do a comprehensive range of tools for the modeller with everything from knives, files, drills, sprue cutters through to magnifying glasses and even reading glasses.

In addition Expo also supply the superb Albion Alloys range which includes brass tube, rod and sheet, aluminium tubing, and precision engineered microtube.

We have also received their new releases a plank bending tool, and two varieties of pin pusher.


You may not have heard of these tools before, they are invaluable for railway and boat modelling enthusiasts, but we also think they are extremely useful for all you scenery builders out there.

In scenery this week we have restocks and some new items. The Treemendus individual leaf packs allow you to super detail your bases, or even produce your own trees. We have restocks on Javis trees and scenic scatters.

We also have restocks on plasticard.

1 33 34 35 36 37 41