I’m never sure of the best way of painting cavalry. Should you attach the rider to the horse and paint the model as a complete item? Or is it better to paint the horse and rider separately? I’ve tried both methods and I think that when it comes to painting a unit of cavalry, I find that a batch paint for the horses and riders separately works best for me. I tend to paint the horses in two’s or three’s, varying the colour for each batch and then adding different markings to give some variety. The same goes for the riders, unless of course, they are in uniform.
It’s then a question of how to paint the rider. By this I mean how do you hold the rider when there is no base to grip?
my previous method of mounting riders for painting
I’ve tried several methods. My preferred method used to be to sit the rider on a ‘saddle’ of blue tack attached to a stick. I then upgraded this to the method above. A wire stuck in bluetack through a plastic tube. It was OK but a bit over engineered!
My latest solution is just to drill the base of the rider and use super glue to attach a cocktail stick. The cocktail stick is more than big enough to hold whilst you are painting the figure and gives you access to all areas! Once the model is painted, I simply clipped off the stick with my trusty Xuron sprue clippers and the rider was ready to attach to his horse. Cheap, easy and effective.
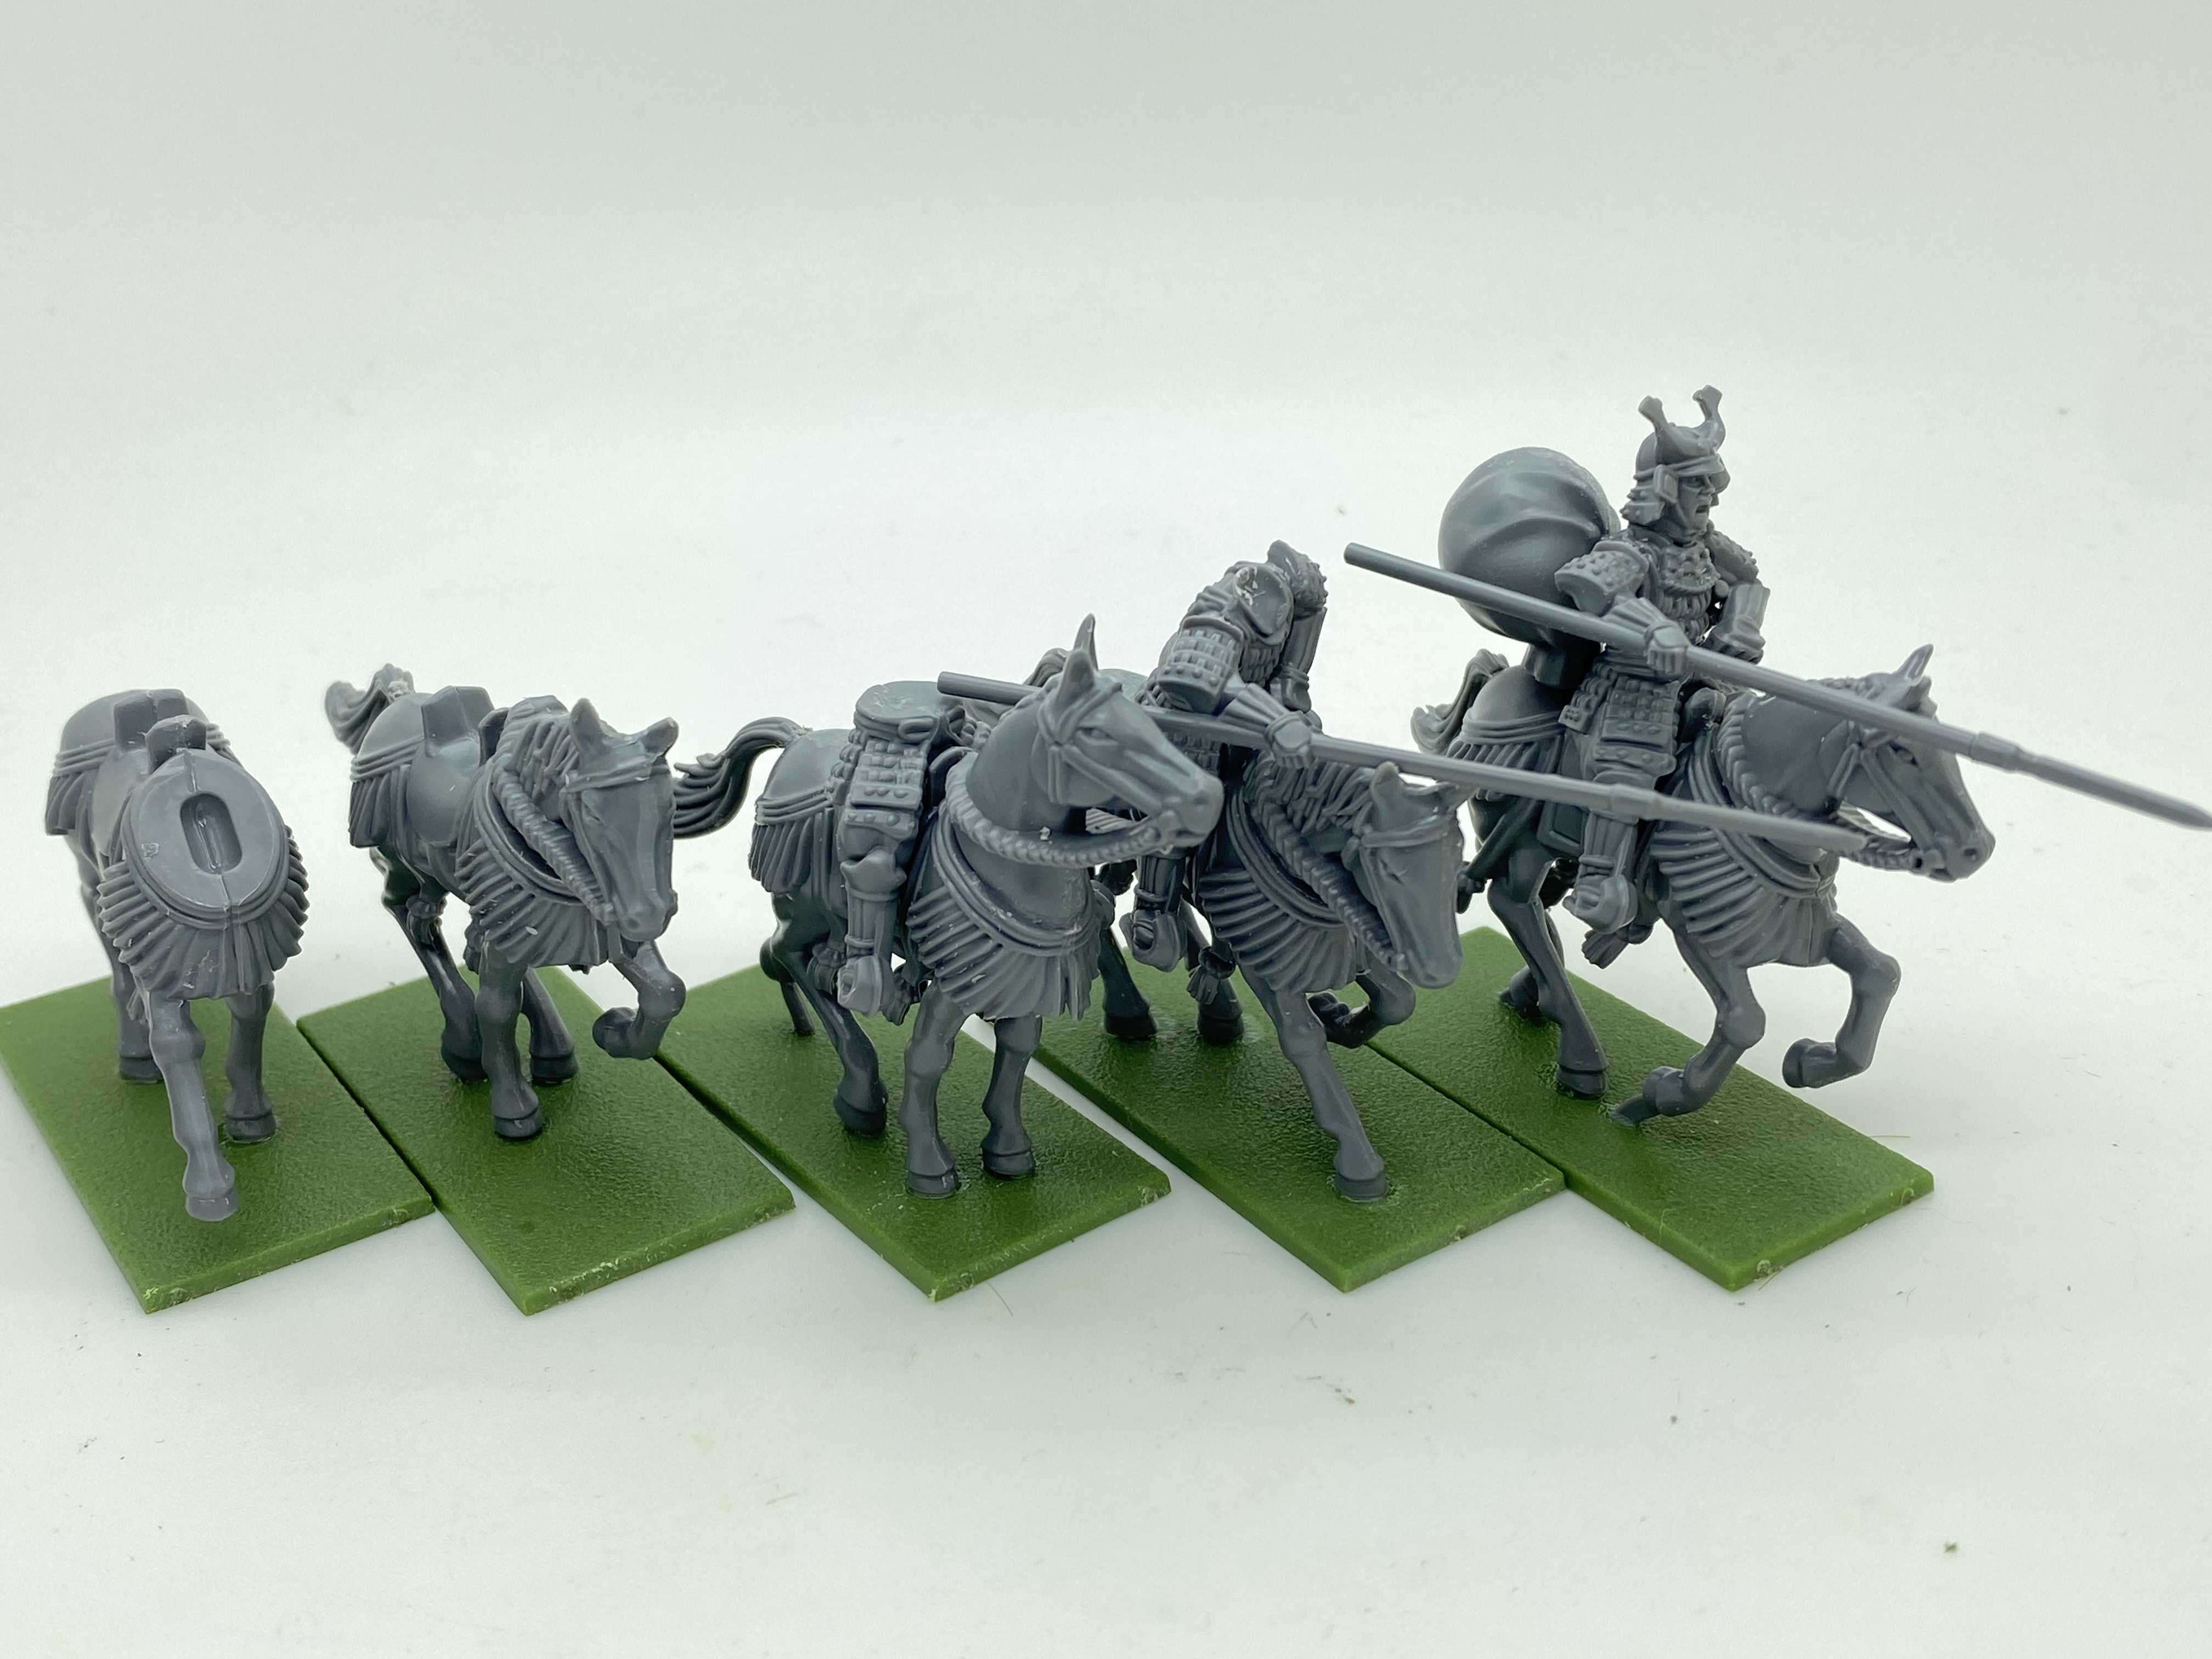
Samurai cavalry primed, dry brushed and ready to paint.
As you can see from above, I ‘plonk’ the stick into a blob of blutack in between coats to protect the paint from any damage or if a wash is drying.
The horses were painted separately as a ‘mini batch’Ready to paint the ridersThe nearly finished Cavalry – just the basing to complete!two out of six complete – just four more on the bench.
So, I have a new simple method of painting cavalry riders that seems to be both cheap and effective. Unfortunately, whilst it makes painting easier, it doesn’t make it faster. It’s taken me two weeks to get six horses and two riders completed. Just four more to go!
I officially retired on Thursday 28th March and with the Friday being Good Friday a bank holiday, it should have been an easy transition to a life of loafing and painting model soldiers. Hmmm. It didn’t quite work out as I planned. The fact that everyone else was off on their Easter break made it feel like nothing much had changed.
As grand parents, we found ourselves on child care duty for a few days over the last couple of weeks to cover the school holidays, so again, my time wasn’t quite my own. Add to that the glitches involved in closing a business down and the queries that have arisen regarding all sorts of family and other issues and it doesn’t quite feel like I have reached a state of contented bliss that retirement promised! Indeed, I have painted less in the last three weeks than I usually manage.
The good news is that it hasn’t all been work and complications. Eleanor ( my granddaughter) and I were able to finish off one of her modelling projects. She had been making and painting a Sarissa precision delivery van which she chose to complete as a Fresh Grape sales van. Most of the painting was done, it was just the basing to complete. Here’s the result.
Fresh Grapes anyone?
I helped with the ground work but Eleanor did most of the painting and was very enthusiastic when it came to adding the tufts and flowers! It’s a nice little model for her collection and I very much recommend the smaller Sarrissa kits as great little project for youngsters ( Eleanor is 8 years old), so long as they have an adult to help with the super glue etc.
Inside the VulcanA Buccaneer!Folland GnatElectric LighningTurning Cartwheels!
We also visited the Newark Air museum. Perhaps not quite on Eleanor’s agenda but Granddad thought it was appropriate. Actually, I thoroughly enjoyed the visit as did Eleanor. We were lucky enough to be able to sit in the Vulcans cockpit – it’s not always available. There is plenty to see here, mainly Cold War jets but a really good venue. Anyone coming to Newark to go to the Partizan Wargames show would be well advised to take time out to visit the air museum. It is less than 2 minutes down the road and well worth a coupe of hours from your day.
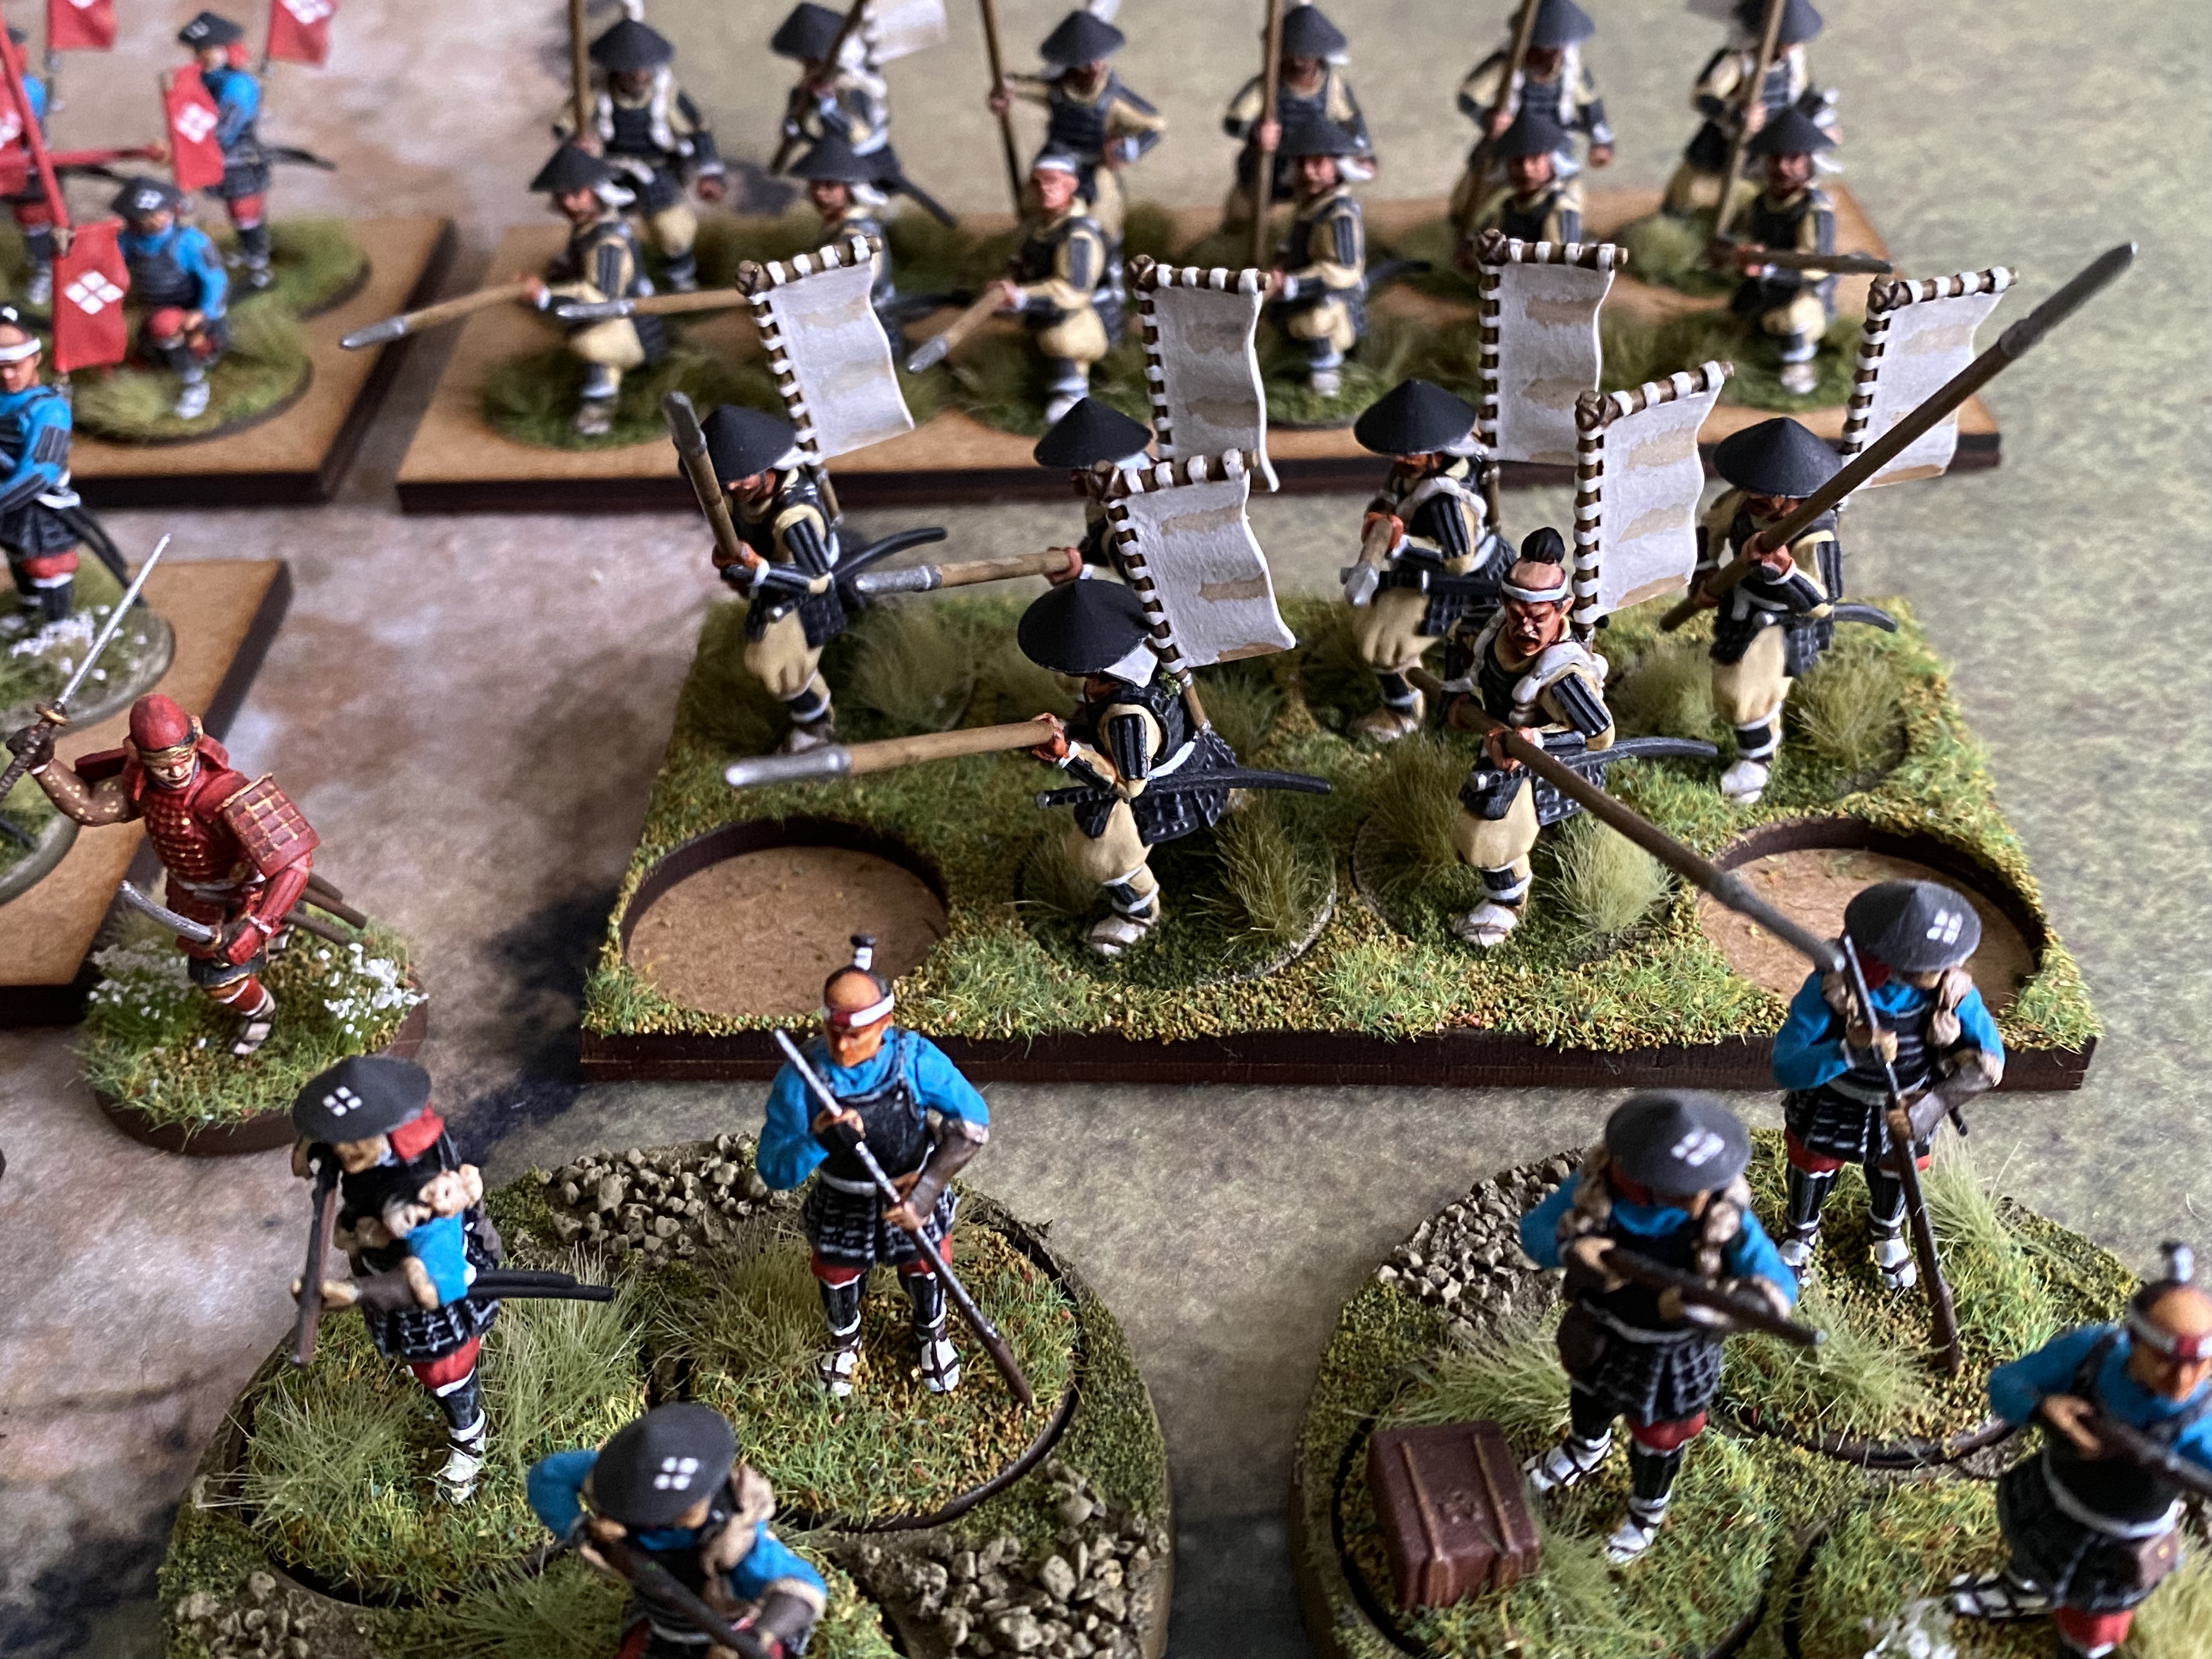
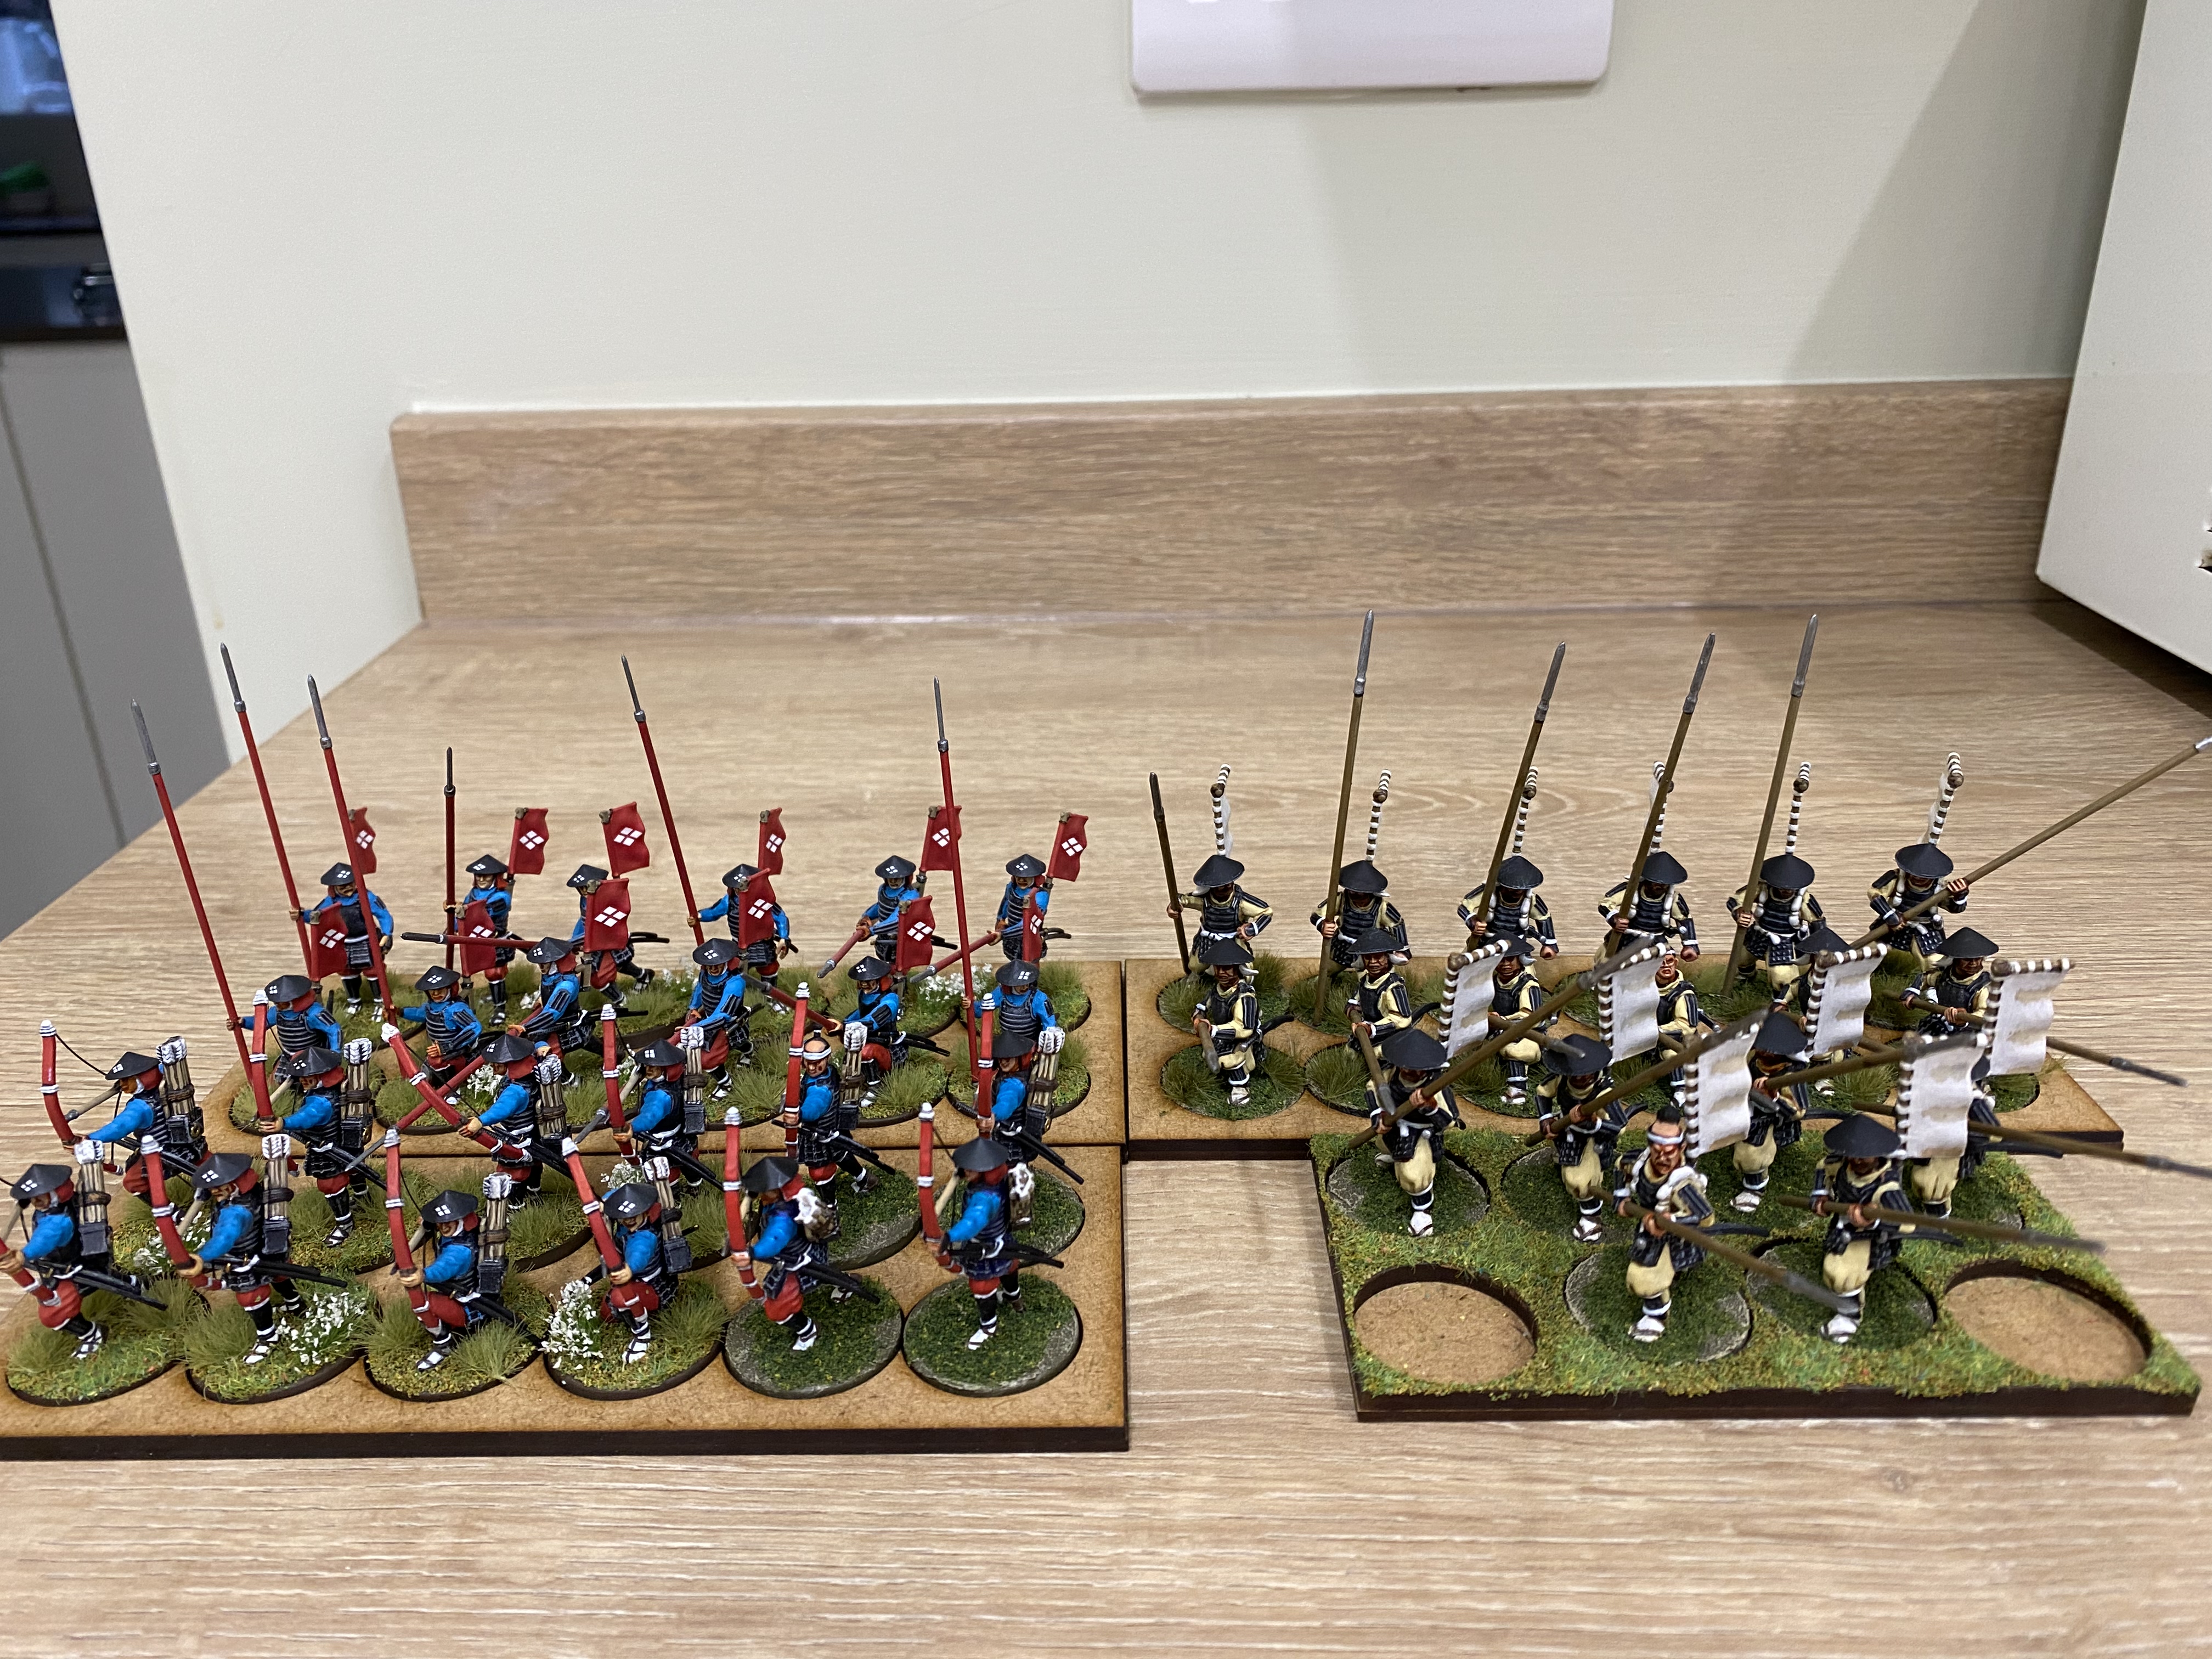
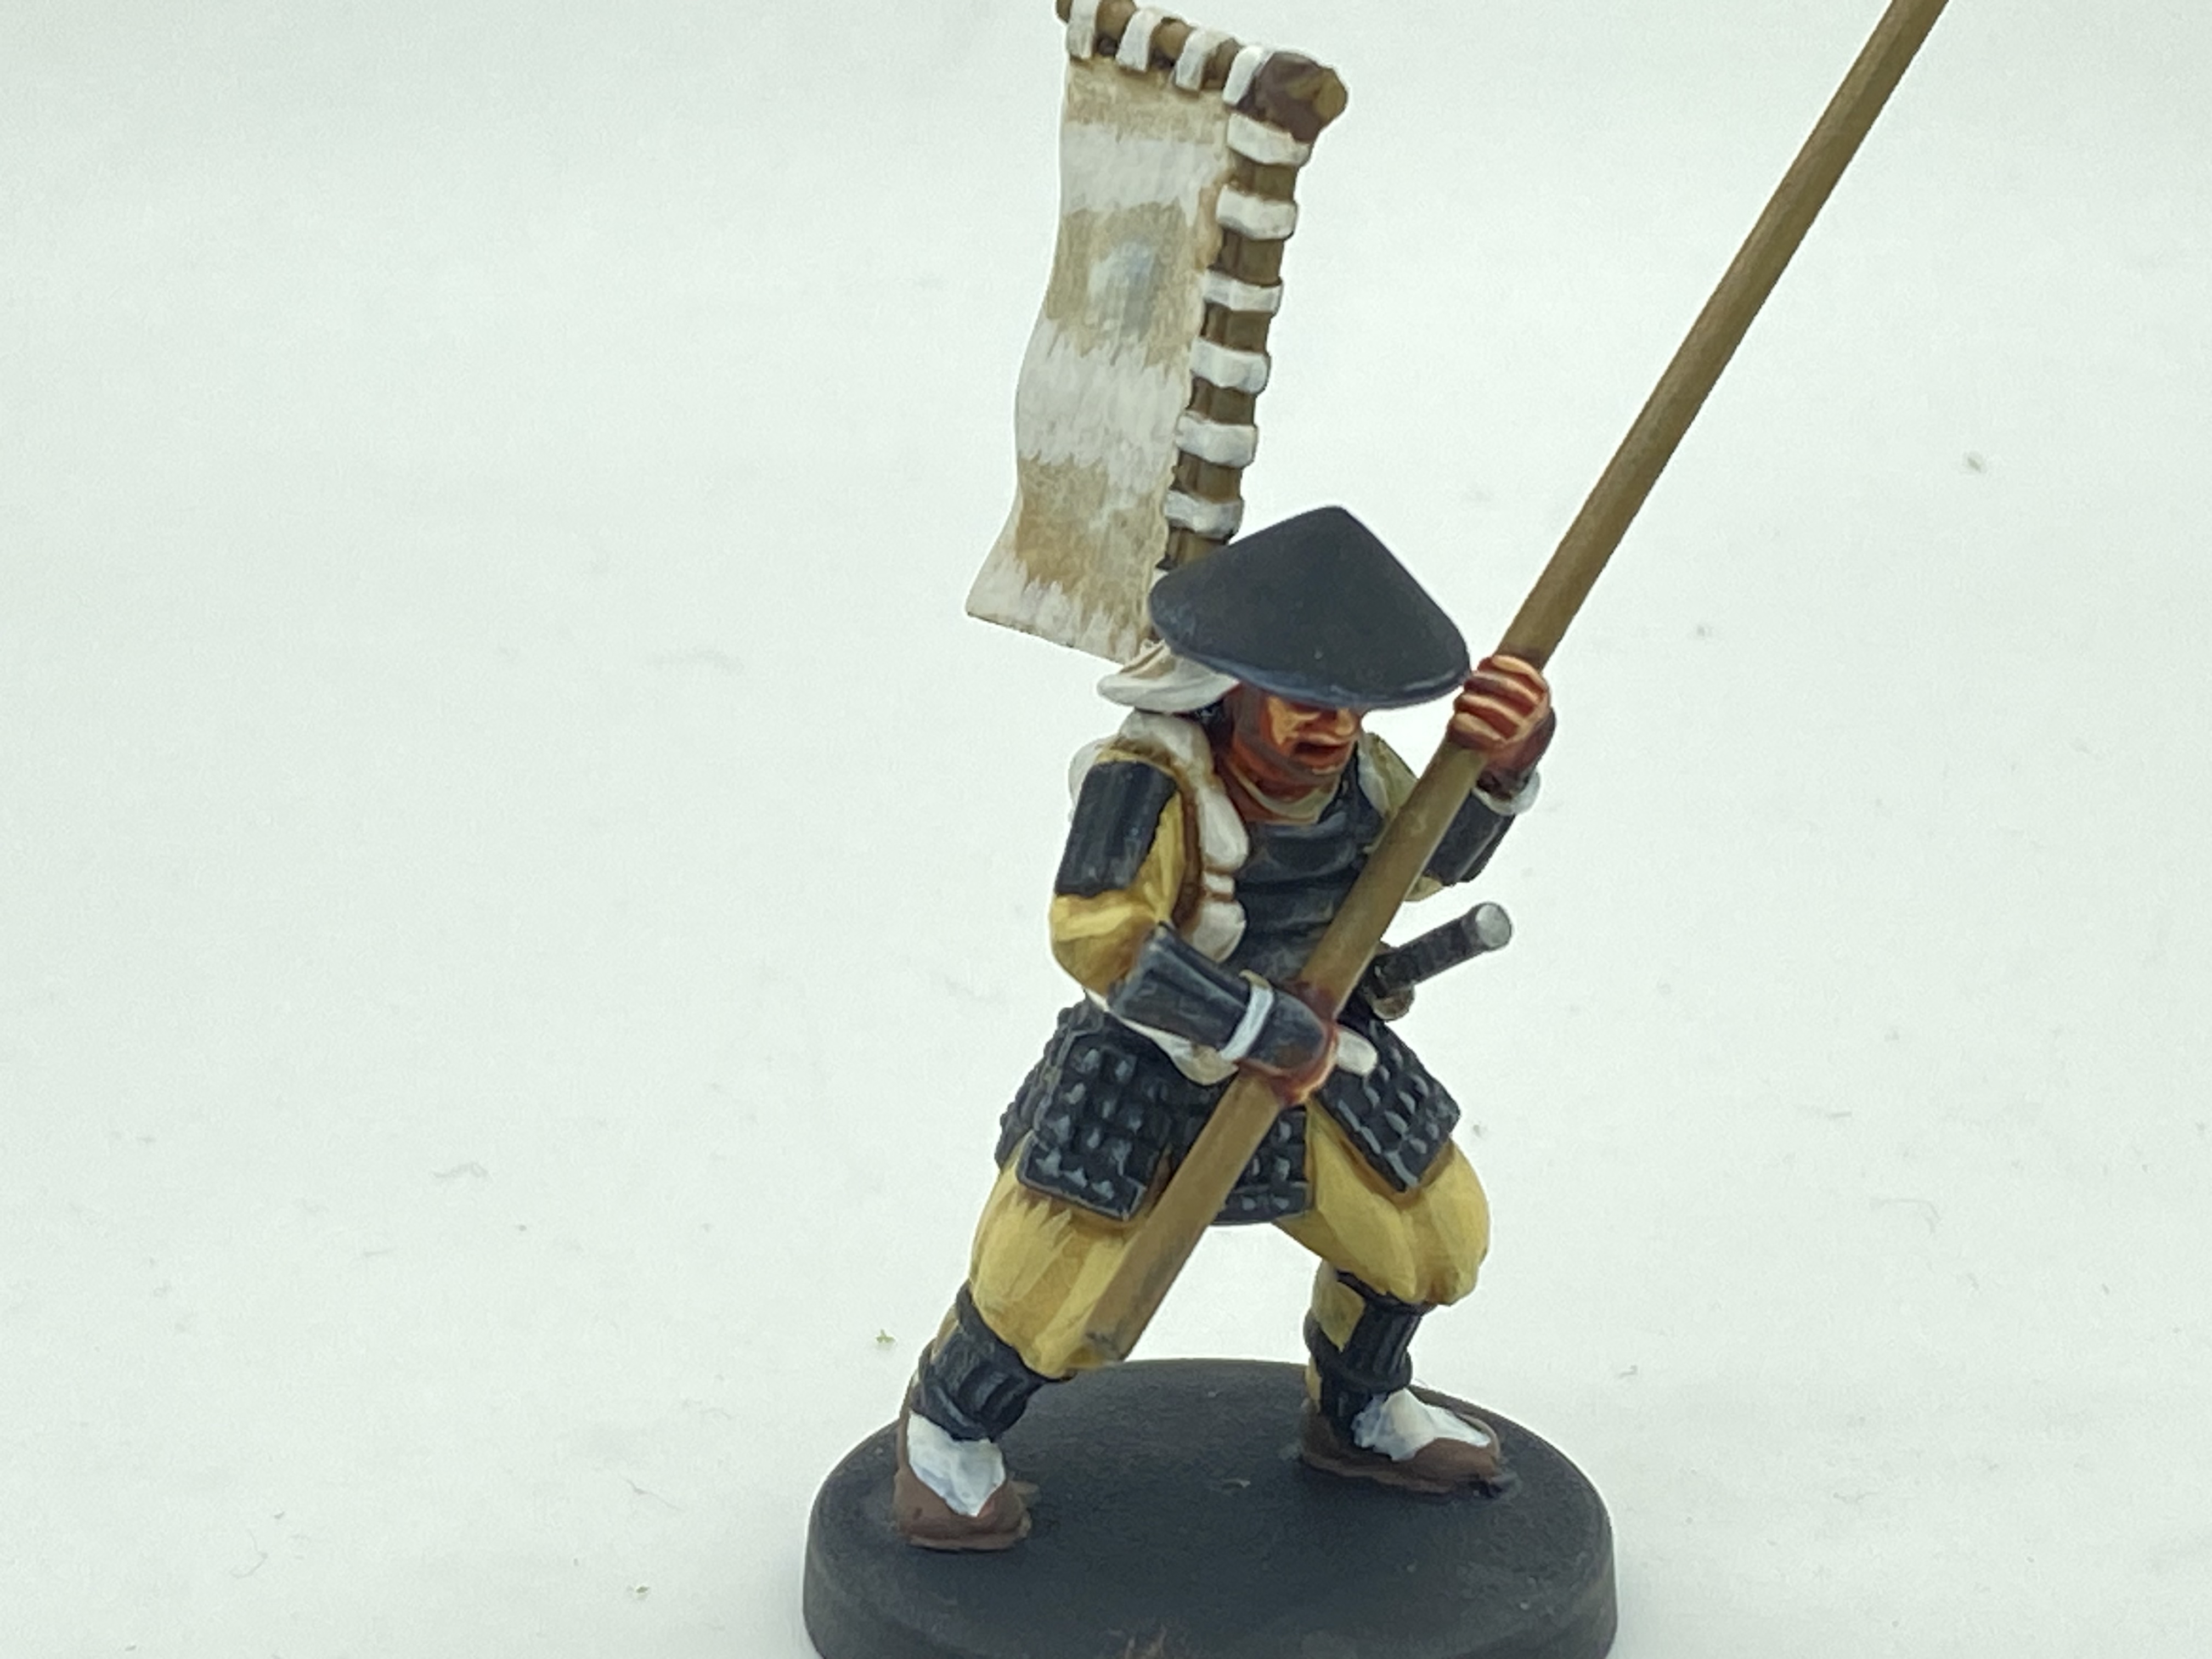
Ashigaru with teppo!
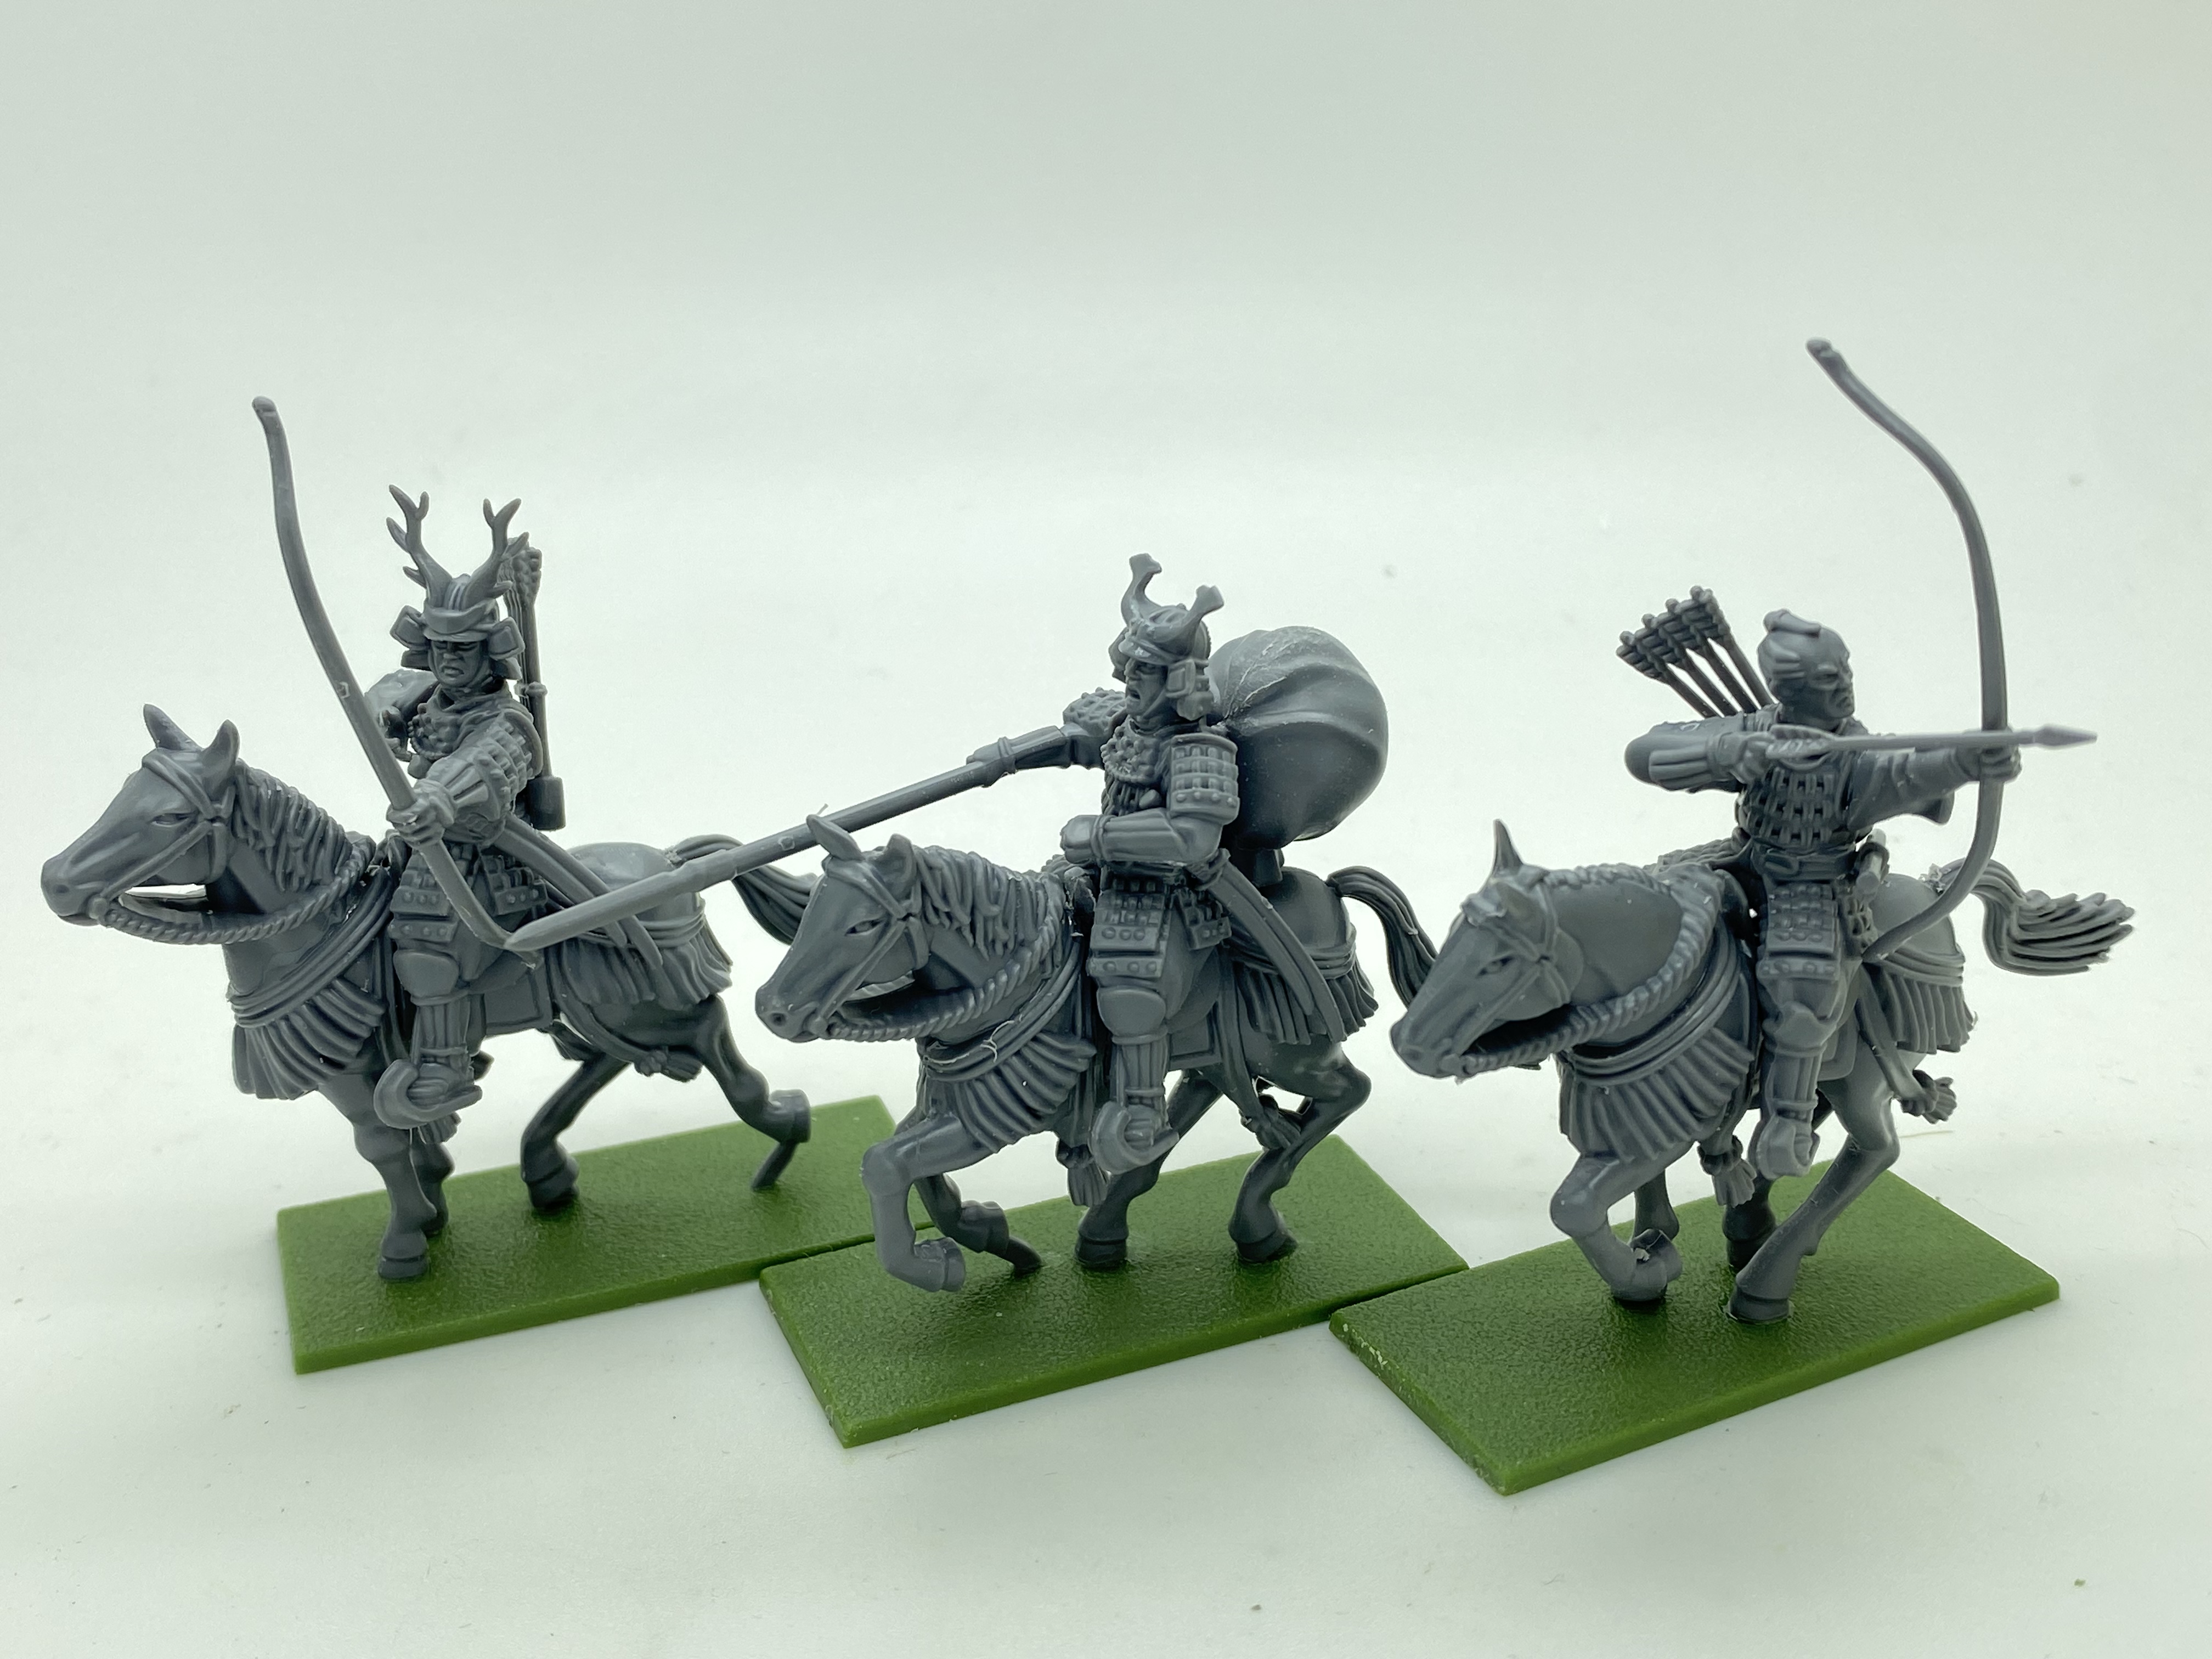
Despite all of the distractions. I have achieved some progress with my Samurai project. It has taken some time but my second unit of Teppo armed Ashigaru is now completed – just the movement tray to landscape! This now gives me 24 Ashigaru with Teppo, more than enough for the time being. So I’ve now turned my attention to mounted Samurai.
Ponies for the mounted Samurai.
I have six assembled and awaiting painting. I’ve decided to paint 2 light brown ponies, 2 dark brown, one black and one white one for variety. The horses are first up and you can see the first two are ready for their riders.
Mounted Samurai W.I.P.
I’ll paint all six horses first before returning to paint the riders. I’m hoping that now the Easter holidays have come to an end and I gradually tick off the job list, I’ll have a bit more time to get these finished!
If you’ve wondered where my blog articles have been over the last few weeks, I have been distracted by my decision to retire at the end of this March and the consequences of doing so.
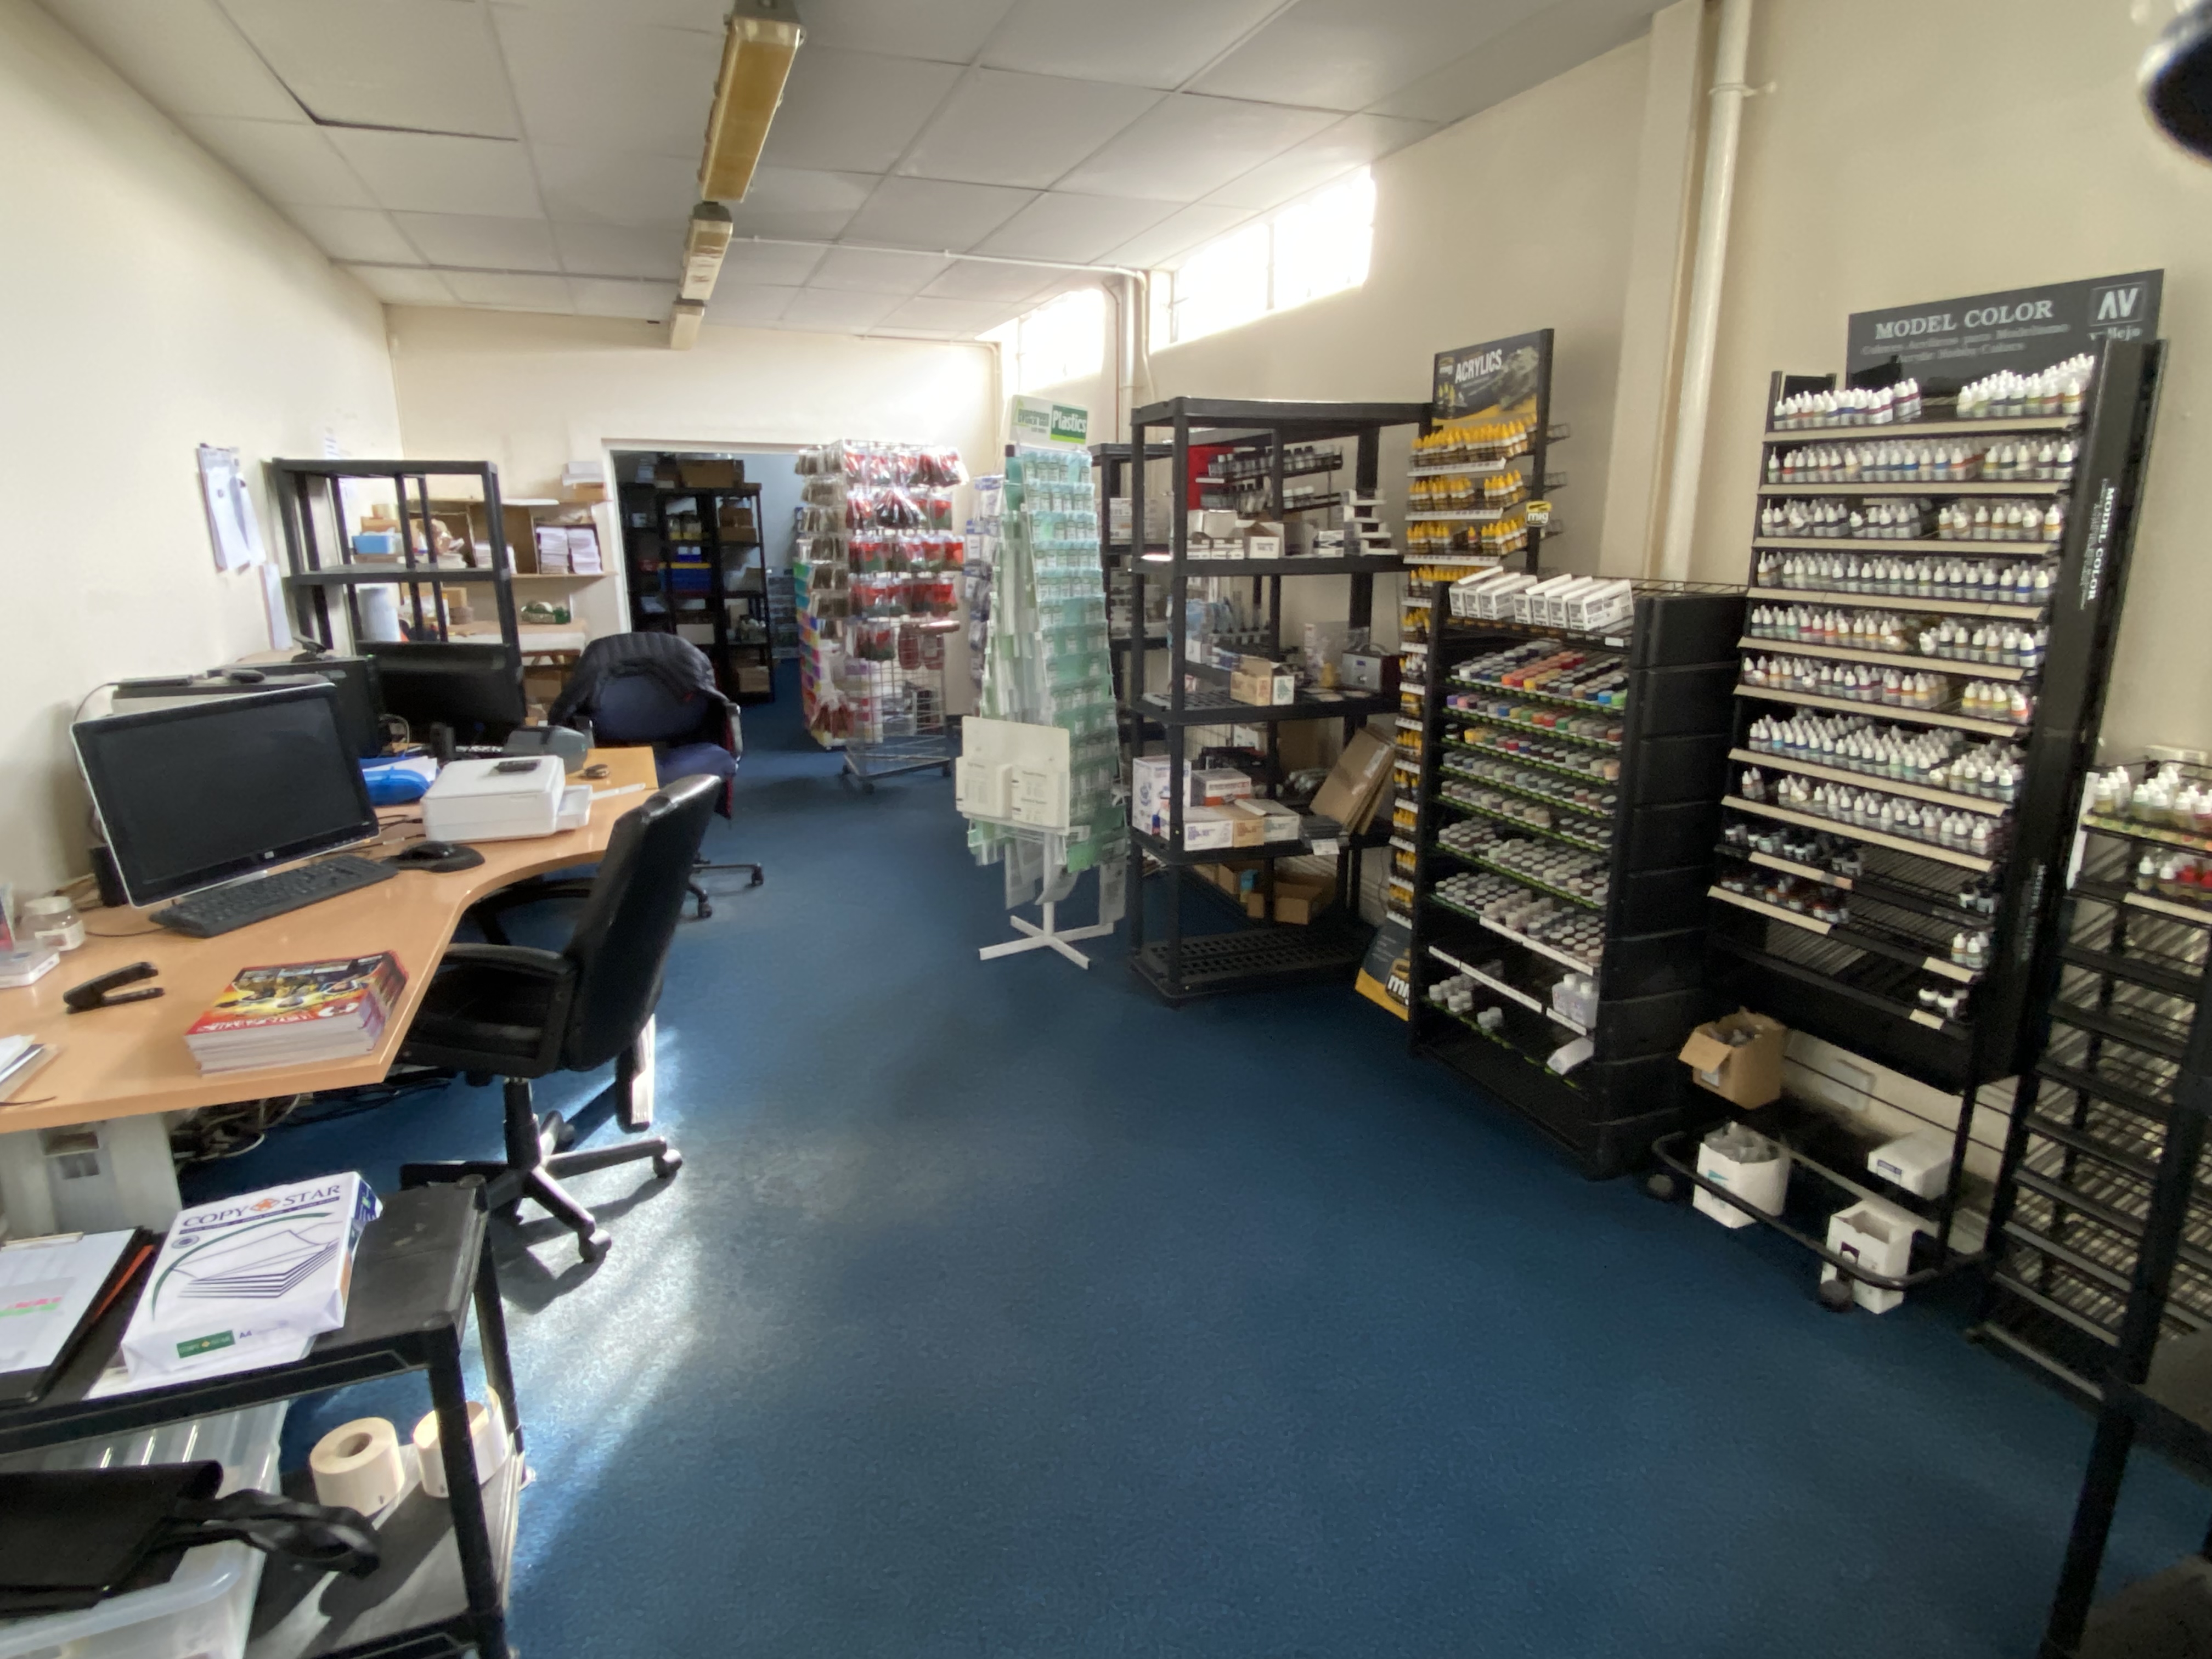
Arcane HQ in the Lenton Business Centre
I’ve been running Arcane Scenery with Julie for at least 17 years now and have clocked up just about 50 years working full time throughout my career, so it’s time for a change of pace and a chance to do something slightly different.
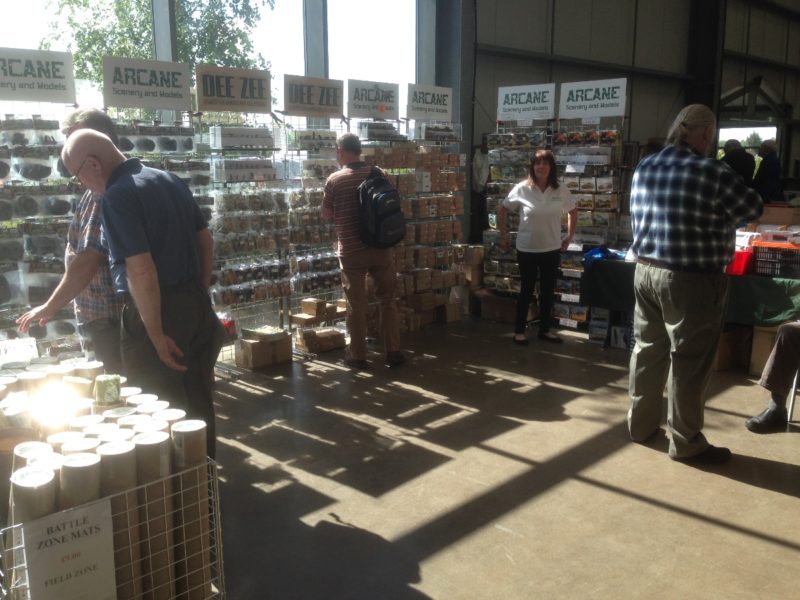
Arcane scenery at Partizan
As well as Julie, I’ve had tremendous support from the team over the years – the main players, Hayley, Rob and Kevin have all helped to keep Arcane running through some pretty tough times. Hayley and Kevin were stars through the very challenging COVID years.
As you can see,we used to attend number of shows, Salute, Derby and my favourite, Partizan- one and two! I have to say a big thank you to Pete Harris, who would often help and support us during these busy events.
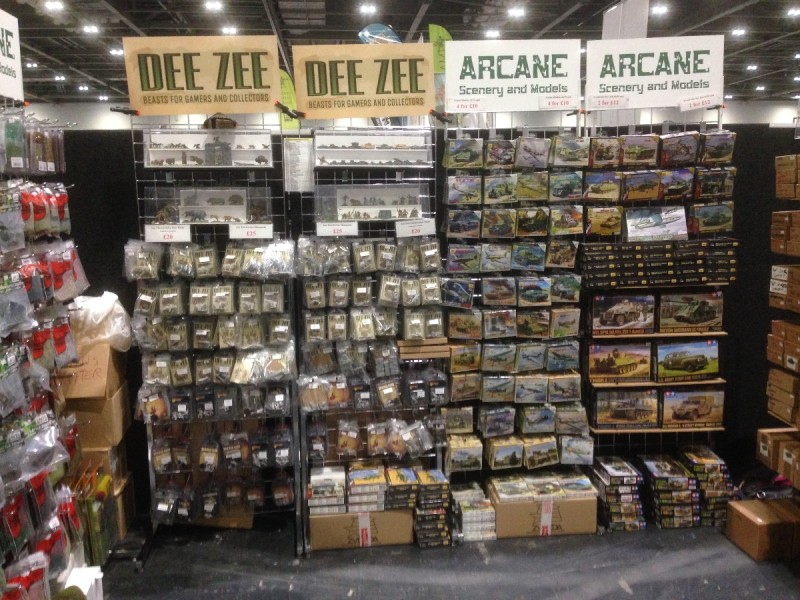
Another of our stands at Partizan
I’ve also had the support from some superb companies and their teams over the years. In no particular order, other than alphabetical, thanks go to Albion Alloys, Blitzkrieg Miniatures, Creative, Expo, Footsore, Gaugemaster, Hobby Company, Javis, North Star, Nortons, Pocketbond, Renedra, Sarissa Precision, Wargames Illustrated, Warlord Games and a few that I have forgotten, no doubt! I haven’t name checked the individual’s involved – they know who they are – but it was always a pleasure to deal with them and as well as doing business together, we had a lot of fun.
Of course, the other group of people that I must thank are my loyal customers, far too many to name! I am very grateful for their support and of course, orders that we have had from them over the years. It’s a fact that without customers, there is no business. We tried our best to ensure that they were always well served and their orders were delivered on time and safely. It gave us great pleasure to know that we were helping people to enjoy their hobby.
So what happens next? The business will close down for a couple of weeks after Easter, whilst we try and tie up all the loose ends. If all goes to plan, the Arcane Scenery web site will continue but only as a blog, not as a retail operation. I hope to retain and continue with the blog – there are over 400 articles which I find useful and I hope other hobbyists do to!
Any remaining stock that we have left will be disposed of on ebay over the coming year at our leisure. For any fans of the DeeZee range, we will continue to make this available through our very good friends at Footsore. Who knows, with their help, I may even expand the range – just a little….
The good news is that I have reduced the price of much of our stock and there are some real bargains to be had, so buy now, when it’s gone it really will have gone!
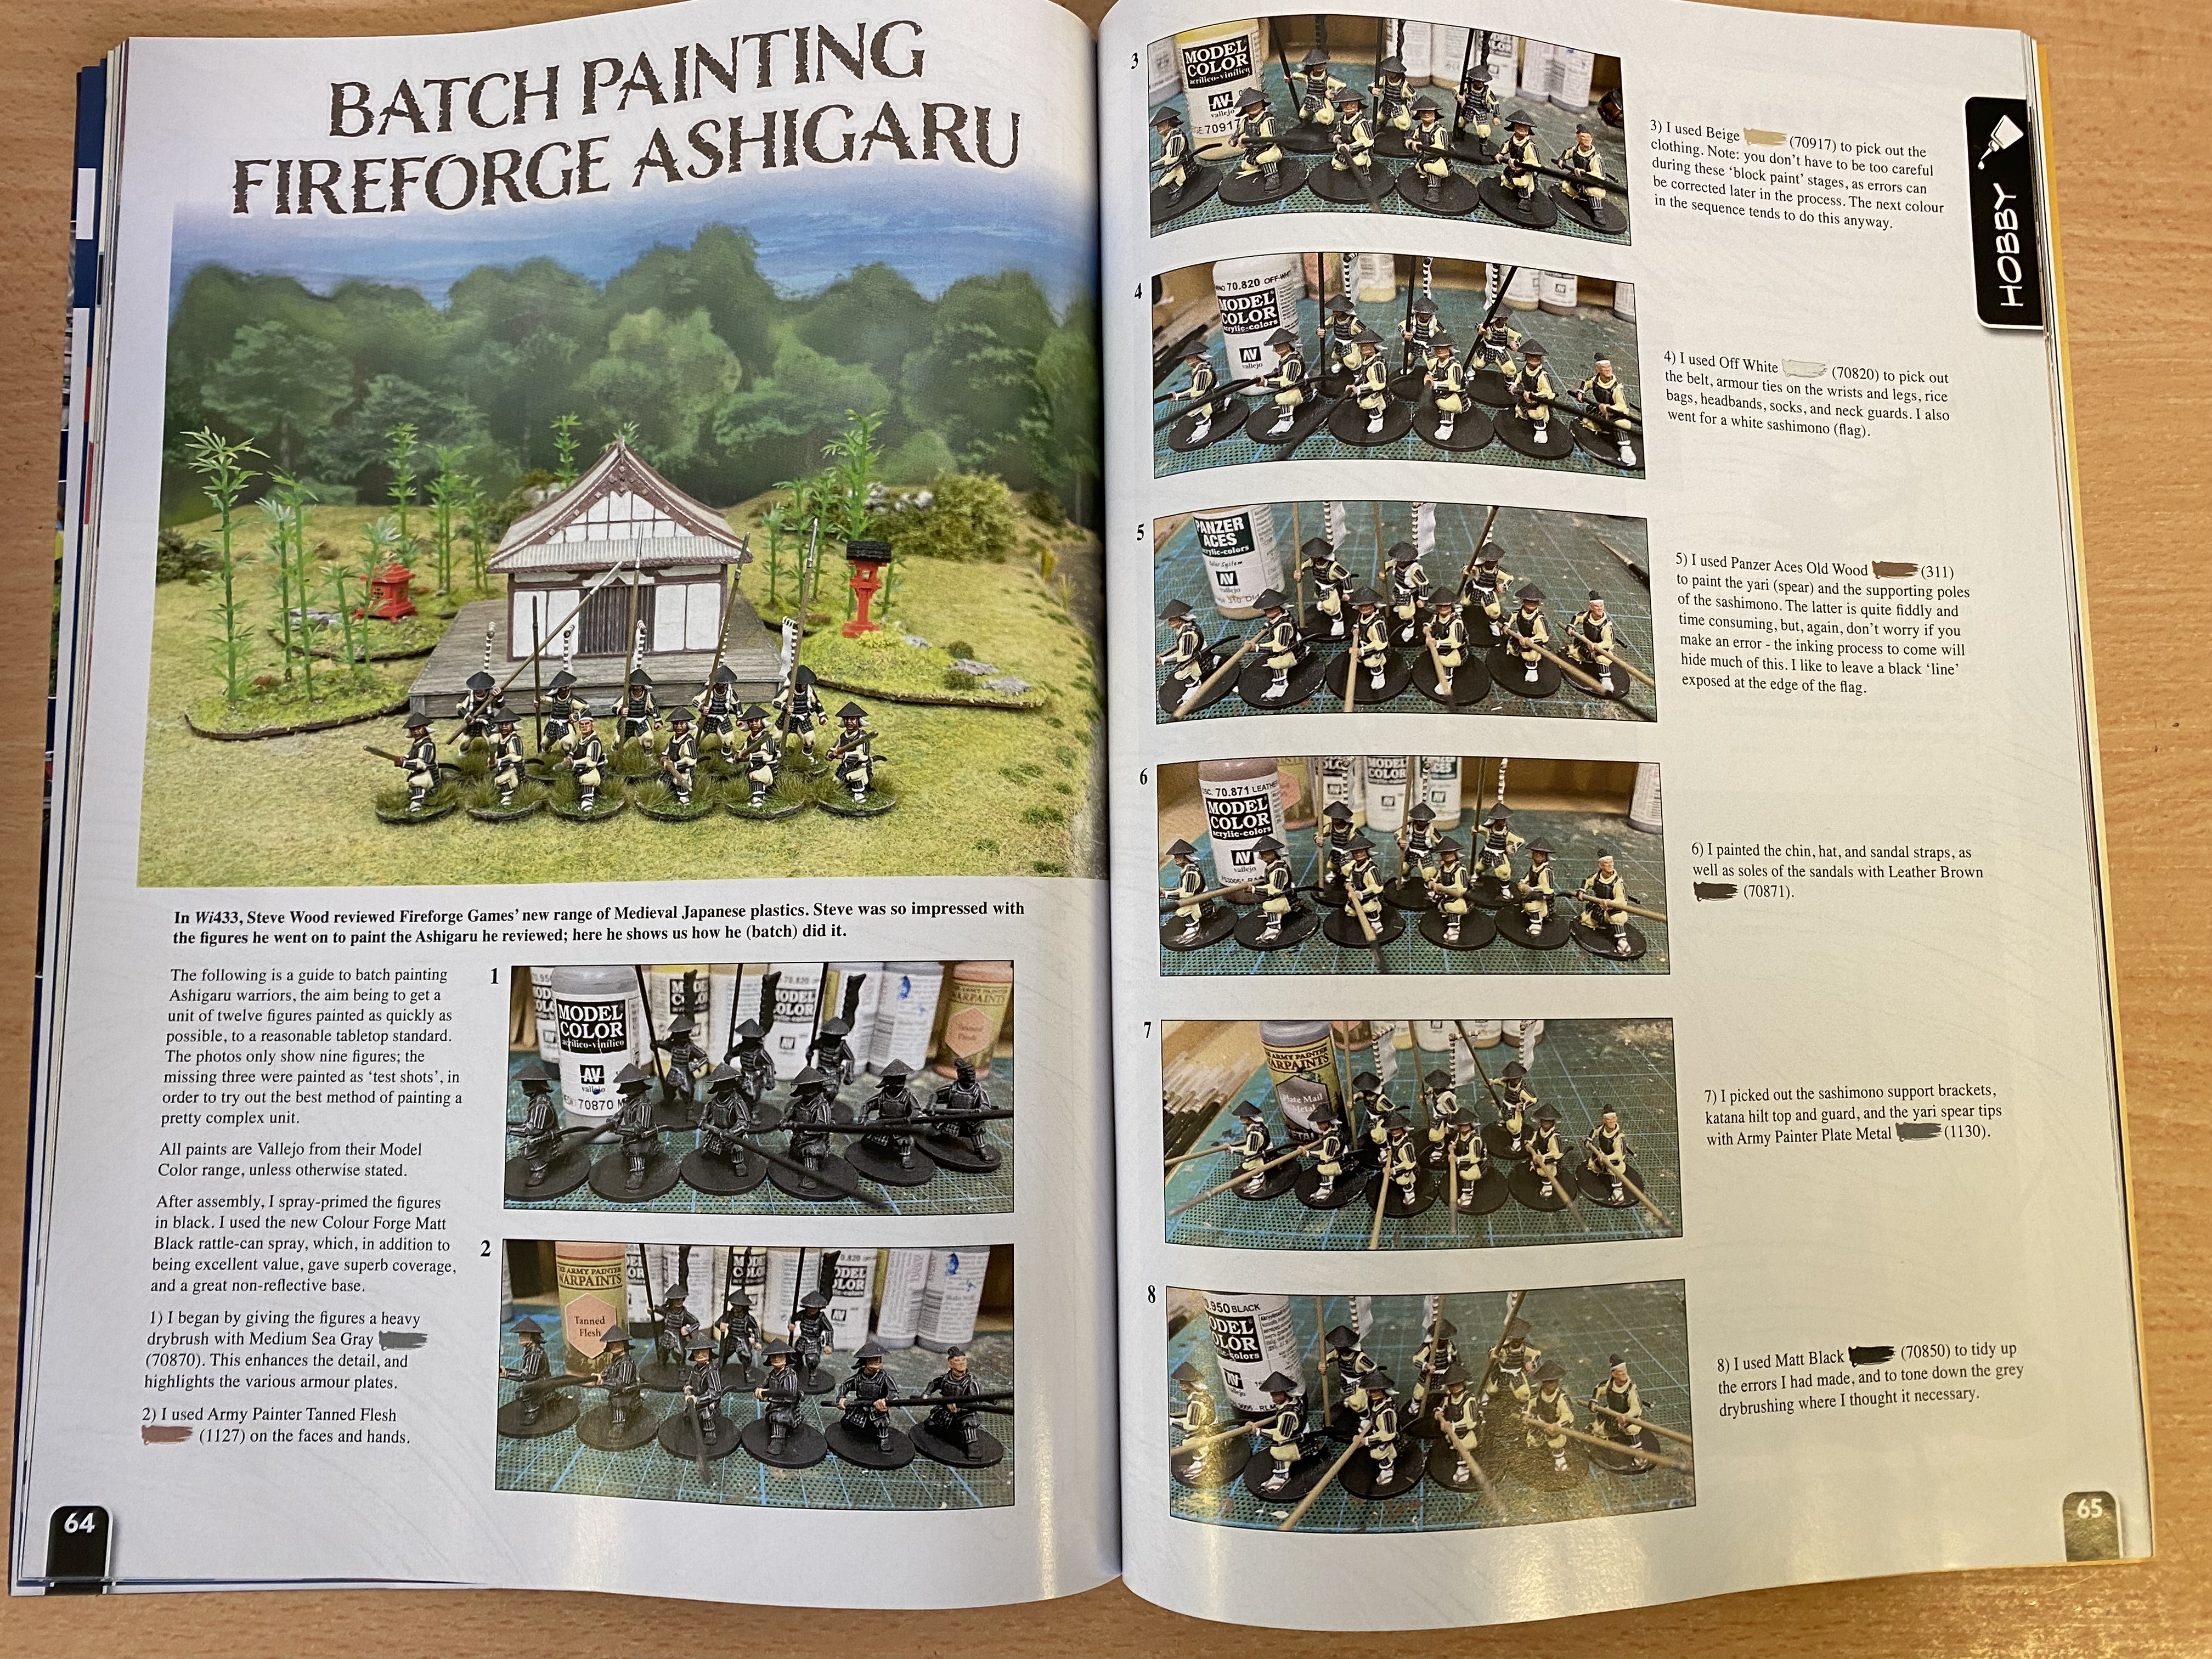
My latest article in Wargames Illustrated 435
I will of course continue with my hobby and I hope to stay connected to the War games community by writing for Wargames Illustrated, as well as running demo games at shows – Partizan being the most likely!
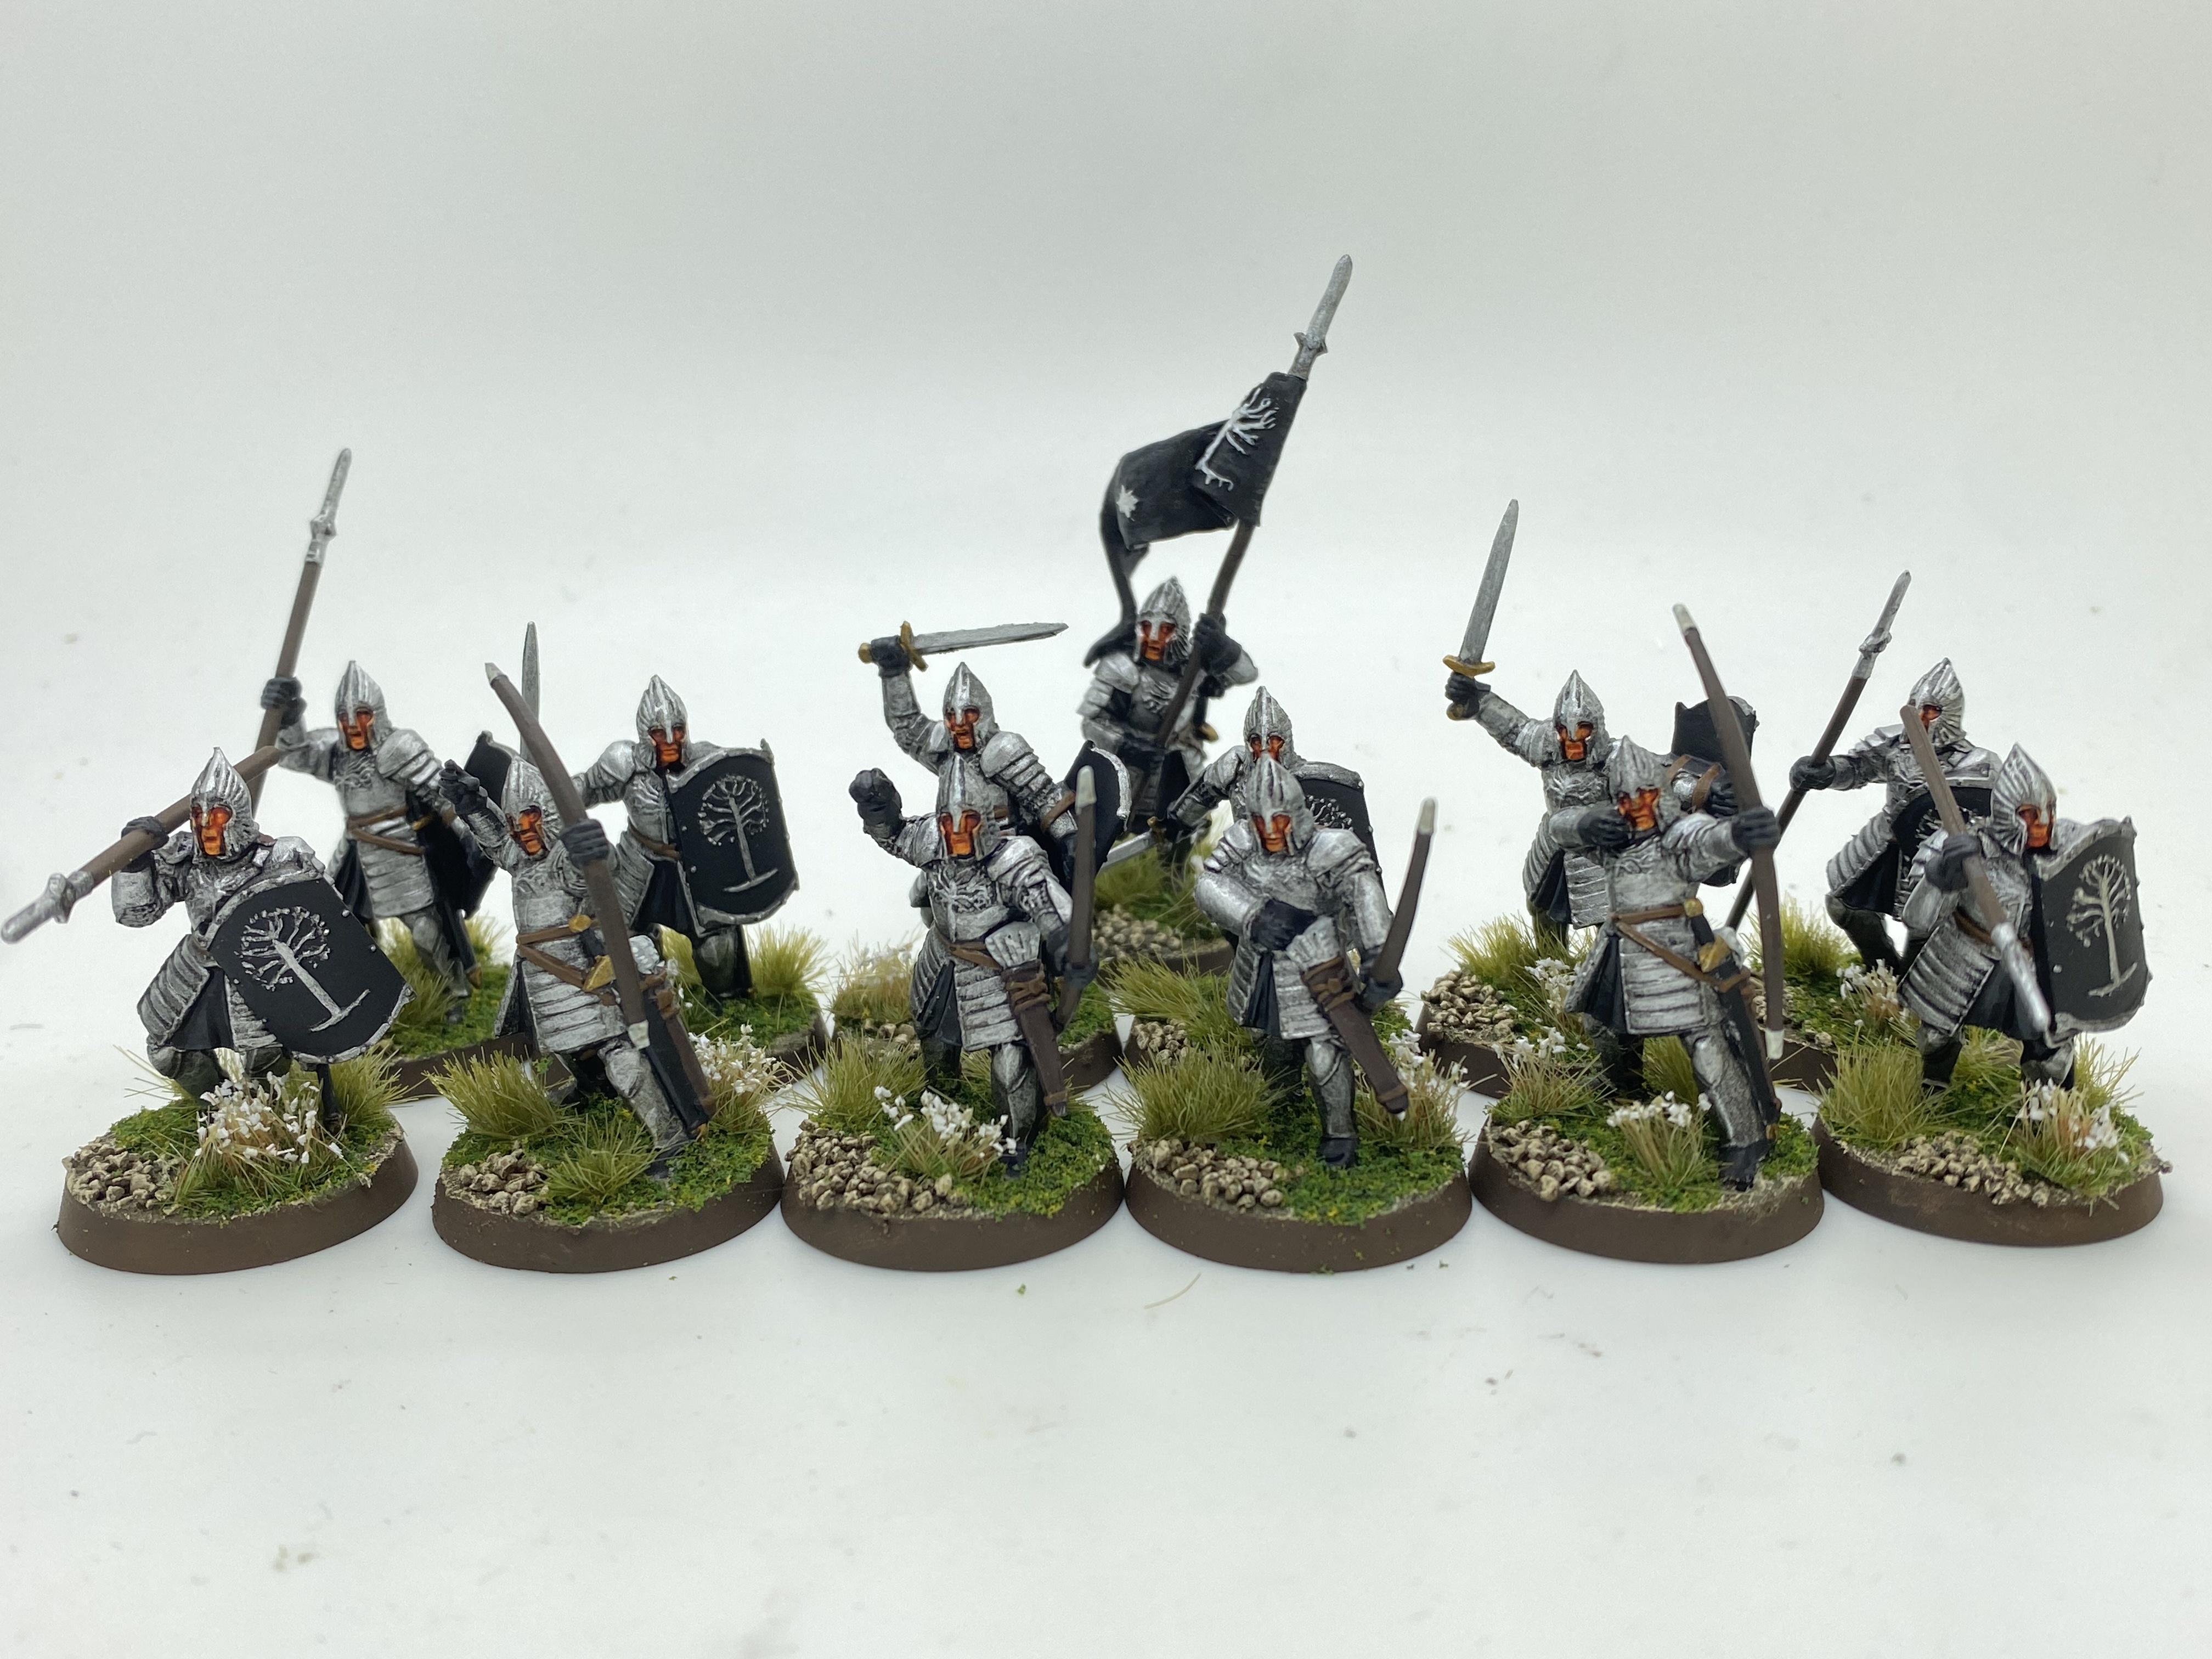
I may even finally conquer the lead mountain, that despite my best efforts, is still growing faster than I can paint! Here’s the latest batch that I have painted. Some men of Gondor from the LOTR magazine – I have now reached issue 34!
Men of Gondor!
So once again, a sincere thank you to all of my customers, suppliers and friends that have supported Arcane Scenery over the years. I have really enjoyed my time in the business. It’s now time to focus on the Hobby!
I can only wish that you enjoy it as much as I do.
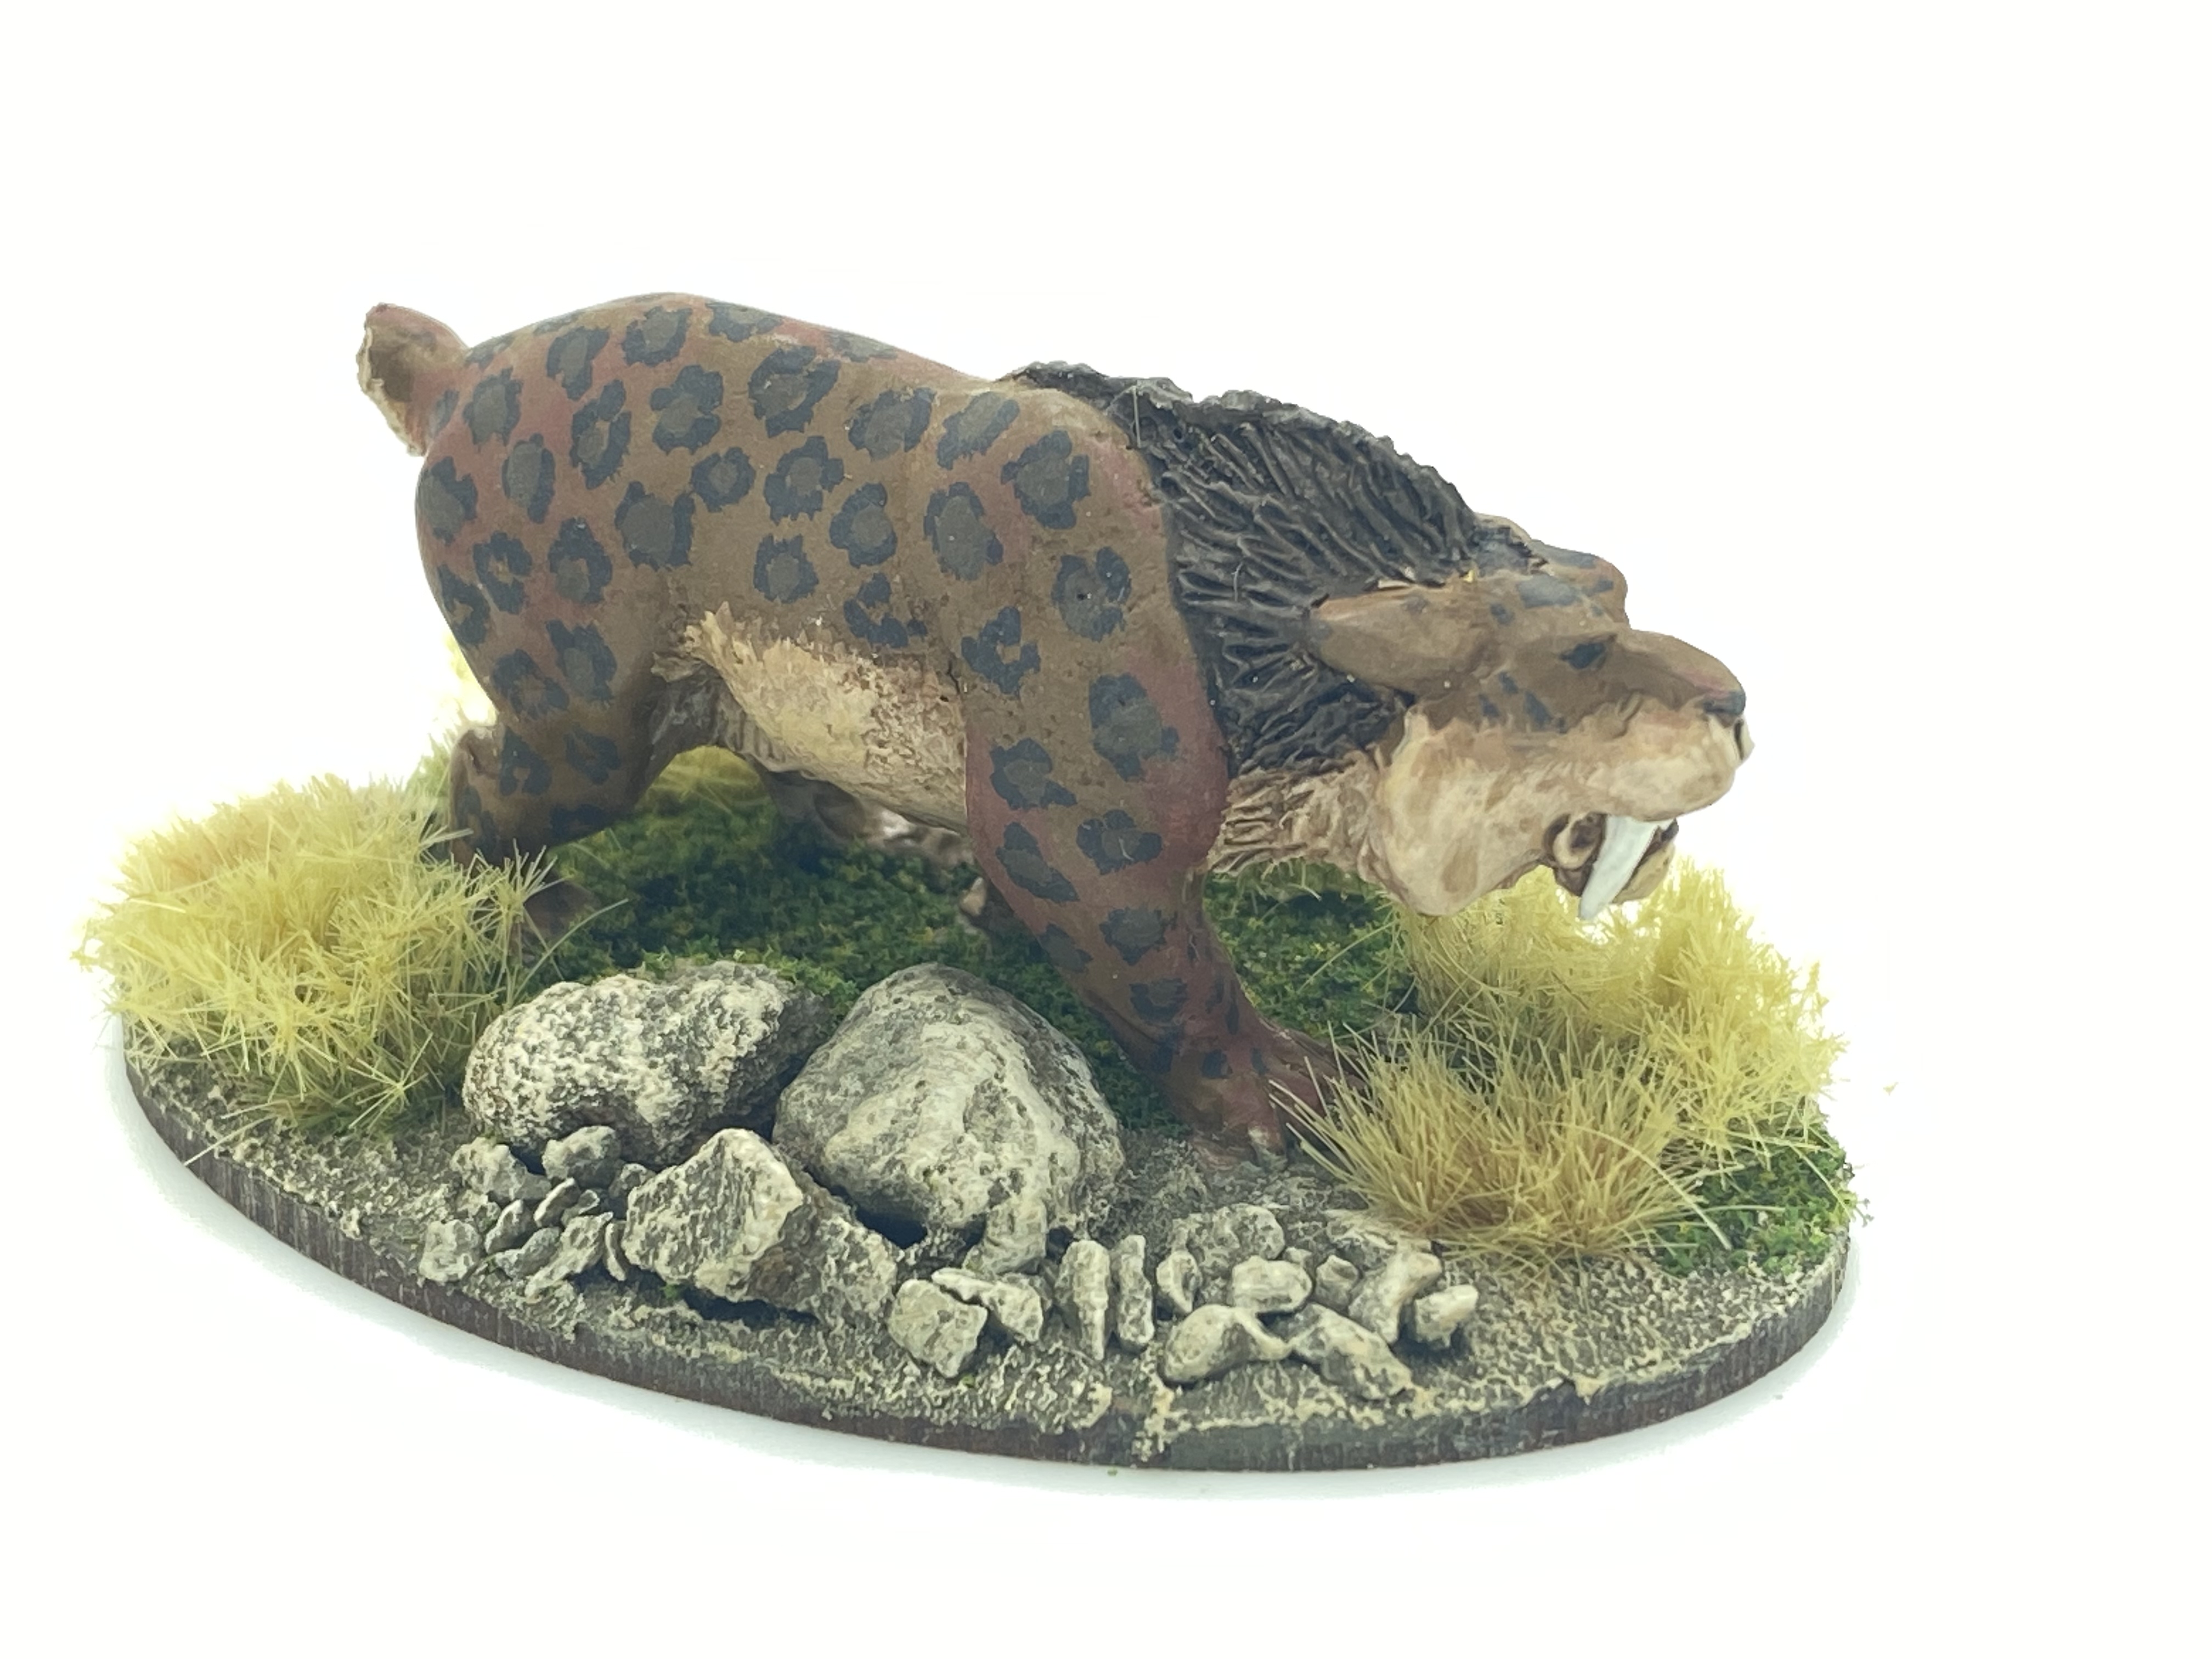
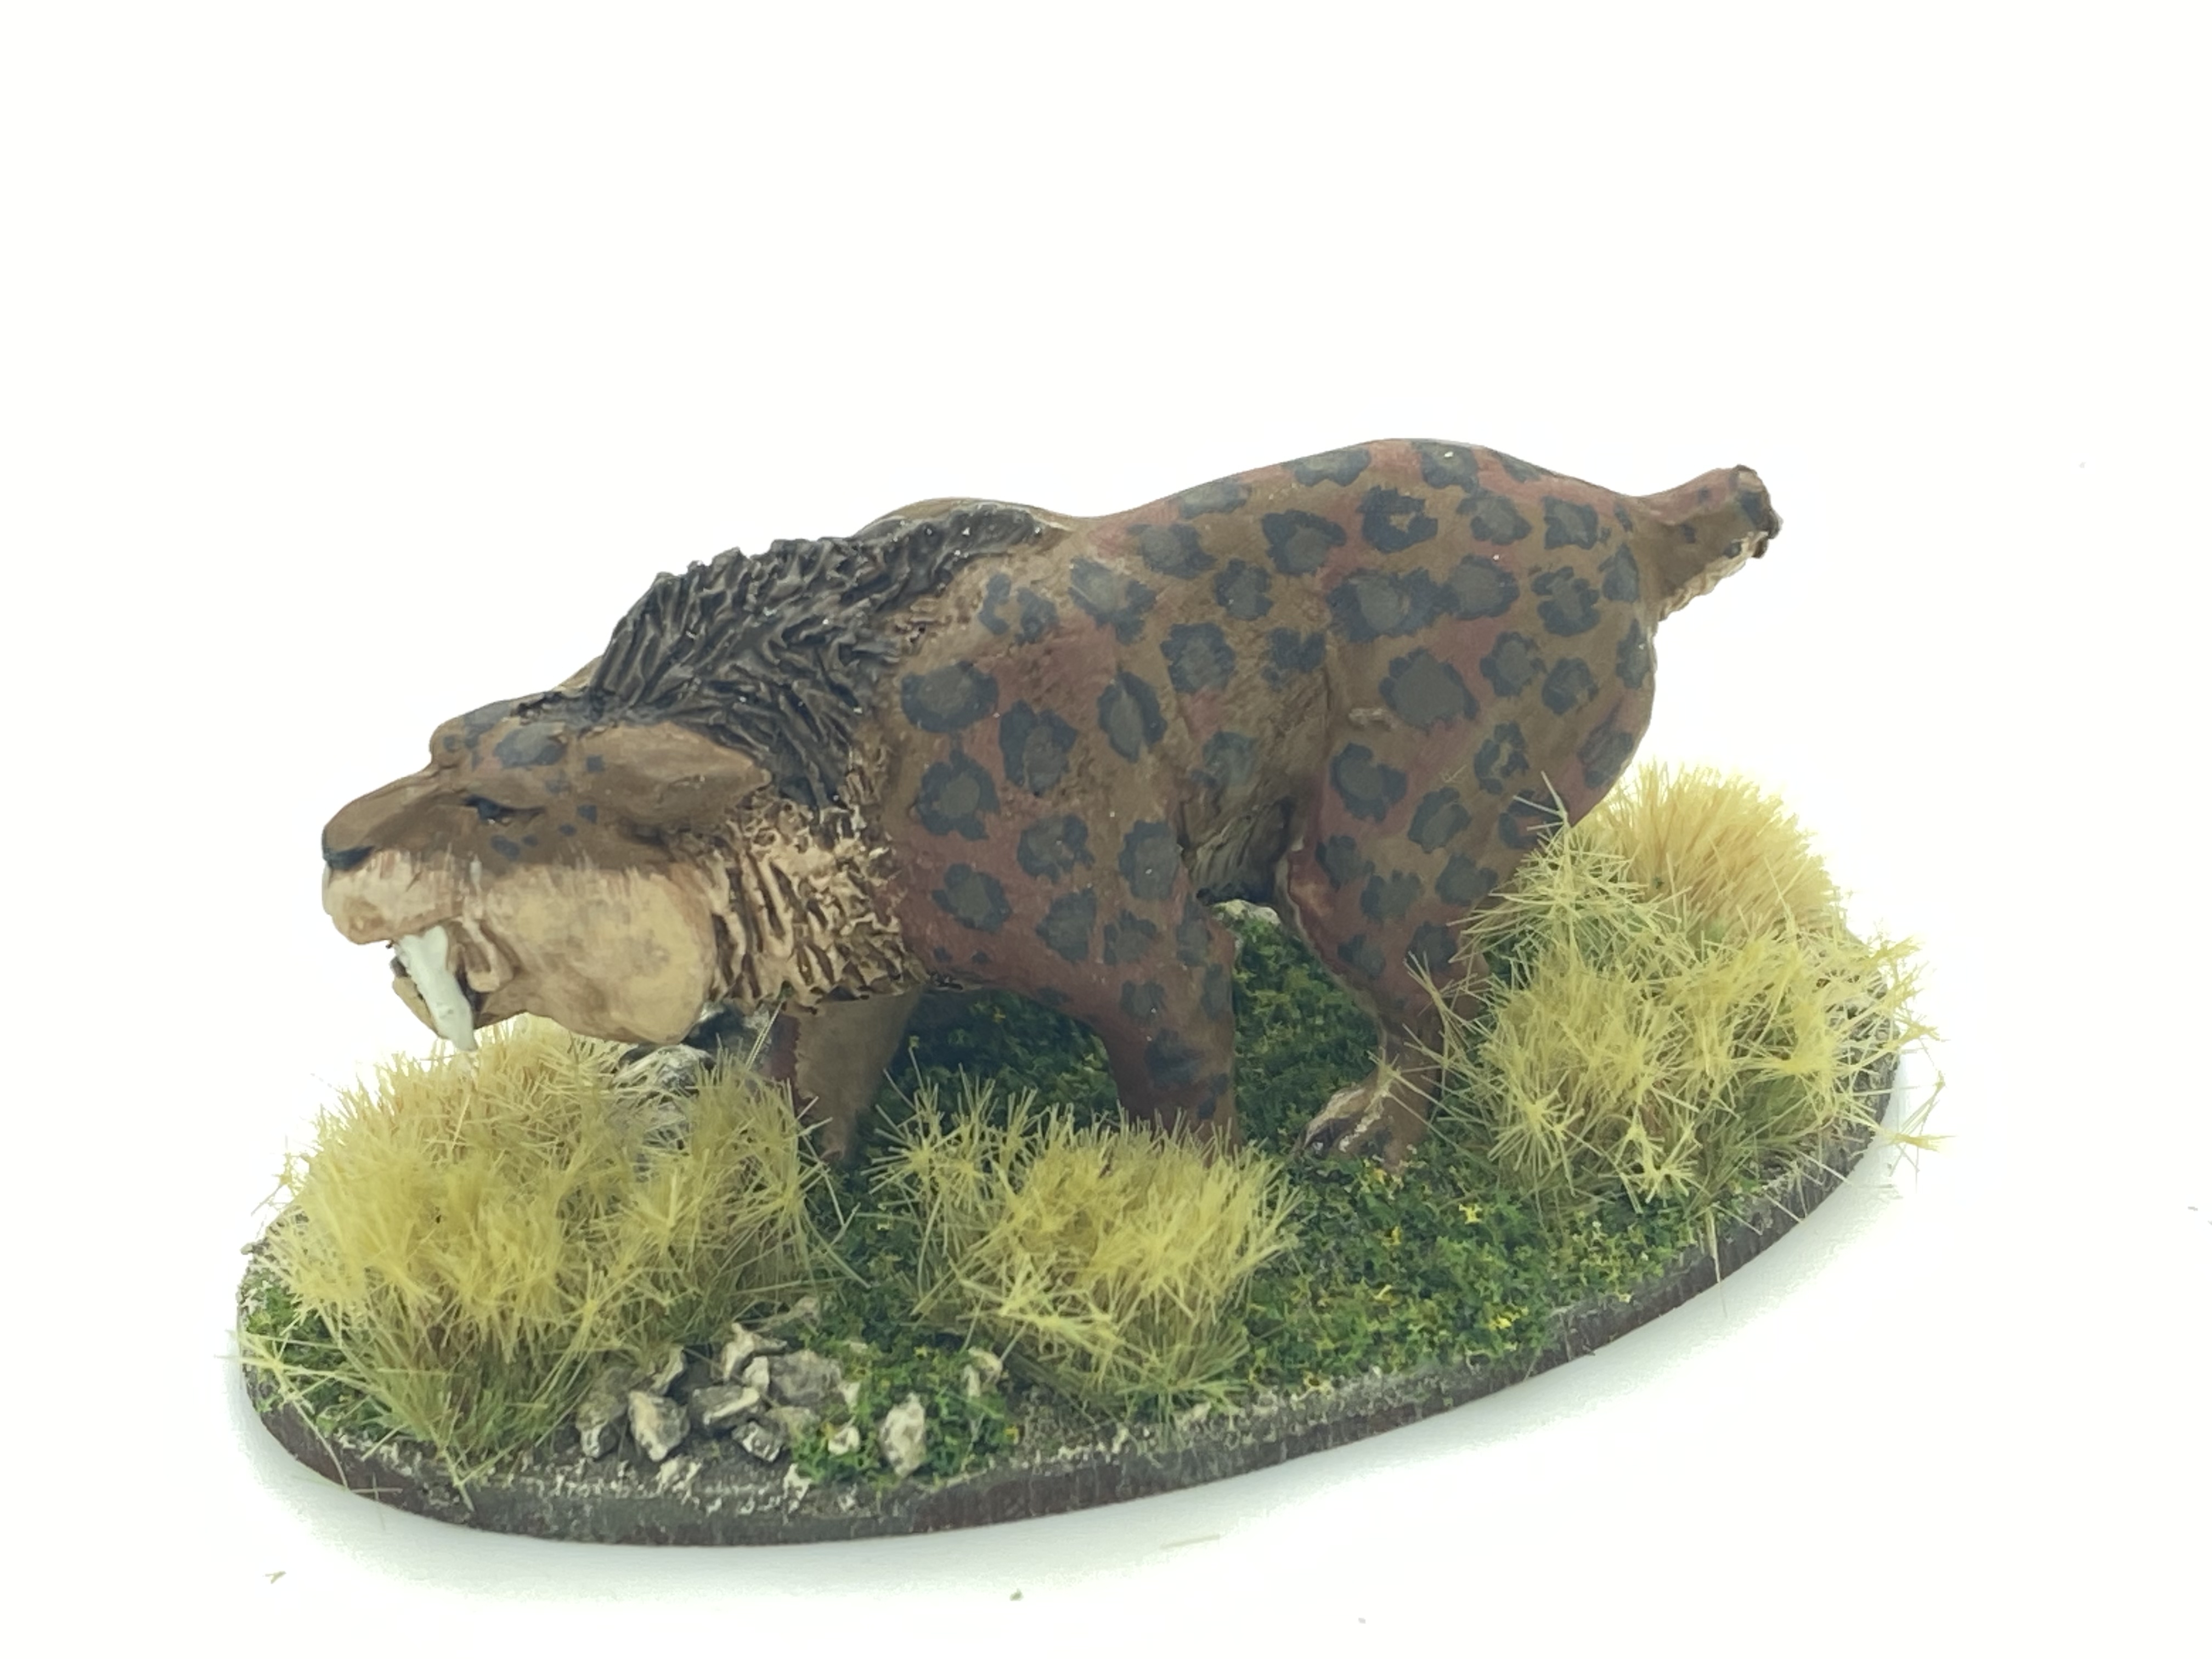
My quest to paint every model in the DeeZee range continues, albeit at glacial pace. I have too many other distractions to focus on finishing this project! However, there are two Smilodons in the DeeZee range; DZ13 Smilodon or Sabre Tooth attacking and DZ15 Smilodon or Sabre tooth stalking, so it made sense to paint them as a pair and knock another two models off of my list!
Although these big cats from the Pleistocine epoch are more familiarly known as Sabre tooth tigers, they are not closely related to either Tigers or modern cats and were inhabitants of the North and South America’s, rather than Asia. It is thought that they hunted large herbivores such as Camels and Bison. Although no record of the coat patterns exist, it is thought that the Smilodon had either plain coats or spotted ones, resembling leopards.
You can read more about the Smilodon on the Wikipedia page here:
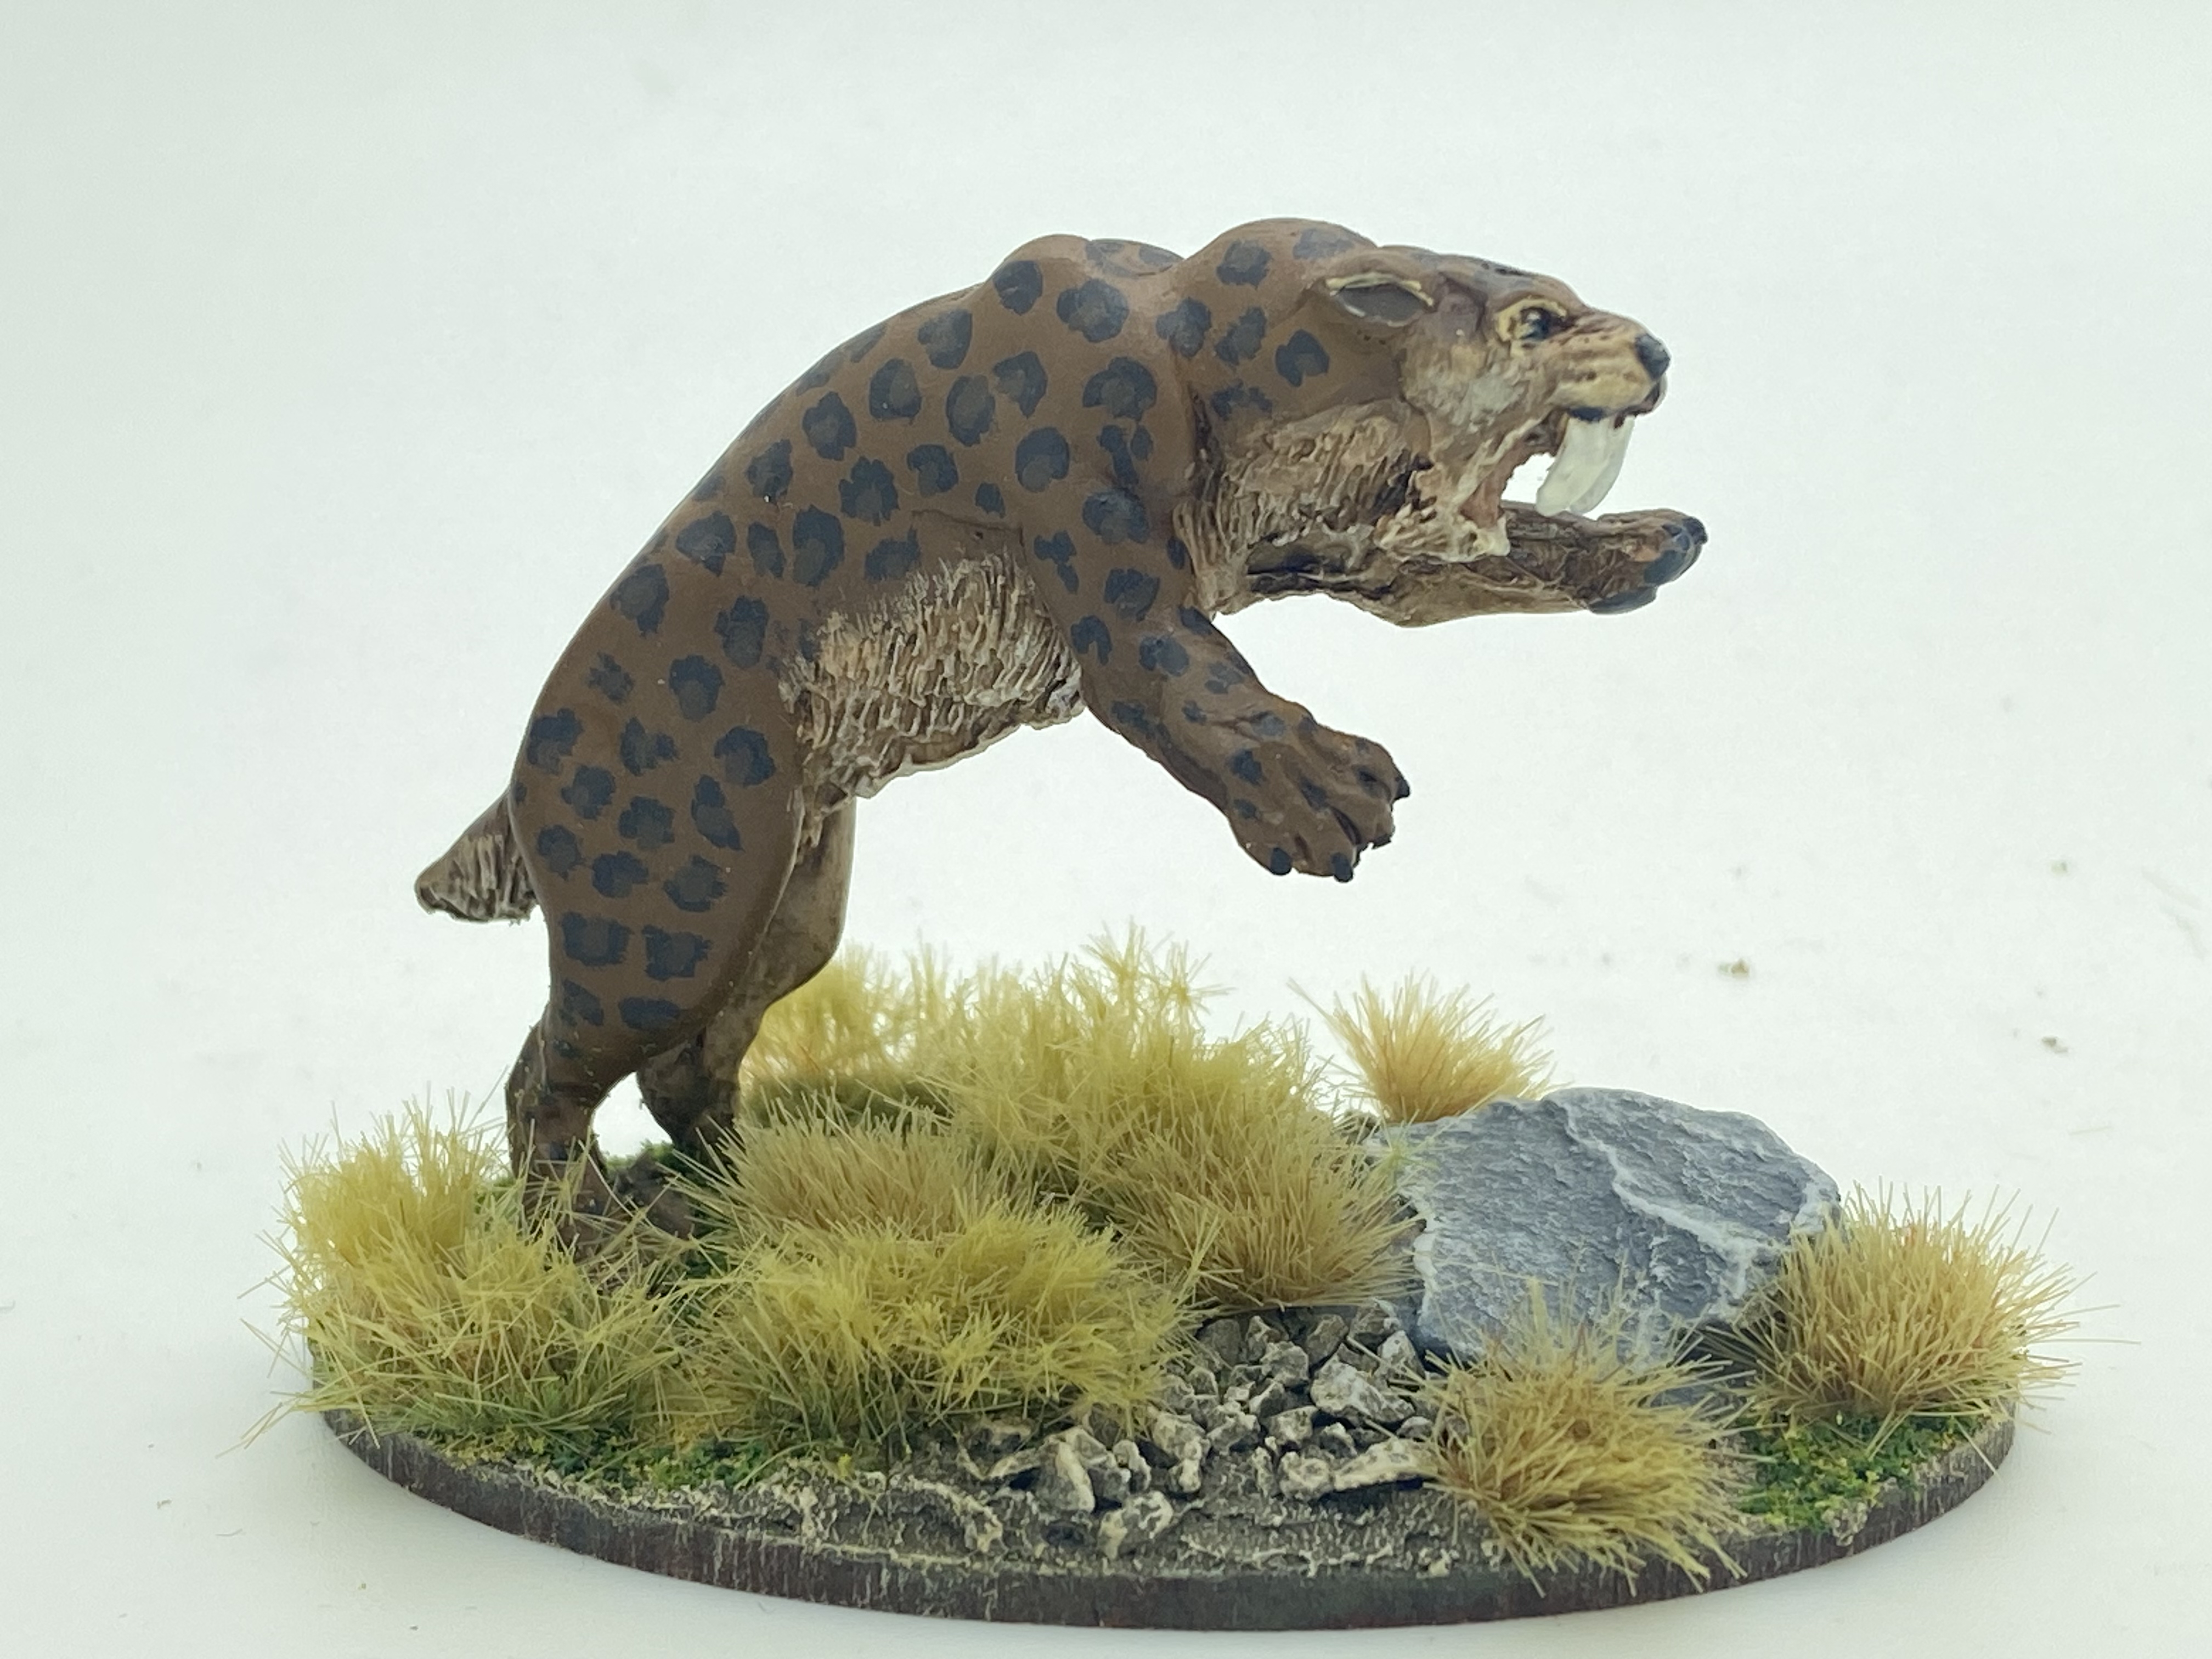
So when it came to choosing a colour scheme for my models, I decide to go for the leopard variant. I did consider starting with a grey base for the fur and even using Tiger markings in grey/black but settled on the leopard scheme, using browns to get the darker look that I was after.
Painting finished – basing in progress
After priming the models in Army painter leather brown, I painted the top half of the models with Vallejo Flat Earth 70983. I used cork brown 70843 for the undersides. I then blended and highlighted using Iraqi Sand 70819.
To get the rosettes, I used German Camo Black Brown 70822 and dabbed the paint on to make rough circles, and then went back and filled in the middle of the rosettes with Burnt Umber 70941. I used Off white 70820 for further highlights on the belly and to outline the eyes and ears. The open mouth was painted with Beige red 70804 and the teeth in Ivory 70918. The claws and paw pads were picked out in Black, 70951
The finished Smilodon attacking!
Everything was then given a wash of Army painter soft tone to bring it all together.
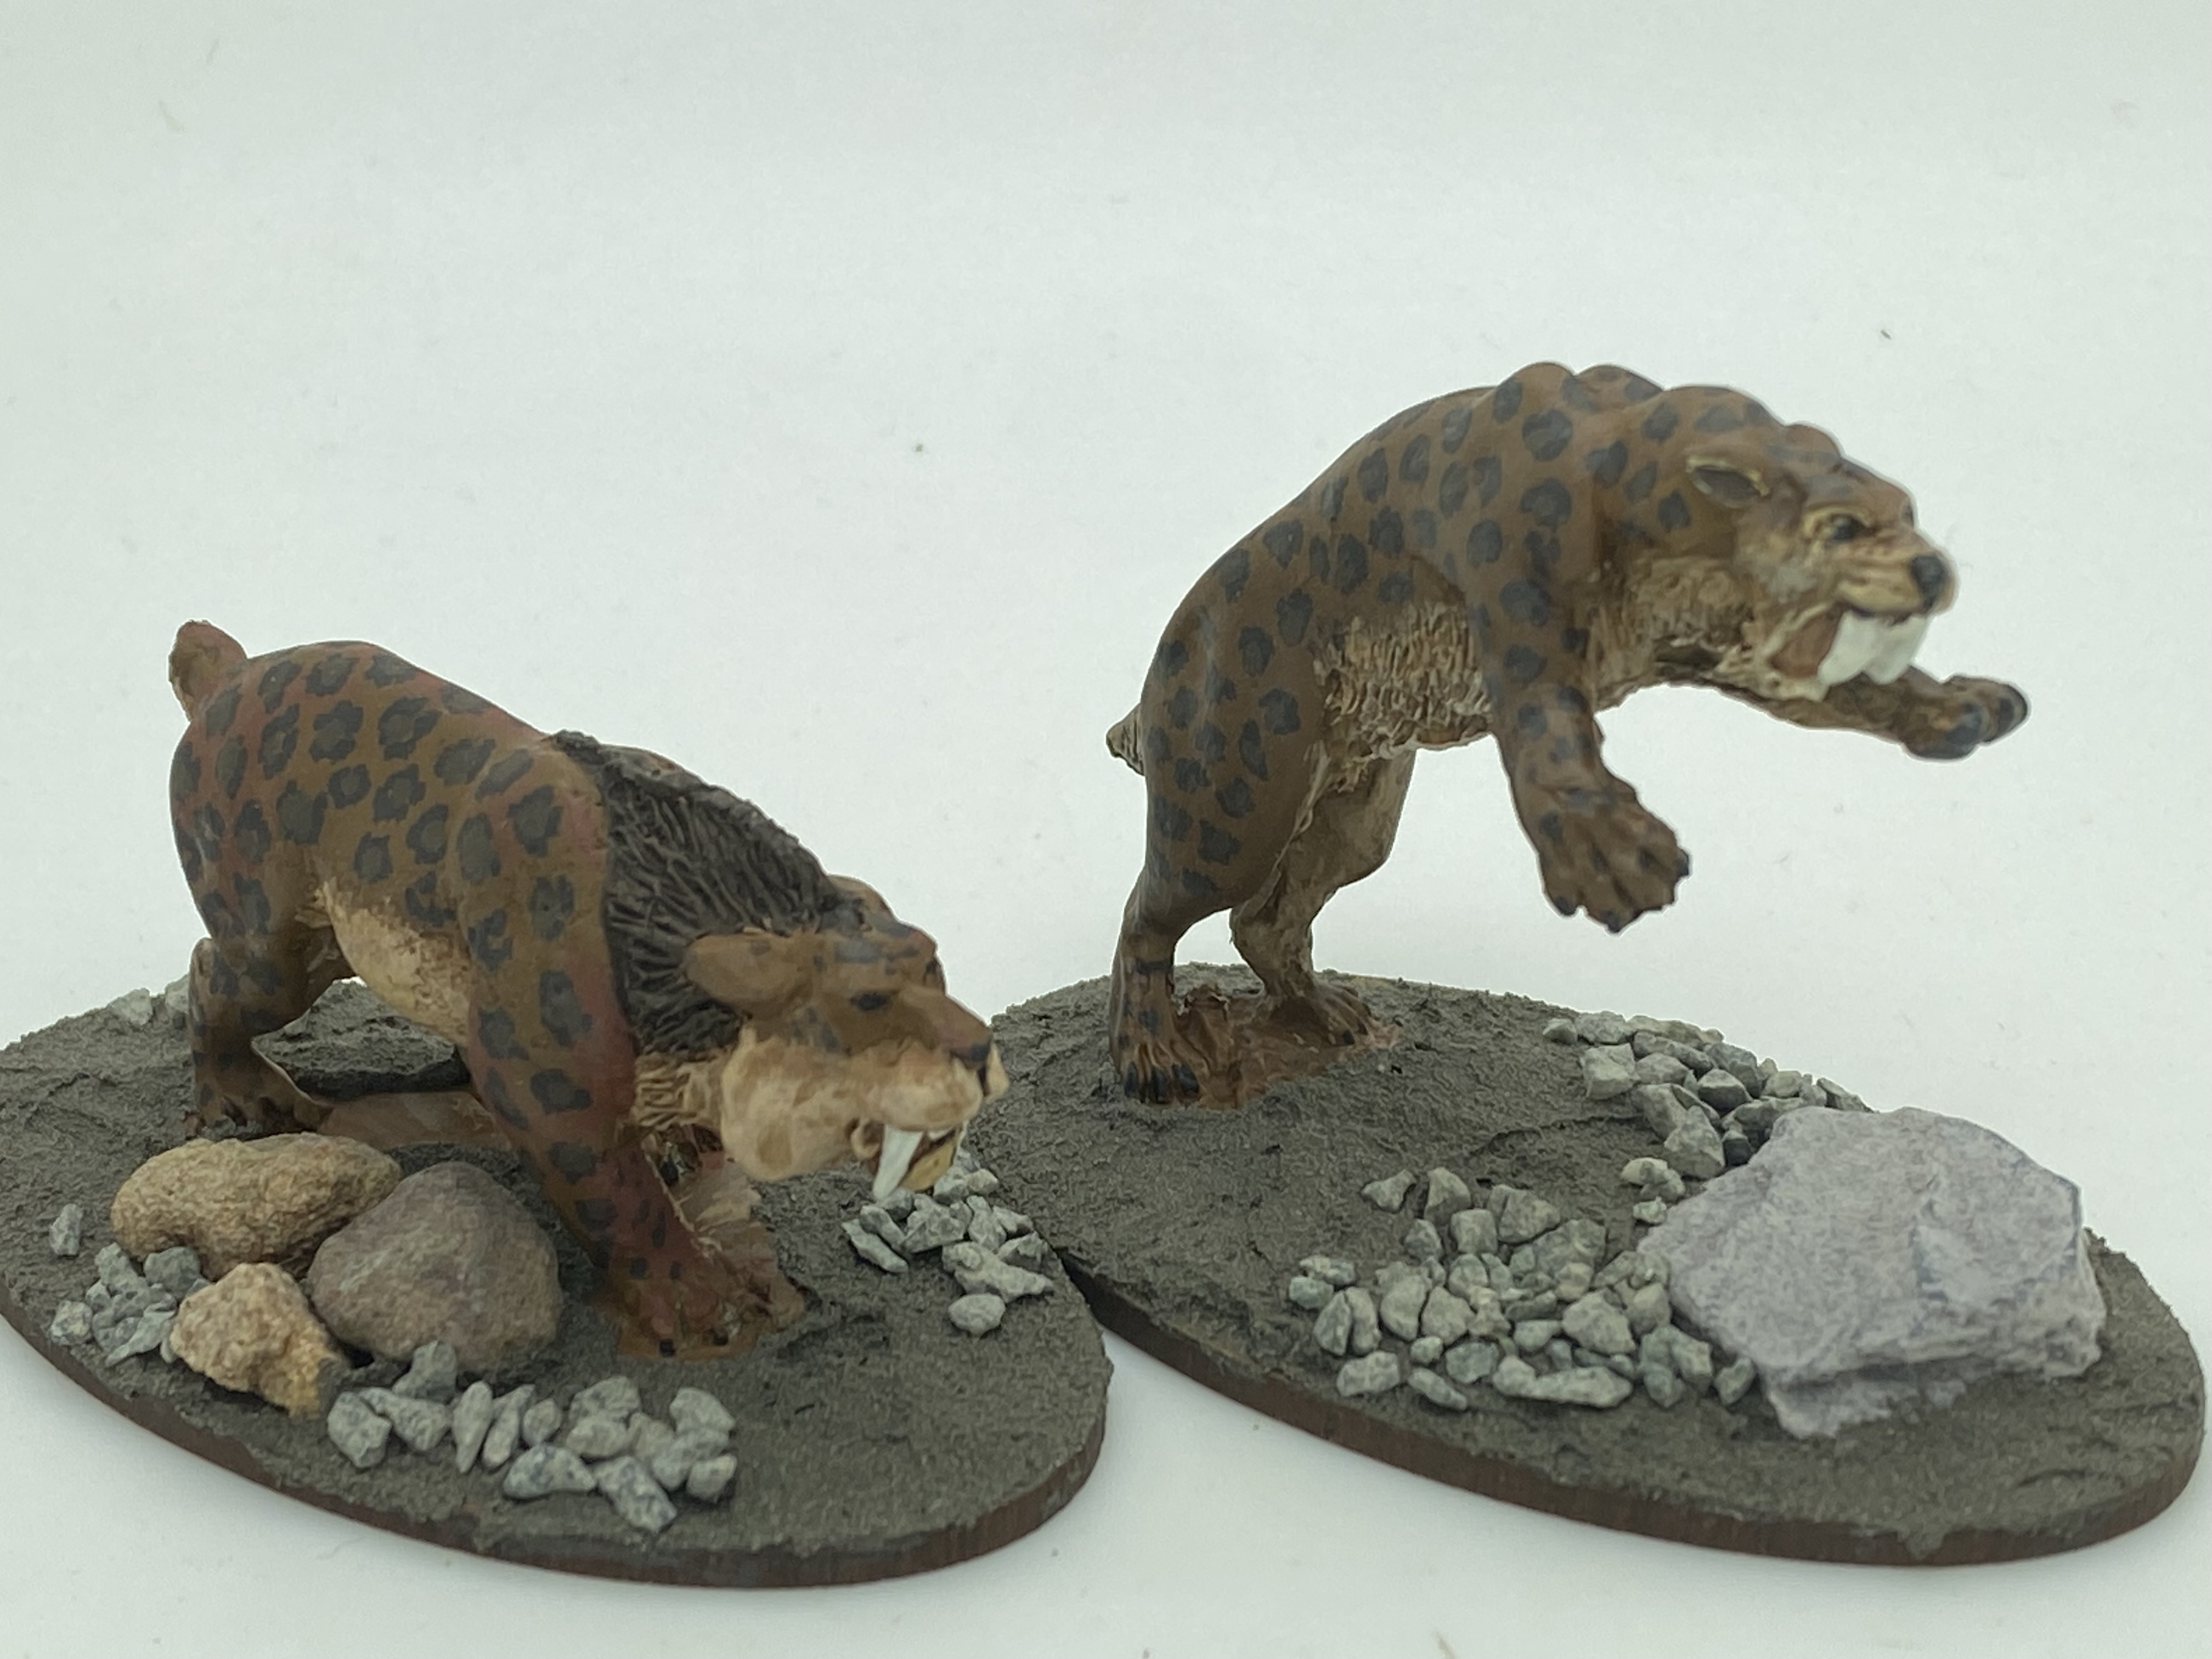
Smilodon Stalking!
The basing was completed to my usual formula using oval bases – I had considered basing them as a pair but decided that separate bases were a better idea. I finished the bases with Gamers grass tufts. A mixture of dense beige and standard beige tufts to contrast against the scatter.
So another two DeeZee models to add to my collection for posterity! I still have an idea of combining the two models with the cavemen that we sell and making a small diorama. May be that will be a project for the future but for now it’s back to painting Samurai!
THE COMMERCIAL BIT
I hope that you all enjoy your hobby as much as I do – our web site will have much of what you need! Click here to see our shop.
Starting a new army can be somewhat daunting. I can see the appeal of small skirmish games where only a dozen or so figures are required but even Never Mind The Bill Hooks requires about 120 figures and from a standing start that’s still quiet a commitment to painting. So when I decided to write an adaption to Never Mind the Bill Hooks for Samurai battles – Never Mind The Bushido, I quickly realised that the army was going to take some time to paint.
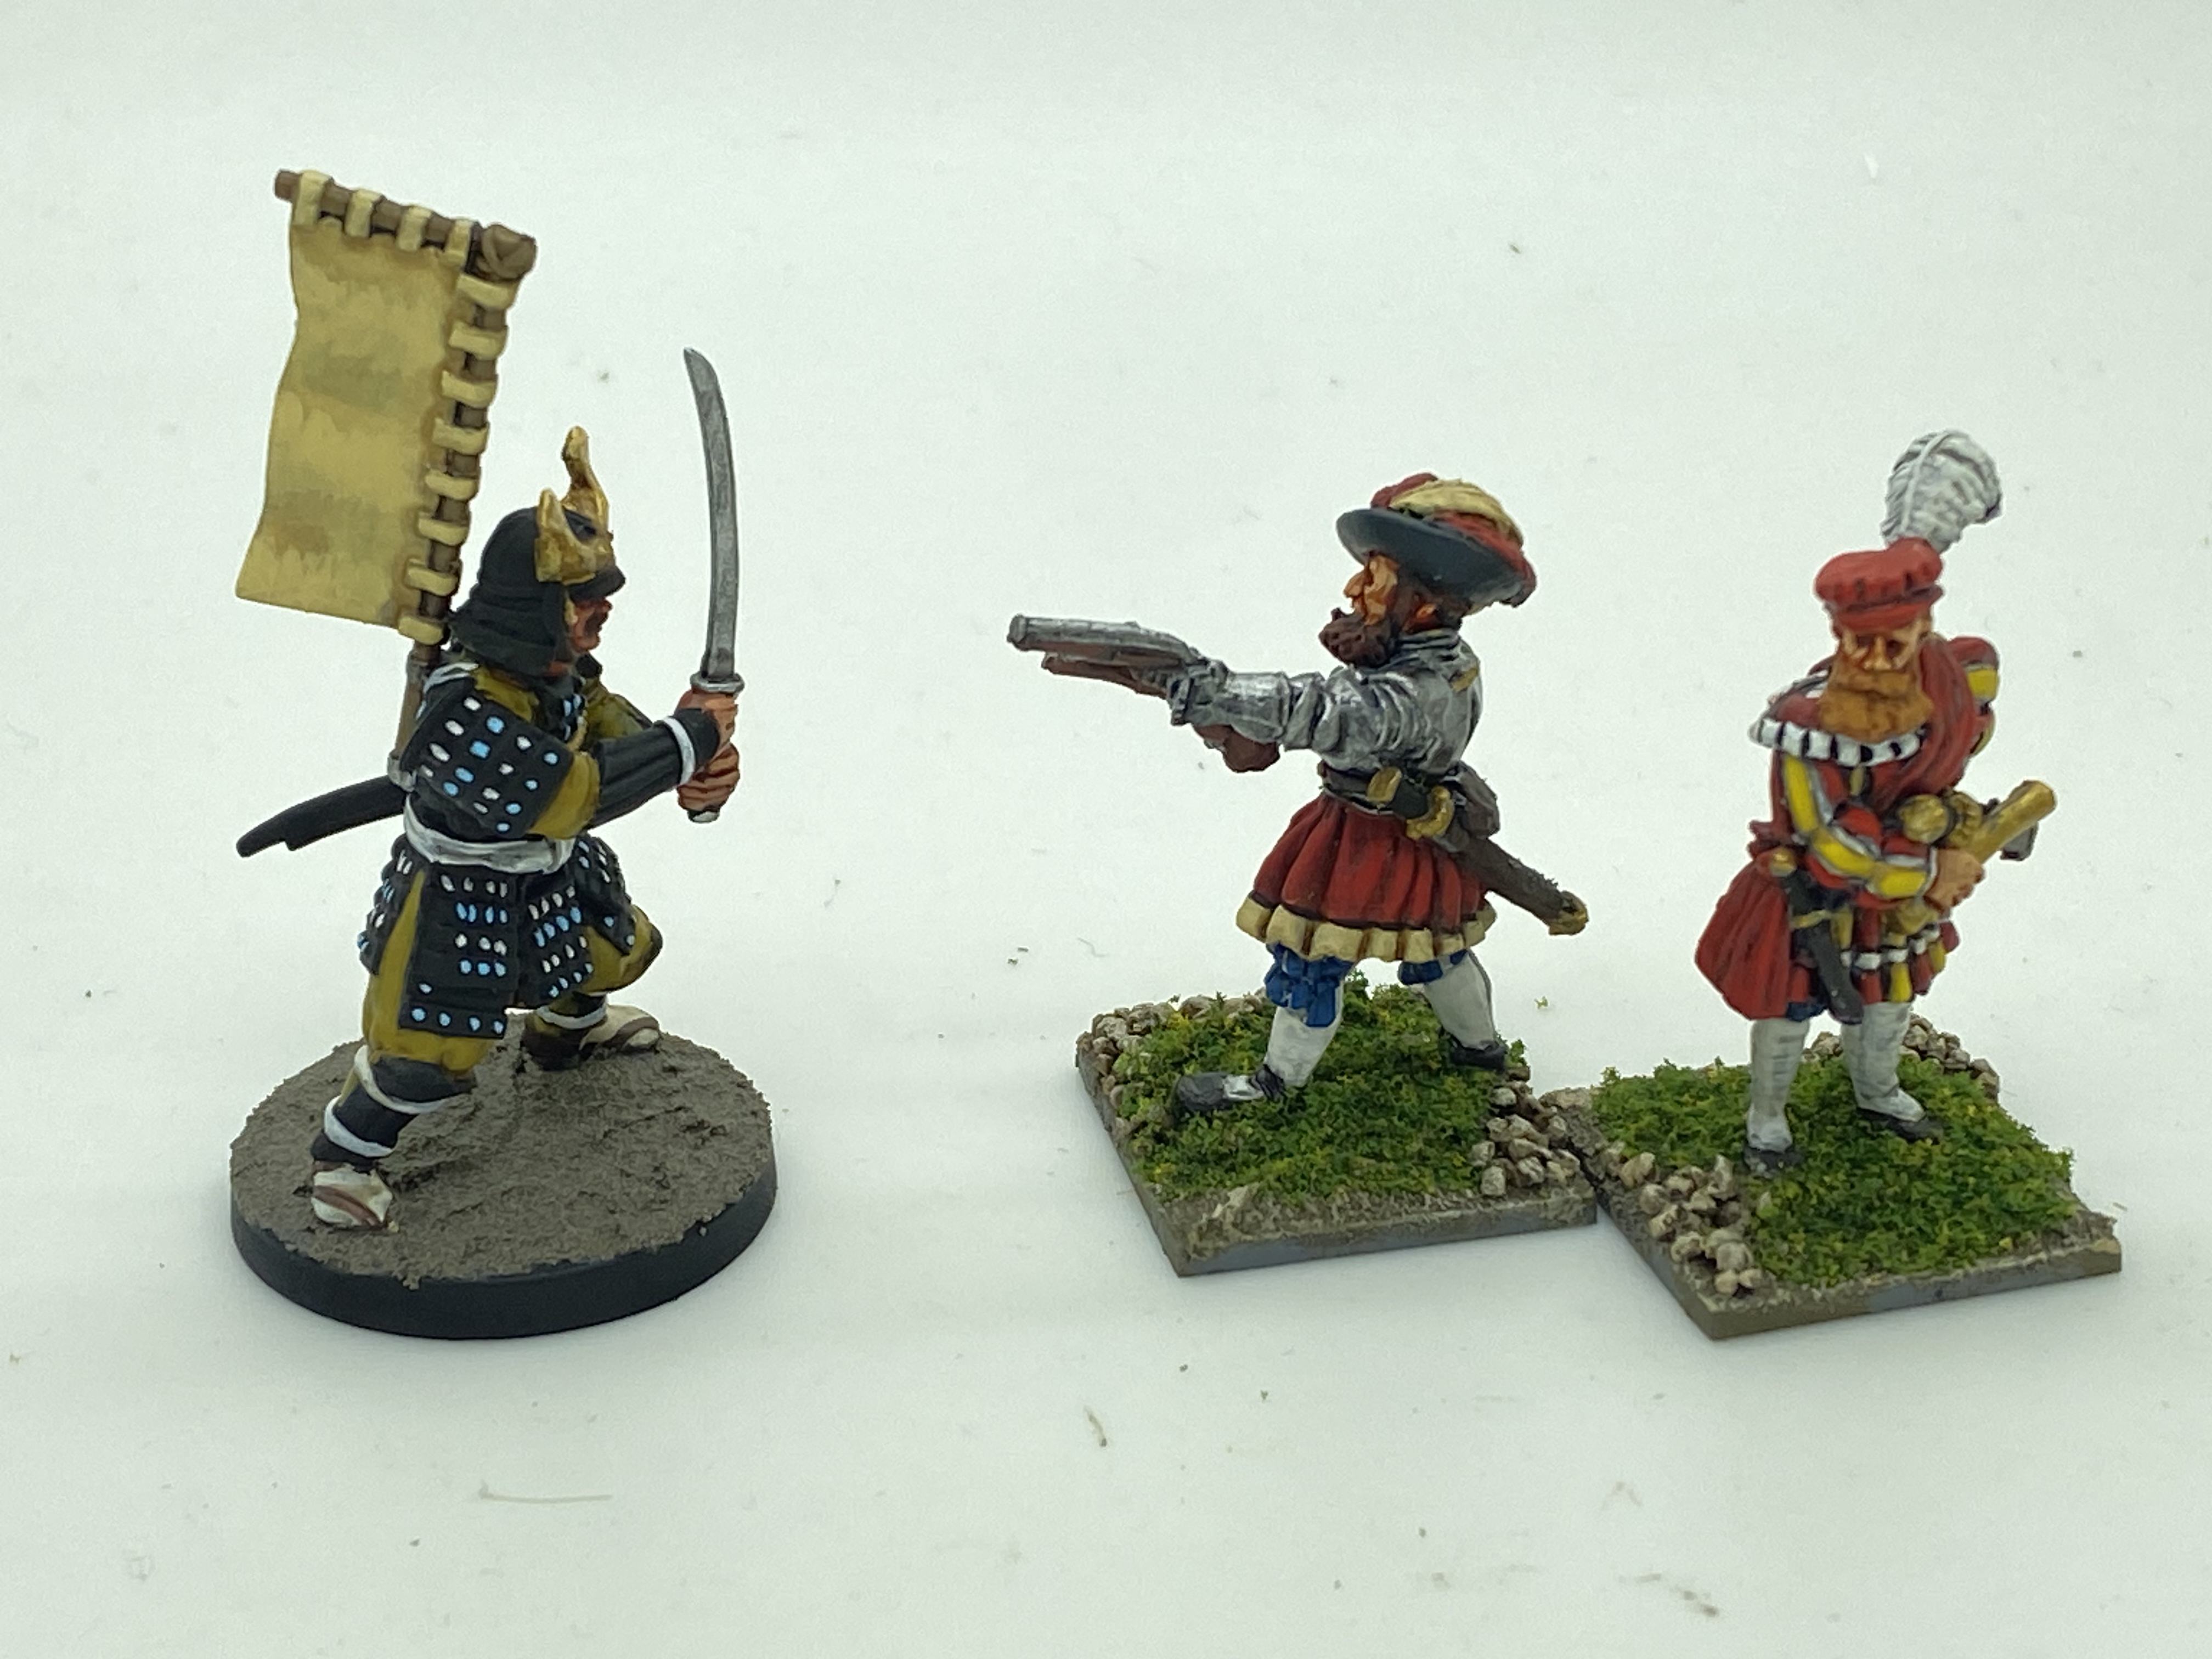
Samurai vs Landsknecht – which is quicker to paint?
I did have a bit of a start. I had in the past been playing Test of Honour and so had a few painted figures with which to start the army. However, based on my initial army list from the first draft of the rules, I am going to need at least 131 figures. Well, I managed to create a Landsnkecht force of similar size so I just need to get on with it! As you will know if you have read my last blog article, I have started to upgrade my Test of Honour force and I now have 36 Warlord Games Ashigaru painted, as well as 18 of the new Fireforge Ashigaru ready for action. Add in 6 Warlord Ashigaru armed with teppo and a couple of Warlord Samurai and I have the makings of an army.
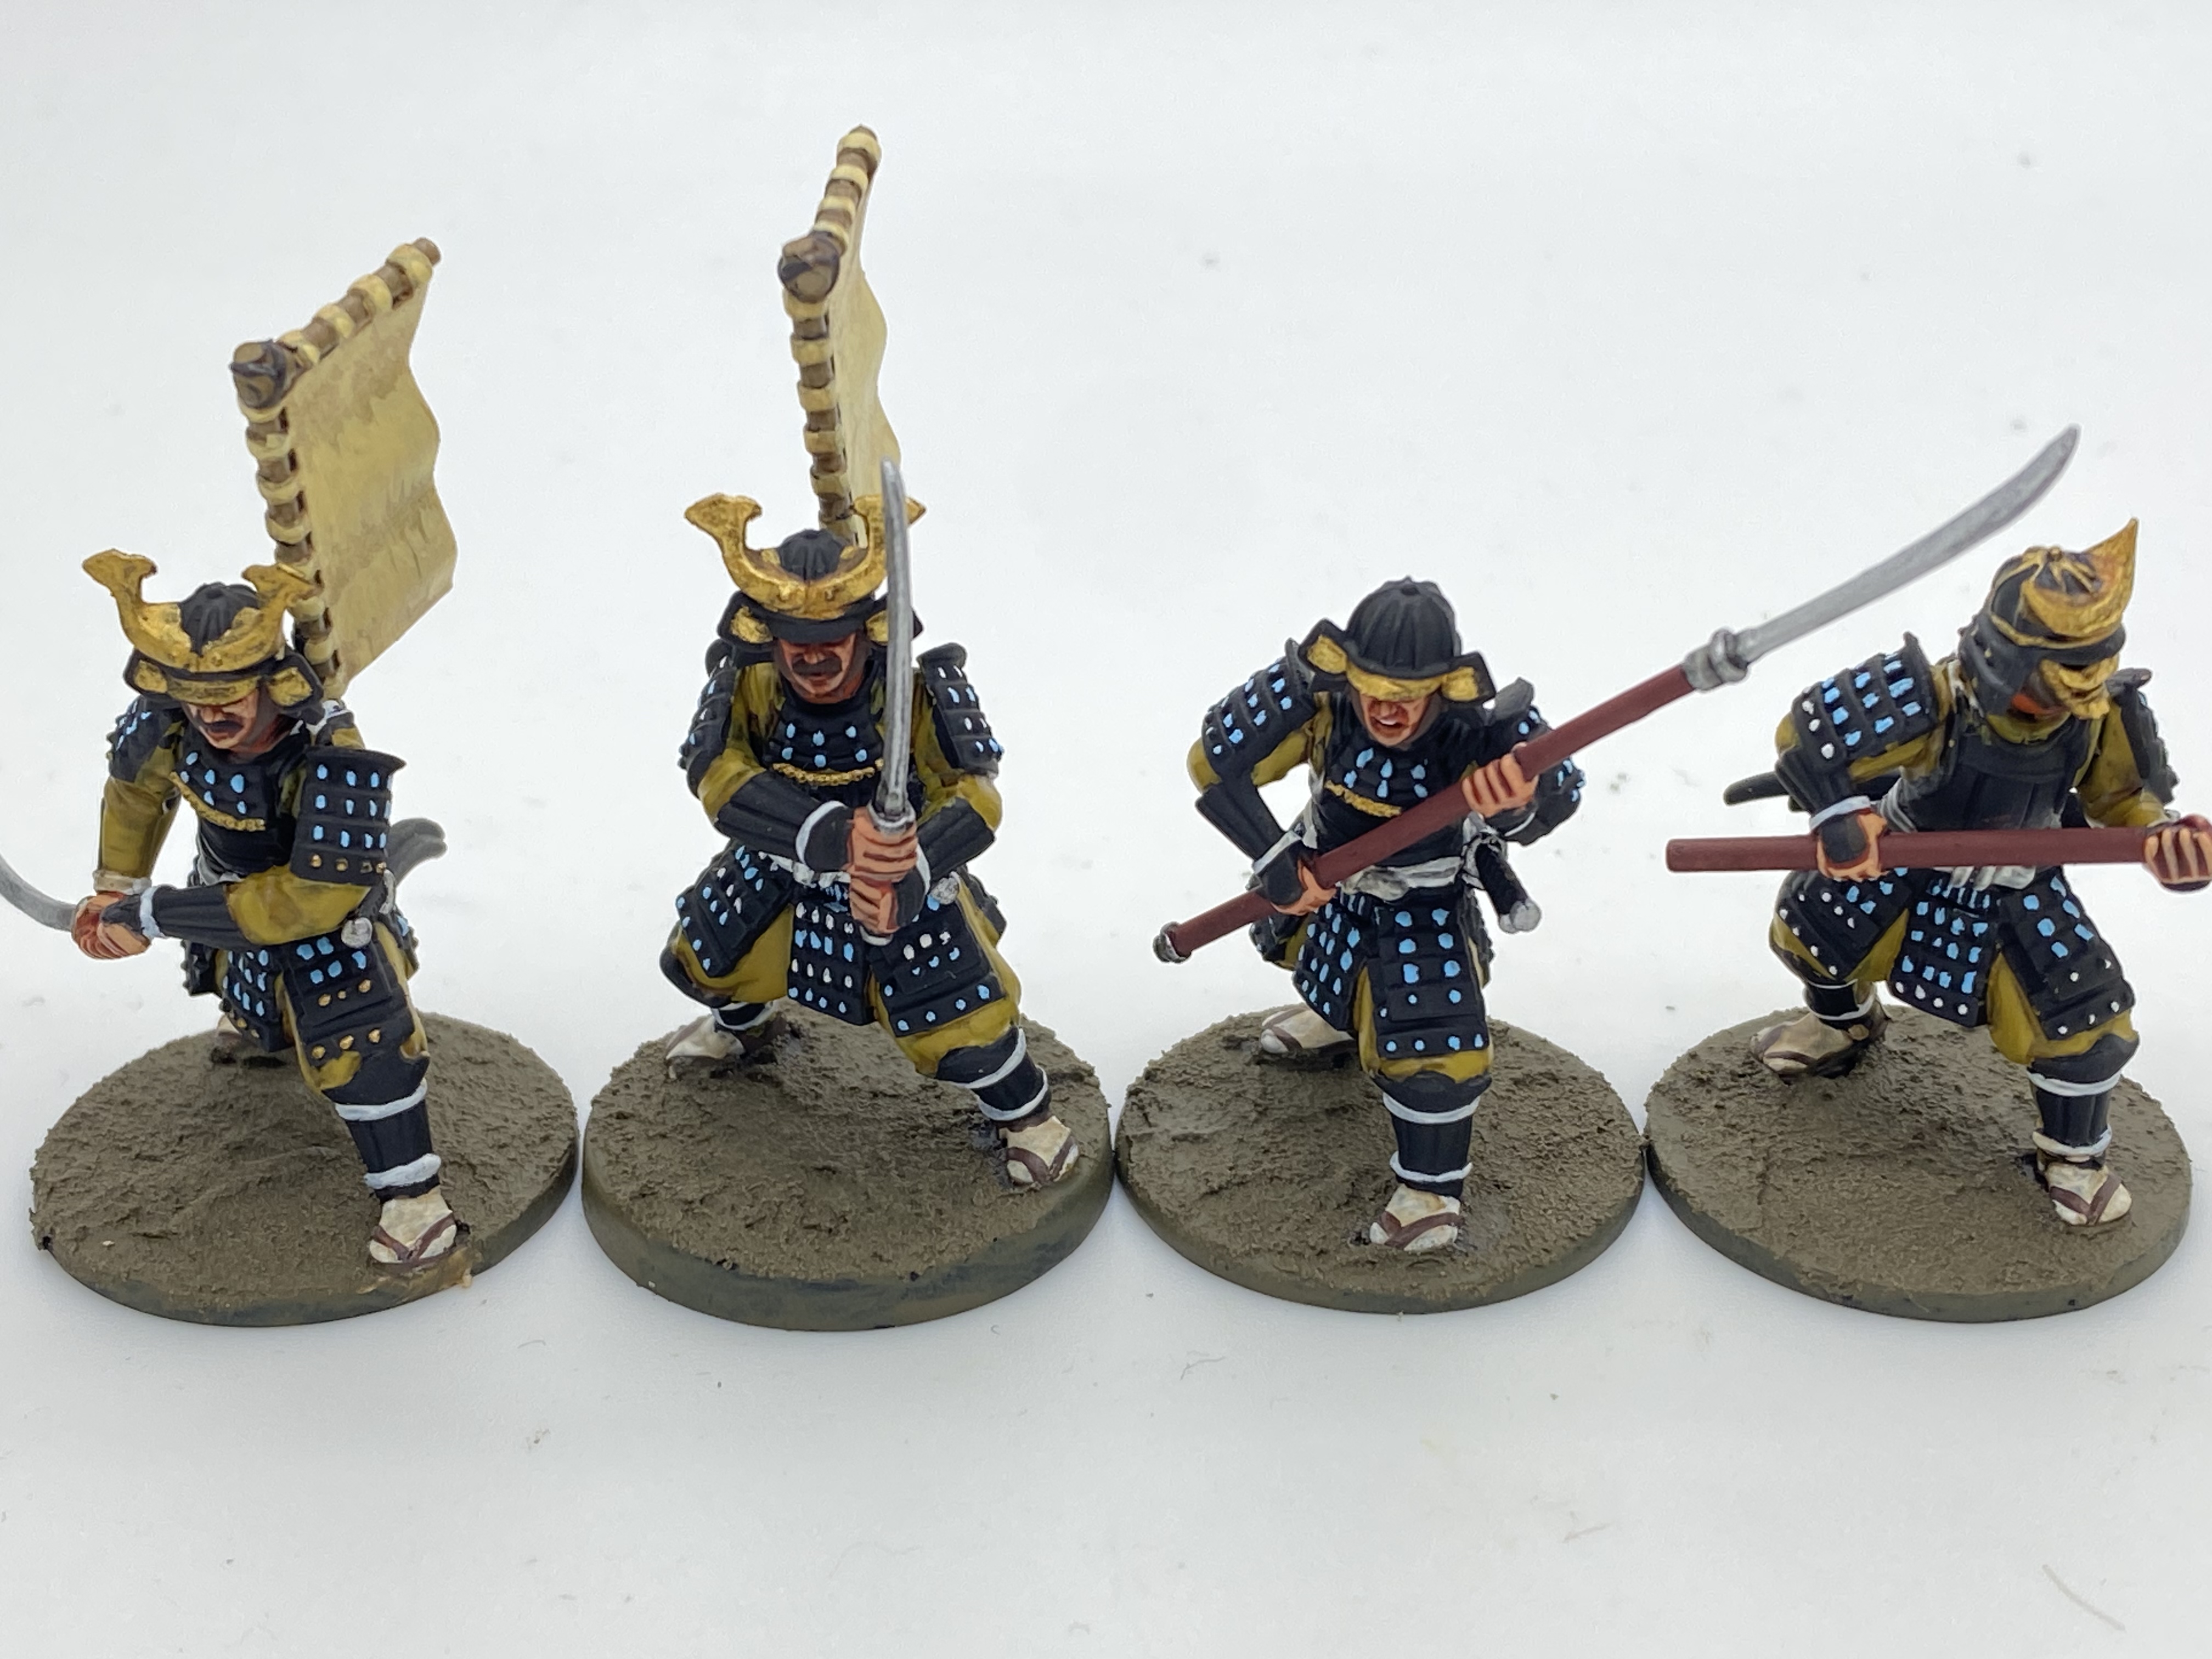
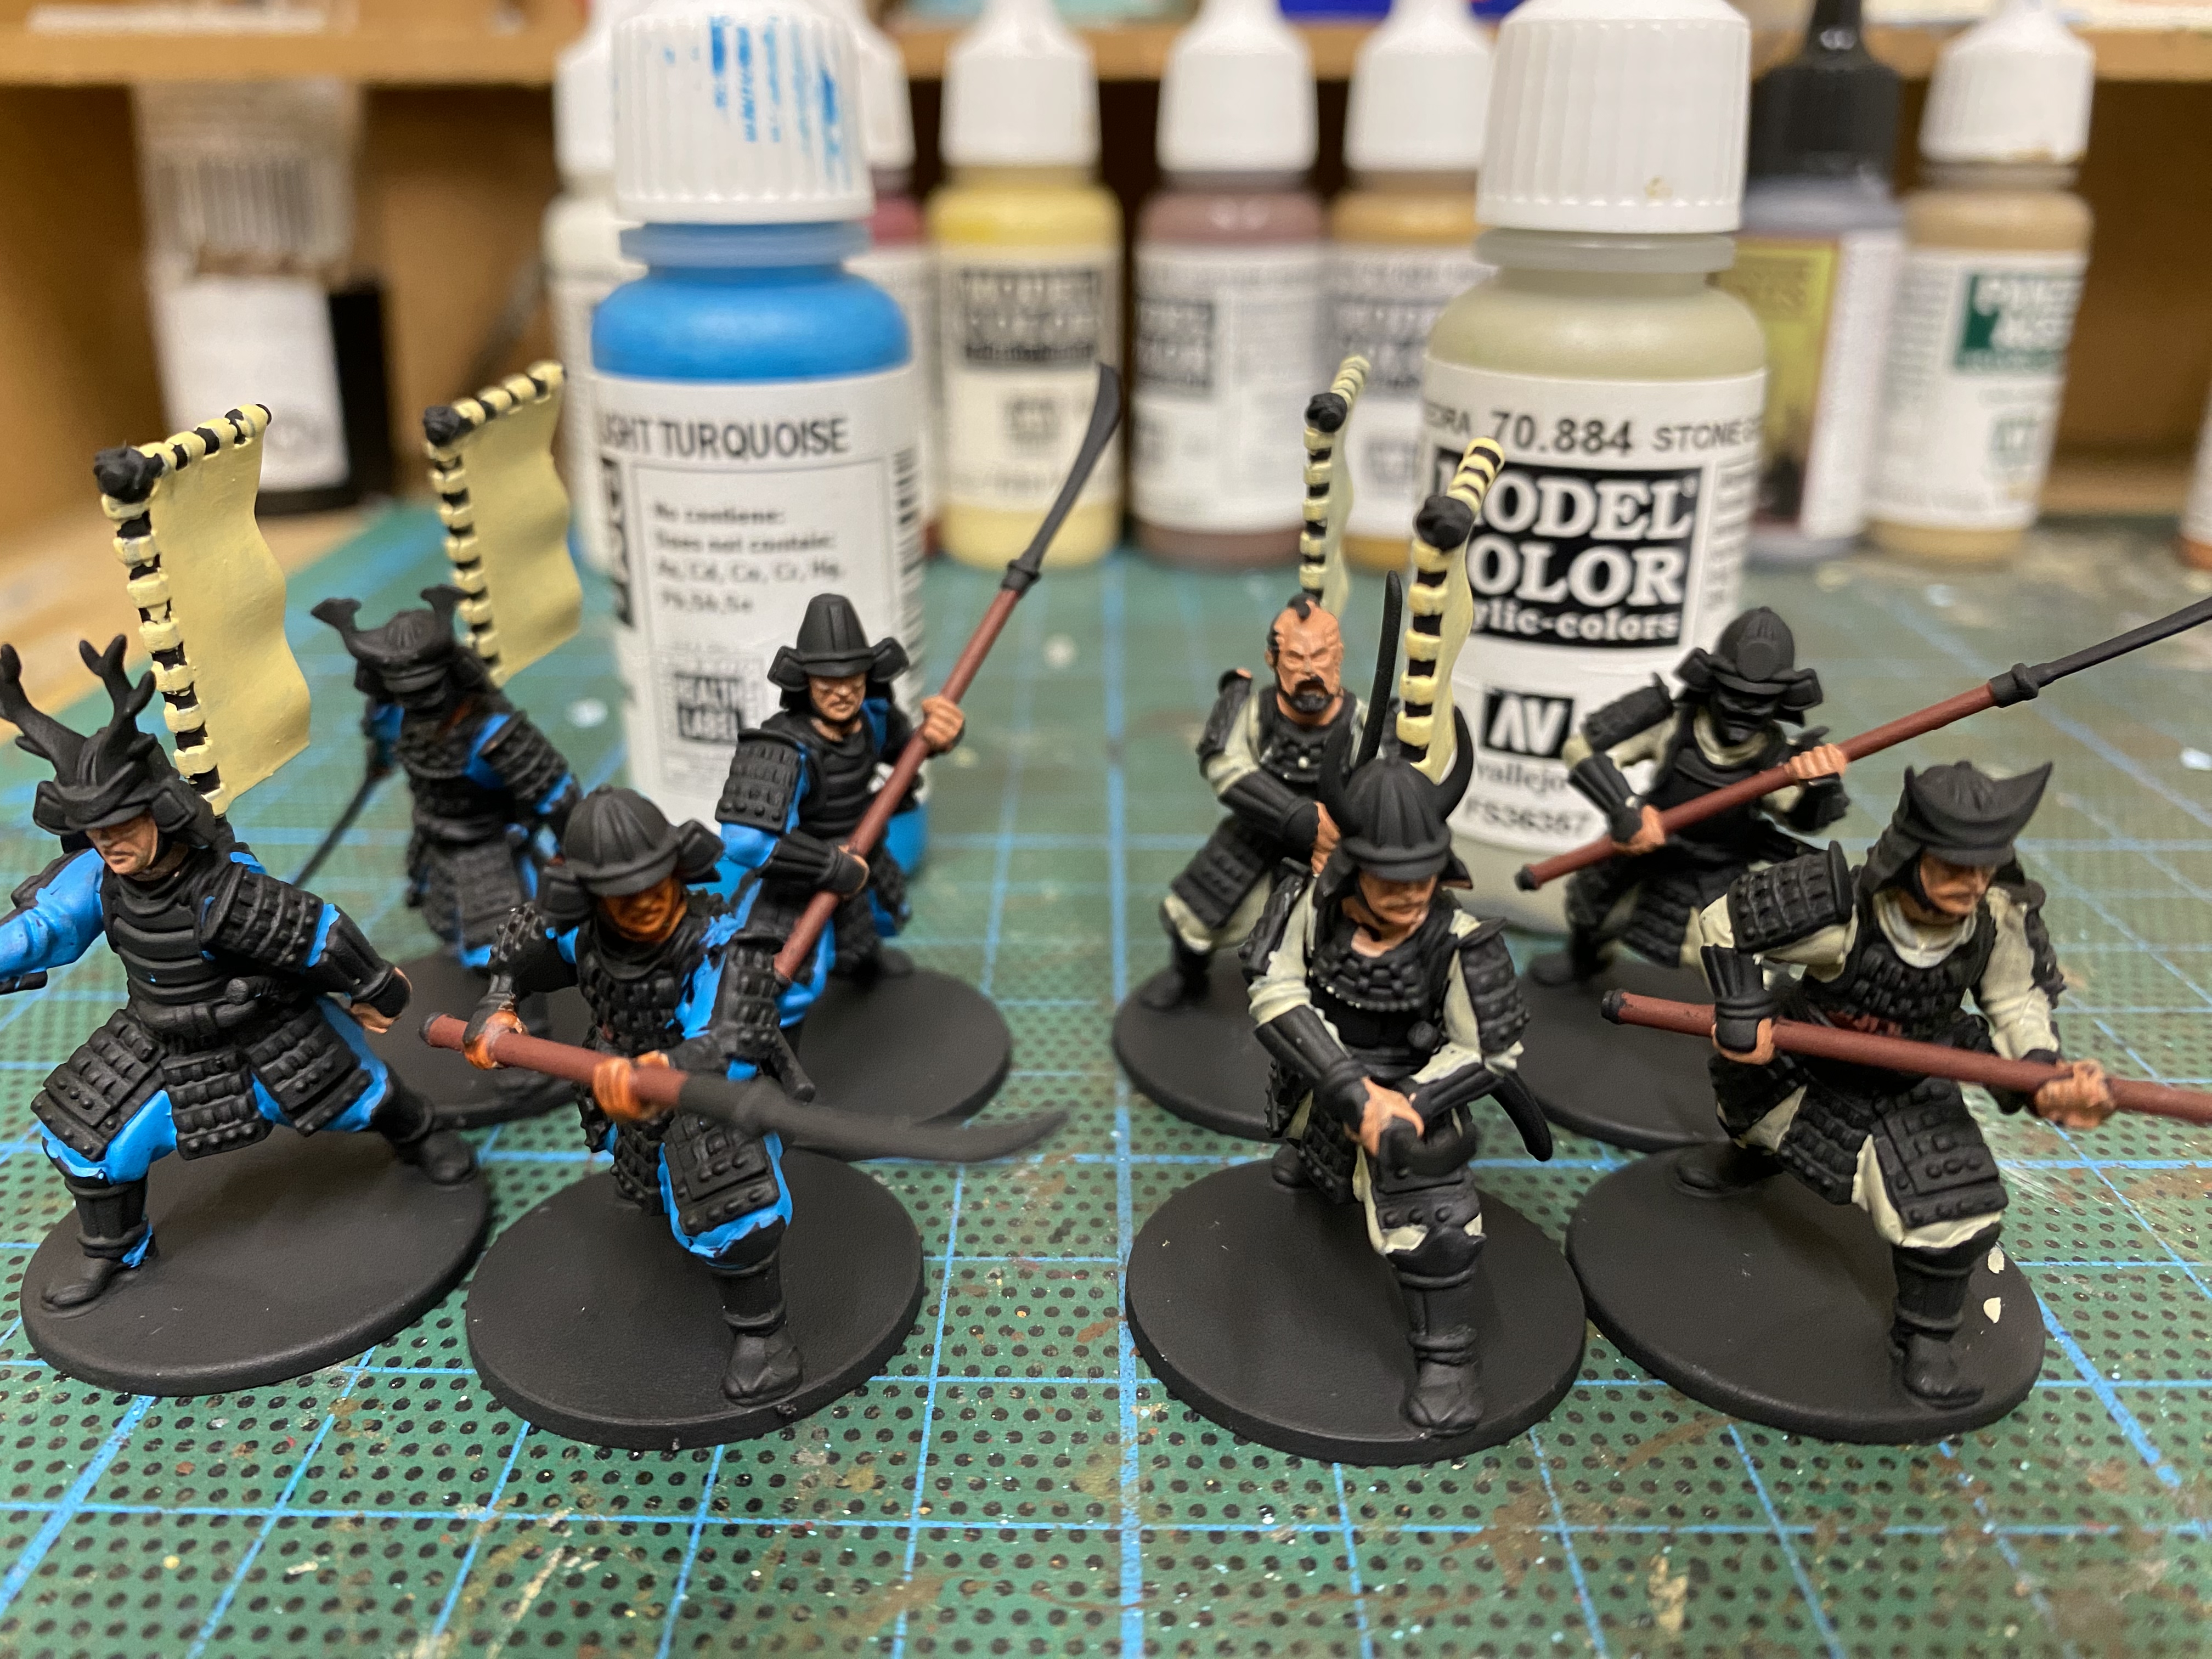
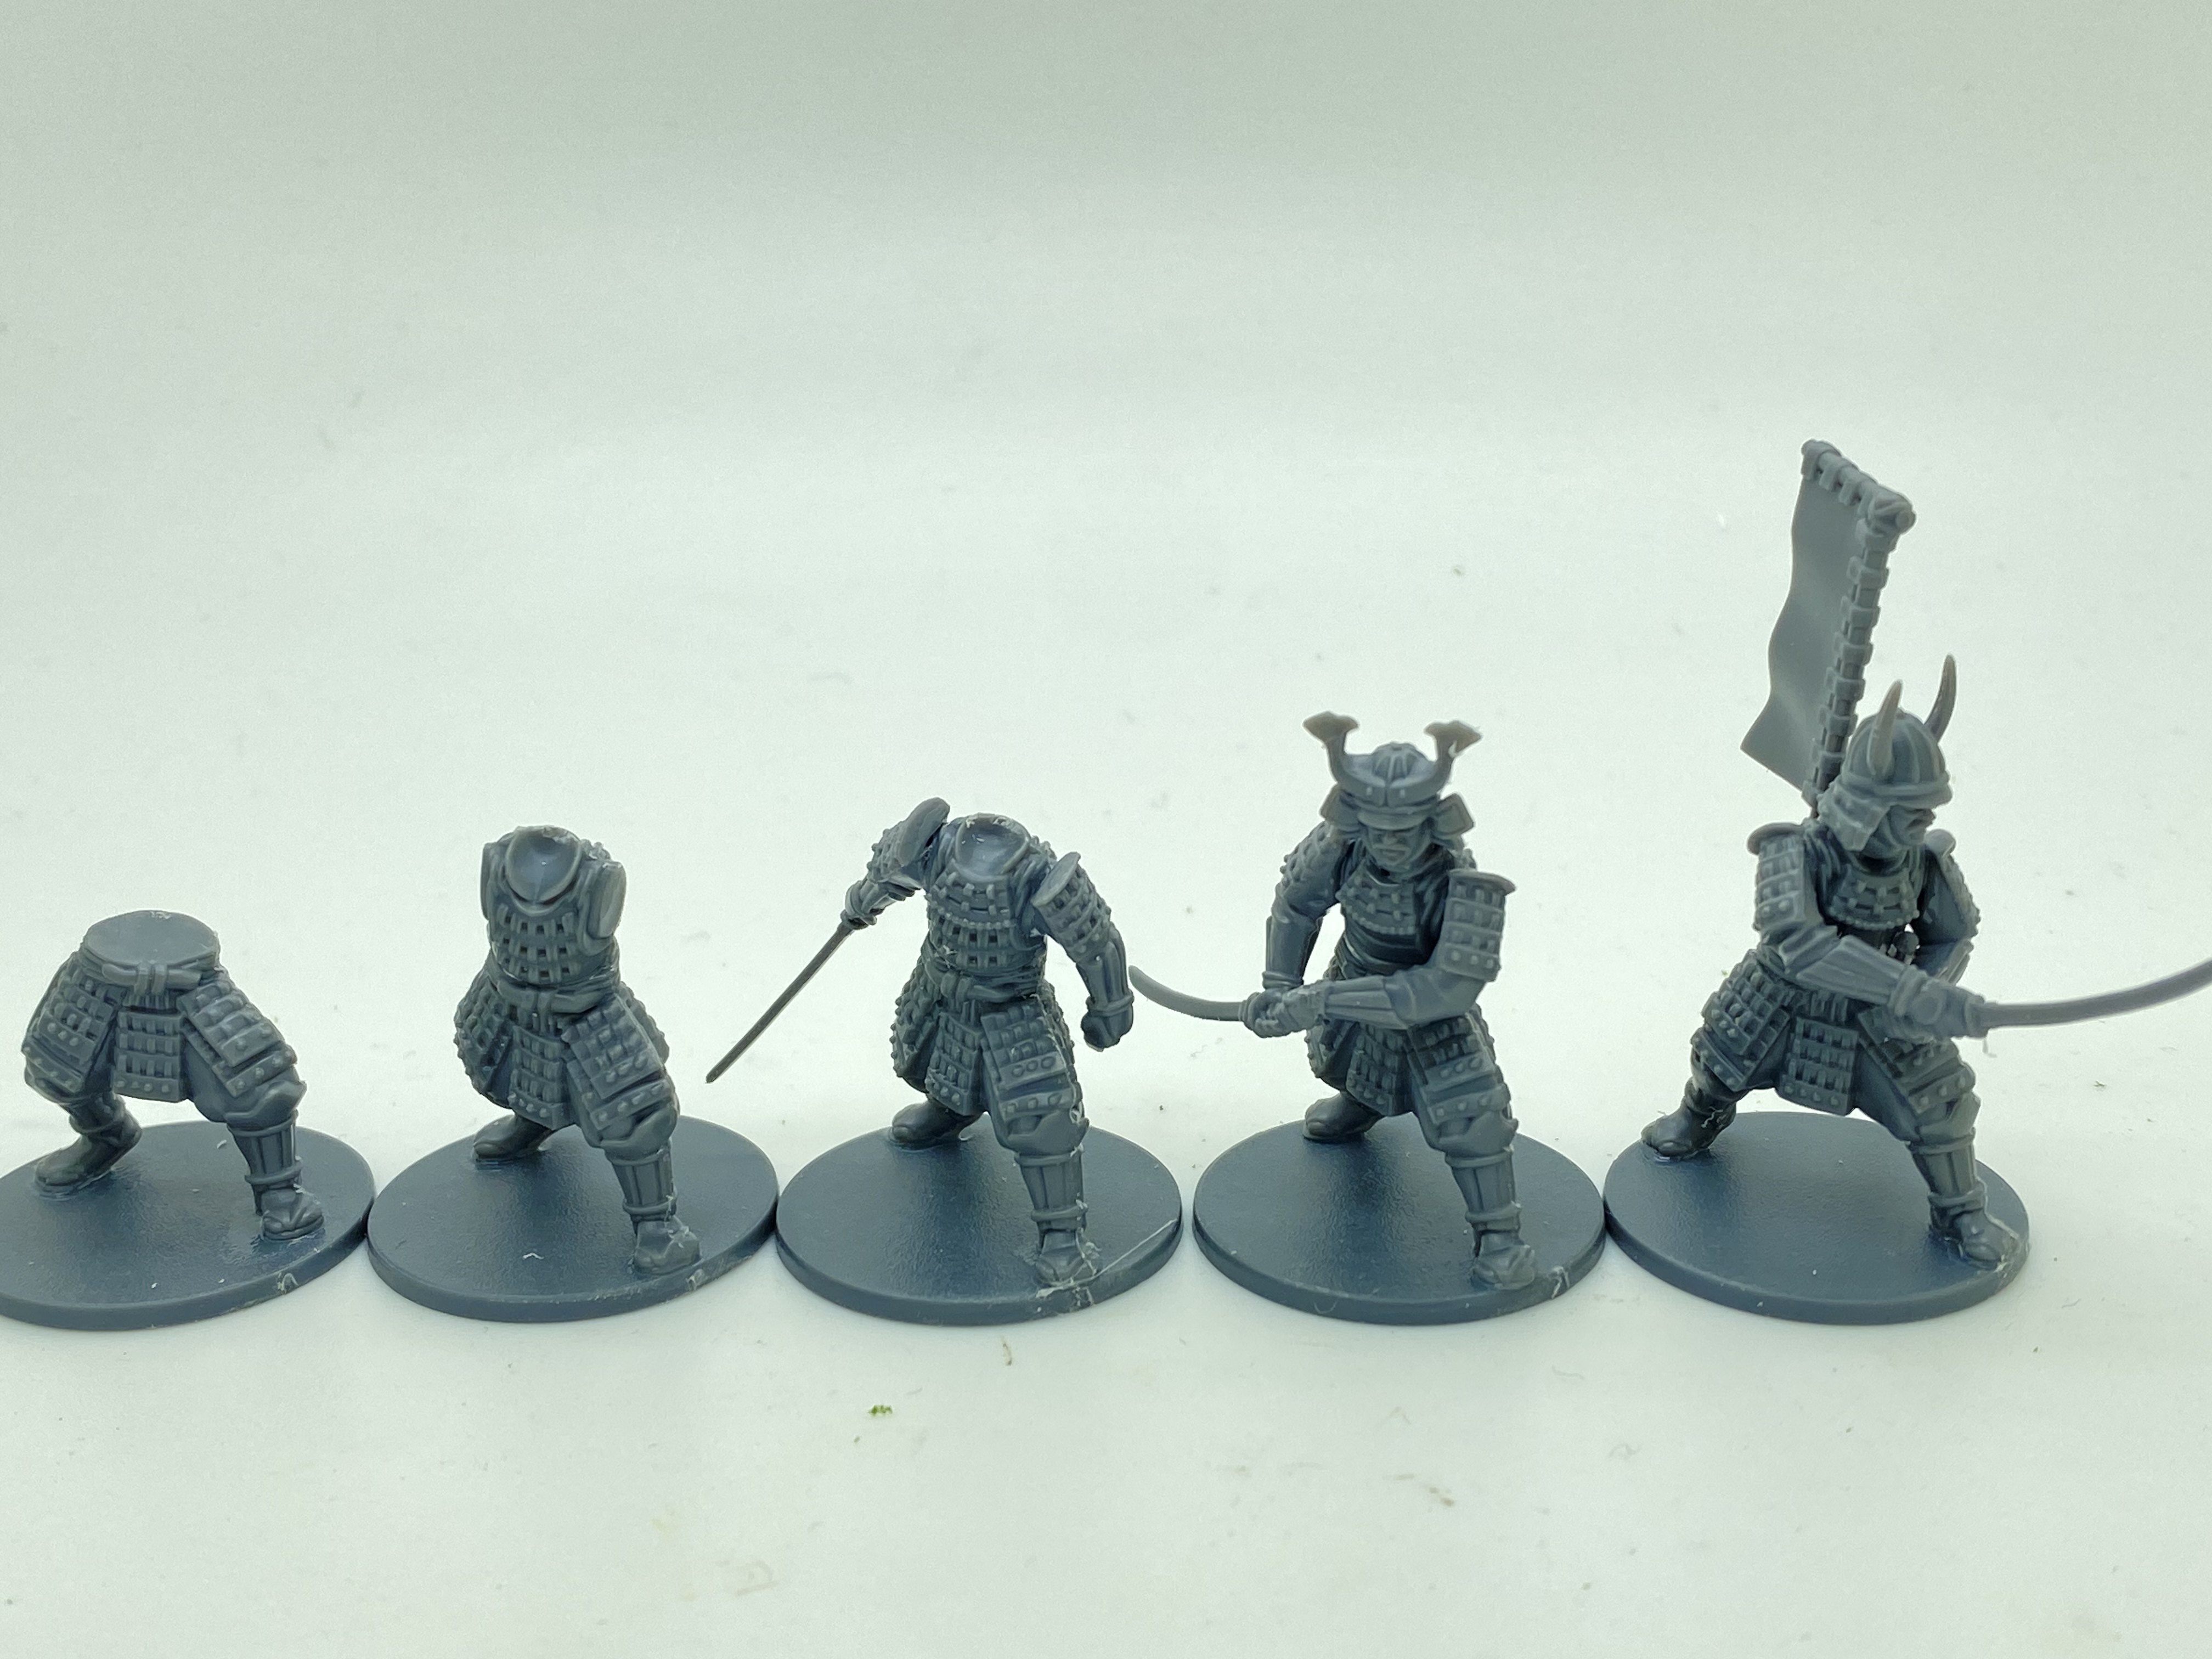
The next task was to paint some Samurai warriors. I would need at least 24 fighting troops in two units, as well as another seven based as leaders. I have decided to batch paint the Fireforge Samurai and started by painting a test model. As you can see from the top picture, I went for a simple colour scheme. For the Samurai, rather than dry brushing the armour to highlight it, as I did for the Ashigaru, I decided to leave the armour as a solid black and instead paint the stitching in a colour to add interest to the figure. I was also looking for a fast way to produce some reasonably painted figures that would look good as a unit. Perhaps I will spend a bit more time on the Samurai leaders but for now I need quantity!
The first four figures painted as a batch ready for basing.
Once I had figured out a basic scheme, I decided to paint them as a batch. Using of all colours, Vallejo Japanese uniform for the cloth. By producing these four, I now had a ‘Template’ for the next batch. This time I would go for eight to give me my first unit.
The next batch of eight on the work bench
I chose light turquoise for the clothing on four figures and stone grey for the other batch. Everything else will be the same colours for the batch, with perhaps the stitching on the armour also varying between the four. I fancy Blue for the turquoise and red for the stone grey but I may change this when the paint hits the figure! This should result in a unit of Samurai that look similar but not identical as you would expect. It also means that I should get this first batch finished within a week or so. My target is to have the army completed by the end of February! I’ll keep you informed of progress in future blogs.
THE COMMERCIAL BIT
I hope that you all enjoy your hobby as much as I do – our web site will have much of what you need! Click here to see our shop.
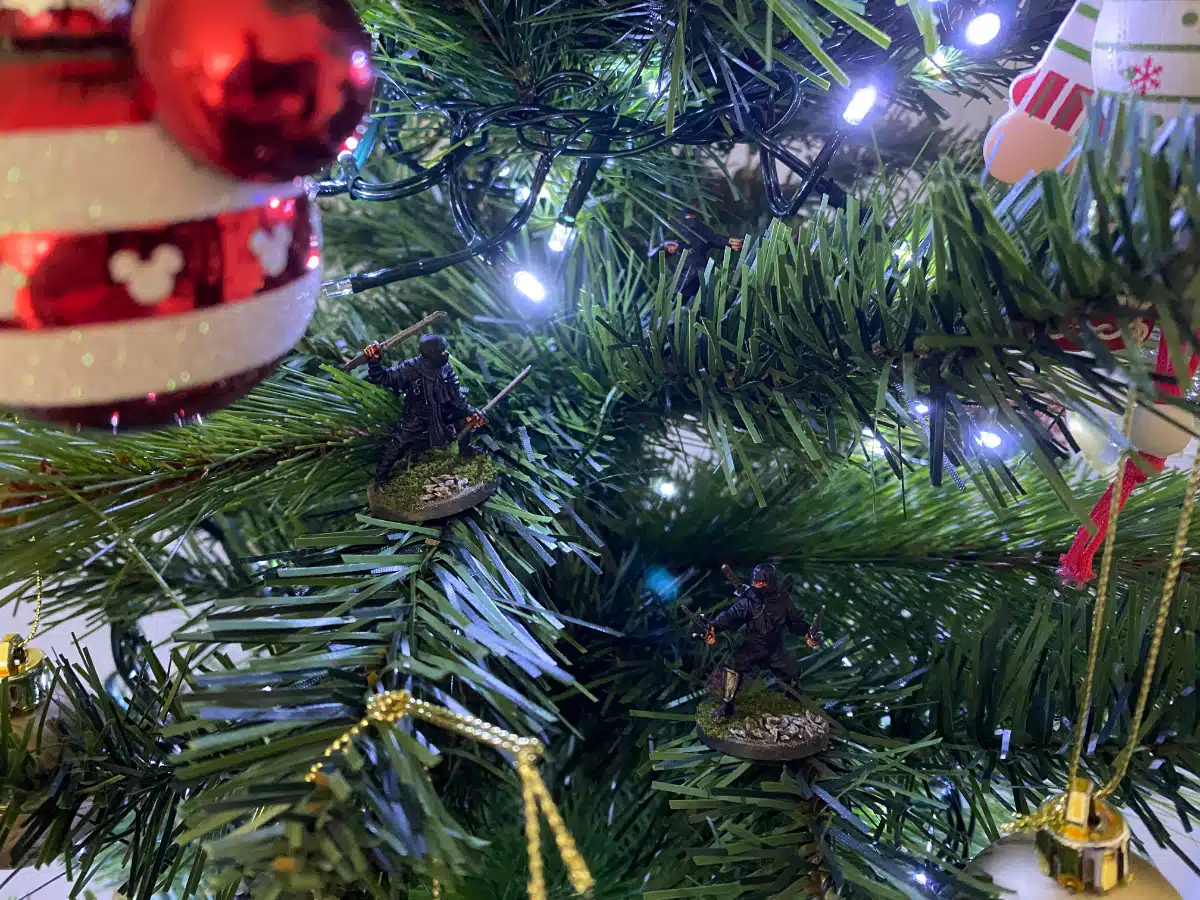
Christmas is nearly upon us, so a Merry Christmas and a Happy and Prosperous New Year to all of my Friends, Customers, Facebook associates and any one else that that takes the time to read my blog!
To be fair, my blog is as much a self indulgence as it is anything else. I hope that it is of use to fellow hobbyists as I try to share my research and thoughts on the hobby. I think that there are some useful tips and techniques and perhaps reading how someone else goes about building a collection or army is useful. Even if this means you avoid my mistakes!
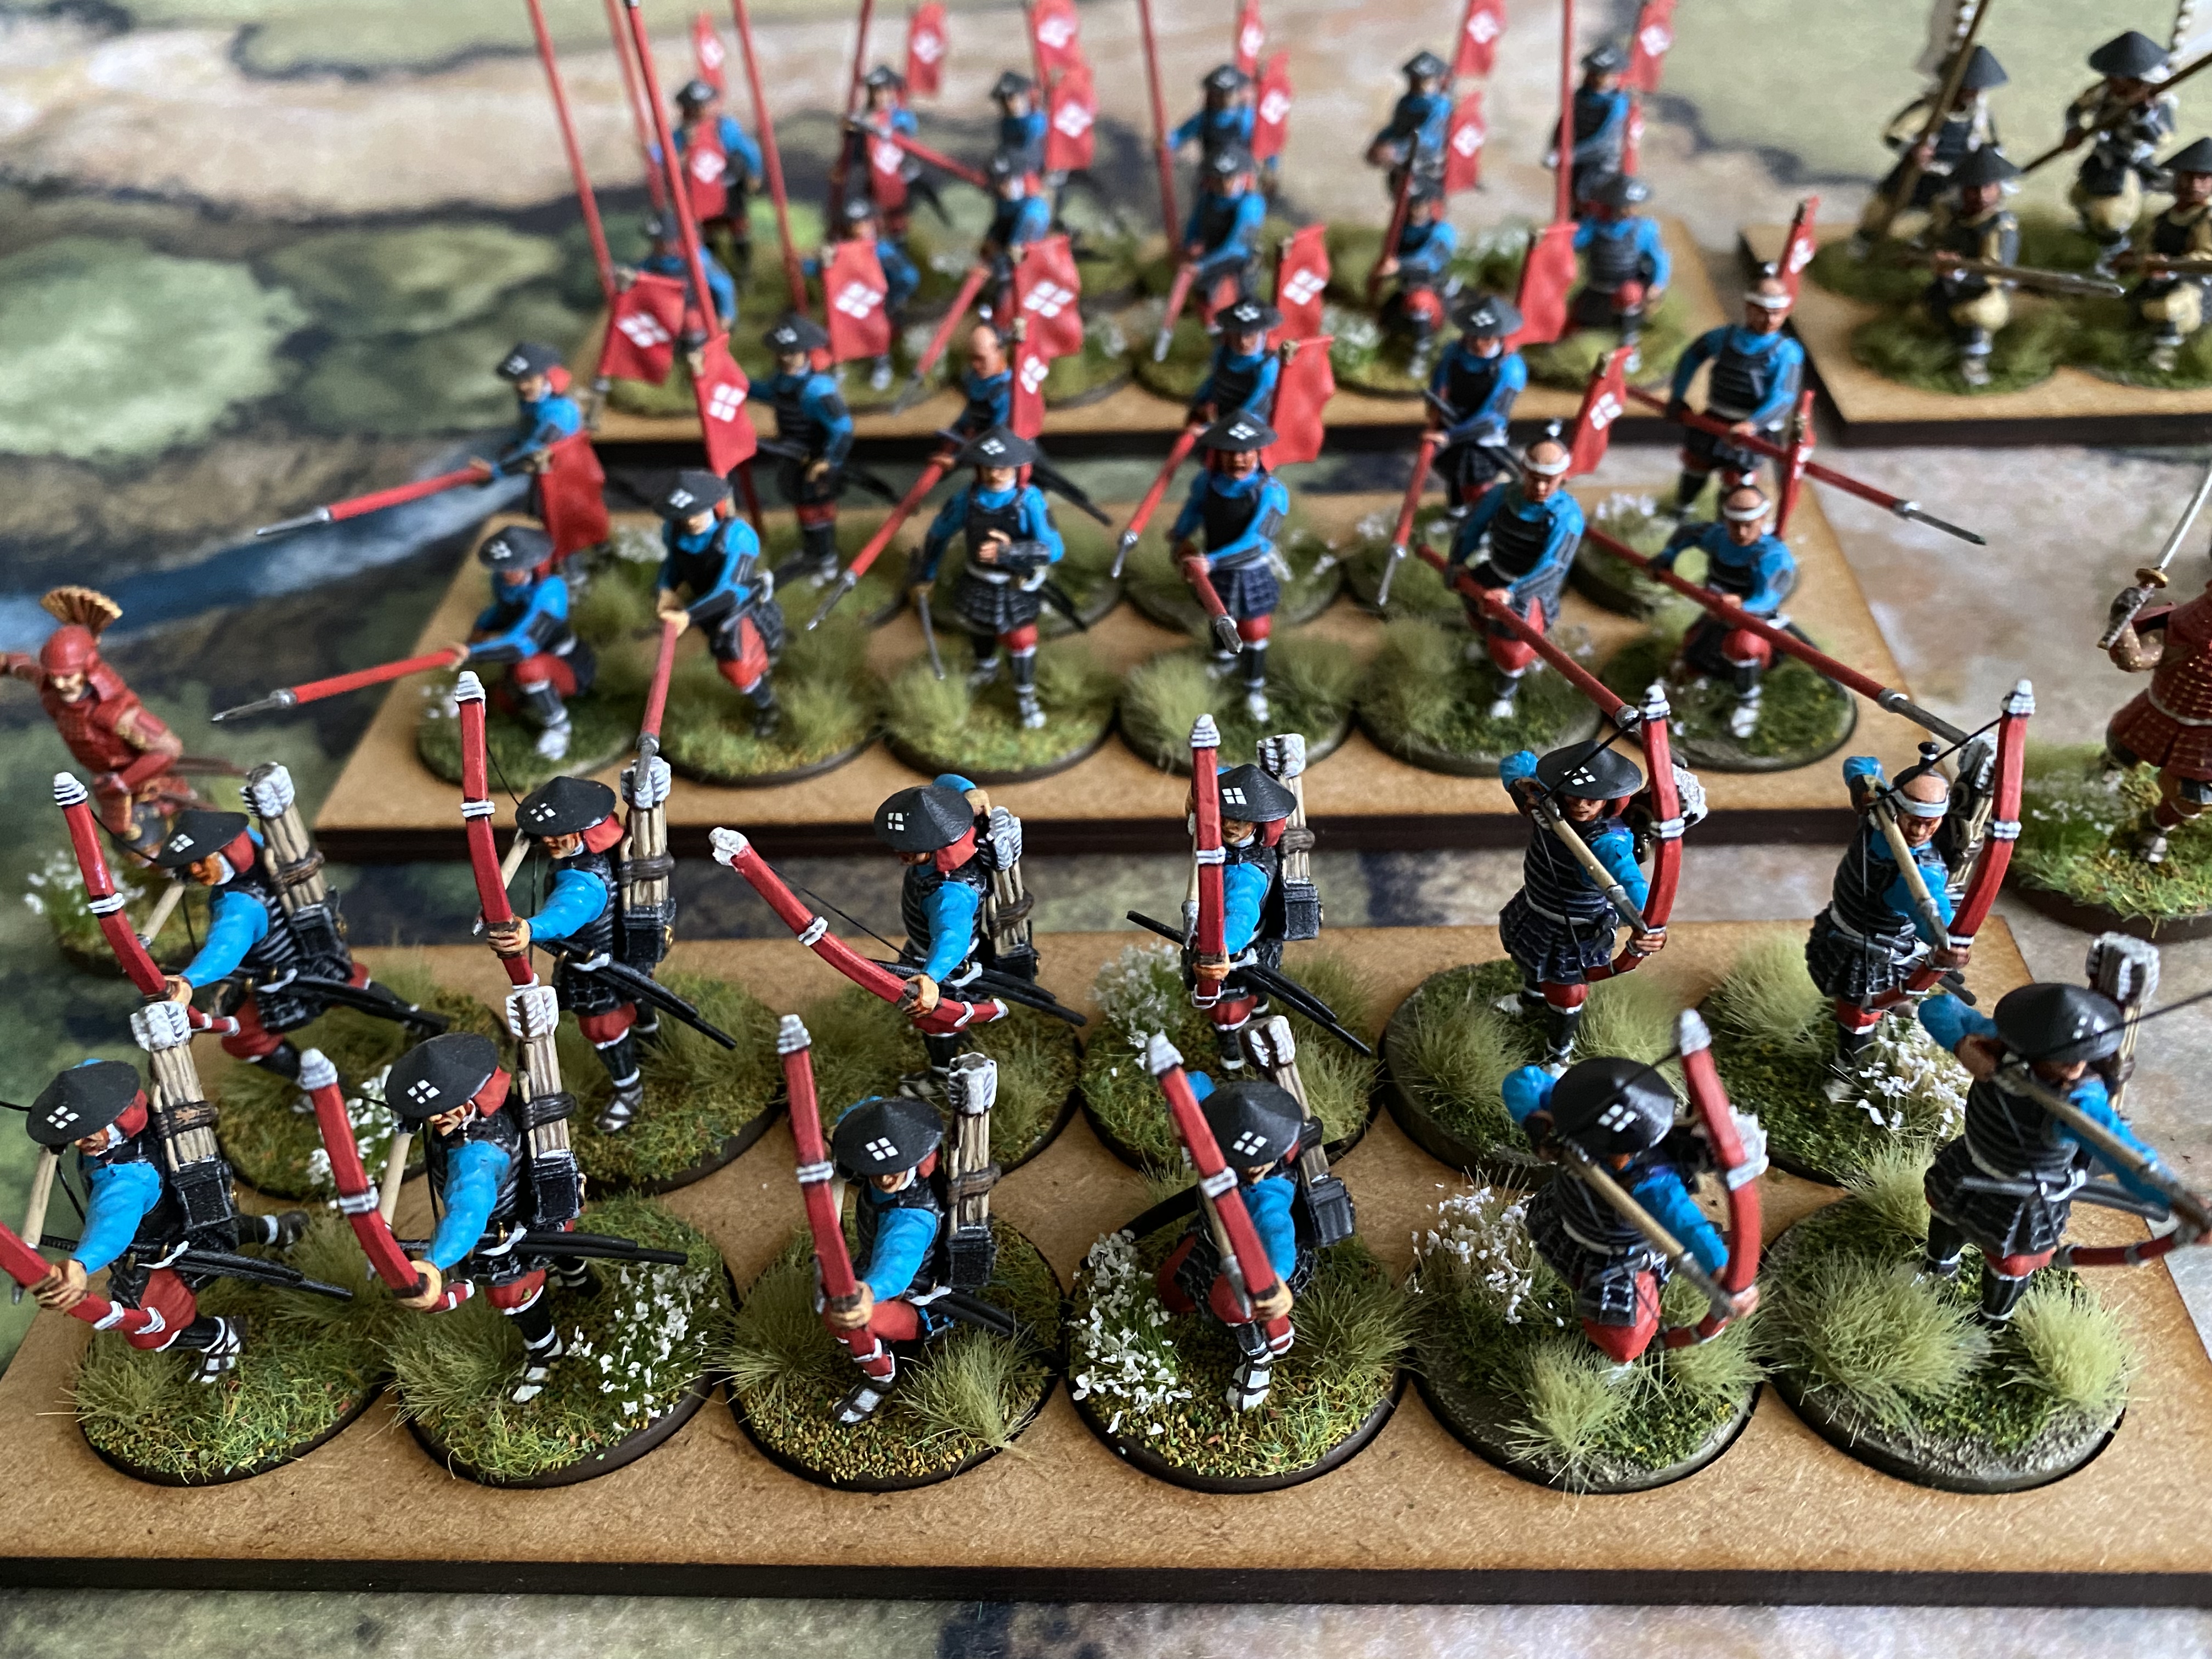
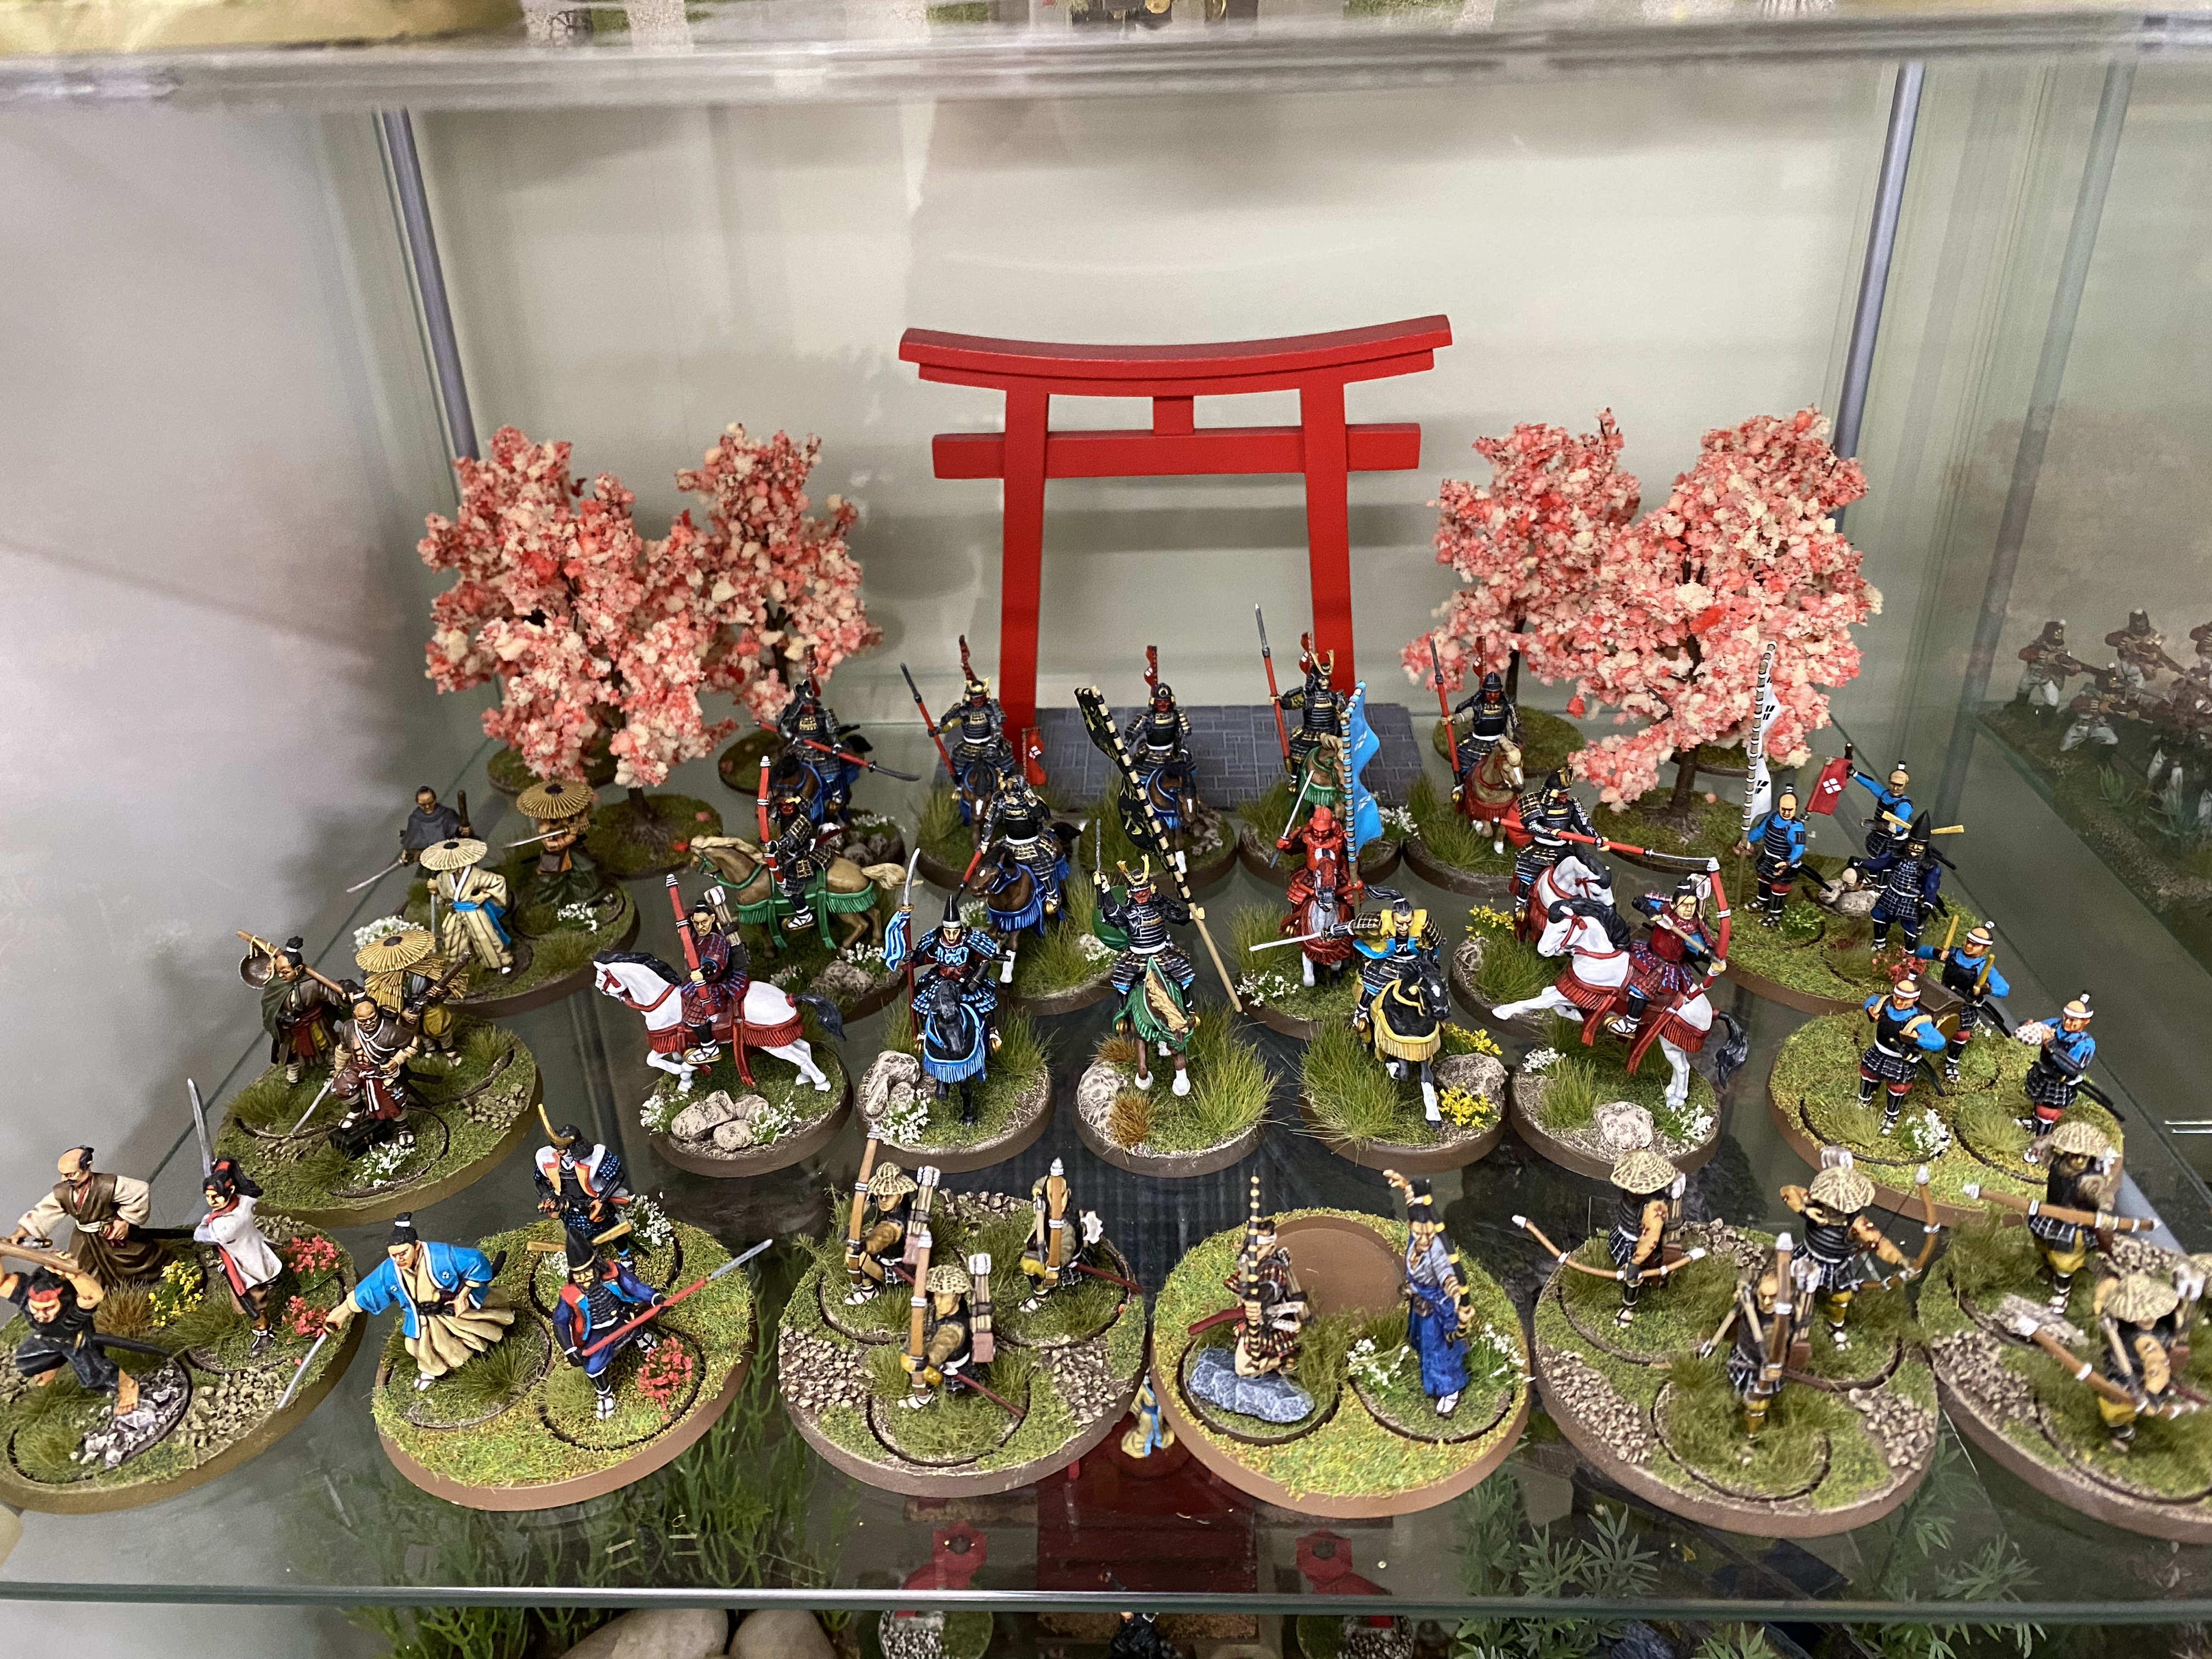
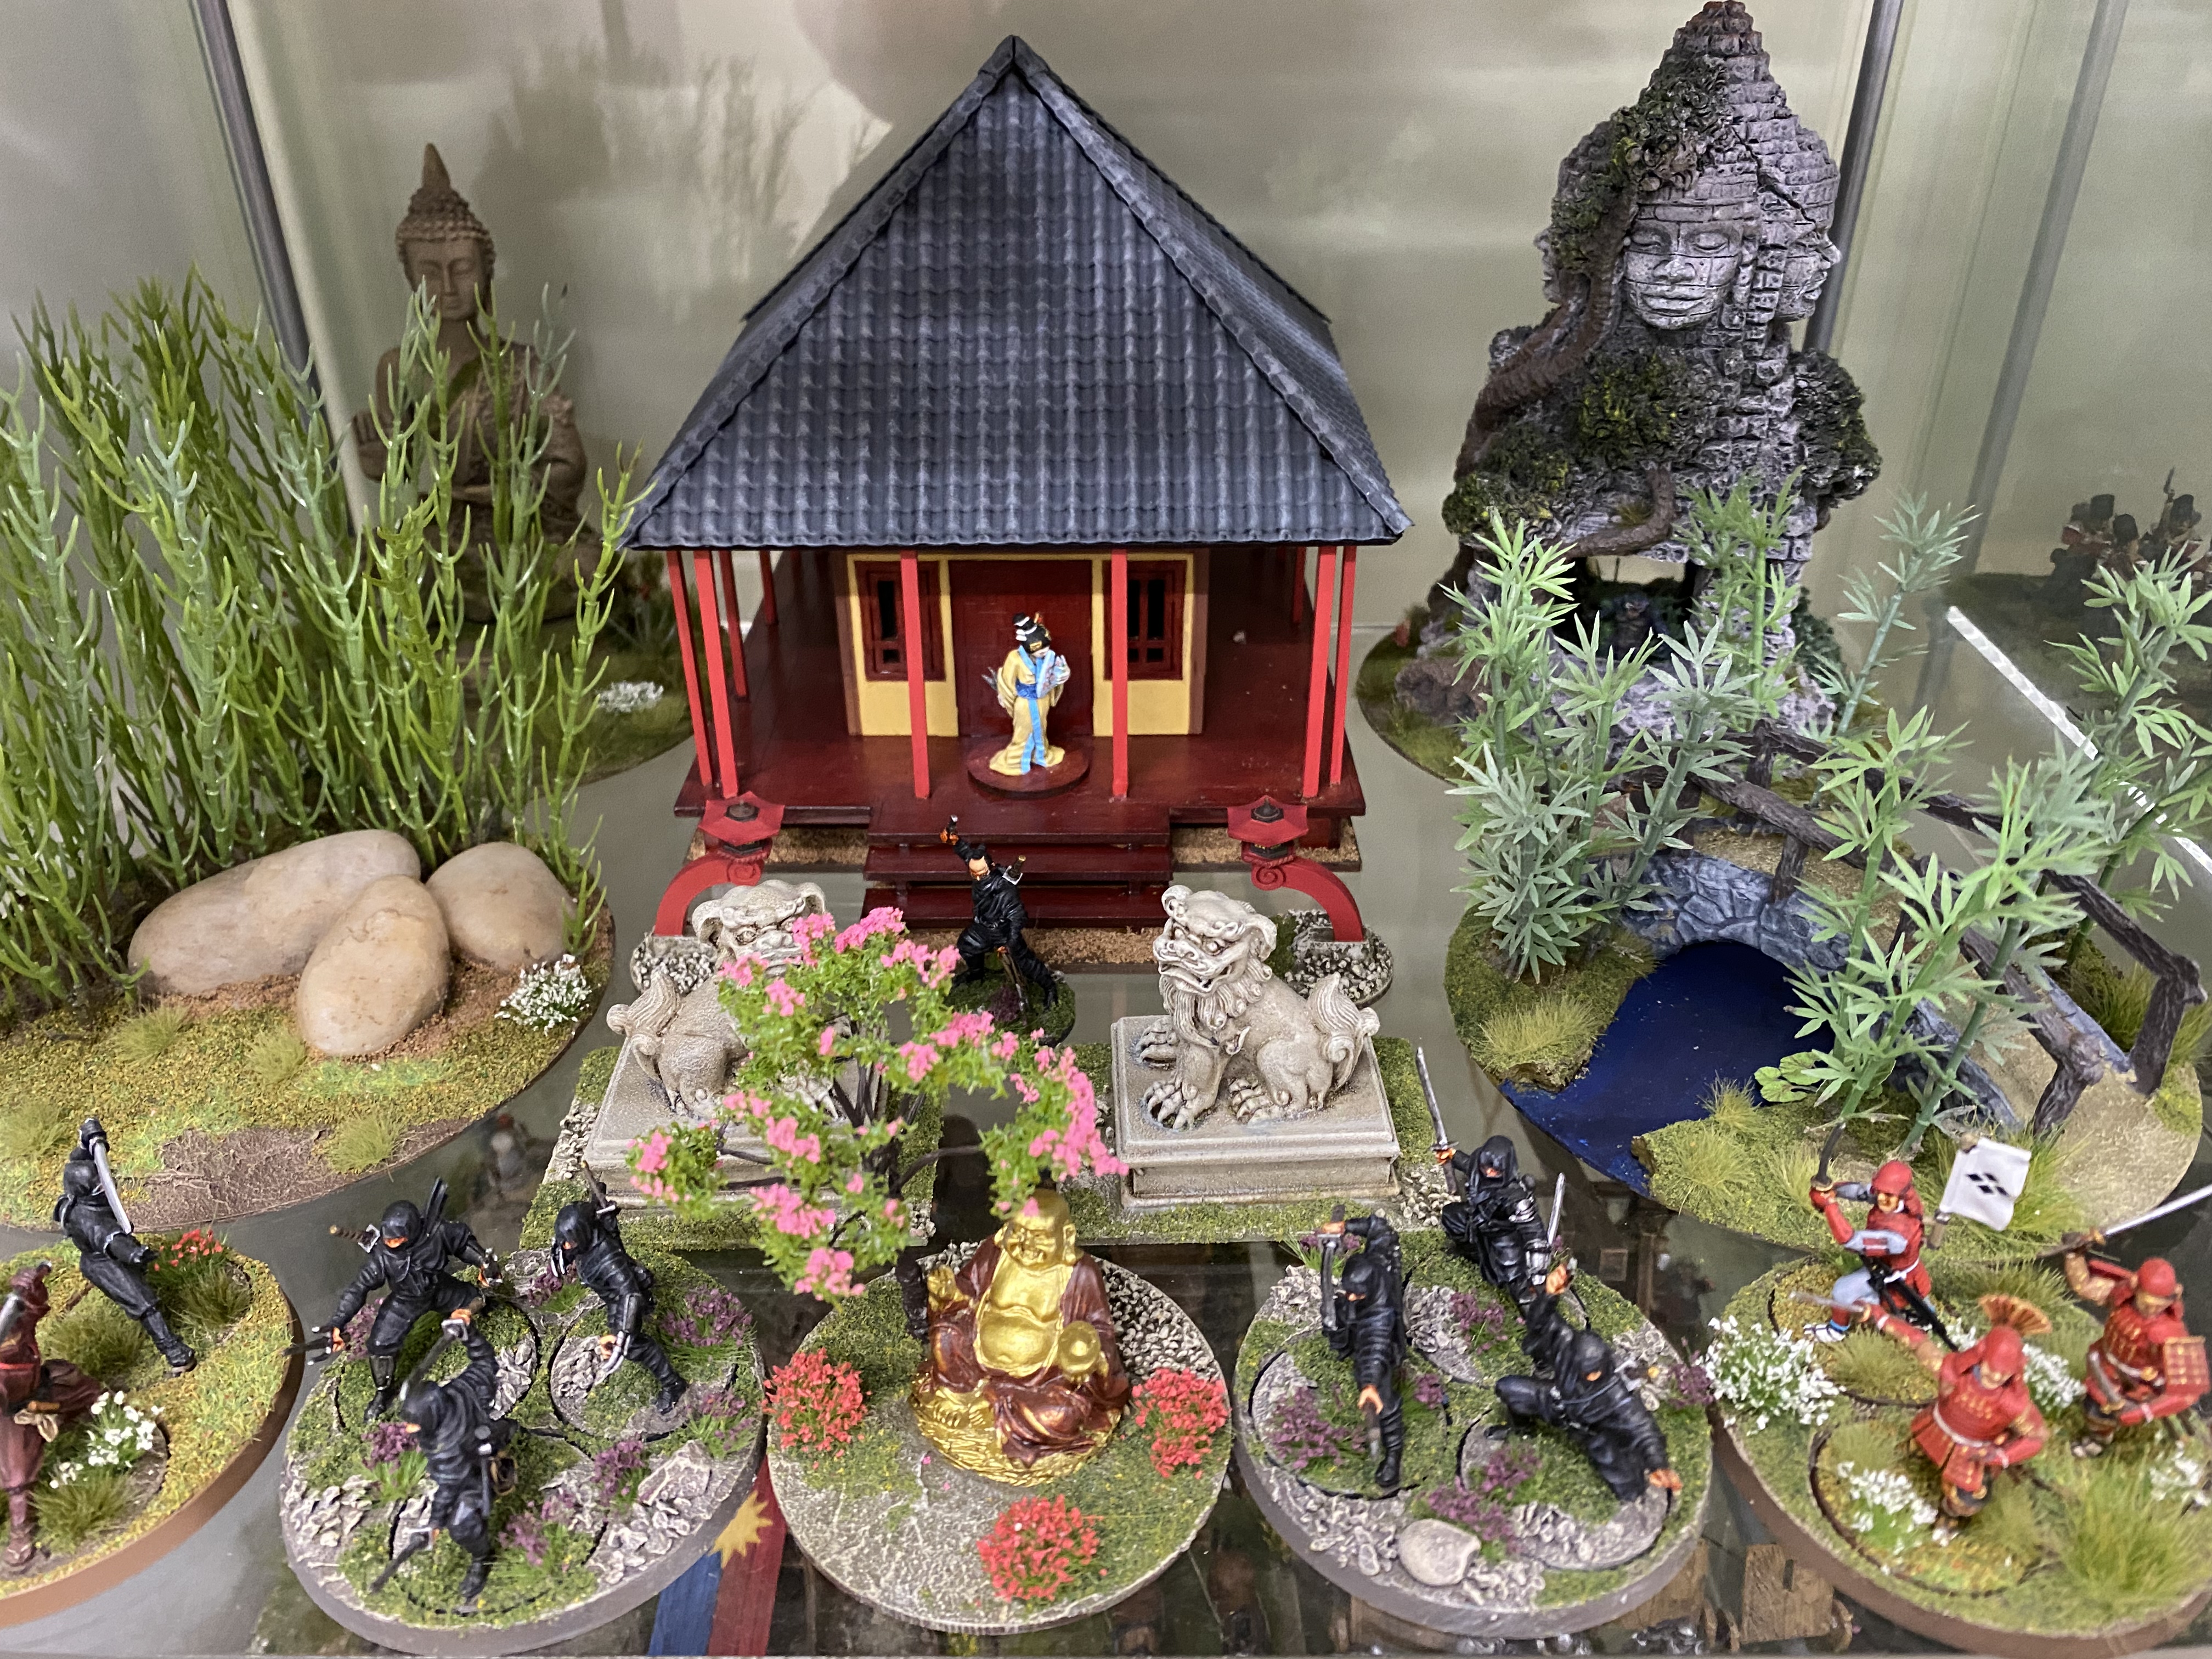
Just some of the models in my Japanese collection.A few more models in the cabinet
It certainly is useful for me! For one thing, it keeps me focused on a particular project and it is an invaluable record of how I have done things in the past. A good example is my most recent project. I have written an adaptation of the ‘Never Mind The Bill Hooks’ rules for Samurai warfare – ‘Never Mind the Bushido’. Before I unleash these rules onto the Never Mind The Bill Hooks community, I want to sanity check them and make sure that some of the new mechanics that I have introduced actually work in a gaming situation as opposed to in my imagination!
In order to play test the rules I need an army. The easy way would be to borrow one from the generous friends that have made this offer. However, that would leave me in a position of not being able to play my own rules, should they be successful. No, I have to bite the bullet, so to speak, and get painting!
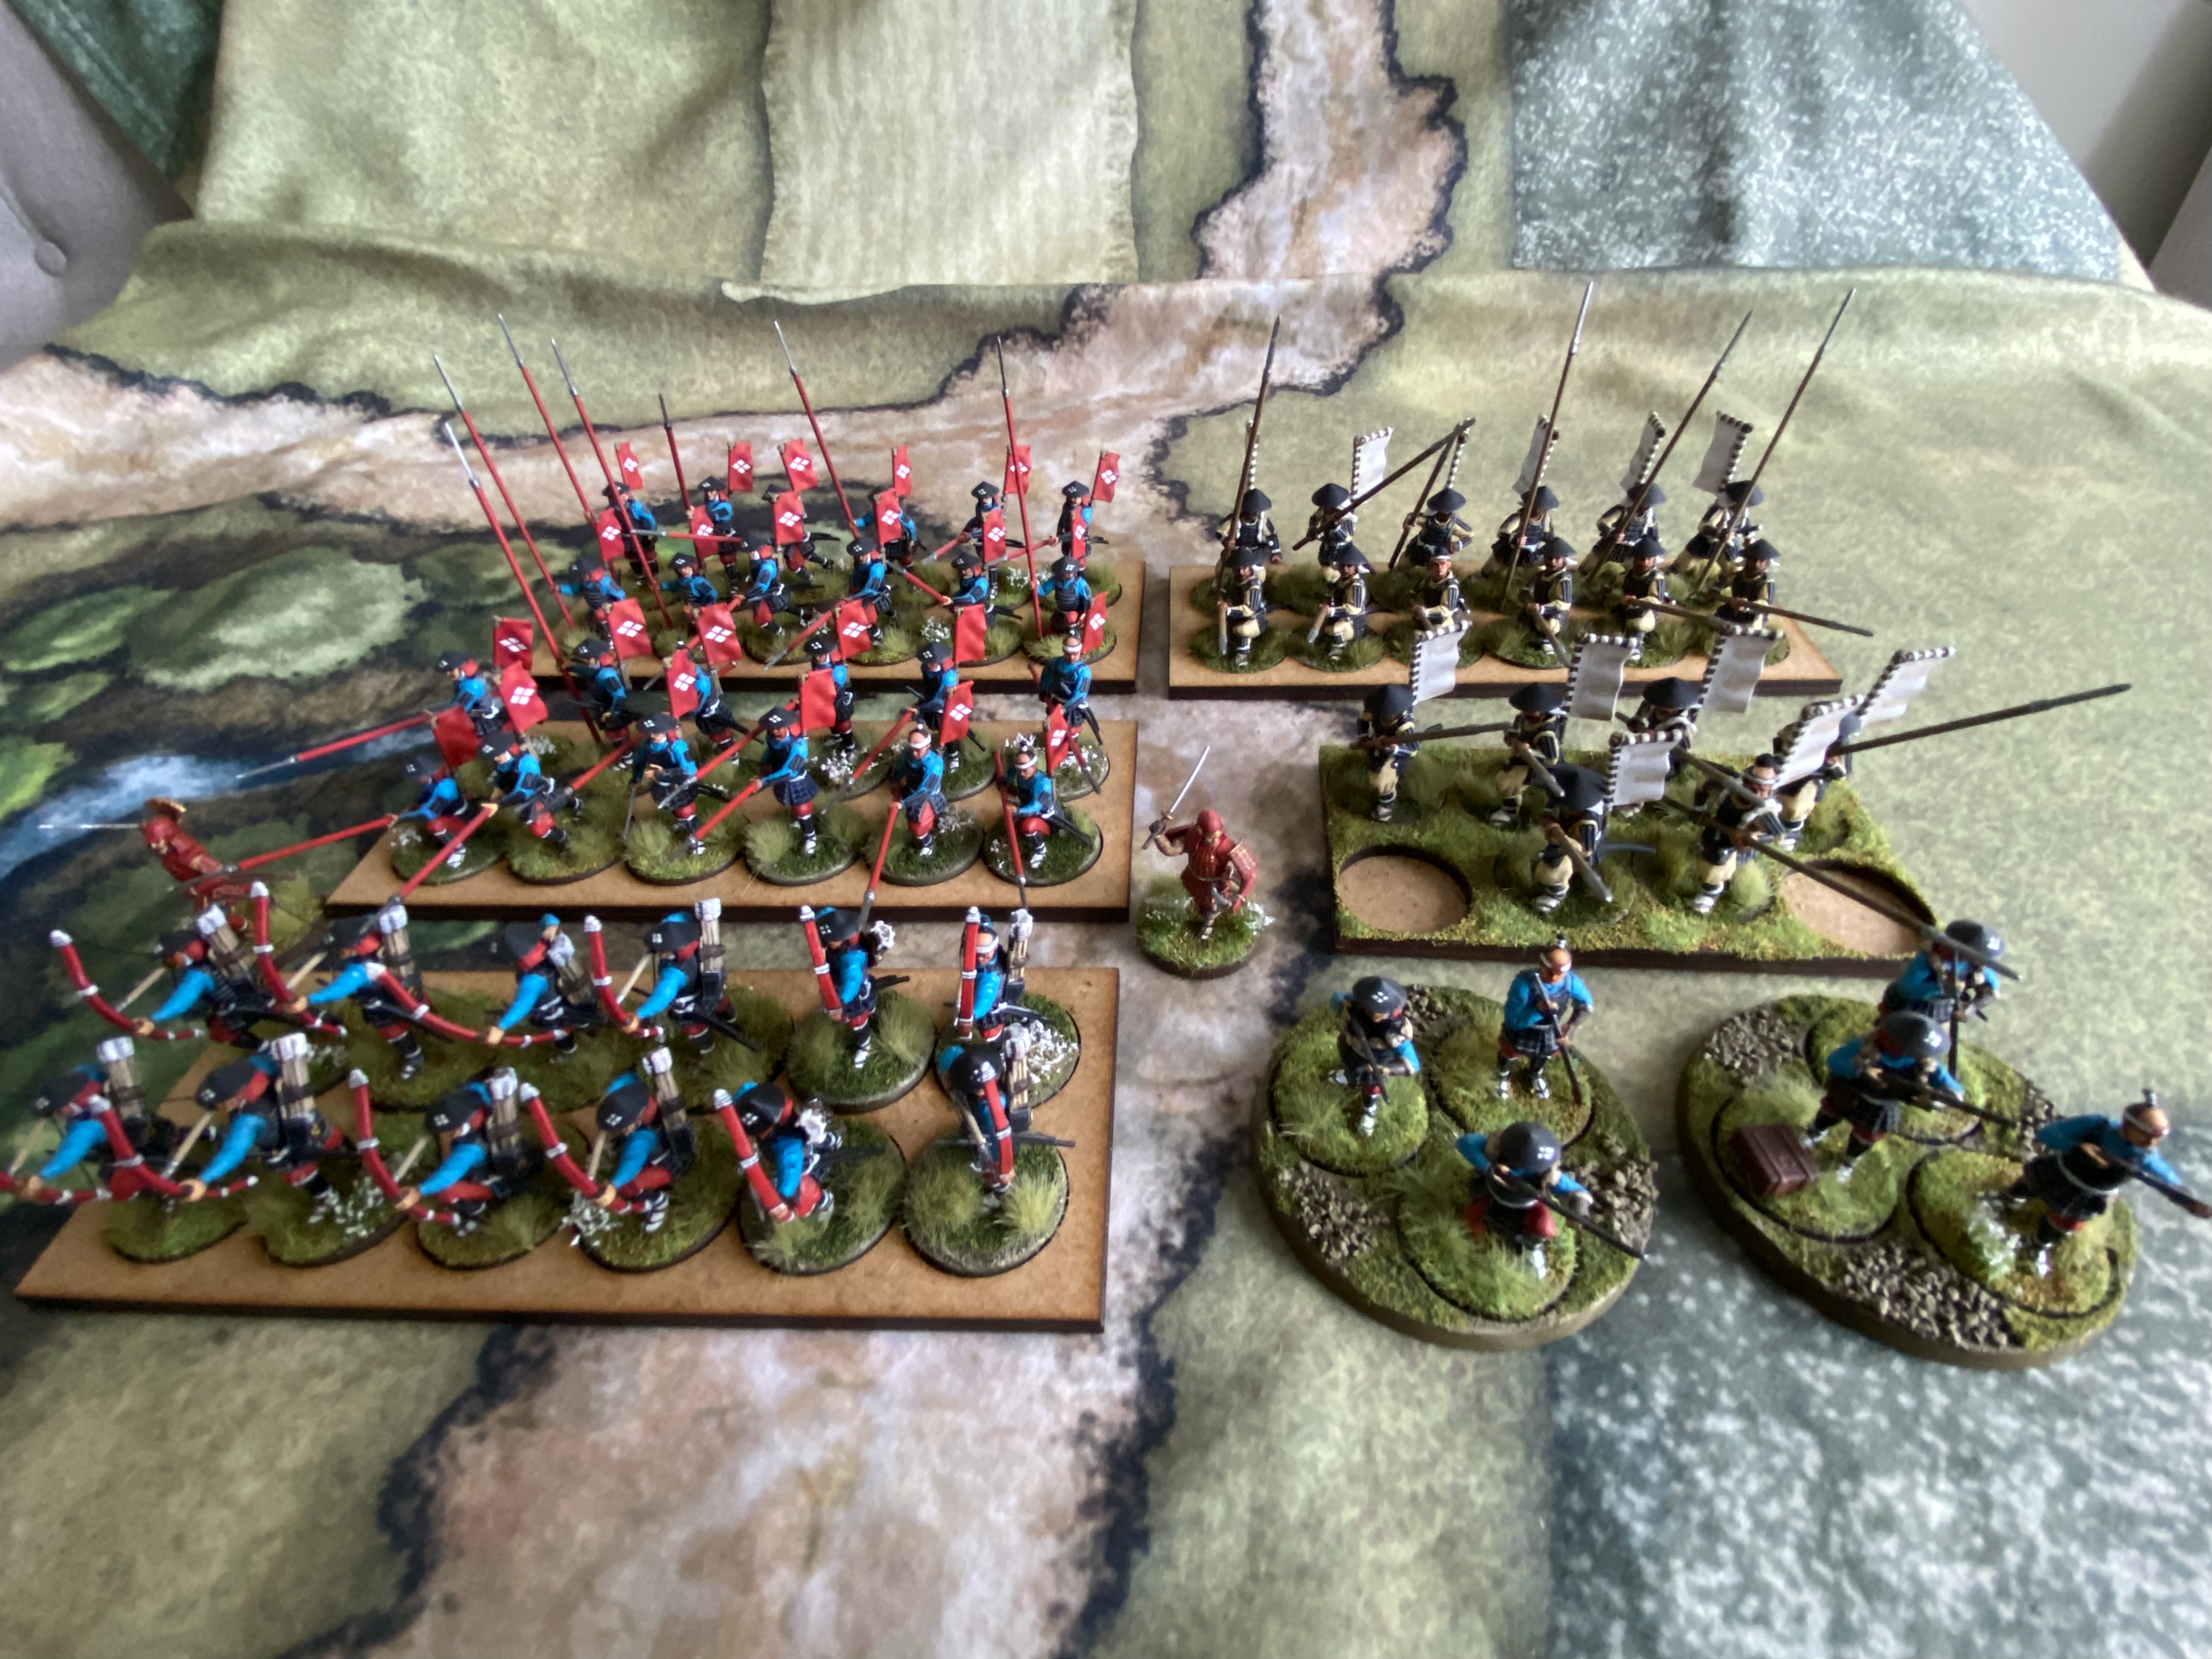
My new army taking shape – a mixture of Warlord and Foreforge figures
I do have a helpful starting point. I was very much into the original ‘Test of Honour’ game and I had painted a large war band as well as some scenery (see pictures above) All I needed to do was to paint the additional figures to up grade my collection into units for NMTB. I will need about 120 figures and my first army list will look something like this:
24 Samurai Warriors ( possibly in 2 units)
24 Ashigaru armed with Yari ( spears to form a ‘pike block’)
24 Ashigaru armed with Yumi (bows)
12 Ashigaru armed with Naginata (bills)
12 Ashigaru in two bands of six armed with Teppo (guns) as ‘Skirmishers’
8 Mounted Samurai armed with Bows
8 Mounted Samurai armed with Naginata or Katana
At least 7 Samurai Leaders
The rules also have an option of Ninja being ‘bought’, so I’ll need six of these!
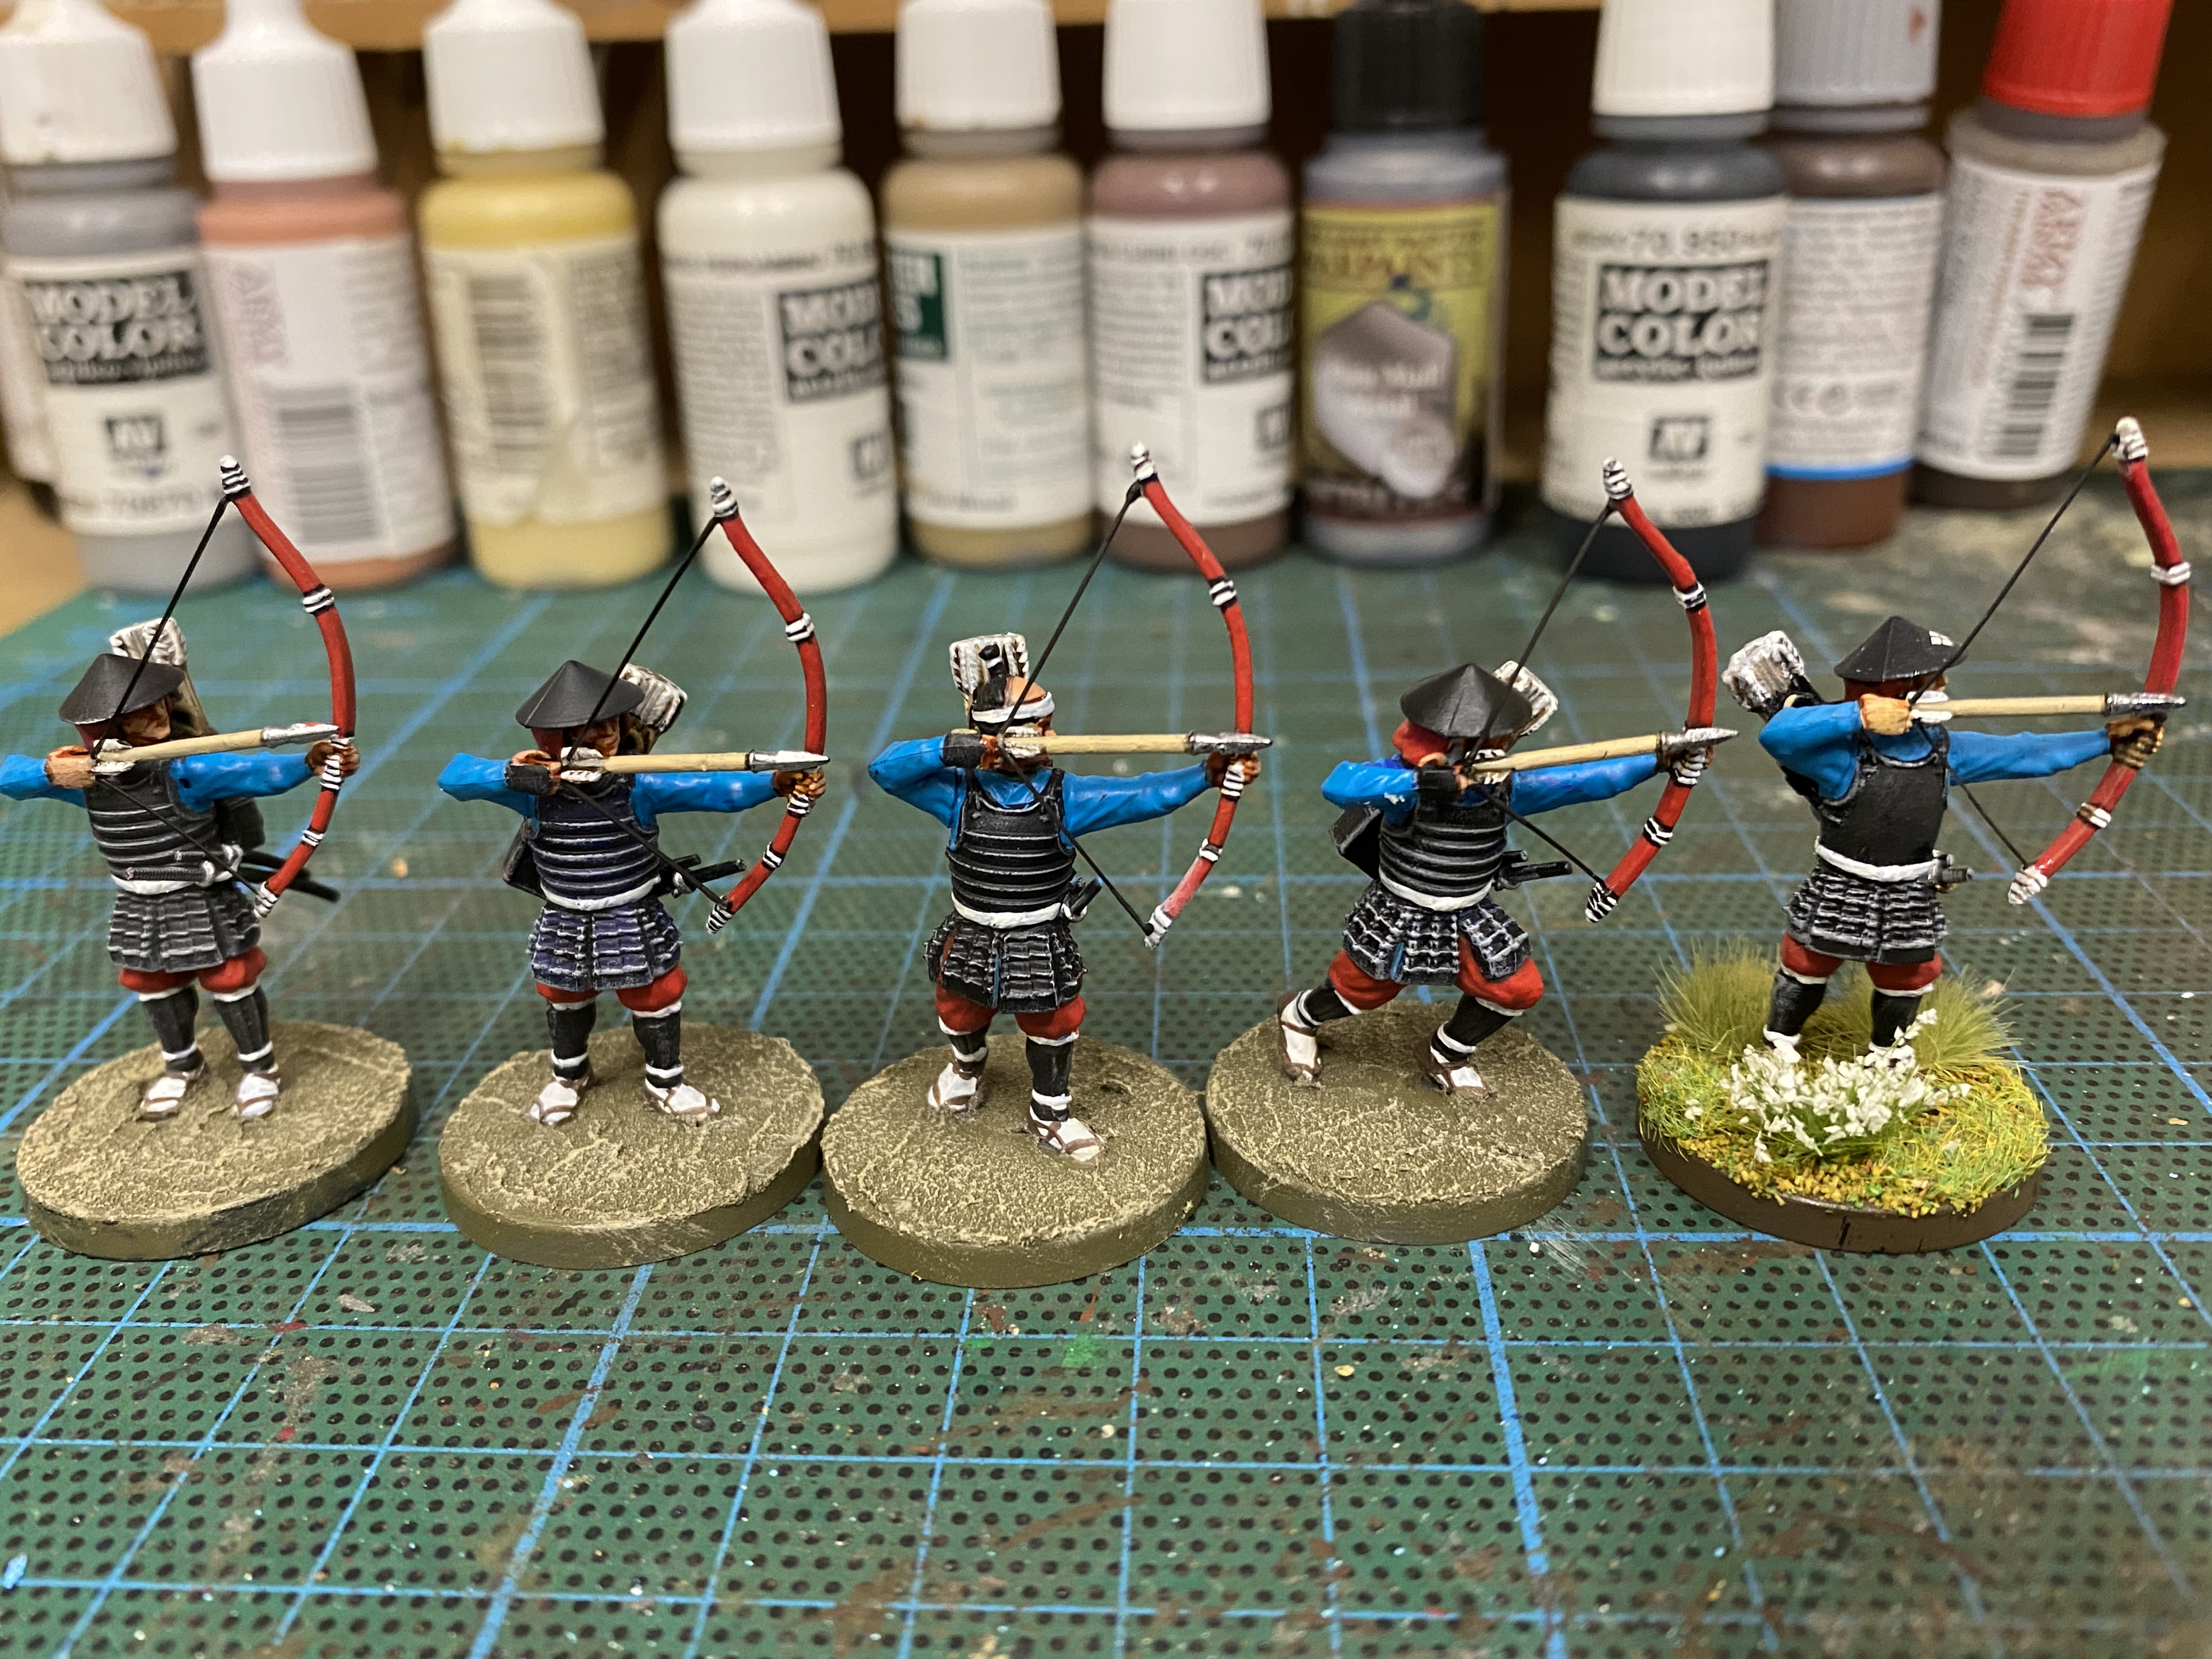
The four to the left are the new additions – copied from the one on the right, thanks to my blog! Just the basing to finish.
Which brings me back to my blog. I have 8 Ashigaru armed with bows already painted. To get my first unit of 12 all I need to do is to add another 4. So when it came to remembering just how I painted them originally and the colours used, all I had to do was to check back on my blog and all the information that I needed was there! It is worth noting that it was 2017 when I last painted these! Without my blog, I would have struggled to remember how to start again!
If you would like to see more articles about how I built my Japanese Samurai collection, including the scenery, click on the link below to my Samurai category in my blog. I suspect that the New Year will bring a few more articles on this subject!
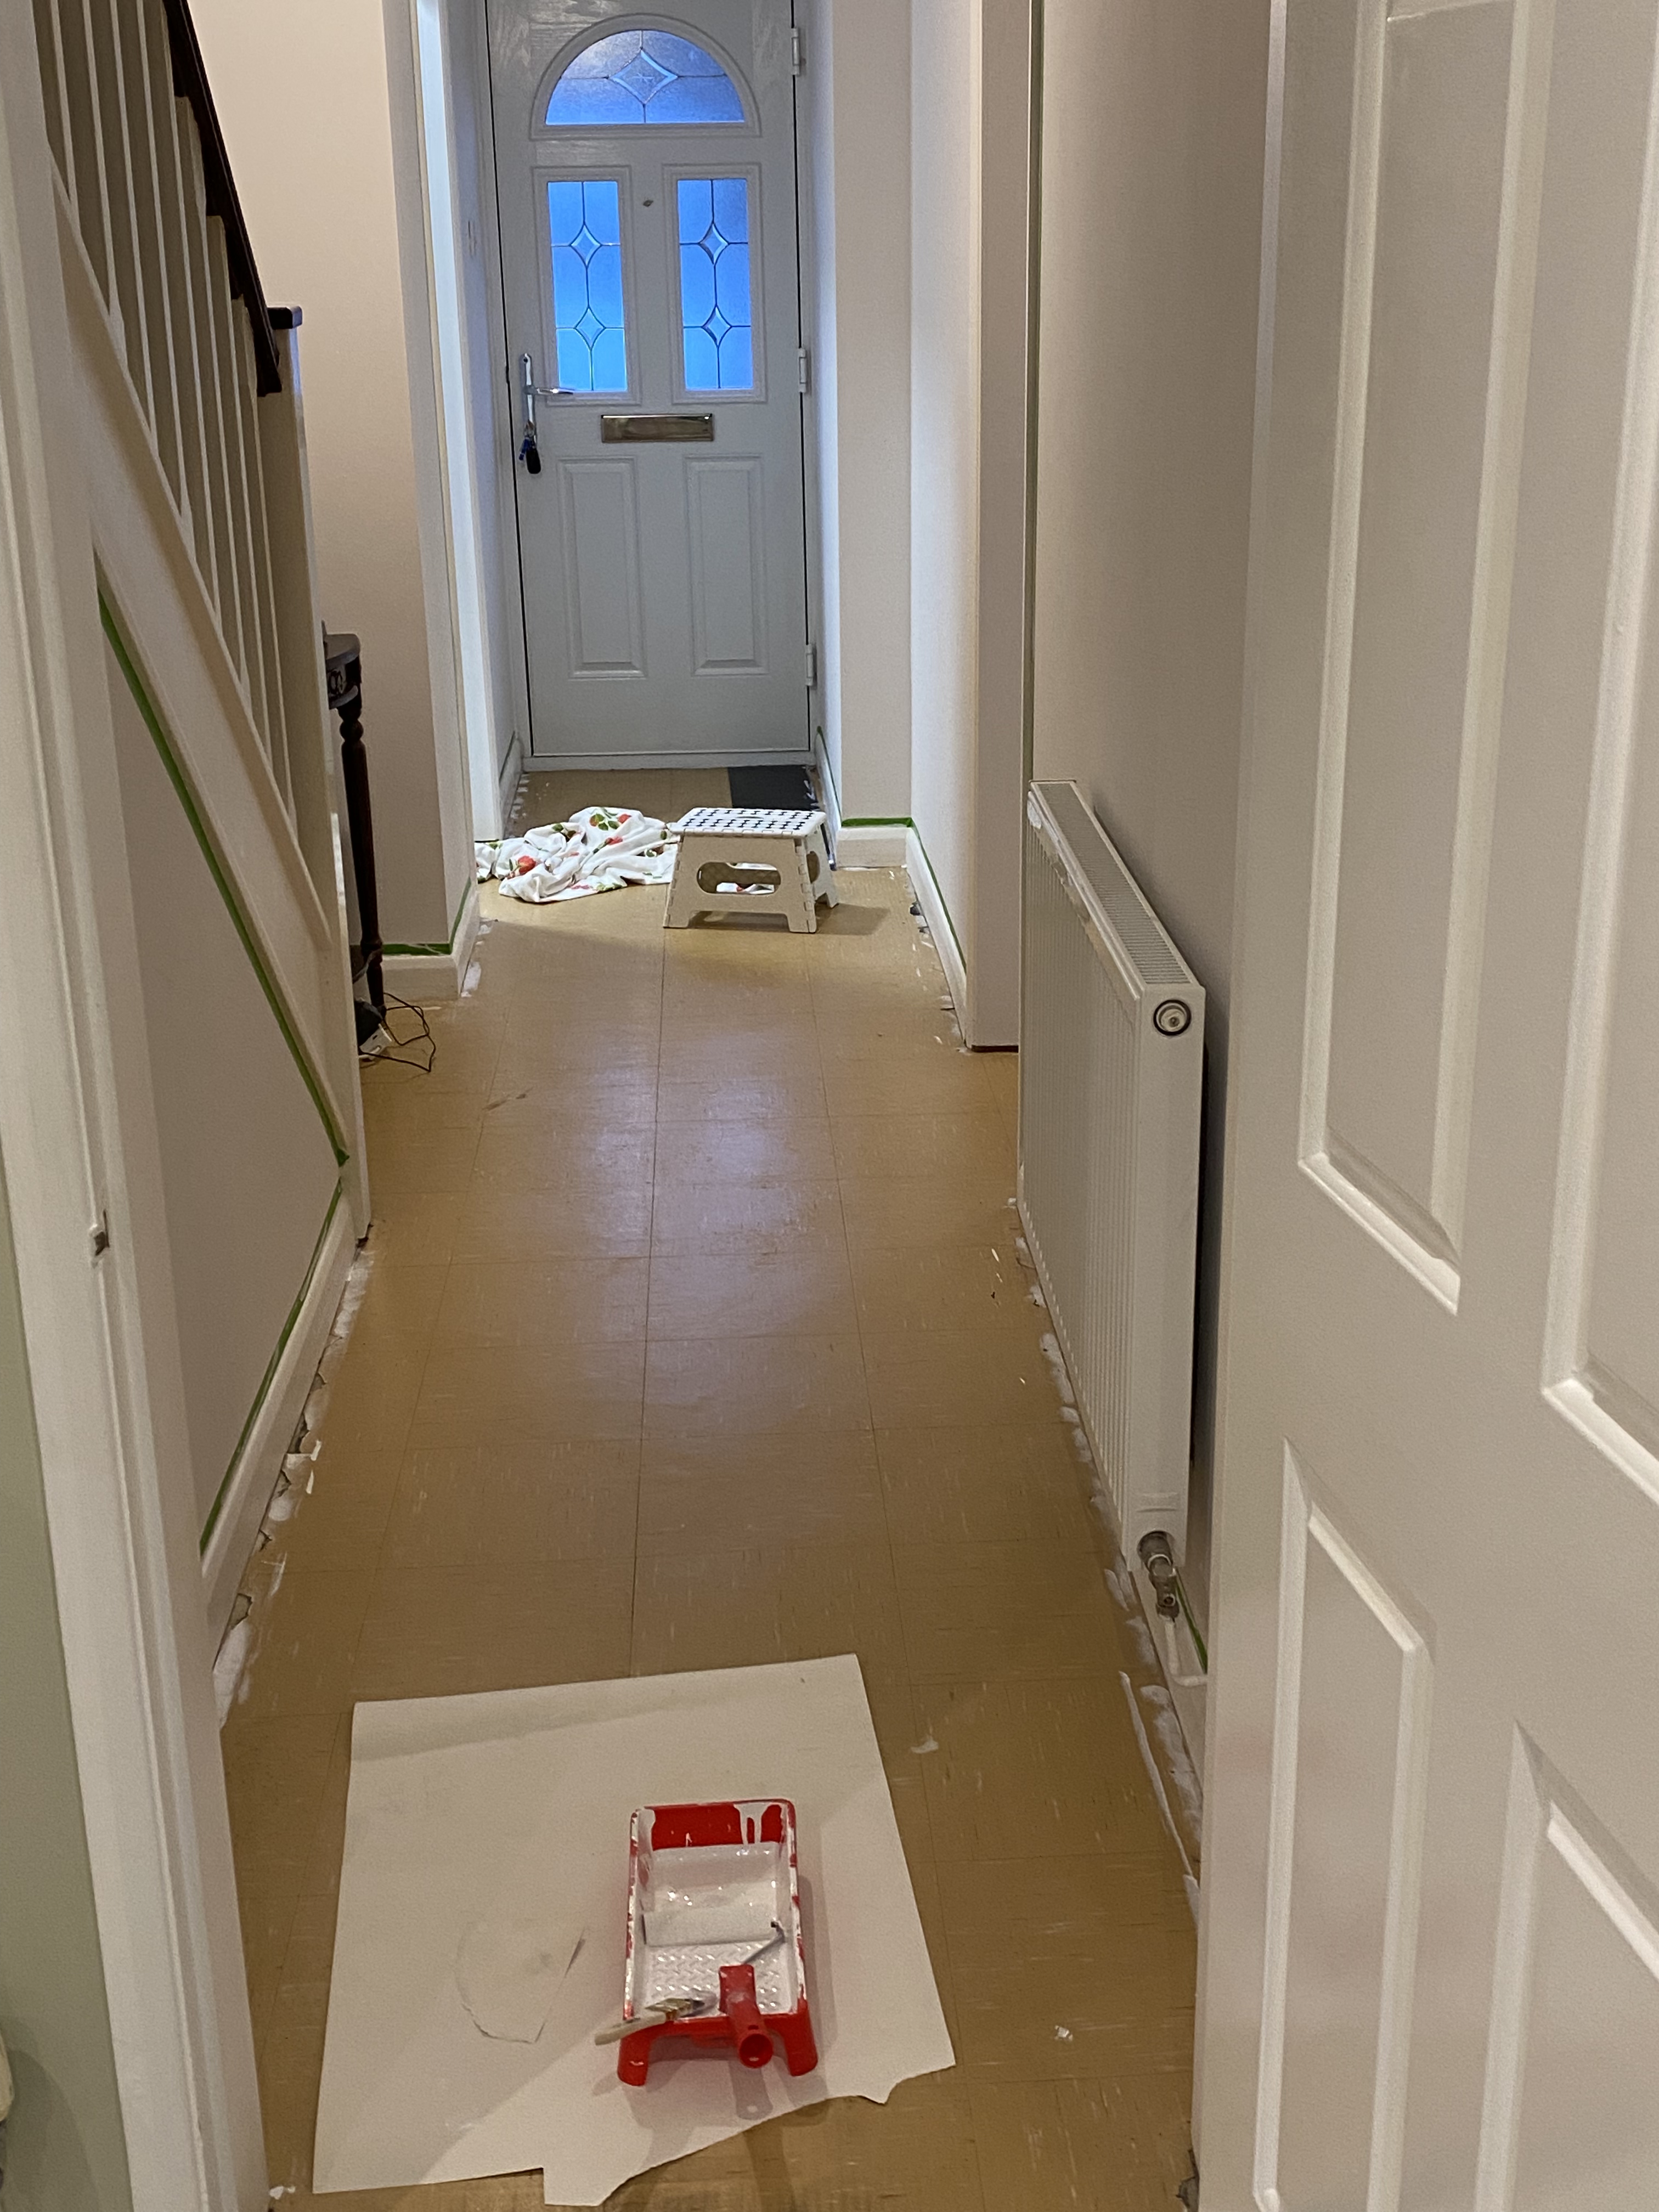
I’ve found my modelling time somewhat curtailed these last few weeks. I have been doing quite a lot of painting, just the wrong sort. We decided to re decorate the Hall, Stairs and Landing, the sort of project that I should have delegated to someone else! For a start it involved painting 11 doors and the respective frames, the woodwork on the stairs and the skirting boards. Add to that the ceilings and stripping the old wall paper off, making good the surfaces and then painting the walls ( just two coats…) and it’s fair to say that we had our work cut out. At my age and now that I am carrying a tad too much around the waist, going up ladders is never a good idea either. But I managed it and with a bit of innovation ( taping a brush to a stick!) I managed to reach all of the tall corners to cut in properly.
Glossing the doors!
When it comes to painting woodwork, I’m old school, preferring to sand every thing down to get a decent key for the paint and then undercoating before applying the finishing top coat – Satin rather than gloss for me these days. I also prefer the oil based paints, which do come with their own distinctive smell that seems to linger but the finish is good and hard wearing. An innovation for me this time was to apply both the undercoat and the top coat using foam rollers. The finish was better than anything that I could have achieved with a brush and cut the painting time in half and the clean up time to practically zero ( you just dispose of the rollers when done).
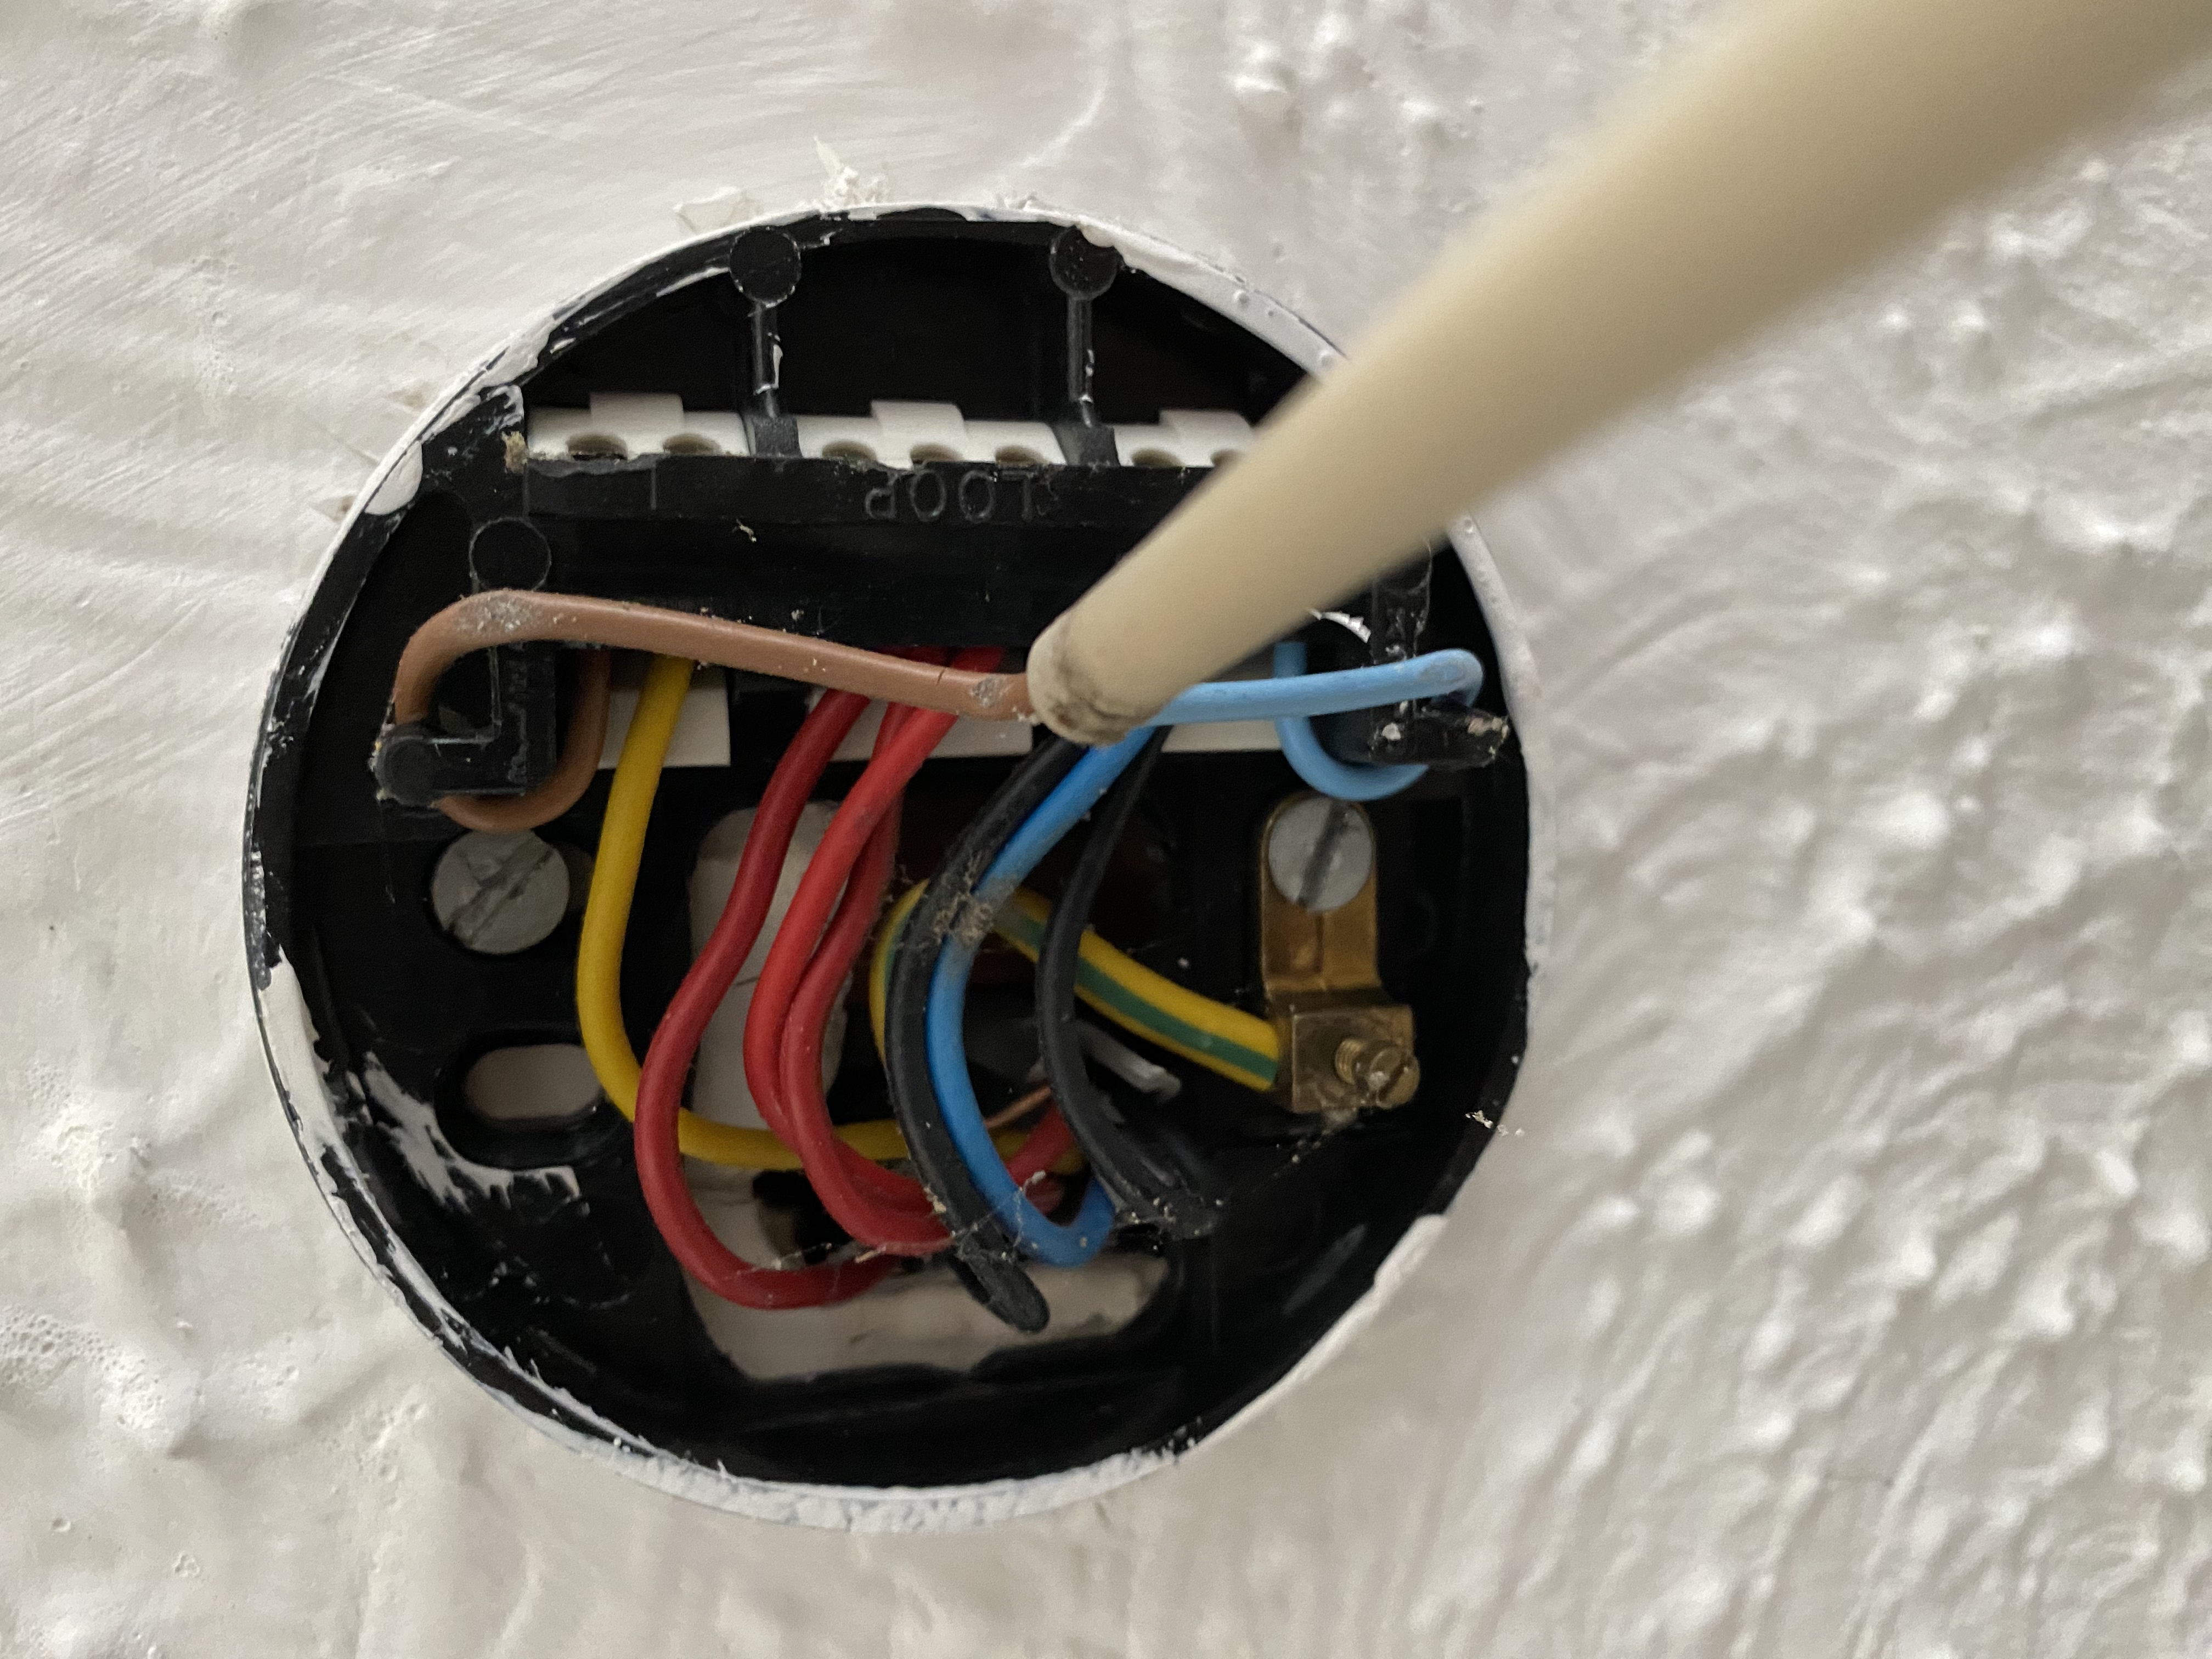
The old Ceiling rose…how come so many different coloured wires?
I then took on the job of replacing the light fittings and the old thermostat for the central heating, which worked but was very discoloured and tatty. This turned out to be too much of a stretch for my DIY talents but fortunately, I didn’t electrocute myself or burn the house down. I did need rescuing by my neighbour and very good friend Barry, who is a trained electrician and managed to sort out the problems that I encountered.
When it came to the new flooring, I did get an expert in, although I did take up the old wooden stuff that I had laid many years ago. The last bit was to replace the hall stand with a new shoe locker from IKEA. Walking around that place is guaranteed to get your 10000 steps in! So after a final bit of construction, everything is more or less done. There’s a new carpet to be laid on the stairs and we are having a new banister fitted but both of these jobs are being done by professionals , so I’m off the hook!
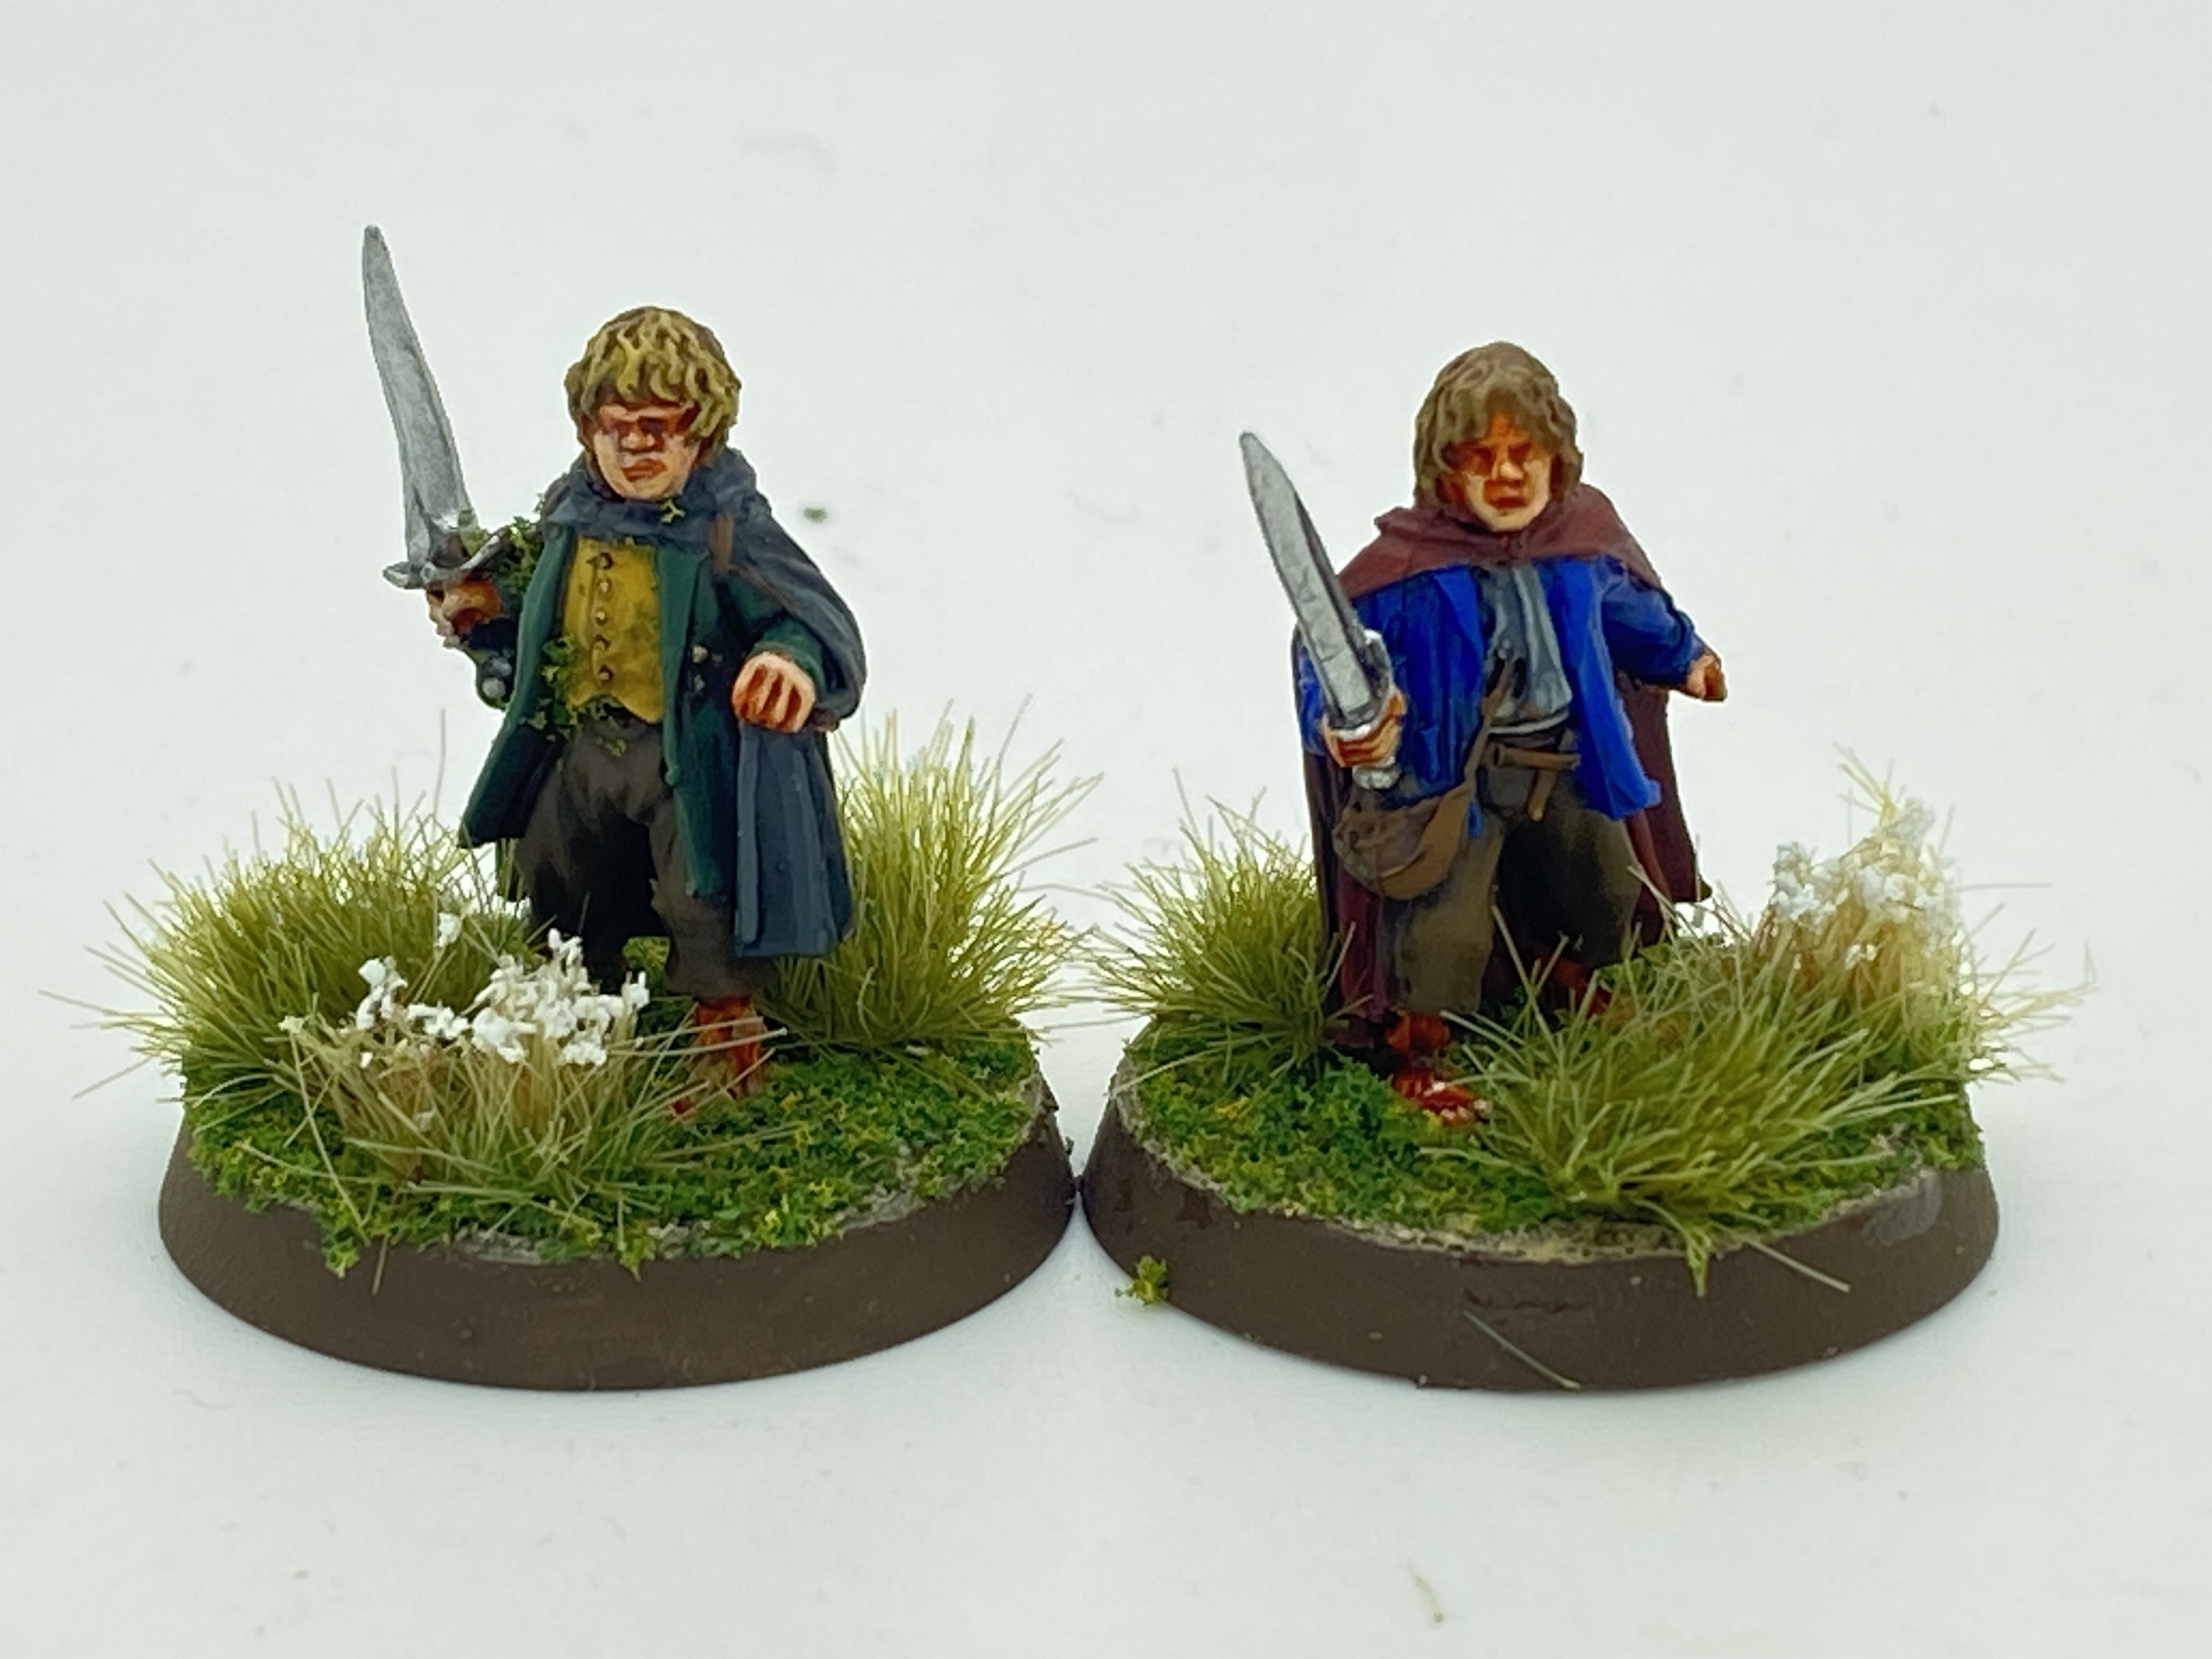
Pippin and Merry or Merry and Pippin, I forget which one is which!
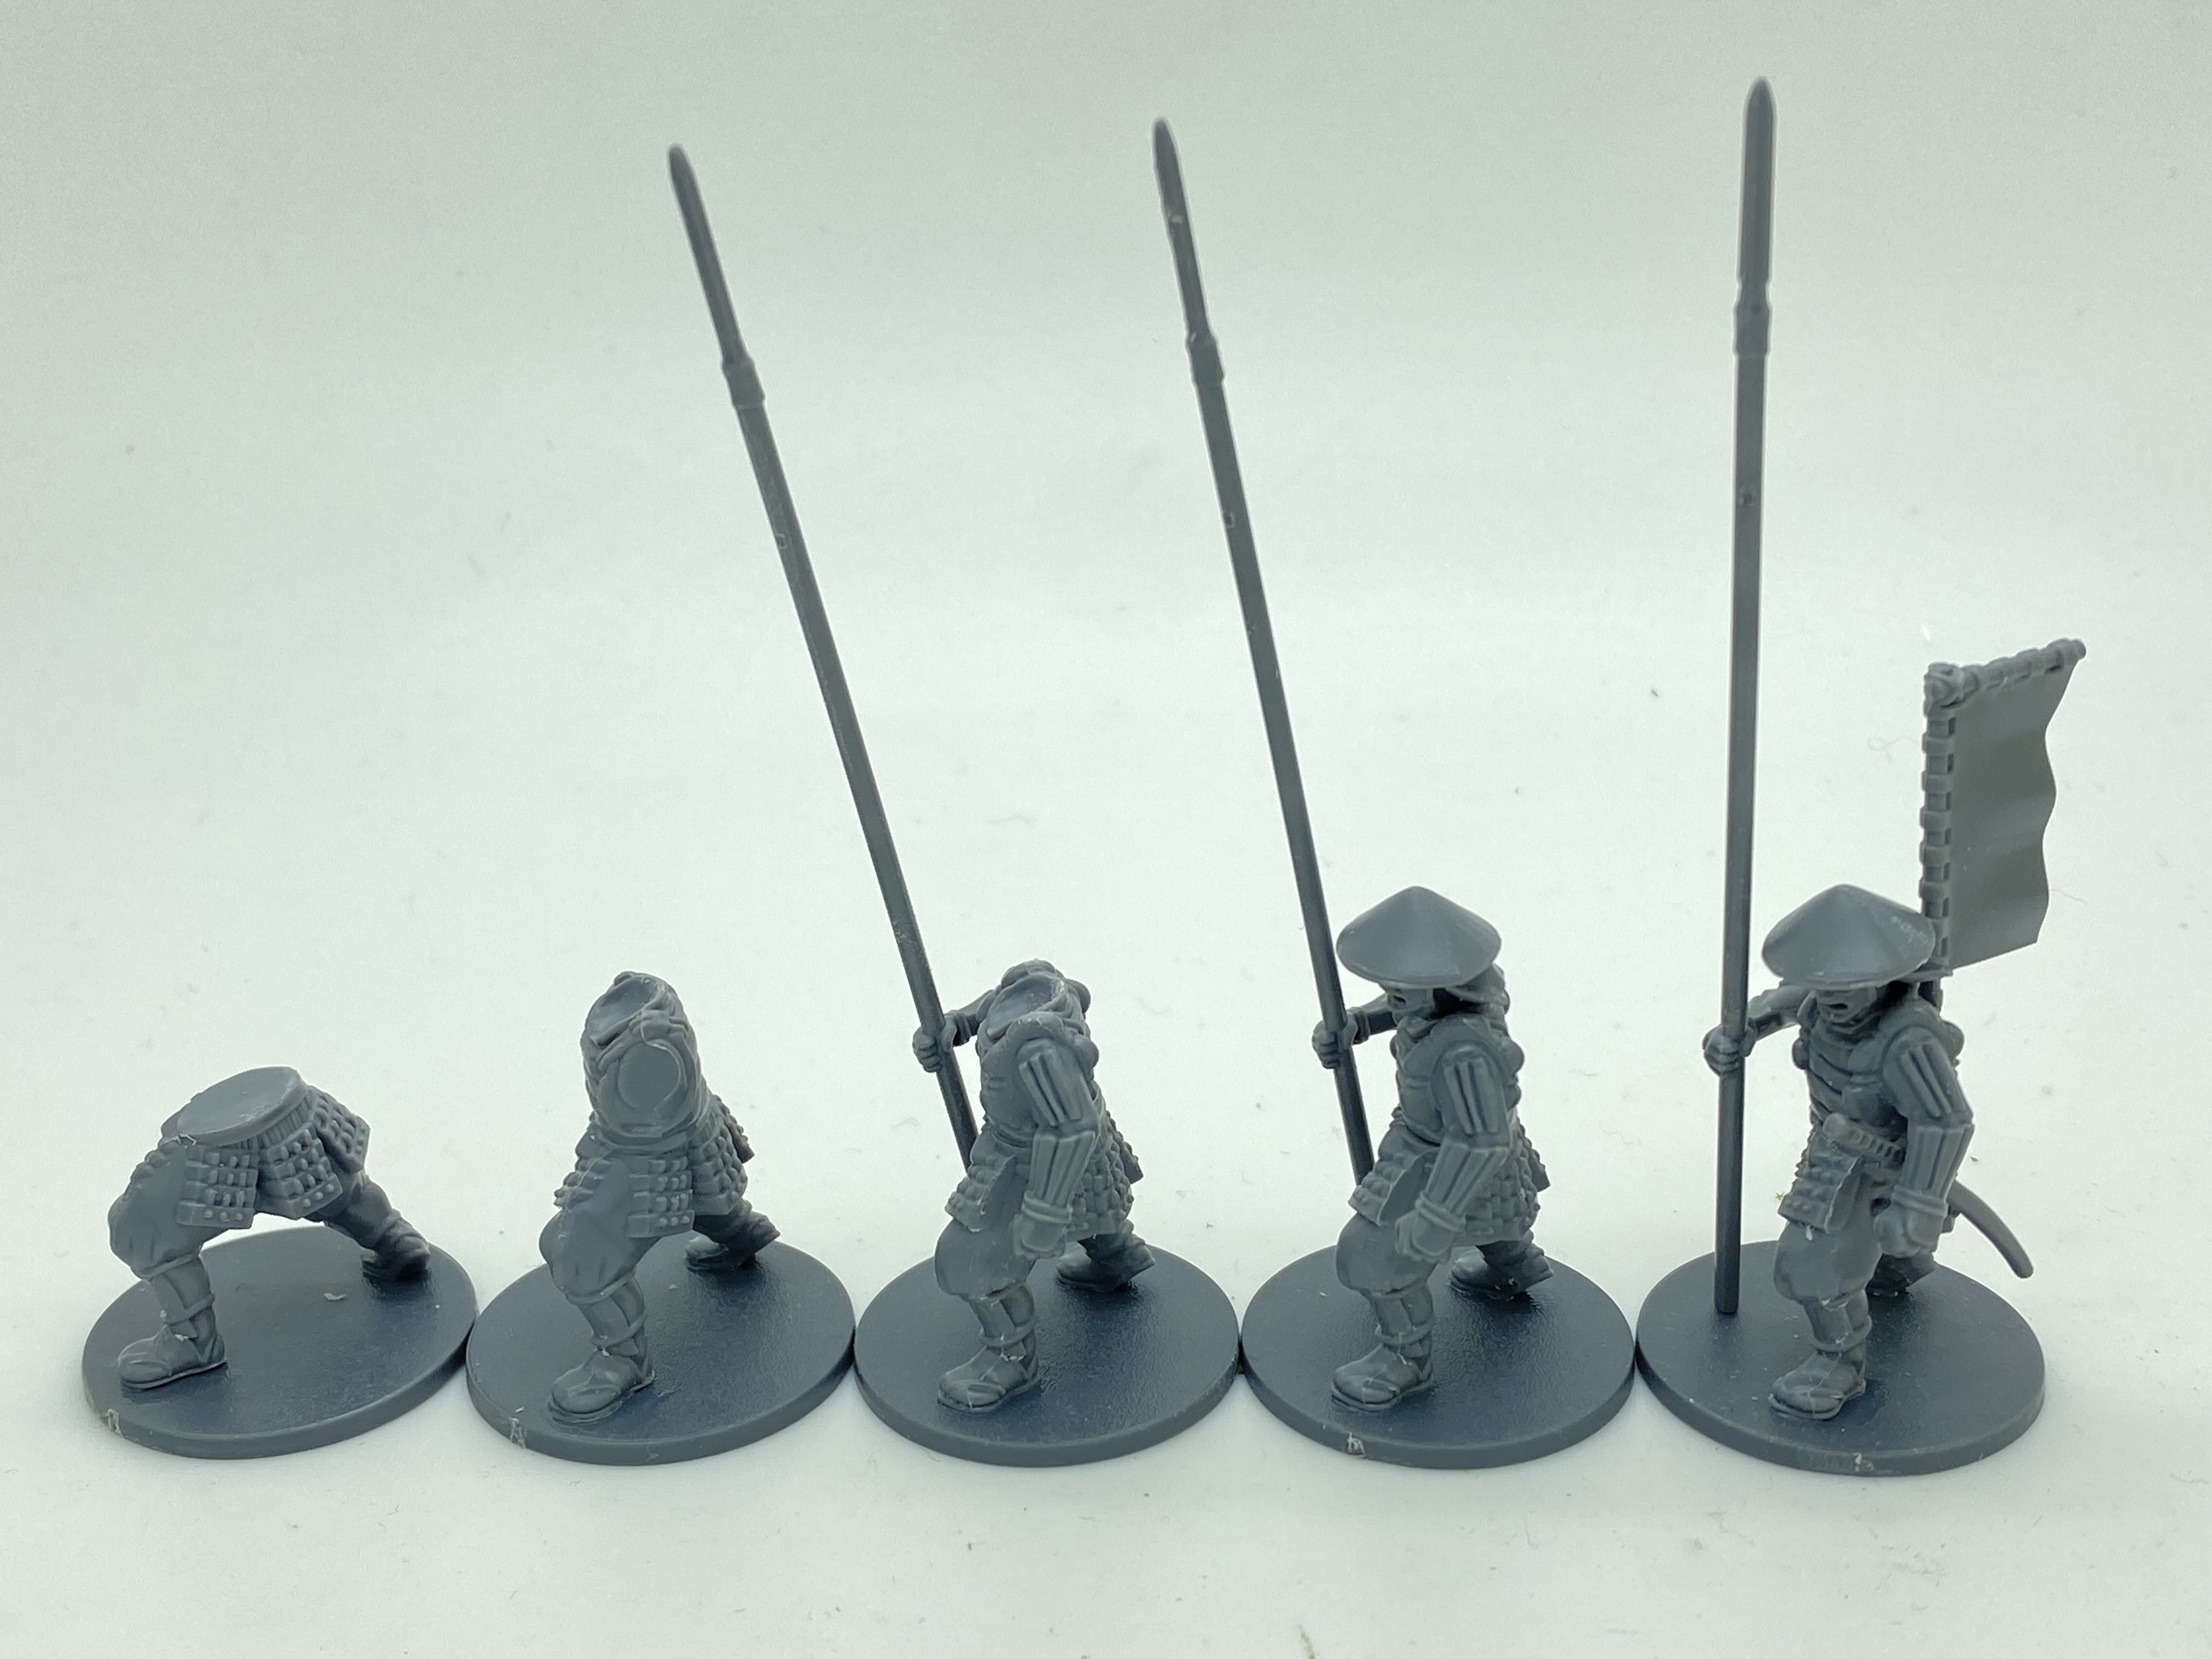
All of which means that whilst I’ve done a fair bit of painting, not much of it was on my miniatures! I did manage to complete another two LOTR miniatures, Pippin and Merry. I’ve also started a new project. I am writing a set of rules that will adapt Never Mind The Bill Hooks to the Samurai era of Japanese warfare. I have started to build and paint a new Samurai army based around the Fireforge sets, which I have also reviewed for Wargames Illustrated. I wont repeat my review here – you will need to get hold of the January edition of WI to read that but here’s a couple of pictures of the fireforge models being assembled.
Finally, here’s a picture of the first painted Ashigaru – I always do a test figure or two, before I start the batch painting of the units. I’ve picked up a few things to correct. I’m not that happy with the flesh but will have a play with a slightly different approach on the next models.
Test shot of my first Ashigaru
I will need to paint at least 100 or so of the Fire Forge models to get just one army ready to play test my rules. So it will be early next year before I am ready to go. I guess that I could just use unpainted models or buy some ready painted but as you will note from my exploits in decorating, I am just hard wired to DIY!
THE COMMERCIAL BIT
I hope that you all enjoy your hobby as much as I do – our web site will have much of what you need! Click here to see our shop.
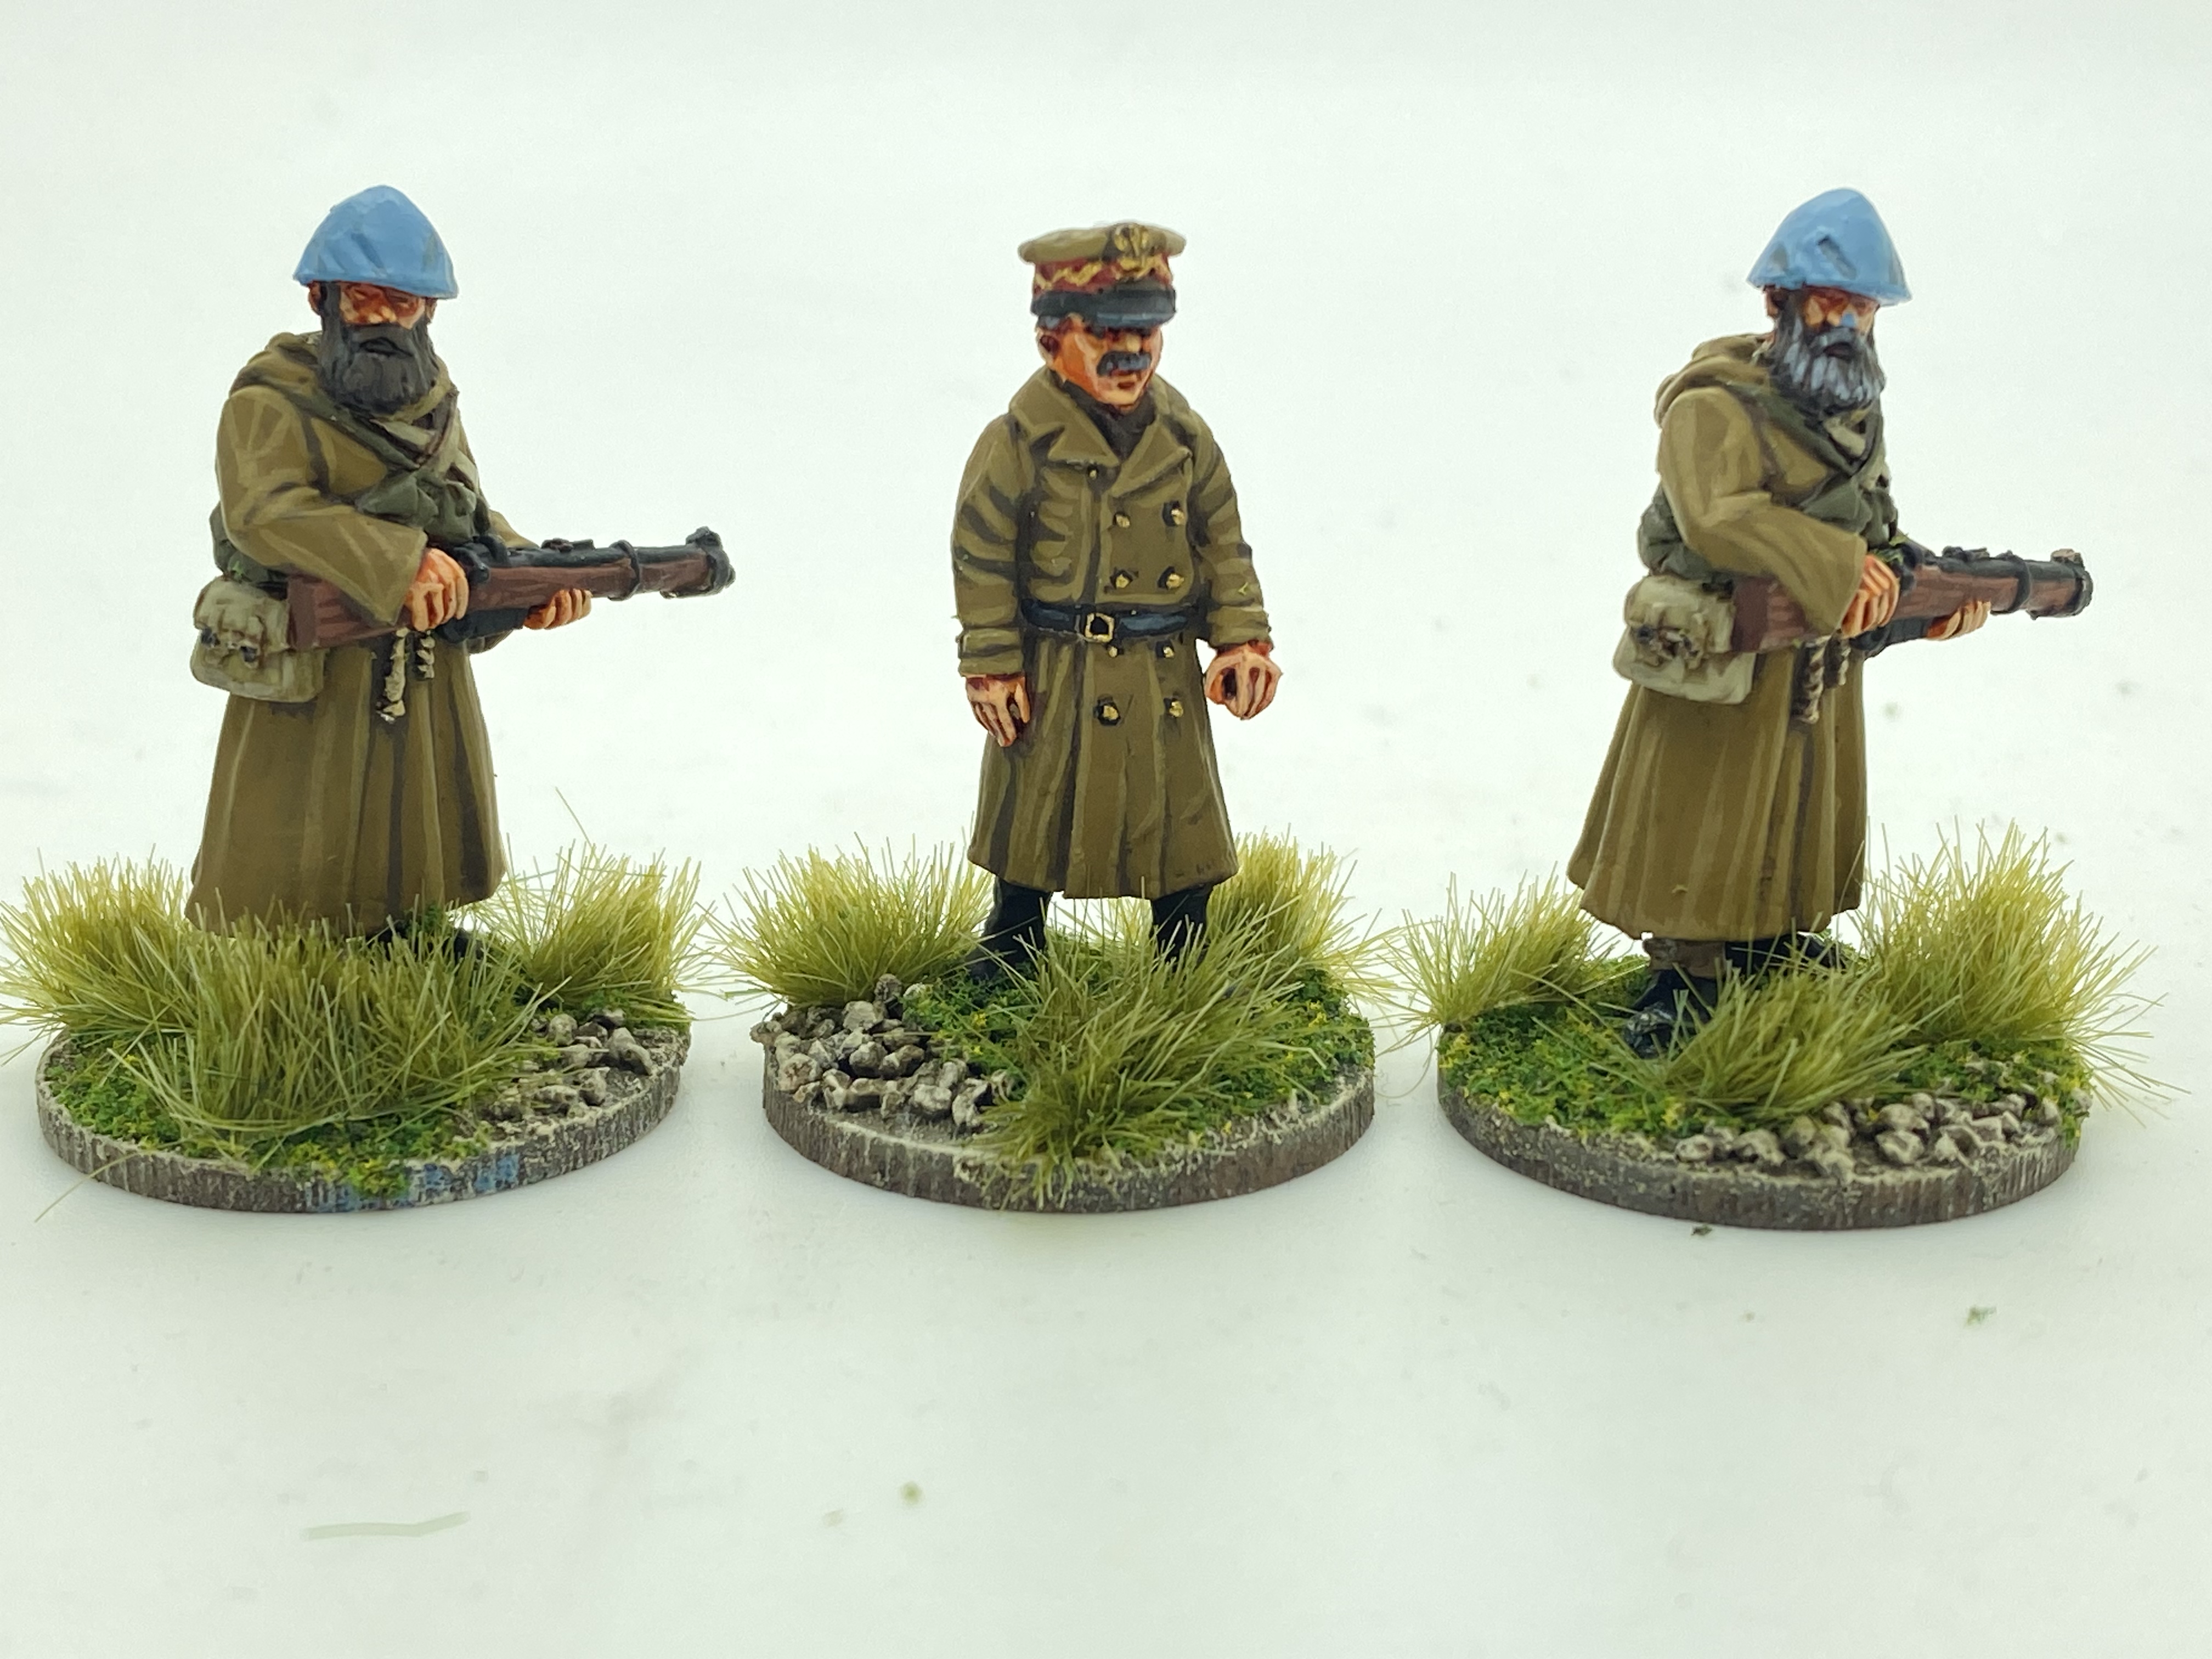
Just a quick blog this week. As a change from painting the rather colourful Gendarmes, I gave myself a break and painted the free figure that was given out at the ‘Other Partizan’ in October of this year, General Sikorski, leader of the Free Polish army in the Second World War. As I am reducing my Lead Pile, I also decided to have a go at another Partizan figure, a Kelham Hall Monk. This figure is the 29th figure given out at Partizan, I think in about 2012! I actually had two of these for some reason – perhaps a friend had given me his, so it made sense to paint them both.
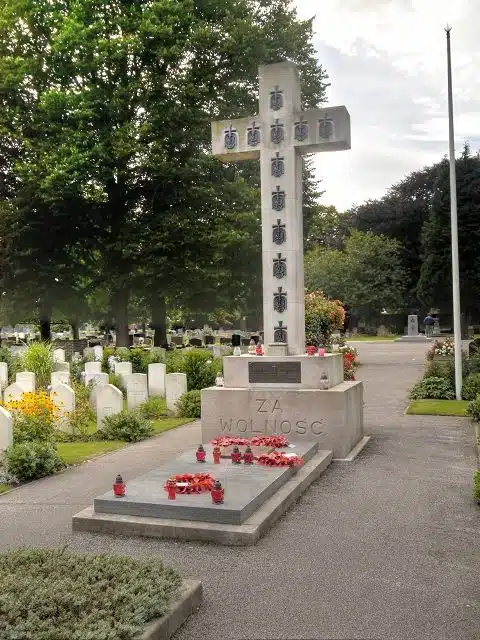
General Sikorski has a special significance to Newark, the home of Partizan. He was buried in the Polish War cemetery in Newark after his death in 1943 before his remains were returned to a free Poland in 1993. As an aside, my daughter lives practically next door to Newark Cemetery, so I have visited the Polish war graves many times.
The Polish War memorial at Newark
I painted the General Sikorski in British uniform colours – it looked fairly close to the Polish uniform. So a base coat of Burnt Umber, followed by a mid coat of British Uniform and highlighted with Khaki Grey – all Vallejo colours. The hat has a red hat band with gold trim. I could be wrong with this as I have seen officers also wearing hats with a light blue band.
Kelham Hall Monk
As for the Kelham hall Monks, I actually found a picture that the figure was based on. It looks as though he was designed to be used in the Very British Civil War rules. Here’s a link to the blog and the original creator of the concept:
Based on this illustration, it made sense to use pretty much the same colours! Here are the finished figures:
Another three figures go into the cabinet and out of the lead pile. I now have eleven of the Partizan figures painted. It would be nice to have the full set but first I need to paint the other seven that I have in the lead pile! I’m in no rush and I find that painting these are a nice diversion from my other projects. You can see most of the Partizan figures here:
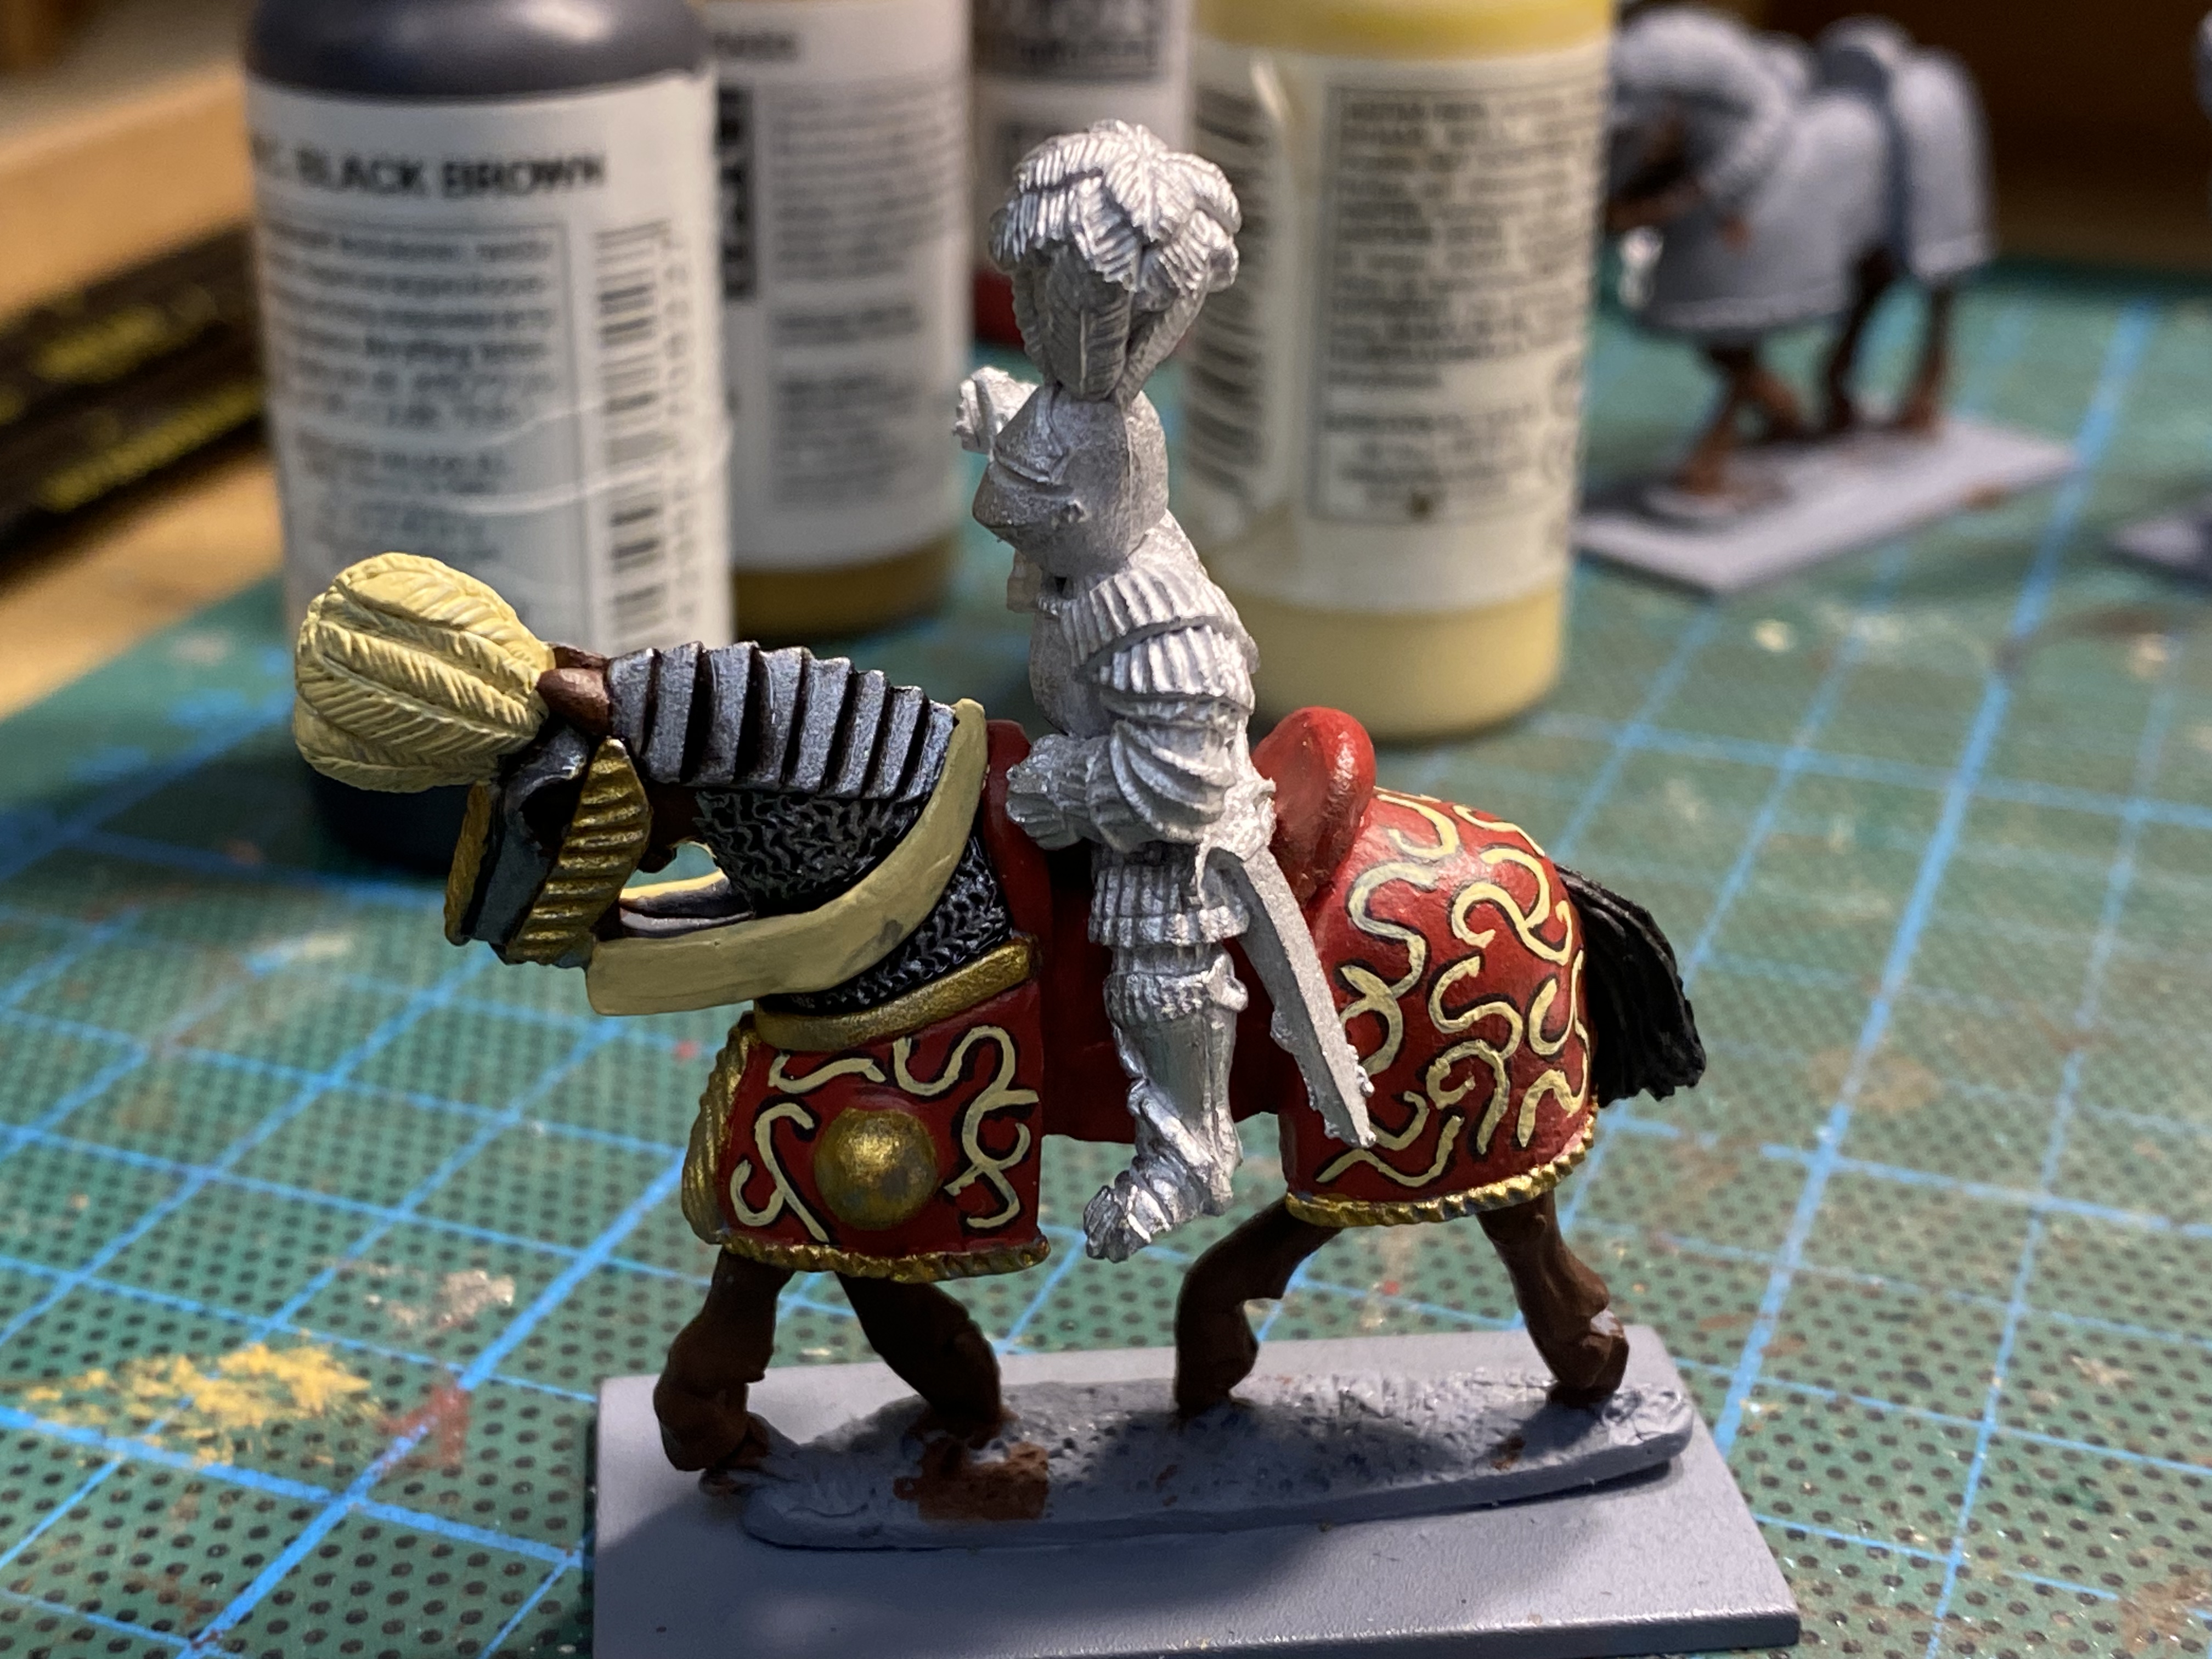
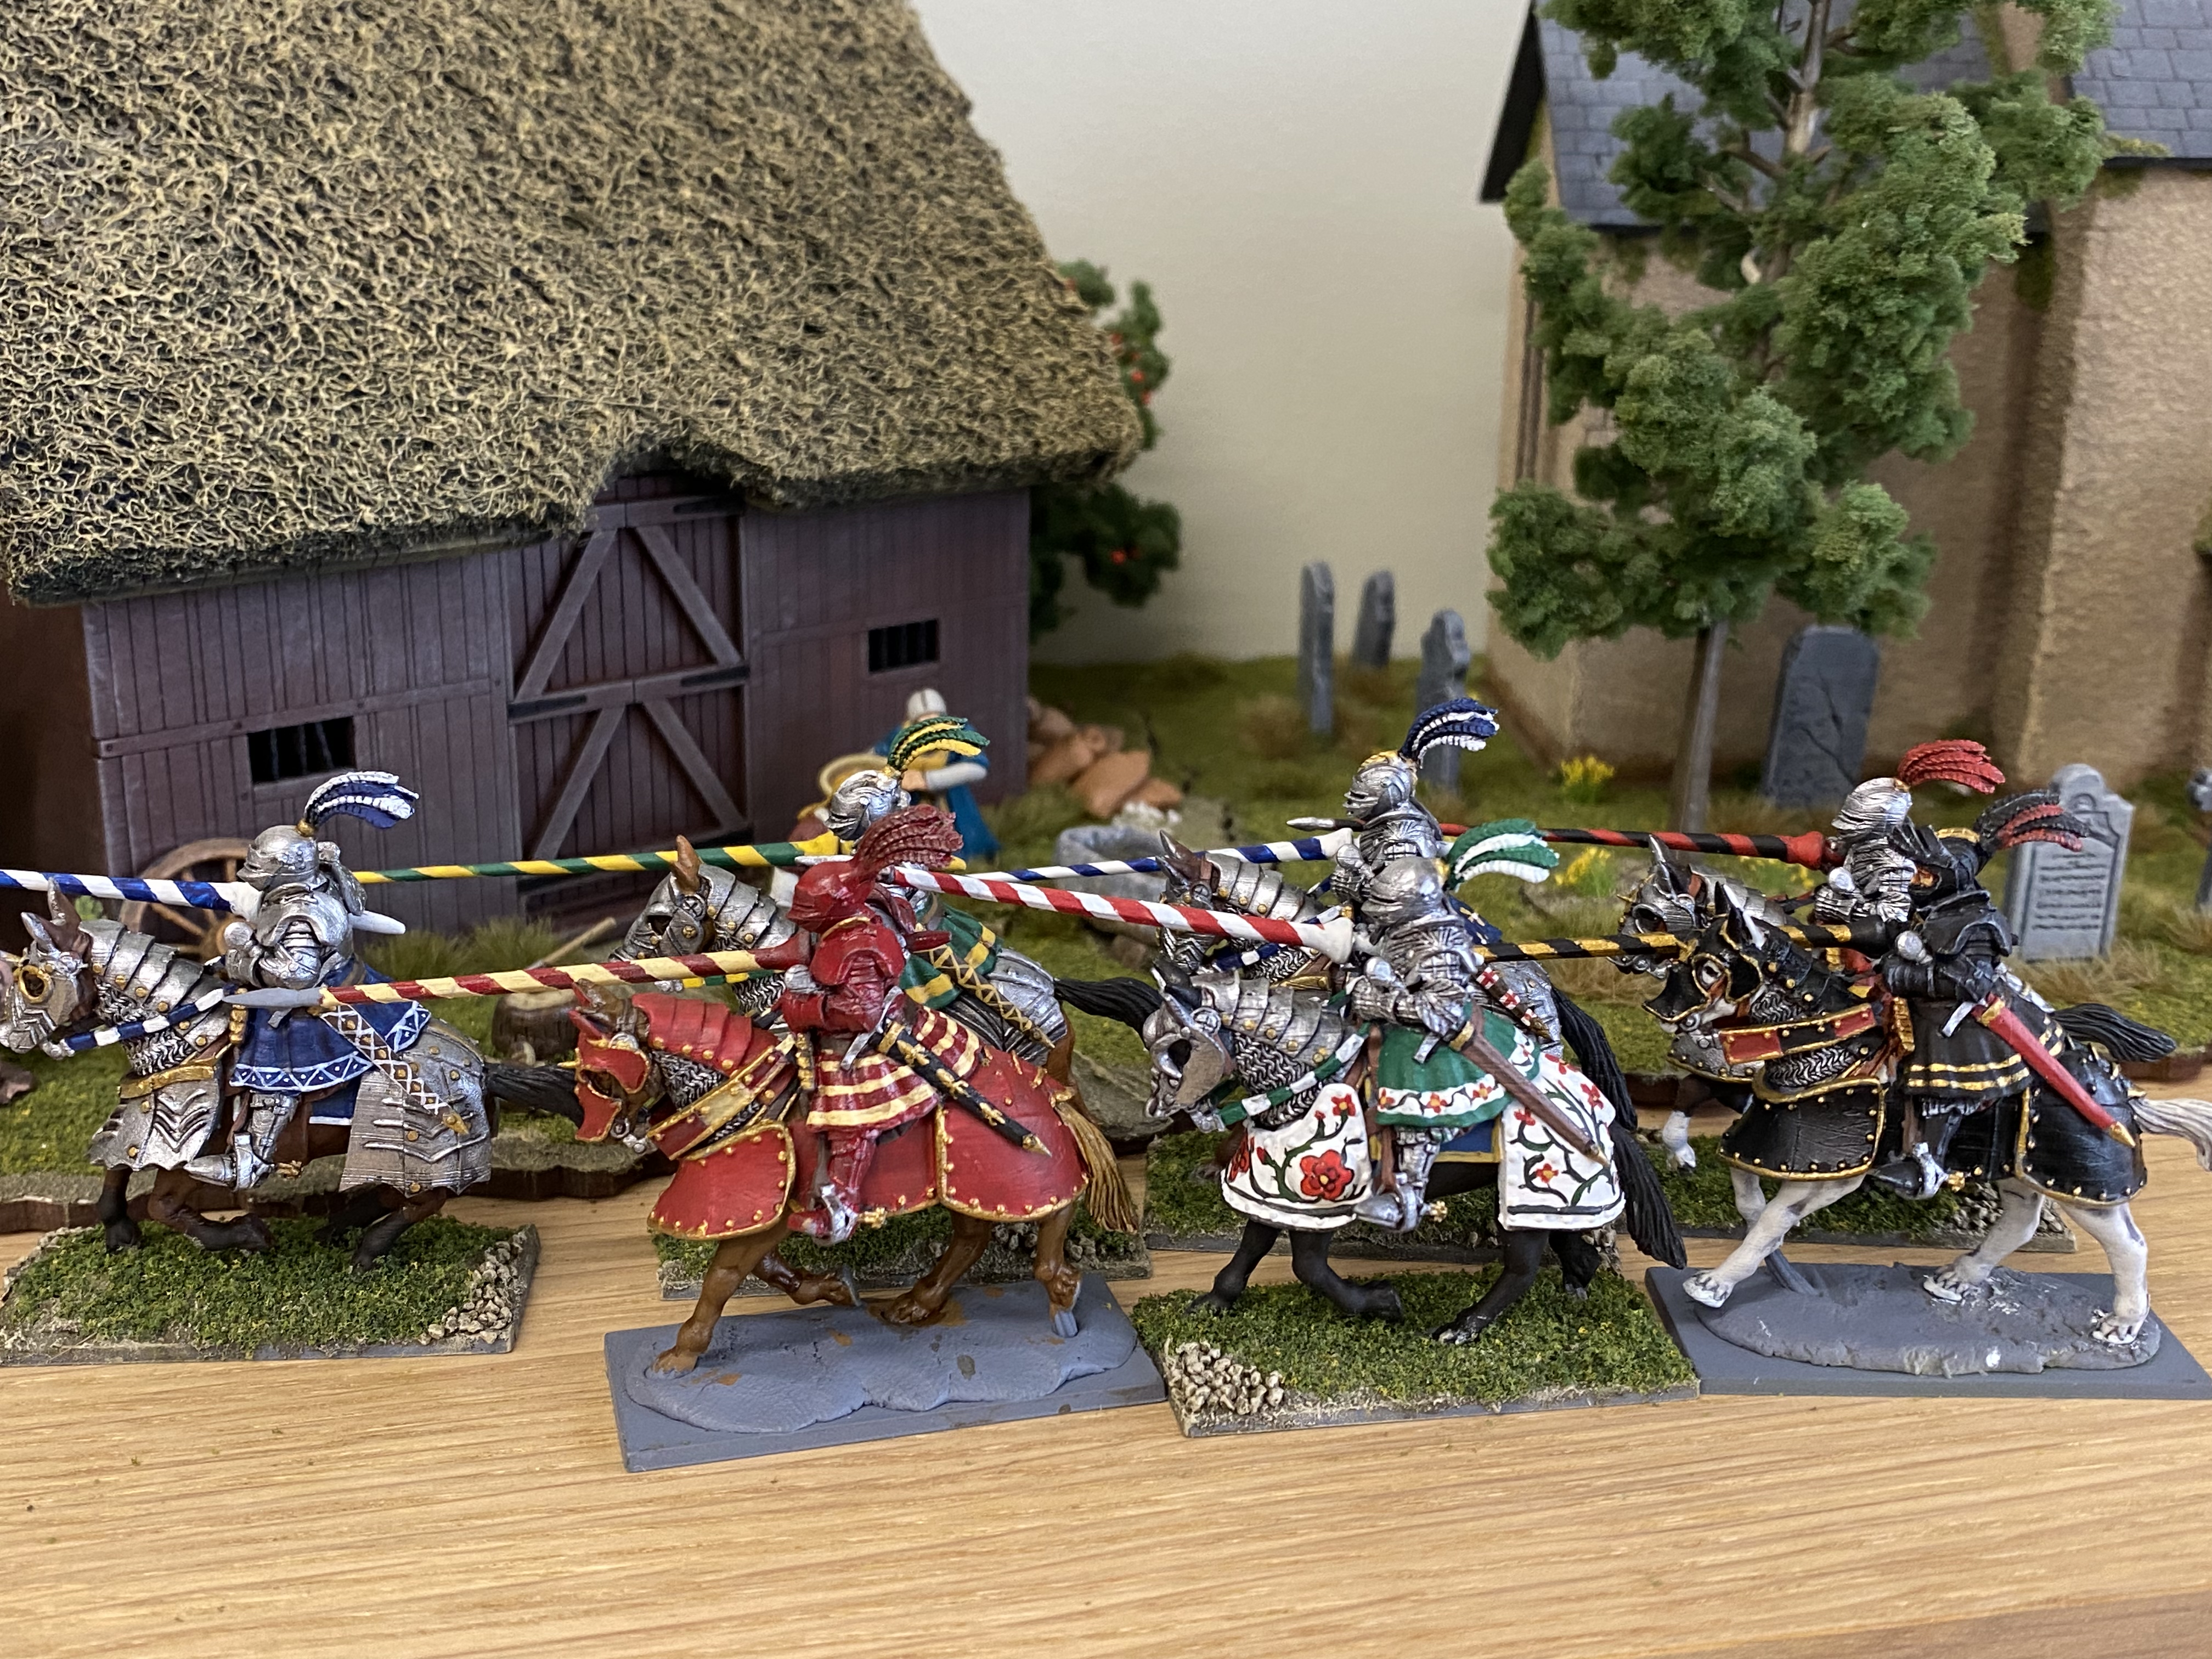
Having finished my resin Gendarmes, I decided to crack on and paint the Gendarmes that I had picked up from Foundry Miniatures. They are actually listed as Casting Room Miniatures but are an off shoot of the Foundry brand and available from the factory shop in East Stoke.
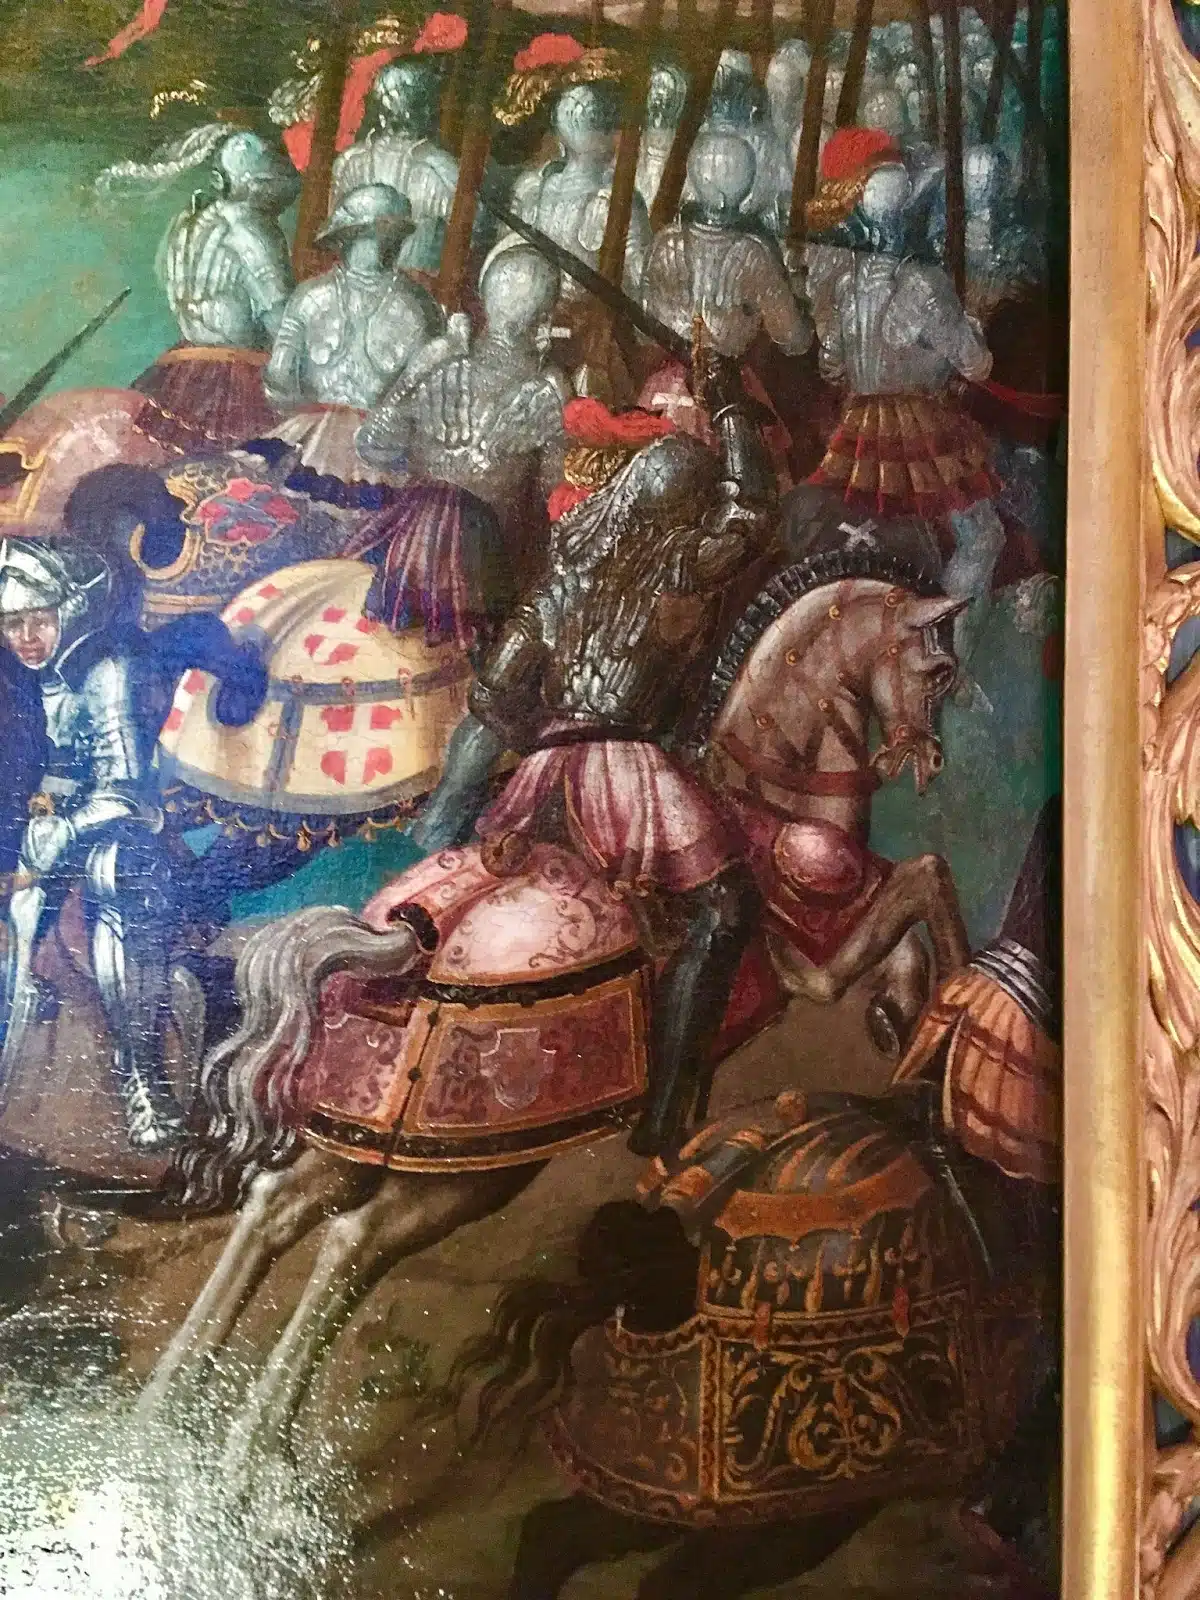
Once again, I have to point out that my research with regards to the actual colours that these knights appeared in is limited. I used the Foundry web store pictures and references that I found on Pinterest and Google images as a guide. To be fair, in some cases, I simply attempted to copy the superb work that other people had produced. If you type French gendarme knights into google and click on the images tag, you will see plenty of inspirational images and for that matter, models. Here’s just a couple.
If you do follow the links, it’s worth clicking through to some of the blogs. You will see some of the models that have influenced me (those that I copied!) and there is some good background research. In painting these Gendarmes, I was aware that I may be closer to Fantasy that reality. However, some of the artwork shows some amazing designs – I nearly copied a knight with bee hives and bees painted on his horse’s armour but decided it was too complex! As it is, my free hand was being pushed beyond what I would normally attempt!
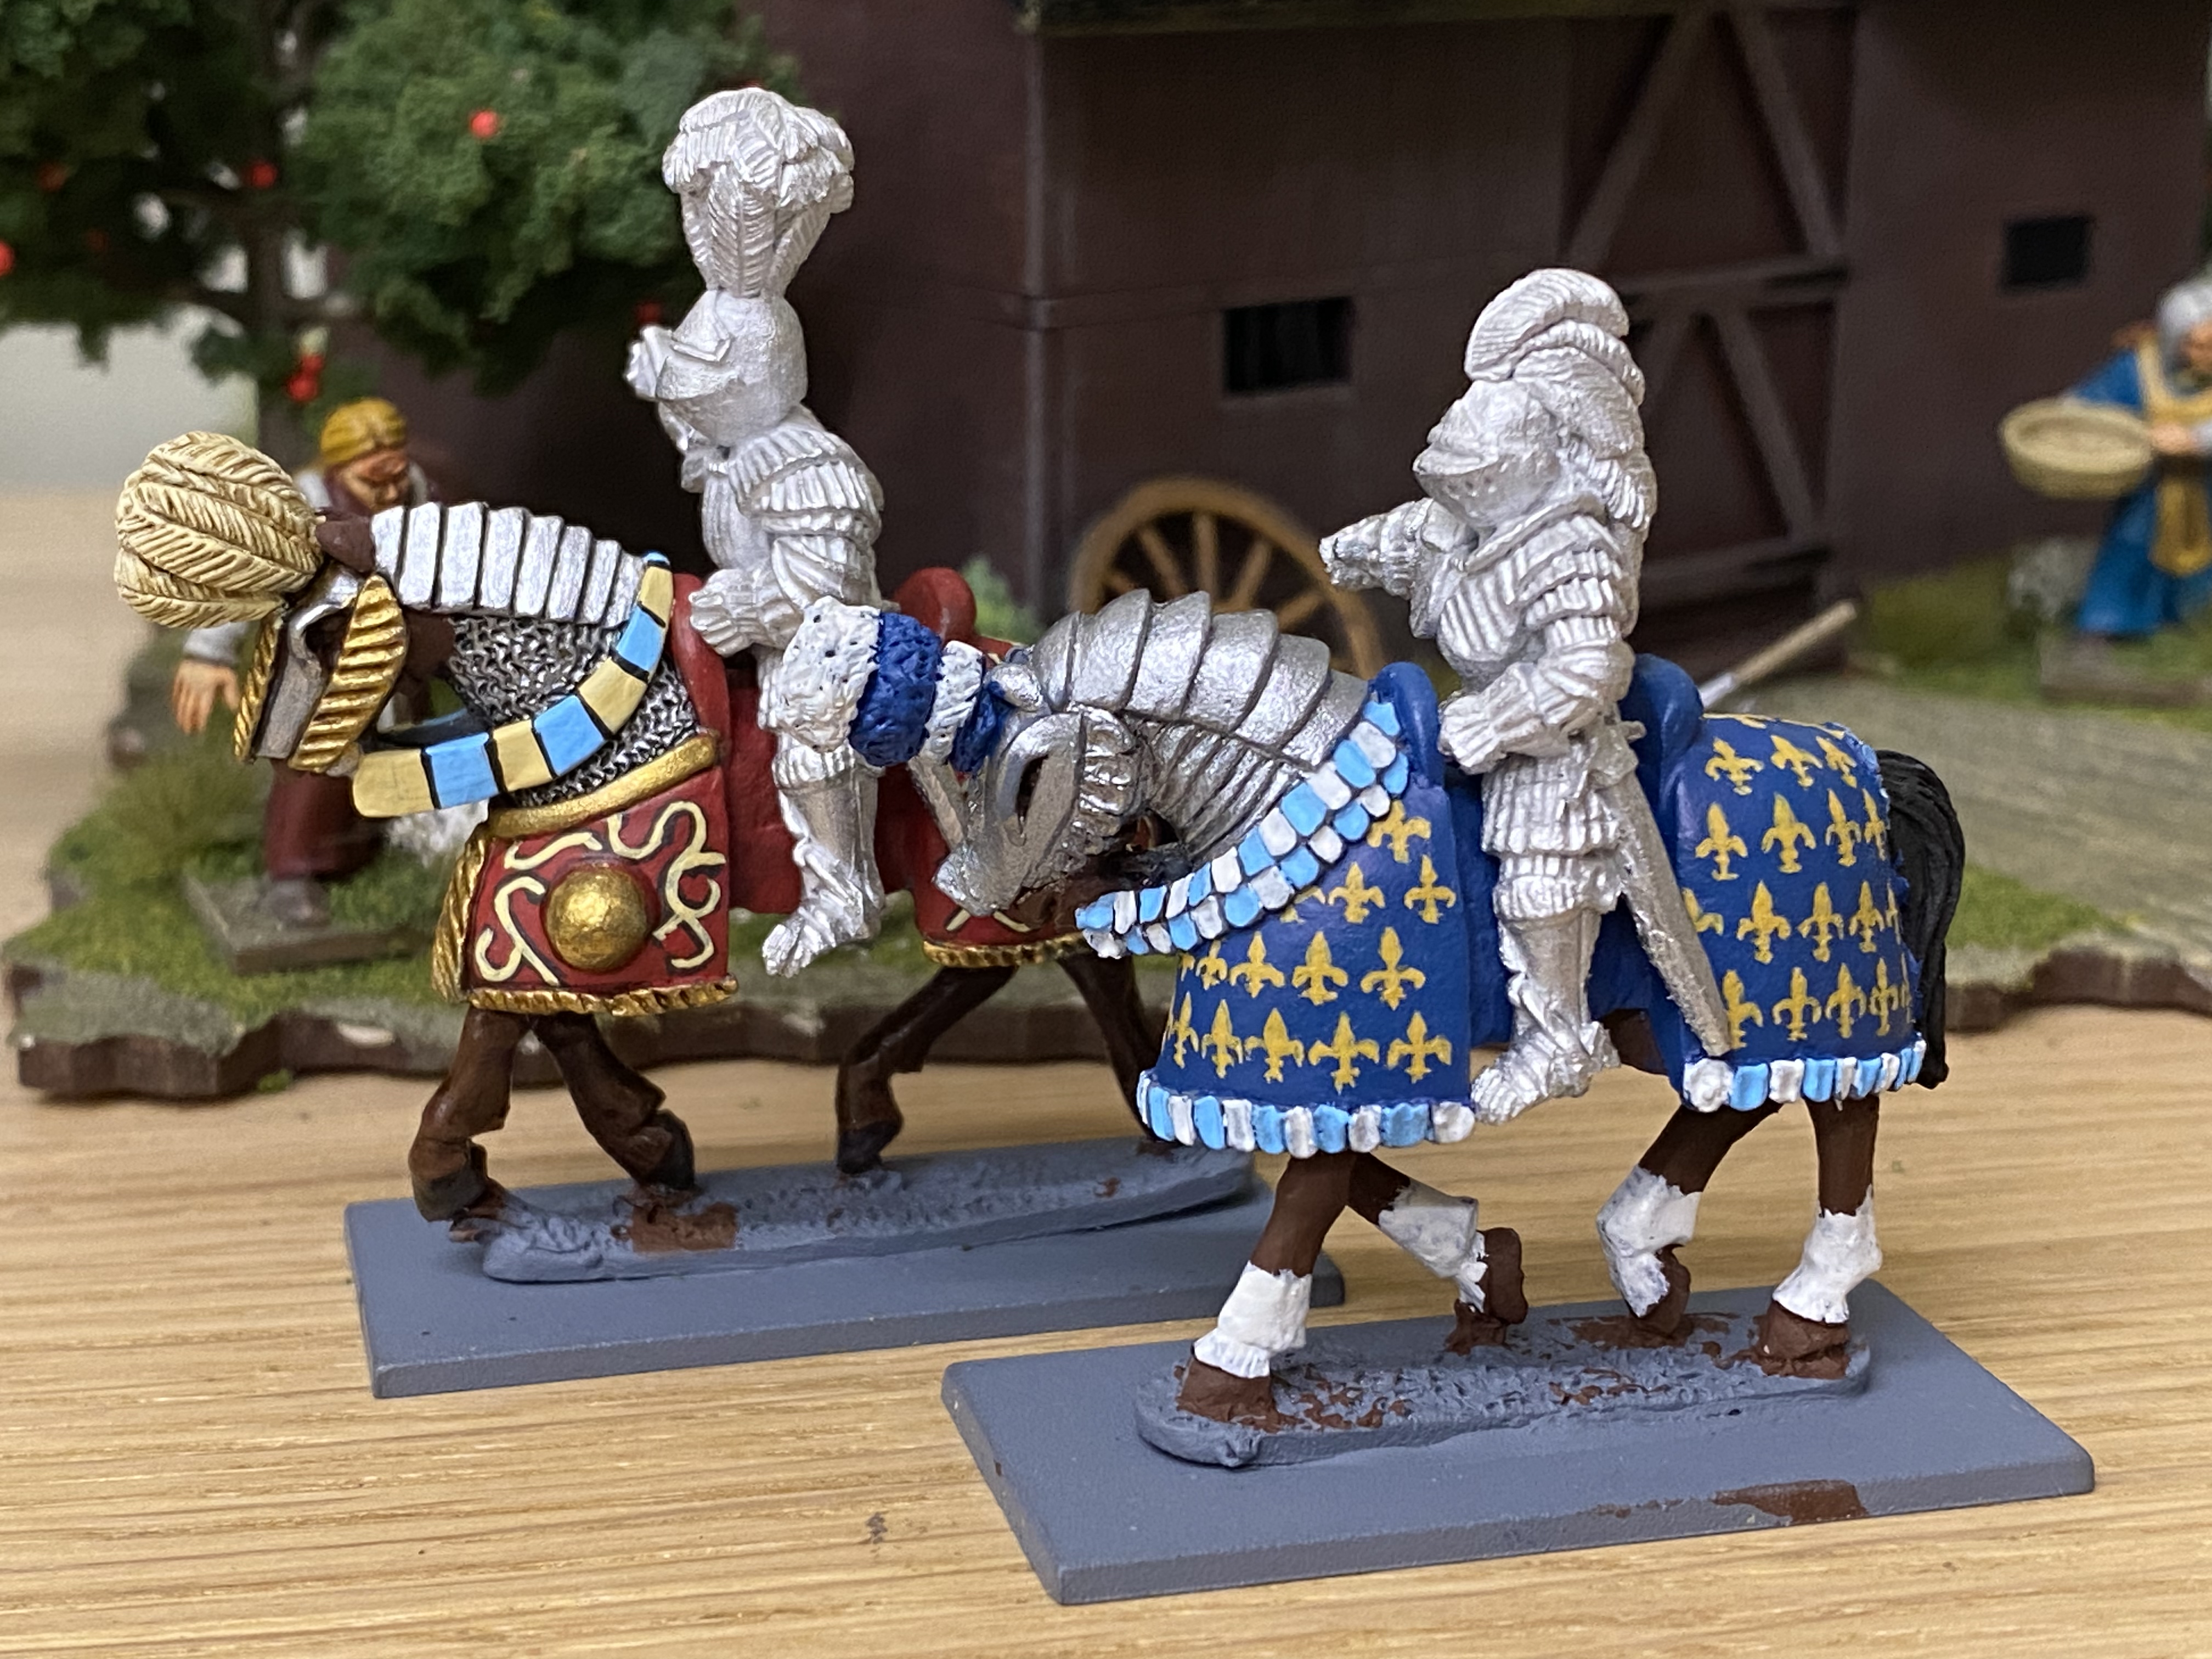
And so to the miniatures. The Foundry (Casting Room) miniatures are lovely chunky models with plenty of character and detail. The horses are perhaps a bit smaller than the Perry miniatures but once based, I doubt that it will be a noticeable difference. They were a joy to paint and needed very little cleaning up. Rather than detail the painting process, the general method that I followed was to block paint the horses and armour with the base coat colour. Then to apply the freehand design. The difficulty that I encountered was my lack of skill in replicating the exact design on both sides of the horse. I soon realised that you cant see both sides at once anyway so it wasn’t so much of a problem!
Once the freehand design was completed, I shaded the colours with either black, brown or light brown ink from the Army painter range. I find that Black ( Dark tone) works well over Silvers, White and Blues, the dark brown (Strong Tone) is good for Reds and Leathers and the light Brown ( Soft Tone) is good over yellows. Once the colours were inked, I then re-highlight with the original colours, occasionally adding a further highlight of a lighter tone. This gives me a clean a bold finish that I prefer. It might not be to everyone’s taste but as I am slightly red/green colourblind, I like to see the colours clearly and anything too subtle is lost on me!
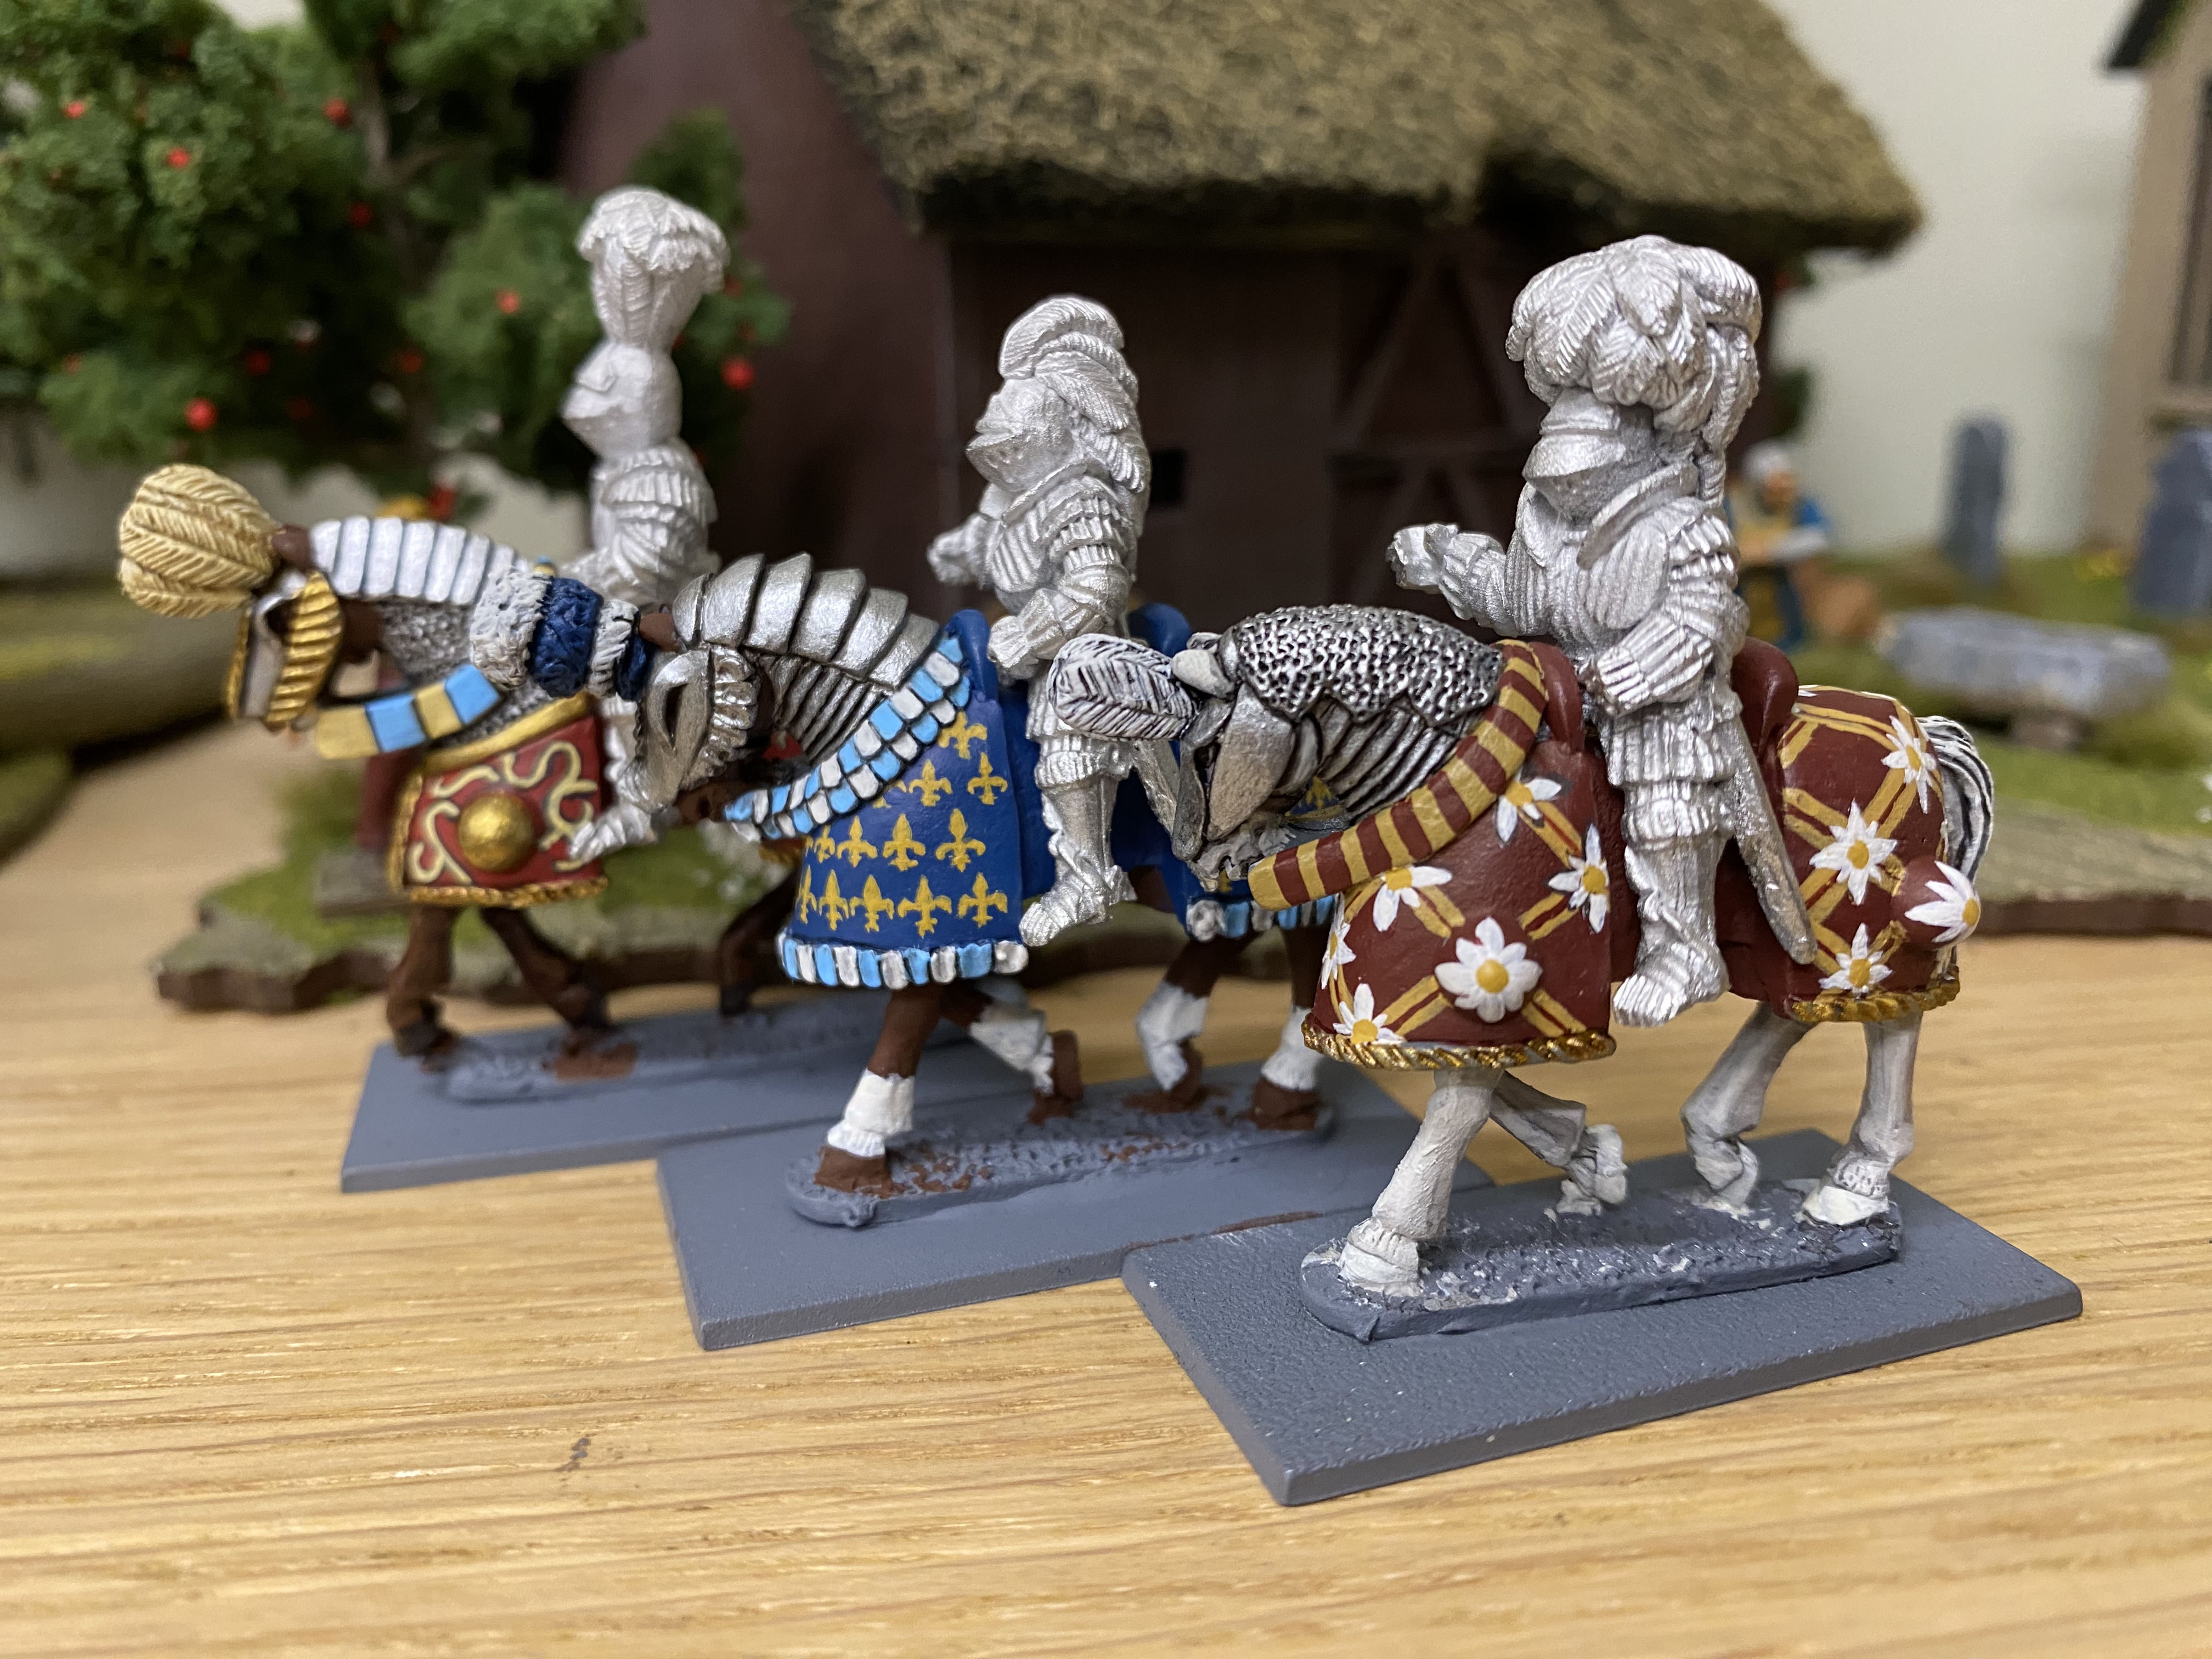
When it came to the lances I decided to use the very pretty candy stripe design on each lance, choosing the colours to match the livery. To get the candy stripe effect, I painted the lighter colour on the lances first and then used Tamiya flexible 2mm masking tape to get a spiral design and then painted the darker colour. It’s not always perfect but a bit of retouching and it looks fine! I suspect that these lances would not have appeared on the battlefield but would be reserved for the jousting yard or parades. I guess that if it came to the actual battle, if they decided to charge, they could always get their Squire to change lances.
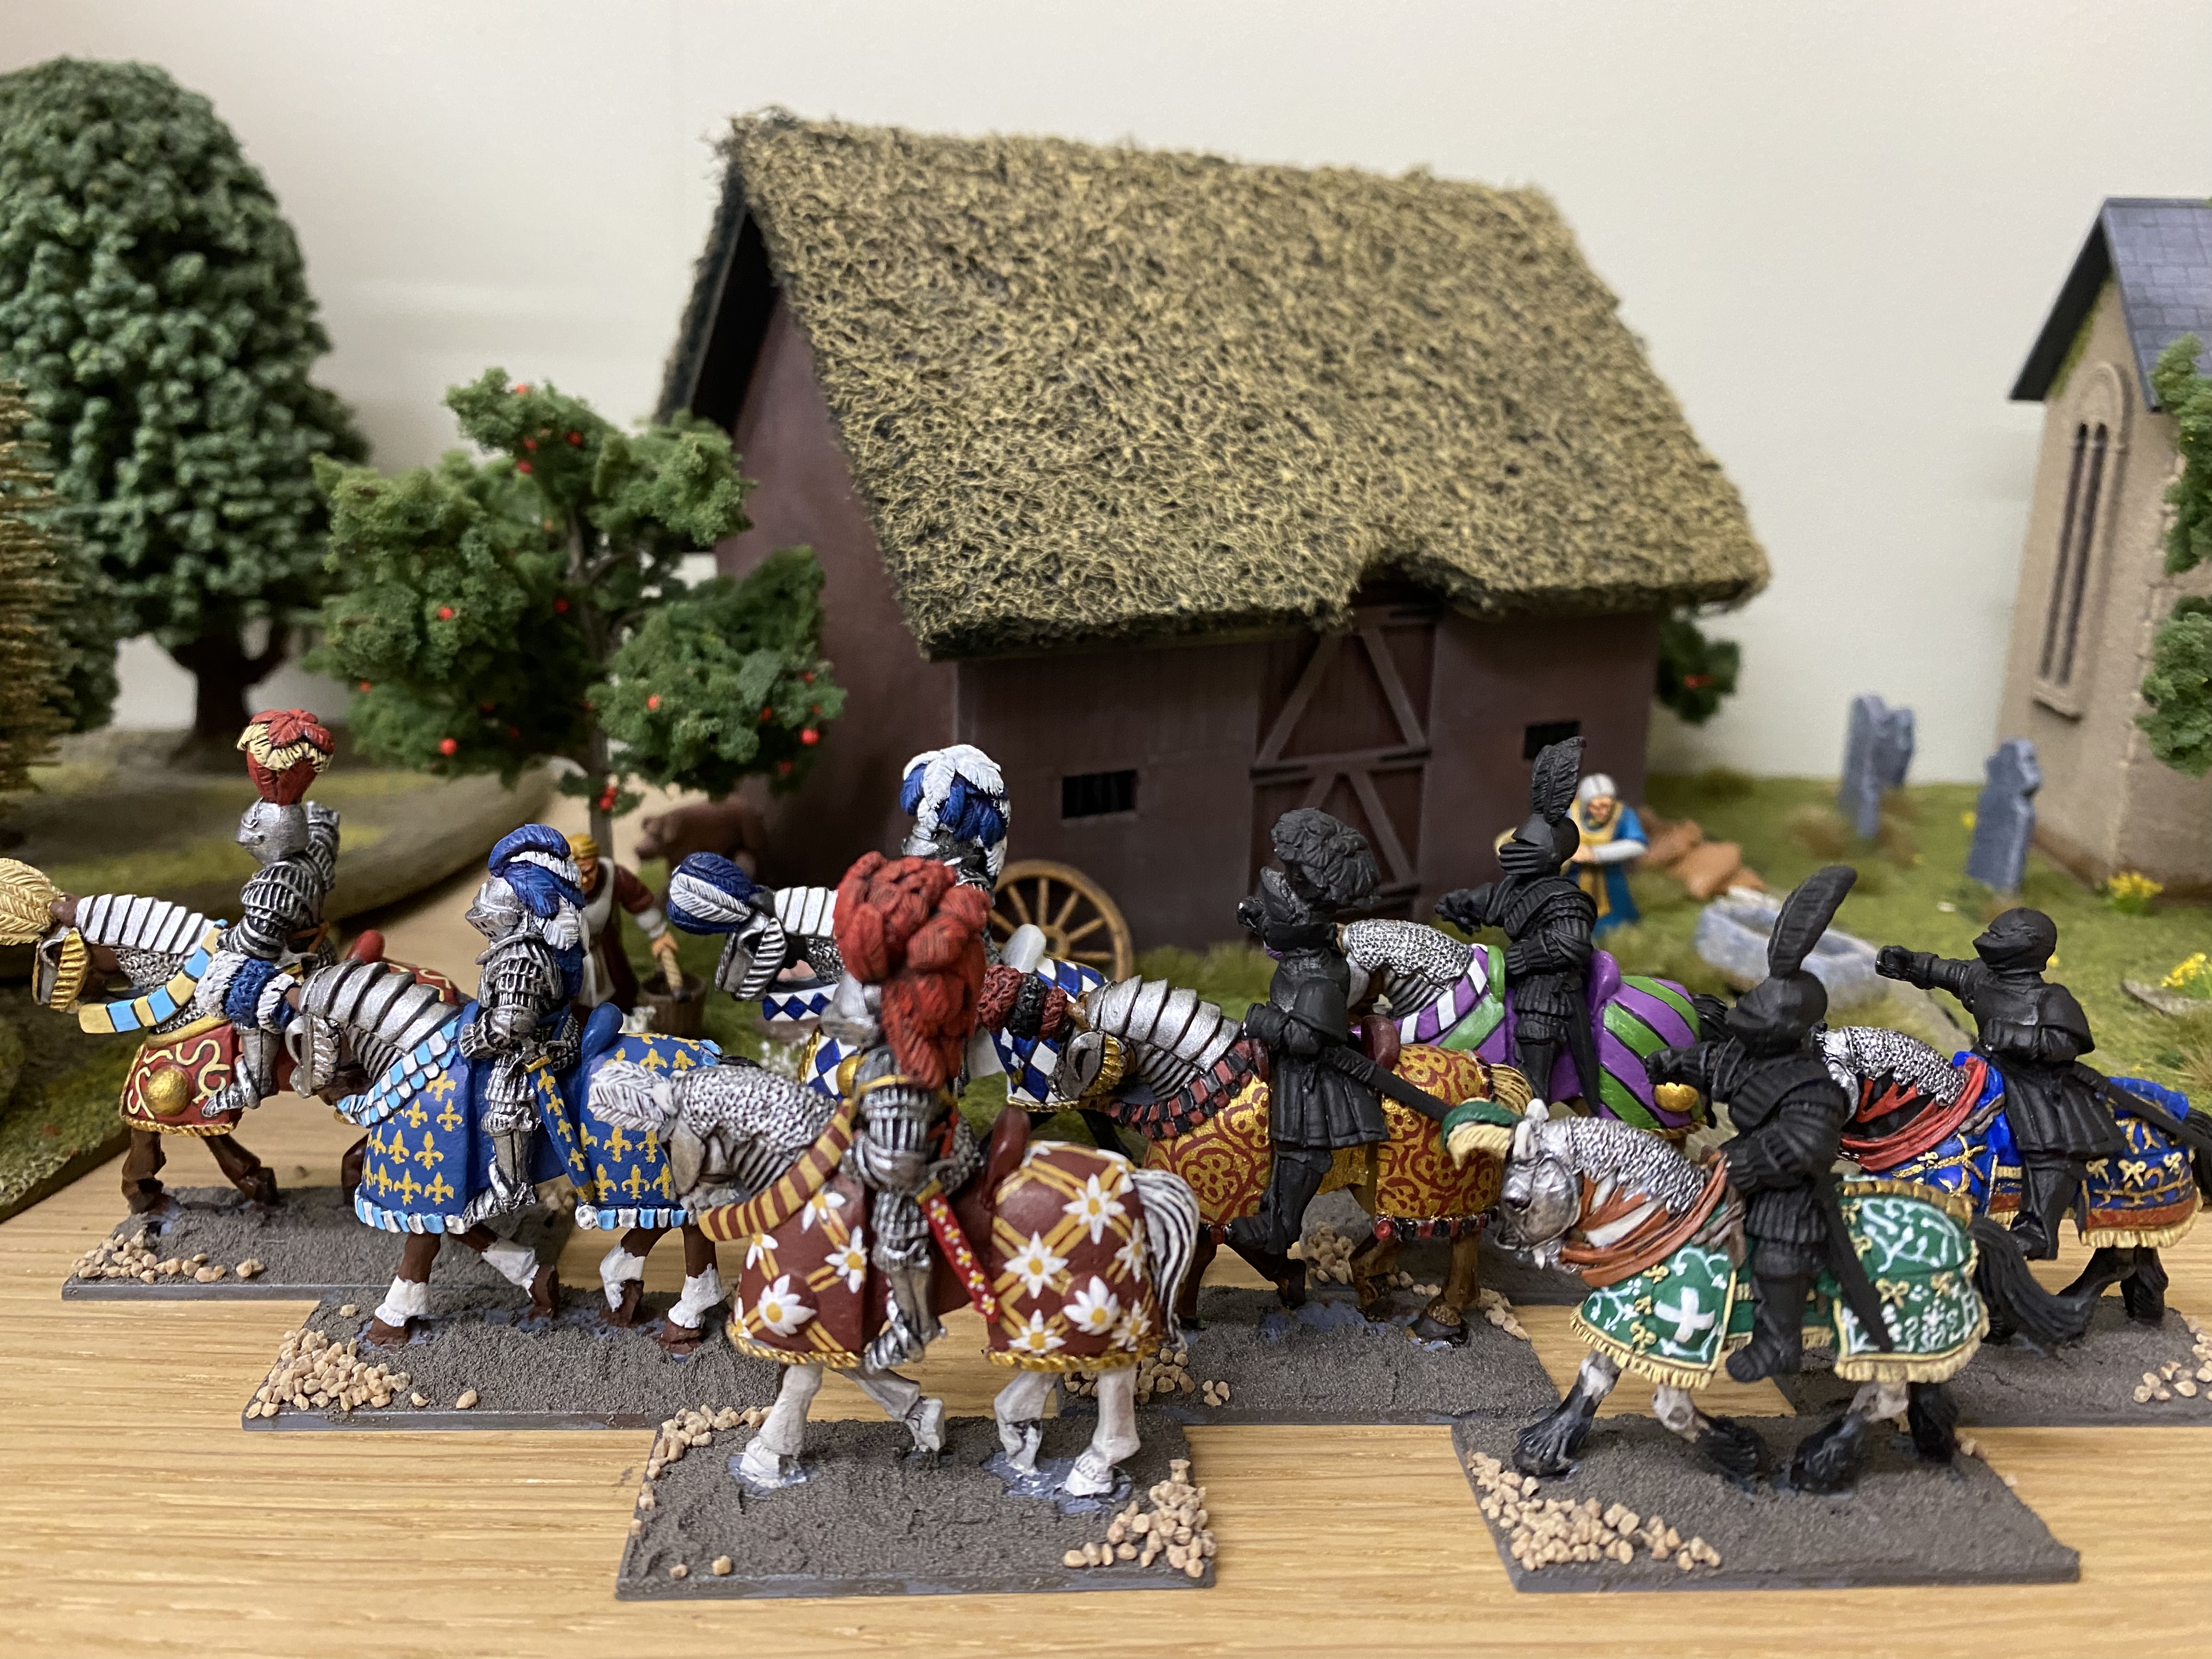
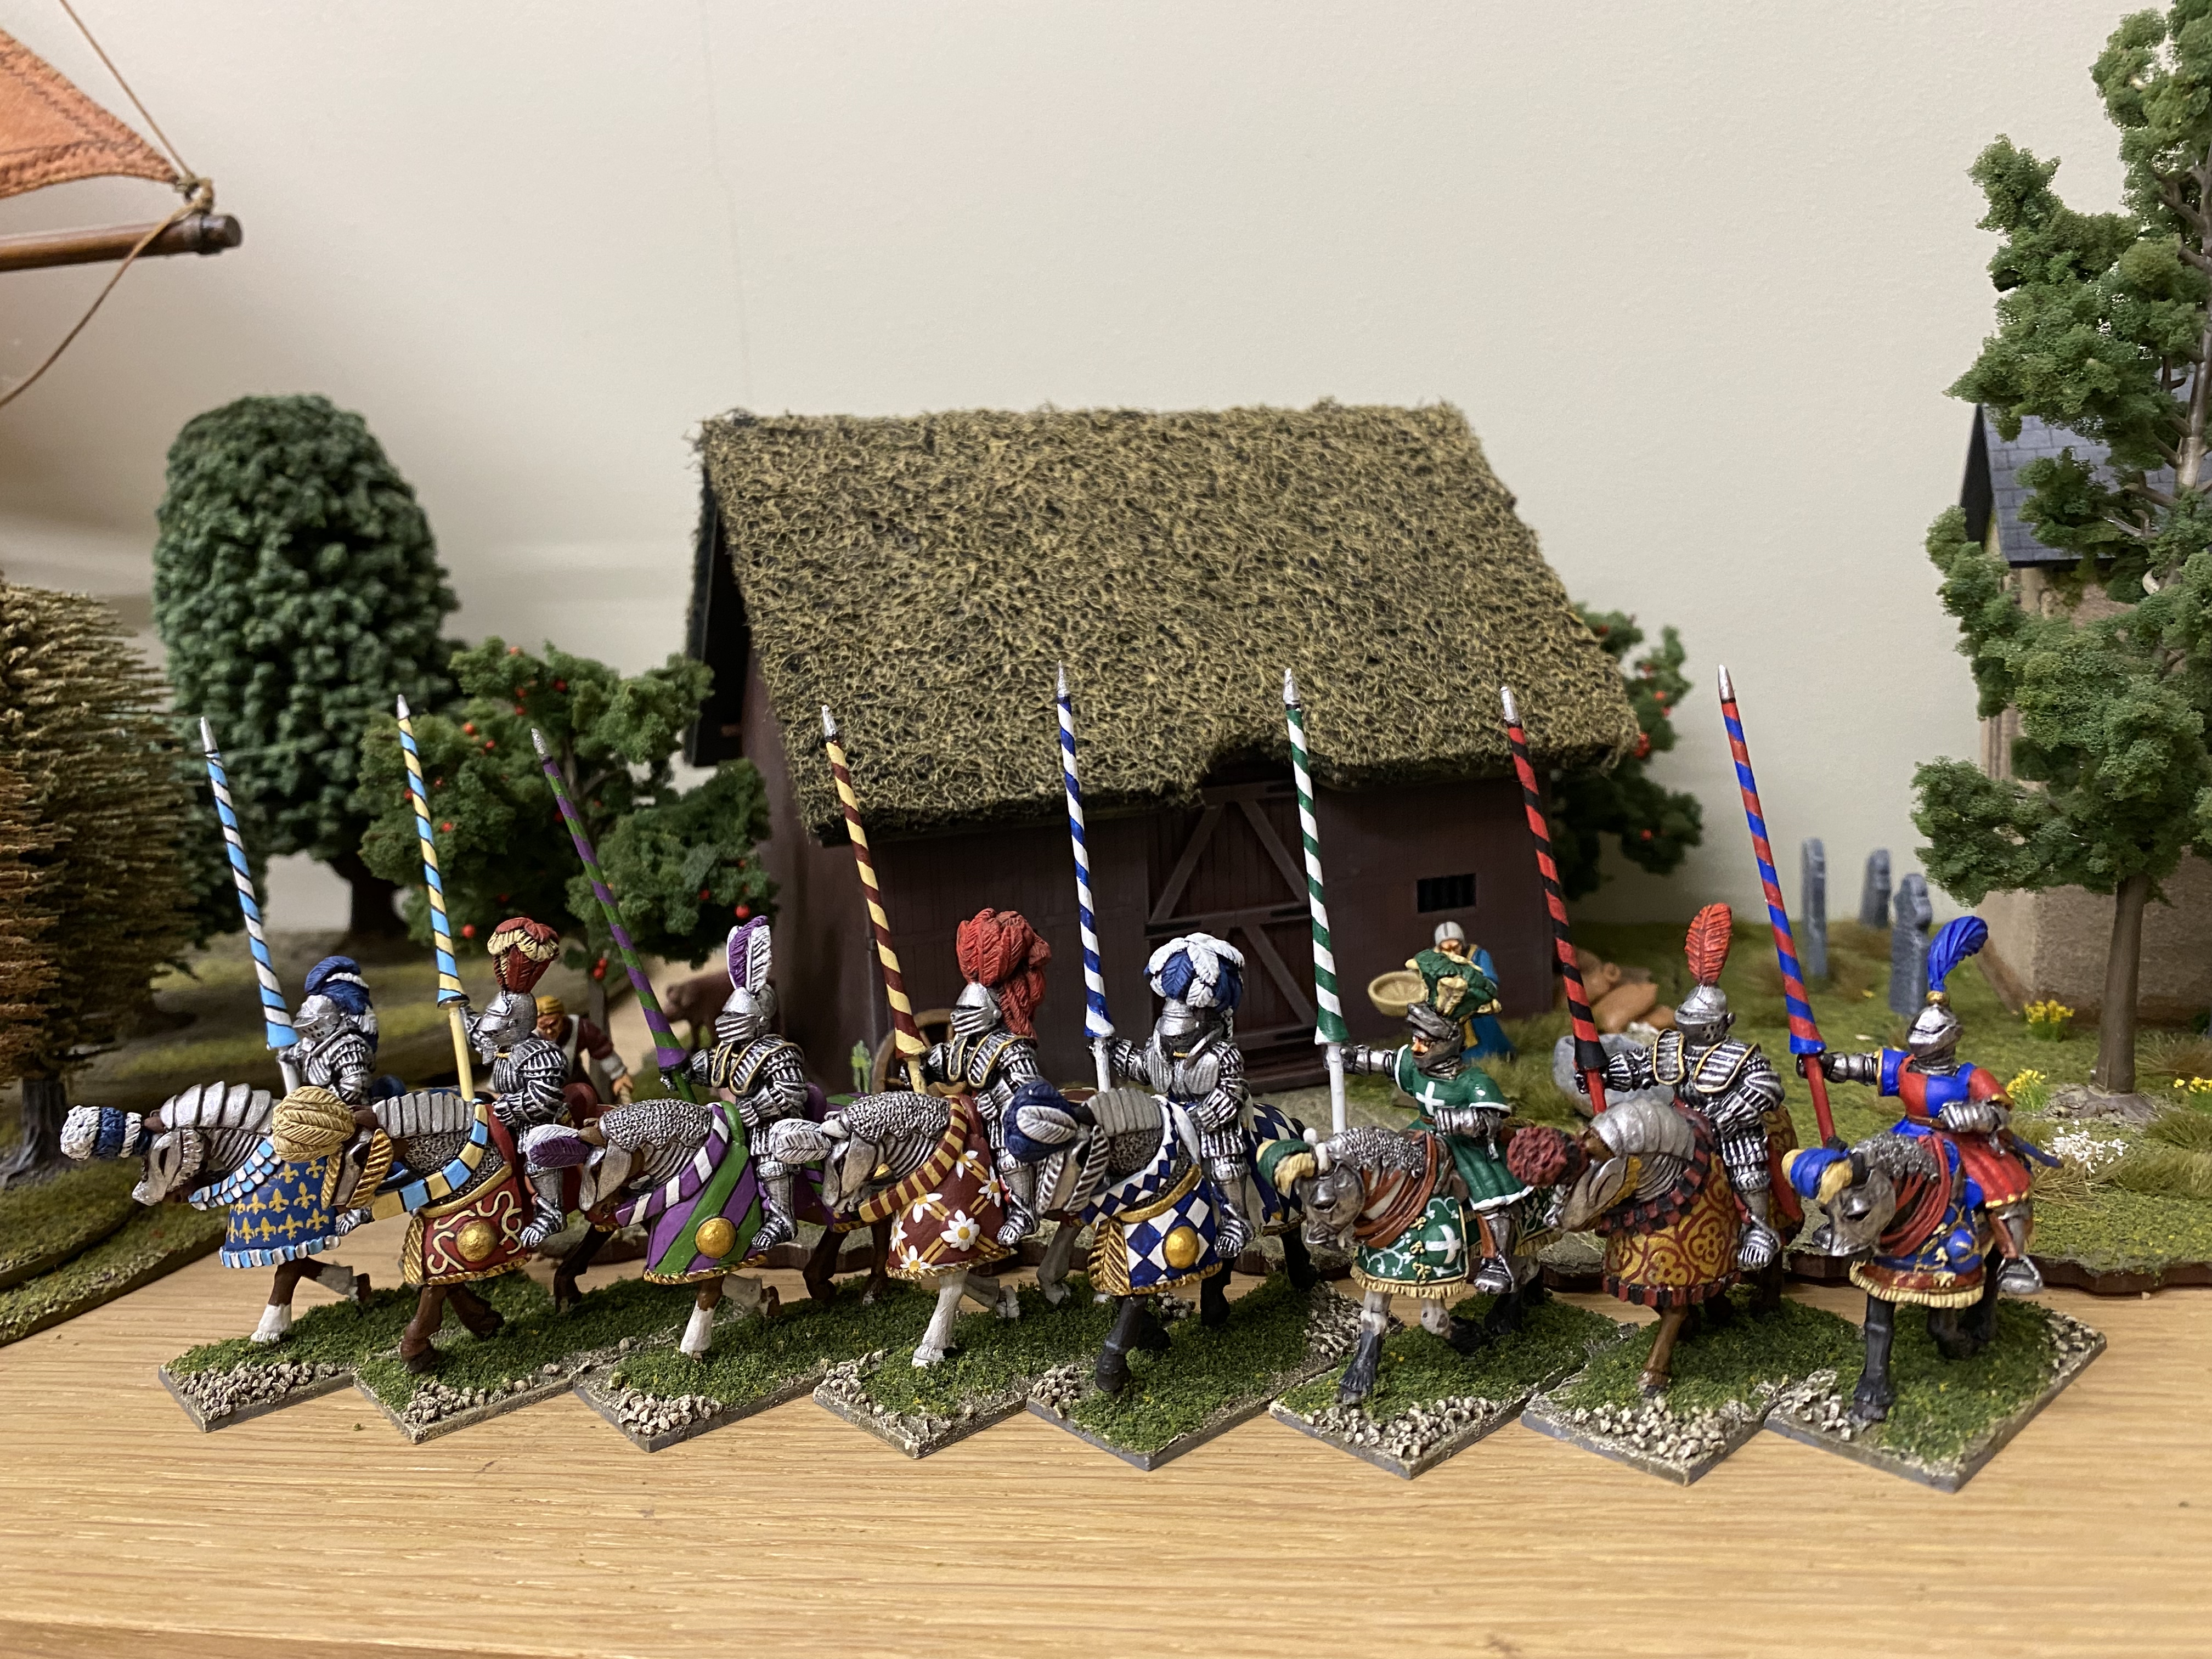
The unit is nearly finished – just the tufts and flowers to add
I had intended to put flags on each lance and ordered a selection from Pete’s flags. Although the flags are lovely it seemed that it would be too much to add them to the lances. Thanks to a suggestion from a facebook comment, I think that I will model a commander and banner man as a separate command stand. That can wait for now though!
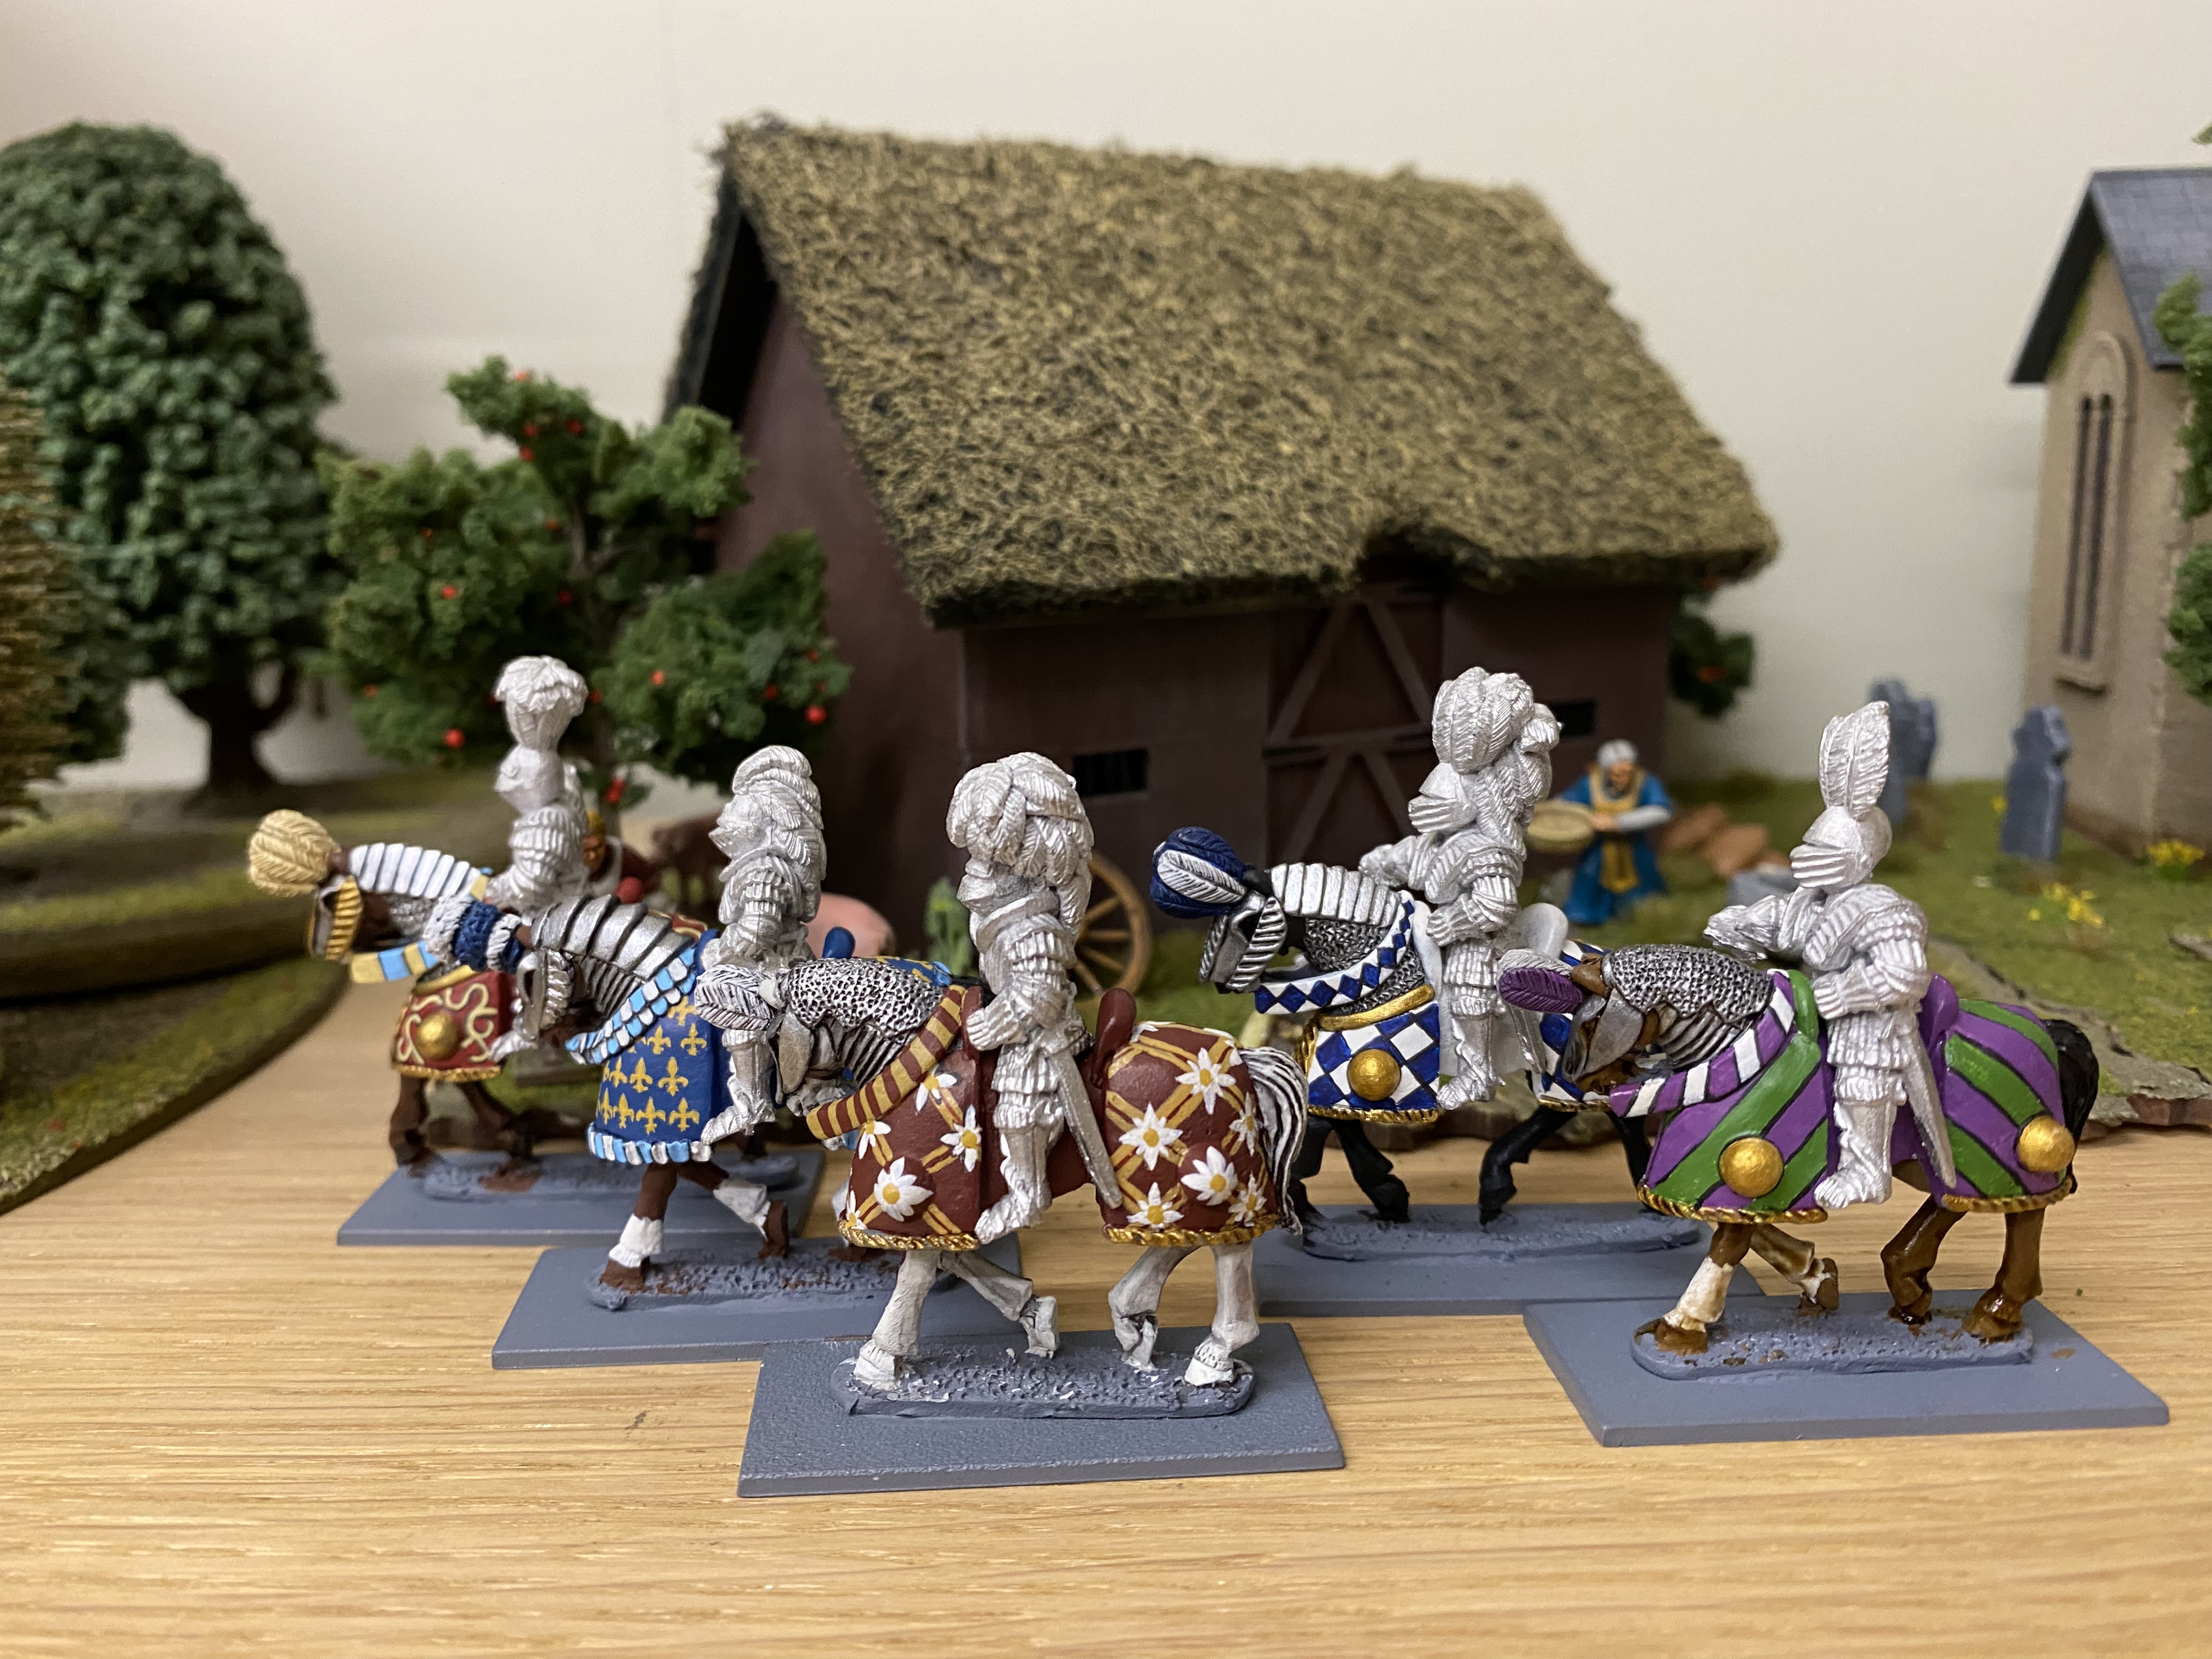
The finished unit ready for battle!
So. another unit is ready for Battle – I now have a growing army for the Italian Wars. I think that after painting these I will have a break from the period and complete something a bit more straight forward. I also have a Japanese project that I’m itching to get on with….Watch this space!
THE COMMERCIAL BIT
I hope that you all enjoy your hobby as much as I do – remember that our web site will have much of what you need! Click here to see our shop:
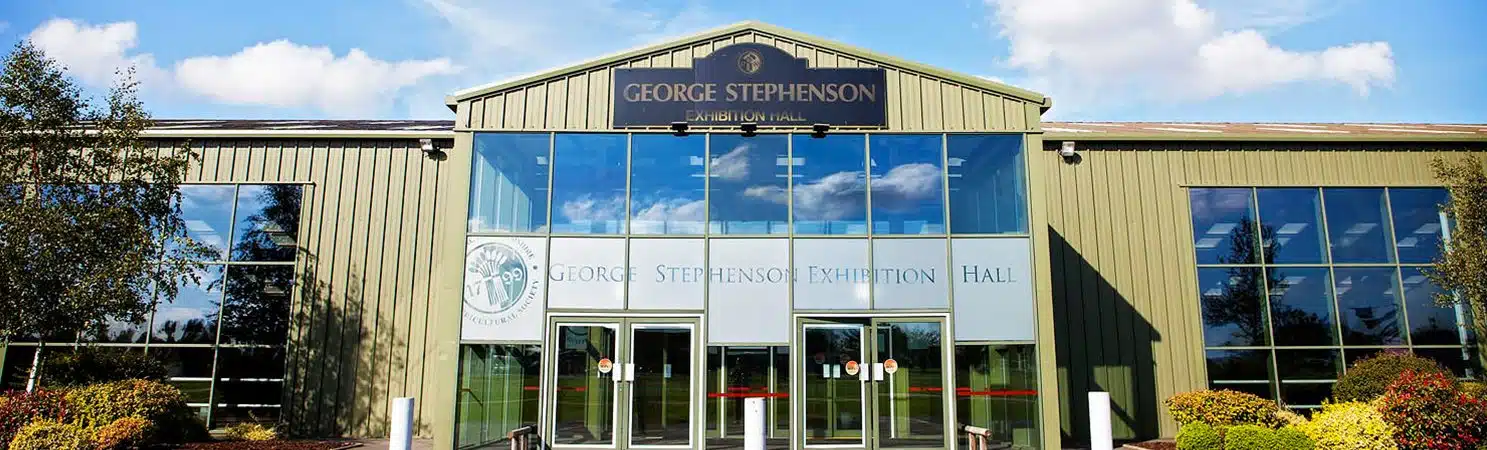
The Other Partizan Show is held at the George Stephenson Hall at the Newark show ground, just outside of the historic town of Newark. The Other Partizan show is the second Partizan show of the year, held in the Autumn, with the original Partizan show held in the spring. I am happy to proclaim Partizan as my favourite wargames show, although I admit to being totally biased in this respect. It is only an easy 20 minutes down the A46 from my house.
However, to back this claim up I would add that the venue is generally bright and airy, there’s free parking, the standard of games on show is the best you’ll see anywhere and the selection of traders means that you should be able to find most of what you want and much that you didn’t realise that you needed! Add in a decent cafe (the bacon cobs are excellent!) and an Ice cream stall – somehow the weather always seems fine at the Partizan shows – and you have the recipe for a very pleasant day out.
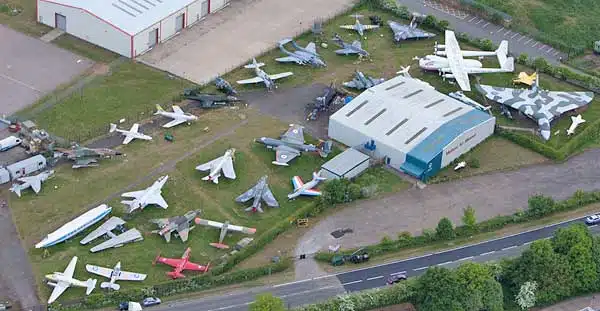
An ariel shot of some of the exhibits at the Newark Air Museum
If all that isn’t quite enough for you, the venue is next door to the Newark Air Museum, 5 minutes away from Newark; which of course has the Castle ( free entry), the English Civil War museum, Queens Sconce and Polish WW2 Cemetery and is 15 minutes away from the Stokes Field Battlefield at East Stoke village. So you could quite easily make it a weekend break if you fancied it.
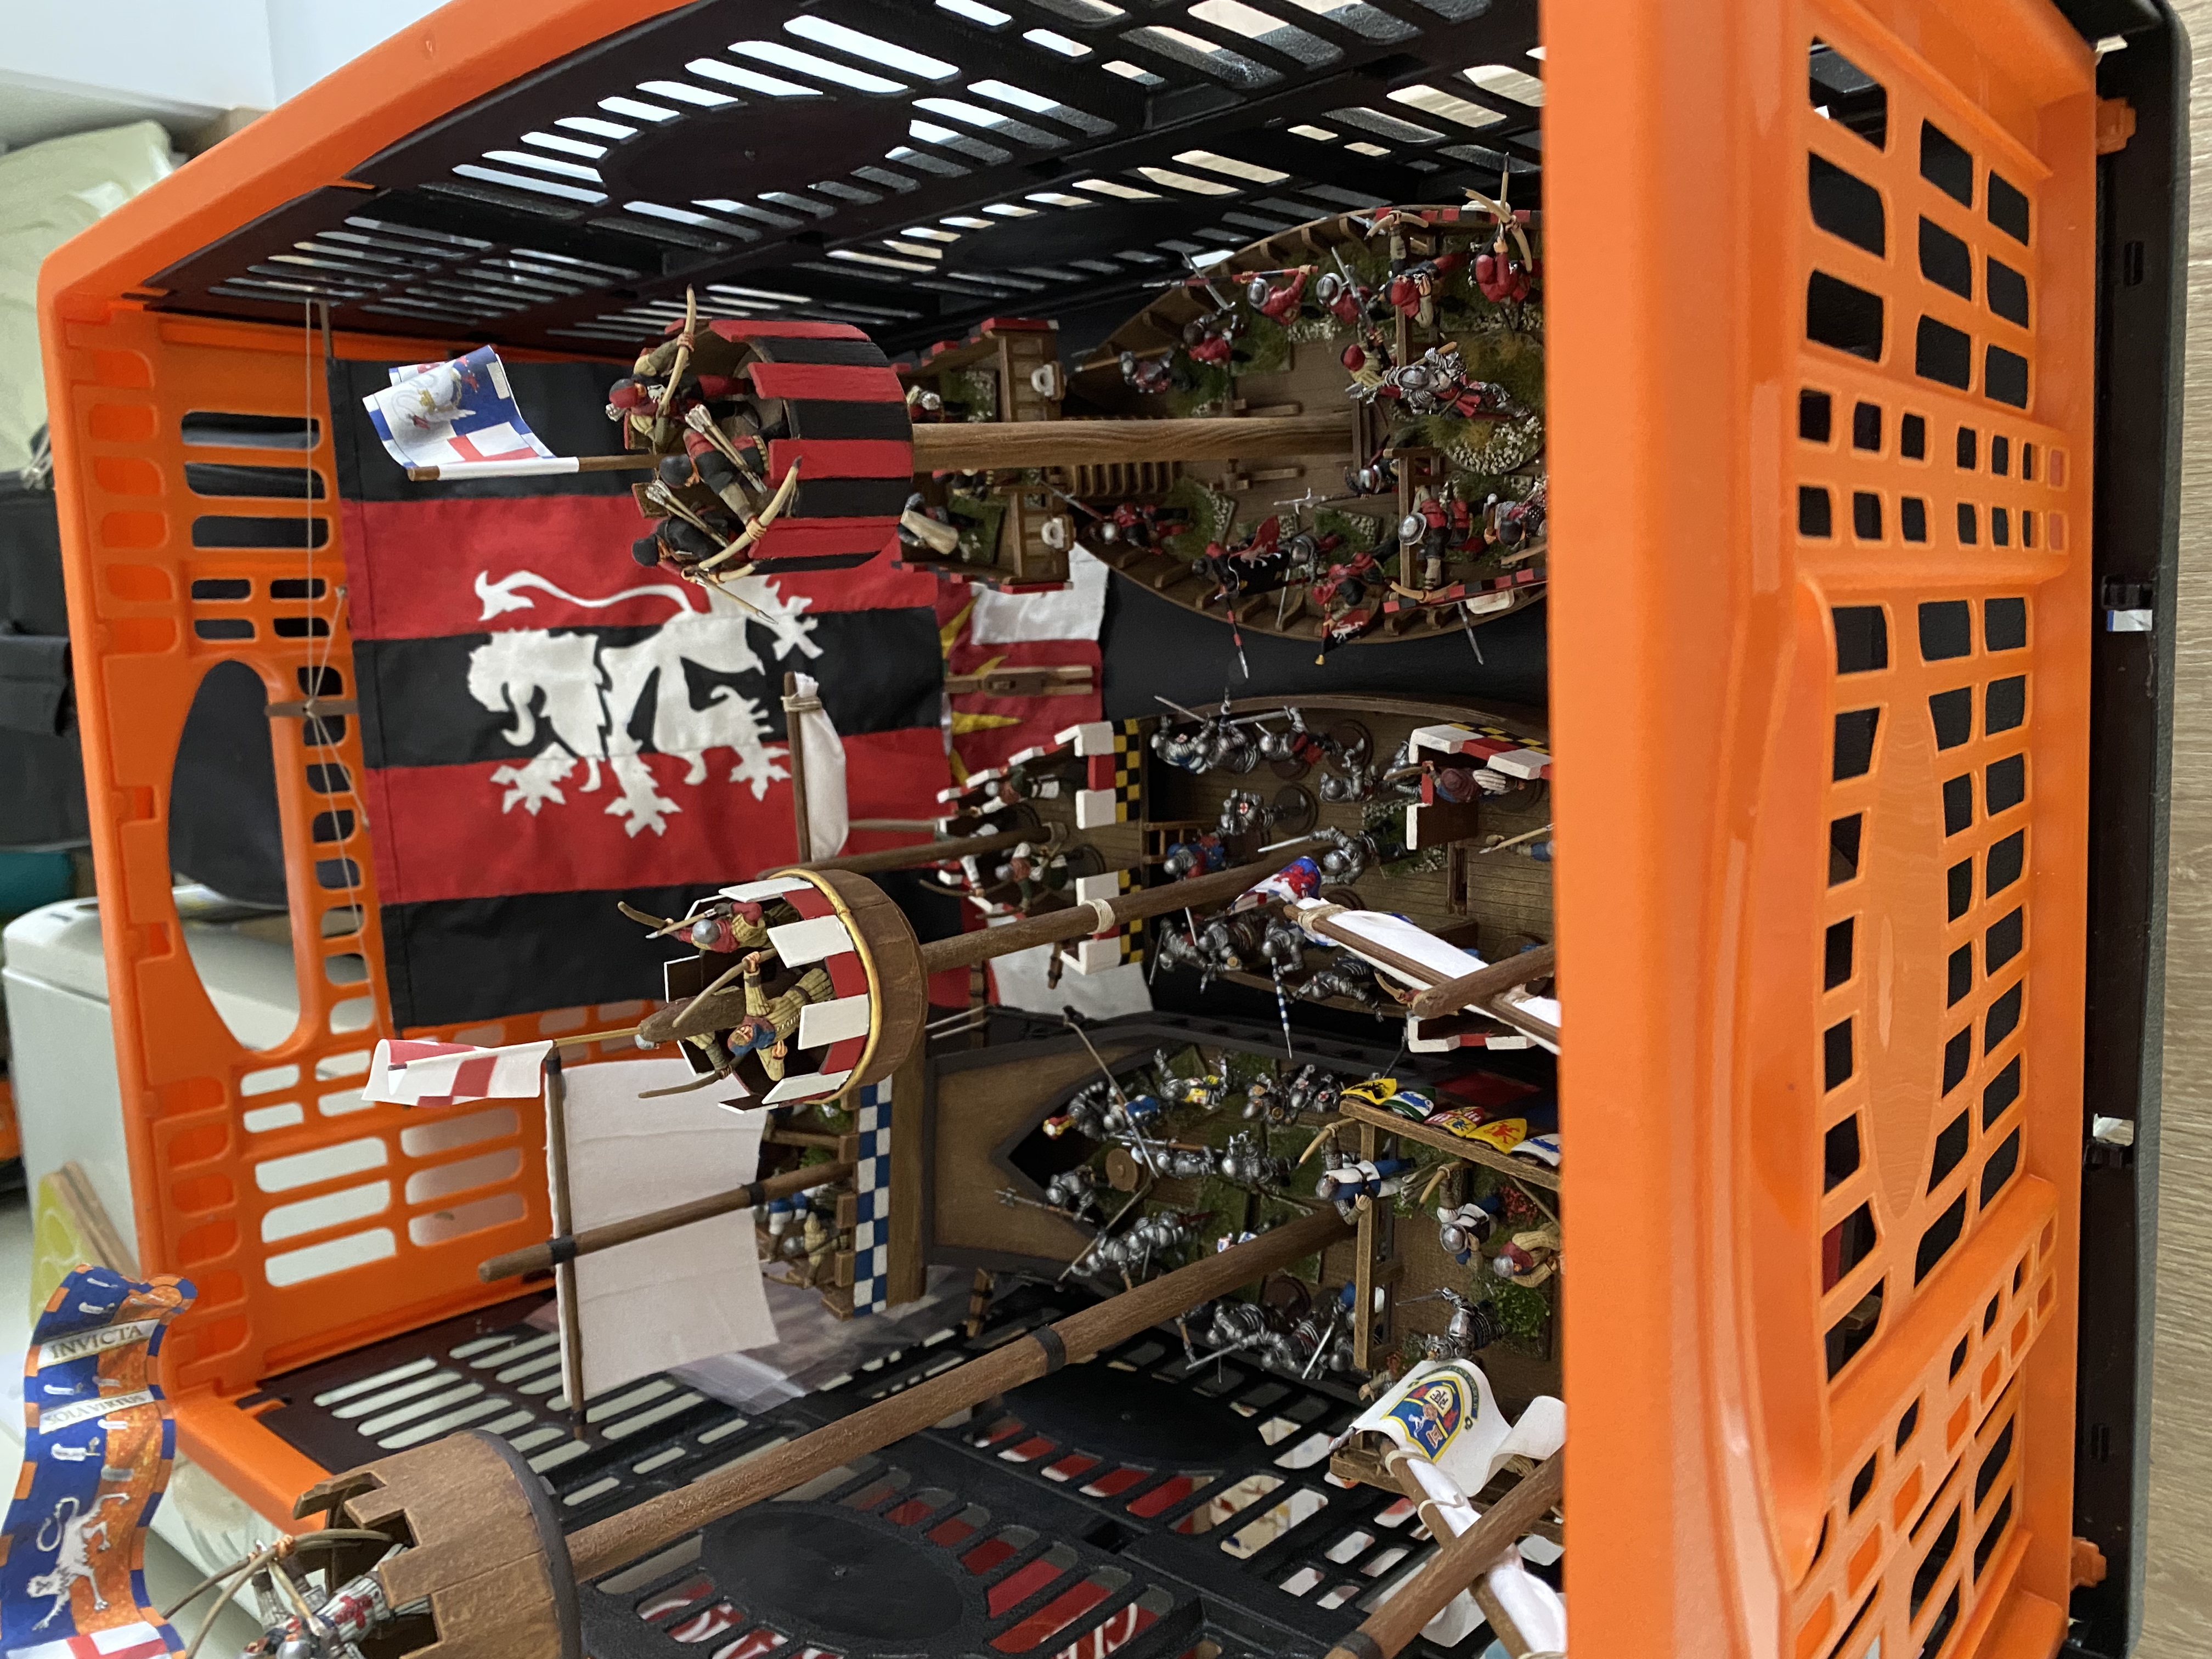
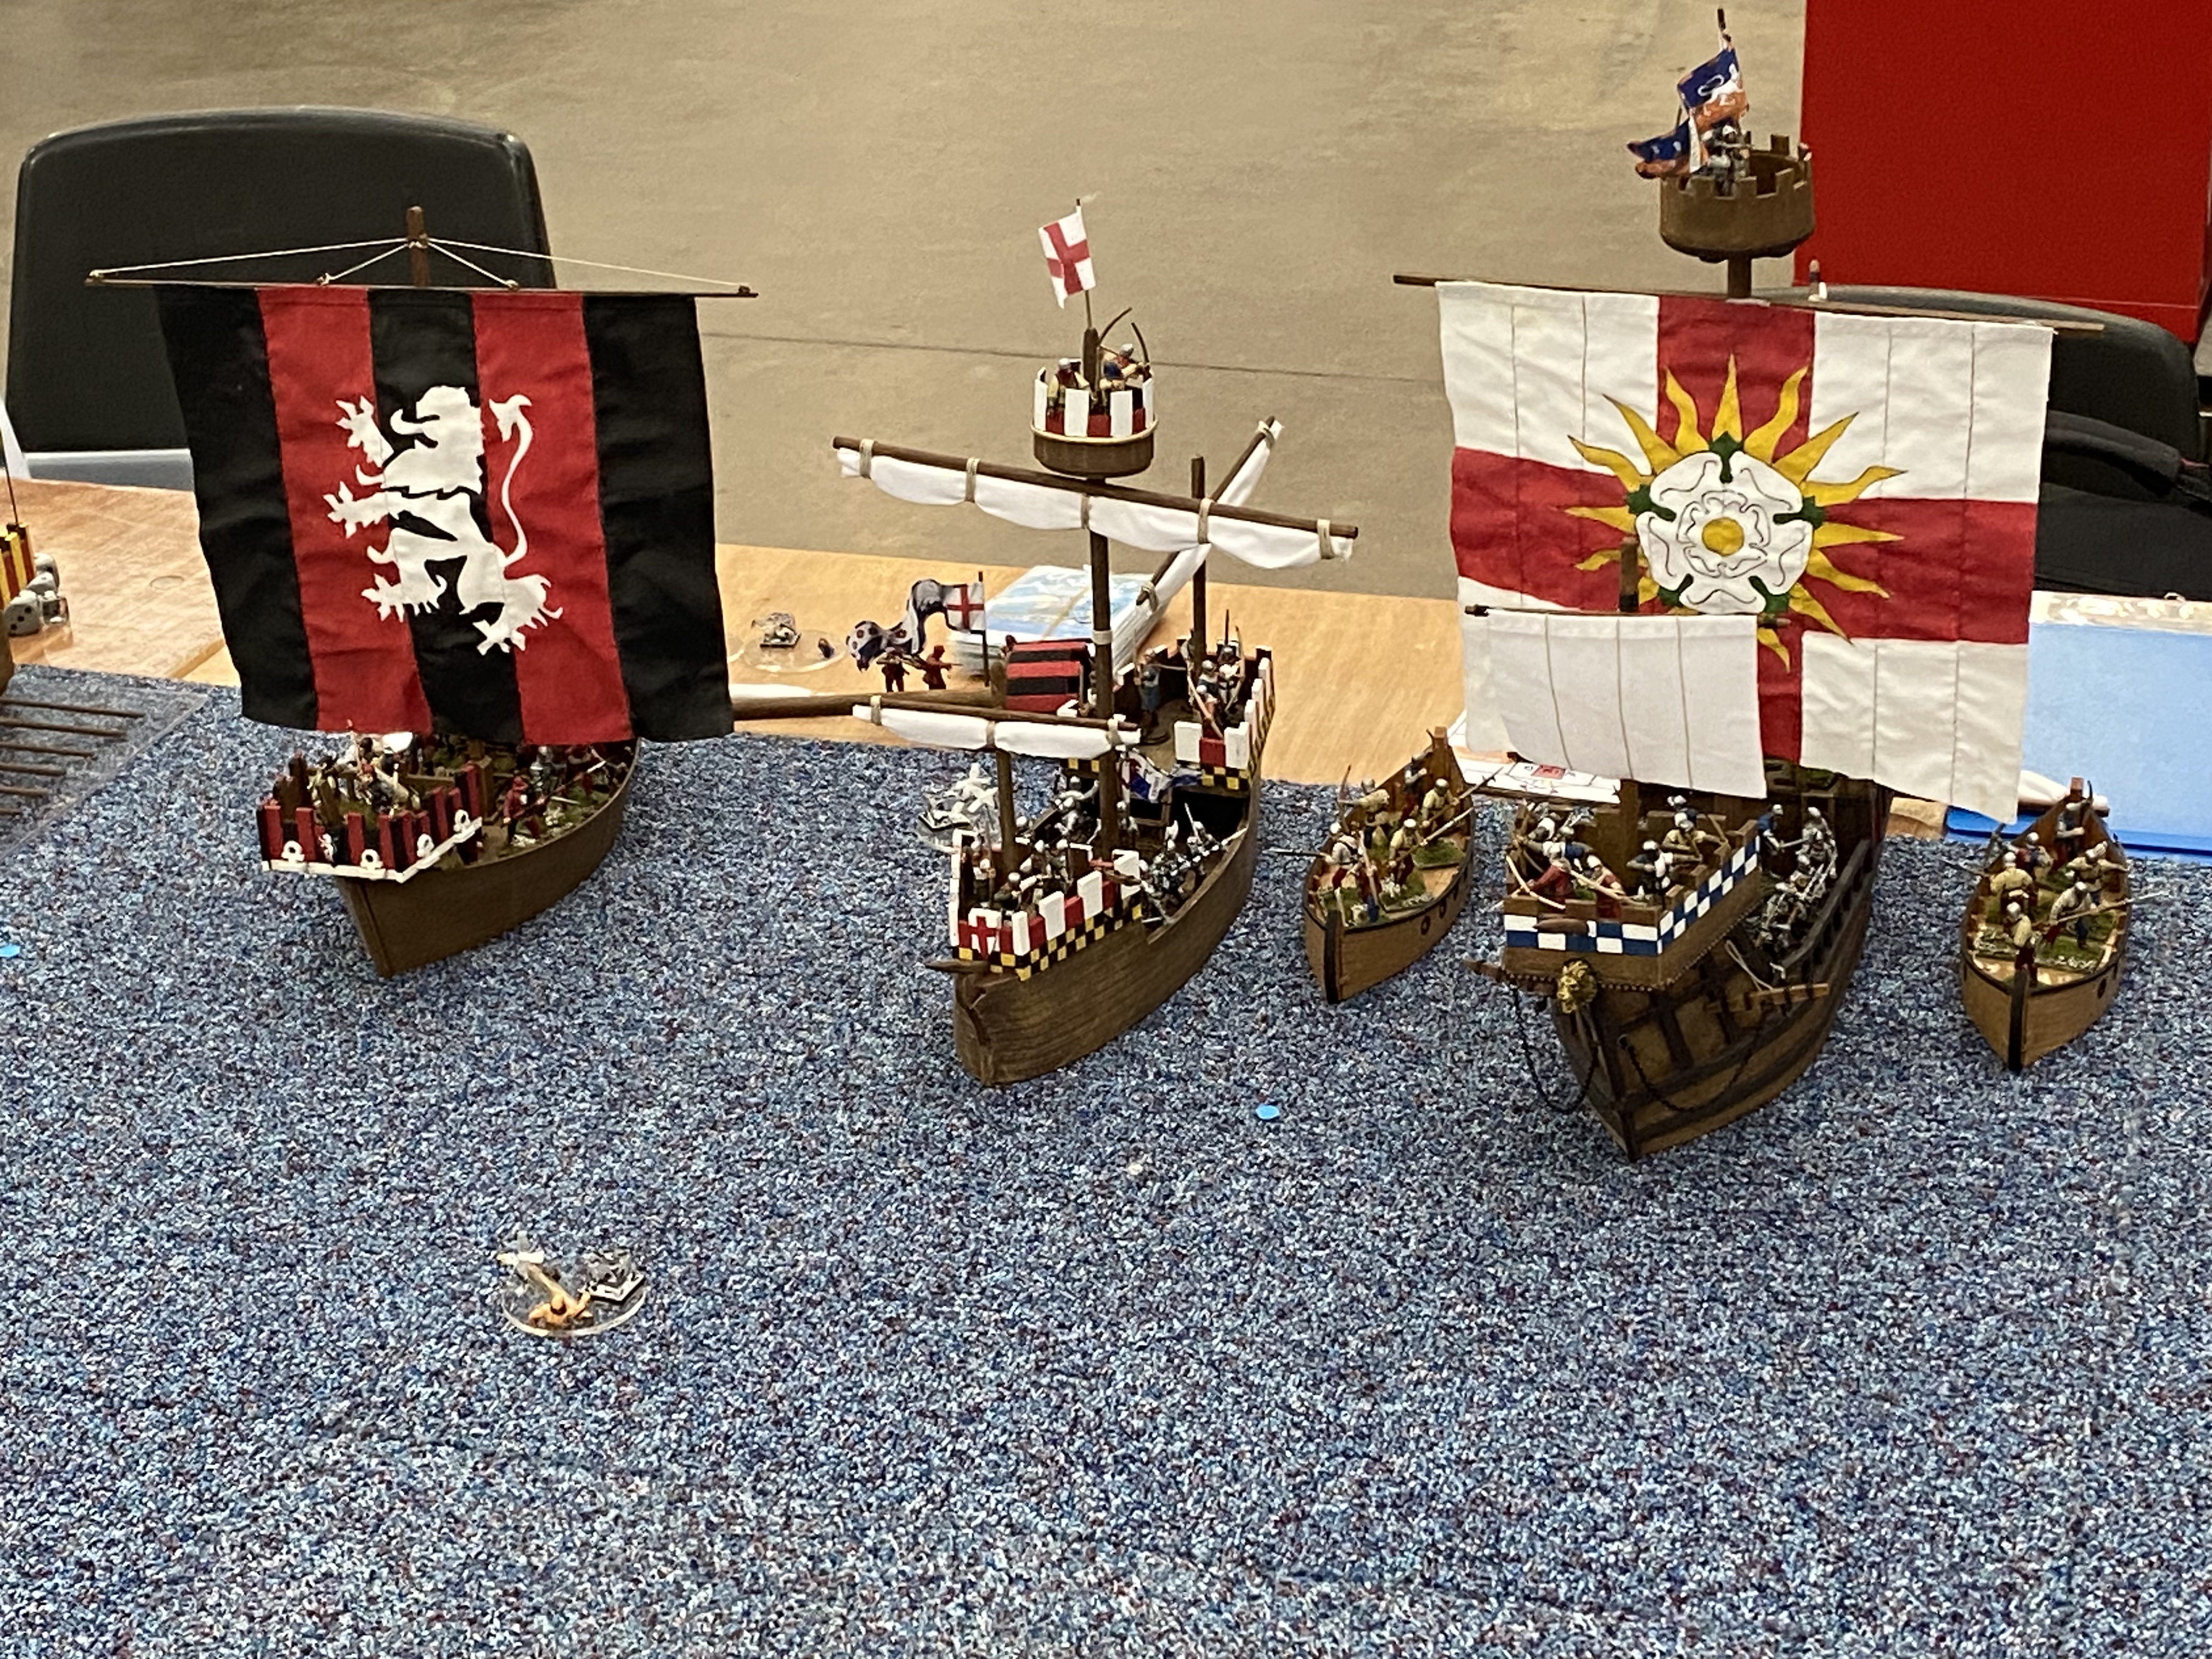
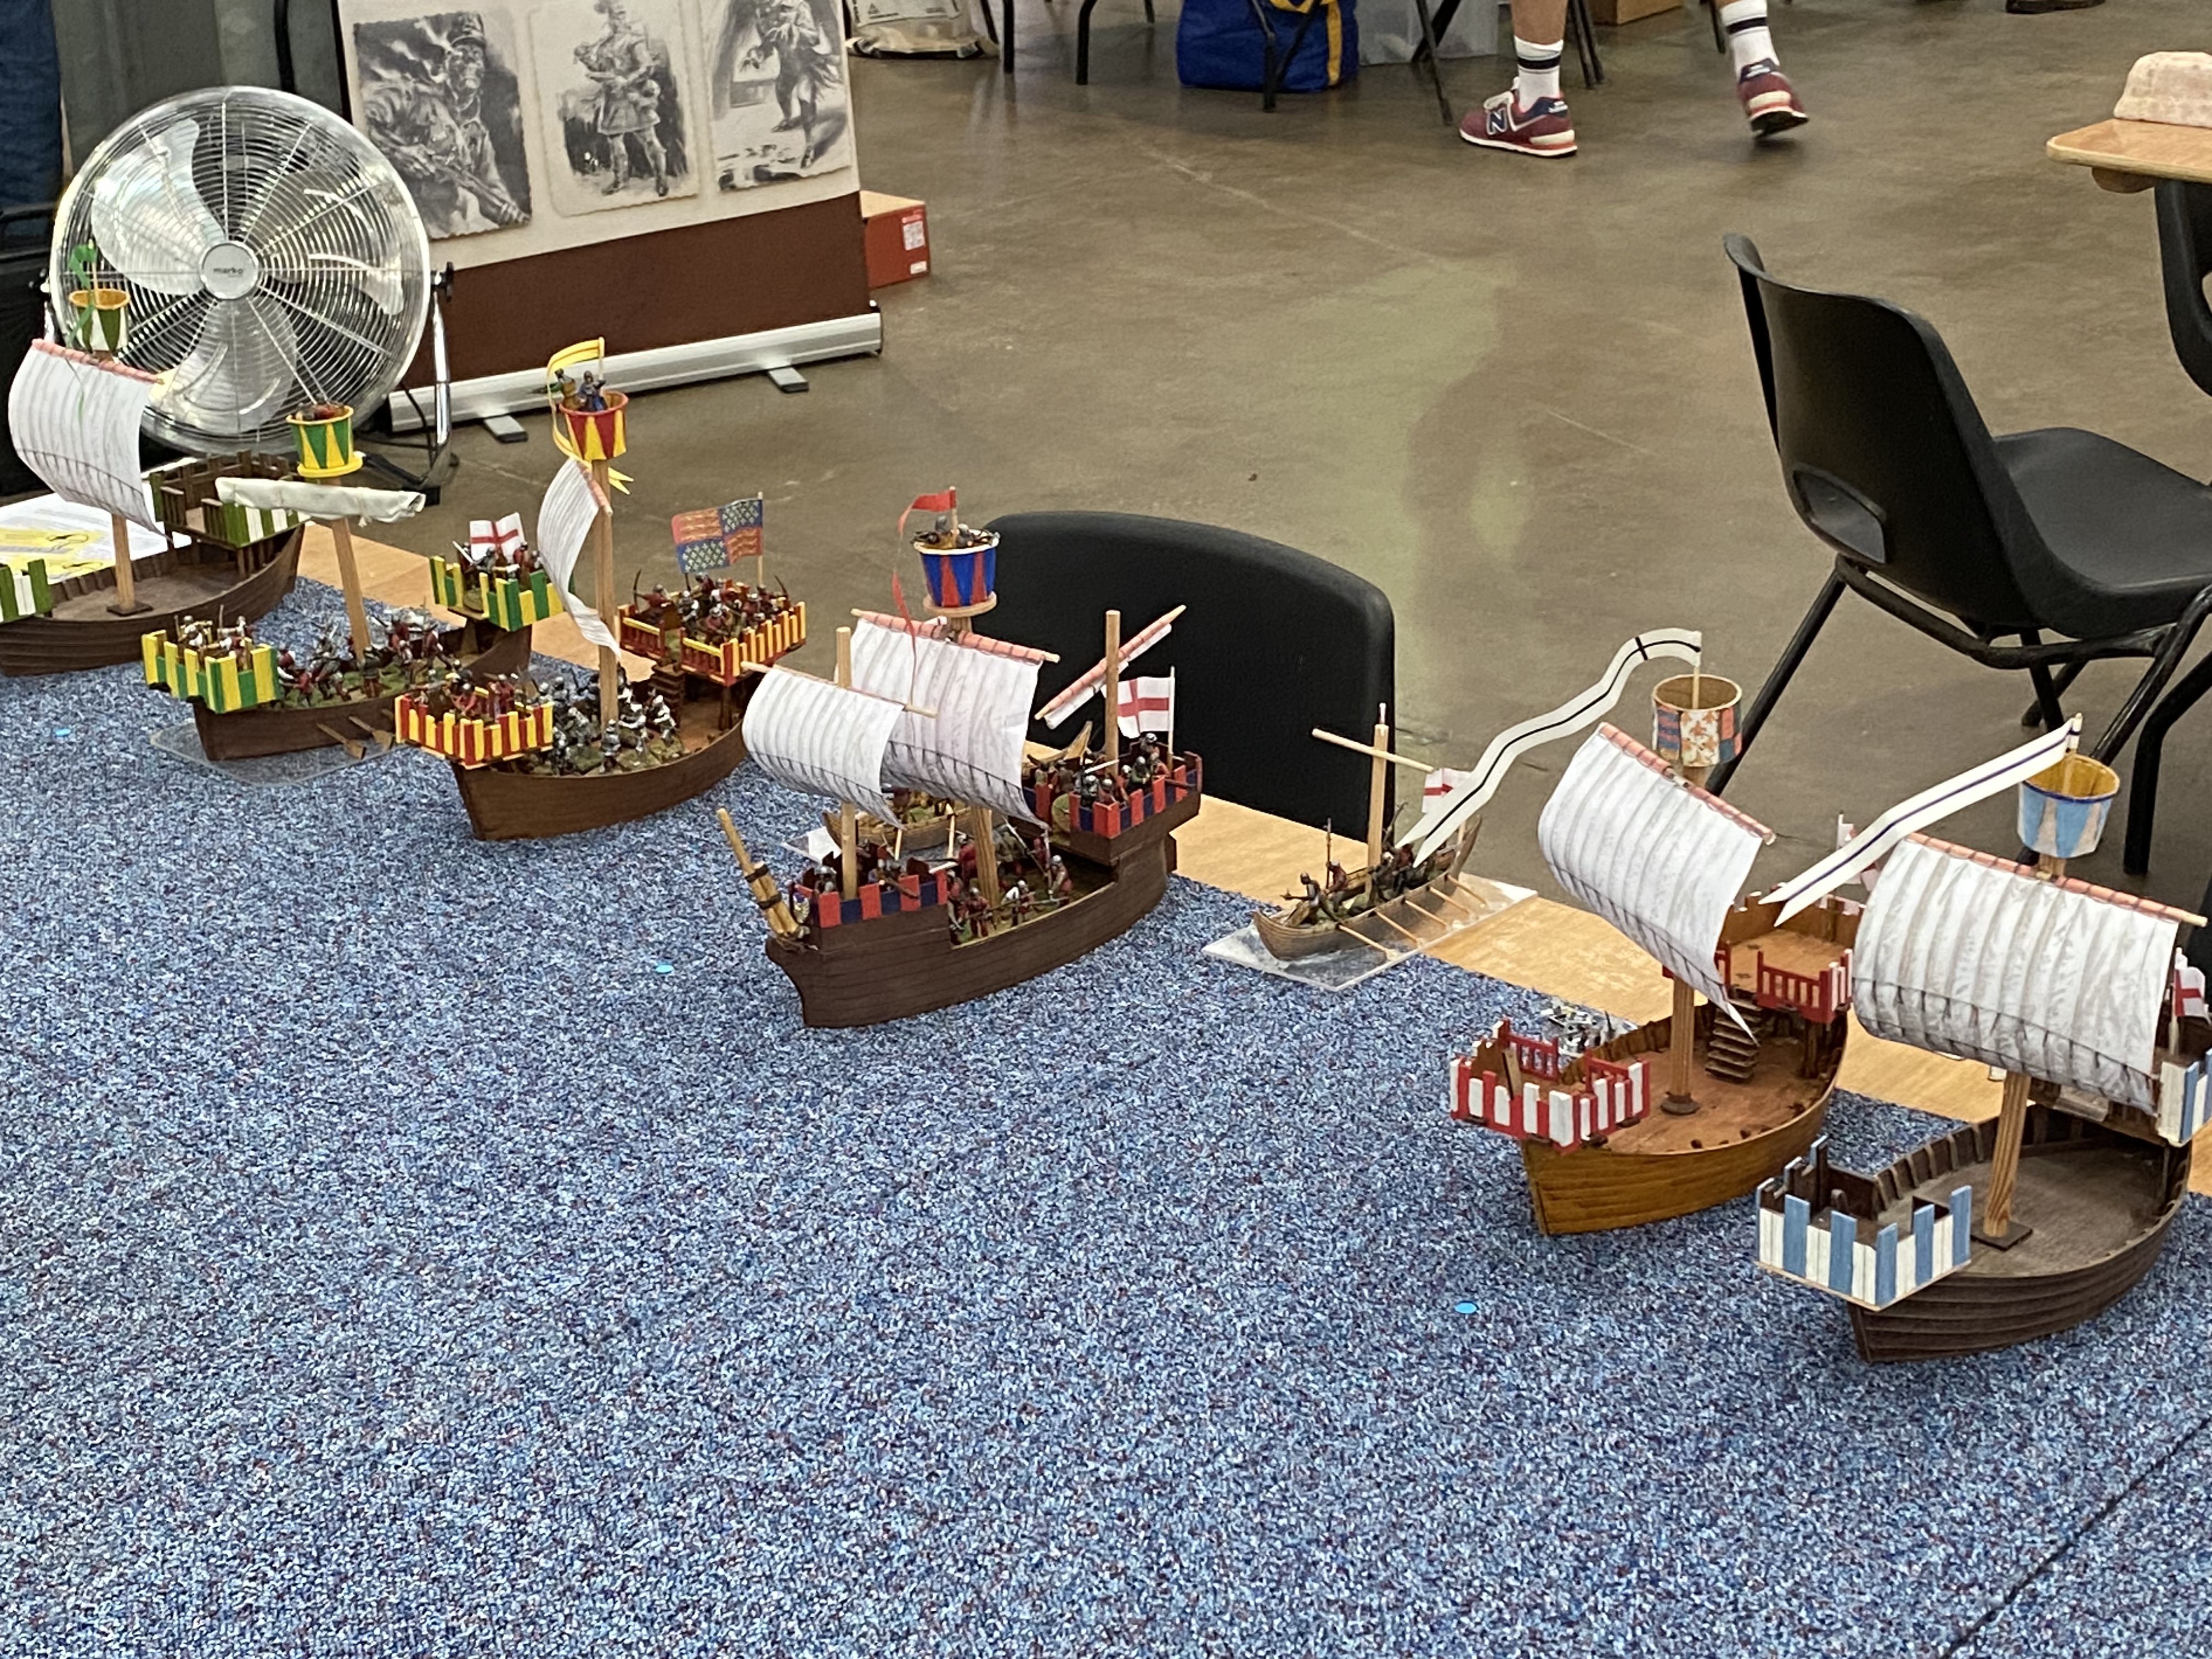
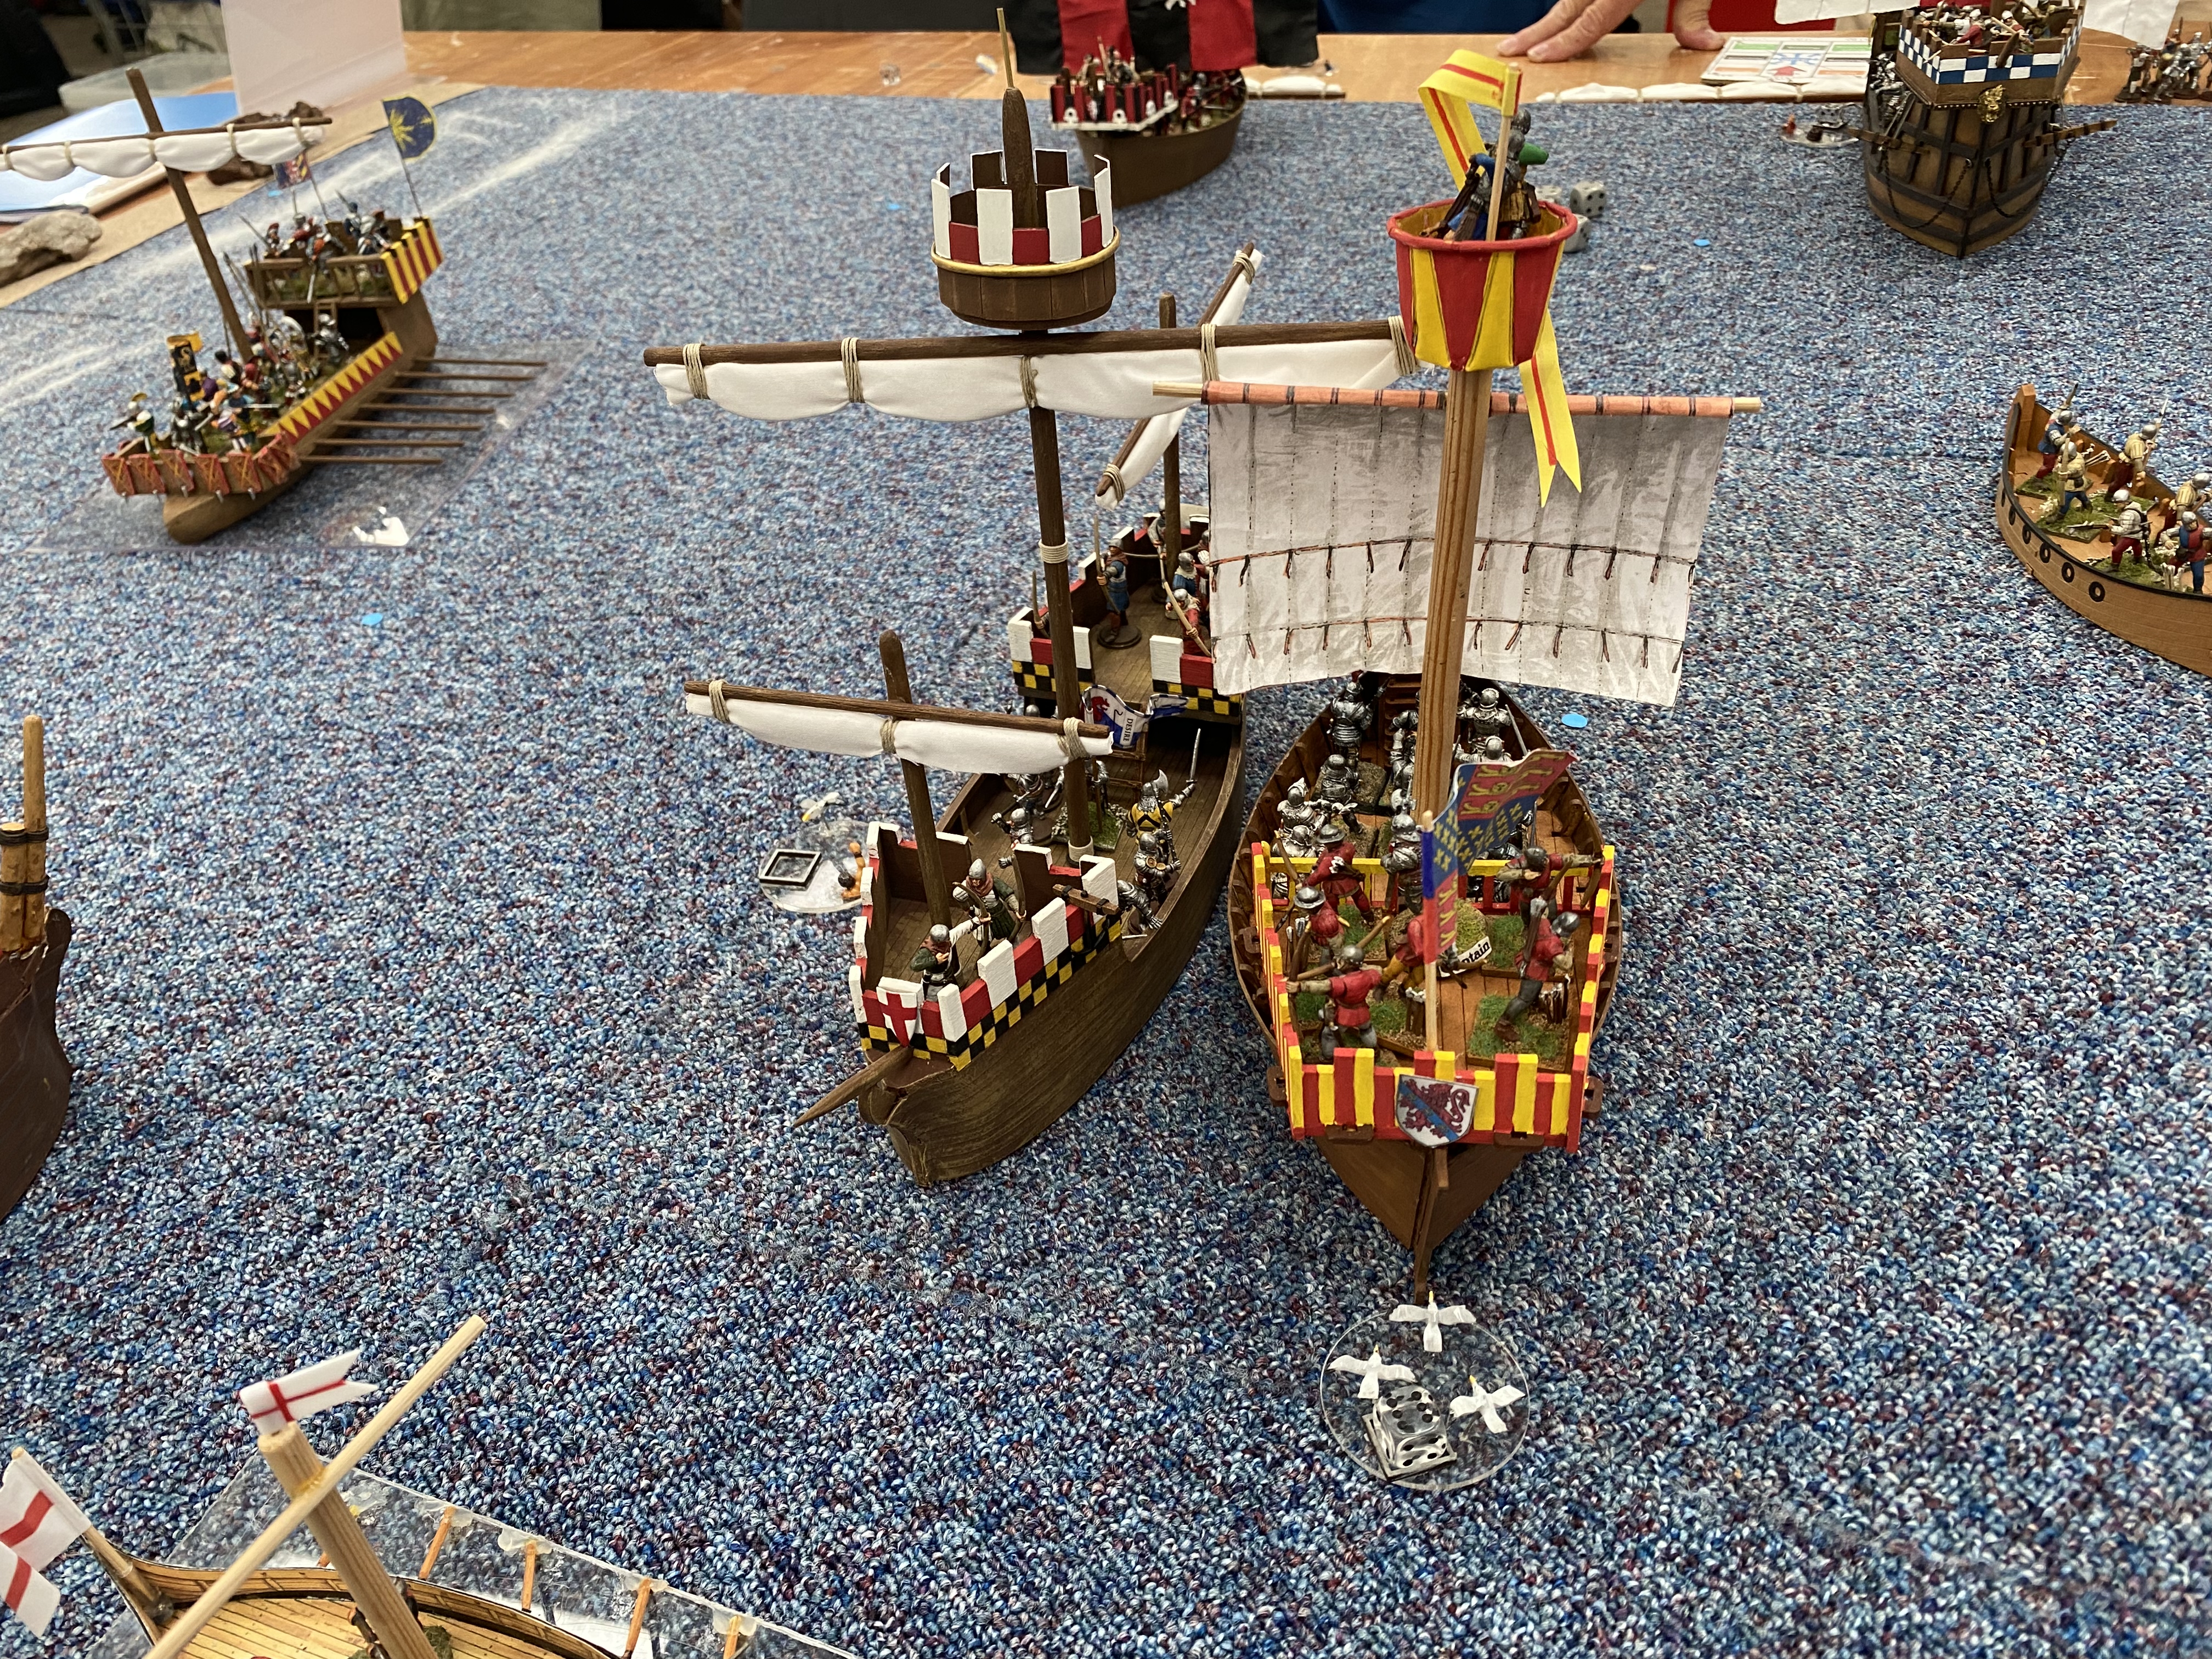
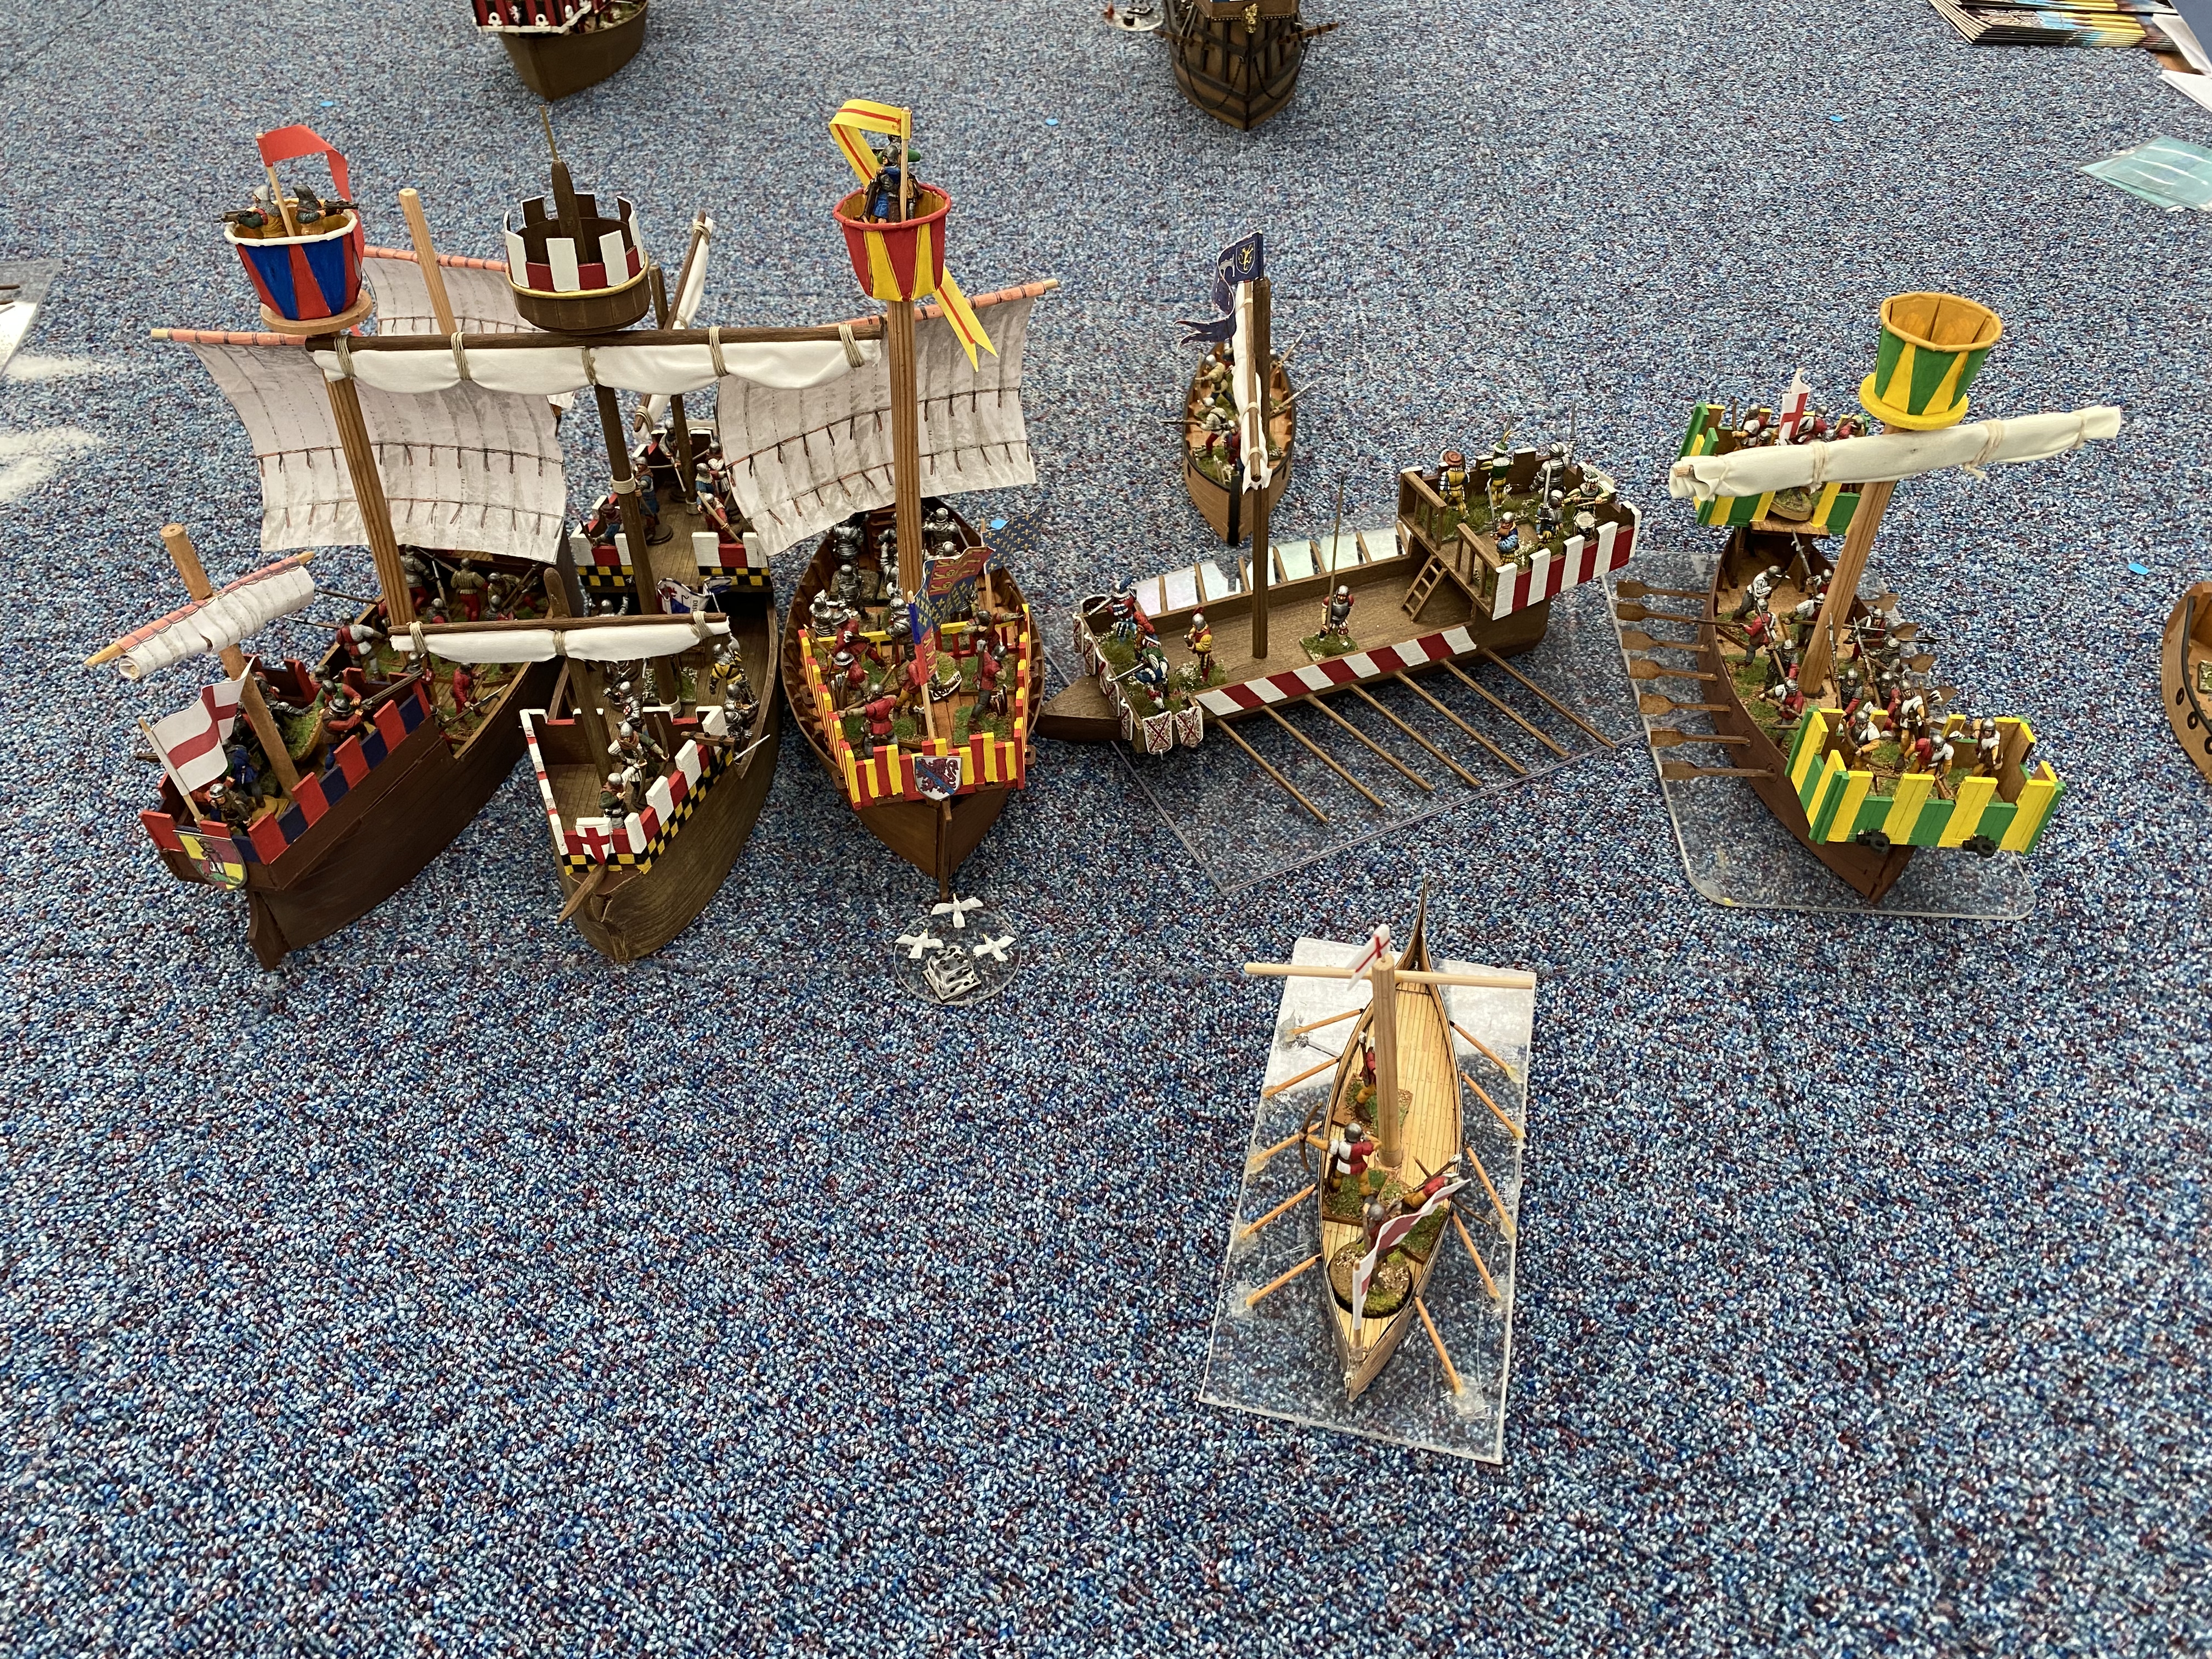
My Fleet all packed up and ready to go to Partizan.
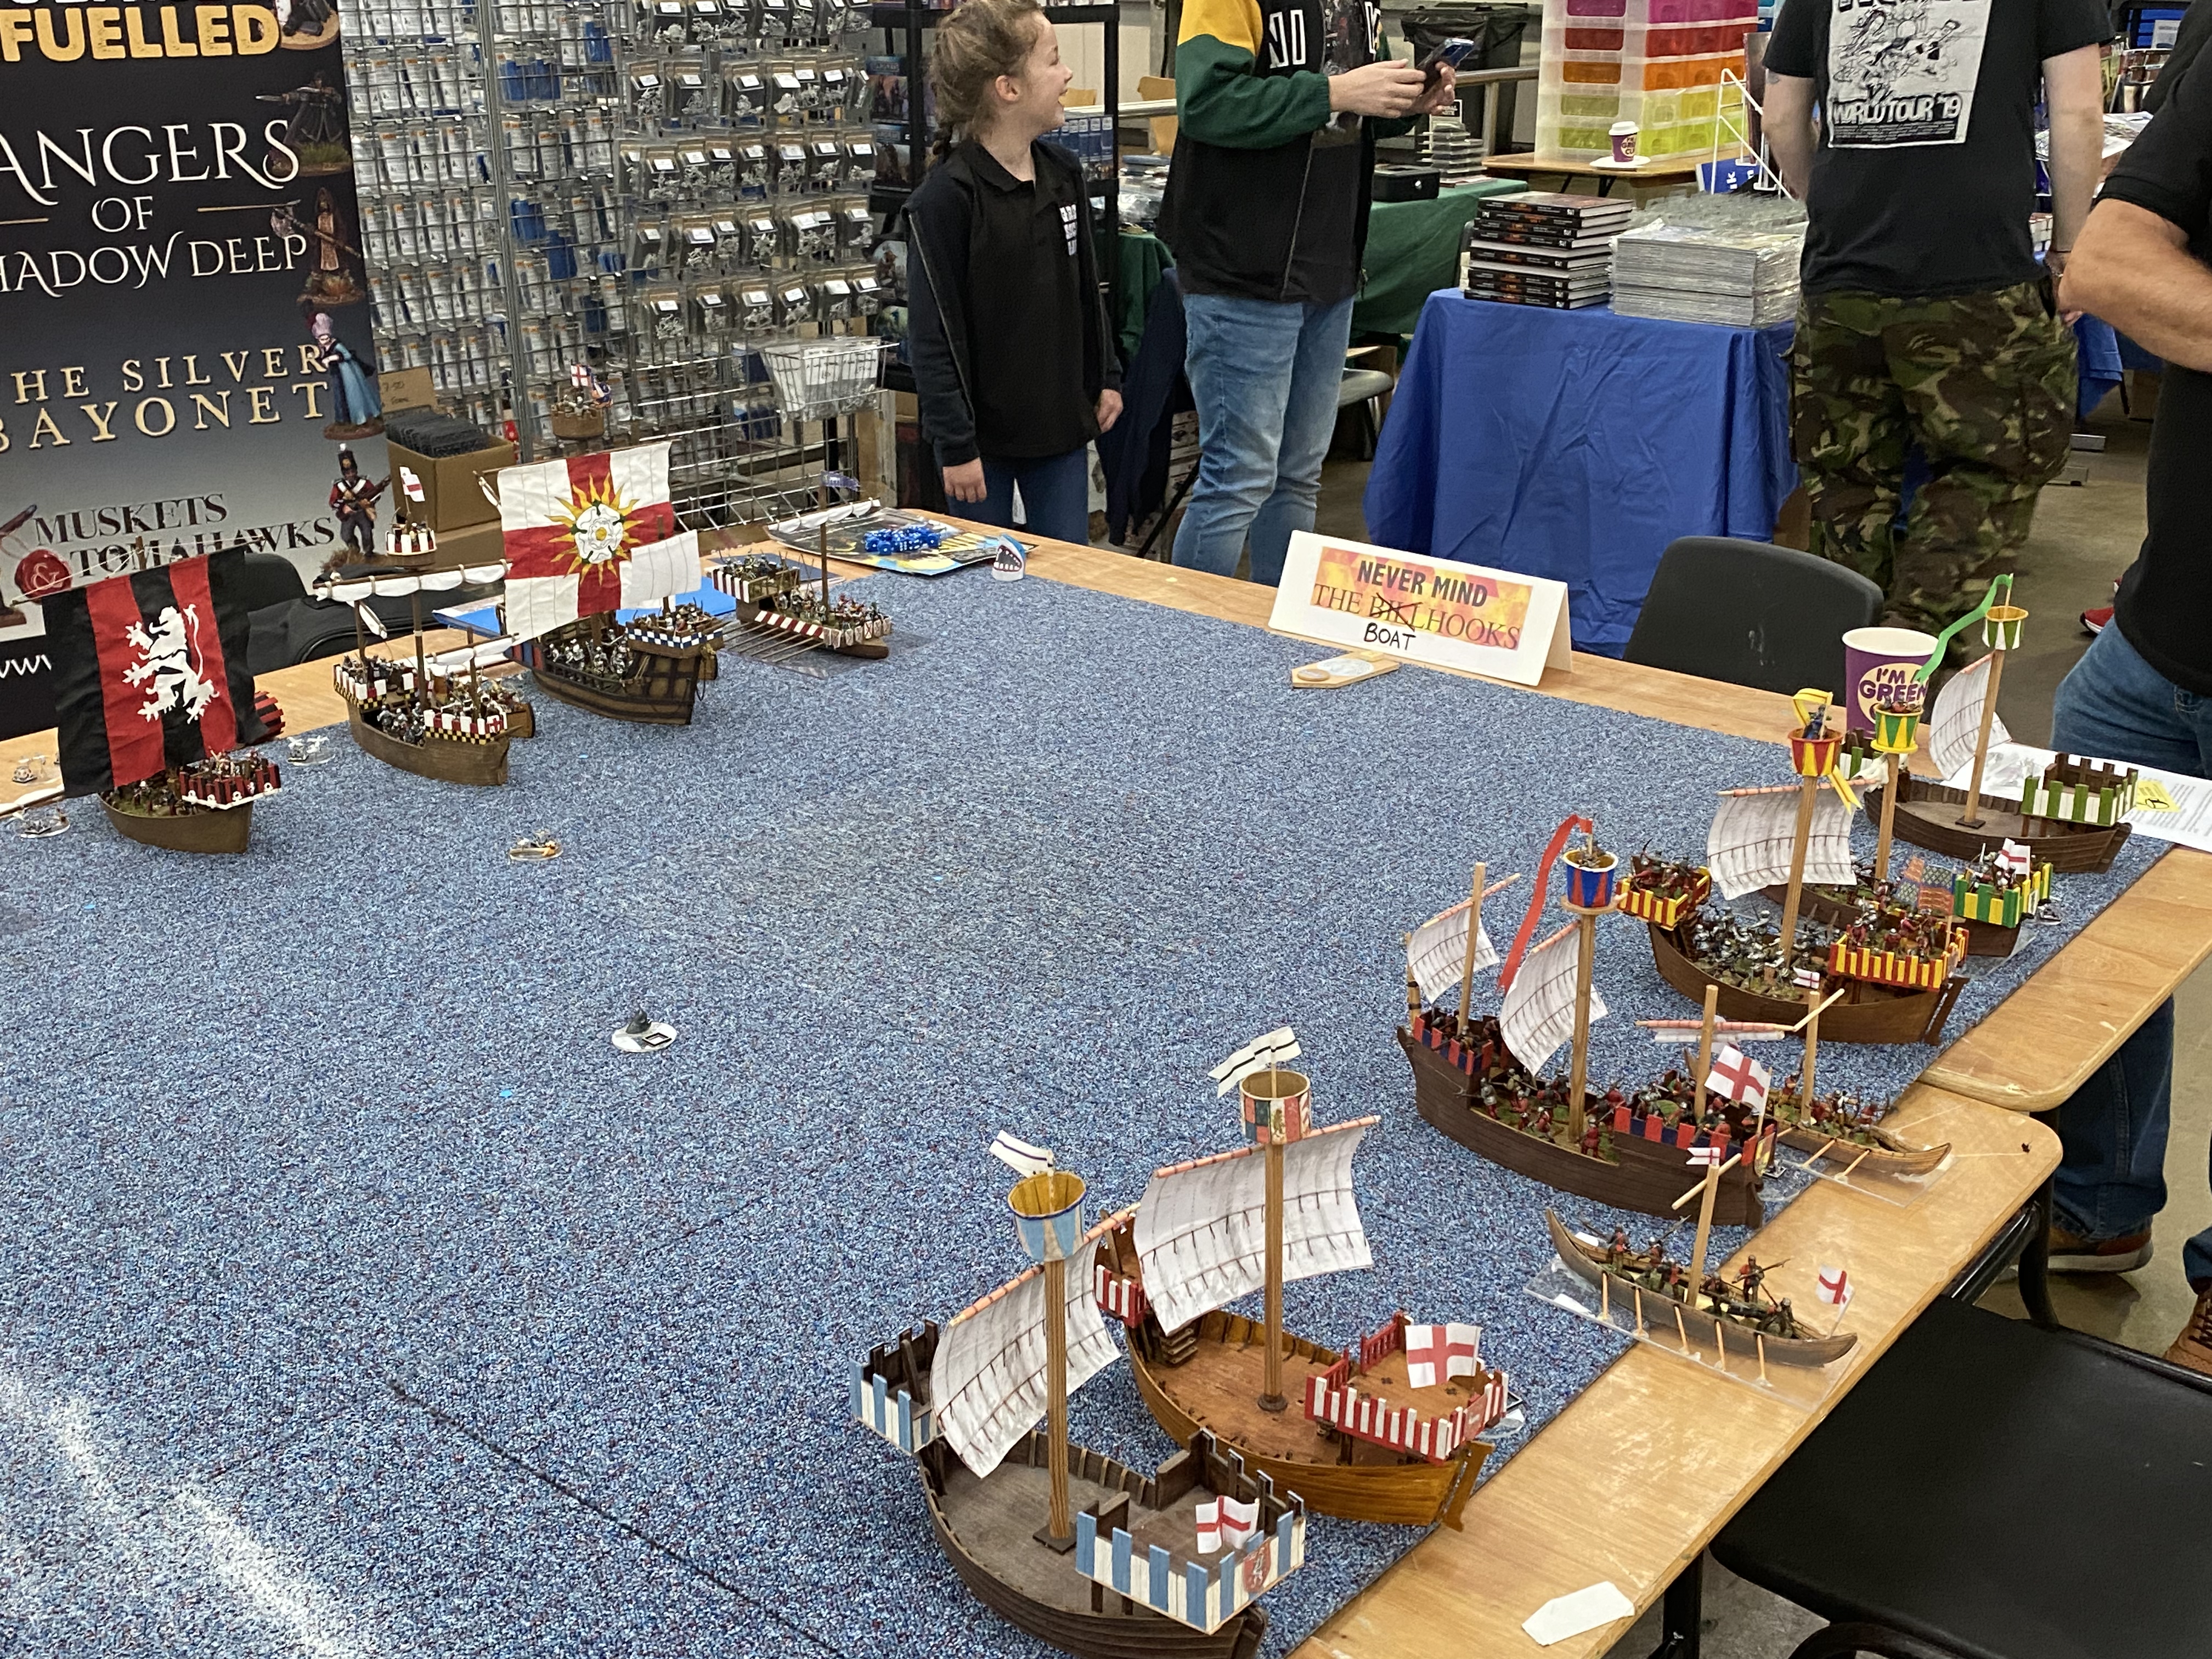
I was attending the show with Andy Callan and his brother Ian, and as the ‘Billhooks Brothers’ we were presenting a participation games of Never Mind The Boat-hooks. It was the second time that we had presented this game and having learnt from the first game that we had run at a previous Partizan, the idea was to present a stripped down game, involving three or four ships rather than the whole fleet that was on the table, to allow for faster games. As it happened, we had very few people that actually wanted to roll dice but plenty that were happy to chat to us about the game and the various spin offs of the ‘Bill Hooks’ rules sets.
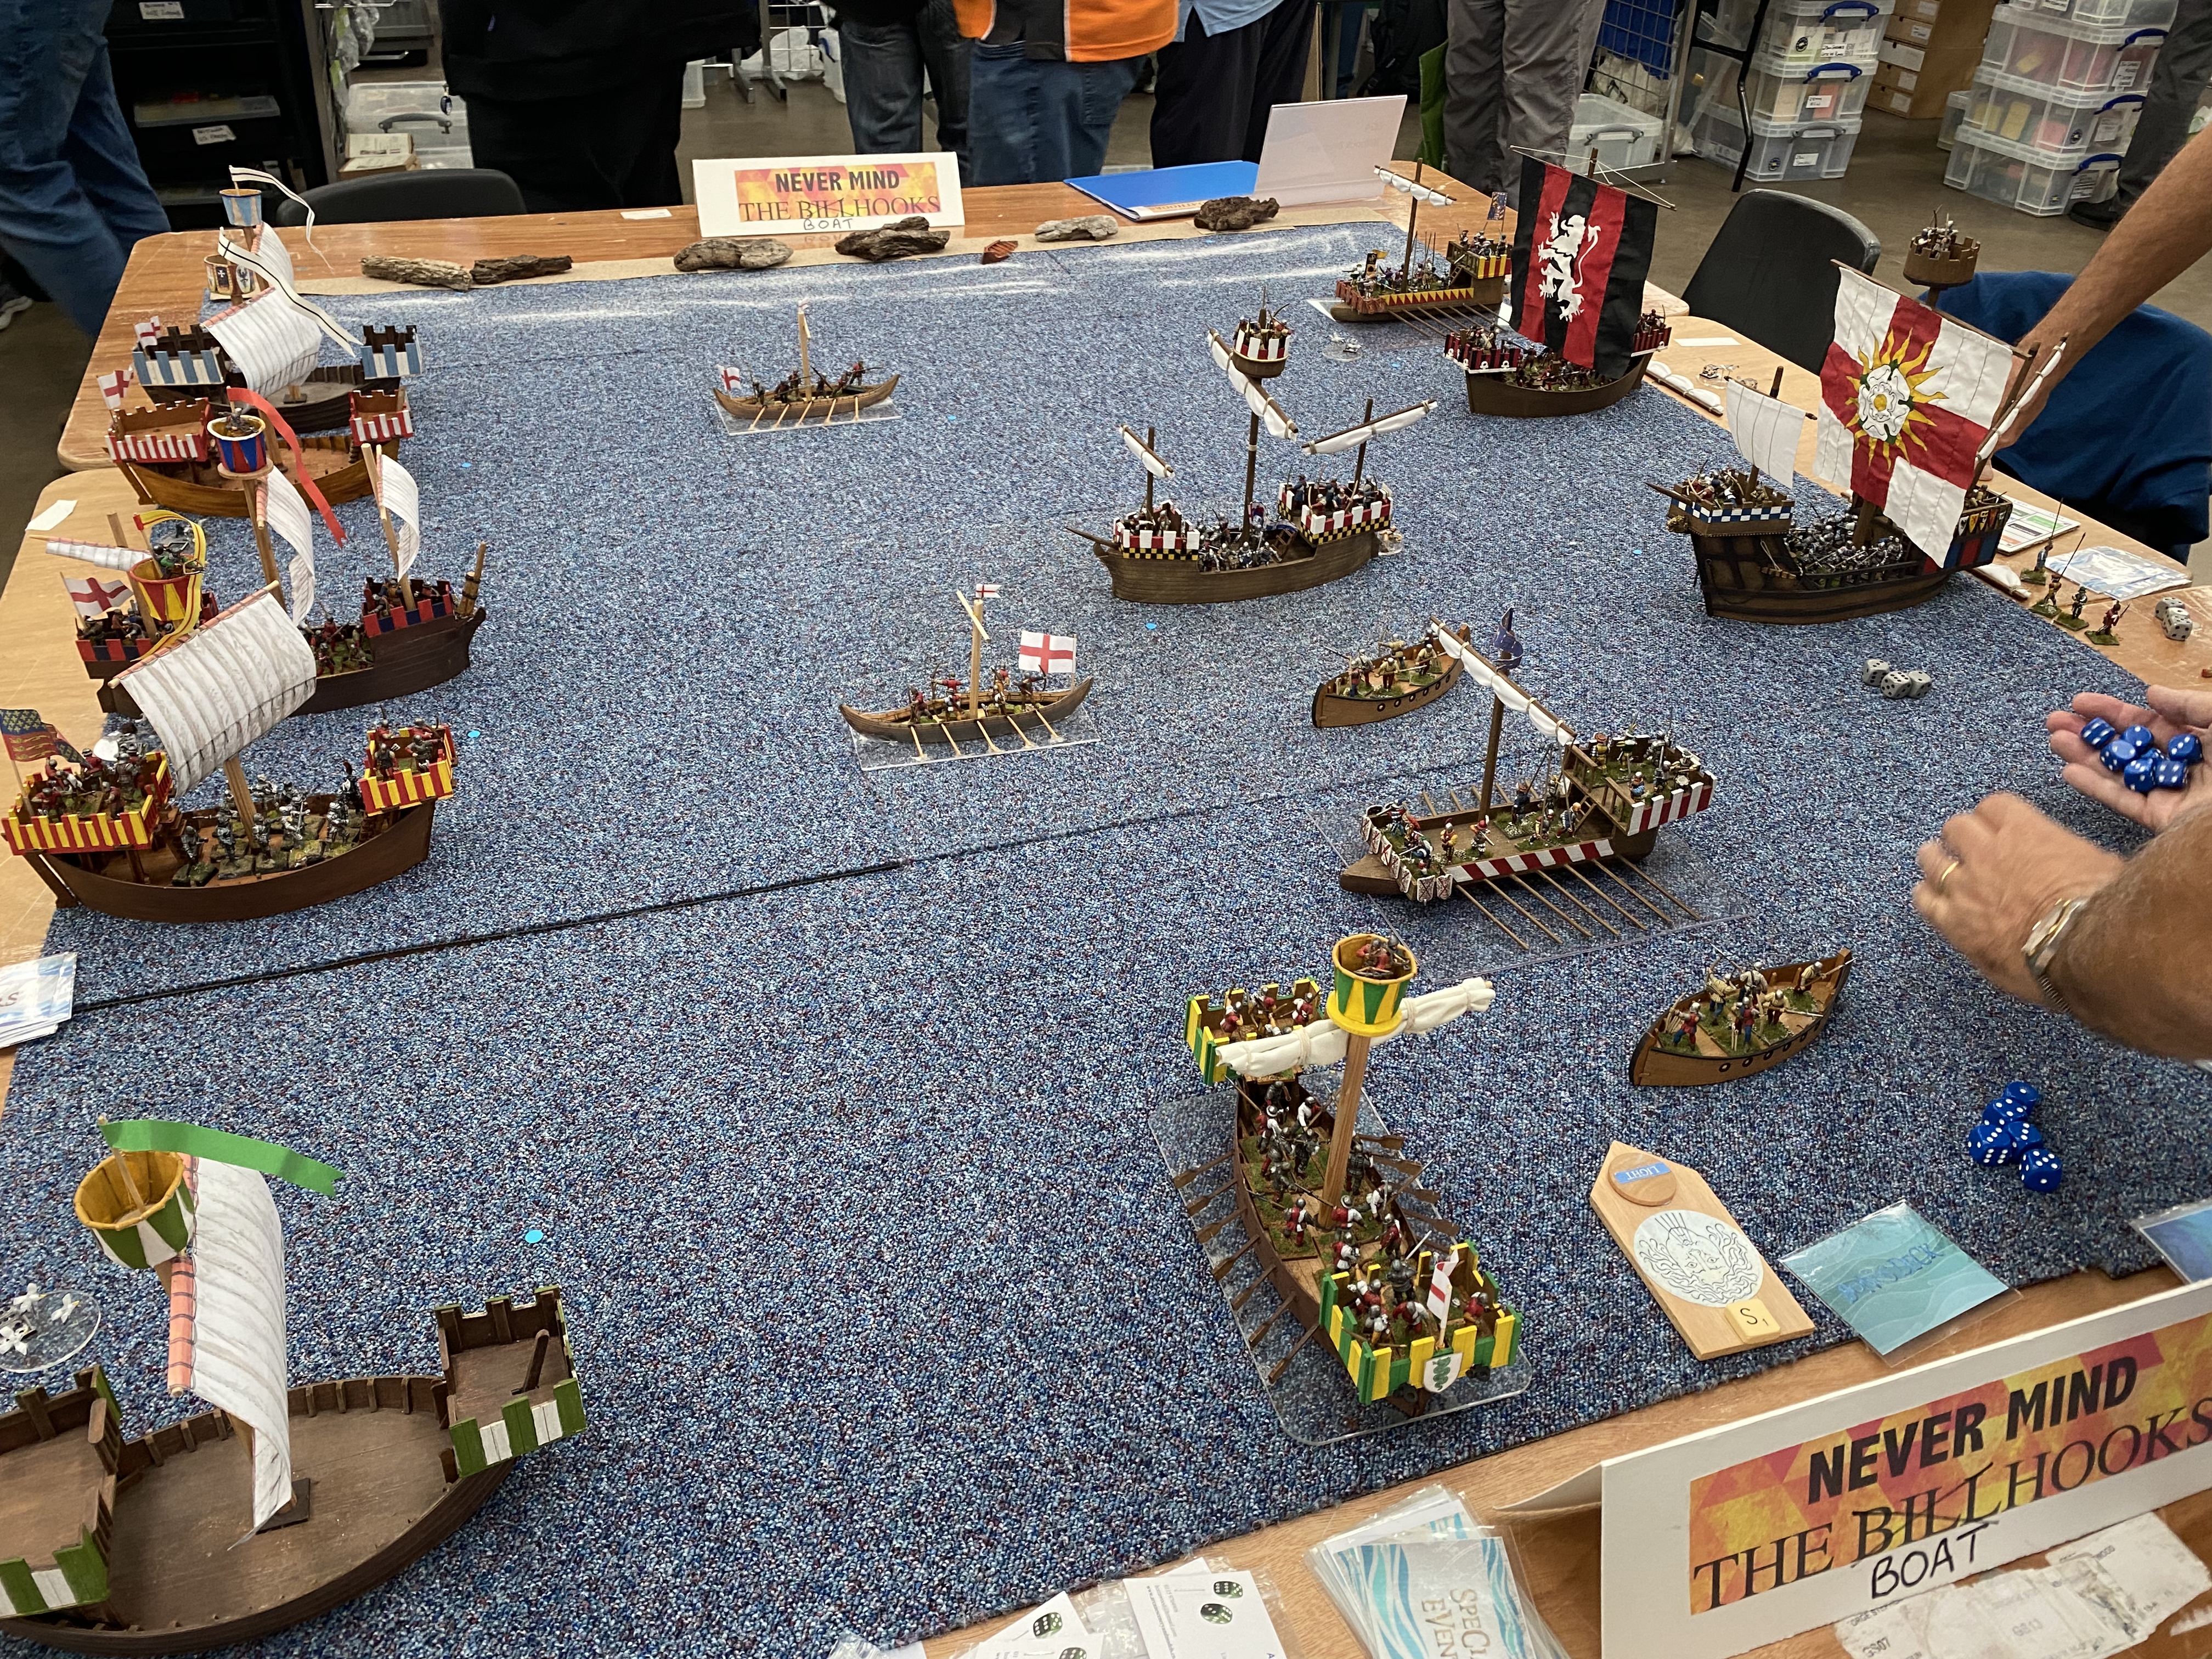
It was a very enjoyable, if tiring day, meeting so many good friends of the game, some of whom, we only knew as Facebook friends. We spent so much time chatting that we barely finished the actual game that we had started, to get things going. I was tasked with taking photo’s and posting live to our Facebook group so here is a round up of all of the pictures as well as a brief narrative of the battle.
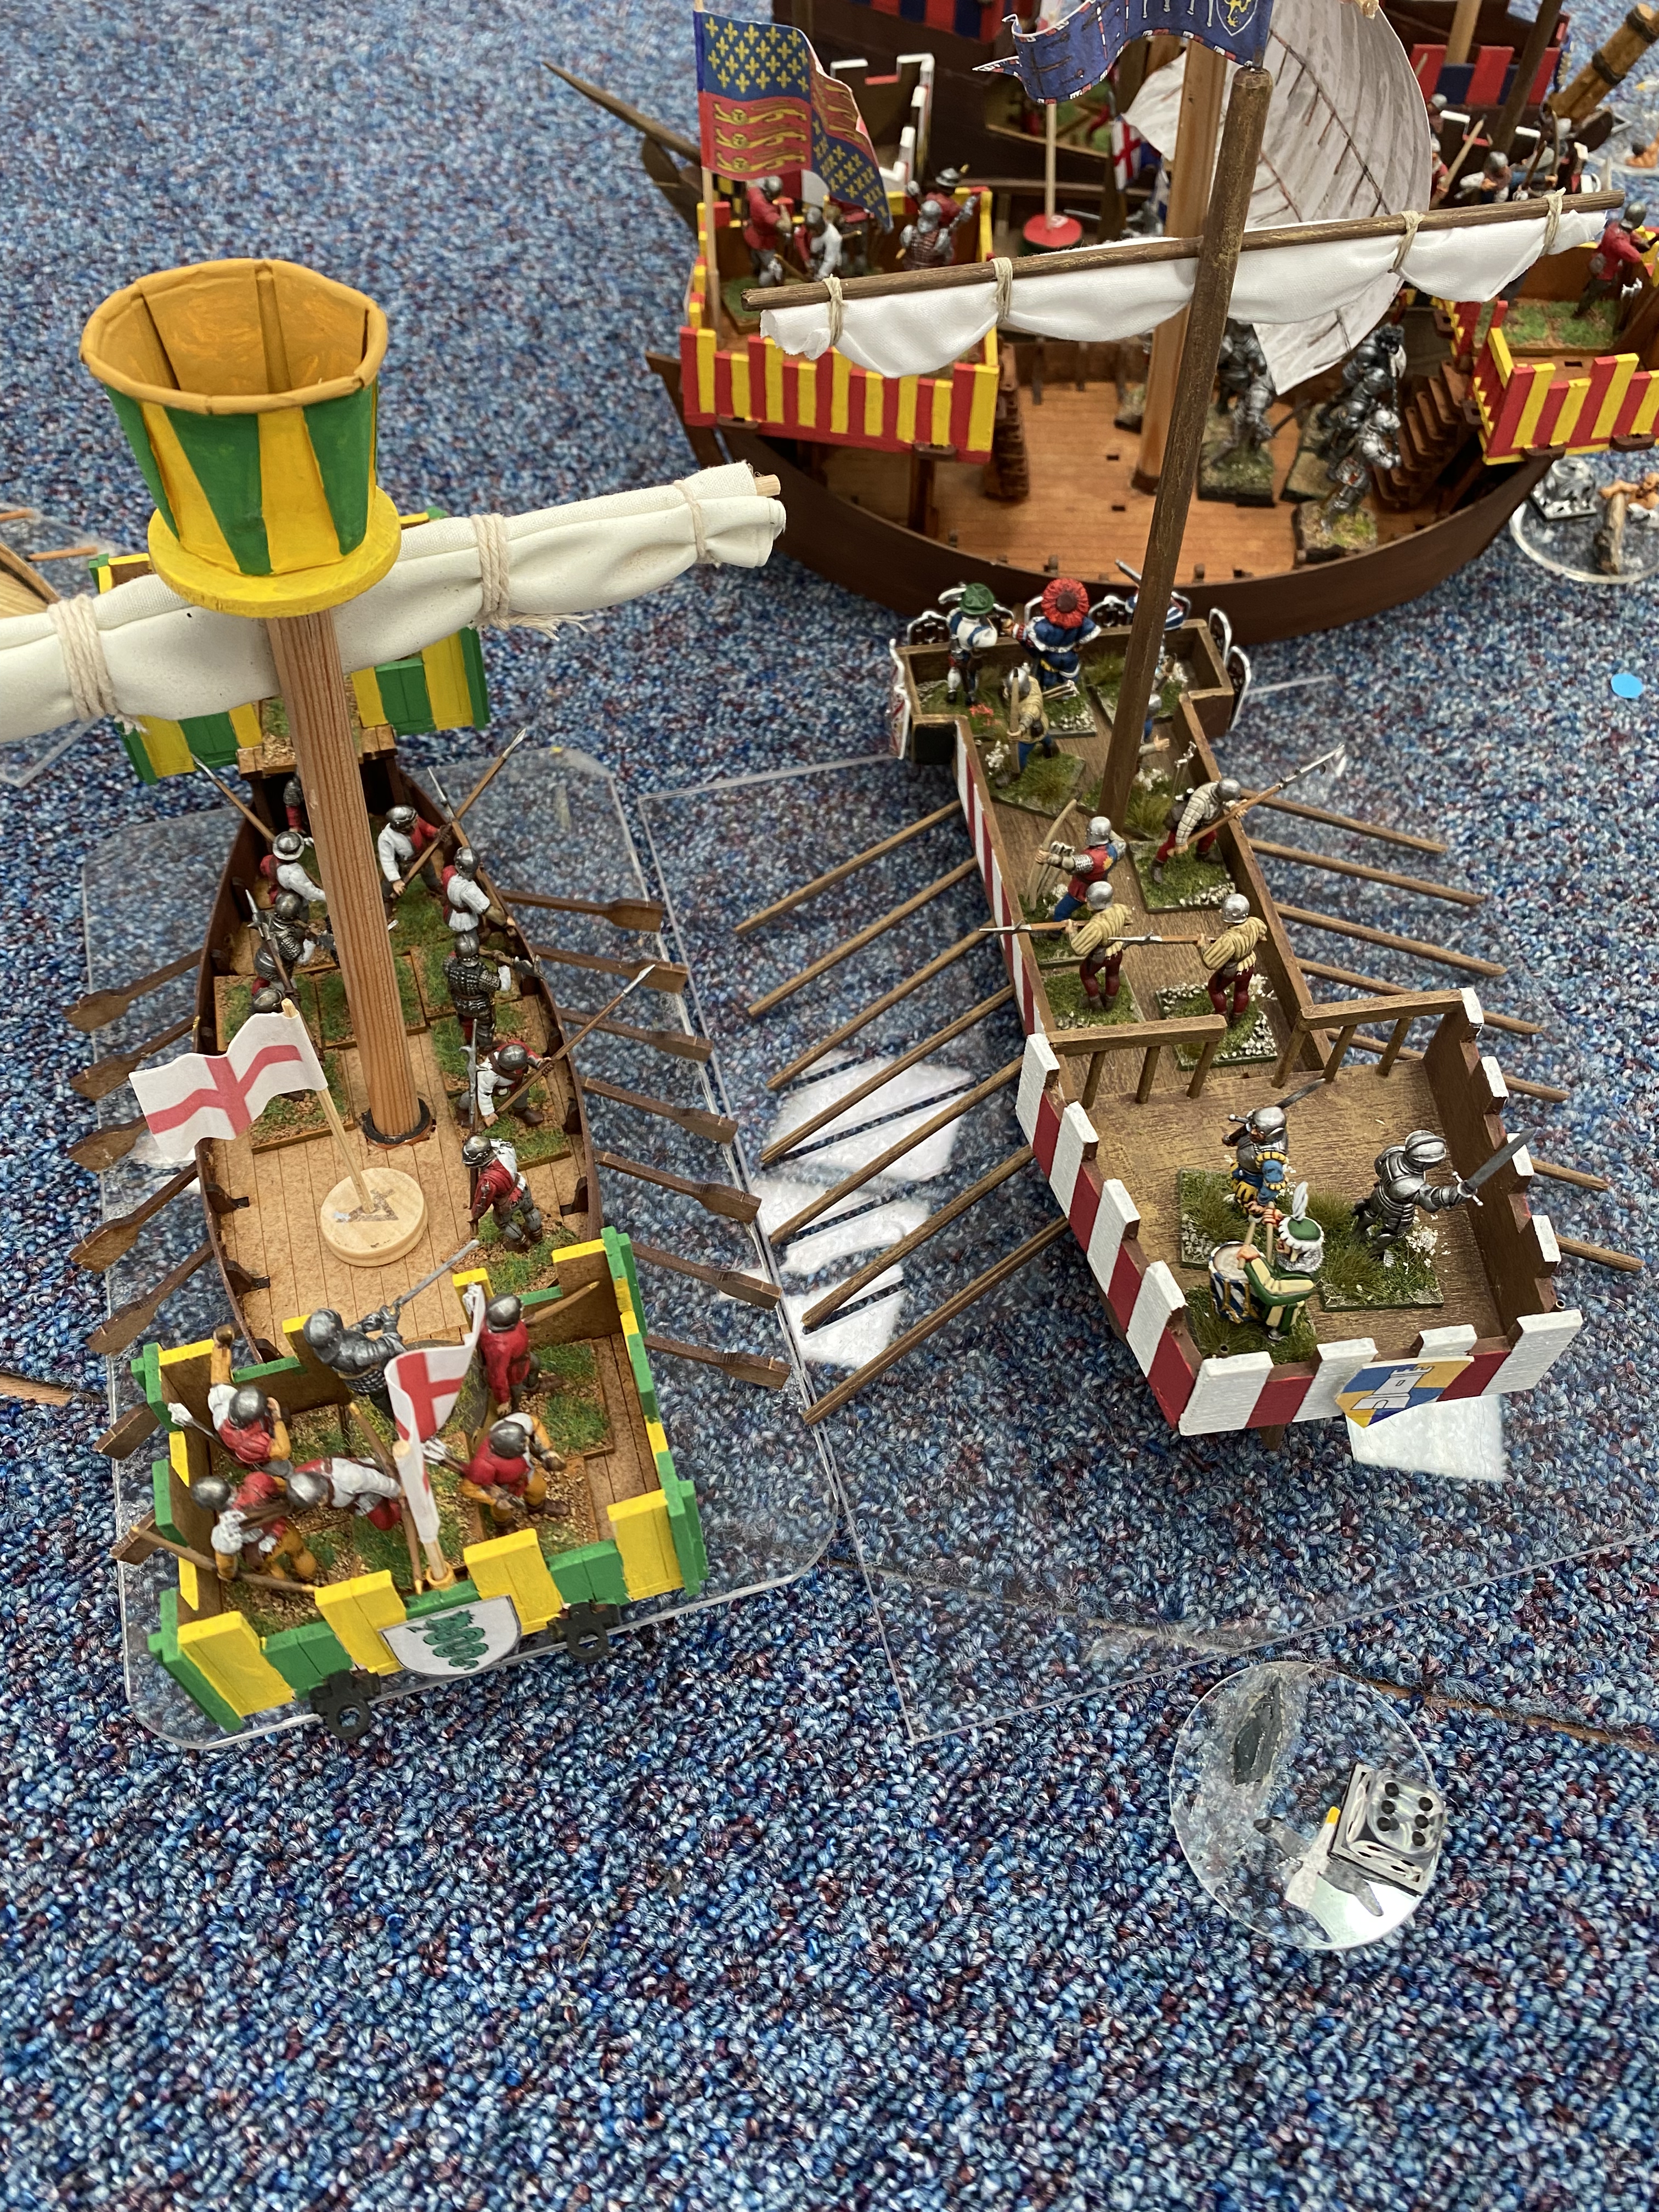
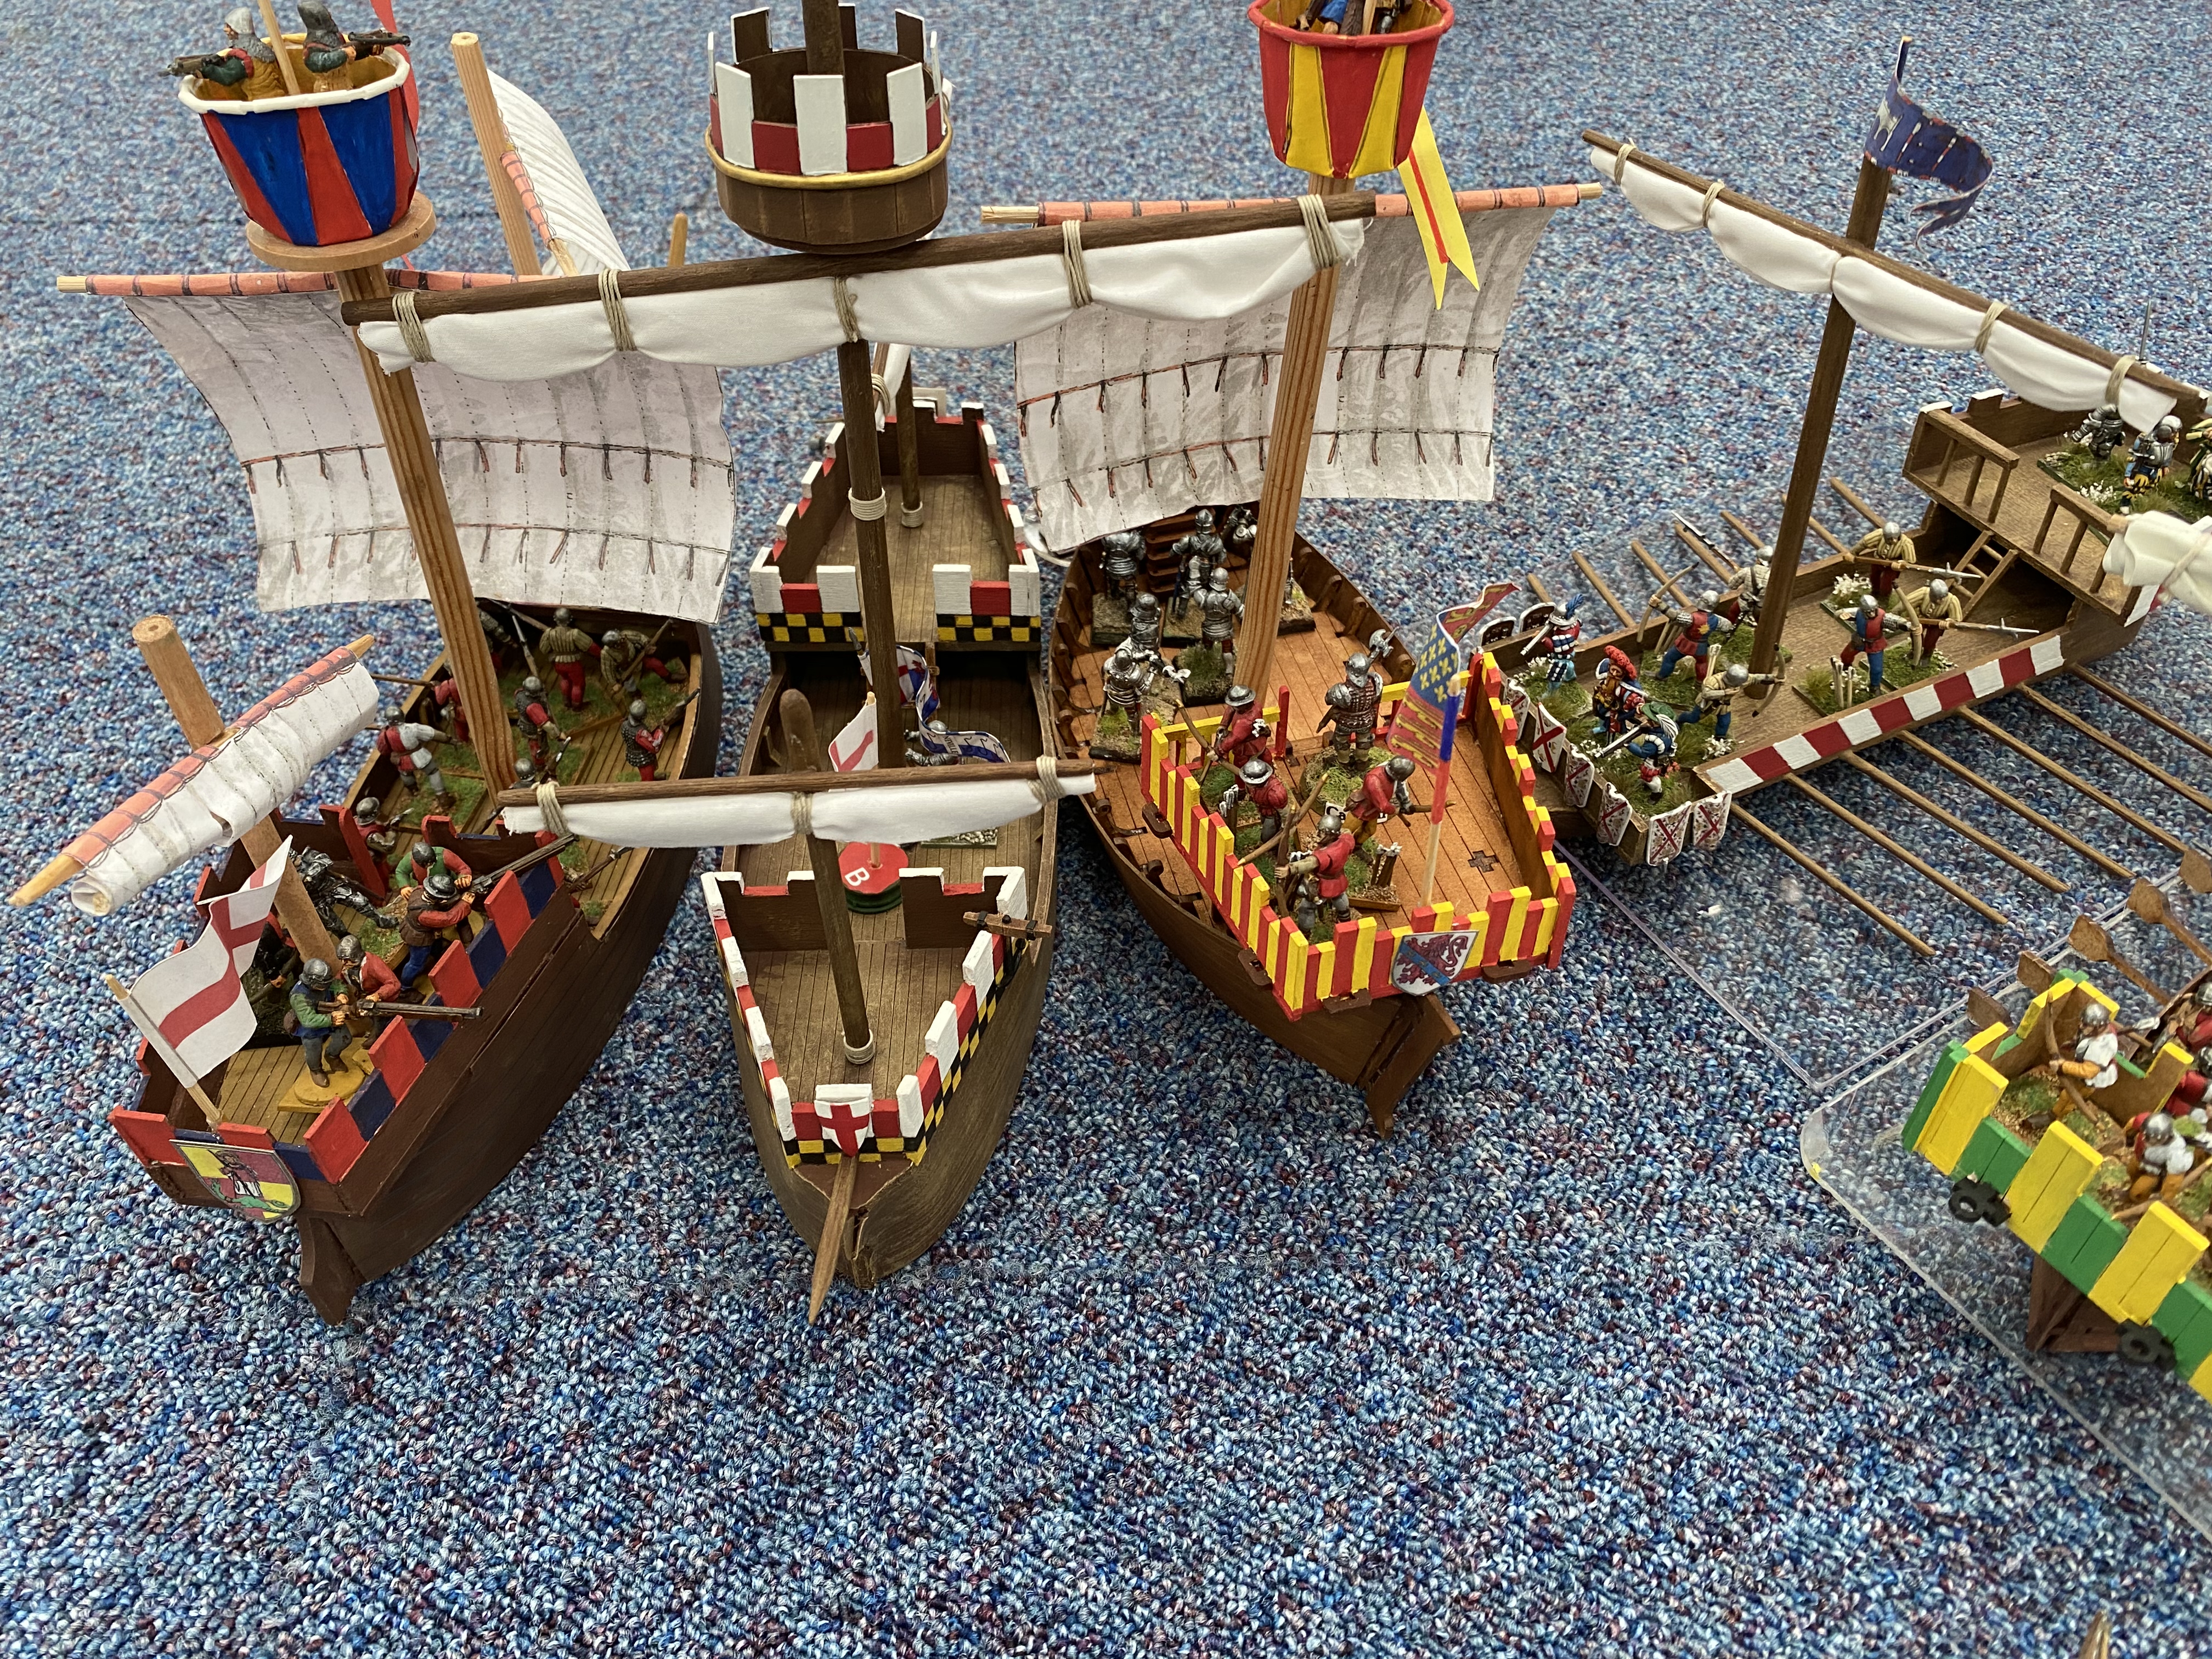
The Fleet on the left of the picture were designated as the French and started the game aggressively by sailing straight across the table and peppering the English with Arrow fire. The Green and yellow galley had positioned itself in a commanding position to windward!The English Cog (red and Yellow) attempts to grapple and board the now French Carrack ( formerly the George!). The boarding attempt failed but in the ensuing collision, the French archers were thrown out of the fighting top! In the back ground, a French Galley is rowing to support.Another English Cog joins the fight and again fails to grapple. The French carrack could elect to slip away between the two ships but decides ( rather optimistically…) to fight and successfully grapples.To add to the mayhem, the French Galley joins the fight although comes off worse in the ensuing melee. To add to their woes, the English Galley has swept down to pour fire onto the French. In addition, their other galley, thanks to a special event, has run aground and can play no further part in the battle. The French aggression now looks somewhat hasty!Against all odds, the French are able to resupply their galley with additional crew and board the English galley! The English will fight on but at a severe disadvantage.It’s small comfort for the French though, in the continuing melle, their Carrack has been captured, all the crew have killed and with the loss of their Flagship, the French are forced to concede the battle.
So, it was only a brief game of just four moves but thanks to the amount of chatting, a battle that could have been over in an hour stretched out over the day! I hope that everyone enjoyed themselves at the show and perhaps were tempted to have a go at Boat hooks – you can always start as we did, with some cardboard cut out shapes. The rules are available as a free supplement to WI 426 – we still have copies – see the link below – and the cards and tokens are available as free downloads from the WI NMTB site. As for crew, we use the same troops as in the land version, Never Mind the Billhooks – hence the landscaped bases!
One final thought, there were some amazing games on show at Partizan – the best way to see them is to go to the Partizan web site and Blog.
THE COMMERCIAL BIT
I hope that you all enjoy your hobby as much as I do – remember that our web site will have much of what you need! Click here to see our shop:
Having finished my Landsknechts force (for the time being…) I thought that I would add some heavy cavalry and I fancied painting some Gendarmes. Although it goes against the grain somewhat – adding French troops to my collection, that is – I couldn’t resist having a go at painting these ‘fancy Dans’!
Having spent a little time researching the options to purchase some of these heavily armoured knights, I chose two very different options. I bought eight 3D printed resin knights from Terrain Store on eBay and six metal ones from Foundry Miniatures. I also had three spare Perry Miniatures plastic knights that would give me a total of 17 figures; two units of 8 gendarmes and a commander. I am happy to mix and match manufacturers. By and large the size difference is minimal and can be hidden with some careful basing.
At 24 points a unit, the chances of fitting these Gendarmes into a typical ‘Bill Hooks’ army seems remote and for that matter, impractical but they will look nice in the cabinet!
Work in progress – some of the 3D print lines are obvious from this close up – they’ll pass as battle damage!
Just a brief note about the 3d resin figures. The detail on these figures is simply beyond anything achievable in casting metal or plastic. With separate reins on the horses, detailed spurs, raised visors with open vision slits and more, I couldn’t wait to get paint onto these figures. There was a slight downside, however. Whilst the fine detail is wonderful, larger surfaces are actually not so good, with the 3d printing lines showing up across some of the armour plates and other flat surfaces. You could really only see these once the models were painted and I was happy to treat these as ‘battle damage and scratches!
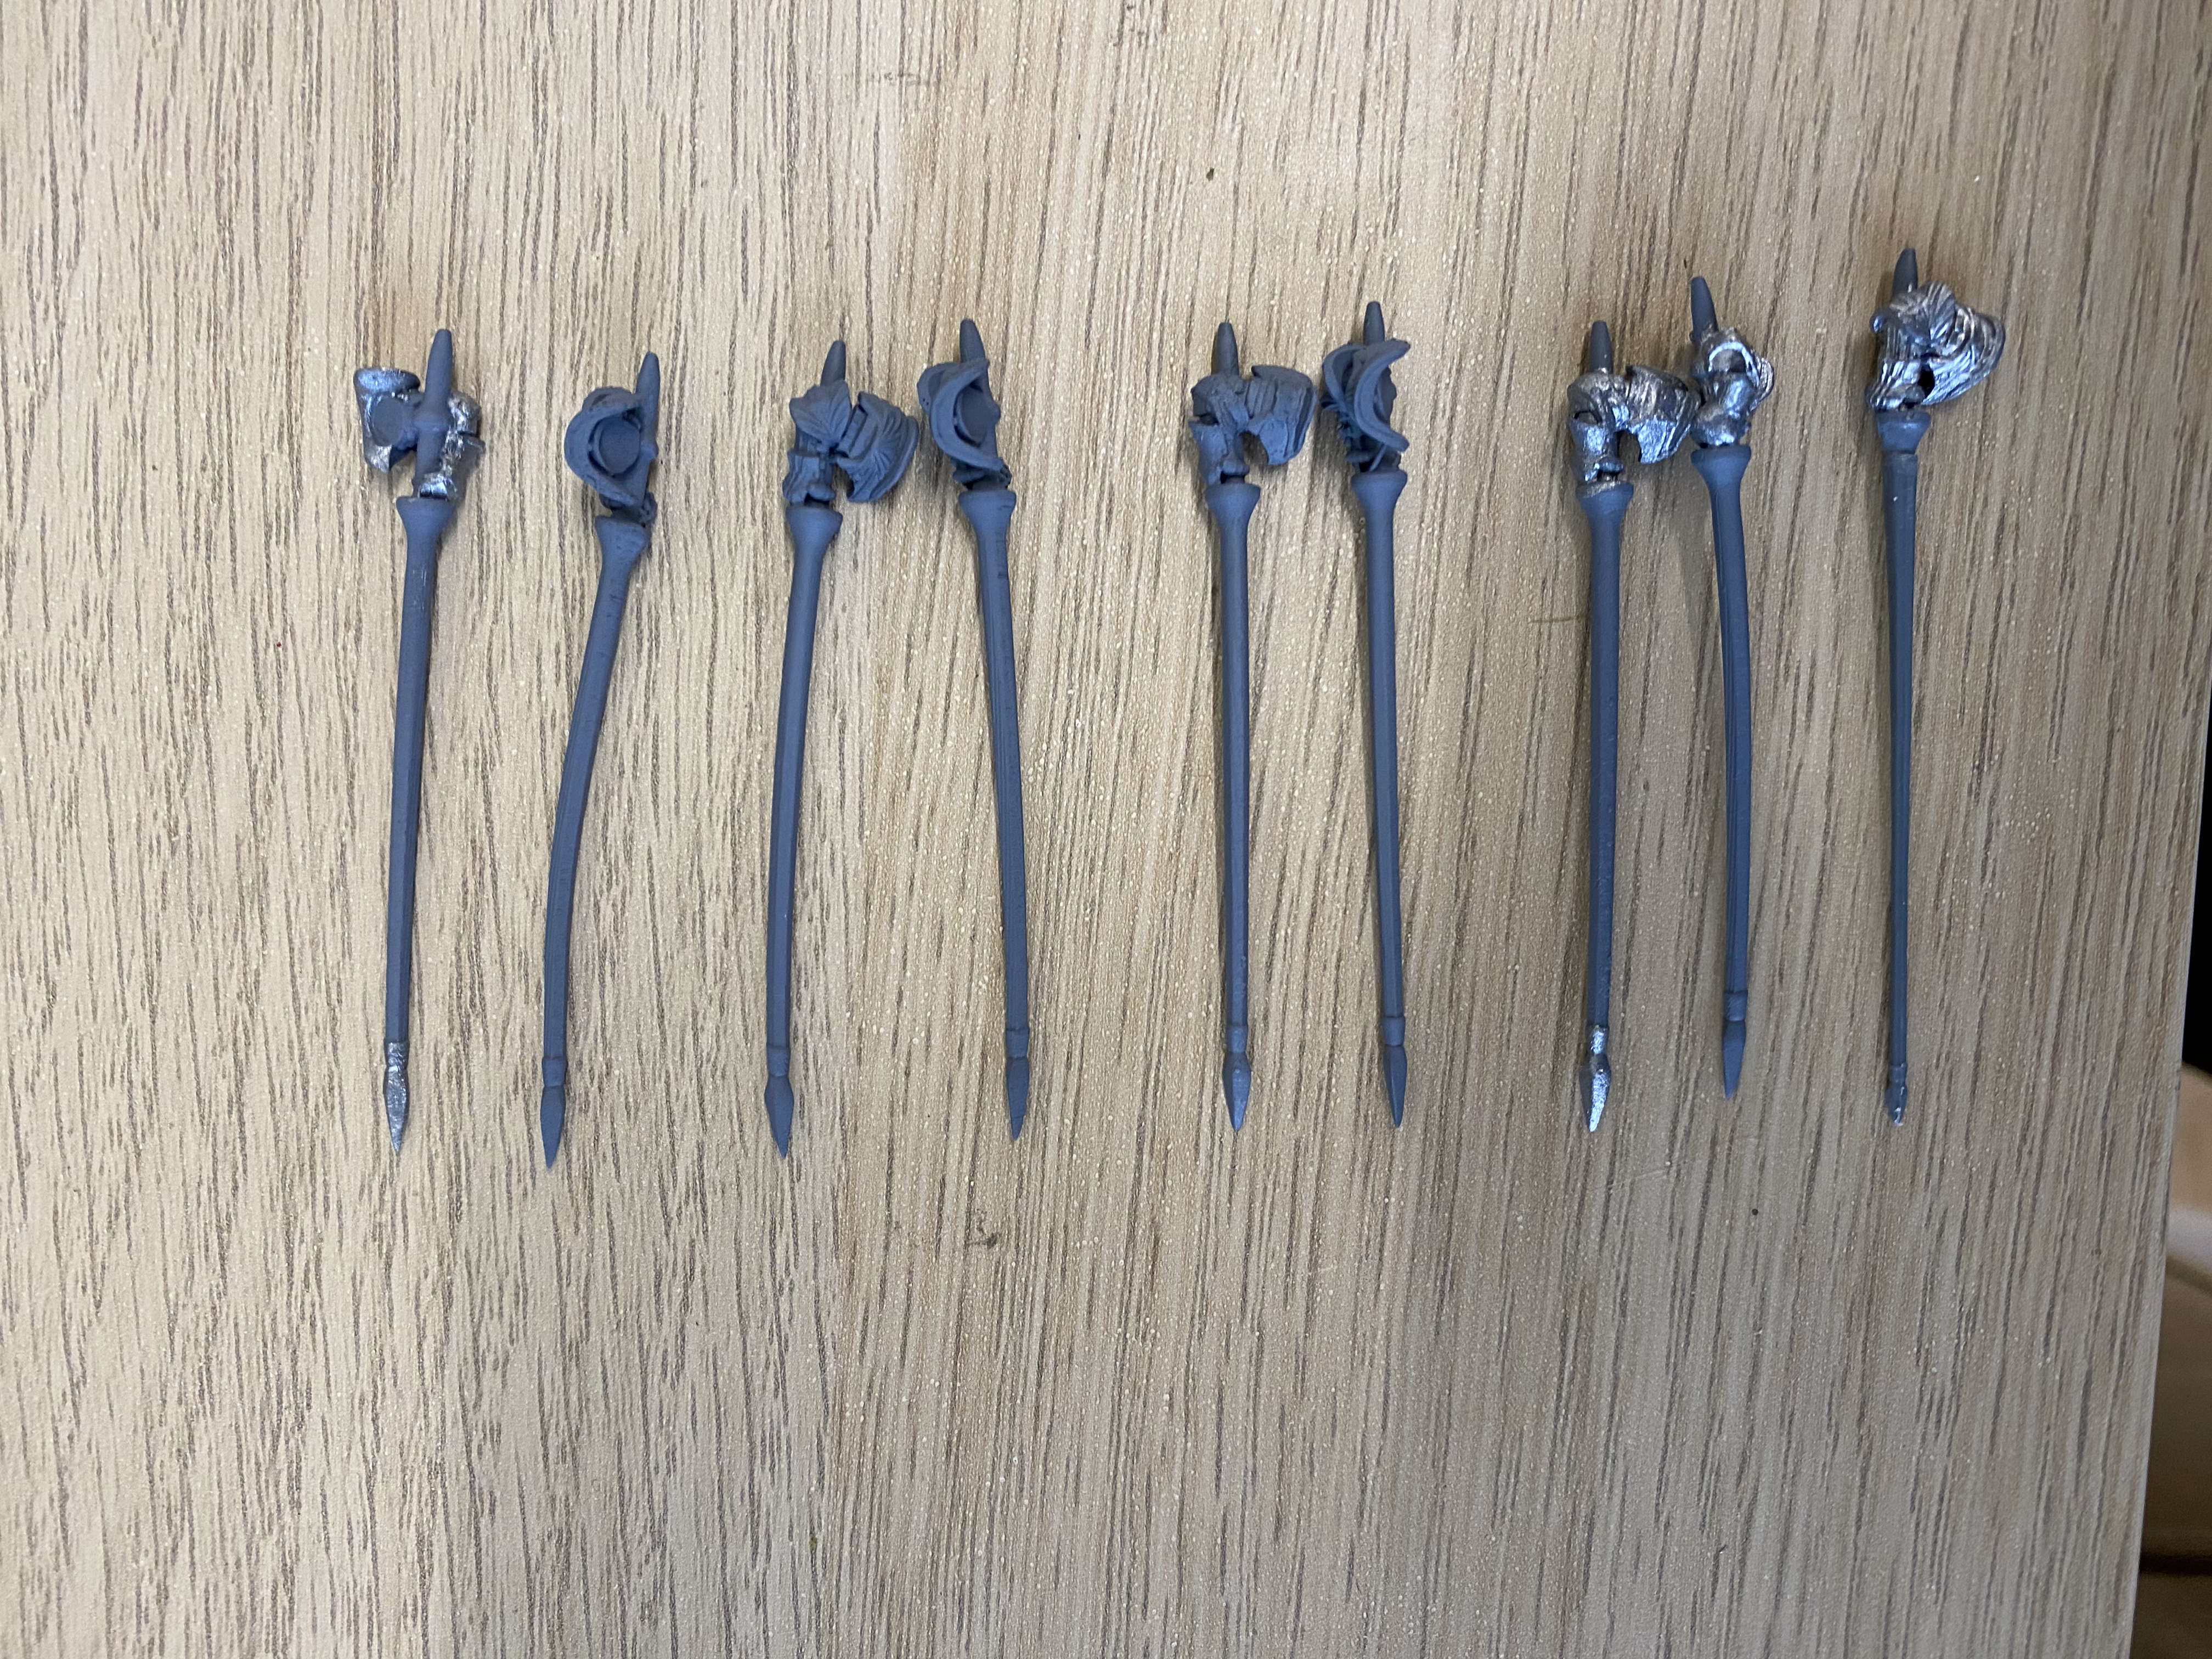
The resin lances were quite badly bent and difficult to straighten, even with hot water treatment.
Also the lances were anything but straight. I managed to correct some by dipping them into hot water and clamping to a straight surface but lost a number to breakage in the process. I had to replace the broken lances with ones from the Perry mounted men at arms set. So, I’m not quite a convert to 3d resin figures yet and I have yet to see how they will survive the rigors of gaming or for that matter, time.
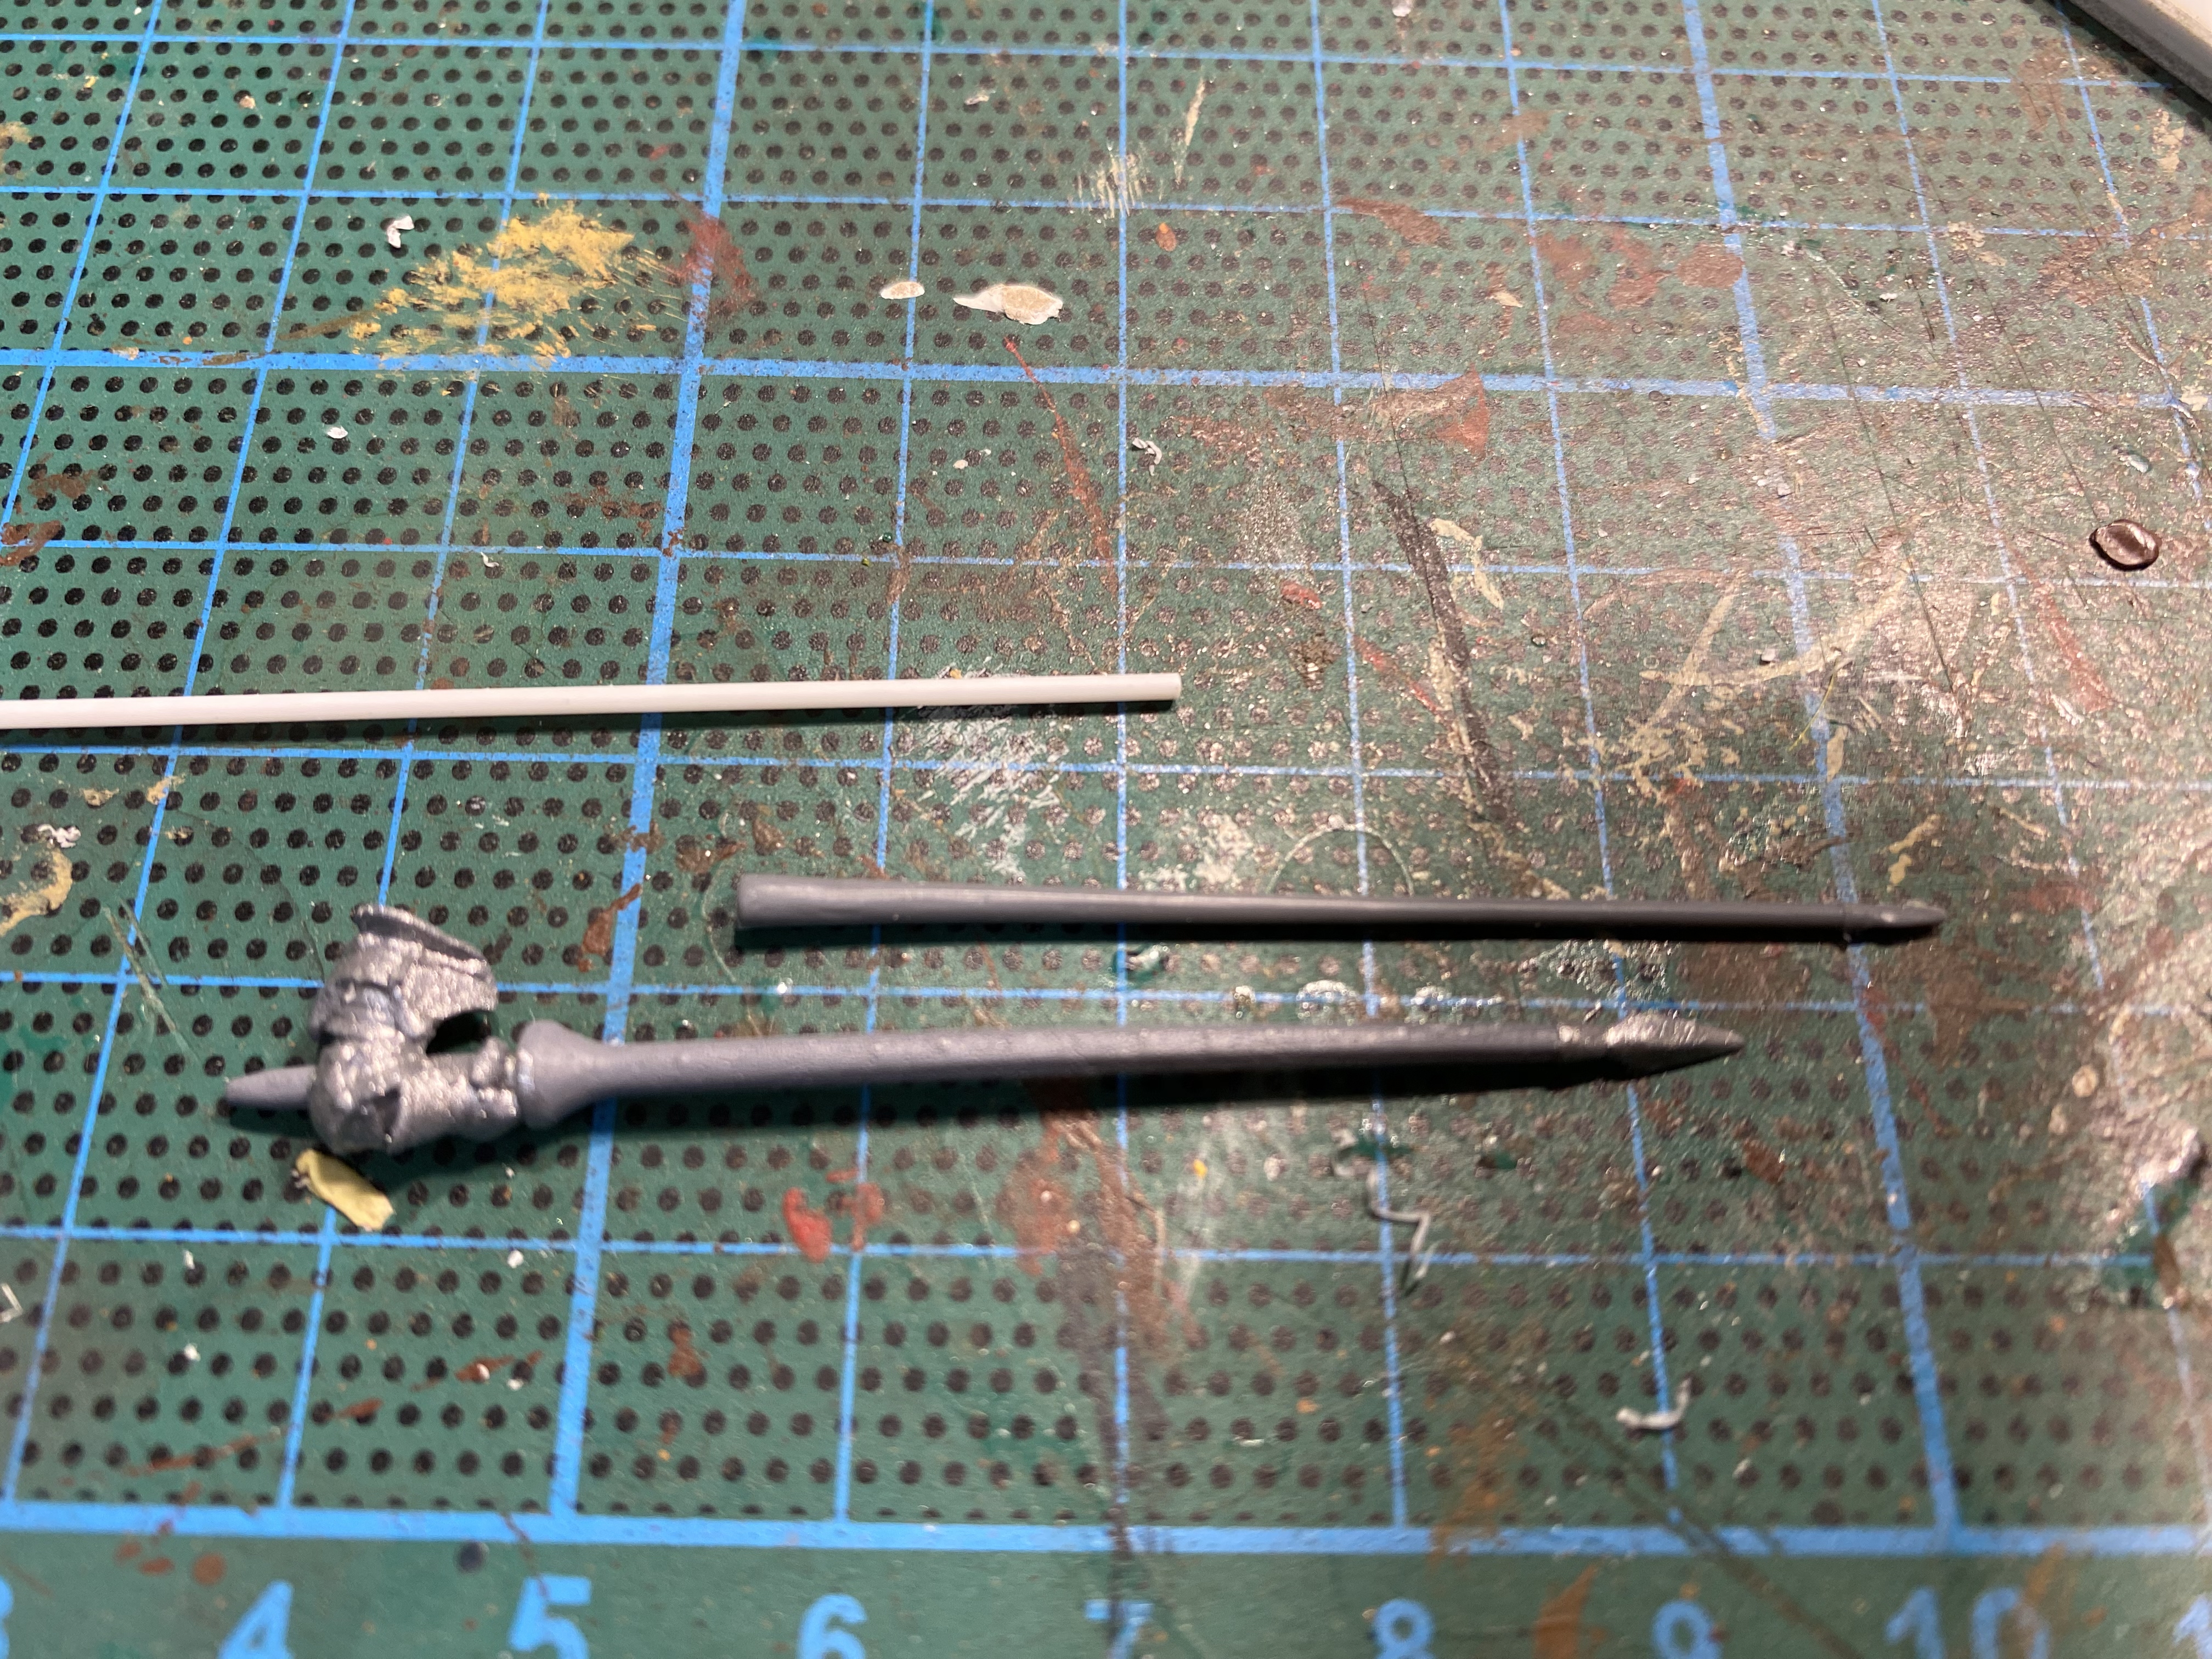
A Perry plastic lance cut ready to replace the bent resin one – I used a razor saw to cut near the base of the resin lance and simply super glued the replacement.
When it came to painting the figures, my main references were Pinterest and other internet picture sites. There has been some discussion on the Facebook Bill Hooks site recently, as to what is ‘accurate’ when it comes to livery or colours for this period. As I rarely attempt to model a specific character or unit for a specific battle, I’m not too concerned with the detail. There were 2000 or so Gendarmes at the Battle of Pavia. If I was so minded, I suppose that I could find out who they were and maybe what they were wearing but it’s not my idea of a good use of my time. I wanted to paint some really colourful Knights that will look good on the table as they make a glorious charge to victory or oblivion in my little table top battles.
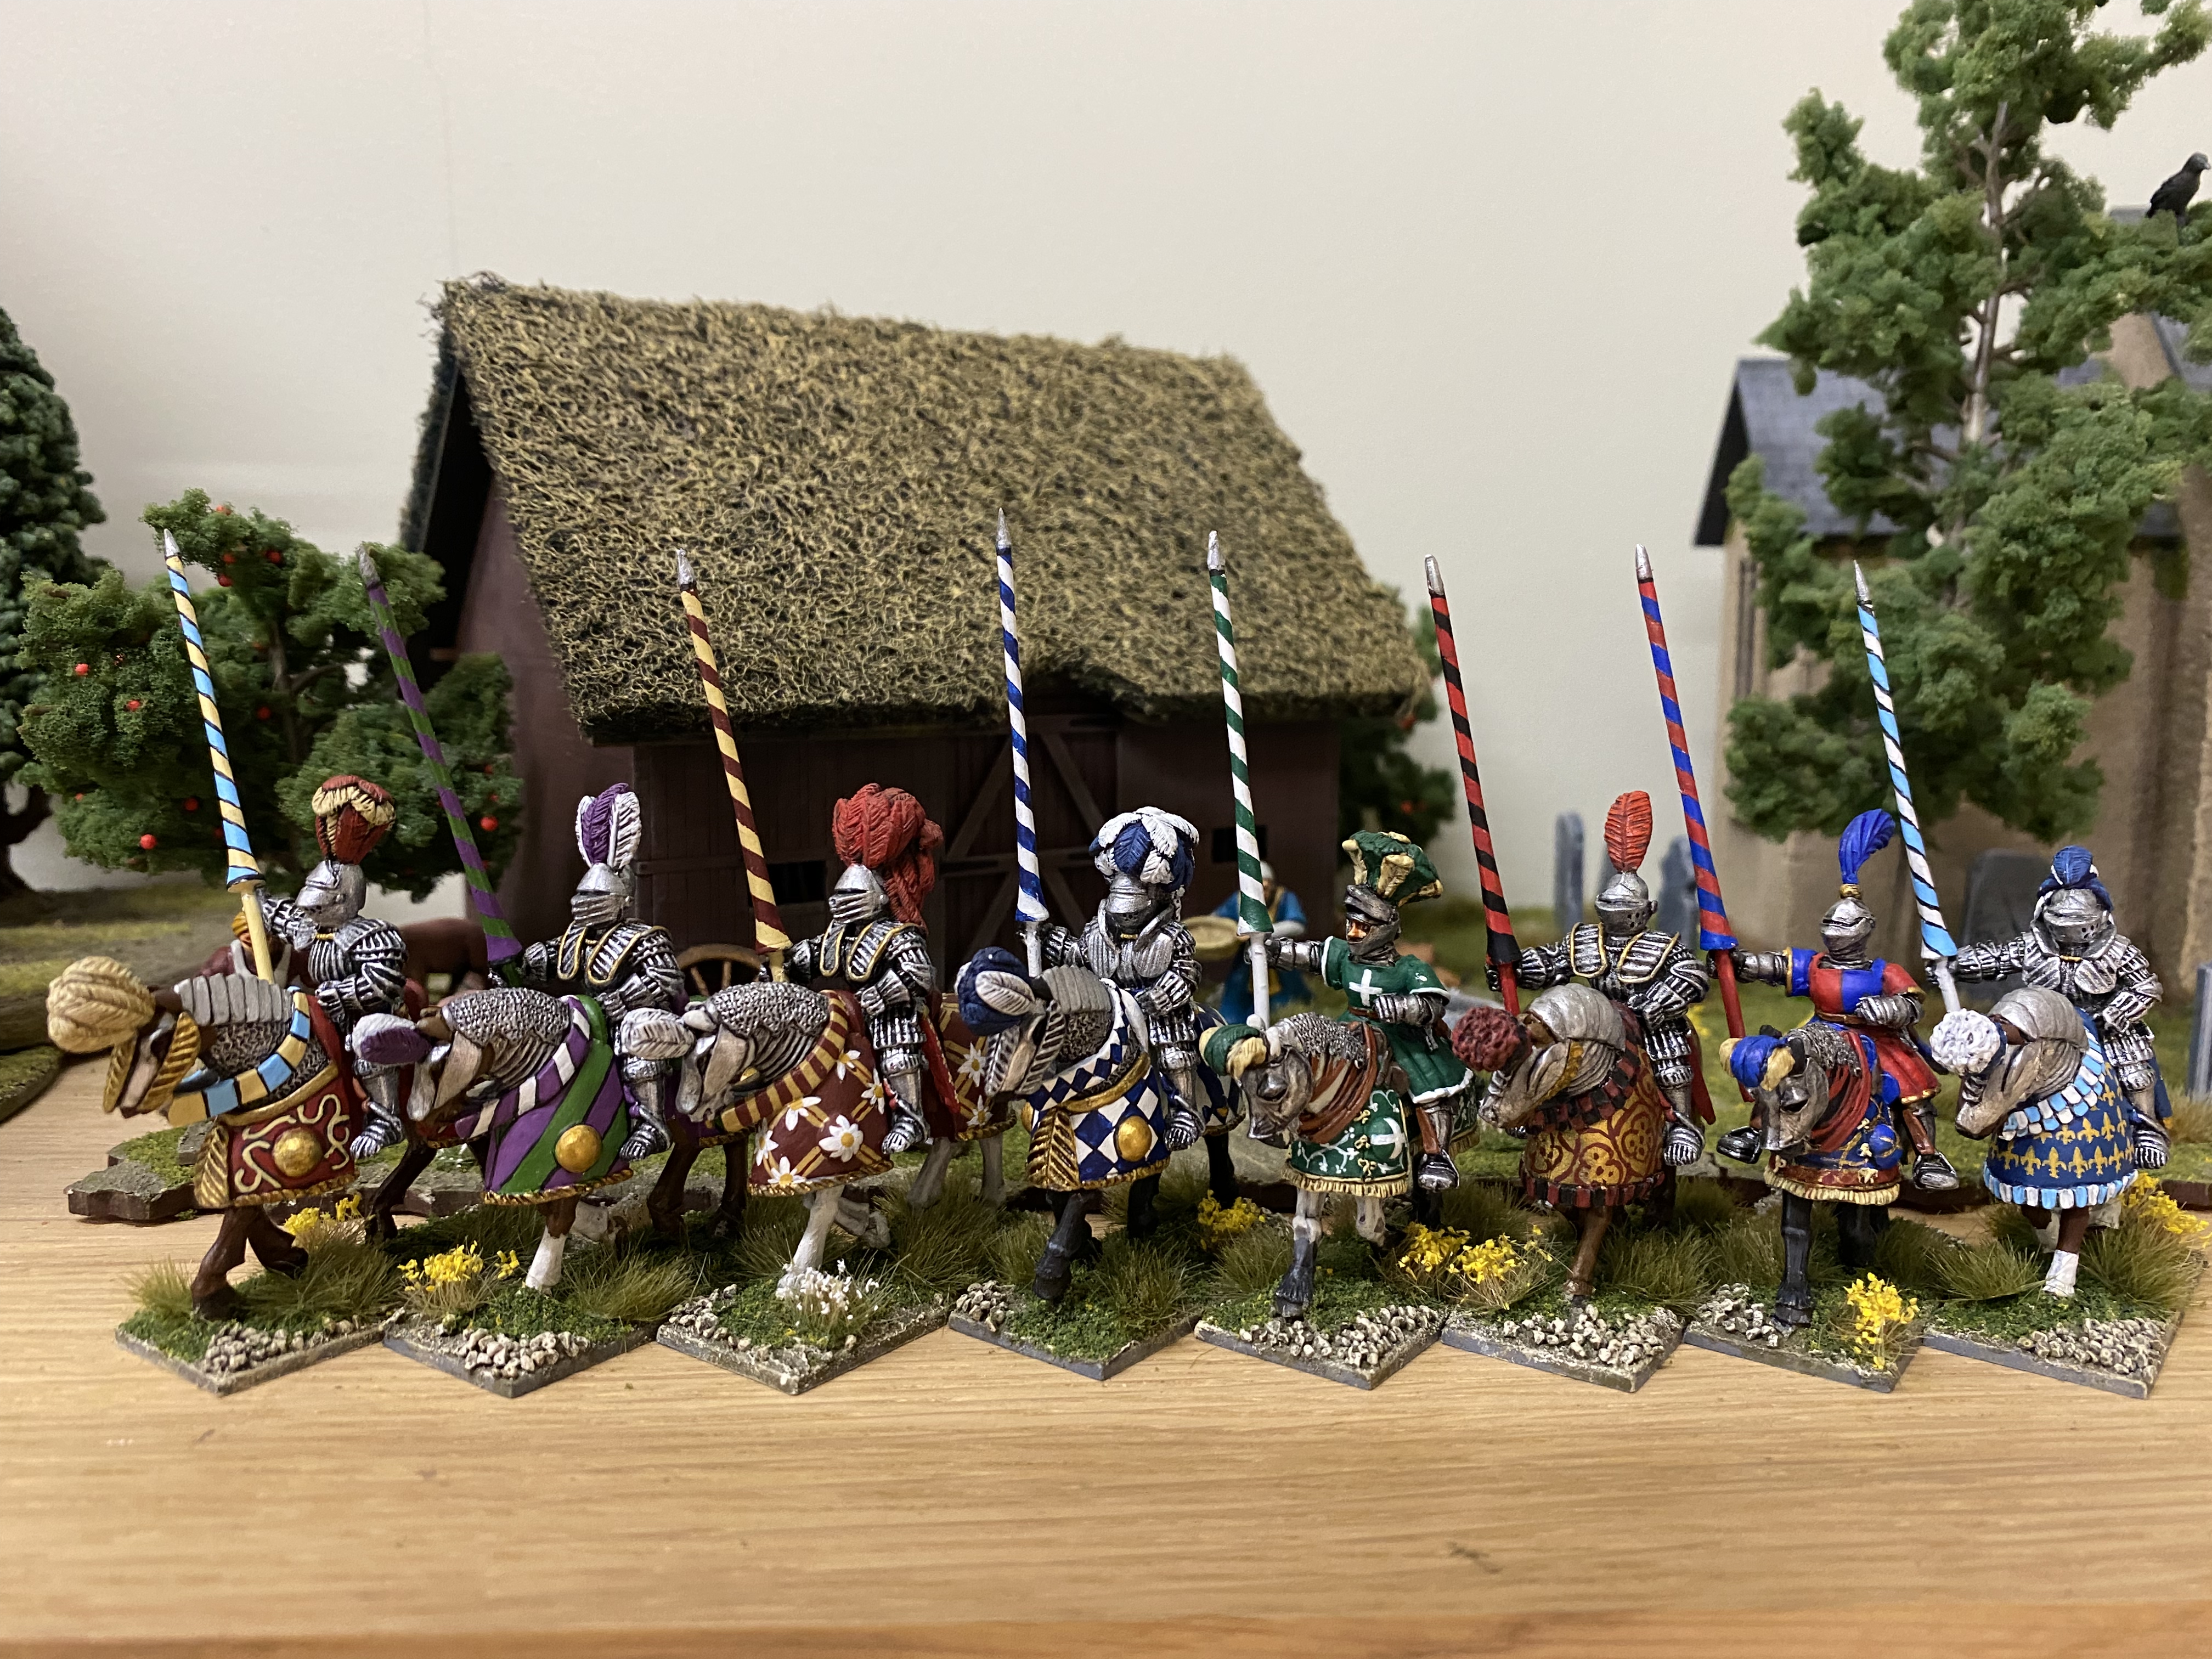
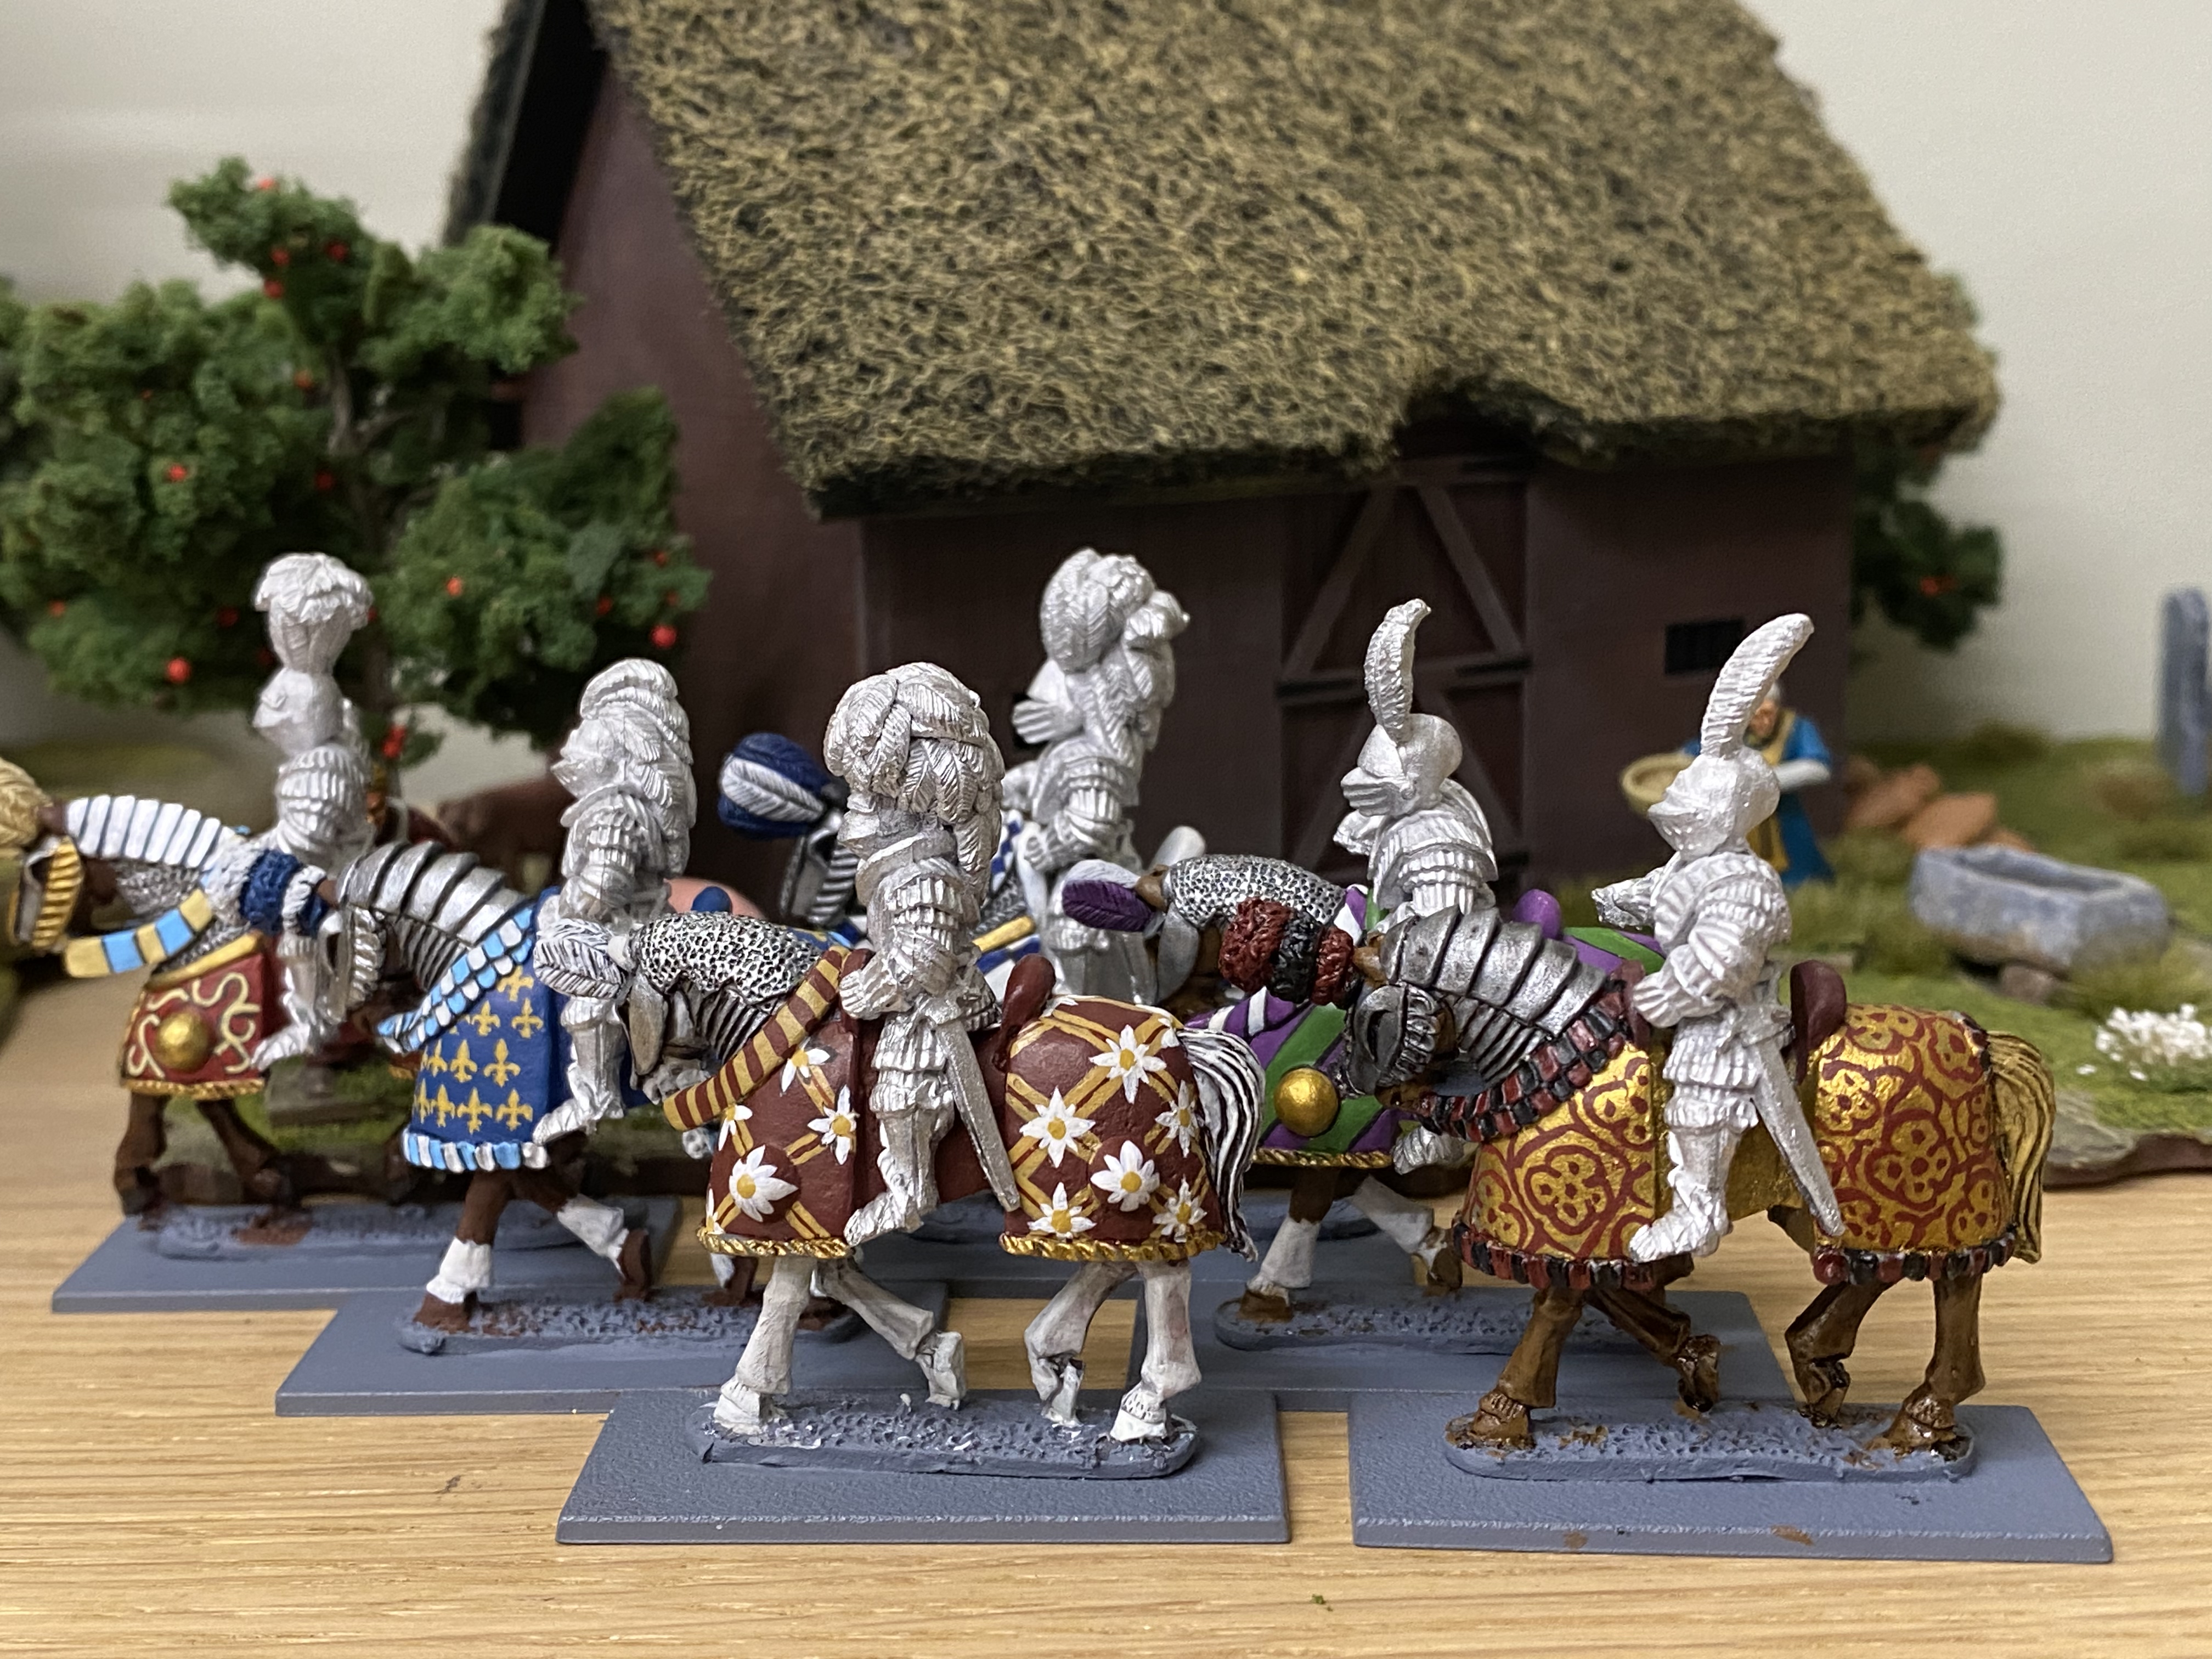
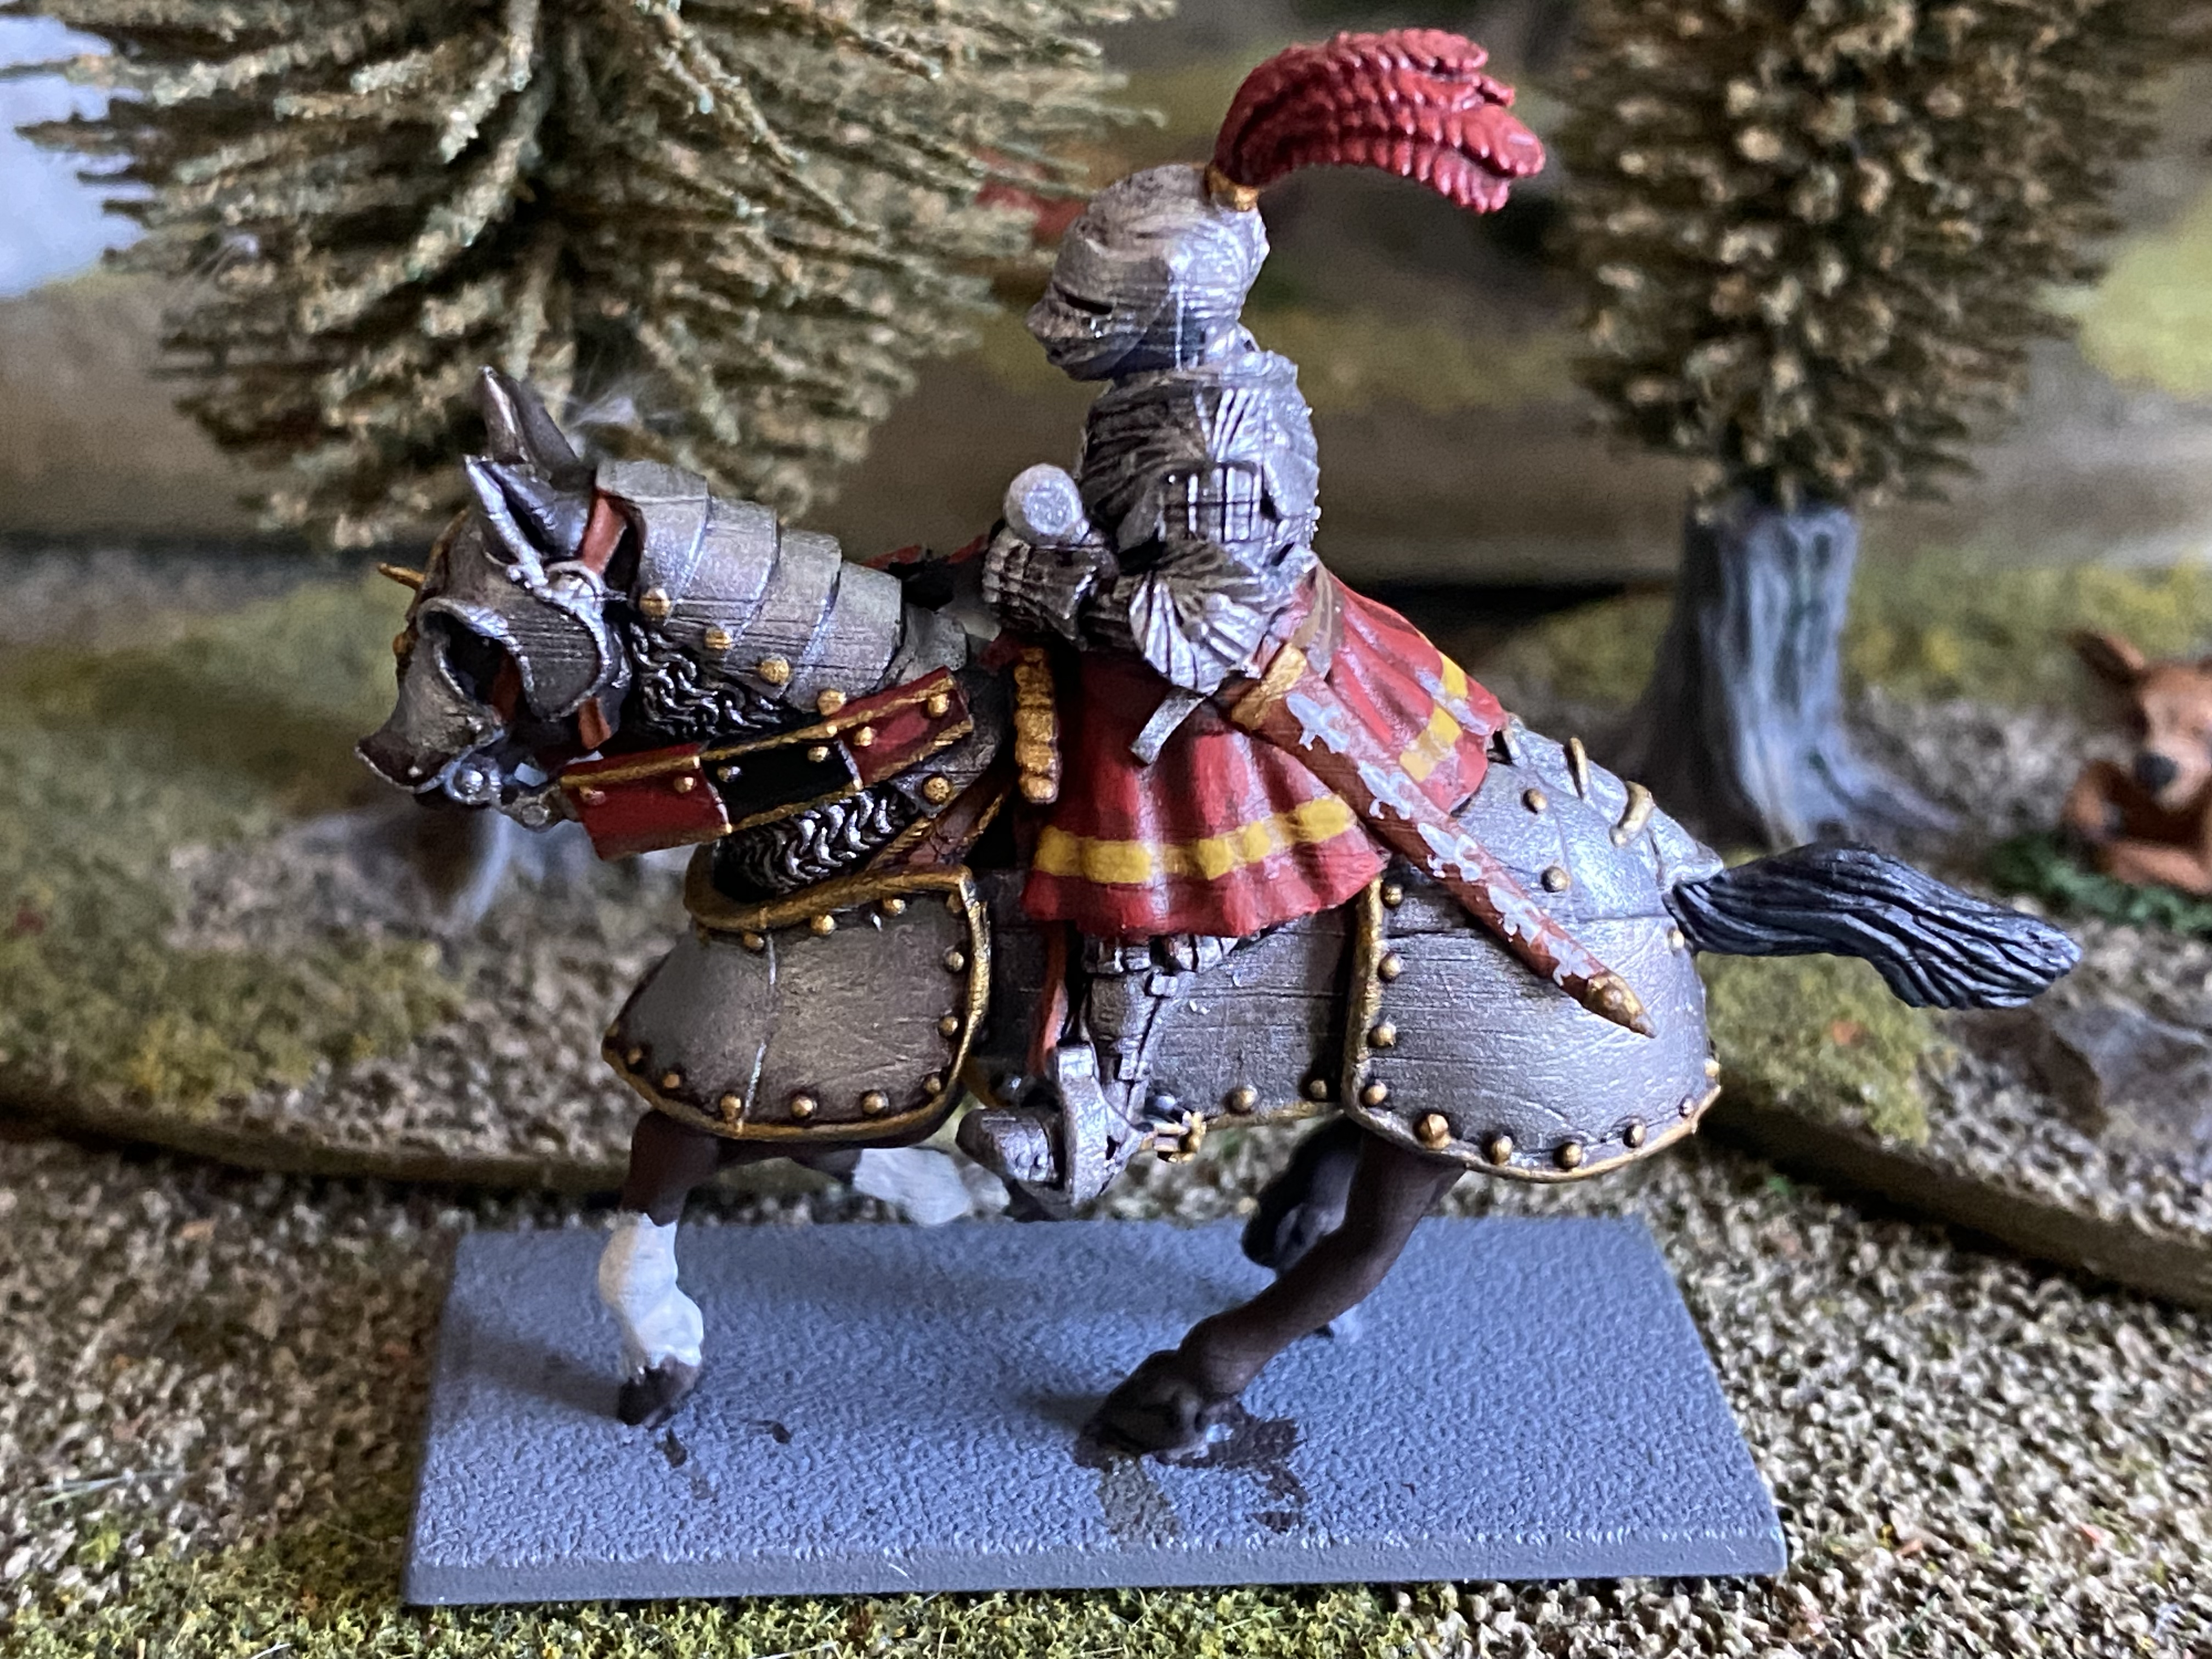
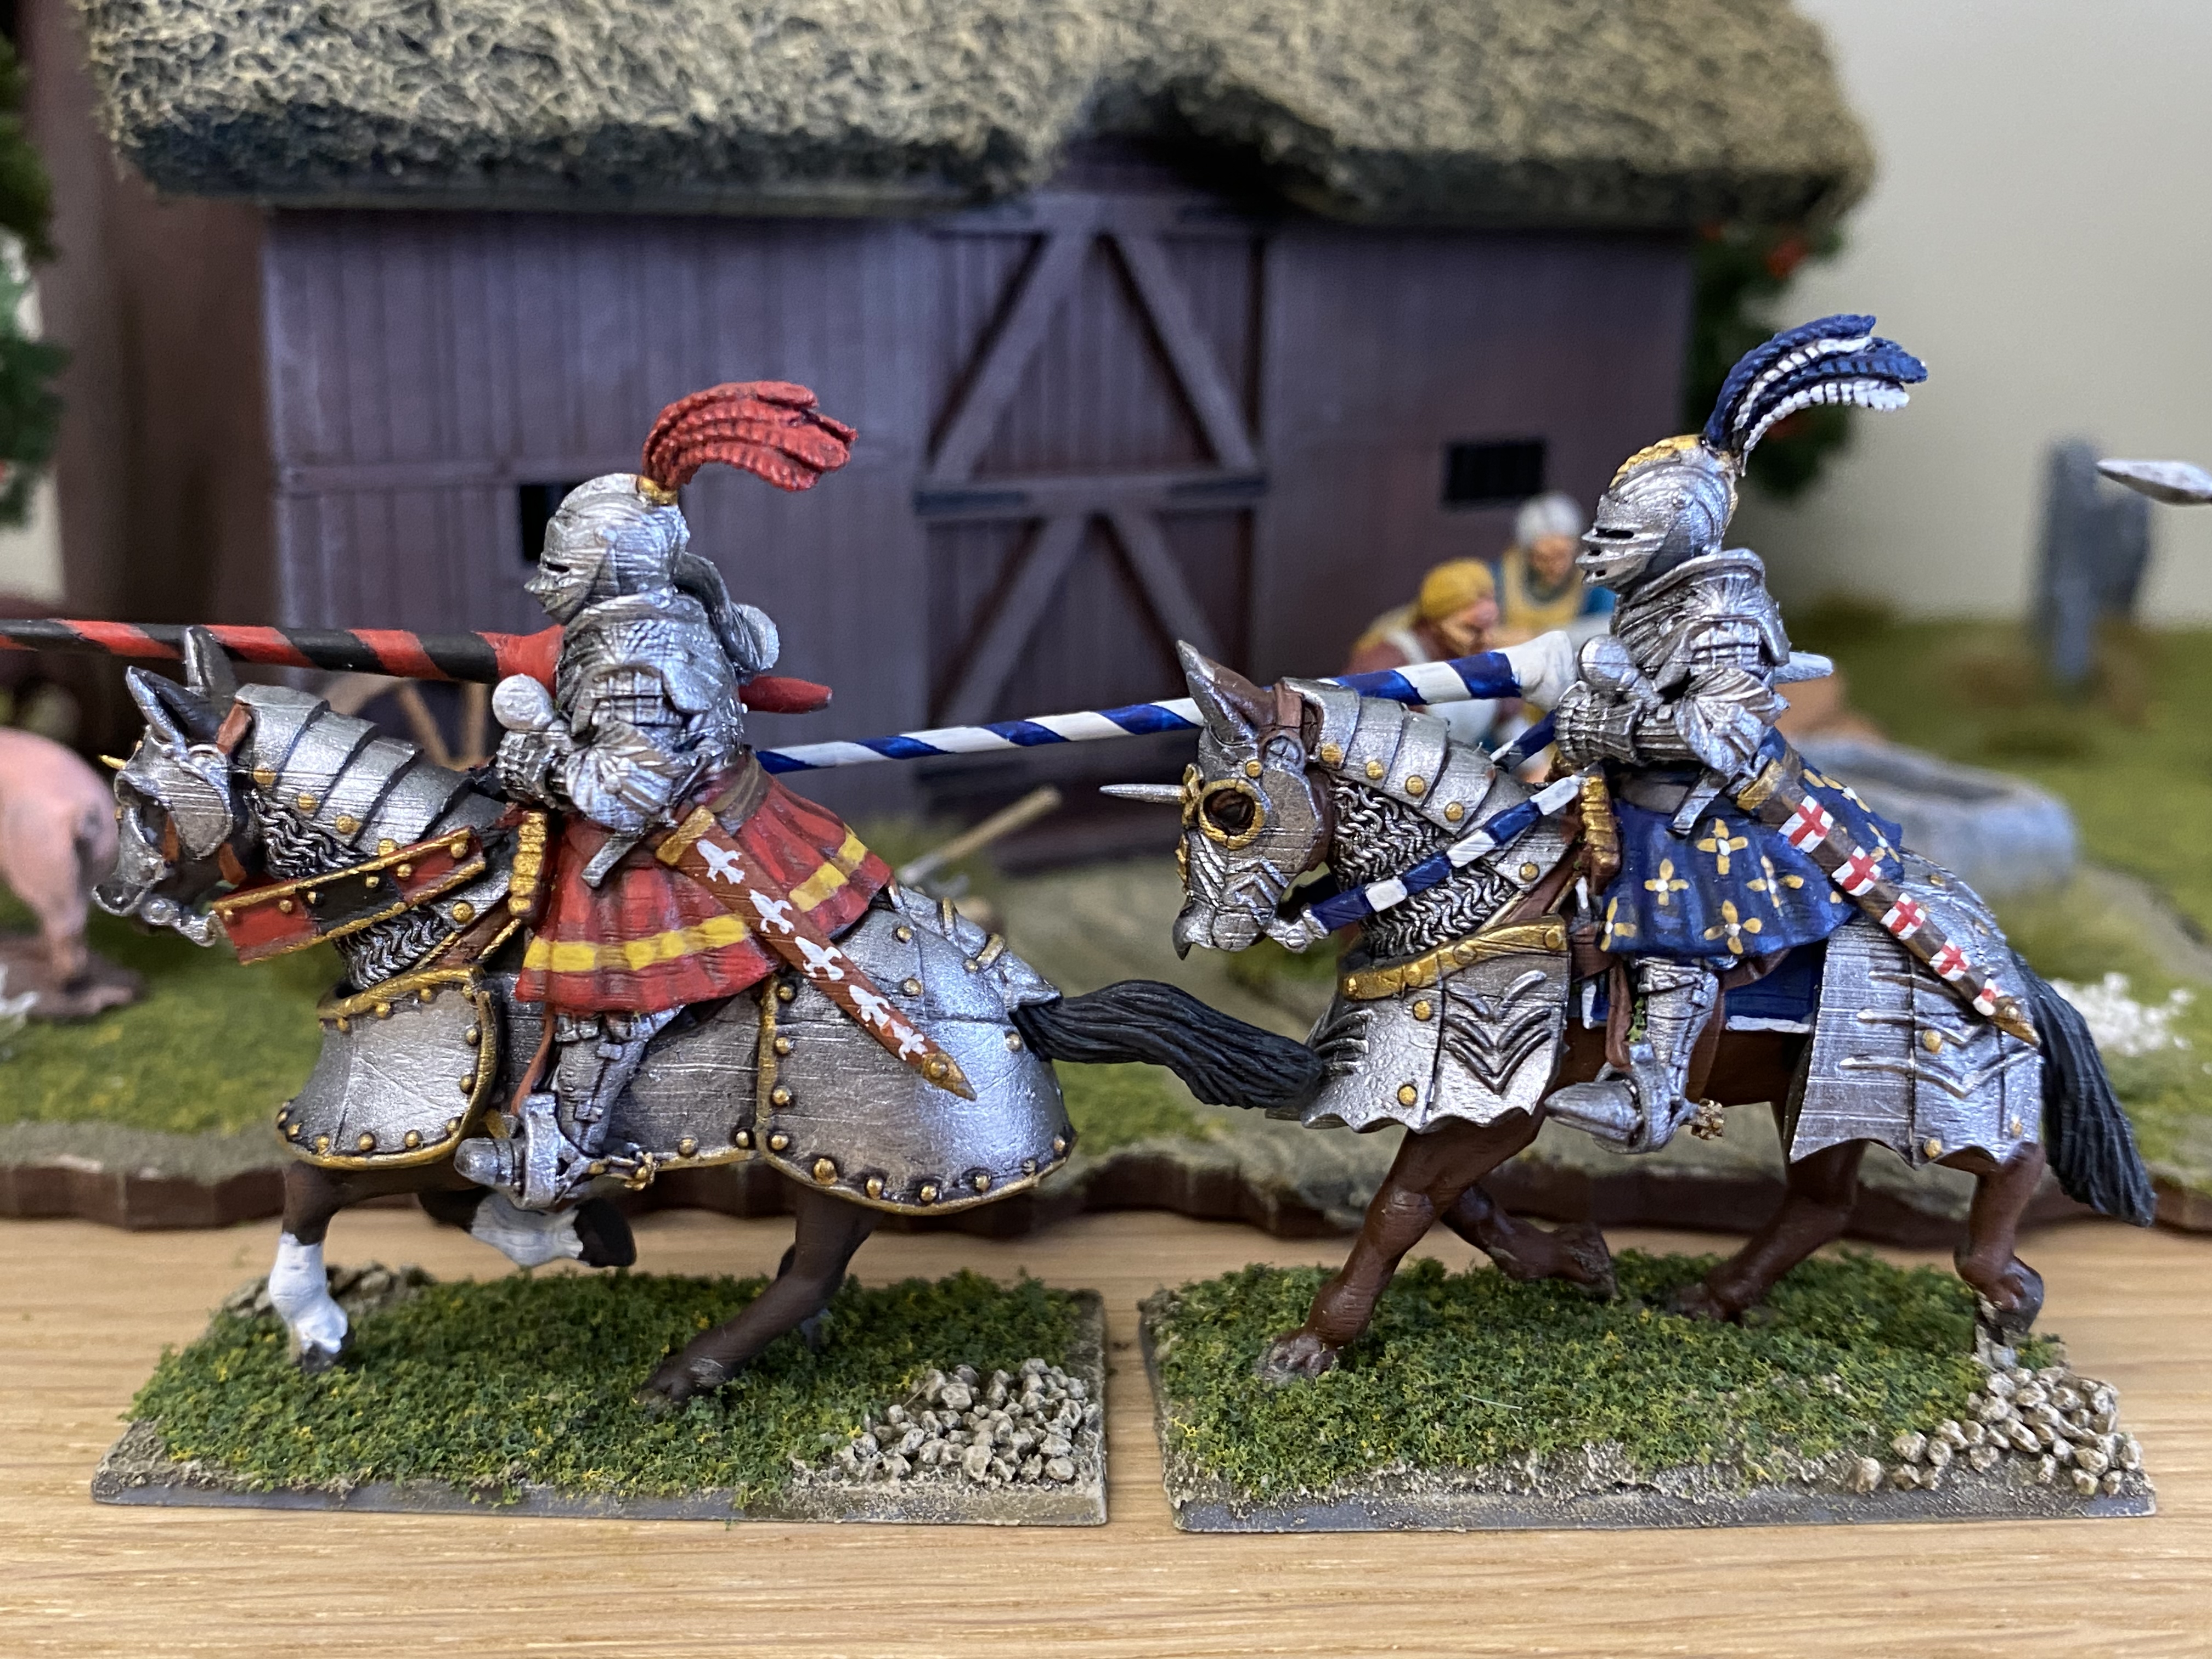
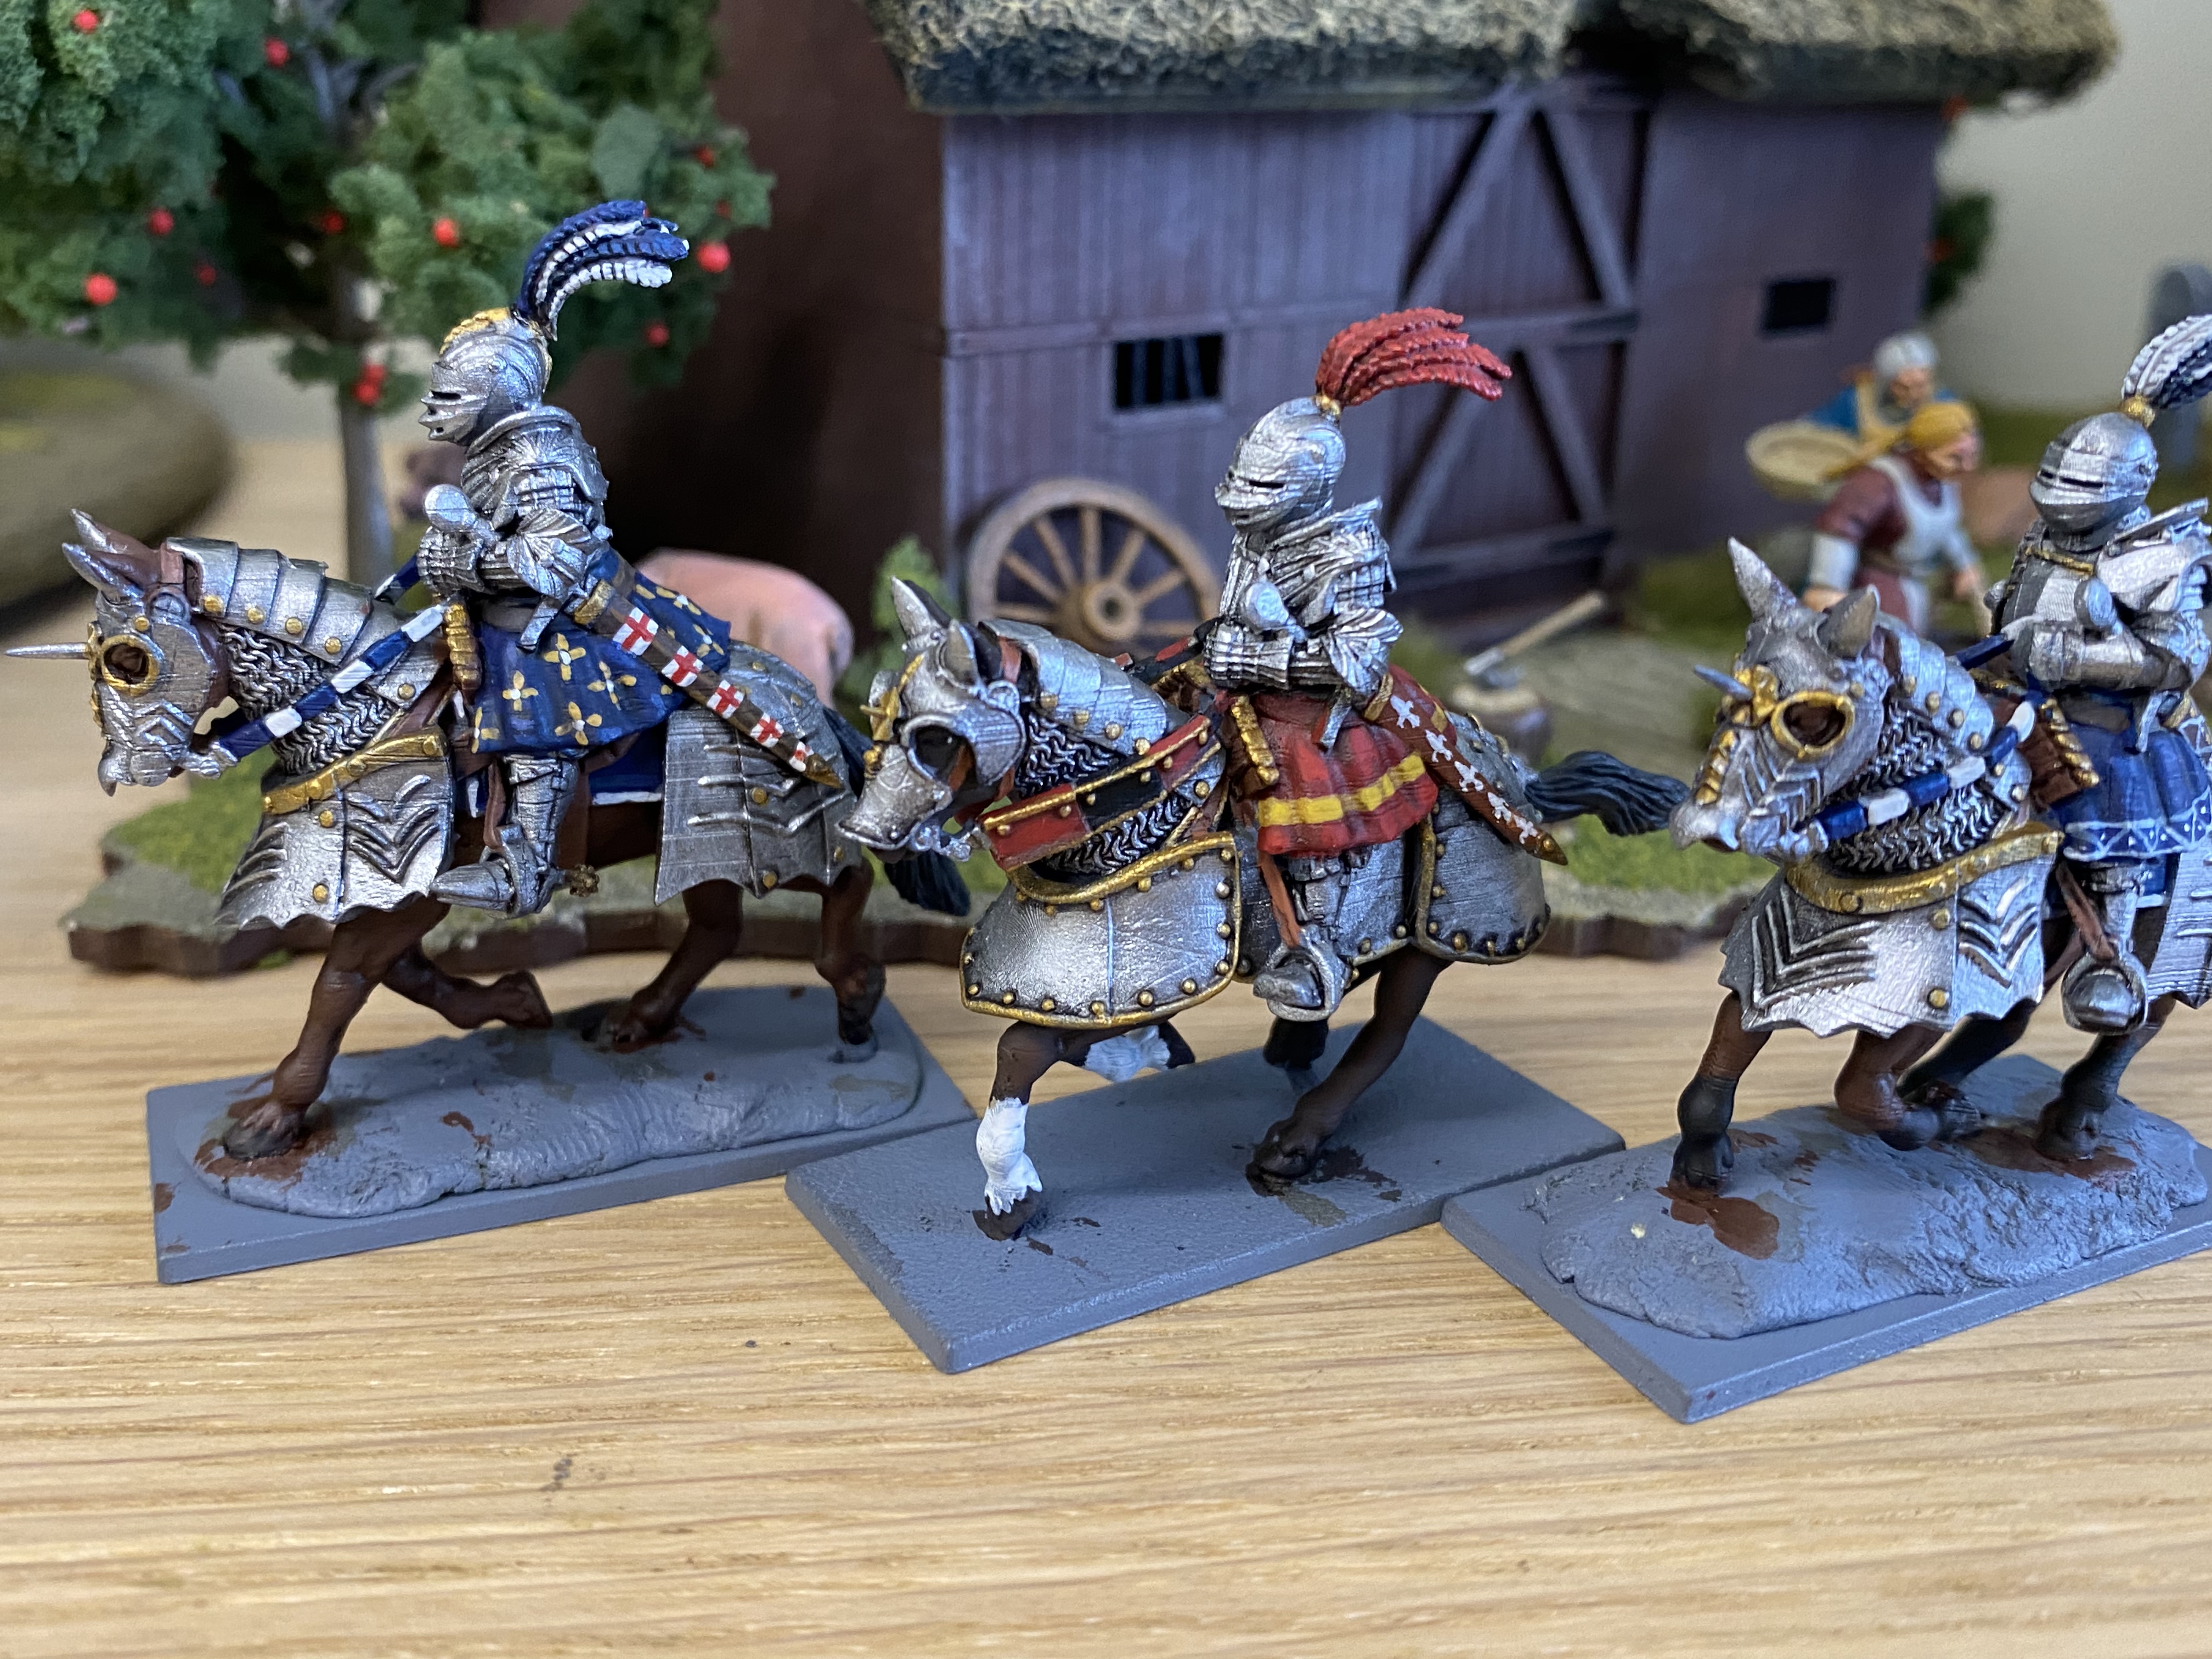
First two knights in plain armour.Ser Loras leads the charge!
With the freedom to use whatever colour scheme took my fancy, I have gone from some fairly conservative colours to those bordering on fantasy. The white armour with the roses is inspired by the Tyrells of Highgarden – they use a yellow rose on a green background but when I first read the Game of Throne books, I had imagined Ser Loras in white armour.
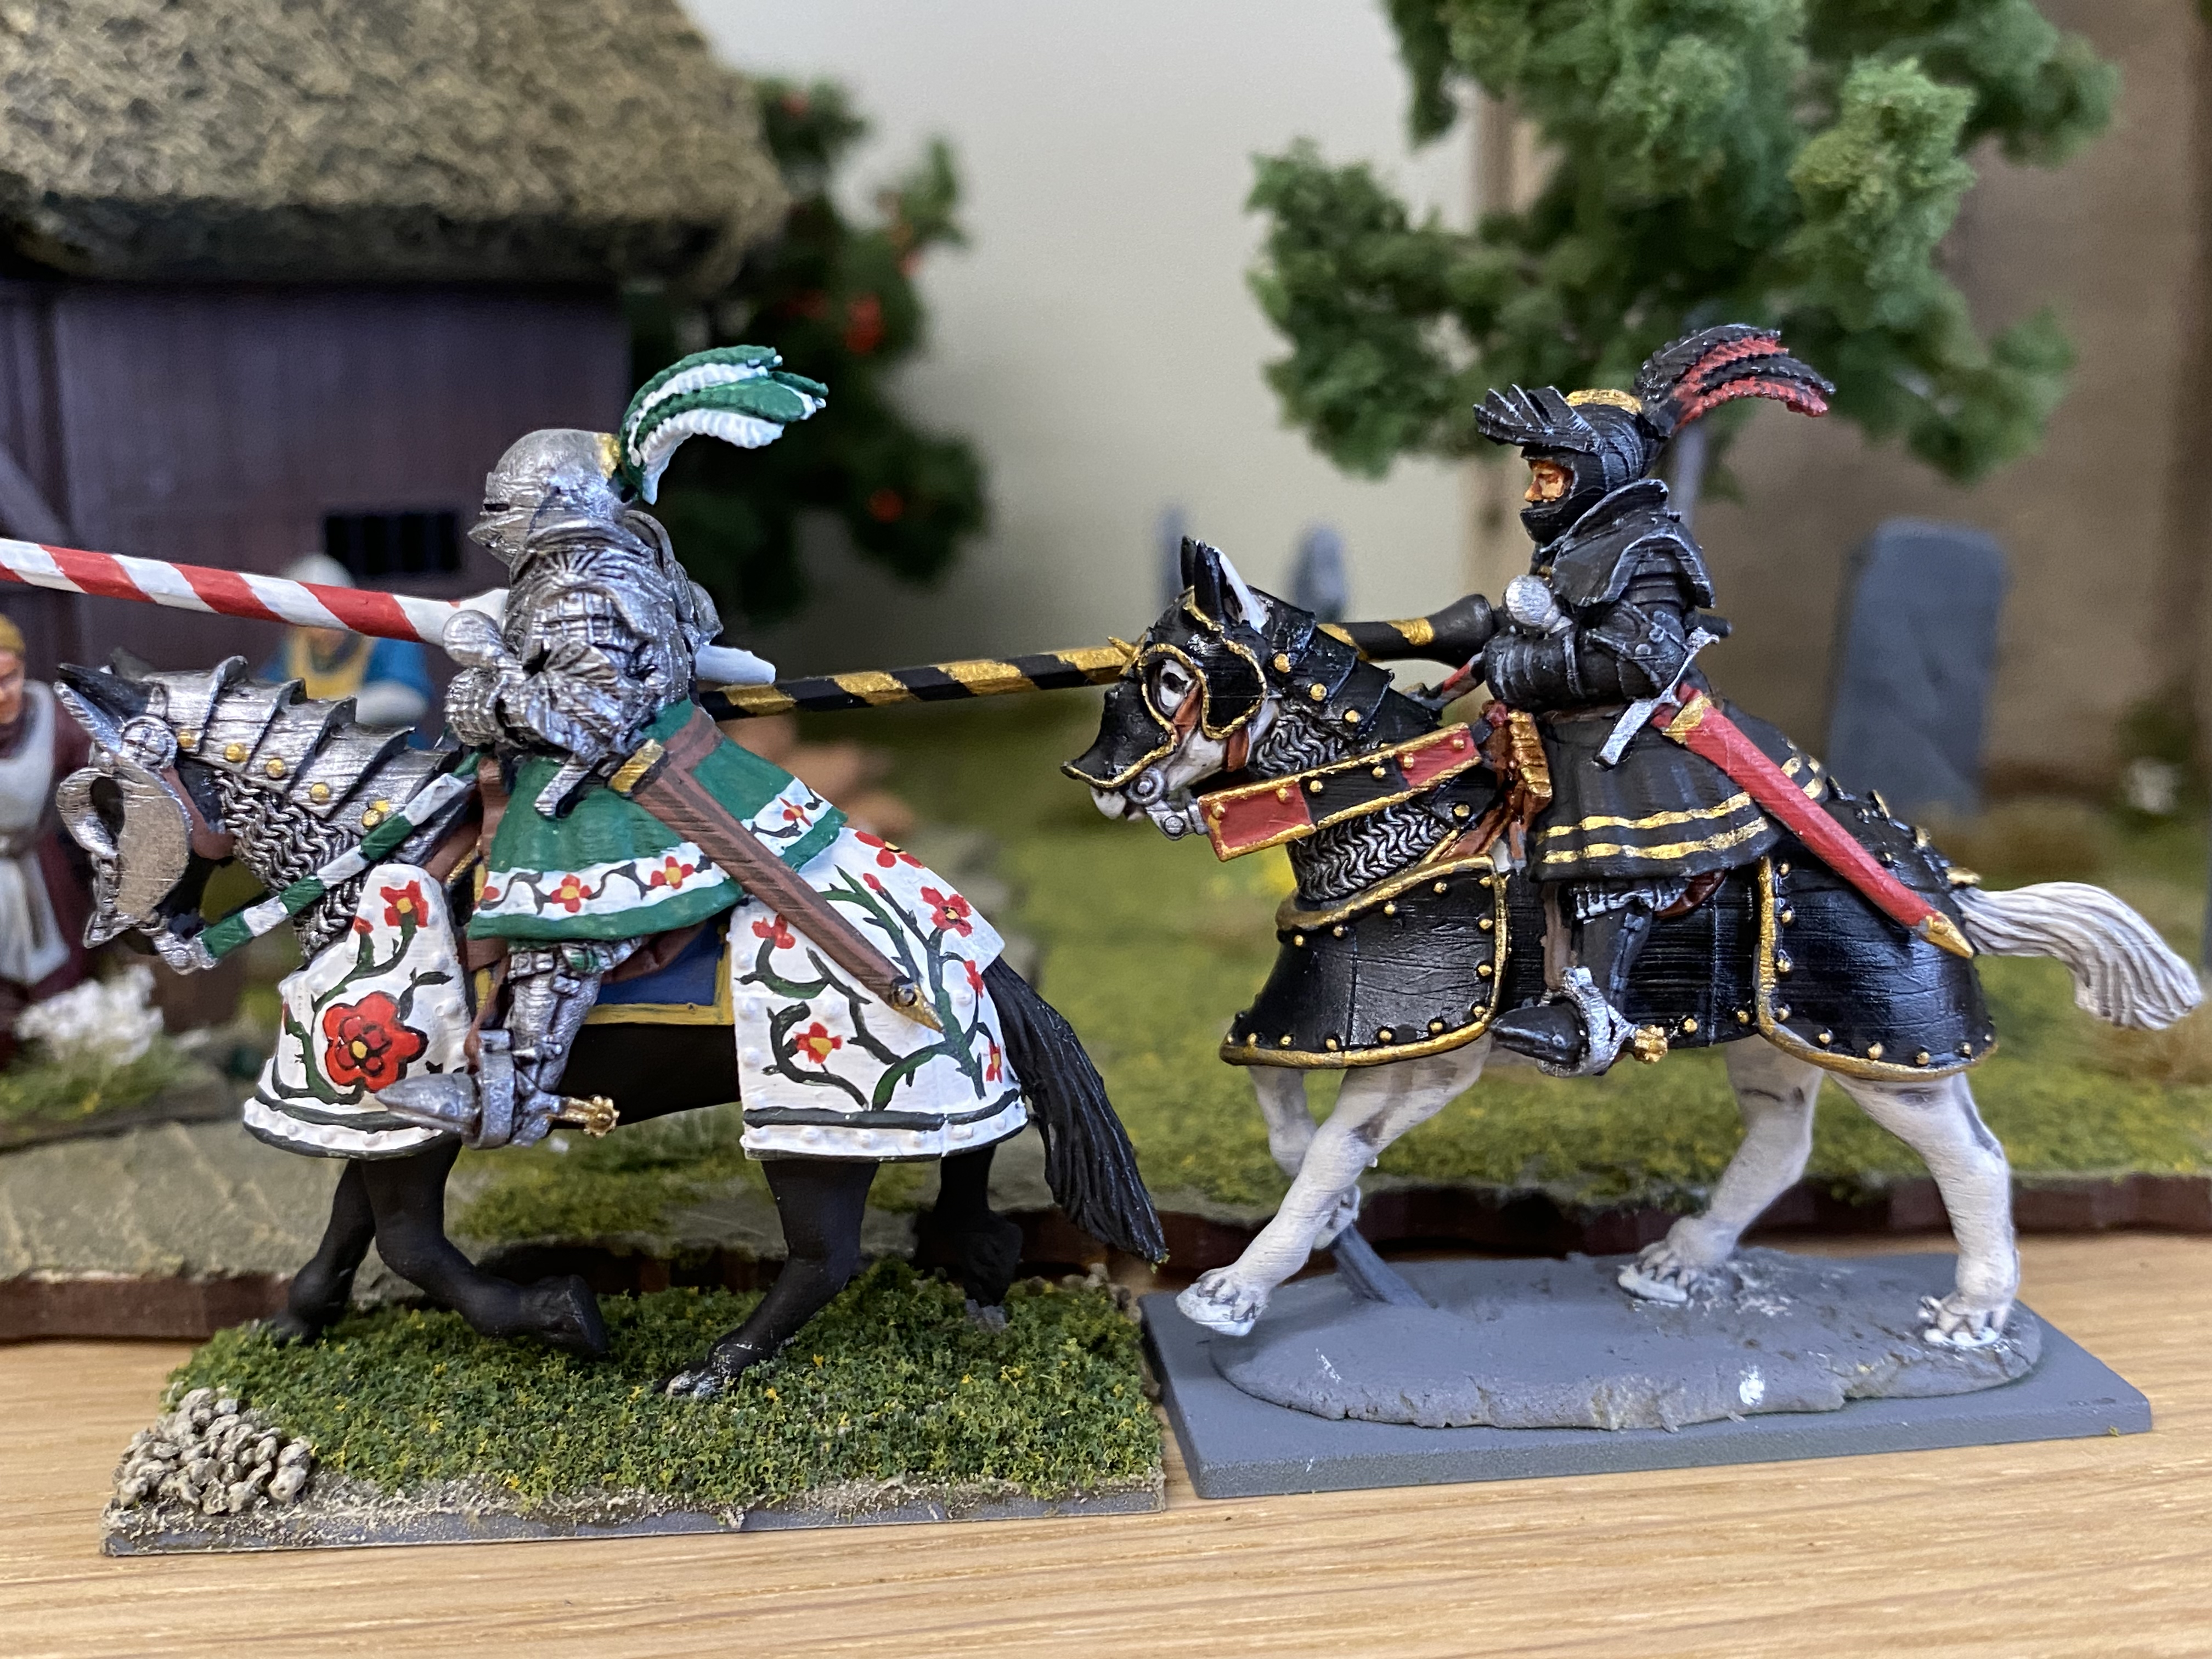
The black and red schemes are based on various illustrations that I have seen, although my freehand skills were not up to some of the details! As for the lances, the ‘barber shop’ twisting patterns were inspired by other models that I had seen and look pretty, if unlikely. I doubt that they were used in battle but rather saved for the tournaments in the tilt yard. It’s fairly easy to paint the spirals using 2mm flexible masking tape (Tamiya) to mask off the base colour as you apply the darker top colour.
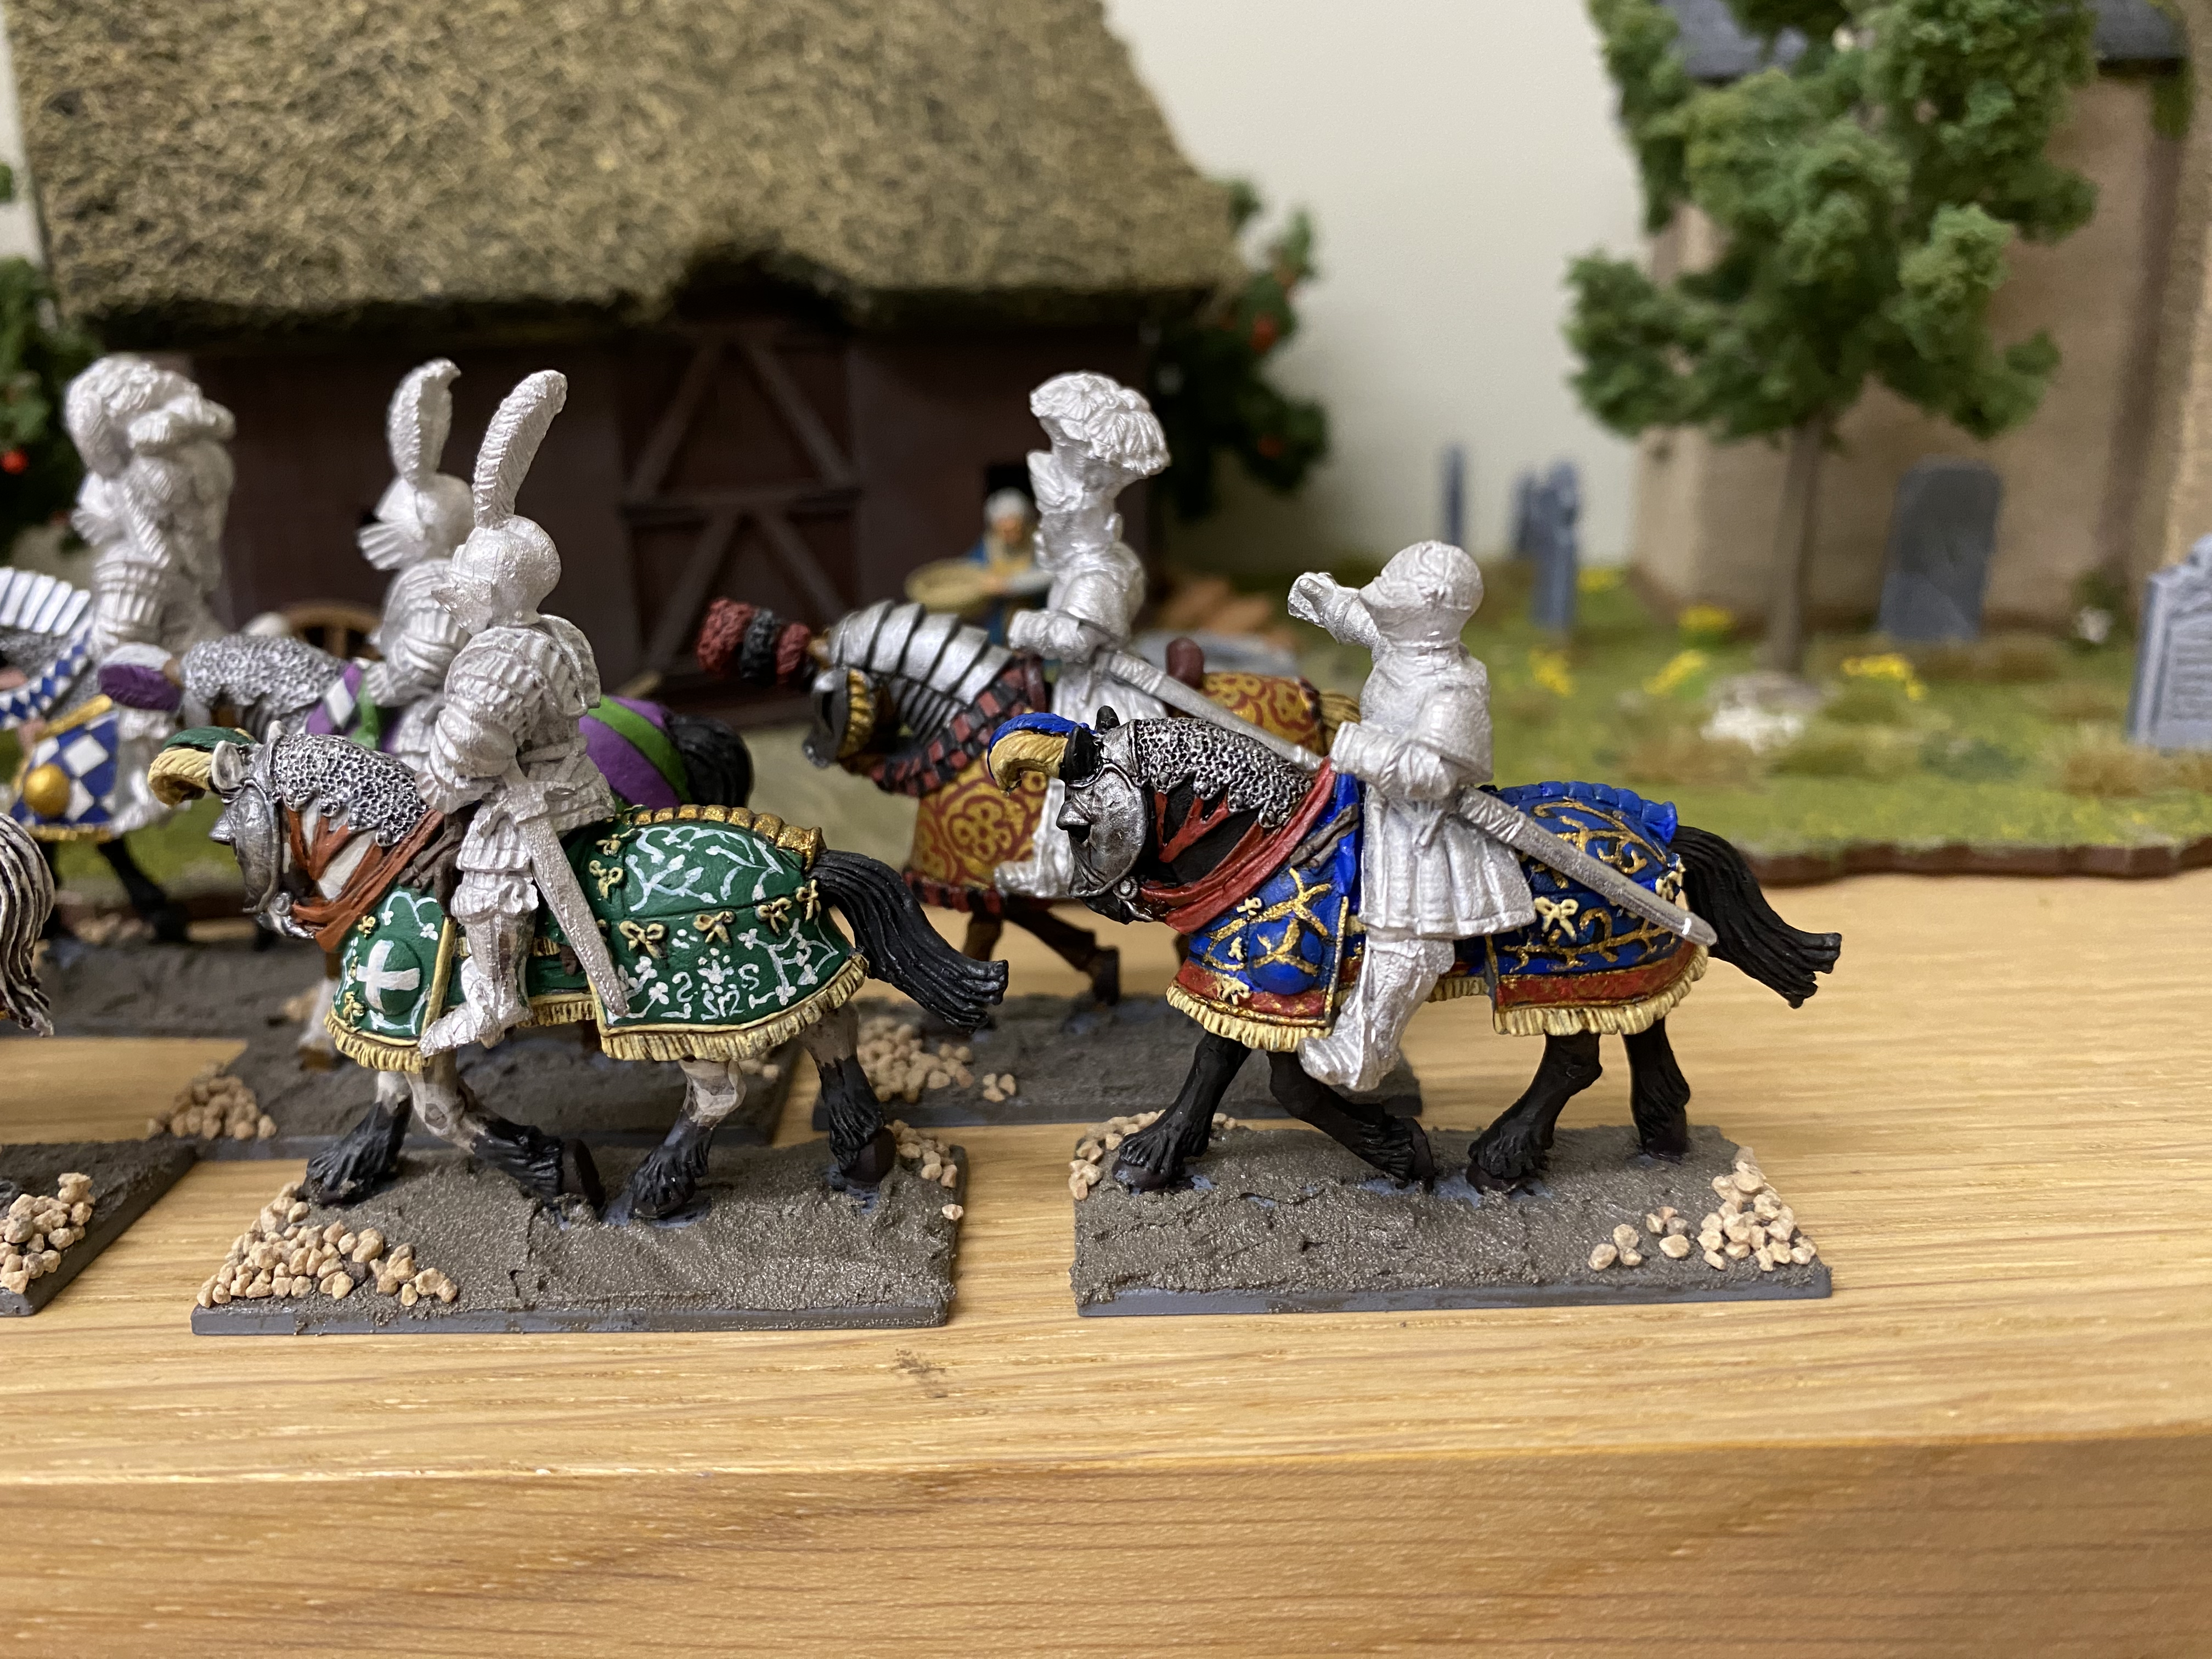
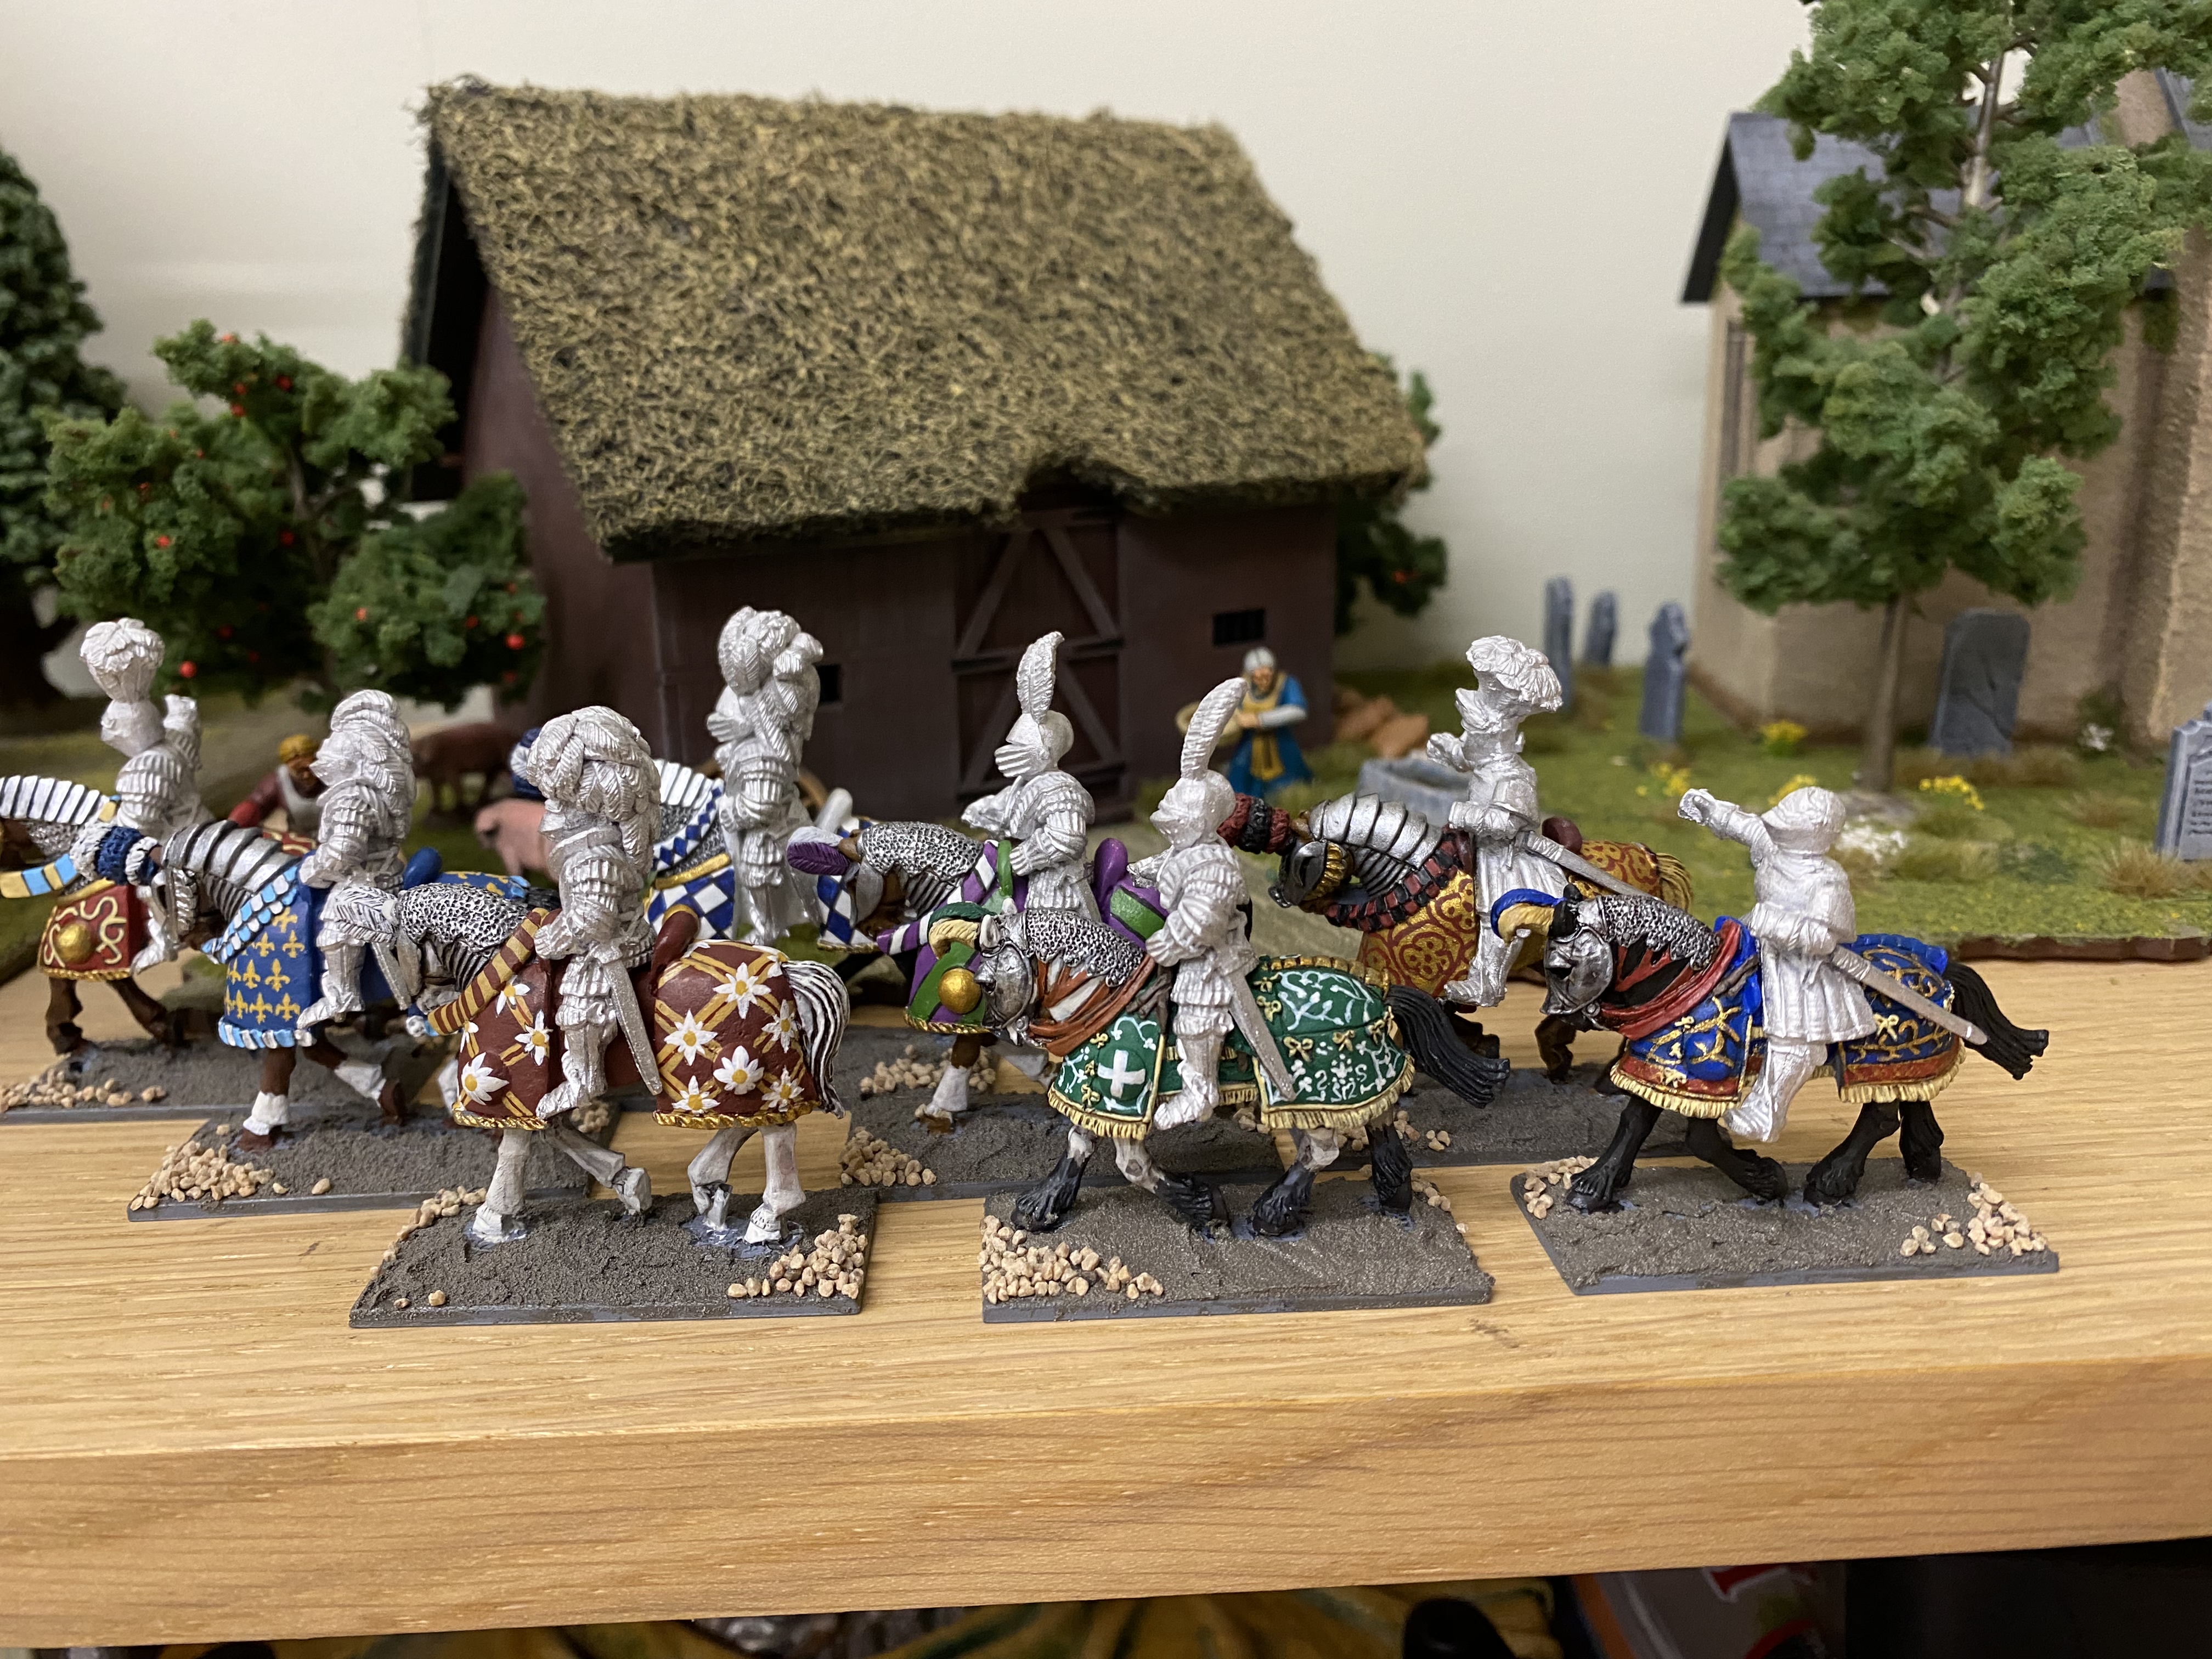
Seven Knights in the picture but the red knight is still being painted and the Black knight needs basing.
I’ve completed six of the resin knights so far, with two more in progress, so this will be my first unit. I intend to paint the Foundry knights as well and I will go for flamboyant colour schemes to see if I can push my freehand on again! I haven’t covered the details of painting these figures. I’ve used the same procedure as usual; that is block paint, wash and highlight. The exact colours are not important as I have already ‘confessed’ that I have not followed a particular livery scheme.
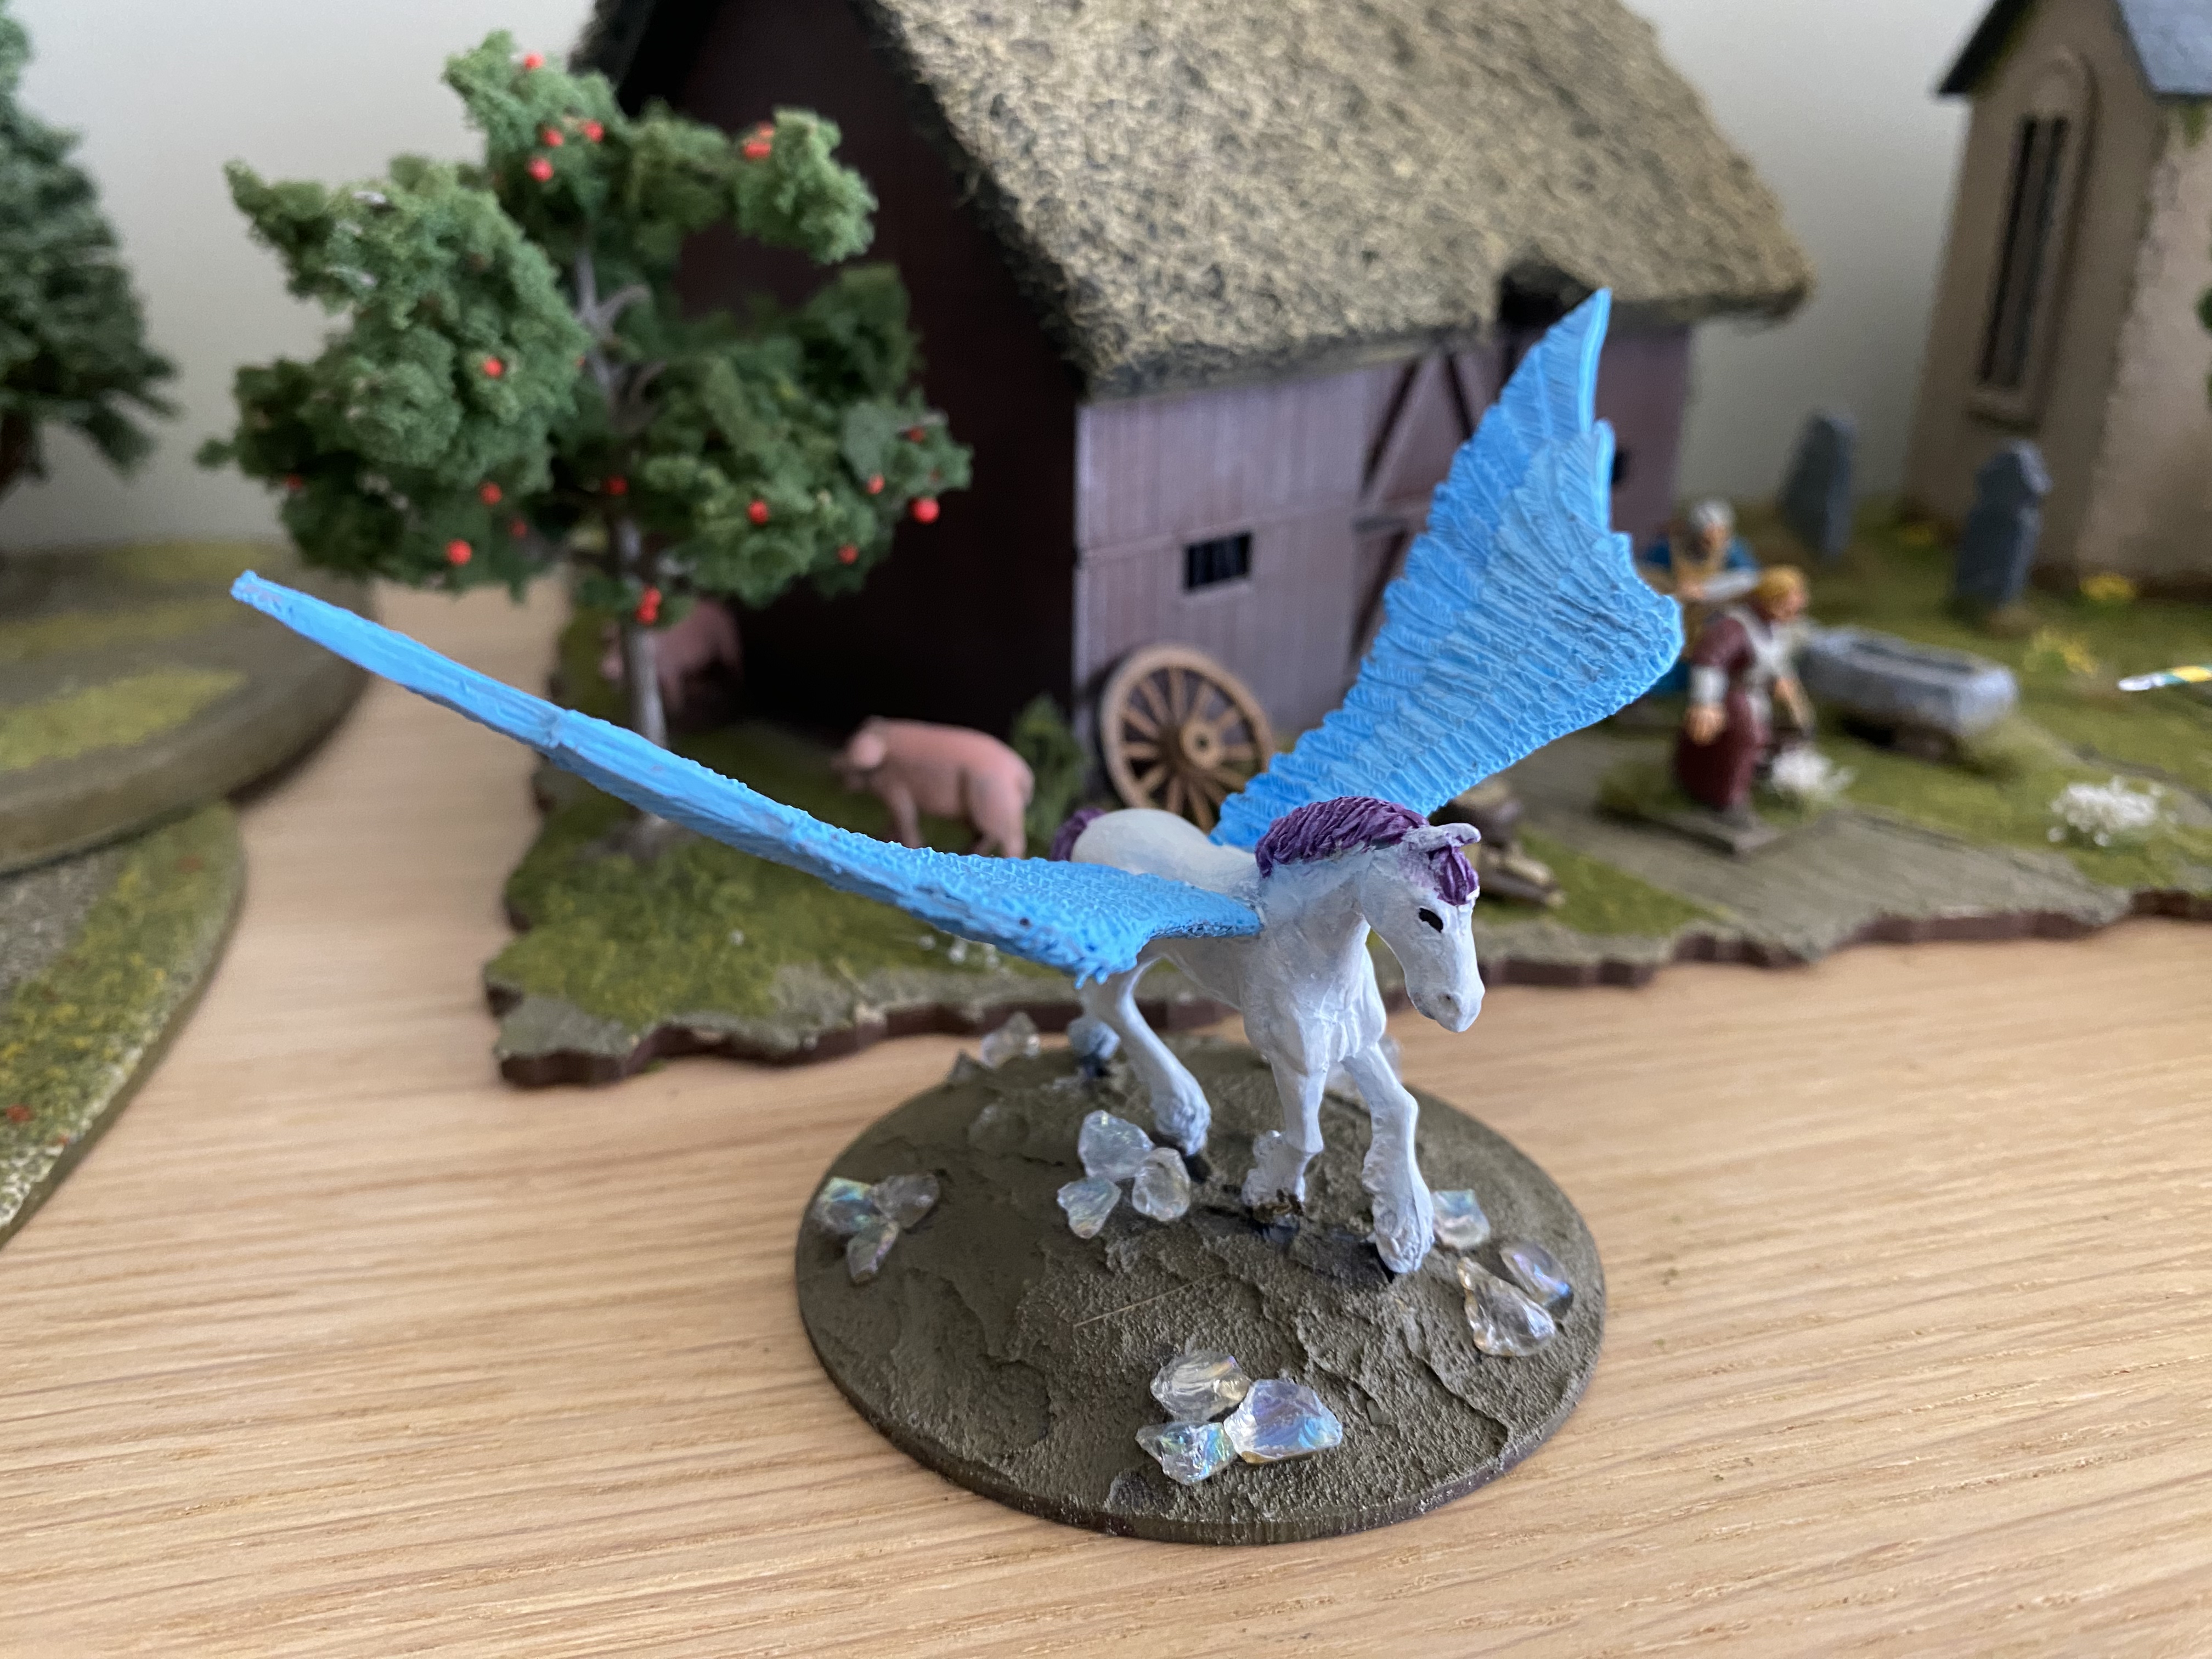
Finally, I mentioned that I had bought a Pegasus from Foundry for my Granddaughter Emily. Well, here’s a picture of her progress with the model. She has of course chosen the colour scheme and followed the block paint and ink method to paint it – just some basing to finish and Emily will have a nice model for her bedroom shelf. I may yet convert her to wargaming!
THE COMMERCIAL BIT
I hope that you all enjoy your hobby as much as I do – our web site will have much of what you need! Click here to see our shop.
My intention was to produce a Landsknecht force that I could field using the Bill Hooks Deluxe rules set. Having painted a force of three units of 24 pikemen, along with three units of 6 gunsmen, I felt that the only other requirement would be to add some artillery. I already have a few guns in my collection but any excuse to add some more sent me searching online. I also needed an army commander and although I had some nice models on foot that could fulfill the role, I wanted a mounted general so that he could move quickly on the battlefield to rally any daunted troops.
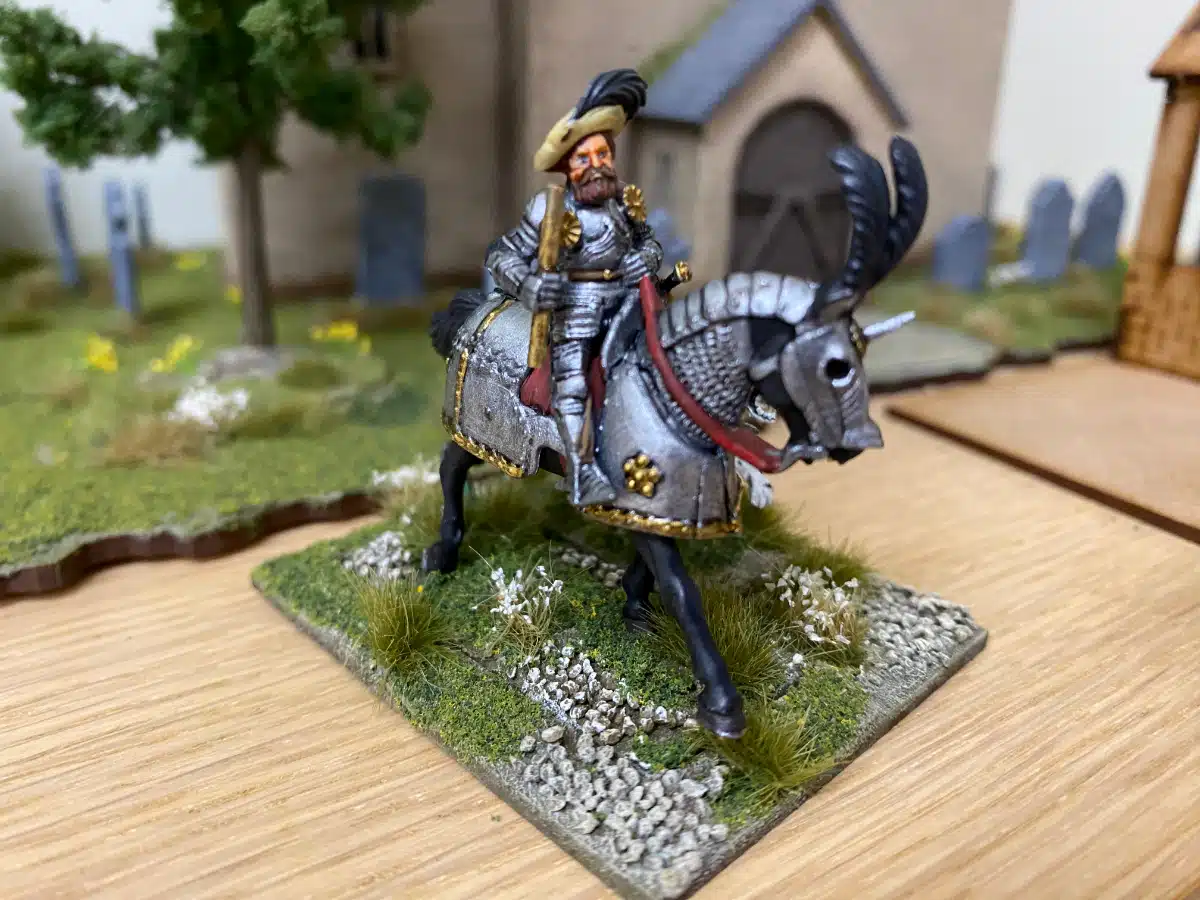
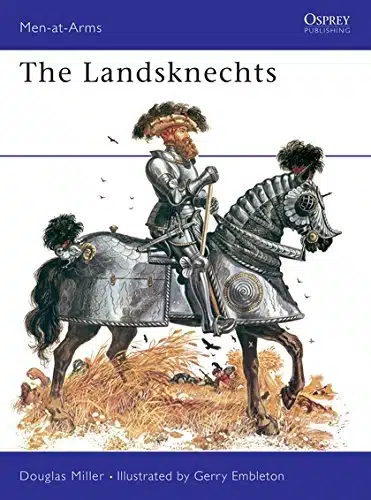
To start with the General first, I copied an idea from Andy Callan, who in turn based his model on the cover of the Osprey book on Landsknechts.
It’s actually a very straight forward conversion. I simply took a Perry Miniature mounted man at Arms with the fully armoured horse and added a Warlord games Landsknecht head that looked about the same as the guy in the picture. I also added some spare feathers to the the rear of the horse armour and the commanders staff was made by cutting down a spear arm from the same Perry’s set.
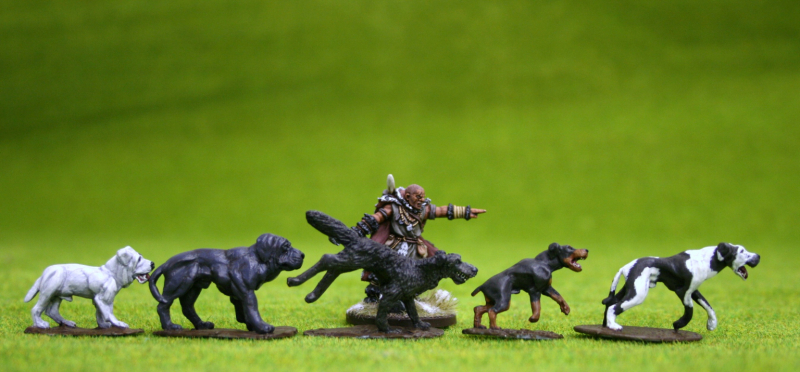
My Landsknecht commander – Heinrich Kane of Bayern!
You can’t see it in the above picture but I’ve also given him a big dog as a companion. I’ve re-used an existing base that I had and will at some point make another and change the dog from ‘the biggest spotty dog you ever did see’ (older readers will get the reference and joke) to something more Germanic – a Great Dane or Rottweiler seems appropriate. I like to add dogs to my army – it helps that I have direct access to the Deezee range!
With the General sorted it was back to the artillery. My internet search had resulted in me settling on the guns and crew produced by Foundry Miniatures. Again, I am lucky to have easy access to Foundry. They are just 9 miles up the road from my house, so I was able to spend a pleasant couple of hours visiting them and showing my Granddaughter the Church and Battlefield at East Stoke. As well as purchasing two of the guns and crew, I also picked up a couple of packs of Gendarmes and a winged unicorn for my Granddaughter Emily! I have to report that the service at Foundry was first class. The young lad on ‘front of house’ was extremely helpful and ensured that I was able to get the models that I wanted. You can read about one of my previous visits to the Stokes Field Battlefield and find links to Foundry here:
Stokes field – the view to Hoveringham and the Trent – The Yorkists retreated over these fields!
Foundry Miniatures are sometimes thought of as being smaller than the current ’28mm’ crop of models. I have not found this to be so. As a general rule, some of the older ranges maybe but I found that the Landsknechts were, if anything, more on the large size but certainly compatible with Warlord and Perry Miniatures. I suspect that one of the Perry’s probably sculpted these figures.
When it came to painting them, I simply copied the figures on the Foundry web site. I actually went a bit rogue with the colours on the guns. According to one reference that I had read, the wheels were natural wood and the carriages painted red. I decided I preferred the wheels painted red and the carriages in natural wood. What a rebel, Heh!
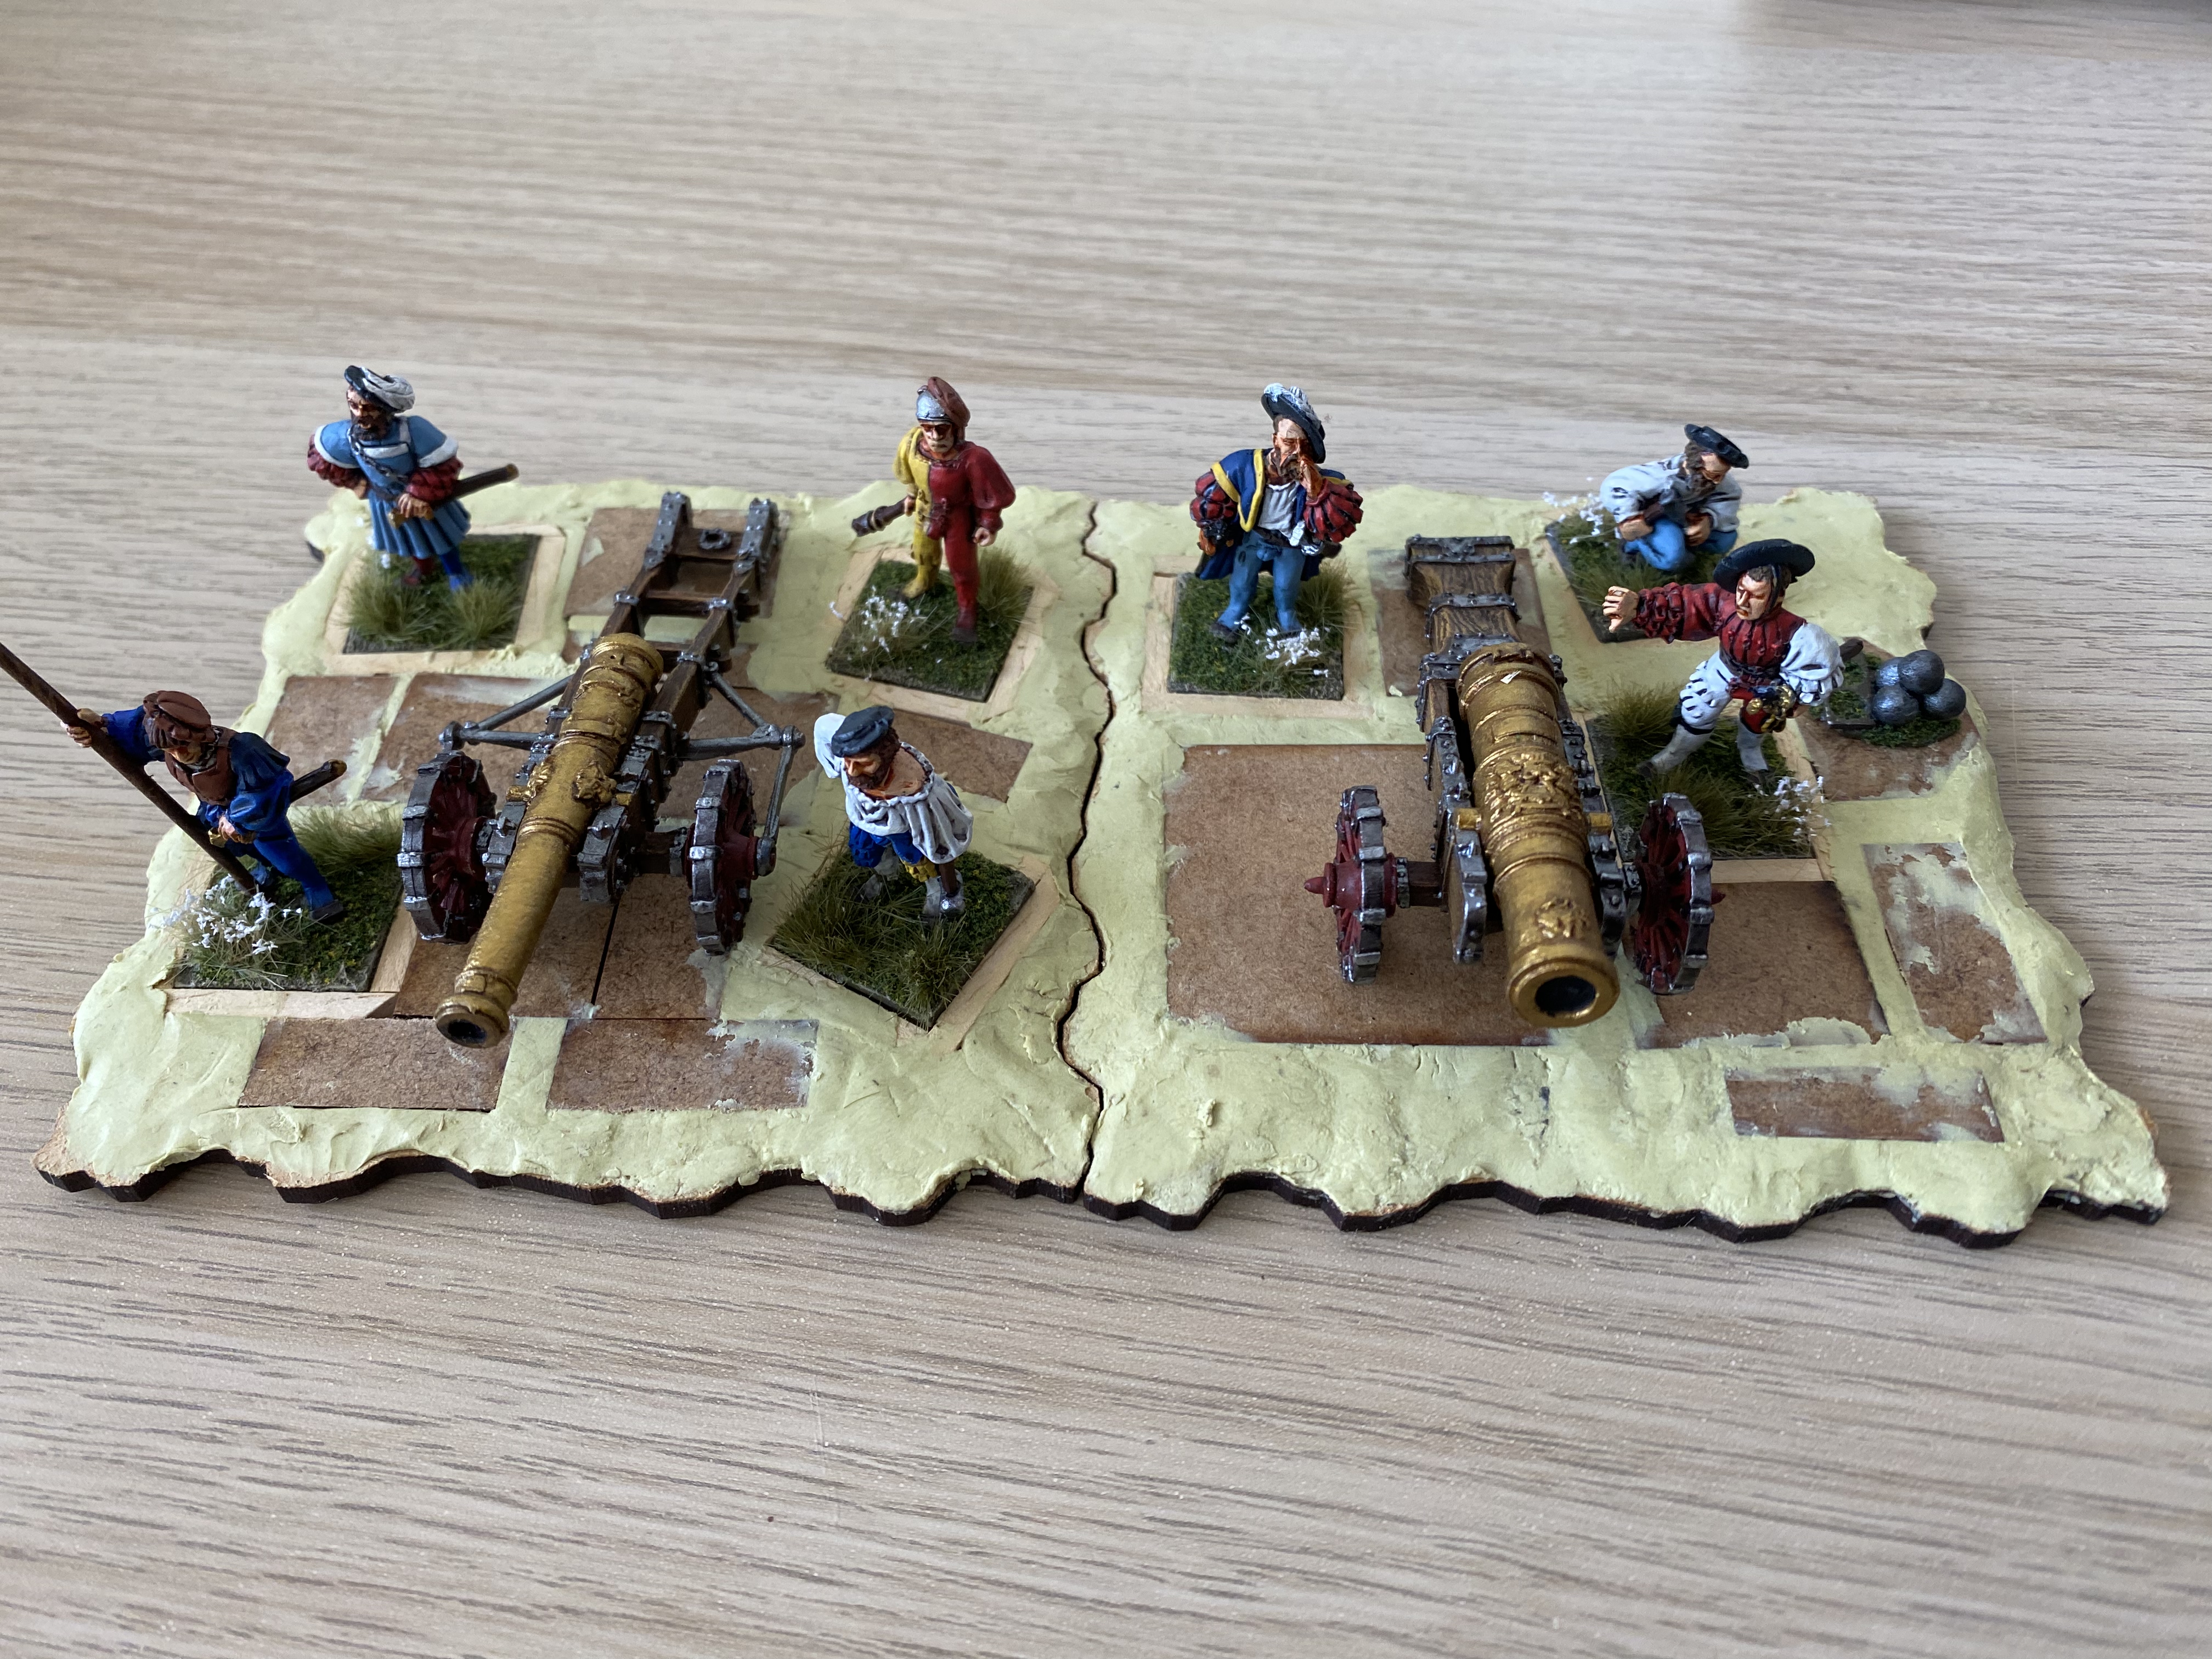
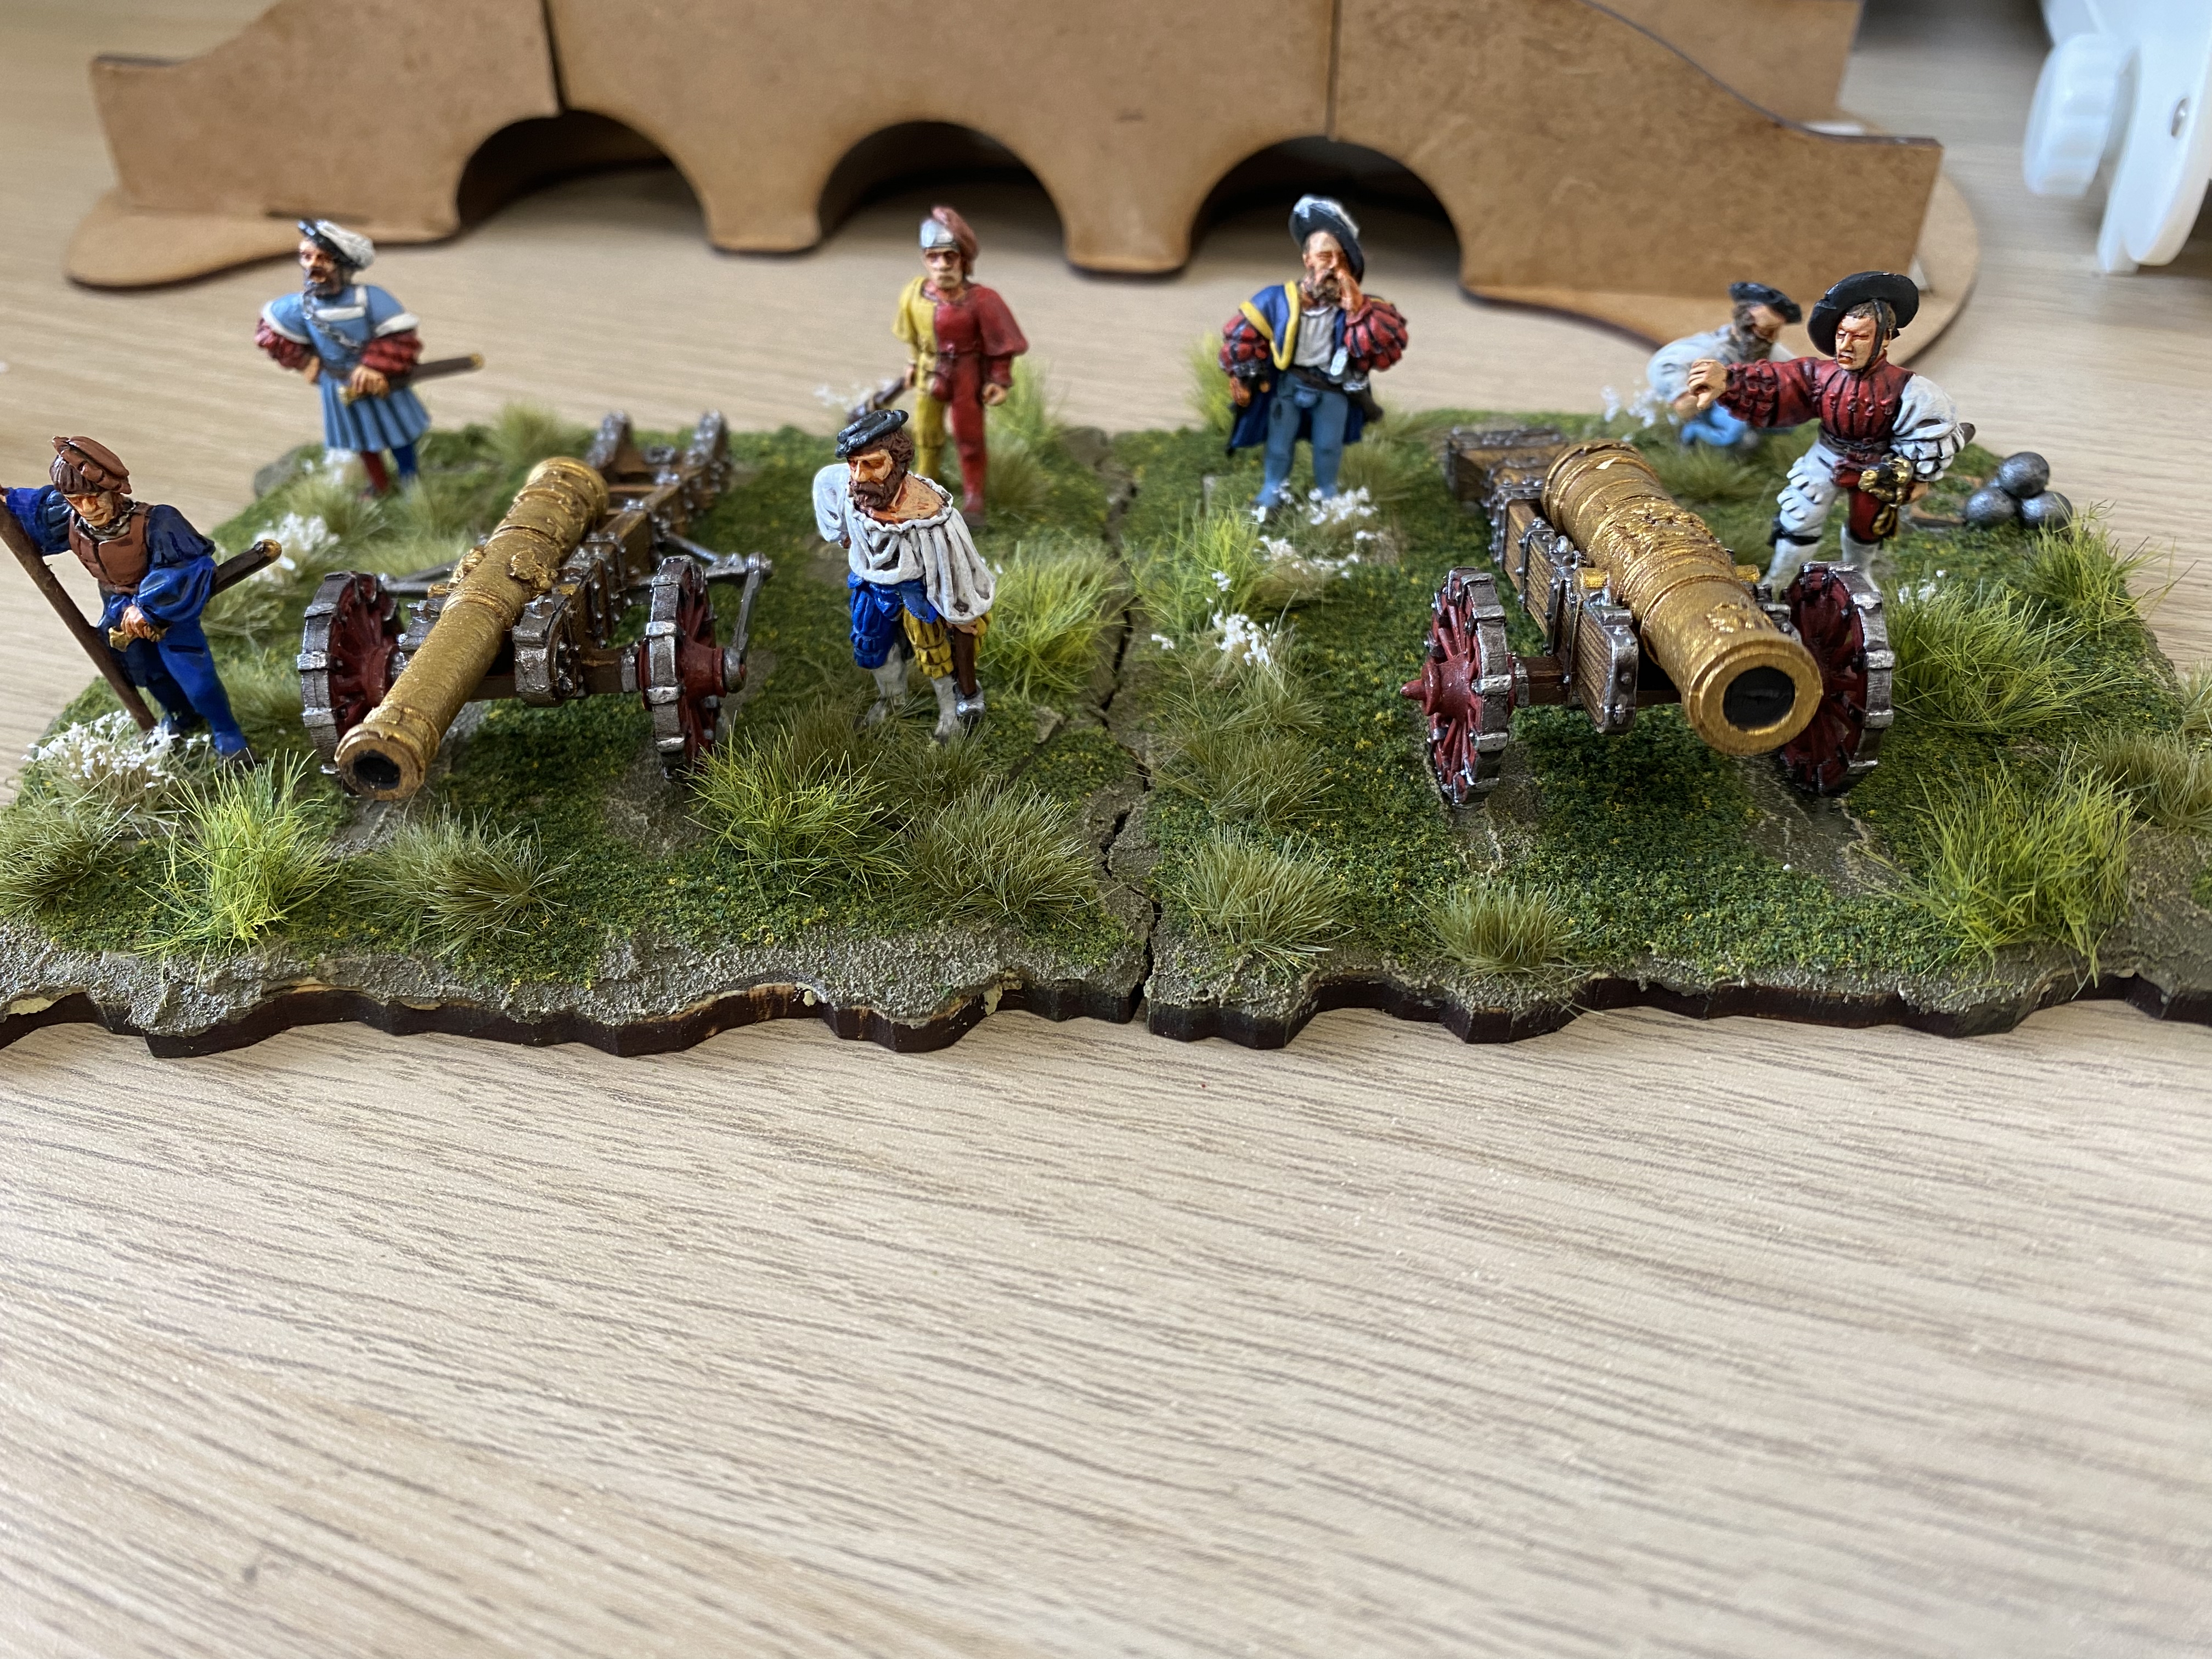
I decided to base them on the Sarrisa Precision Terrain tiles for a couple of reasons. First of all they were large enough to accommodate the guns and secondly, I have vague ideas of making a larger diorama/encampment. Here’s the painted guns and crews on the bases.
Landsknecht Artillery on bases prior to finishing.
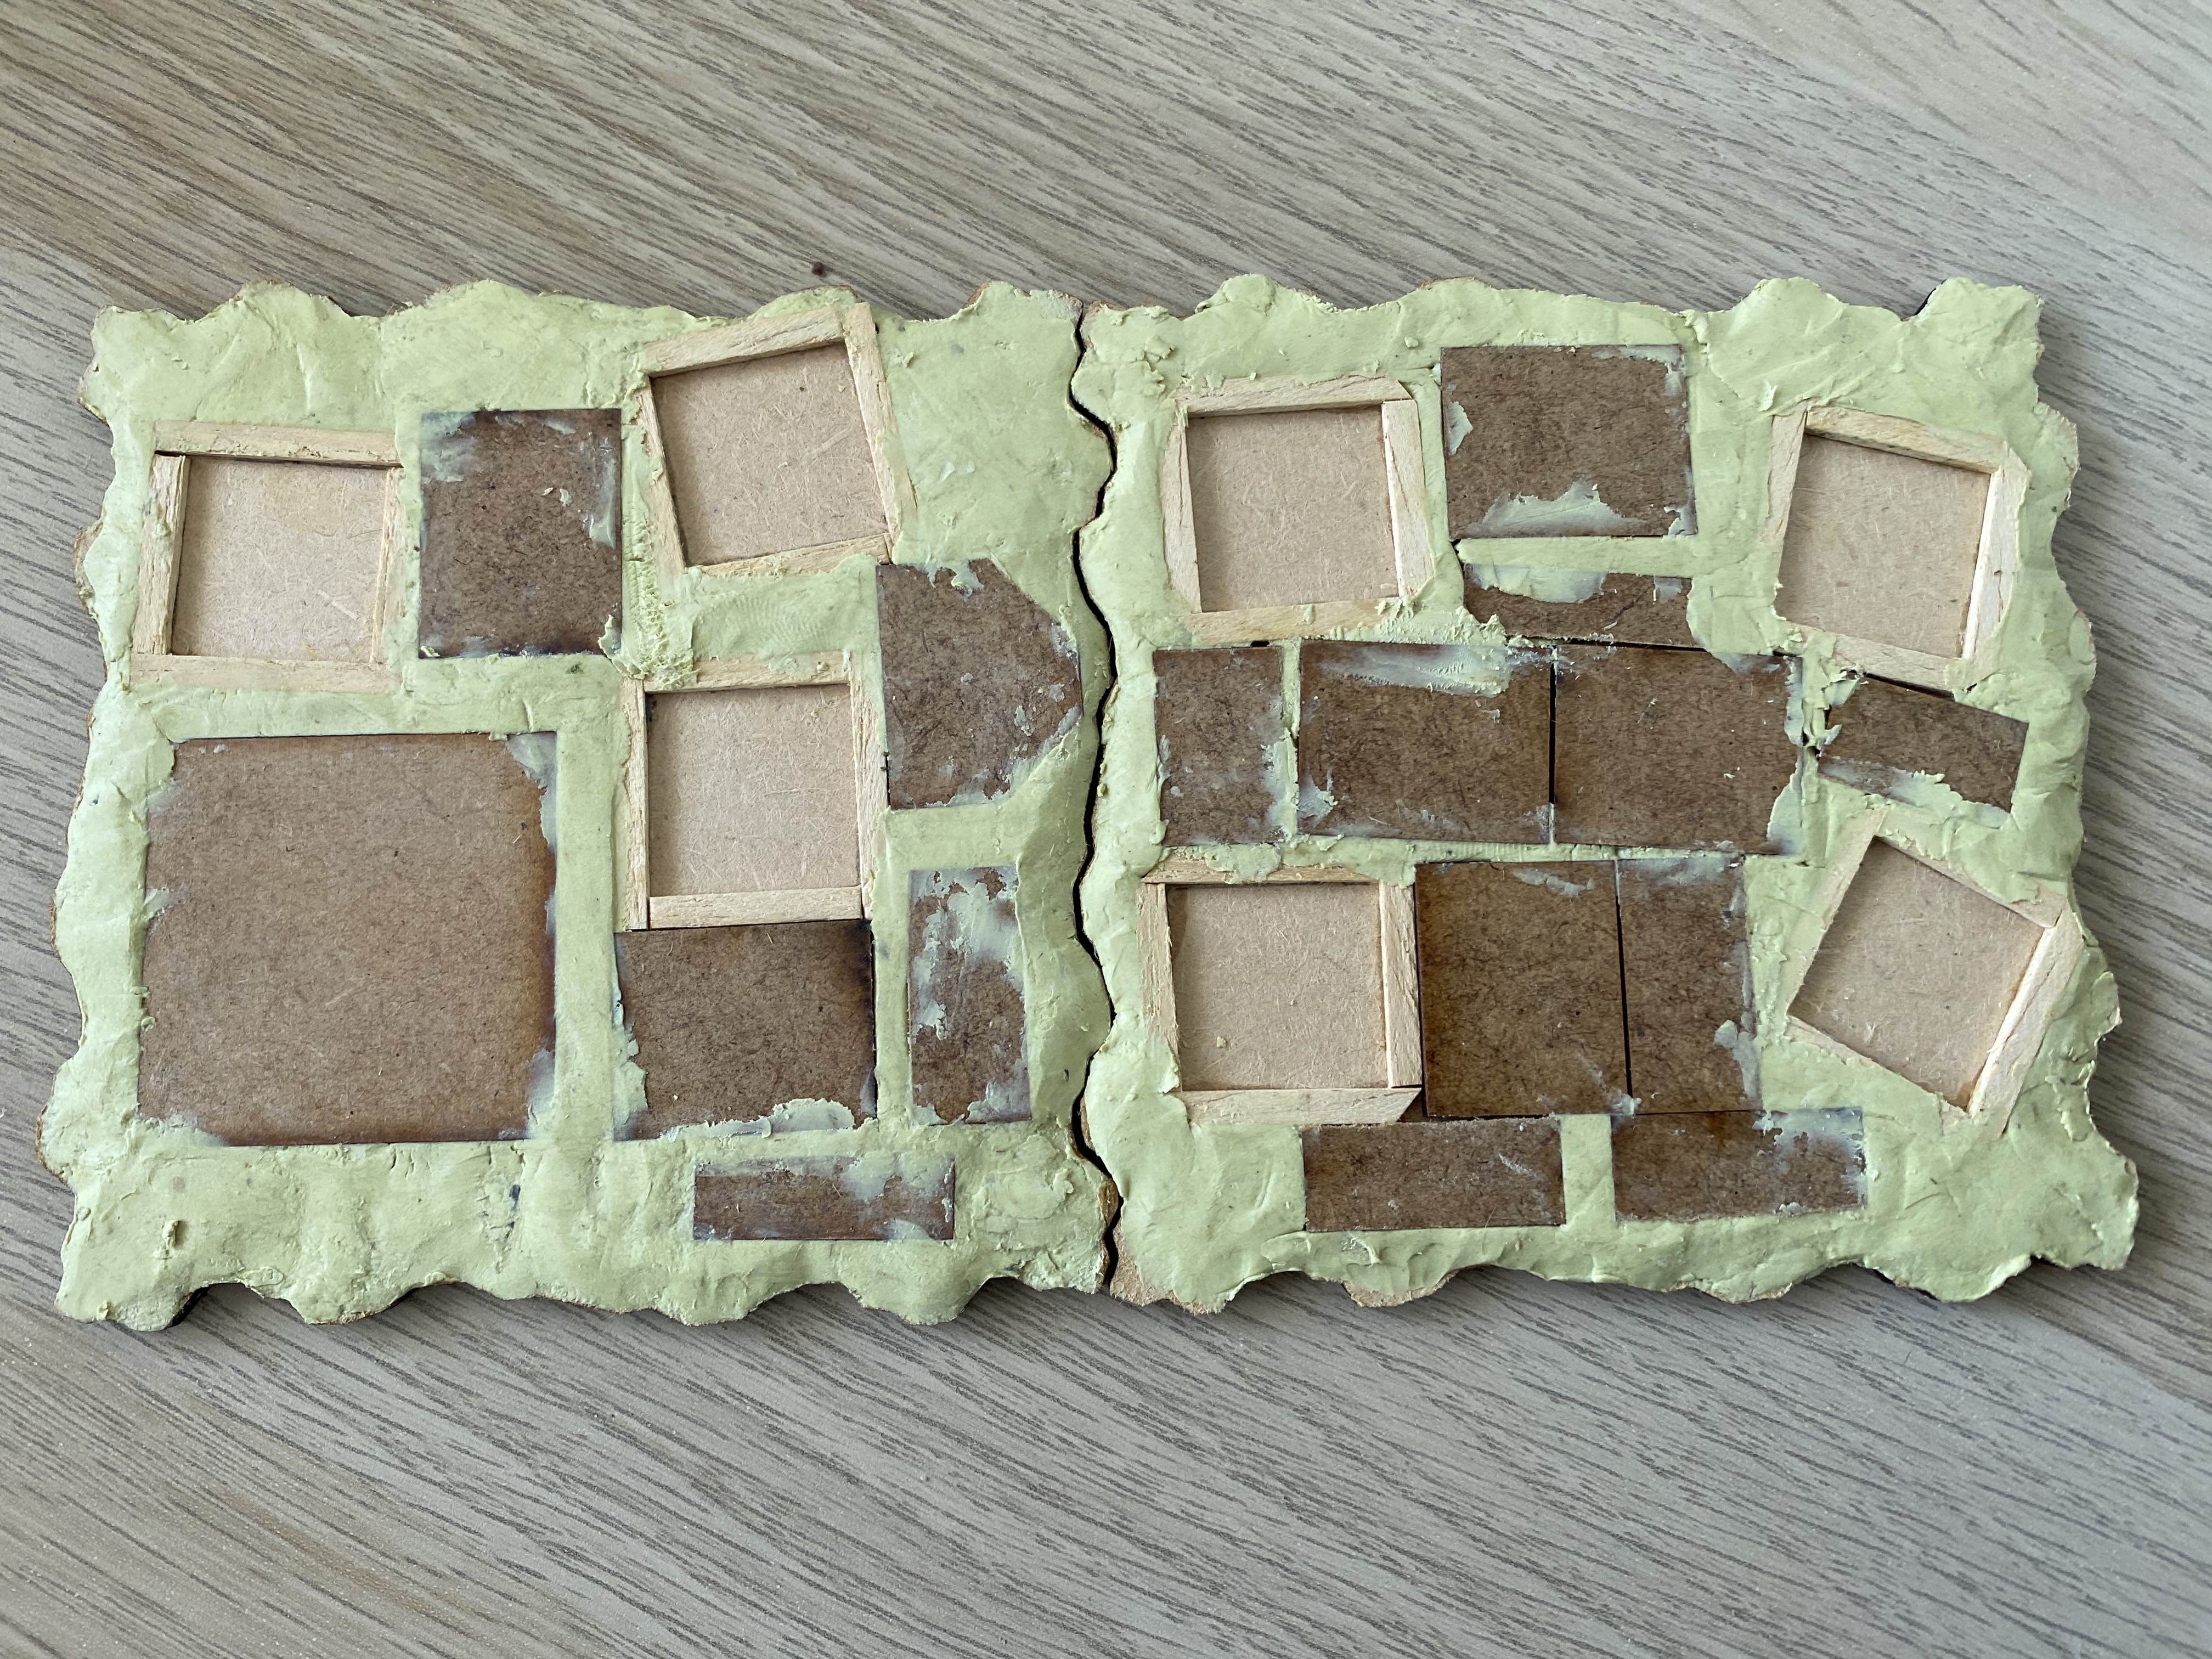
You can see that I use sabot style basing so if in the future I change my mind, it’s a simple matter to remove the figures and guns. The following picture sequence shows how I made the bases.
The frames are made from thin box wood, the gaps roughly filled with spare MDF and then all the gaps filled with milliput.The bases are covered with Vallejo texture Paste.The bases now painted, scatter and tufts addedA bit of work in progress, the next terrain tile with gabions will be an extra that I can add if I want a defended position!
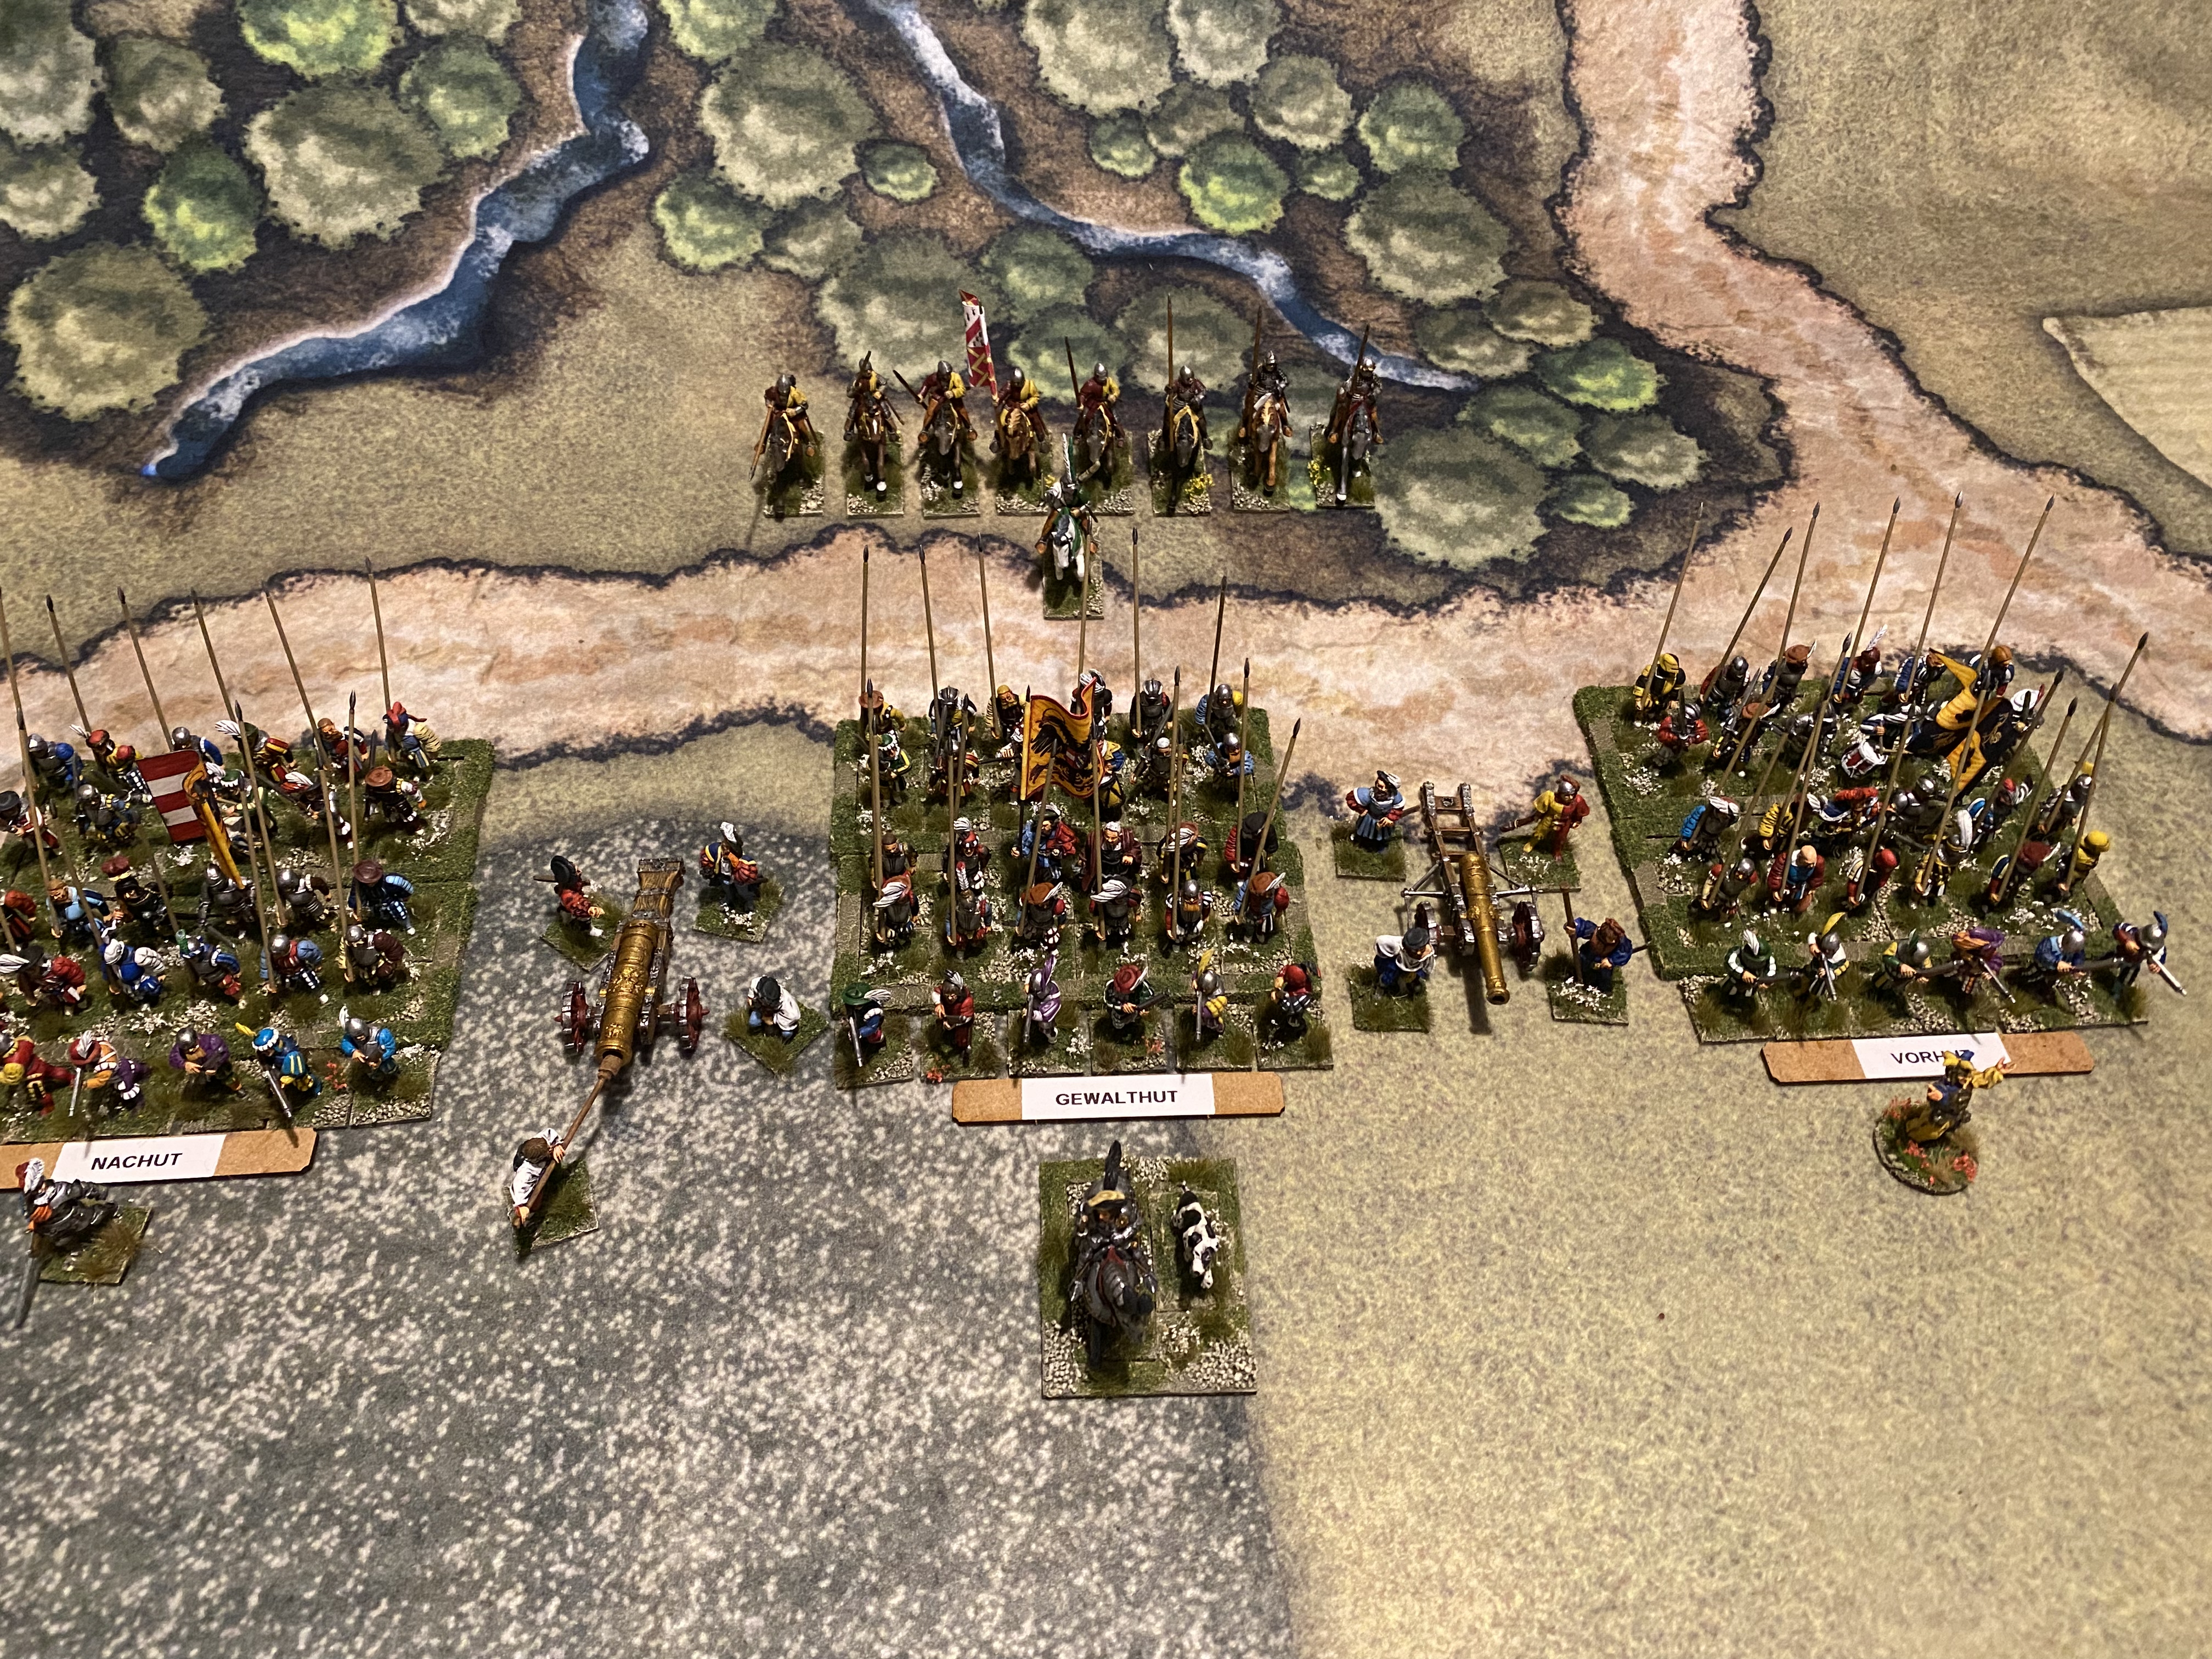
So that’s the Landsknechts done – here’s a view of the army ( with the artillery not on the bases.)
The light cavalry in the background are a temporary unit – I intend to add some Stradiots in the near future. That’s once I have finished my Gendarmes…
Work in progress – Gendarmes – I plan to have two units of 8 and a leader!
THE COMMERCIAL BIT
I hope that you all enjoy your hobby as much as I do – our web site will have much of what you need! Click here to see our shop.
This website uses cookies to improve your experience. We'll assume you're ok with this, but you can opt-out if you wish.AcceptRead More
Privacy & Cookies Policy
Privacy Overview
This website uses cookies to improve your experience while you navigate through the website. Out of these cookies, the cookies that are categorized as necessary are stored on your browser as they are as essential for the working of basic functionalities of the website. We also use third-party cookies that help us analyze and understand how you use this website. These cookies will be stored in your browser only with your consent. You also have the option to opt-out of these cookies. But opting out of some of these cookies may have an effect on your browsing experience.
Necessary cookies are absolutely essential for the website to function properly. This category only includes cookies that ensures basic functionalities and security features of the website. These cookies do not store any personal information.