
Having finished my Landsknechts force (for the time being…) I thought that I would add some heavy cavalry and I fancied painting some Gendarmes. Although it goes against the grain somewhat – adding French troops to my collection, that is – I couldn’t resist having a go at painting these ‘fancy Dans’!
Having spent a little time researching the options to purchase some of these heavily armoured knights, I chose two very different options. I bought eight 3D printed resin knights from Terrain Store on eBay and six metal ones from Foundry Miniatures. I also had three spare Perry Miniatures plastic knights that would give me a total of 17 figures; two units of 8 gendarmes and a commander. I am happy to mix and match manufacturers. By and large the size difference is minimal and can be hidden with some careful basing.
At 24 points a unit, the chances of fitting these Gendarmes into a typical ‘Bill Hooks’ army seems remote and for that matter, impractical but they will look nice in the cabinet!
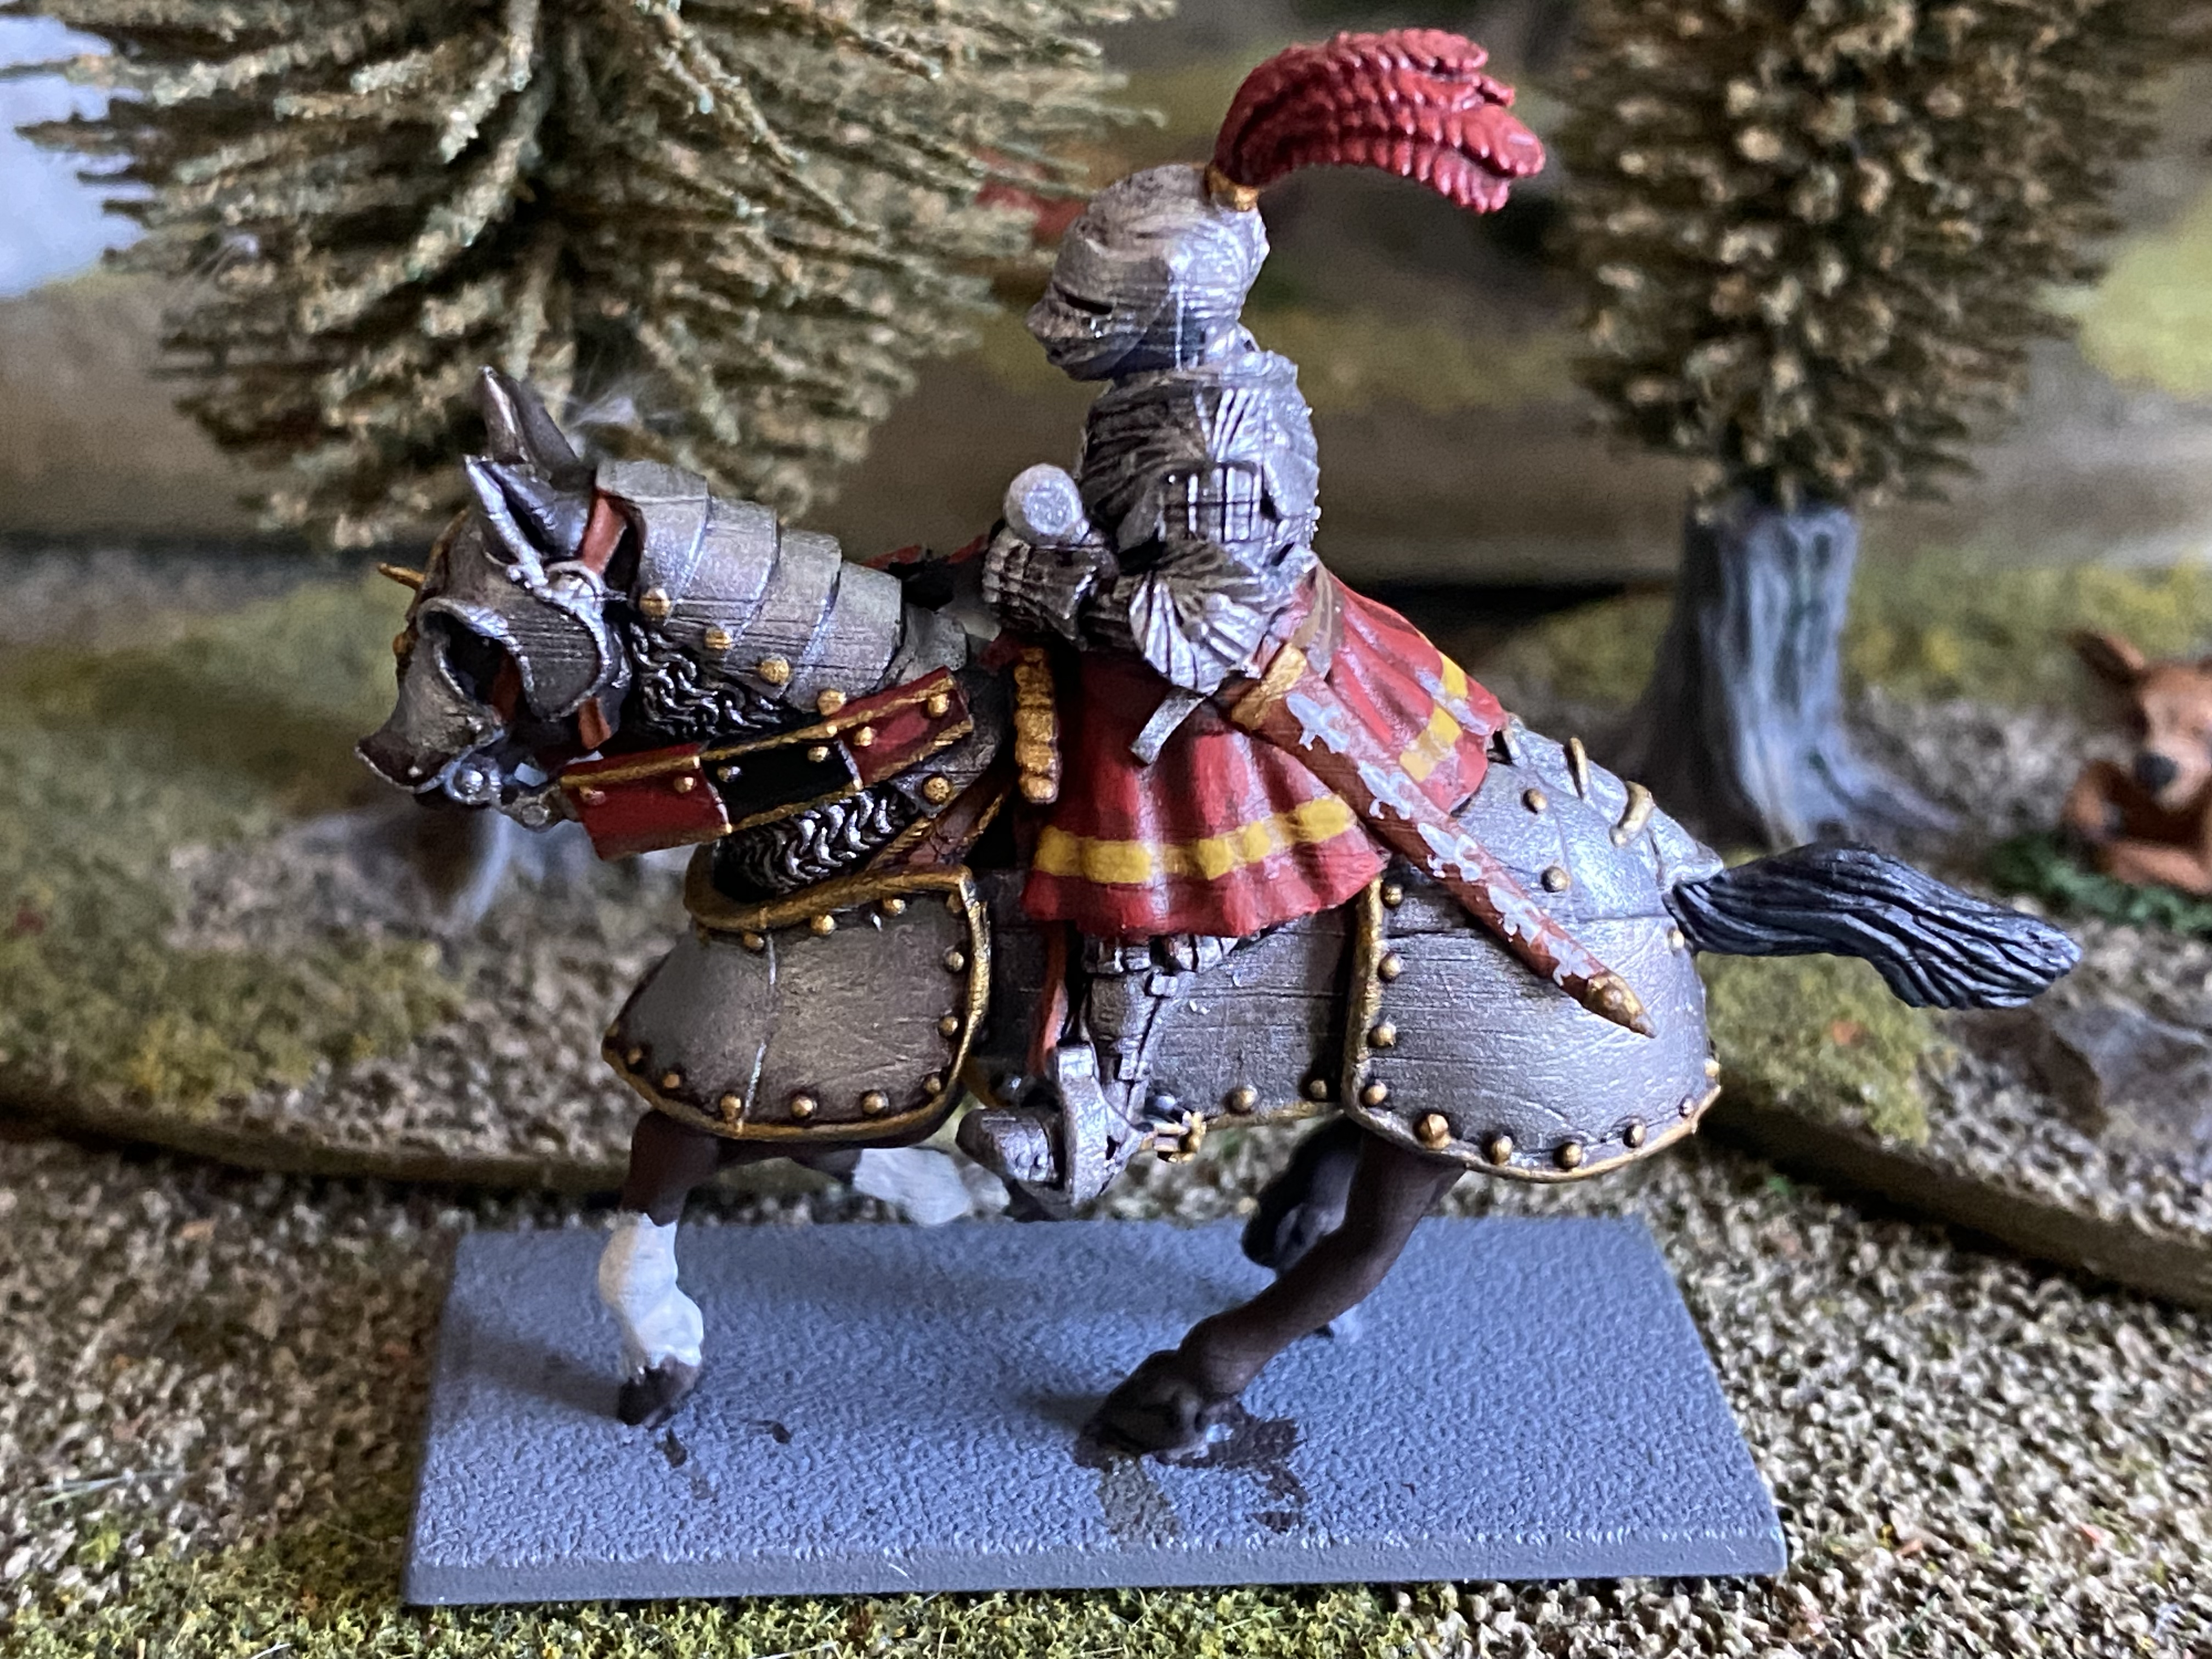
Just a brief note about the 3d resin figures. The detail on these figures is simply beyond anything achievable in casting metal or plastic. With separate reins on the horses, detailed spurs, raised visors with open vision slits and more, I couldn’t wait to get paint onto these figures. There was a slight downside, however. Whilst the fine detail is wonderful, larger surfaces are actually not so good, with the 3d printing lines showing up across some of the armour plates and other flat surfaces. You could really only see these once the models were painted and I was happy to treat these as ‘battle damage and scratches!
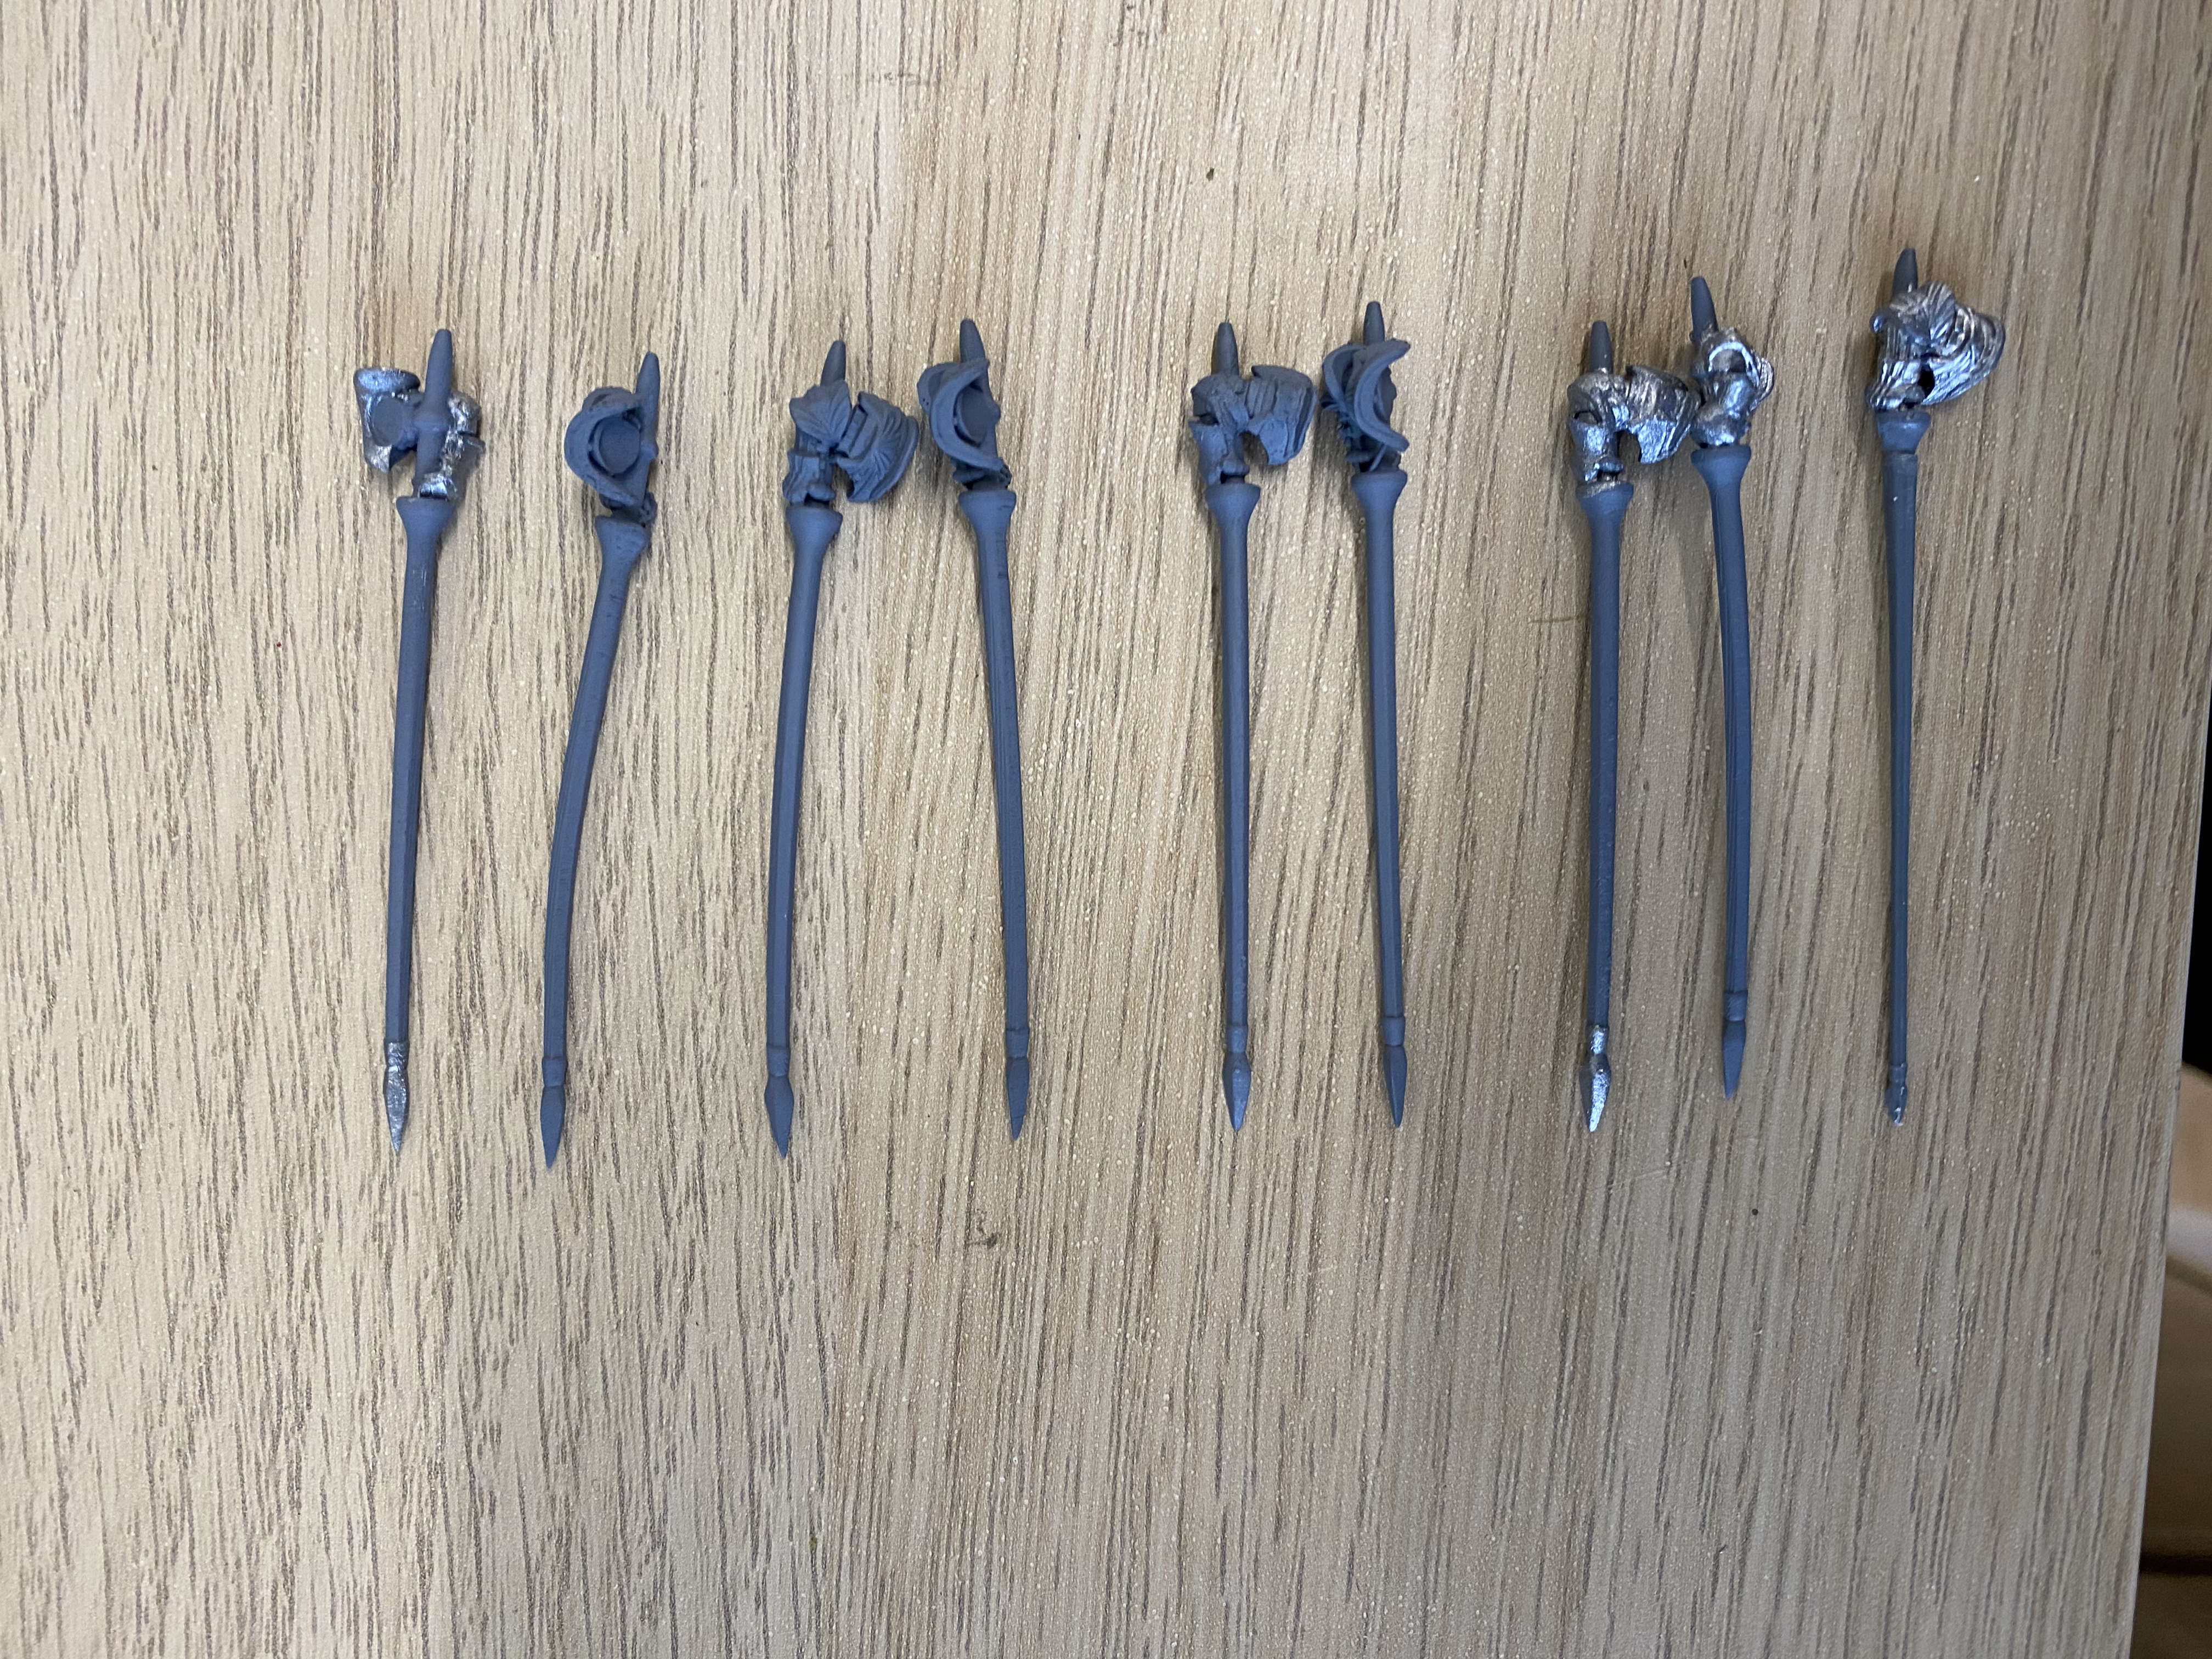
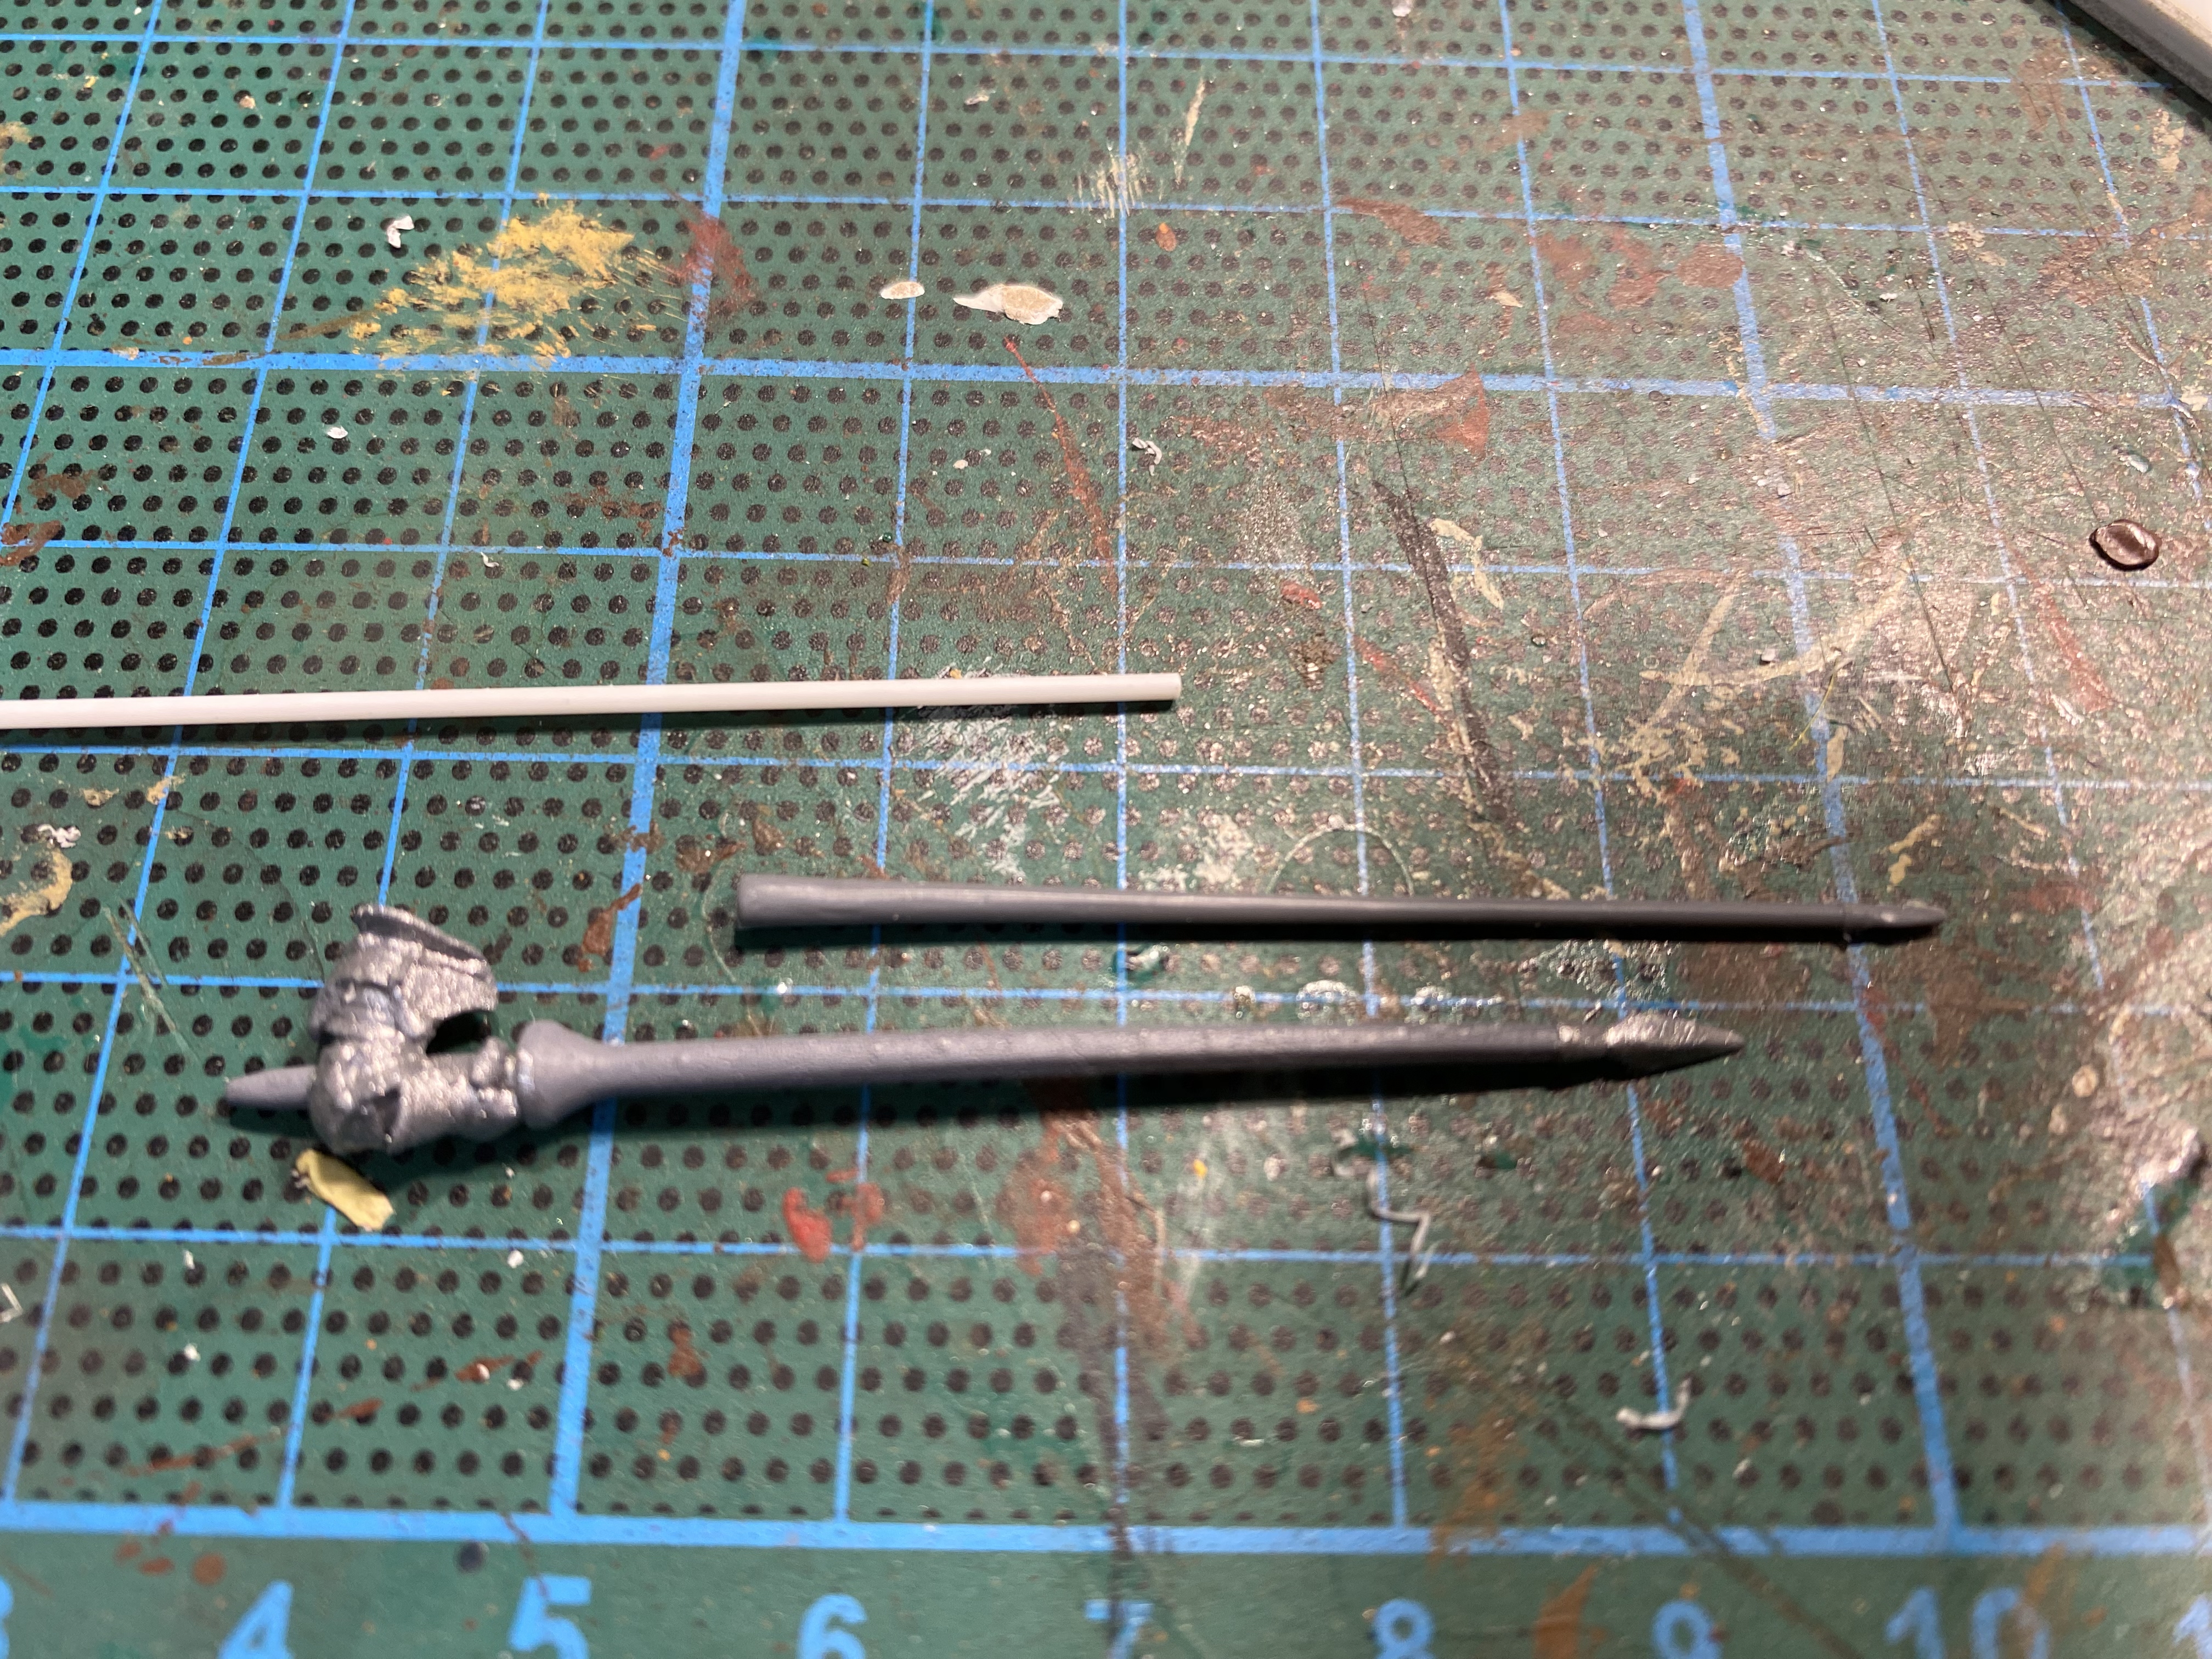
Also the lances were anything but straight. I managed to correct some by dipping them into hot water and clamping to a straight surface but lost a number to breakage in the process. I had to replace the broken lances with ones from the Perry mounted men at arms set. So, I’m not quite a convert to 3d resin figures yet and I have yet to see how they will survive the rigors of gaming or for that matter, time.
When it came to painting the figures, my main references were Pinterest and other internet picture sites. There has been some discussion on the Facebook Bill Hooks site recently, as to what is ‘accurate’ when it comes to livery or colours for this period. As I rarely attempt to model a specific character or unit for a specific battle, I’m not too concerned with the detail. There were 2000 or so Gendarmes at the Battle of Pavia. If I was so minded, I suppose that I could find out who they were and maybe what they were wearing but it’s not my idea of a good use of my time. I wanted to paint some really colourful Knights that will look good on the table as they make a glorious charge to victory or oblivion in my little table top battles.
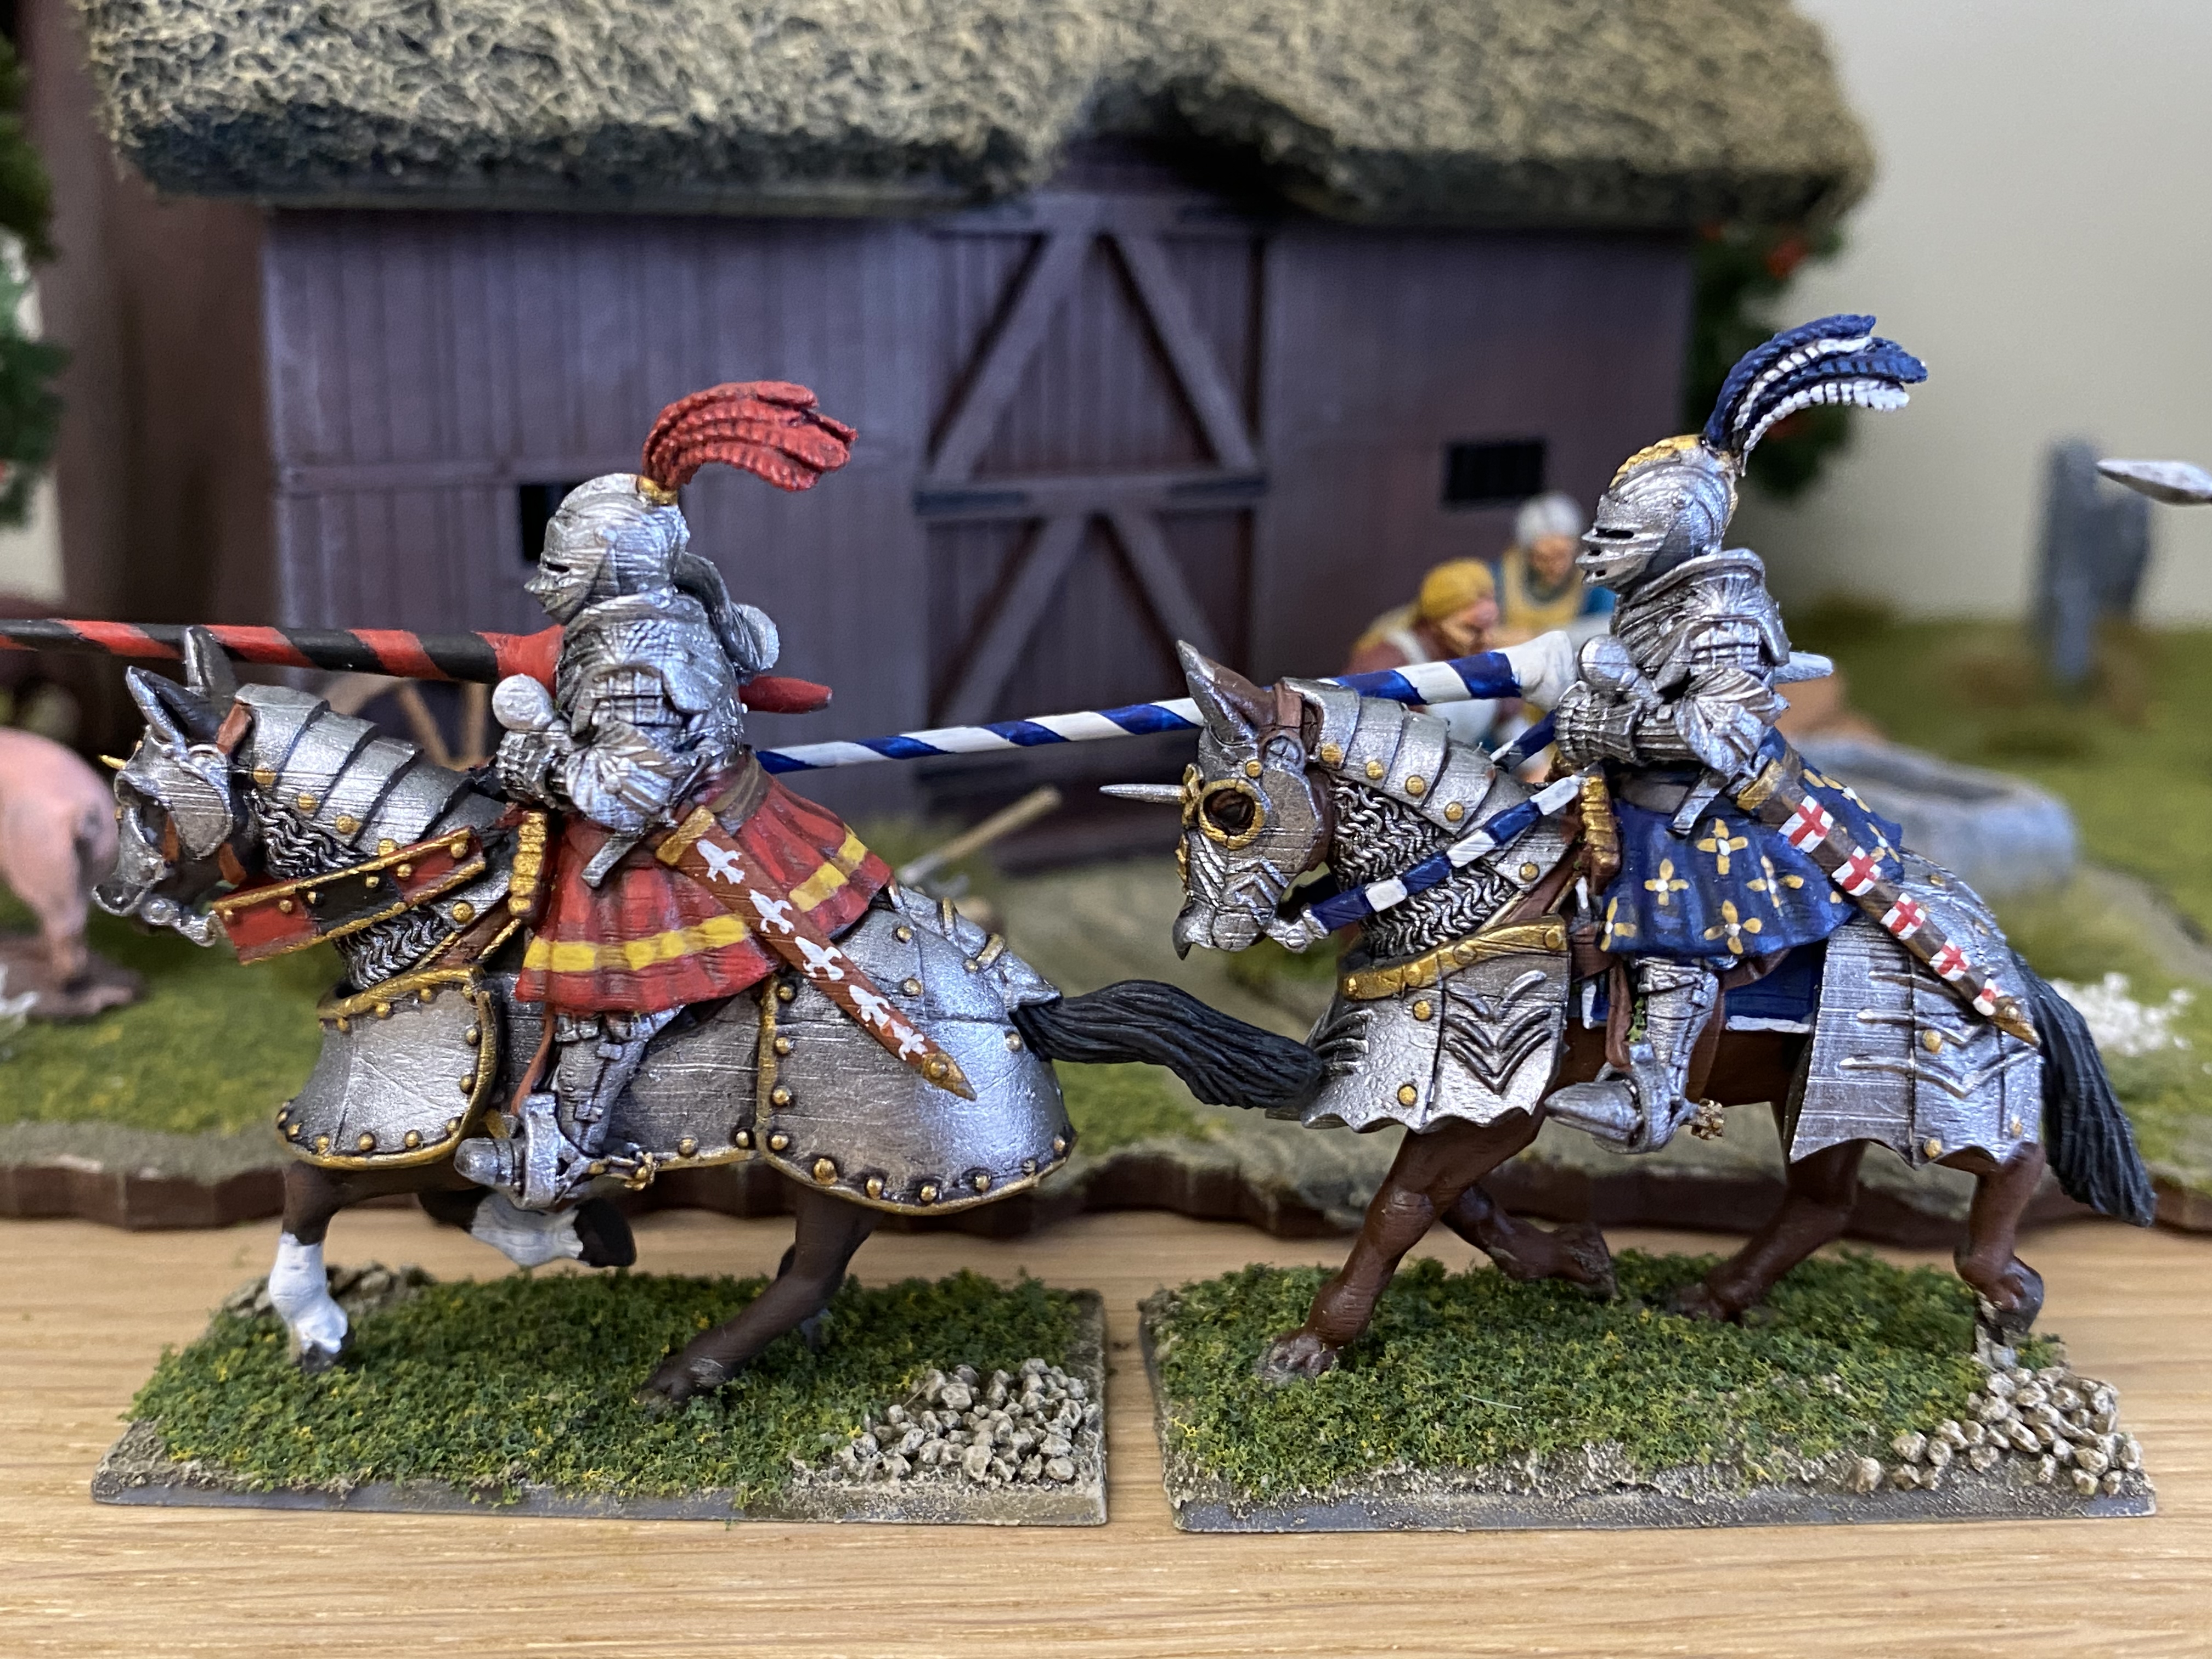
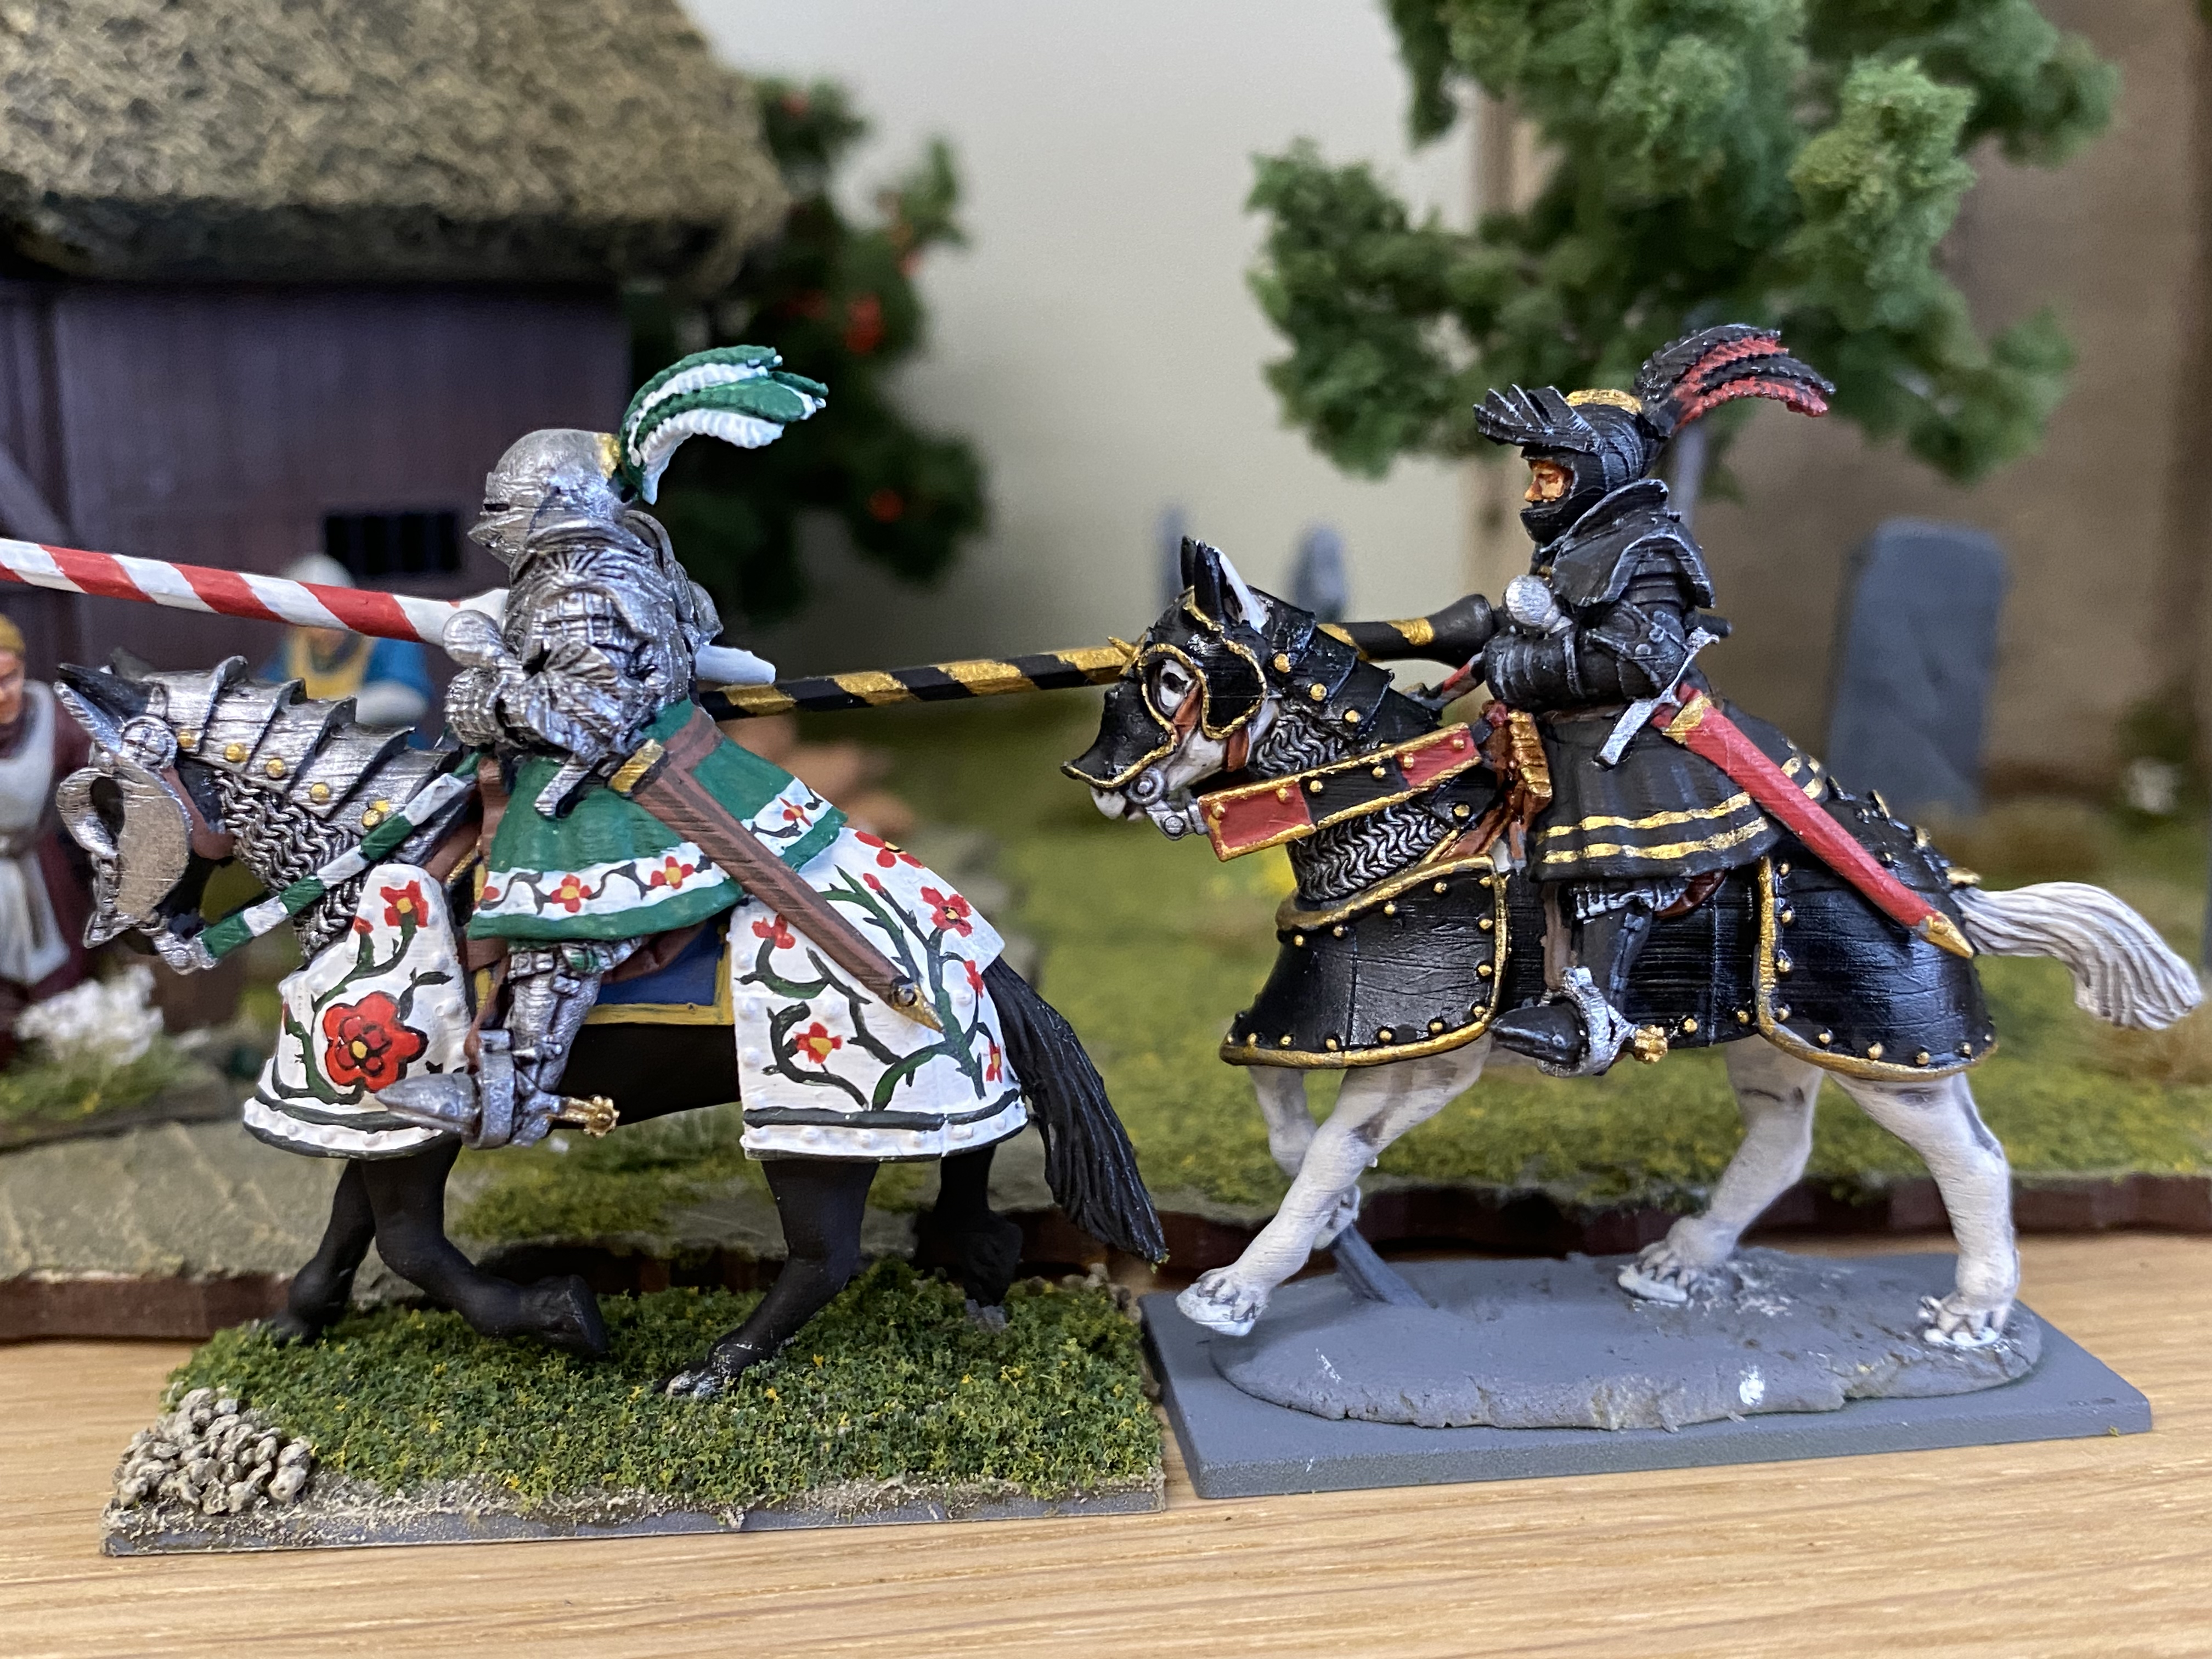
With the freedom to use whatever colour scheme took my fancy, I have gone from some fairly conservative colours to those bordering on fantasy. The white armour with the roses is inspired by the Tyrells of Highgarden – they use a yellow rose on a green background but when I first read the Game of Throne books, I had imagined Ser Loras in white armour.

The black and red schemes are based on various illustrations that I have seen, although my freehand skills were not up to some of the details! As for the lances, the ‘barber shop’ twisting patterns were inspired by other models that I had seen and look pretty, if unlikely. I doubt that they were used in battle but rather saved for the tournaments in the tilt yard. It’s fairly easy to paint the spirals using 2mm flexible masking tape (Tamiya) to mask off the base colour as you apply the darker top colour.
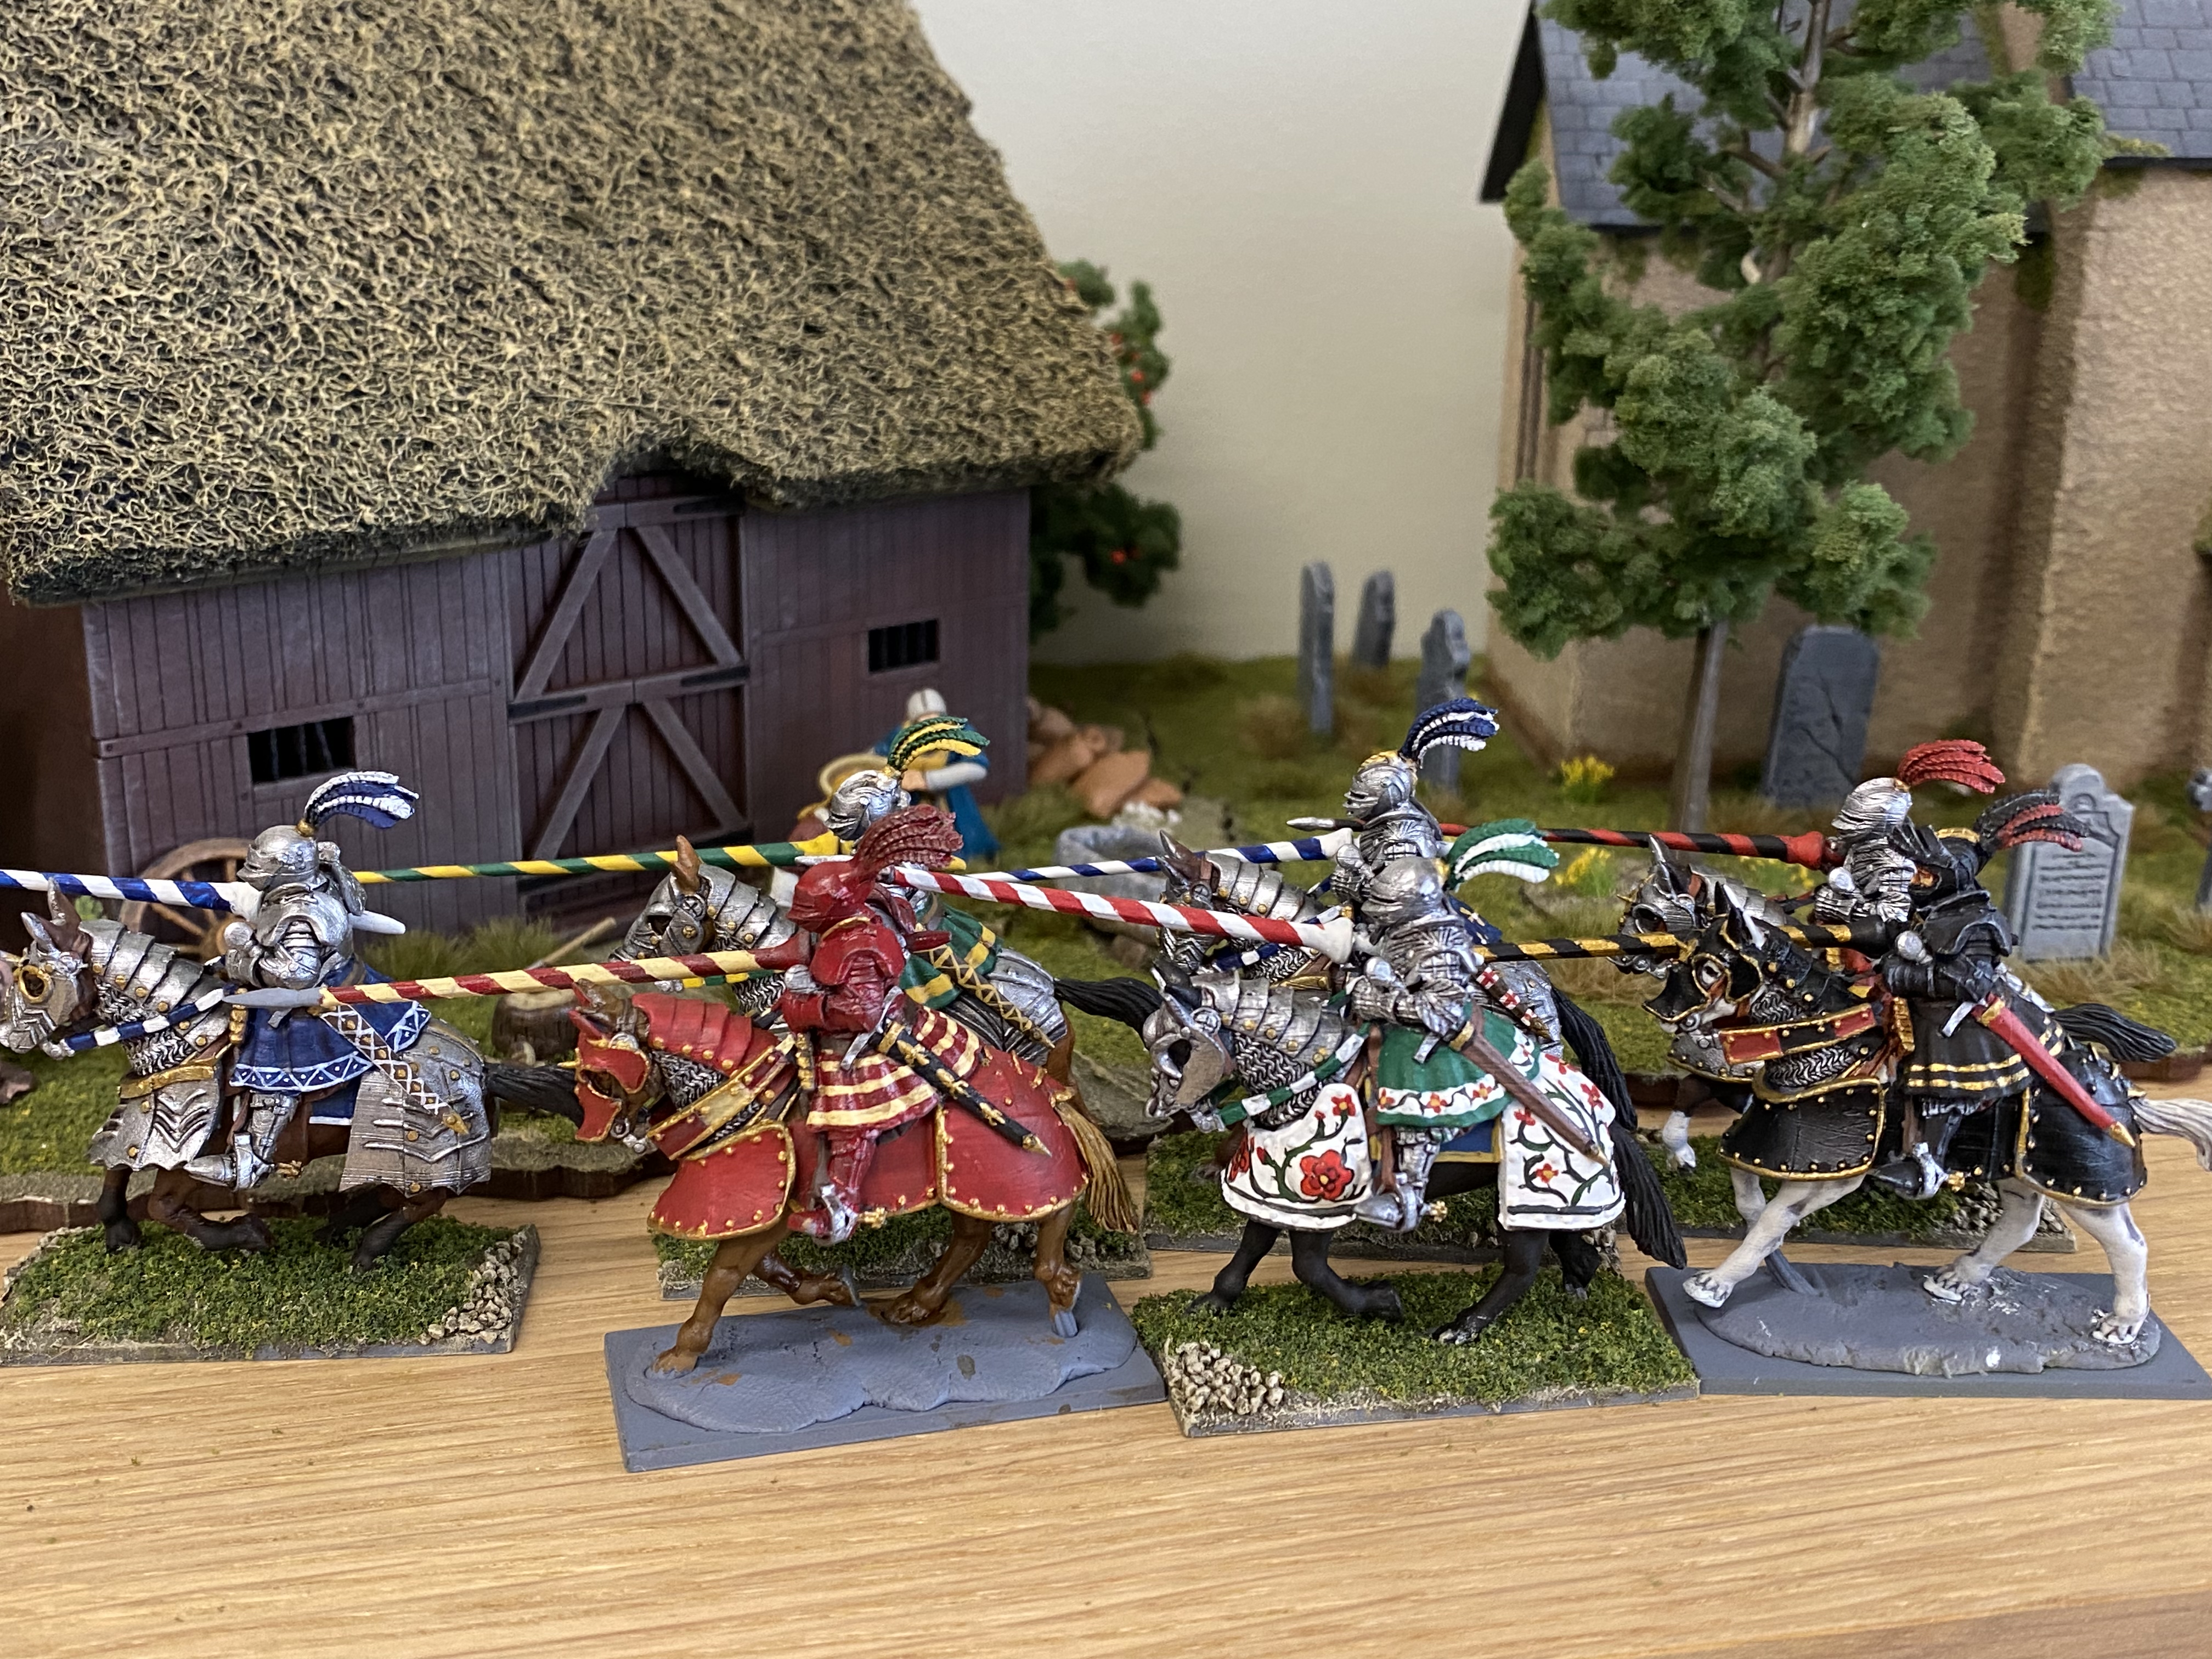
I’ve completed six of the resin knights so far, with two more in progress, so this will be my first unit. I intend to paint the Foundry knights as well and I will go for flamboyant colour schemes to see if I can push my freehand on again! I haven’t covered the details of painting these figures. I’ve used the same procedure as usual; that is block paint, wash and highlight. The exact colours are not important as I have already ‘confessed’ that I have not followed a particular livery scheme.
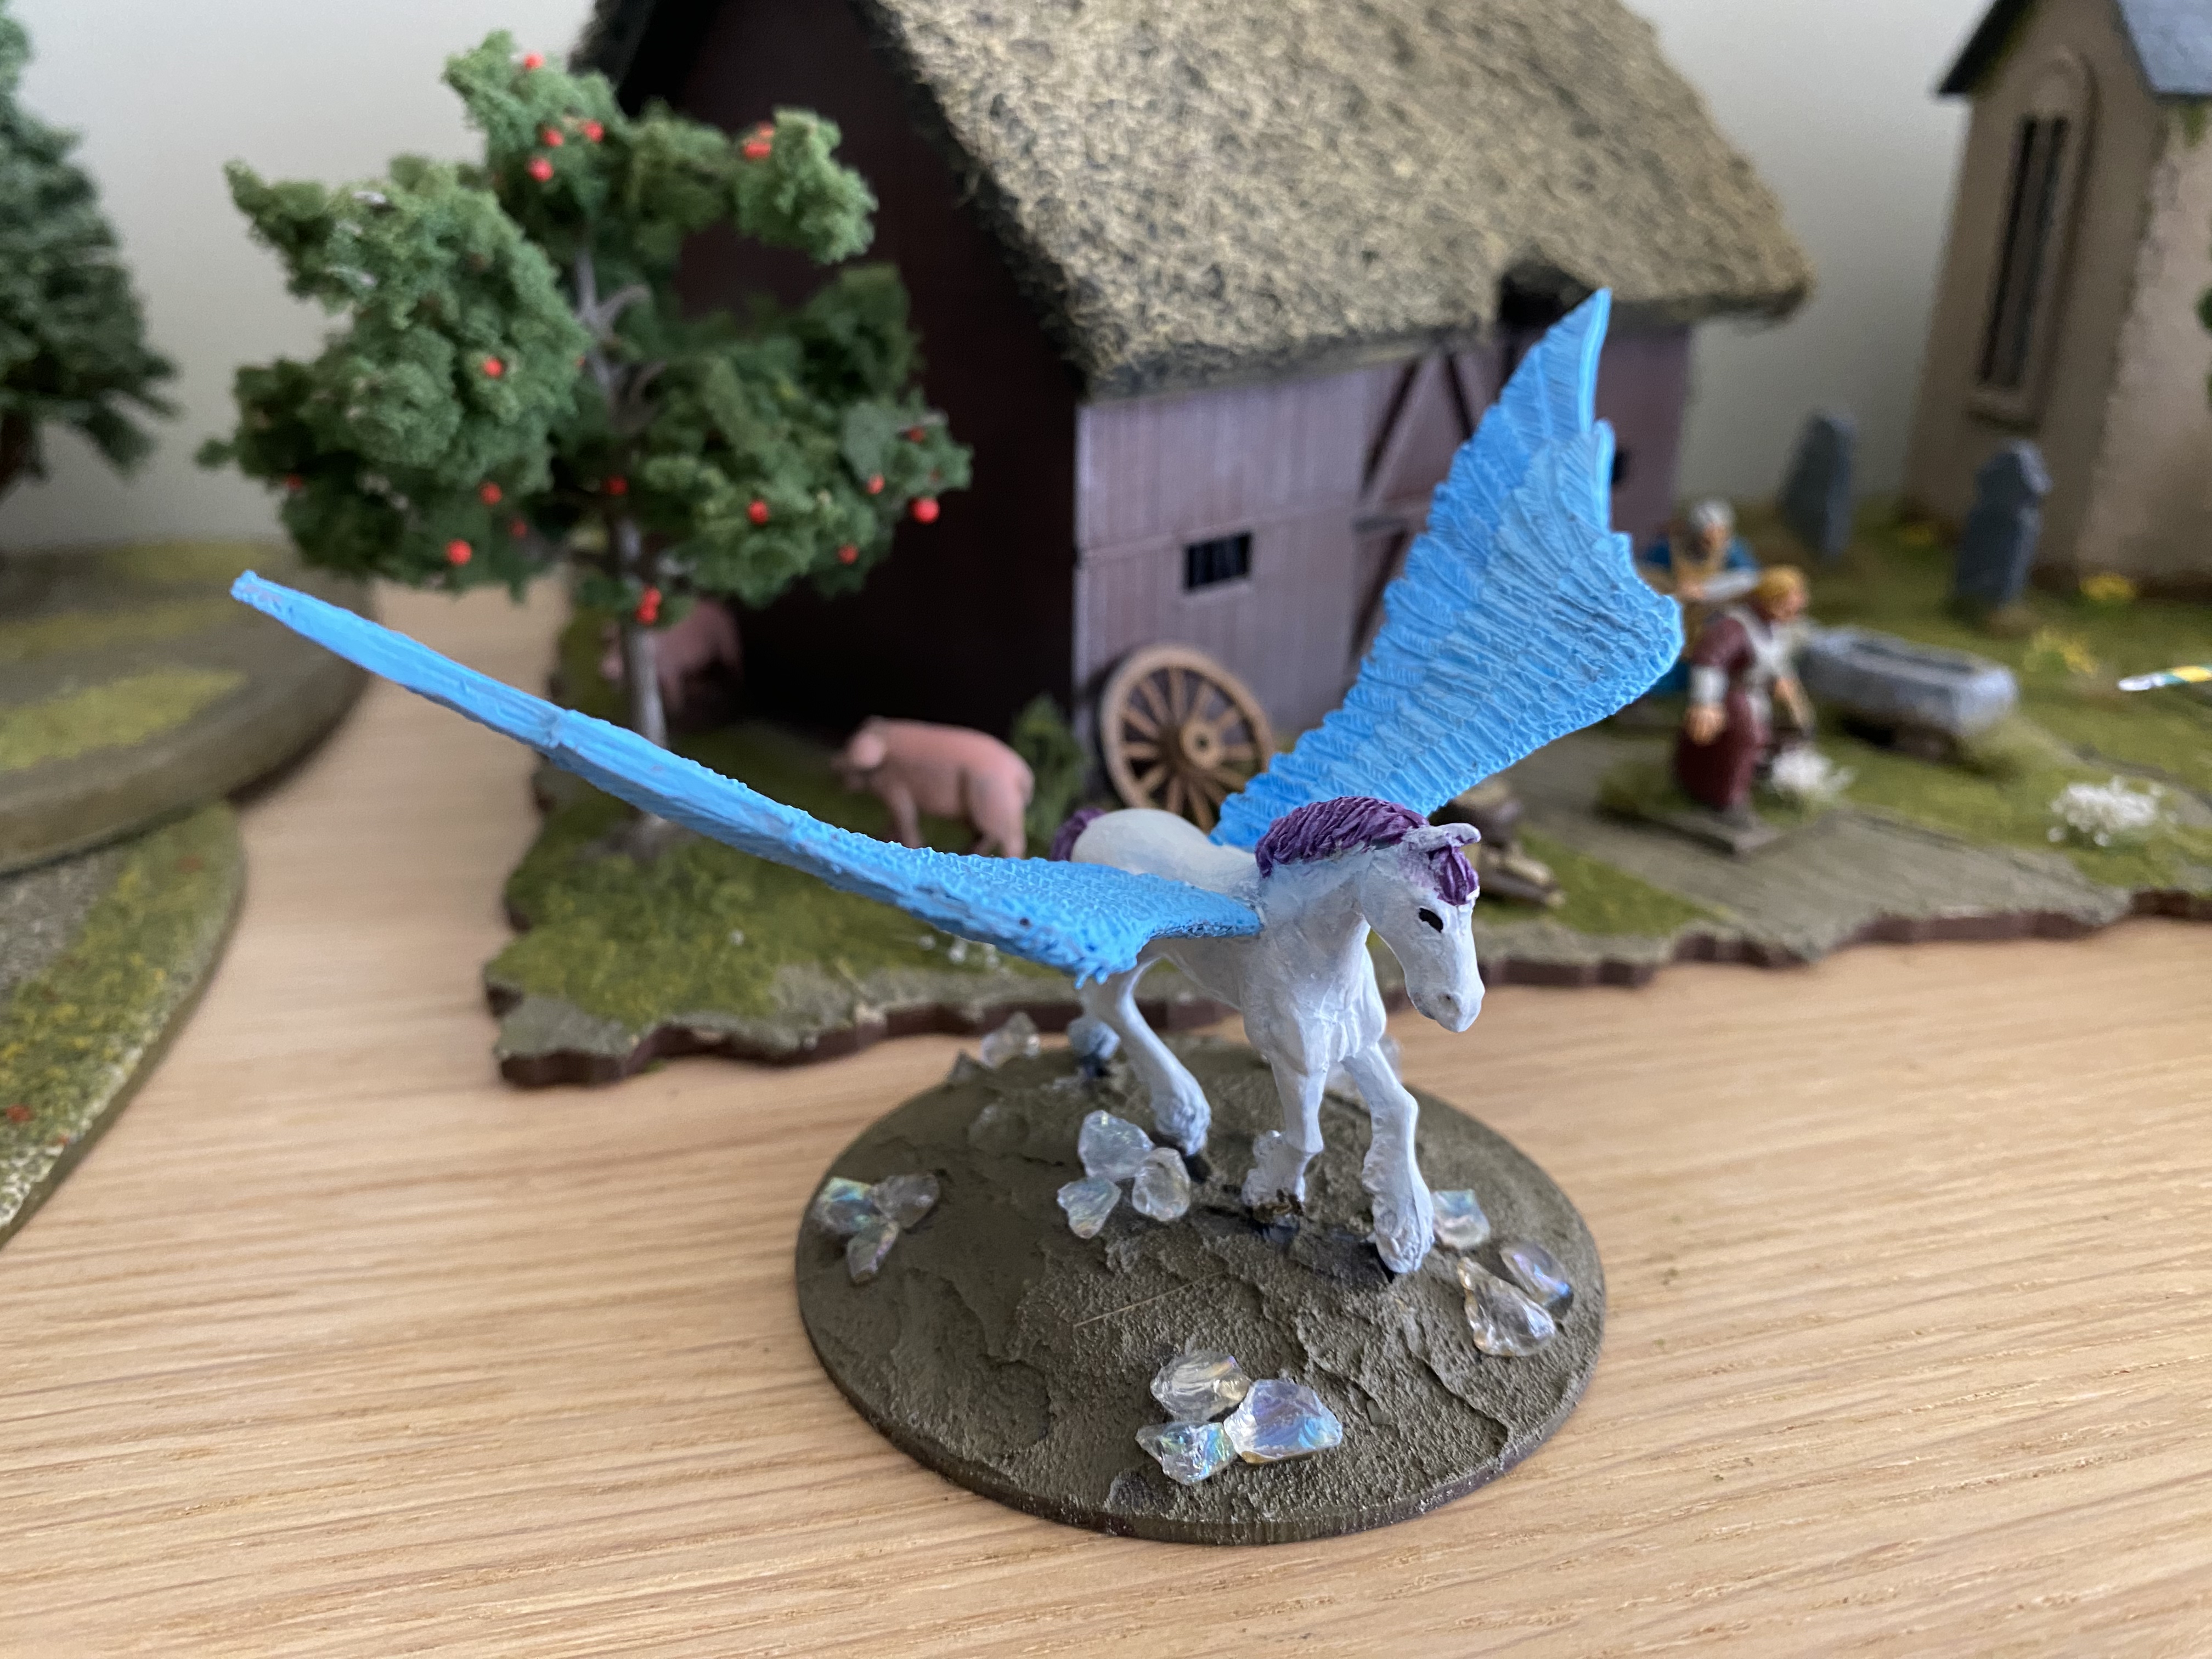
Finally, I mentioned that I had bought a Pegasus from Foundry for my Granddaughter Emily. Well, here’s a picture of her progress with the model. She has of course chosen the colour scheme and followed the block paint and ink method to paint it – just some basing to finish and Emily will have a nice model for her bedroom shelf. I may yet convert her to wargaming!
THE COMMERCIAL BIT
I hope that you all enjoy your hobby as much as I do – our web site will have much of what you need! Click here to see our shop.
Happy modelling!