And there’s more….from Italeri

This is the latest in from Italeri and I liked it so much that I nearly started to put together a World War Two North African German African Korps army just to go with it…but I’m sticking to Napoleonics for the time being…

Anyway, the subject is a North African House in 1/72 scale and as you can see it looks superb! Italeri have released a steady stream of soldiers and vehicles from the Second World War North African Campaign and this is a lovely piece of scenery to go with these sets. It will make an objective for your battlefield or just a great centre piece for a diorama.

It’s moulded in Sand coloured plastic but there is plenty of detail in the kit so even a simple paint job with a drybrush & wash will result in a very nice looking model.

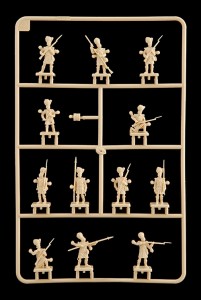
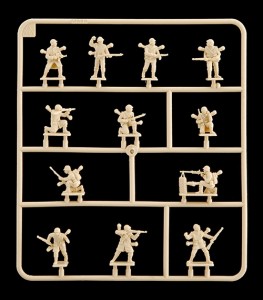
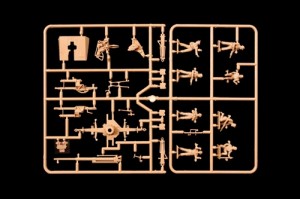
Here are the pictures of the sprues:

As you can see, the pieces are well textured and detailed.

The model retails for around

New releases, New releases, New Releases!

I’ve mentioned before that I have been very busy with an amazing number of new products that are being released at the moment. So here’ s the first of the latest batch to arrive. If all goes well today there will be more posted later.

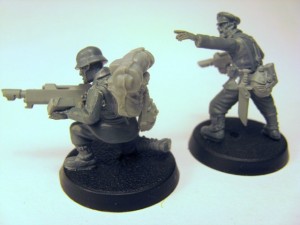
The latest release from the Wargames Factory is a Science fiction themed set of Greatcoated Troopers or infantry for the far flung future universe. Armed with a mixture of Rifles, Flamers and Grenade Launchers, they will look good in any Science fiction army and the price tag of

First Choose your weapons

So here’s the next article tracking my progress in painting my first Napoleonic 28mm wargaming army. It’s designed to help beginners to the hobby or those like me who have decided to move from Science fiction to real history.

There is a bewildering choice of 28mm Napoleonic wargaming figures available, so before you dive in and buy some troops there are some fairly simple questions to answer. Firstly, do you want to have a British, French or other European army? I decided to start with the British. After all, I had been brought up on tales of Wellingtons victory at Waterloo and the heroics of Bernard Cornwell’s Richard Sharpe. And of course, although the French Army at the time was undoubtedly a fine fighting force and contained some of the finest troops ever seen, as well as a vast range of superb units and uniforms, it’s one draw back was that it was French…..   :0)

Next, do you have a preference for plastic figures or metal? Plastic figures are usually cheaper, lighter and easier to transport. Metal figures are usually one piece and so do not need assembly, they ‘feel’ more substantial and the detail can be better although the new plastics are catching up. I have no strong feelings either way. I like working with plastic and I enjoy the process of putting the models together. I also like the infinite variety of poses that you can get when assembling your army. Plastic also tends to be less expensive so buying the Troops in plastic & the character and specialist models in metal is a good compromise.

So if you are happy to be building a British Napoleonic army that will be made up of plastic and metal figures read on!

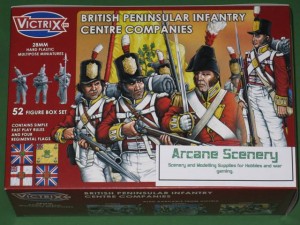
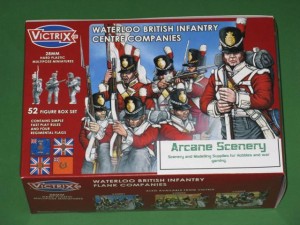
The next decision was to chose the box set. Would it be the Perry set or Victrix….If you have read my previous blogs, you will know that I am a great fan of the Perry Miniatures sets. The quality and sculpting are superb and they have cleverly put together a set that makes up into a British Battalion formed up as a firing line and includes 4 British 95th riflemen. That said, the Victrix sets are also nicely sculpted and although they are split into Flank and Centre Company sets ( the Perry’s include parts for both) you get 52 figures in a Victrix set and just 40 in the Perry set.

I chose the Victrix set to start with…I just wanted more men to start with and I figured that if I started with Victrix I would have to buy the Perry set at a later date so that I could add another regiment to my army. I know, it doesn’t really make sense but remember at this stage I didn’t have a firm plan but just wanted to build an army and start painting Napoleonics.

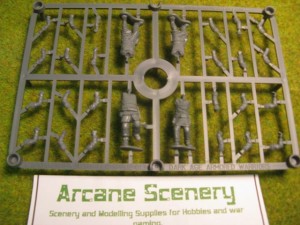
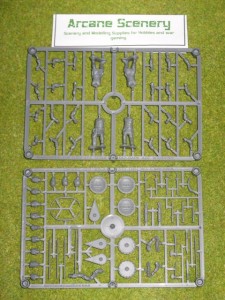
Having chosen the Victirx, lets have a look in the box . There are 8 sprues in the box. Four of these:

These sprues contain most of the soldiers torso’s. The top two bodies on the far right are for the Sergeant and drummer, the rest being normal Waterloo Centre Company troops. The rest of the sprue contains the drum for the drummer, back packs for the infantry and the ensigns or flag bearers flag.

You also get four of these:

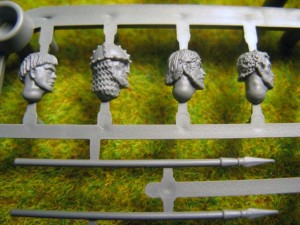
The one torso on this sprue is for the Officer and also doubles for the Ensign or flag bearer. There are also 14 different heads and lots of different arms. Fortunately, the instruction sheet is fairly clear and you should have no difficulty in putting the figures together, with a minimum of ‘cleaning up’ required.

The only issue that I had with the set was that some of the pieces on the sprues aren’t numbered very well or not at all. That said, assembly is straight forward and mixing and matching the different heads & arms is the fun bit!

If you take a close look at the heads, some are clearly Veteran Campaigners and some are more suited to the Drummer and Officer figures. Also some of the Hats ( or Belgiac Shakos to be precise!) have covers. I dont think that it matters whether you use the covered ones but I prefered to have all of my troops with the plume showing.

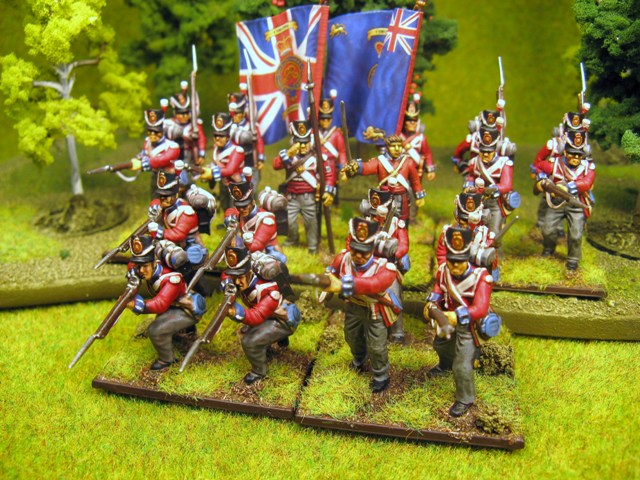
Also included with the instructions is a small flag sheet. Although there are four flags, you actually have just two regiments to choose form, this is because each Battalion carried two flags. One was the Union flag or Kings colours, the other the Regimental flag. The colour of the Regimental Flag usually determined the colour of the facings on the Troops uniforms. Or to put it more simply, a blue regimental flag meant that the collars and cuff of the troops’ uniforms would be blue. For my first regiment, I choose the 4th Kings Own, with the blue flag.

So that’s enough to be going on with now. In the next installment, I’ll have a look at the differences between Centre & Flank Companys and Waterloo and Pennisular Uniforms as well as showing you some pictures of my own version of the 4th Kings Own Regiment.

History, it’s the future….

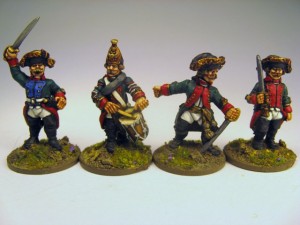
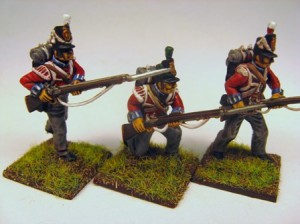
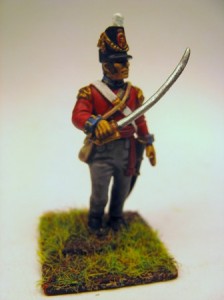
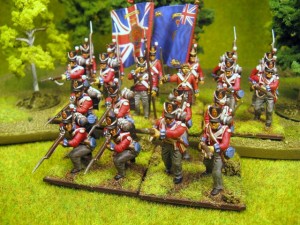
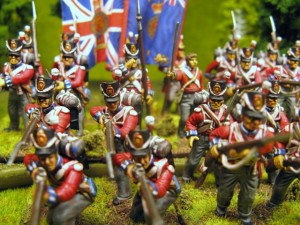
Back in January I mentioned that I had treated myself to a box of the Victrix British Waterloo infantry and that I would be painting them over the coming month. Well, it’s taken a bit longer than that to get them finished but my first Battalion is now nearing completion. Here’s a quick picture of the command group just to prove it!

Kings Own 4th Regiment

It was only through attempting to paint these figures that I became aware of how difficult it is to get into the hobby that I enjoy so much. The actual process of painting is a skill in itself that you have to learn but the real barrier for me was the difficulty in finding the correct reference material and help and advice on how to put together a Napoleonic army. If I found this difficult, then I think that many a newcomer to the hobby must be deterred before they even start. And where do you start? Sure there’s plenty of great websites and forums on the internet but they often are difficult to find and contain conflicting advise. There’s also the problem that you can never find the correct piece of information just when you want it.

So I plan to do a series of web logs charting my progress as I build my first British Napoleonic Army. Yes, I did say Army and I know I haven’t finished my first Battalion yet but I have resolved to have a historical army completed by the end of this year…..To track my progress, or lack of it on this subject, check out the Make History category of my blog.

I haven’t abandoned my Necron army. Far from it, I’ve still got a number of projects on the go and I’ve completed a couple that were started in previous articles. However, I think that having two very diferent armies and modelling projects on the go will allow me to have a change and learn new techniques and face new challenges. I also think that the contrast between the two facets of the hobby, that is Science Fiction & Fantasy versus Historical will provide a refreshing change.

Finally, I need to change the way I write my blog, so watch out for shorter posts and hopefully, more frequent ones …

New Unseen Lerker & Trees……

Where on earth does the time go! It’s nearly three weeks since my last blog entry. The lack of updates isn’t at all due to the lack of topics. The new products are coming thick and fast, so to speak and there’s plenty happening in the hobby. On top of that, despite the distraction of the world cup and a garden that needs keeping in check at this time of year, I’ve been busy on the modelling front at home.

So here’s a couple of new items to look at and a teaser or two for things to come. First up the new issue of Unseen Lerker has reached us and is now available both through my ebay shop and my online shop. Issue two is also still available. I have to admit to having a soft spot for the Magazine, having spent years as part of the Magazine business I know how tough it is to get into print, so full marks to the Guys at Unseen lerker for bringing a truly independent Fantasy Gaming Magazine to life!

Issue three is packed full of pictures of superbly painted miniatures, Modeling and painting tips and of course a fully illustrated battle report. All written in a nice easy humourous style that makes you feel like you’re down at your local club with your mates, talking toy soldiers! Just the sort of Magazine to sneak into your suitcase for your Hols or to relax in your favourite armchair & read whilst the missus is watching Eastenders……

We have also been doing some work with the Unseen Lerker team to develop some scenery for their Gaming Competions. We’ll be showing you the result of our collaboration in a future Blog post but in the meantime we are now selling Heki Trees. These are some of the nicest trees around for wargaming scenery, so I was very pleased to be able to add them to my range. You can purchase them as singles or as a pack from my shop.

Just a quick note about my two shops. I trade both on ebay and I have an independant Shop that is attached to this Blog. I only list for sale those items that I have in stock and that I can despatch instantly ( I currently have 1700 lines in stock!). So to ensure that I dont let my customers down I tend to list the majority of my stock on Ebay. The items that I carry in my independant shop are lines where I have stock in depth and I am unlikey to ever have problems in shipping, so you can buy from both of my shops with confidence. Over the coming months we will be adding even more lines to both shops and developing the independant shop to give our customers more choice and better postage rates. If there is any thing that you think that we can help you with, you can email us through the shop, on horzawood@hotmail.com or phone us on 0115 9788152. If we’re not there, leave us a message and we will get back to you.

Finally, I’ve been working on a Napoleonic army. I first mentioned this back in January and I have now finished my first 20 models…..yes, it’s just taken 6 months. Actually, that’s not quite true but watch out over the next few months as I start the journey from Necron fanatic to Historical Old Buffer…..

Yes, at the tender age of 53 I’ve decide it’s time to grow up and paint some real toy soldiers. Watch this space!

More Goodies from Airfix! New Resin Scenery.

I’ve just received the latest releases from Airfix for the month. In a slightly new departure for Airfix, these items are not plastic kits but resin models. They are part of a series of scenery and diorama models to be released by Airfix this year and very nice they are too! First up we have the European Ruined Cafe, representing the typical French small town cafe.

The buiding is reproduced in off white resin and is very crisply moulded with plenty of detail that will be ‘brought to life’ once the model is painted. The model comes with brass etched window frames for those who would like to add the windows.

The buildings are 1/76th scale and so are ideal for 20mm figures and will also suit 1/72nd scale figures for wargaming purposes. On that note, the design has been well thought through to allow plenty of cover for your soldiers!

As well as the Cafe, there is also a ruined workshop, again based on those typically found in Northern France.

The same attention to detail is present in this model and again there is plenty of cover for your troops.

Of course being a workshop, there is room for a tank to take cover here and if you look closely at the box art you can see a Tiger Lurking in the background!

There are two other pieces due for release later in the year, a town corner house and a cottage, so World War two Wargamers will have a good selection of scenery and a basis for creating a mini town for their troops to battle over. Well done Airfix! Yet more evidence that this much loved brand is on the rise again.

Both of these models are available from my eBay shop at

New From Airfix….Well nearly……

We have just received three new sets from Airfix. They are the Second World War Aircrew sets for the RAF, USAAF and the Luftwaffe. Strictly speaking, these aren’t brand new sets but re-releases of sets that were originally released back in the seventies. That said, they are great sets packed full of interesting subjects. They will make great additions to Air base dioramas and liven up model airplane kits. The sets also include a number of interesting accessories. They are of course available now for fast despatch in my ebay shop.

WWII RAF PERSONELL

WWII USAAF PERSONELL

WWII LUFTWAFFE PERSONELL

THE VIKINGS ARE COMING!

The plastic revolution in war gaming continues with two new sets of 28mm figures, both of Viking warriors. First up is the latest release from Wargames Factory, Viking Huscarls.

This set features 12 sprues loaded with parts to build 32 armored Viking warriors.

Weapon options include spears, axes (in two sizes), swords, bows, and all the necessary equipment to create leaders, musicians (horns), and standard bearers!

Also released are the new plastic Viking Hirdmen from Gripping Beast.

The box contains the parts to build 44 finely detailed Viking Warriors armed with Spears, Swords, Hand Axes and Dane Axes. Also included are the parts to change two of the Warriors into Lords and two into Horn Blowers. Bases and four coloured paper flags are also included.

These figures are 28mm (1/56 scale) hard plastic multi-part with exceptional detailing.

Viking Hirdmen were the professional fighting men of a Viking Lords Household and were well equipped with armour and weapons.

Gripping Beast have traditionally produced Metal figures and have a reputation for producing well sculpted figures. Their new plastic set upholds this reputation and their new boxed set will hopefully be the first of many to come. Here are the sprues:

So with these two superb sets available it’s easy to put together your very own Viking Raiding party!

Hurrah for Hussars! New in from the Perrys

The Perry’s have done it again!

Another super set of Napoleonic figures from the Perry twins. This time, French Hussars from the Napoleonic Wars.

The figures in the box cover the regiments in the French army from the Revolutionary War to the end of the Empire. They can be represented in their stunning full dress uniforms or their more functional (yet still colourful ) campaign dress.

Included in the box are enough heads to kit the whole unit out in either mirlitons, colpacks, 3 different types of bell top shakos (one of which is covered) or cylindrical shakos. The torsos are separate from the legs to allow you to choose between the full dress breaches or campaign overalls. The pelisses and carbines are also separate.

Here are some pictures of the sprues, with apologies for the poor quality of the pictures, as you cant really see the fantastic detail that the Twins have sculpted:

A lovely addition to the Napoleonic range at a great price of

NEW! Victrix British Napoleonic Foot Artillery 28mm

Just arrived in store, hot from the production line, is the new Napoleonic boxed set from Victrix. The subject is British Napoleonic Foot Artillery in 28mm and what a great set it is! The set contains three sprues as shown below:

This means that you can make three Field guns and three limbers , as well as a total of 15 crew members. Even better, you have the option of making either 3 short barrelled six pounders, 3 Long barrelled six pounders, 3 Nine Pounders or 3 5.5 inch Howitzers.

The crew can be made with Belgic or Stovepipe Shako’s which means that you can model either the Pennisular Campaign or recreate the Battle of Waterloo!

Of course as with all Victrix sets there are plenty of extras and other details:

This set is a superb addition to the Victrix range and is great value for money at

New In From Italeri.. German Paras in Tropical uniforms

I’ve just received the latest new releases from Italeri. The first is a set of German Paratroops in Tropical uniform from the Second World War.

The set consists of three sprues of figures, with 16 figures on each sprue. There’s a good selection of poses and I particularly like the kneeling sniper. I haven’t seen these troops available in Plastic before and they complement the many sets of Afrika Korps that are available. Together with the selection of Italian subjects that Italeri produce, it’s now possible to field a comprehensive World War Two Axis desert force.

Here is the front & rear view of the sprues:

The Second new release is a Quick Build kit of the Self propelled gun, the Priest. There are two kits in the box and these quick build kits are ideal for wargaming, allowing you to build a decent model in a few minutes.

Both sets are currently listed in my ebay shop and are available for despatch now!

Super glue is great….but there are other adhesives!

I was very excited to receive a new consignment of stock last week. It wasn’t that the delivery had lots of shiny new releases but that, at last, I could offer a reasonable range of glues to my customers. The funny thing was that I was the only one that was excited, the other guys at the unit seemed to think that glue is just glue and one glue is the same as another. I suppose that it’s because I grew up making models before the invention of super glue and I’ve also been influenced by my dear Dad who was a superb model maker and always had the right tool for the job in hand. I’ve had experience of ‘improper use of glue’ ( I don’t think that this is actually an offence yet, but only because the Govt doesn’t appear to believe in making things, so they wouldn’t know…..) when I recently bought some second hand stuff from ebay. It was quite obvious that the plastic model that I had bought, had been glued with super glue and far from being the best glue for the job, it was a disaster. Fortunately, this meant that I could strip it down and re build it, but that’s another story.

So here’s a list of my four favourite glues and when best to use them!

If you are making a Plastic kit, then the glue to use is Polystyrene Glue. I recomend the Revell Contacta glue shown below. It comes with a fine needle applicator so the glue goes where you want it to. In the rare event that the Needle becomes clogged (usually because the top has been left off for a while ) simply pull the needle applicator out, reverse it, give the whole thing a good shake and it will clear. If all else fails, leave the bottle hanging, needle down for an evening ( with the top on) and the glue applicator will clear. So why use Polystyrene glue on plastic? Well, the glue works by melting the plastic that it comes into contact with, so you get a really strong joint. This also means that there is a degree of filling that happens, so even if the joints aren’t perfect, as long as the two pieces to be glued are held firmly together they will ‘weld ‘ together. This does require a bit of patience, particularly for large joins but your patience will be well rewarded by a strong joint that can be carefully sanded to become invisible. I like the Revell glue because of the consistency ( it’s like water) and combined with the fine applicator, it will go exactly where you want it too without the danger of spilling or running over fine detail.

Finally, as far as Polystyrene glue goes, there are other brands and you can buy it in tubes or with a brush. The tube of glue is great for big joins but has a tendency to be thicker and you generally end up with more glue on your model than you wanted. The Glue with a brush applicator is good but it doesn’t beat the needle applicator for accuracy in getting the glue where you want it!

Next up is Epoxy resin. This is a glue that has fallen from grace ever since the arrival of super glue but it still has it’s uses and I wouldn’t be without it. My favourite brand is Devcon, although I will happily use Araldite Rapid ( but dont carry it in stock). Why Devcon? Well, most importantly it dries to a really clear finish, so much so, that you can use it to make the lenses for model headlights, glass effects and even water. It also has great filling qualities and dries quickly to a hard finish. True, it is a nuisance to mix, and you don’t get the fast grab of super glue but the finished joint is far stronger. I use epoxy to fix my metal models to their bases and for gluing the larger metal components, particularly when I am pinning them. Epoxy beats super glue for strength, particularly when it comes to shearing strength which is why when you drop super glued figures they have a tendency to break at the joints. If you use epoxy, you will find that your models are far more resilient on the gaming table. As epoxy will glue most materials, it is also useful for fixing small rocks & scenery pieces to your models as well.

Talking of basing your models, I couldn’t do without white PVA glue. It was designed to glue wood & paper products and it also dries to a clear finish. Even better, it can be thinned with water so it is ideal for fixing sand, scatter, static grass and other small scenic products to the bases of your figures. I usually water it down to make it go further. It’s very easy to use and gives a good bond and if you do get some on your model, simply wash it off with a damp brush before the glue dries. I sell the White PVA Speed bond which is good quality and dries quickly but any white PVA glue will do the job!

And so at last to Super glue, or as it’s sometimes known, cyanoacrylate. There’s no doubt that this is a great innovation in the world of adhesives and it seems to stick practically anything, including your skin, so be careful. As if super glue wasn’t good enough, it’s even better now that you can get superglue accelerators or activators. The activator ensures an instant bond once it is sprayed onto the super glue and has the added bonus of providing some ‘fill’ element to the join. So If you are glueing small metal components, using a thicker version of super glue and an activator gives great results. I’ve seen the guys at Ibis studios put together a set of metal figures in less time than it takes me to open the packet…..OK, I exagerate slightly but this stuff is fast! For really small components, there is a brush on activator but I tend to use the pump action stuff. I know that once I press spray, the component will stay where exactly I put it. Since I’ve been using this I have had not one case of glueing the model to my finger…….

I tend to use the thicker version of super glue as it has a slightly slower drying time which lets me adjust the bits to the position that I want until I am ready to zap them with the accelerator. The thinner super glue is more suited to invisible repairs, particularly where the joint is a clean break. So I have a bottle of the thin stuff ready for any repairs needed after a battle!

So there it is,

Use Polystyrene Glue for plastics,

Use Epoxy for big metal joints & fixing your figures to bases

Use PVA for scenery & basing products

Use Super glue & accelerator for whatever else you like……Shimples!