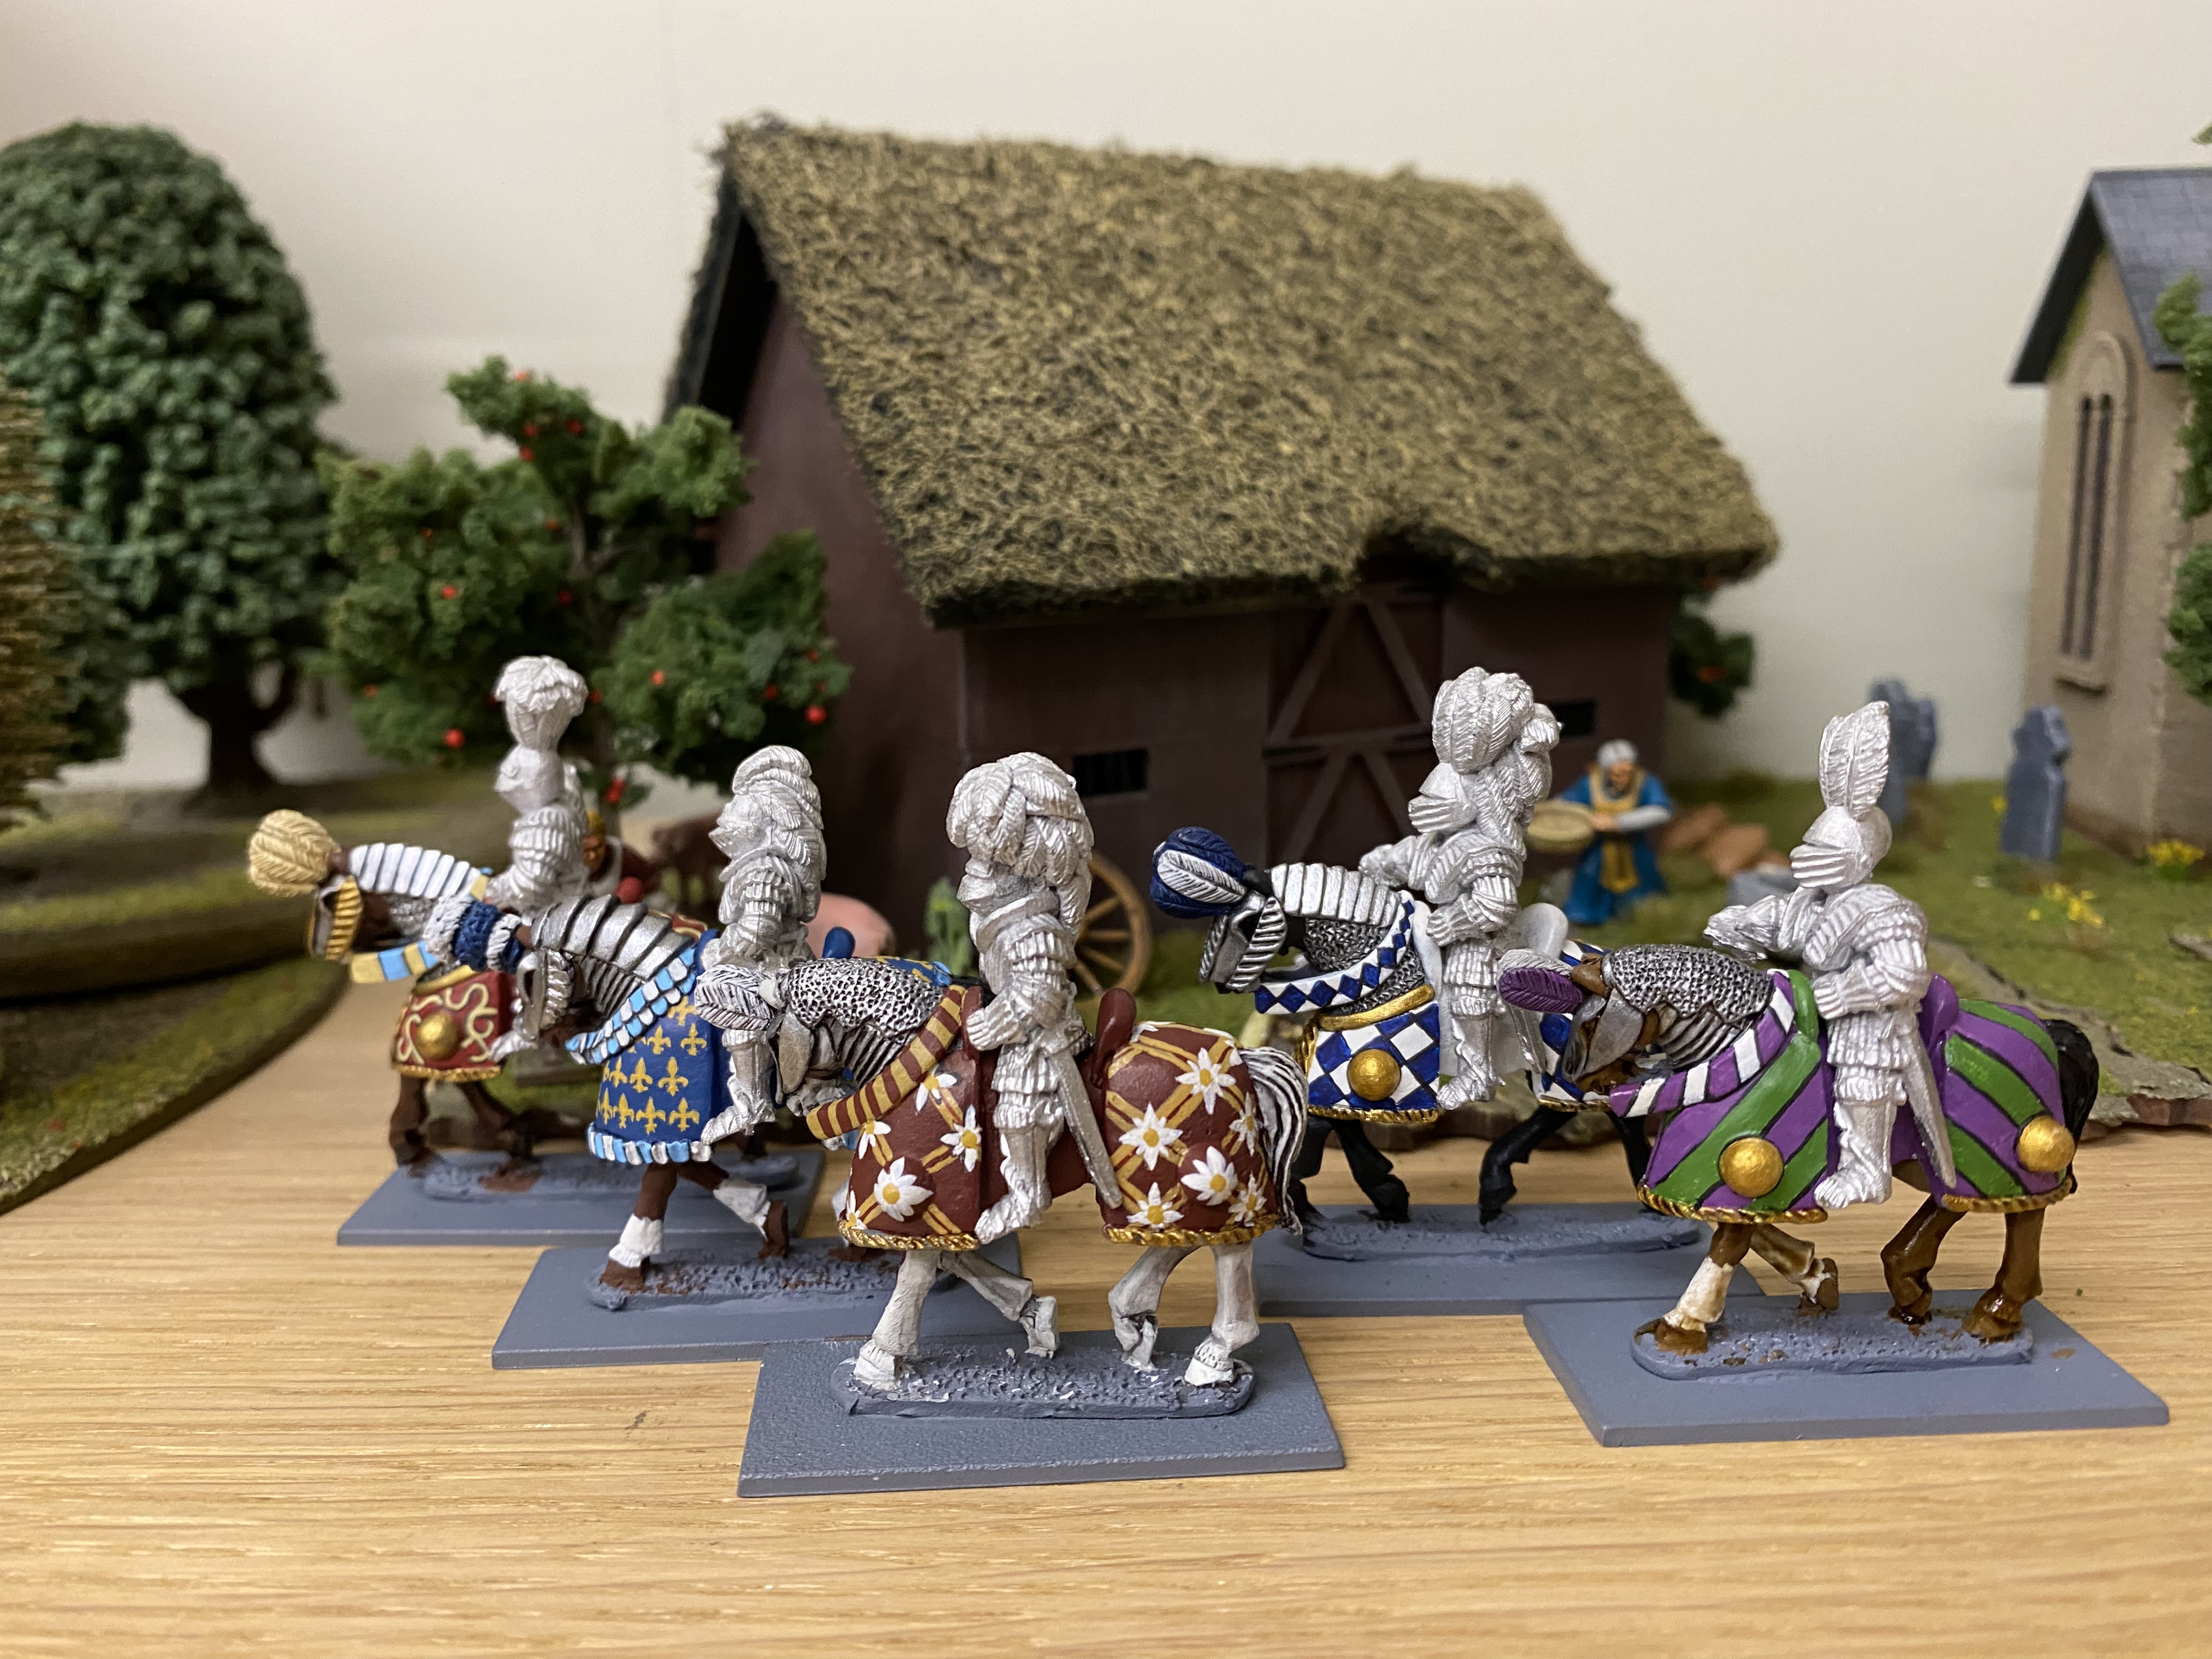
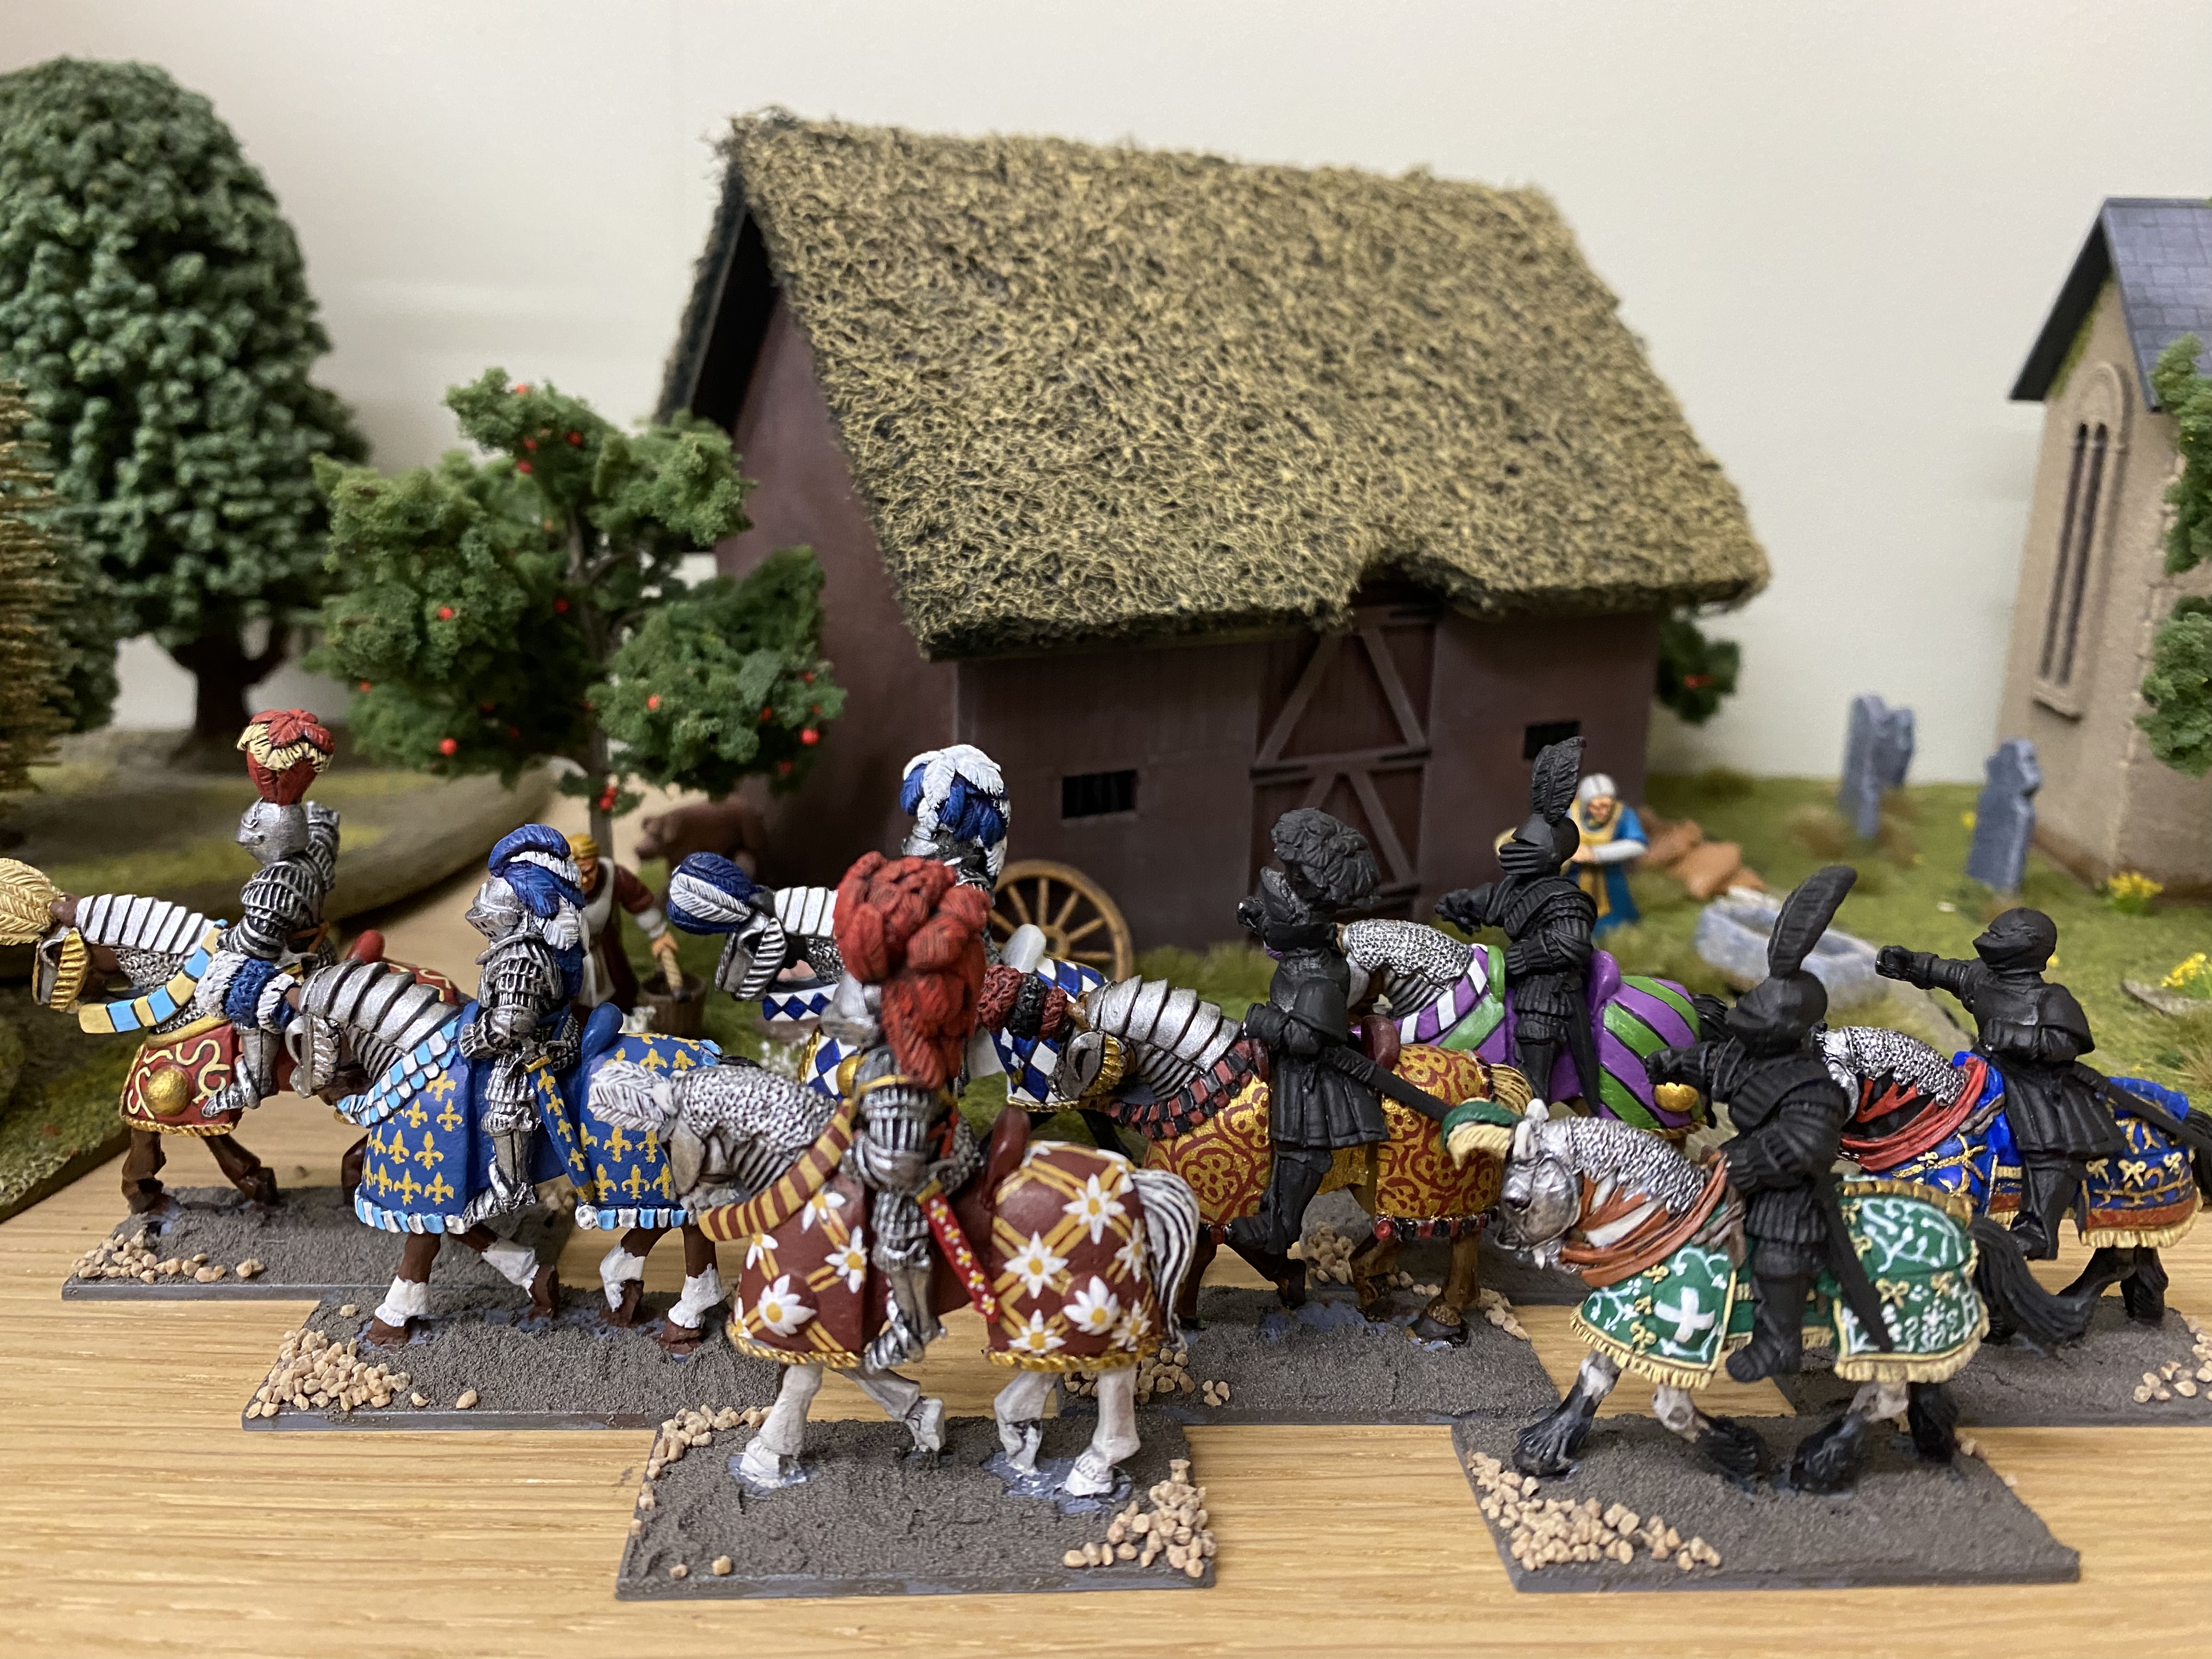
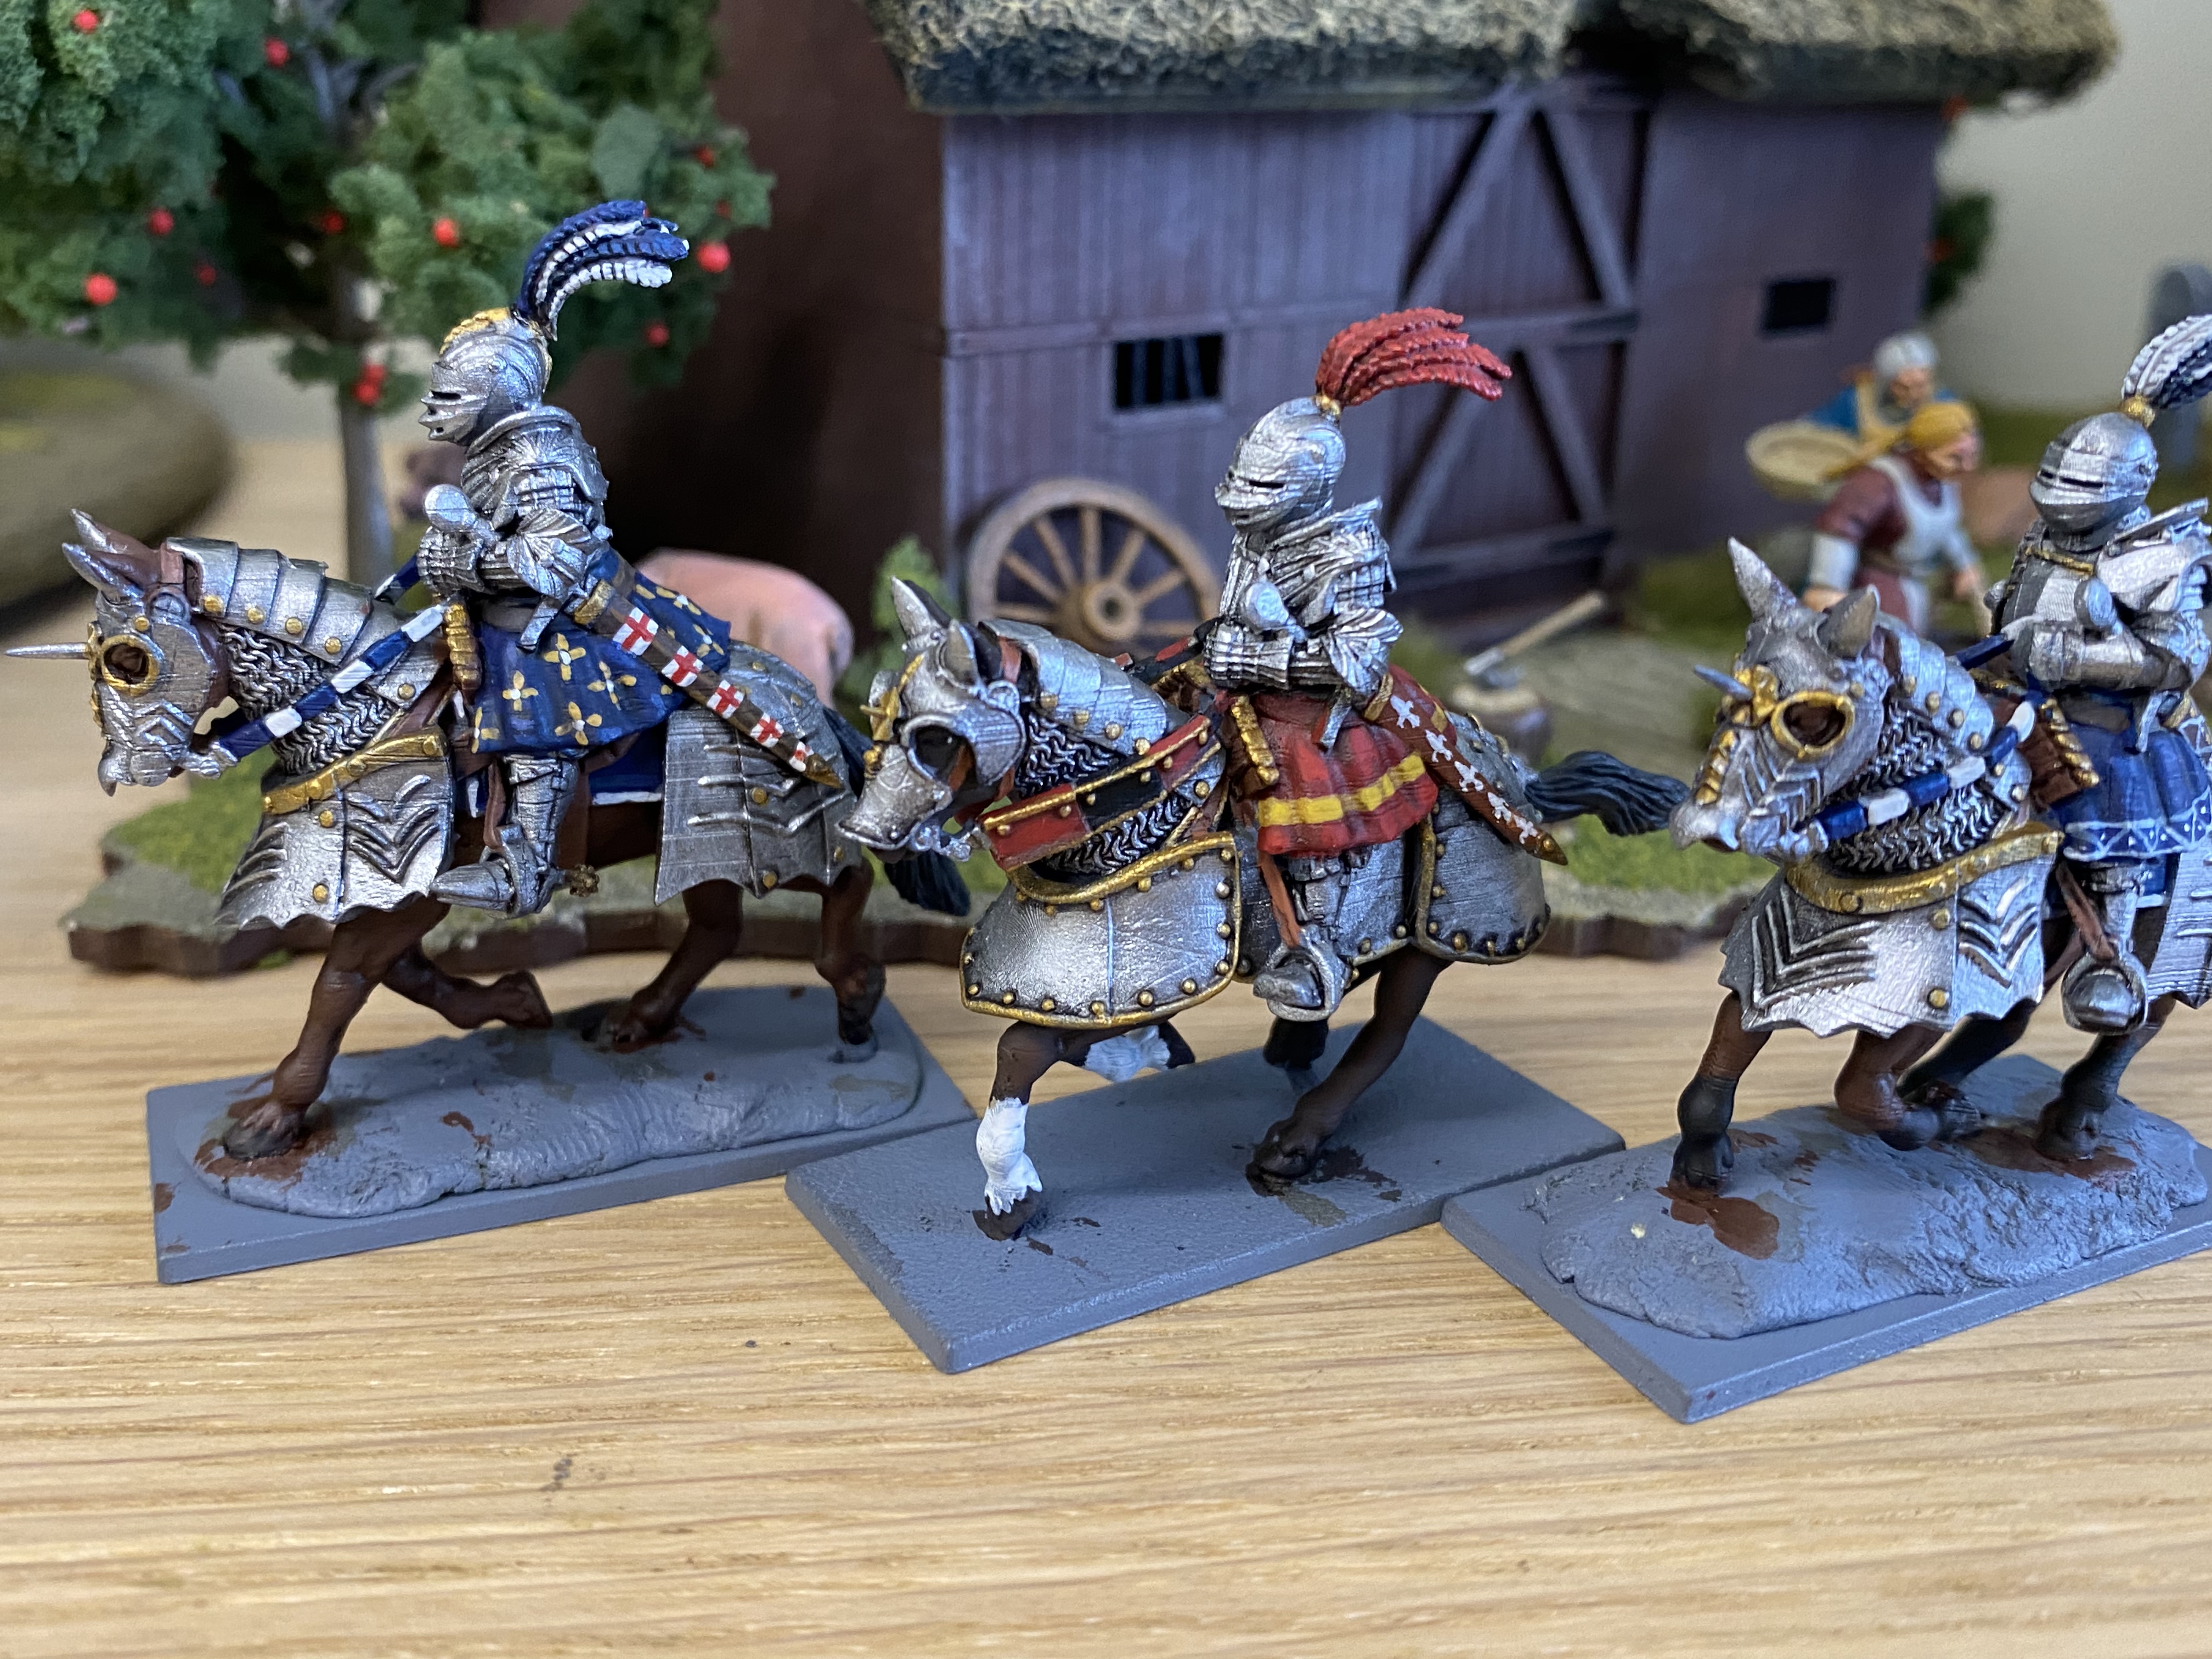
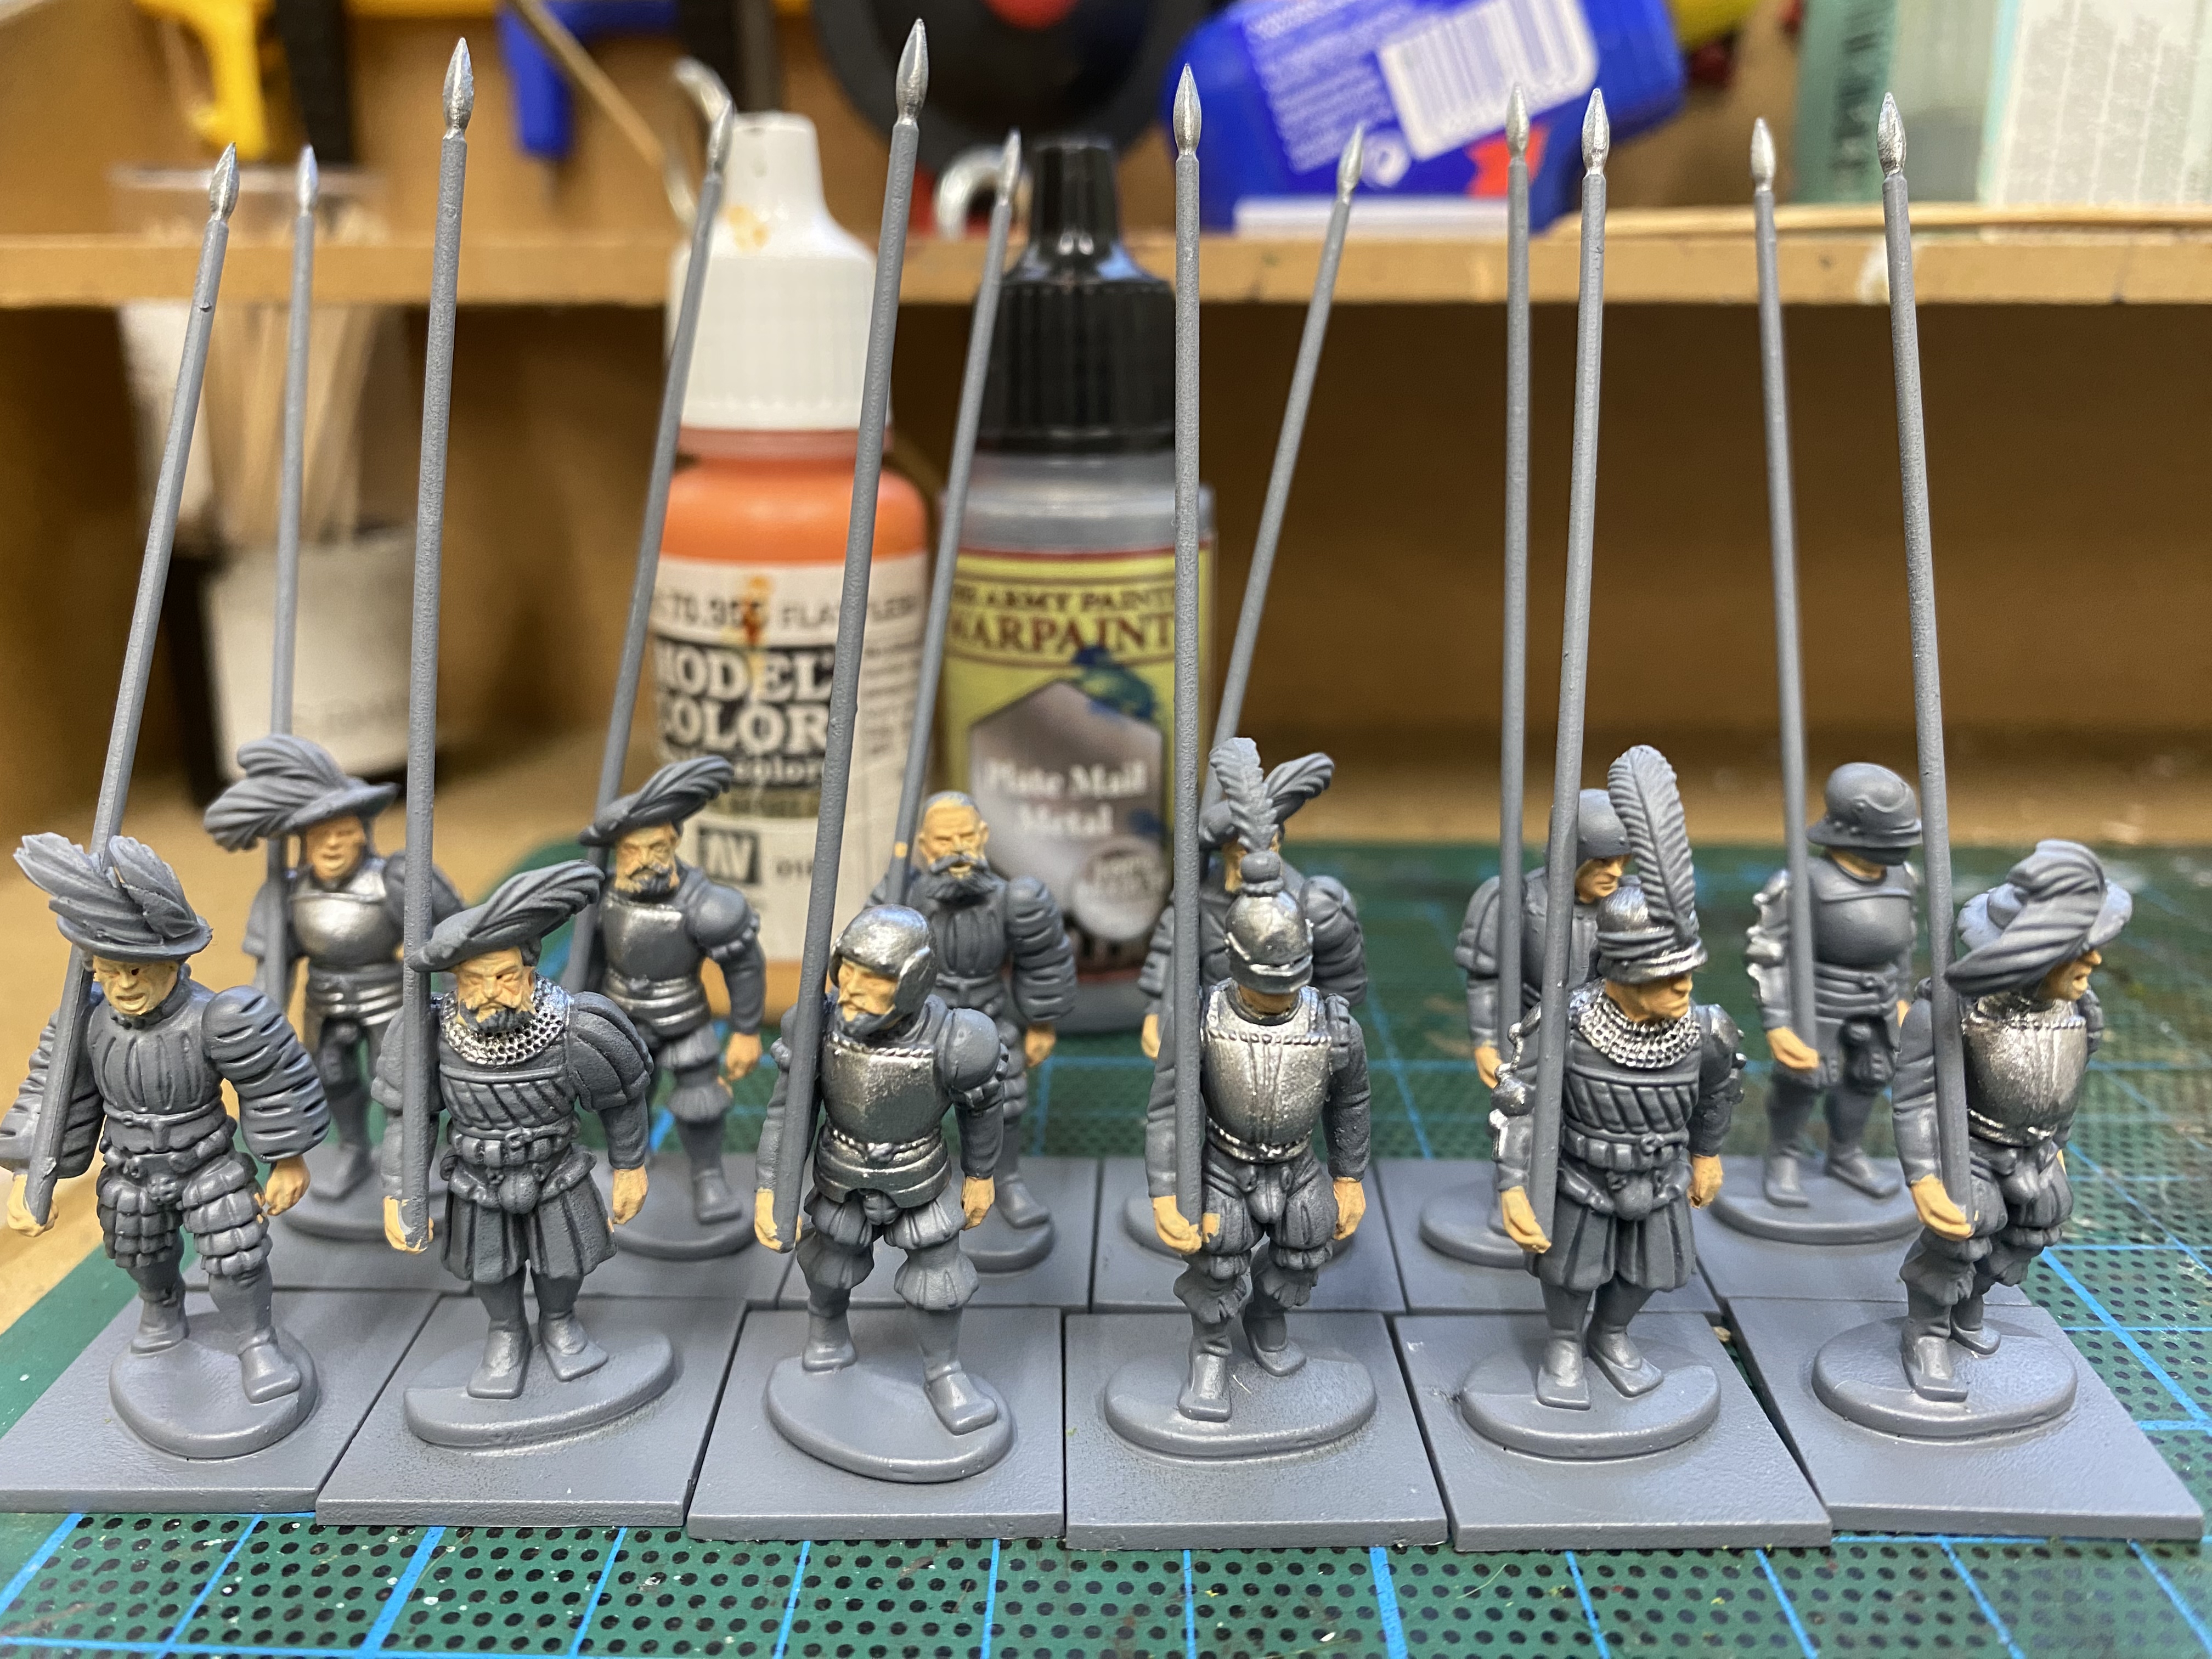
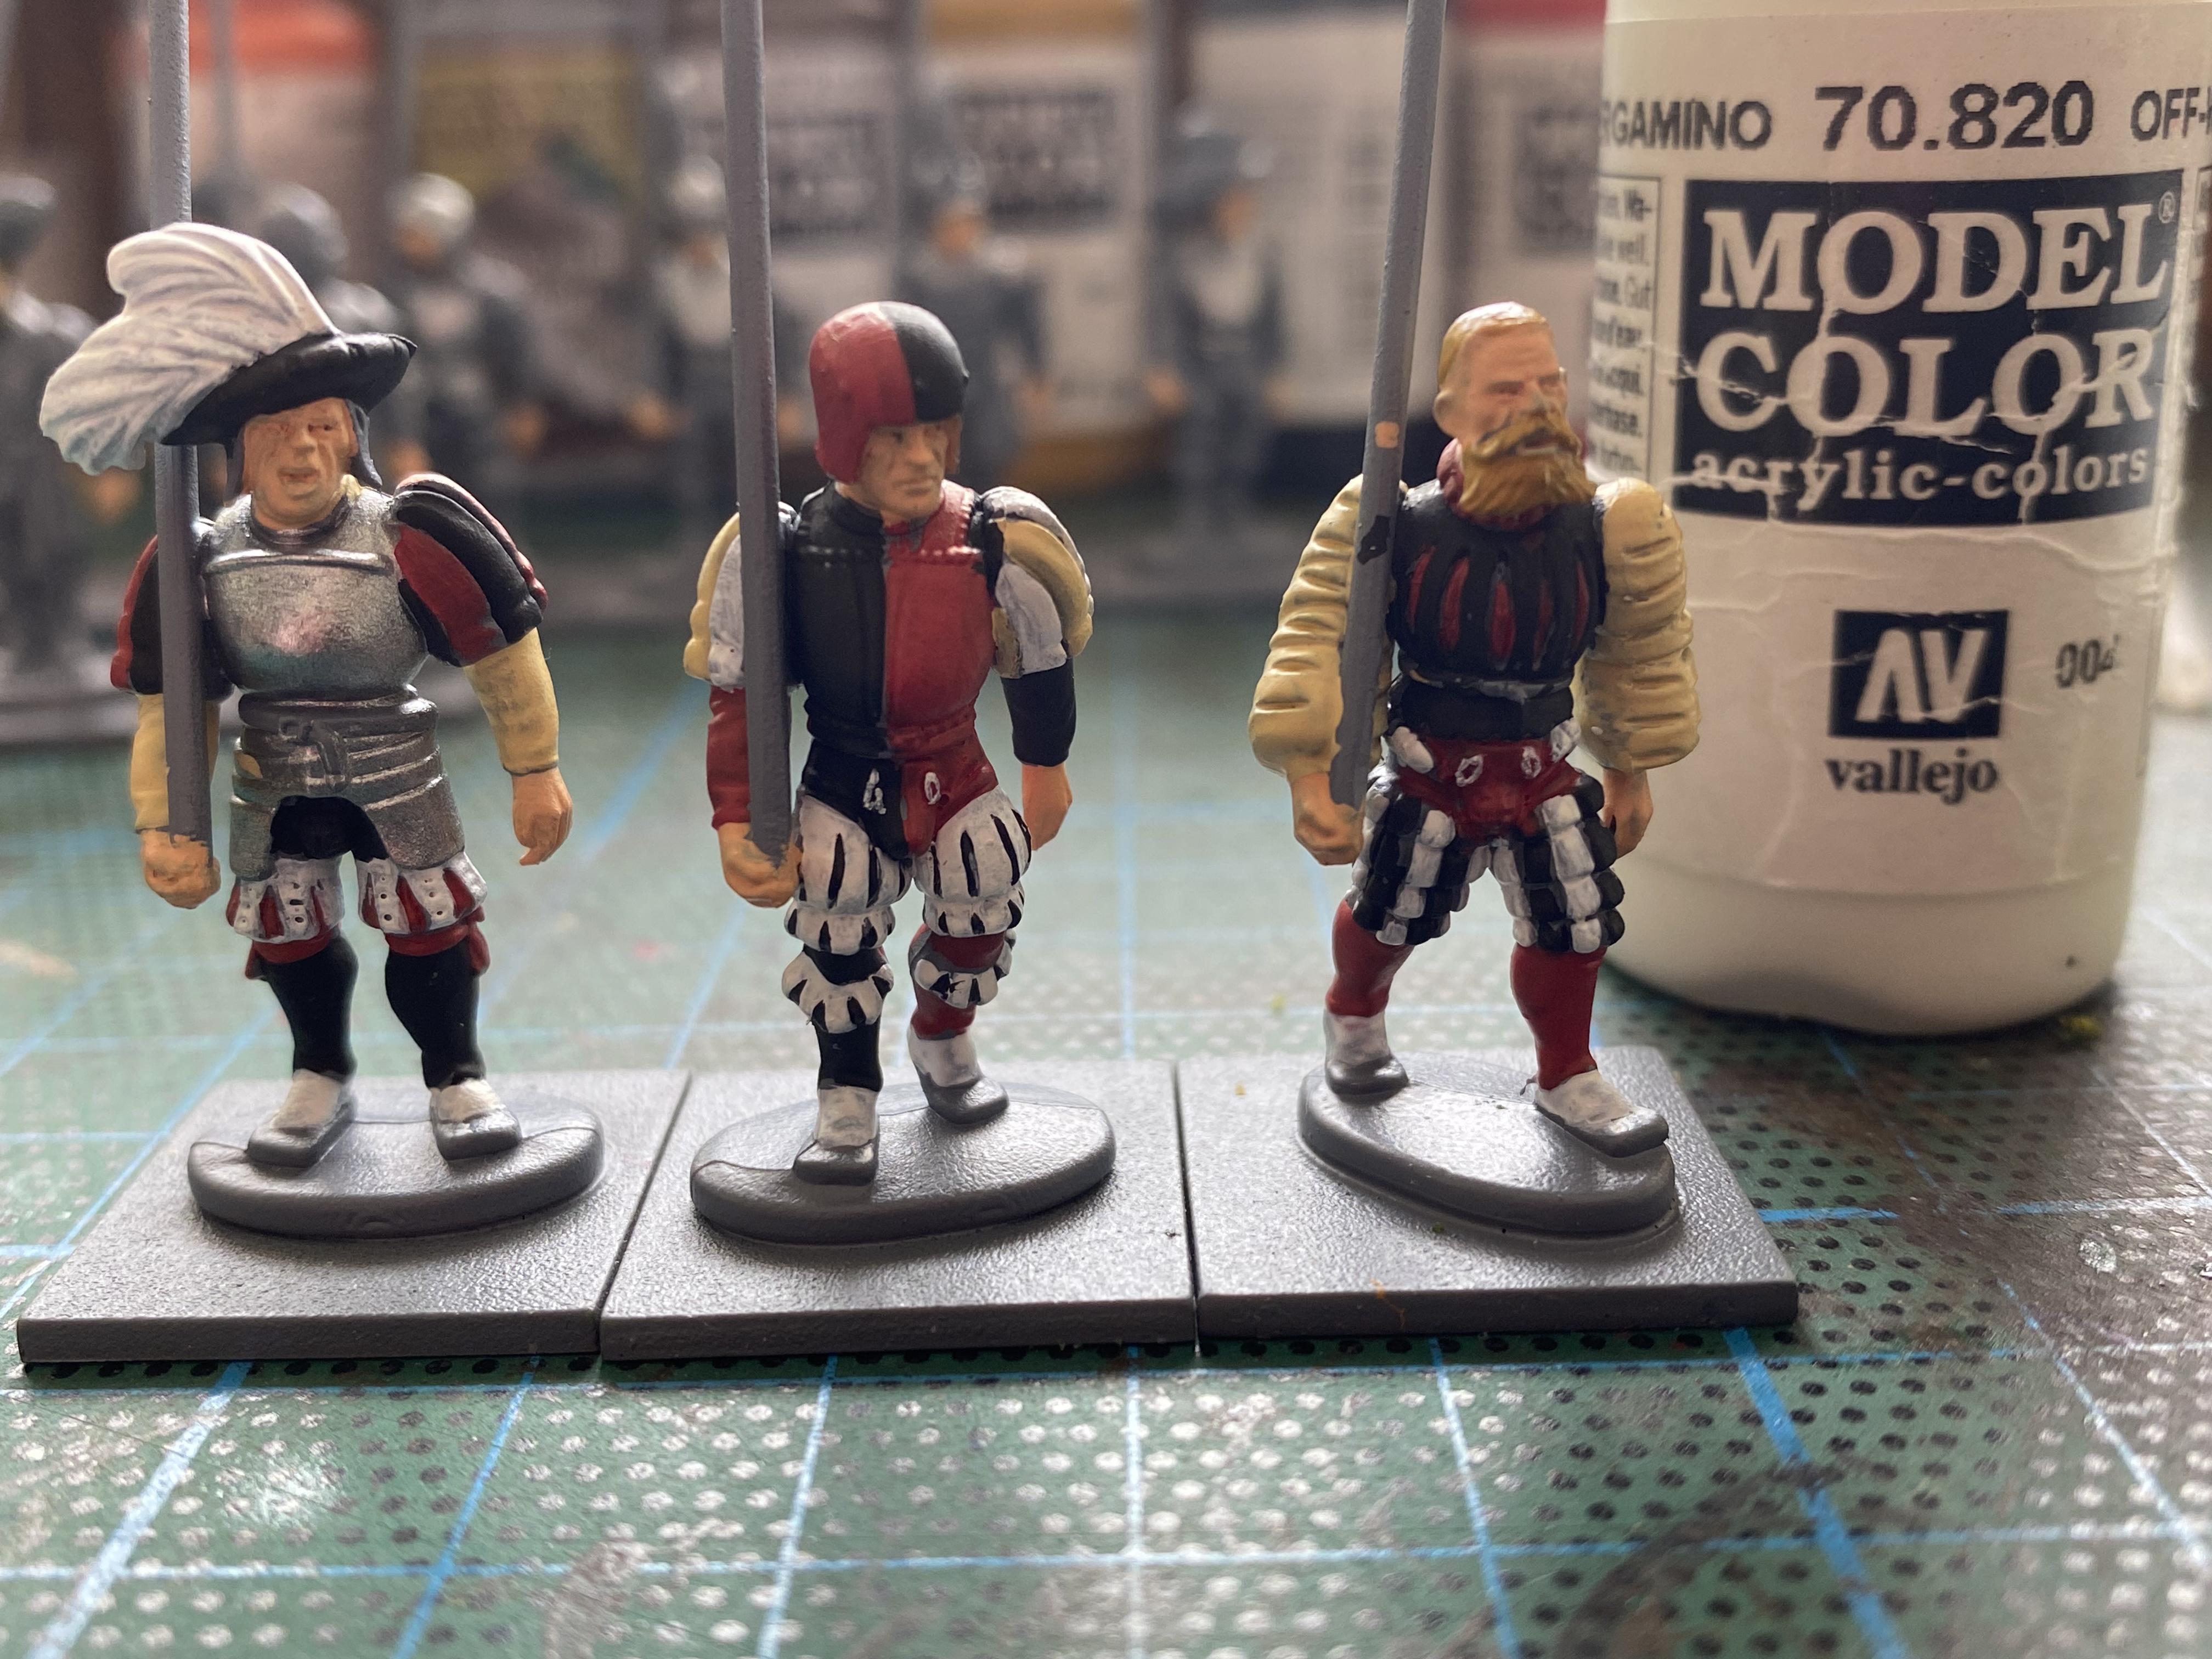
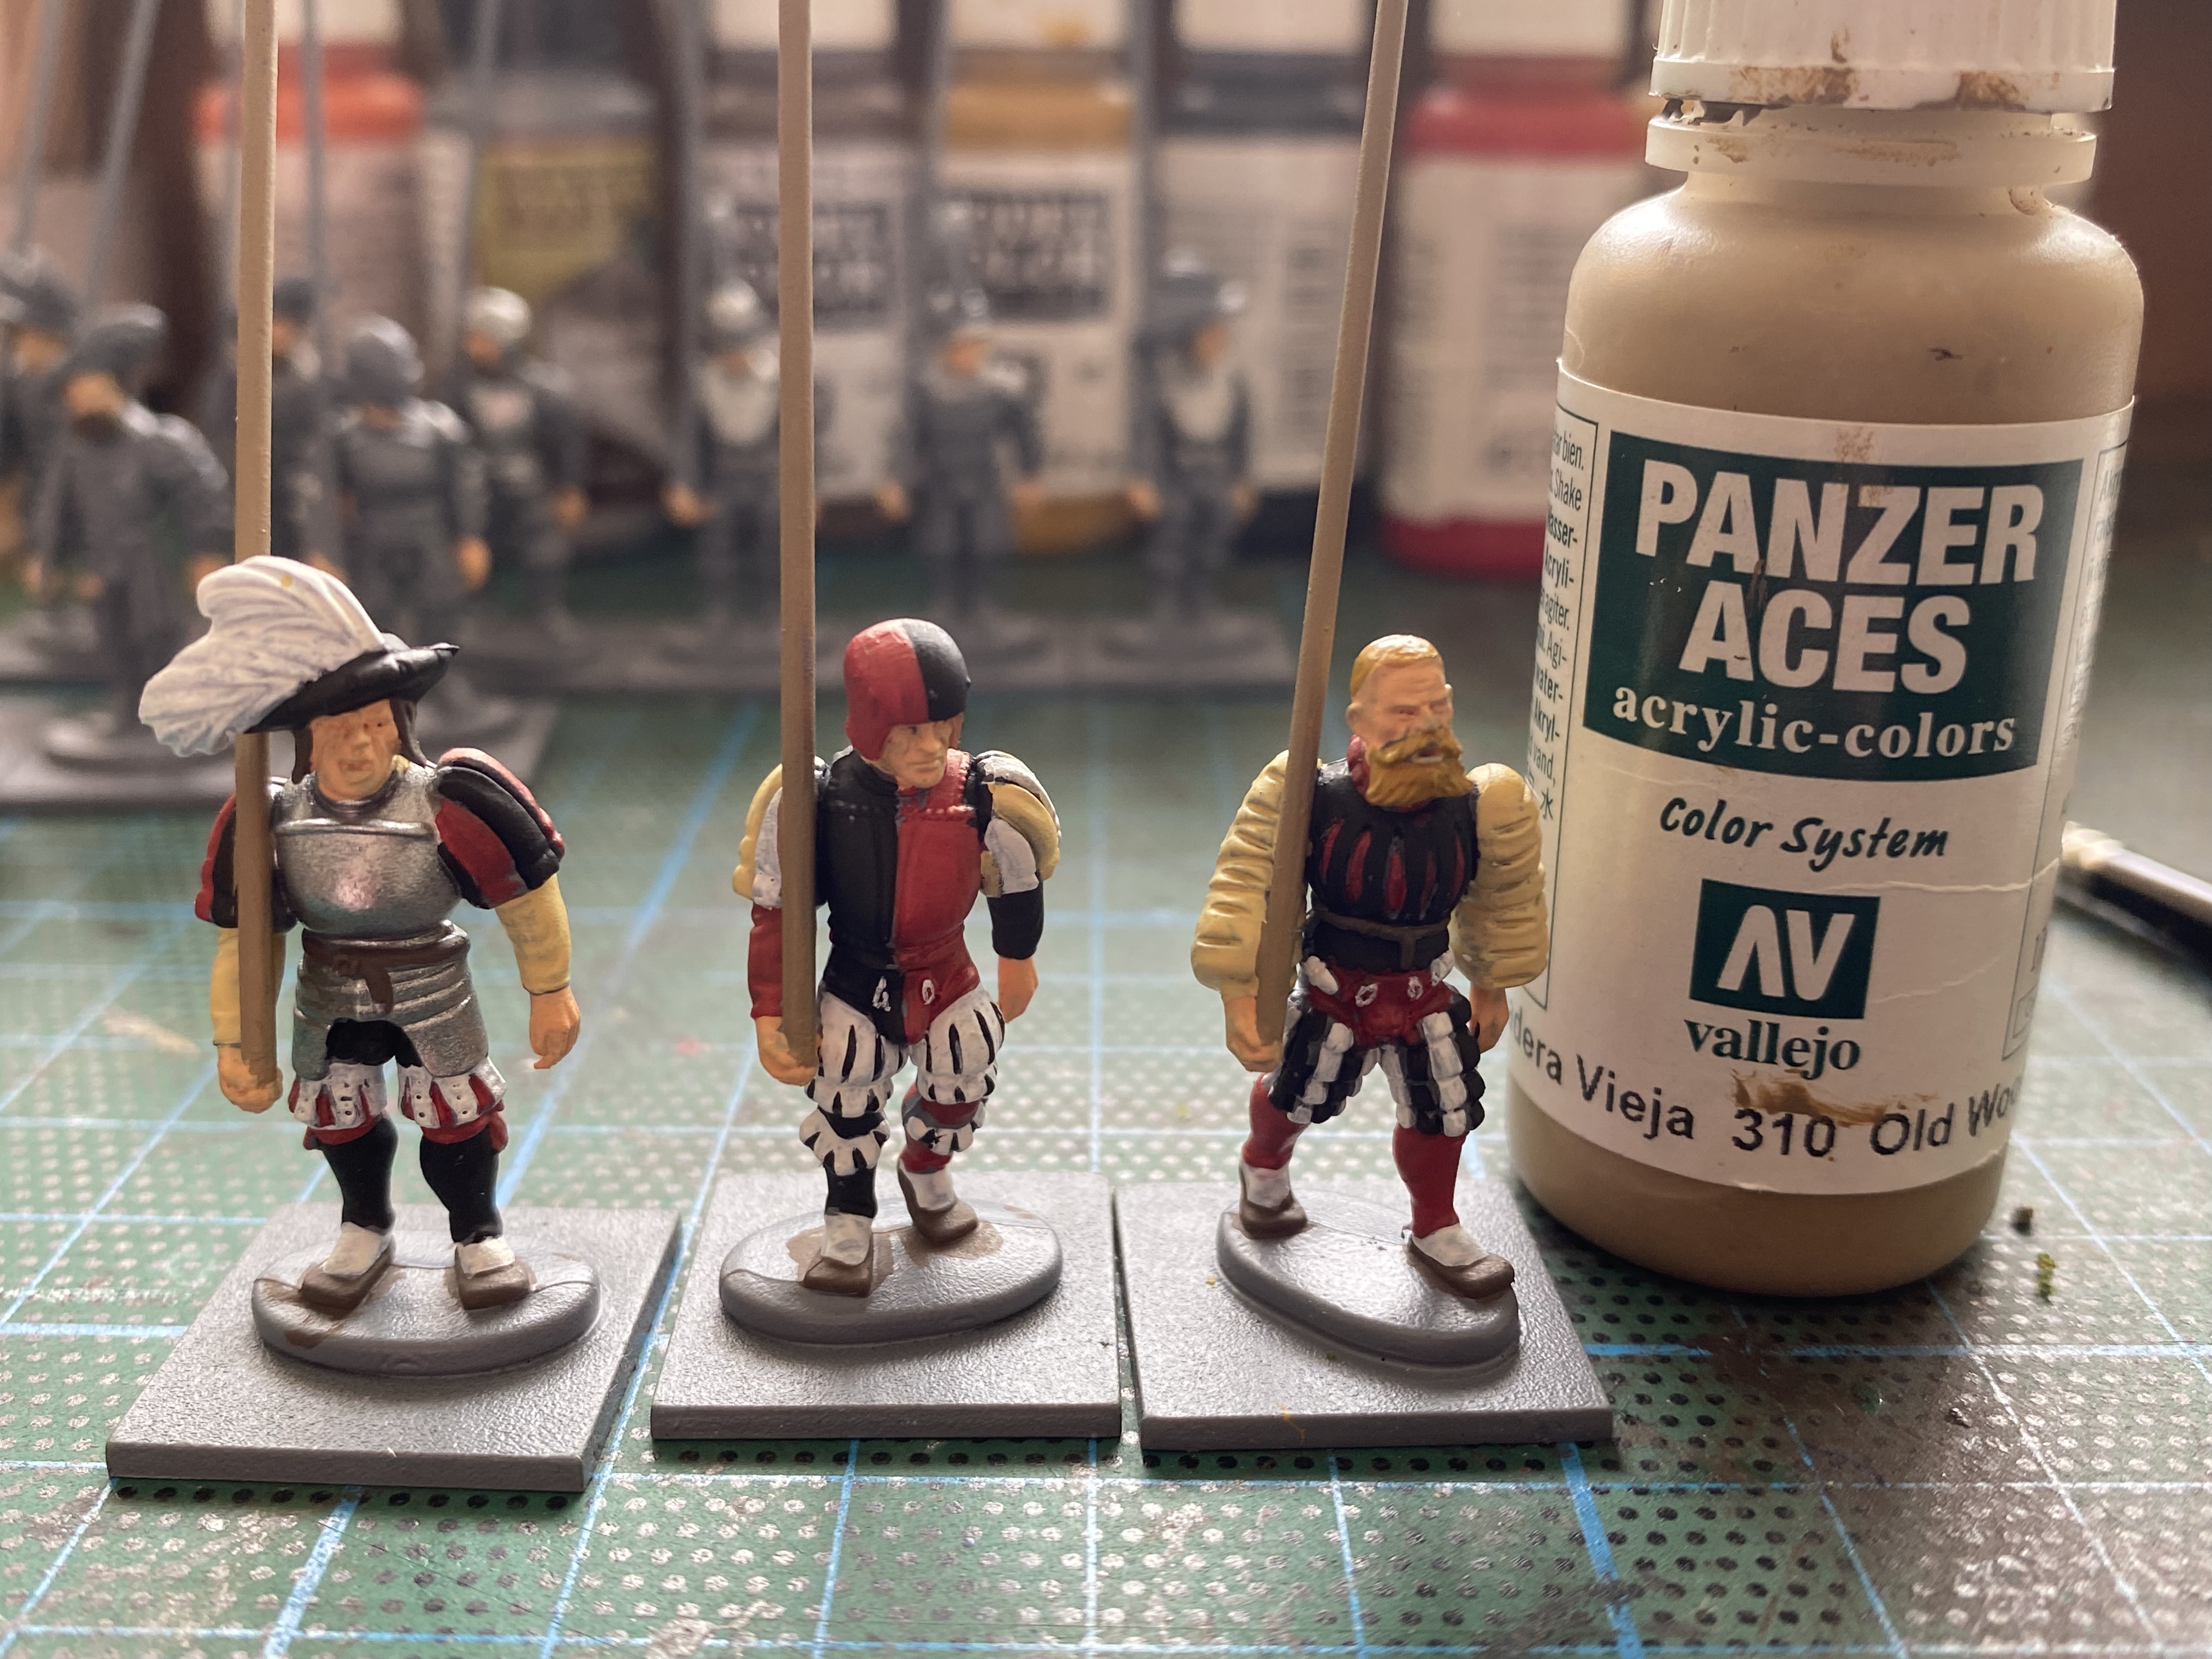
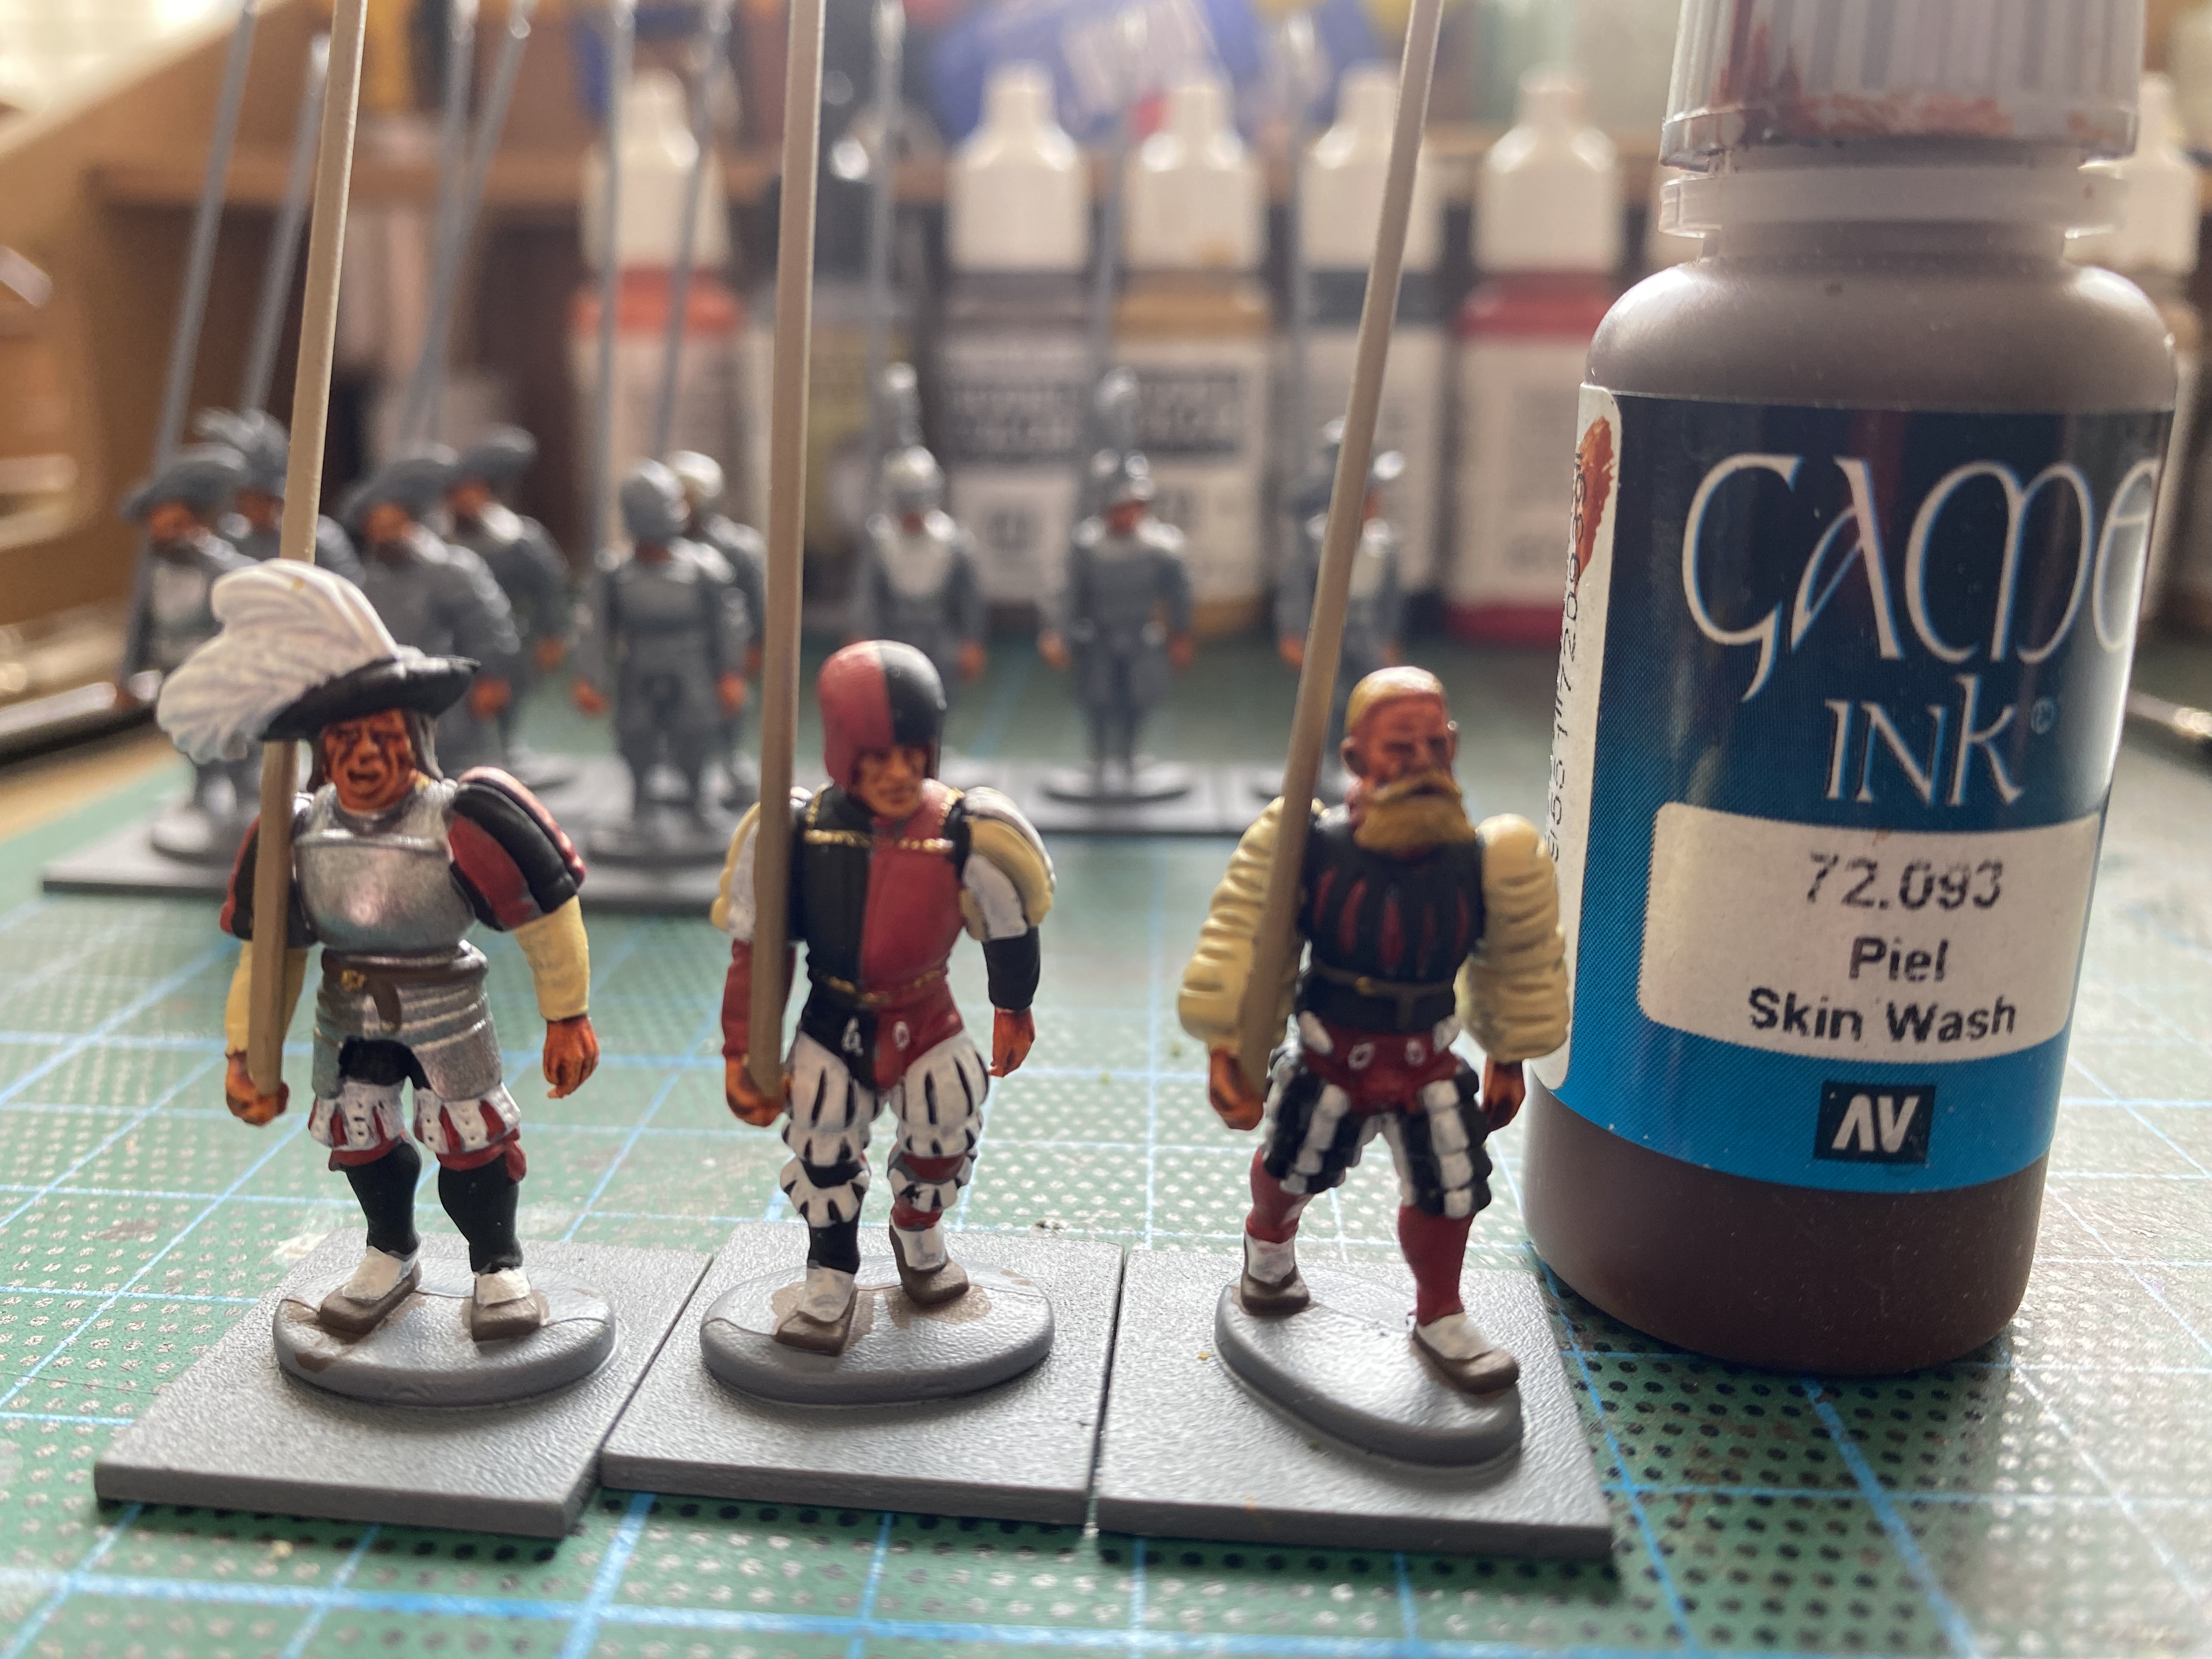
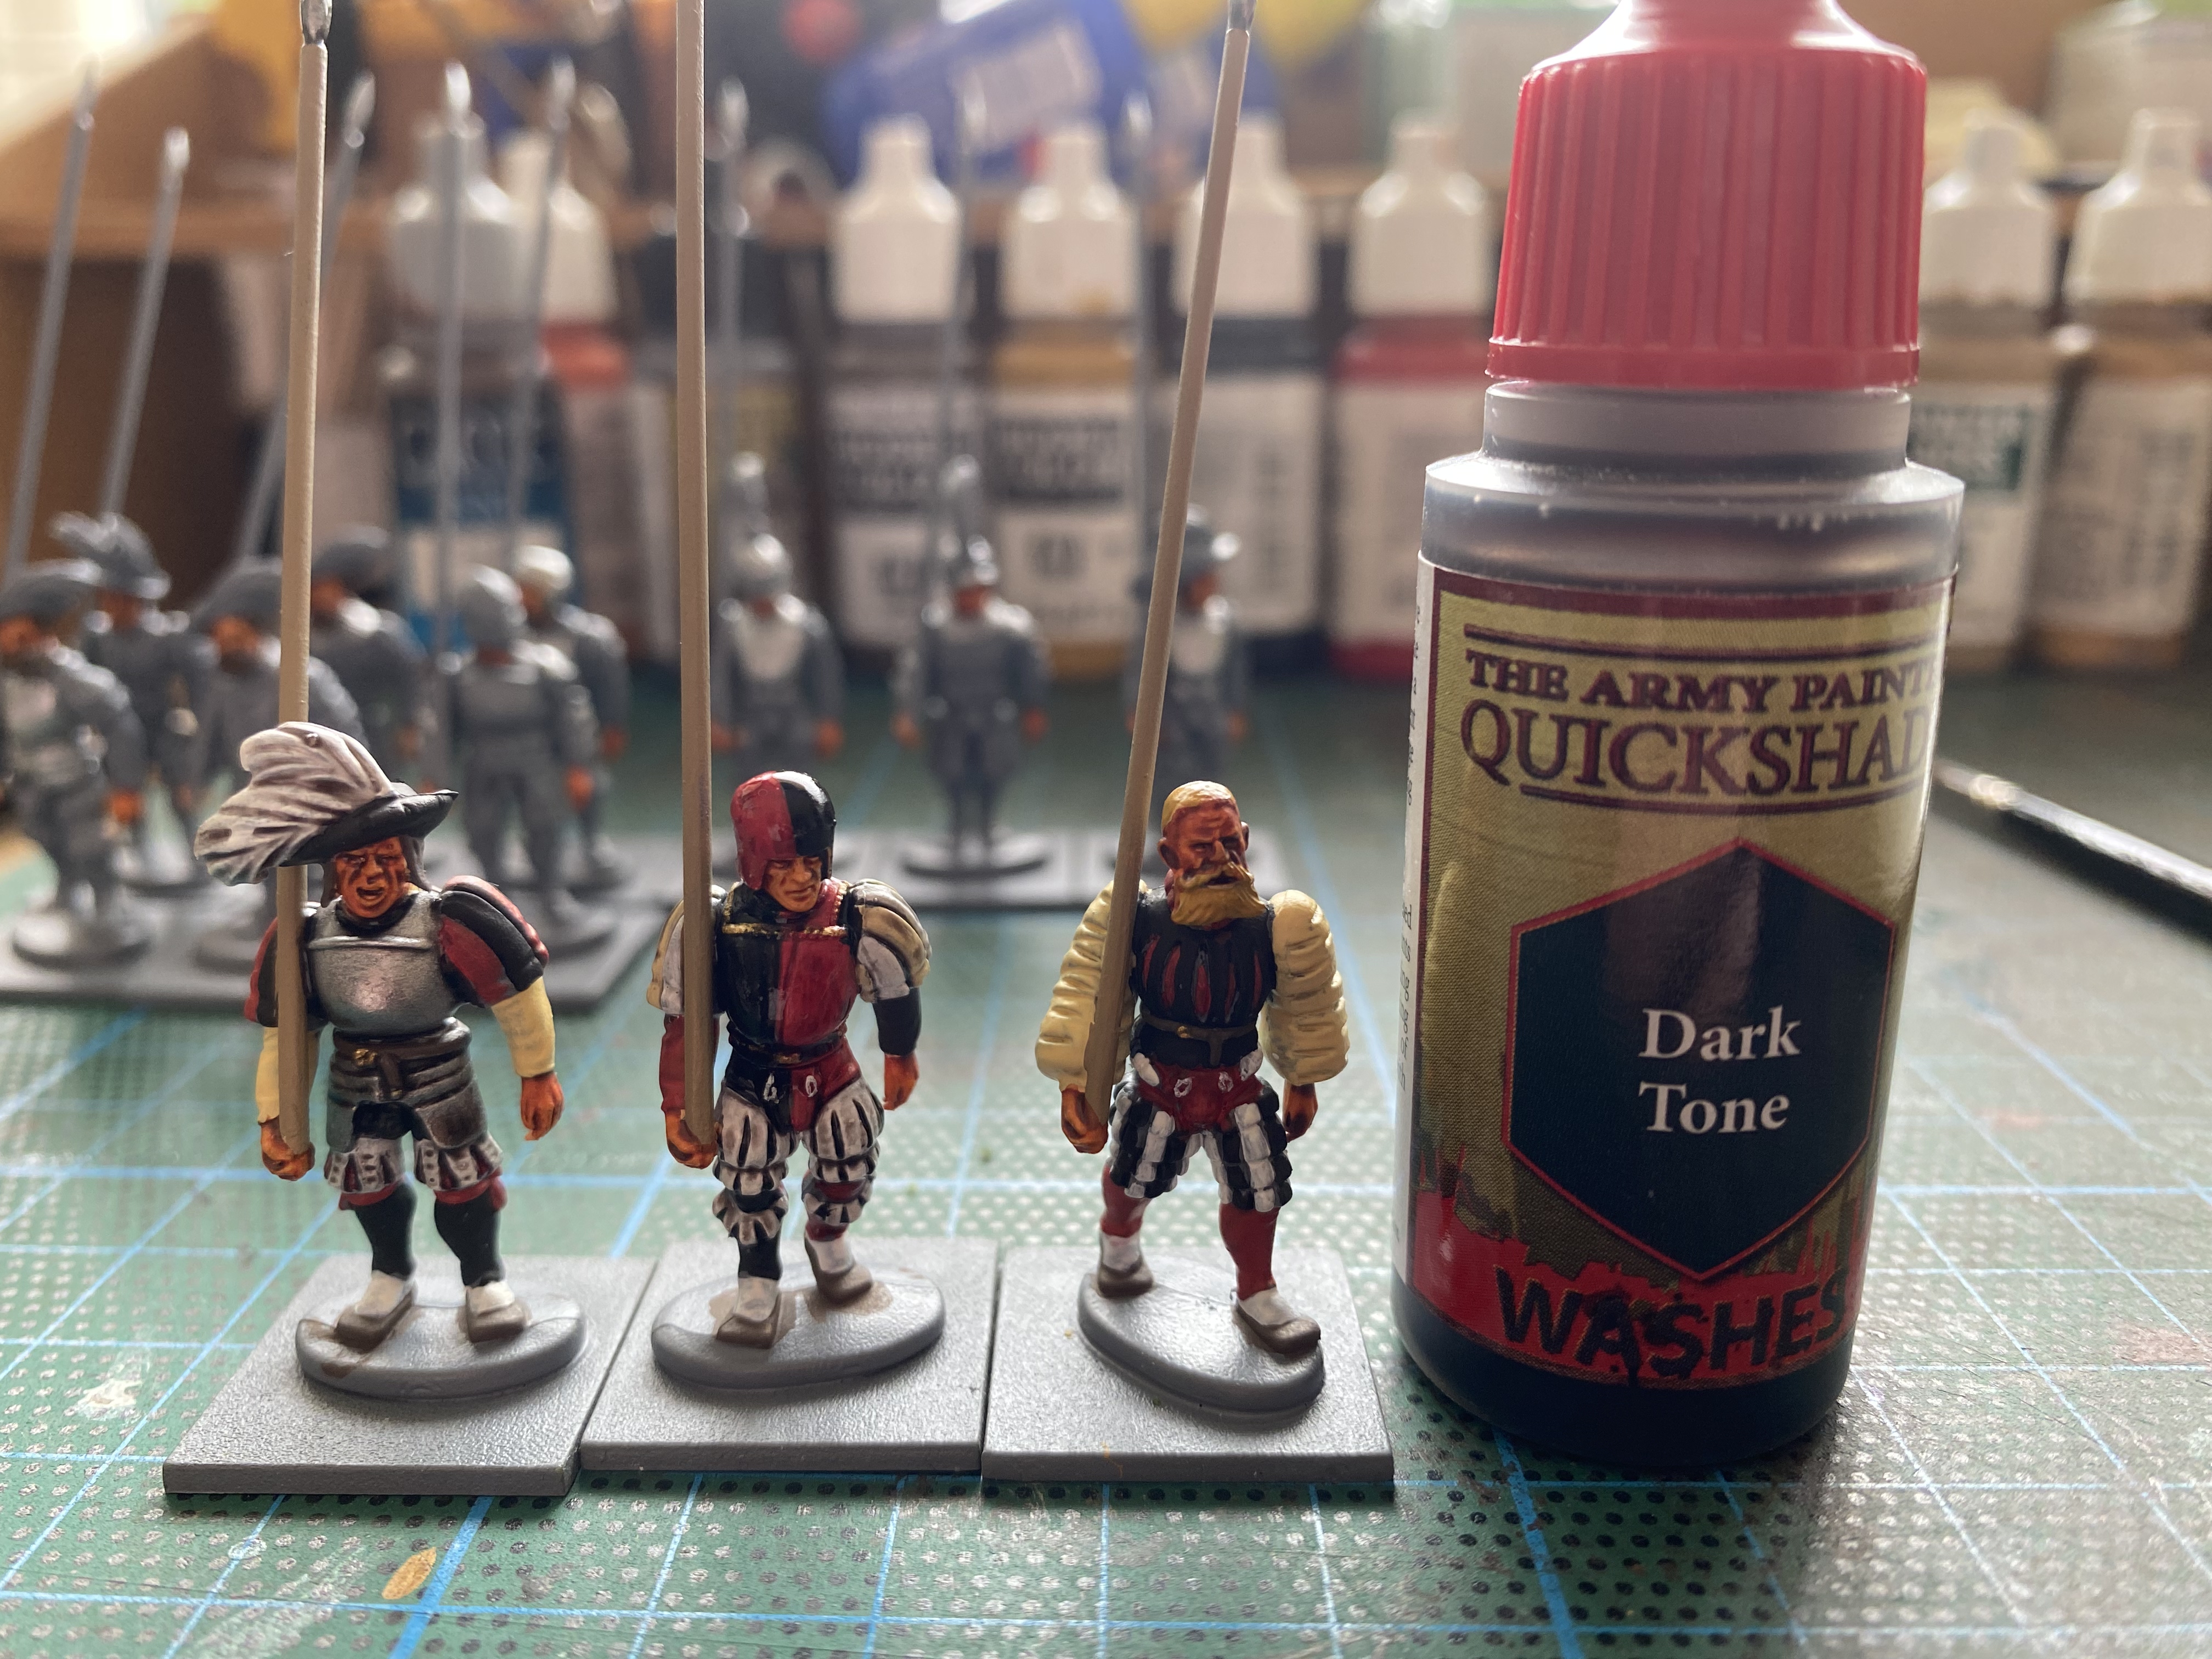
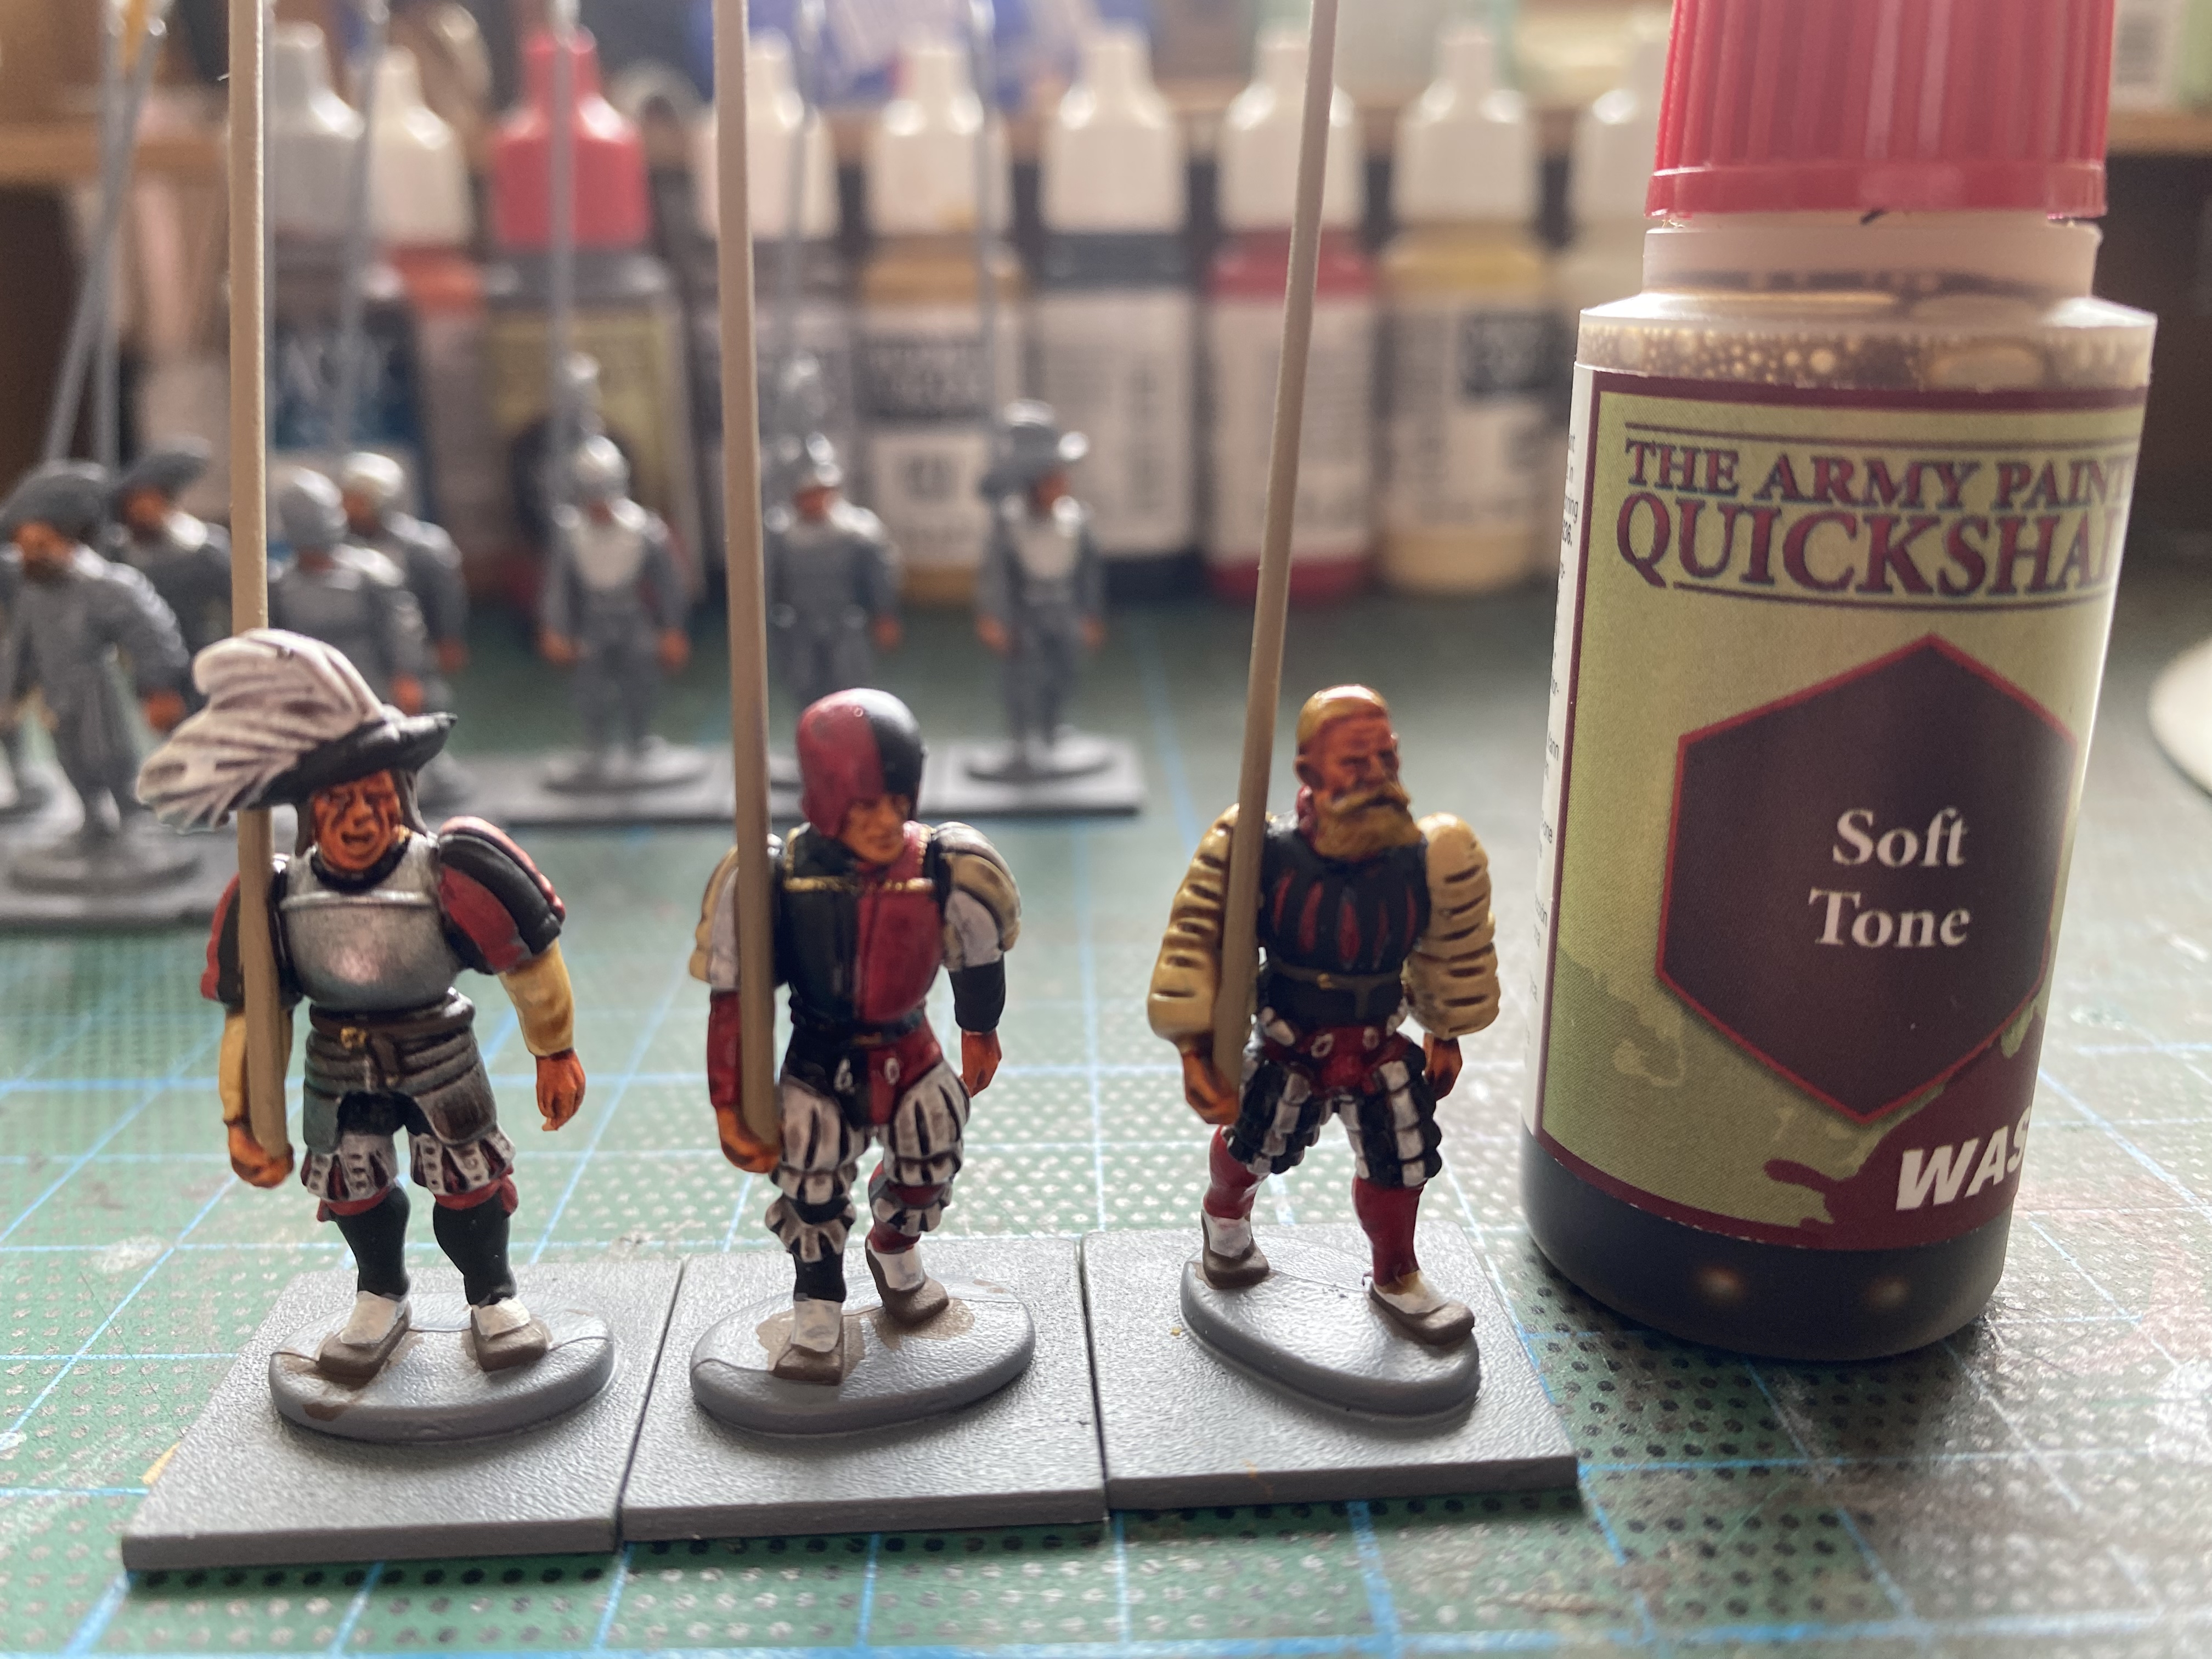
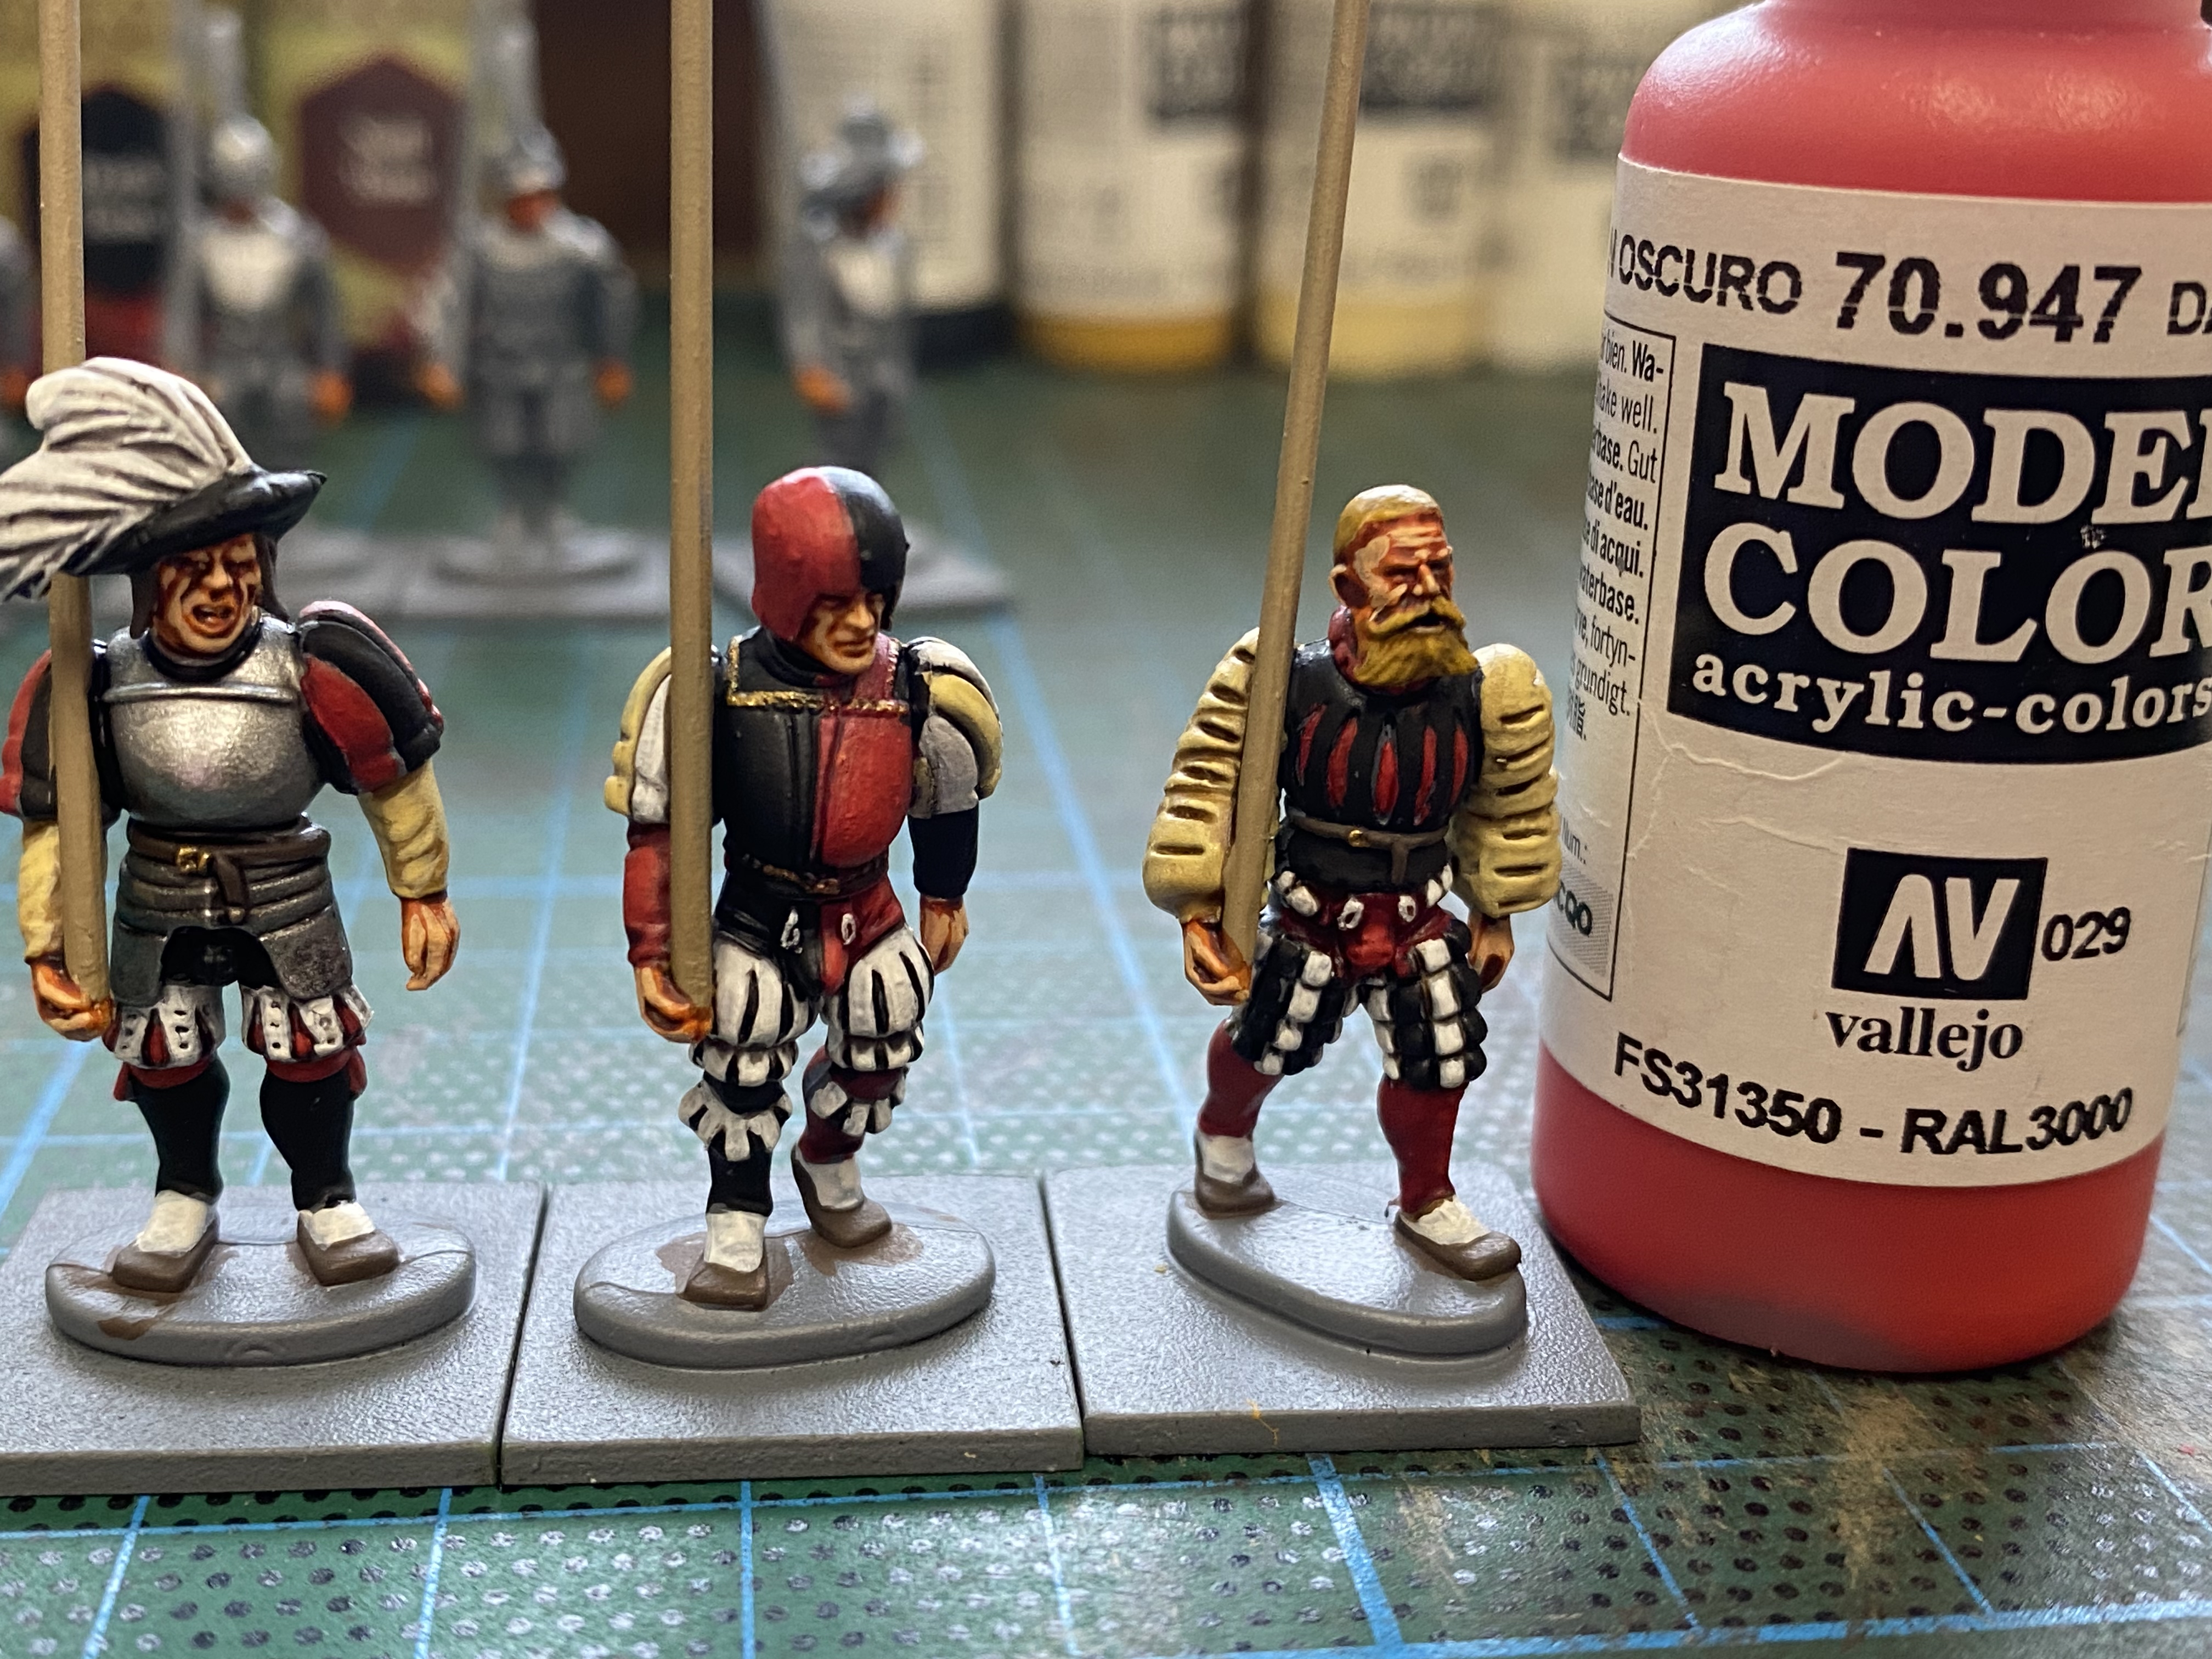
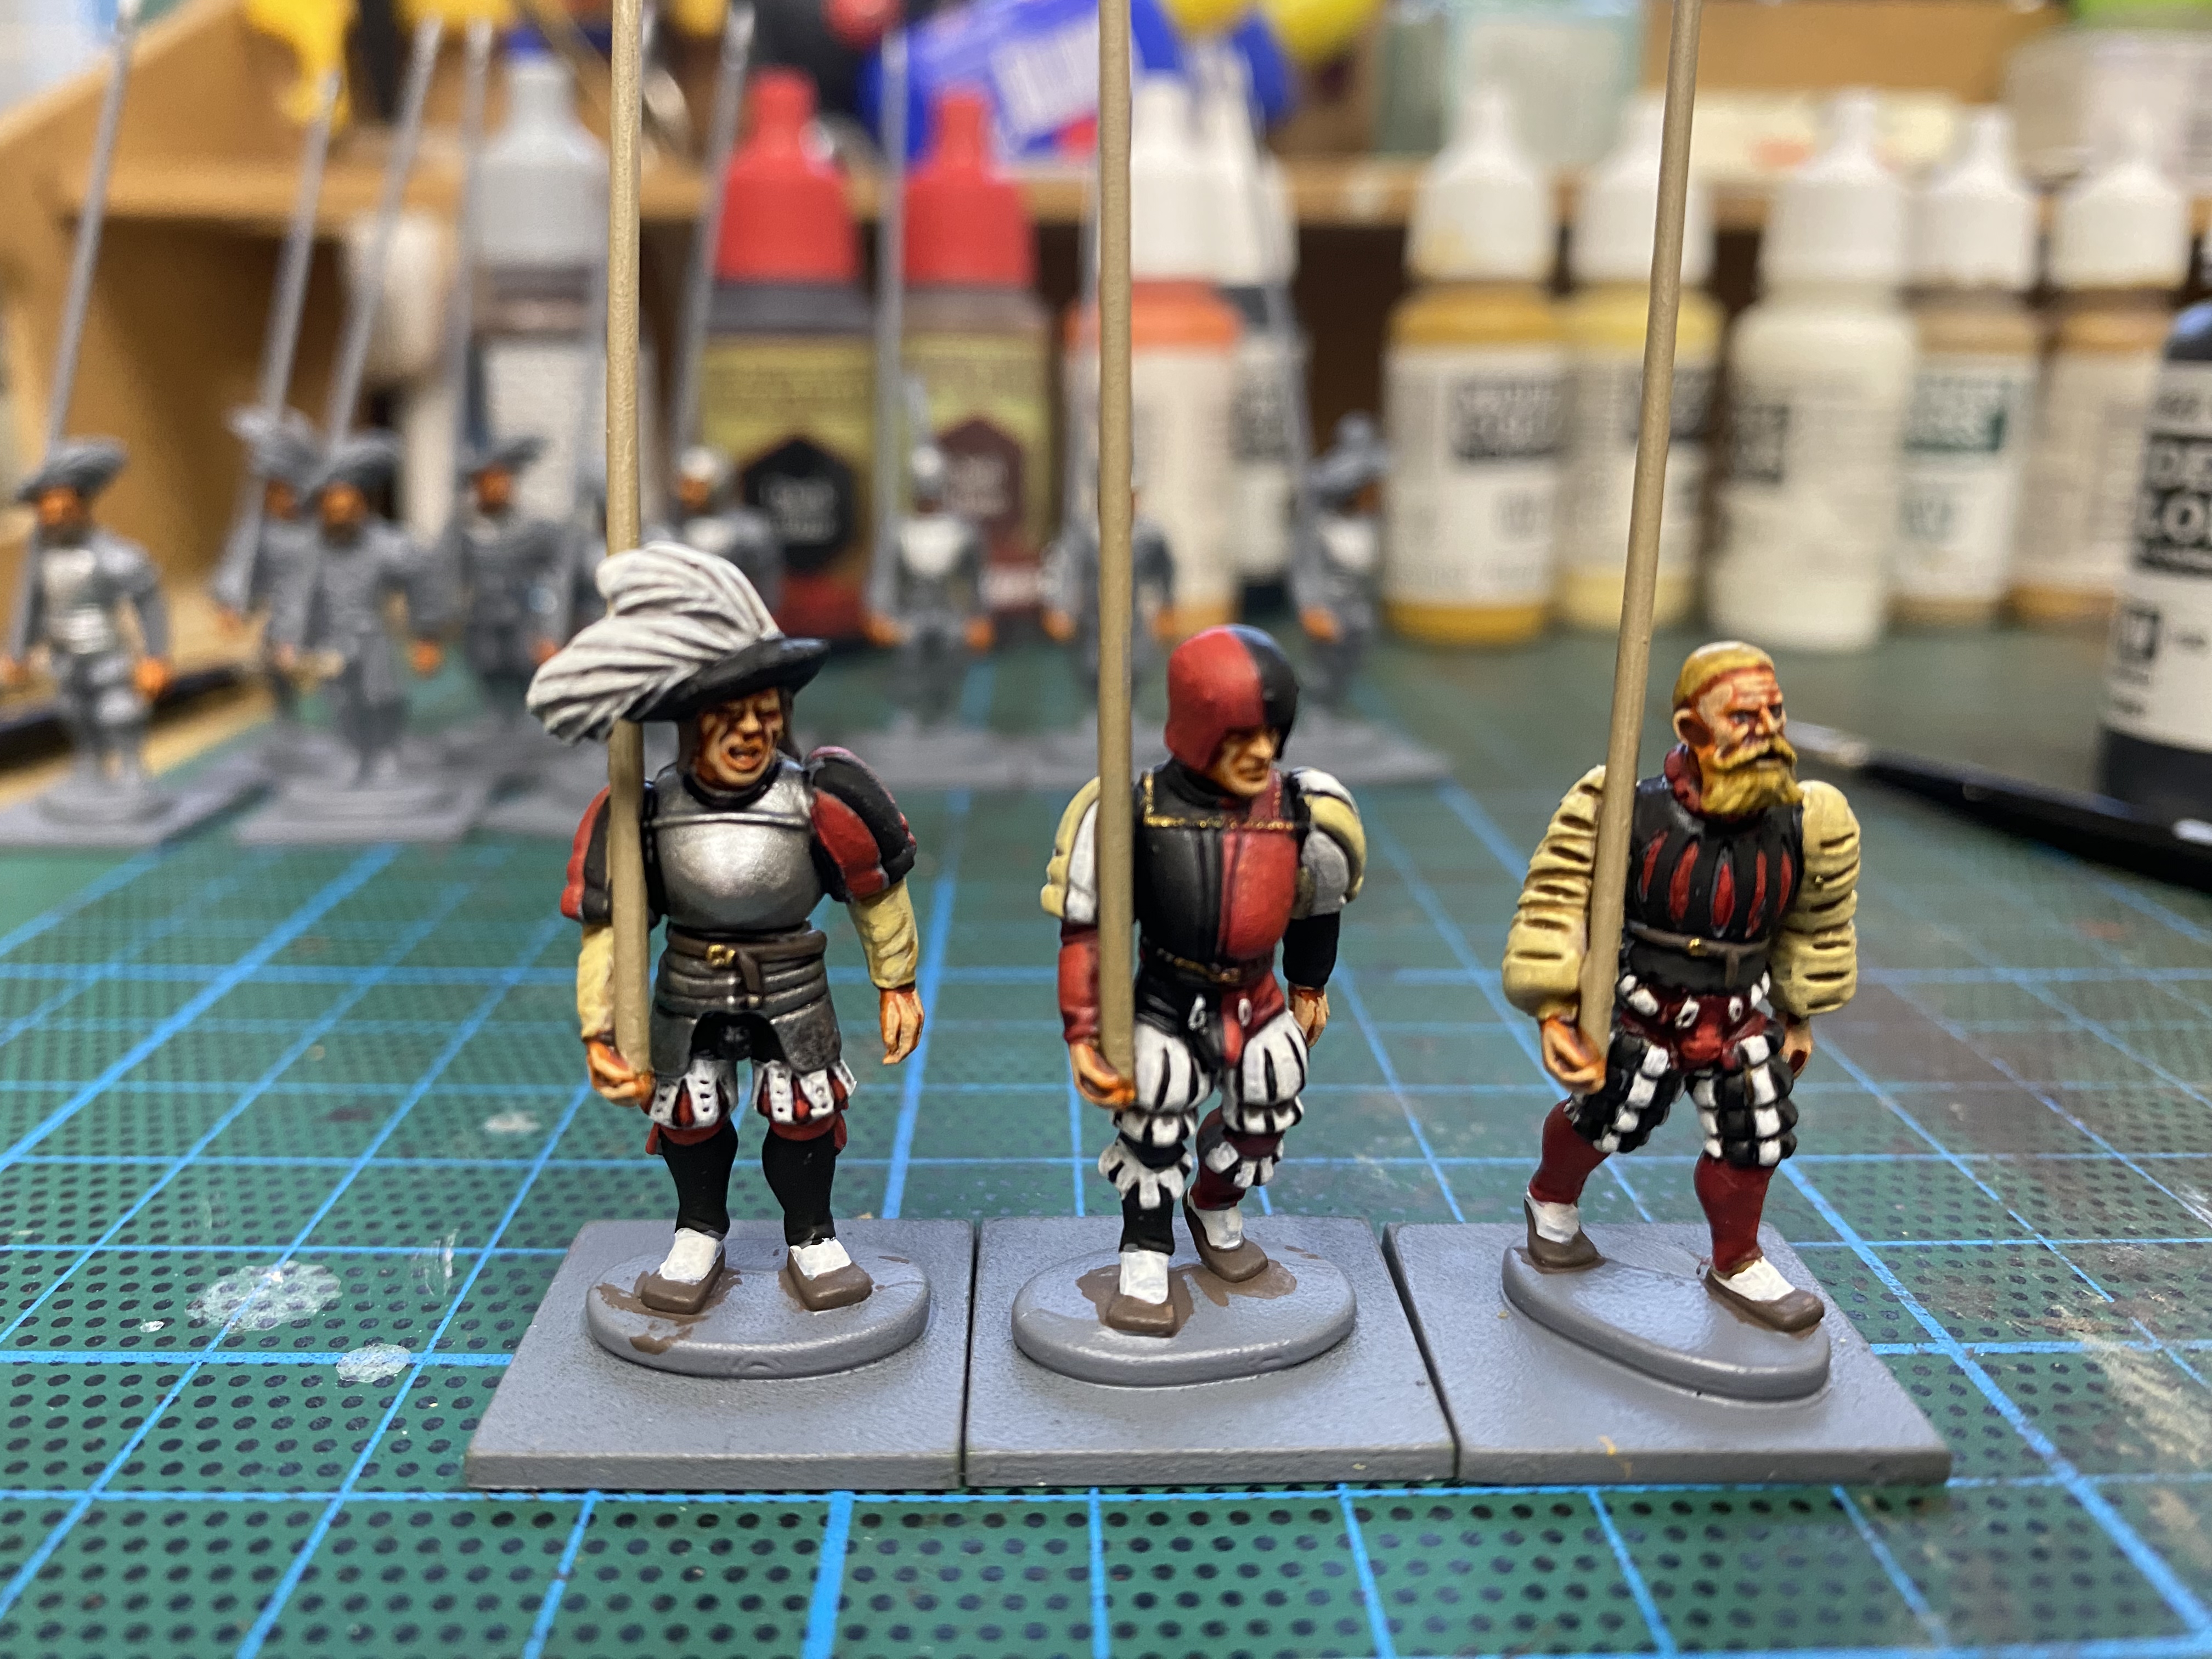
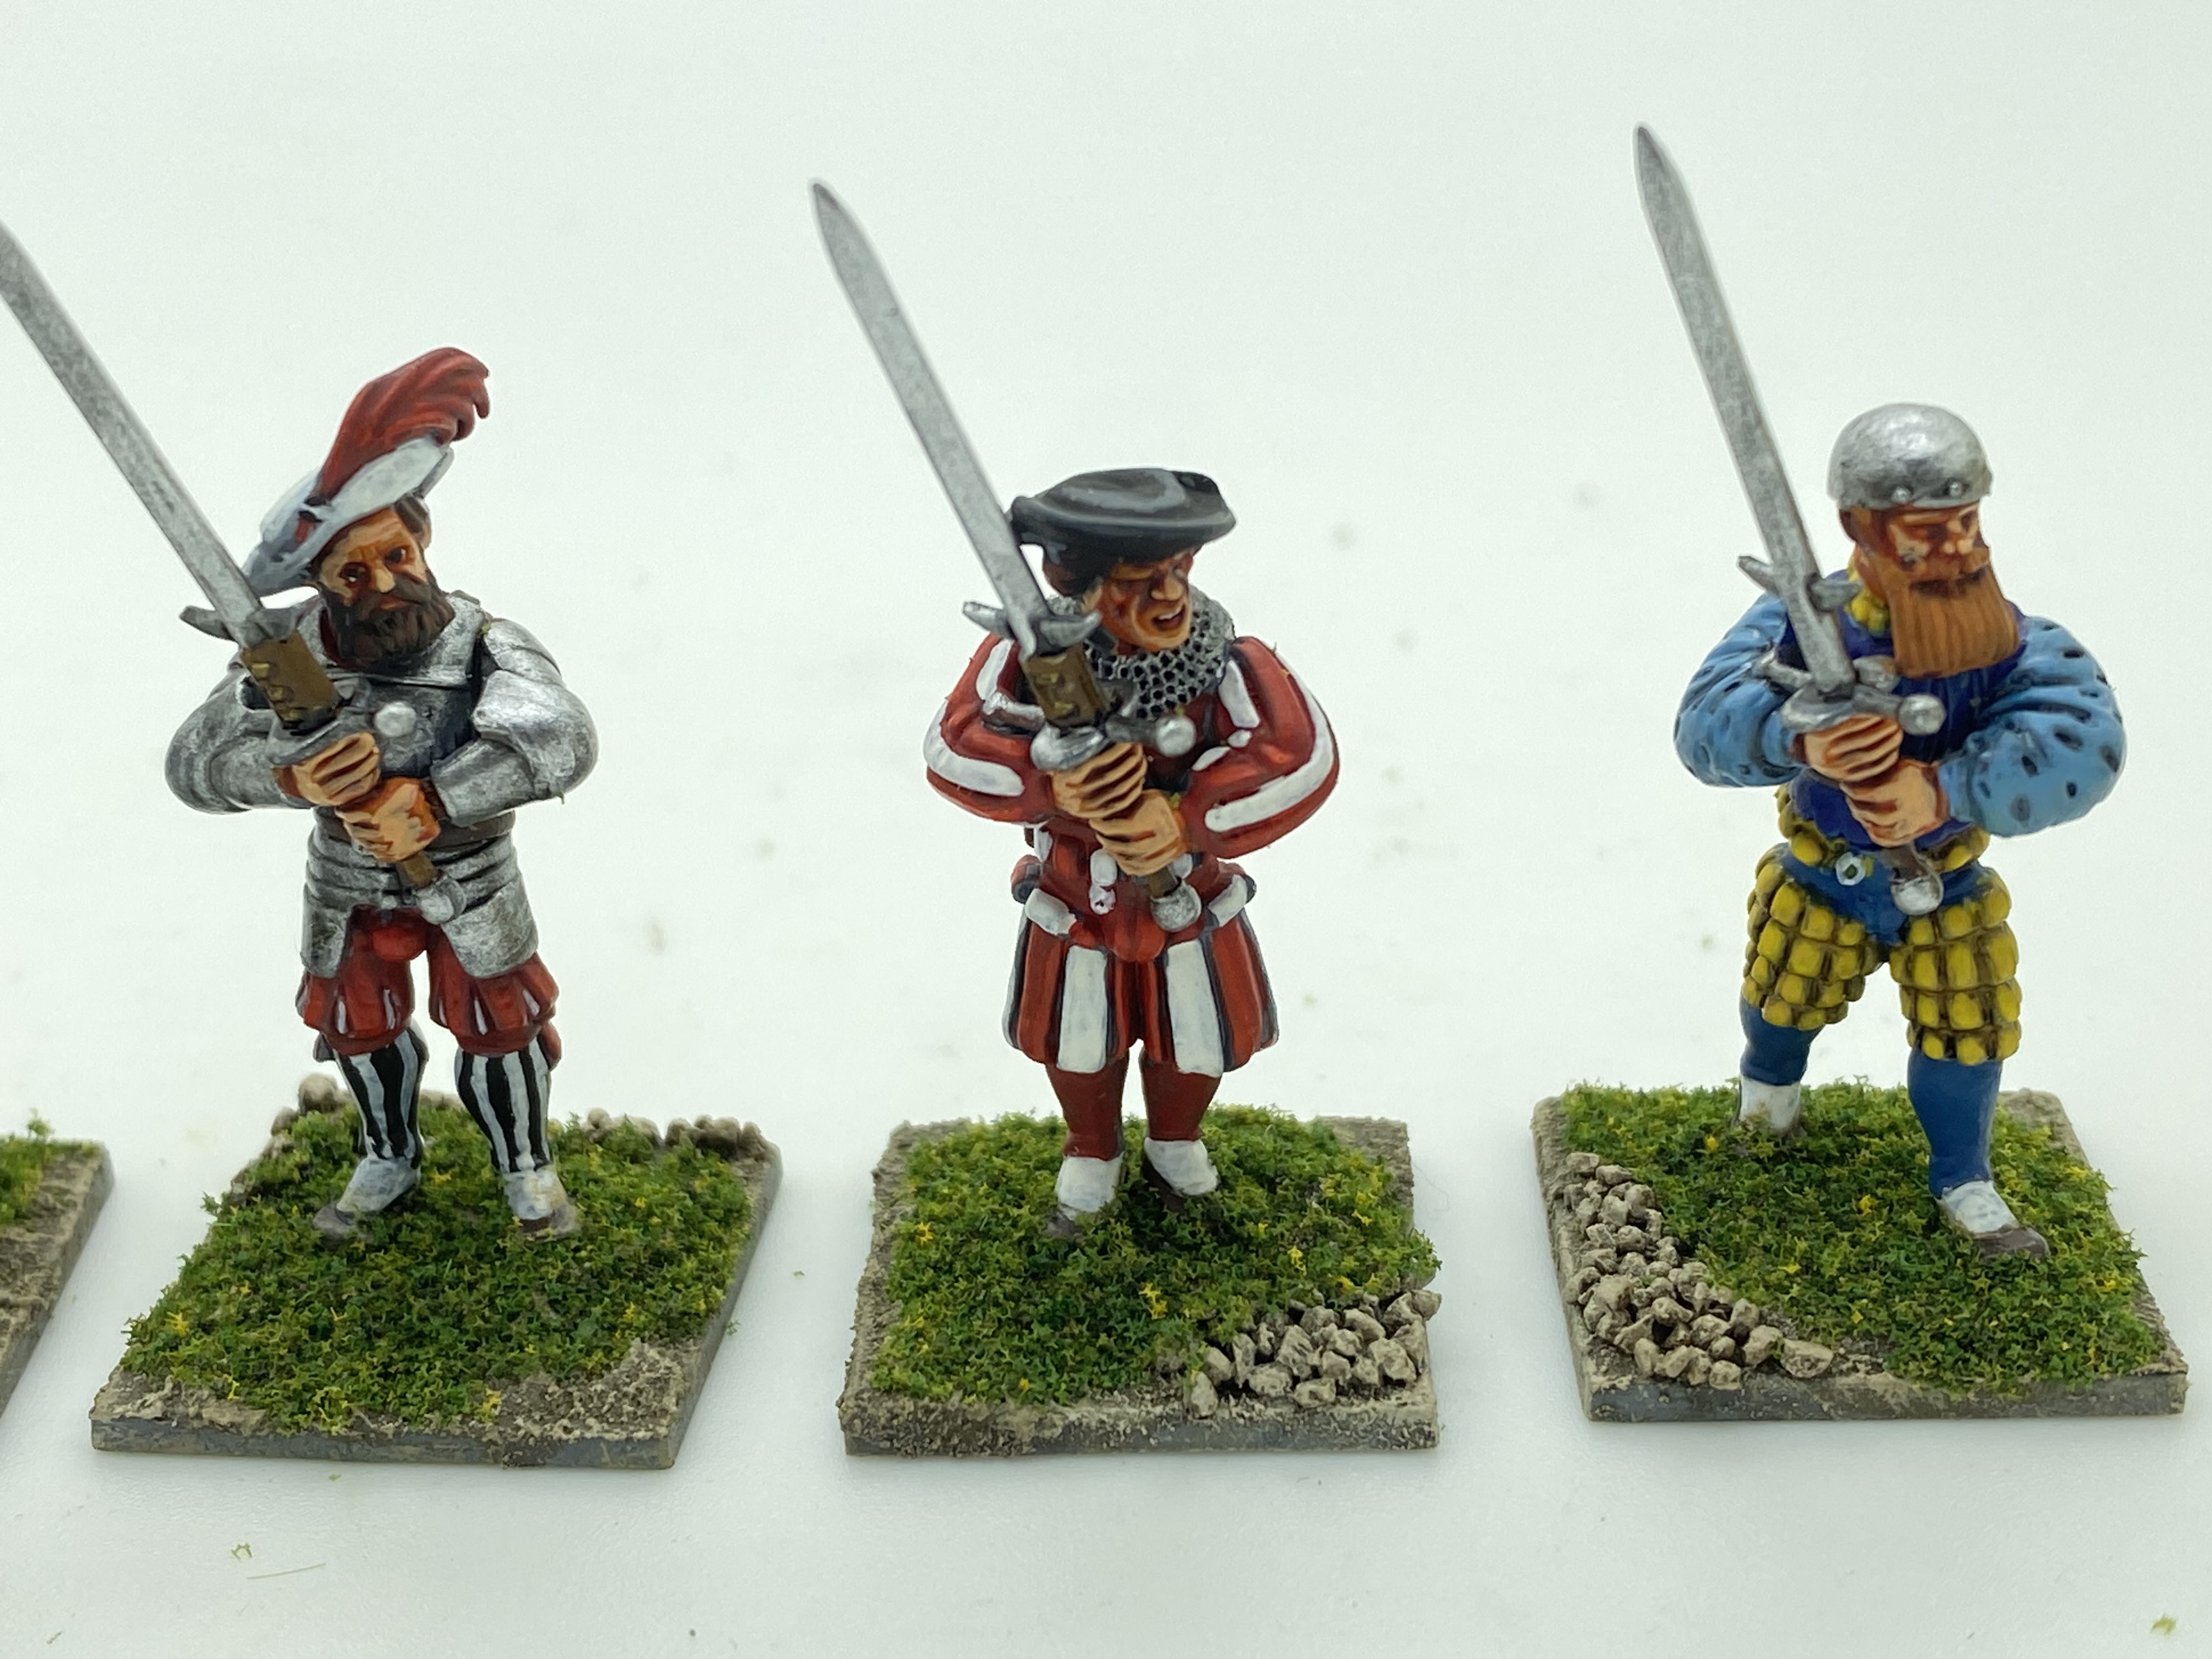
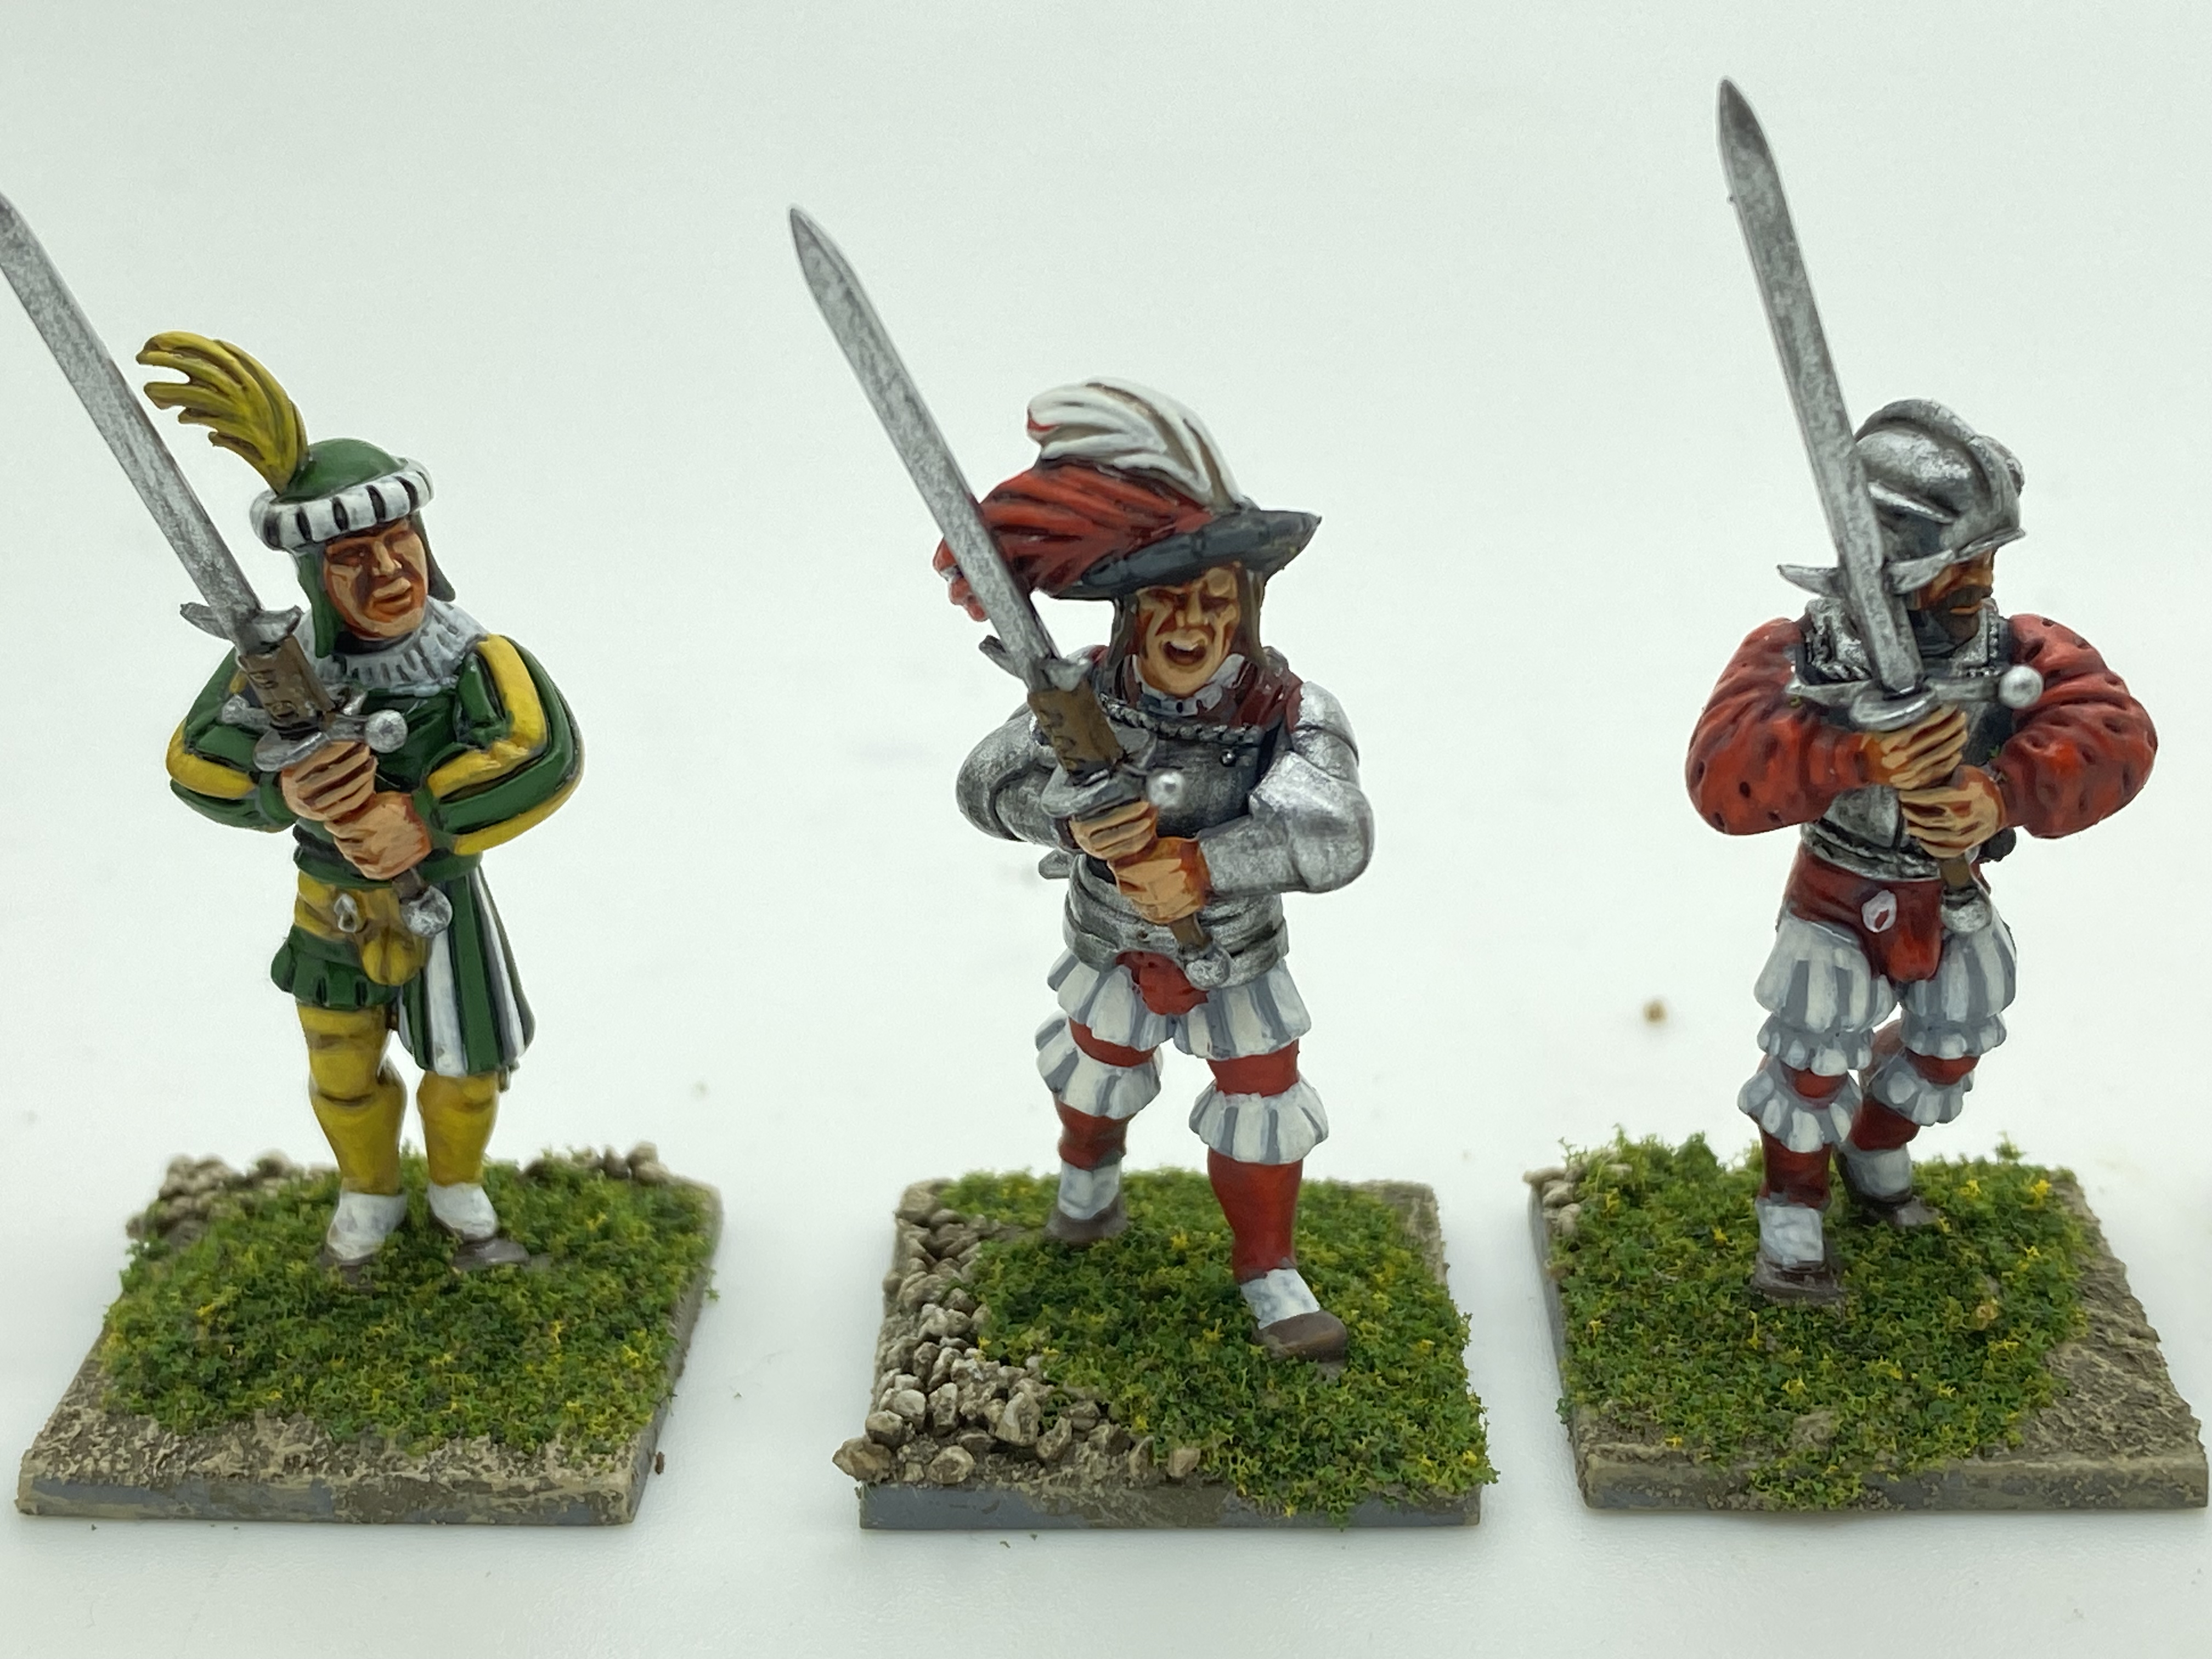
Having finished my resin Gendarmes, I decided to crack on and paint the Gendarmes that I had picked up from Foundry Miniatures. They are actually listed as Casting Room Miniatures but are an off shoot of the Foundry brand and available from the factory shop in East Stoke.
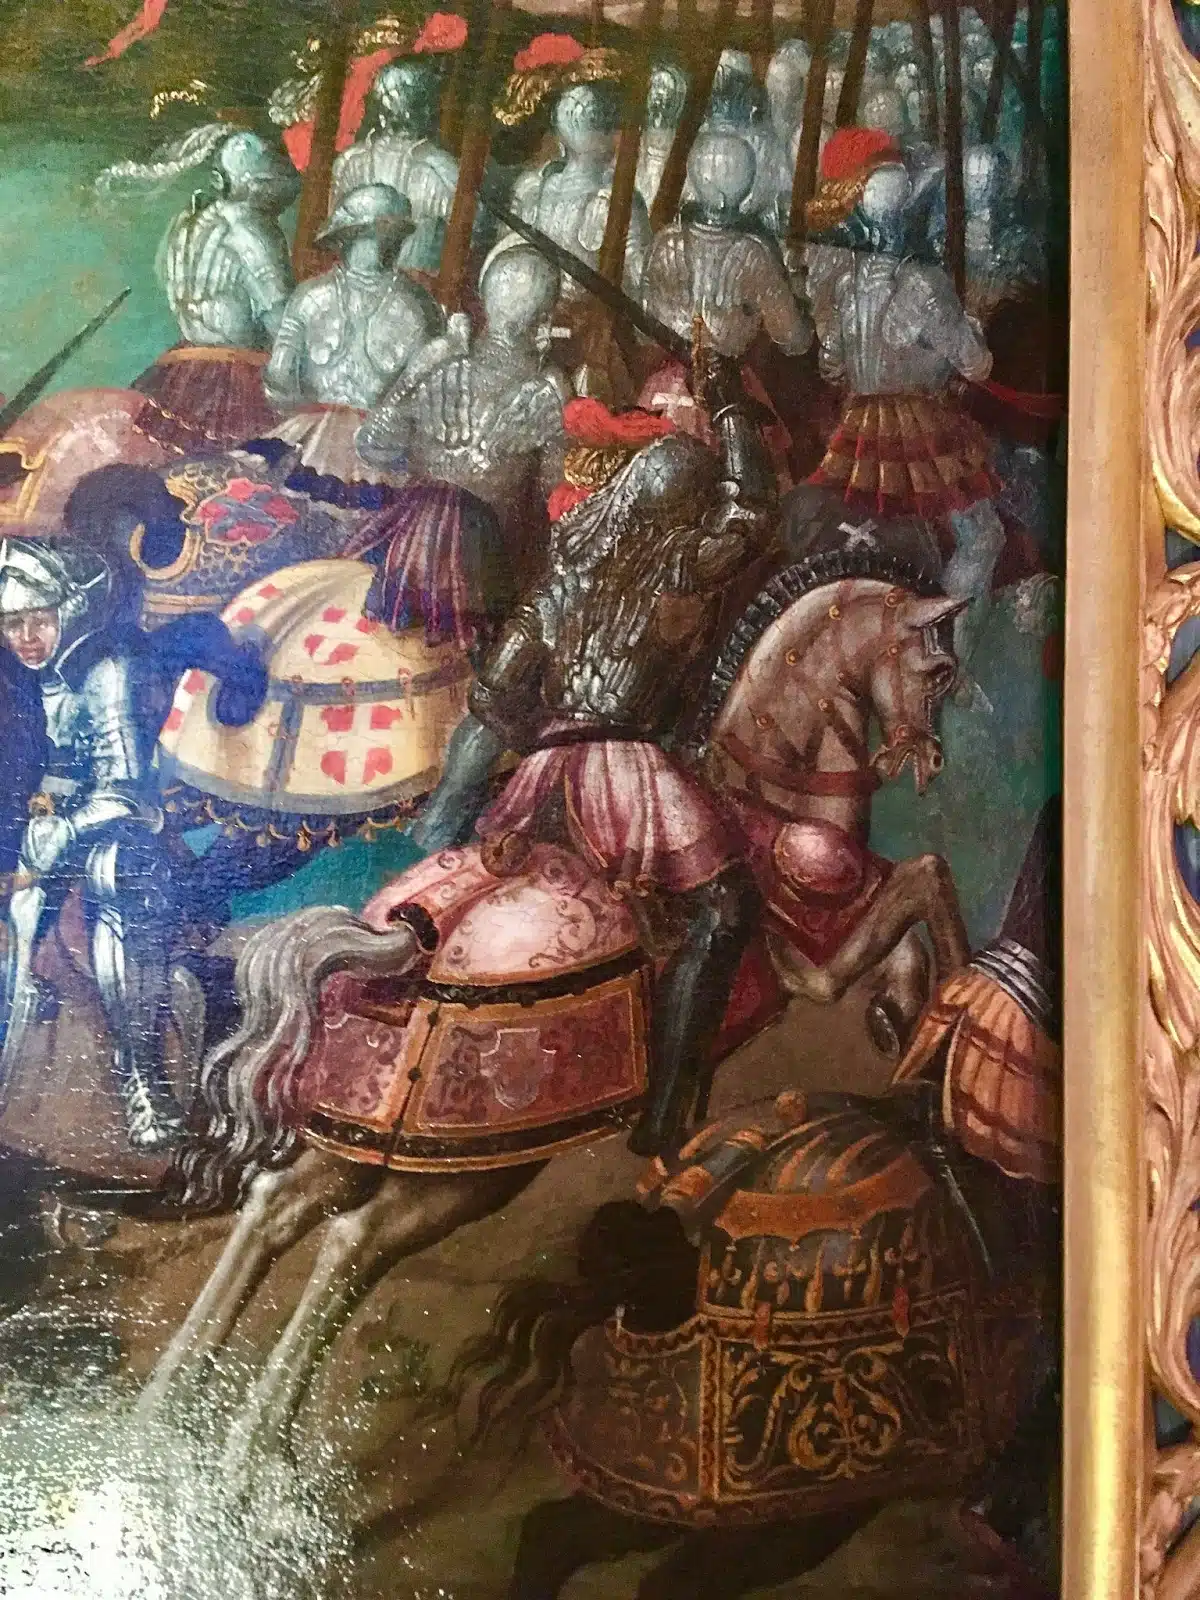
Once again, I have to point out that my research with regards to the actual colours that these knights appeared in is limited. I used the Foundry web store pictures and references that I found on Pinterest and Google images as a guide. To be fair, in some cases, I simply attempted to copy the superb work that other people had produced. If you type French gendarme knights into google and click on the images tag, you will see plenty of inspirational images and for that matter, models. Here’s just a couple.
If you do follow the links, it’s worth clicking through to some of the blogs. You will see some of the models that have influenced me (those that I copied!) and there is some good background research. In painting these Gendarmes, I was aware that I may be closer to Fantasy that reality. However, some of the artwork shows some amazing designs – I nearly copied a knight with bee hives and bees painted on his horse’s armour but decided it was too complex! As it is, my free hand was being pushed beyond what I would normally attempt!
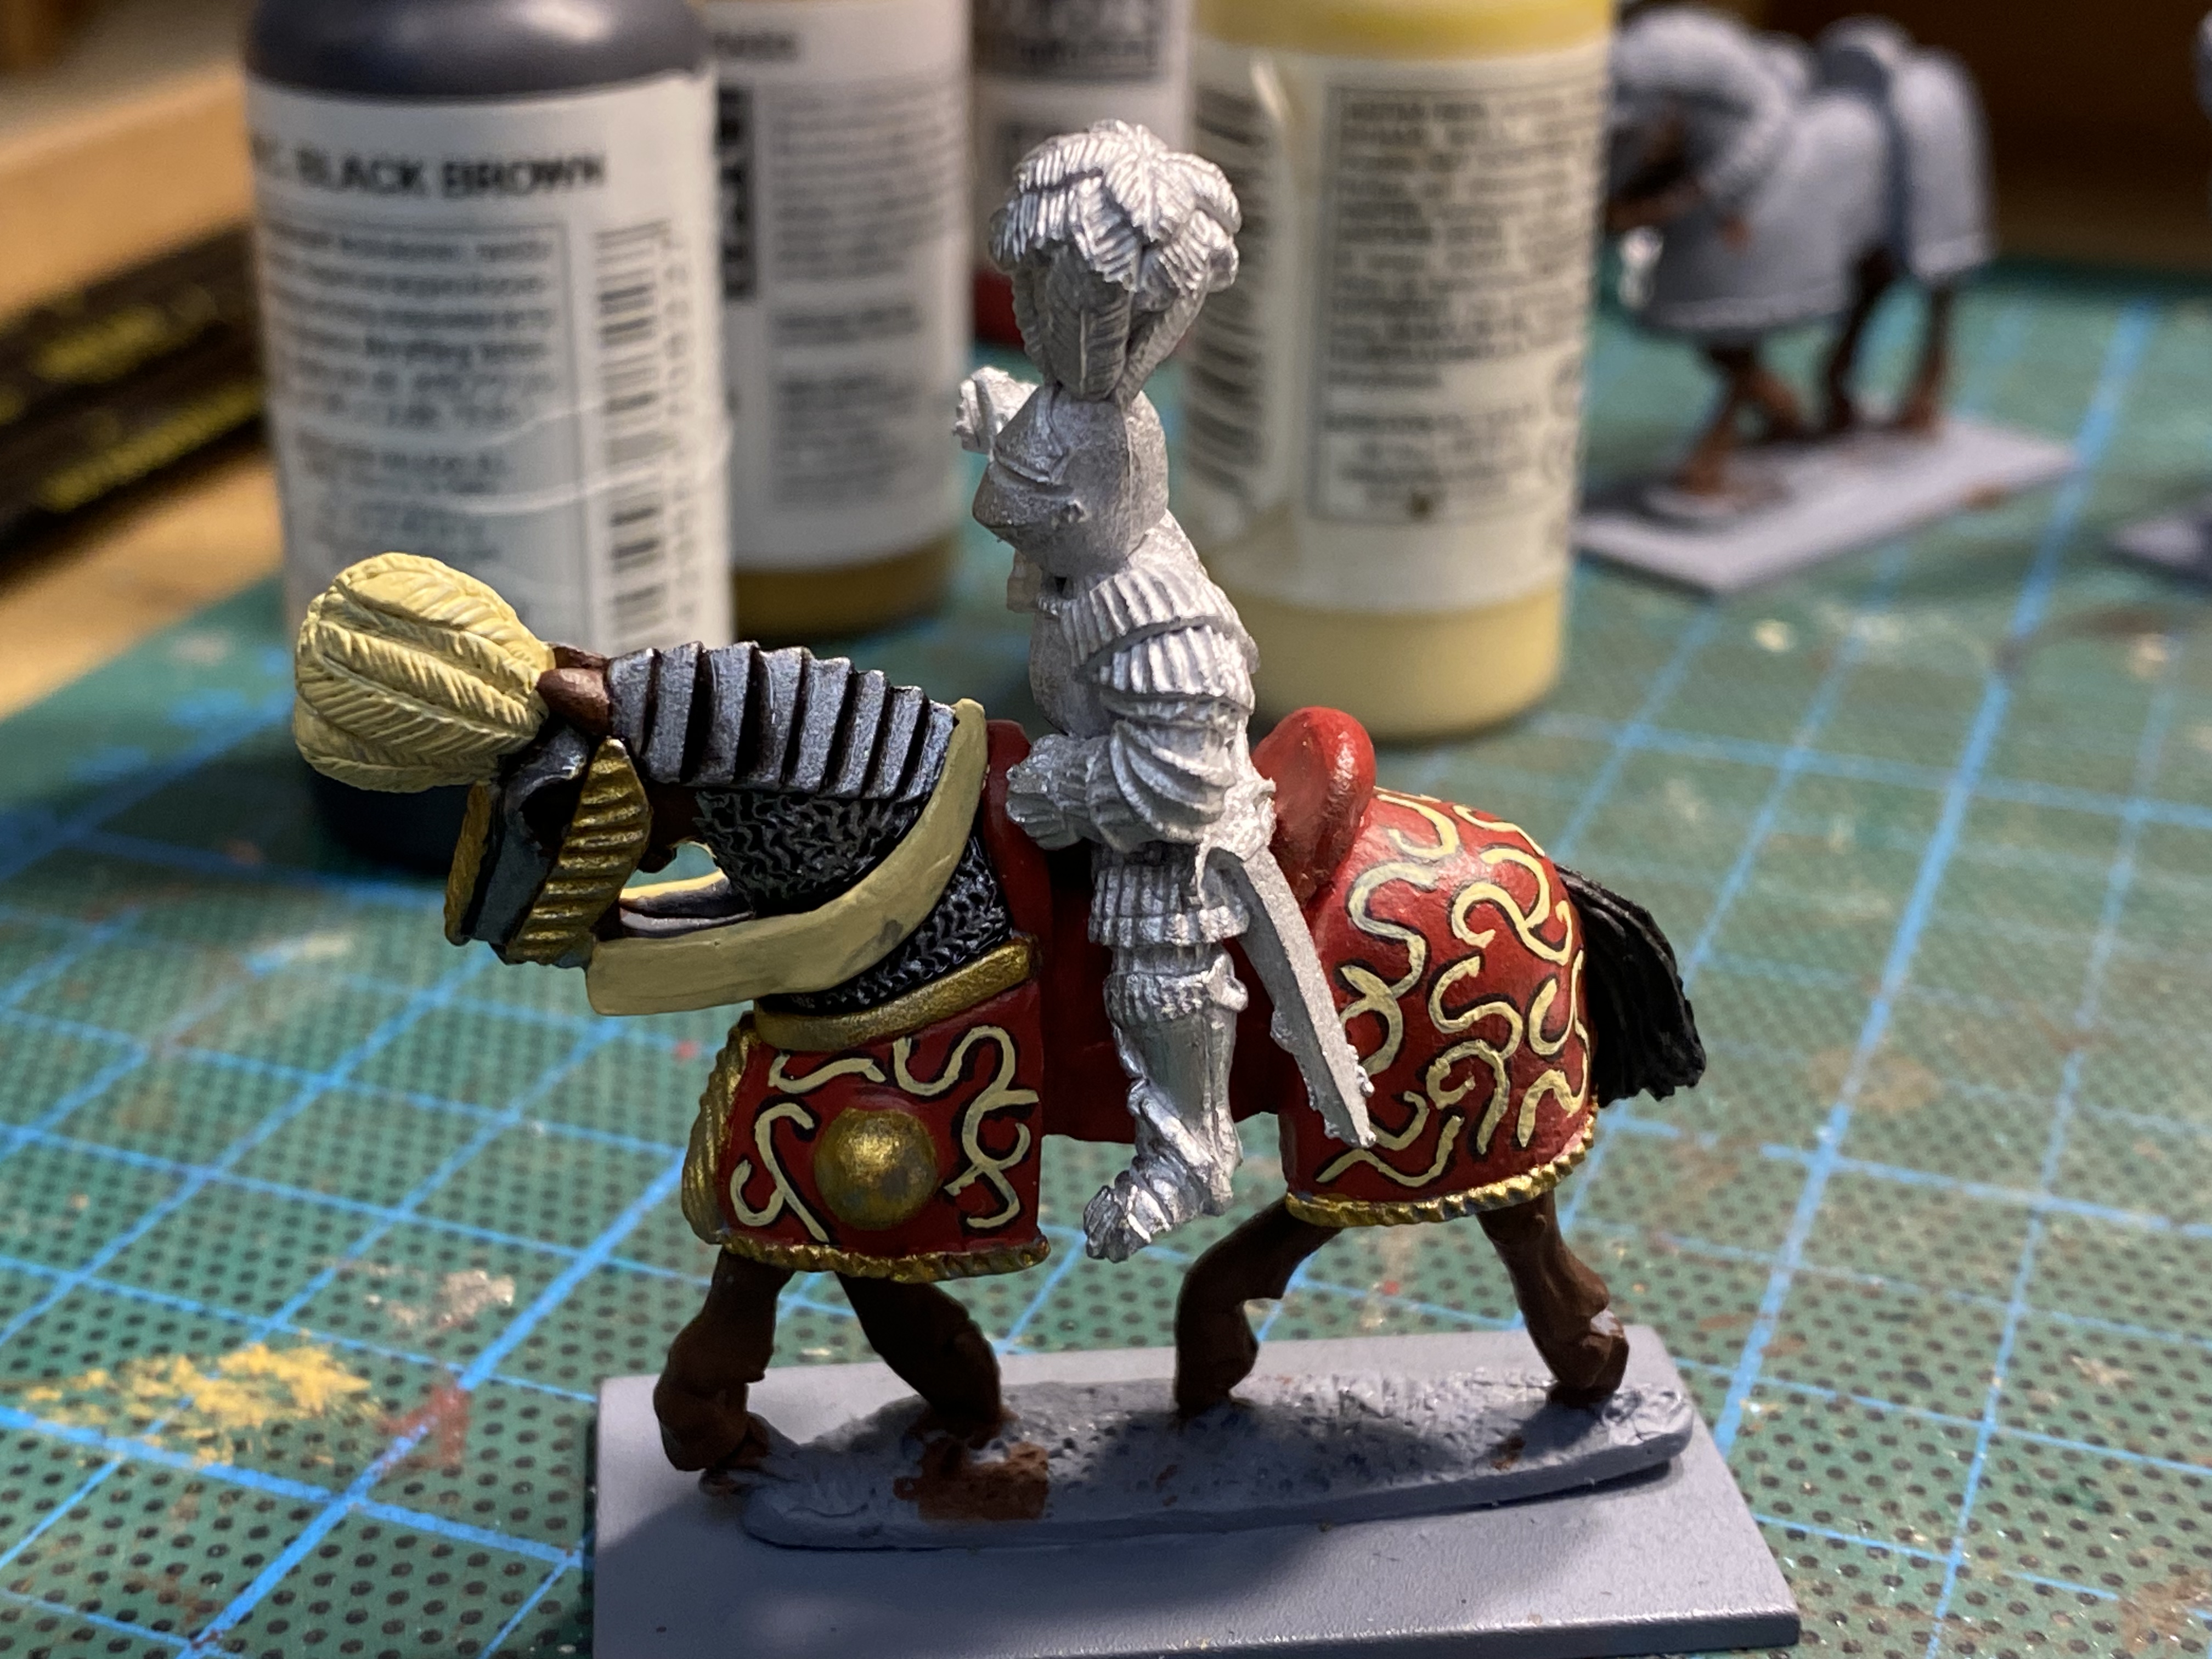
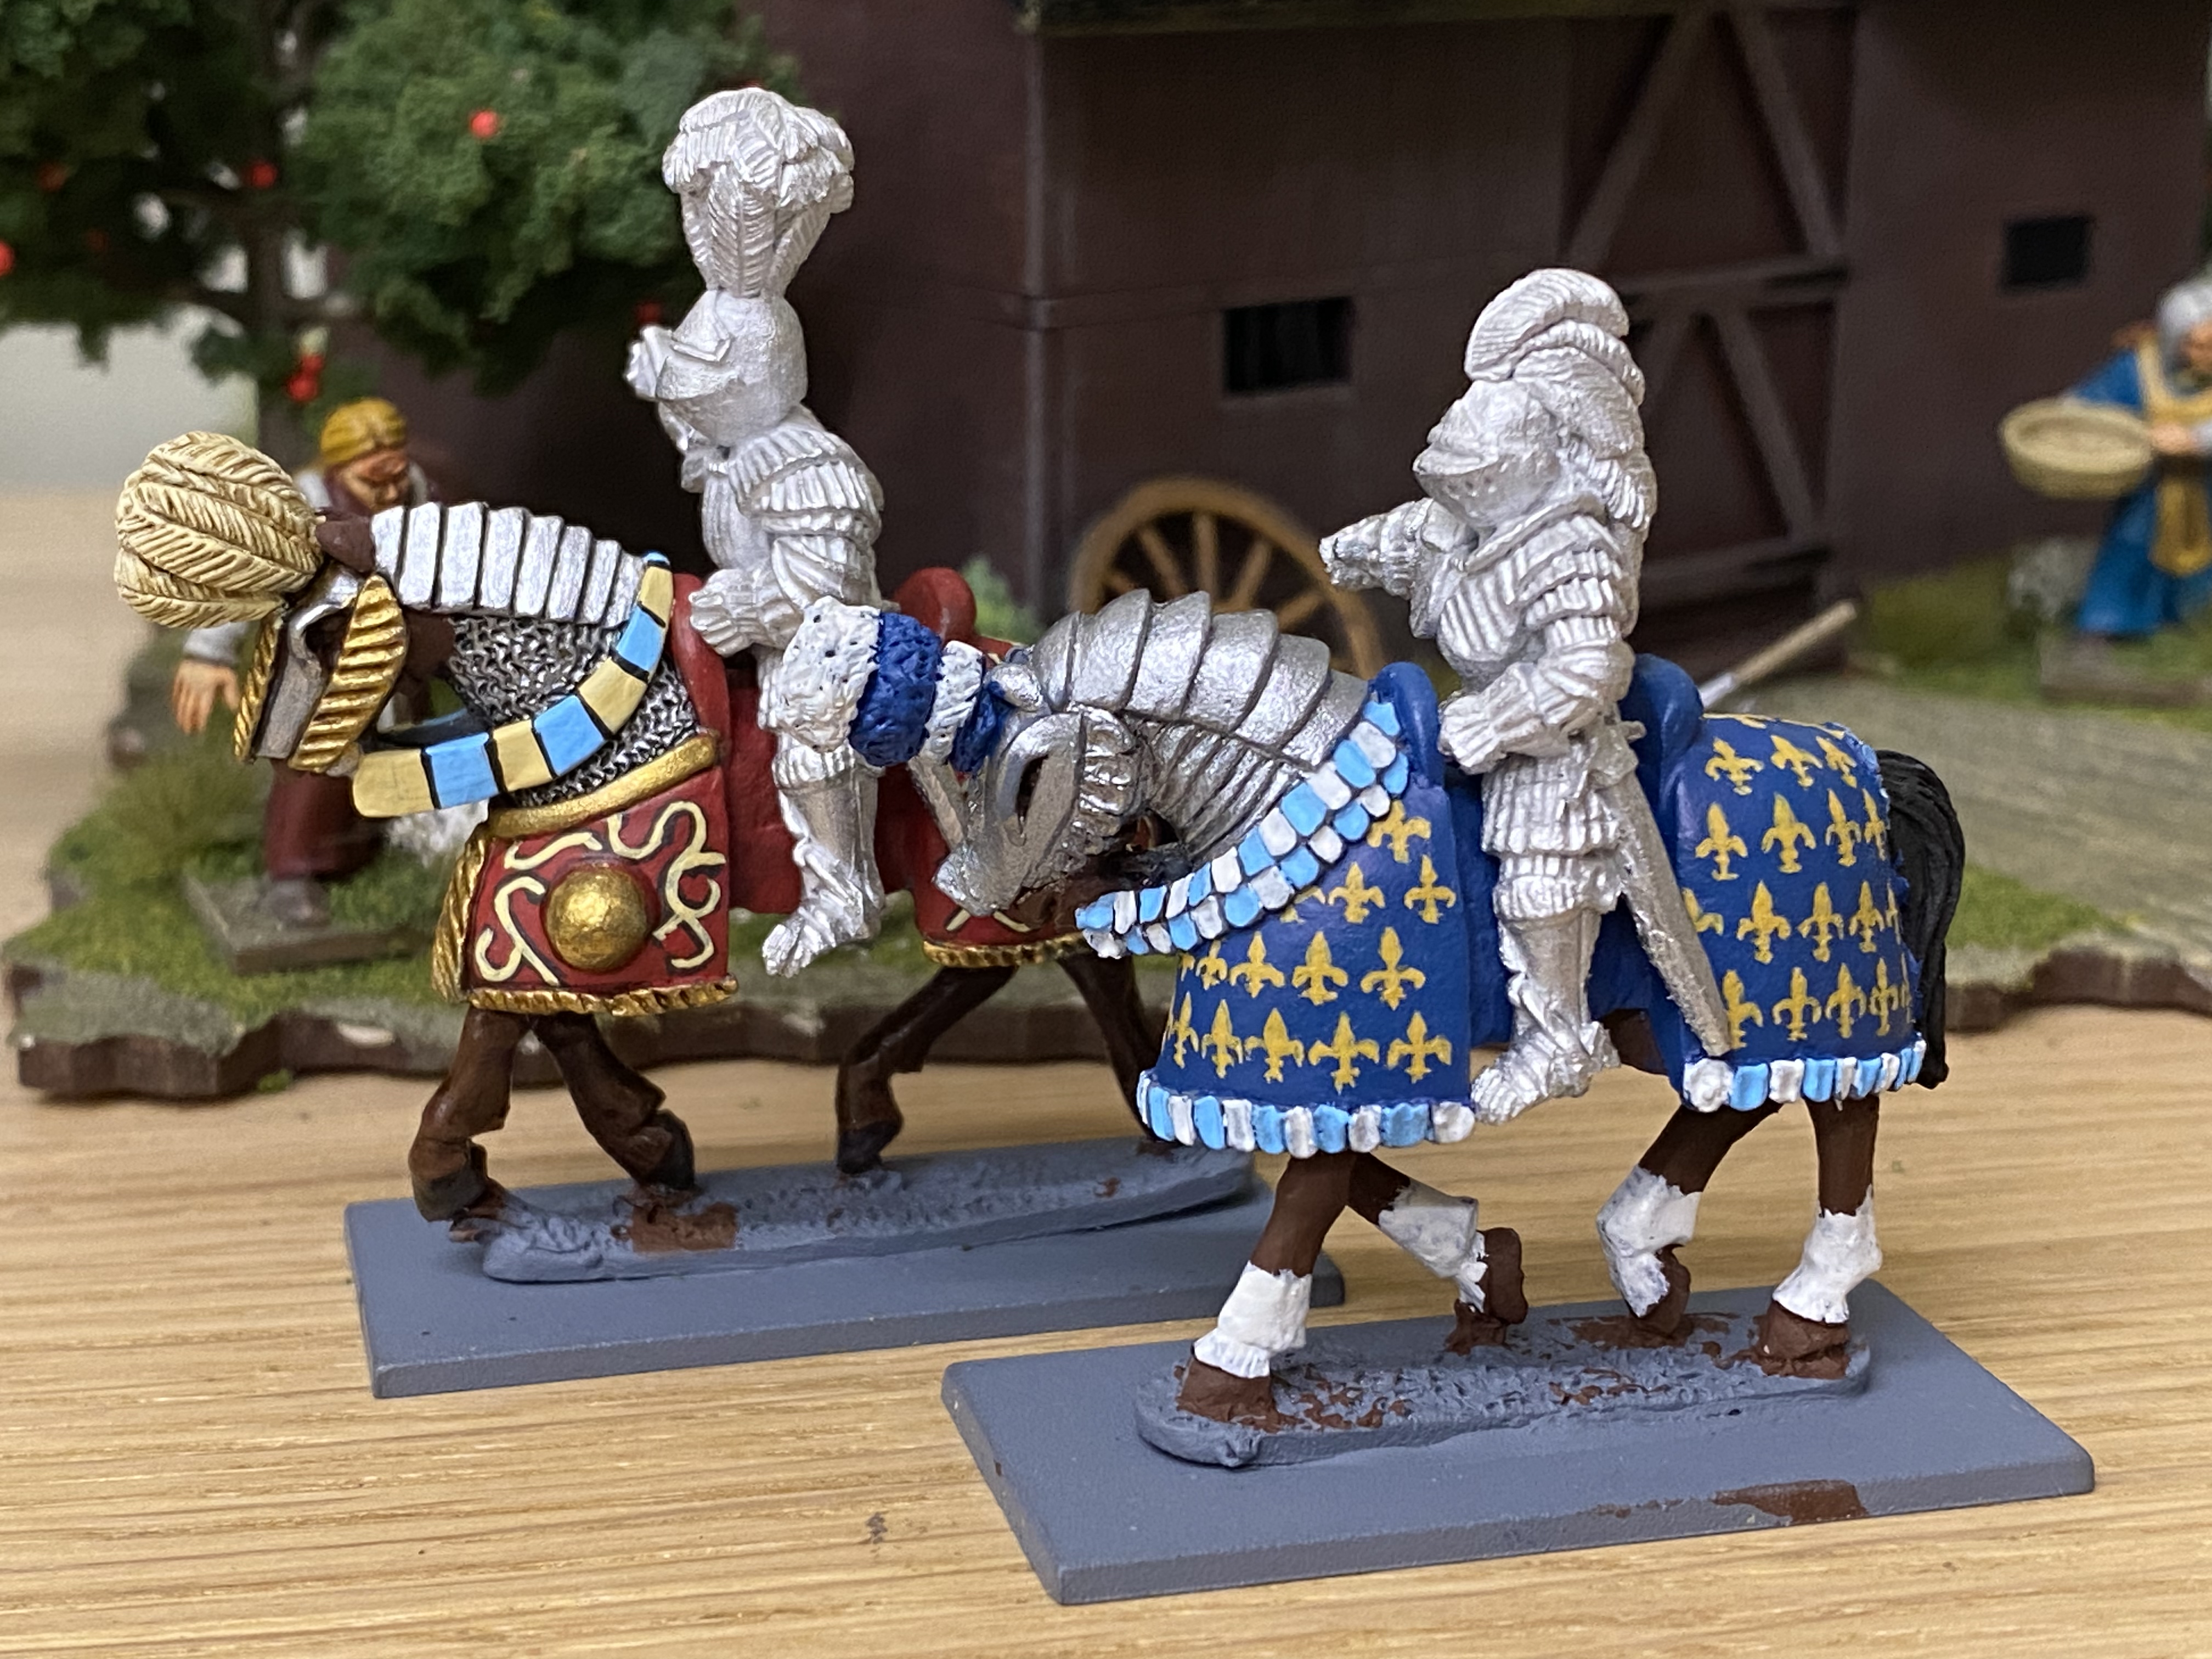
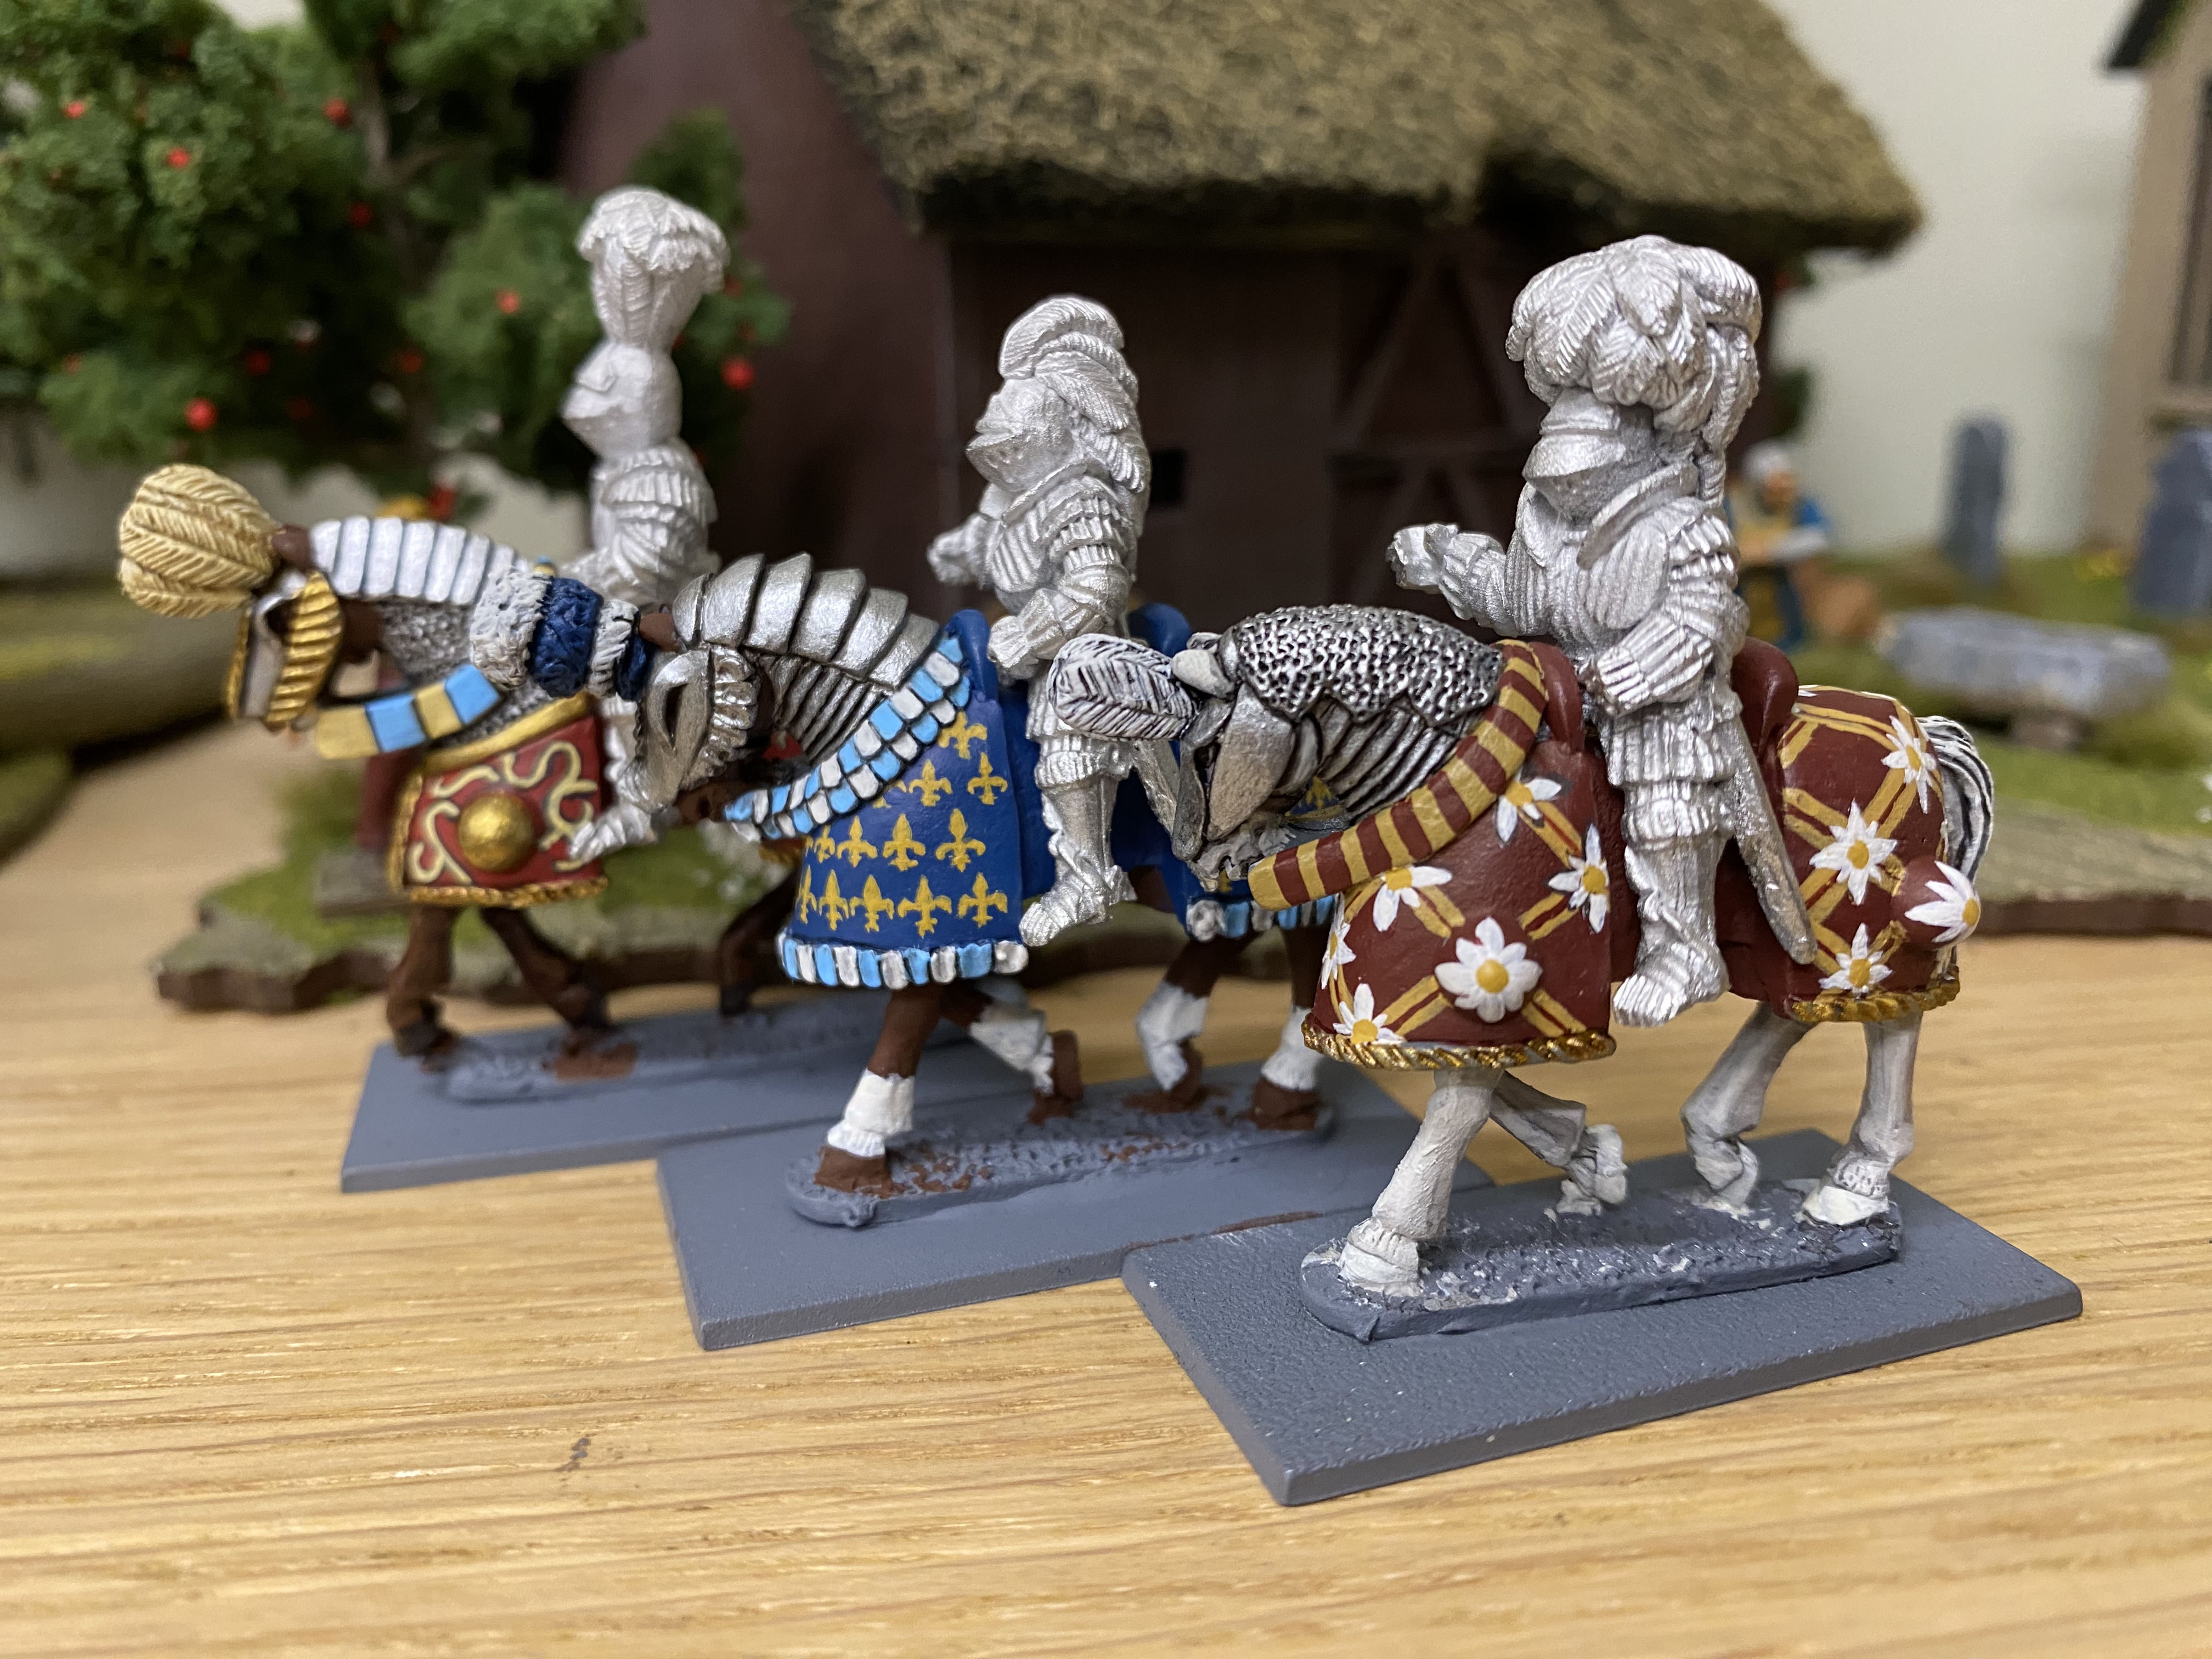
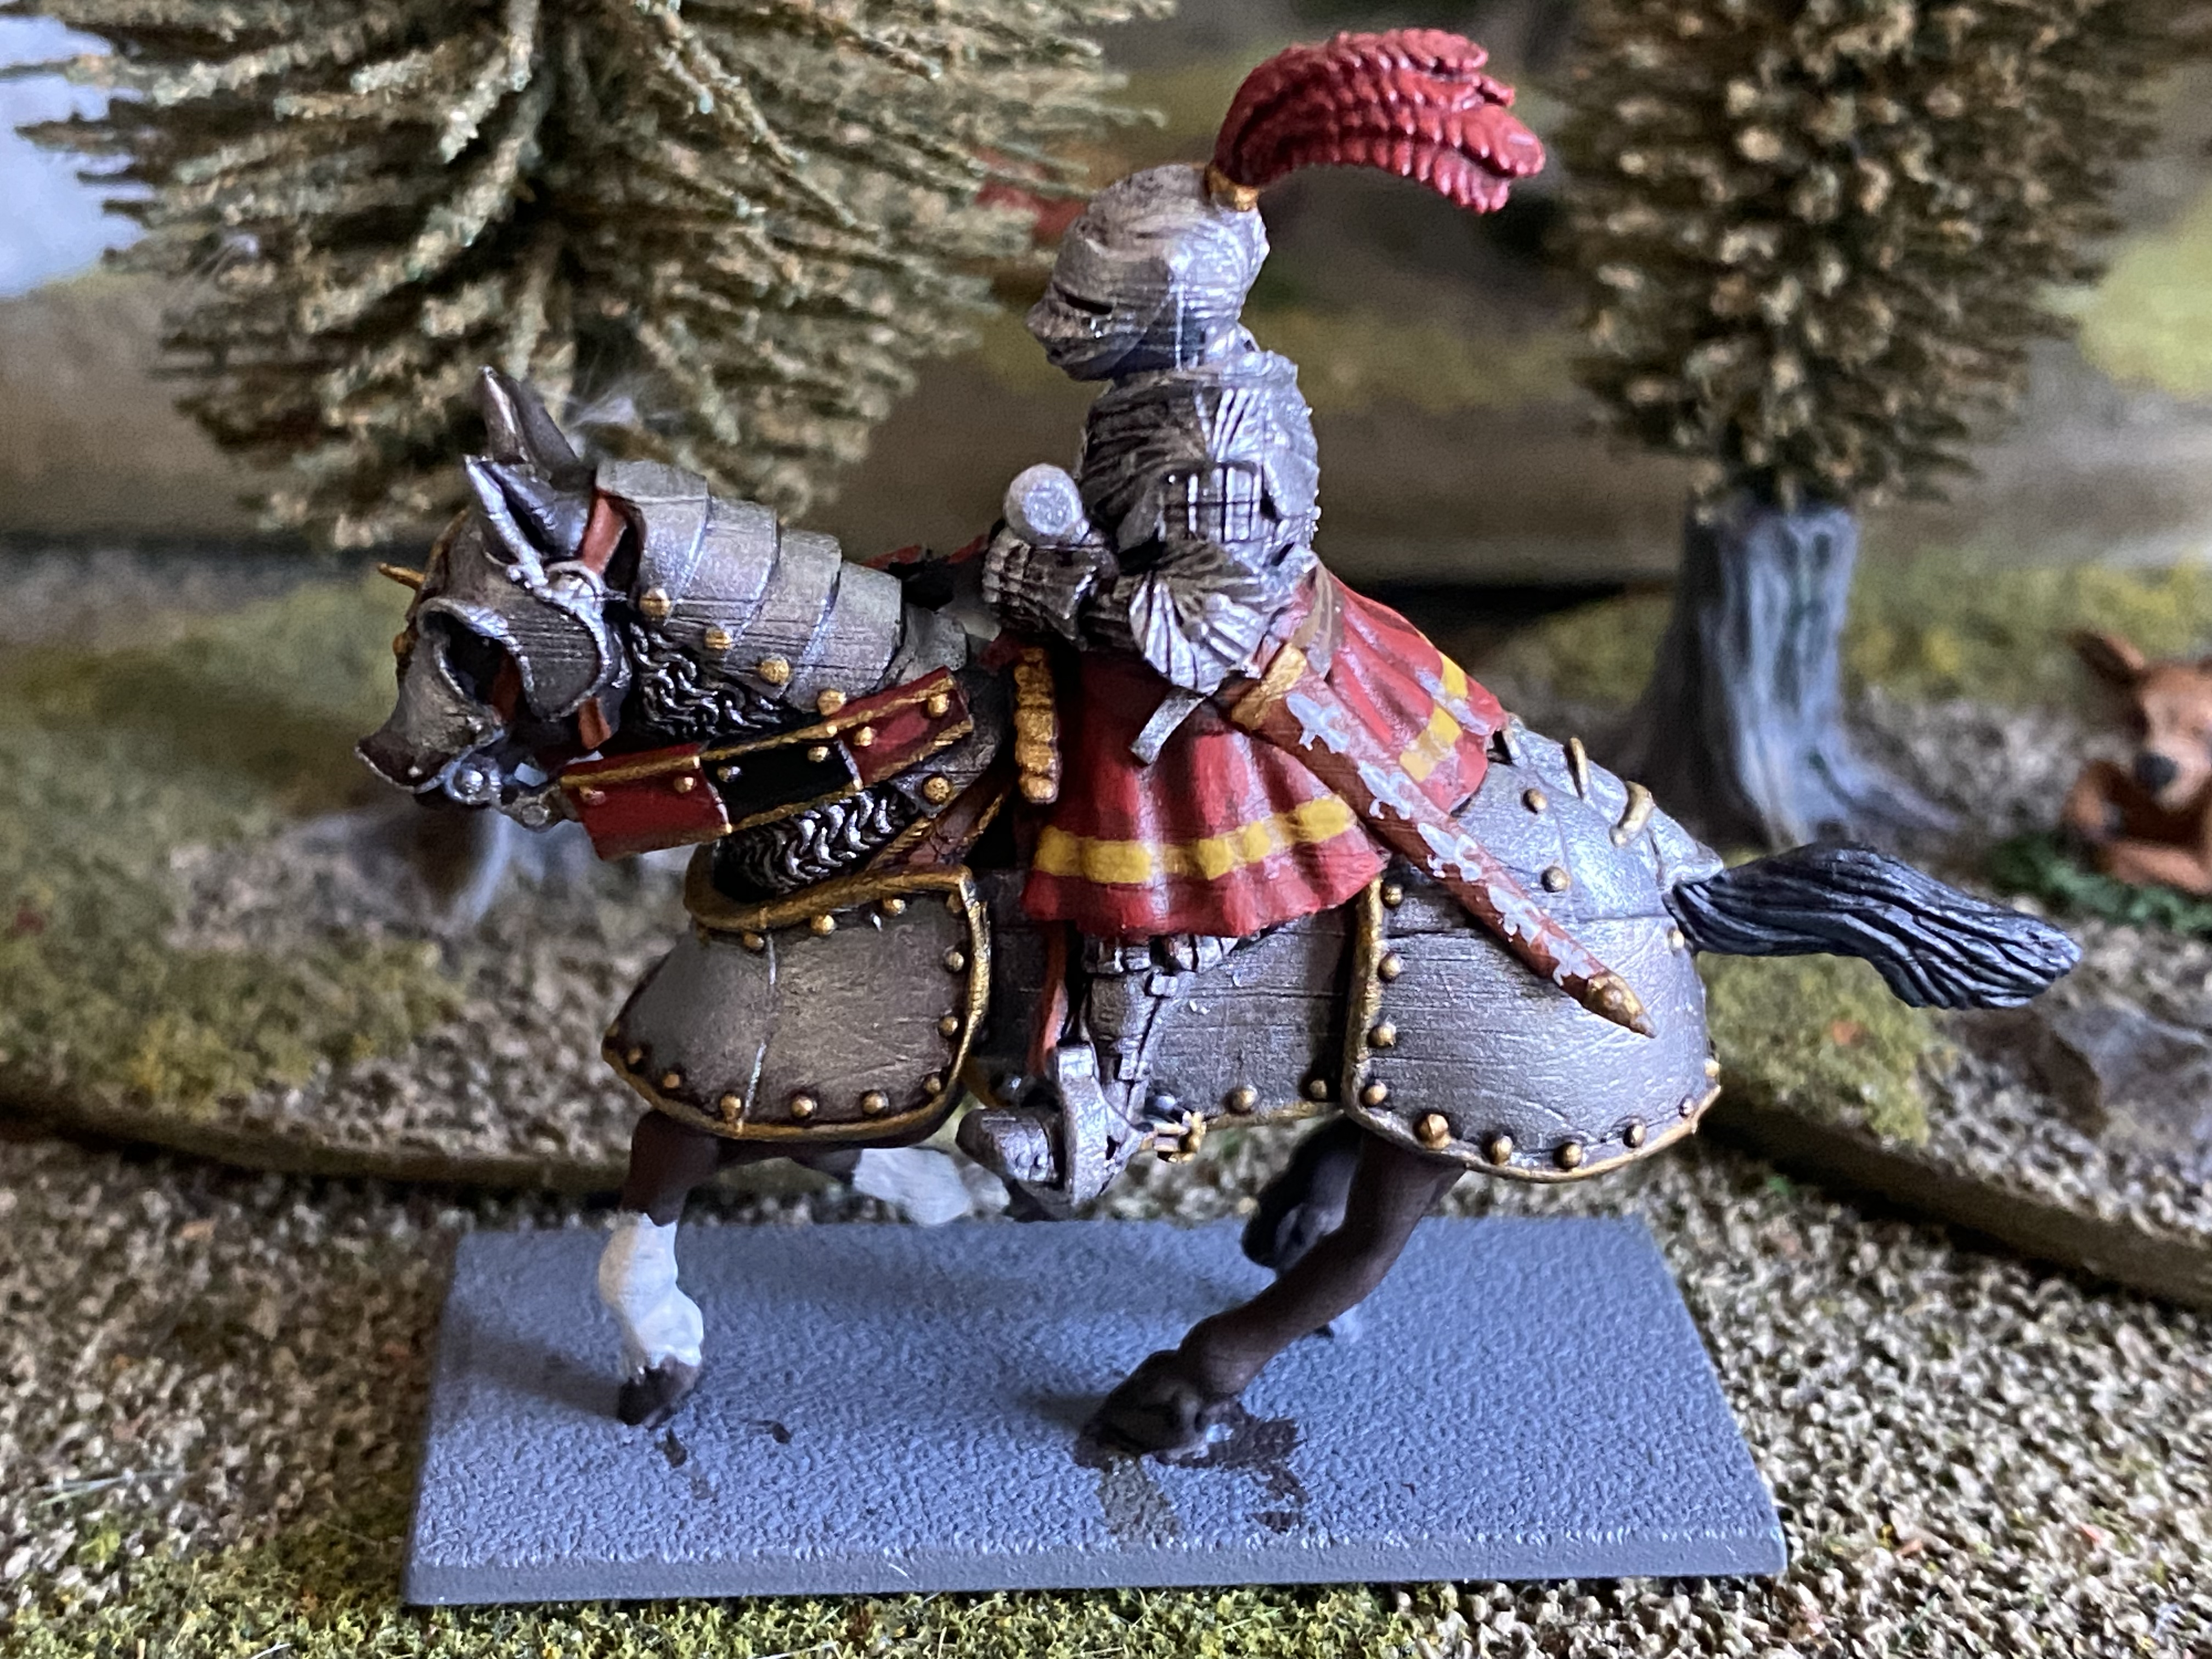
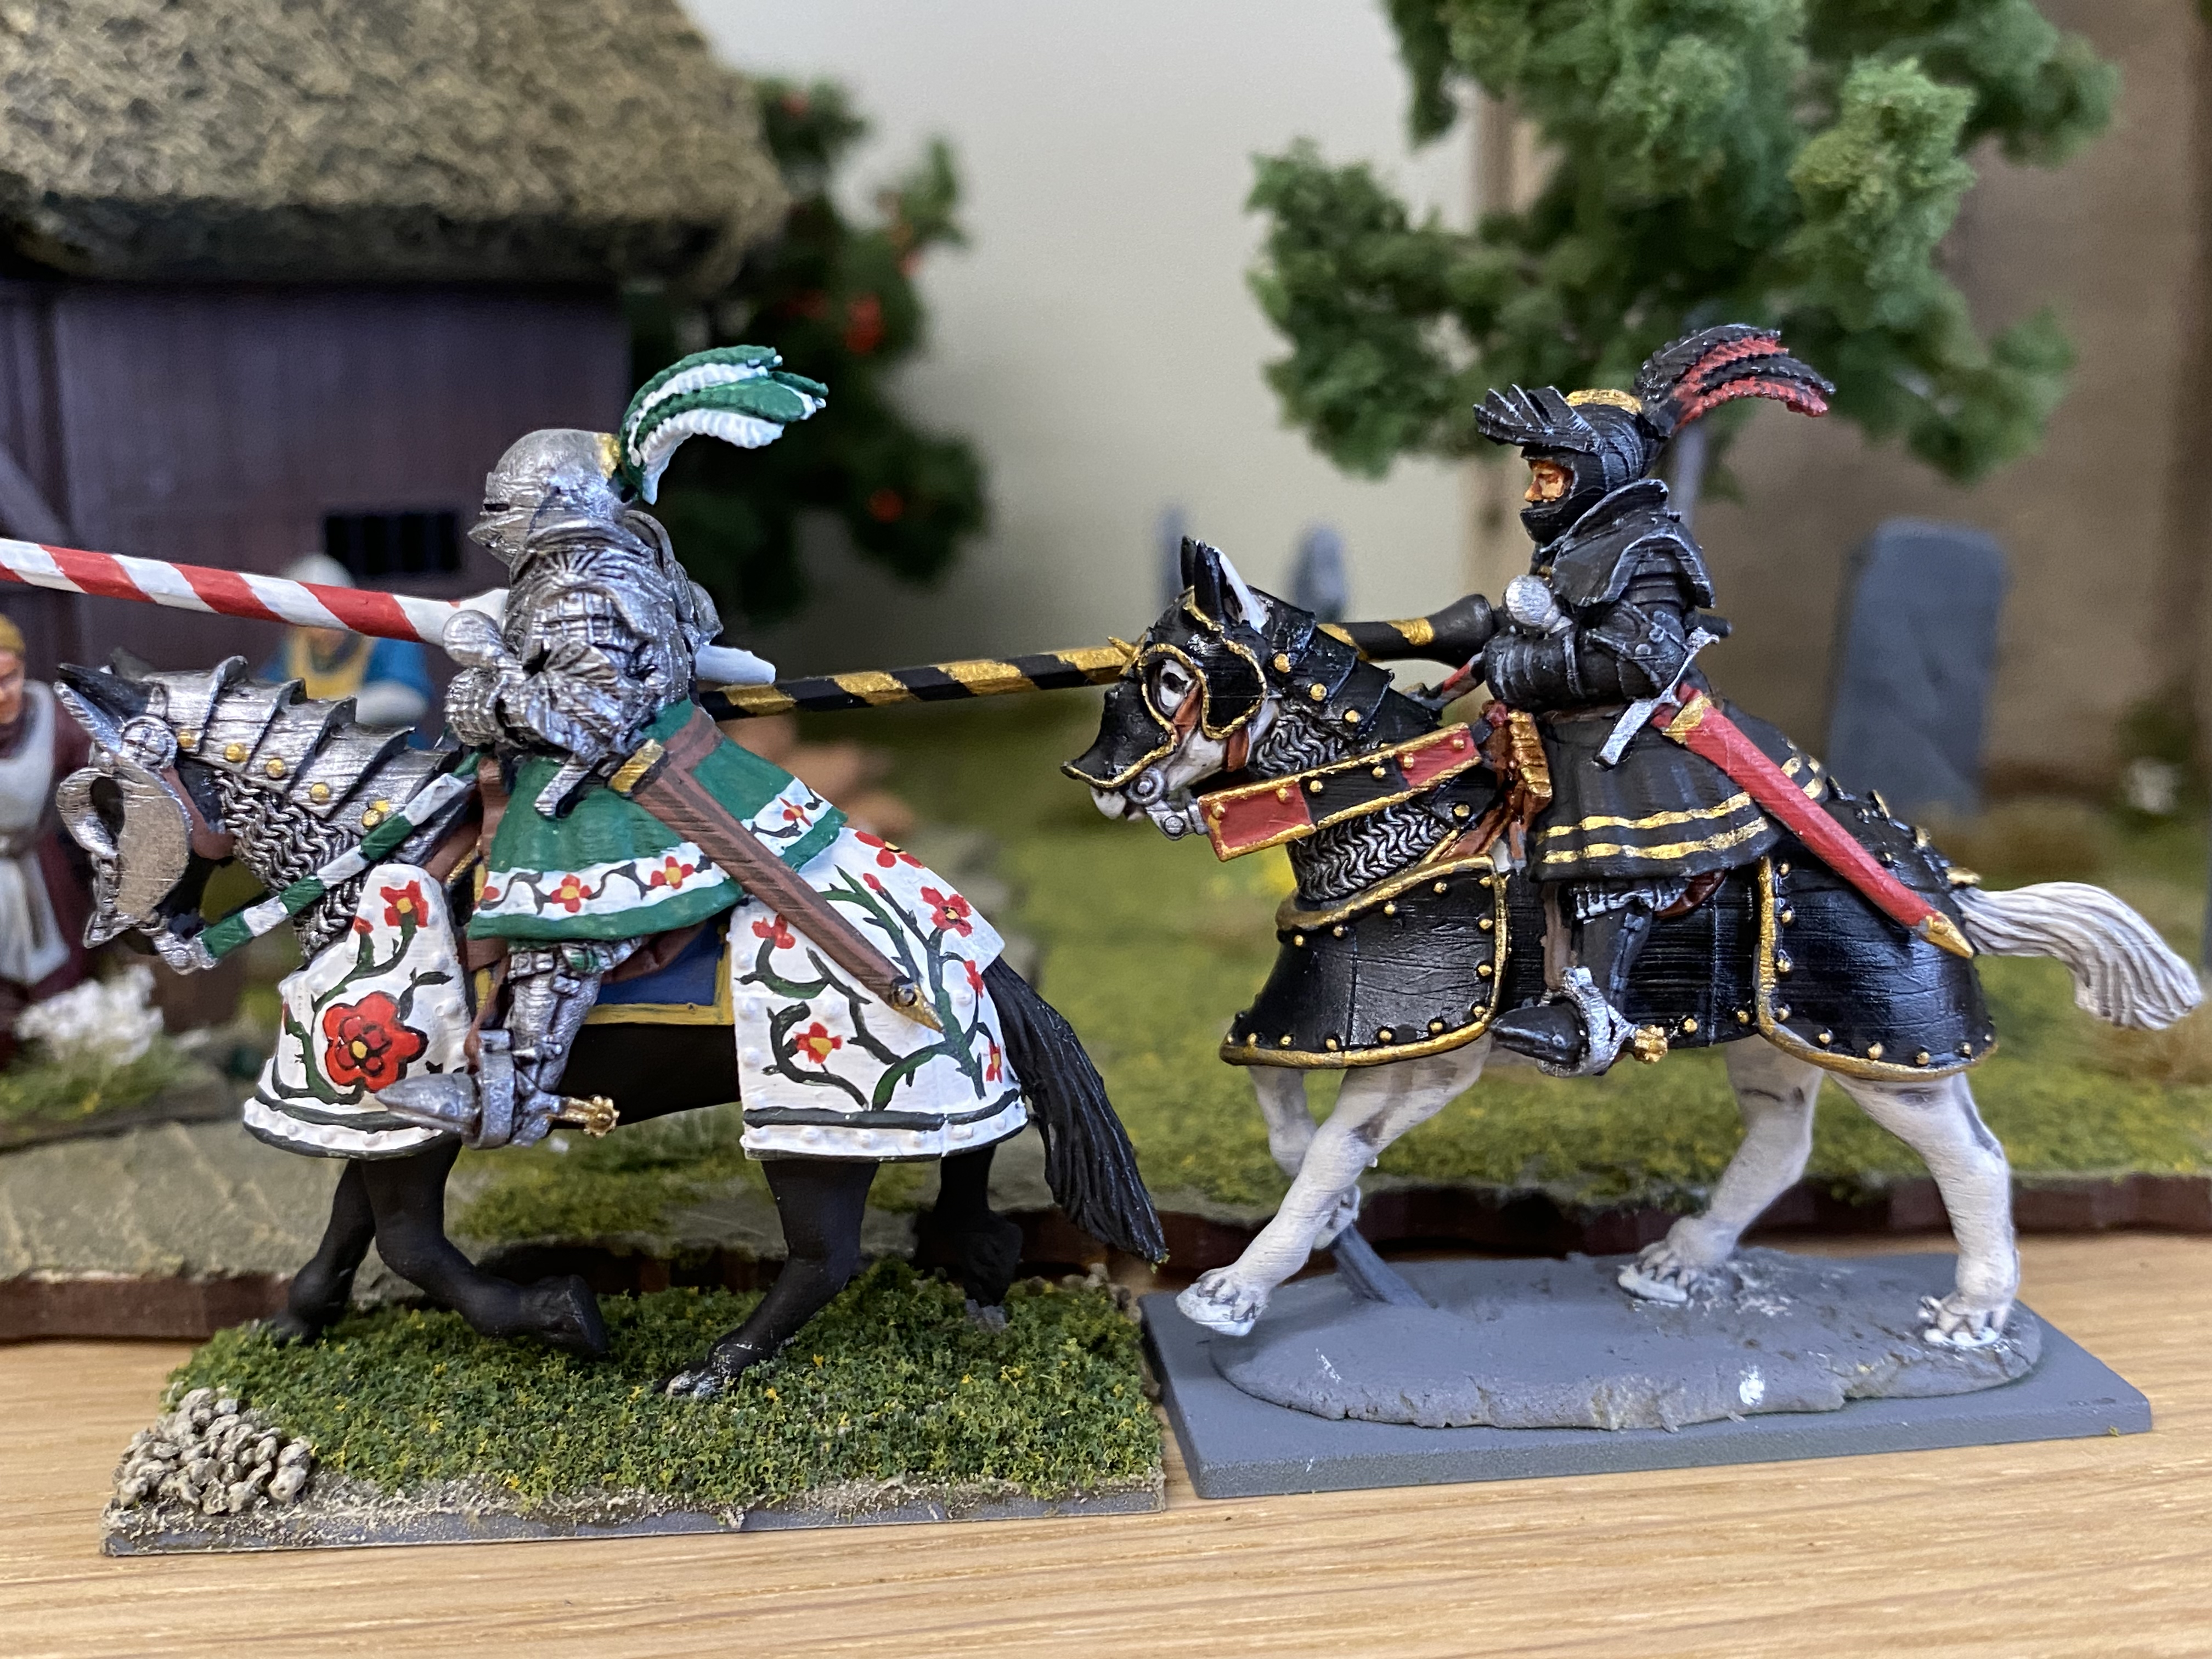
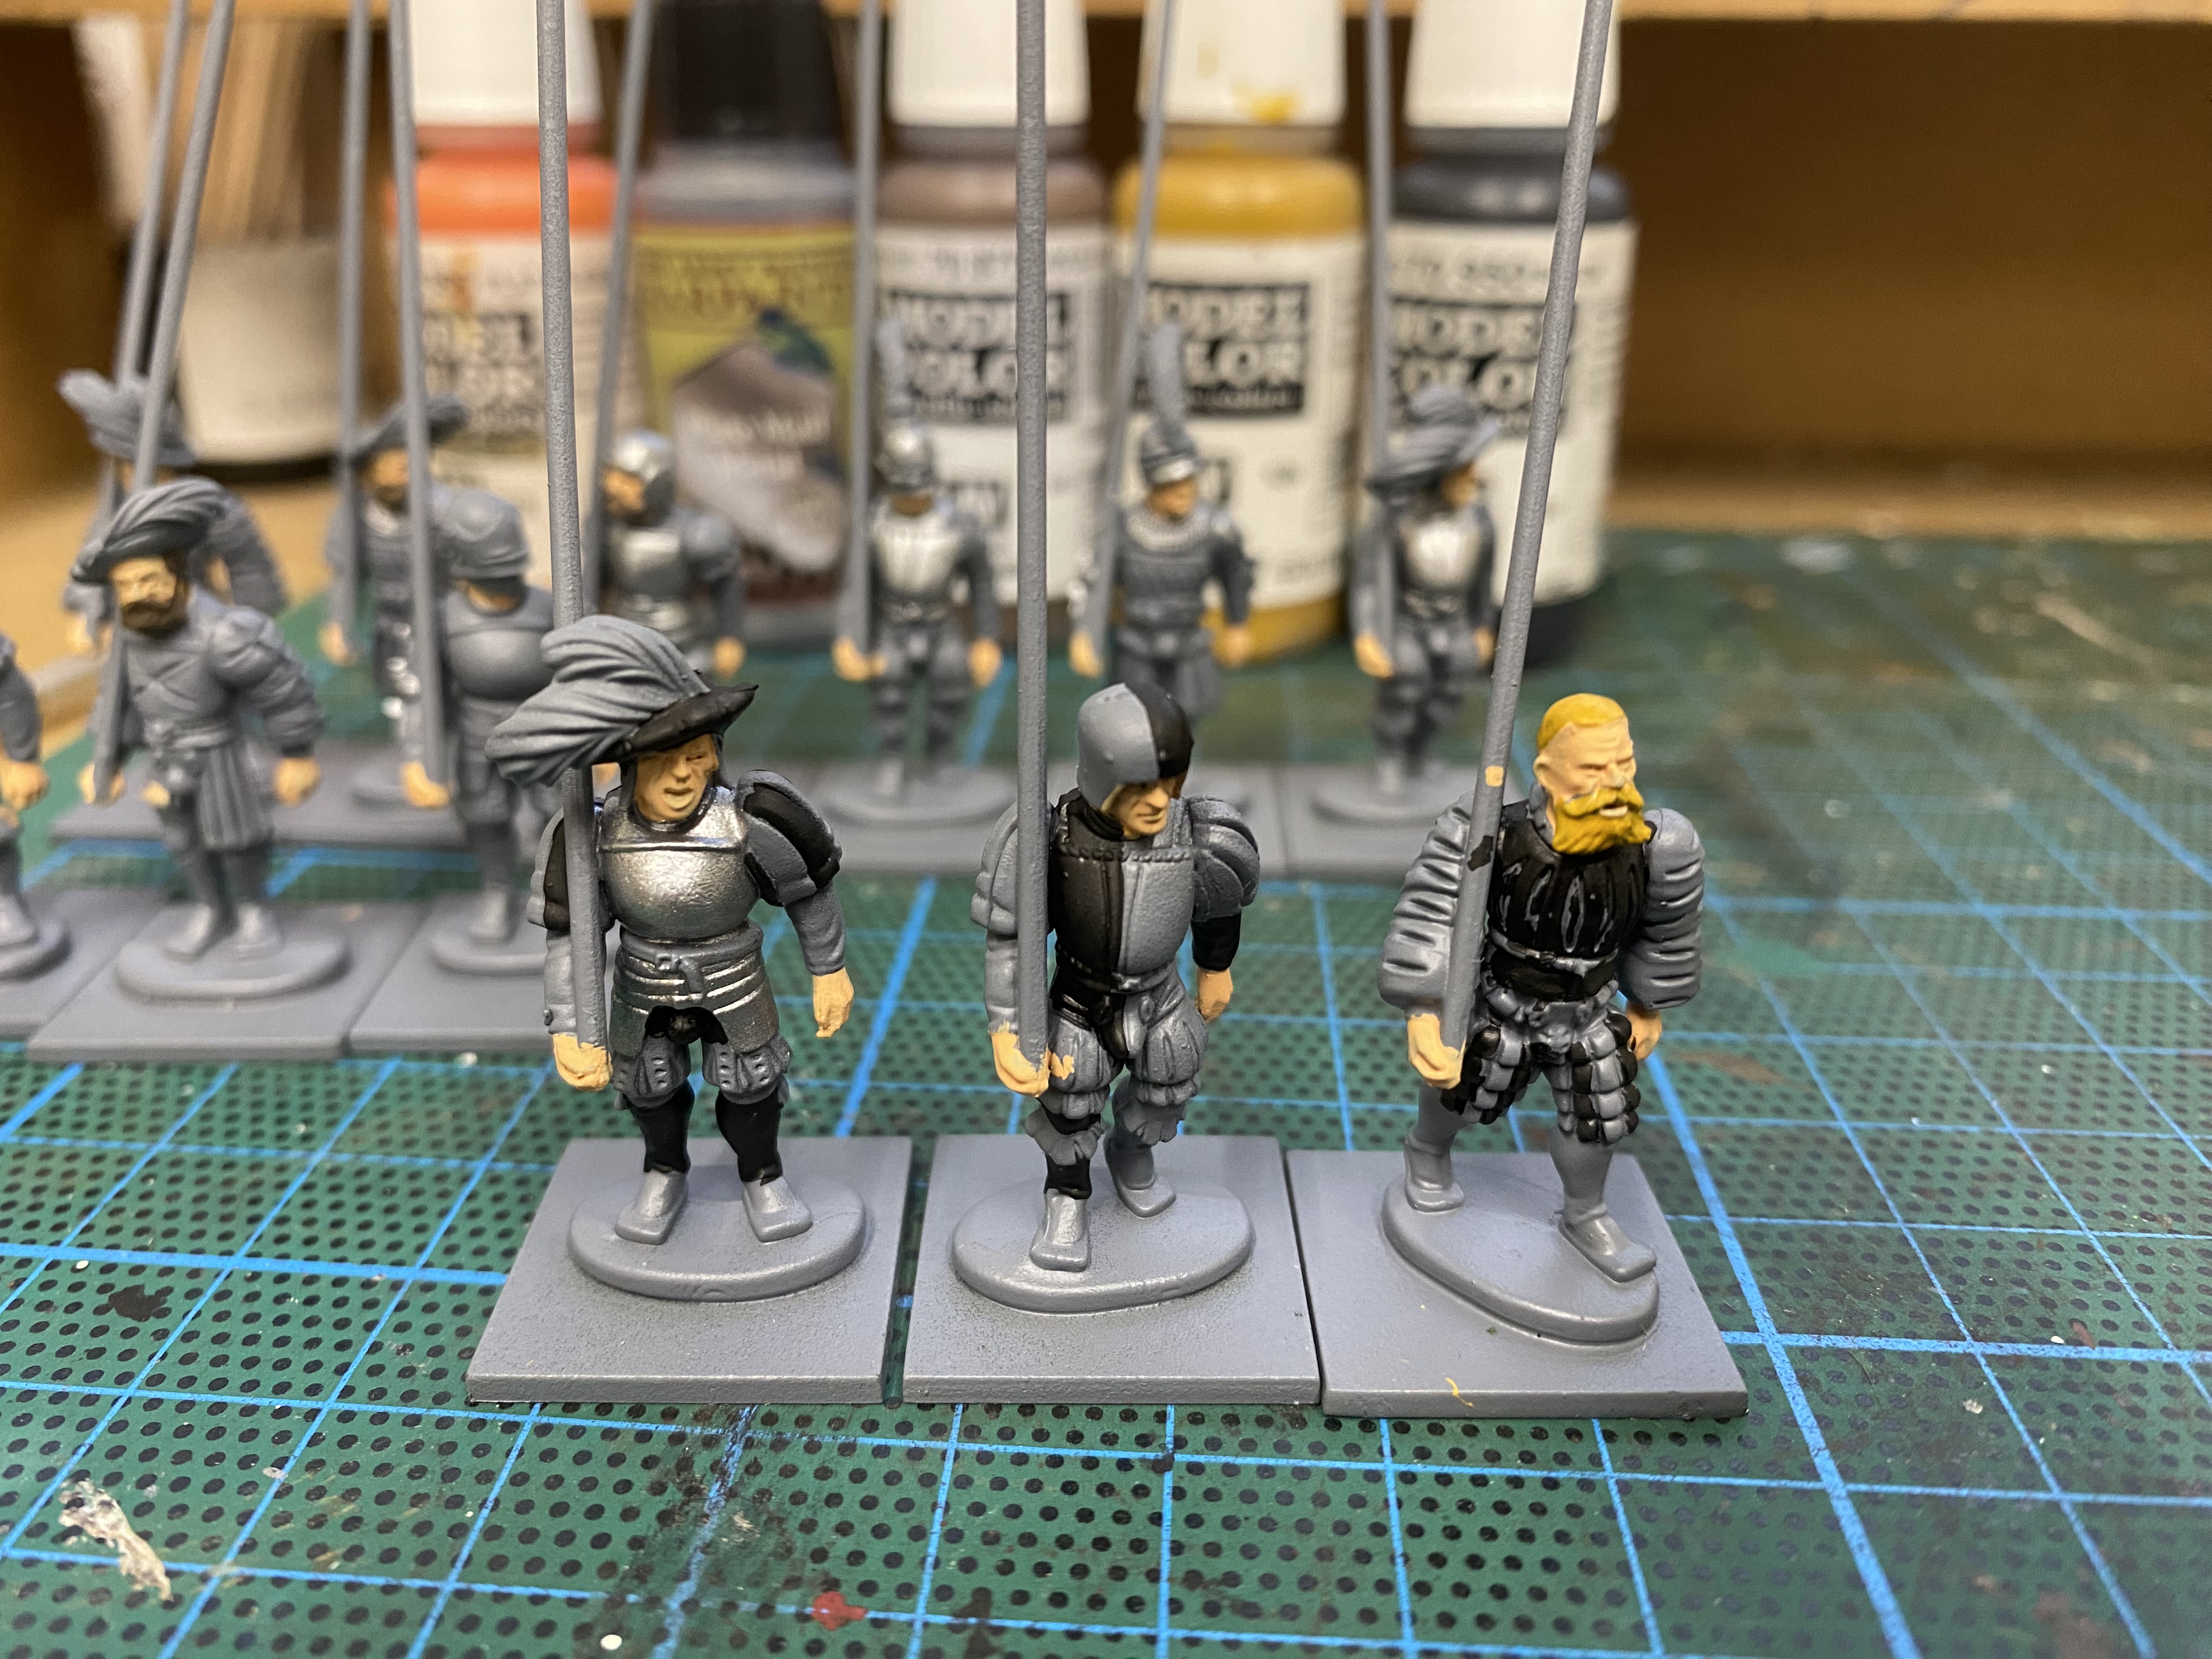
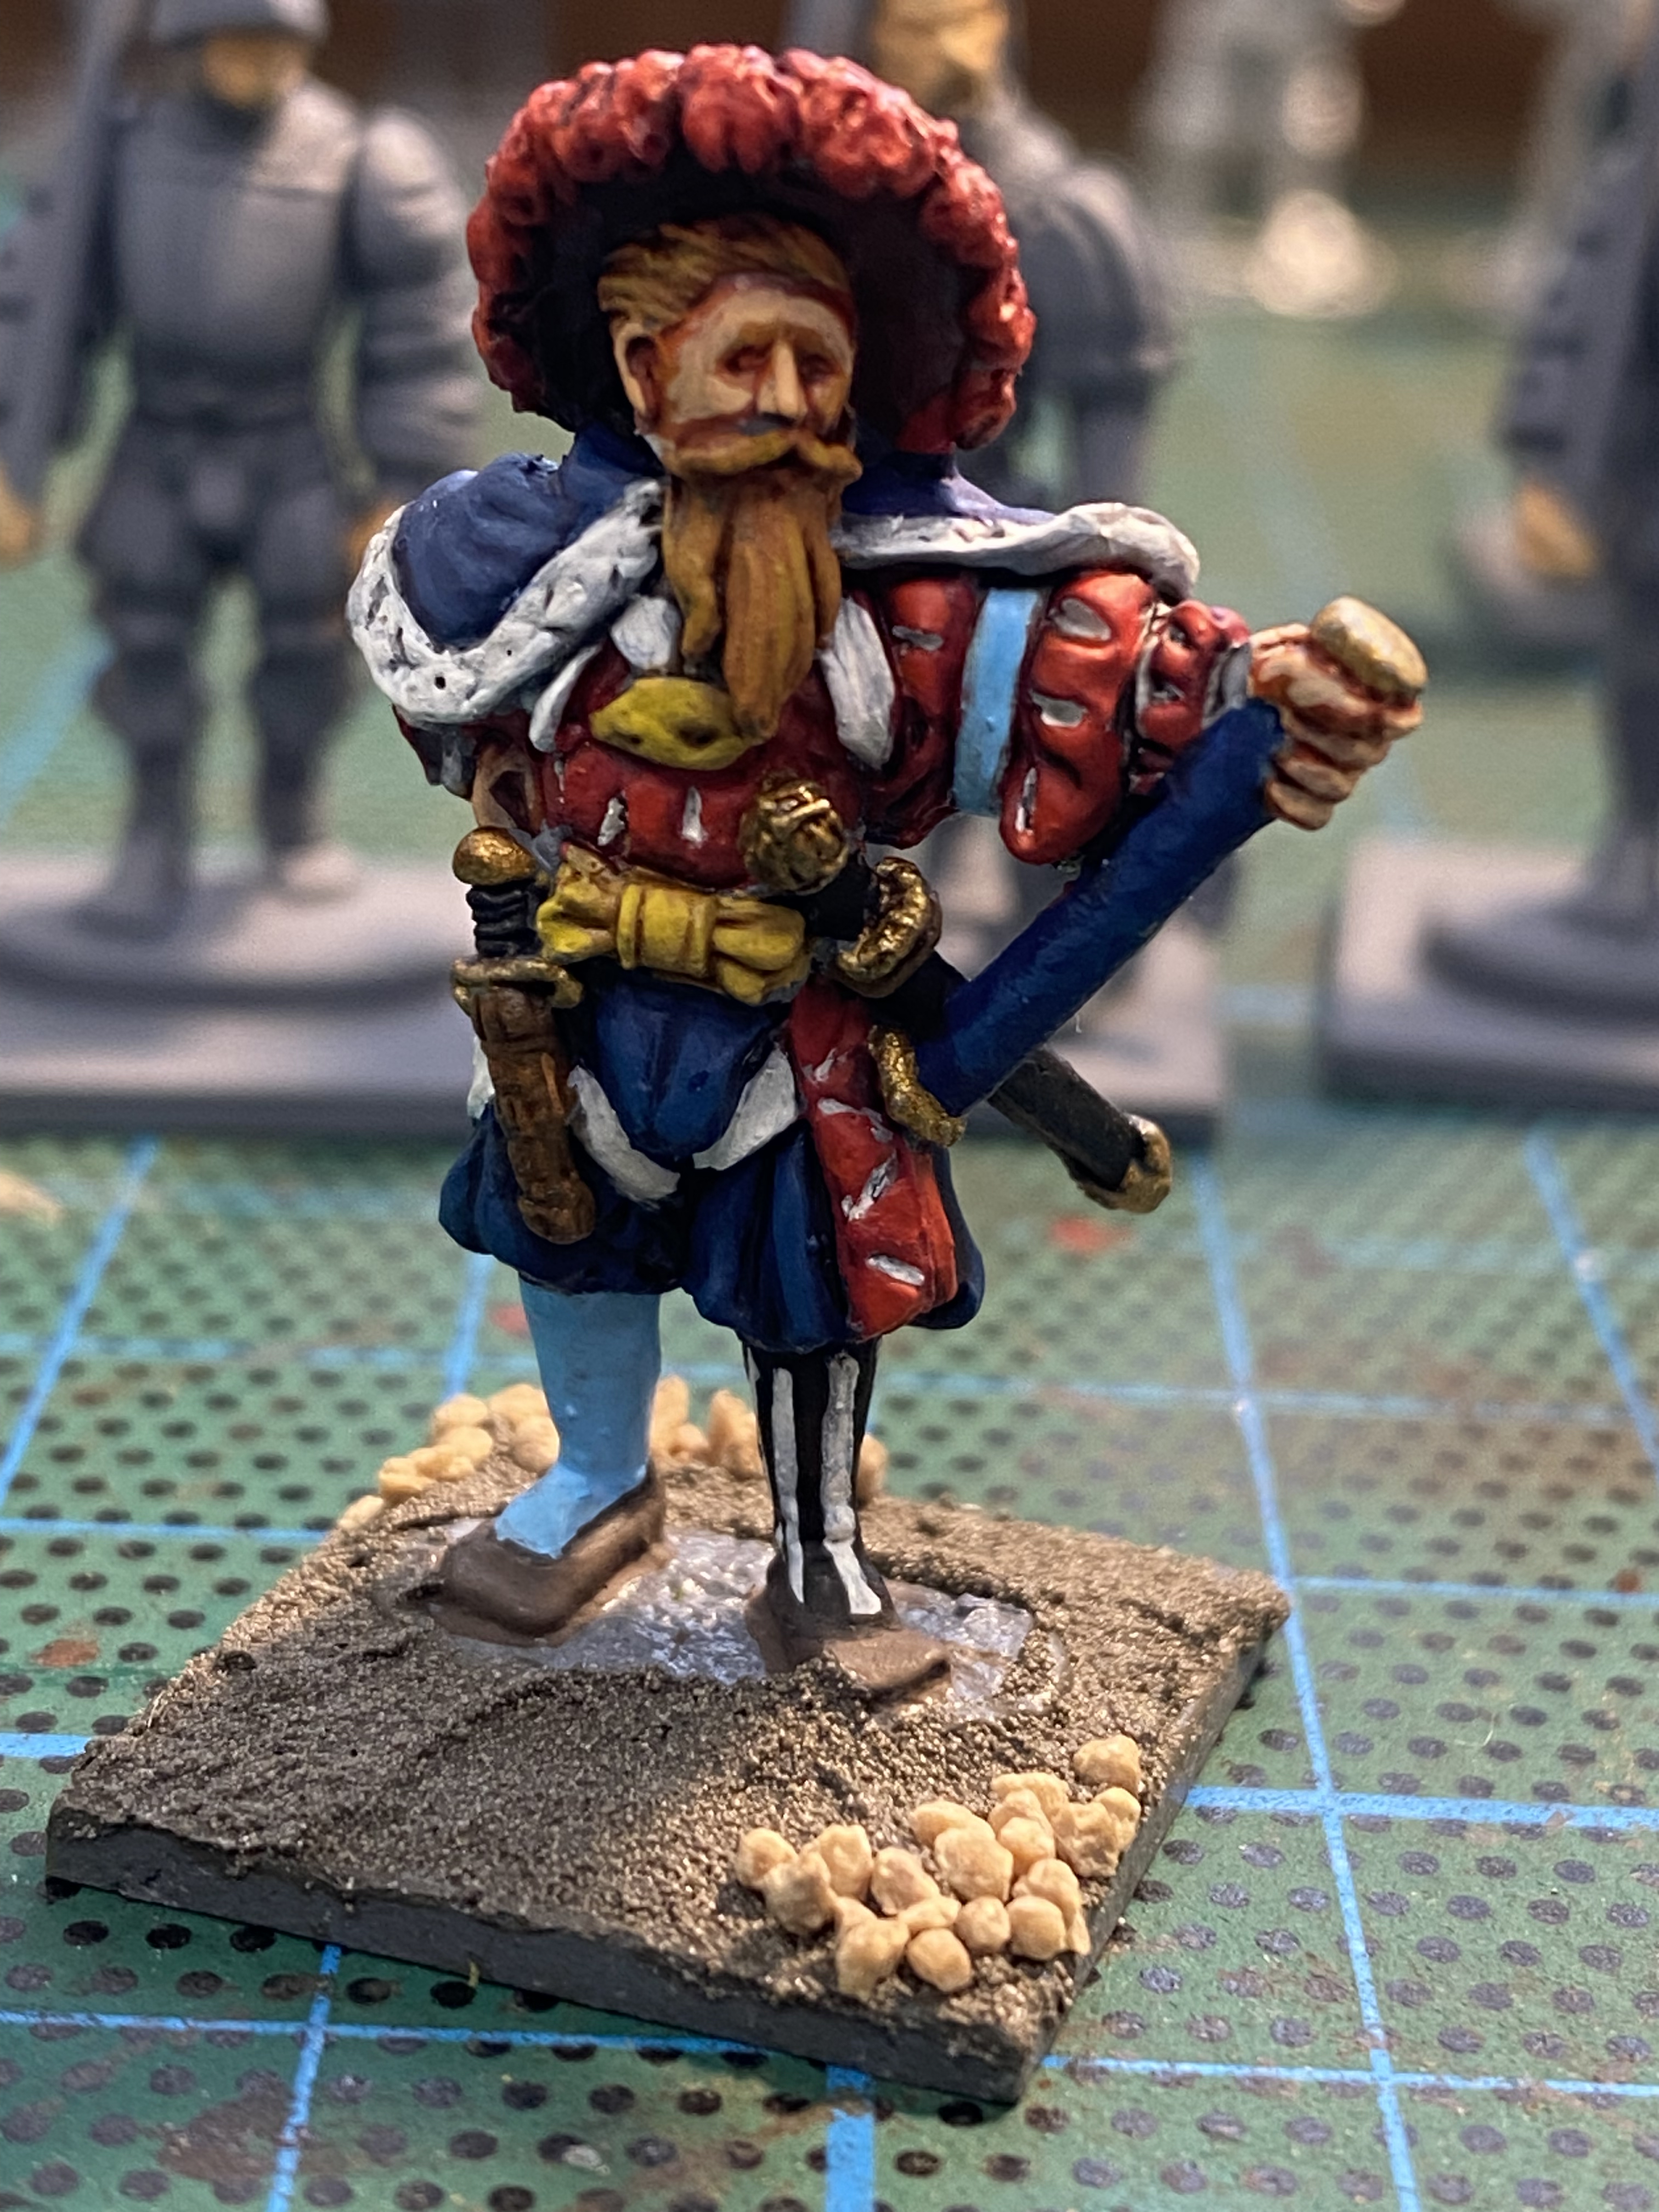
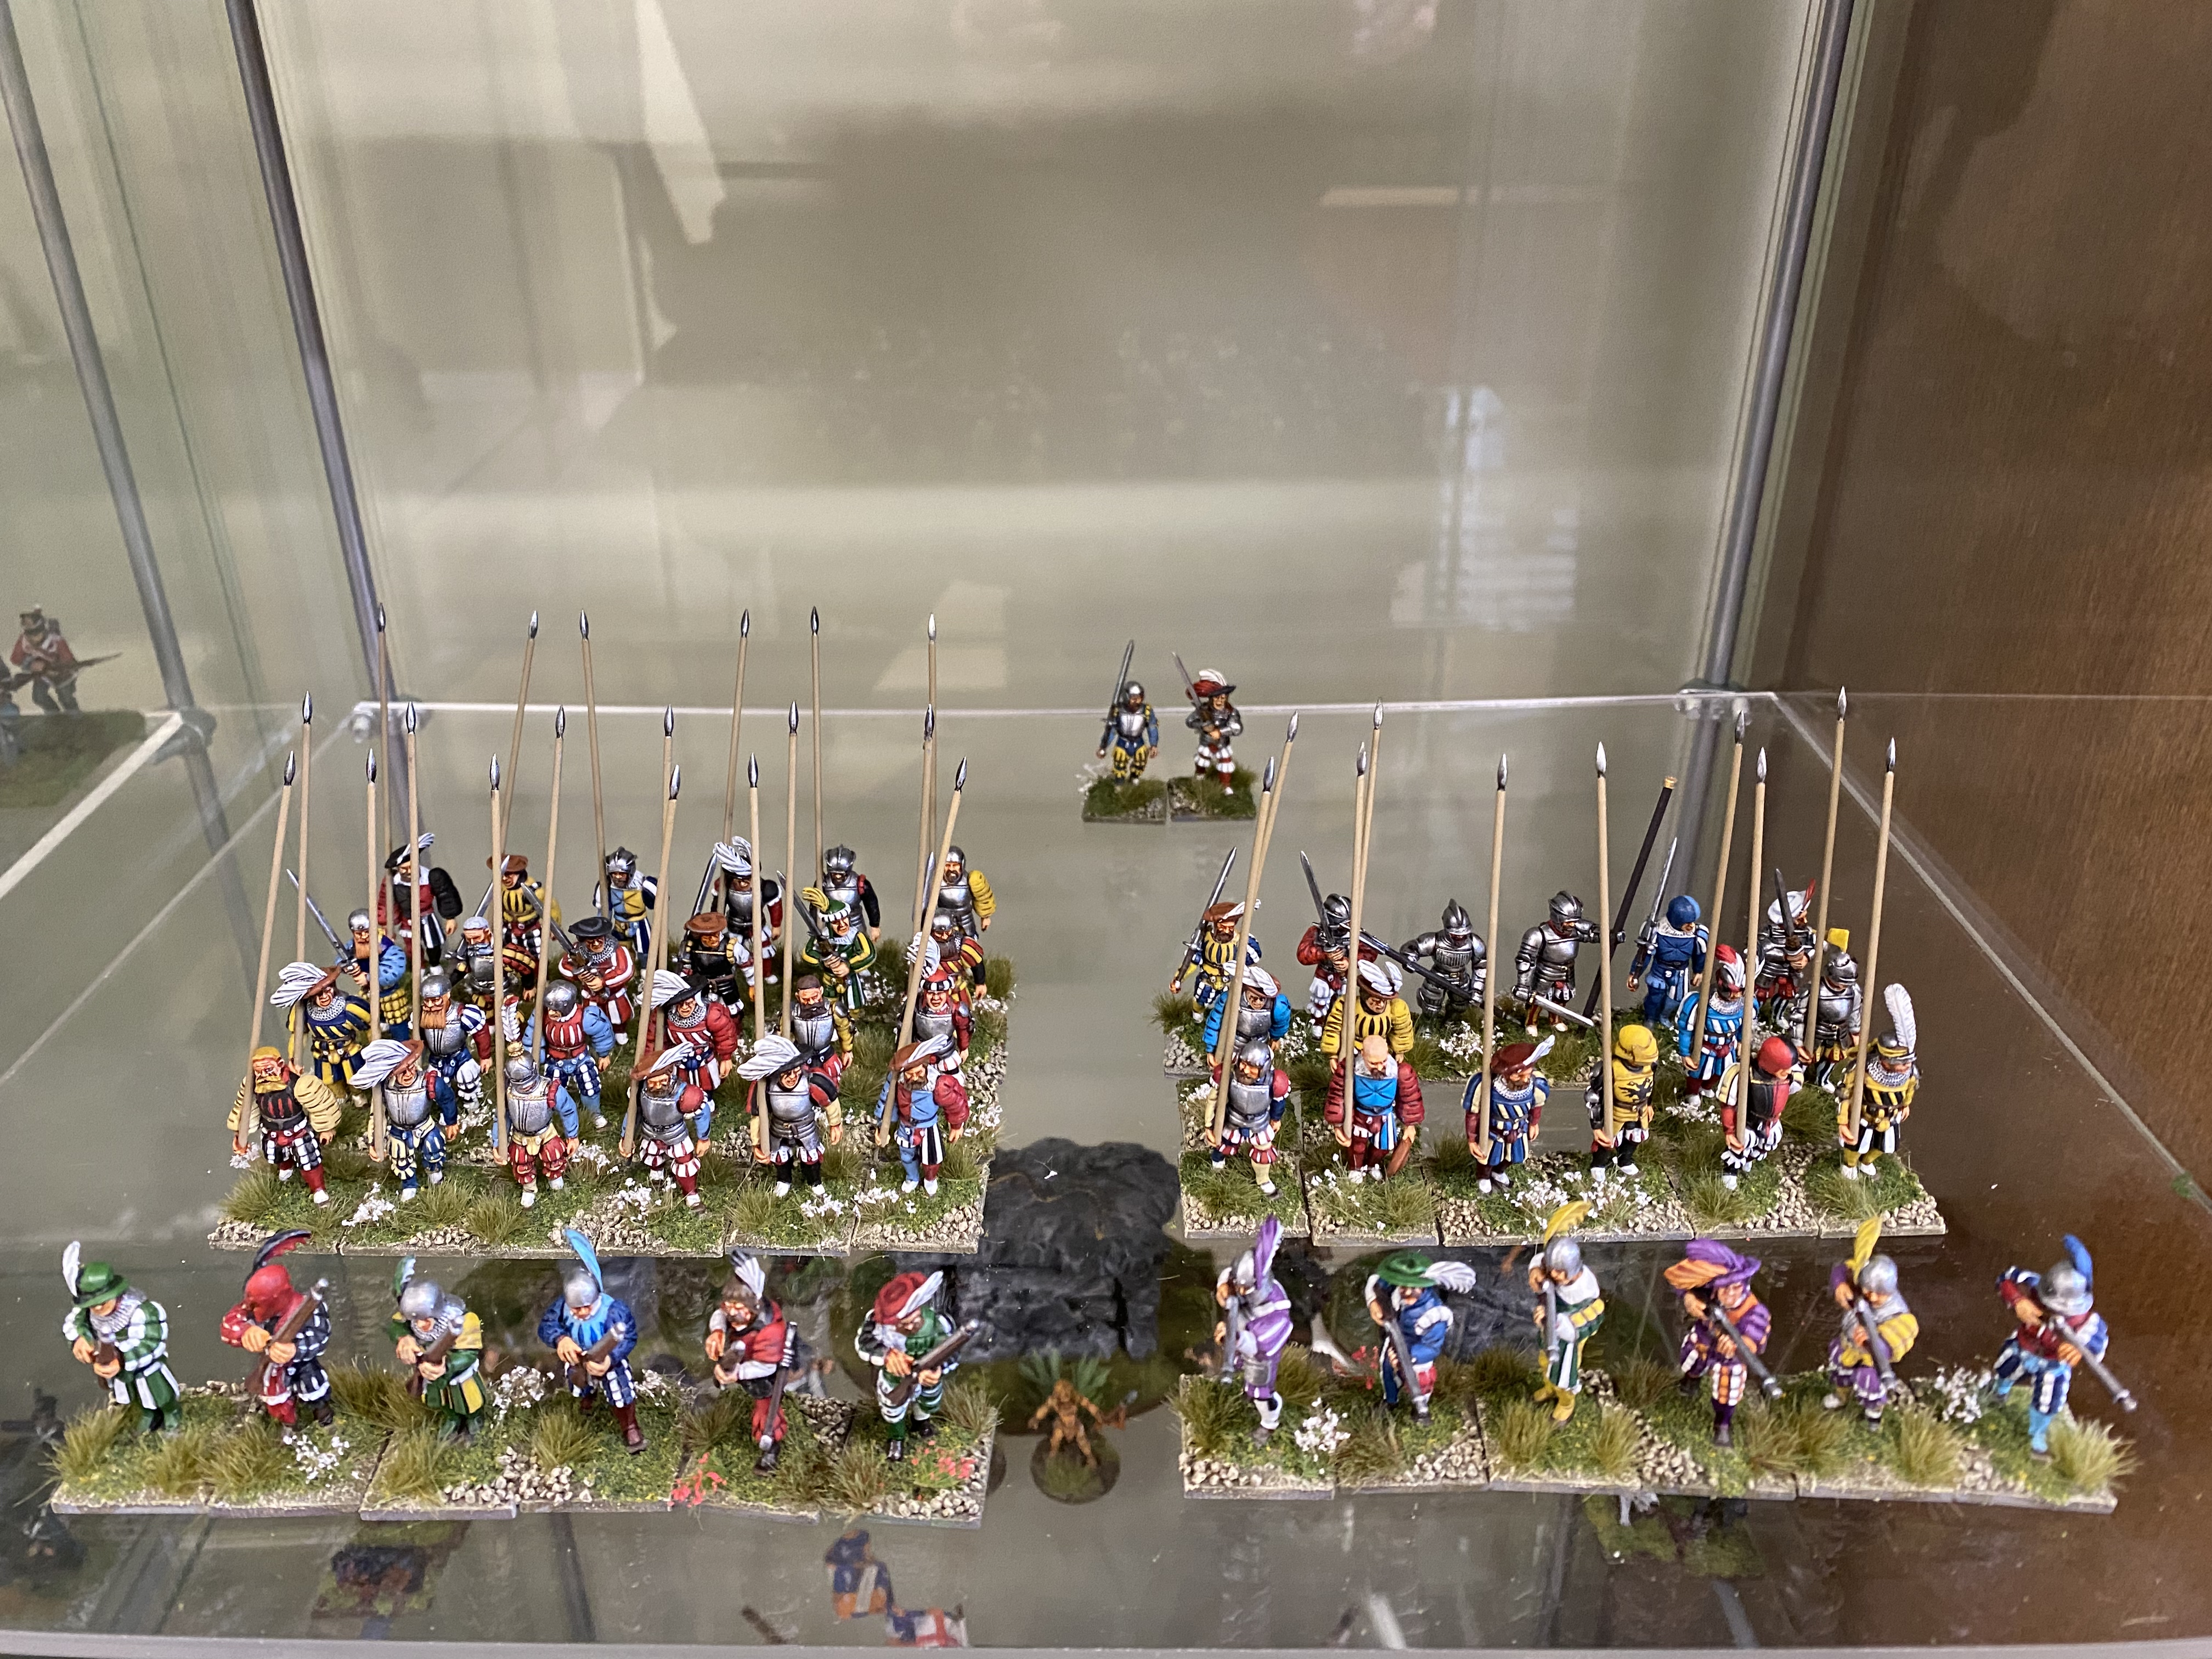
And so to the miniatures. The Foundry (Casting Room) miniatures are lovely chunky models with plenty of character and detail. The horses are perhaps a bit smaller than the Perry miniatures but once based, I doubt that it will be a noticeable difference. They were a joy to paint and needed very little cleaning up. Rather than detail the painting process, the general method that I followed was to block paint the horses and armour with the base coat colour. Then to apply the freehand design. The difficulty that I encountered was my lack of skill in replicating the exact design on both sides of the horse. I soon realised that you cant see both sides at once anyway so it wasn’t so much of a problem!
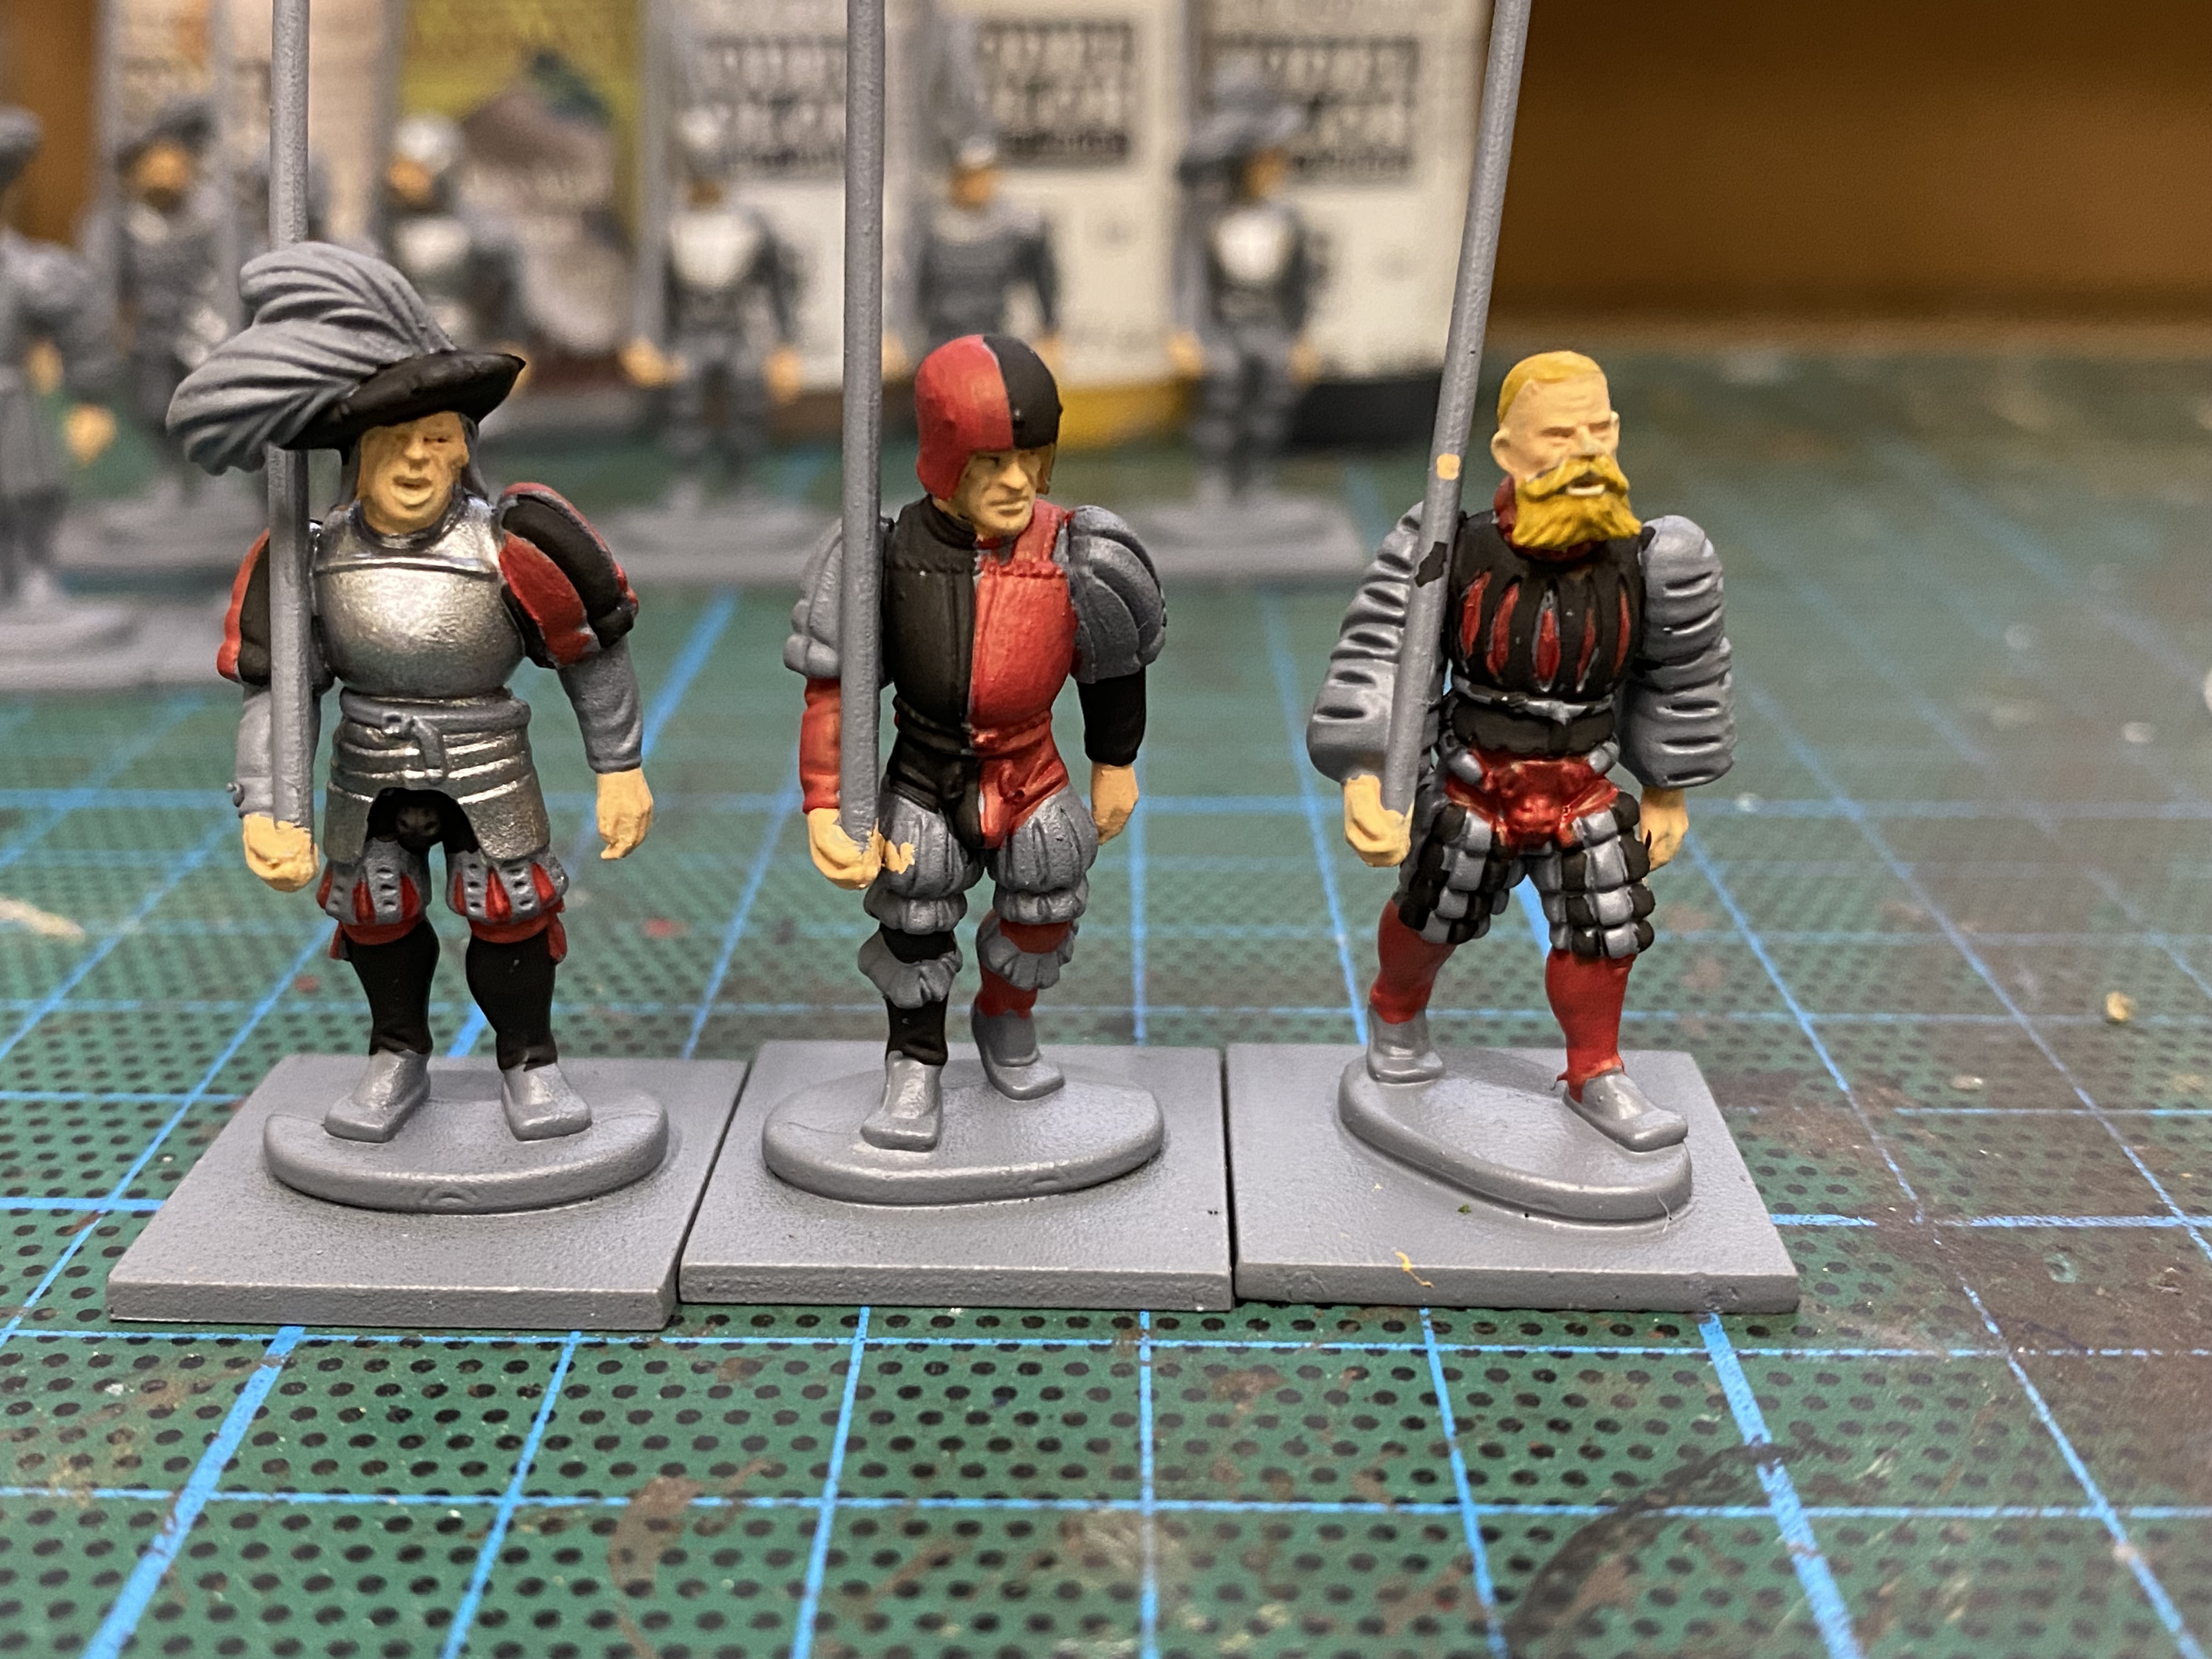
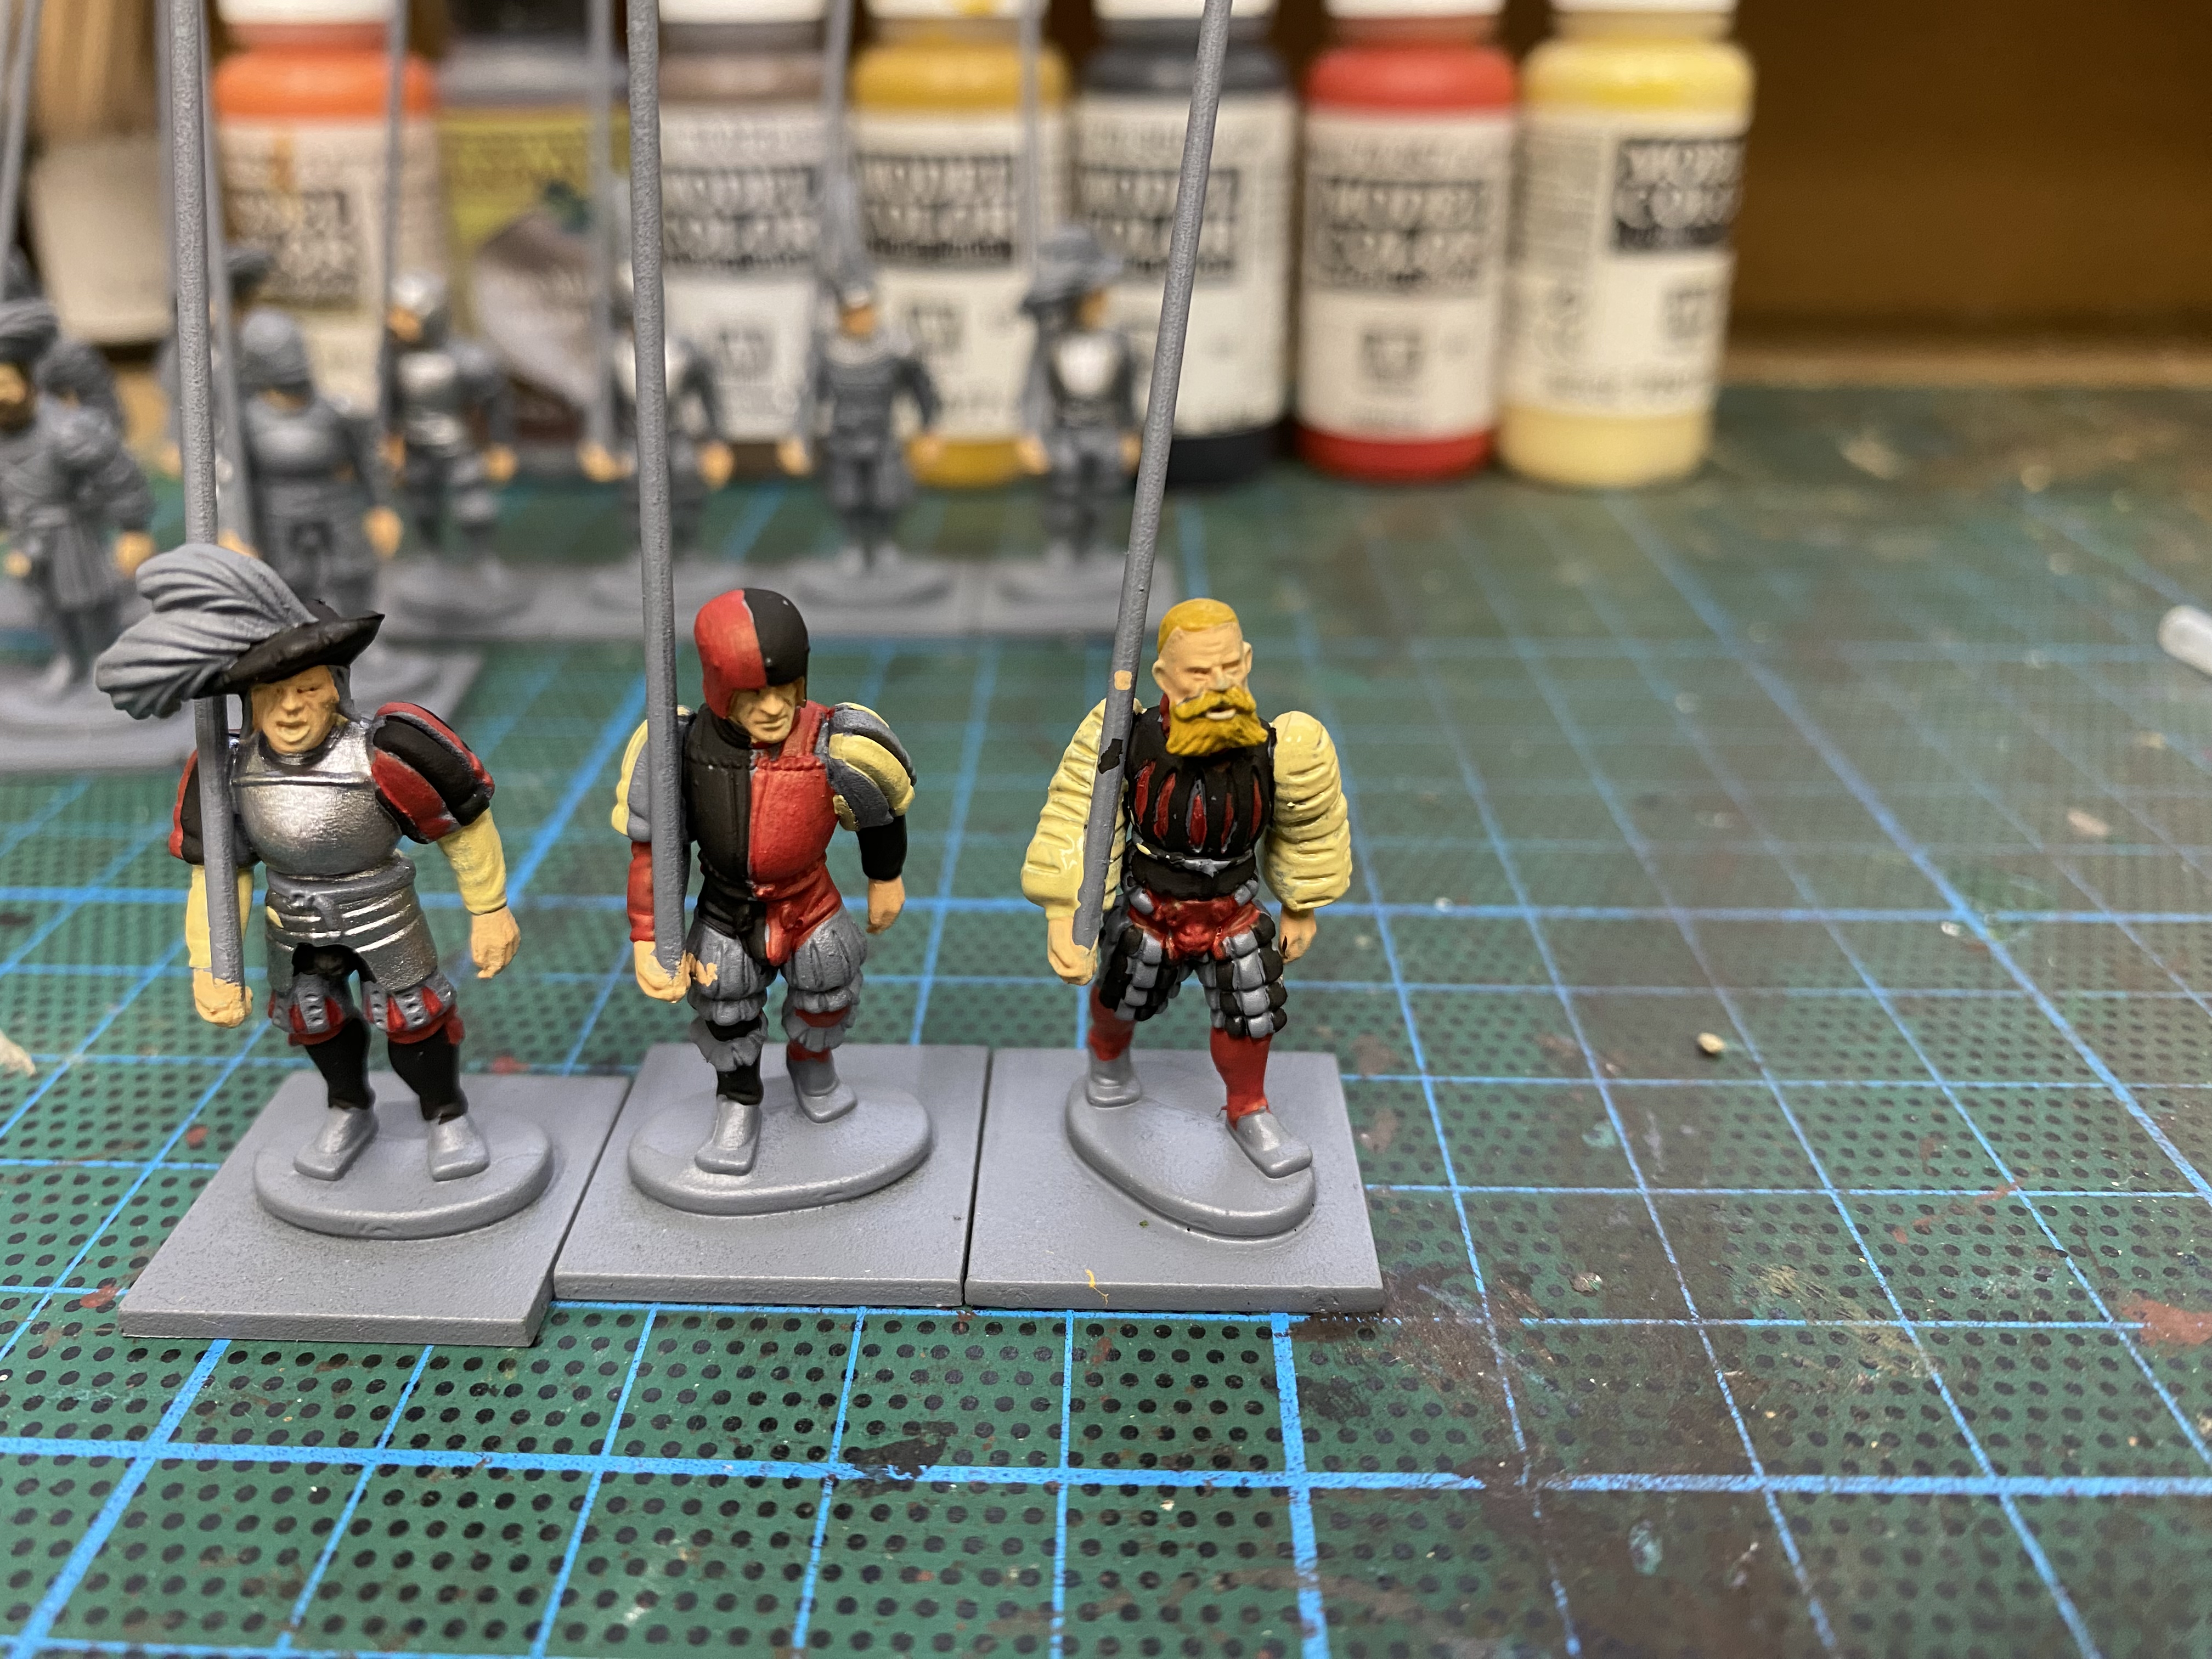
Once the freehand design was completed, I shaded the colours with either black, brown or light brown ink from the Army painter range. I find that Black ( Dark tone) works well over Silvers, White and Blues, the dark brown (Strong Tone) is good for Reds and Leathers and the light Brown ( Soft Tone) is good over yellows. Once the colours were inked, I then re-highlight with the original colours, occasionally adding a further highlight of a lighter tone. This gives me a clean a bold finish that I prefer. It might not be to everyone’s taste but as I am slightly red/green colourblind, I like to see the colours clearly and anything too subtle is lost on me!
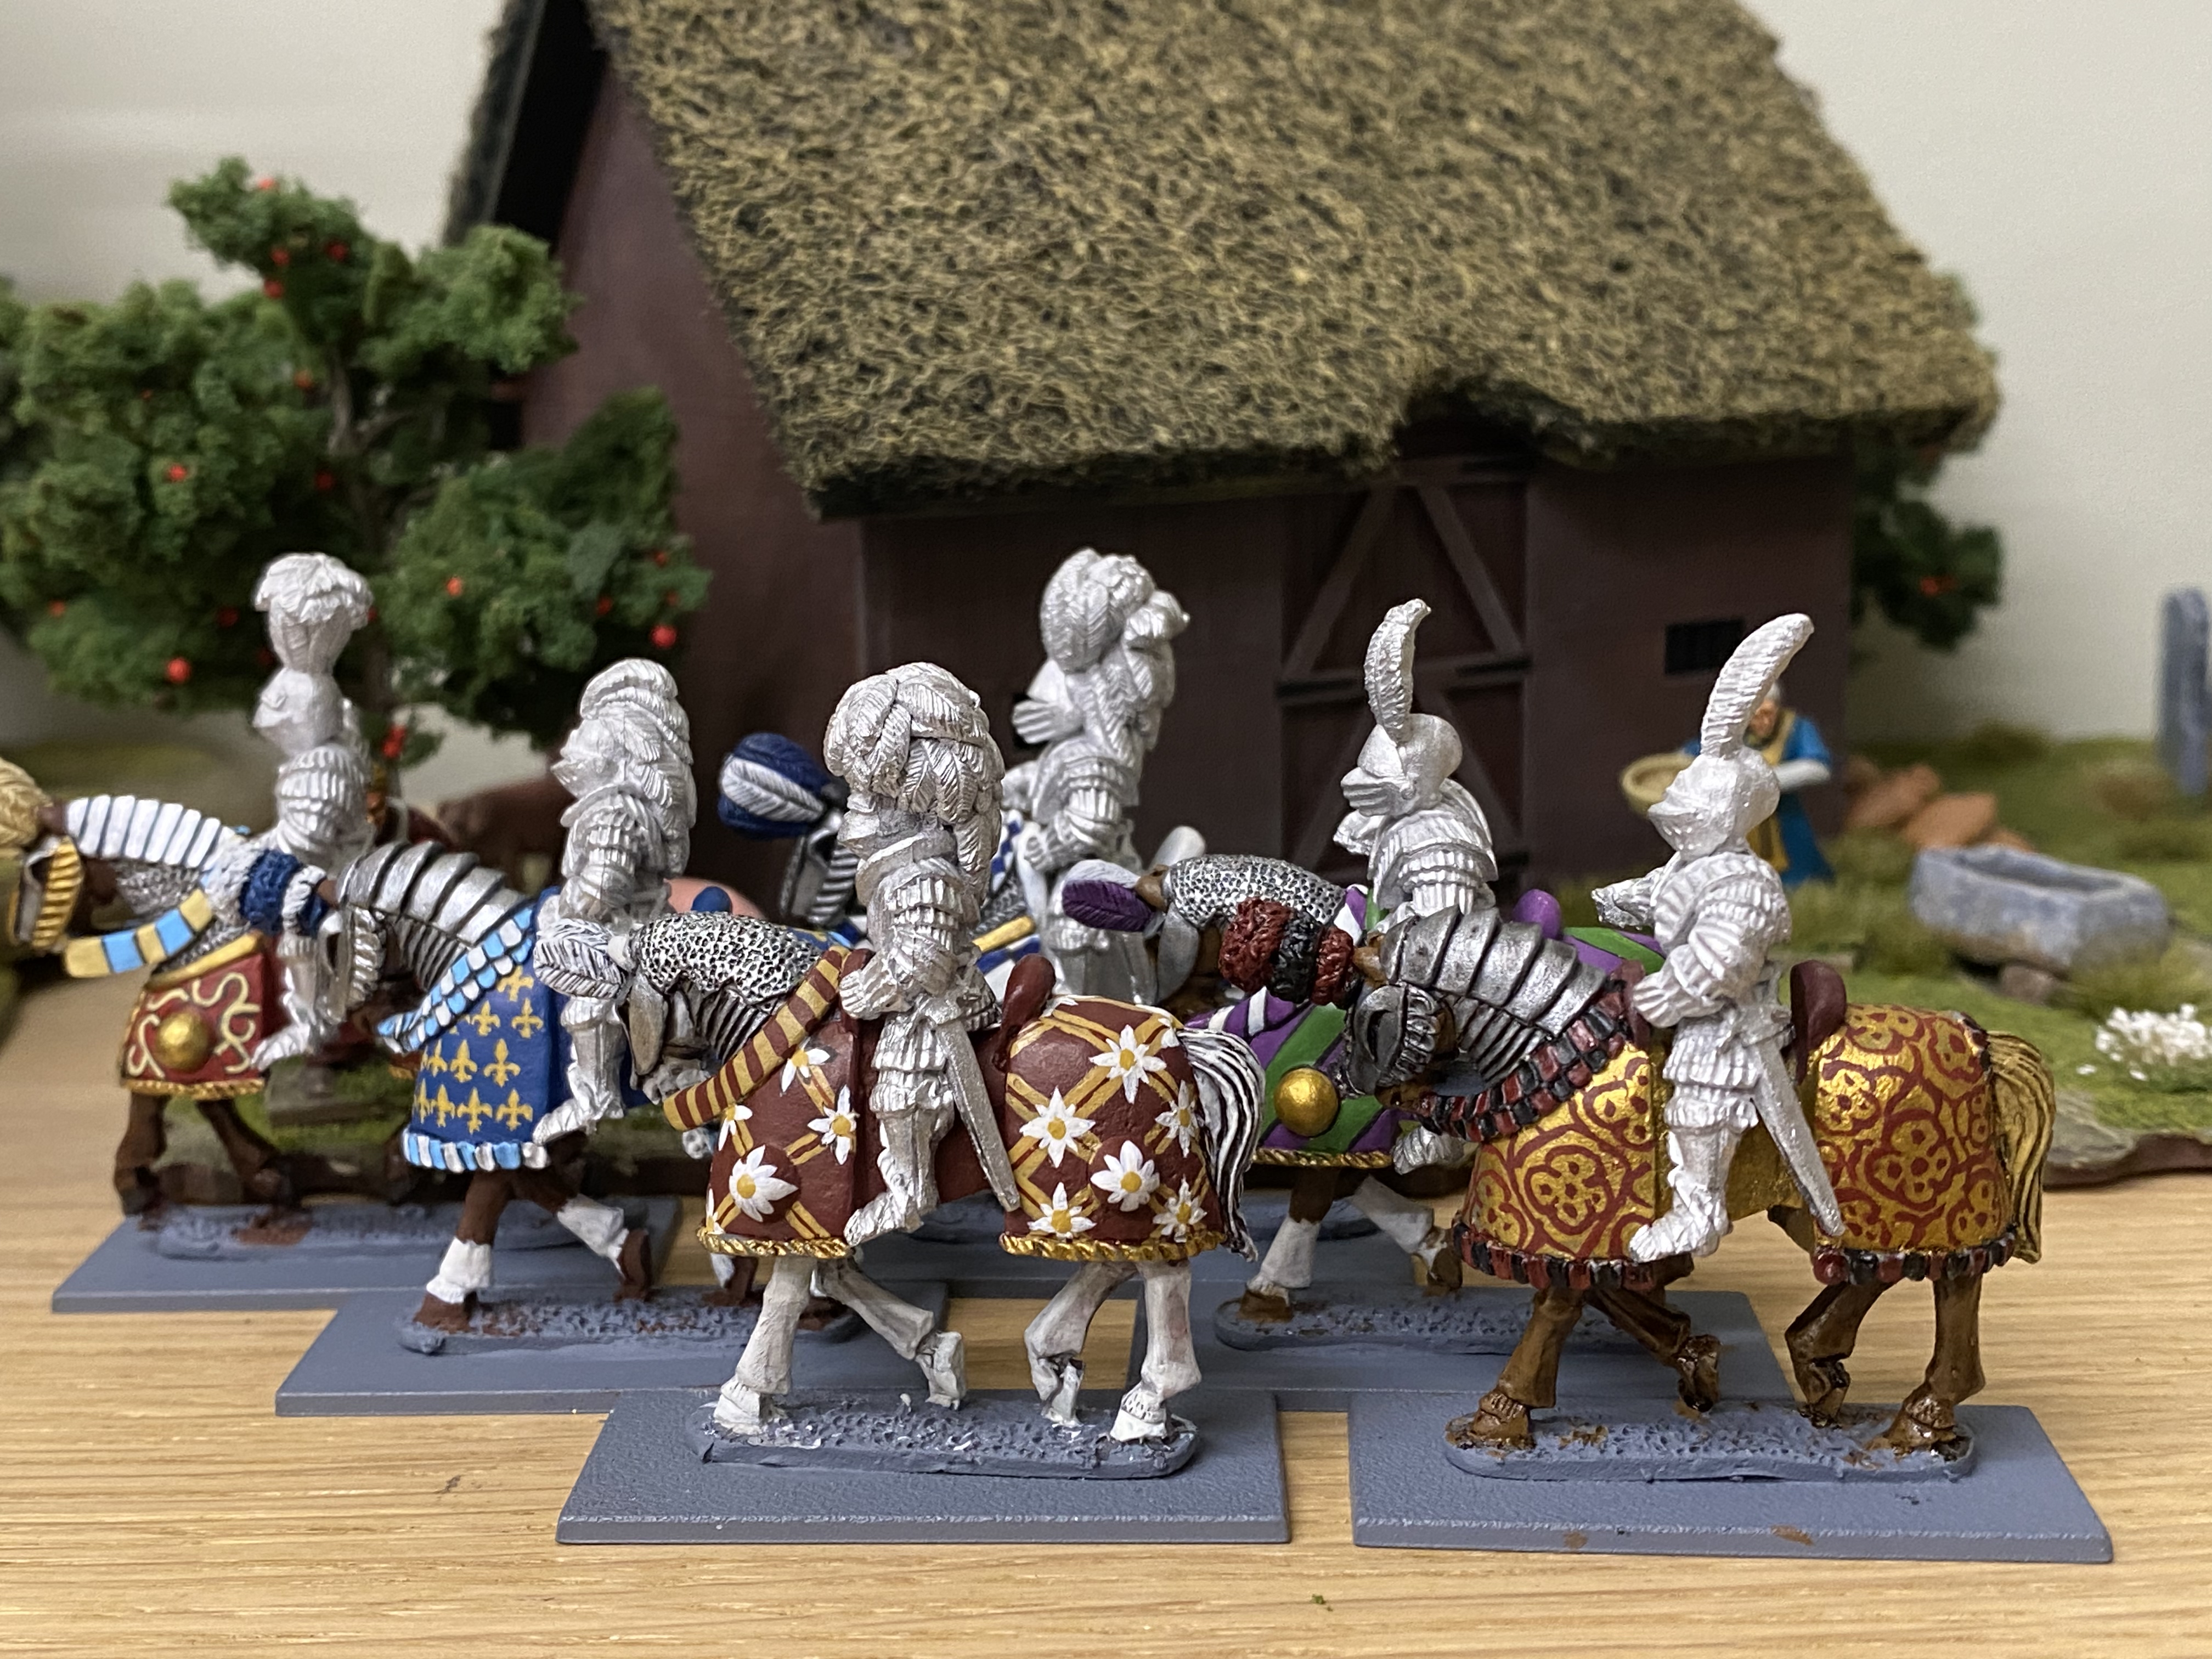
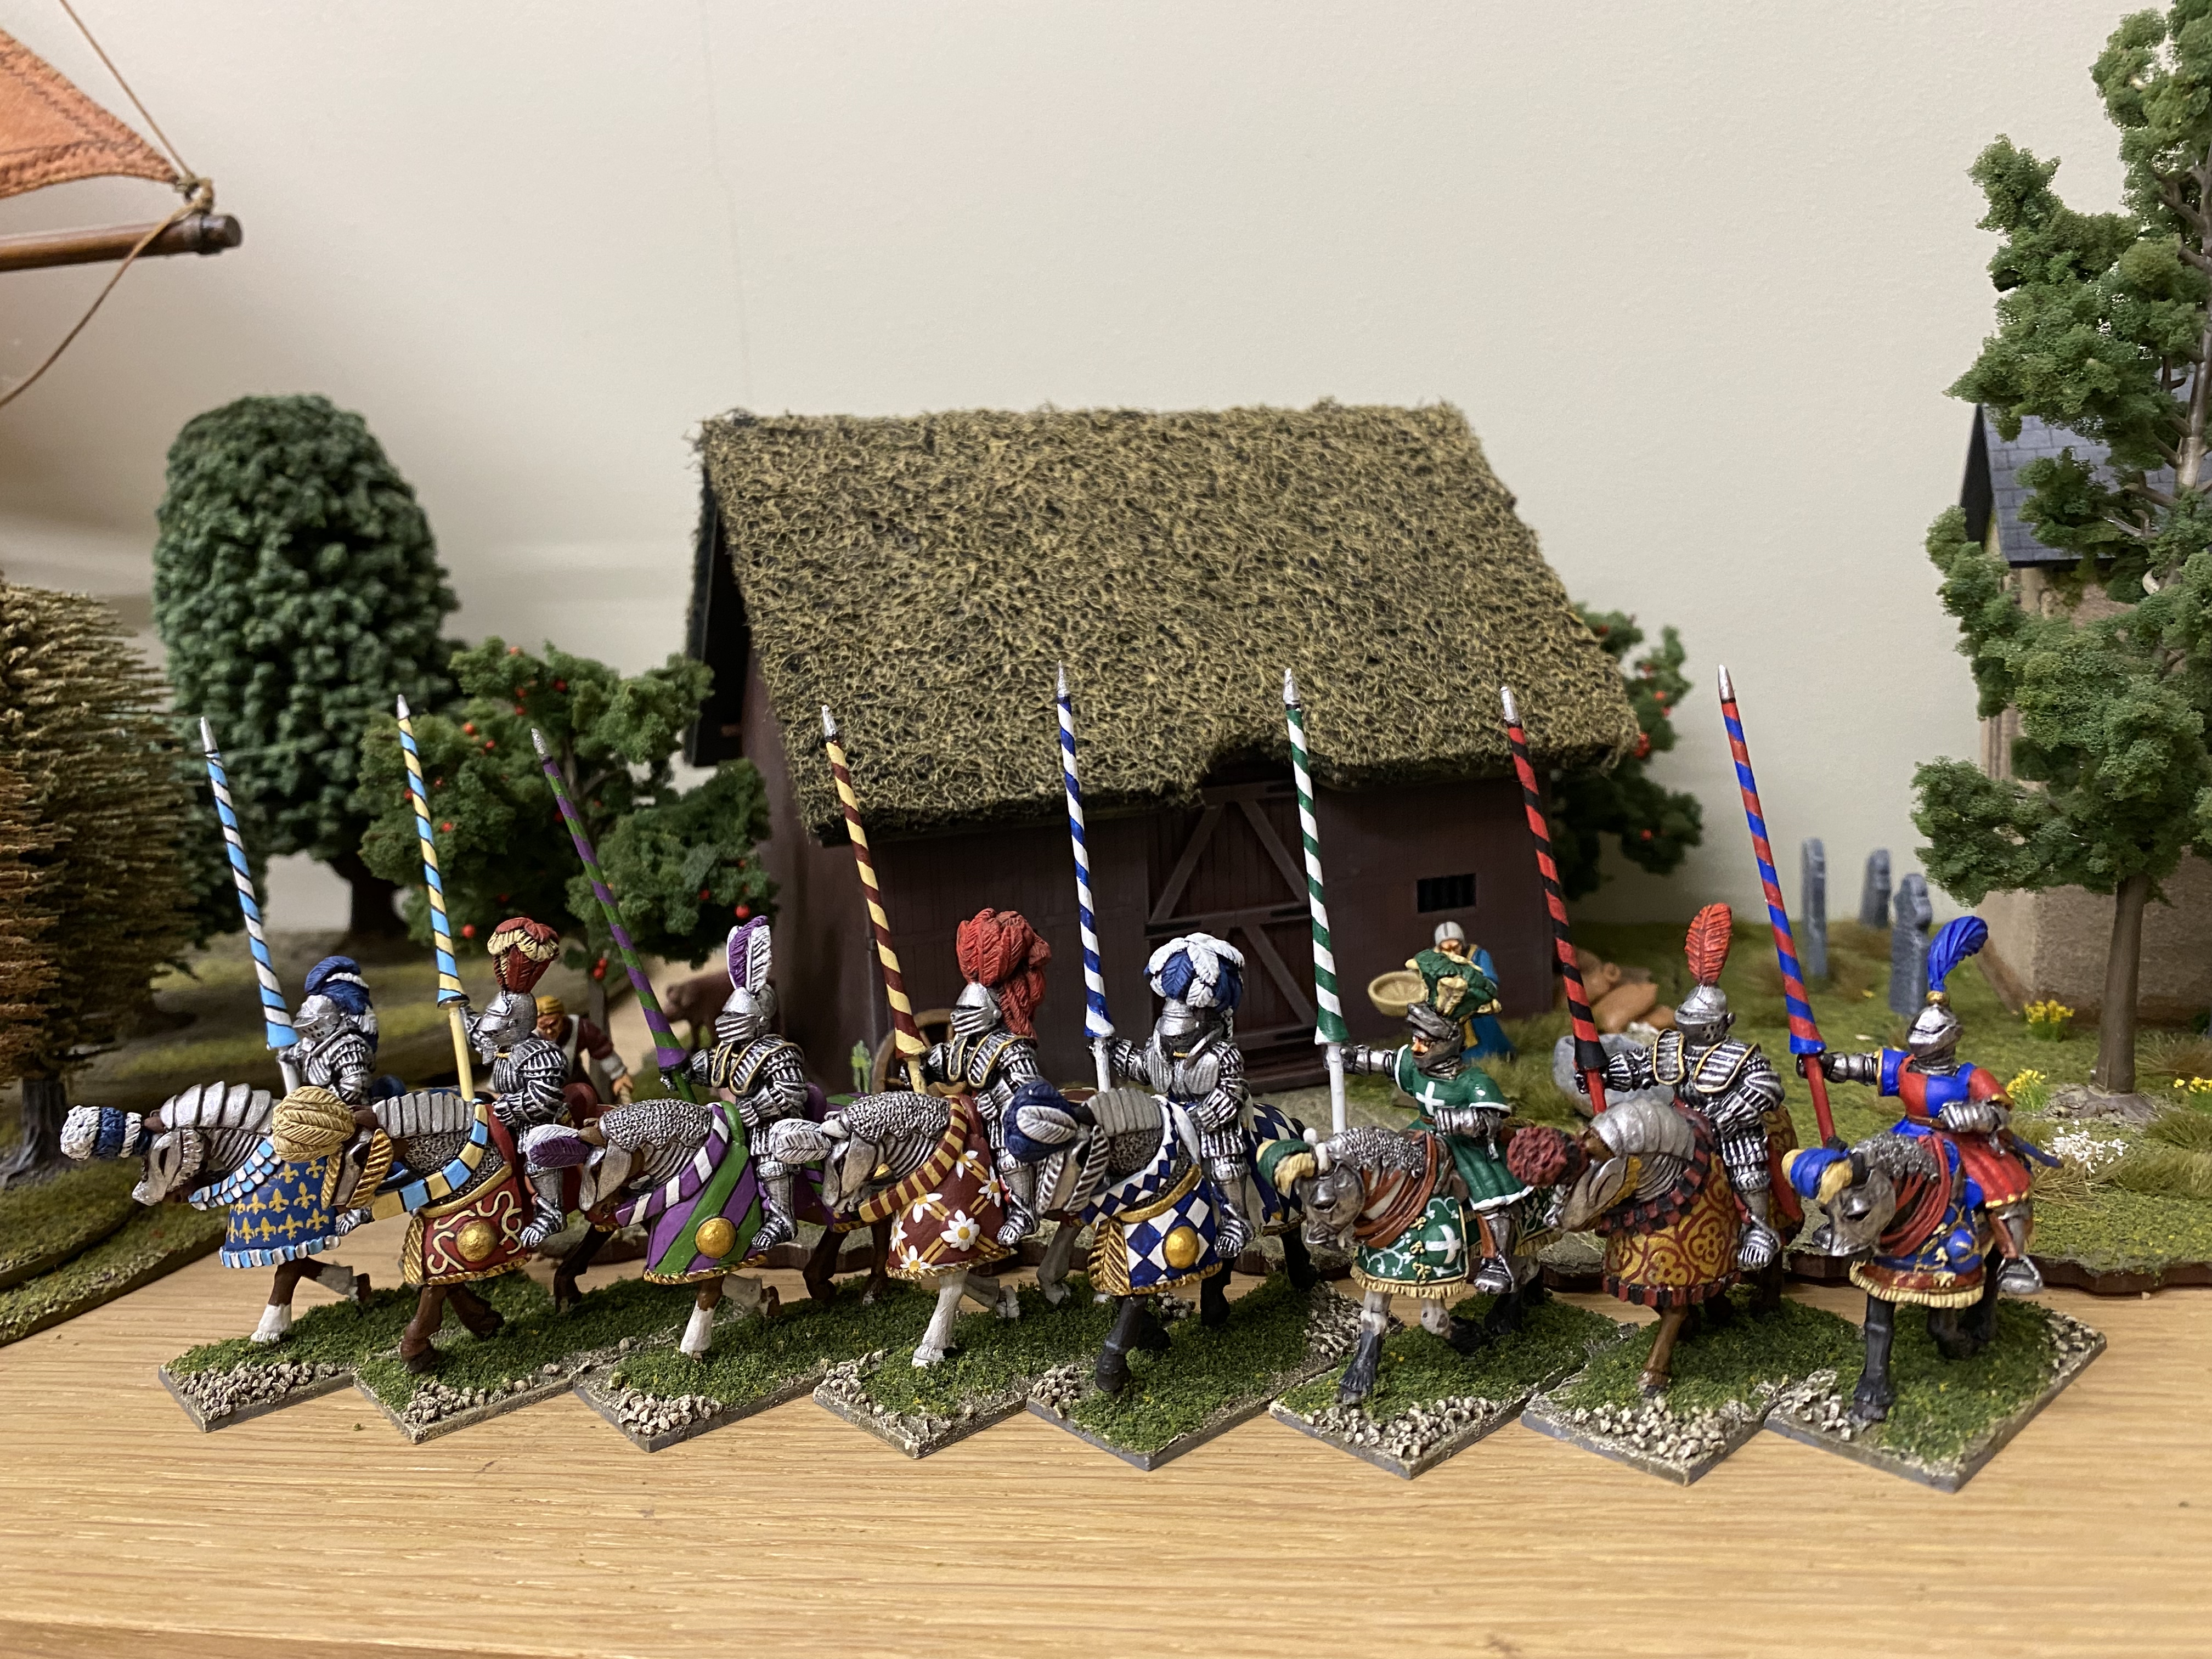
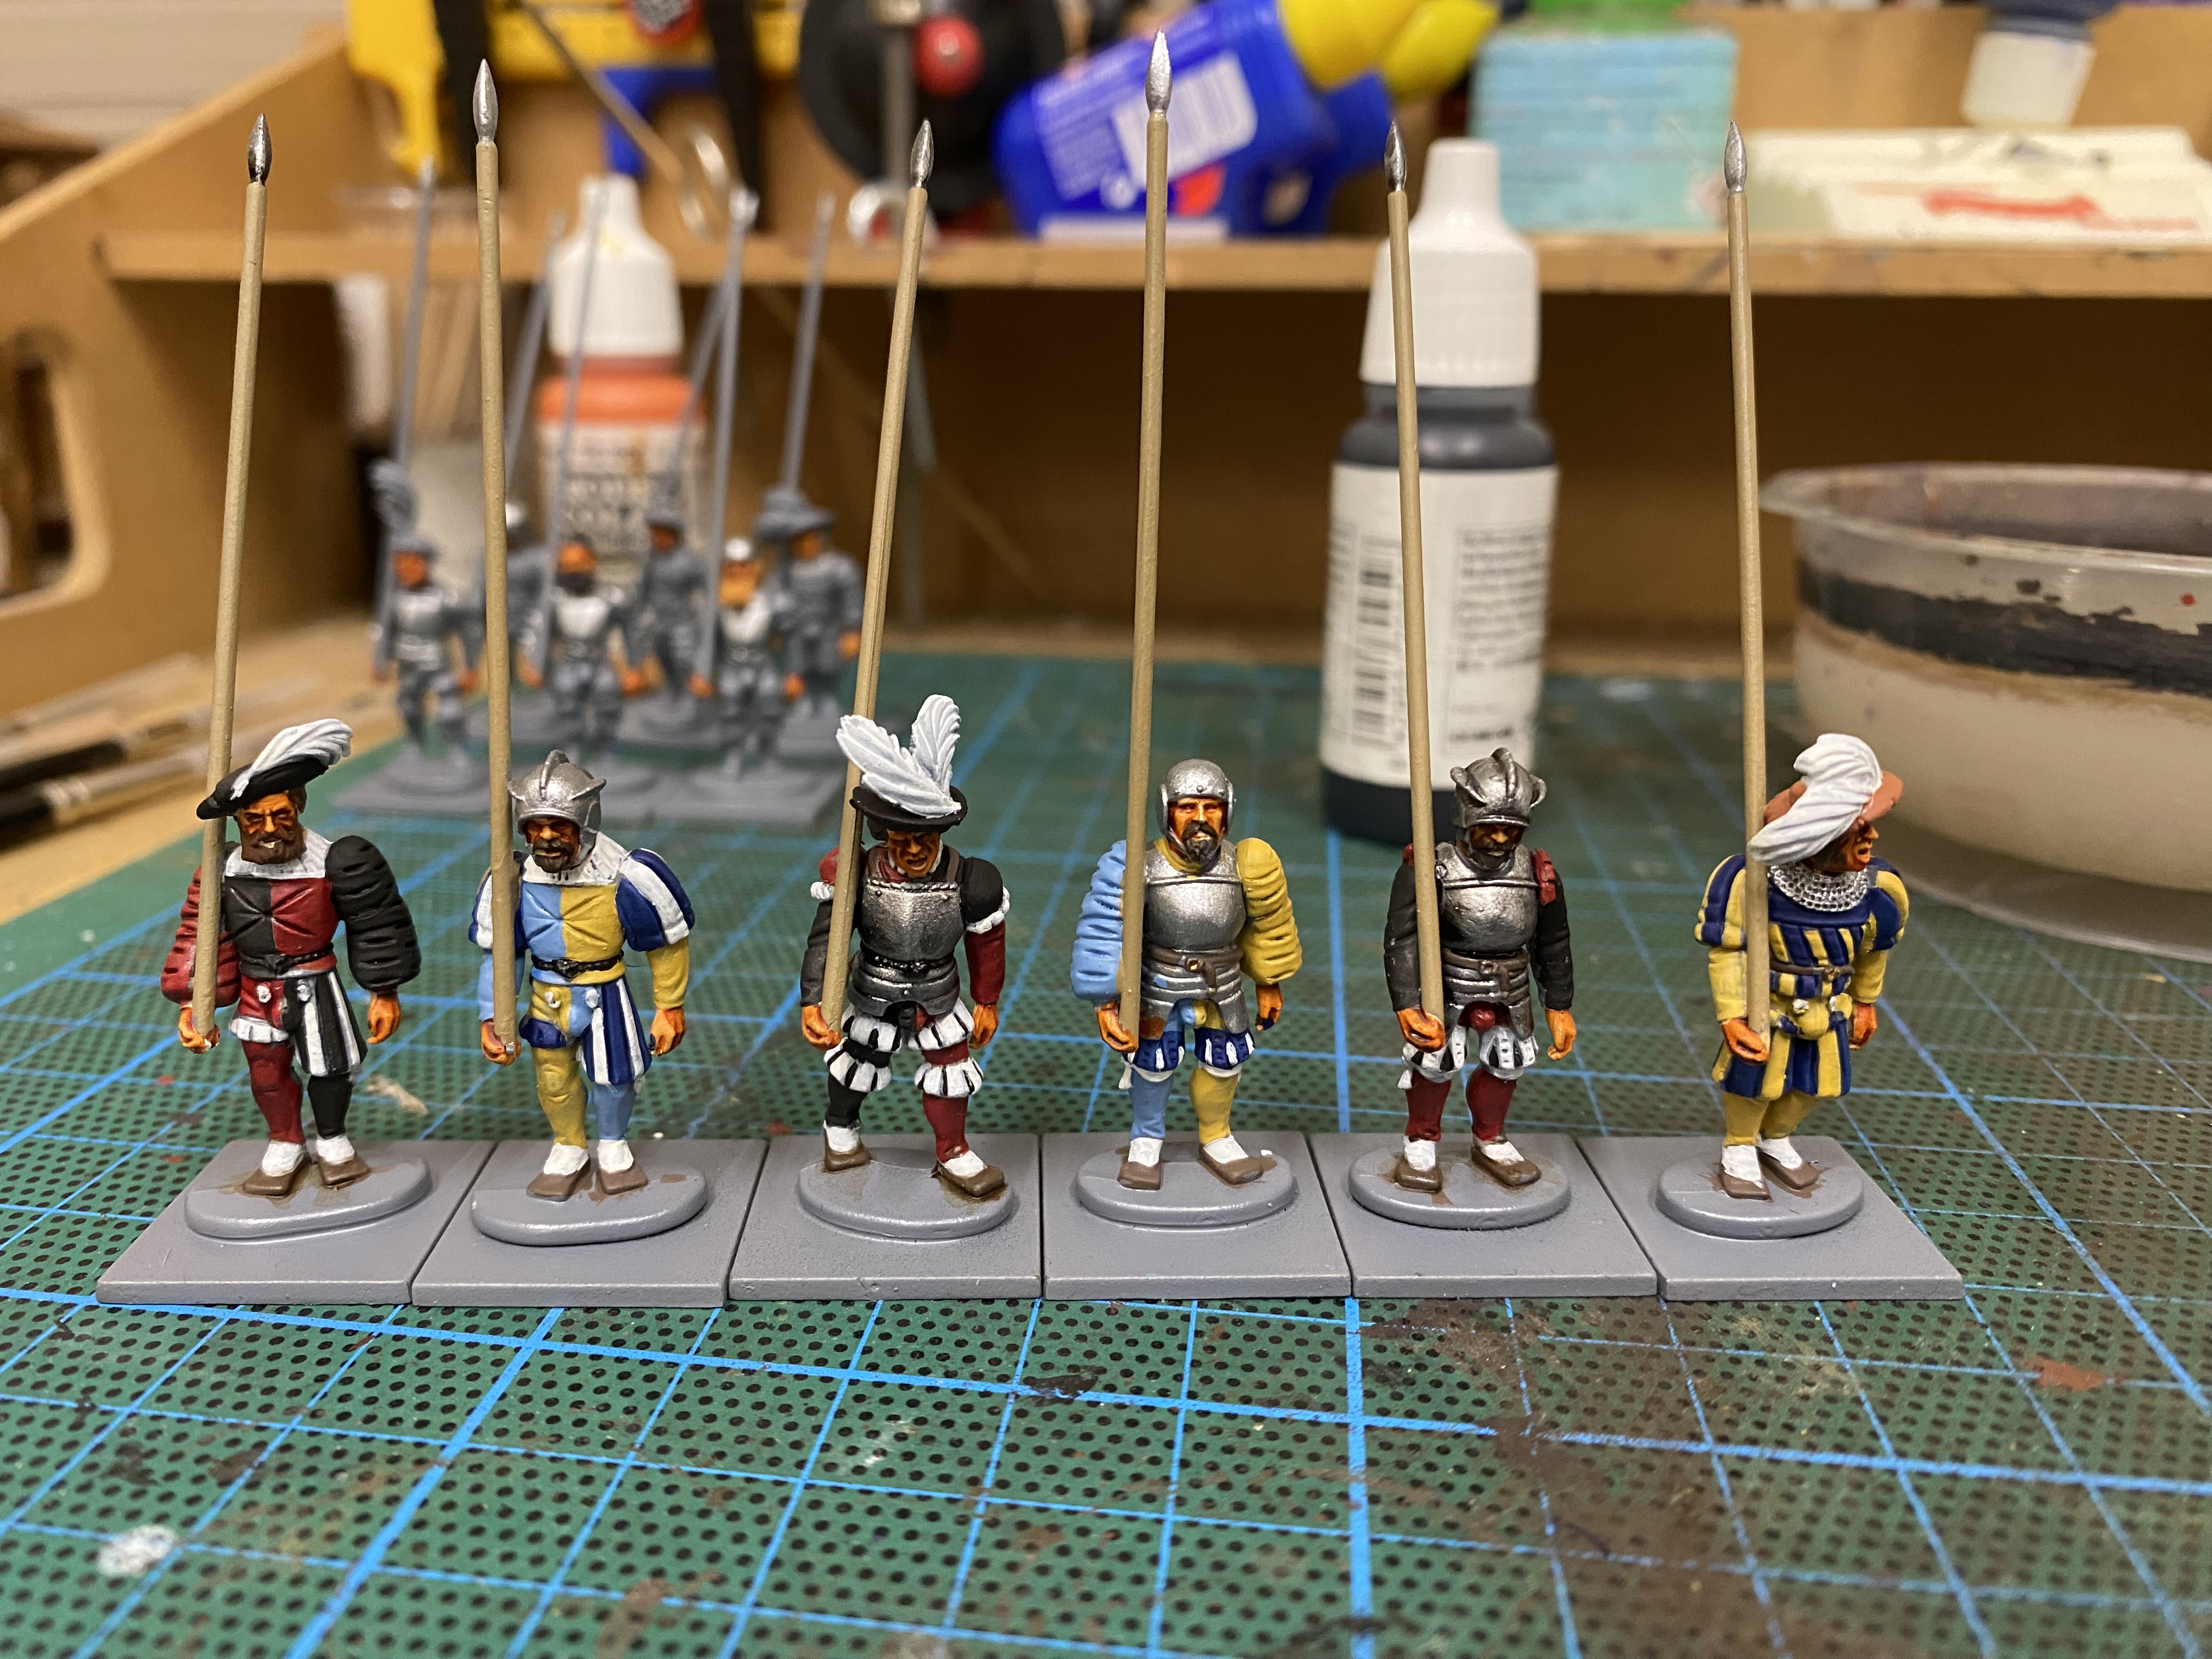
When it came to the lances I decided to use the very pretty candy stripe design on each lance, choosing the colours to match the livery. To get the candy stripe effect, I painted the lighter colour on the lances first and then used Tamiya flexible 2mm masking tape to get a spiral design and then painted the darker colour. It’s not always perfect but a bit of retouching and it looks fine! I suspect that these lances would not have appeared on the battlefield but would be reserved for the jousting yard or parades. I guess that if it came to the actual battle, if they decided to charge, they could always get their Squire to change lances.
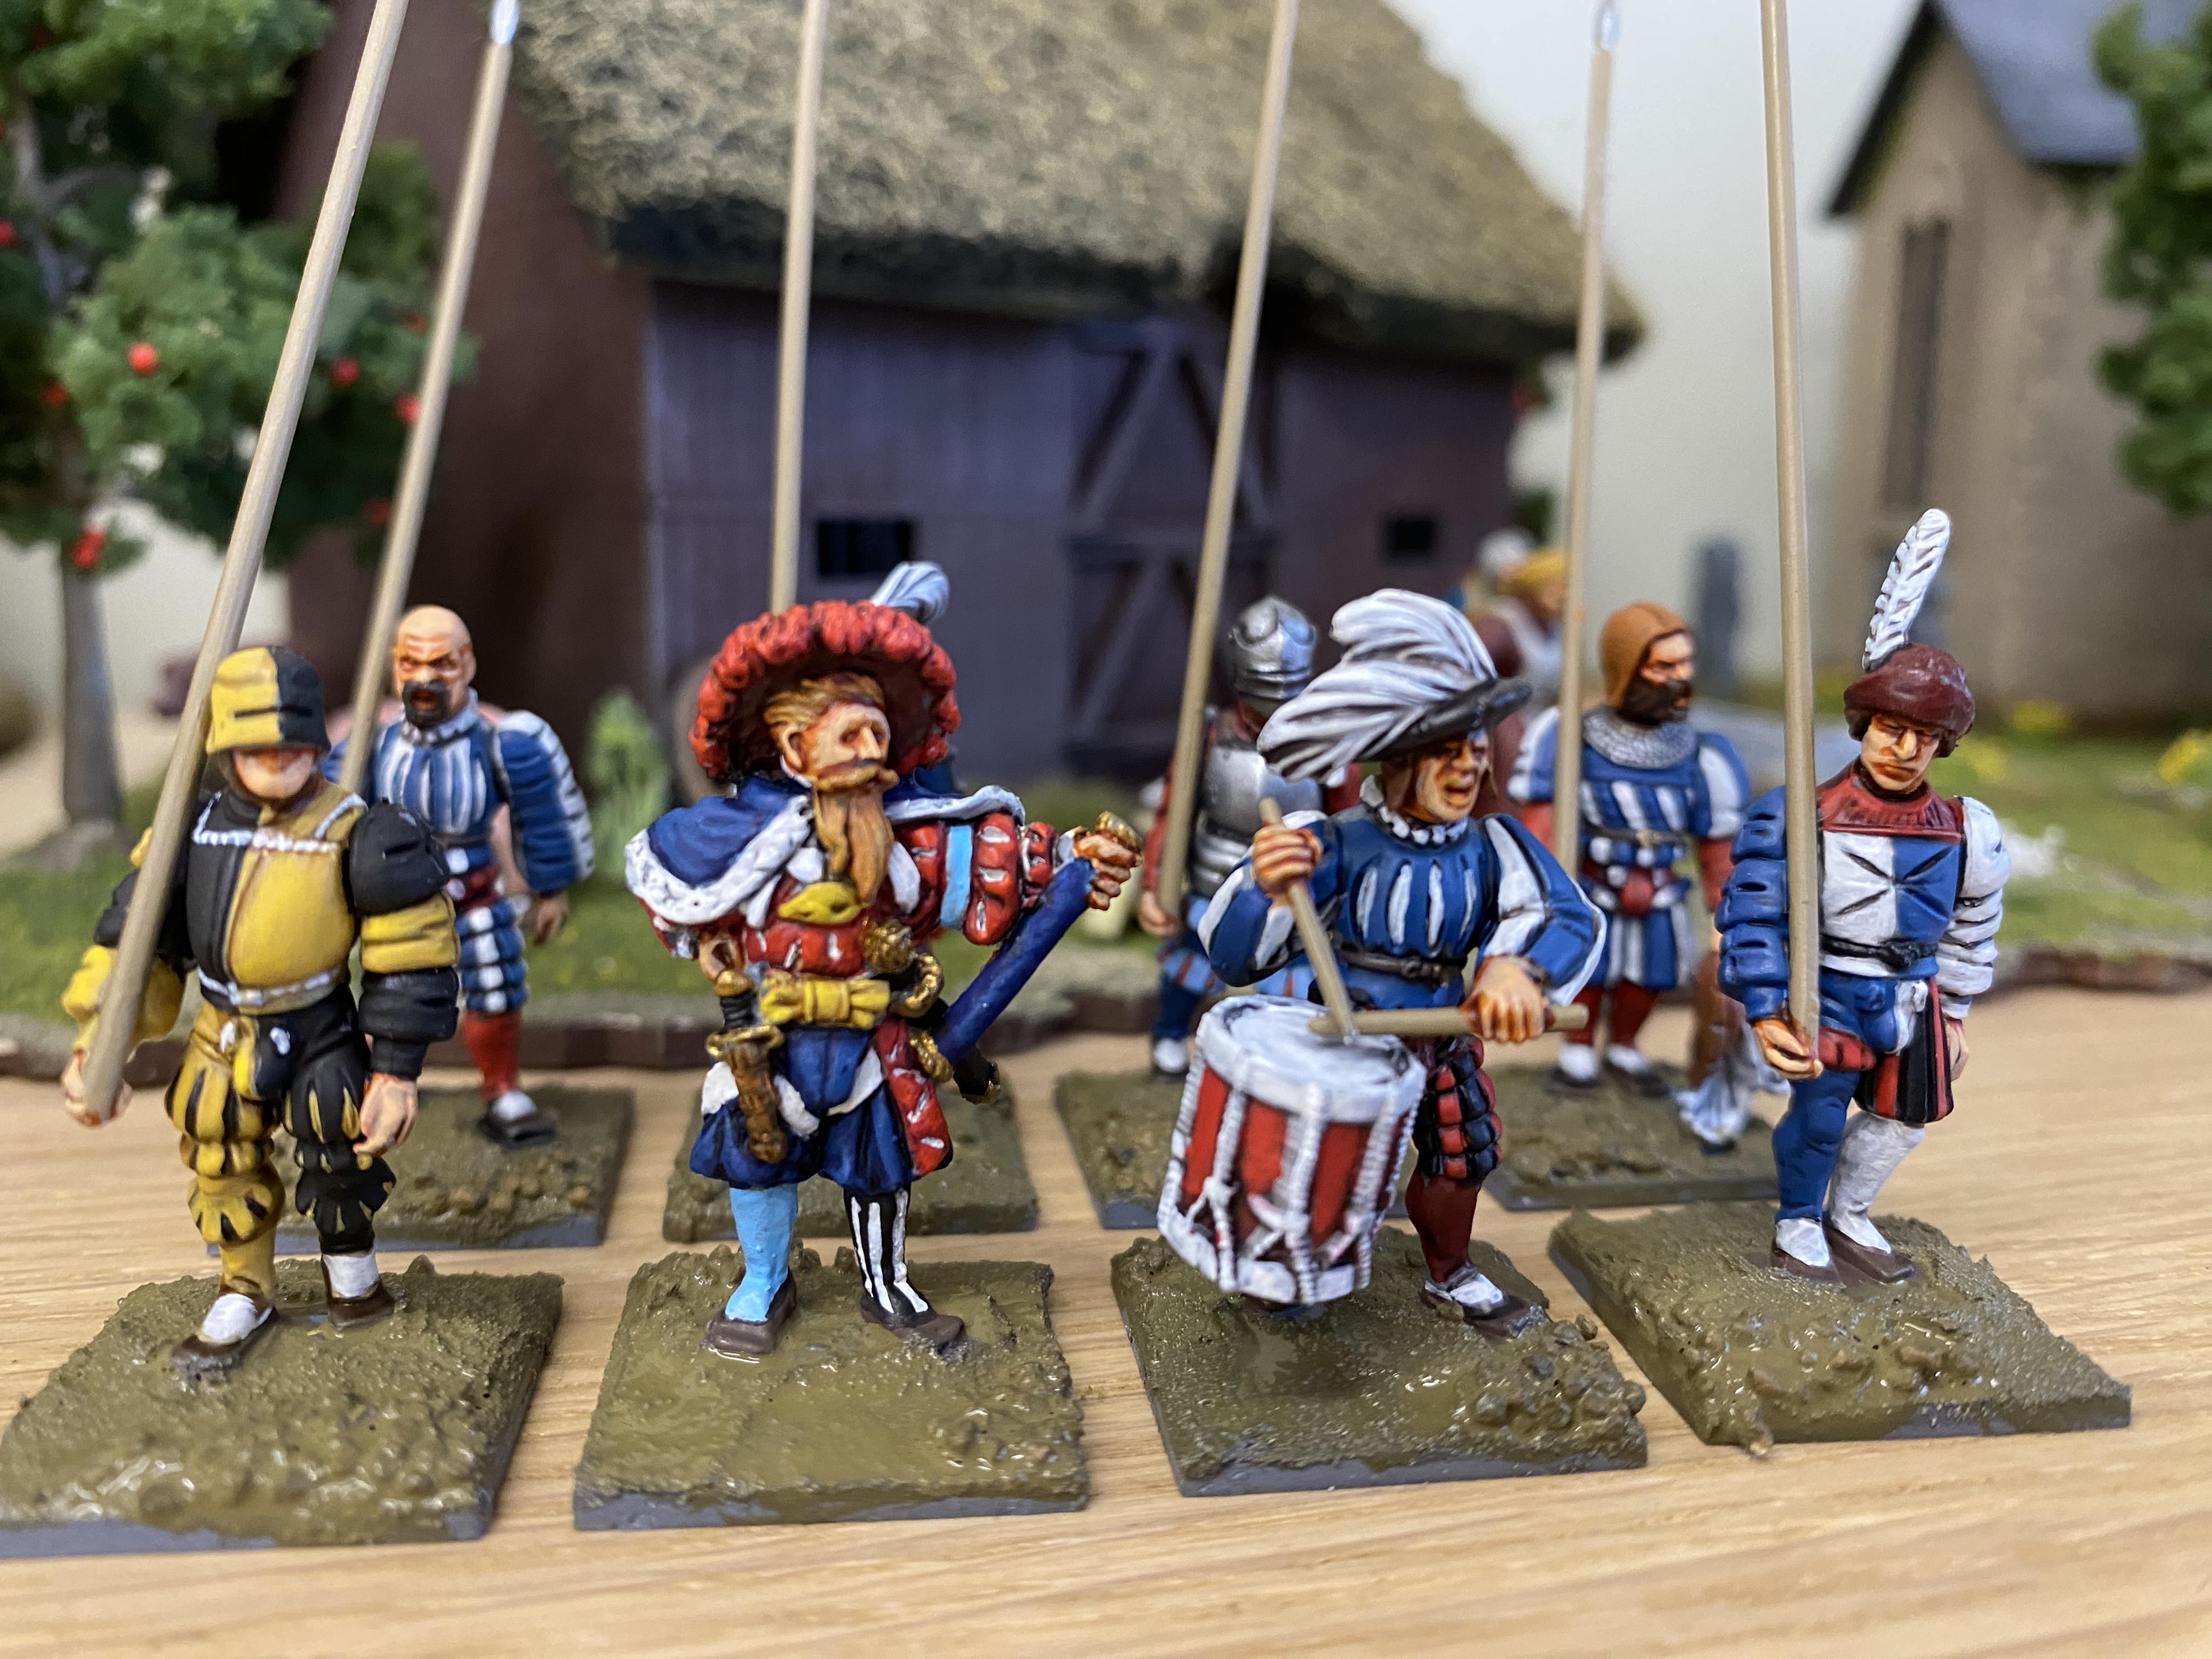
The unit is nearly finished – just the tufts and flowers to add
I had intended to put flags on each lance and ordered a selection from Pete’s flags. Although the flags are lovely it seemed that it would be too much to add them to the lances. Thanks to a suggestion from a facebook comment, I think that I will model a commander and banner man as a separate command stand. That can wait for now though!
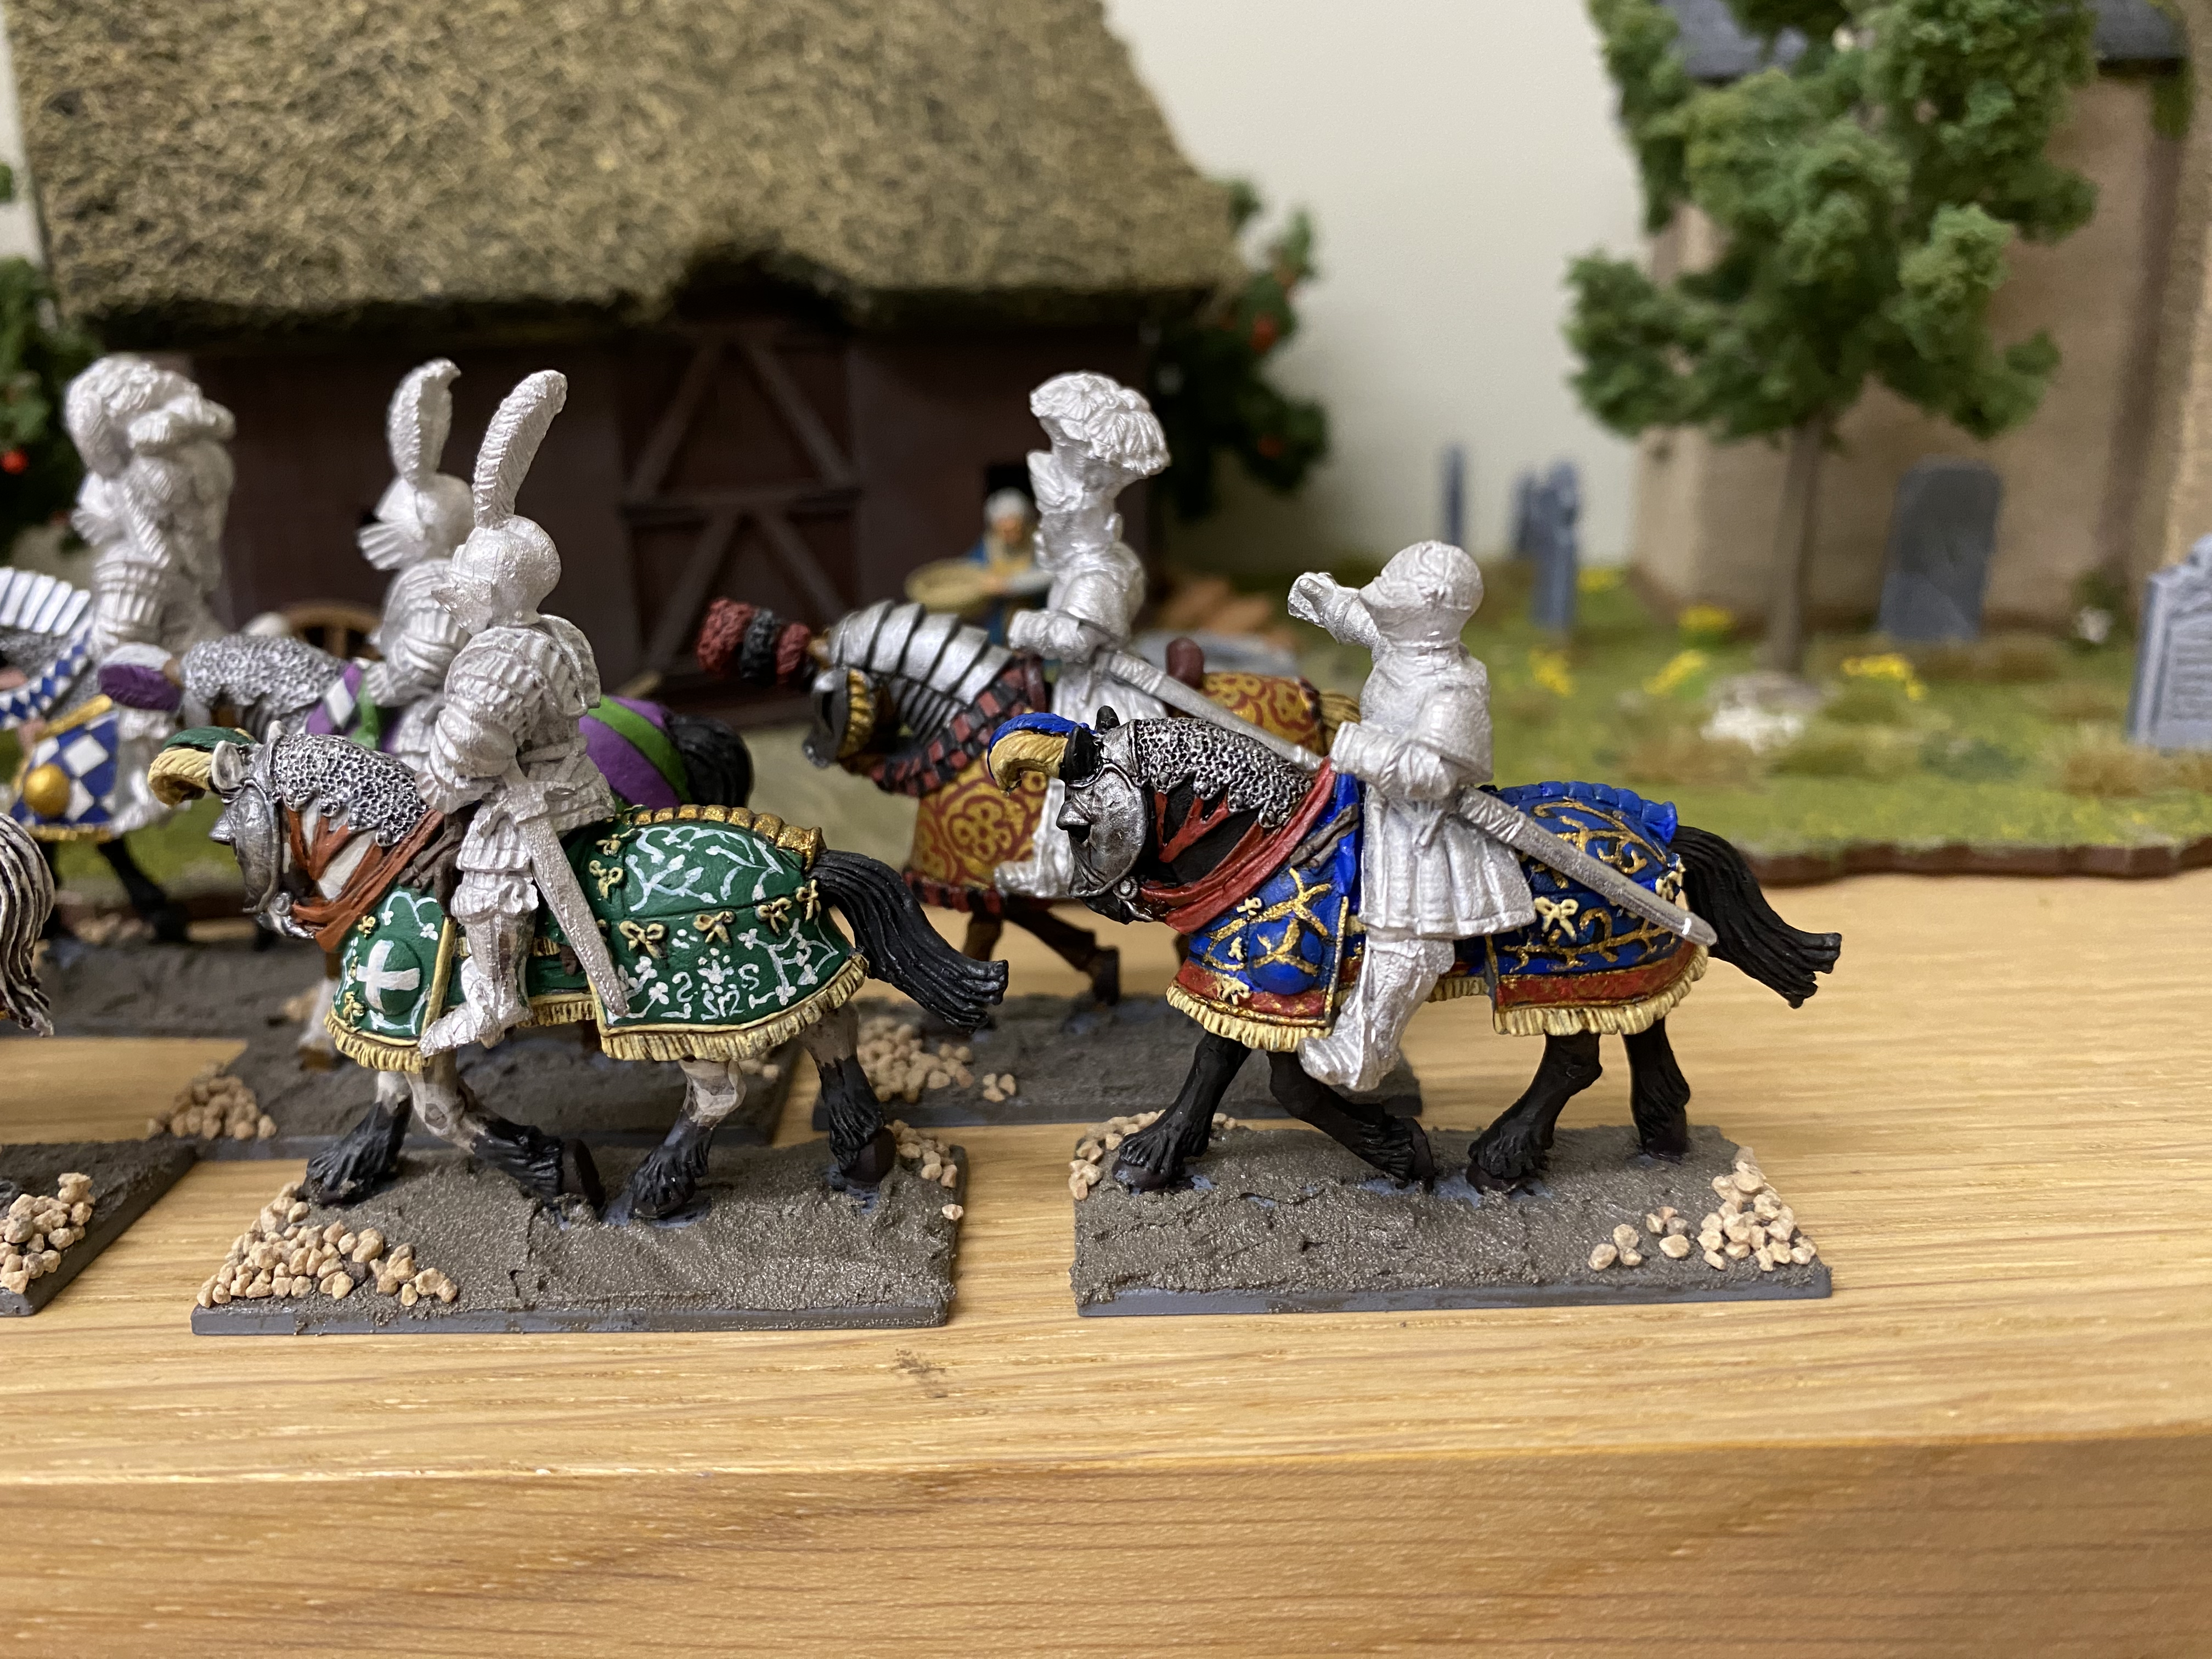
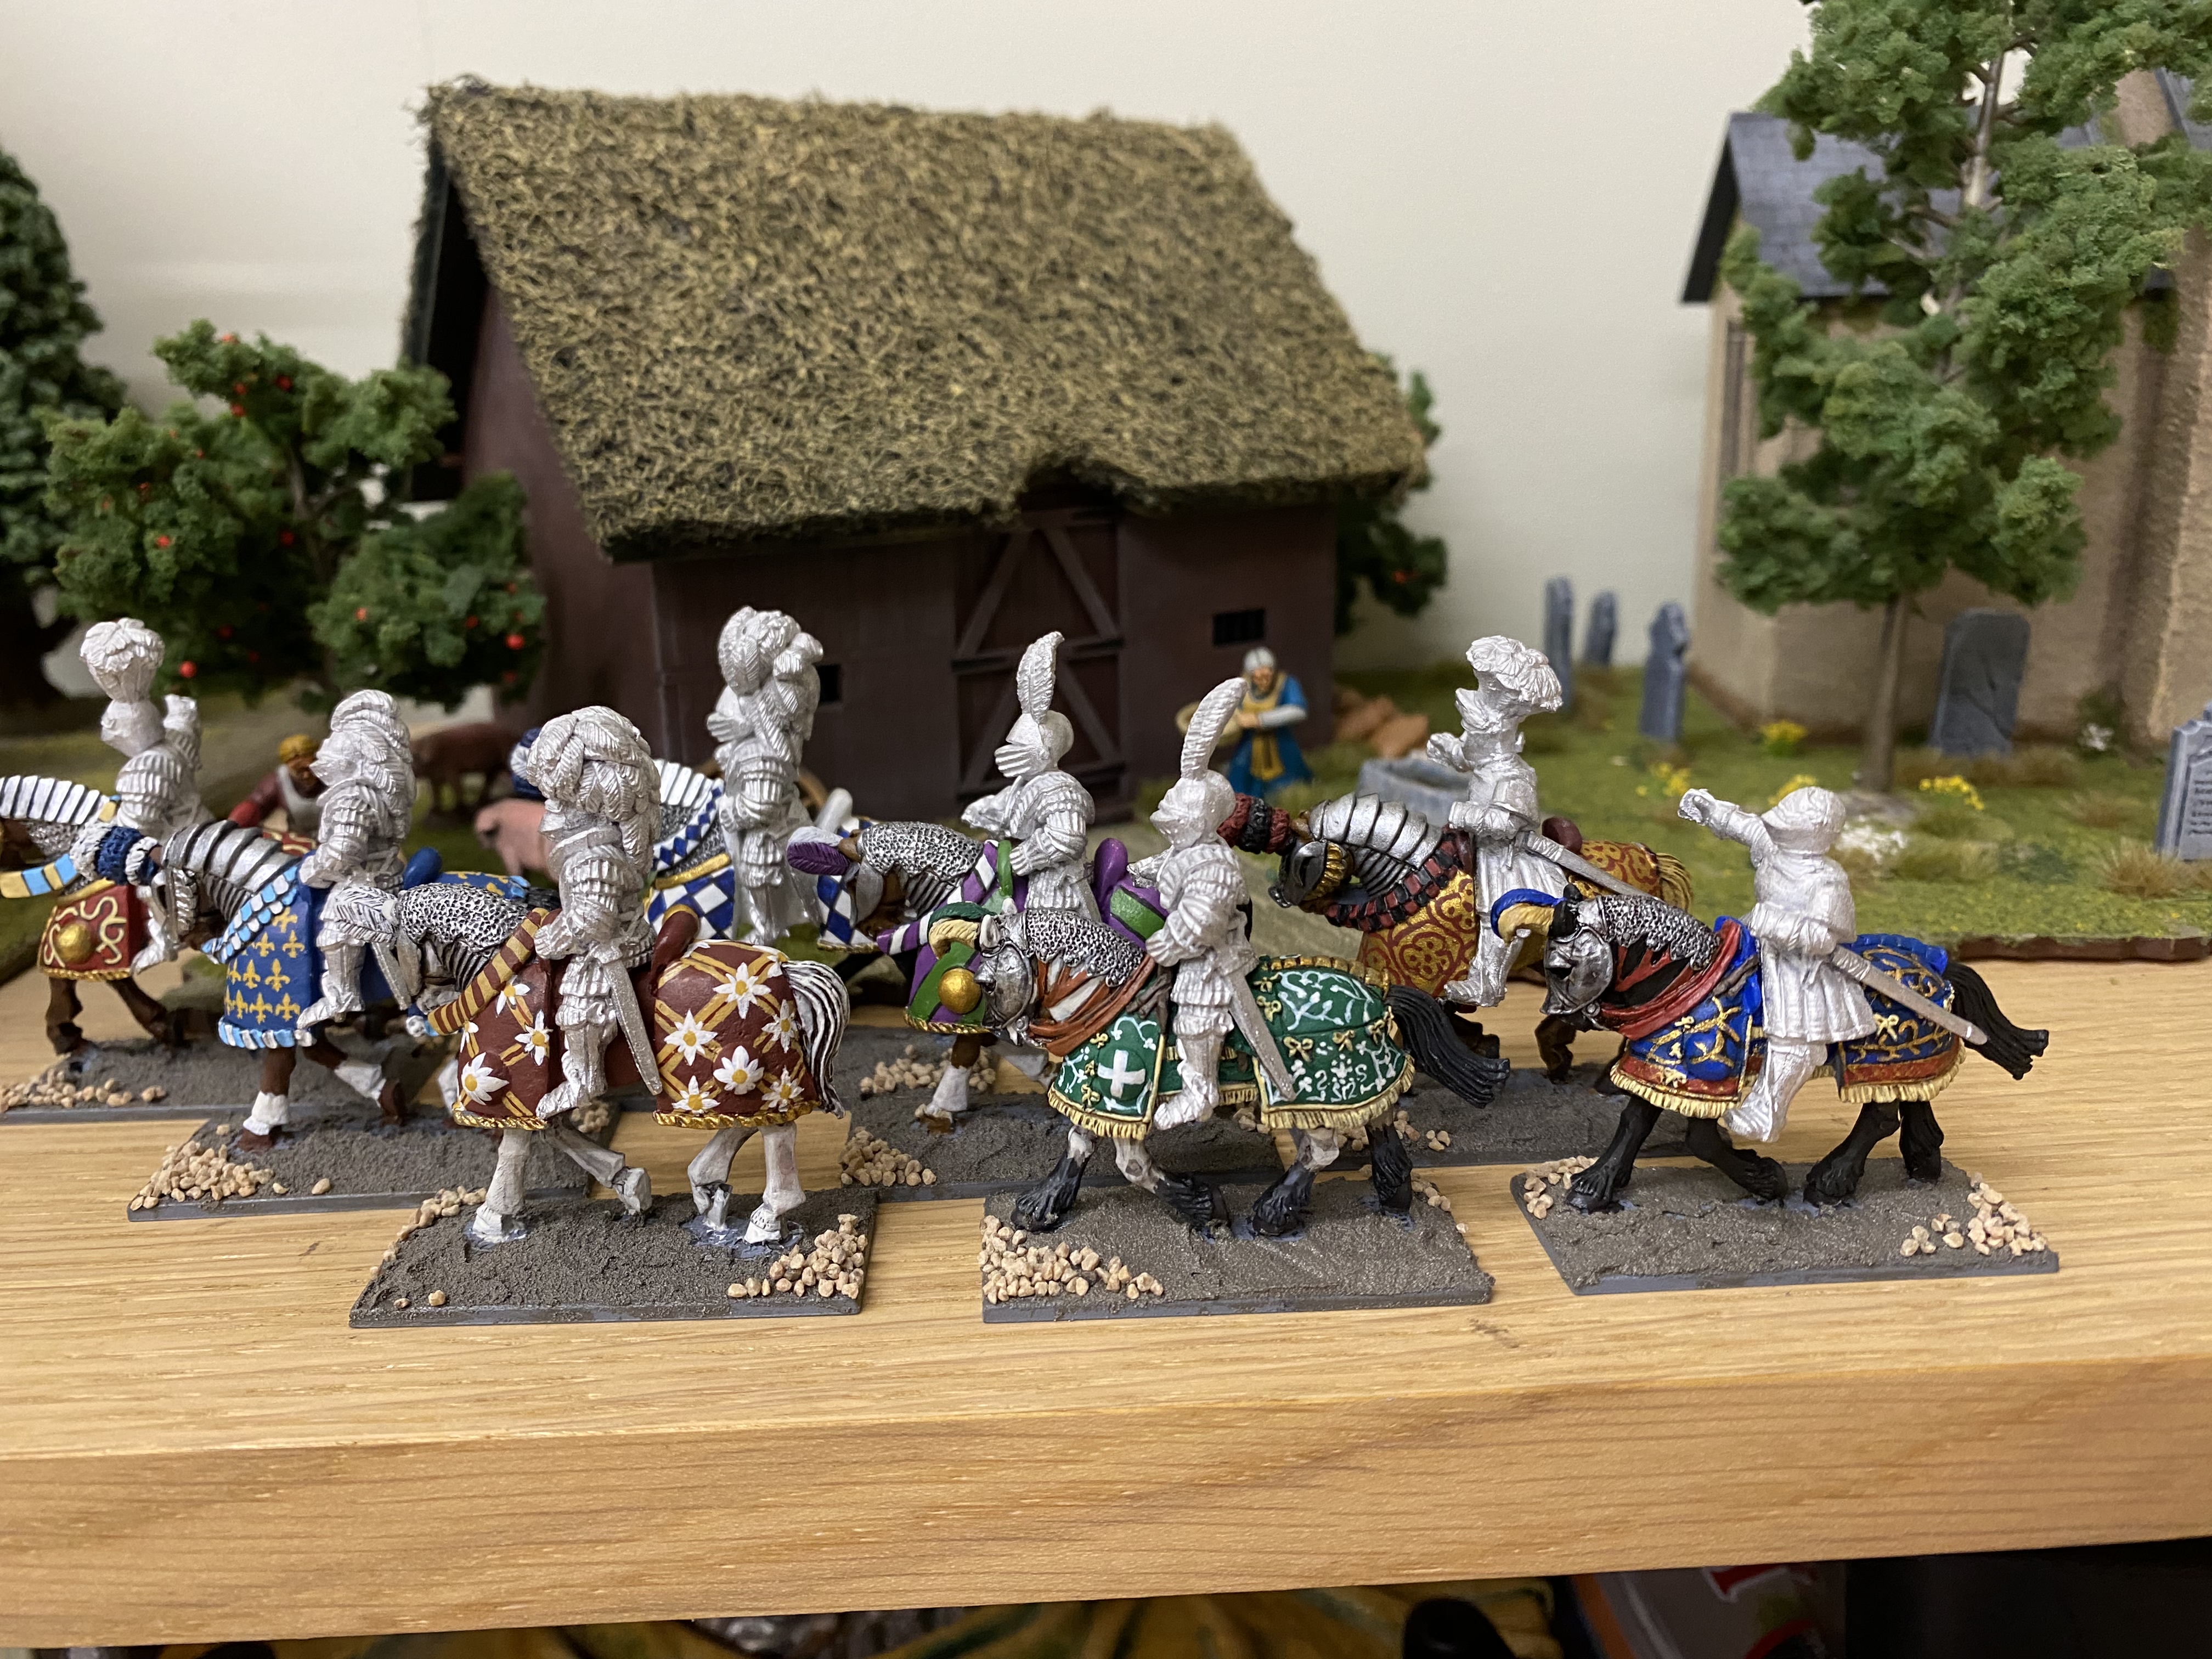
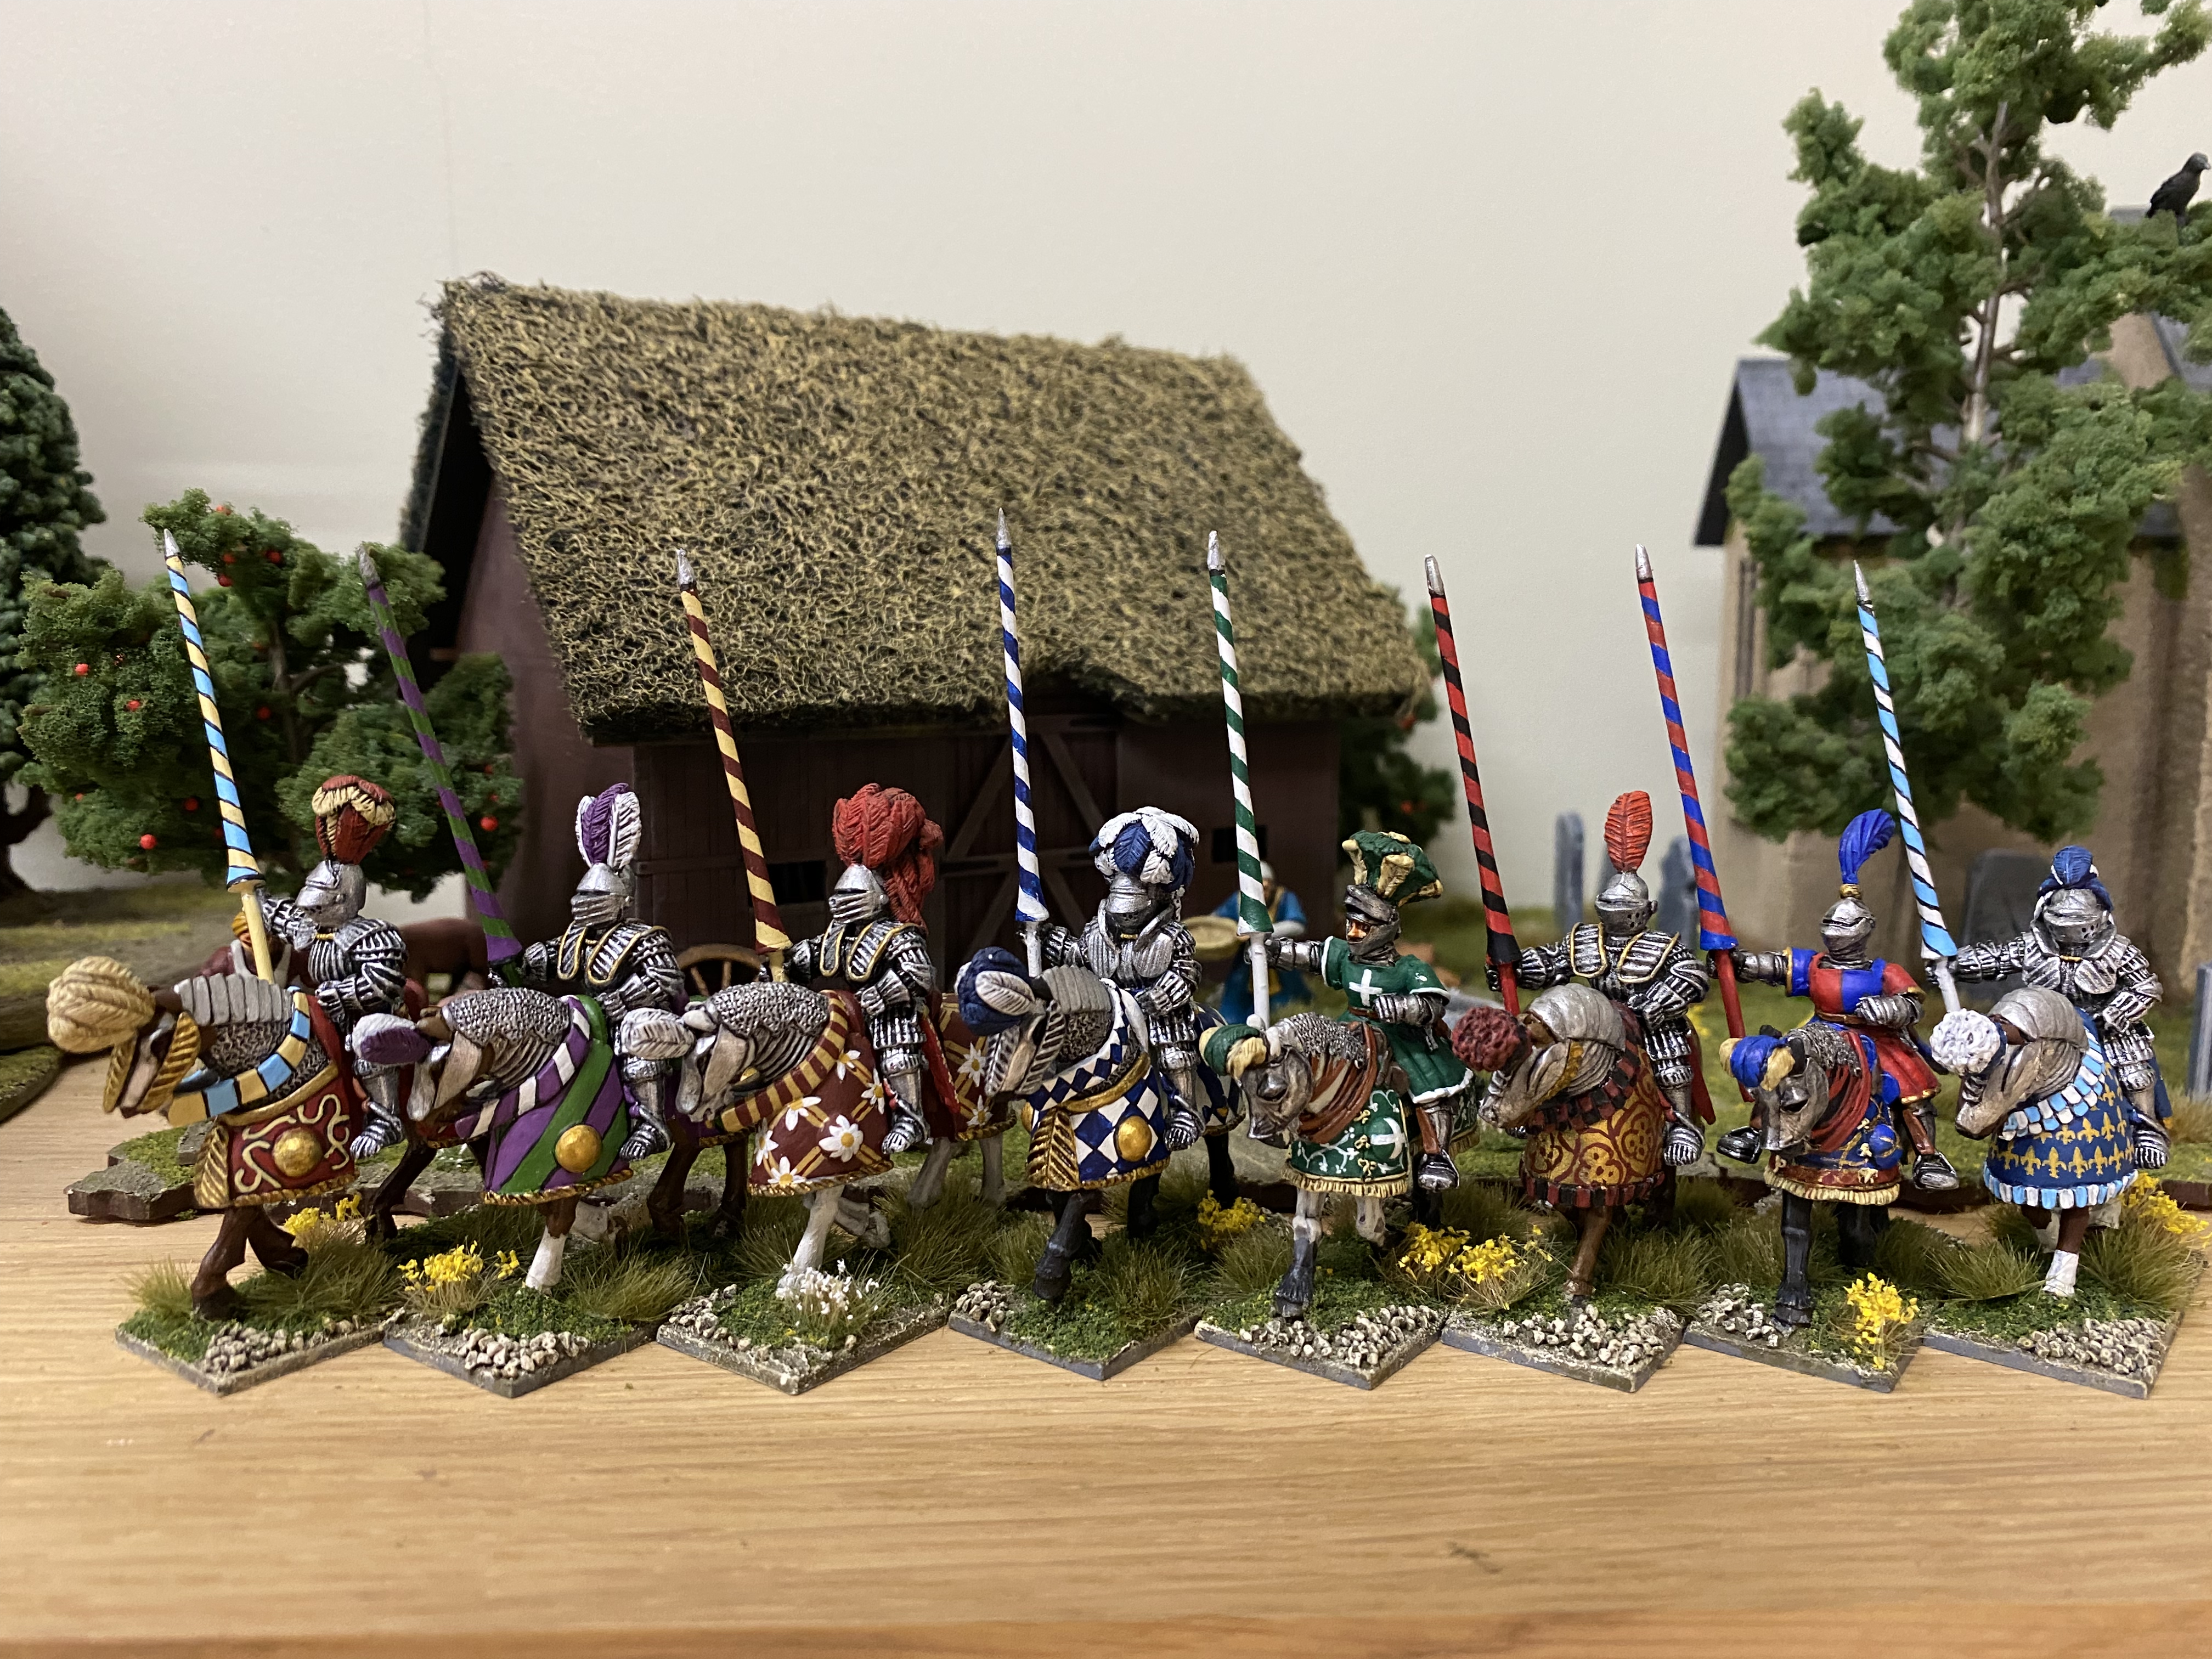
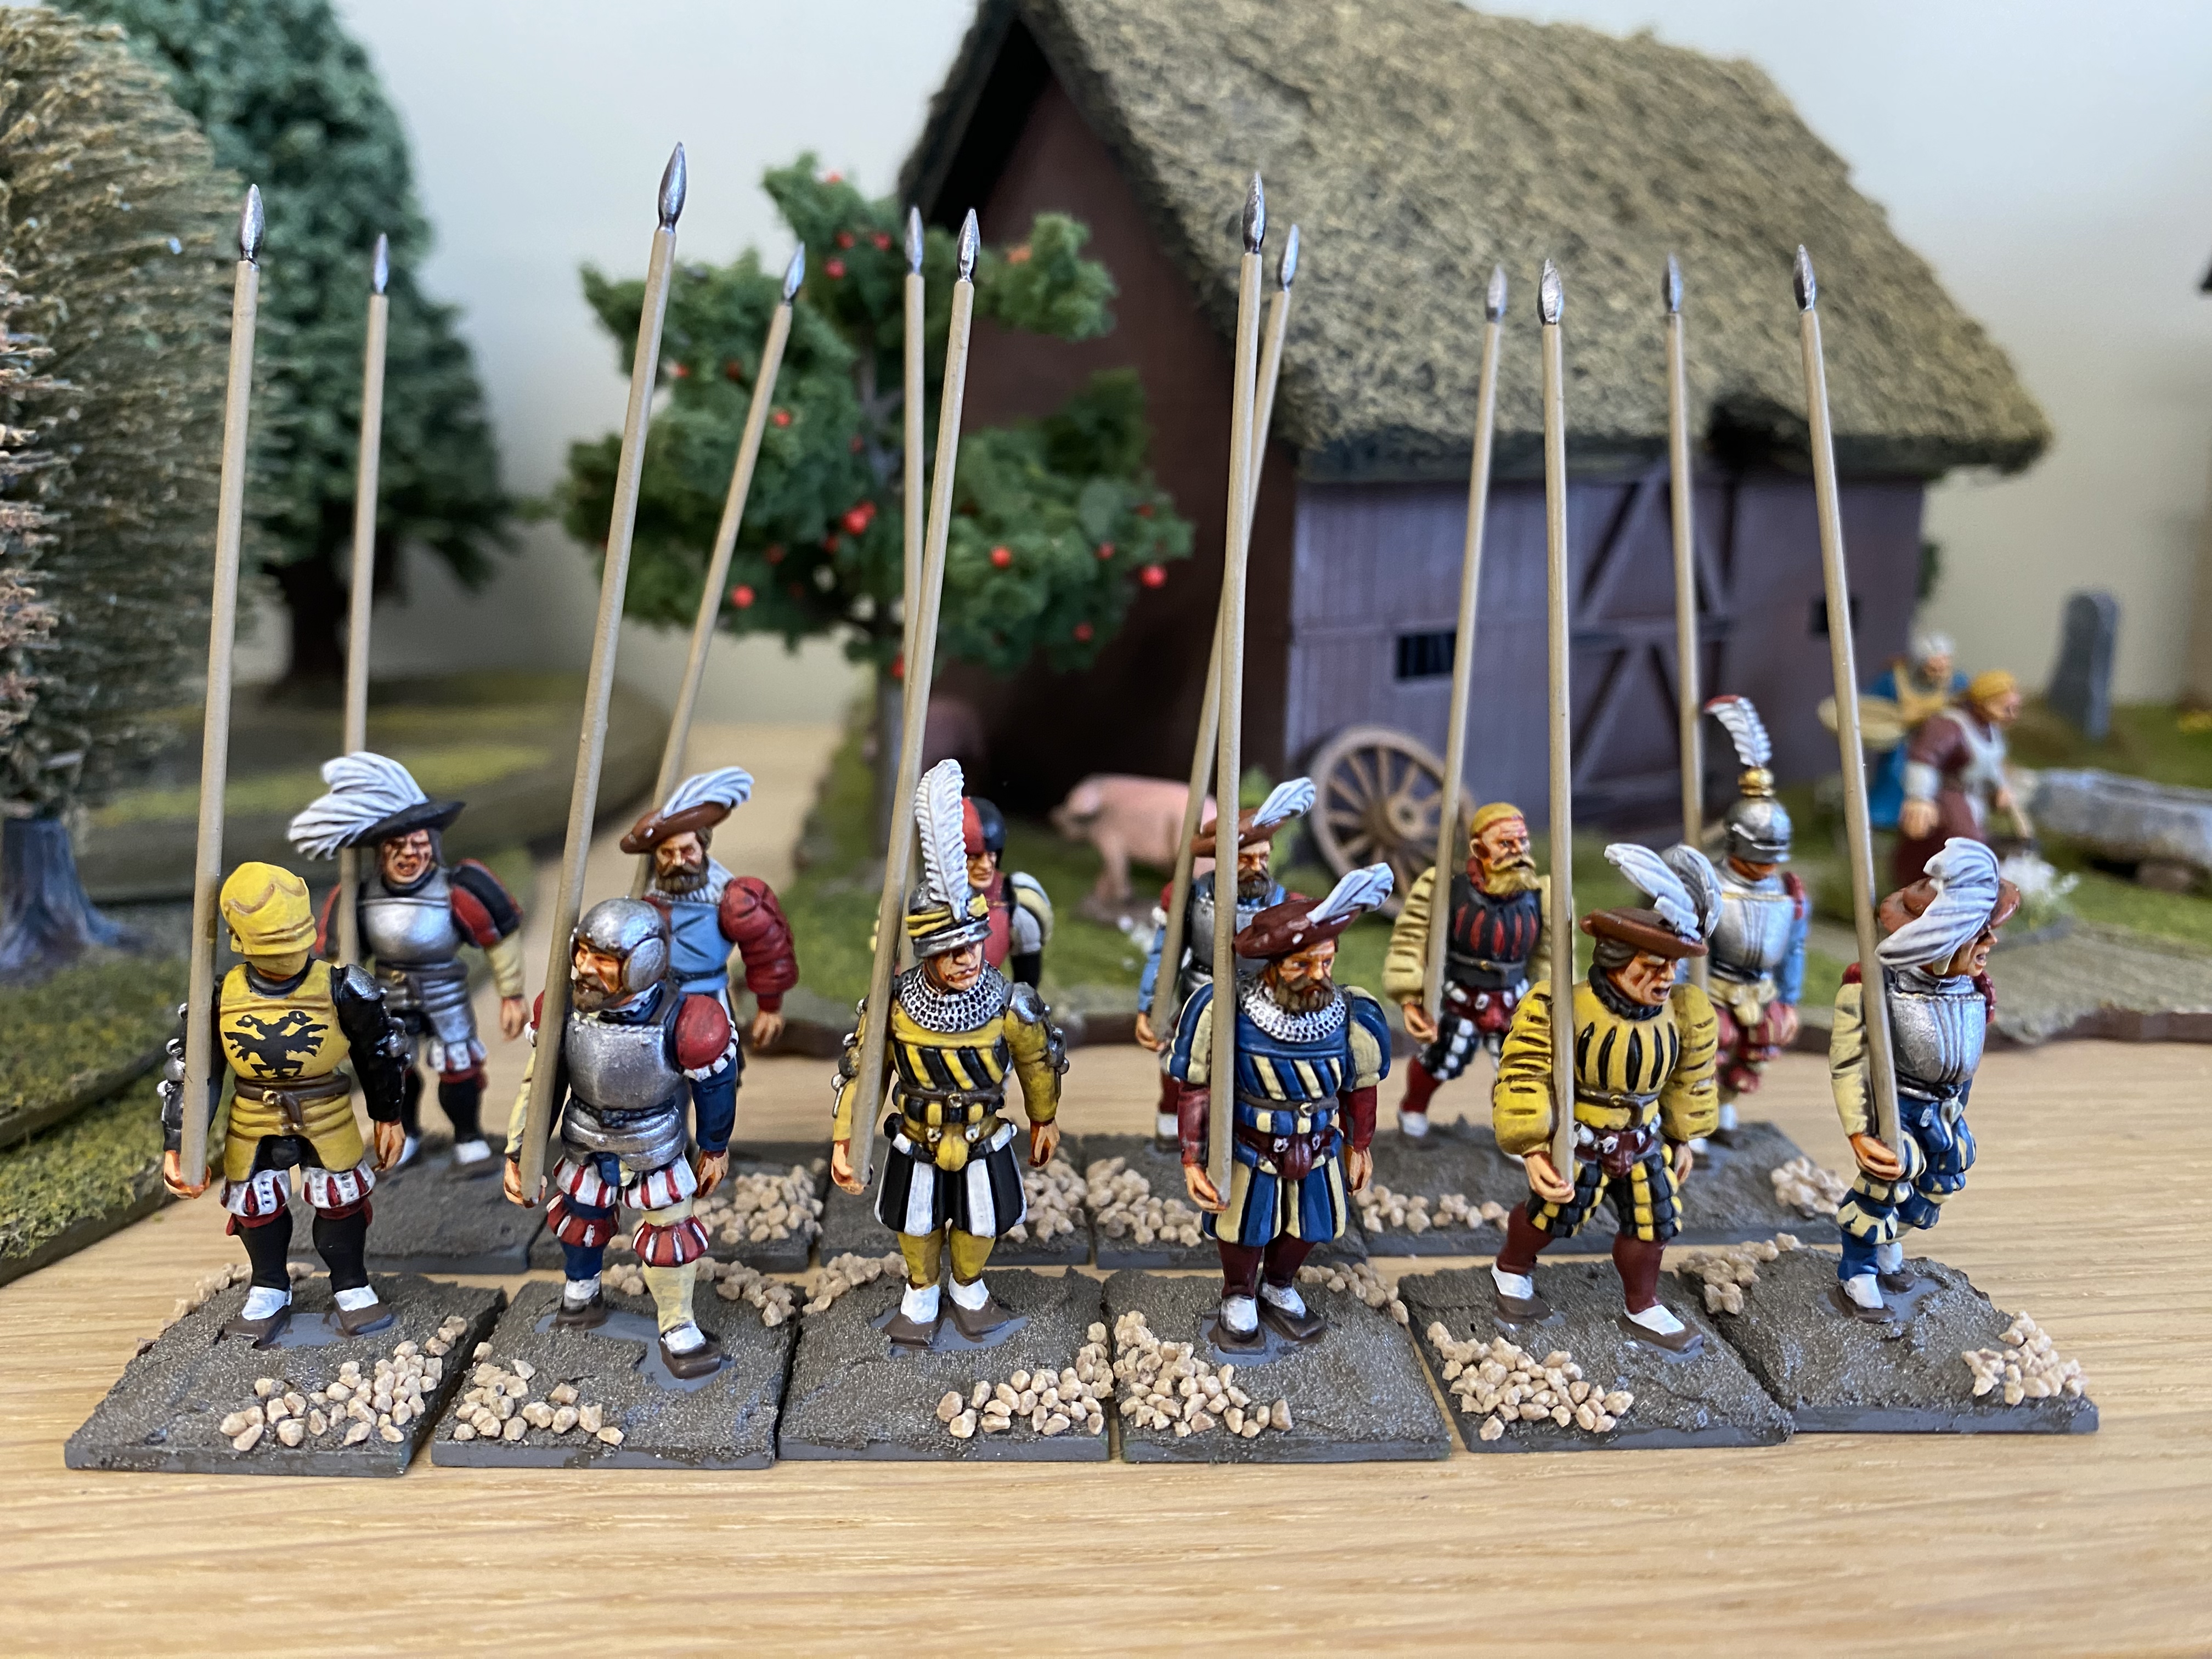
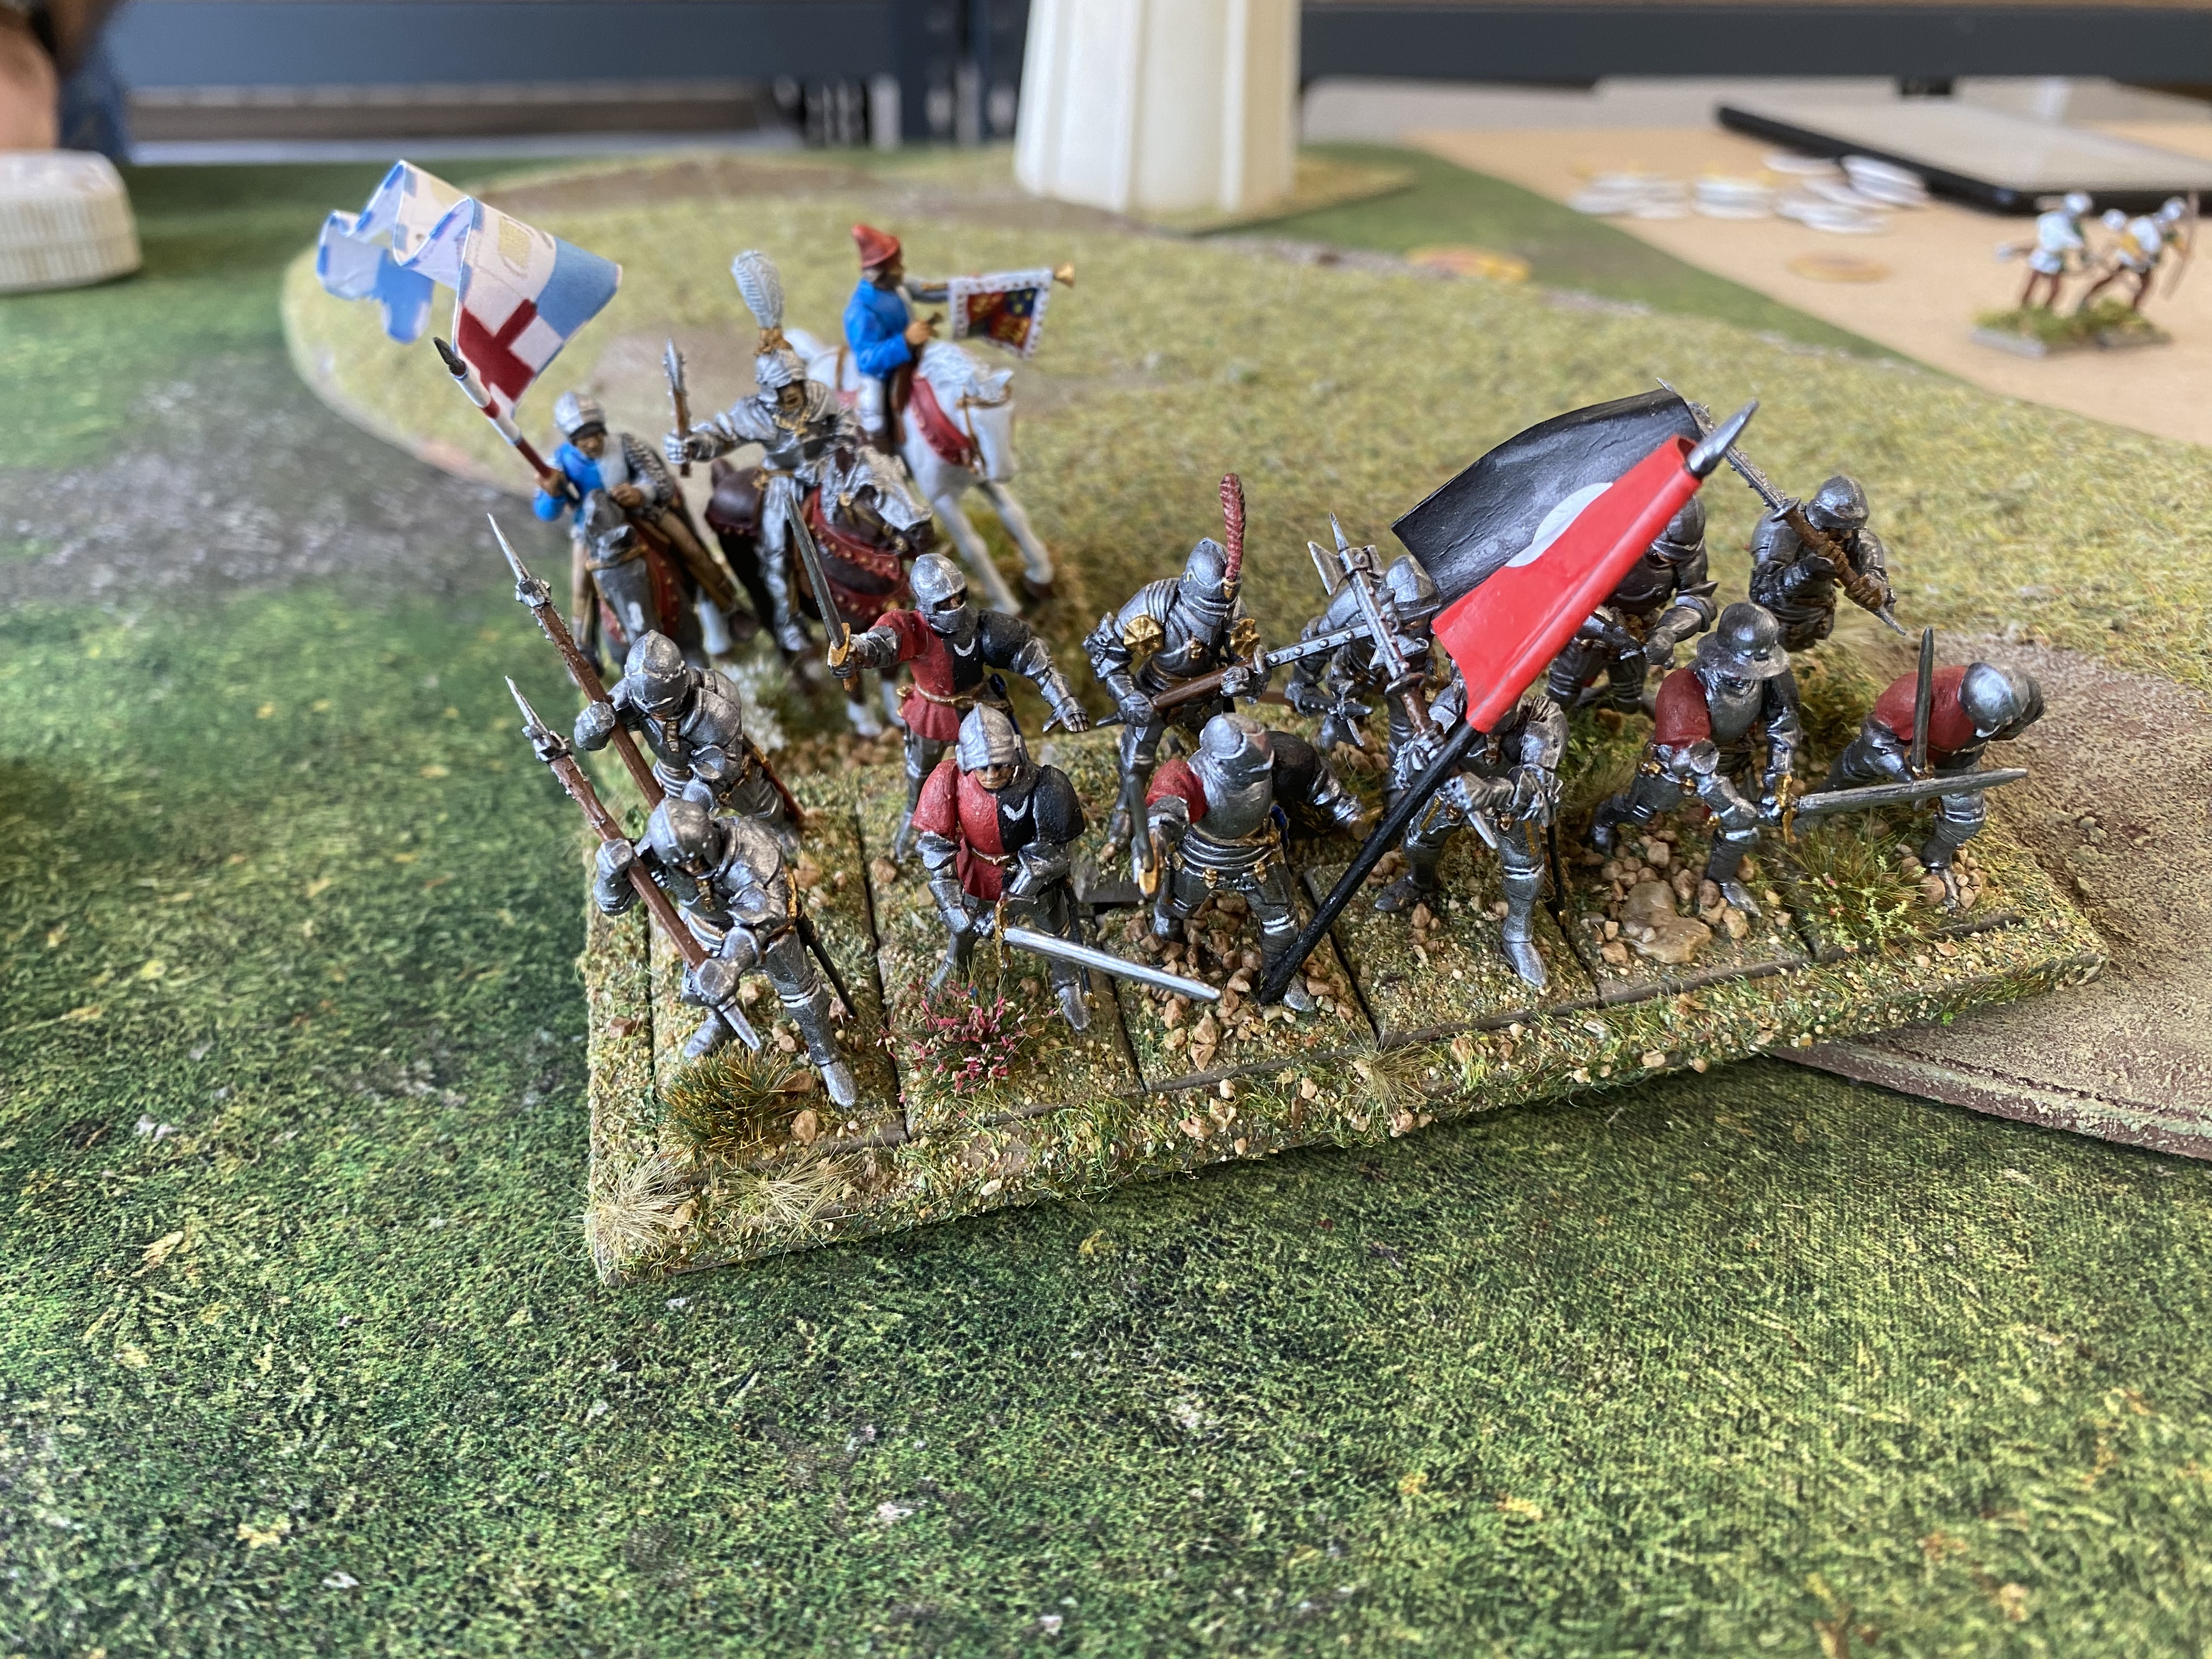
The finished unit ready for battle!
So. another unit is ready for Battle – I now have a growing army for the Italian Wars. I think that after painting these I will have a break from the period and complete something a bit more straight forward. I also have a Japanese project that I’m itching to get on with….Watch this space!
THE COMMERCIAL BIT
I hope that you all enjoy your hobby as much as I do – remember that our web site will have much of what you need! Click here to see our shop:
Having finished my Landsknechts force (for the time being…) I thought that I would add some heavy cavalry and I fancied painting some Gendarmes. Although it goes against the grain somewhat – adding French troops to my collection, that is – I couldn’t resist having a go at painting these ‘fancy Dans’!
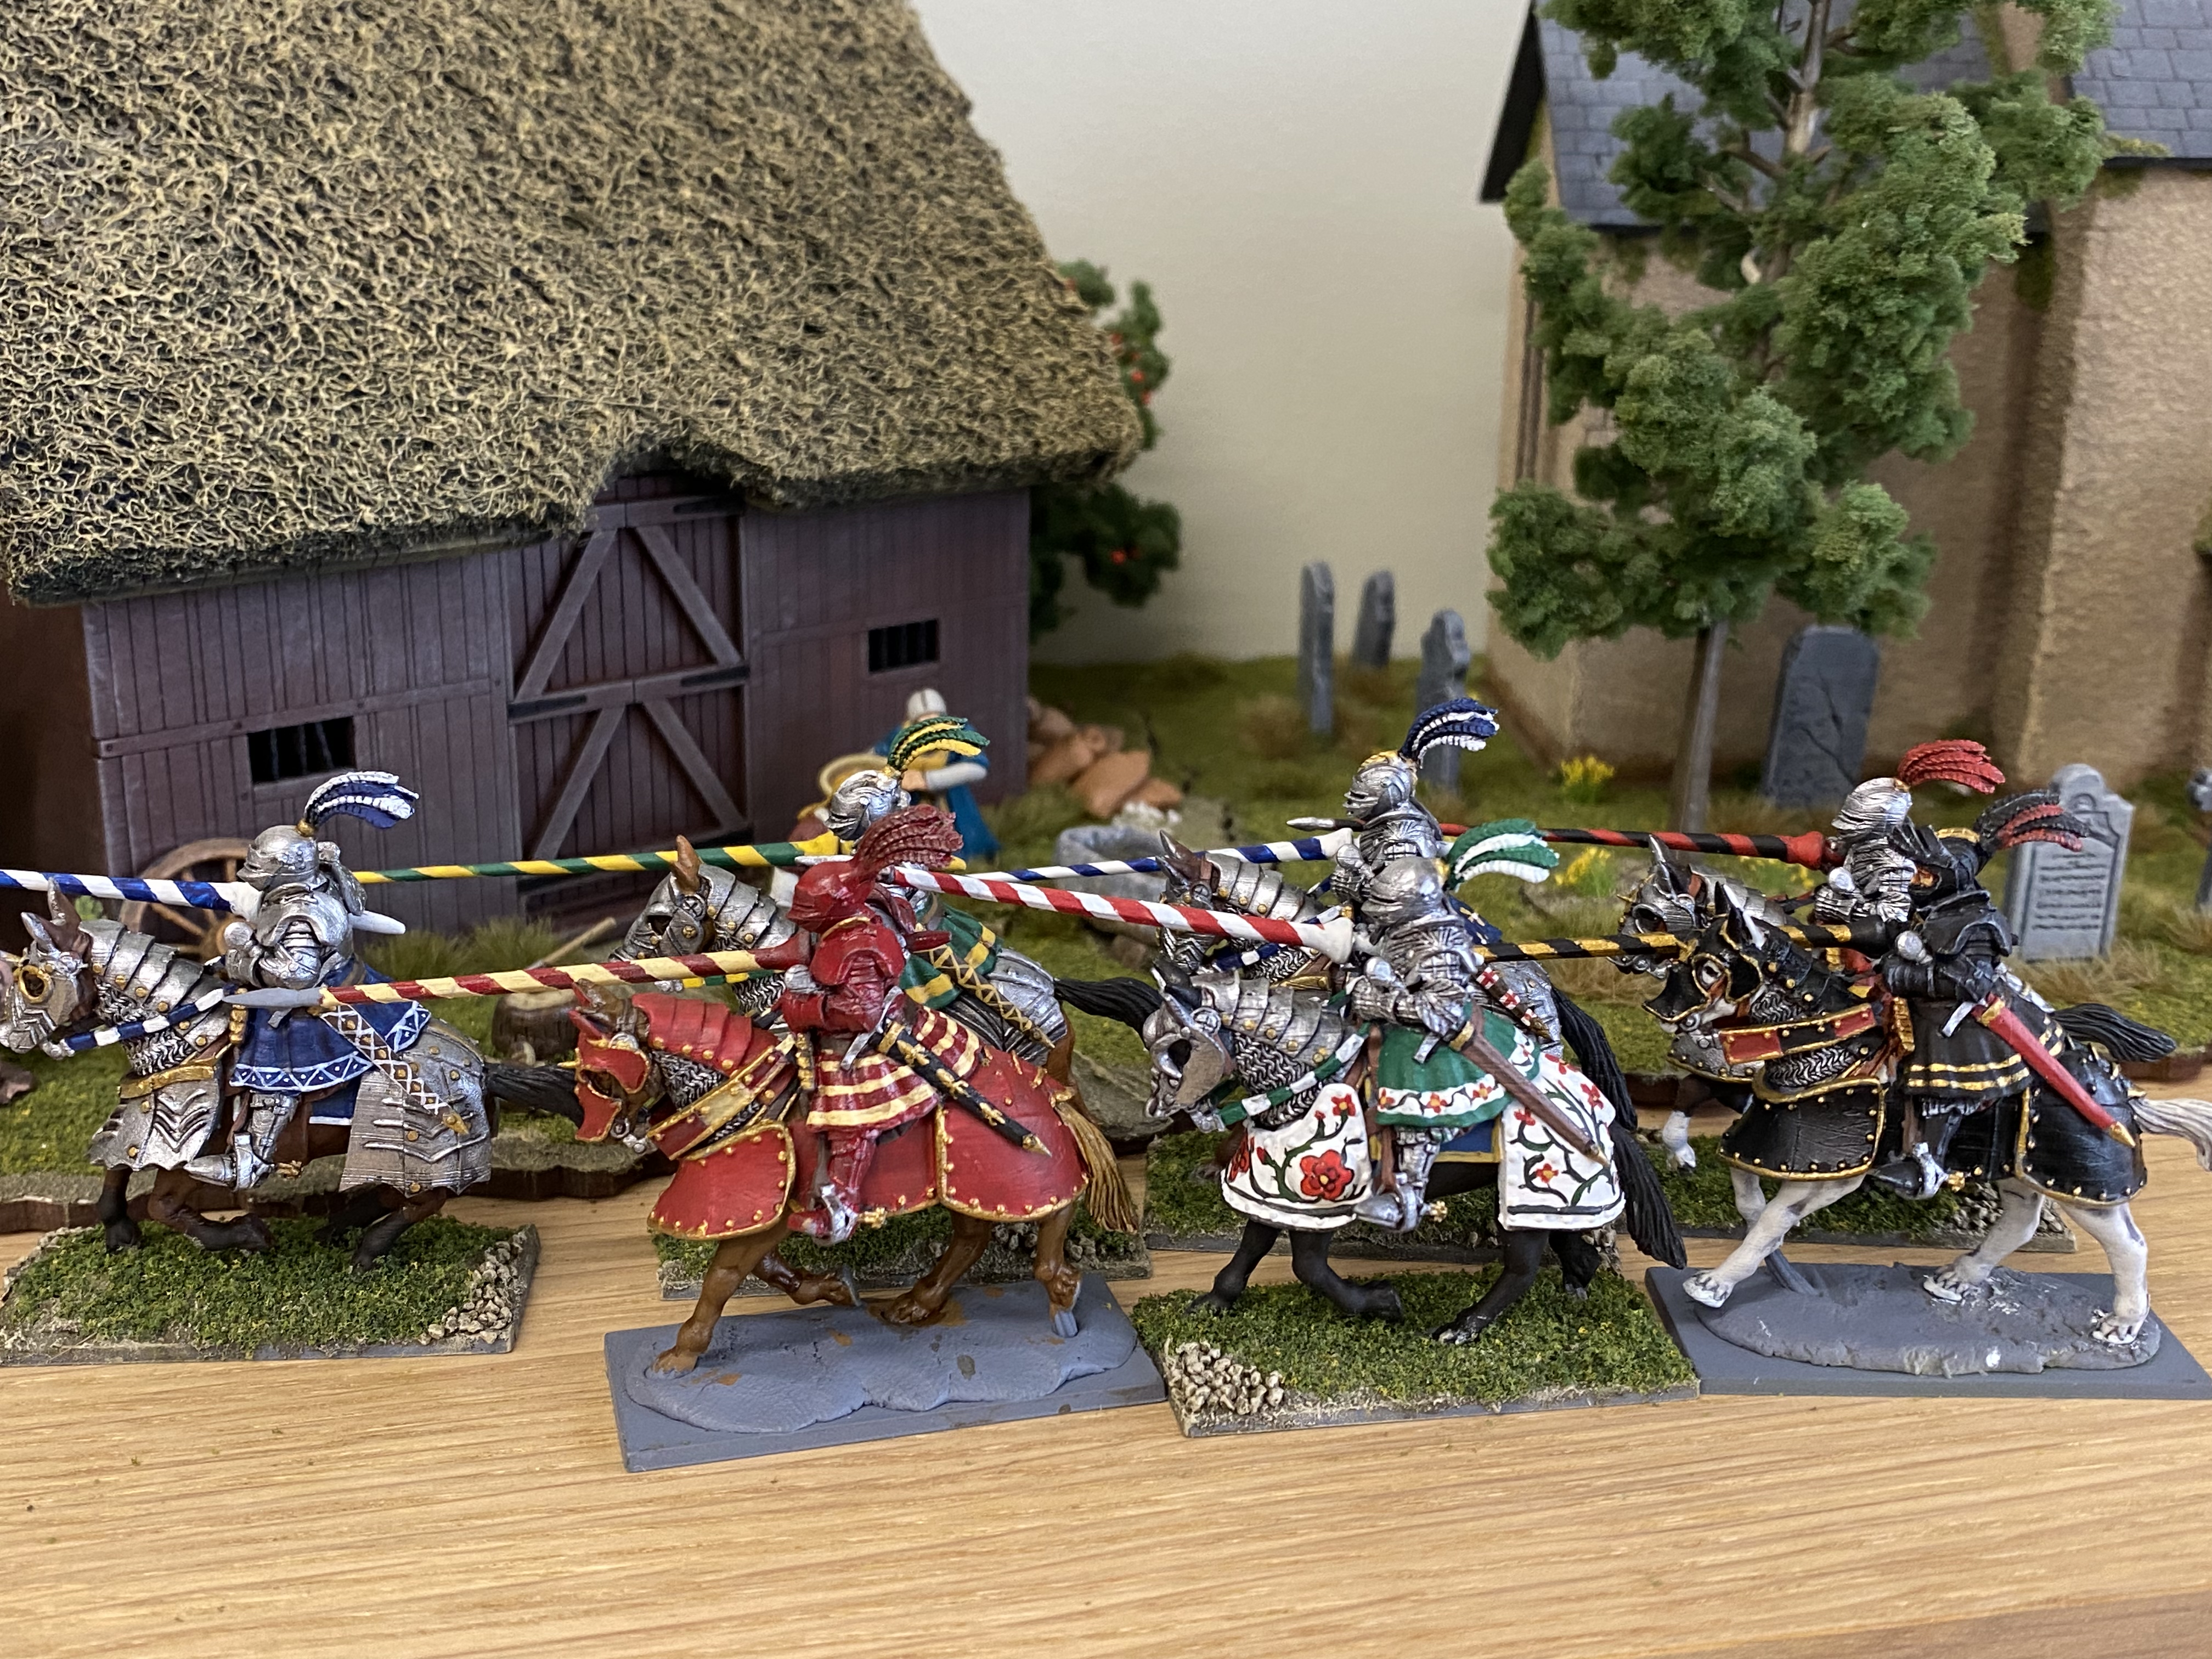
Having spent a little time researching the options to purchase some of these heavily armoured knights, I chose two very different options. I bought eight 3D printed resin knights from Terrain Store on eBay and six metal ones from Foundry Miniatures. I also had three spare Perry Miniatures plastic knights that would give me a total of 17 figures; two units of 8 gendarmes and a commander. I am happy to mix and match manufacturers. By and large the size difference is minimal and can be hidden with some careful basing.
At 24 points a unit, the chances of fitting these Gendarmes into a typical ‘Bill Hooks’ army seems remote and for that matter, impractical but they will look nice in the cabinet!
Work in progress – some of the 3D print lines are obvious from this close up – they’ll pass as battle damage!
Just a brief note about the 3d resin figures. The detail on these figures is simply beyond anything achievable in casting metal or plastic. With separate reins on the horses, detailed spurs, raised visors with open vision slits and more, I couldn’t wait to get paint onto these figures. There was a slight downside, however. Whilst the fine detail is wonderful, larger surfaces are actually not so good, with the 3d printing lines showing up across some of the armour plates and other flat surfaces. You could really only see these once the models were painted and I was happy to treat these as ‘battle damage and scratches!
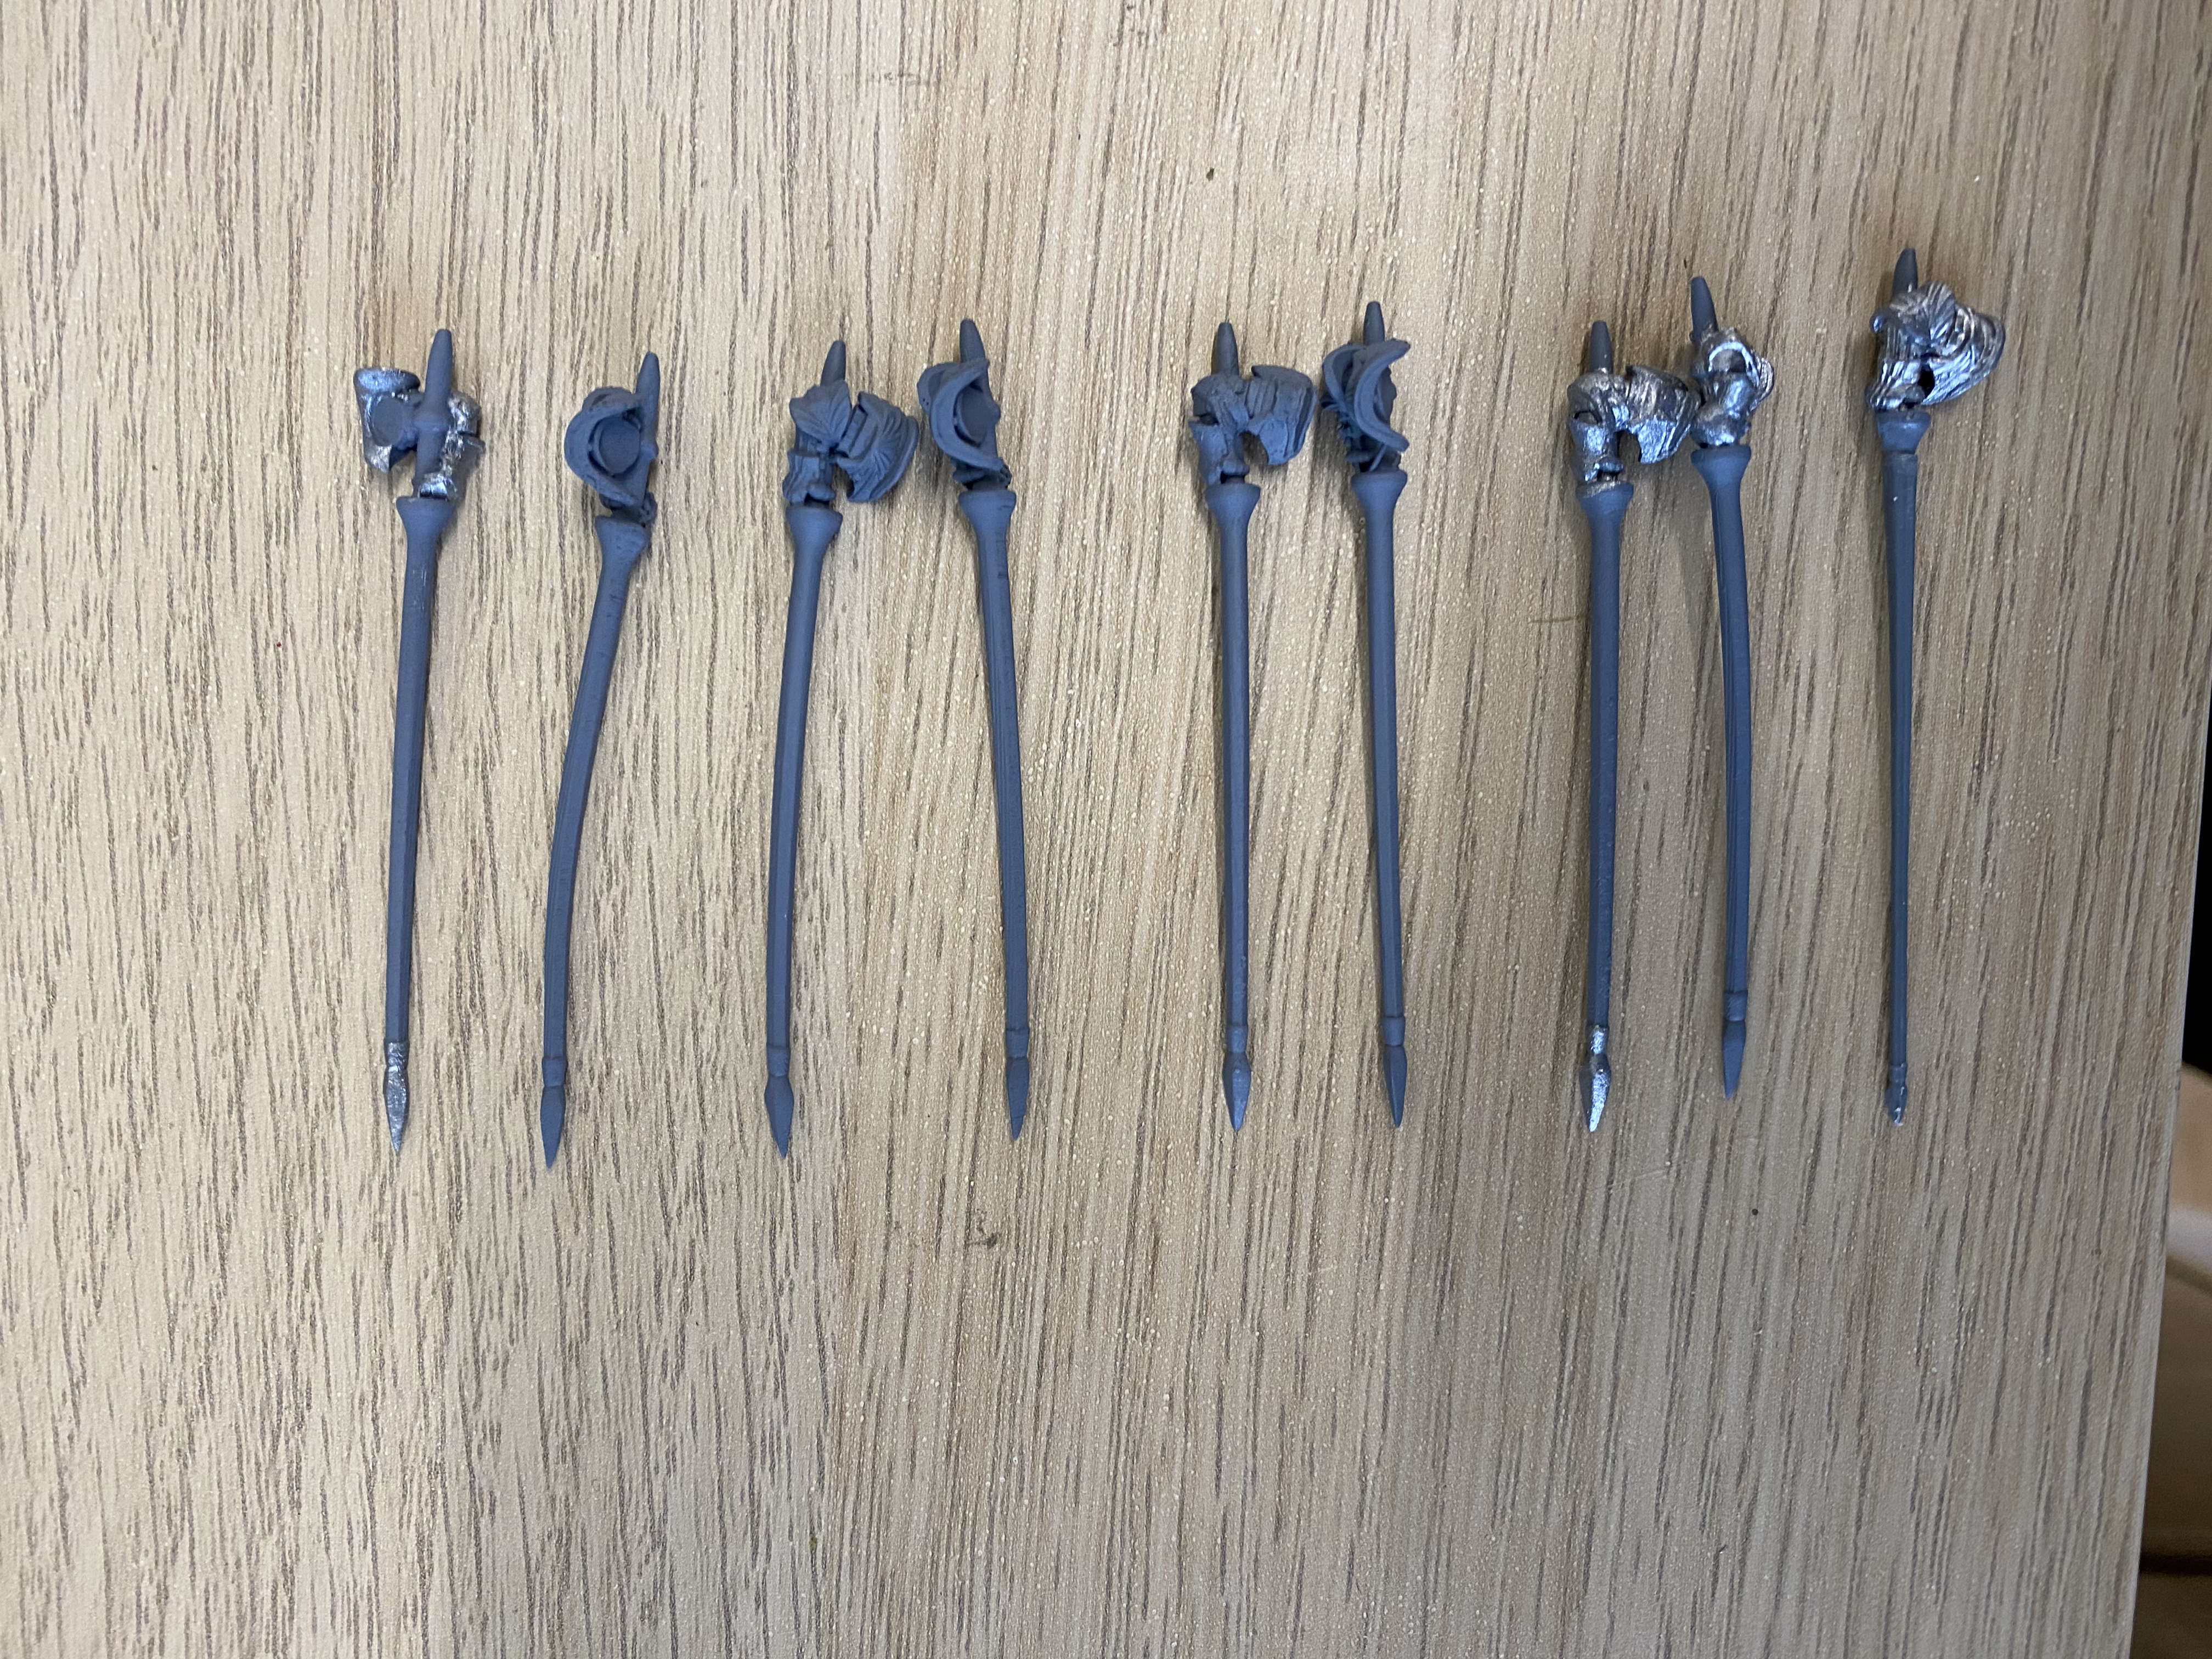
The resin lances were quite badly bent and difficult to straighten, even with hot water treatment.
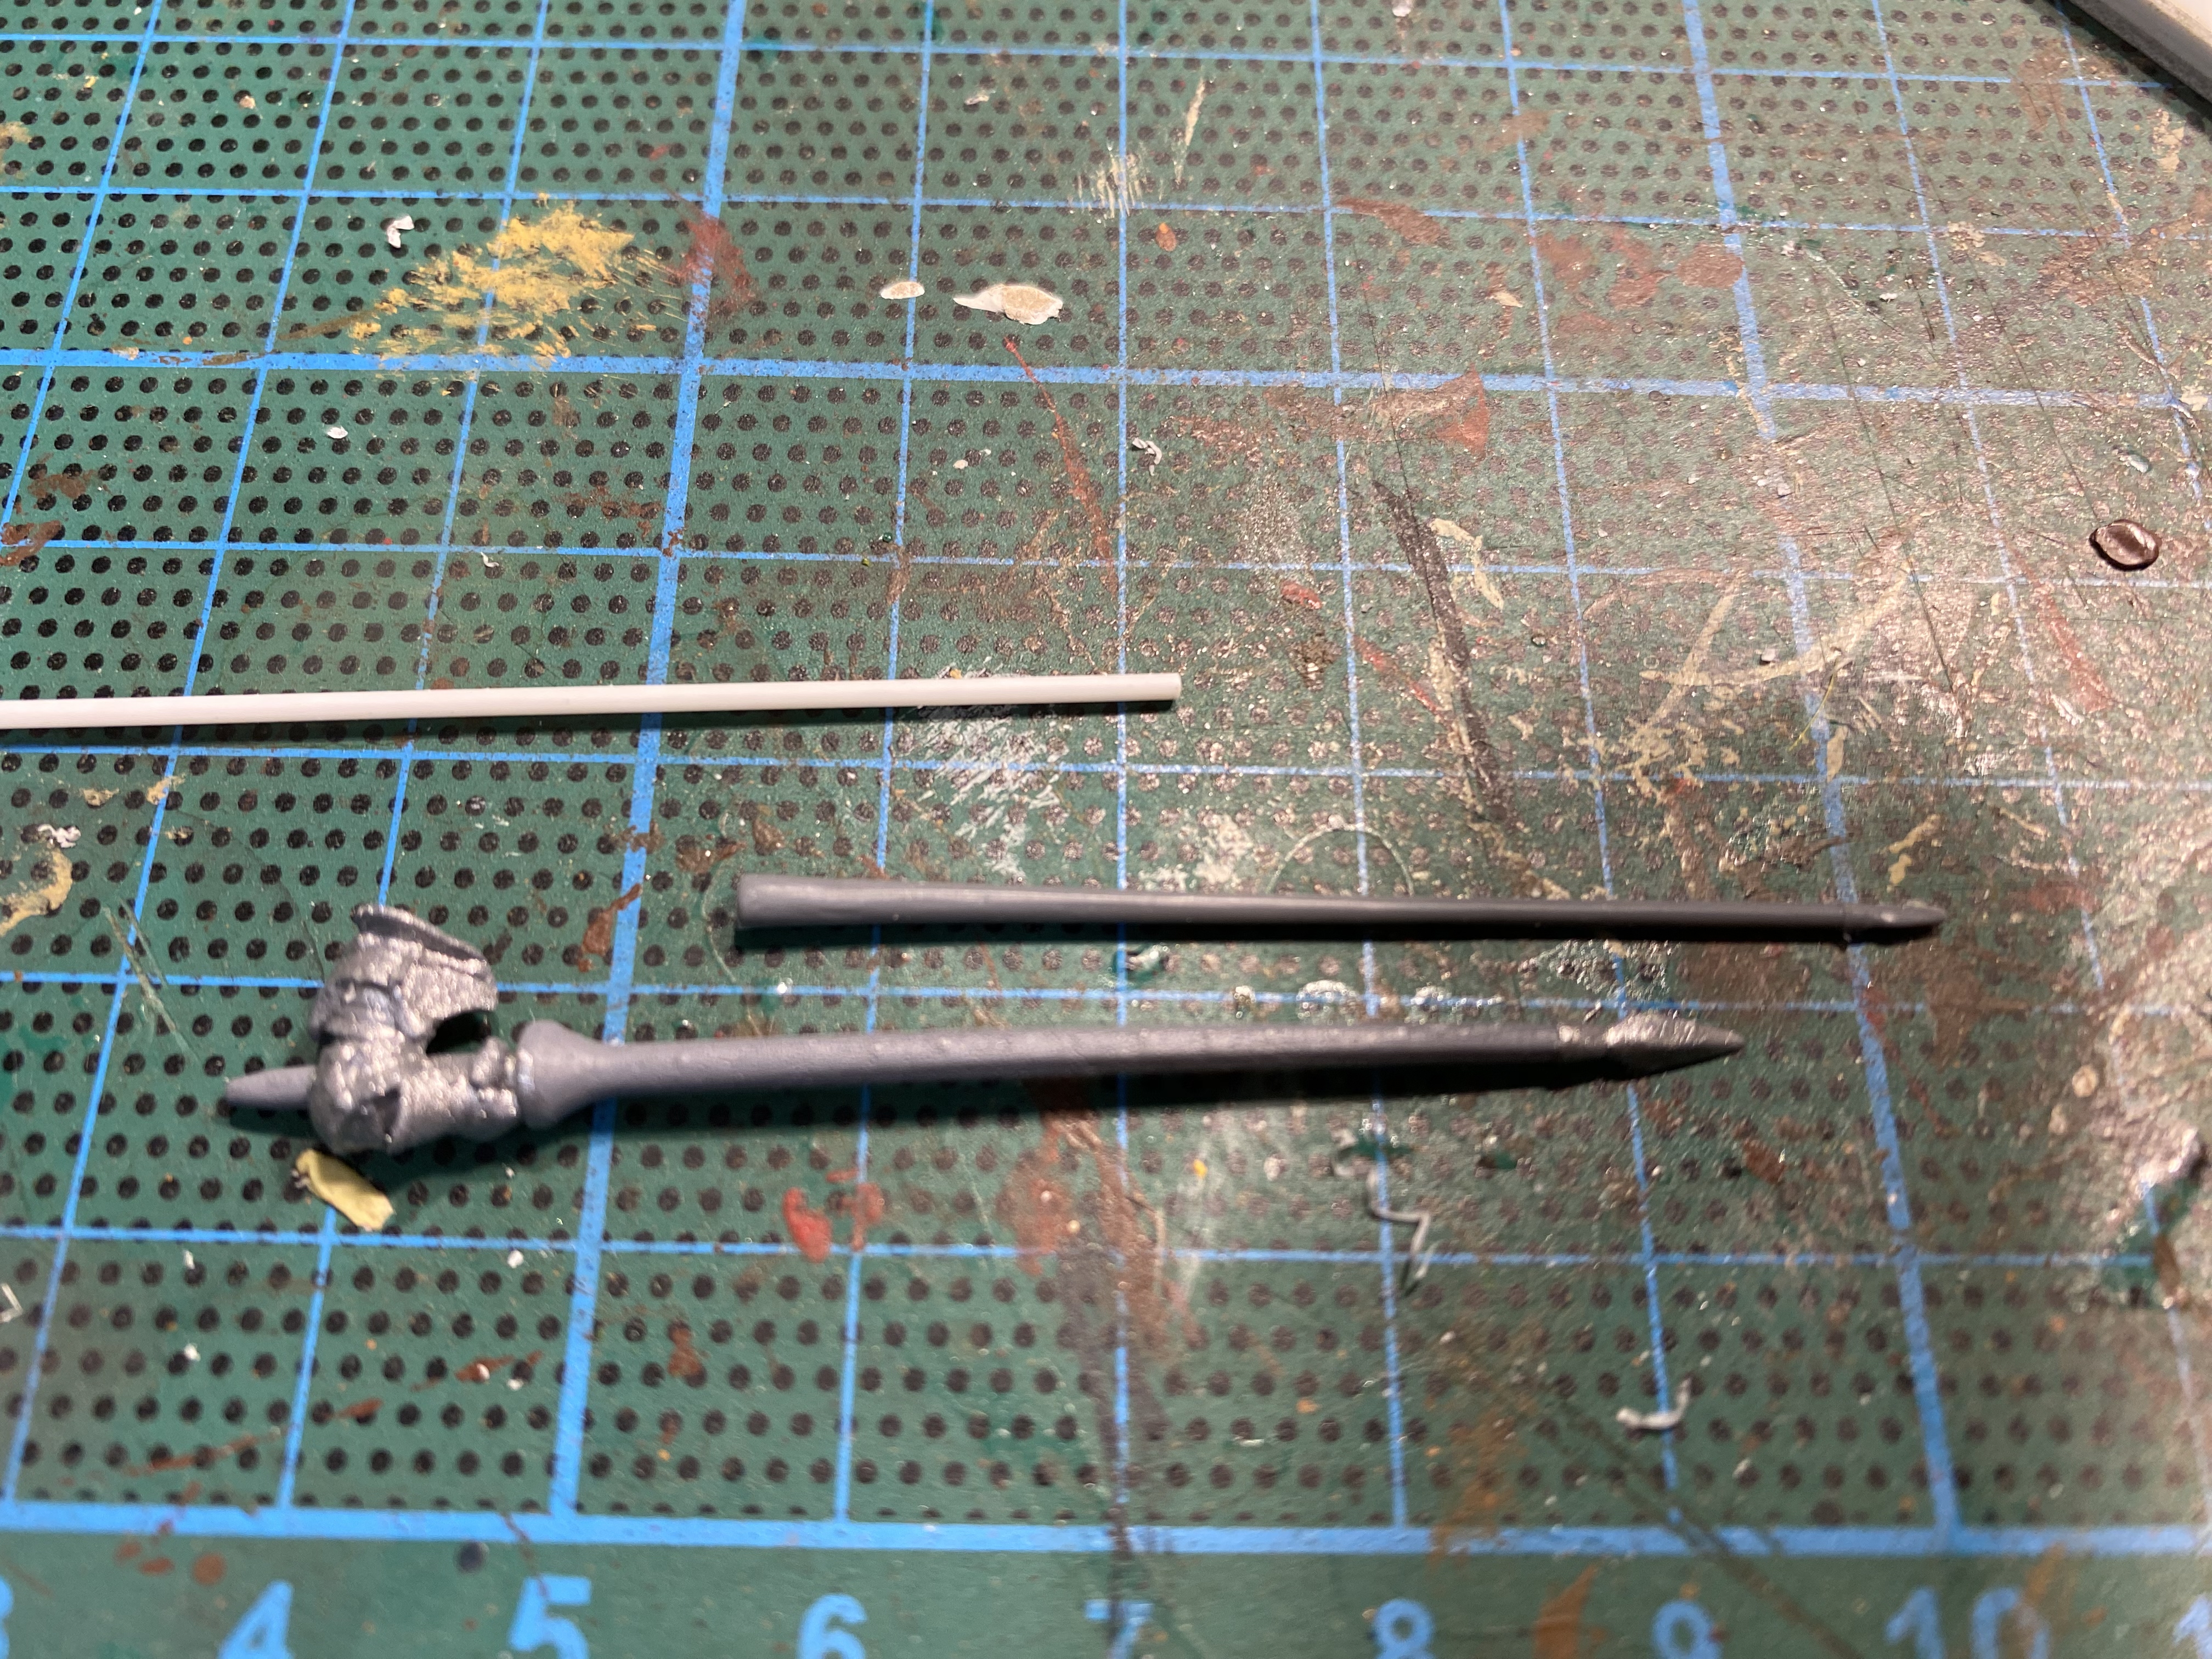
Also the lances were anything but straight. I managed to correct some by dipping them into hot water and clamping to a straight surface but lost a number to breakage in the process. I had to replace the broken lances with ones from the Perry mounted men at arms set. So, I’m not quite a convert to 3d resin figures yet and I have yet to see how they will survive the rigors of gaming or for that matter, time.
A Perry plastic lance cut ready to replace the bent resin one – I used a razor saw to cut near the base of the resin lance and simply super glued the replacement.
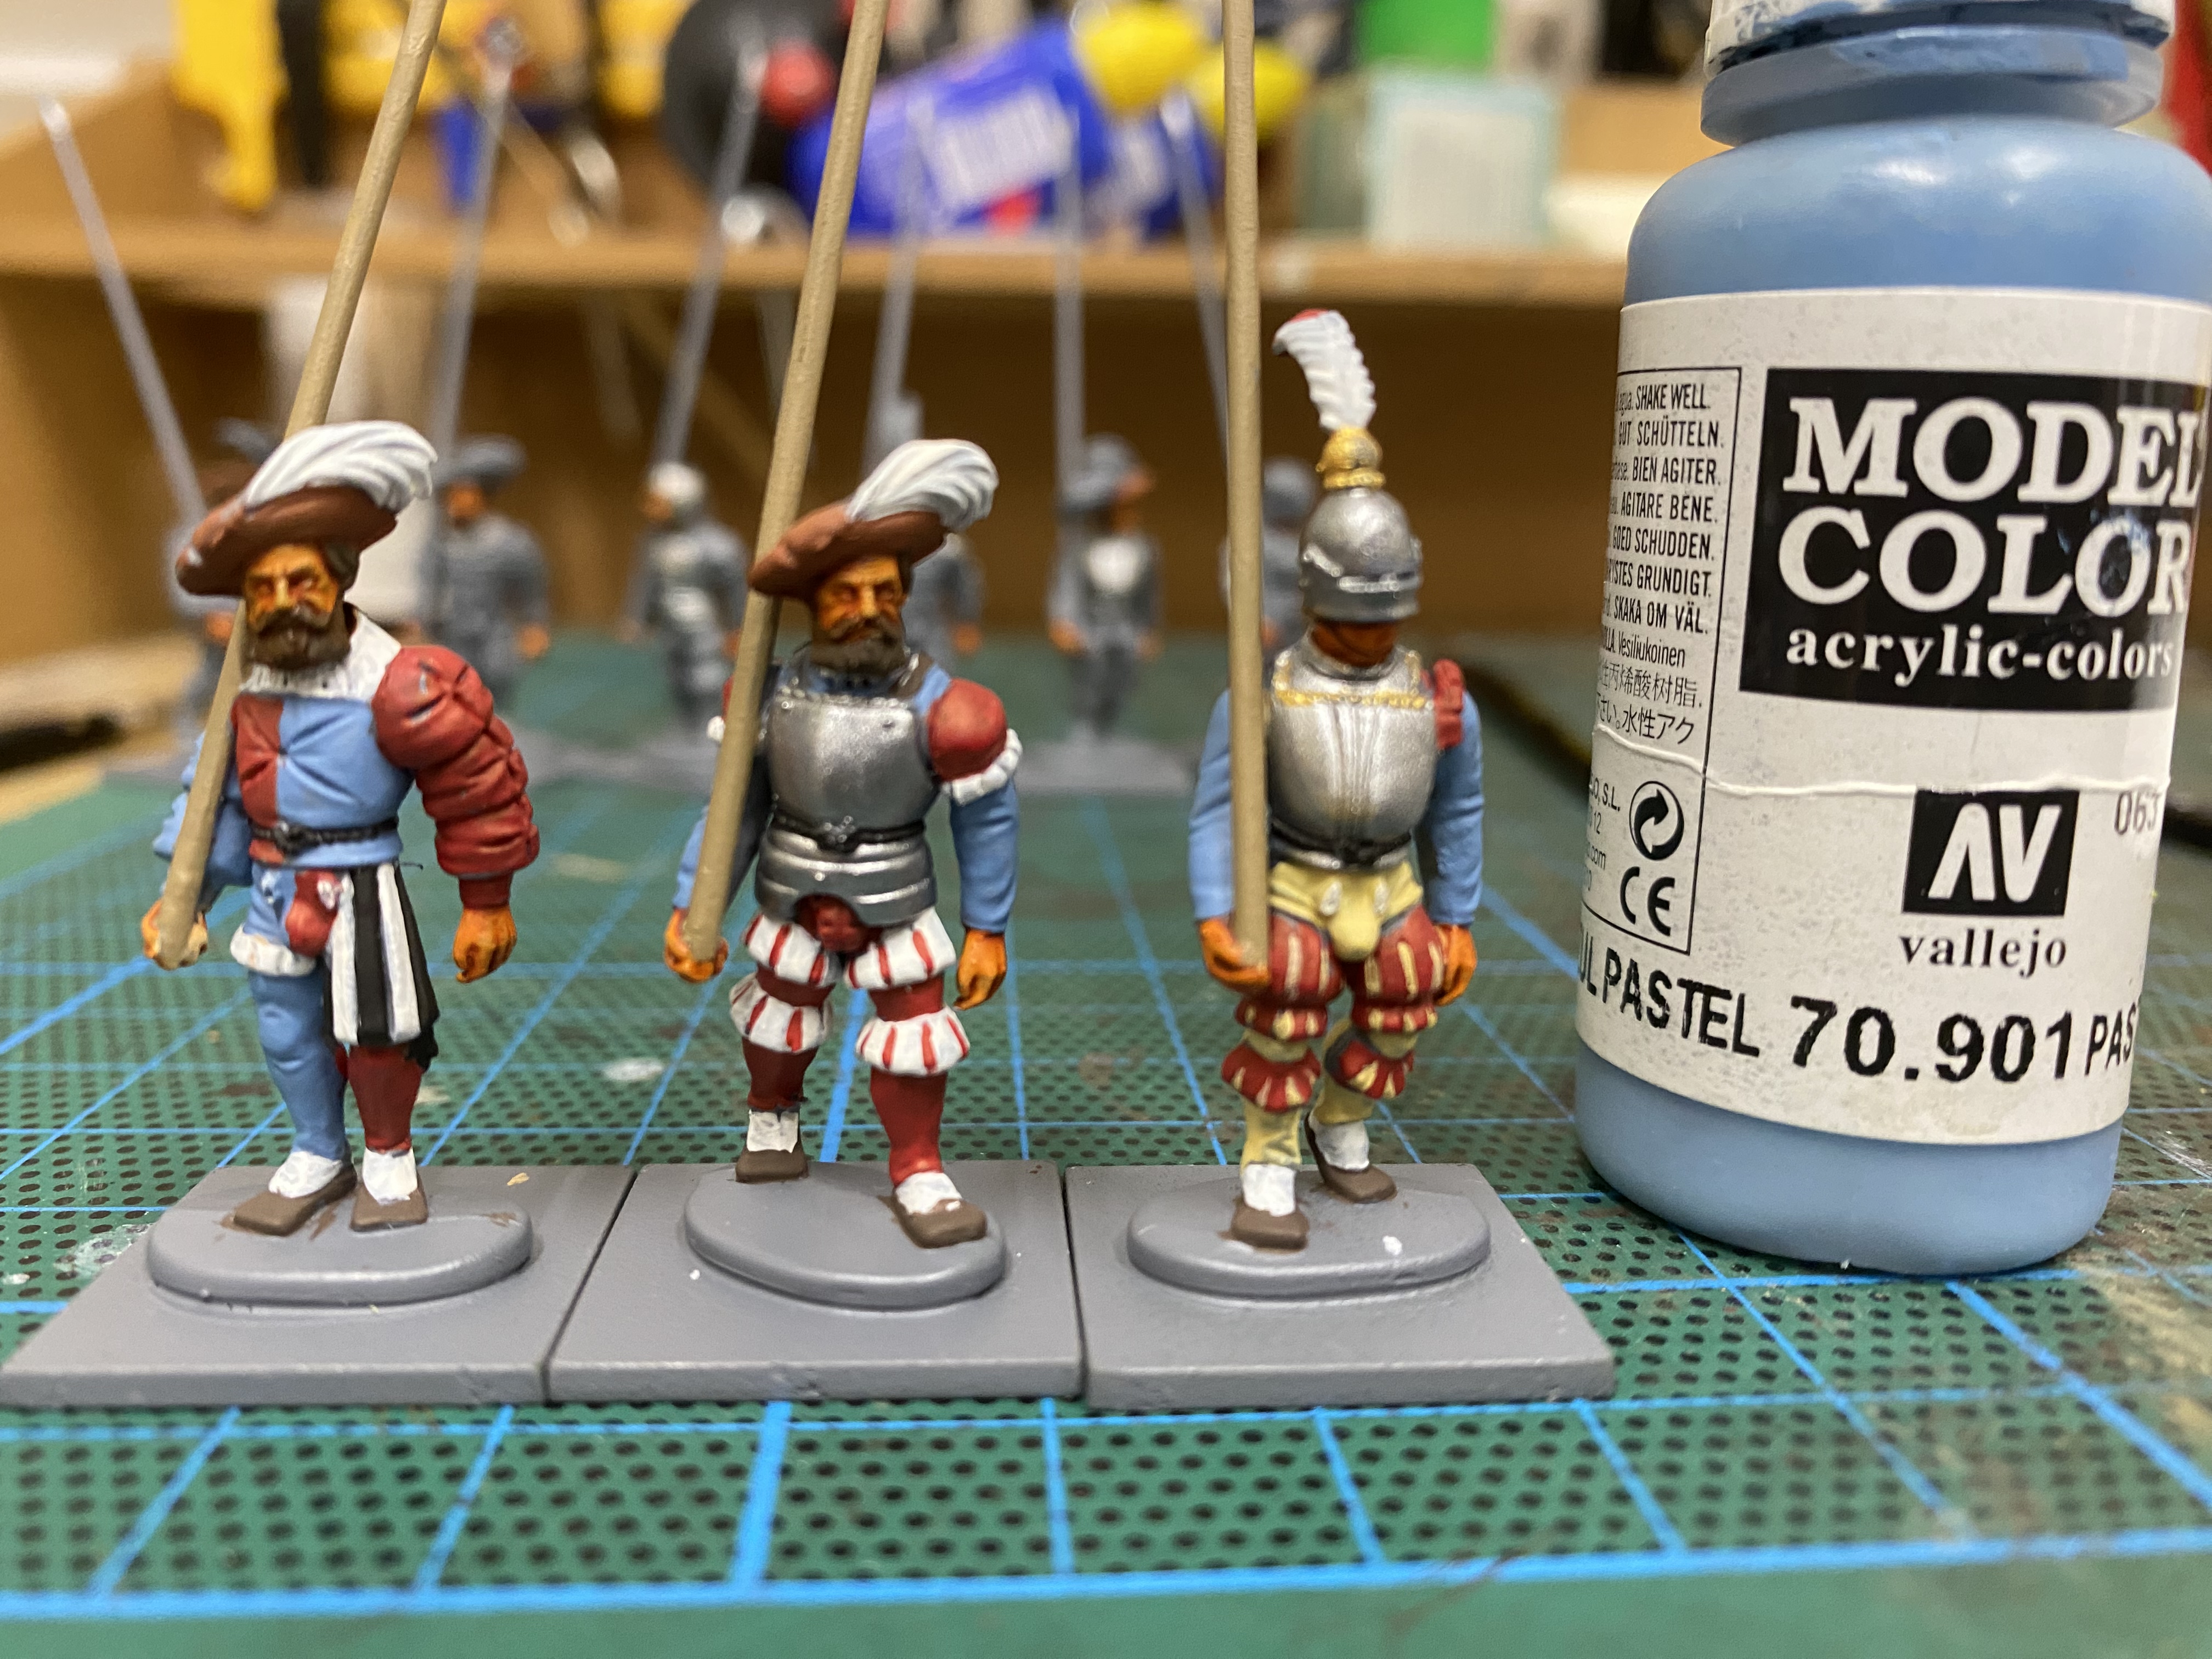
When it came to painting the figures, my main references were Pinterest and other internet picture sites. There has been some discussion on the Facebook Bill Hooks site recently, as to what is ‘accurate’ when it comes to livery or colours for this period. As I rarely attempt to model a specific character or unit for a specific battle, I’m not too concerned with the detail. There were 2000 or so Gendarmes at the Battle of Pavia. If I was so minded, I suppose that I could find out who they were and maybe what they were wearing but it’s not my idea of a good use of my time. I wanted to paint some really colourful Knights that will look good on the table as they make a glorious charge to victory or oblivion in my little table top battles.
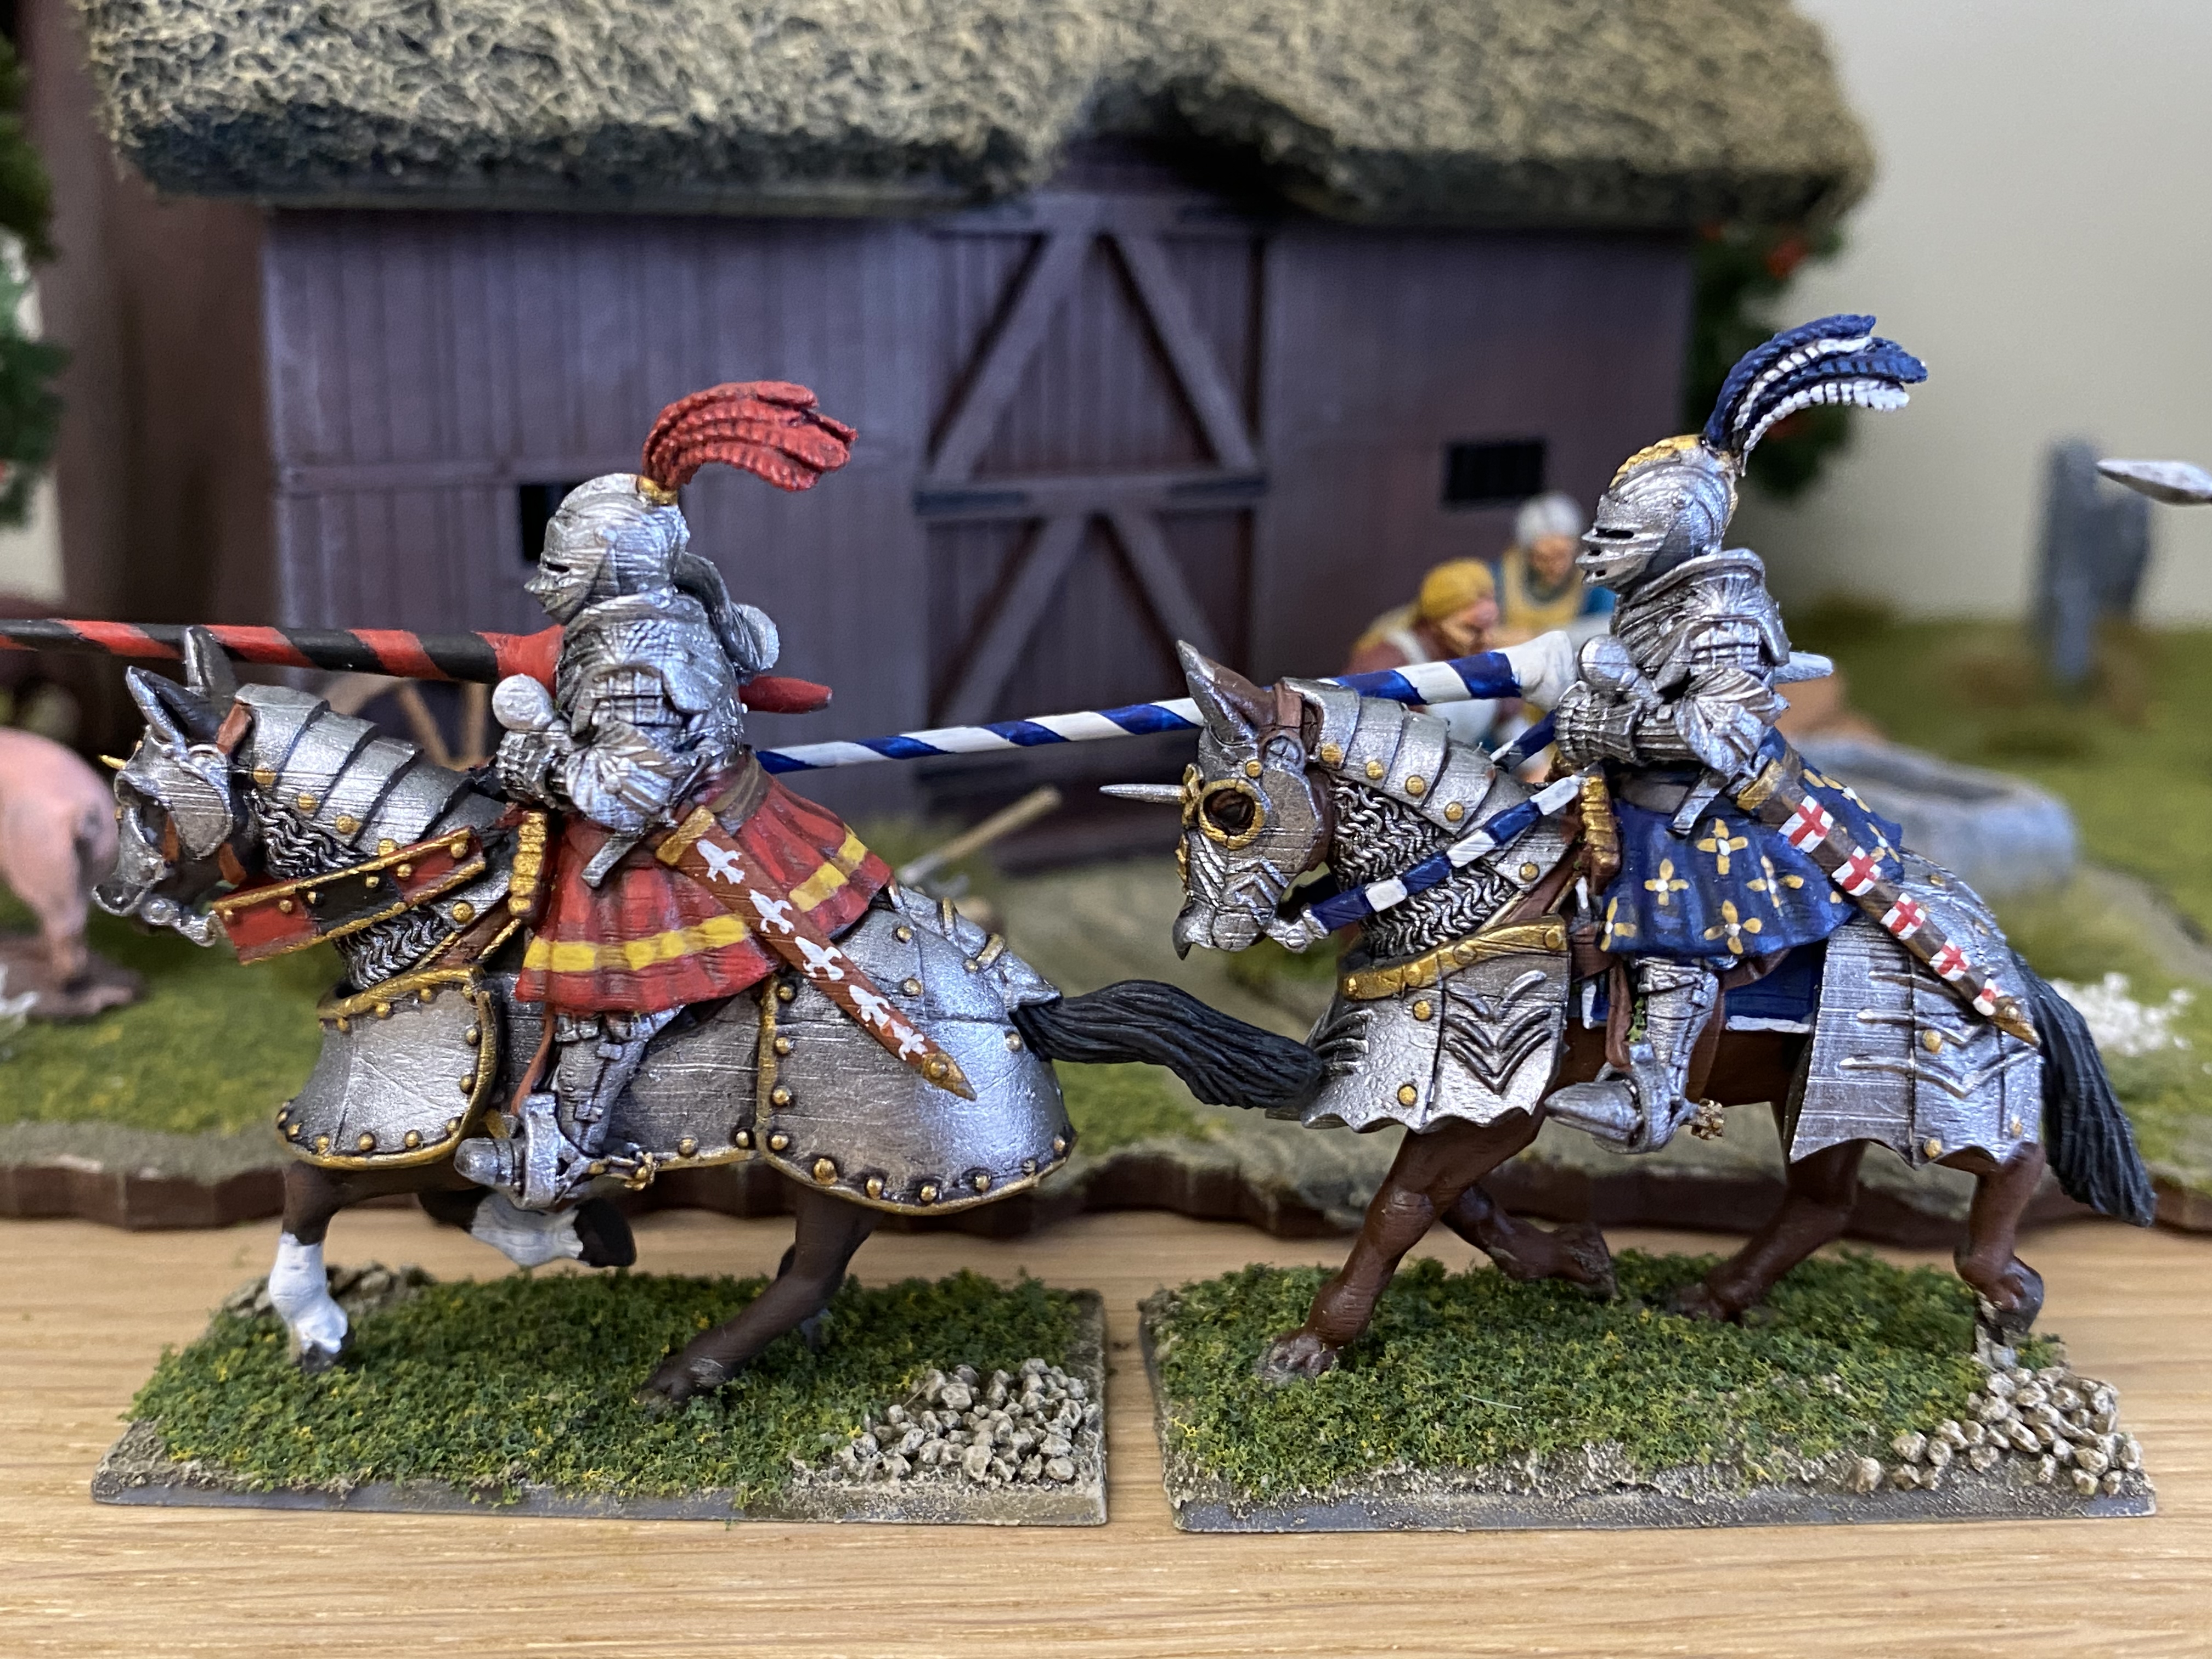
First two knights in plain armour.Ser Loras leads the charge!
With the freedom to use whatever colour scheme took my fancy, I have gone from some fairly conservative colours to those bordering on fantasy. The white armour with the roses is inspired by the Tyrells of Highgarden – they use a yellow rose on a green background but when I first read the Game of Throne books, I had imagined Ser Loras in white armour.
The black and red schemes are based on various illustrations that I have seen, although my freehand skills were not up to some of the details! As for the lances, the ‘barber shop’ twisting patterns were inspired by other models that I had seen and look pretty, if unlikely. I doubt that they were used in battle but rather saved for the tournaments in the tilt yard. It’s fairly easy to paint the spirals using 2mm flexible masking tape (Tamiya) to mask off the base colour as you apply the darker top colour.
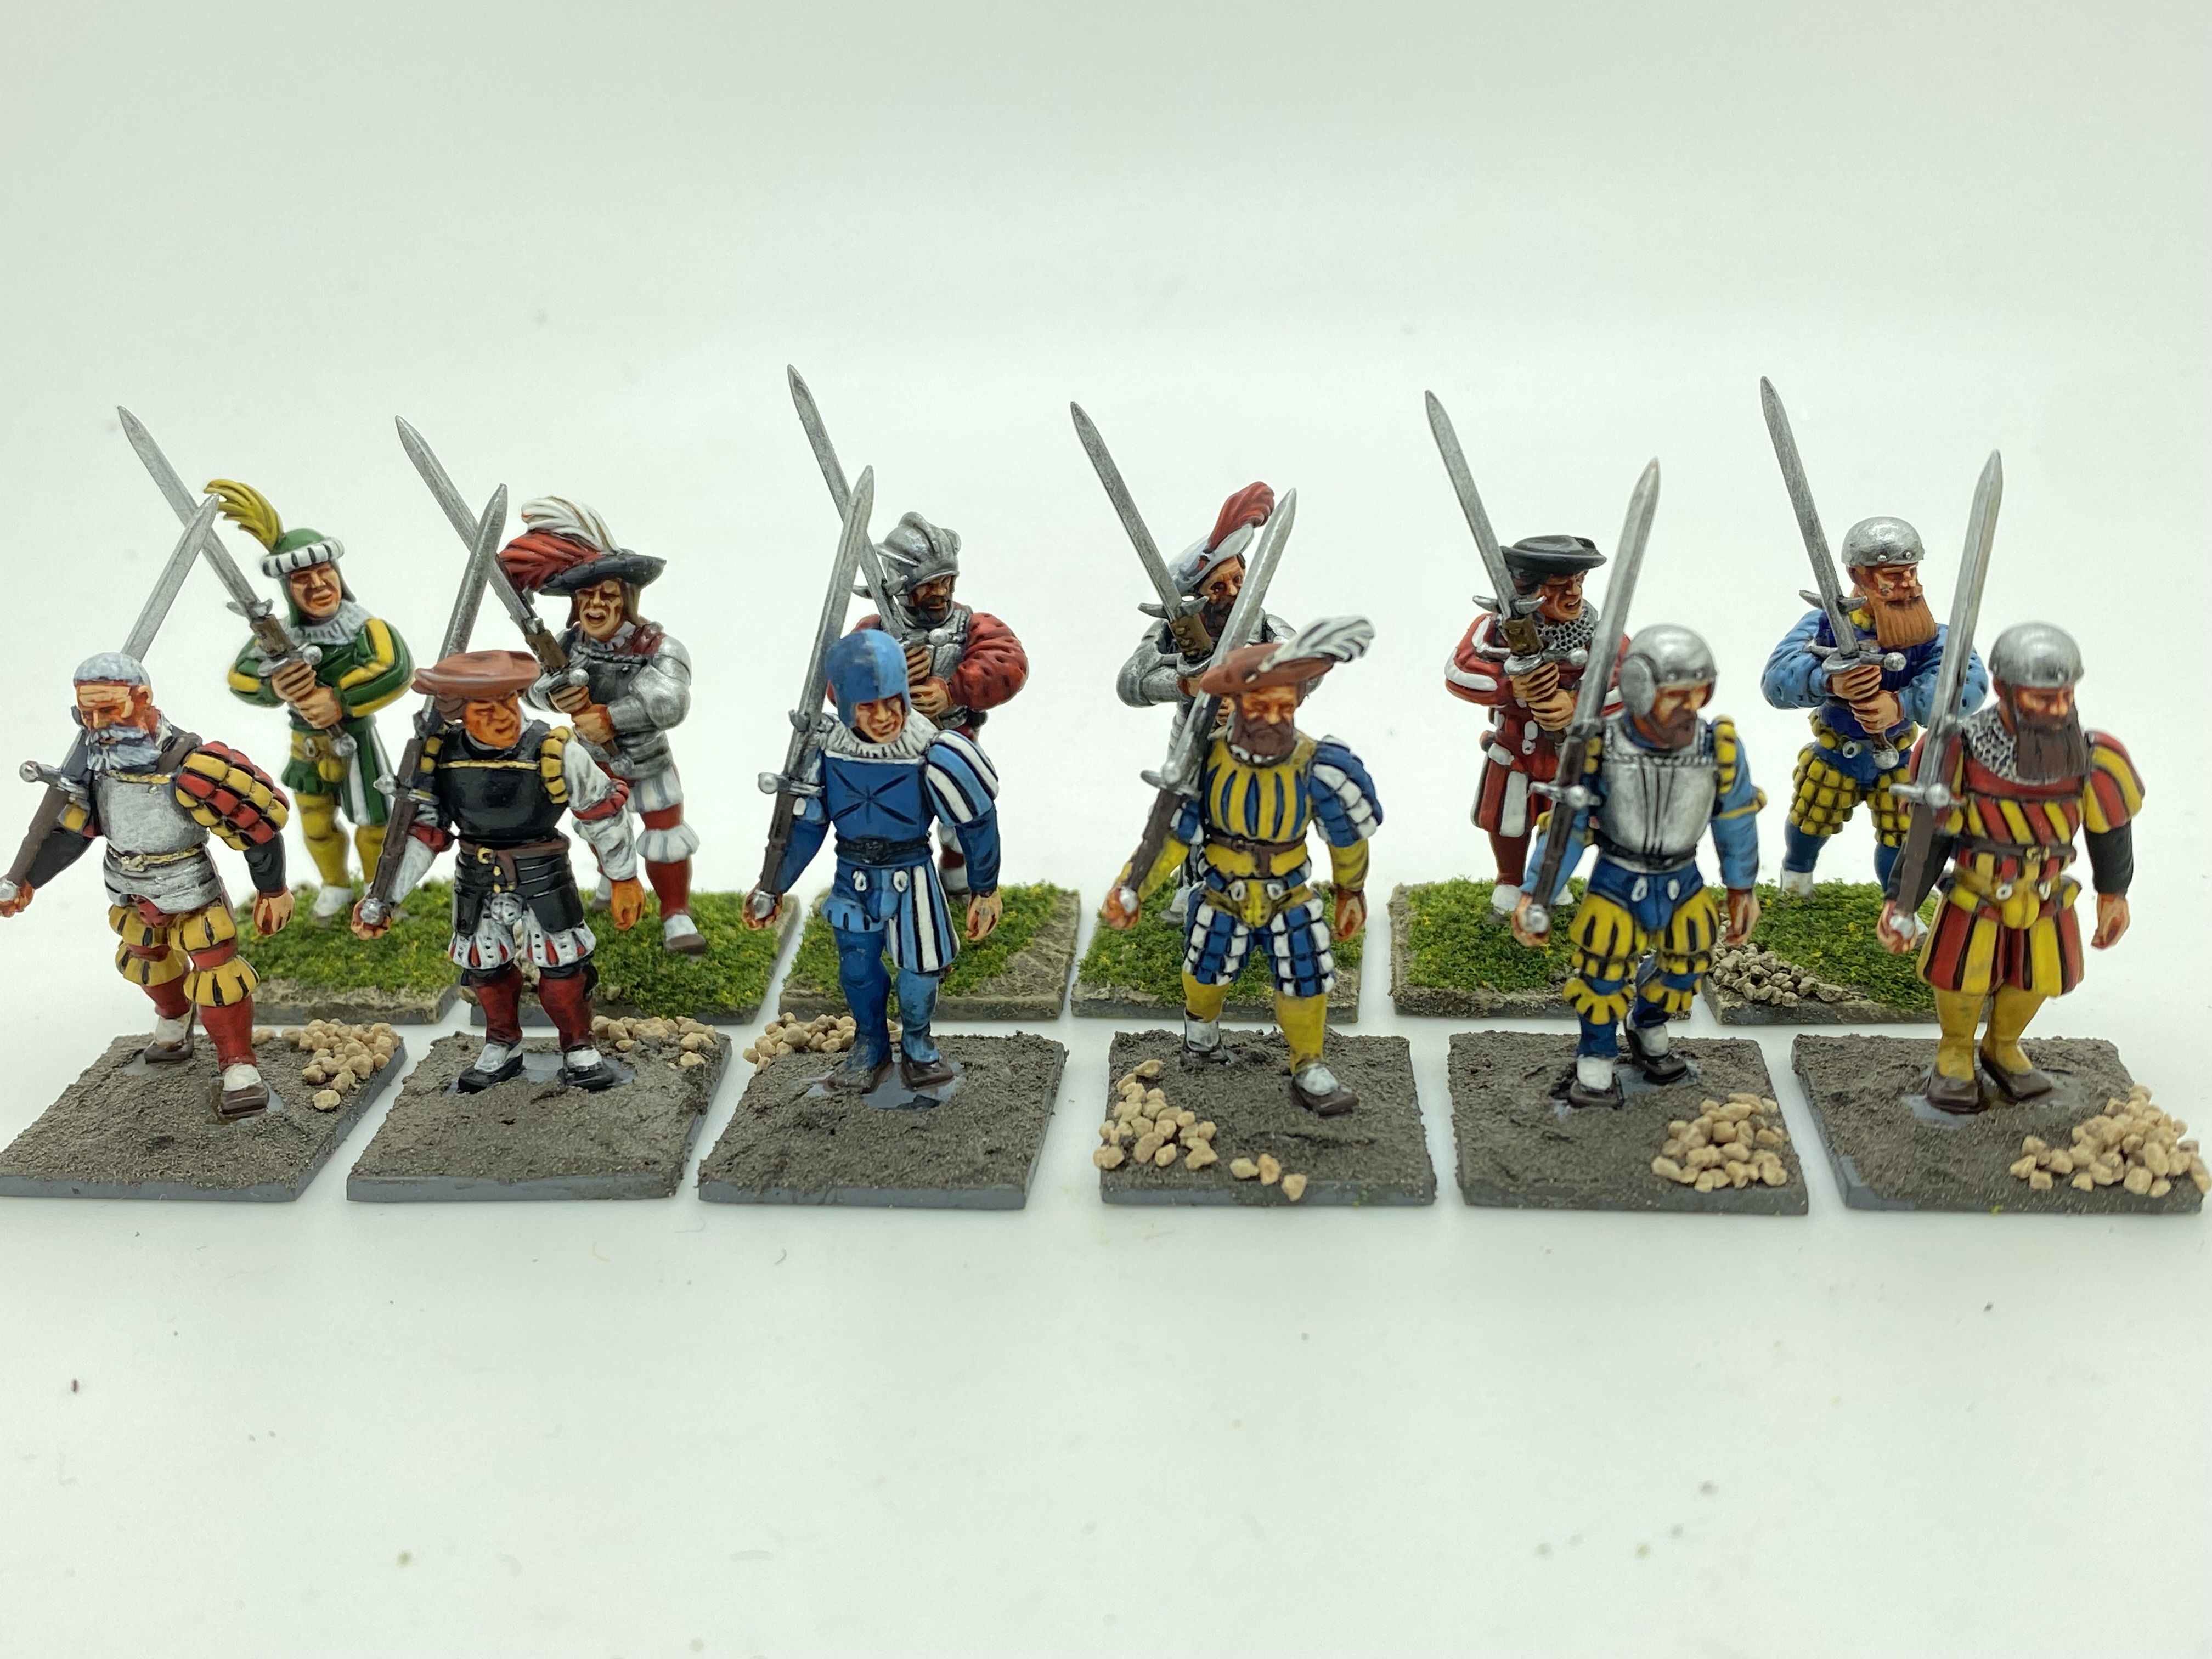
Seven Knights in the picture but the red knight is still being painted and the Black knight needs basing.
I’ve completed six of the resin knights so far, with two more in progress, so this will be my first unit. I intend to paint the Foundry knights as well and I will go for flamboyant colour schemes to see if I can push my freehand on again! I haven’t covered the details of painting these figures. I’ve used the same procedure as usual; that is block paint, wash and highlight. The exact colours are not important as I have already ‘confessed’ that I have not followed a particular livery scheme.
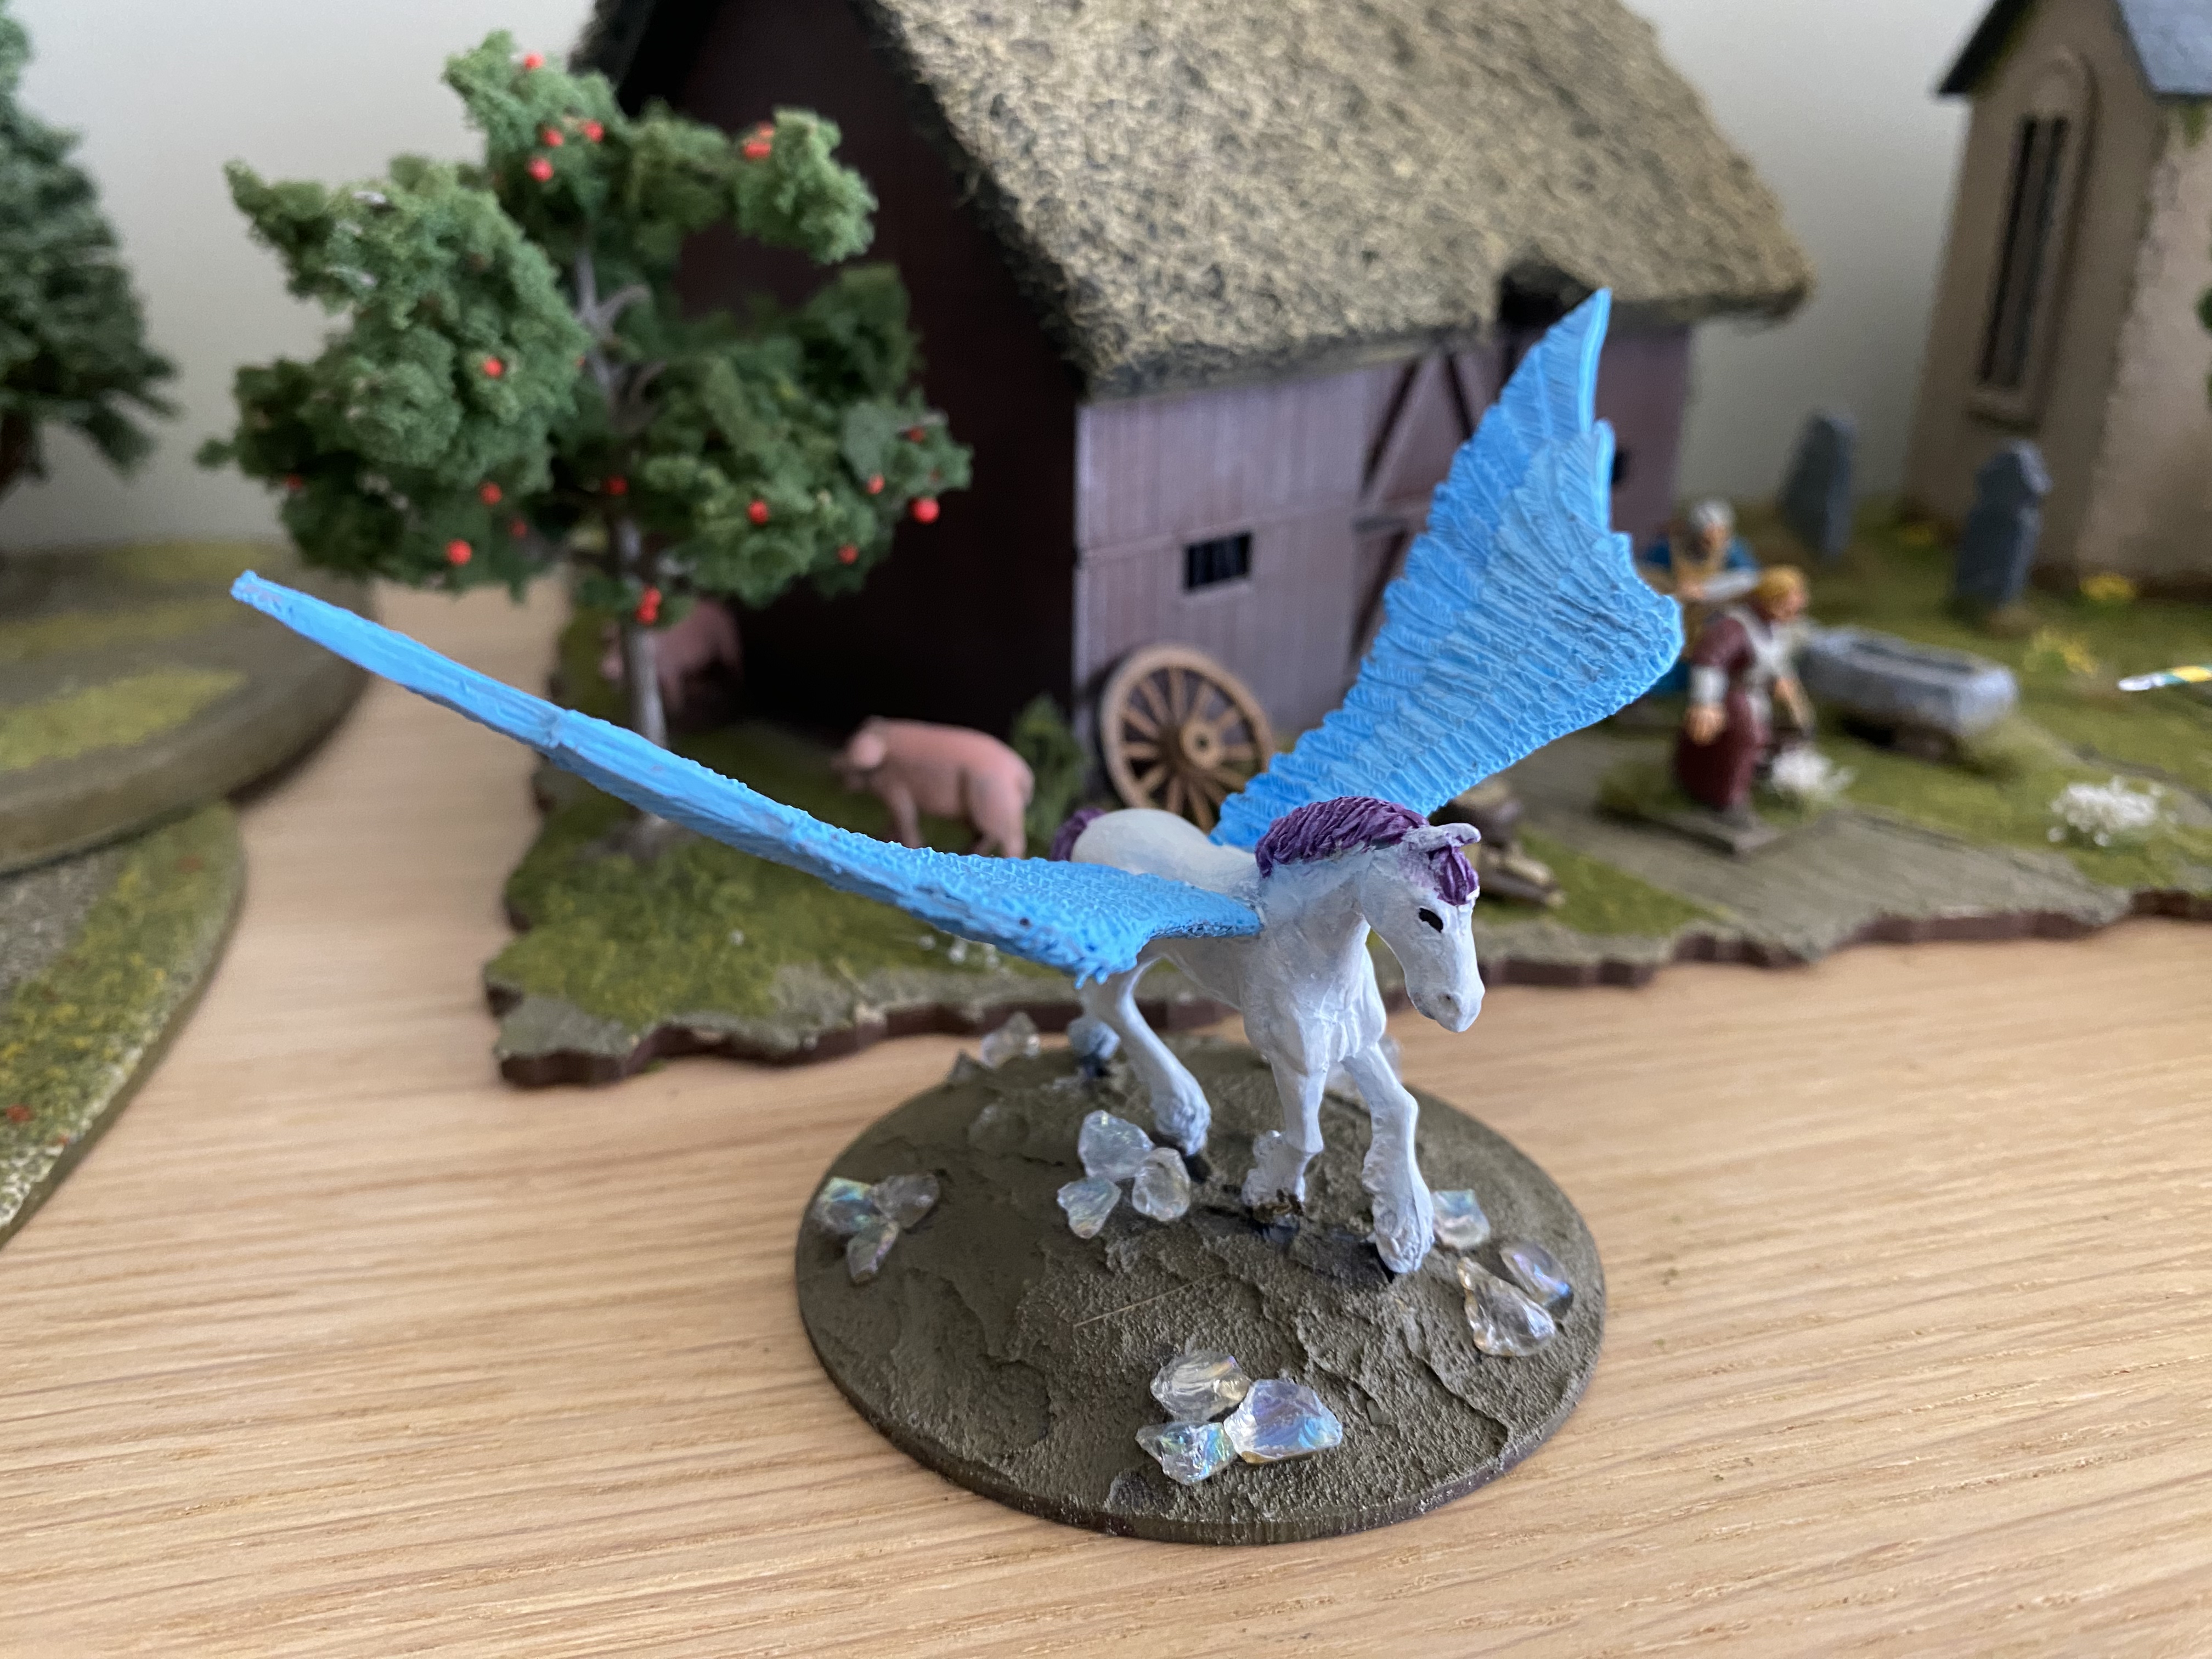
Finally, I mentioned that I had bought a Pegasus from Foundry for my Granddaughter Emily. Well, here’s a picture of her progress with the model. She has of course chosen the colour scheme and followed the block paint and ink method to paint it – just some basing to finish and Emily will have a nice model for her bedroom shelf. I may yet convert her to wargaming!
THE COMMERCIAL BIT
I hope that you all enjoy your hobby as much as I do – our web site will have much of what you need! Click here to see our shop.
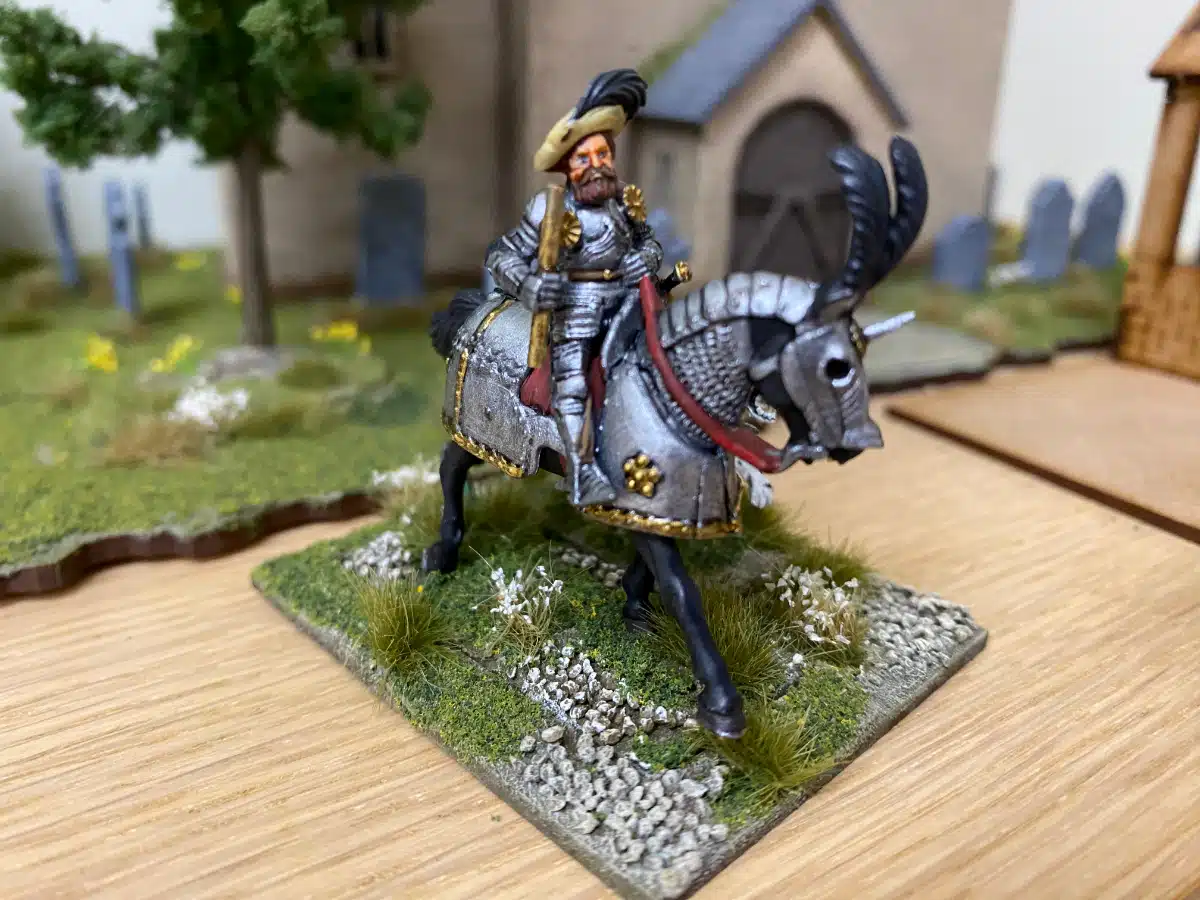
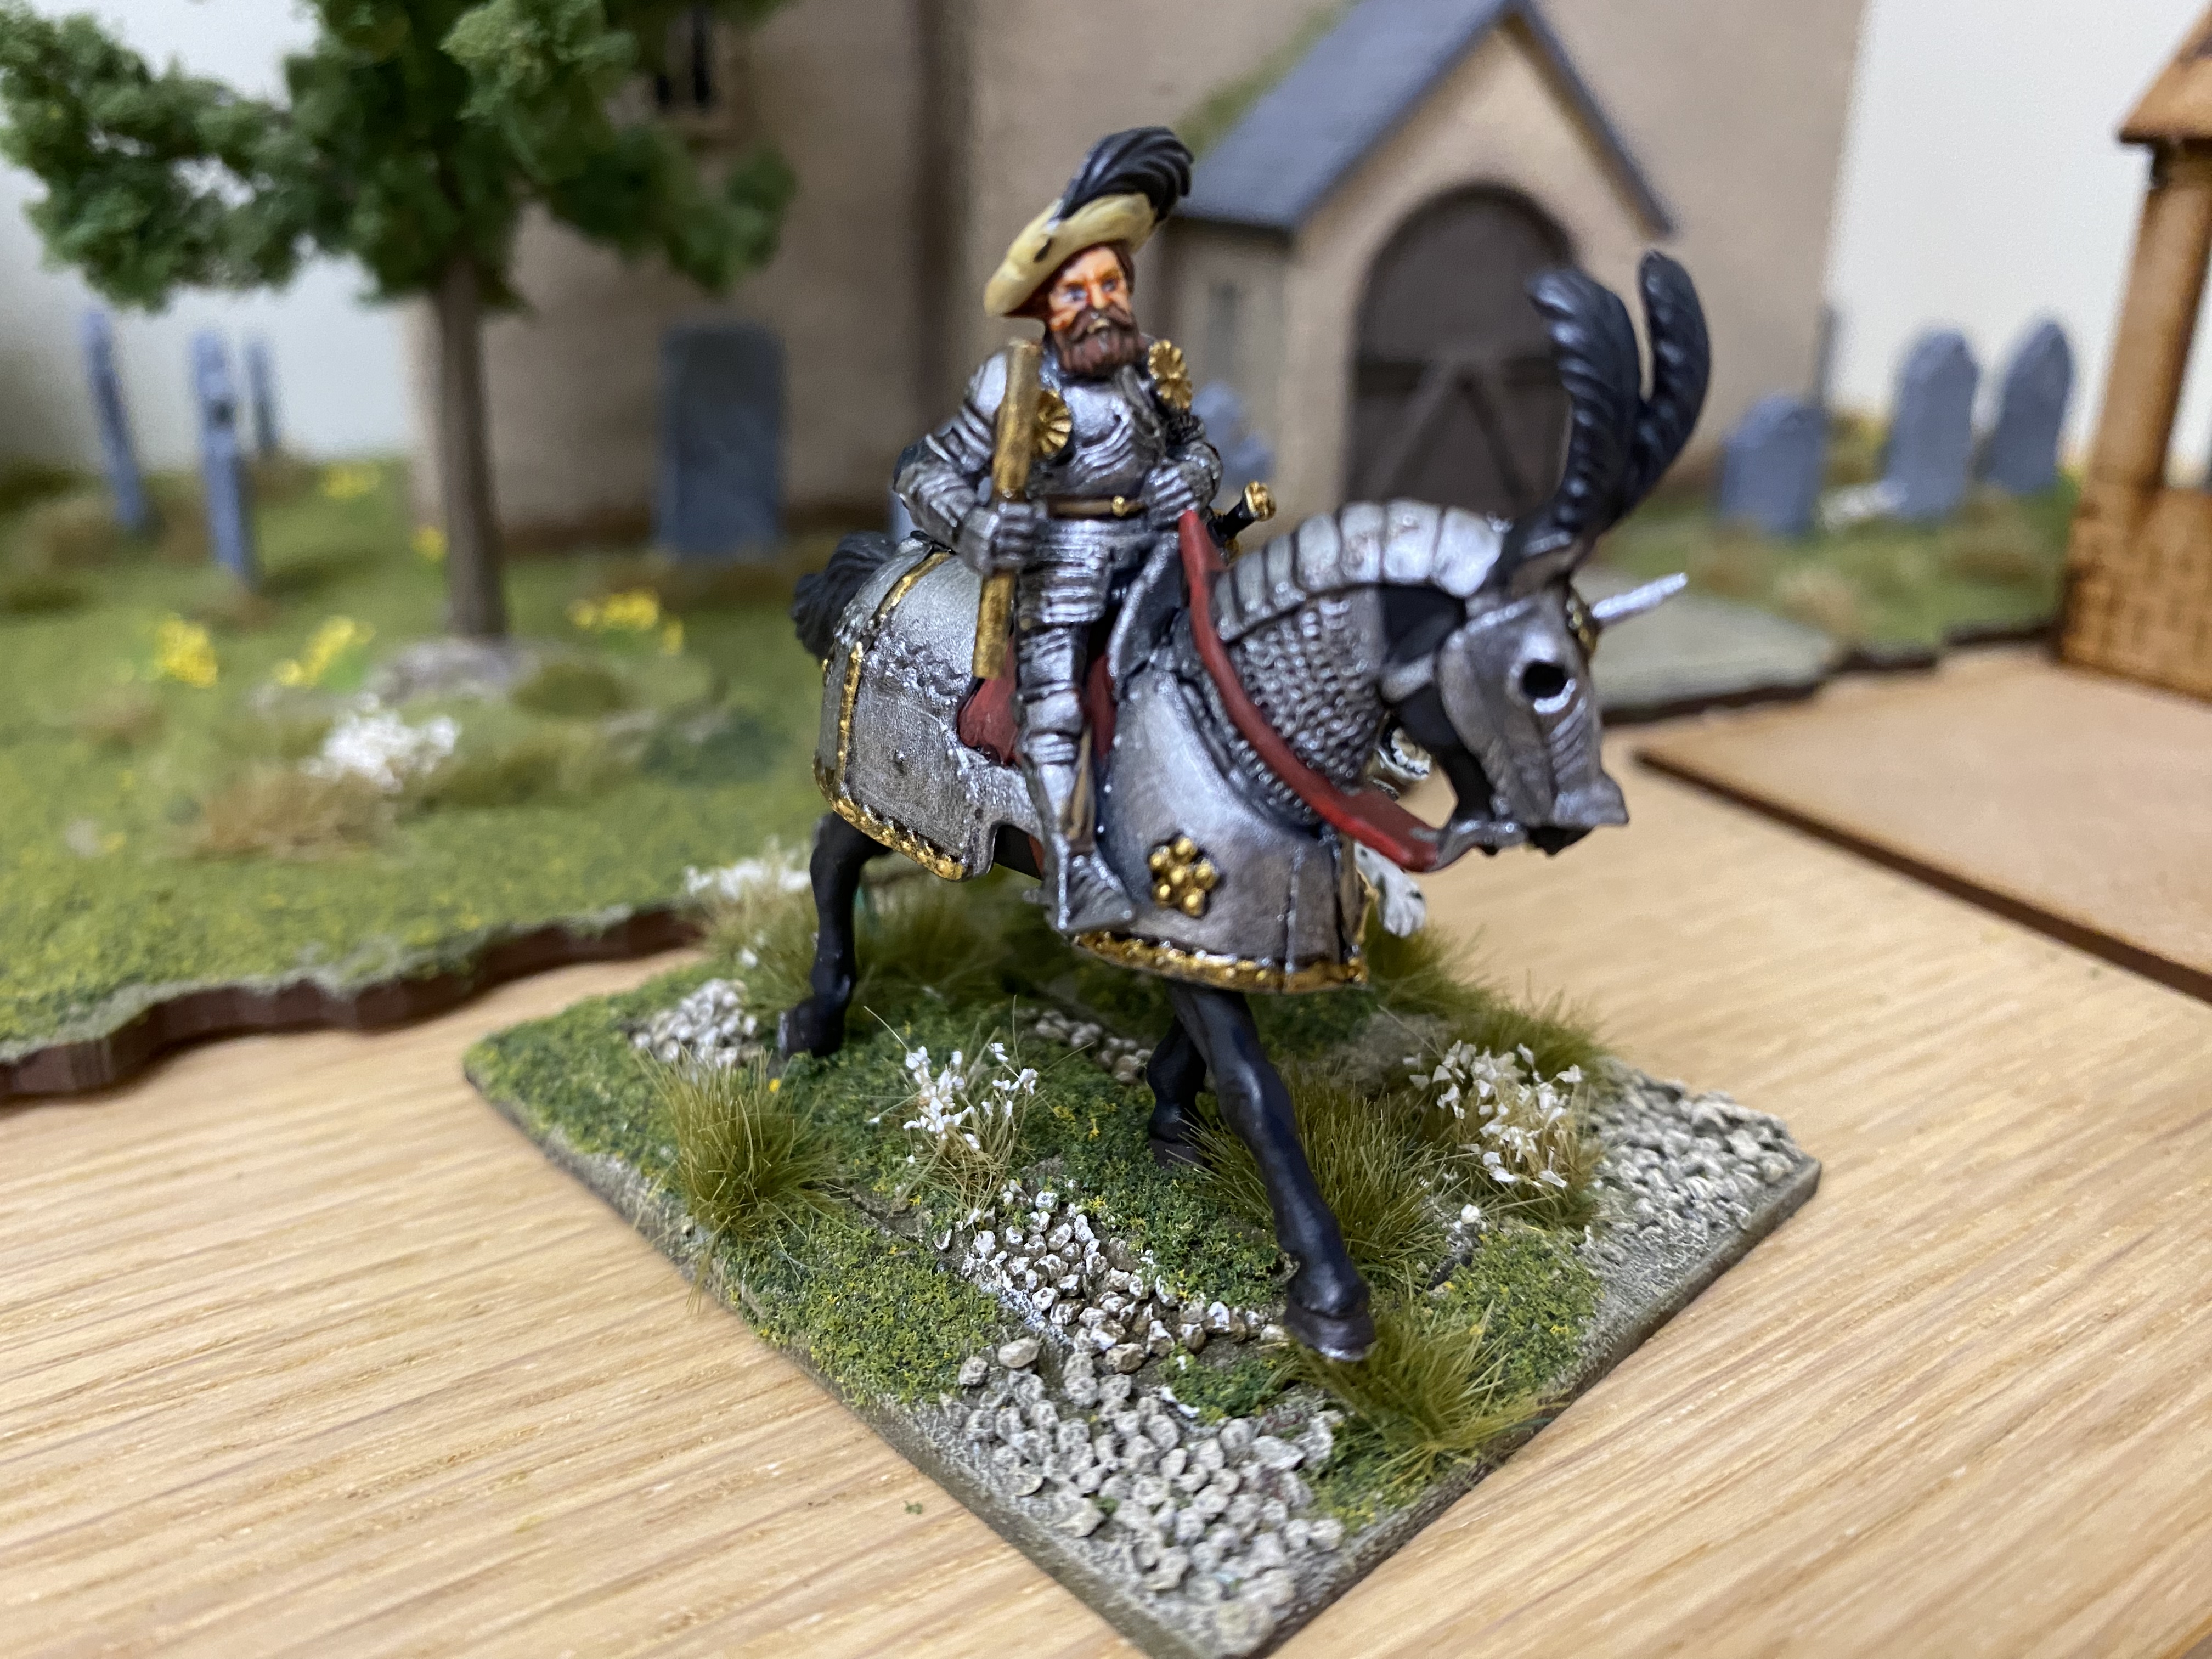
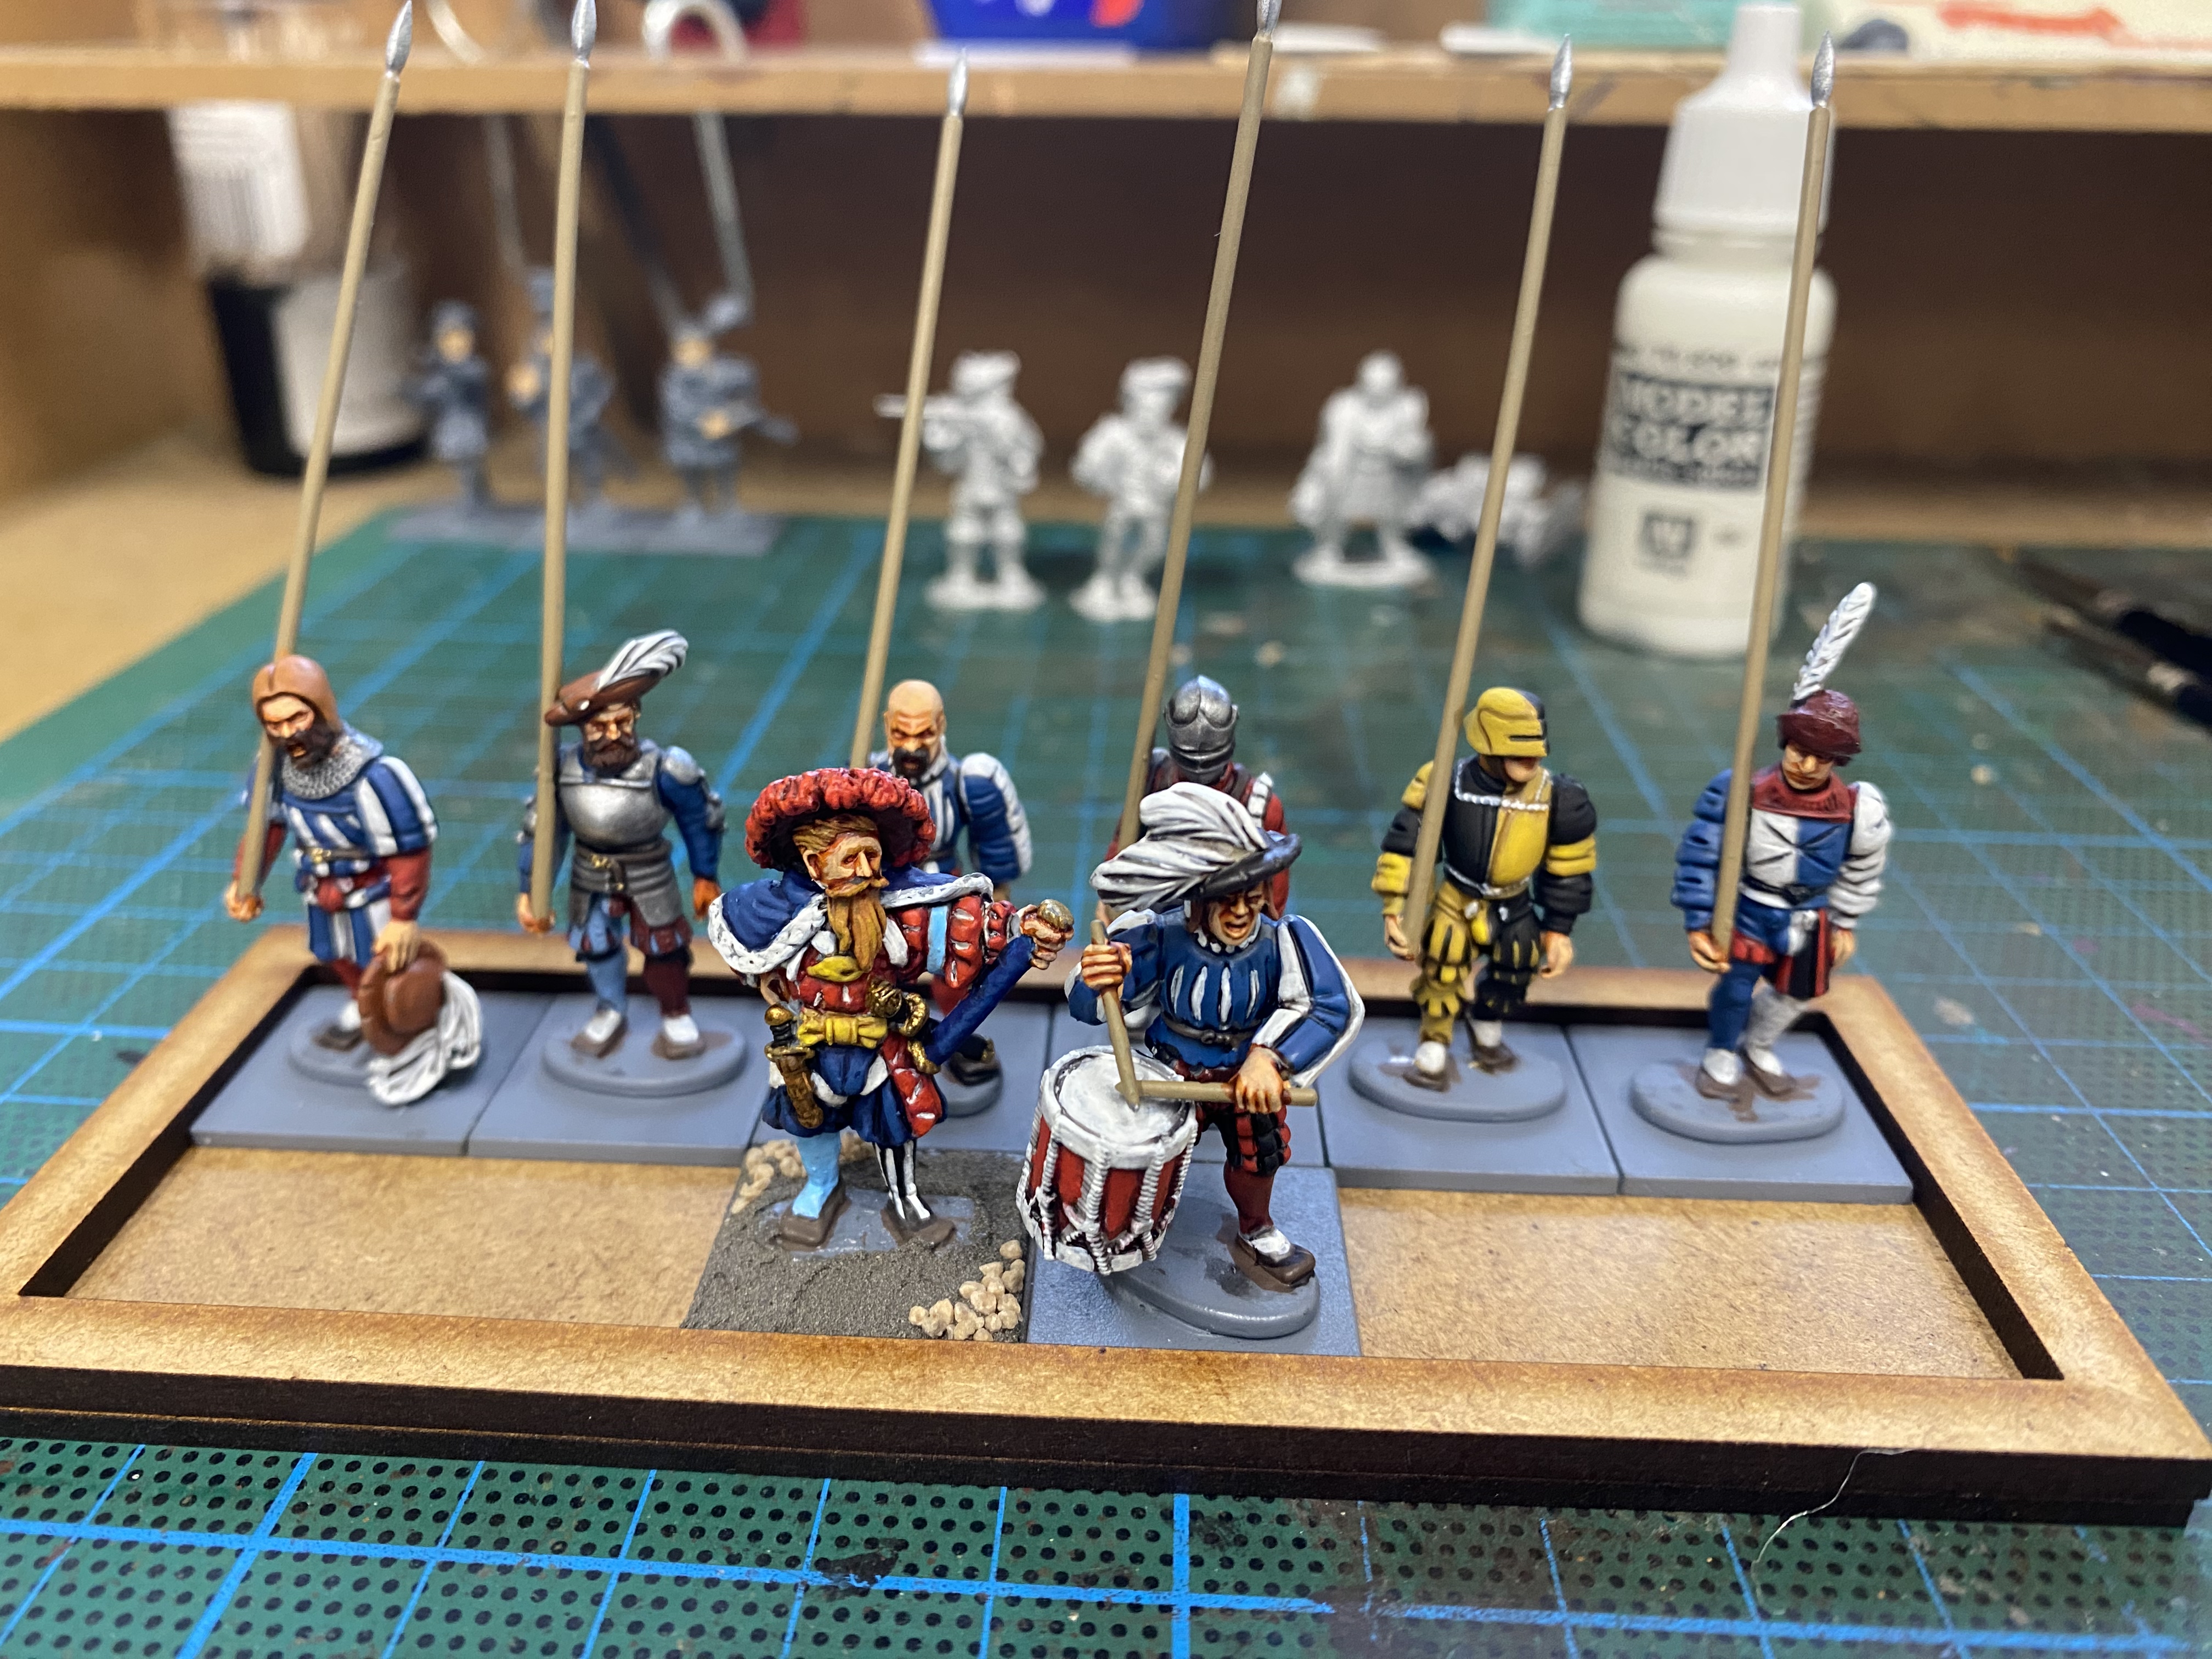
My intention was to produce a Landsknecht force that I could field using the Bill Hooks Deluxe rules set. Having painted a force of three units of 24 pikemen, along with three units of 6 gunsmen, I felt that the only other requirement would be to add some artillery. I already have a few guns in my collection but any excuse to add some more sent me searching online. I also needed an army commander and although I had some nice models on foot that could fulfill the role, I wanted a mounted general so that he could move quickly on the battlefield to rally any daunted troops.
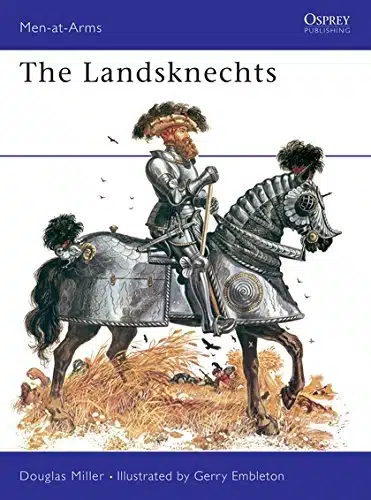
To start with the General first, I copied an idea from Andy Callan, who in turn based his model on the cover of the Osprey book on Landsknechts.
It’s actually a very straight forward conversion. I simply took a Perry Miniature mounted man at Arms with the fully armoured horse and added a Warlord games Landsknecht head that looked about the same as the guy in the picture. I also added some spare feathers to the the rear of the horse armour and the commanders staff was made by cutting down a spear arm from the same Perry’s set.
My Landsknecht commander – Heinrich Kane of Bayern!
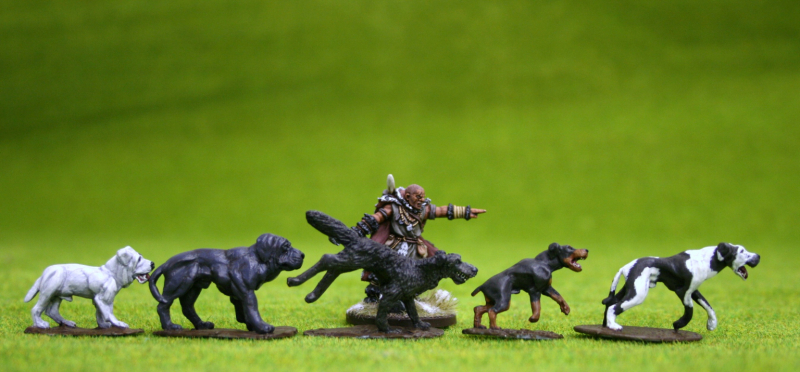
You can’t see it in the above picture but I’ve also given him a big dog as a companion. I’ve re-used an existing base that I had and will at some point make another and change the dog from ‘the biggest spotty dog you ever did see’ (older readers will get the reference and joke) to something more Germanic – a Great Dane or Rottweiler seems appropriate. I like to add dogs to my army – it helps that I have direct access to the Deezee range!
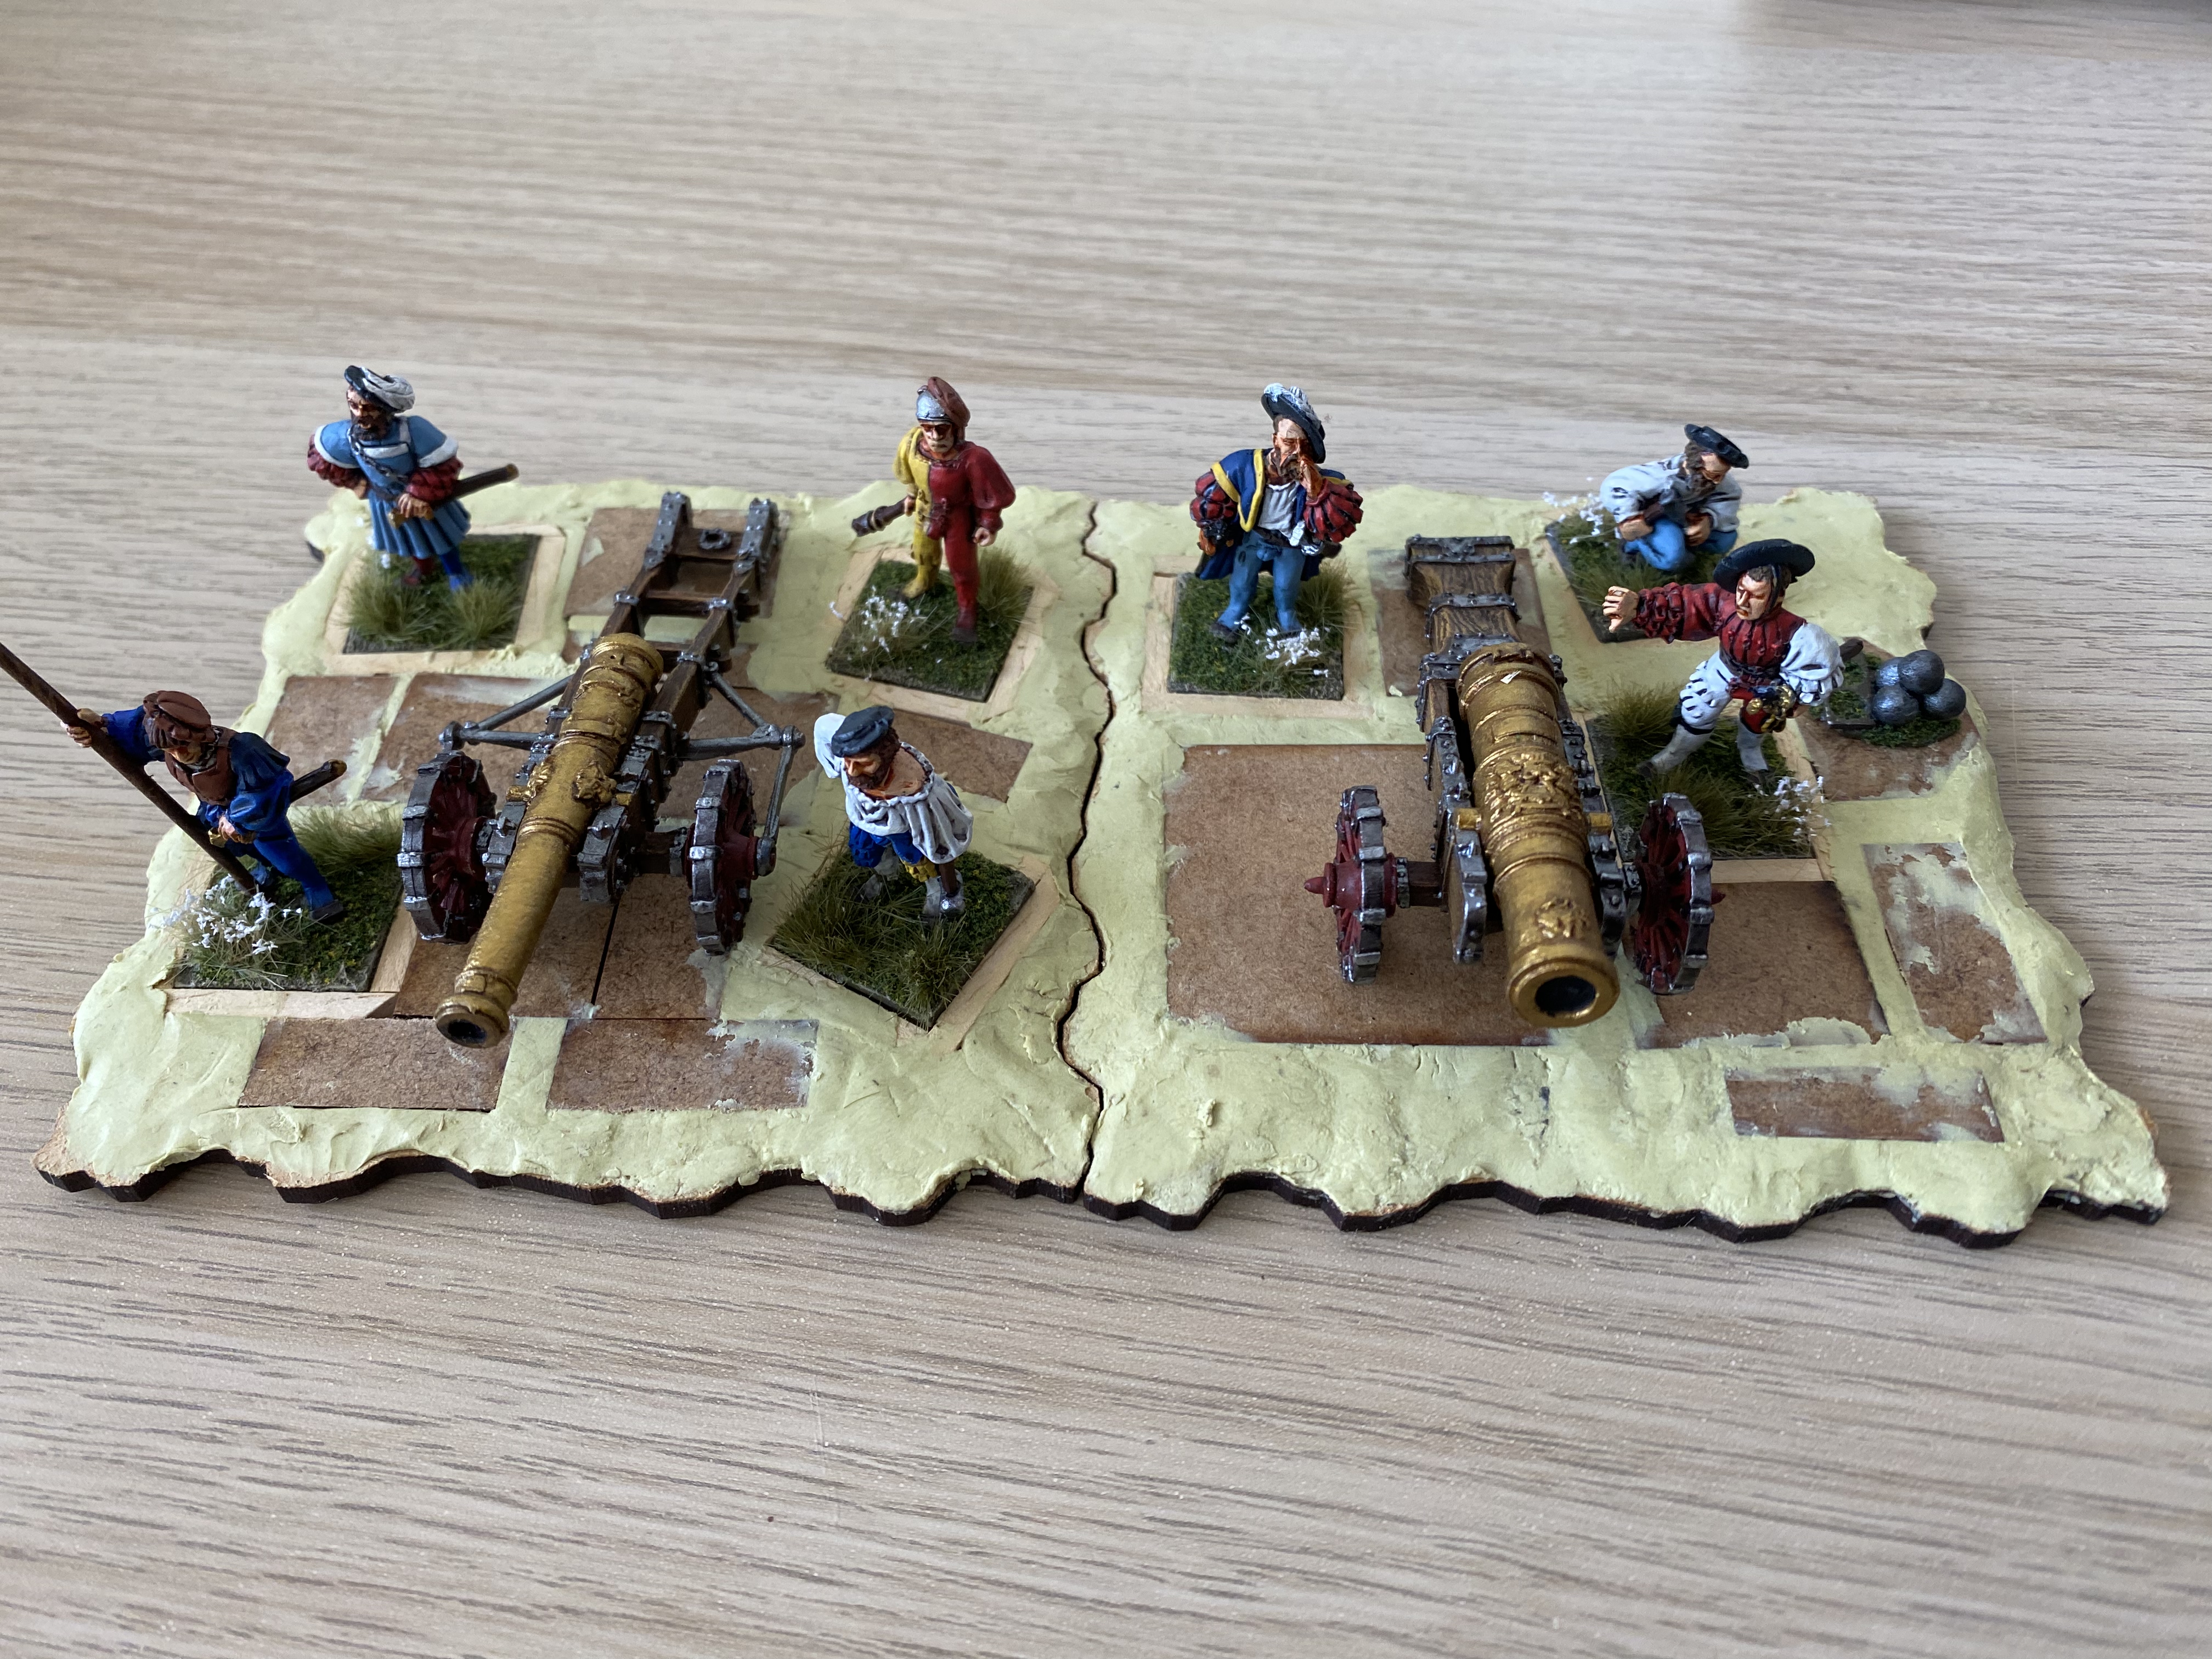
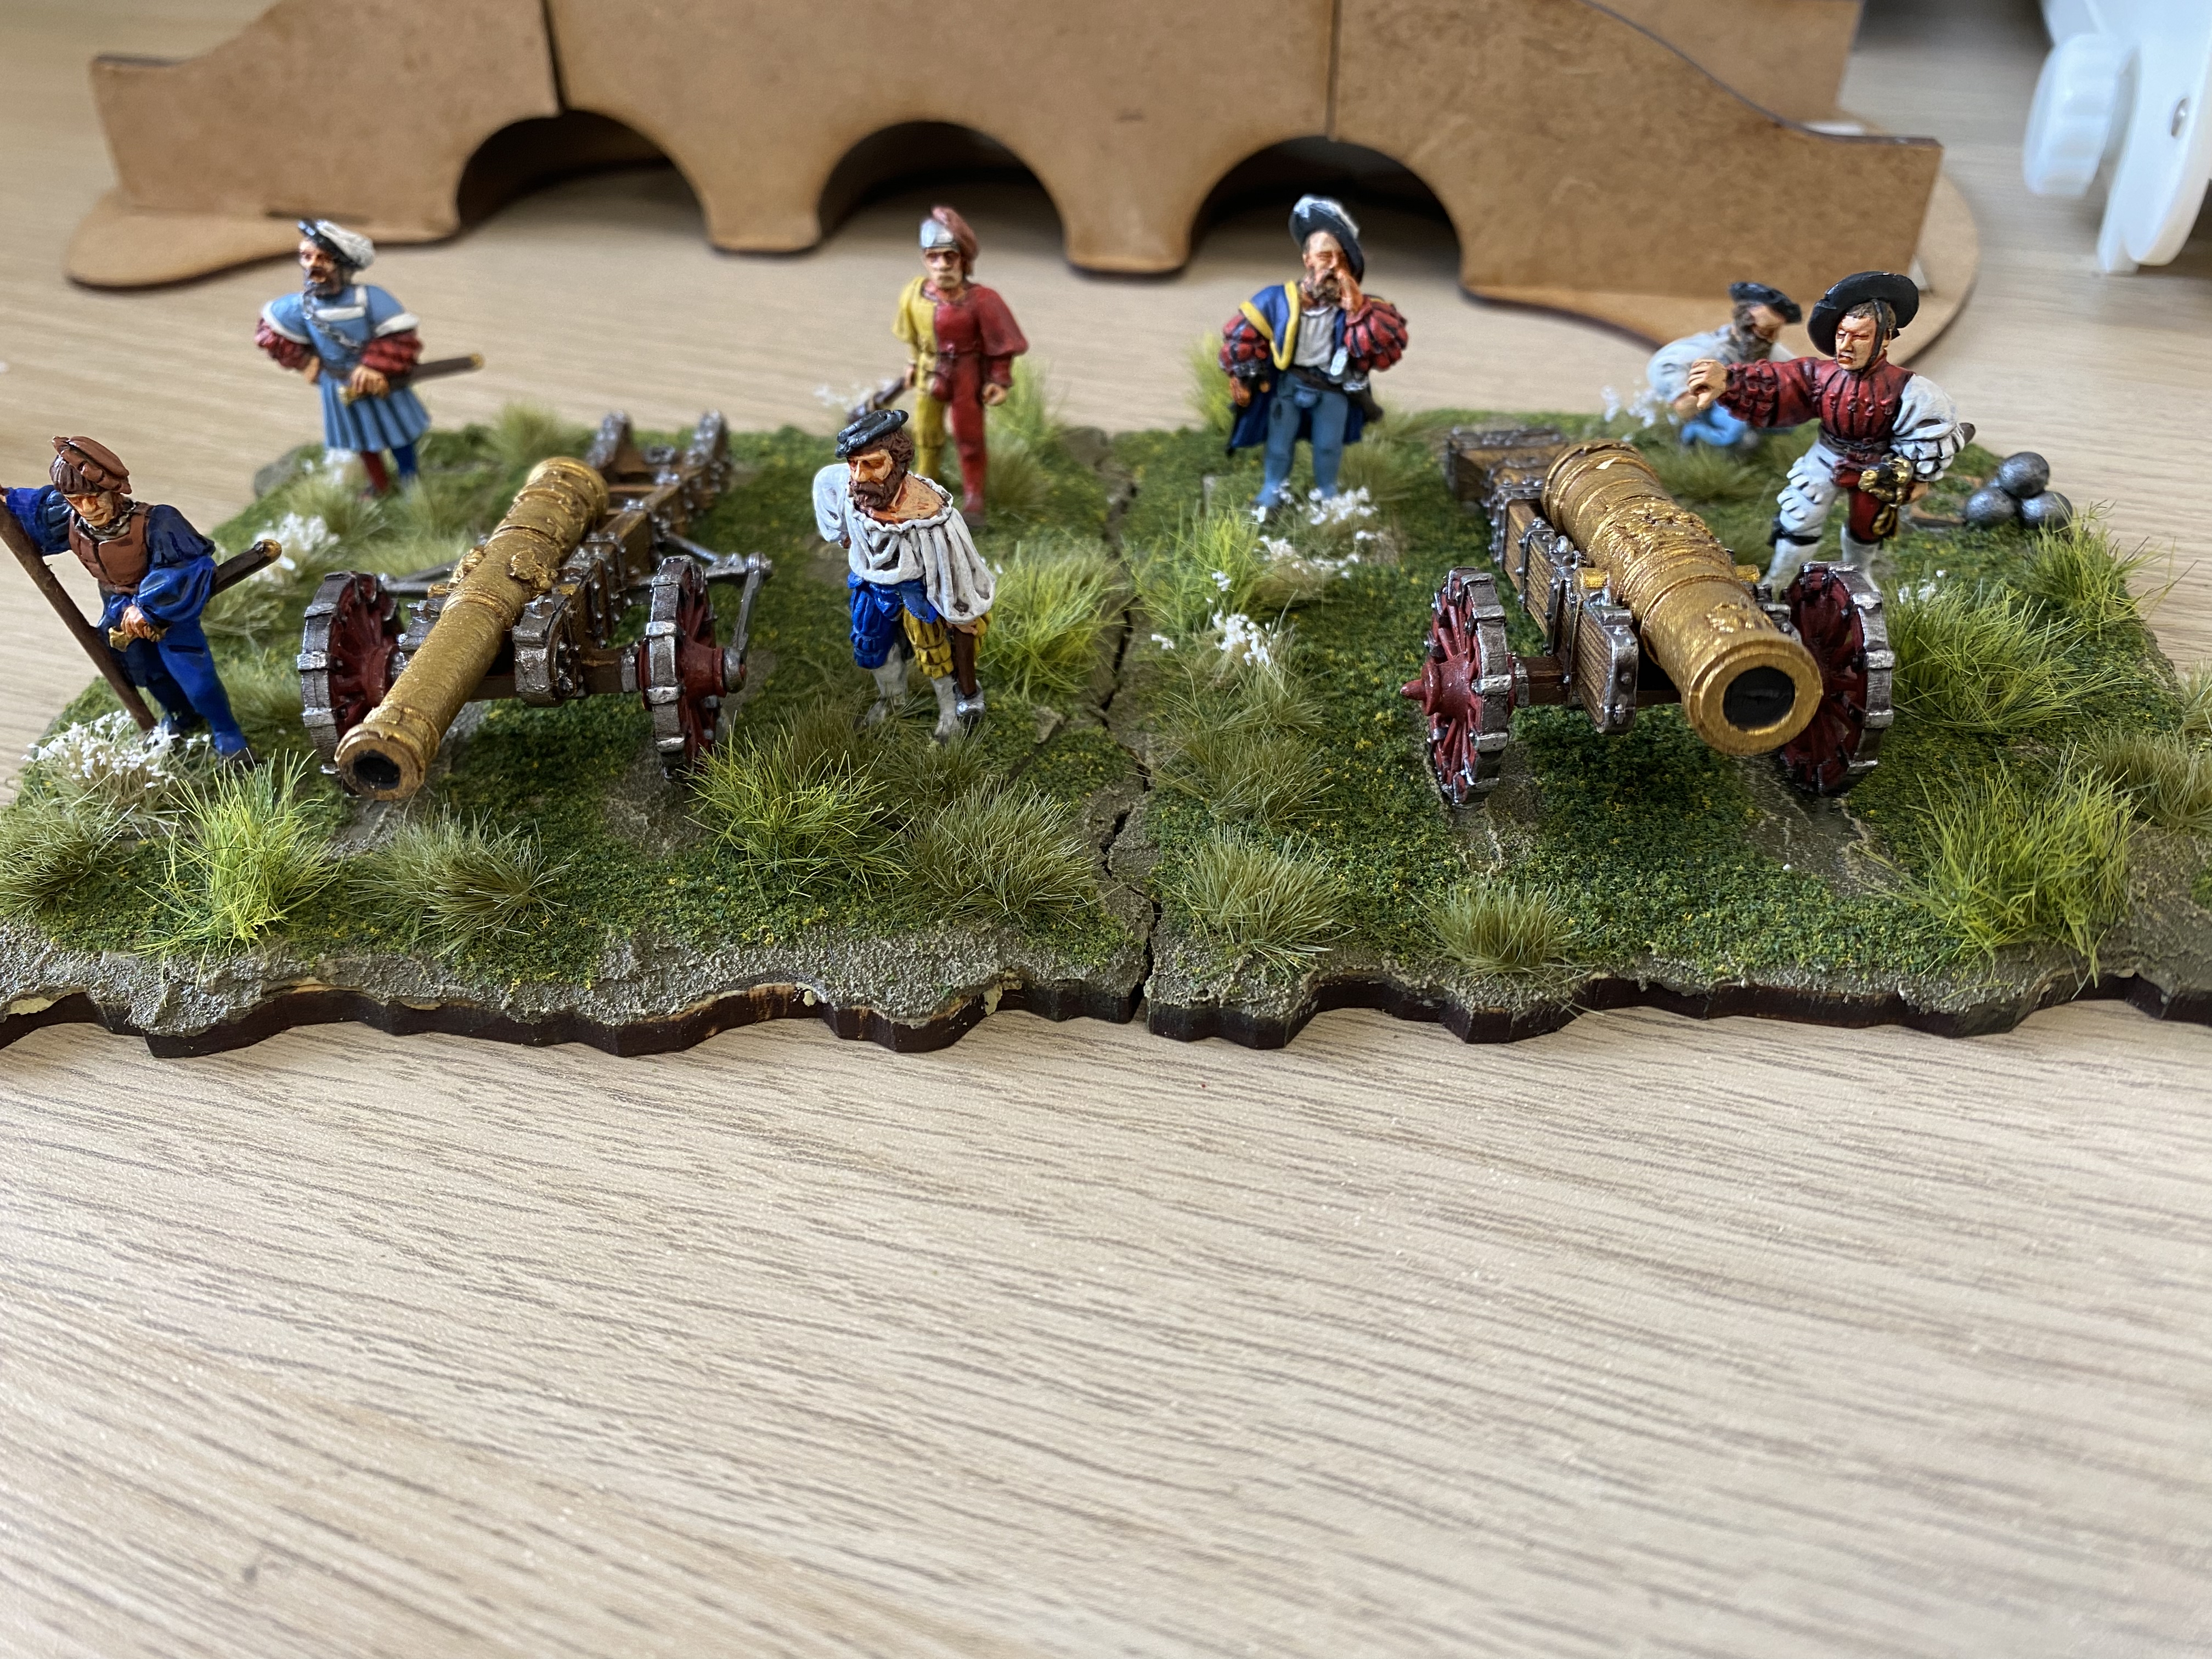
With the General sorted it was back to the artillery. My internet search had resulted in me settling on the guns and crew produced by Foundry Miniatures. Again, I am lucky to have easy access to Foundry. They are just 9 miles up the road from my house, so I was able to spend a pleasant couple of hours visiting them and showing my Granddaughter the Church and Battlefield at East Stoke. As well as purchasing two of the guns and crew, I also picked up a couple of packs of Gendarmes and a winged unicorn for my Granddaughter Emily! I have to report that the service at Foundry was first class. The young lad on ‘front of house’ was extremely helpful and ensured that I was able to get the models that I wanted. You can read about one of my previous visits to the Stokes Field Battlefield and find links to Foundry here:
Stokes field – the view to Hoveringham and the Trent – The Yorkists retreated over these fields!
Foundry Miniatures are sometimes thought of as being smaller than the current ’28mm’ crop of models. I have not found this to be so. As a general rule, some of the older ranges maybe but I found that the Landsknechts were, if anything, more on the large size but certainly compatible with Warlord and Perry Miniatures. I suspect that one of the Perry’s probably sculpted these figures.
When it came to painting them, I simply copied the figures on the Foundry web site. I actually went a bit rogue with the colours on the guns. According to one reference that I had read, the wheels were natural wood and the carriages painted red. I decided I preferred the wheels painted red and the carriages in natural wood. What a rebel, Heh!
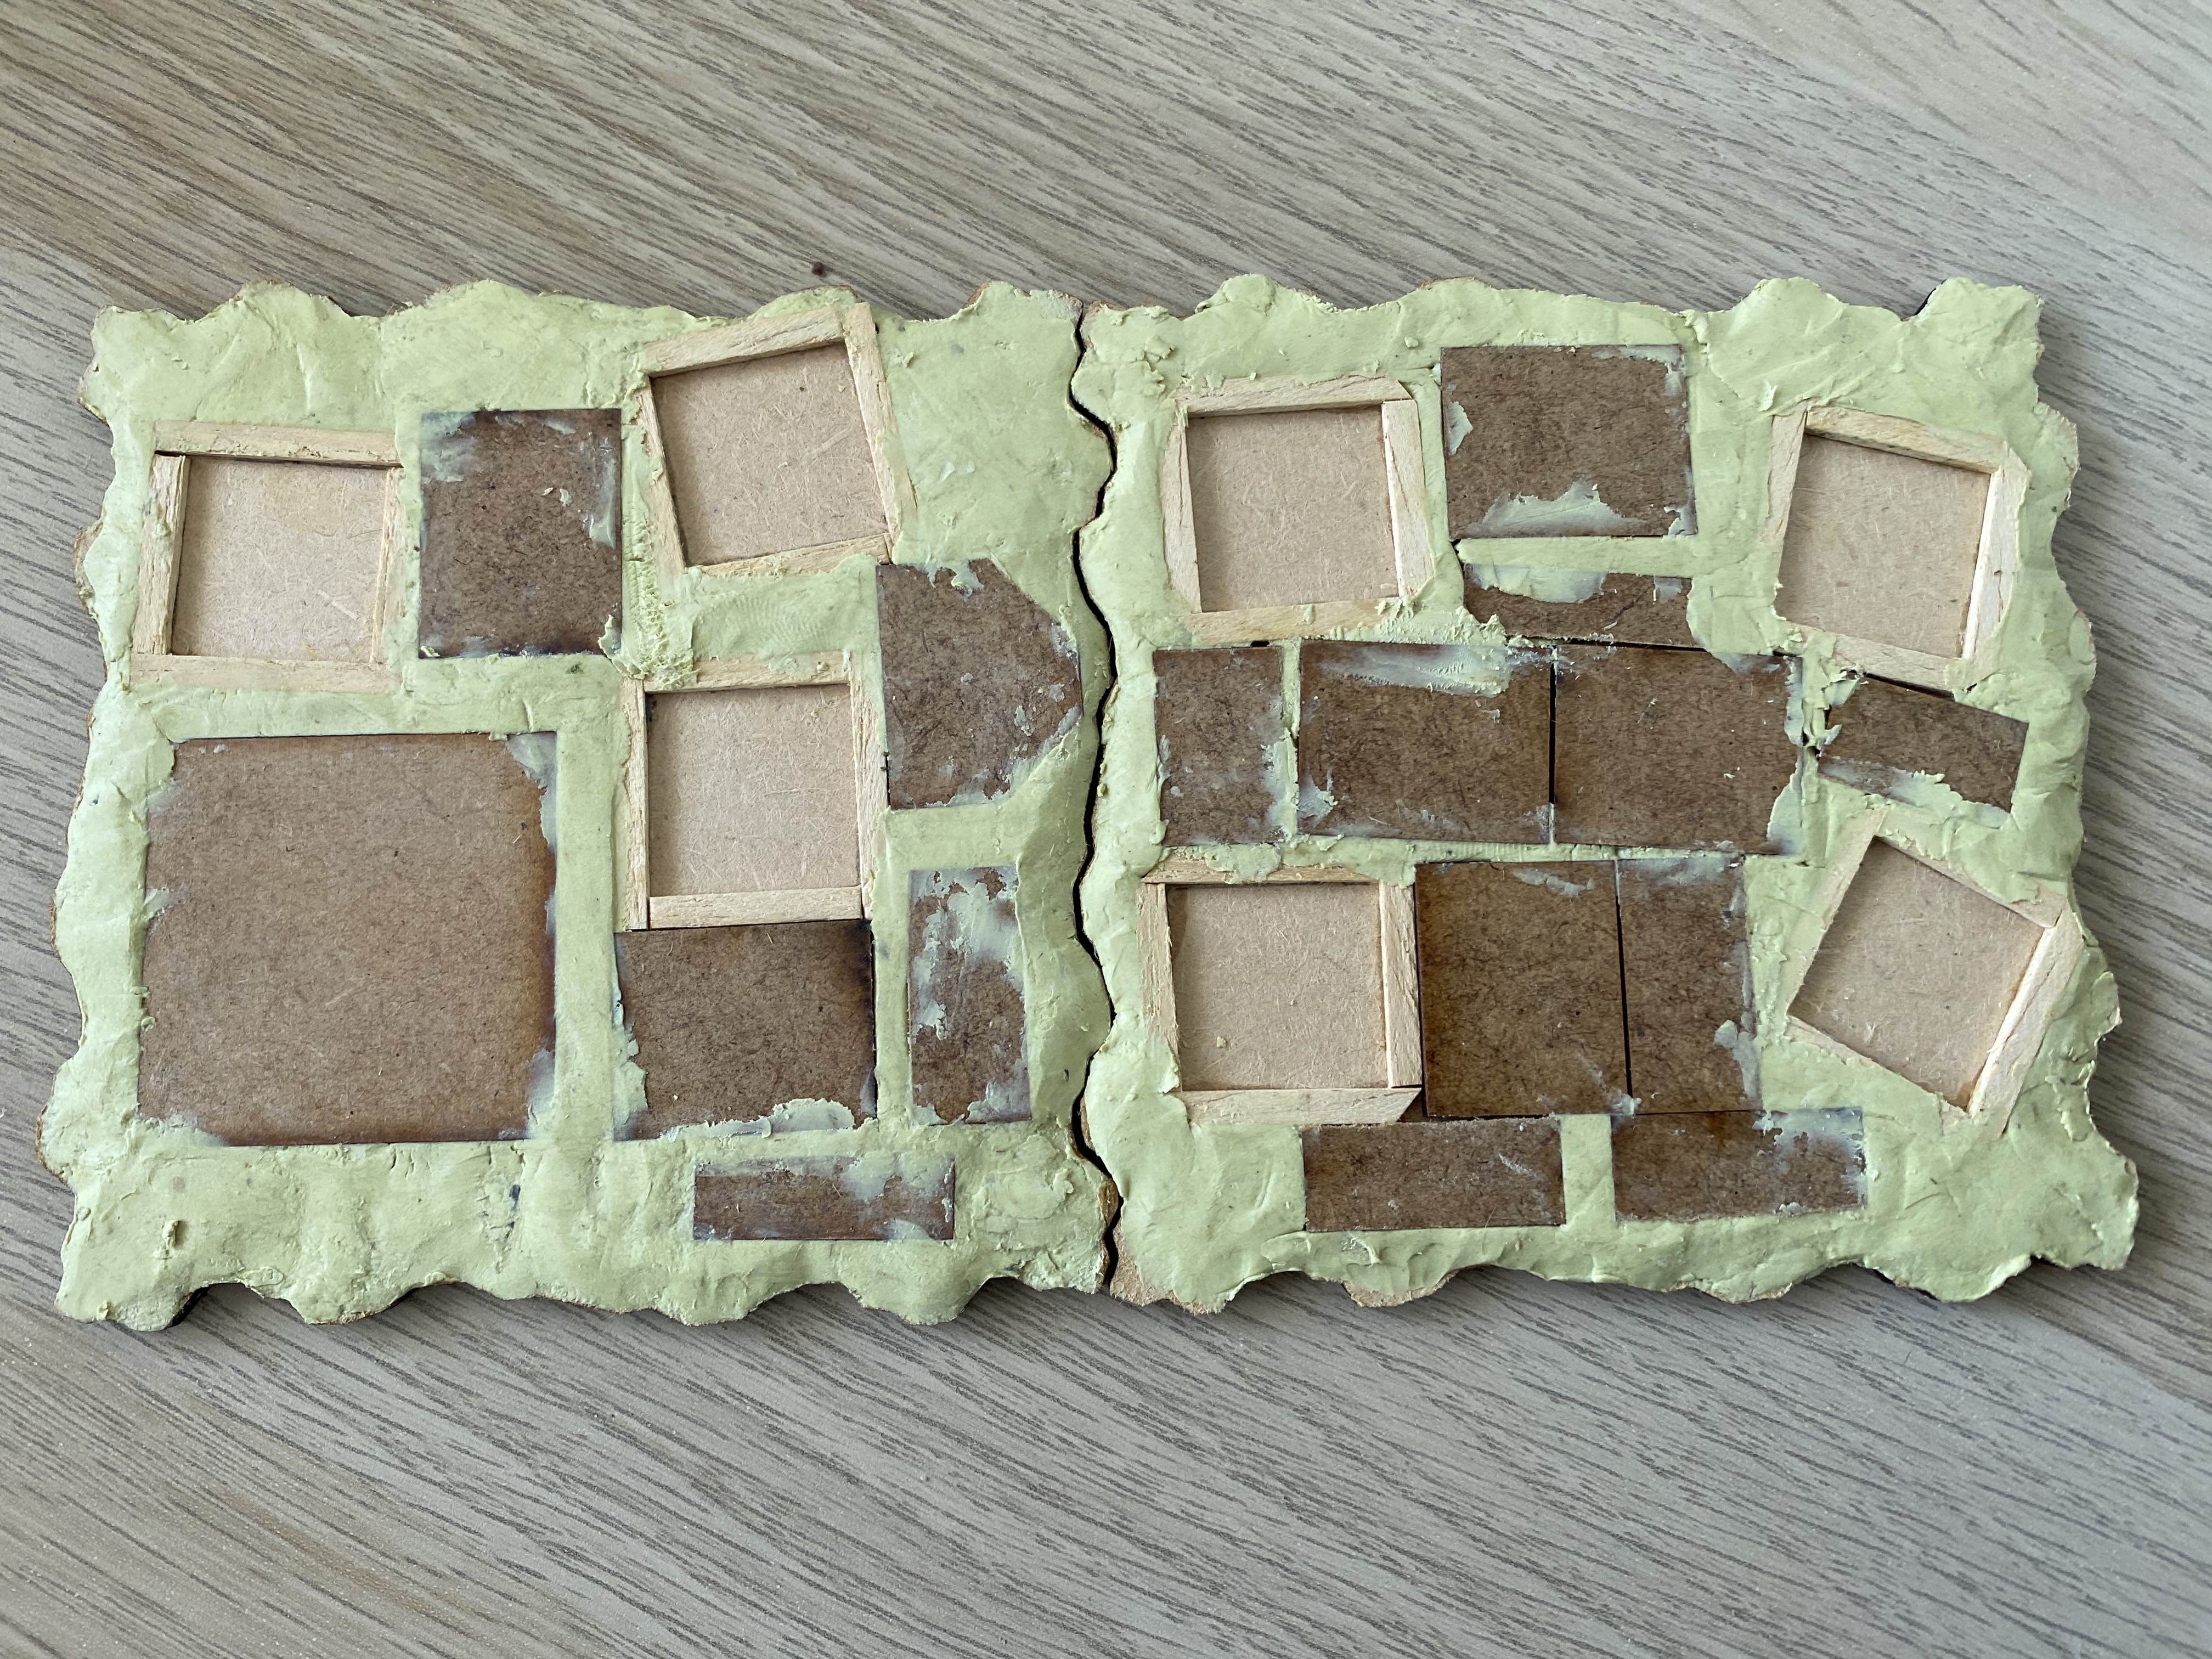
I decided to base them on the Sarrisa Precision Terrain tiles for a couple of reasons. First of all they were large enough to accommodate the guns and secondly, I have vague ideas of making a larger diorama/encampment. Here’s the painted guns and crews on the bases.
Landsknecht Artillery on bases prior to finishing.
You can see that I use sabot style basing so if in the future I change my mind, it’s a simple matter to remove the figures and guns. The following picture sequence shows how I made the bases.
The frames are made from thin box wood, the gaps roughly filled with spare MDF and then all the gaps filled with milliput.The bases are covered with Vallejo texture Paste.The bases now painted, scatter and tufts addedA bit of work in progress, the next terrain tile with gabions will be an extra that I can add if I want a defended position!
So that’s the Landsknechts done – here’s a view of the army ( with the artillery not on the bases.)
The light cavalry in the background are a temporary unit – I intend to add some Stradiots in the near future. That’s once I have finished my Gendarmes…
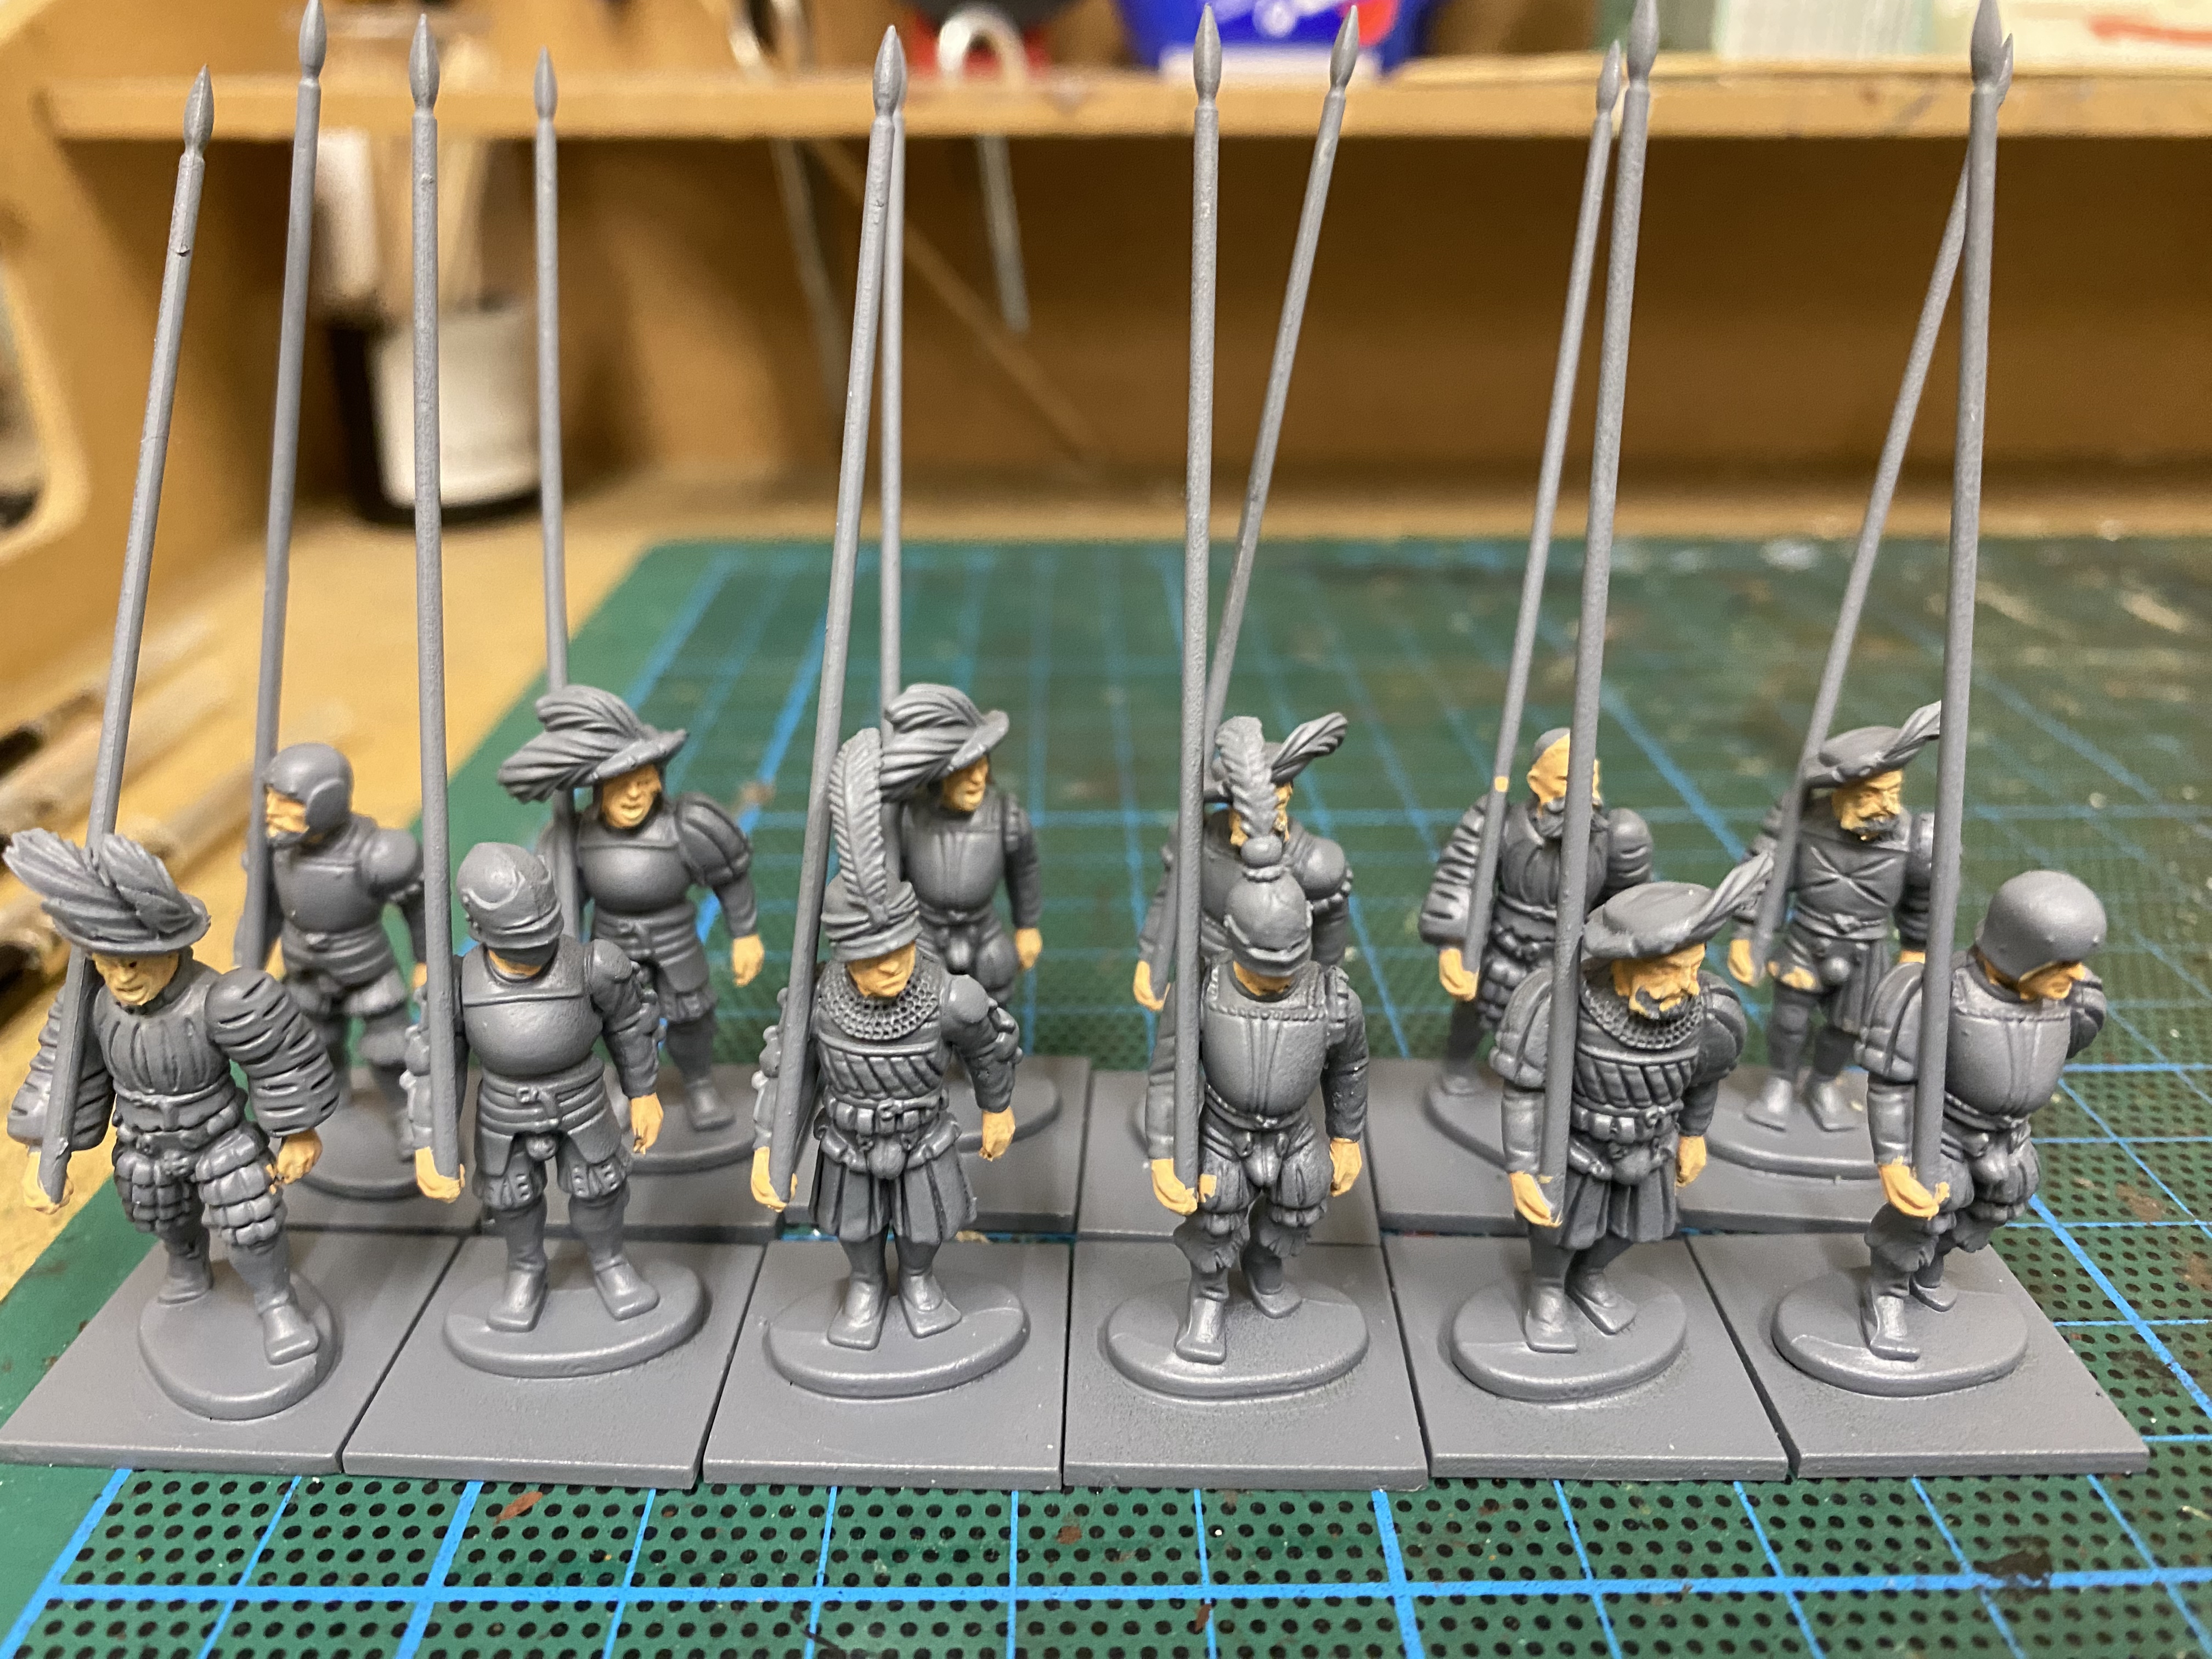
Work in progress – Gendarmes – I plan to have two units of 8 and a leader!
THE COMMERCIAL BIT
I hope that you all enjoy your hobby as much as I do – our web site will have much of what you need! Click here to see our shop.
I’m a bit late writing this up as the event took place on Saturday 2nd September and a lot of beer and bourbon has flowed under the bridge since then…..As usual, I started the day by taking a few pictures and making notes of the battles but as the day continued and the battles became more intense, my note taking dried up, as did my photography. So what follows is more of an impression of the day and some of the lessons that I learnt using my Landsknechts.
The event is organised by Pete Harris and held at the Derby Boards and Swords venue ( link below). Regulars to the event tend to meet up on the Friday evening and have a pre BASH meal and refreshments. Pete Harris had also kindly organised the evening, with the group first meeting in the Derby pub, the Tap (great beer!) and then walking on to the Exeter (great food!). After the usual pre-event banter and an extremely humorous and at times hilarious evening, we retired to the Travel Lodge for a night cap.
The next morning, a full English breakfast and multiple coffees helped to start the day and it was off to Boards and Swords to commence battle.
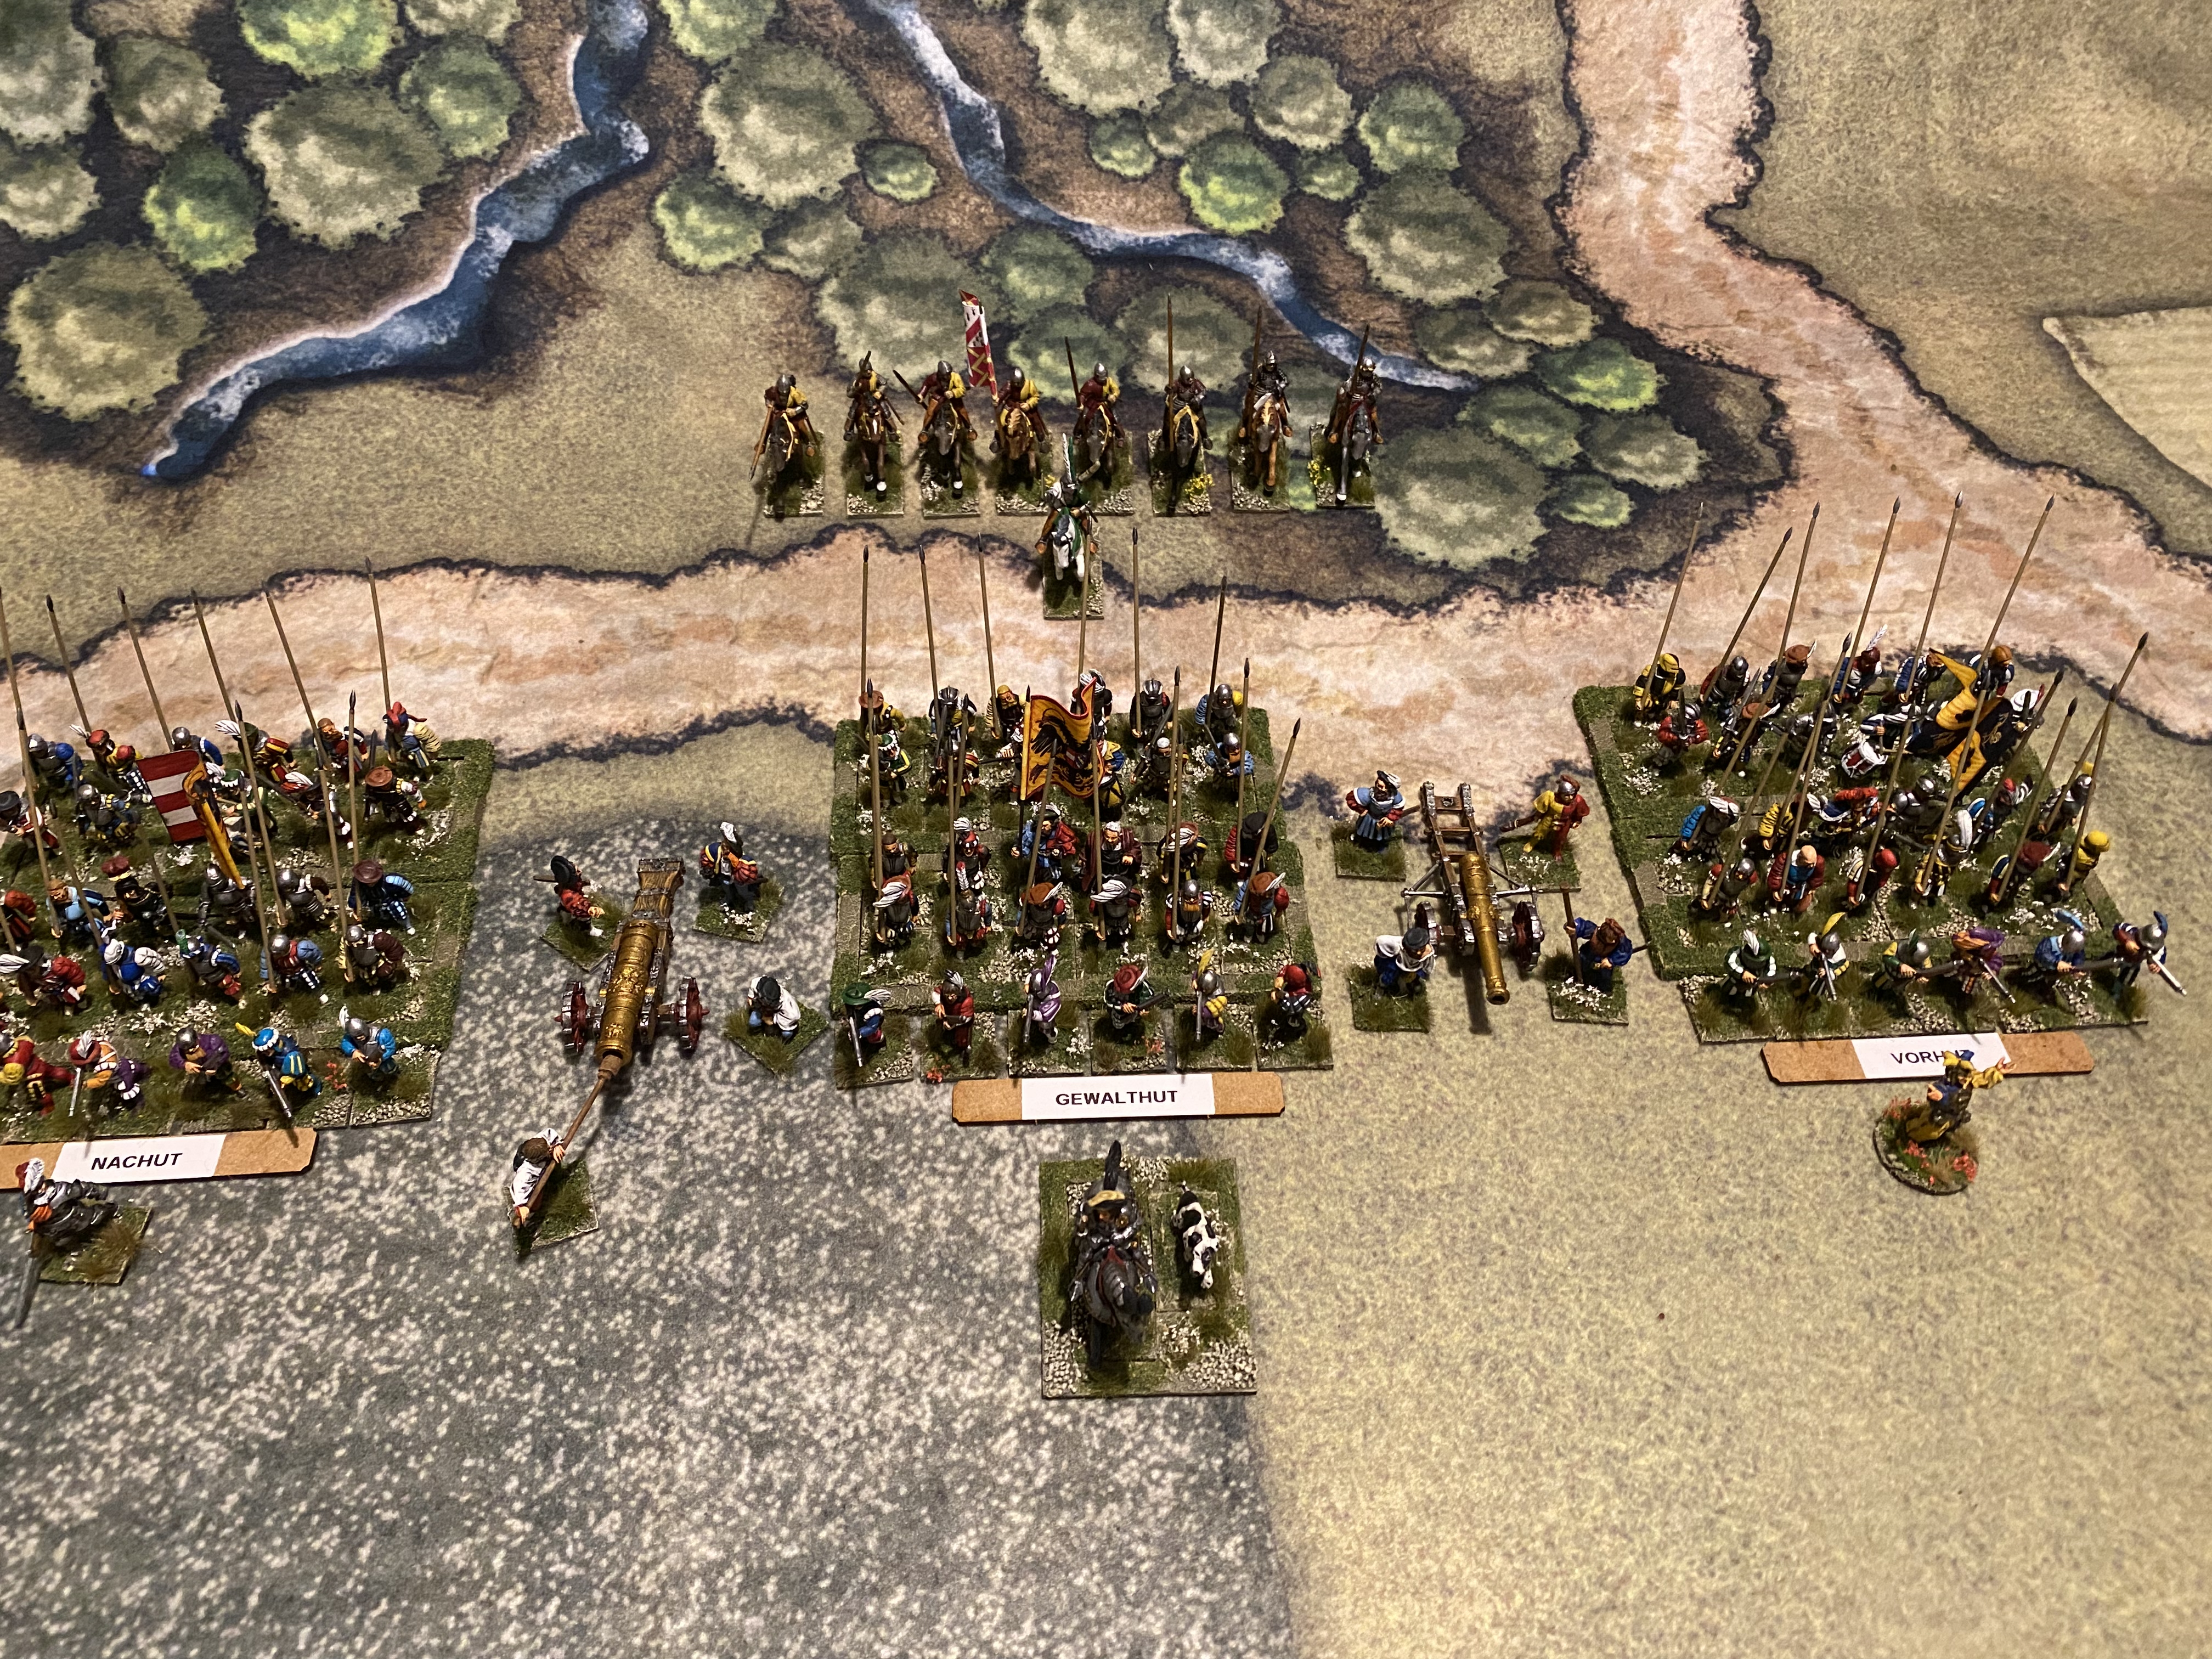
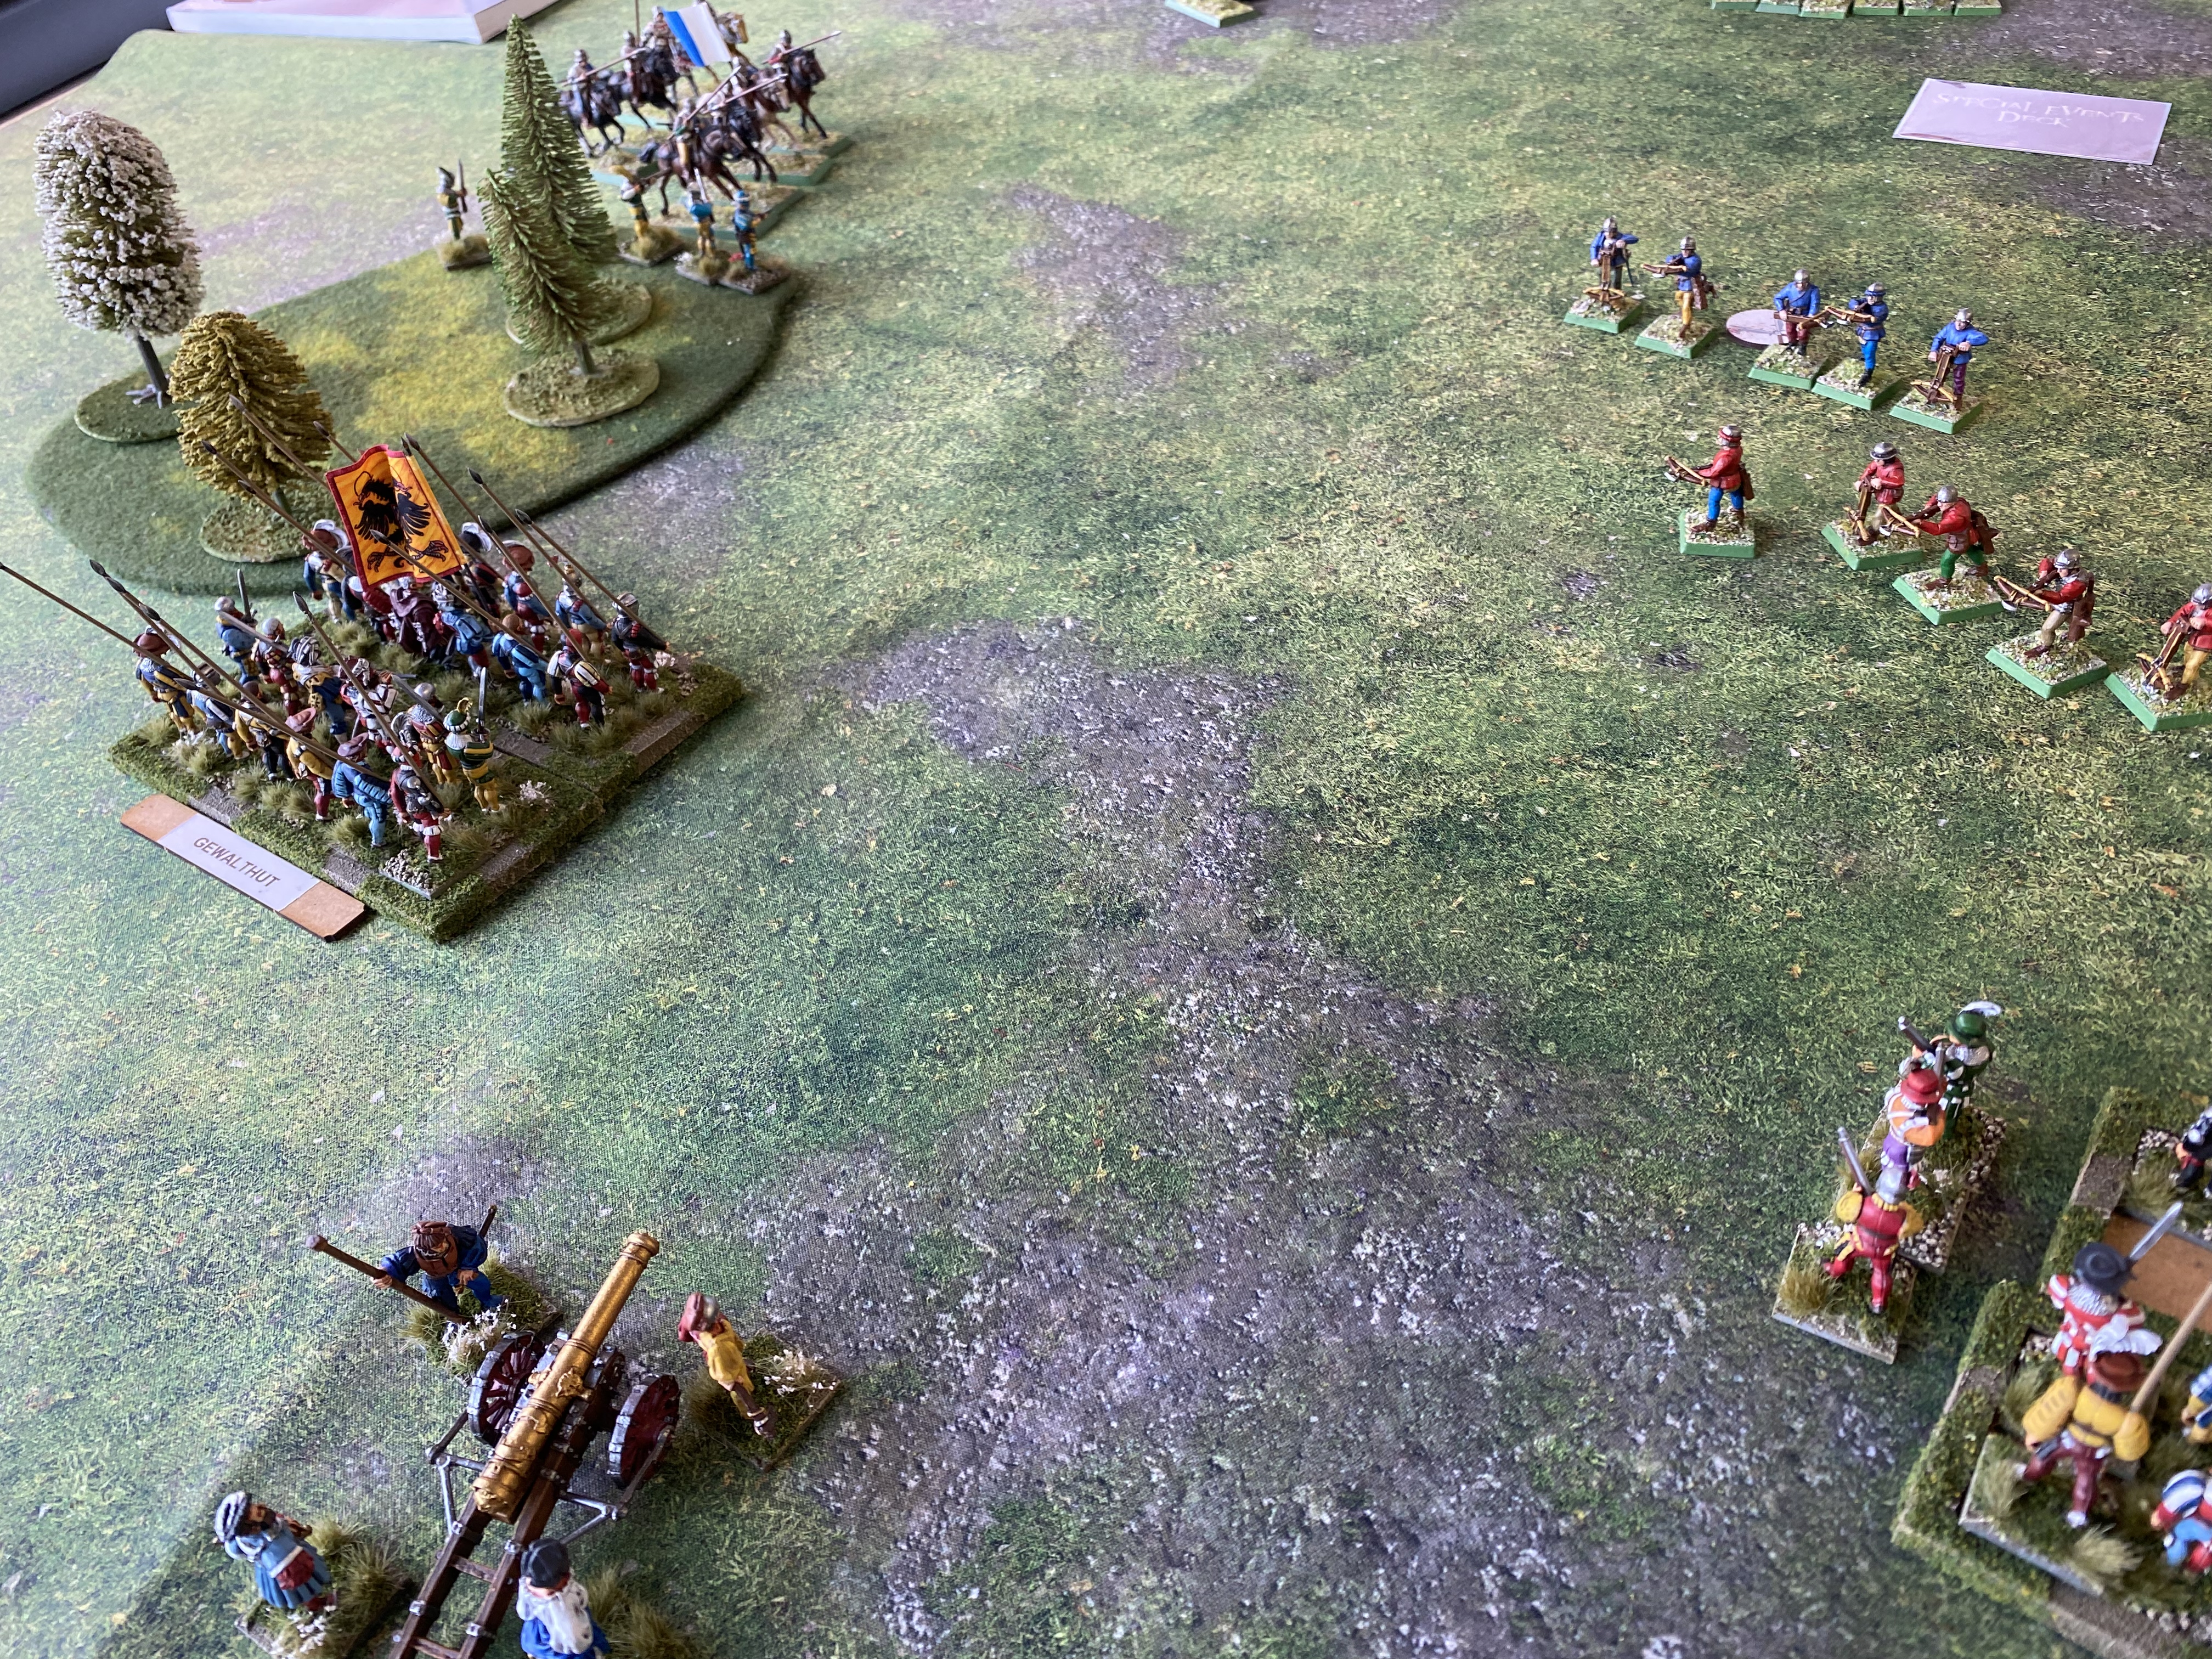
My Landsknecht force on parade!
My Landsknecht force consisted of three blocks of 24 pikes, each with an accompanying band of six gunsmen. As each block is activated by it’s own card, I only had one army commander, Heinrich Kane, who’s main task was to undaunt any units in trouble or to issue orders to any unit that needed to react quickly to unfolding danger. As well as the troops, I had two Artillery pieces and a unit of light cavalry with their own leader.
Heinrich Kane, my newly imported mercenary leader!
This gave me 7 Army morale tokens, which sounds good but losing just two pike blocks would cost me 8 morale tokens. If that sounds unlikely, bear in mind that only the army commander can ‘undaunt’ a unit so if a block ‘daunts’ in combat it will split and the commander, assuming he is available, will have his hands full trying to rally the units. However, the upside is that the Army will have 5 commander cards plus the skirmishers and so plenty of opportunity and flexibility to move during the game.
The other issue with Landsknechts in the game is their lack of fire power compared to some armies and that they will only save on a 5 or a 6 when shot at. As a pike block, they will also take an extra casualty if hit by artillery fire. To offset this, Landsknechts have the attached gunsmen, that can be detached and sent forwards as skirmishers to harass the enemy and tie up their skirmishers (they can’t directly ‘block’ fire from opposition artillery or full units of archers). In addition, they have the ability to spread casualties through the block, making them less likely to require a morale check due to incoming fire and are therefore more durable in combat.
My Artillery pieces – now based
My choice of two artillery pieces might seem extravagant, particularly as artillery seems to have the habit of blowing up in games. Despite this, I believed the odds ( apparently 216 to 1) would make this unlikely and decided that I need something to intimidate the enemy and inflict casualties at range. This proved to be a double edged sword as I will explain below!
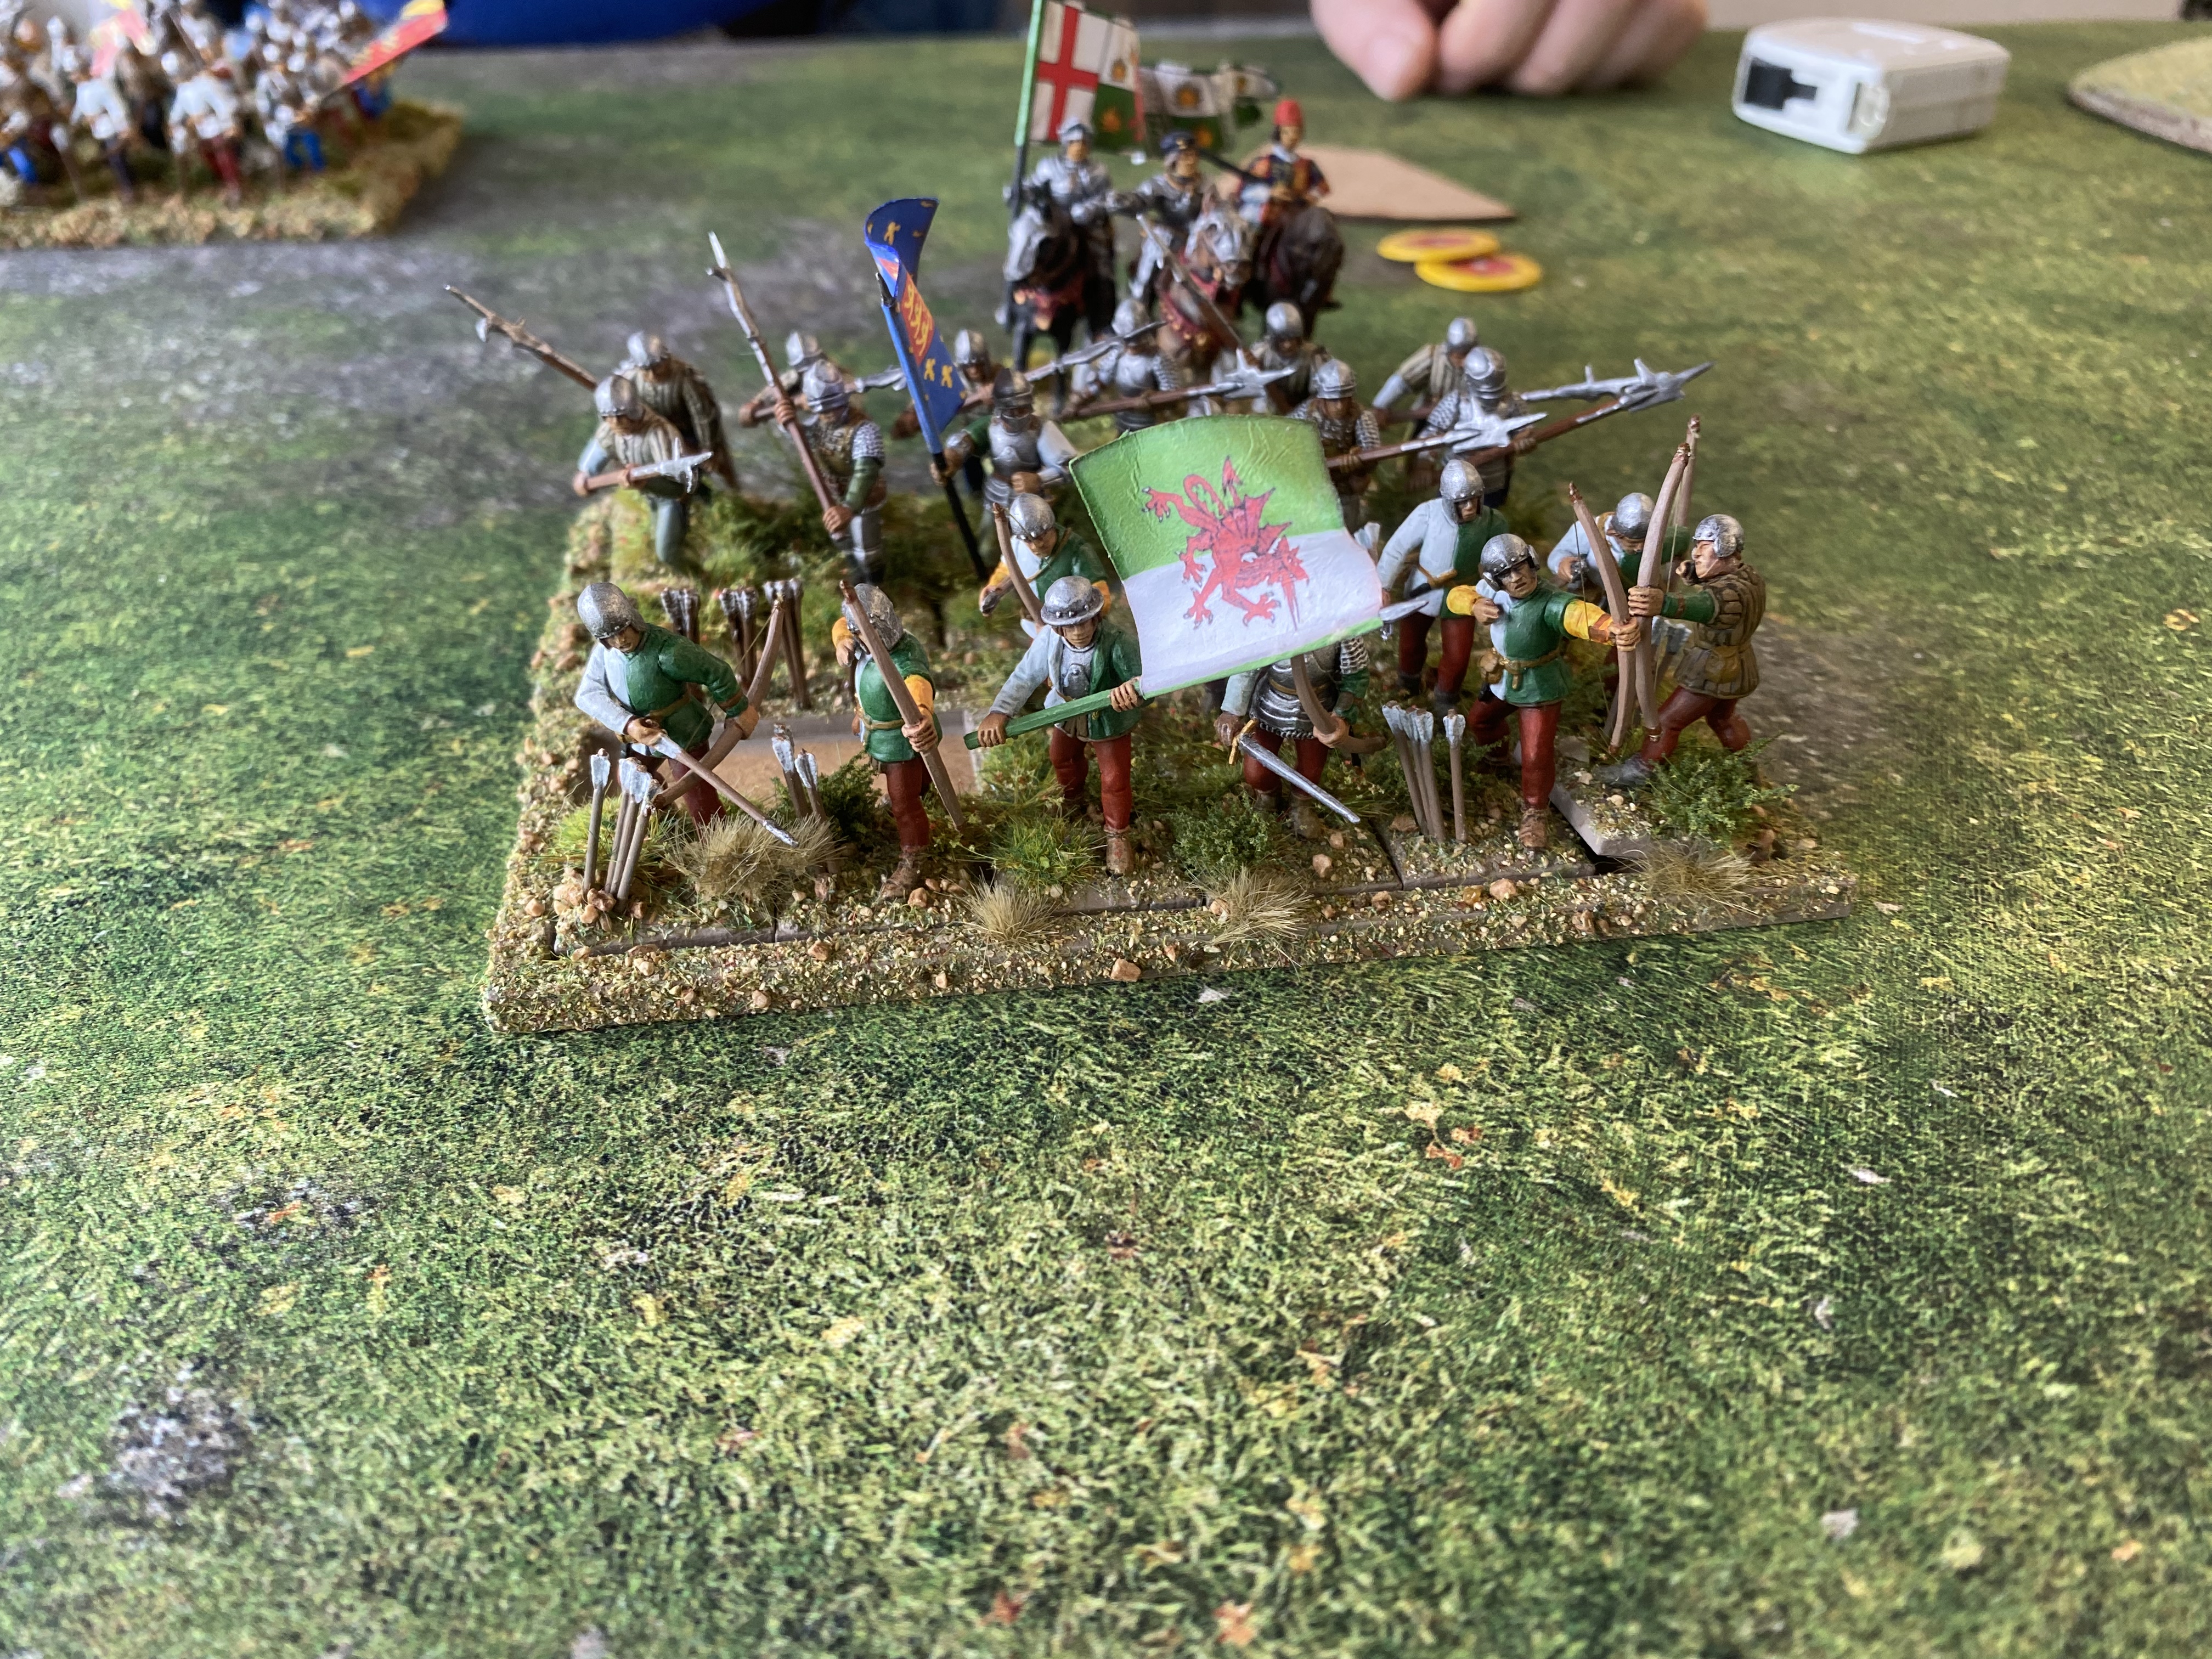
My final unit was a Light cavalry squadron. I will be changing these to Stradiots in the future – any excuse to buy some more toys….but for now they were a mercenary band of Welsh Cavalry led by Owen FitzTudor! I think that light cavalry are a valuable addition to any army. They can be brittle – a couple of lucky fusilades from skirmishers can see them off but they have the advantage of mobility and of course can get around the flanks of an army and cause mayhem.
And so to battle.
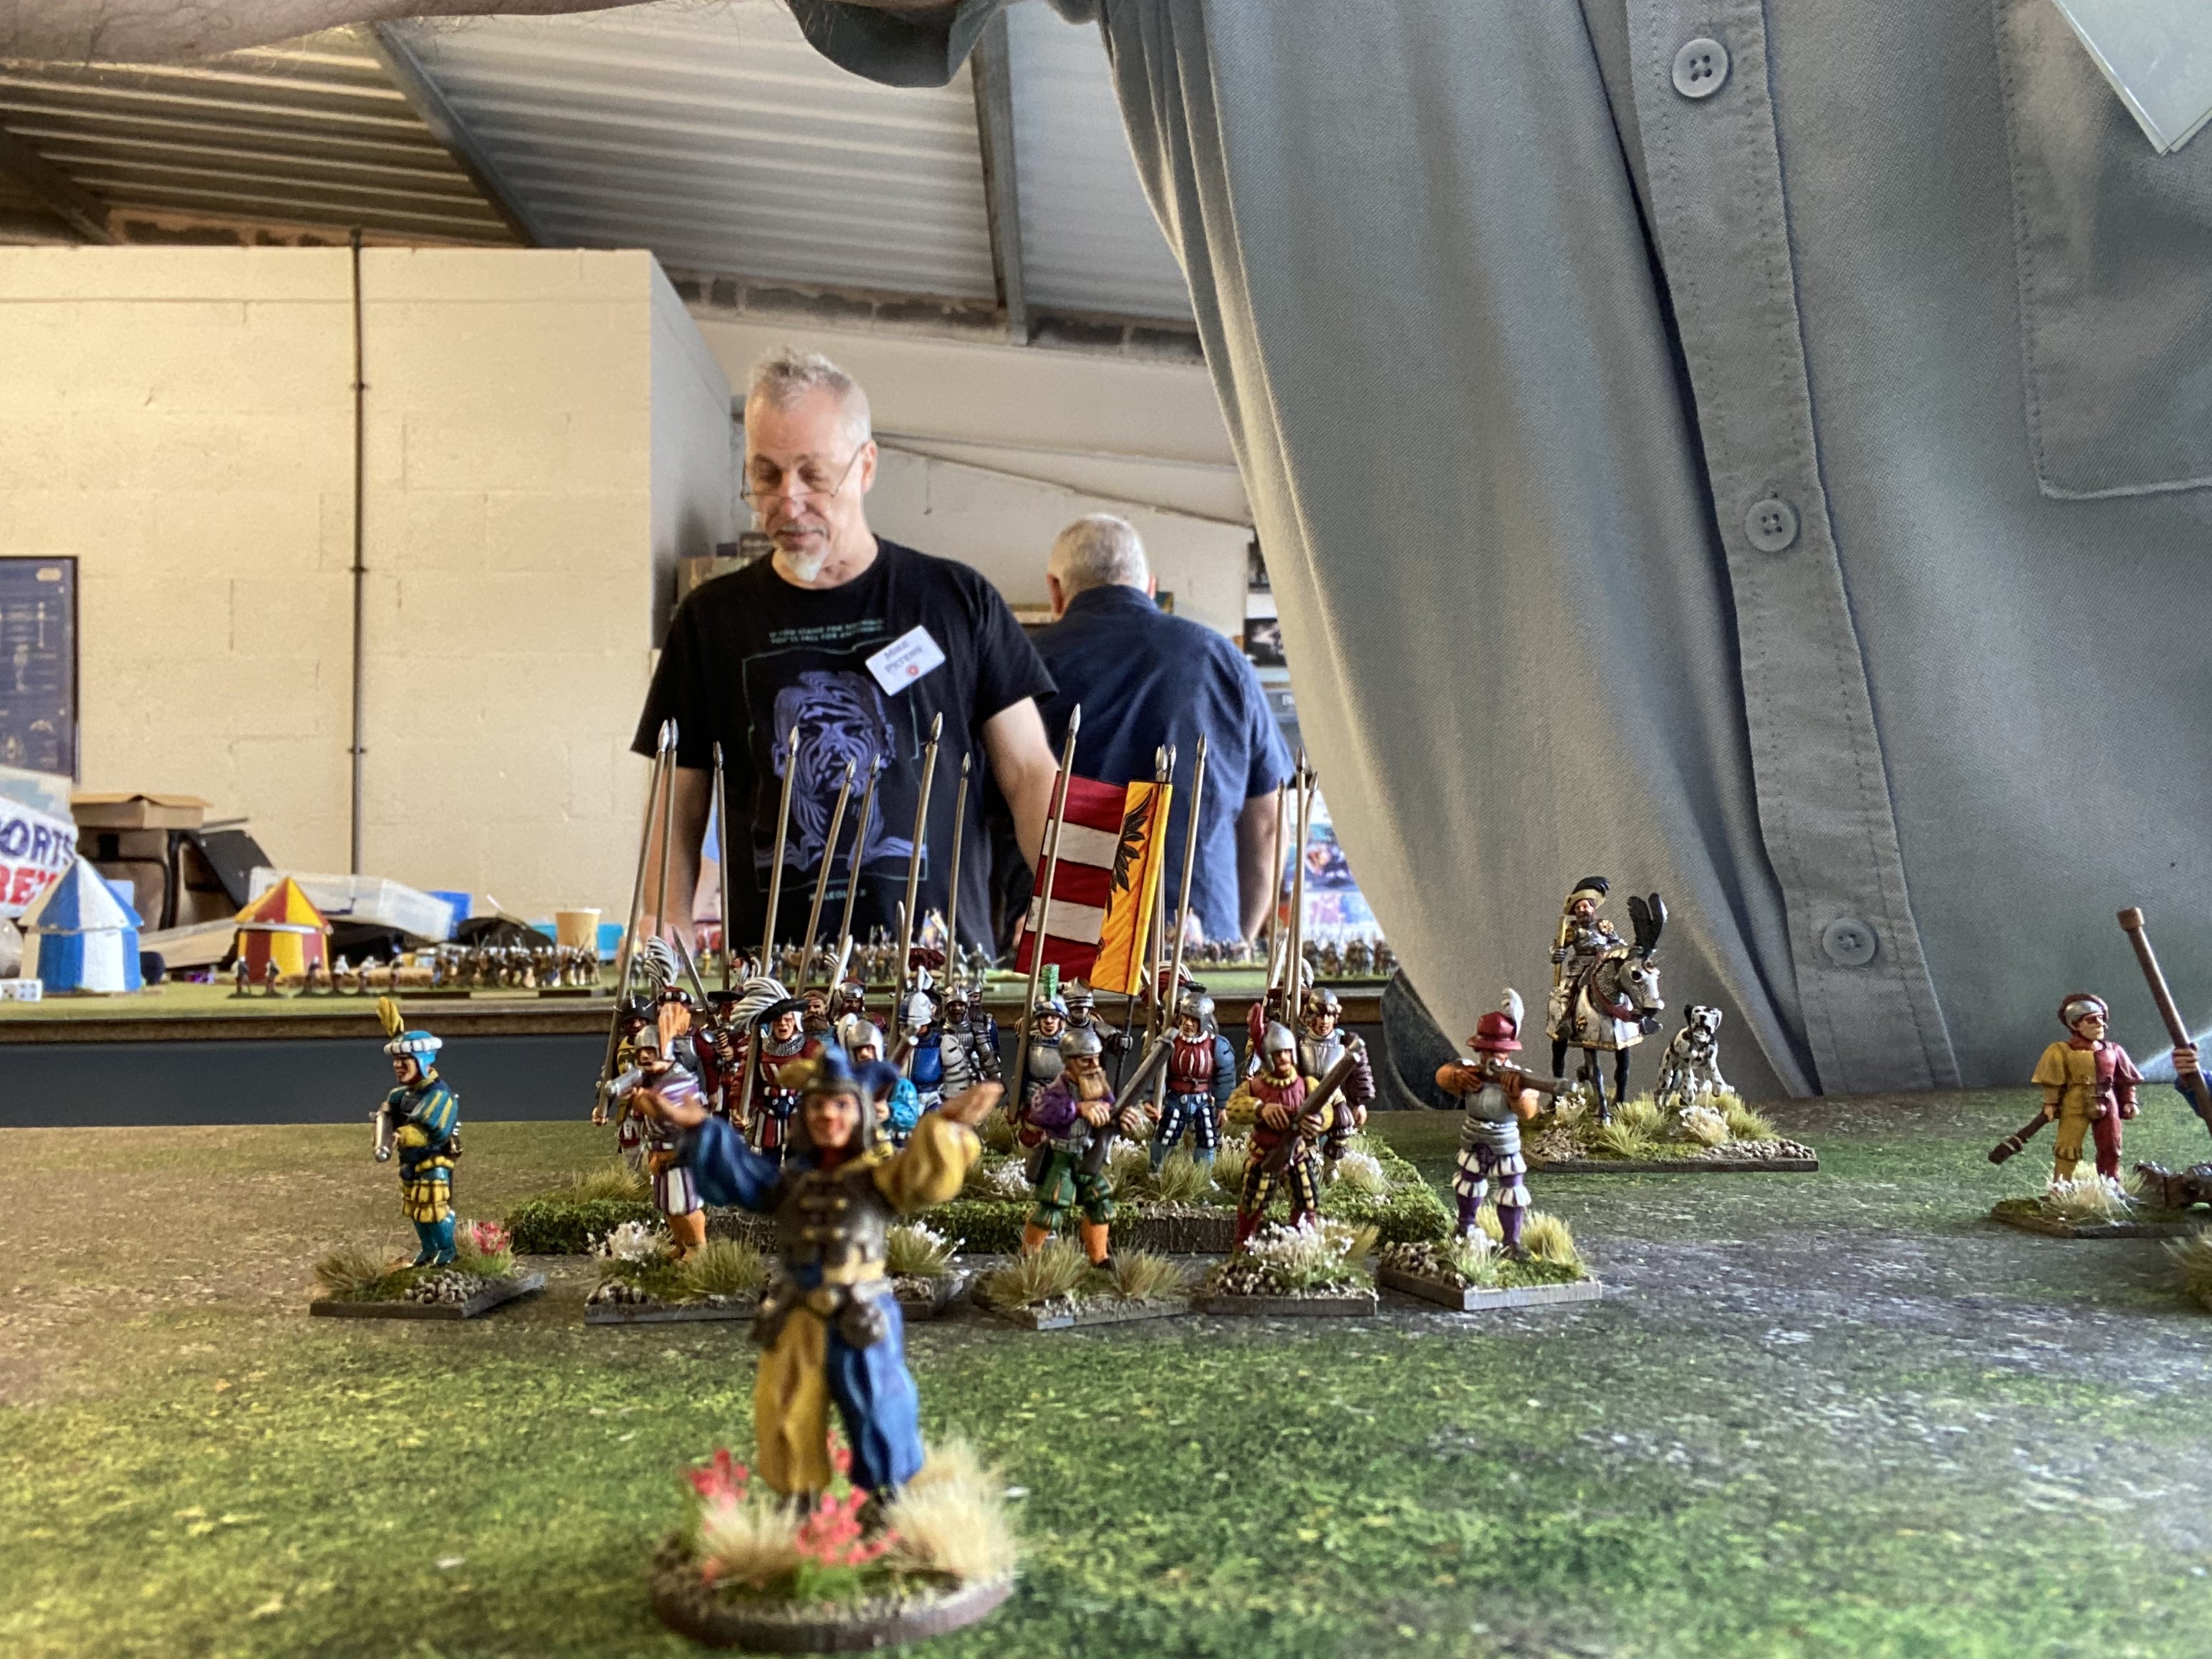
Let battle commence – in the background, Mike Peters surveys his table and plans his attack!
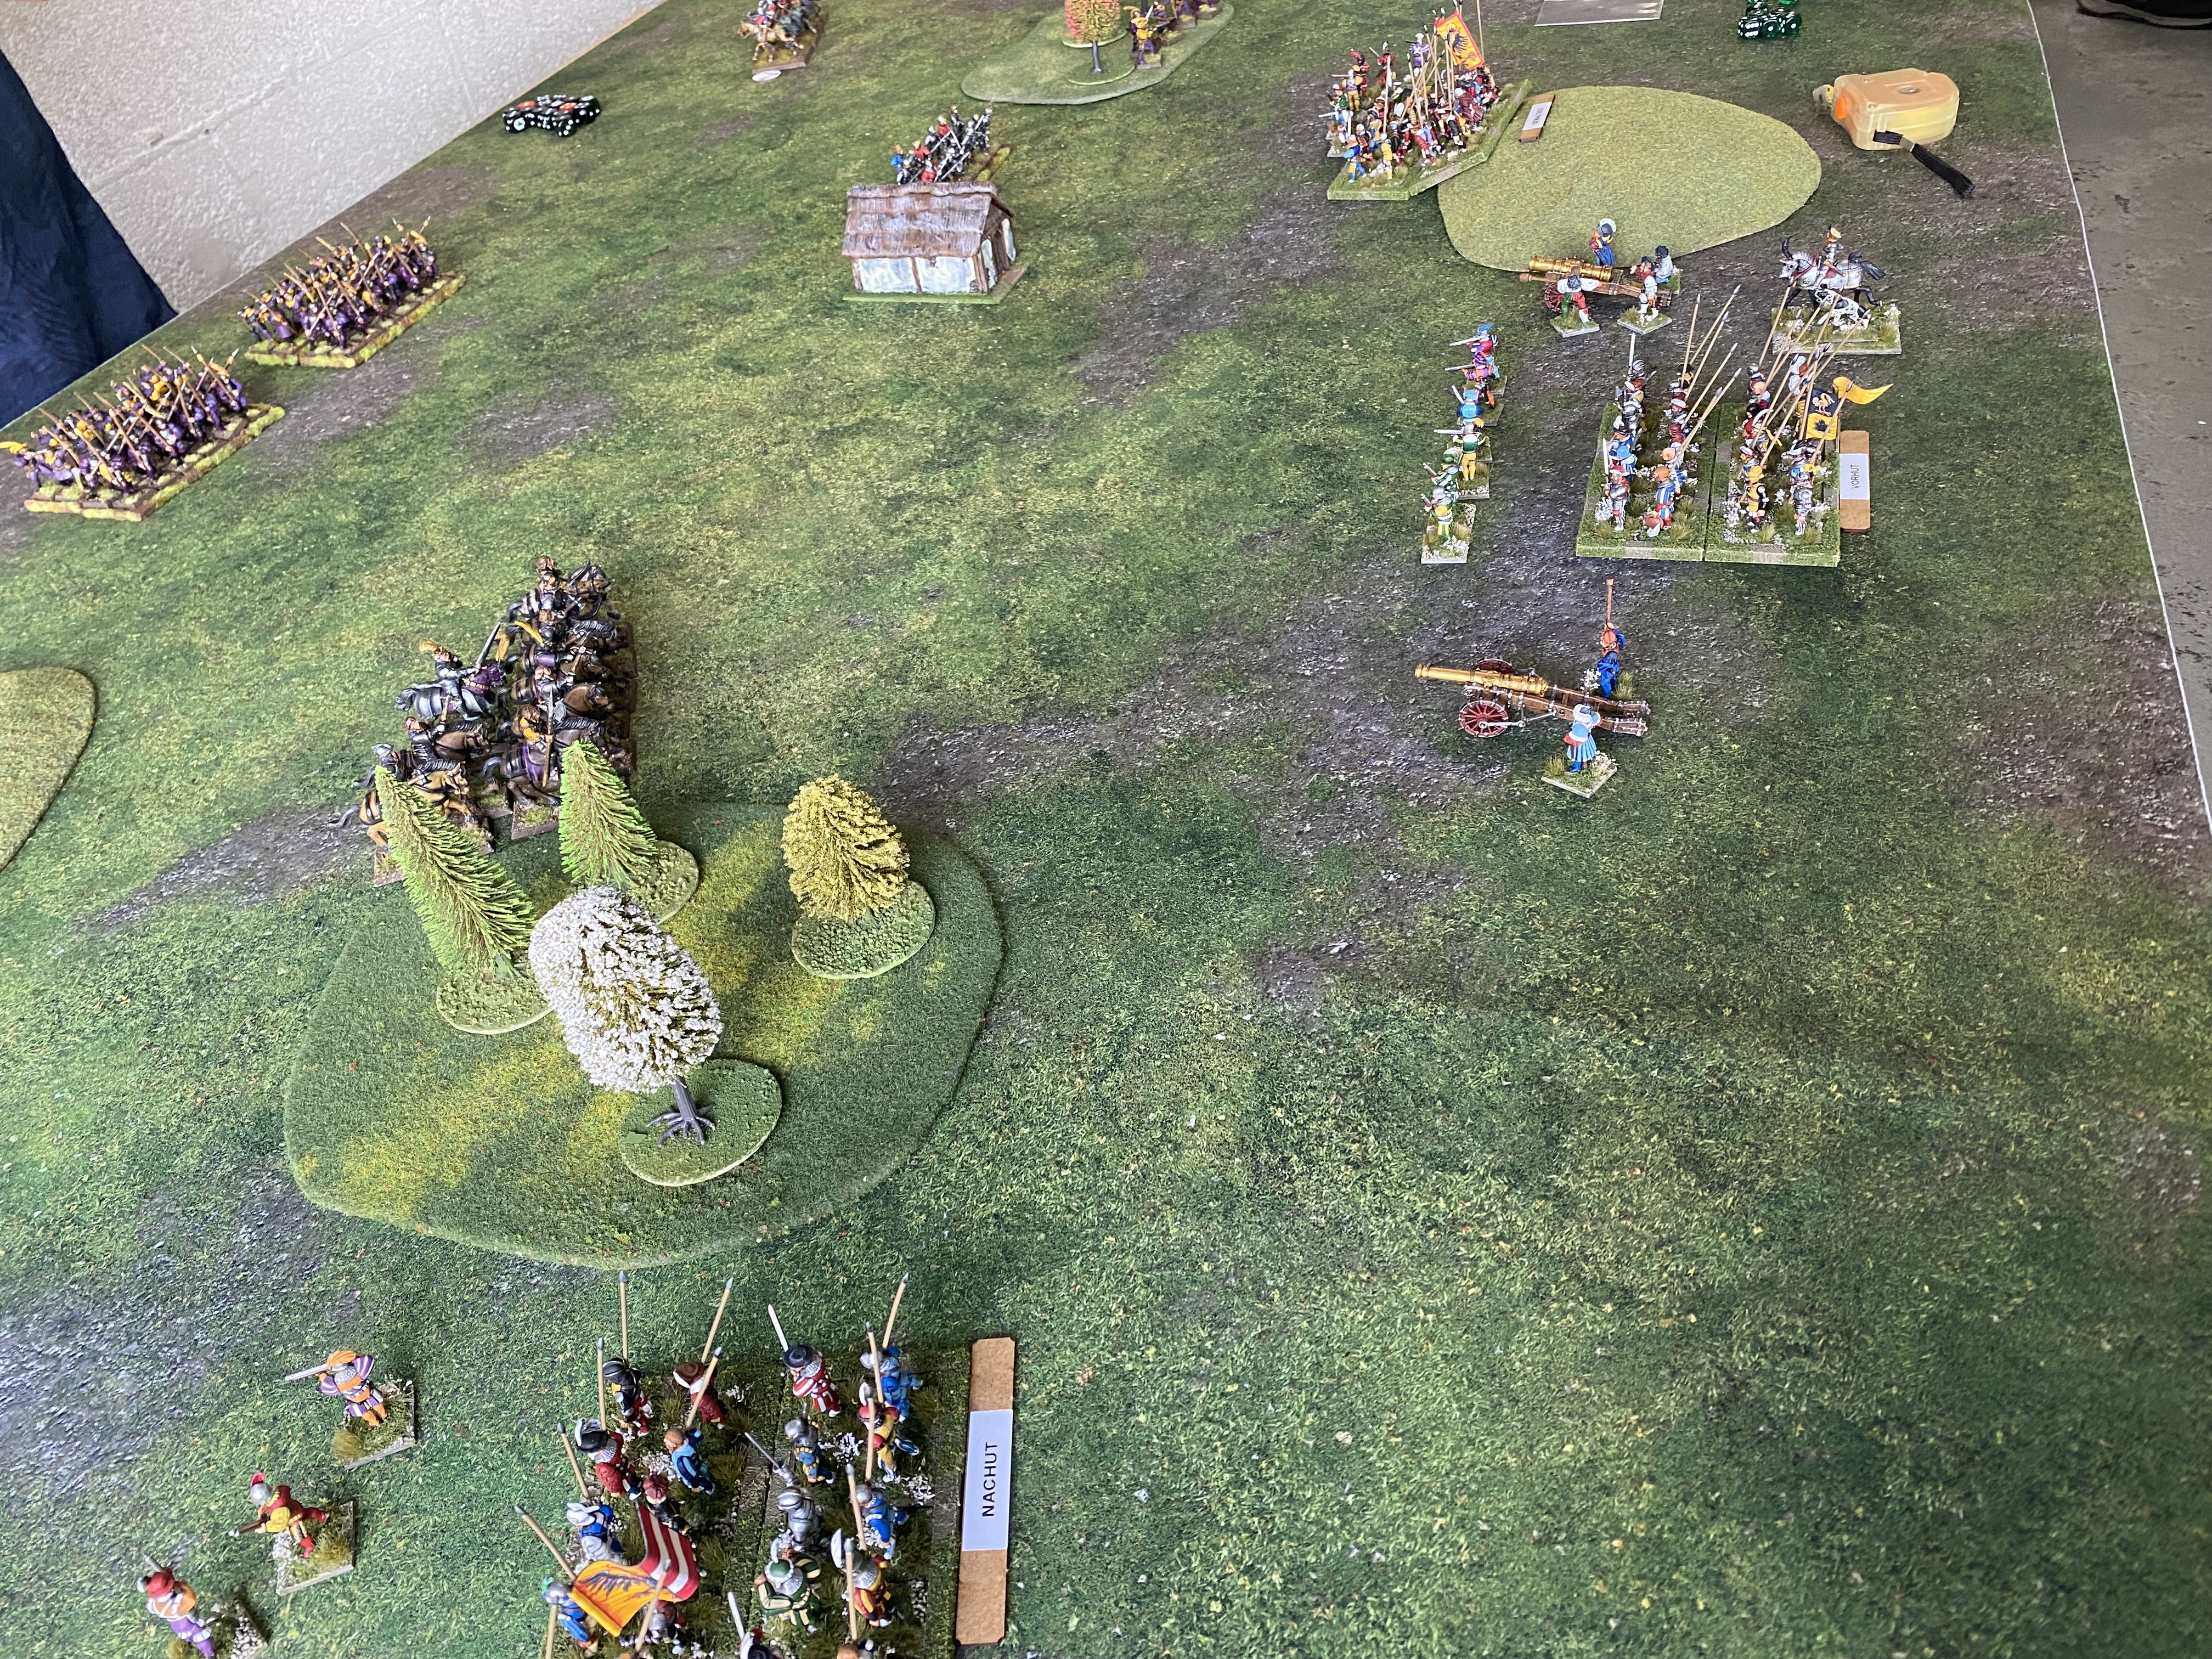
Battle one vs Richard Robinsons Burgundian Force
My Nachult block sneeking around the flank!
Richard opened the game immediately by firing his cannon. Despite my earlier comments regarding 216:1 odds of a catastrophe, Richards gun blew up, much to my amusement. So it was straight to the cards with the initial phases consisting of the skirmishers exchanging fire and my light cavalry winning the dice off with Richards light cavalry.
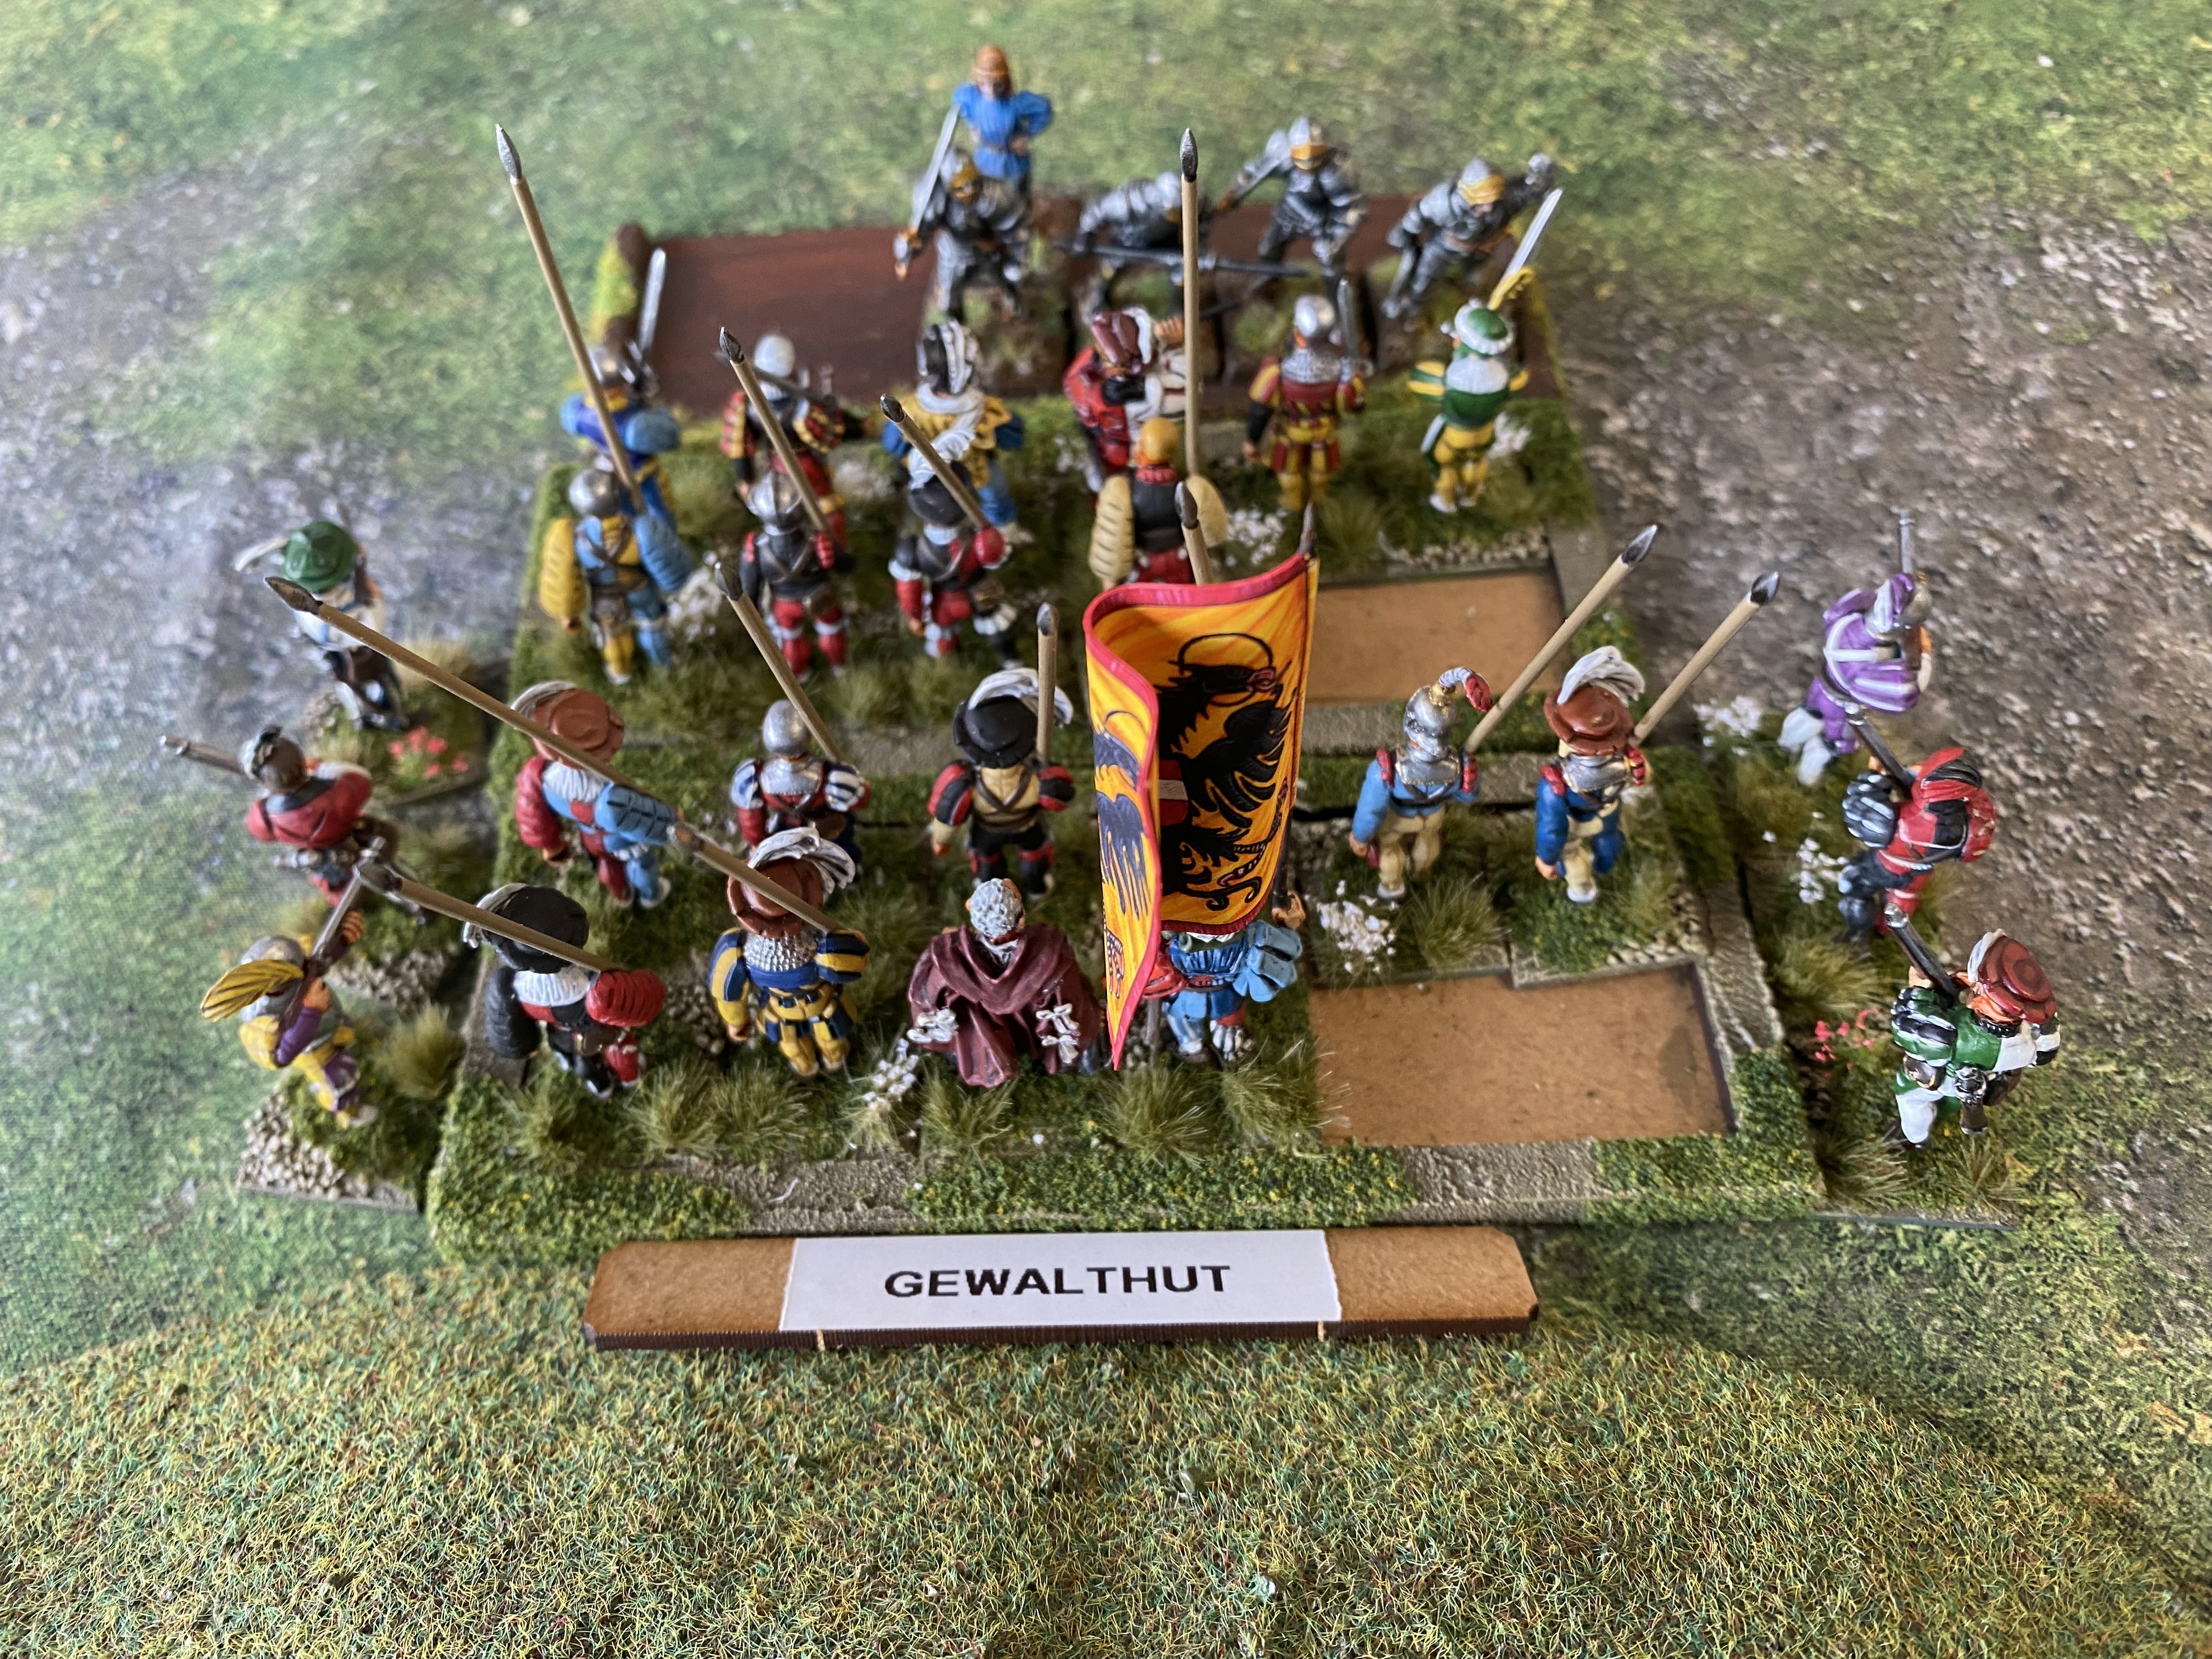
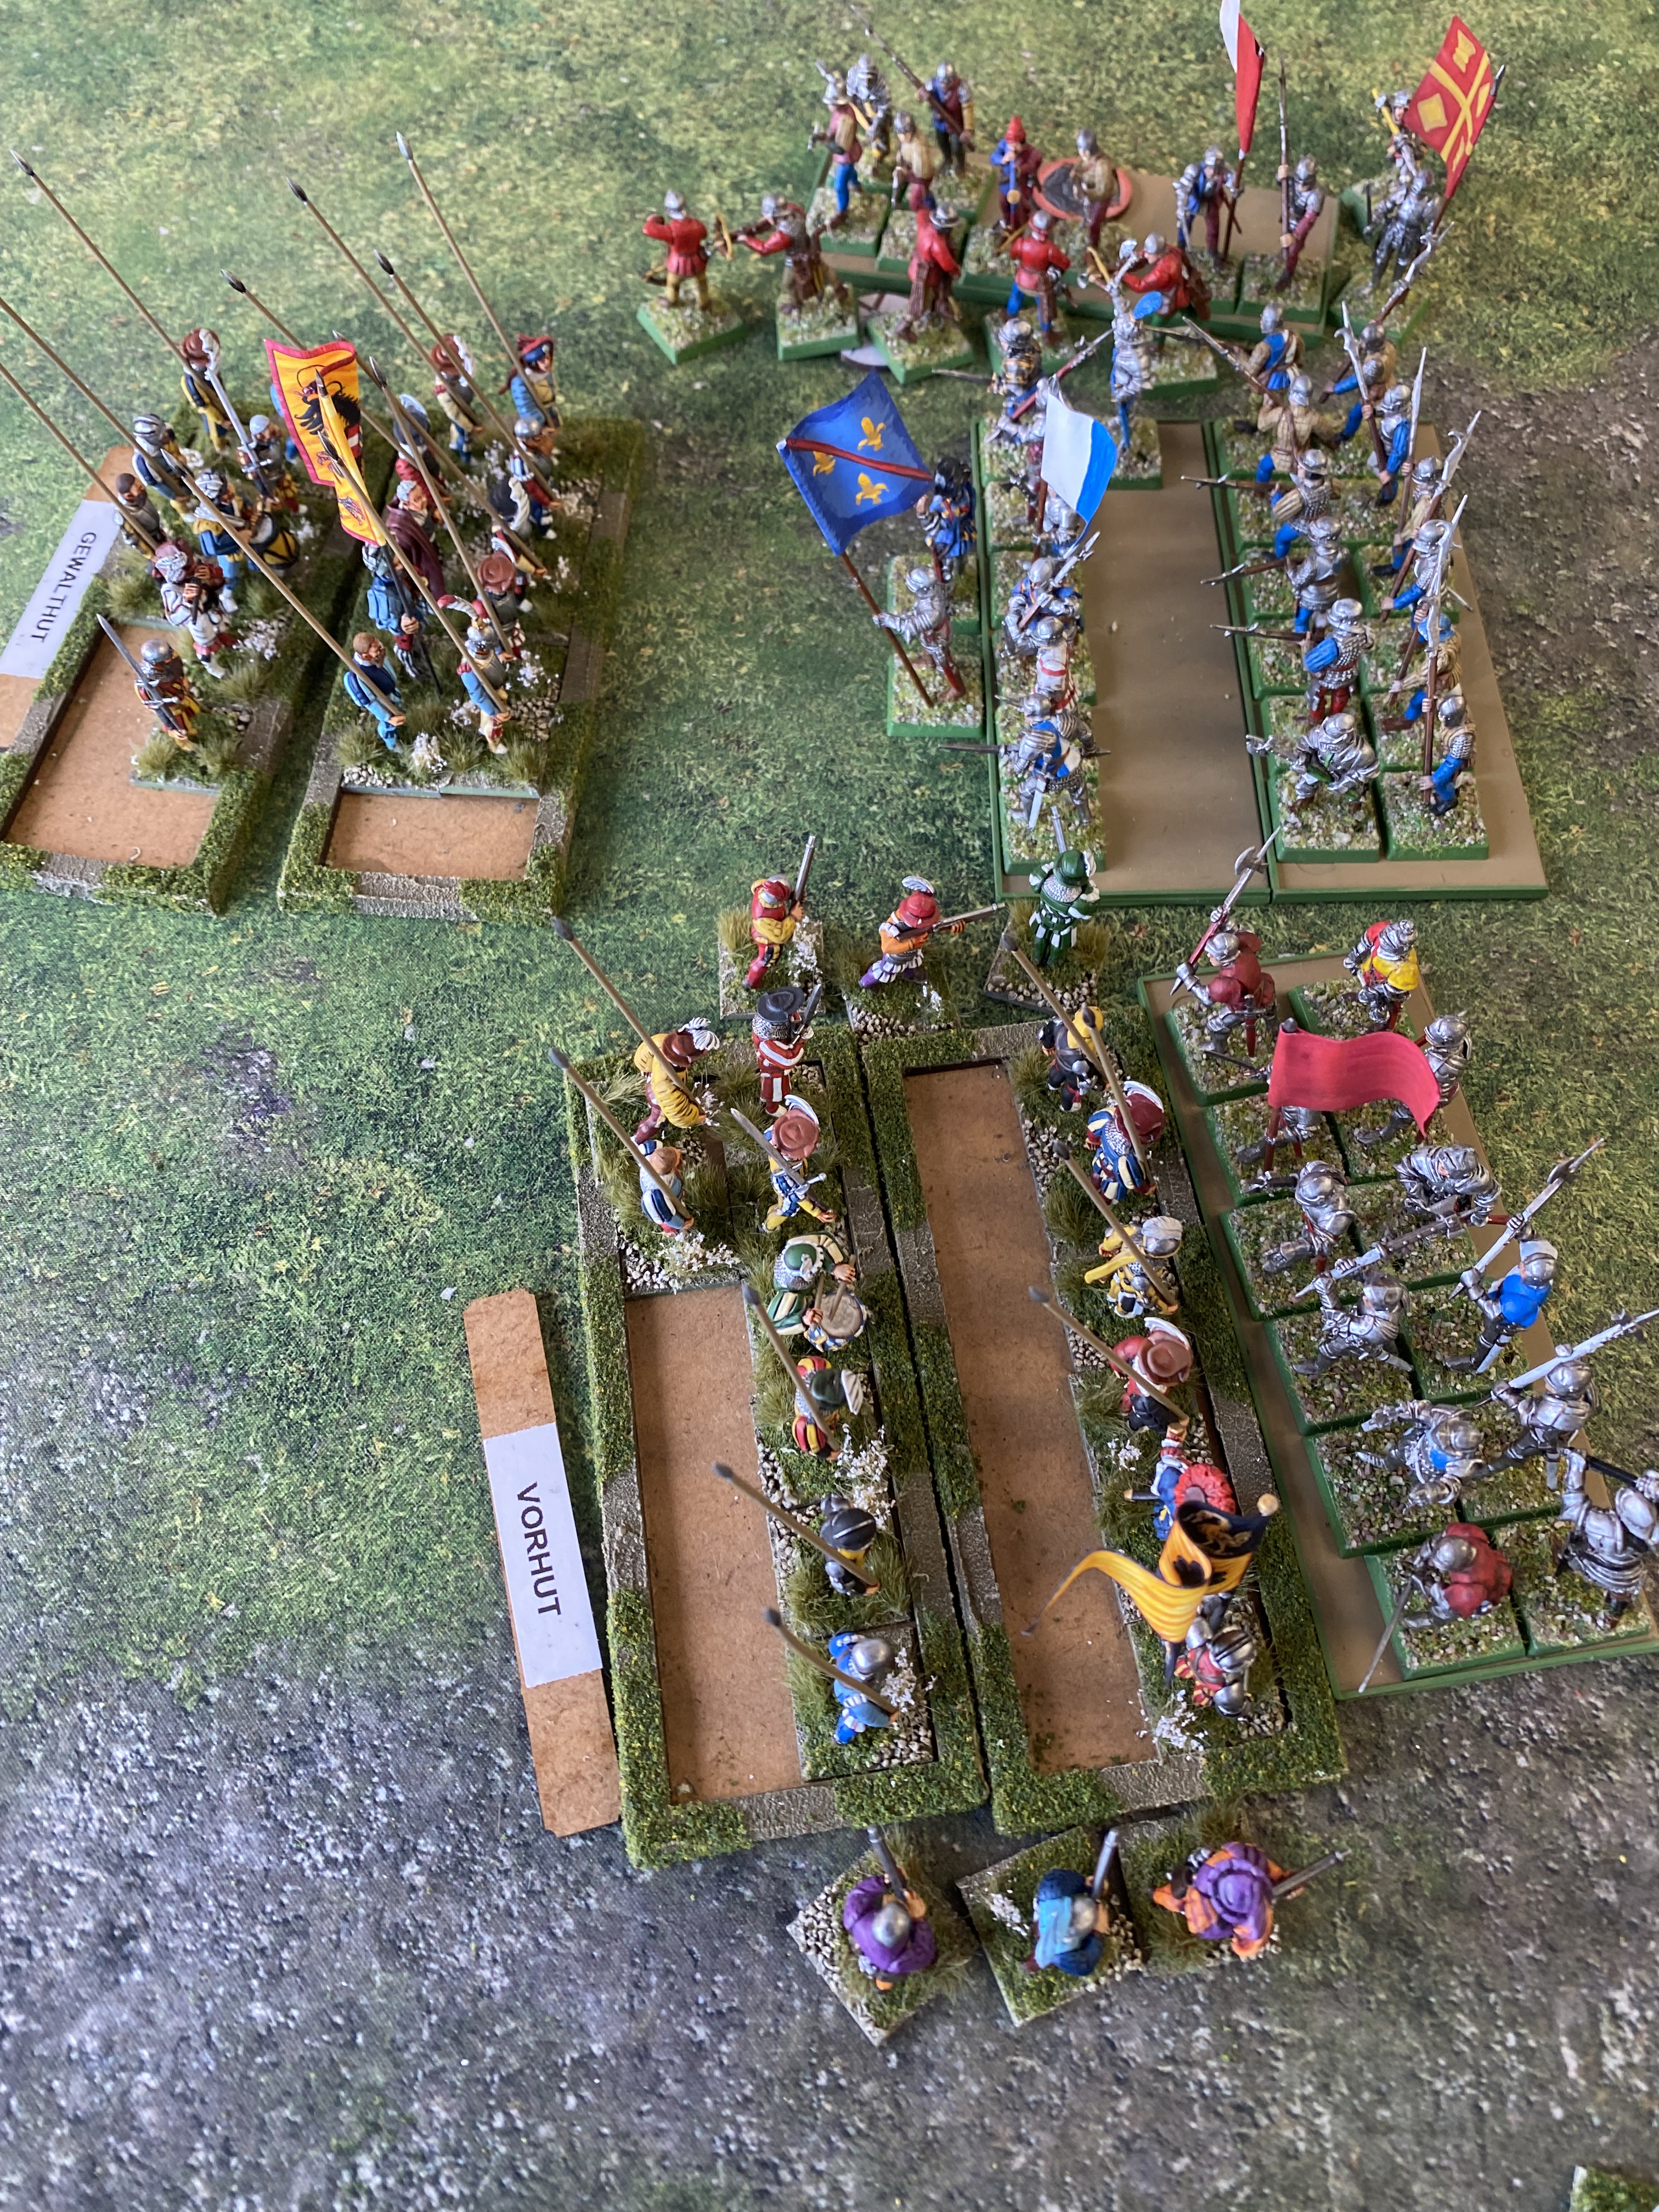
Gewalthut takes on the lone MAA unit and pushes it back!
It was now that I realised that my artillery were counter productive. Although they didn’t succumb to an accident, they just spurred Richard into advancing as quickly as possible! Fortunately for me, this led to Richards army being split, with his bowmen units being left behind whilst his Men at Arms charged home. I was able to defeat the MAA in combat, the pike blocks easily able to match them in combat, and with a pike block sneeking around the Burgundians left flank, they were out numbered and unable get enough shots off to weaken the approaching Landsknechts.
Despite taking casualties from the bowmen, who were protected in a block by spearmen, once combat was joined the pike block was able to use it’s superior numbers the win the melee. Victory to the Landsknechts!
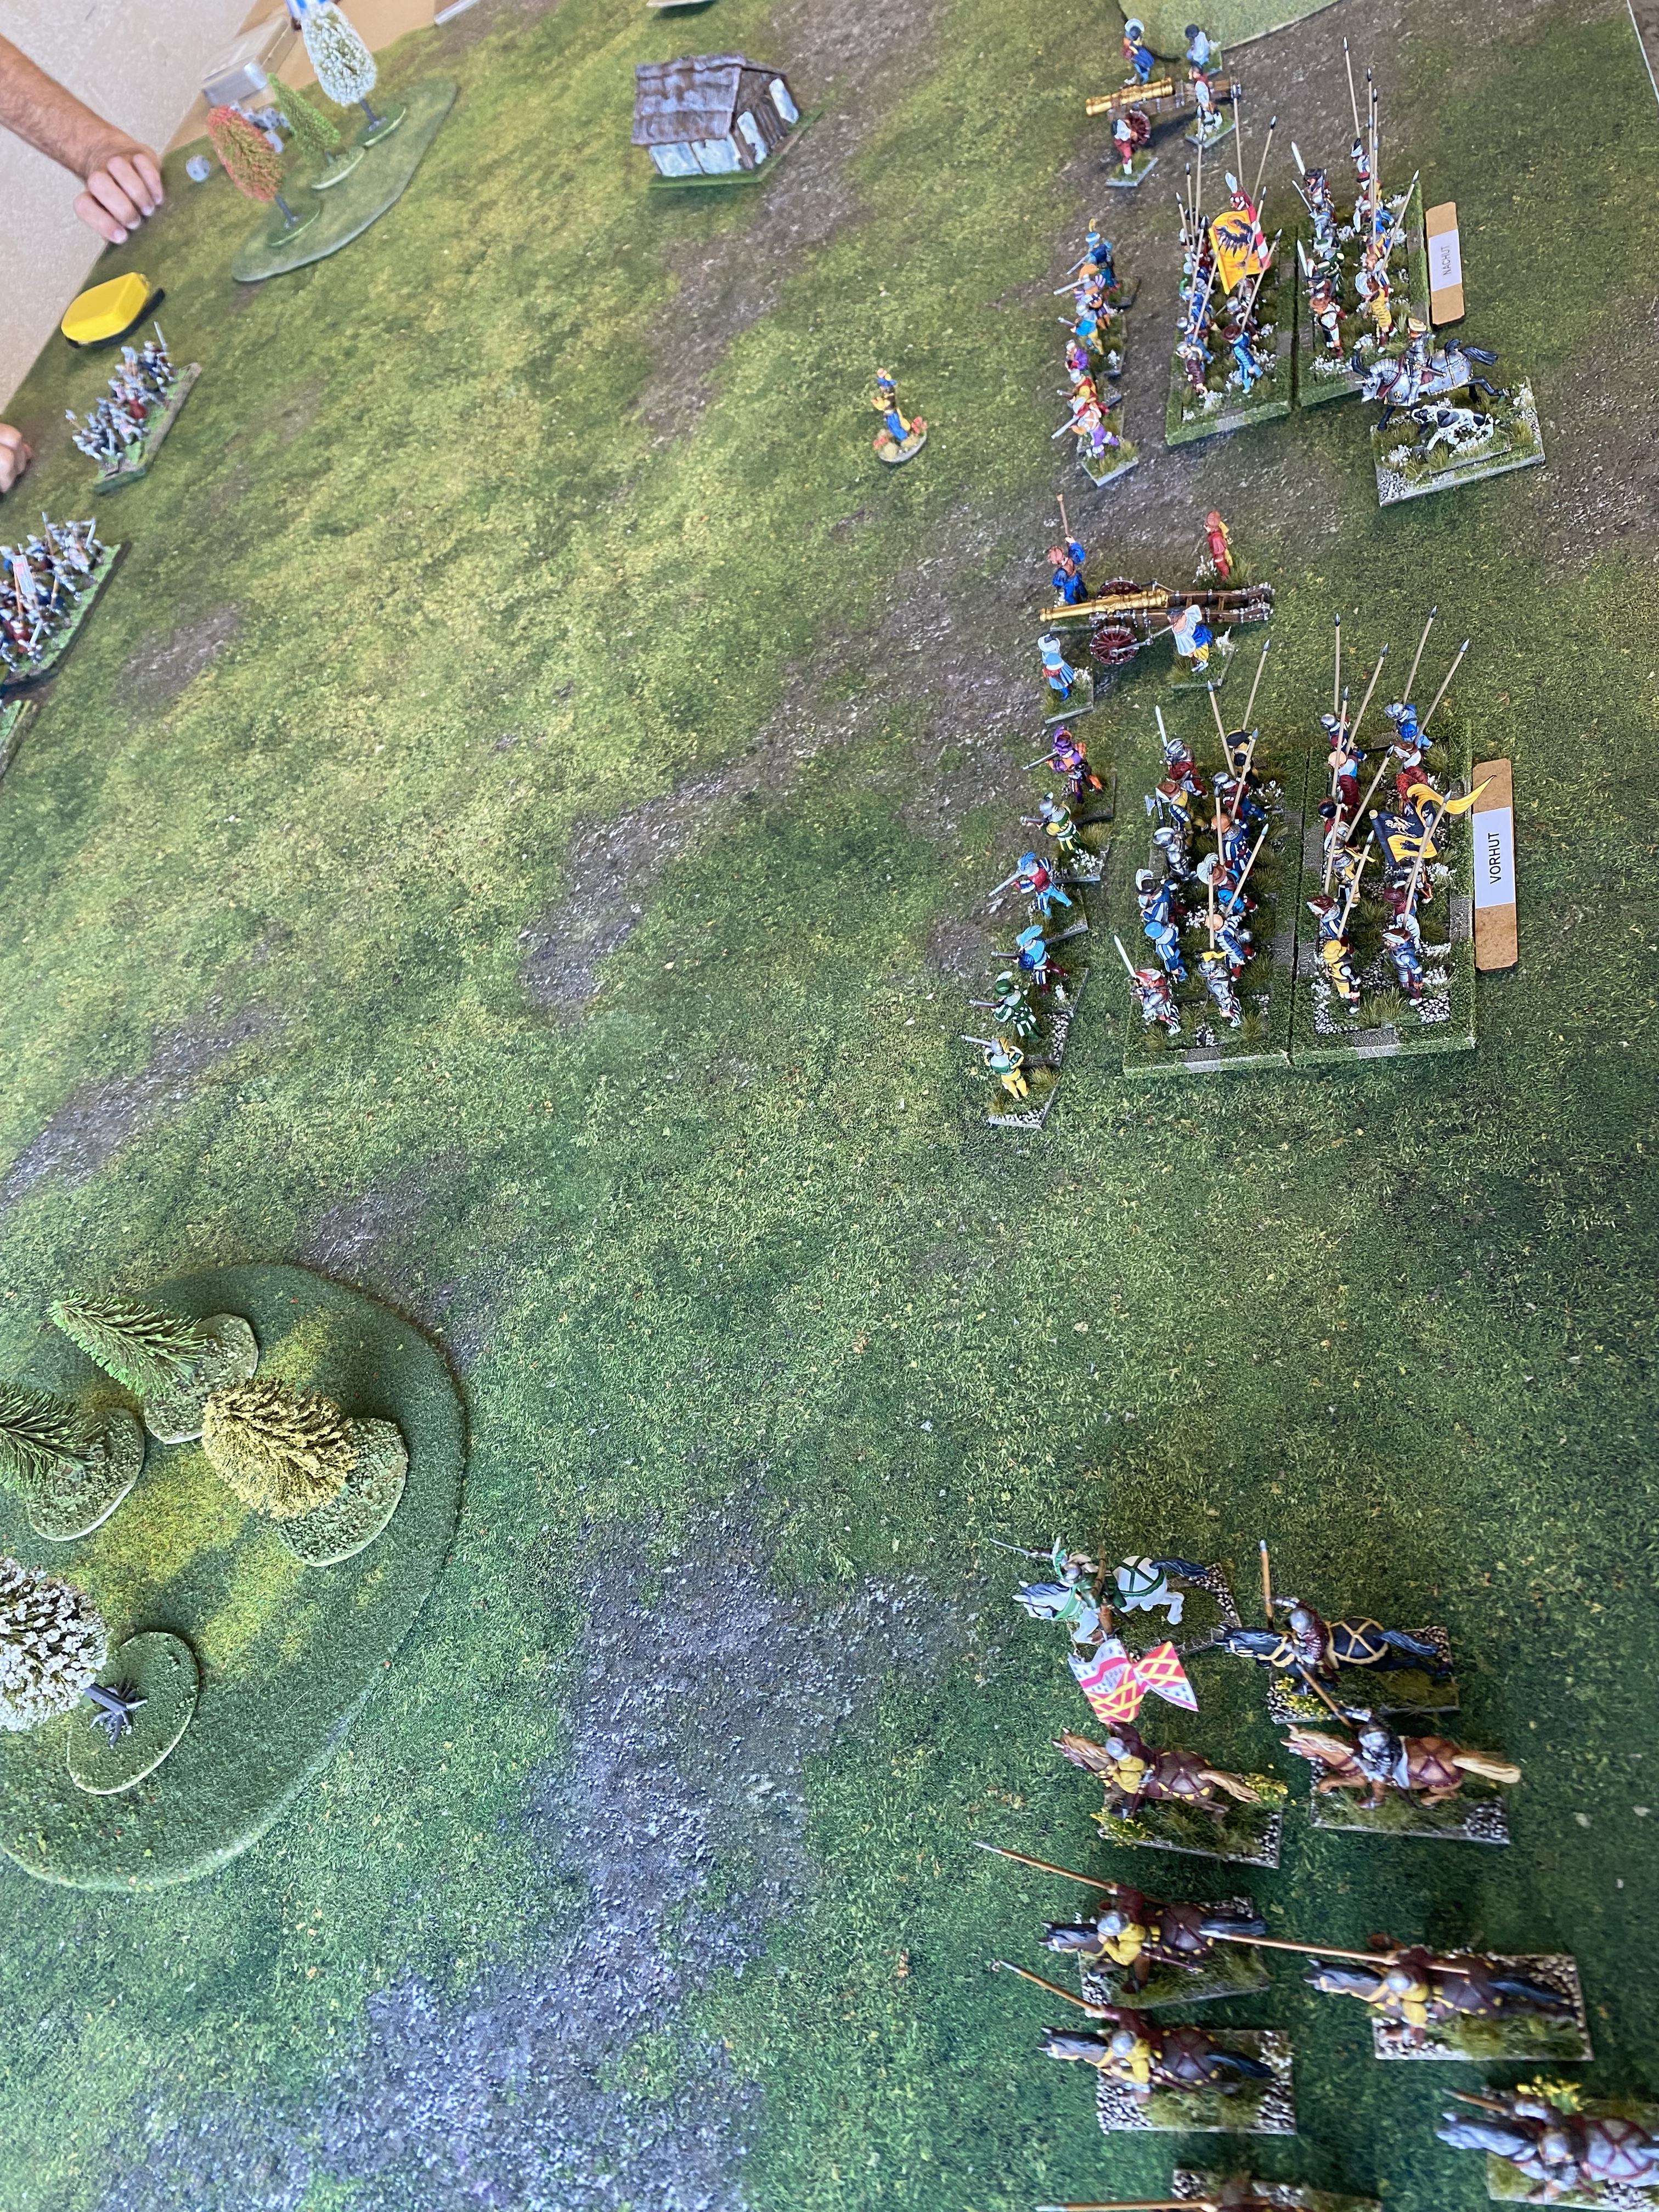
Battle Two vs Ian Callans French Gallia Force
My set up – Cavalry out on the flank, Infantry in the centre
The French force was light on firepower but with blocks of MAA supported by spearmen, the offensive capability in melee is worrying! They get 24 dice for a full unit in combat but are saving on a 3+. Ian set up with a ‘refused’ right flank, pinning my opposing flank with his light cavalry and skirmishers.
Ian’s French with the refused flank
I opened the battle by firing with one of my guns and again, rather than provoke a cautious response, the opposite happened! Ian’s French came charging across the battlefield, eager to engage in combat before they took any more casualties. In addition, his light cavalry slaughtered my lights and then went on to cause mayhem with a flank charge on a pike block and then chasing off one of my artillery crews!
The battle was decided with a large melee in the centre involving two pike blocks and two of the French MAA and spear combo’s. After a three turn ‘slugfest’, it was the French that were victorious, daunting one pike block and breaking the other. Victory to the French!
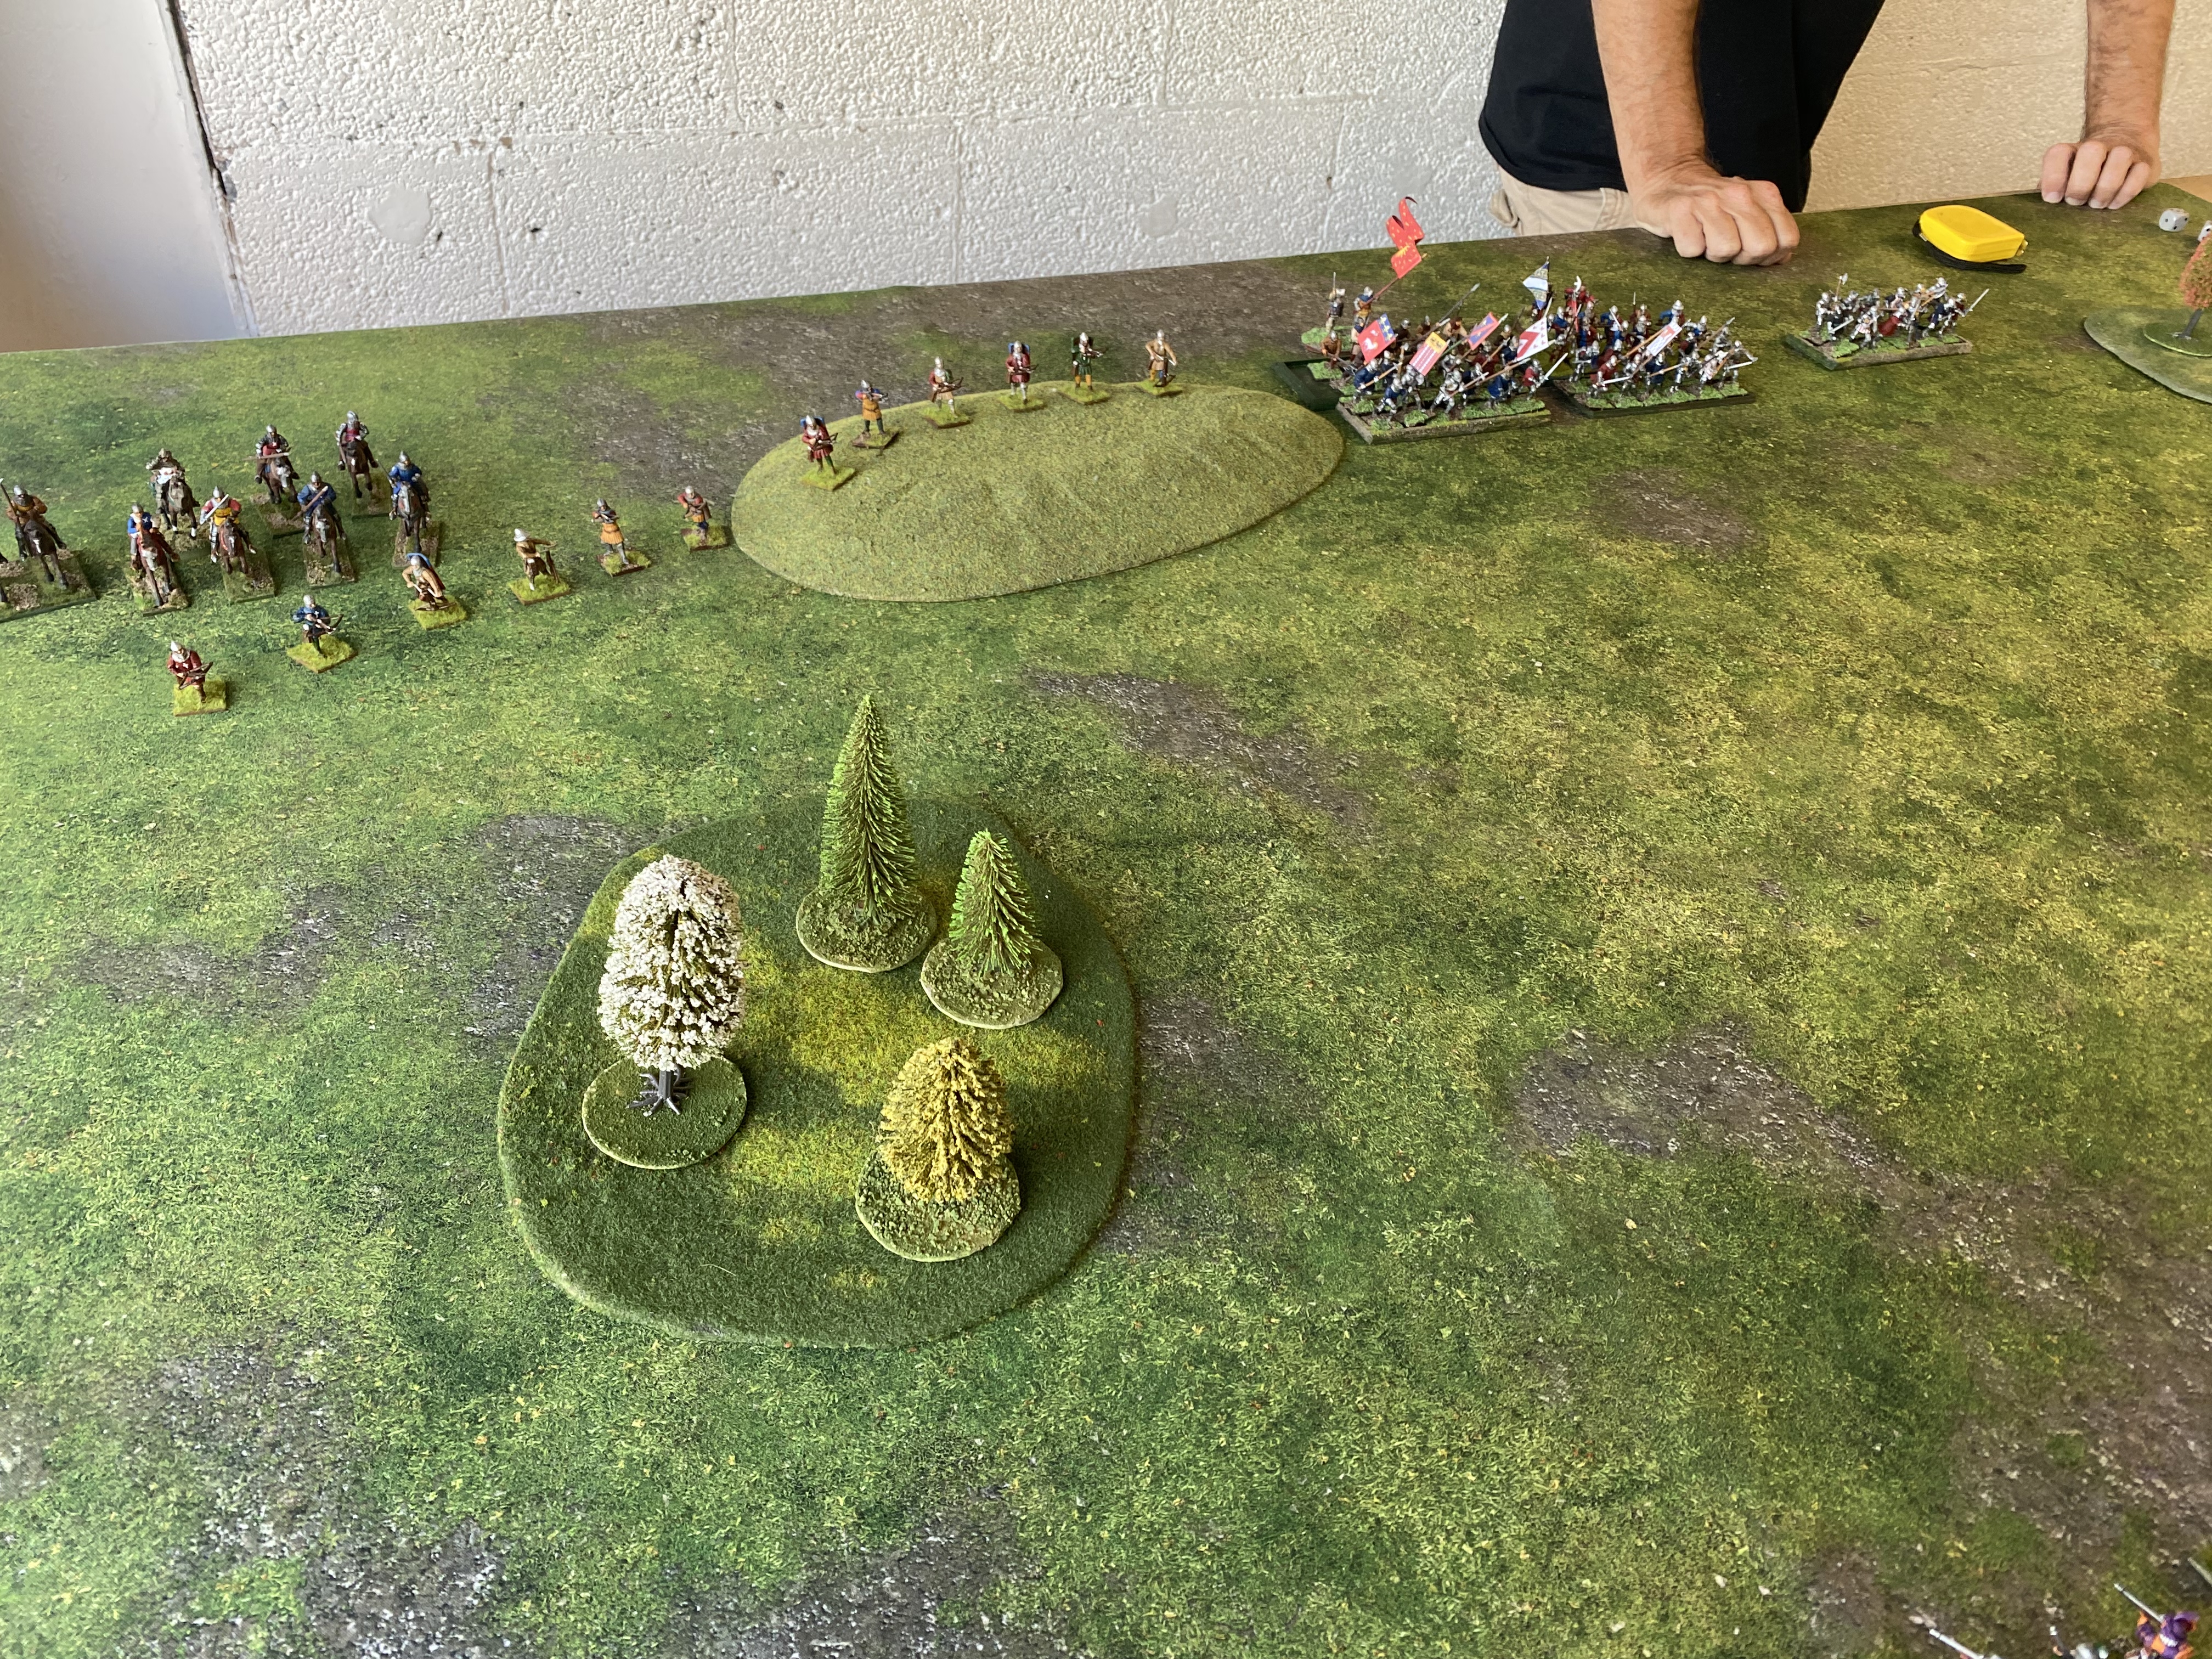
Battle Three vs Ralph Duttons French Gallia Force
I was hoping for a different match up after the last battle but drew Ralph’s French in a near identical set up to Ian’s army.
Ralph’s cavalry play hide and seek with my Landsknechts!
Ralph was somewhat wary of the Landsknechts, initially focusing on their strengths rather than trying to find the weaknesses! Once again, that changed when I opened fire with my guns, prompting him to get into combat as quickly as possible! Despite initially holding their own in combat, the 3+ save of the French MAA gradually won the day.
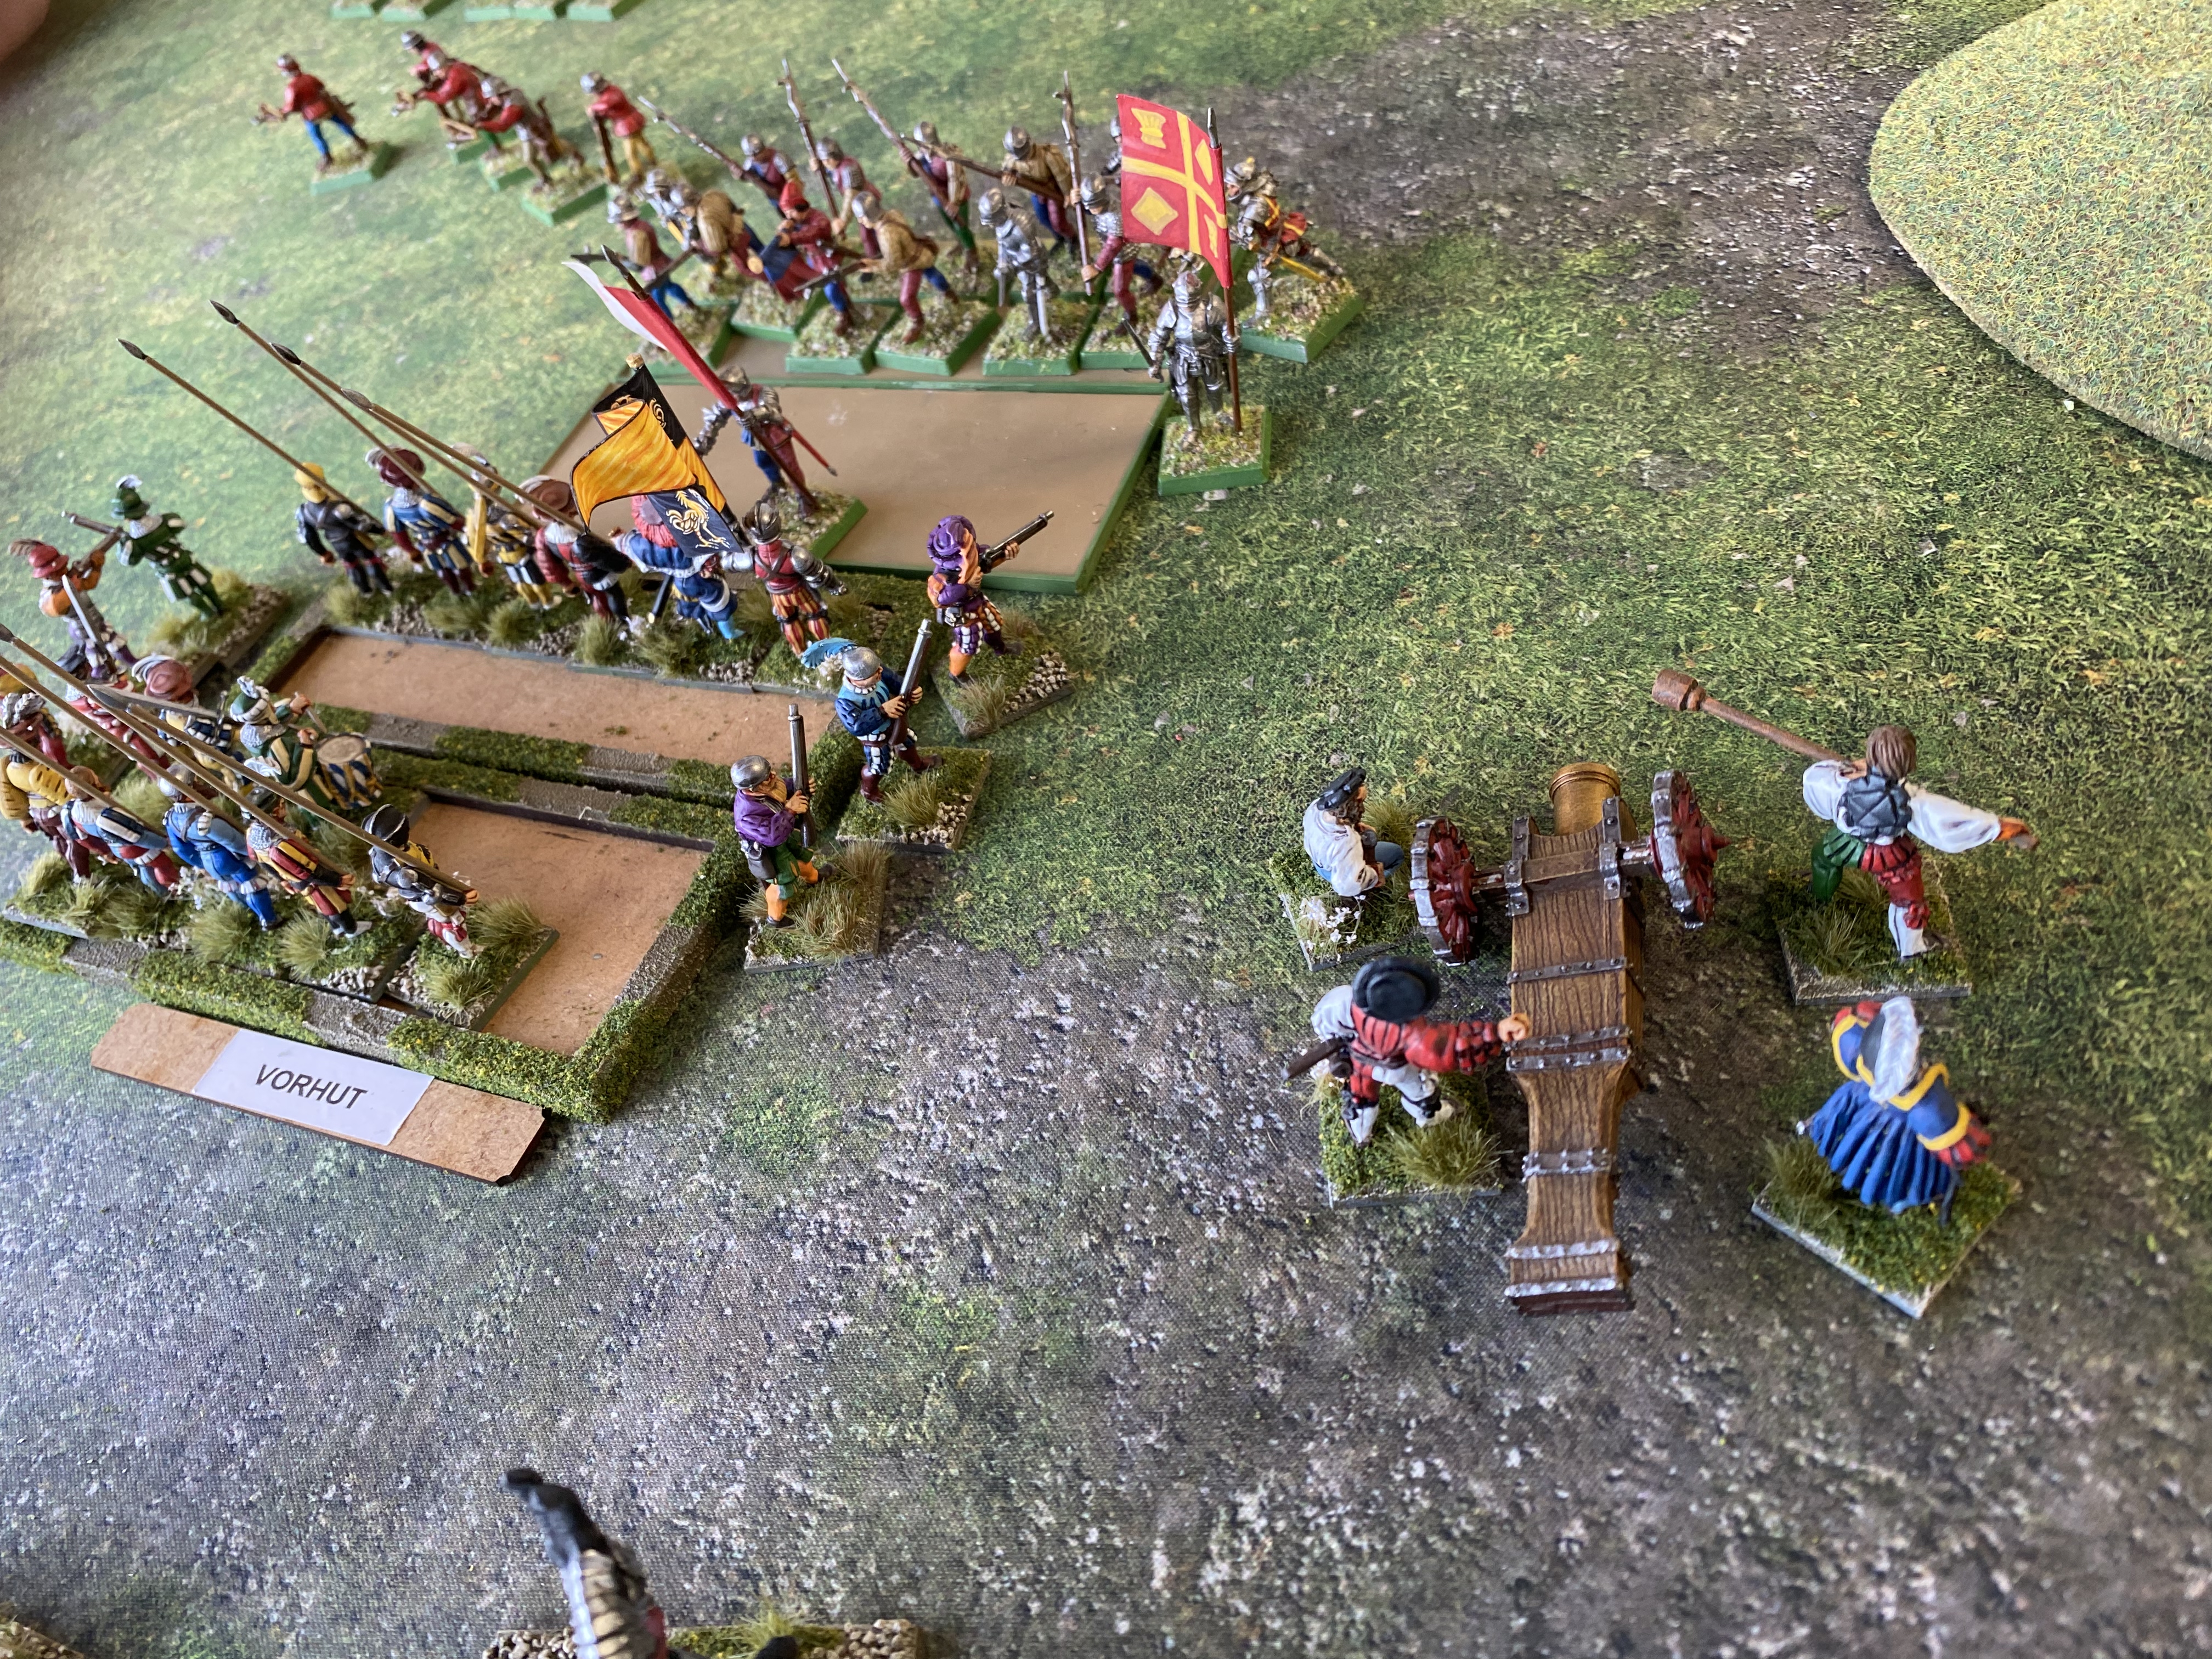
The Vorhut are about to break! In the background, the Gerwalthut have daunted one unit but are facing a charge for the next block – they lose this time!
After a protracted, hard fought combat sequence, again, going into the third round, the Landsknechts had to withdraw, in disarray, as it was them who initiated combat. They were unable to withstand the next charge of the French MAA and were driven from the battlefield. The French were victorious!
The Consultation prize
Well they didn’t fair so well in battle but the Landsknechts were voted the best painted army. So I was pleased with the effort that it took to get them to the table! I have learnt a great deal though. I tended to fight a defensive battle, trying to wear down my opponent before closing in melee. I think that this is a mistake and in future, I will try to be more aggressive and attack first. This will give me all four ranks of pikes in the first round of combat and a re roll of any ones.
There she blows! my only loss to a miss fire!
The artillery is a mixed blessing. I think that the chance of a gun blowing up is exaggerated ( I only lost one throughout the day). However, there were turns when they hit nothing and as the battle progressed, the targets available diminished as my own troops got in the way and combat was joined. The 18 points that I paid for them would upgrade all three blocks to veterans! The other issue with the artillery was that it just forces the opposition into action, in effect giving them the initiative.
Hmmm, as a certain wise man once sang, ‘I think I better think it out again’
Oh! and it wasn’t Chris De Burgh…..
THE COMMERCIAL BIT
I hope that you all enjoy your hobby as much as I do – remember that our web site will have much of what you need! Click here to see our shop:
Following on from my last blog post. Here is a rough guide to how I batch painted my Landsknechts. I am using Warlord Games plastic Landsknechts. I assembled them in batches of 12 models and once assembled and cleaned up, I primed them in Army Painter Uniform grey. I had thought about using a white primer, which would have given the colours a brighter base to paint over but decide to stick with grey as I find it more forgiving if you miss a bit of painting on a figure!
Once primed, I painted the flesh with Vallejo flesh 70955.
I then picked out the armour plates, chain mail and spear tips in Army Painter plate mail. There was one exception, The figures on the far right of the back rank was left as I intended to give him painted armour. I’ve no idea whether this is historically accurate but I had seen some pictures of helmets painted in this way.
At this point, I decided that a batch of twelve wasn’t going to work for me, so I took three figures, painted the hair and then started to block paint the first colour – in this example 70950 Black.
Next, I added the red, 70957. It looks a bit messy at this stage but I tend to tidy up as I go. There’s no plan that I’m following – I just paint the block colours in as the mood takes me!
I’ve now added a third colour to the figures – 70917 beige.
The fourth colour is off white 70820 – we are nearly done with the block paint!
The belts ( front and back) and the shoes are painted 70871 leather. I used this on all of my figures regardless of the colour scheme chosen.
The pikes are painted with Panzer Aces Old Wood 310.
The flesh is now given a wash using Game Ink 72093.
The Black, Red, Plate Mail and White ares are washed with Army painter dark tone – I thin this down slighty with water to make it a bit lighter and easier to flow.
The beige and hair is washed with soft tone.
The next stage is to re paint over the washes with the original colours ( including the flesh) where needed, leaving the wash in the recesses as shading. This gives the colours that nice bright look that I like. If you prefer a more weathered look you could ignore this stage. However, it doesn’t take as long as you would think and if you dont retouch everything it doesn’t matter.
I added some detail by painting the belt buckles and the decoration on the armour with gold 70996 and retouched any errors that I’ve spotted.
I’ve started the basing process. I just spread vallejo dark earth texture paste 26218 and added some fine ballast for extra texture. I’ve covered my basing process in many previous blogs. It’s now just a question of painting, dry brushing, and adding some scatter and tufts.
The next three figures are painted using the same process but I’ve used 70901 Pastel Blue instead of Black and the floppy hats are painted with red leather 70818 and varying the hair colour. By changing up the colours in this way, you get a variety of finishes.
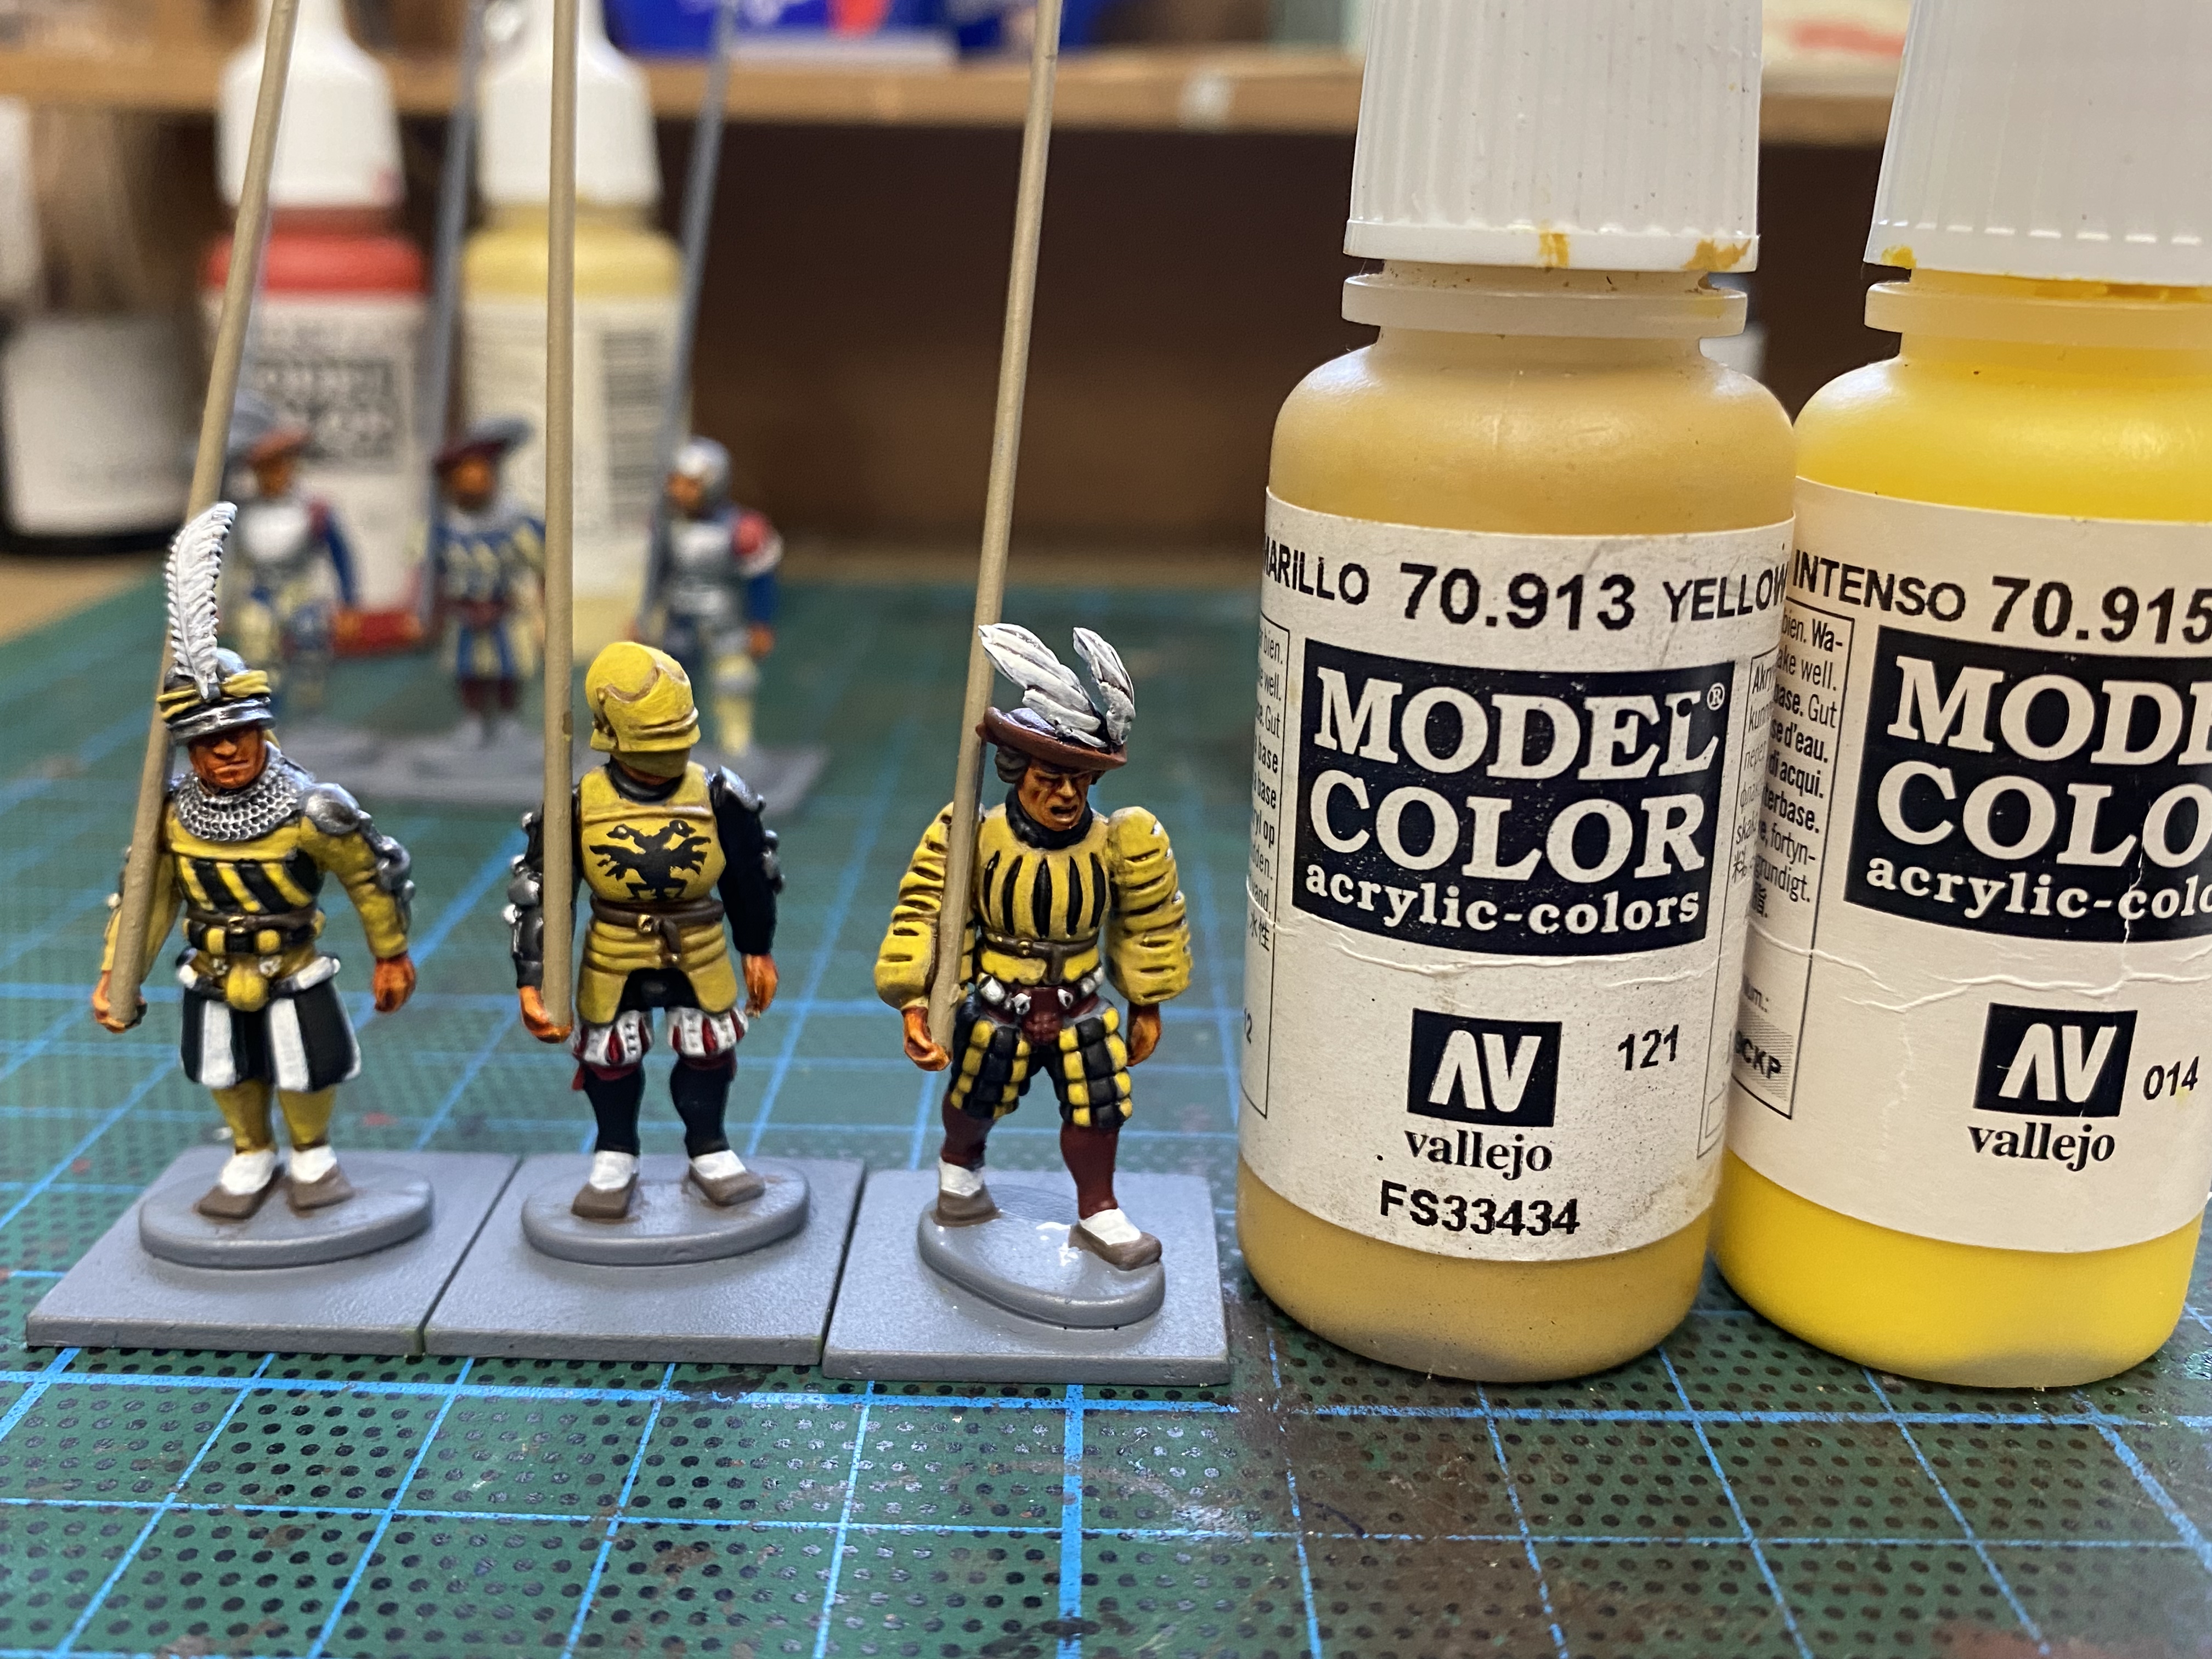
With these three figures I used a very simple yellow, Black and white scheme. the yellow was first painted as Yellow ochre 70913, shaded with Soft tone and then repainted withy yellow ochre before being highlighted with 70915 deep yellow. The imperial eagle is hand painted. It looks a bit rough up close but from a reasonable distance will pass!
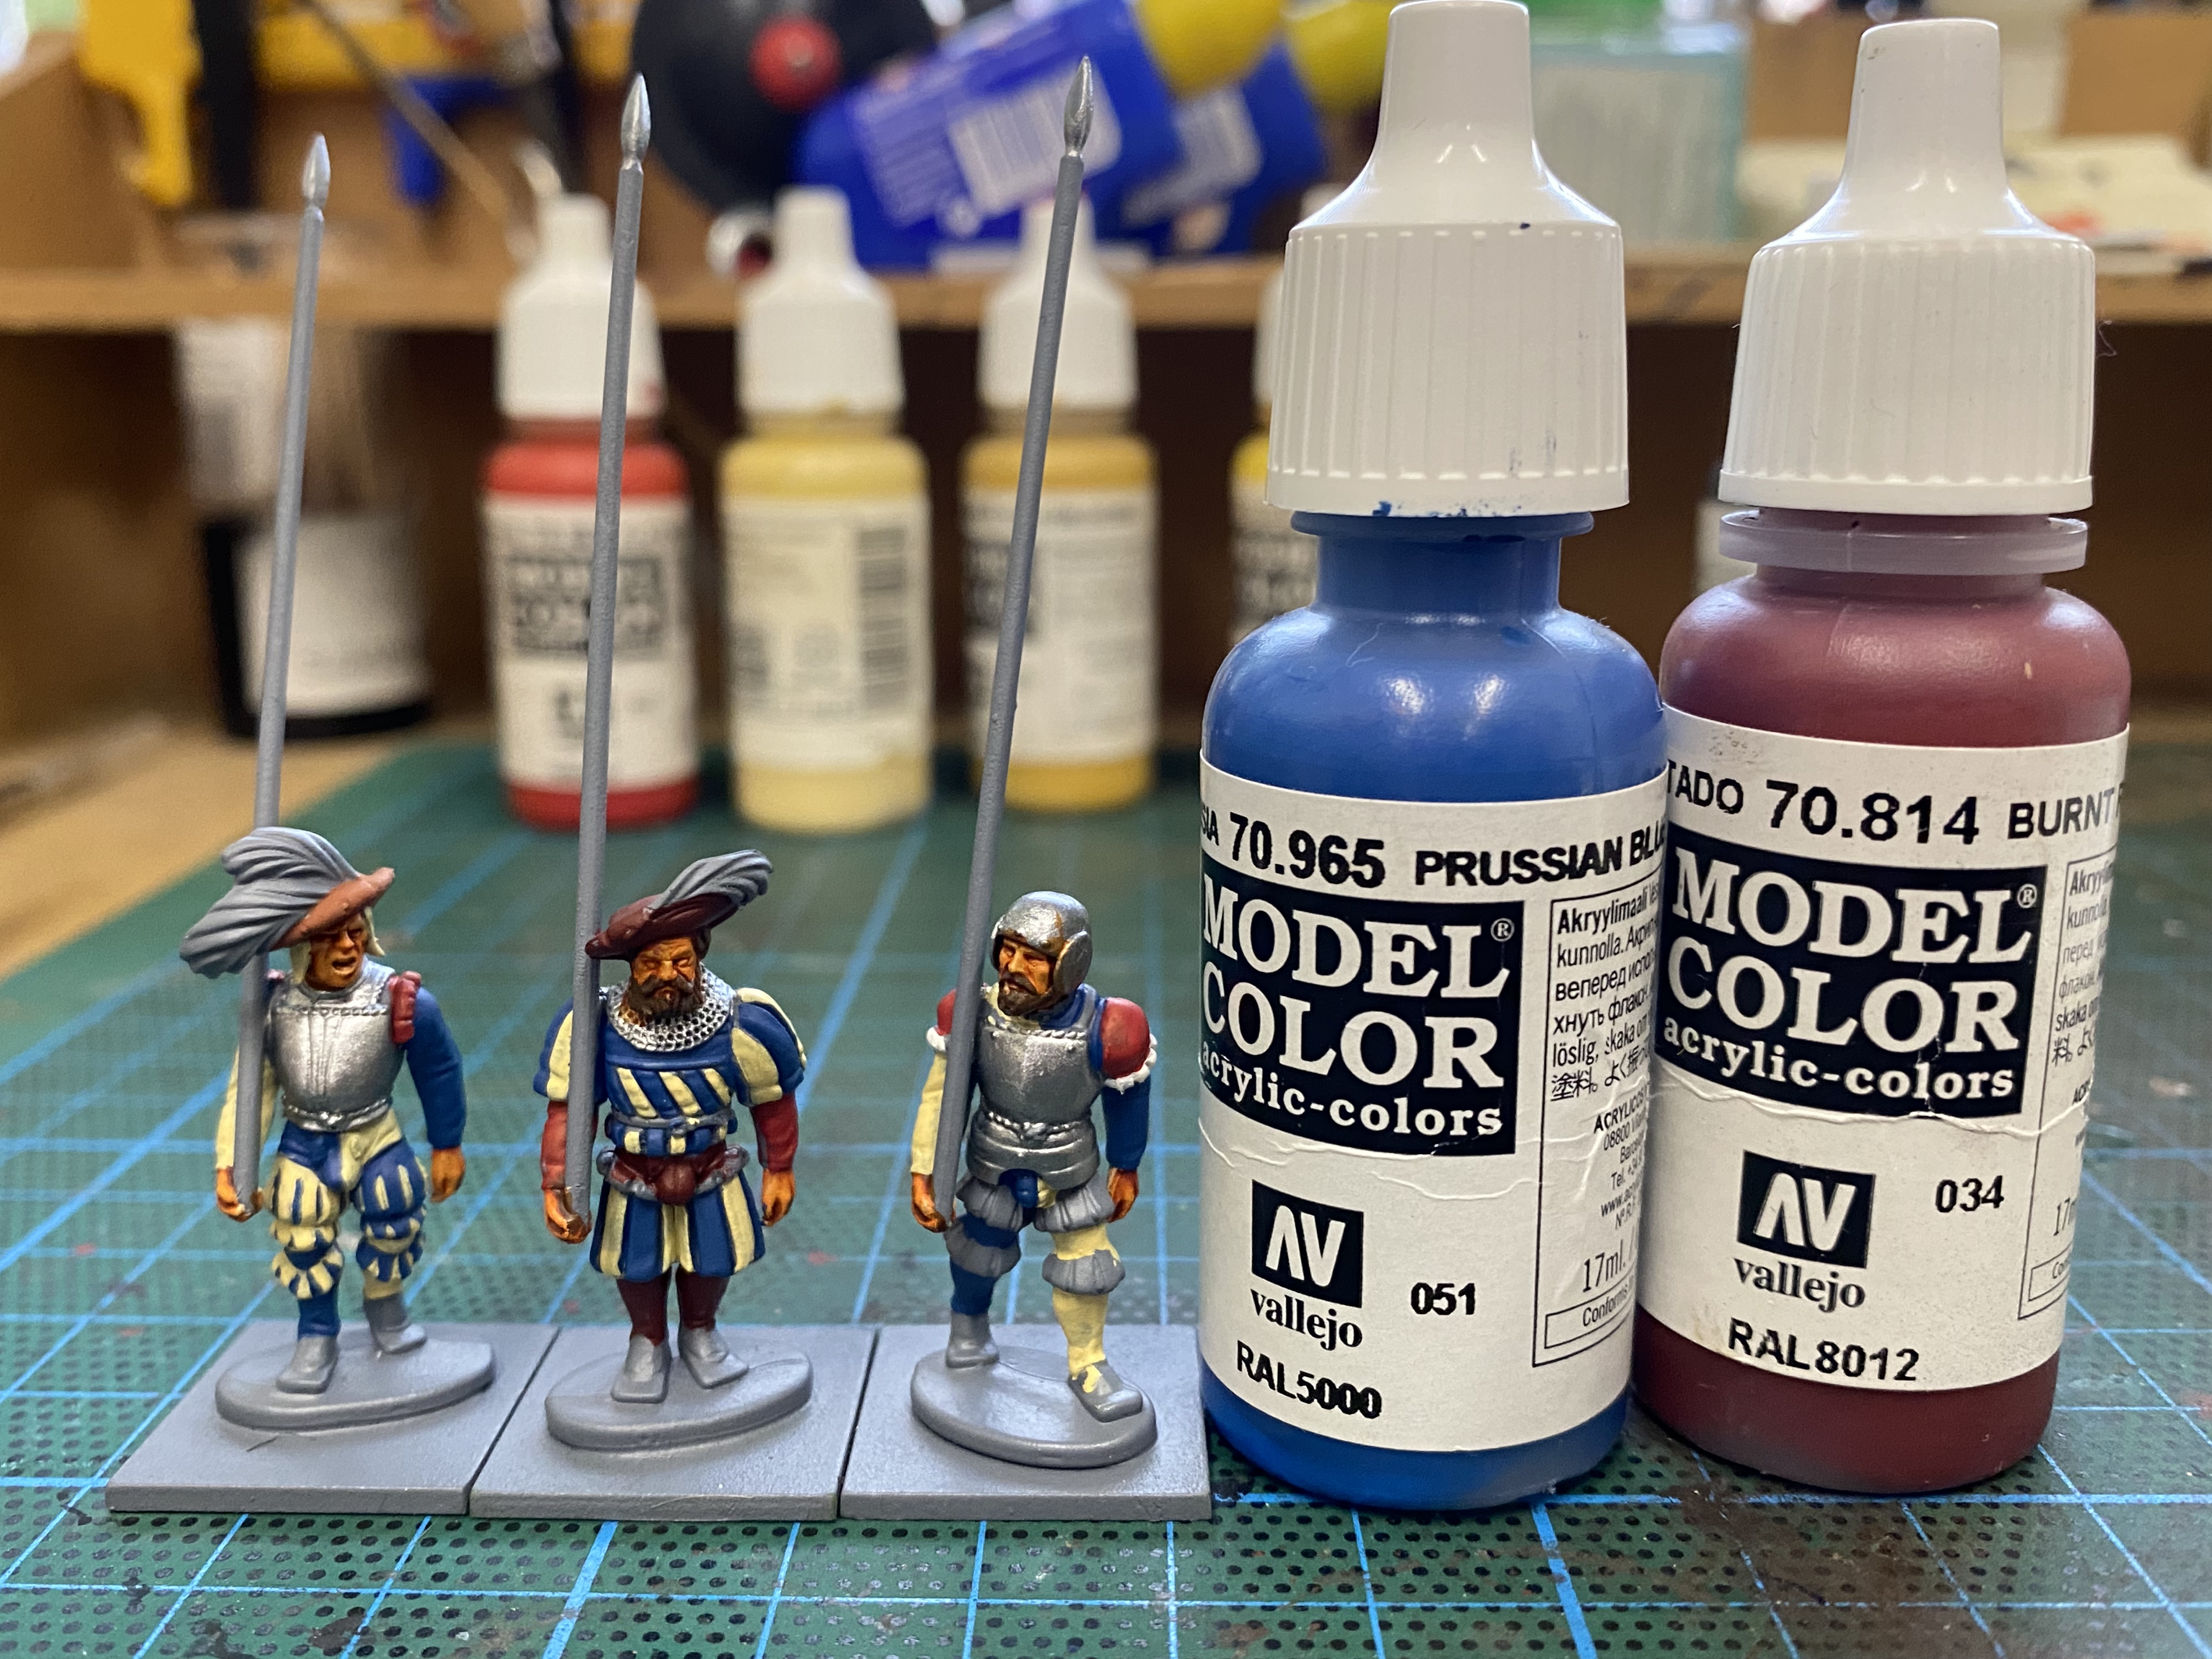
Another colour combo in progress. this time 70965 Prussian Blue with 70814 Burnt red and beige and white as background colours. There’s a multitude of choice when it comes to colour combo’s but I think that by limiting the colours for each batch, it makes painting faster and easier but the end result is still very colourful and varied.
Here is the finished block of twelve prior to final basing. I hope that this is useful to anyone starting out or thinking of painting a Landsknecht force. It’s not a fast project but they do look nice, if I say so myself!
THE COMMERCIAL BIT
I hope that you all enjoy your hobby as much as I do – our web site will have much of what you need! Click here to see our shop.
I have been steadily painting a Landsknecht force for ‘Never mind The Billhooks’. I first painted some of these colourful troops back in 2021. I had a sprue of gunsmen that were given away with Wargames Illustrated 383 back 2019 and they had been consigned to the lead pile until I thought that it would be a good idea to add them in as skirmishers to my WOTR army. The truth was that I just fancied painting something different for a change and six figures didn’t seem like a big investment in time. You can see the original blog here:
Having painted 6 Gunsmen, I thought that that would be it. However, I bought another couple of sprues from Warlord in the sale. My ‘excuse’ was that I would use them for crew on my galleys in ‘Nevermind the Boat hooks’. While I was at it, I also added some Doppelsoldiers armed with the Zweihanders- again as crew for my galleys. Thus my Landsknecht army gradually expanded!
However, the push that I needed to commit to making a full Landsknecht contingent came from an off beat source. I have been reading the fantasy books by Joe Abercrombie. If you haven’t read these books, I recommend that you do! The characters are superb and the action and dry humour is just top class. One of my favourite characters in the books is the mercenary captain, Nicoma Cosca. In my imagination, he is the perfect Landsknecht captain, first of all leading the mercenary band the Thousand Swords and then the smaller but no less ill disciplined and deadly mercenary unit, ‘The Gracious Hand’.
In an exchange with another character, Nicoma Cosca is getting dressed to lead his men into battle. He asks;
“How do I look?”
“Like a pimp lost his mind in a military surplus store”
“Exactly the look I was going for!”
Well, that sort of sums up Landsknechts for me! The final push was the publication of the expanded NMTBH’s rule book, Billhooks Deluxe, which covers the periods of the Burgundian- Swiss and Italian wars and of course, includes rules for using Landsknechts.
As for reference, I fell back on the tried and trusted Osprey series, as well as a number of articles in Wargames Illustrated. Of course, the internet provided plenty of reference, from pictures on Pinterest, various blogs ( once again, Camisodo is a superb reference – I used him to help with my Irish army). I wasn’t overly concerned with specific colours, I just wanted to create a really different and bright looking army.
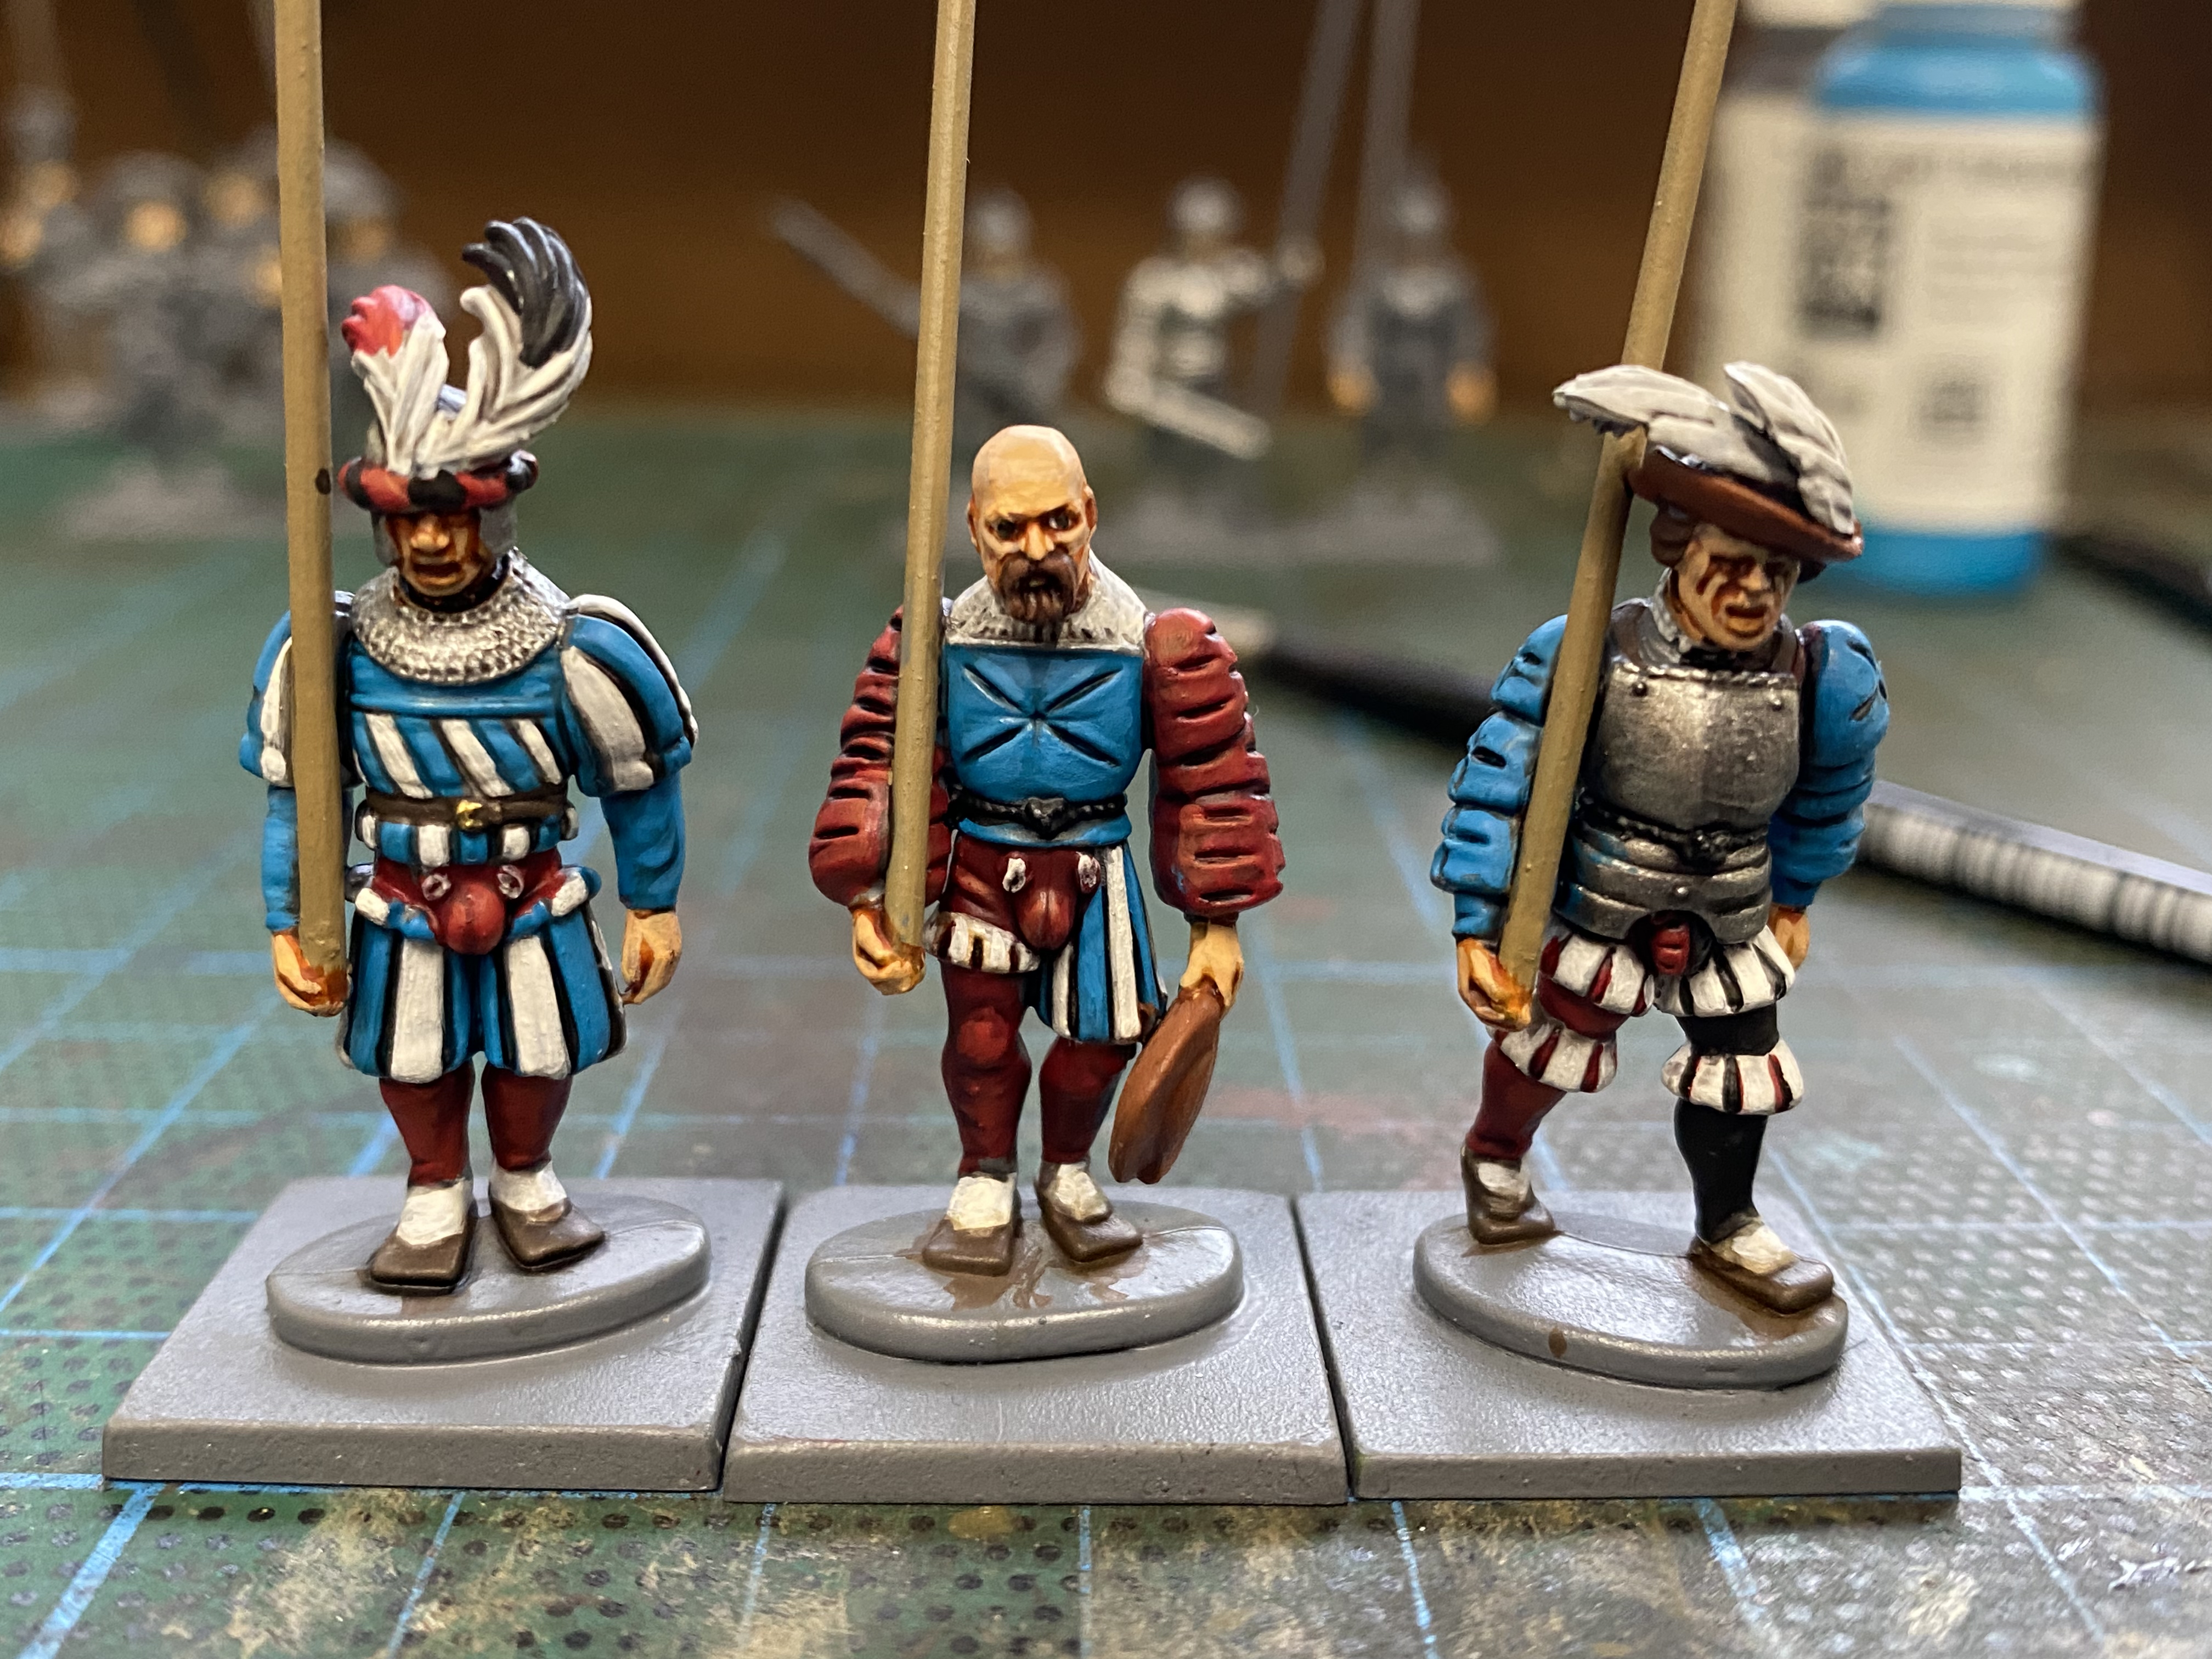
When it came to choosing the figures, in the main, I have used the Warlord Plastic sets. I prefer plastics over metals for the main army as it makes transport and storage easier and the plastics tend to be more durable on the tabletop and easier to repair if broken. The other aspect that I liked about the warlord figures is that the crisp molding and clear representation of the various types of ‘uniform’ make it easy to pick out and paint the details. Having painted the plastics, I tried my hand at some metal figures, notably the Artizan range and now that I understand how the various frills, slashes and armour all work together, I found painting the metal figures more straight forward than had I started with them. Incidentally, the Artizan figures are superb and entirely compatible with Warlord and Perry figures.
One down side of the Warlord figures is that they are all very similar and a limited in the poses available. I varied how they looked with a few head swaps from the Perry sets. I also mixed up the arms and heads supplied to get a good mix.
As I became a bit more adventurous, I tried a few simple conversions. The easiest was to have a Landsknecht holding his hat – the figure in the middle below, looking remarkably similar to Rick Priestly, is my first attempt! Incidentally, the head is from the Fireforge Northern Folk Rabble set!
When it came to painting, I did some batch painting but eventually gave up and just painted three or four figures at a sitting using a limited pallet of colours. In my next blog article I’ll show my step by step approach and the colours that I used. Although I wanted a really bright and colourful army, I also wanted some similarities to the figures to try and tie them together. So all of the pikes were the same colour, as were the socks, shoes, belts and in the main, the feathers.
As you will have noticed, I haven’t finished basing most of the figures in the pictures. I’ll show you the completed units in the next blog – as I write this, I am just four figures away from completing three pike blocks!
THE COMMERCIAL BIT
I hope that you all enjoy your hobby as much as I do – our web site will have much of what you need! Click here to see our shop.
It seems that every blog post that I’ve written recently starts with an excuse as to why I haven’t published anything in the last couple of weeks. Well, I’ve out done myself now and it is a couple of months since my last blog.
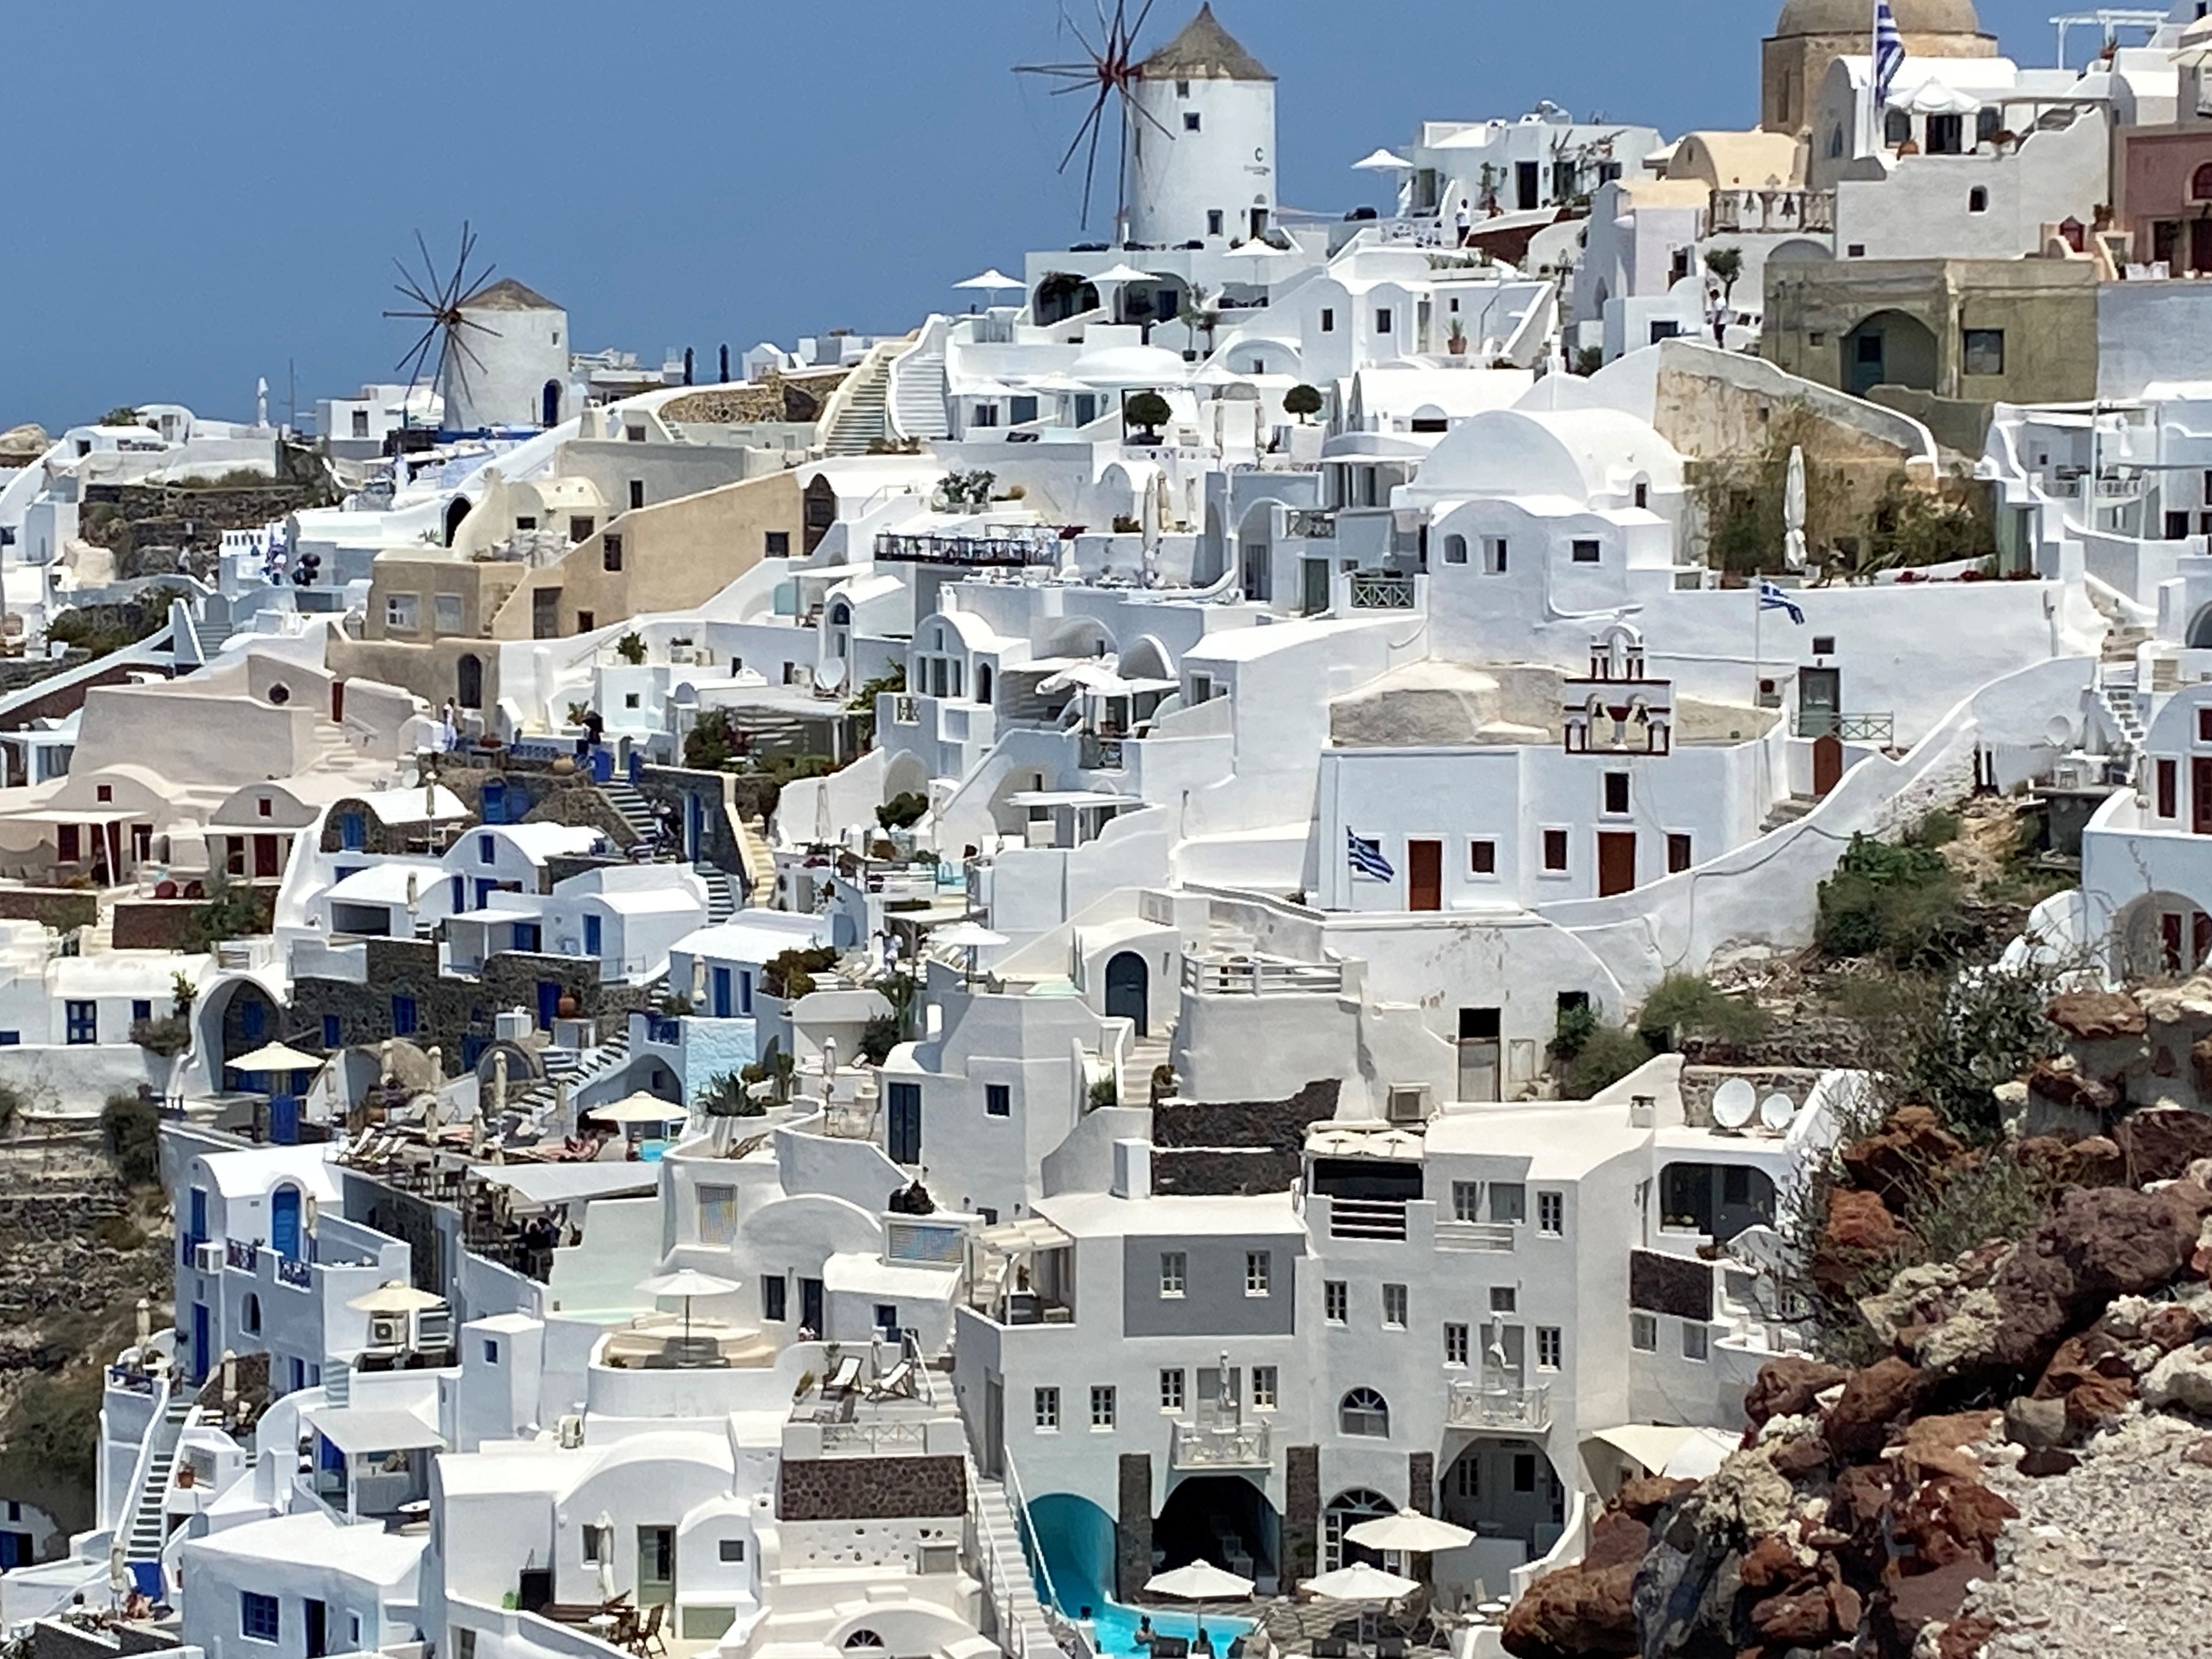
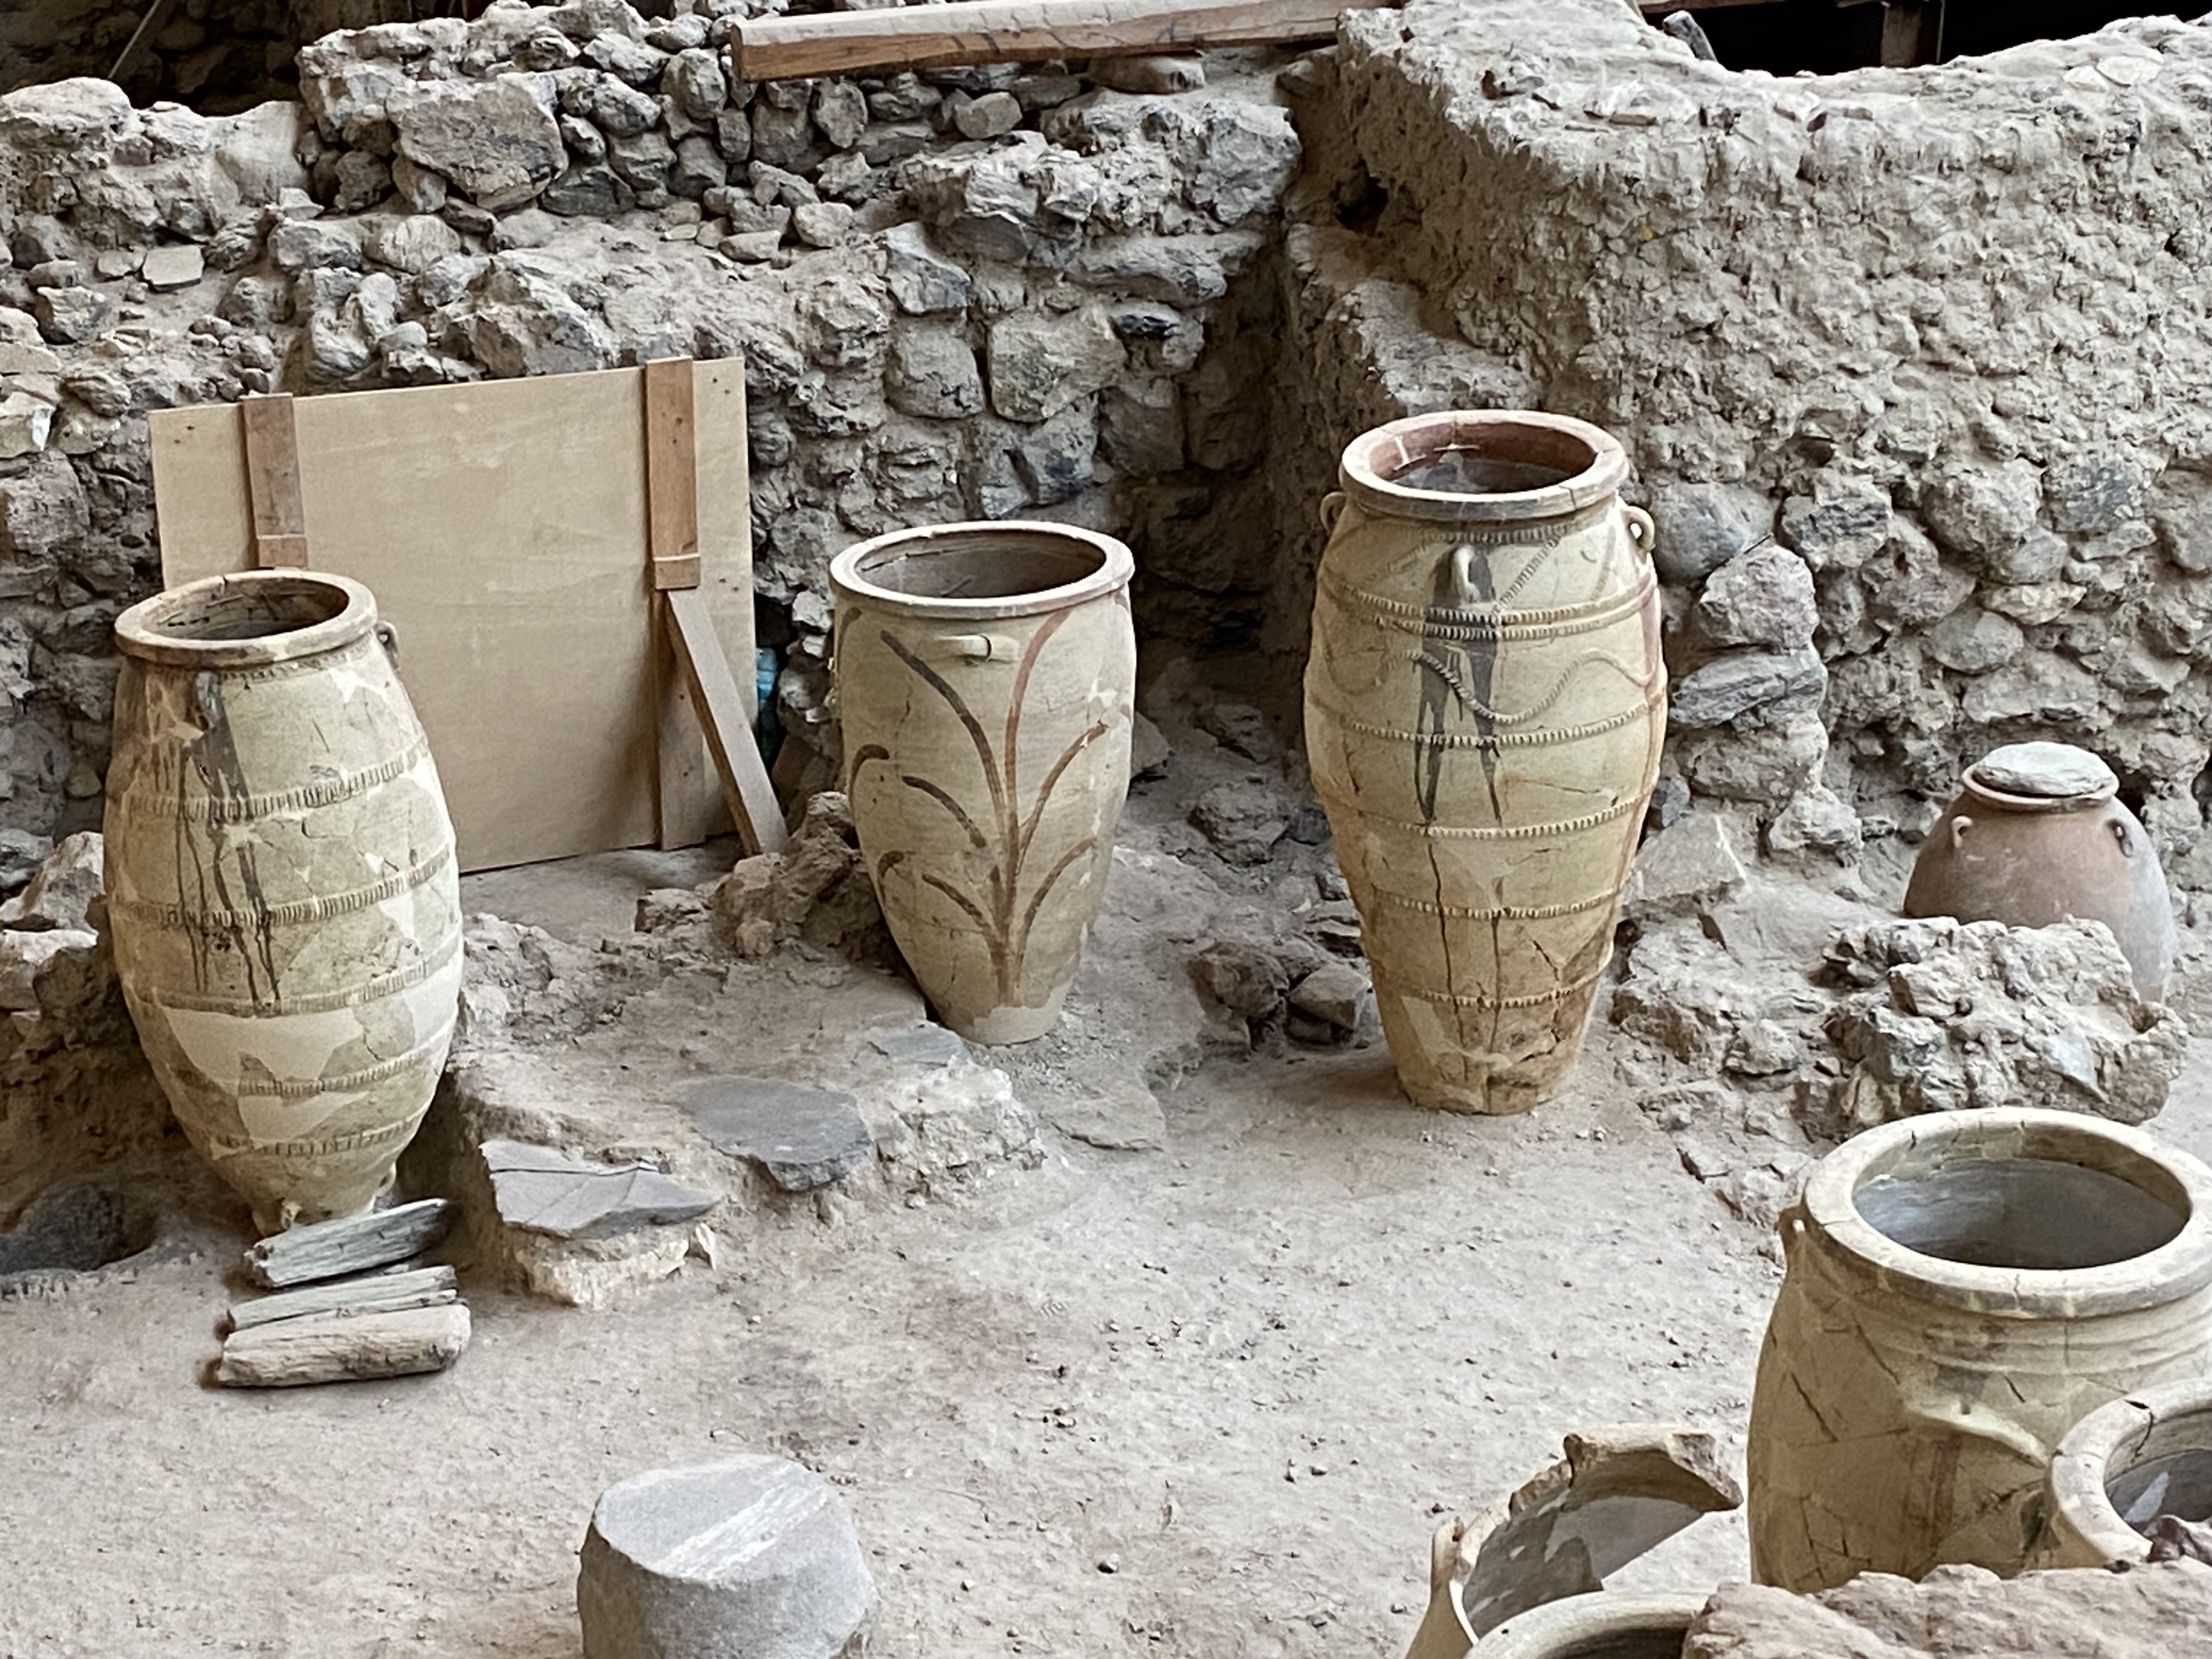
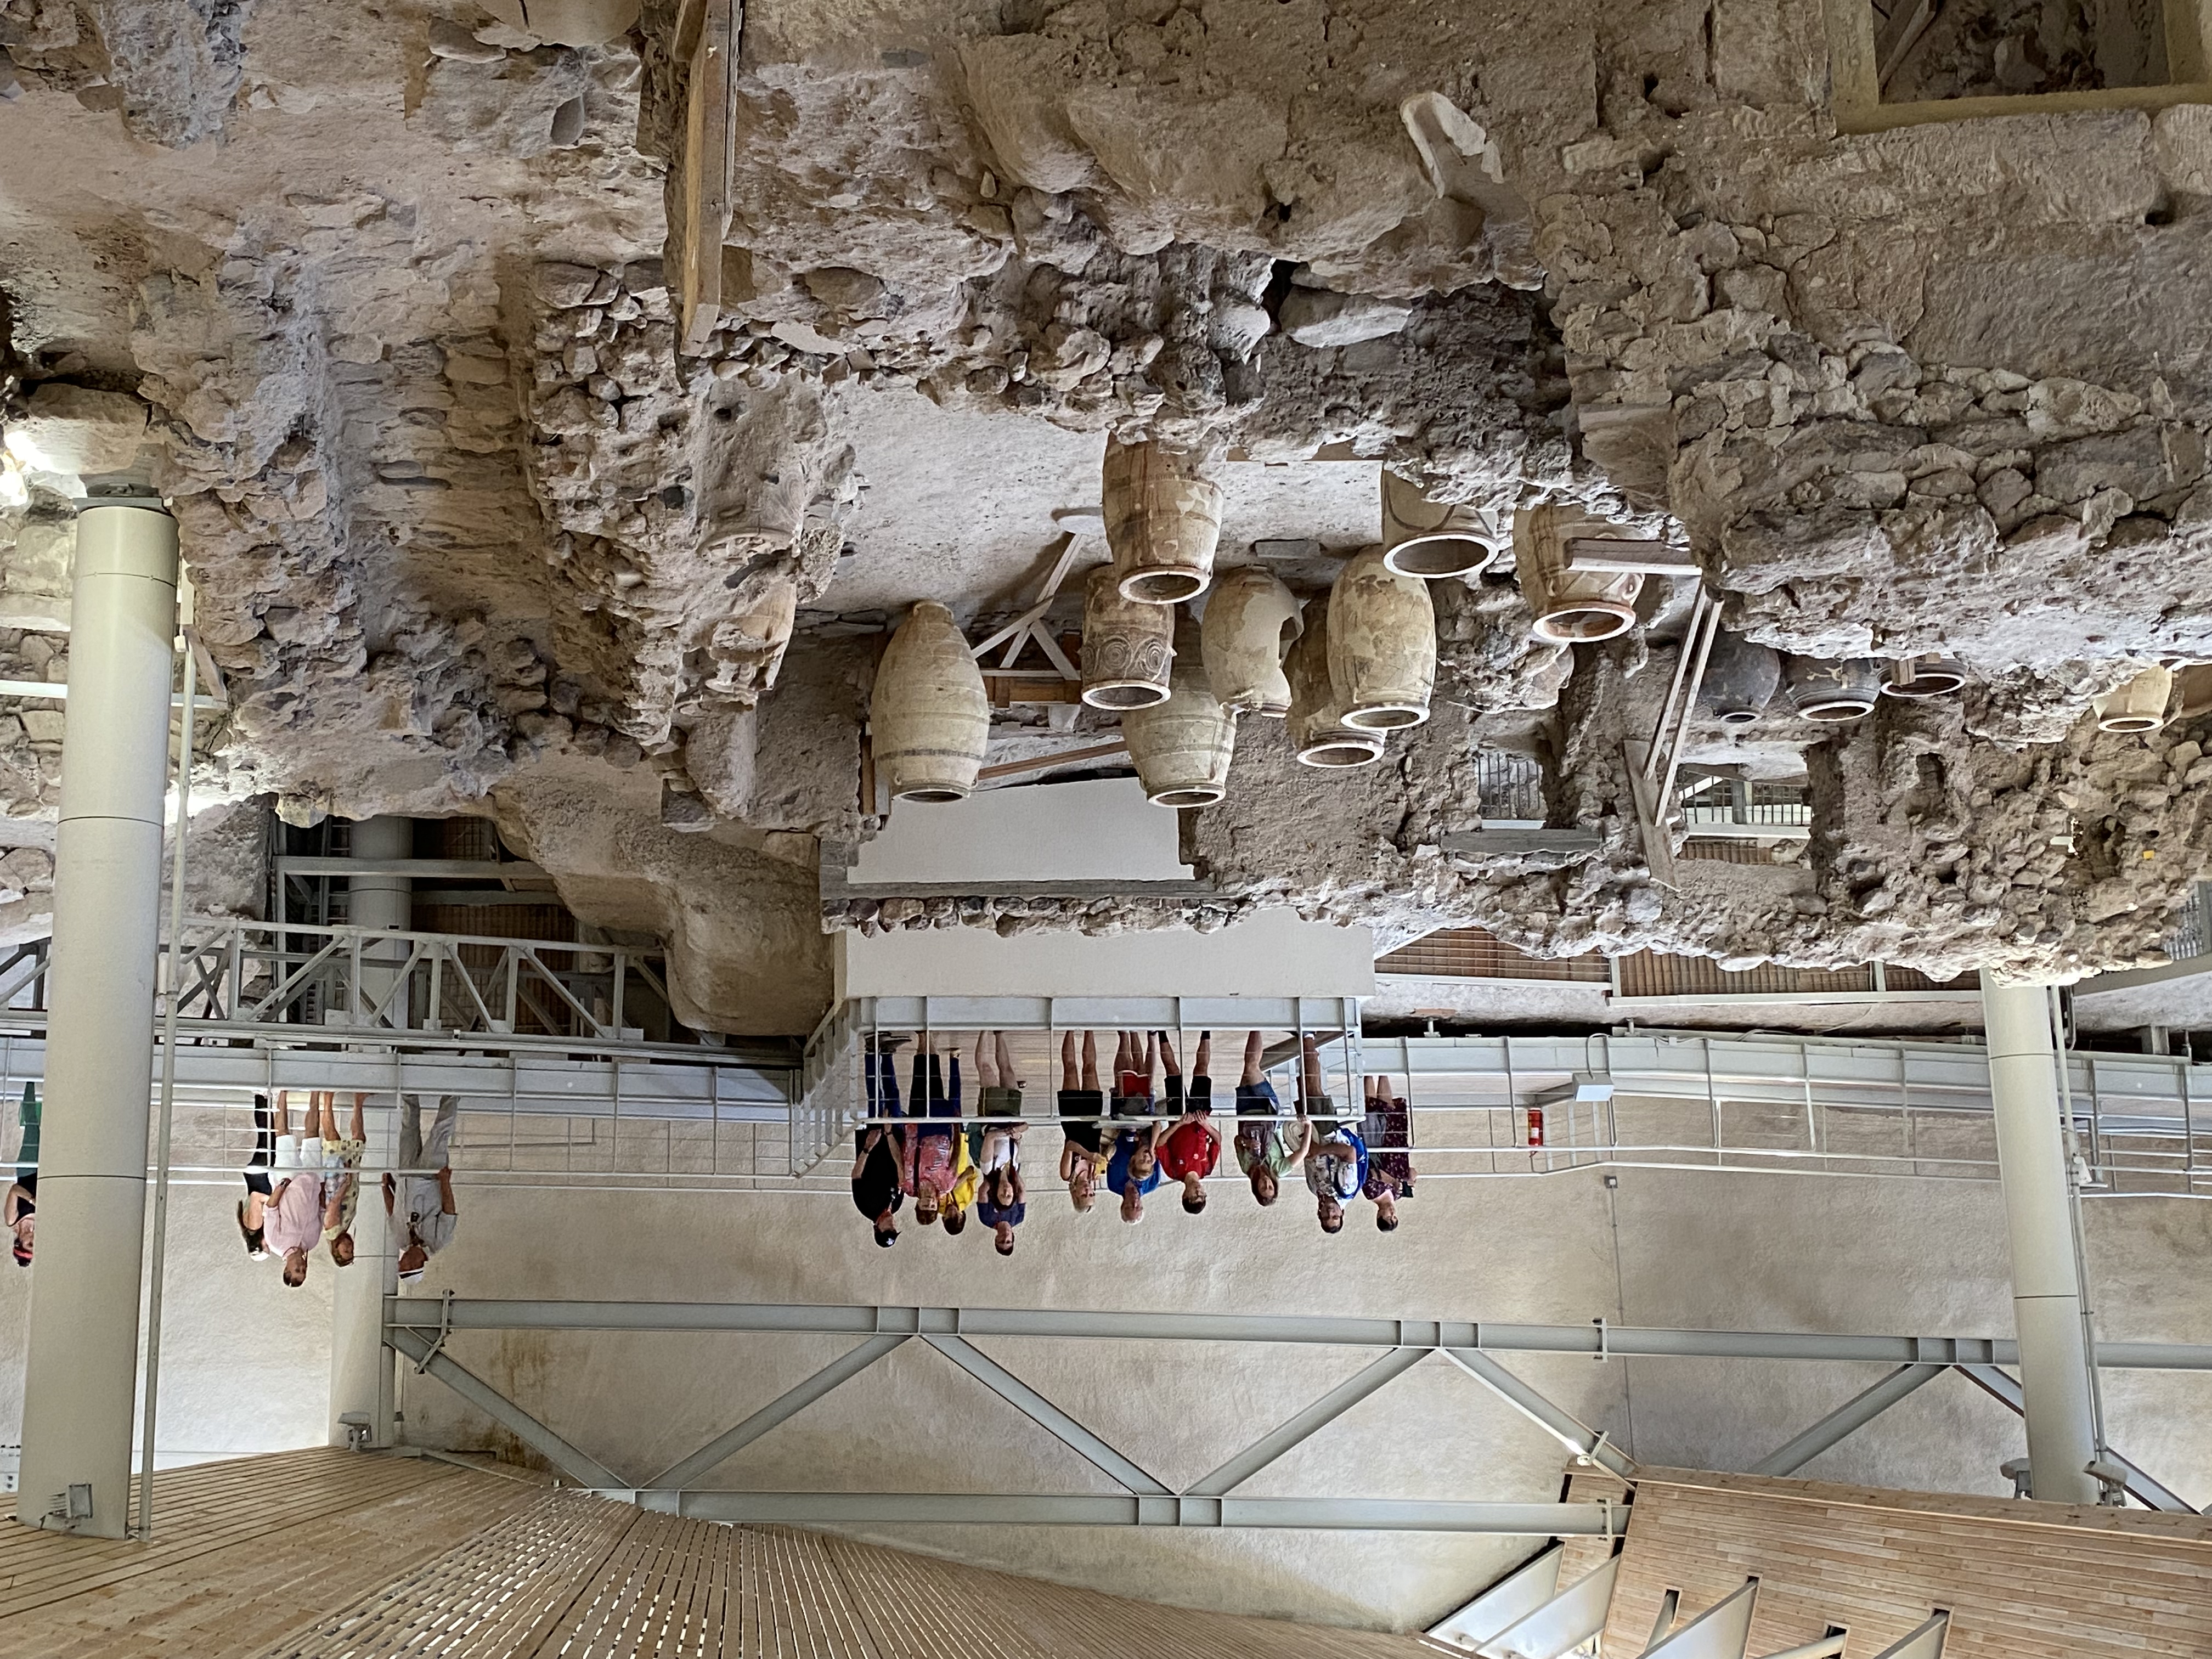
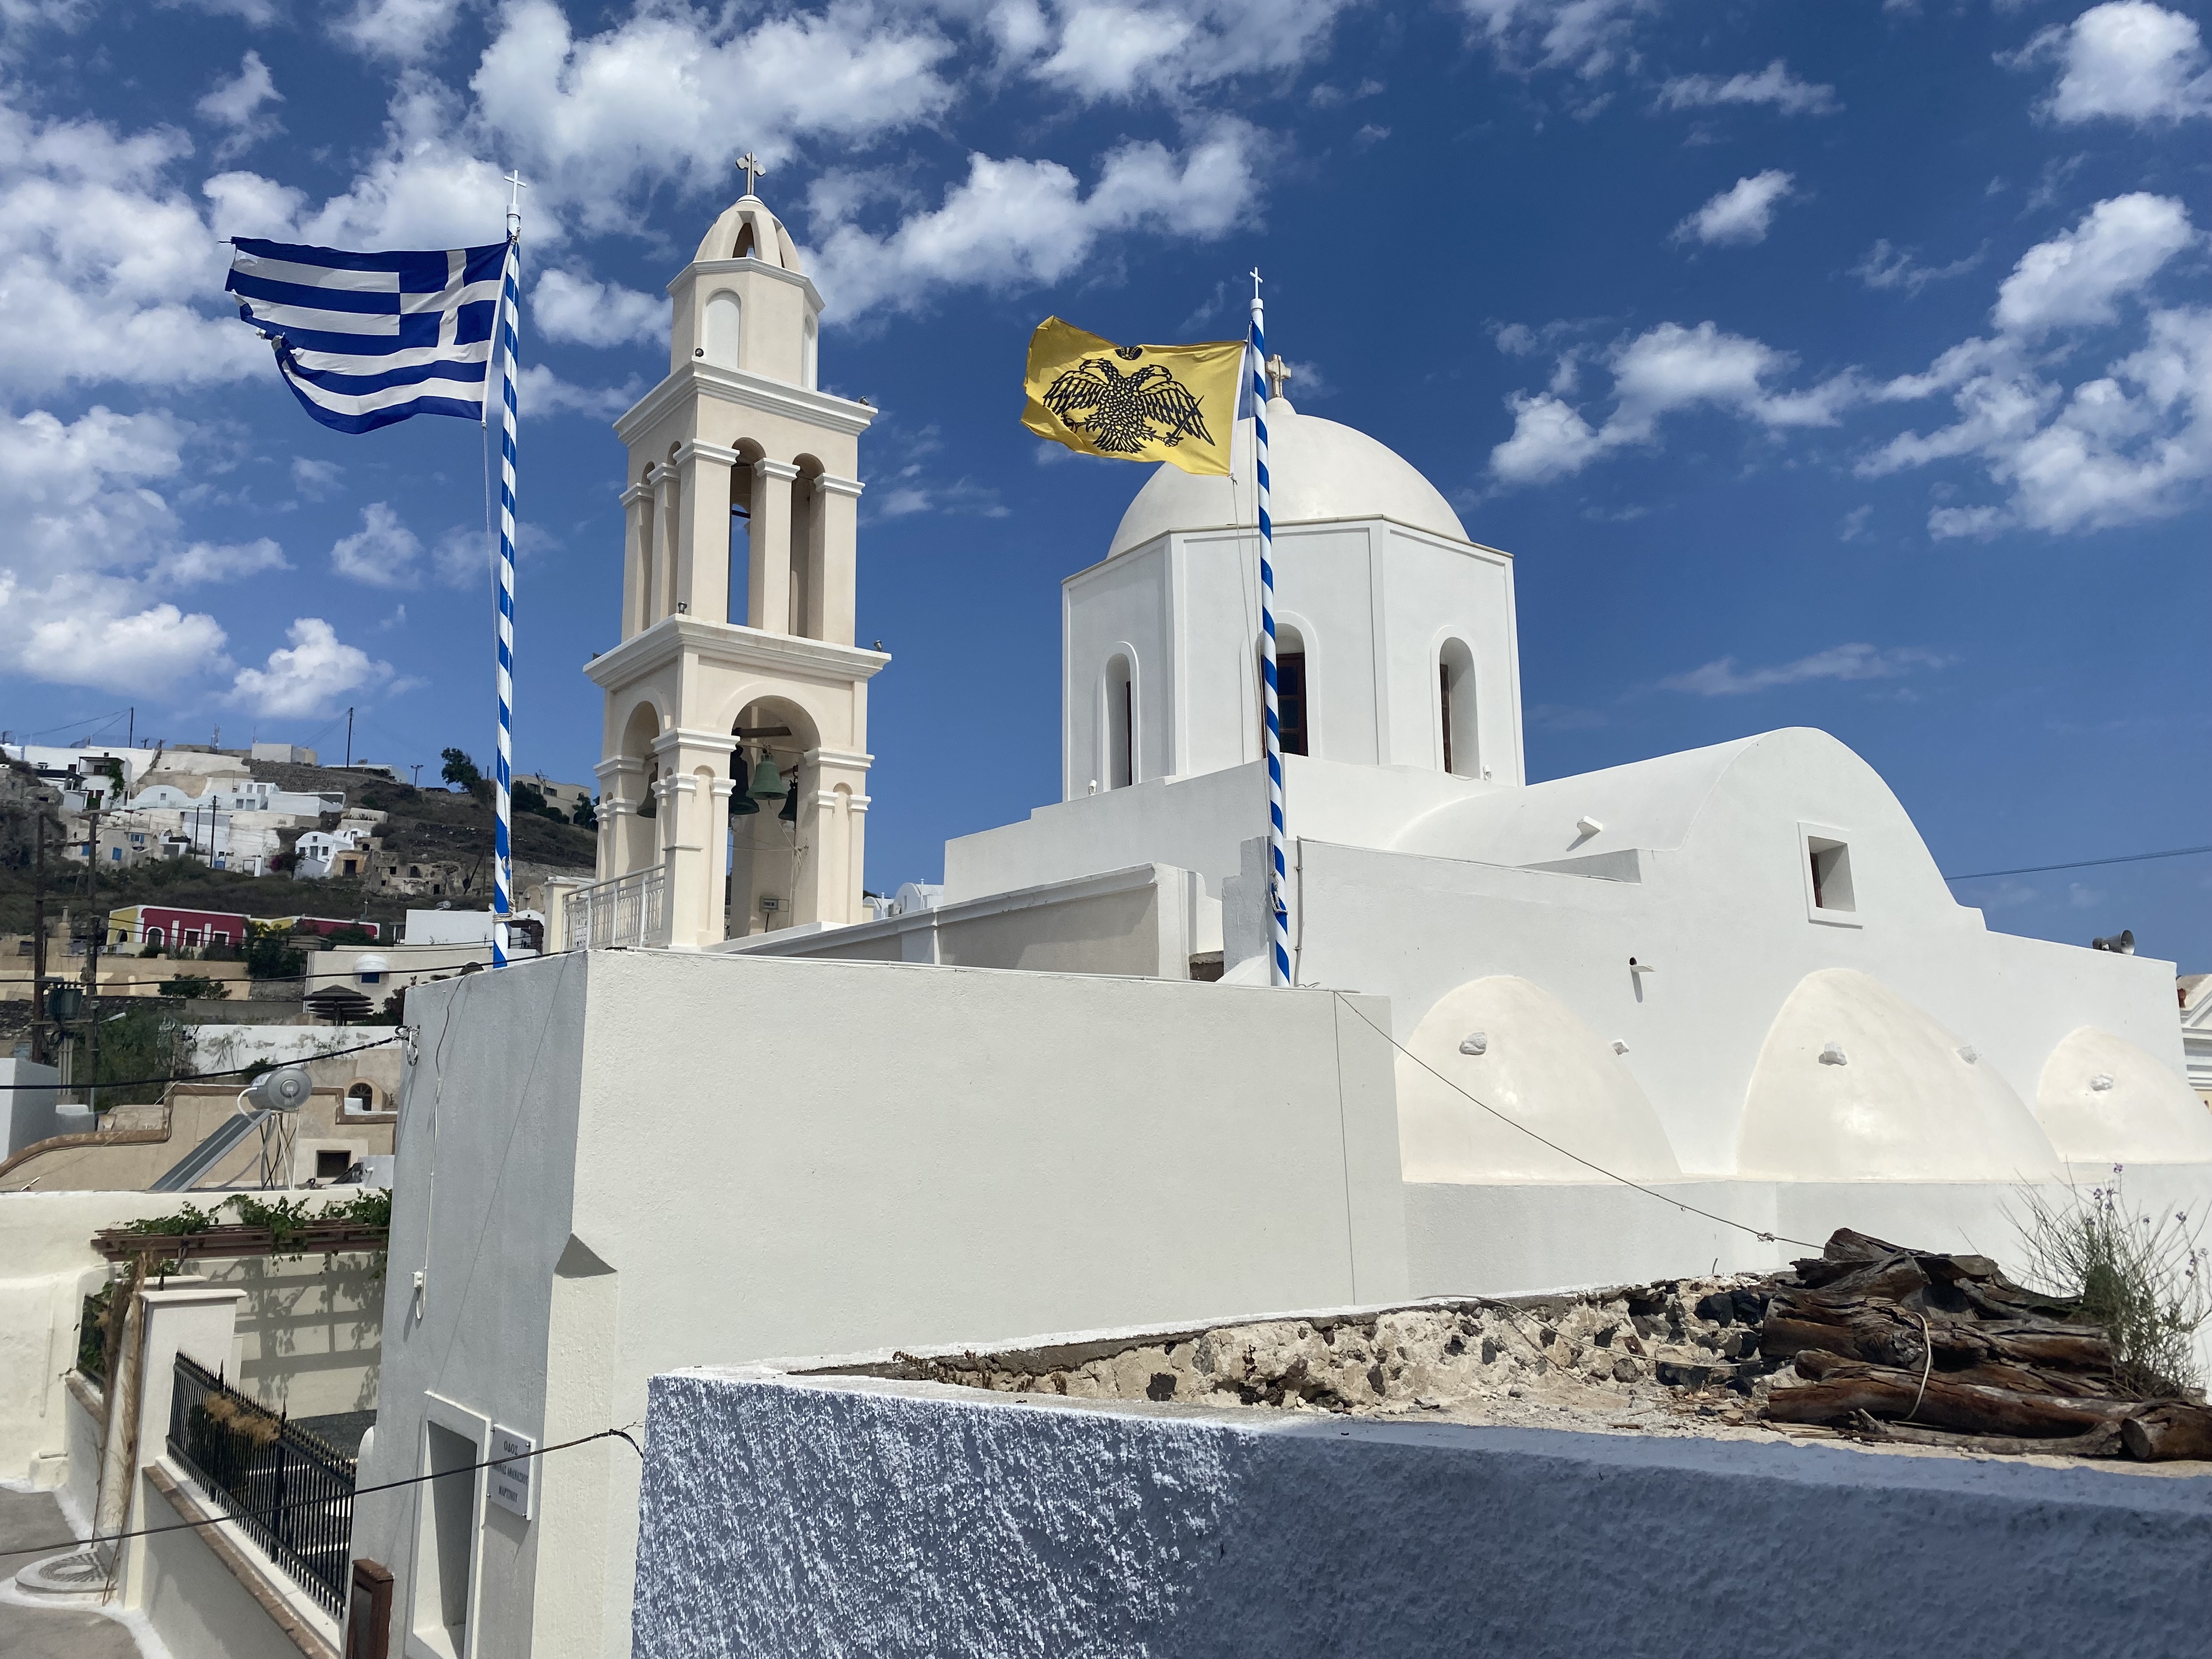
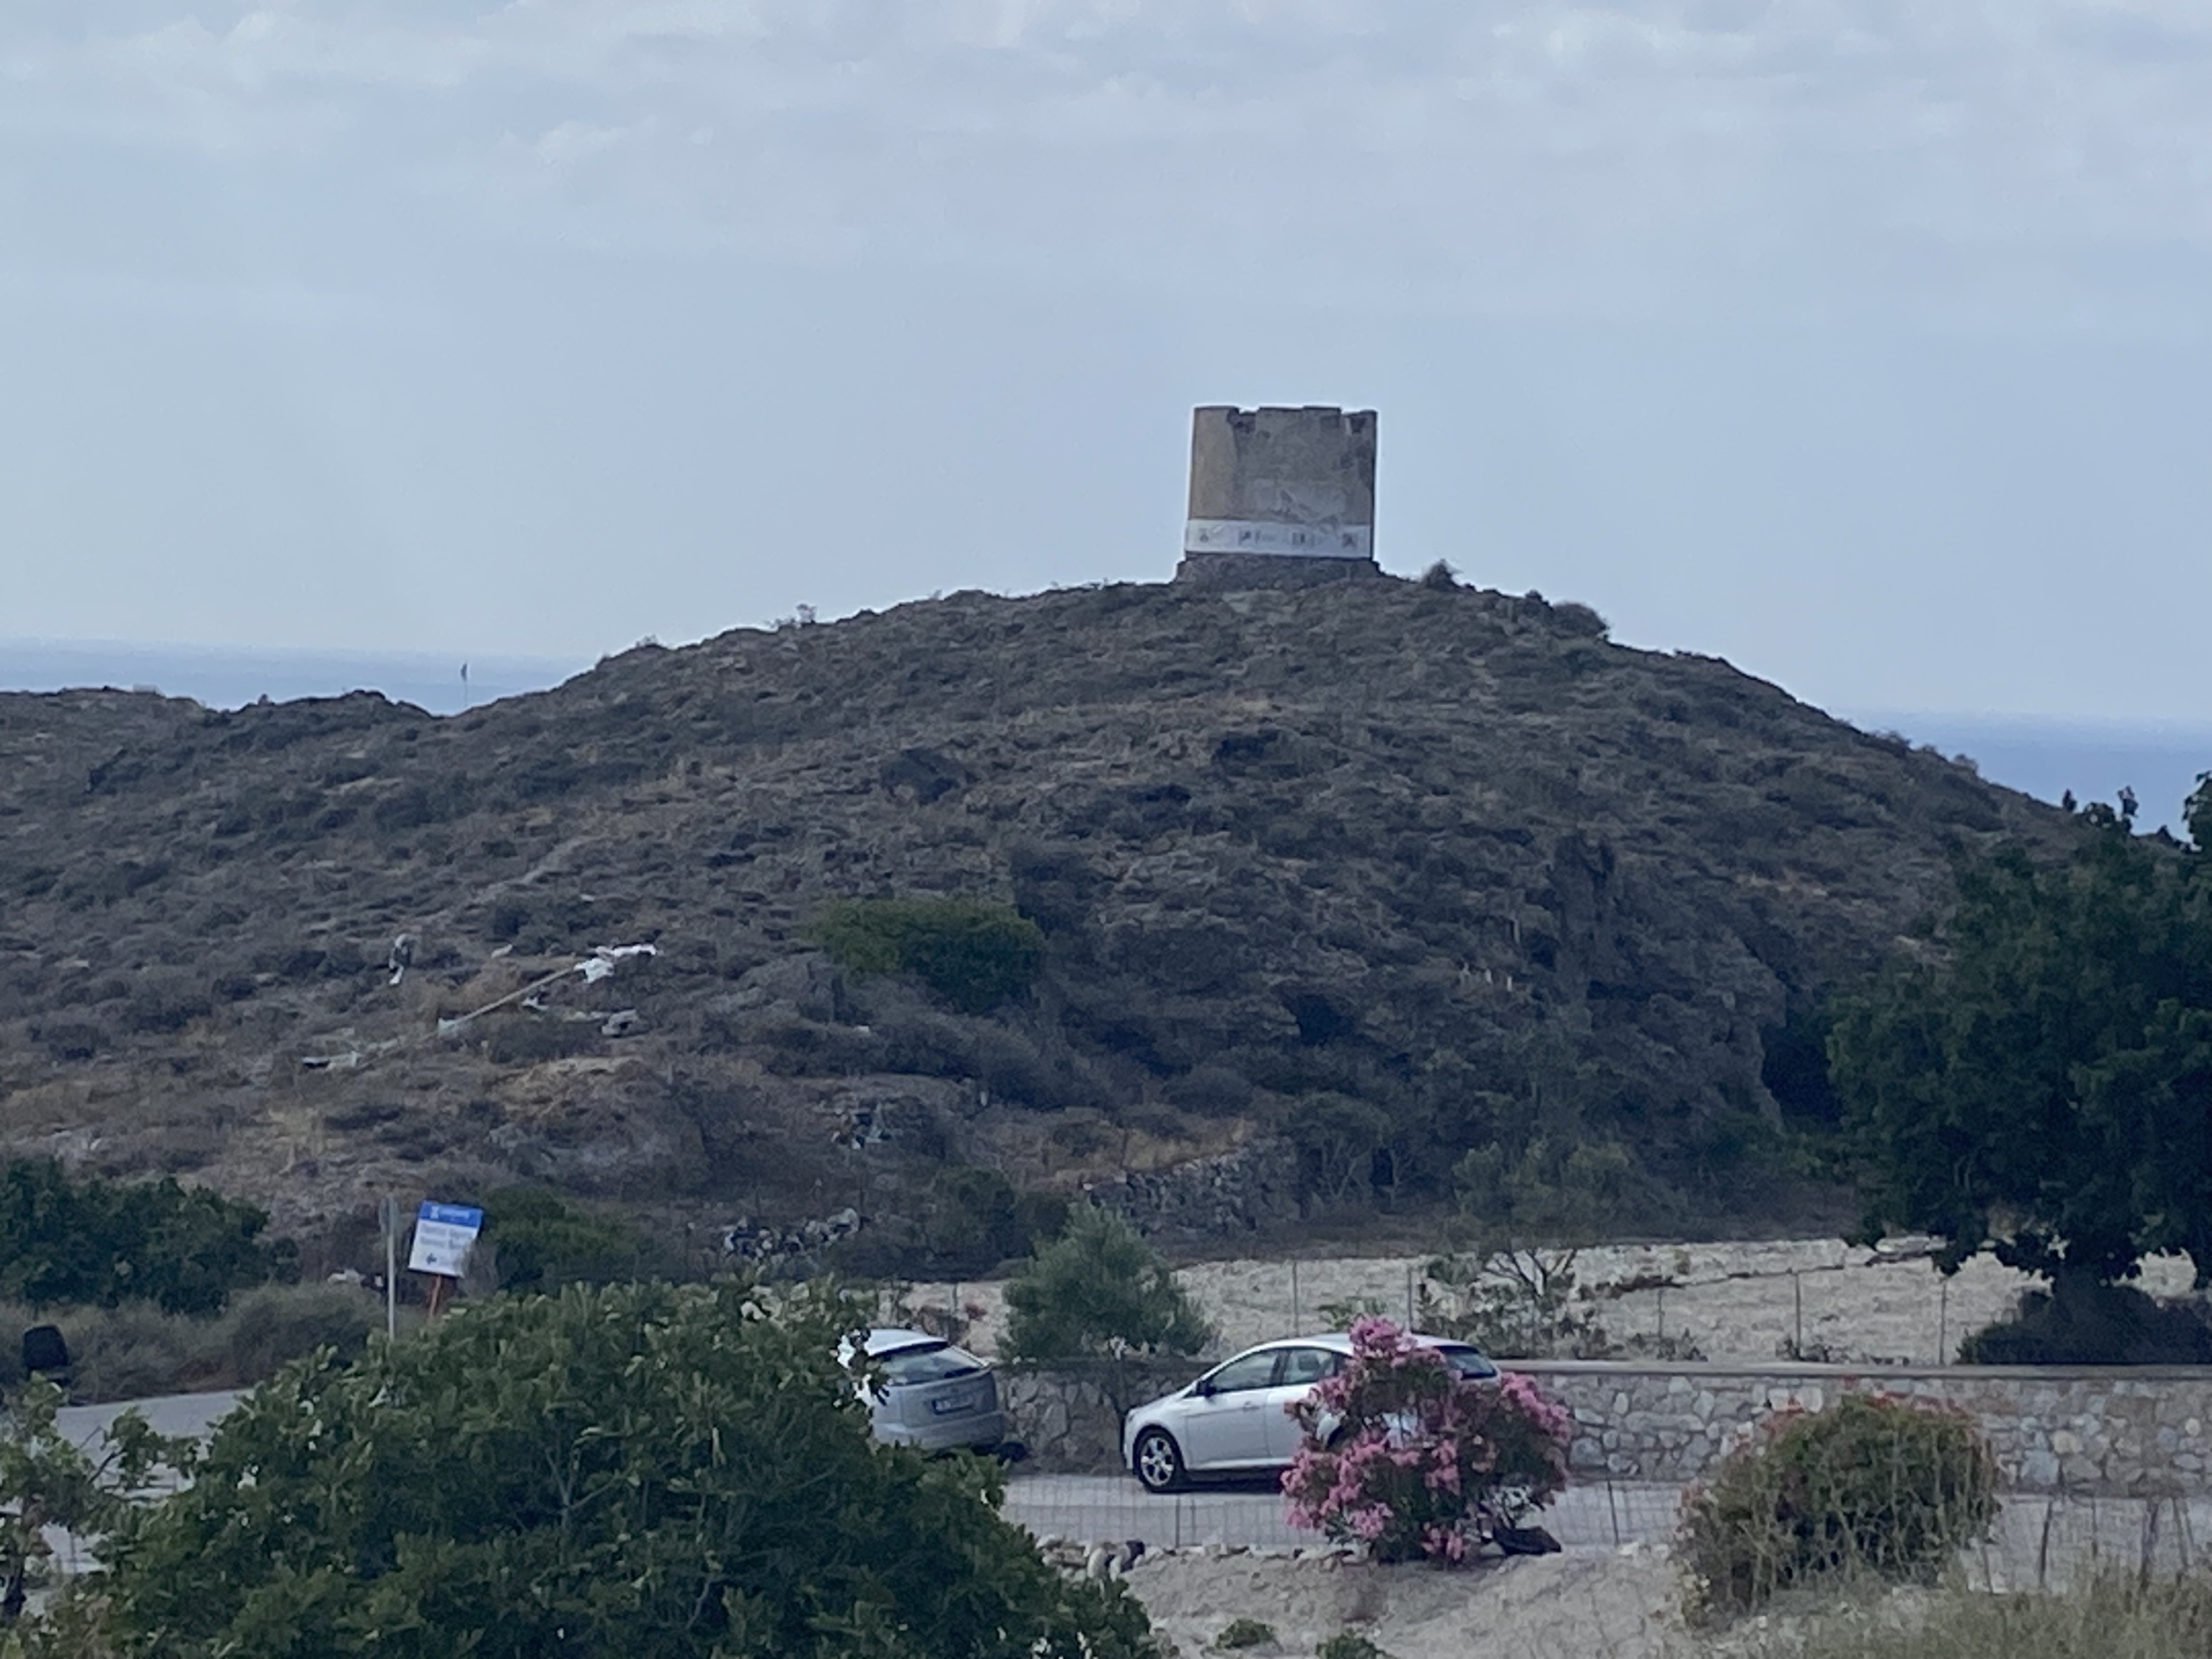
In that time, I’ve had a nice holiday to Santorini, where as well as sampling the local wine and food, I did manage to visit the Archaeological site at Akrotiri, an ancient village consumed by the volcanic eruption back in 1700BC. The site is huge, with most of the village or town, being preserved by the covering of ash from the volcanic eruption. Incidentally, it is this eruption that is thought to have caused a massive tidal wave that overcame Crete, thus prompting the legend of Atlantis. If you would like to know more, I attach a link to the Wikipedia article and a visitors guide:
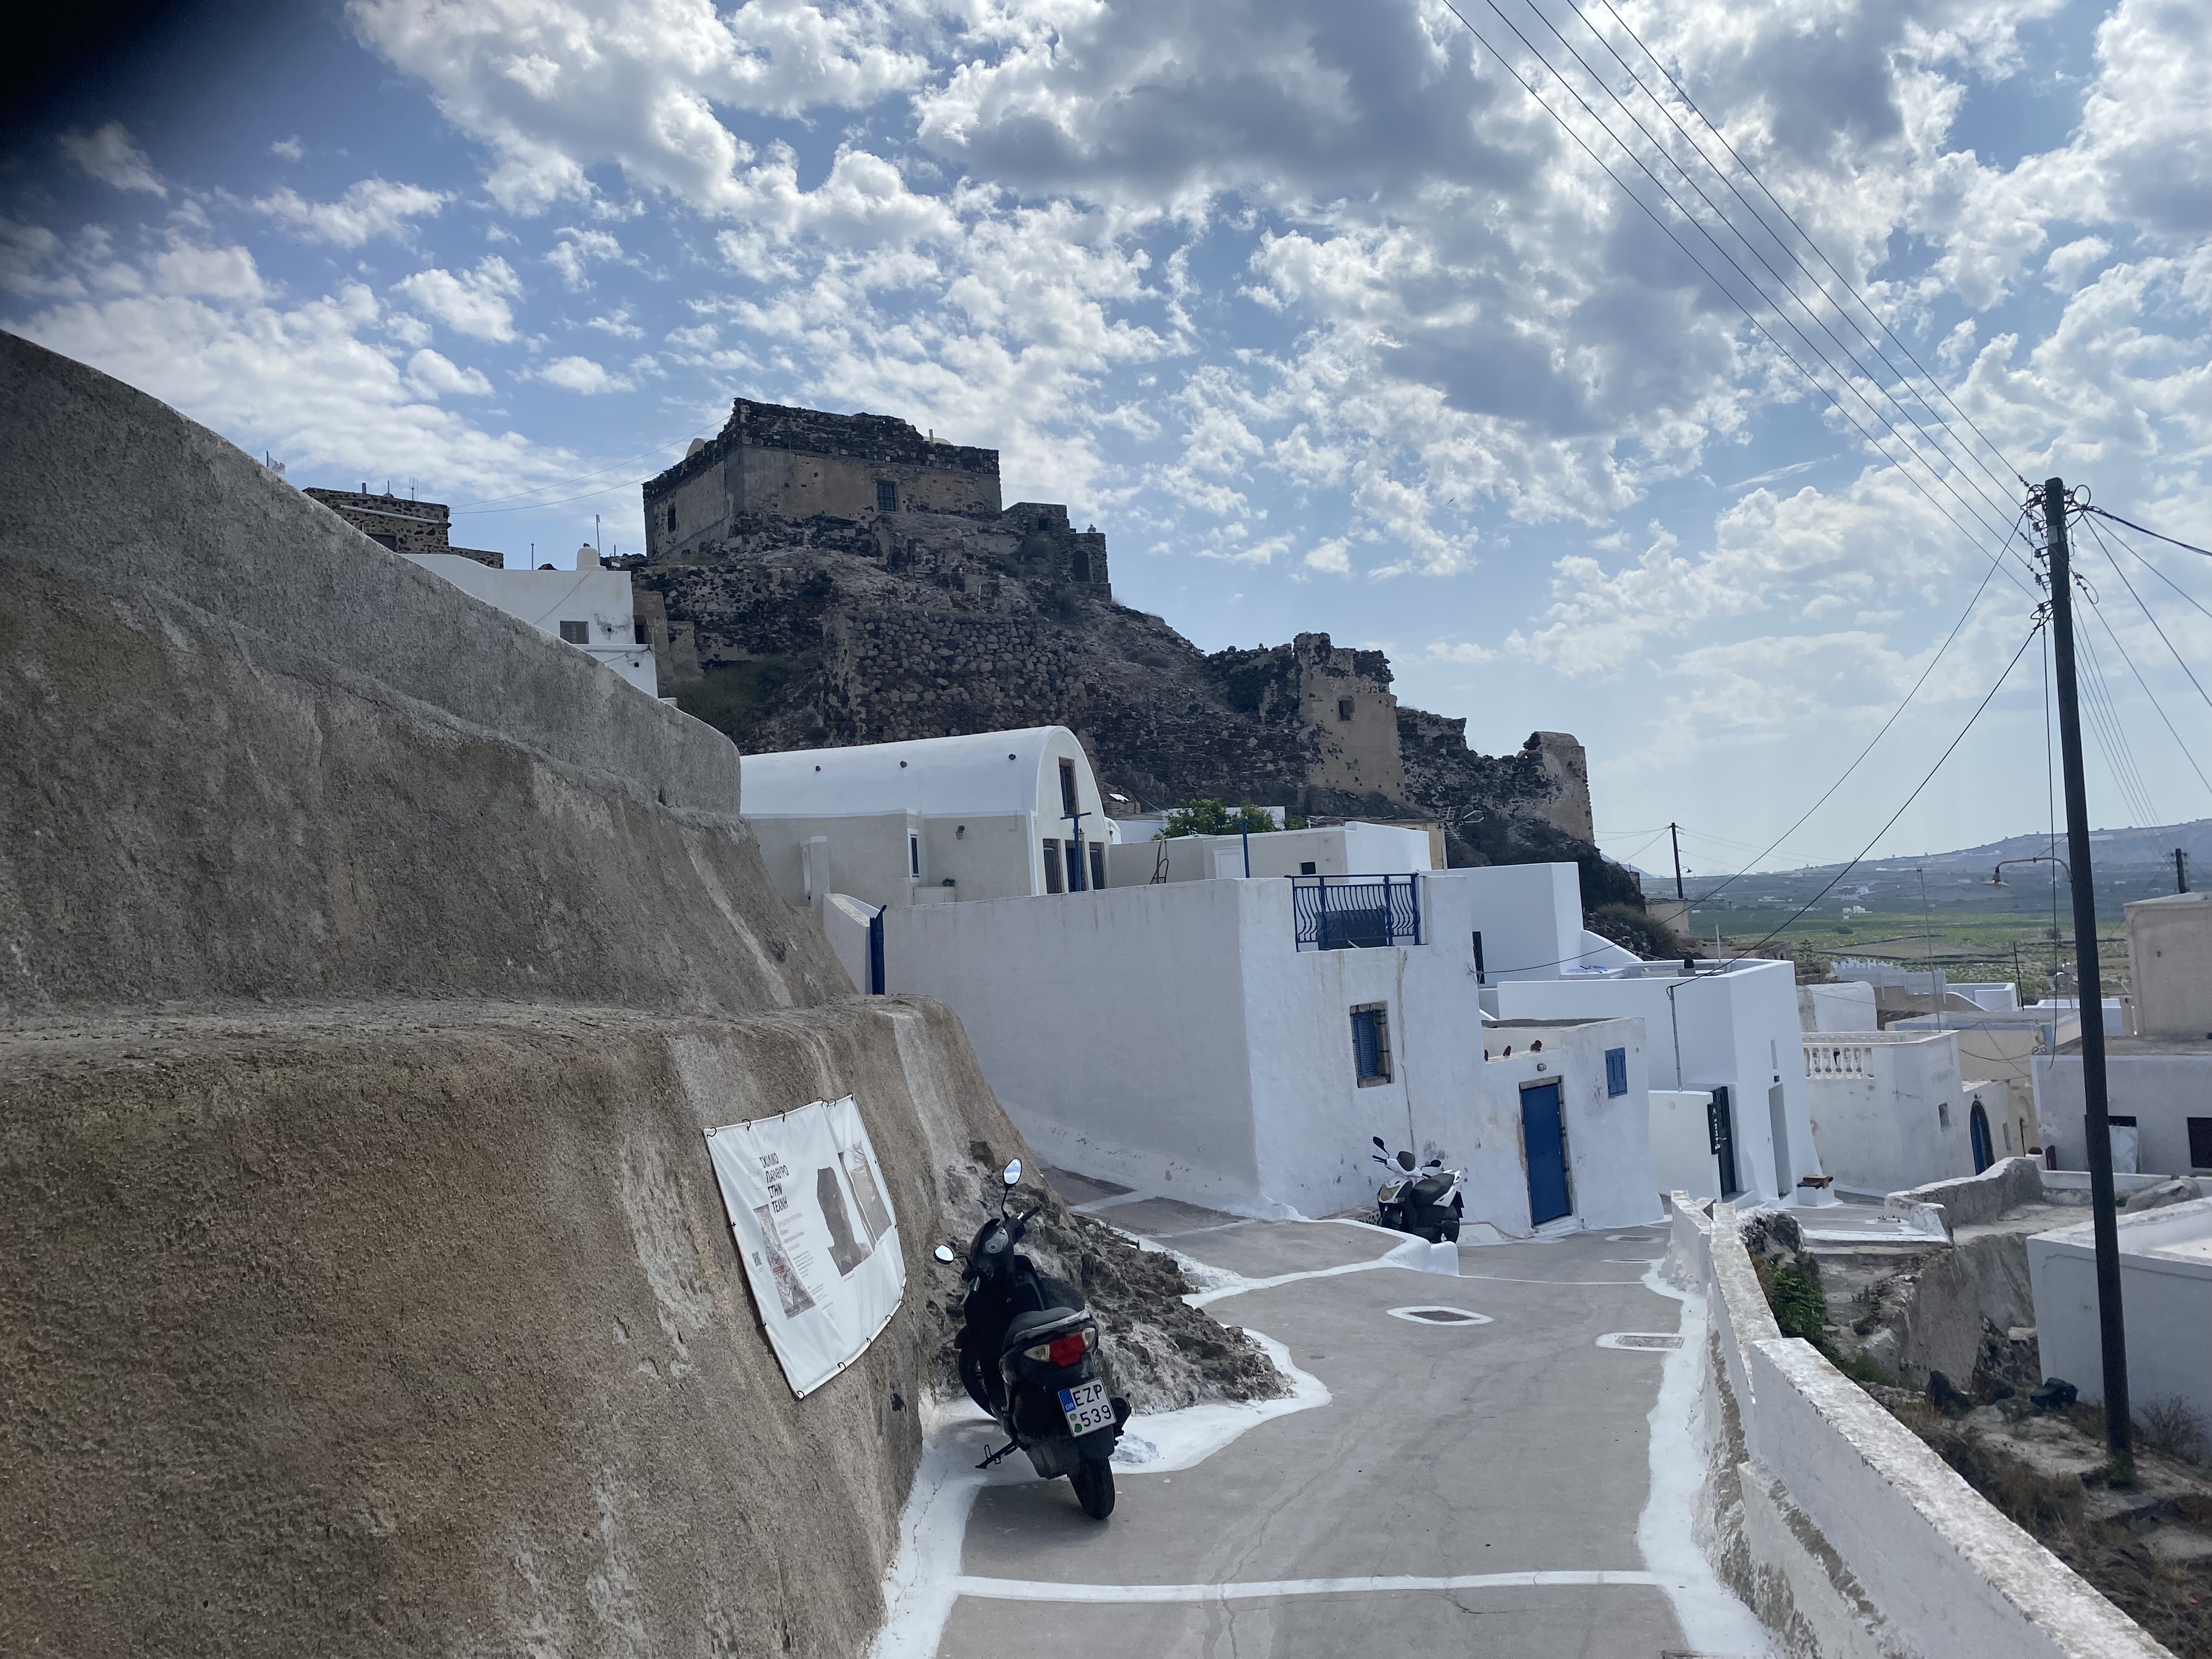
As well as the visit to ancient Akrotiri, I also explored the local castle above the modern Akrotiri village, built by the Venetians to guard the settlement from attacks by pirates and Barbary Raiders. The history hit was most enjoyable but didn’t inspire me to start any more new projects!
I am still very invested in ‘Nevermind The Billhooks’ and it’s various spin offs. Whilst lounging on my sun bed I did manage to read Dan Jones ‘The Hollow Crown’, a very readable and entertaining history of the Wars Of The Roses, If you haven’t read this, I thoroughly recommend it as a very good overview of the period.
As well as recharging my batteries, I have been steadily assembling and painting a Landsknecht force for the next Billhooks BASH at Derby. The event is due to take place on 2 September and it will be a close run thing as to whether my force will be ready. I now have two pike blocks of 24 Landsknechts finished, together with 18 Gunsmen. This means that I will need to get another 24 pikes finished, together with some artillery and a unit of cavalry.
Here’s a shot of the army so far.
And the next batch that will complete the two Pike blocks..
Heres a close up of the commander of the ‘Vorhut’ block – Lorenzo de Pala.
My intention is to publish a guide on how I went about painting these but dont hold me to this….I’m too busy trying to get the army finished in time for the Billhooks BASH event!
THE COMMERCIAL BIT
I hope that you all enjoy your hobby as much as I do – our web site will have much of what you need! Click here to see our shop.
The subtitle should be ‘where did that month go’! If you were to talk to my wife, she would confirm that I have spent as much time as ever out in the war room painting but somehow, I don’t have quite as much to show for the time. I think that I know the answer, I can sum it up in one word: Landsknechts! More on these later.
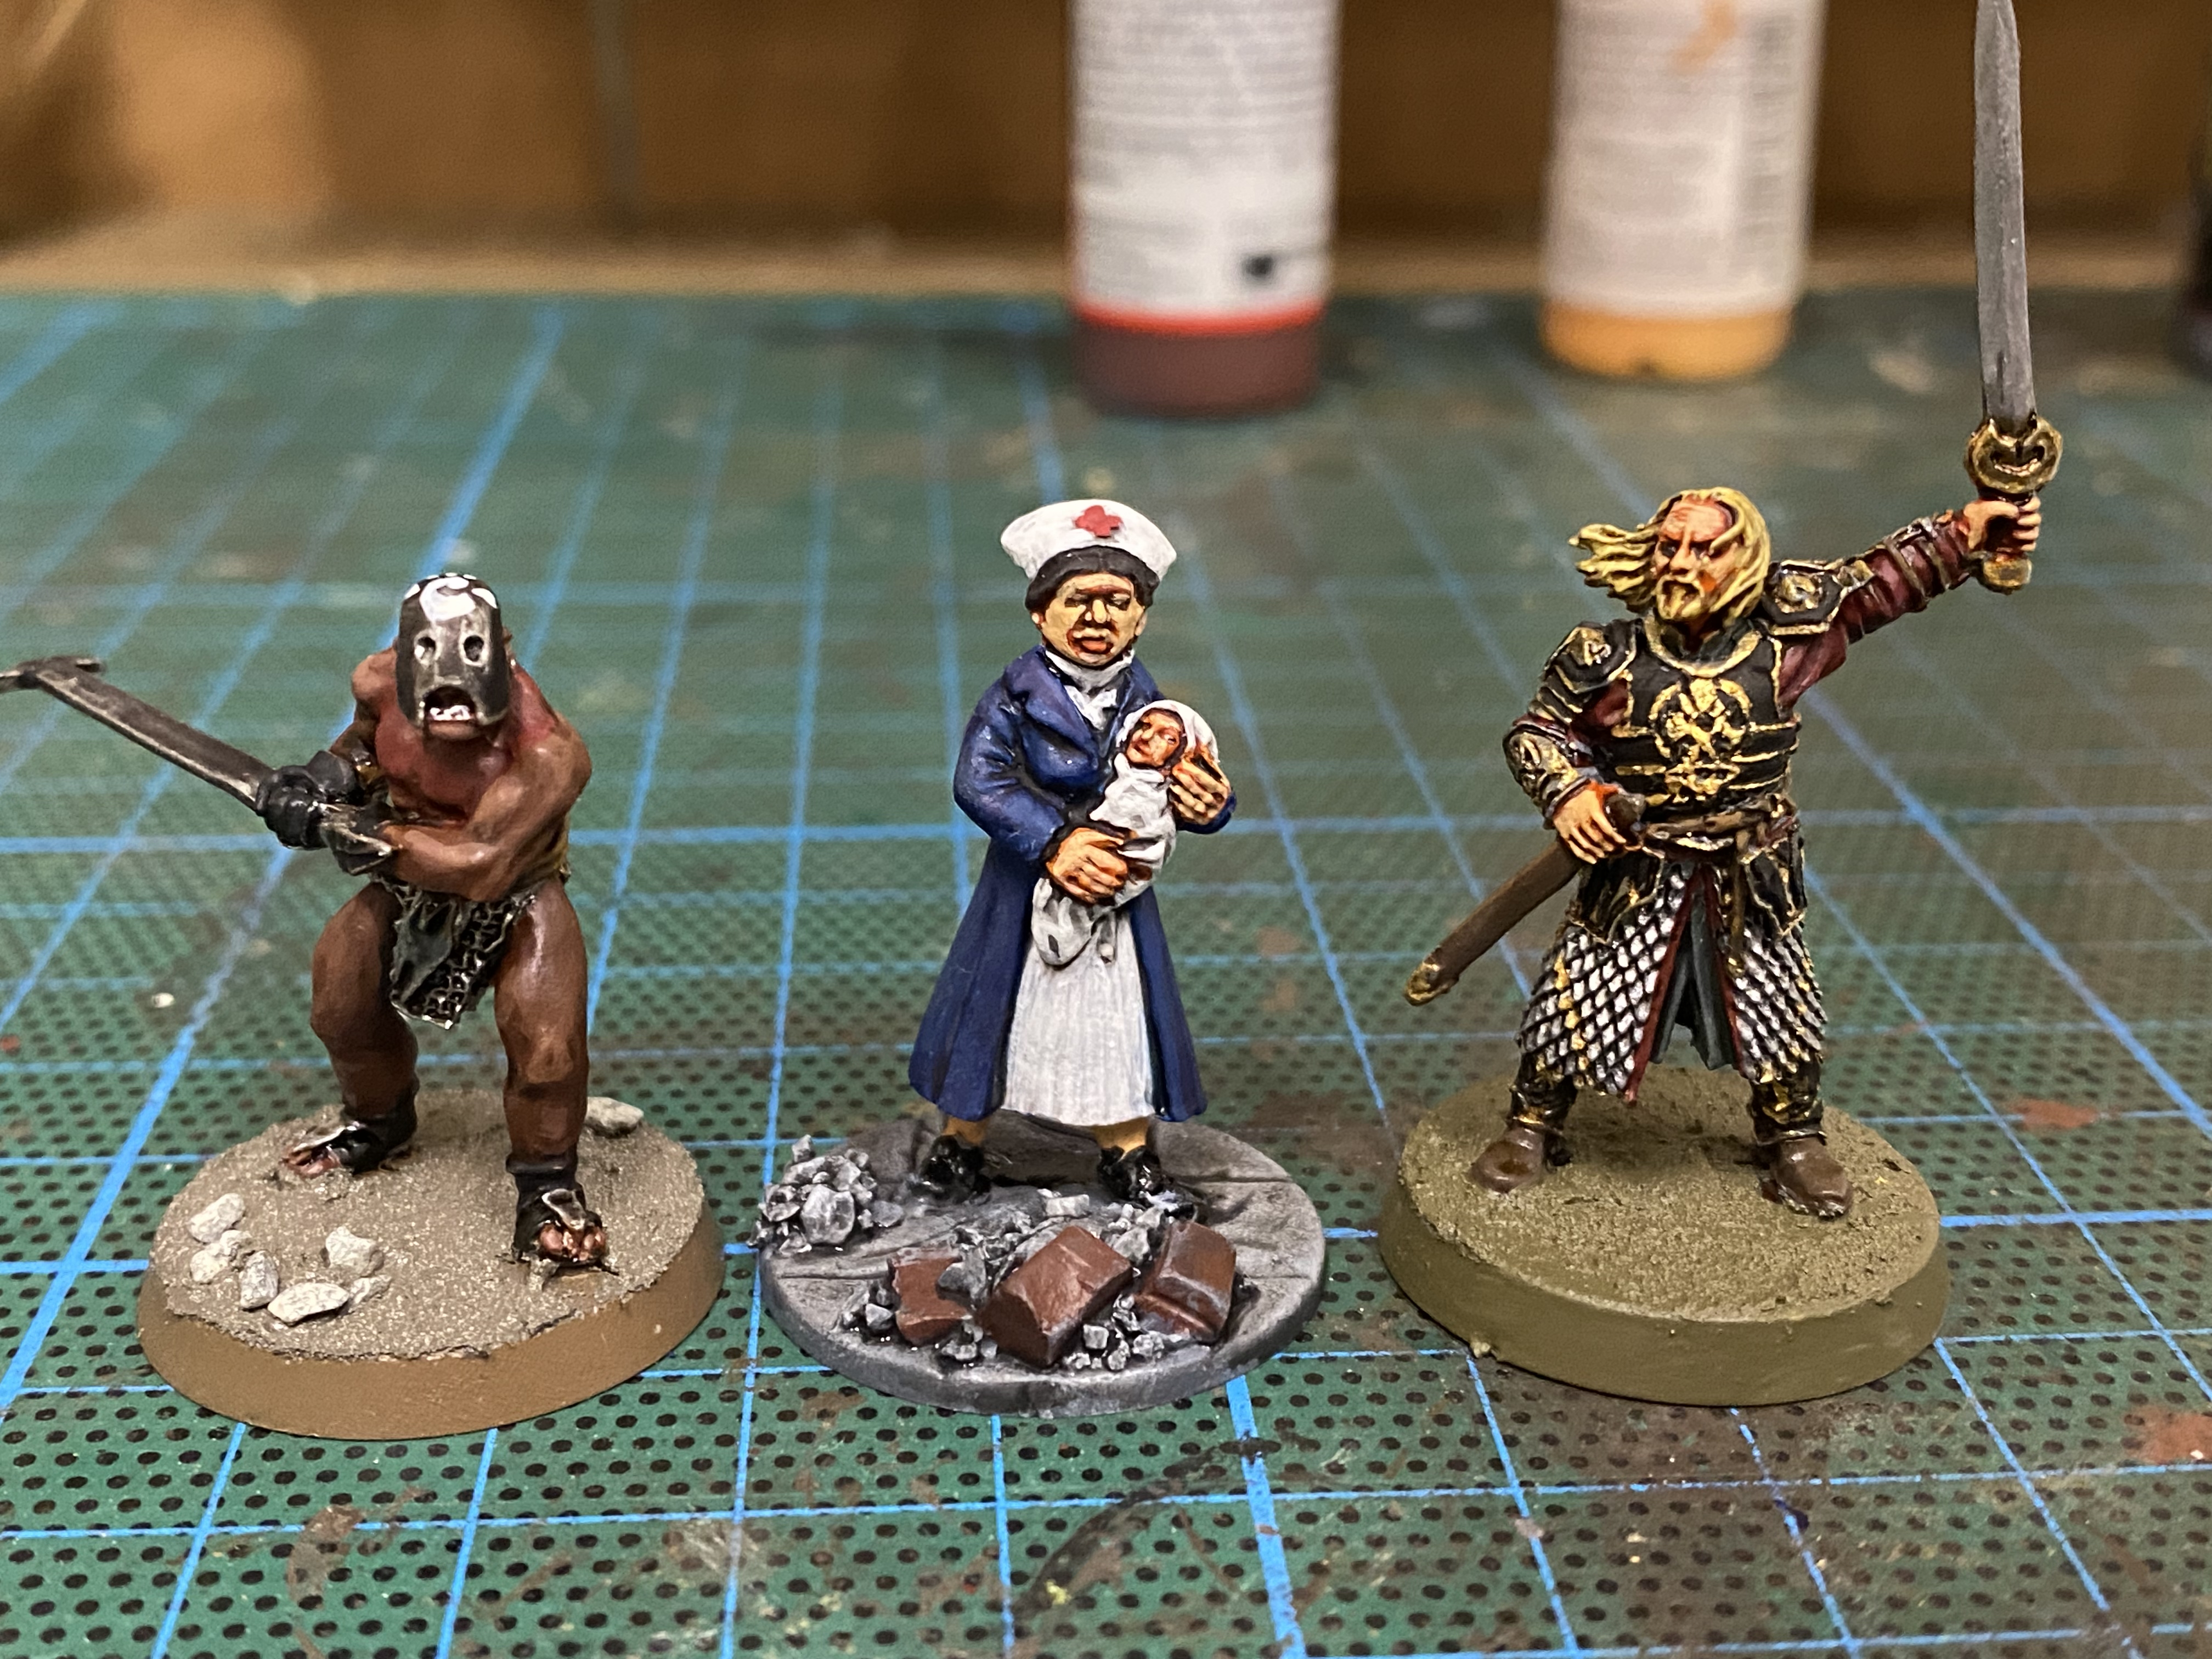
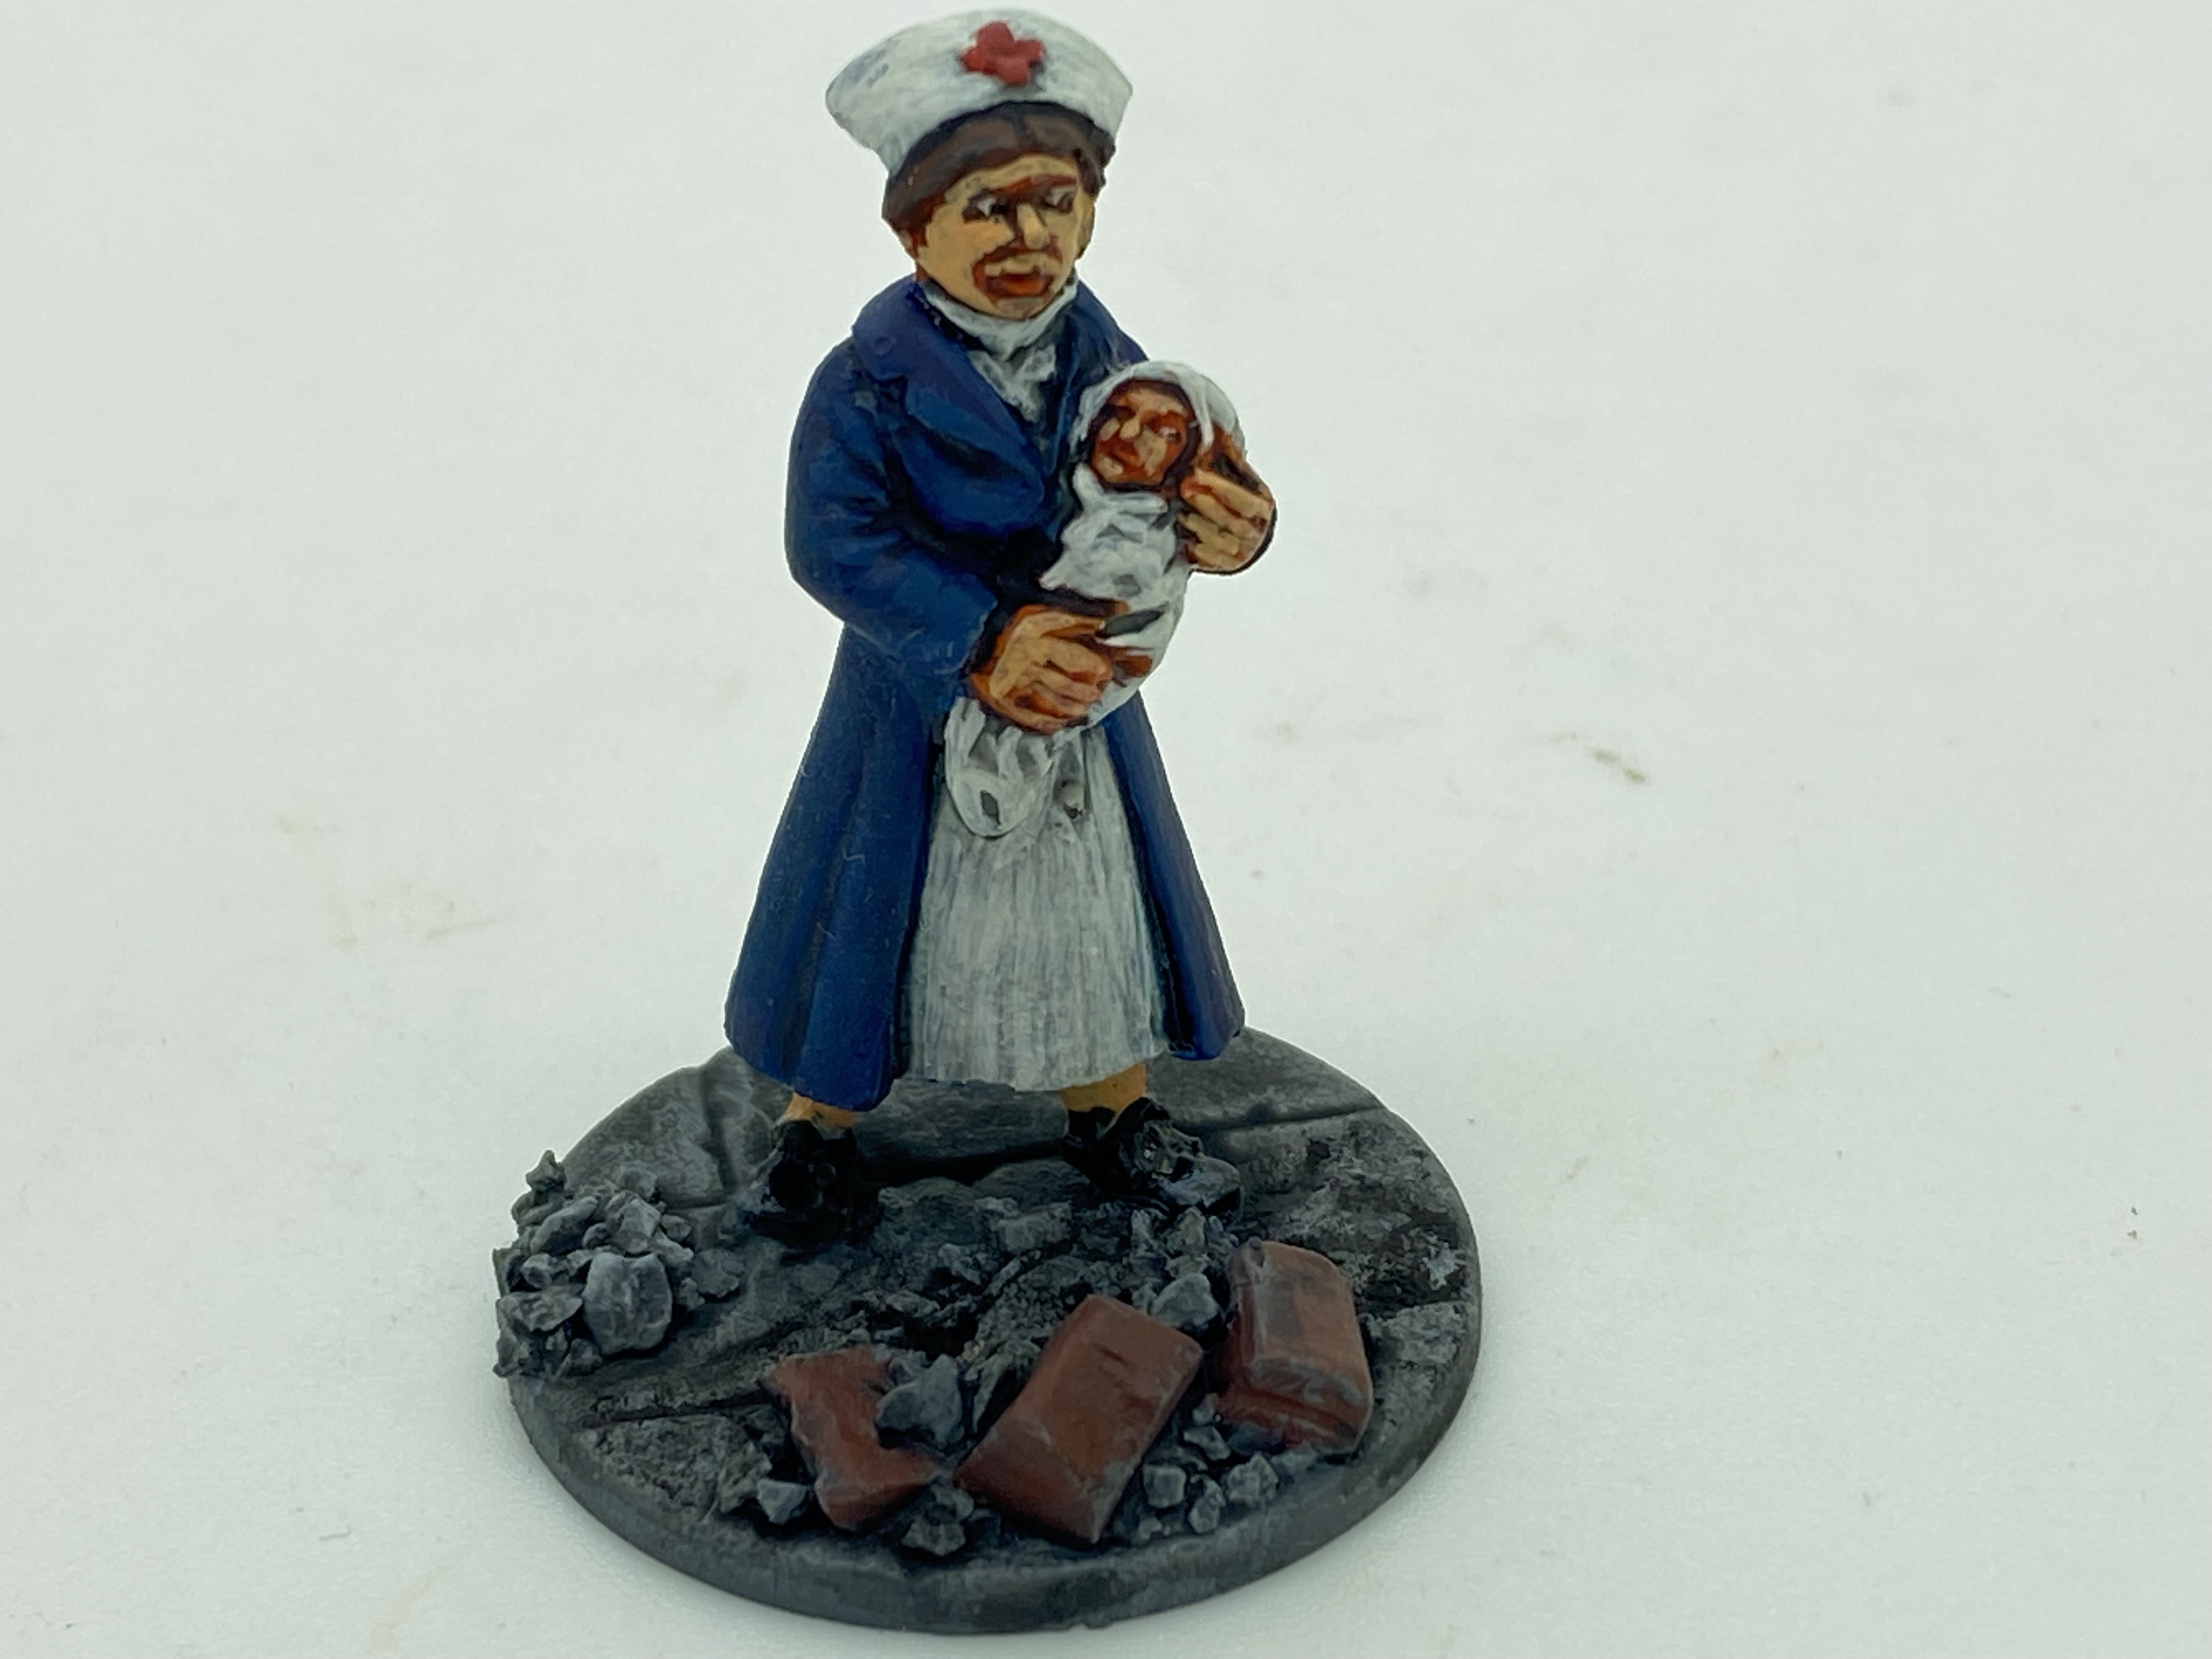
I have completed a rather odd trio of personality figures. In the middle is Irena Sendler or as she is sometimes known, Irena Sendlerowa. The figure was given out at the recent Partizan show and in keeping with my resolution not to add to my lead pile, rather than putting ‘her’ to one side, she was promoted to the painting desk. I needed to find out who exactly Irena was and why she was being sculpted at all. This wiki article will tell you all you need to know:
Suffice to say, she was a Polish hero that fought the Nazis in WW2, rescuing many Jewish children from the Warsaw Ghetto and I am glad that researching the figure gave me the opportunity to read her story. I decided to place her on a renedra paved base, surrounded by debris as a nod towards the conditions in which she was working. I’m not entirely pleased with the ‘finished’ result – I’ve made a bit of a hash with her eyes, which confirms why I usually dont bother! I may have to go back and have another attempt!
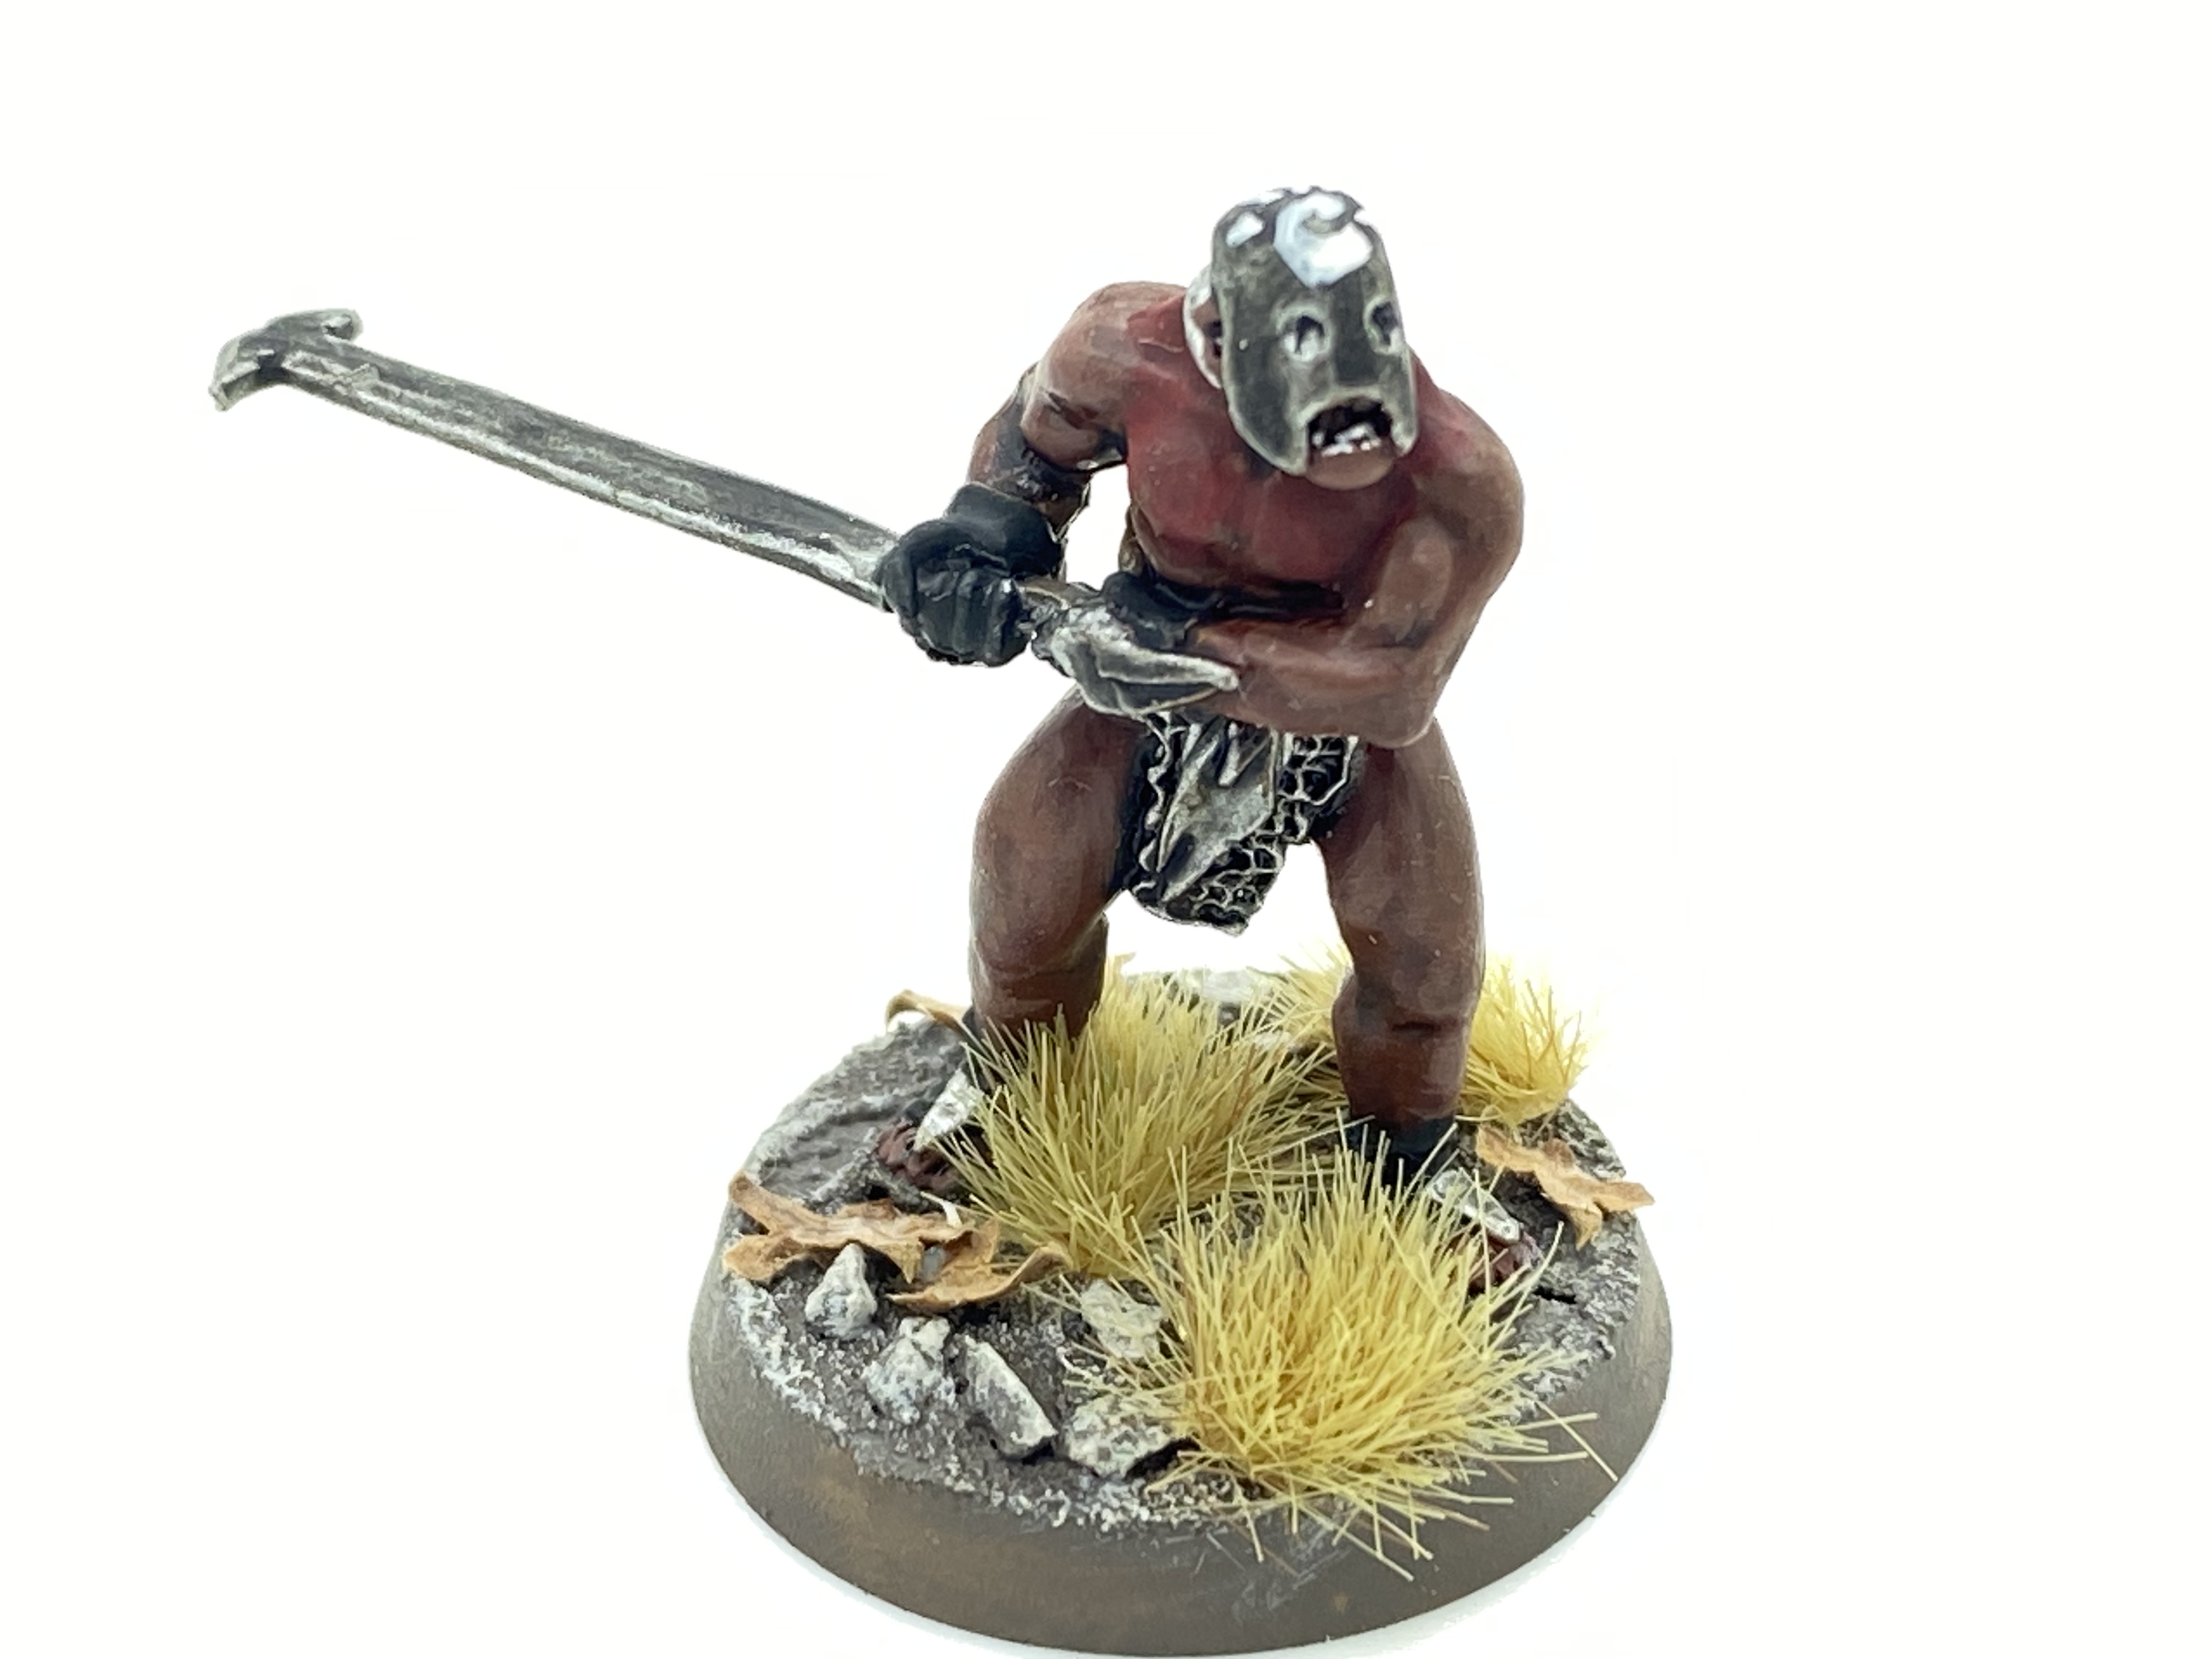
The other two figures are from the ‘Battle Games in Middle Earth’ magazine. I am gradually working my way through the series and with these figures, I have now reached issue 31.
King Theoden was the most challenging to paint. I’m very happy with the result and he is now safely in the display cabinet.
I’m also quite happy with the Uruk-Hai berserker. A much more straight forward paint job than Theoden but a nice addition to the collection. I must at some point have a round up of all the figures that I have painted in this collection just to show them off. Perhaps a project to mark when I reach issue 50!
The project that is taking most of my painting time is my Landsknecht unit. I have decide to branch out into the Italian wars for ‘Never Mind The Billhooks’ by painting a Landsknecht contingent. I’ll need about 96 figures and at the rate I am painting, I should have them done for the autumn!
As you can see, I have 12 Dopplesoldiers more or less complete and 6 pikemen well on the way. I hope to do a full article showing how I have approached the task of painting them. It’s certainly a challenge but they do look nice when they are done! Like everything, the more you do the easier it becomes as you learn that there are some quick wins. So that’s it for now.
THE COMMERCIAL BIT
I hope that you all enjoy your hobby as much as I do – our web site will have much of what you need! Click here to see our shop.
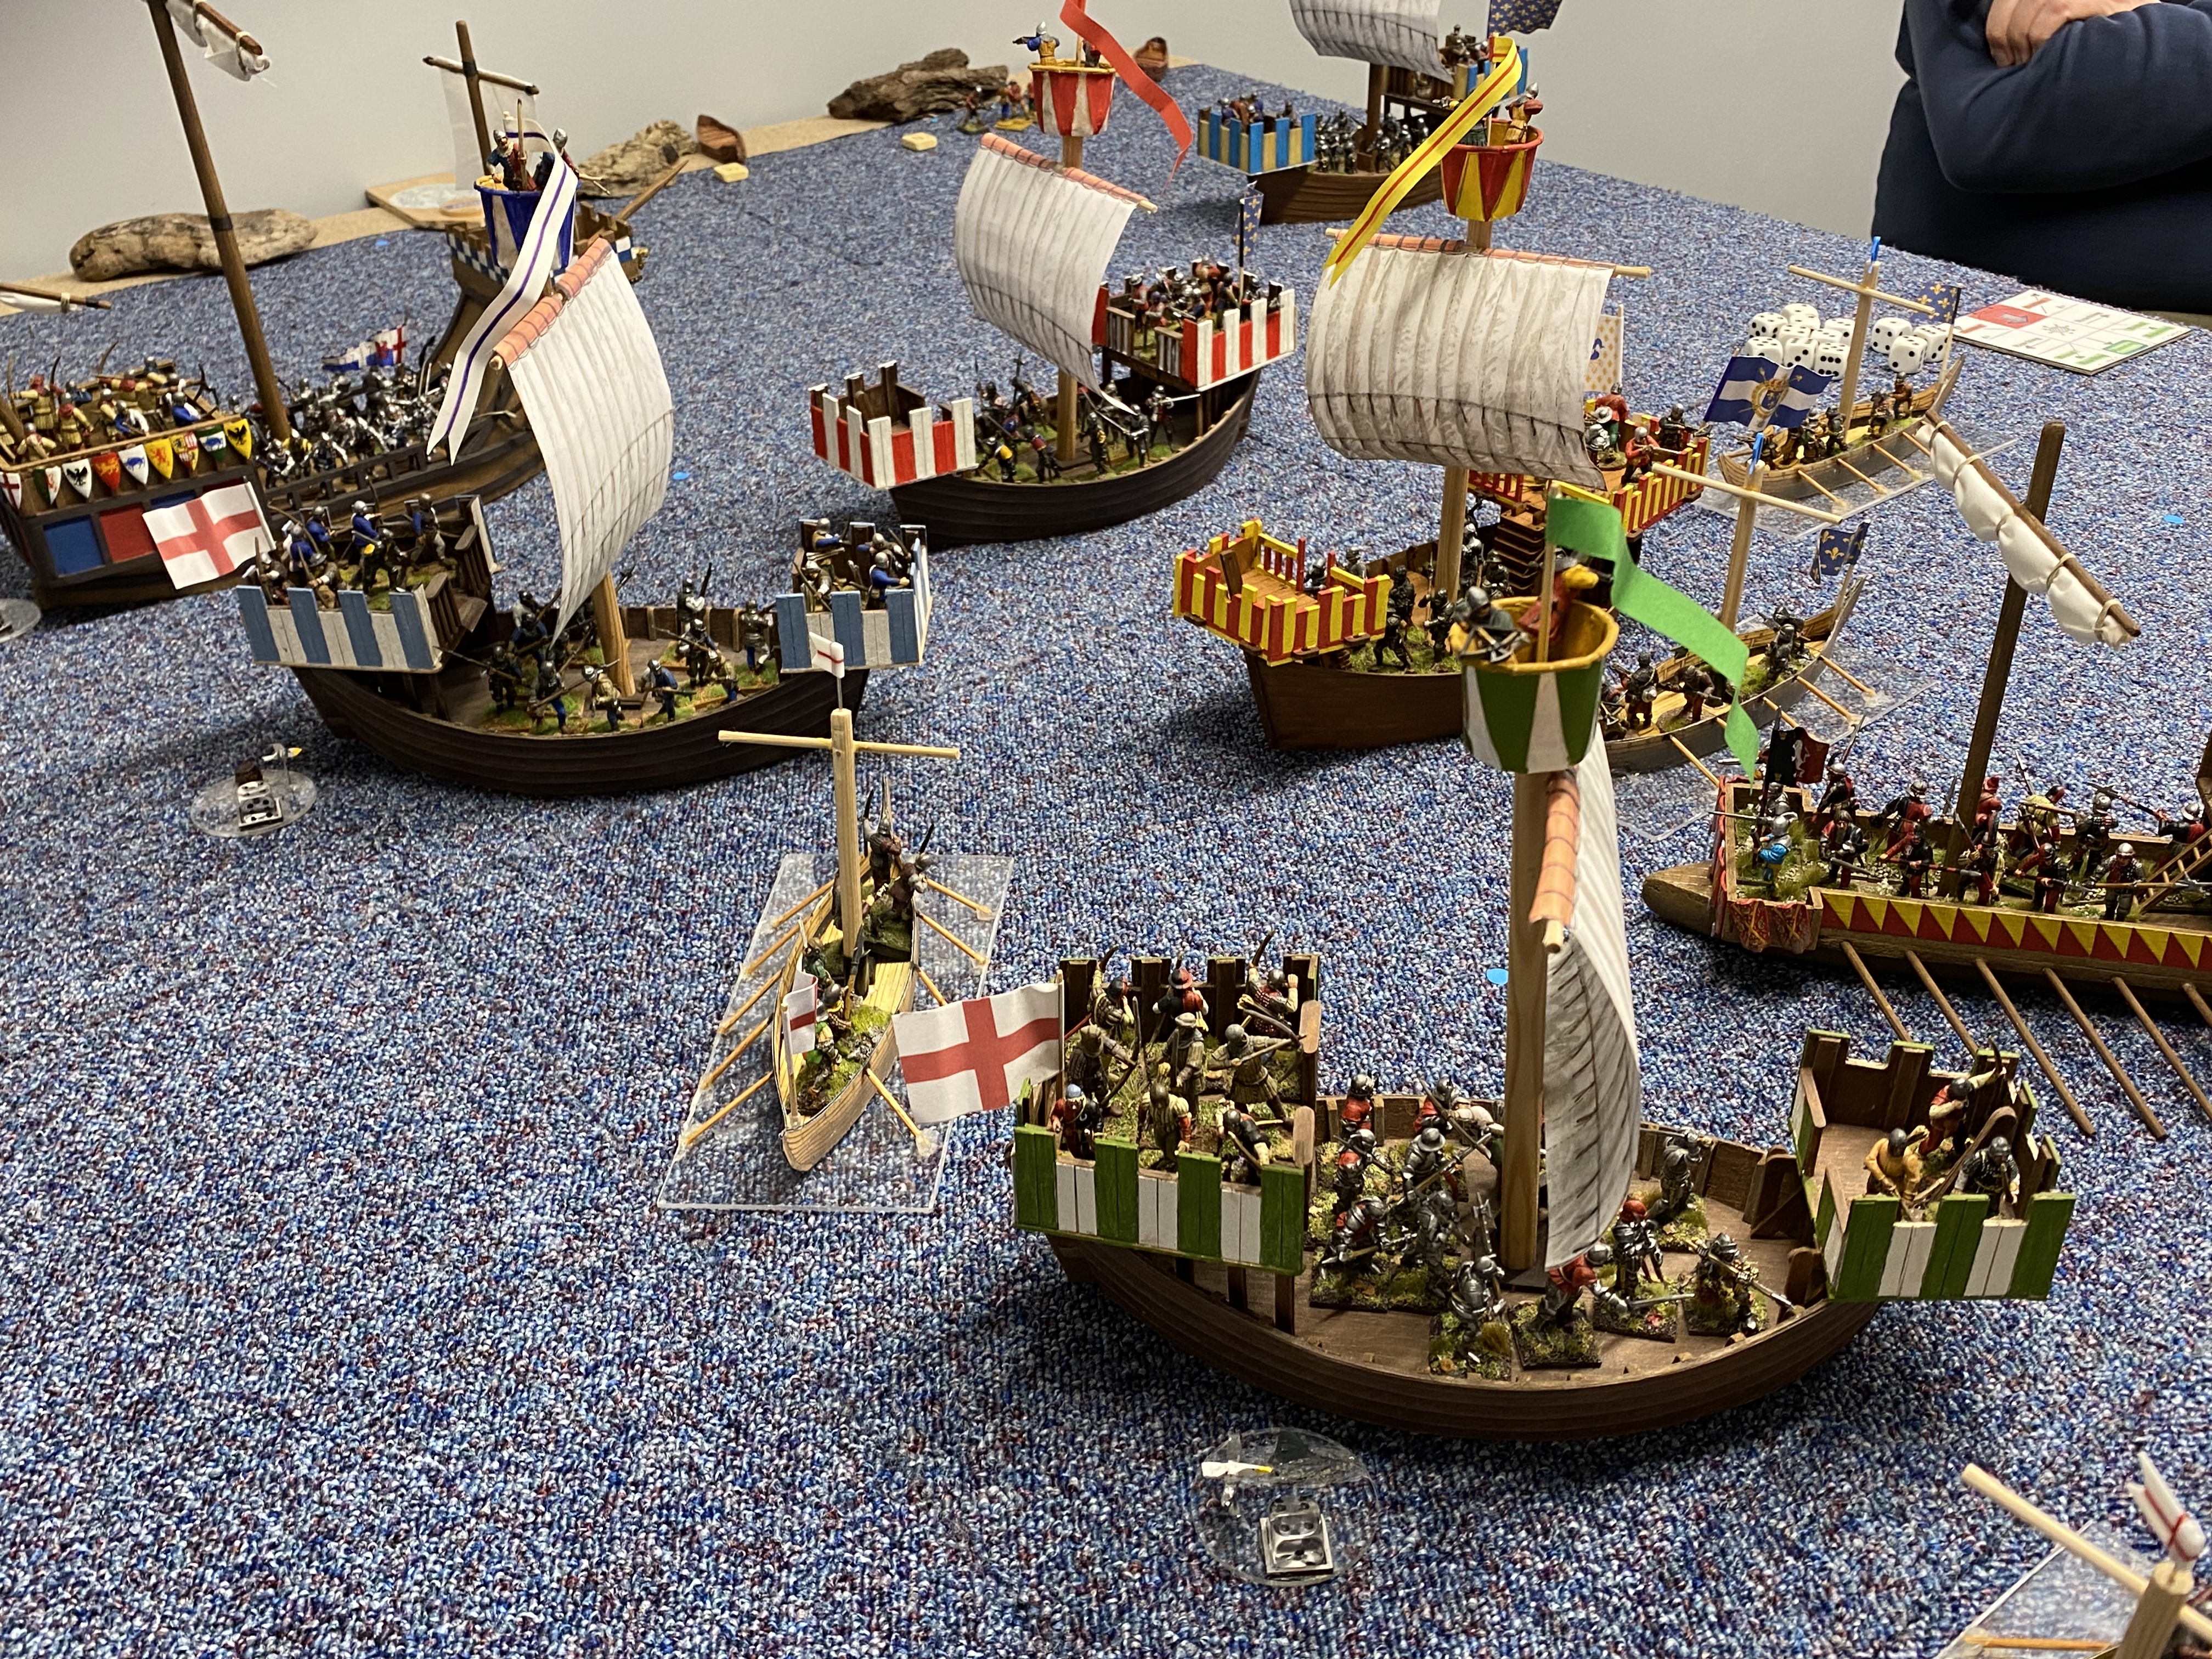
I wouldn’t want anyone to think that I am an expert when it comes to Medieval Ships in wargaming. However, I do have some experience of boat building. My model ship building almost predates my involvement in wargaming and in my younger years, I was a competent sailor of Marblehead yachts and a member of the Gosport model boat club. In an effort to improve my knowledge on the topic, I do spend my lunchtimes perusing the internet searching for information and it would seem to me that there is much that we don’t know about the development of ships in the Medieval period.
I found this piece to be quite interesting:
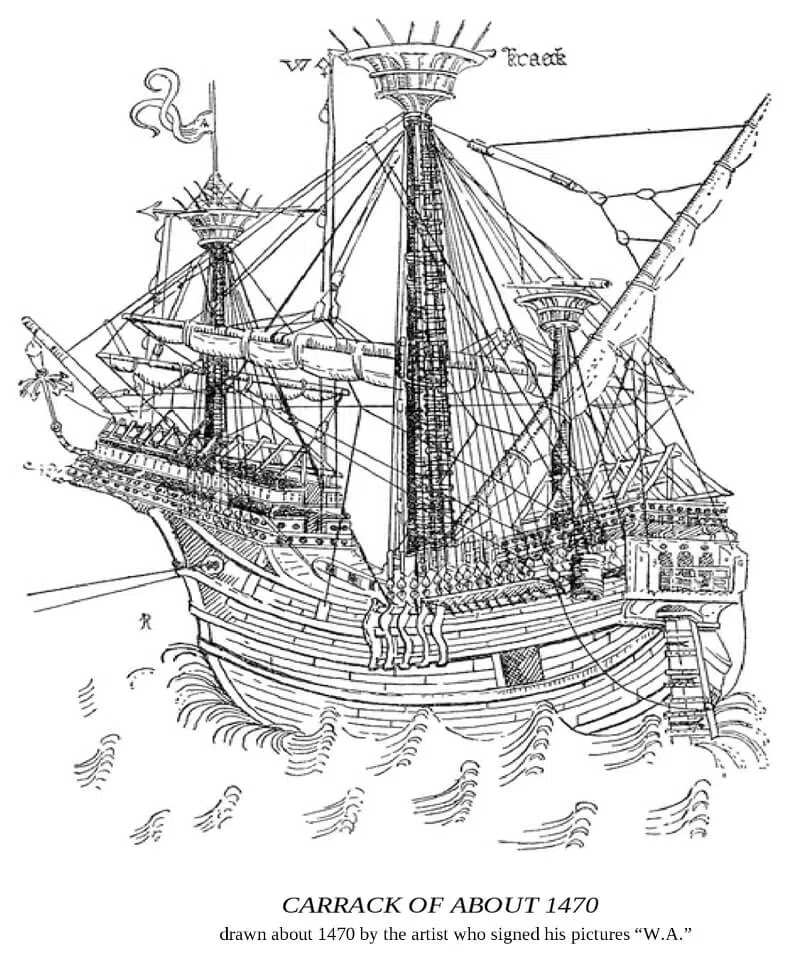
At the beginning of the 15th century the big seagoing sailing-ship had one mast and one sail. Fifty years later she had three masts and five or six sails. Unfortunately this great change comes just at a time when we are very badly off for pictures or descriptions of ships. English inventories of 1410-12 have been published and these give little light on the first stage of the change, but after that comes darkness. Other inventories of about 1425 are known to exist, but they have been not yet copied and printed. The documents of 1410-12 show that one ship in the English Royal Navy – and only one- had more than one mast; she had “I mast magn.” and “I mast parv.” – in other words, one big mast and one small mast. The latter may have been in the top as a topmast. We are not told which, but the reference is very important as being the first evidence of a second mast in Northern waters. It must be noted that this small mast was found in a ship called the “carake” and a carrack was by origin a Mediterranean type… The name ‘carrack’ was not new. It occurs in Spanish documents before the end of 13th century, and there is an account of the capture by Spanish galleys in 1359 of a large Venetian carrack; but it is in the 15-th century that the carrack was in her prime, and we see her then as a three masted ship developed by the southern nations from the Northern one-master and then taken up all over Europe. Genoa was the chief port… There were Venetian carracks as well, but usually the vessels from Venice were galleys,… designed and equipped for long voyages and cargo-carrying. … From the book : A Short History of the Sailing Ship by Romola Anderson , R.C. Anderson
Some of the information above seems to be out of date. we know that the Grace Dieu, Henry V’s warship was launched in 1418 and she was a massive ship ( literally a Great Ship) with three masts but it serves to show what little detail that we have of vessels in this period. We also know that Grace dieu had a number of escorts – smaller ships of similar design, or Carracks.
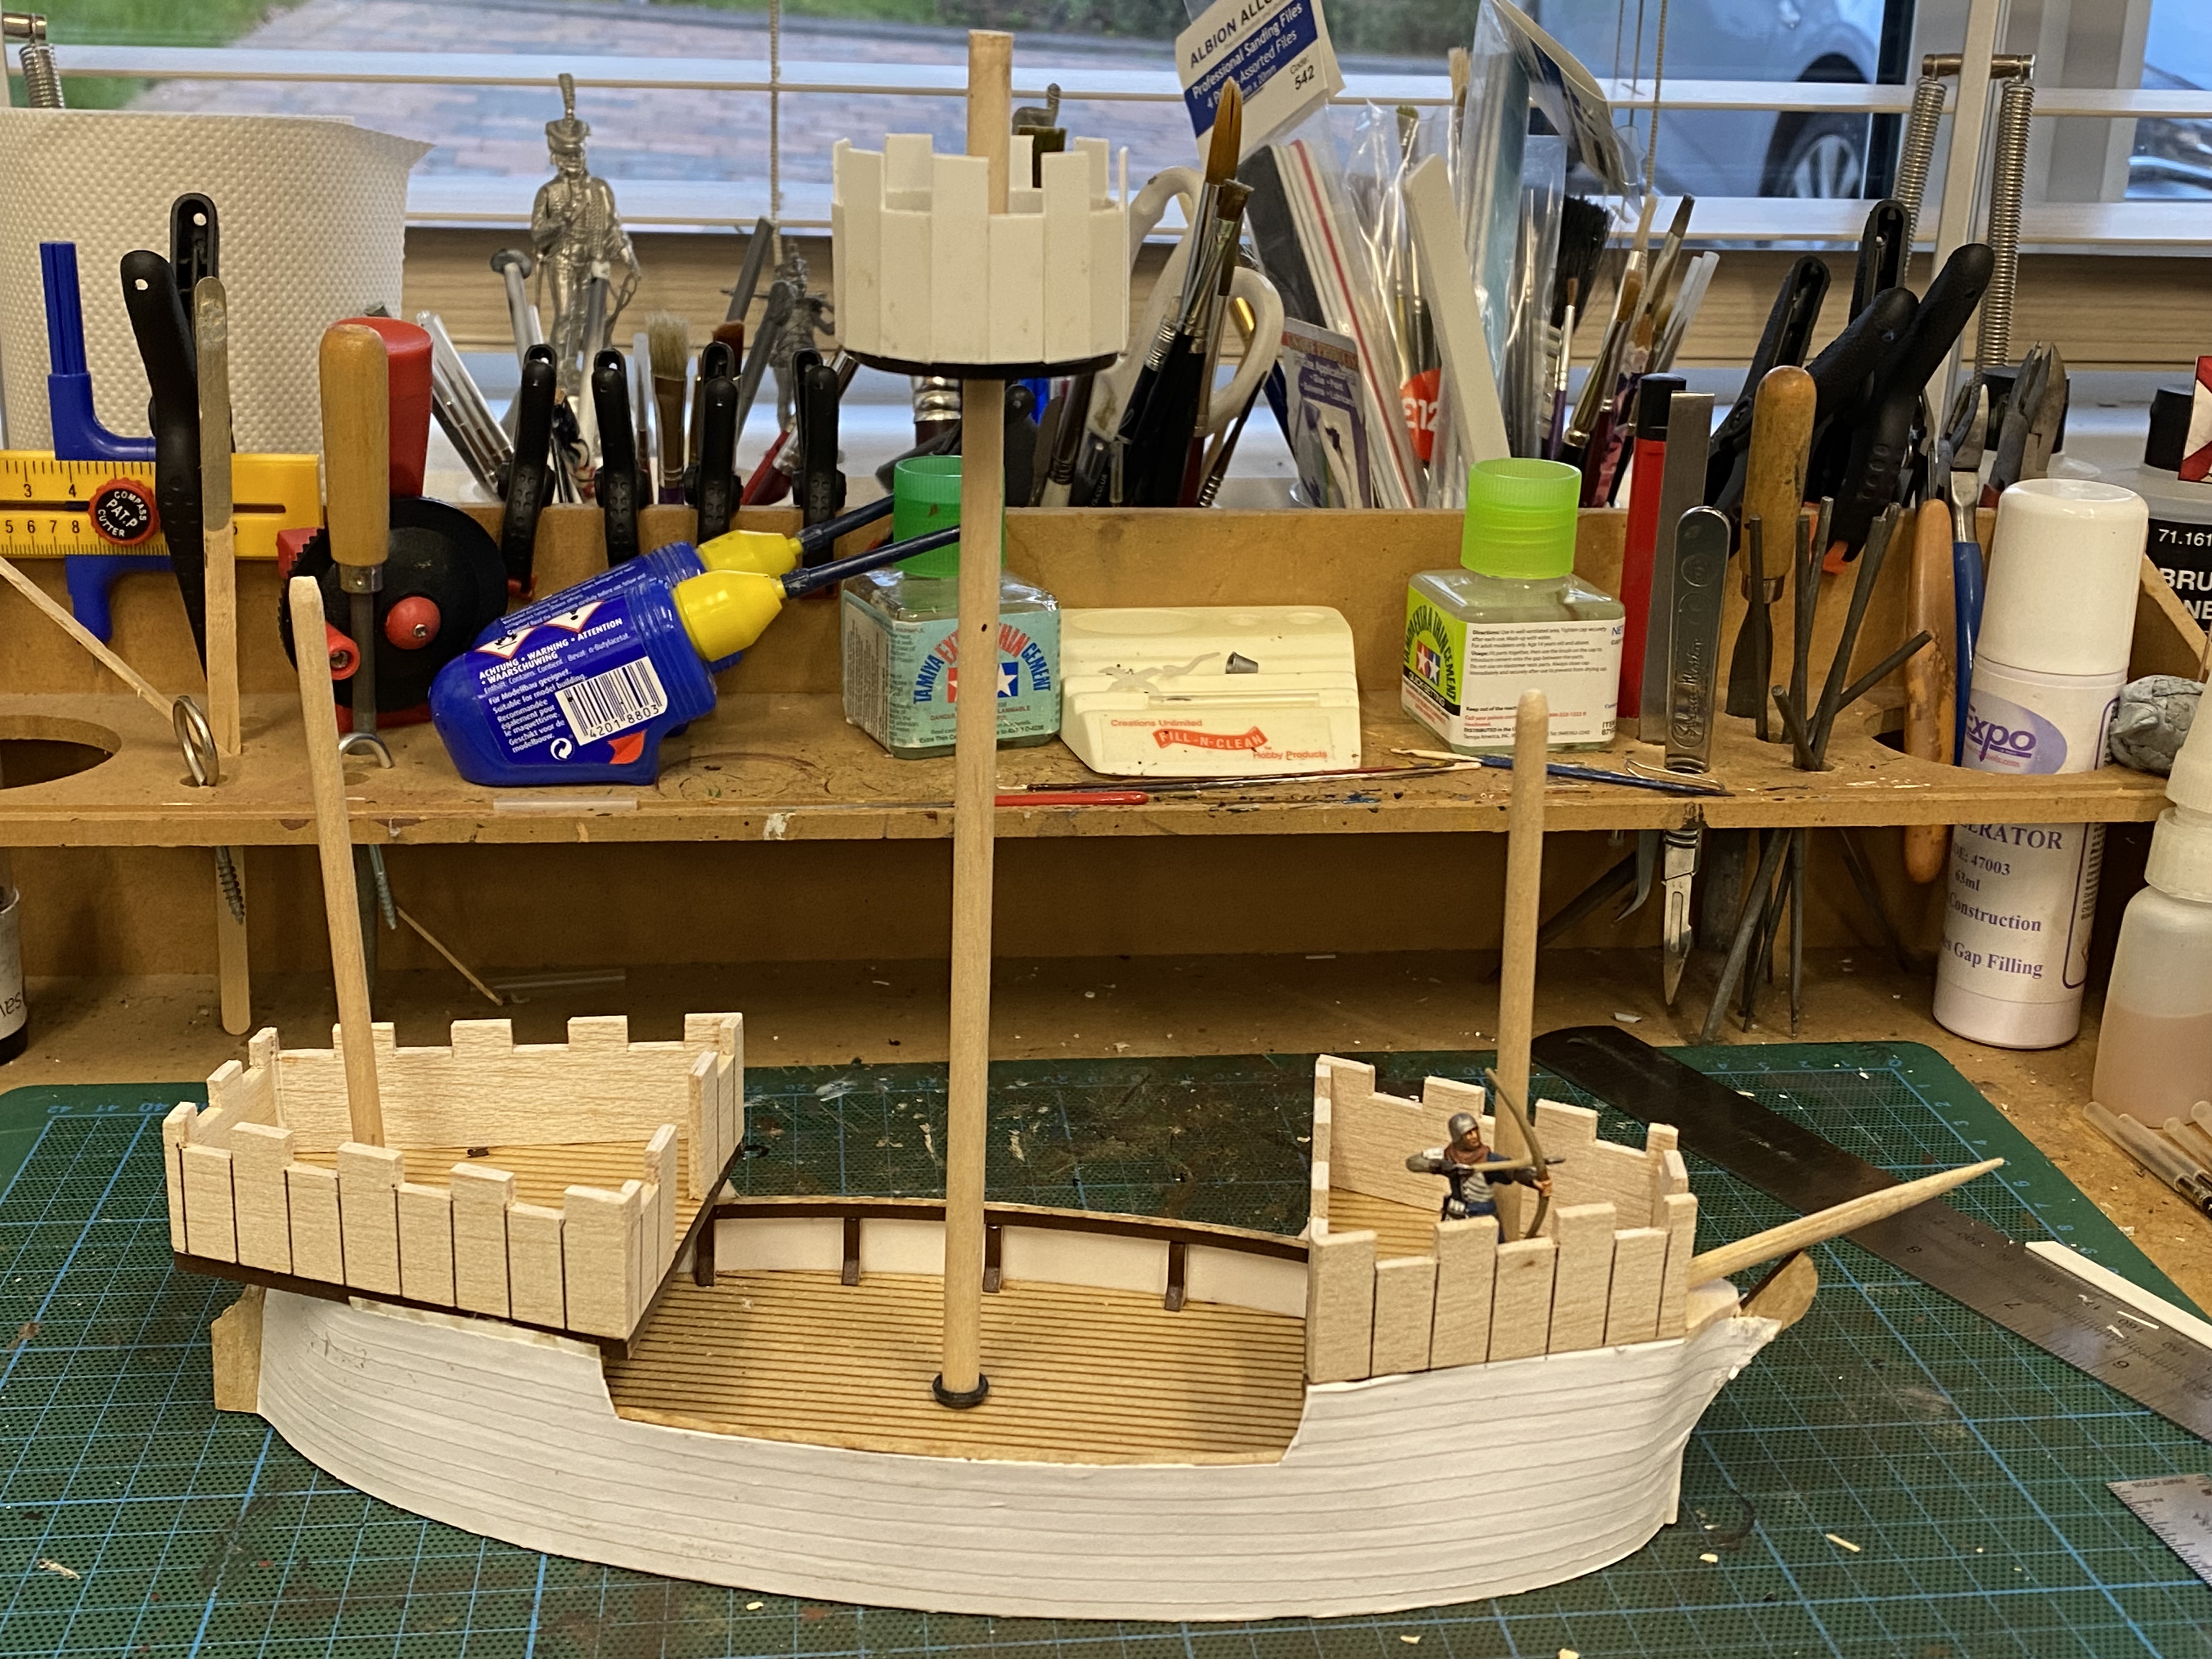
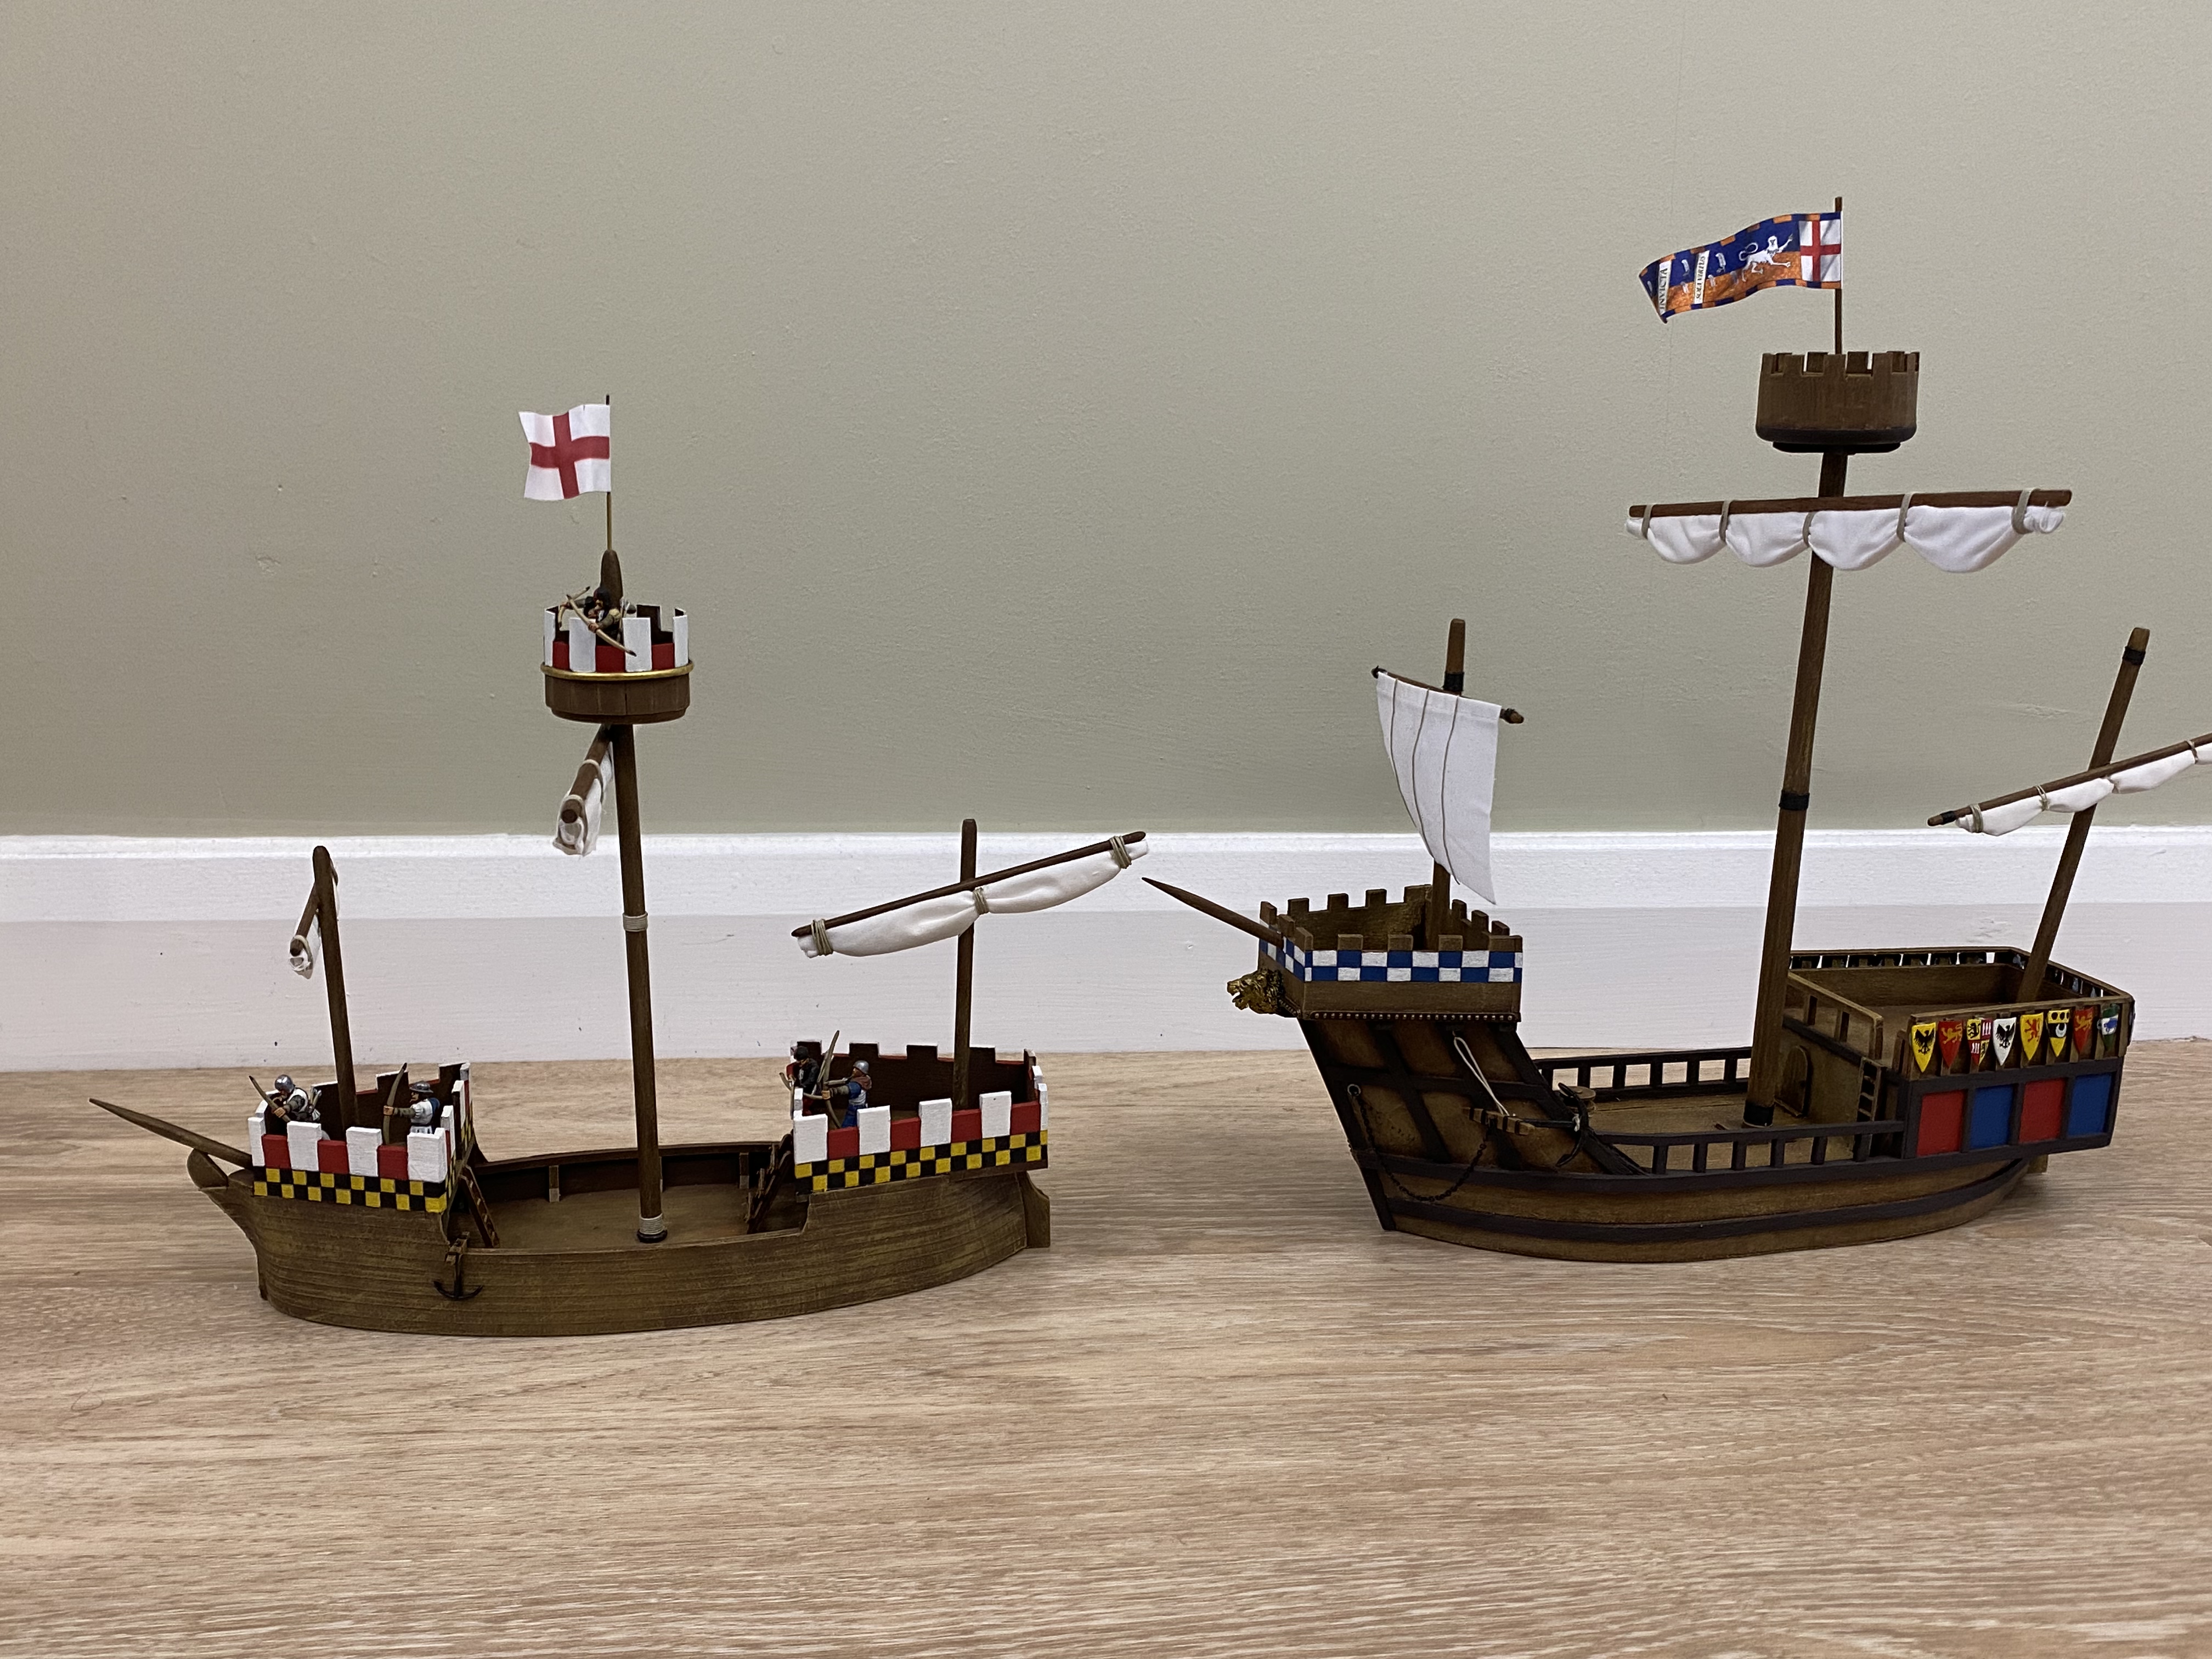
So when I was very kindly sent a kit of a medieval cog by George Antioch, a follower of the facebook ‘Never mind the Billhooks’ page, my first thought was to make an escort for my version of a Great ship, ‘the Sun In Glory’ ( shown above, cruising past the toaster!)
George had designed his kit as a cog but I felt that it was sleek enough to convert to a carrack, by adding the extra masts and building up the two castles. The first task was to assemble the hull.
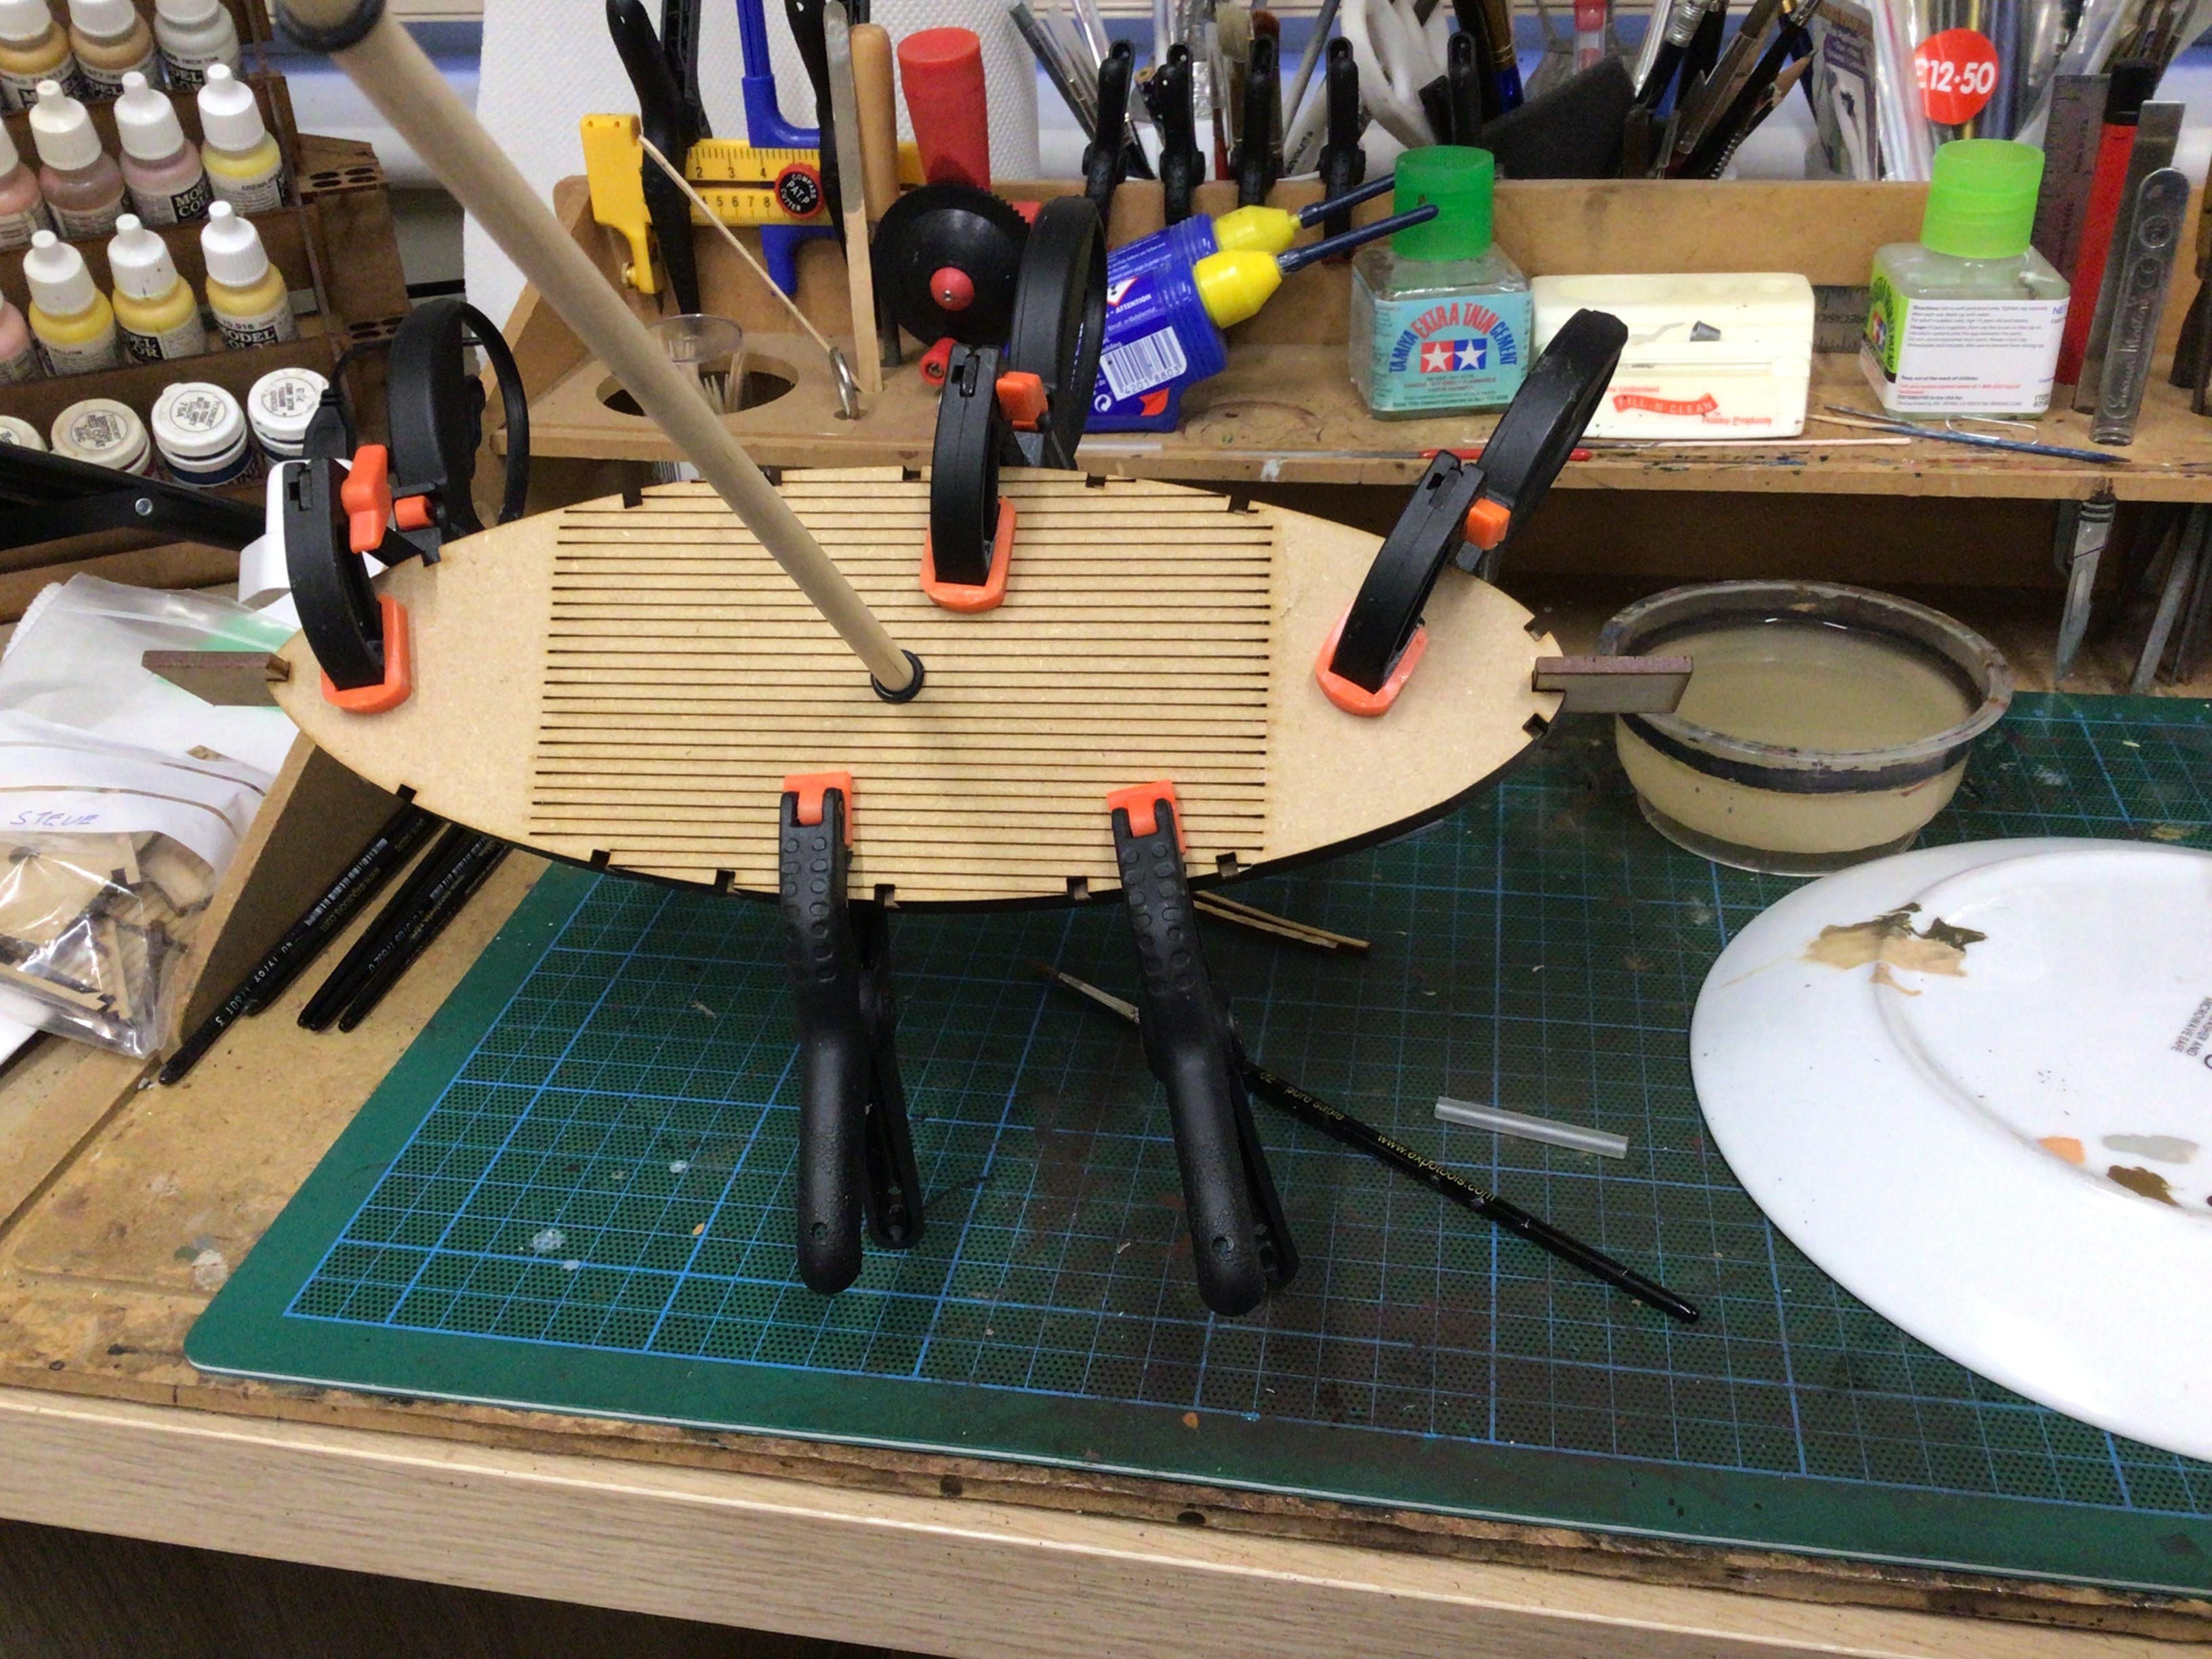
Using the mast to ensure everything was aligned and the temporary square lugs, fore and aft, I used PVA to hold the hull pieces together and clamped it whilst it dried.
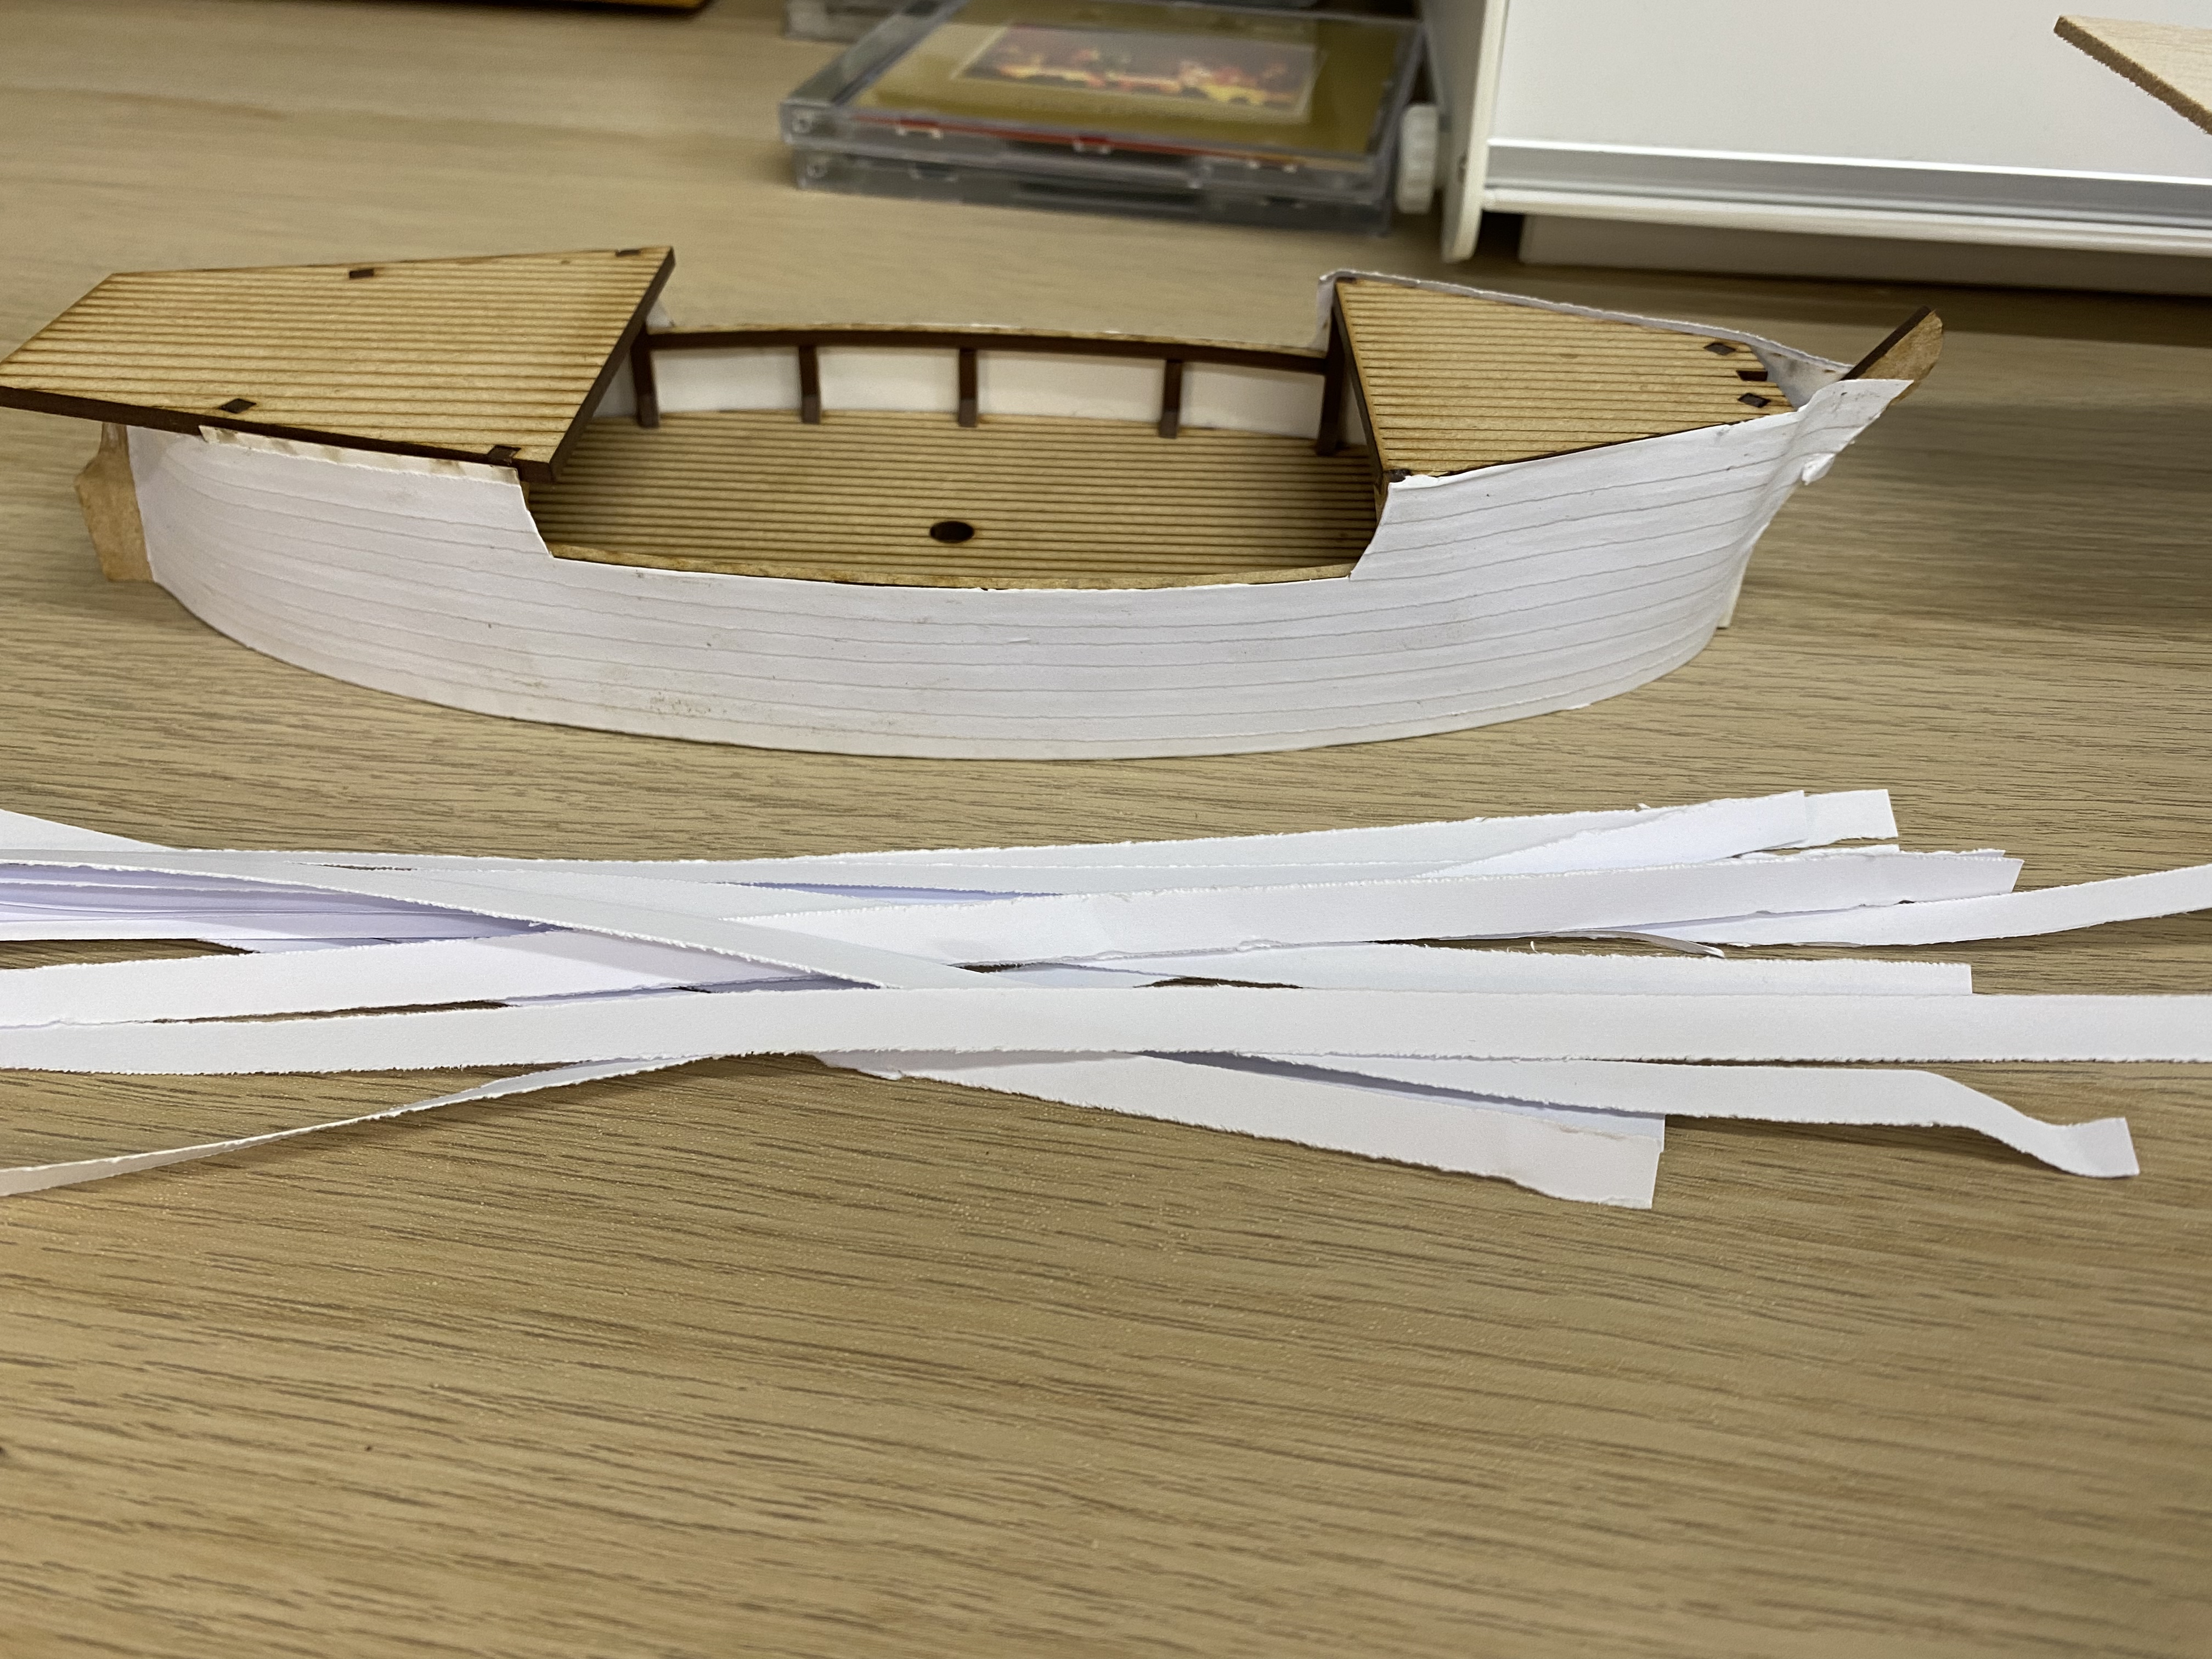
With the hull assembled and the decks of the fore and stern castles in place, I thought that I would add some planking to the card formers that made up the hull. I was too lazy to cut out the individual strips of paper and came up with the idea of using my paper shredder to produce instant planking by running a sheet of good quality paper through it! It was an easy job to apply the paper with PVA to get the effect of planking on the hull.
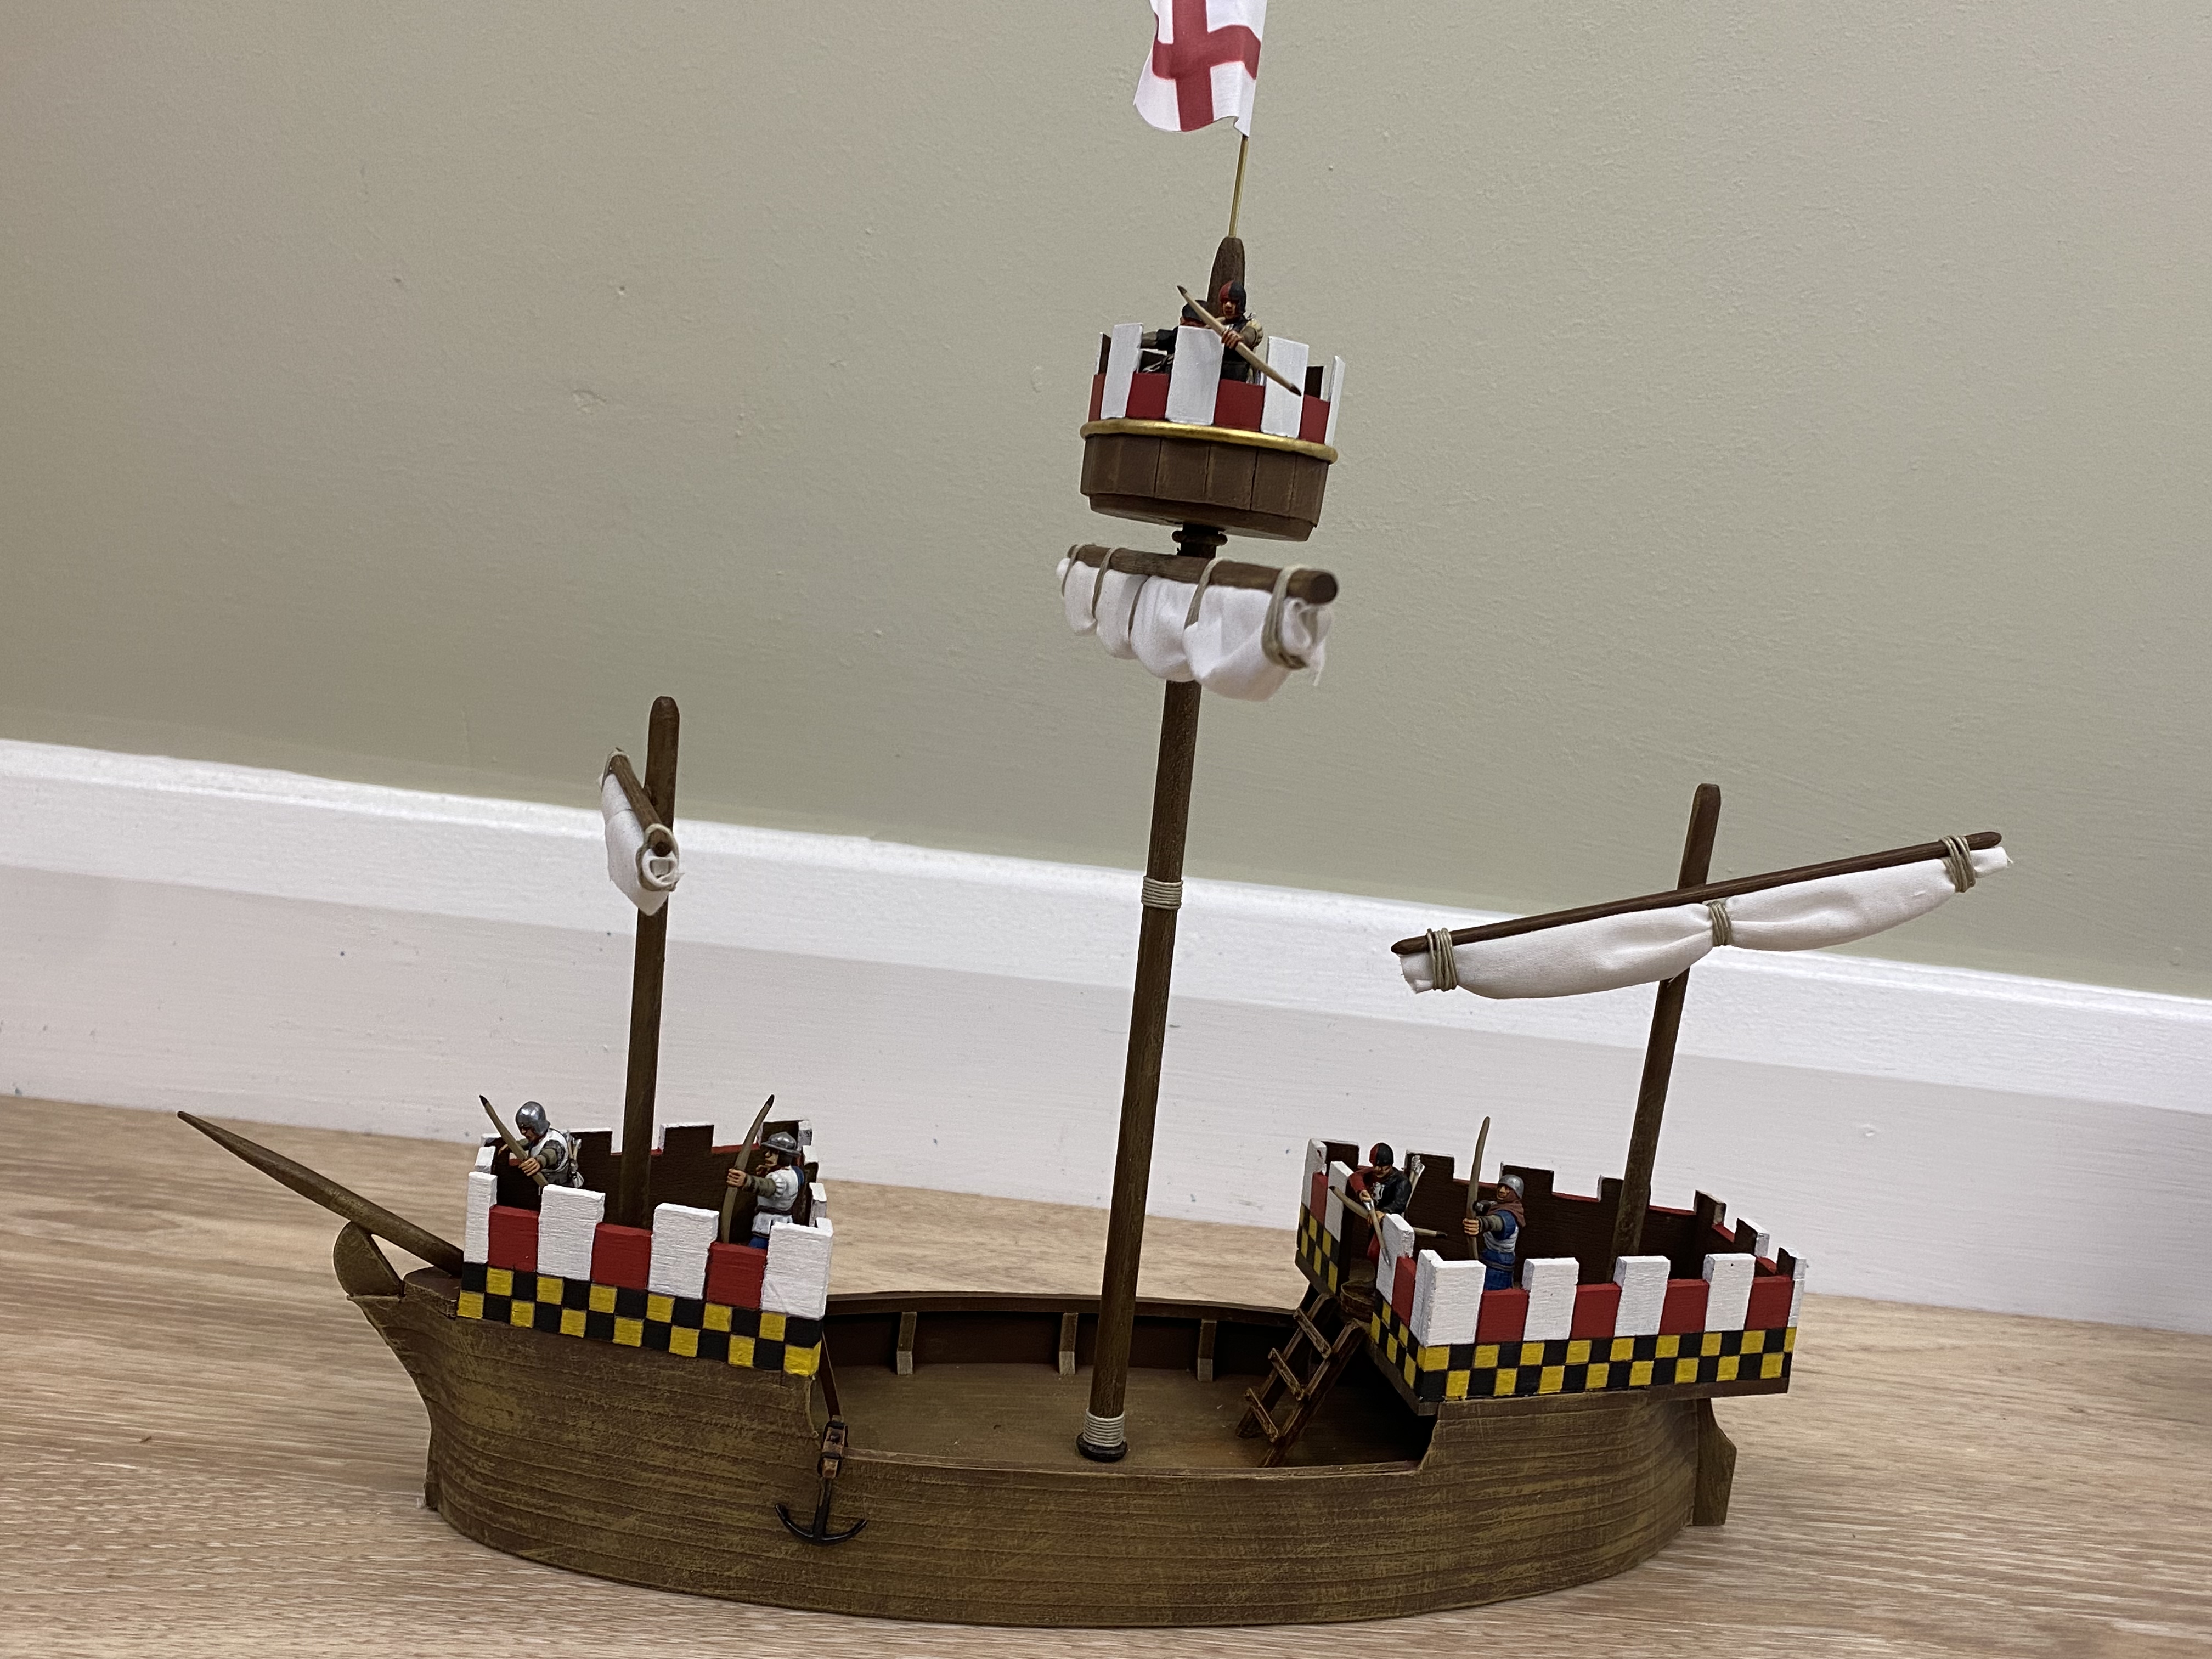
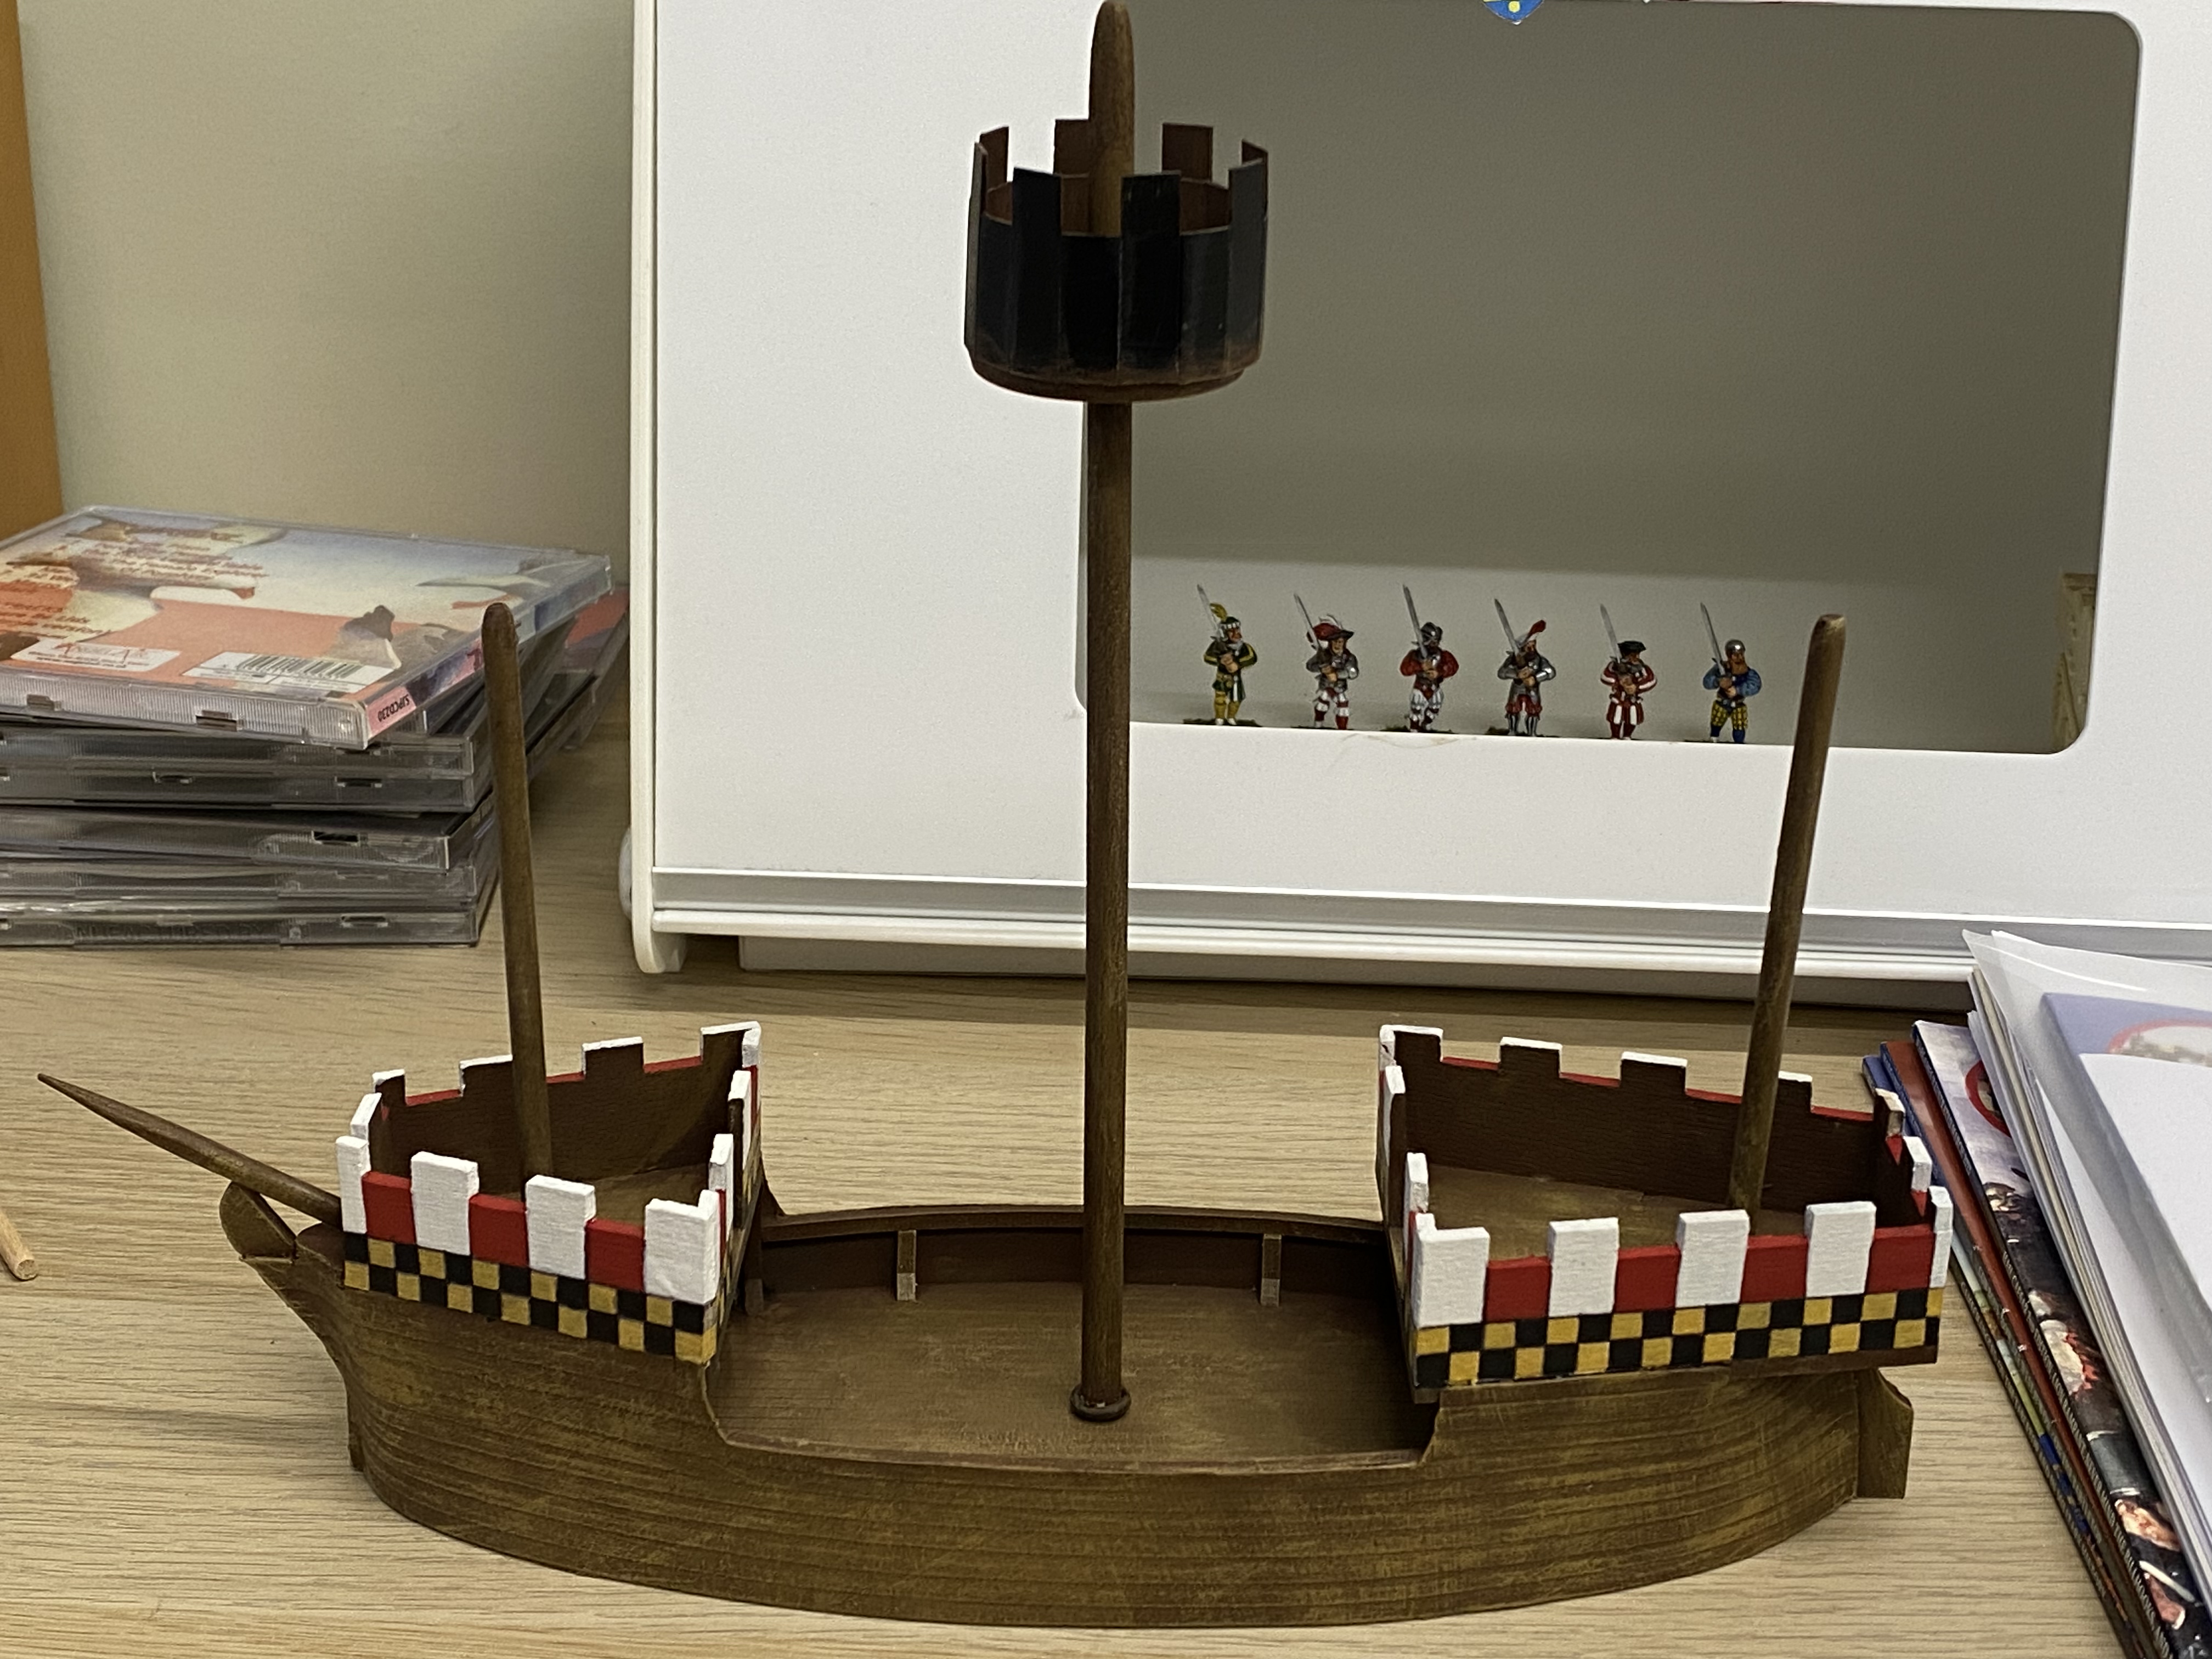
Once the hull was dry, I added the stern castle and forecastle using balsa – I used the card pieces supplied by George as a template but wanted them to be a bit taller than those from George. You can see that I’ve also added the two extra masts and a bowsprit. The masts are of doweling, the bowsprit is a ‘posh’ barbecue skewer, so I didn’t even have to sharpen it! The fighting top is made from two round 40mm bases with evergreen strip ( pack 159,) cut to size and glued into place.
The next stage was to paint everything. I used my standard process of a mixture of browns, finishing with a highlight of yellow ochre. I’ve added the links to my earlier blogs so that you can see this in detail if you need to. The checkerboard pattern was marked out using a black biro. With hindsight a pencil would have been better as correcting mistakes was difficult. The effect is OK but don’t look too closely! Yellow is a bugger to paint at the best of times!
Once I was happy with the painting, I added the spars and furled sails, ladders and anchor. I also modified the fighting top by adding a band of half round evergreen strip ( pack 243). It’s not as straight as it should be, the blooming clamps slipped as it was drying but I was too impatient to correct this and it just about passes!
Here’s the ‘George’ accompanying the ‘Sun in Splendour’ on the floor of my wargames room! I now have quite a fleet to fight using the new ‘Never Mind The Boathooks’ rules set – watch out for my next battle report!
Here are some useful links to my previous blog articles – there are others but these, I think are the most useful:
You can get hold of the rules for ‘Never Mind The Boathooks’ by purchasing issue 426 of Wargames Illustrated. As well as a free supplement with the rules, there are some useful boat building articles! It is available while stocks last here:
Well we’re halfway through May, so an April Round up is somewhat overdue! As with March though, there has been no real focus to what I have been doing other than to continue to work through the lead pile and also to complete anything that I have acquired. To be fair, that process is not quite as random as it sounds. I have a ‘program’ of ten hobby threads that I am following that give some continuity to my hobby and it is these that have shaped the projects passing across my workbench in April.
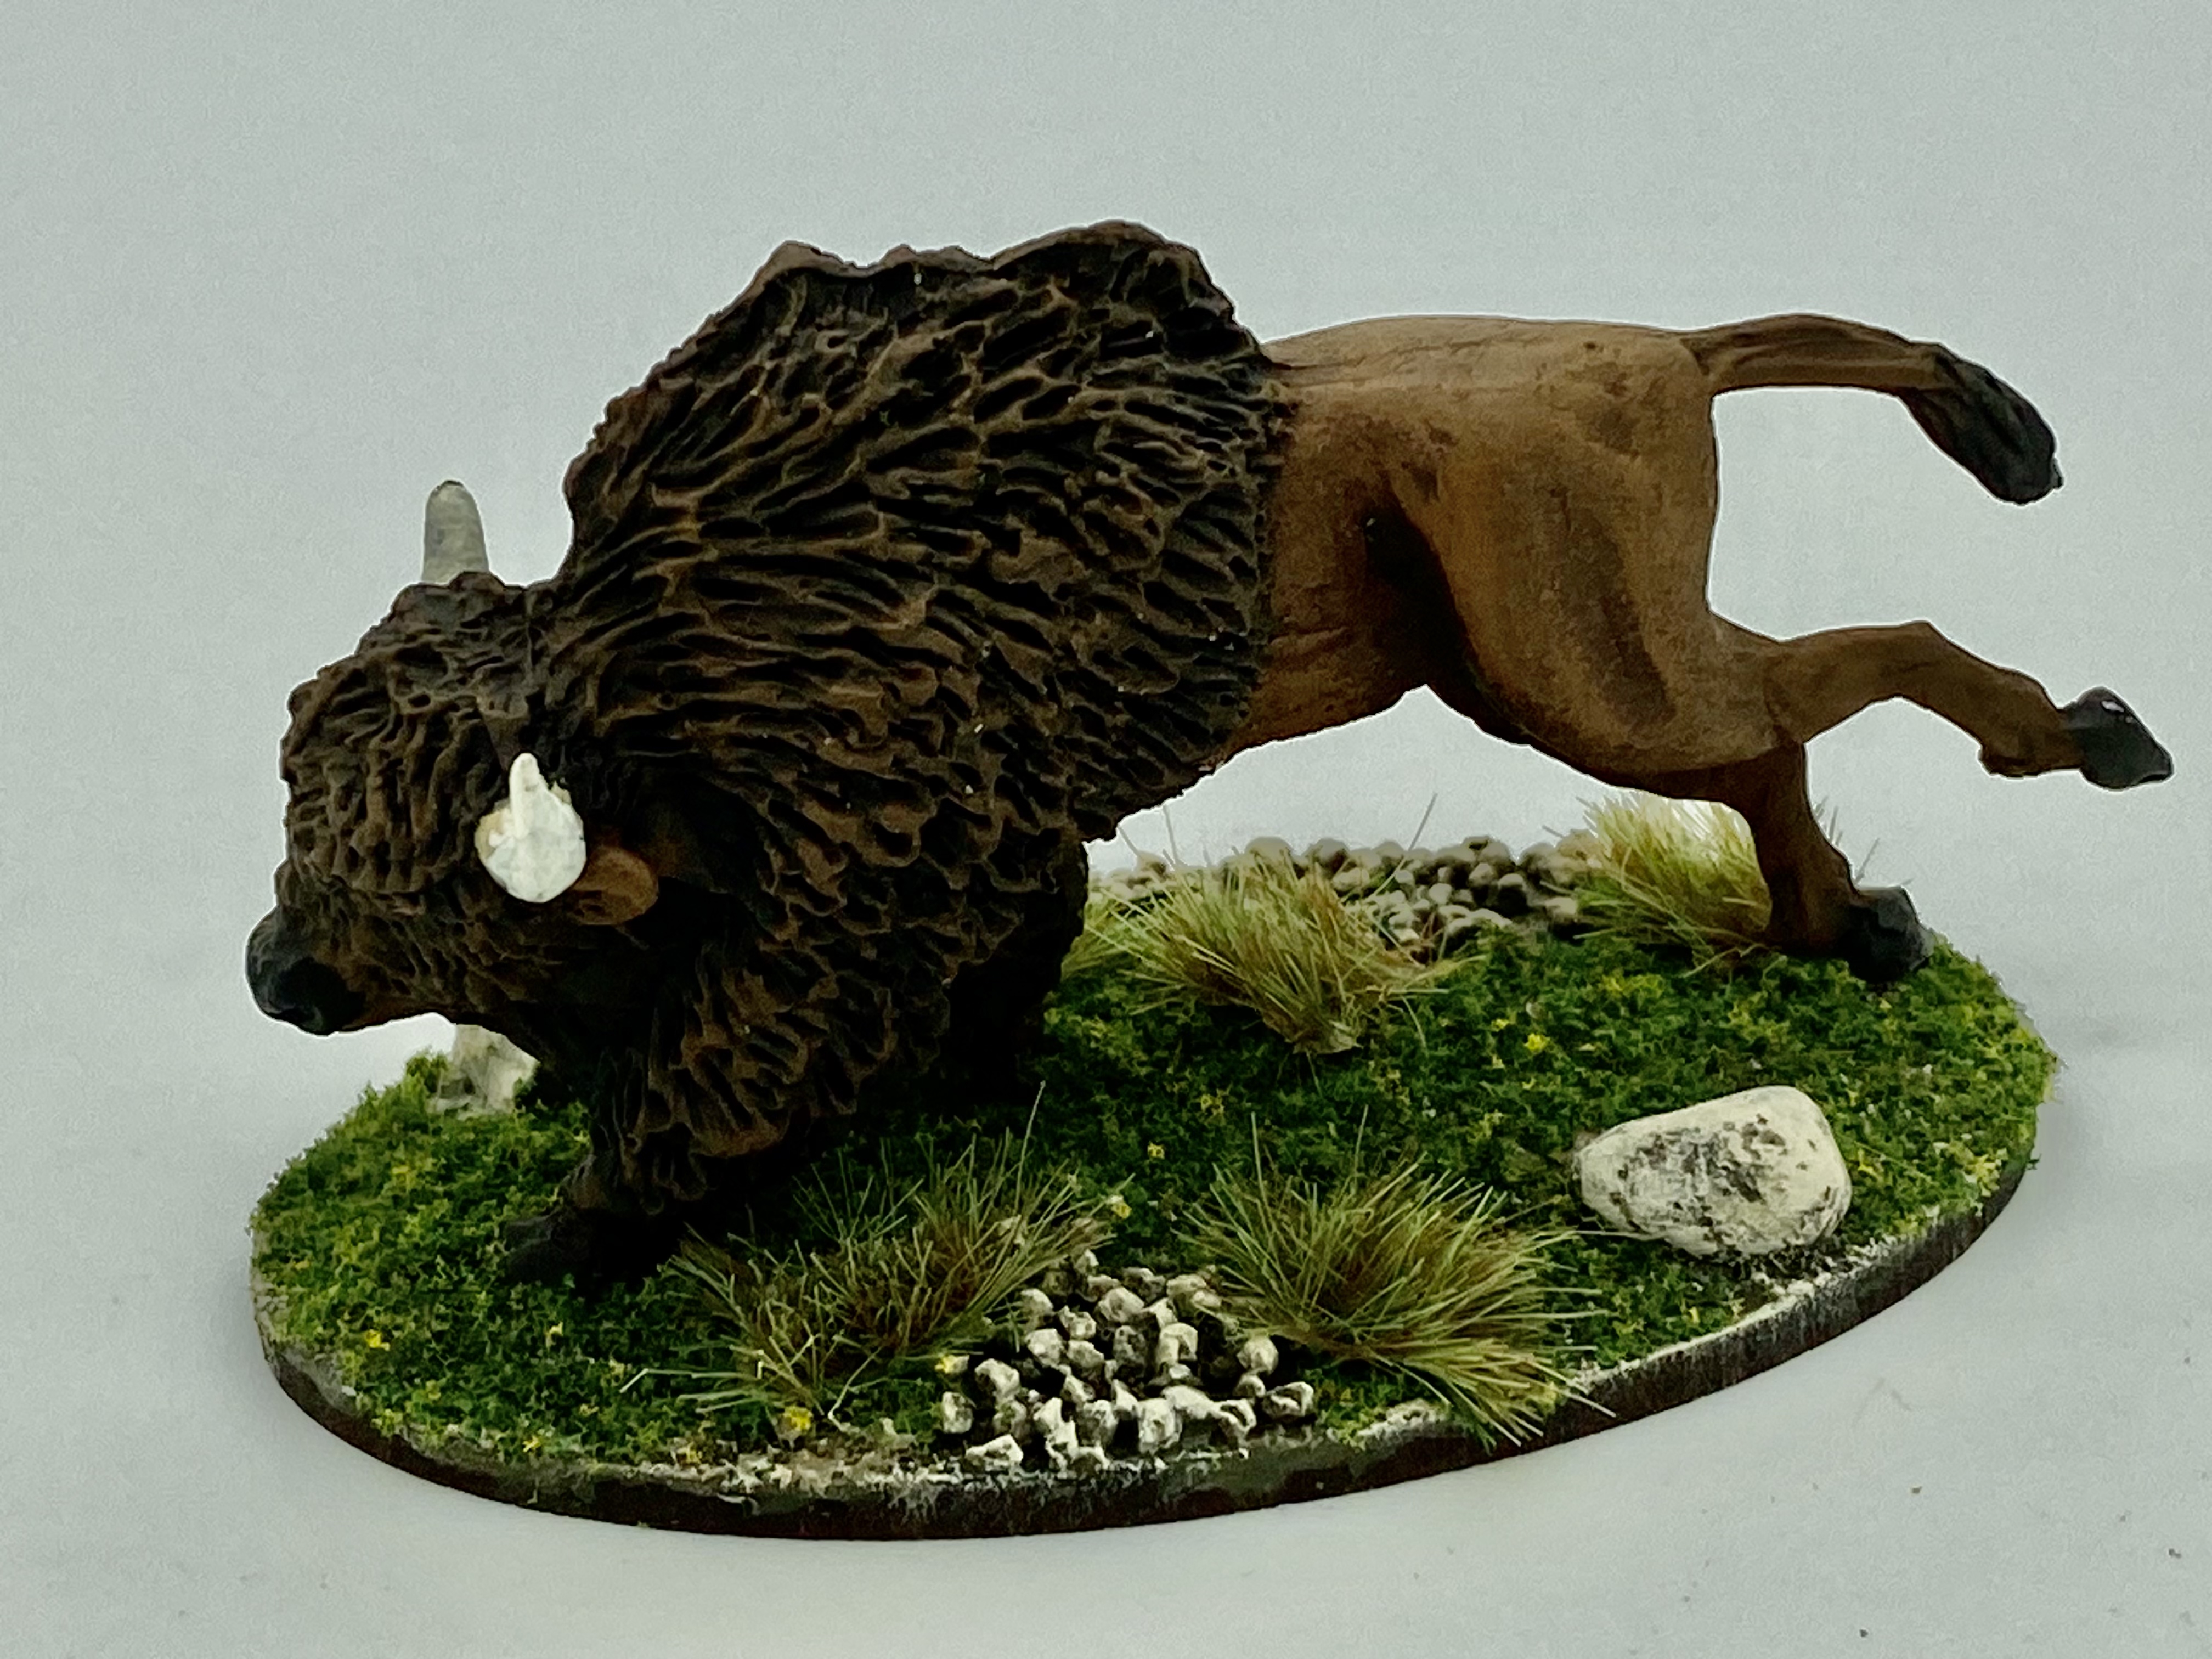
One of those threads is to paint all of the models in the DeeZee range. Above is DZ20, Young Bison, which I completed at the beginning of the month. There are 40 lines in the DeeZee range. I have personally painted about 30 of them, so I am gradually completing that little project.
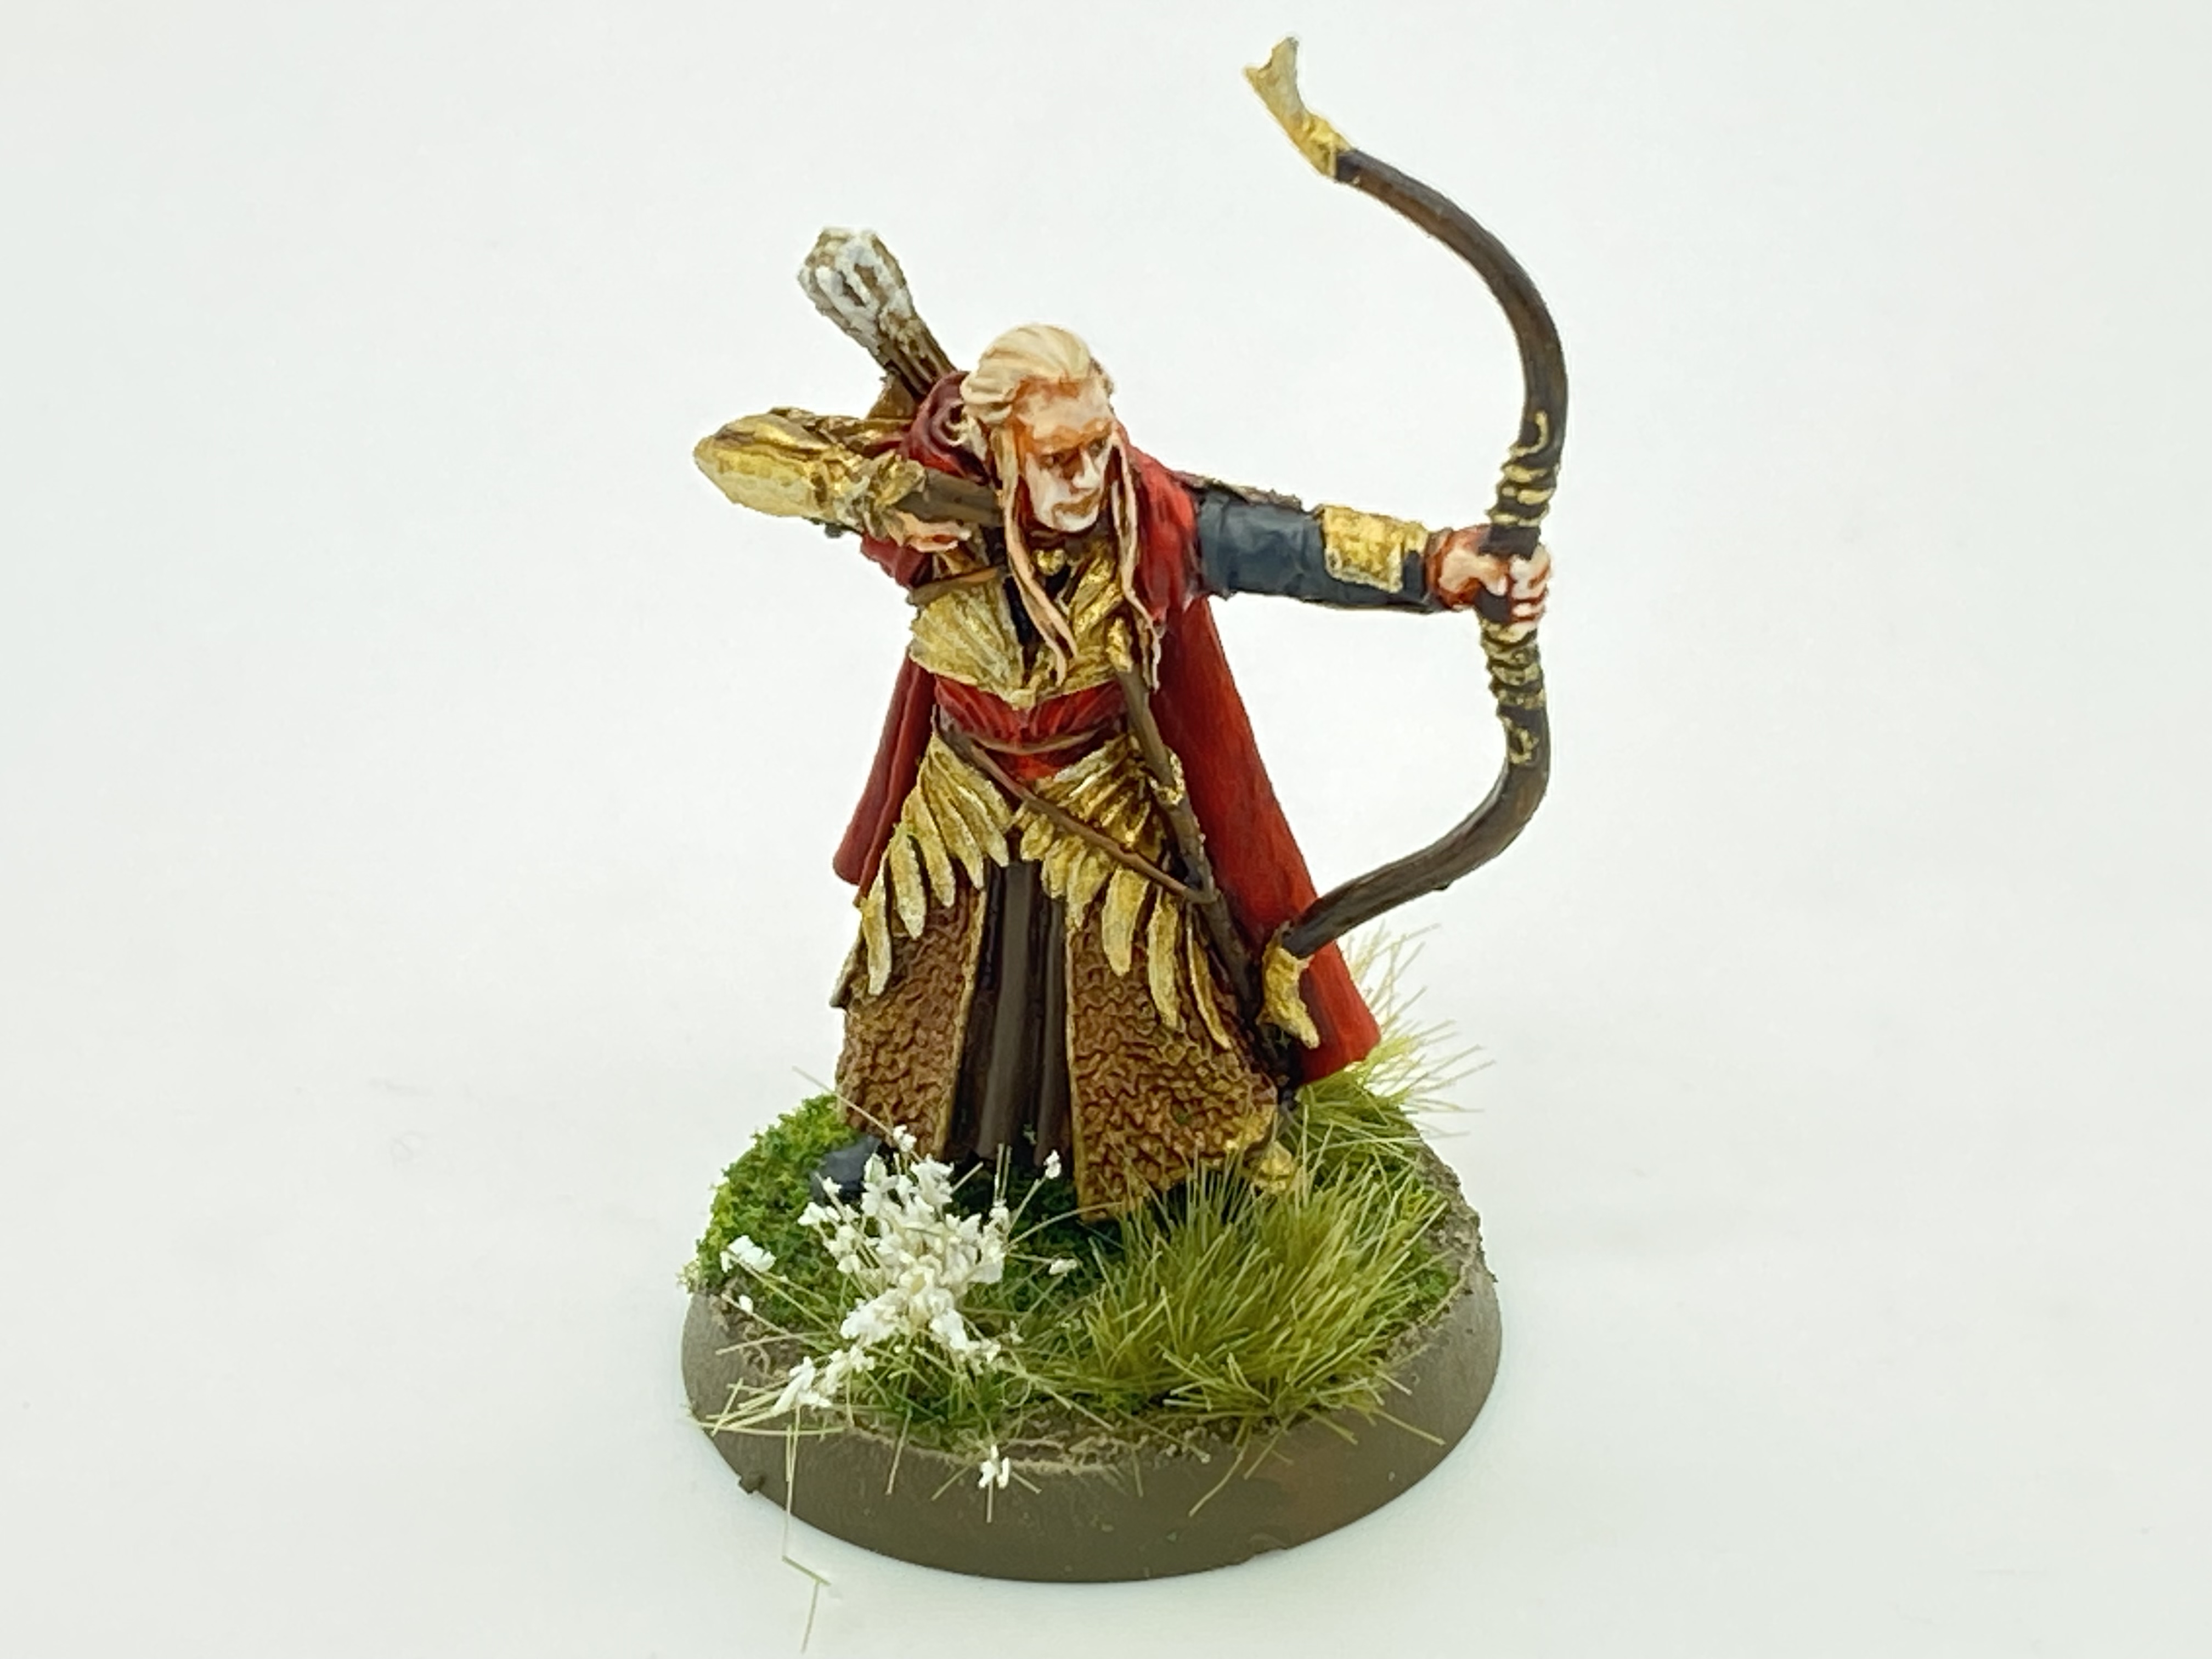
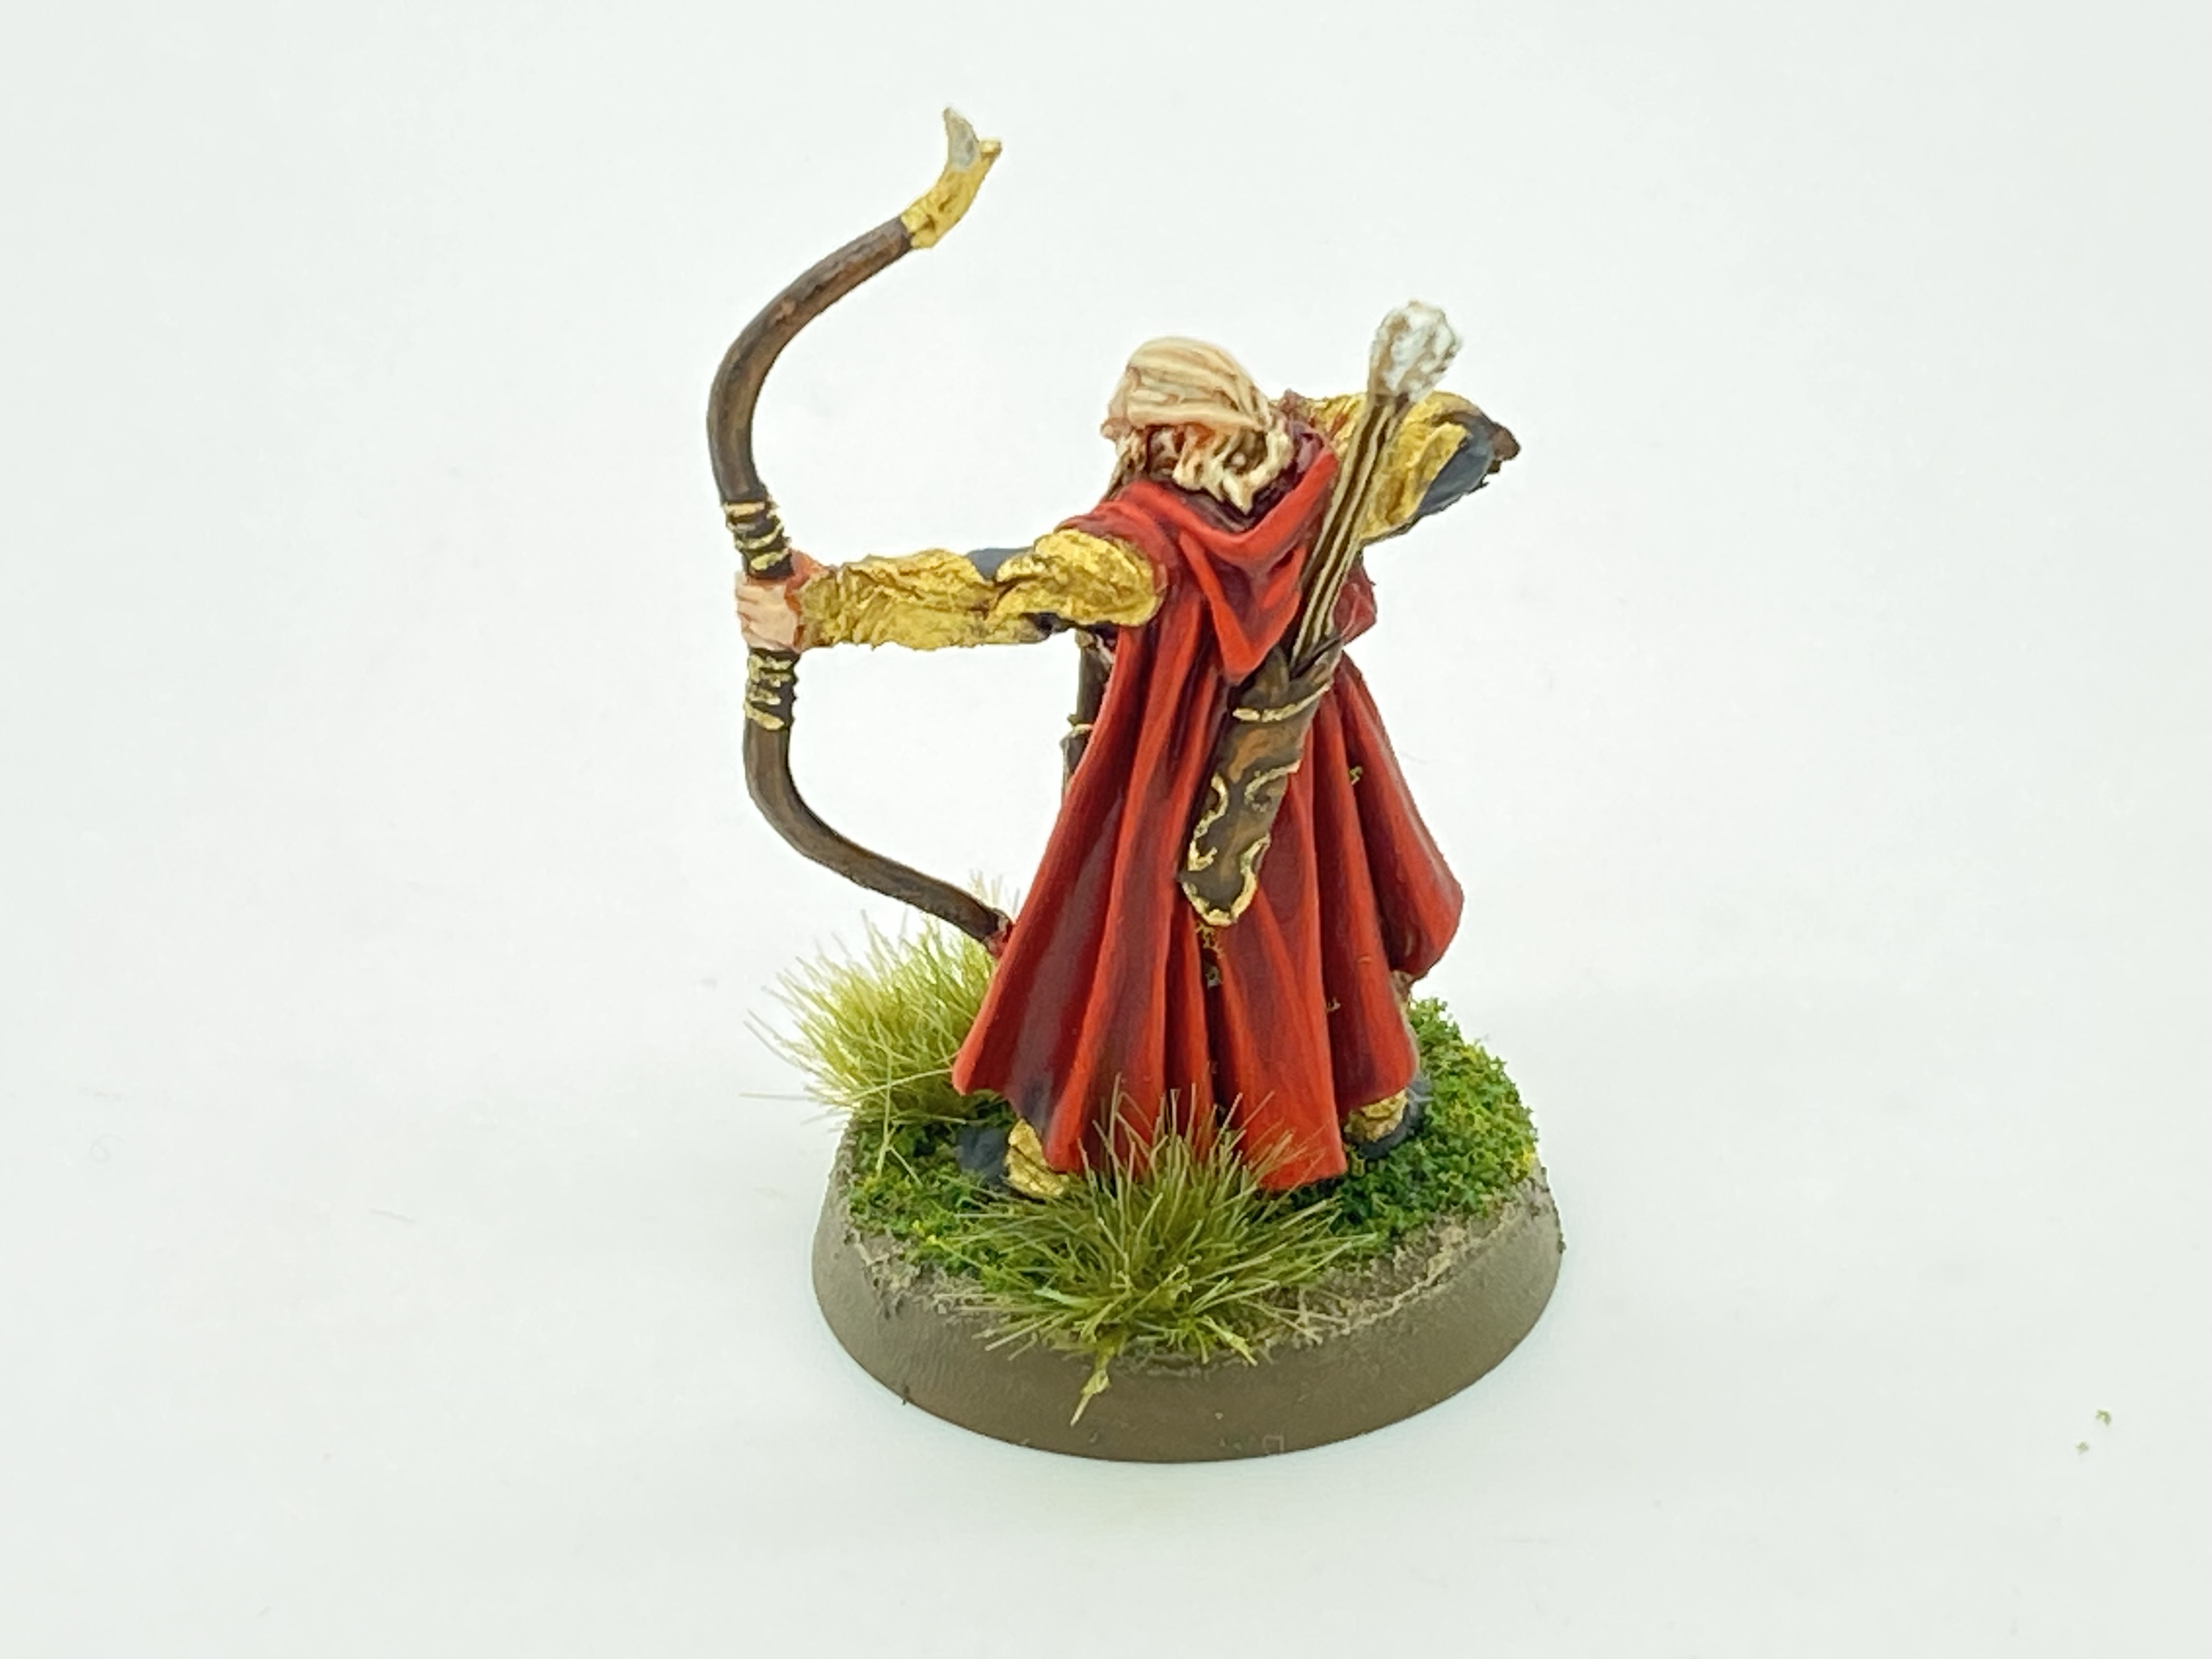
Another thread is to paint all of the figures and Scenery that came with the magazine collection Battle Games in Middle Earth. There are 91 issues of the Magazine and by painting Haldir ( above) I have now reached issue 28!
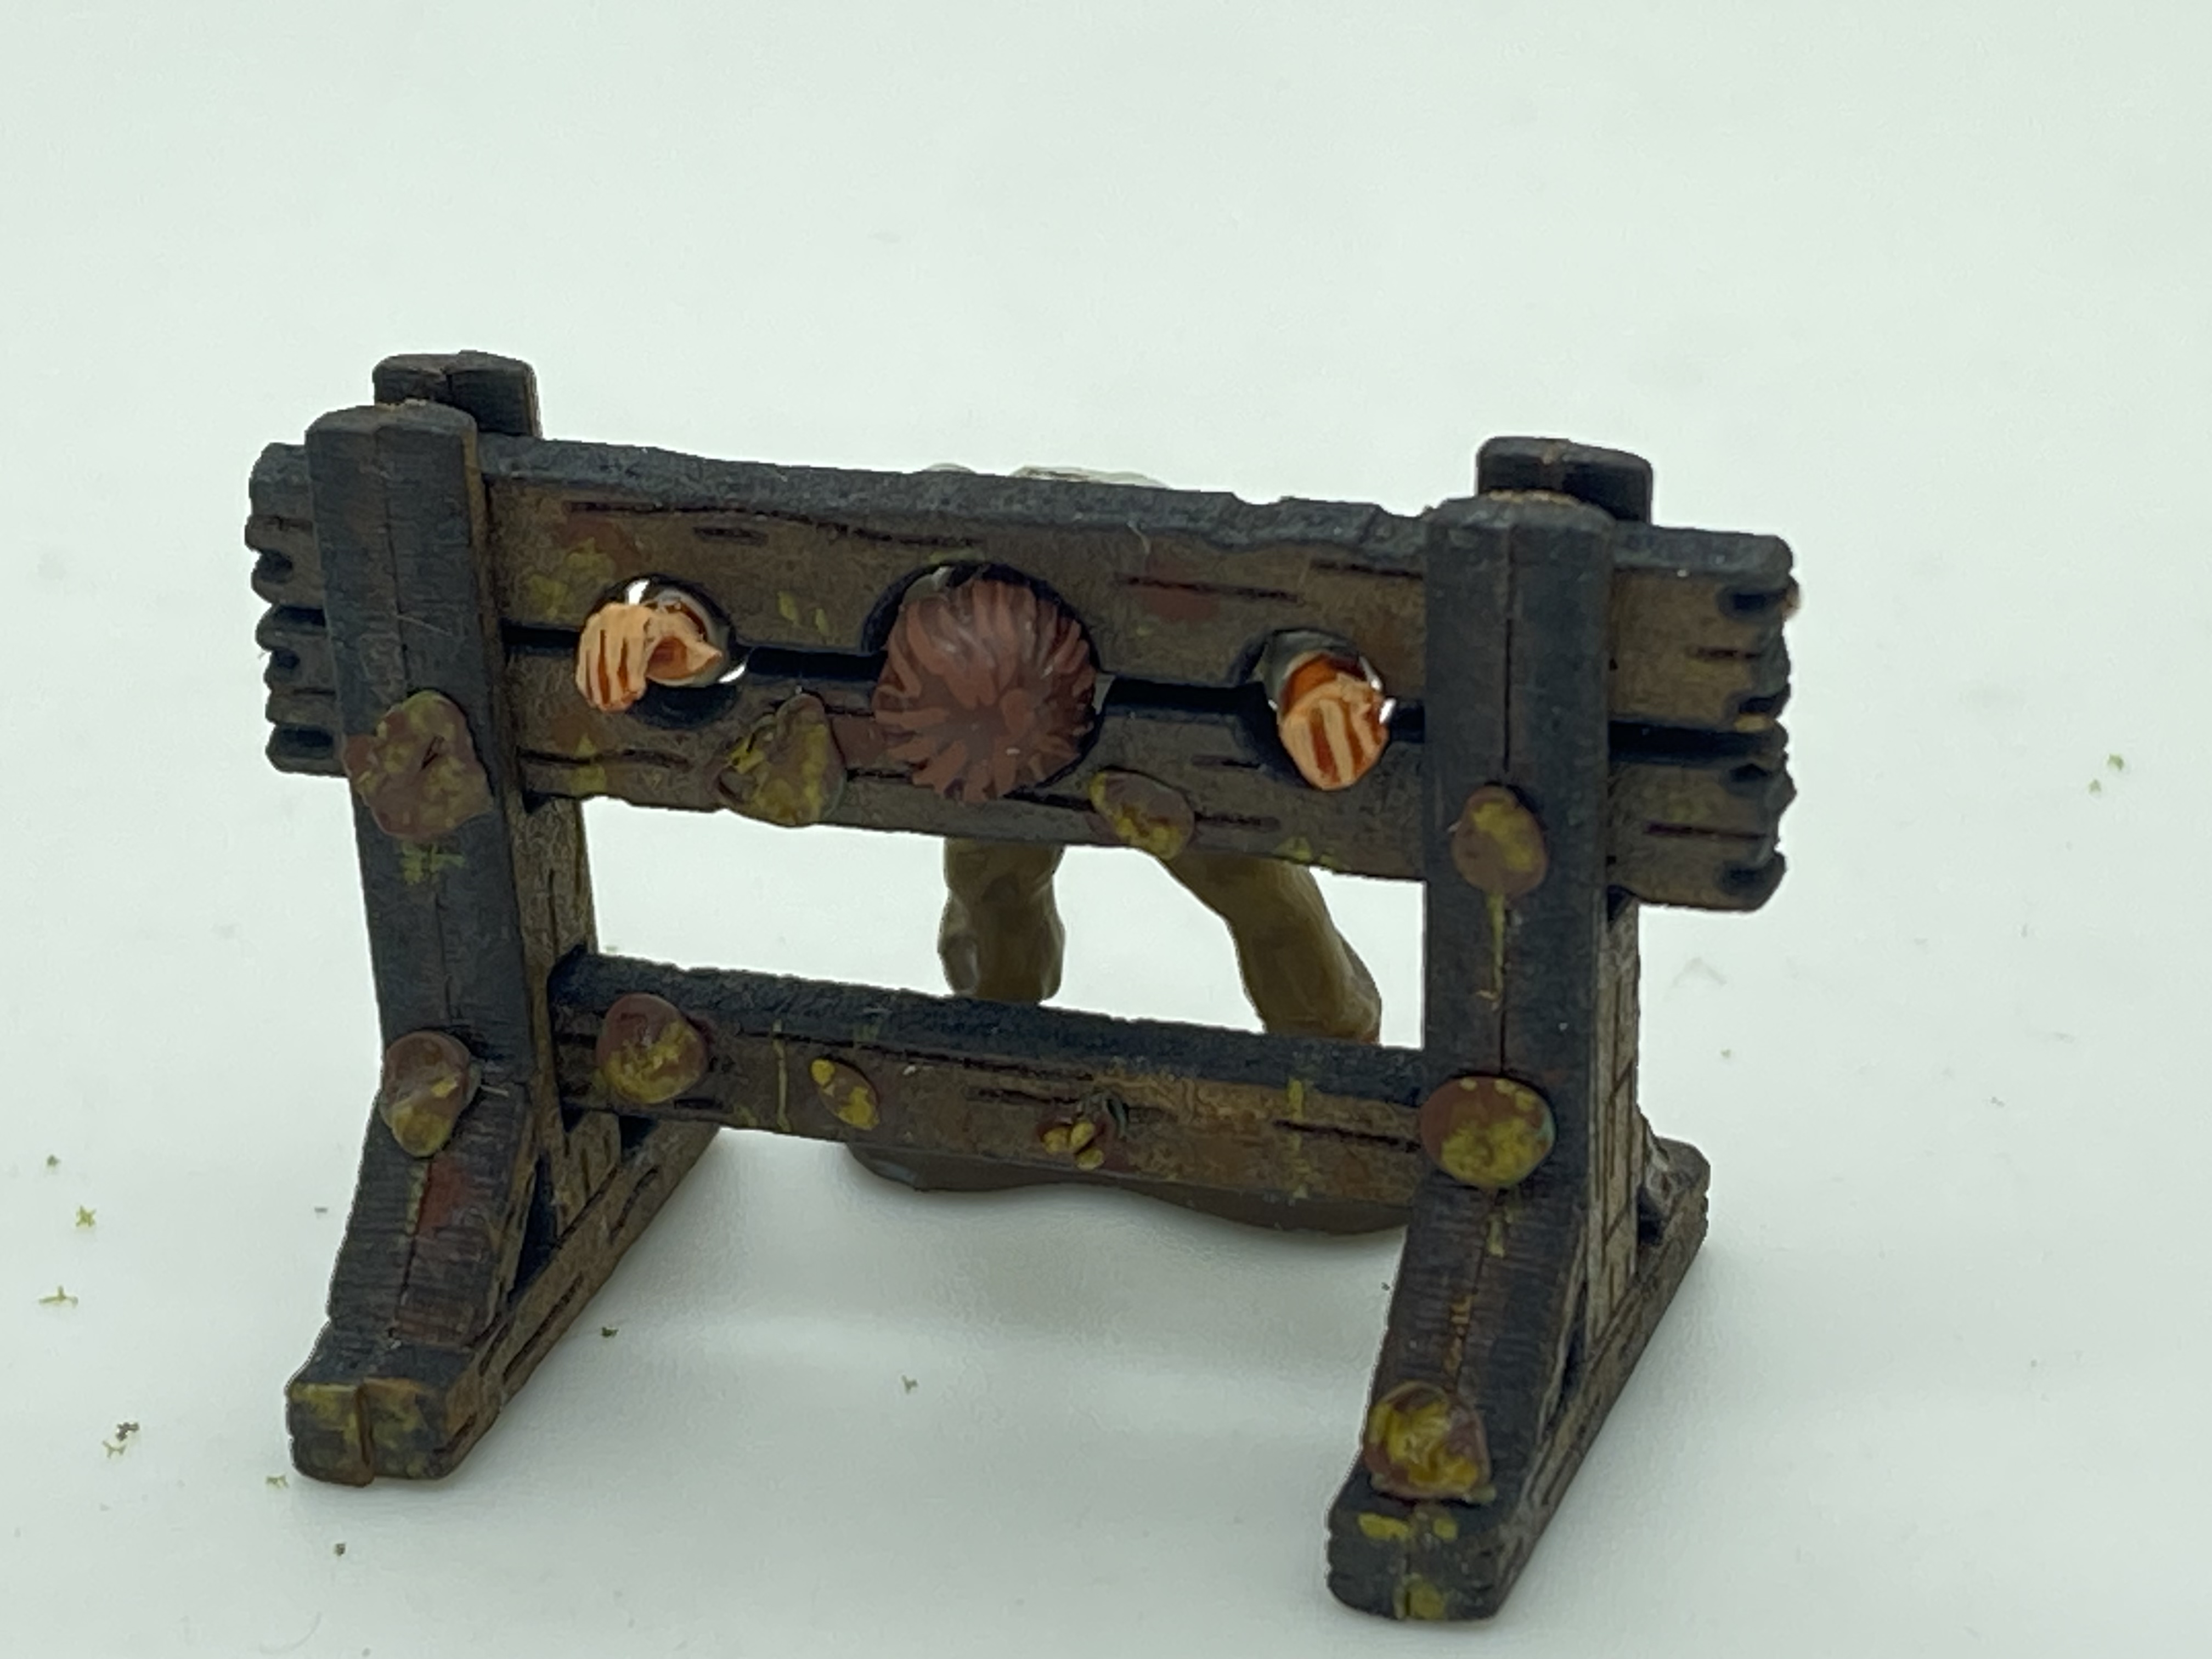
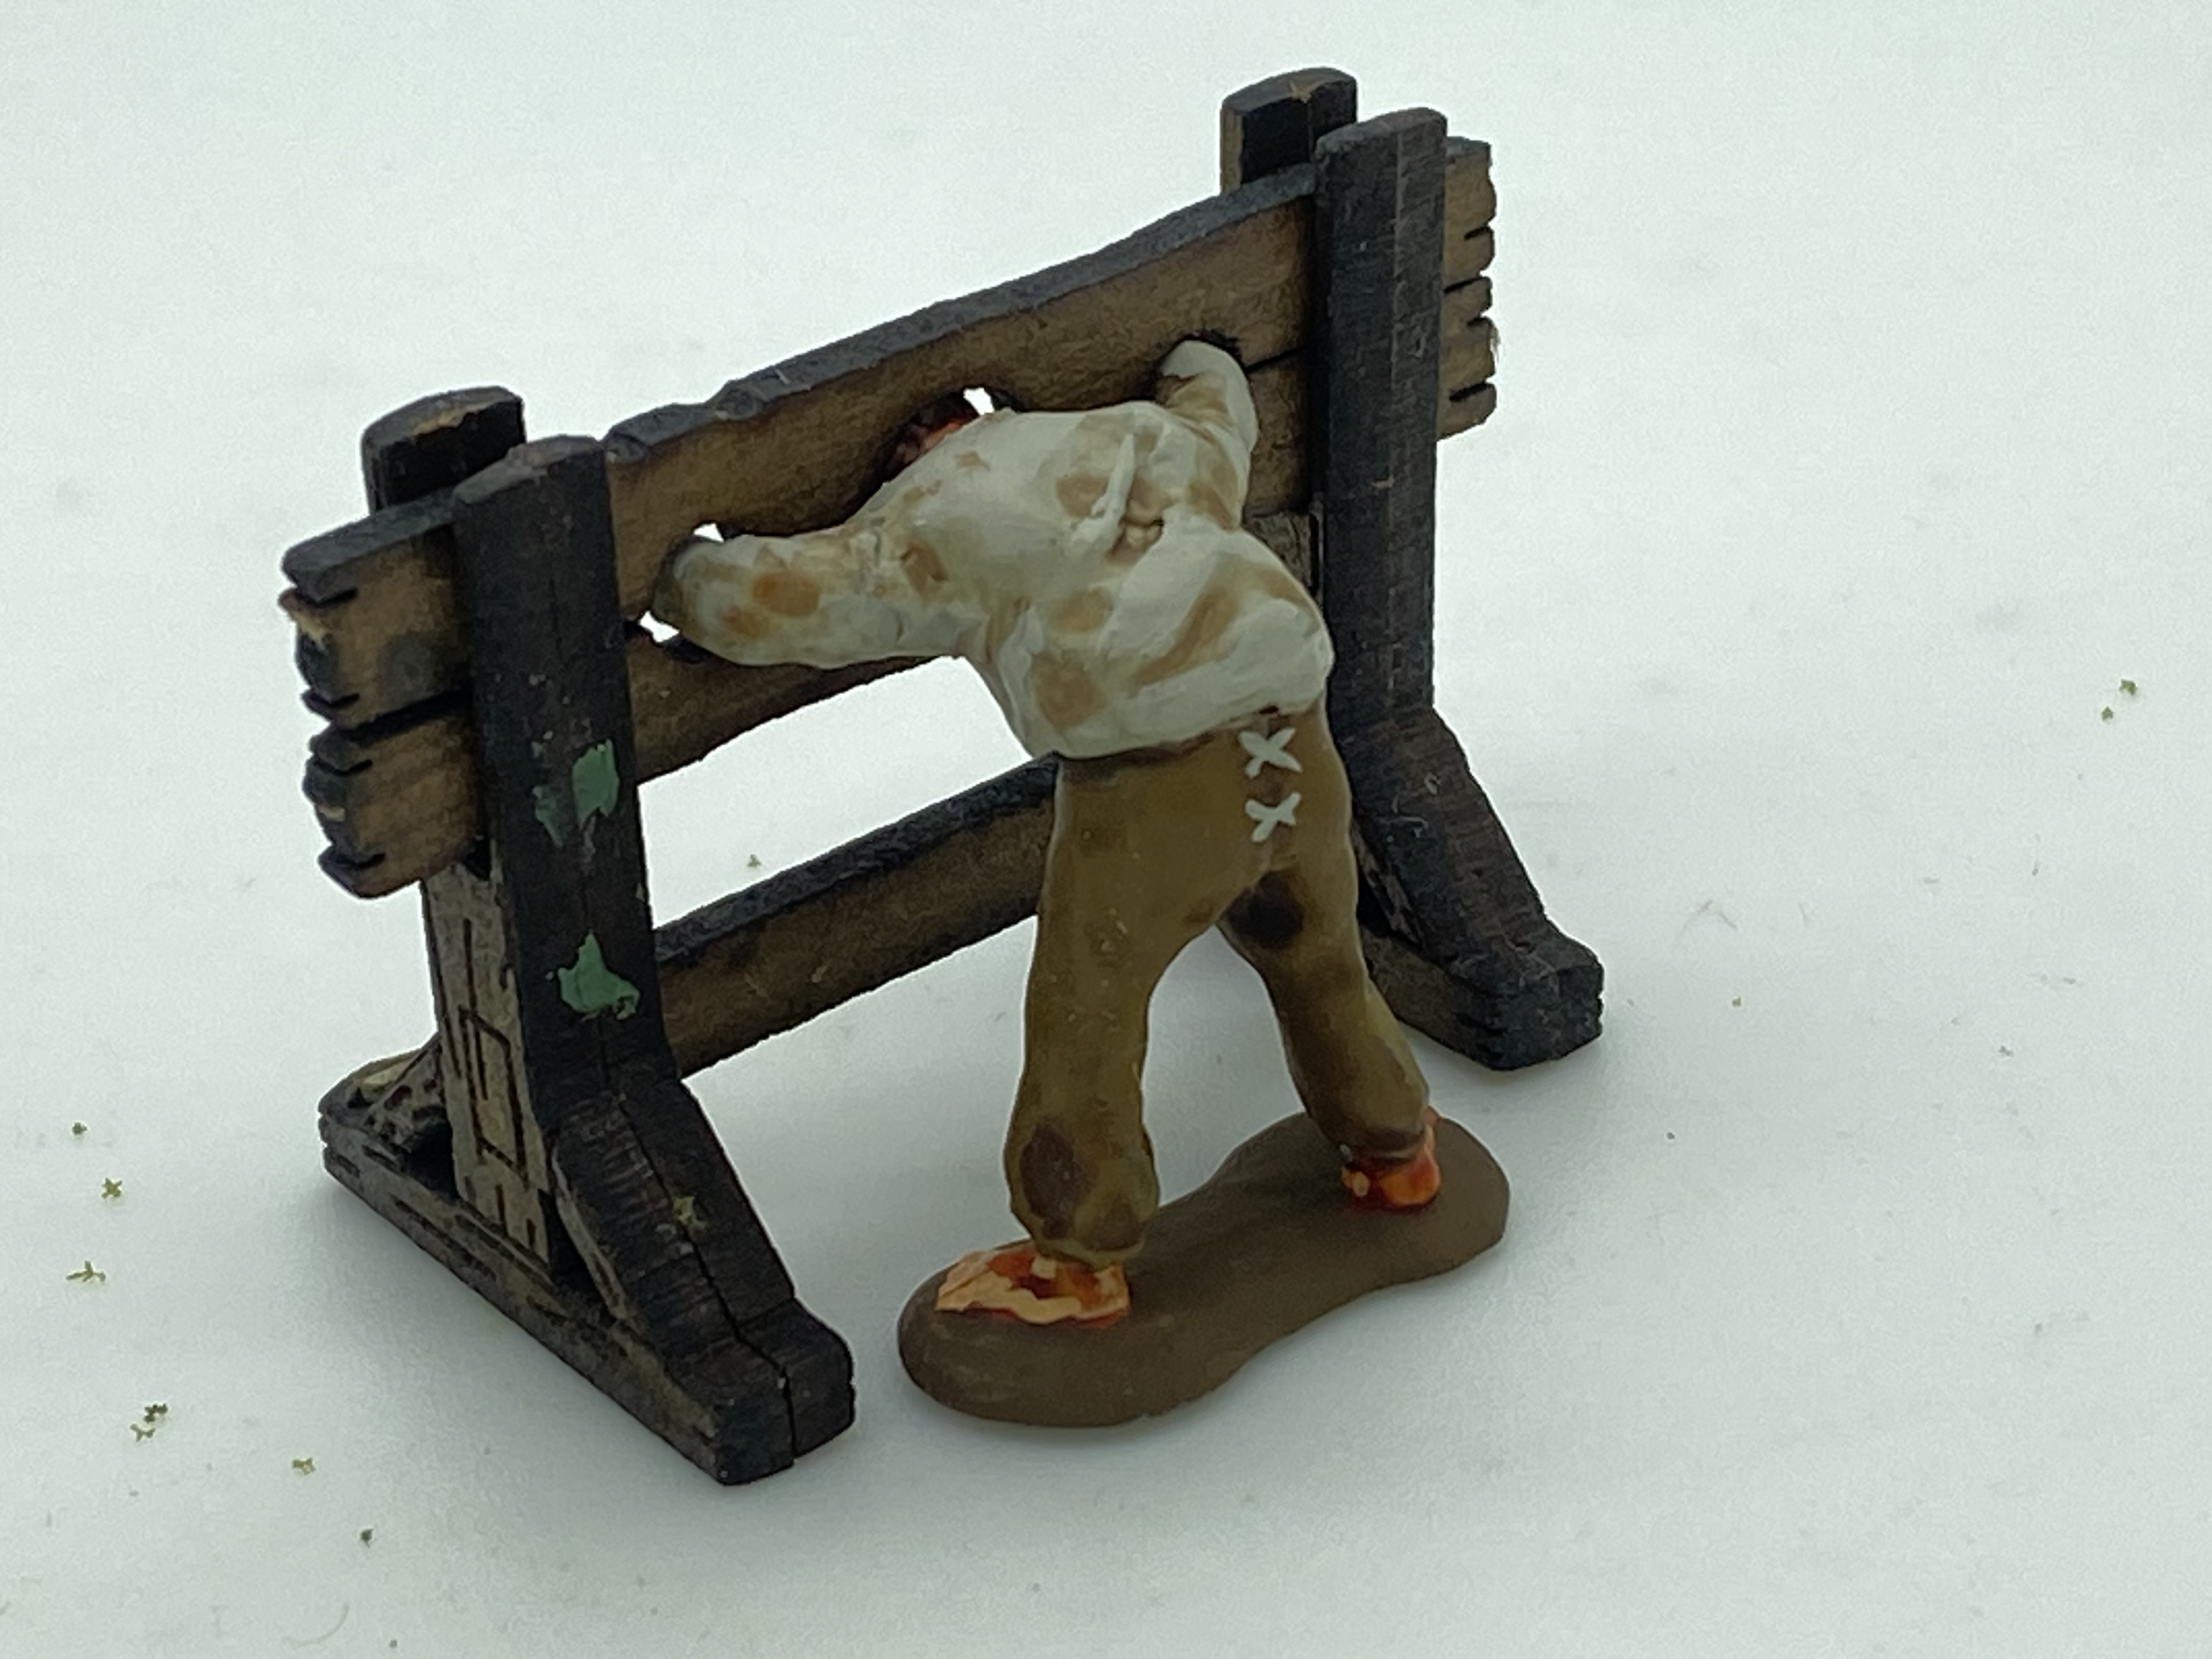
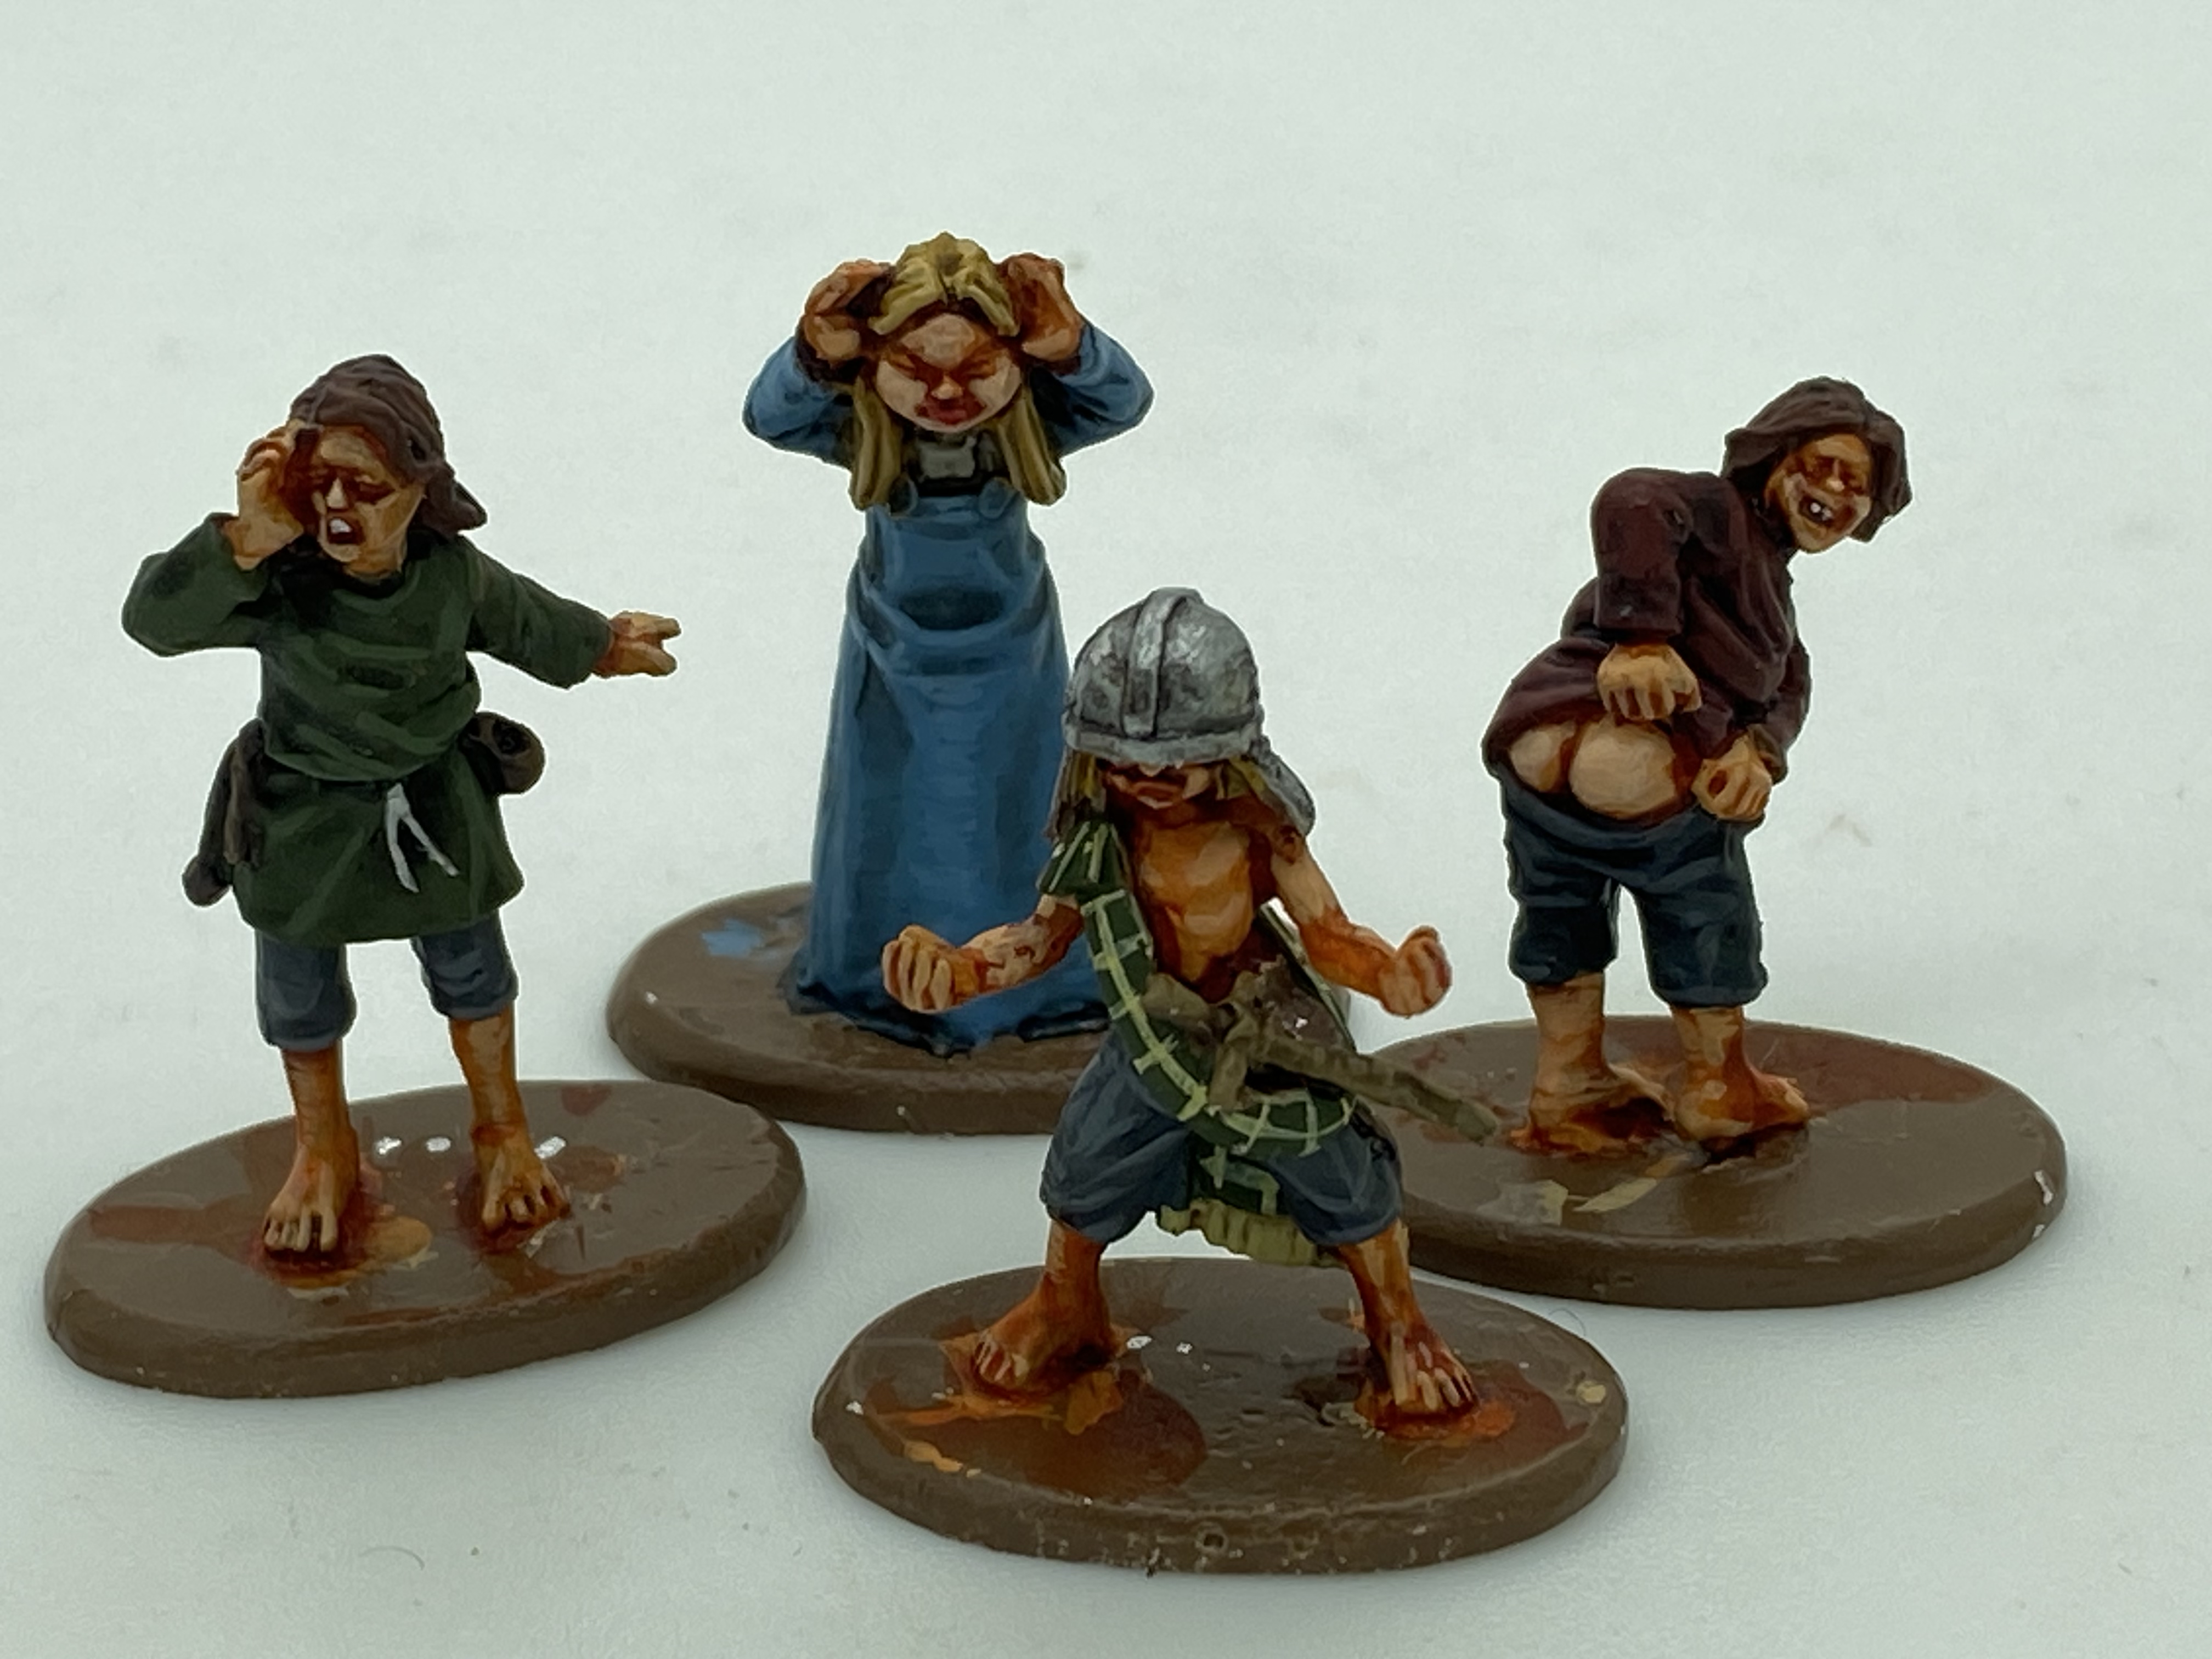
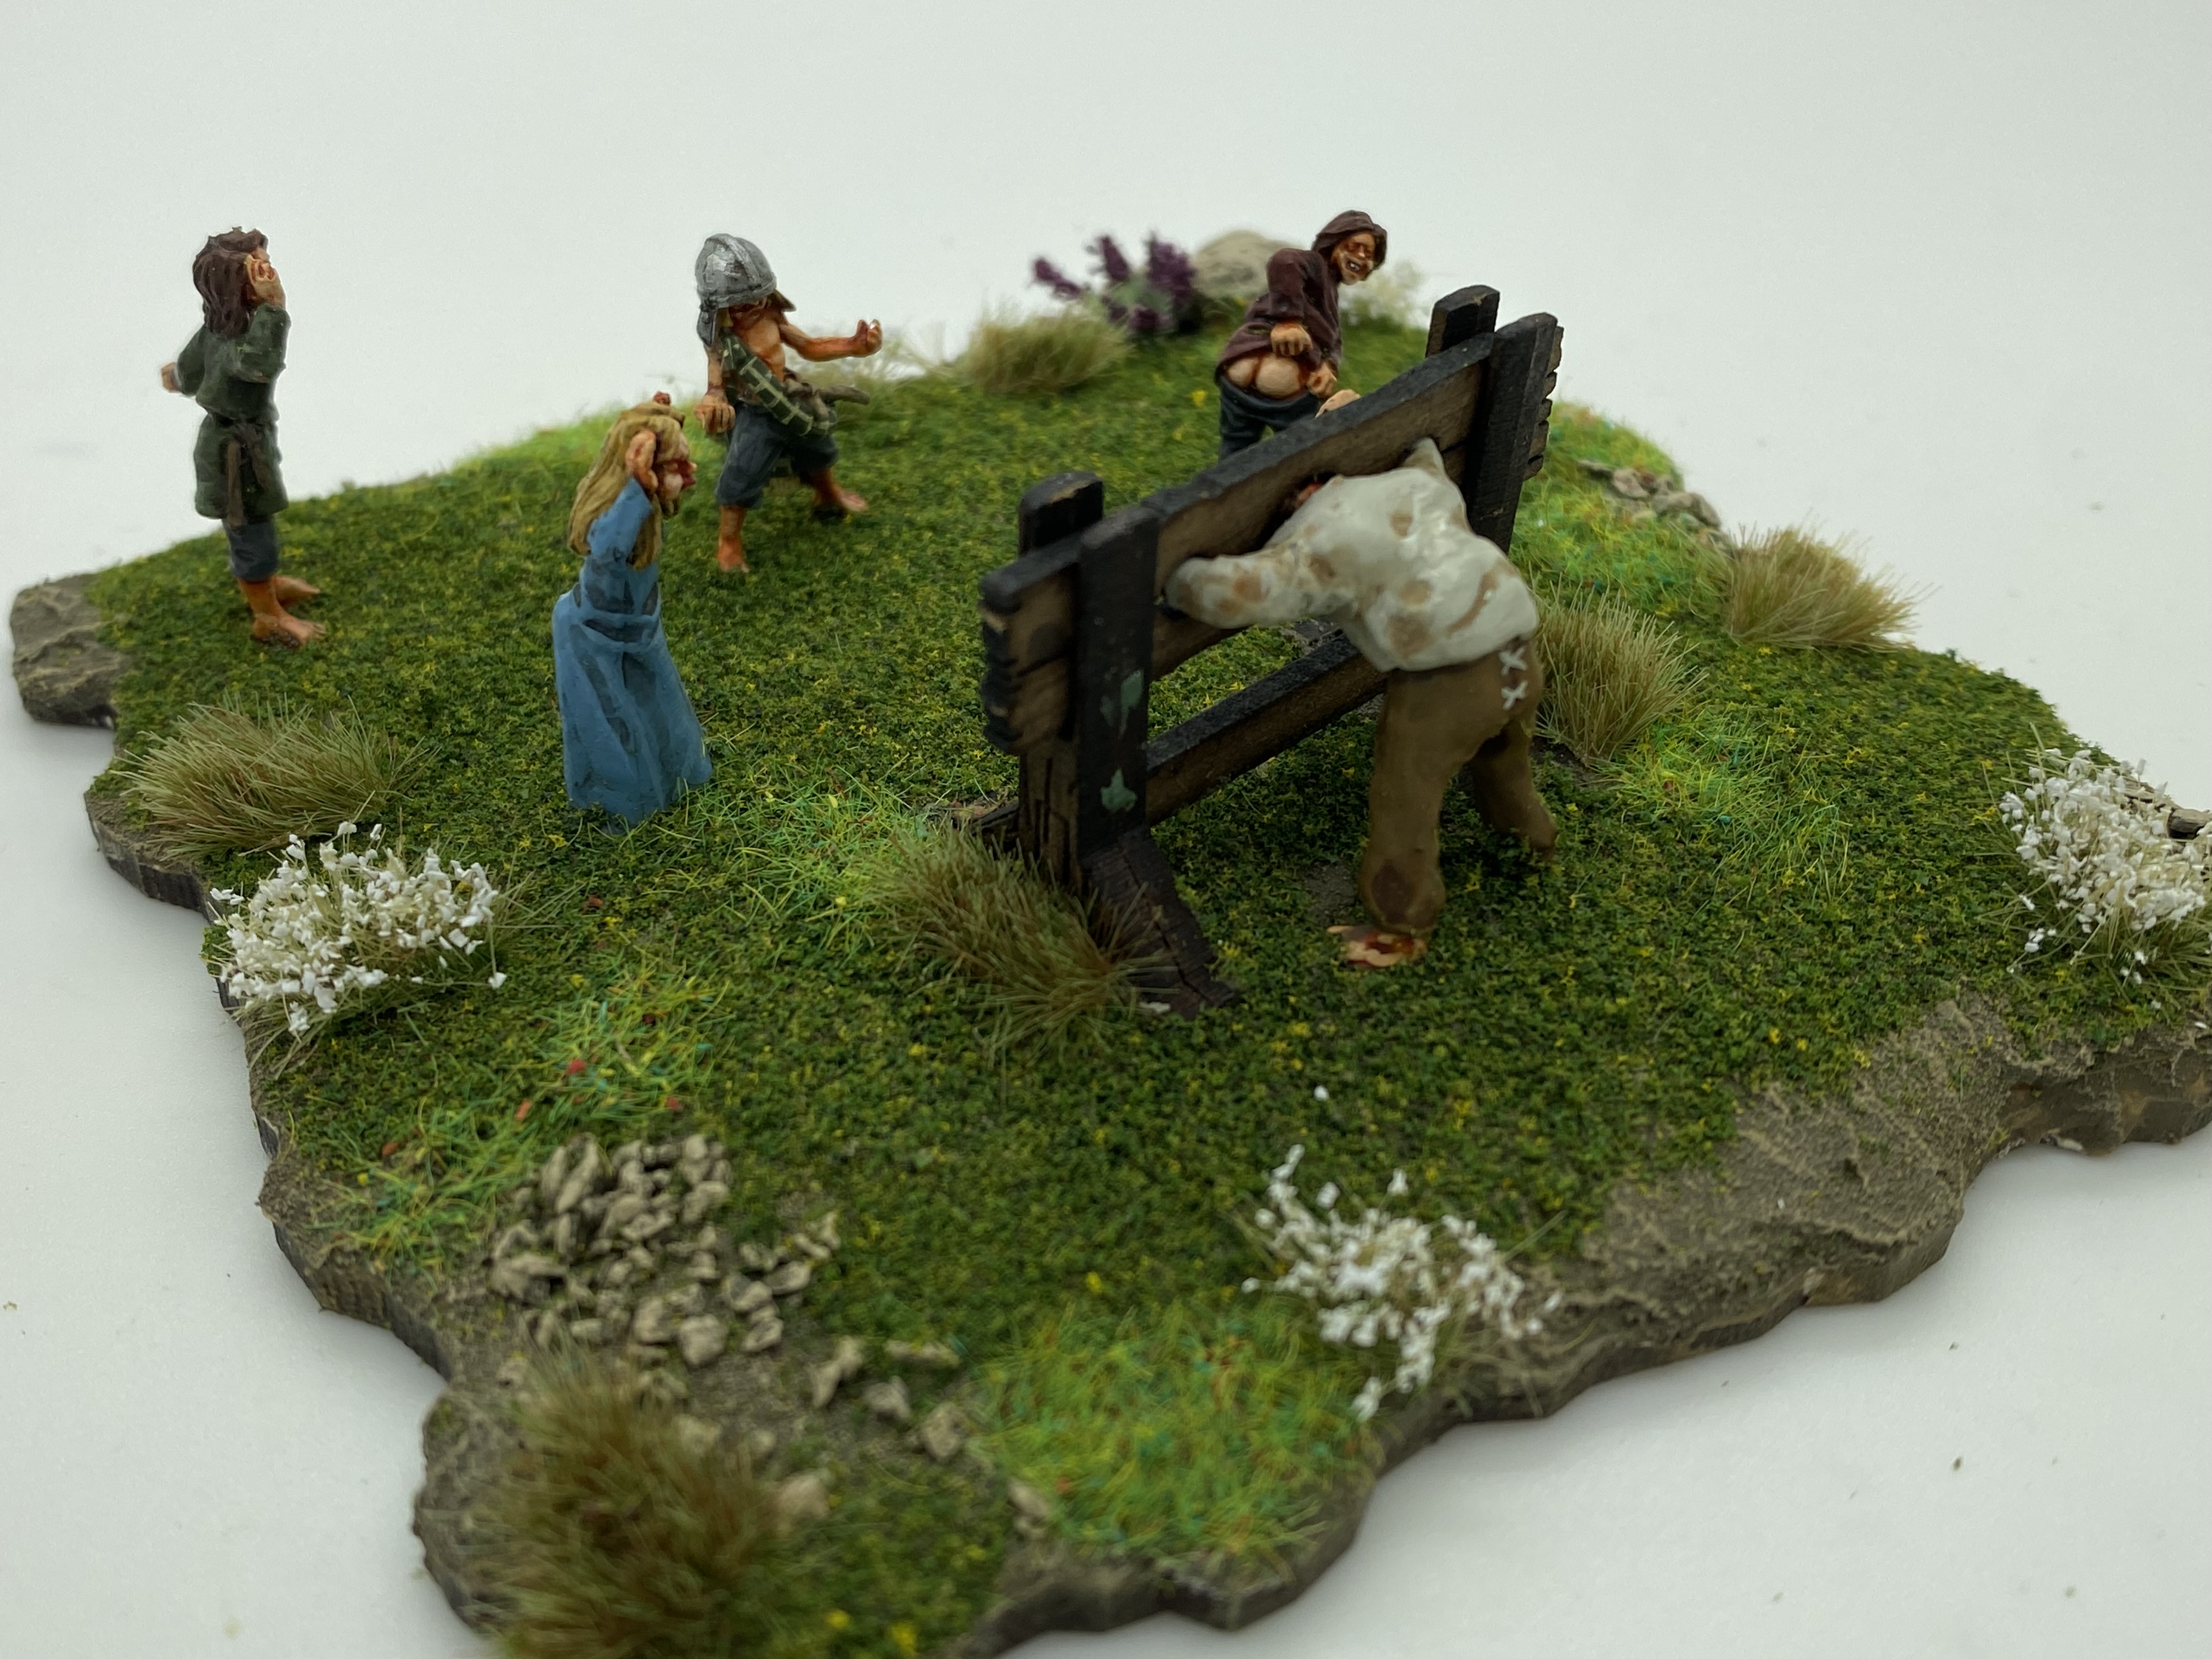
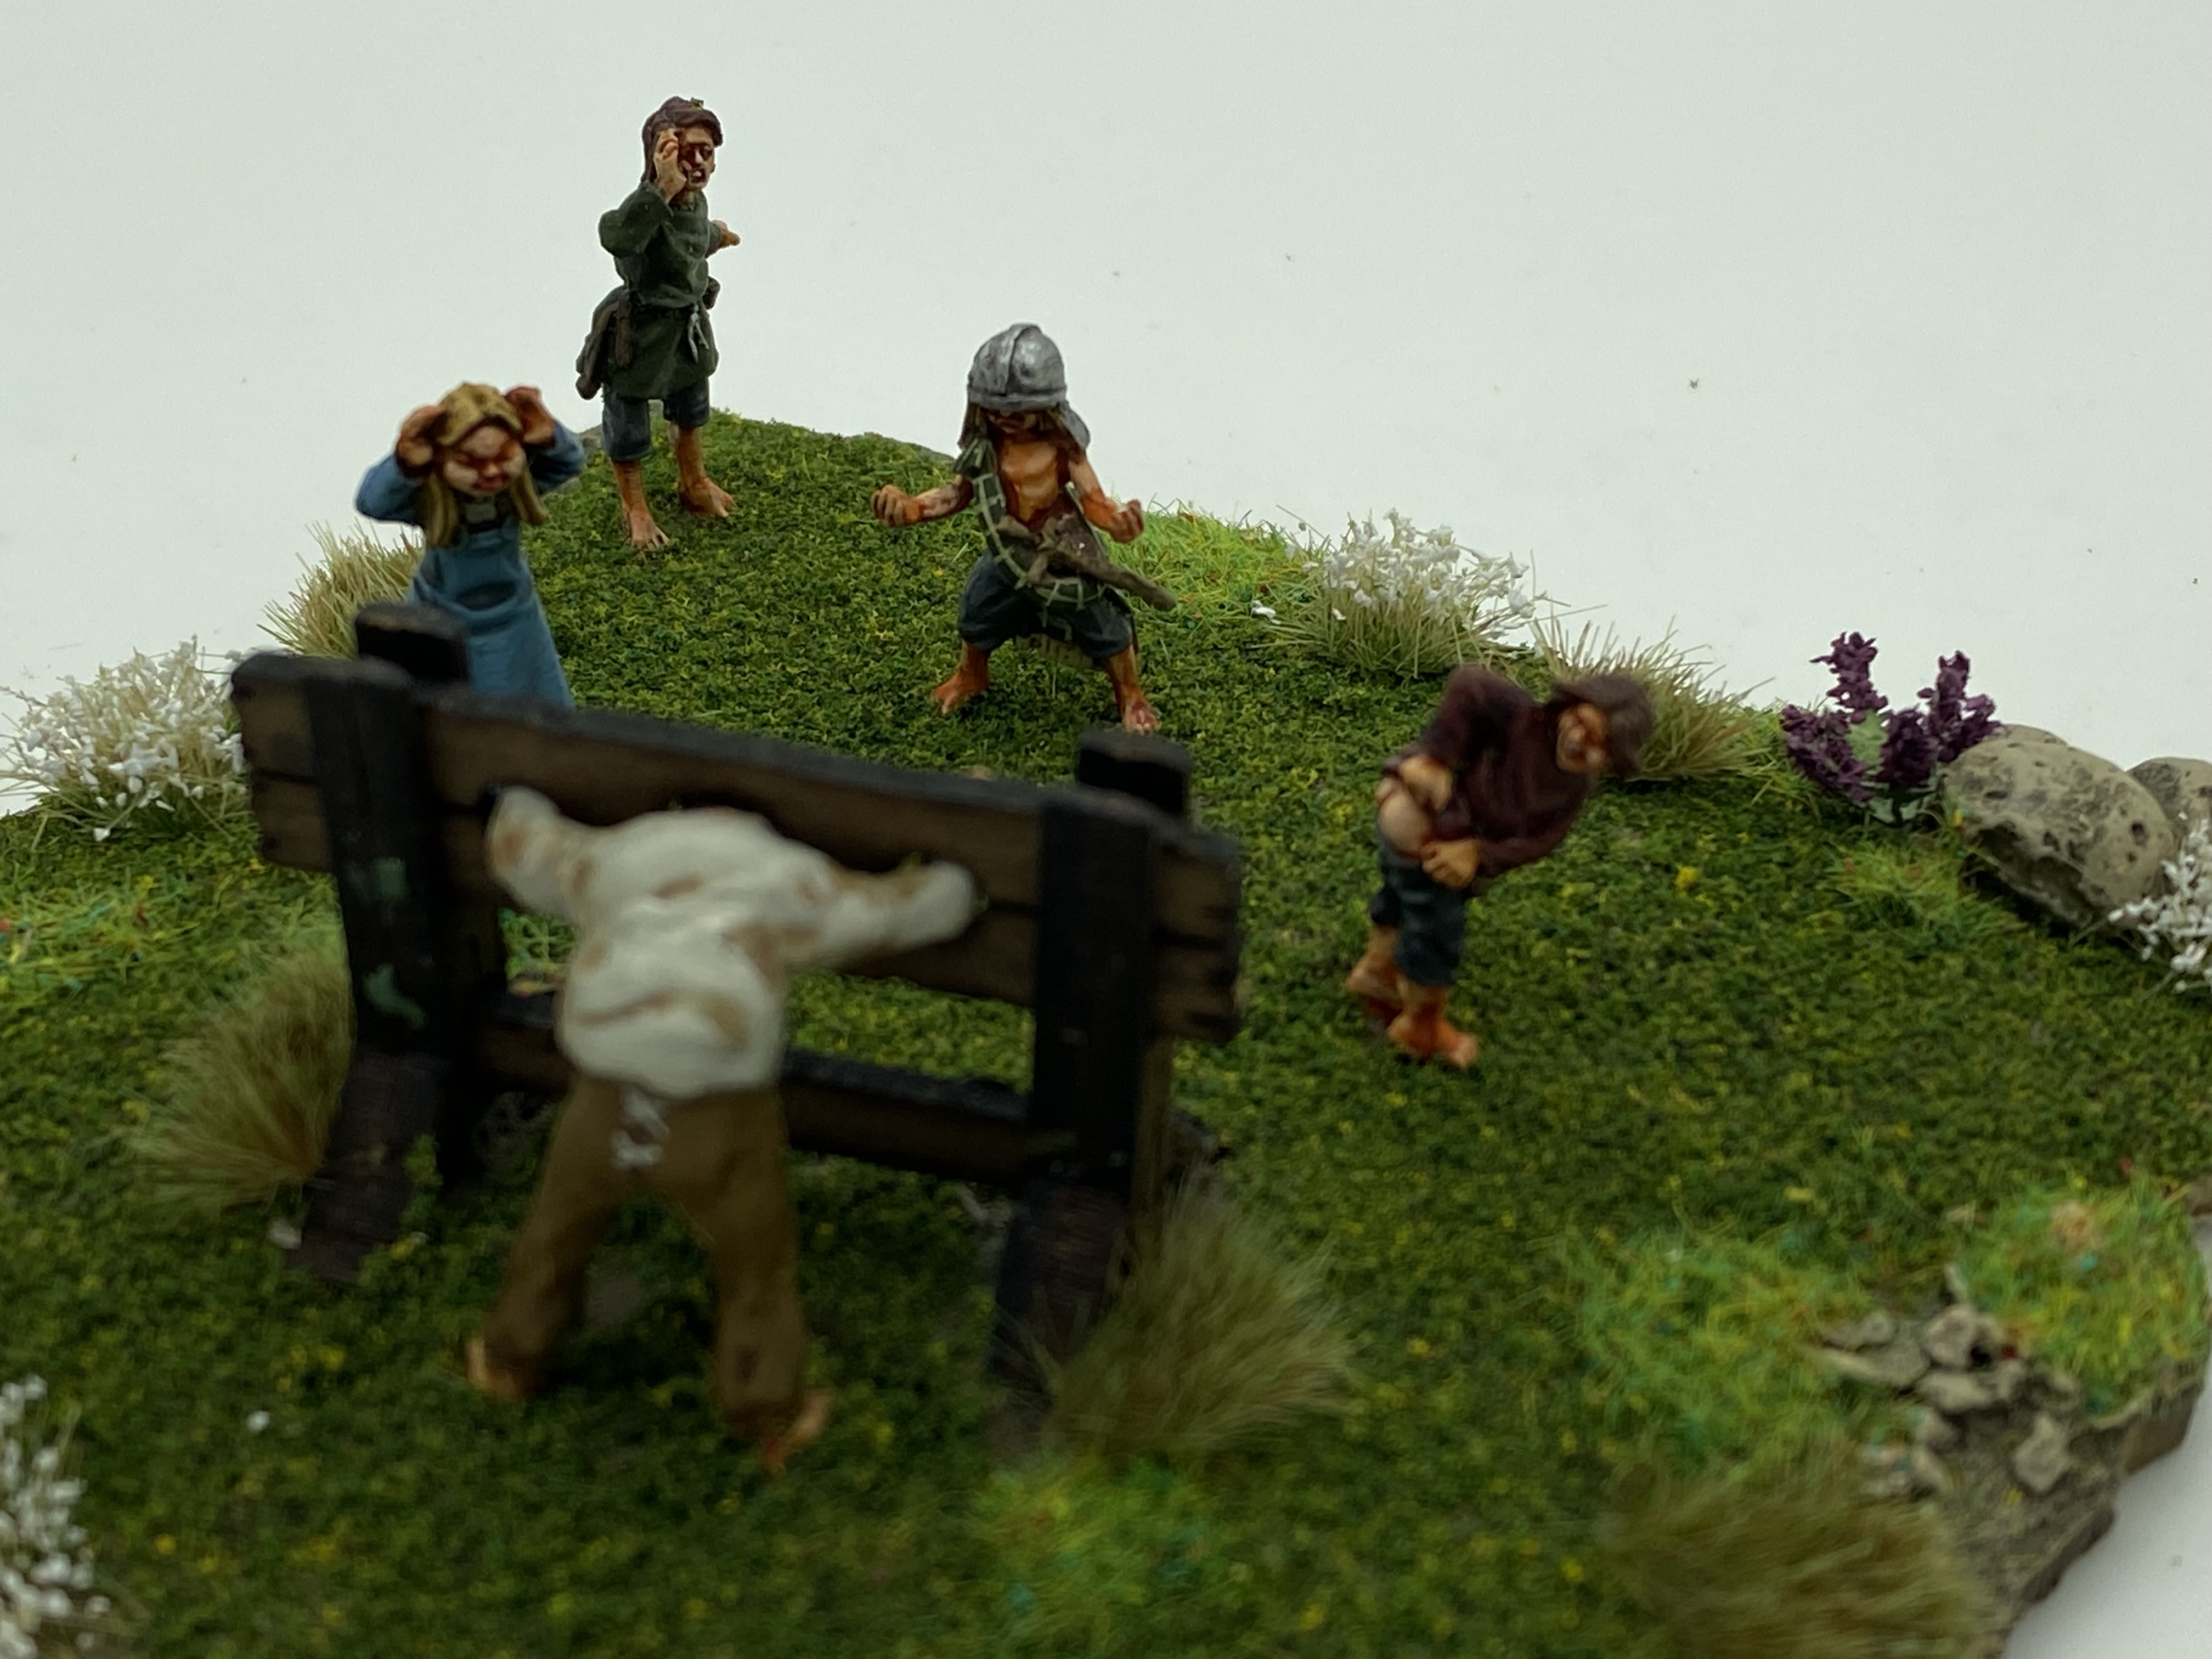
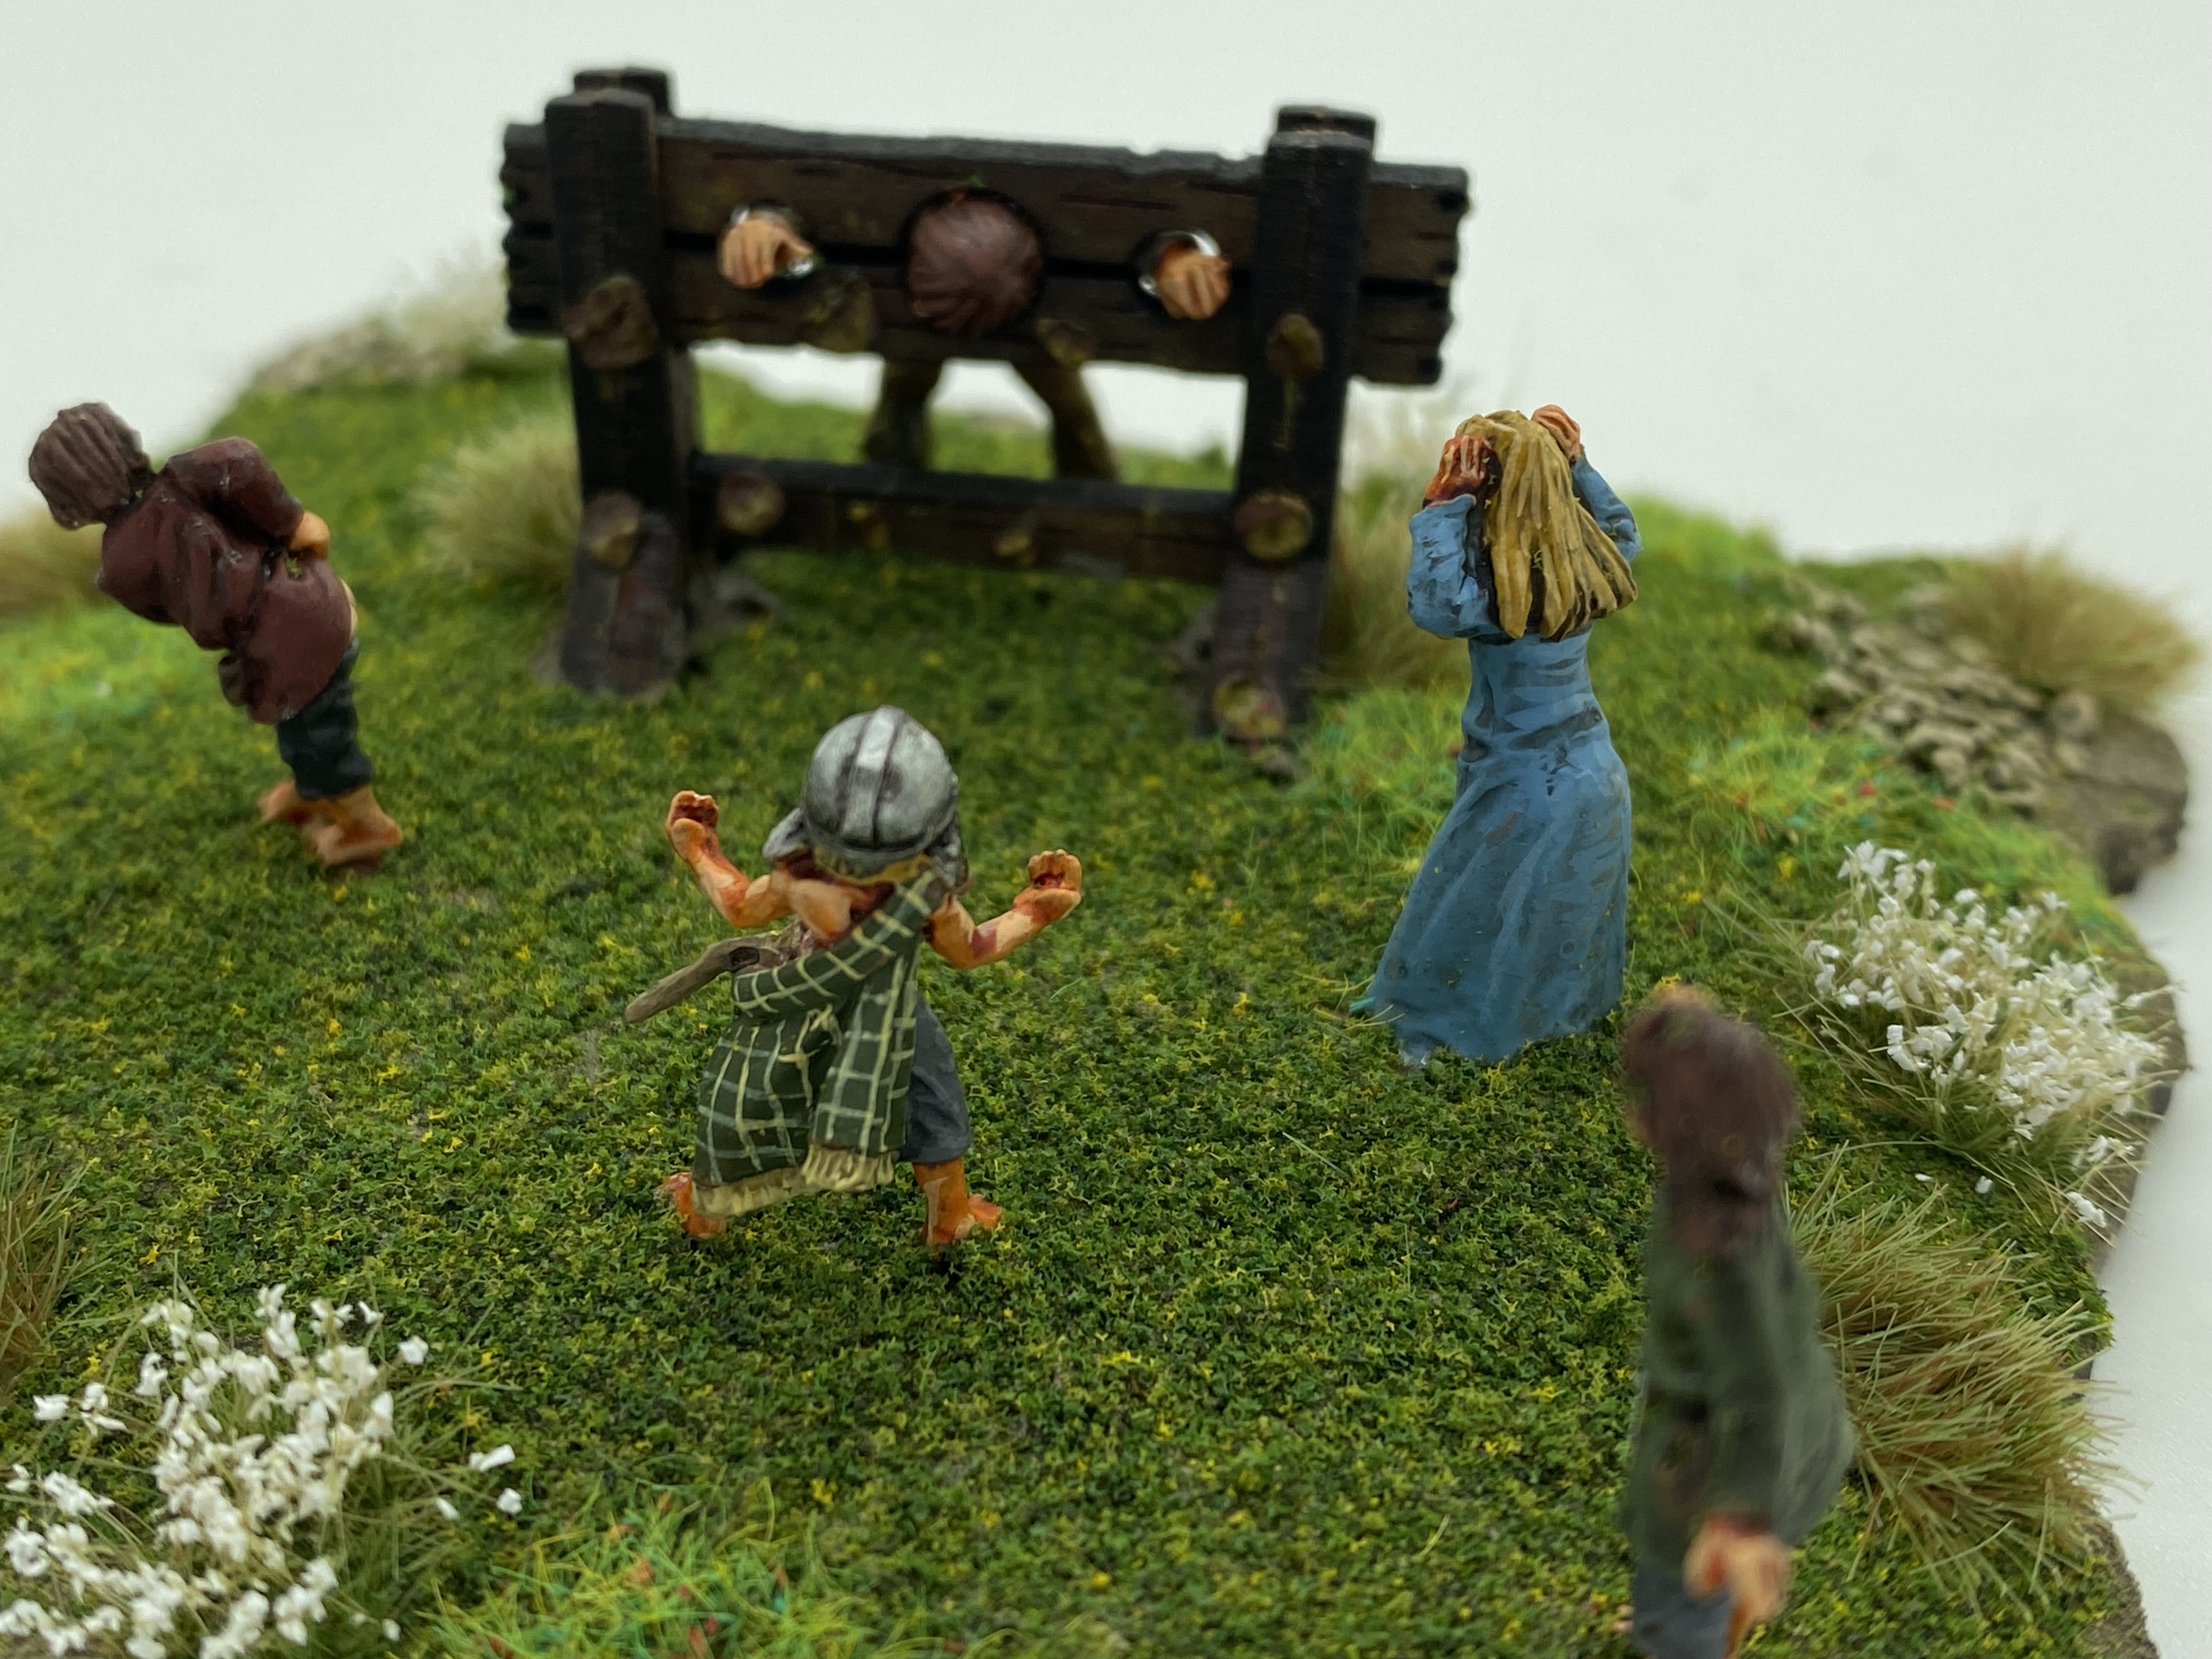
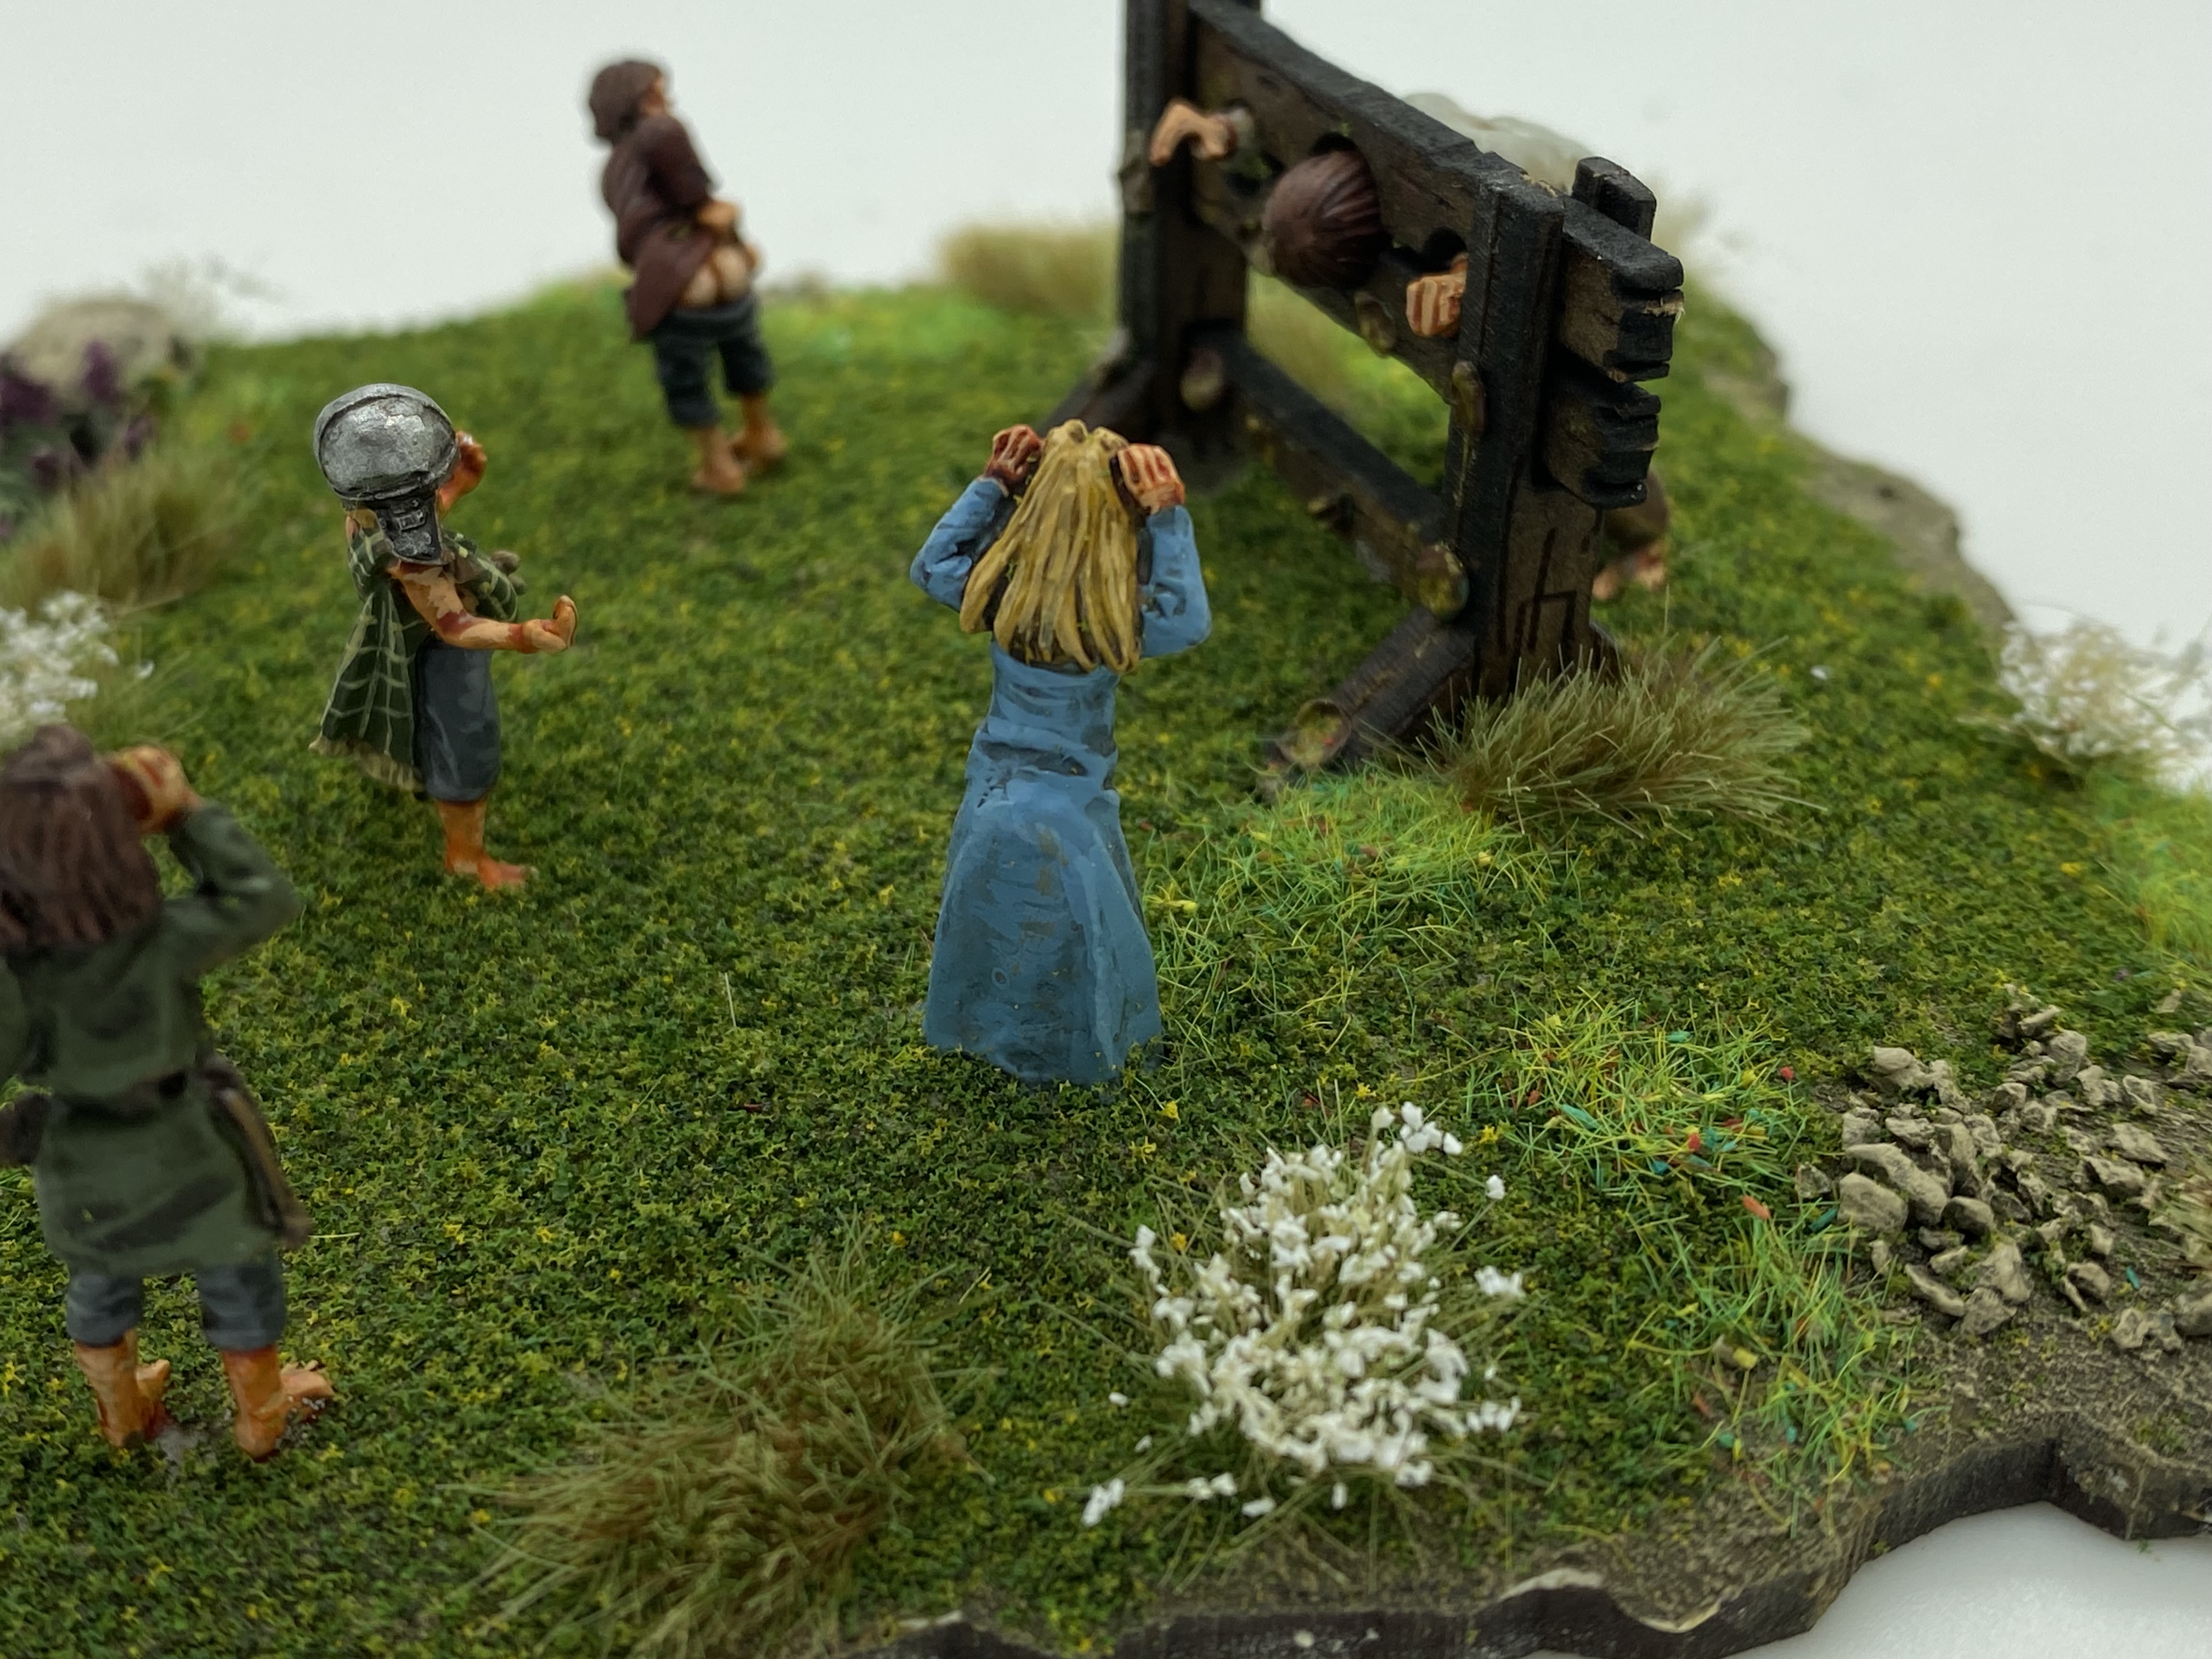
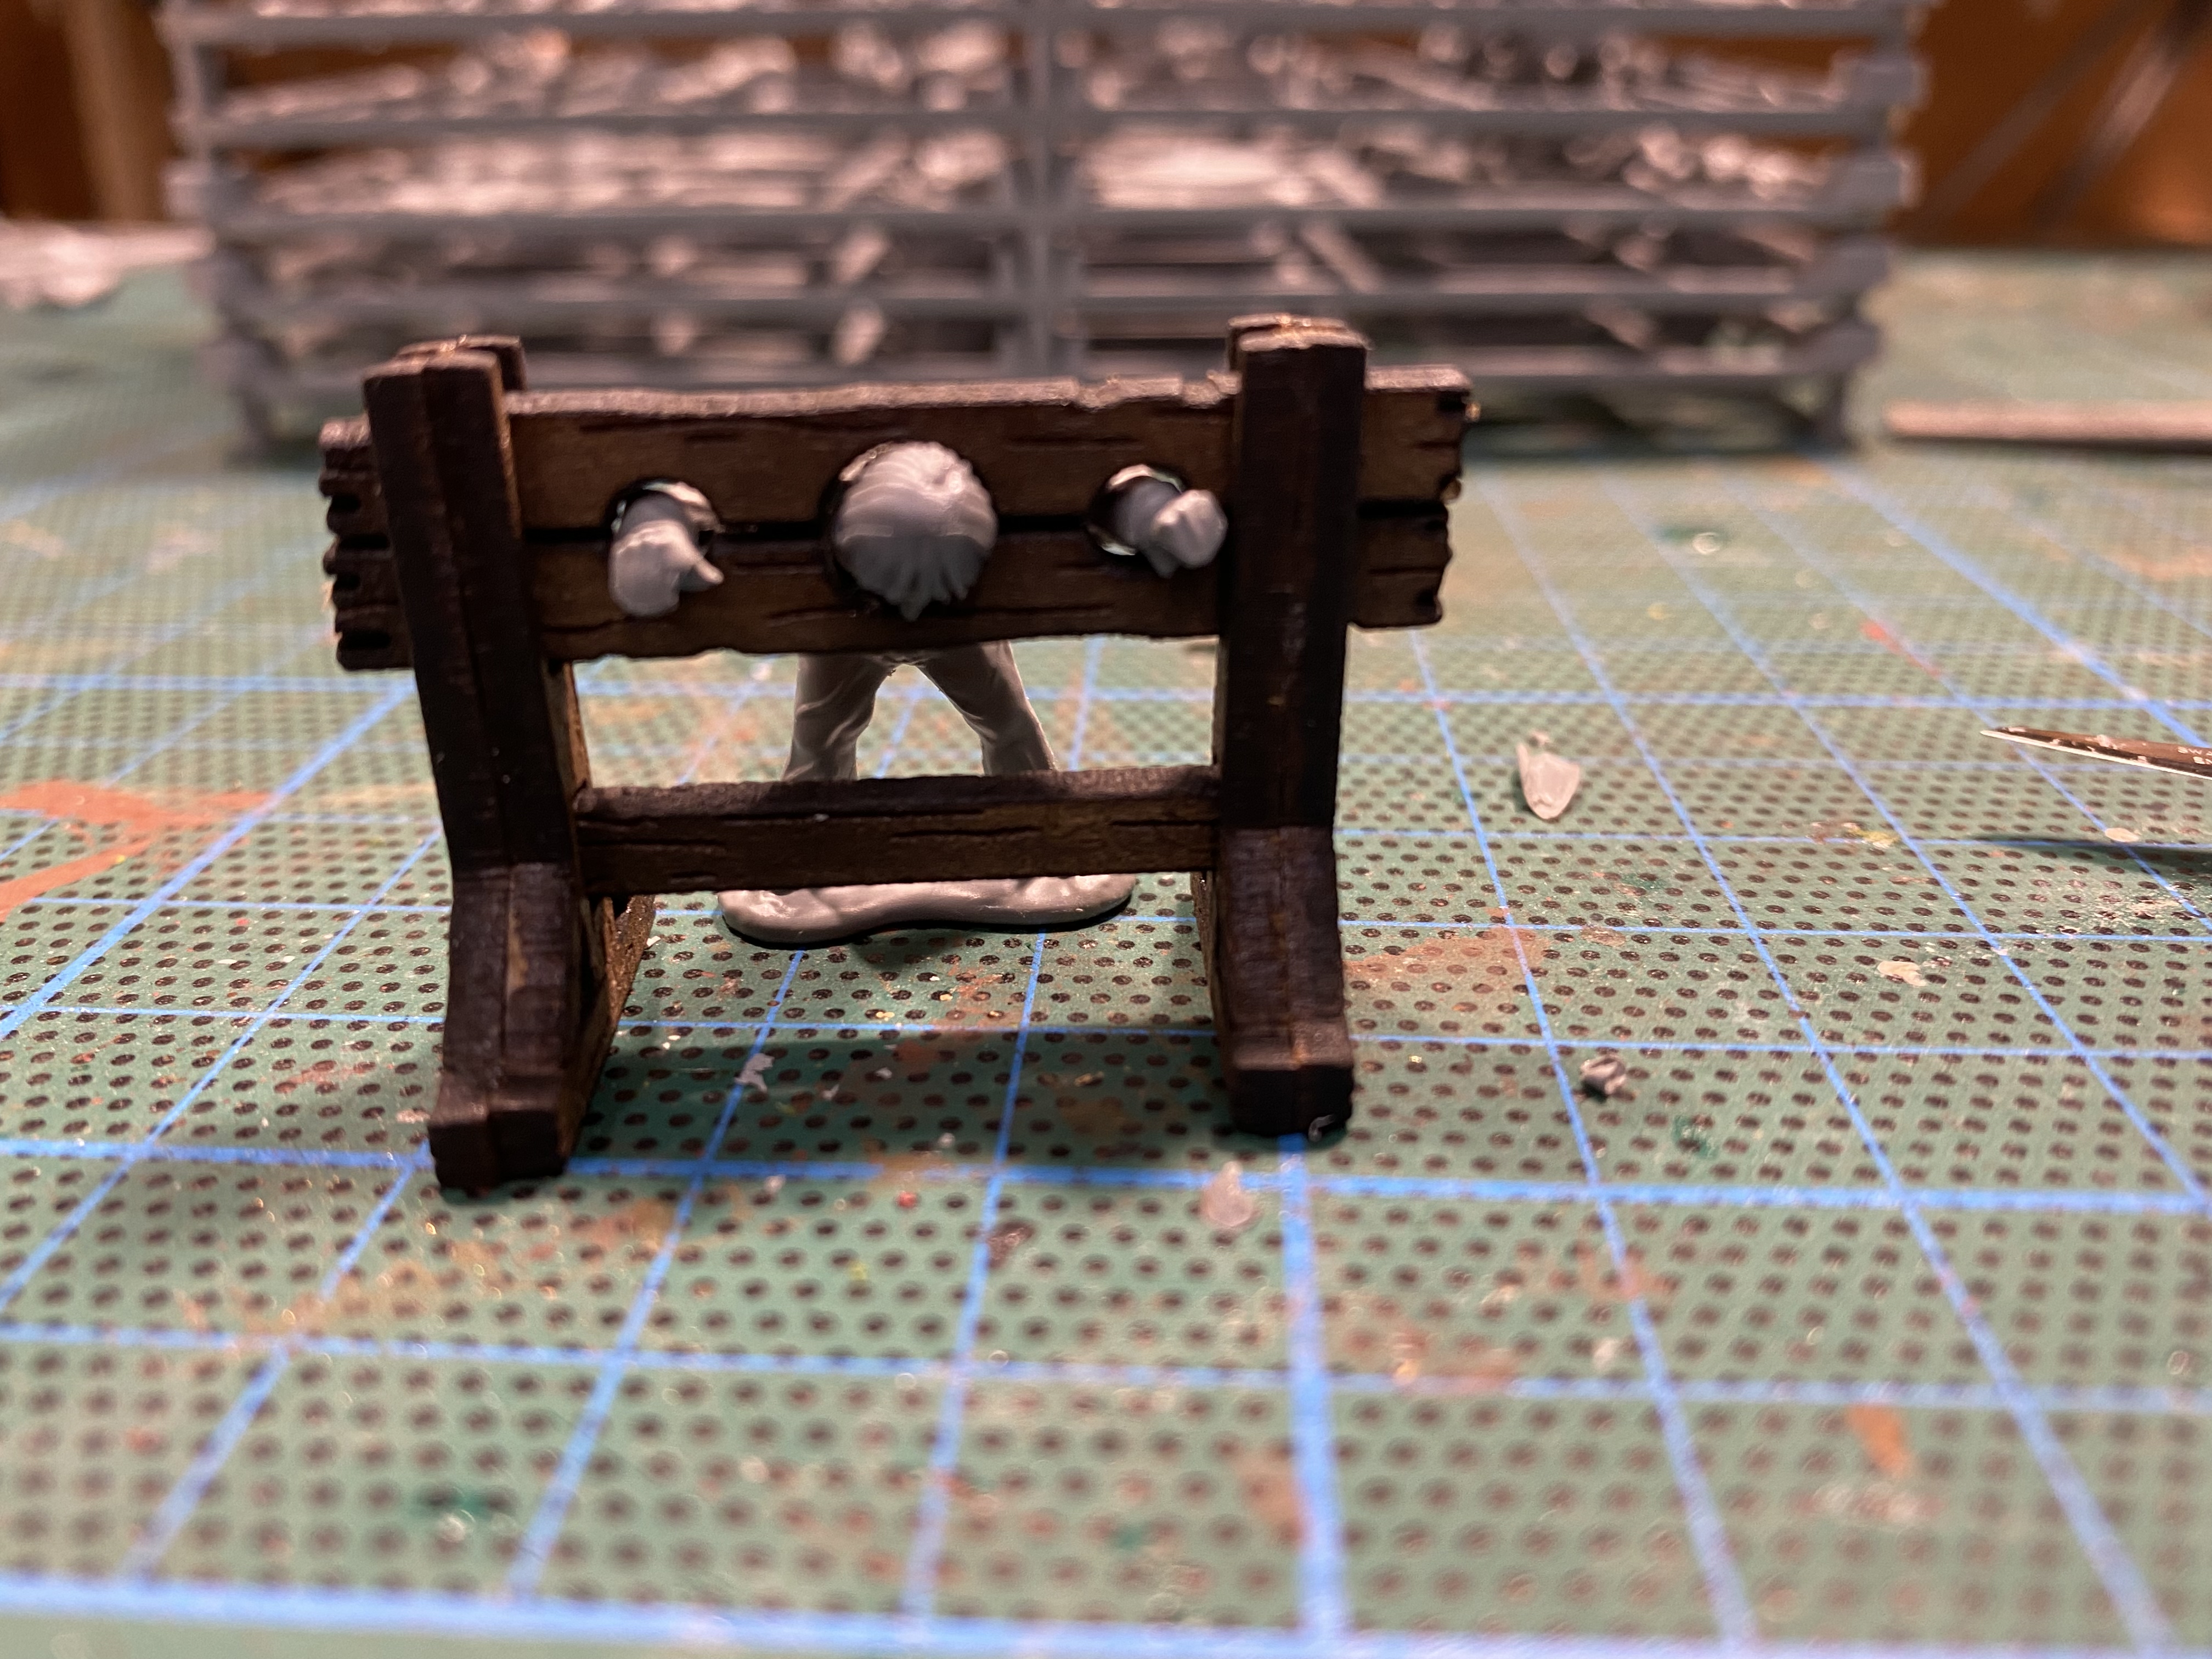
Another long term project is to build a medieval village. I’m building it on the Sarissa bases module system so that it can grow as I complete each subject in what ever random sequence I choose. Andy Callan recently gave me a laser cut Stocks set, so I converted a ‘victim’ to go in them.
This gave me an ‘excuse’ to purchase the Footsore Welsh Minors – a set that I really liked when they were first released. I thought that they would look great tormenting the poor guy in the stocks!
The pictures above show the finished scene. At some point, it will form part of the Village green of my village!
Of course, I am still busy painting subjects for ‘Never Mind The Billhooks’ and having finished my Irish army, I’m slowly working on a Landsknecht contingent. I have 18 handgunners already painted, so next I’m working on 12 Zweihanders. The first six are complete, although I will add some grass tufts.
The last item is my Naval Collection, which of course incorporates, the forthcoming ‘Never Mind the Boathooks’ rules set. This latest addition to my Medieval fleet was kindly sent to me by George Antioch, who is based over in Canada. Although designed as a ‘Cog’, as it was fairly narrow in the beam, I thought that it would make an excellent Carrack and sister ship to my Great Ship ‘The Sun In Splendour’. So with a few modifications to George’s design, the ‘George’ is taking shape. I intend to write an article showing how I constructed and modified the ‘George’ in a future blog.
So that’s about it for April. May has been a bit quieter on the modelling front, although I have attended a fantastic event down in Bristol:
On top of that, I had a long weekend away visiting Blenheim Palace, Shakespeare’s Stratford on Avon and Kenilworth castle! So enough of a history hit to inspire me to get back to the workbench and get some more done!
THE COMMERCIAL BIT
I hope that you all enjoy your hobby as much as I do – our web site will have much of what you need! Click here to see our shop.
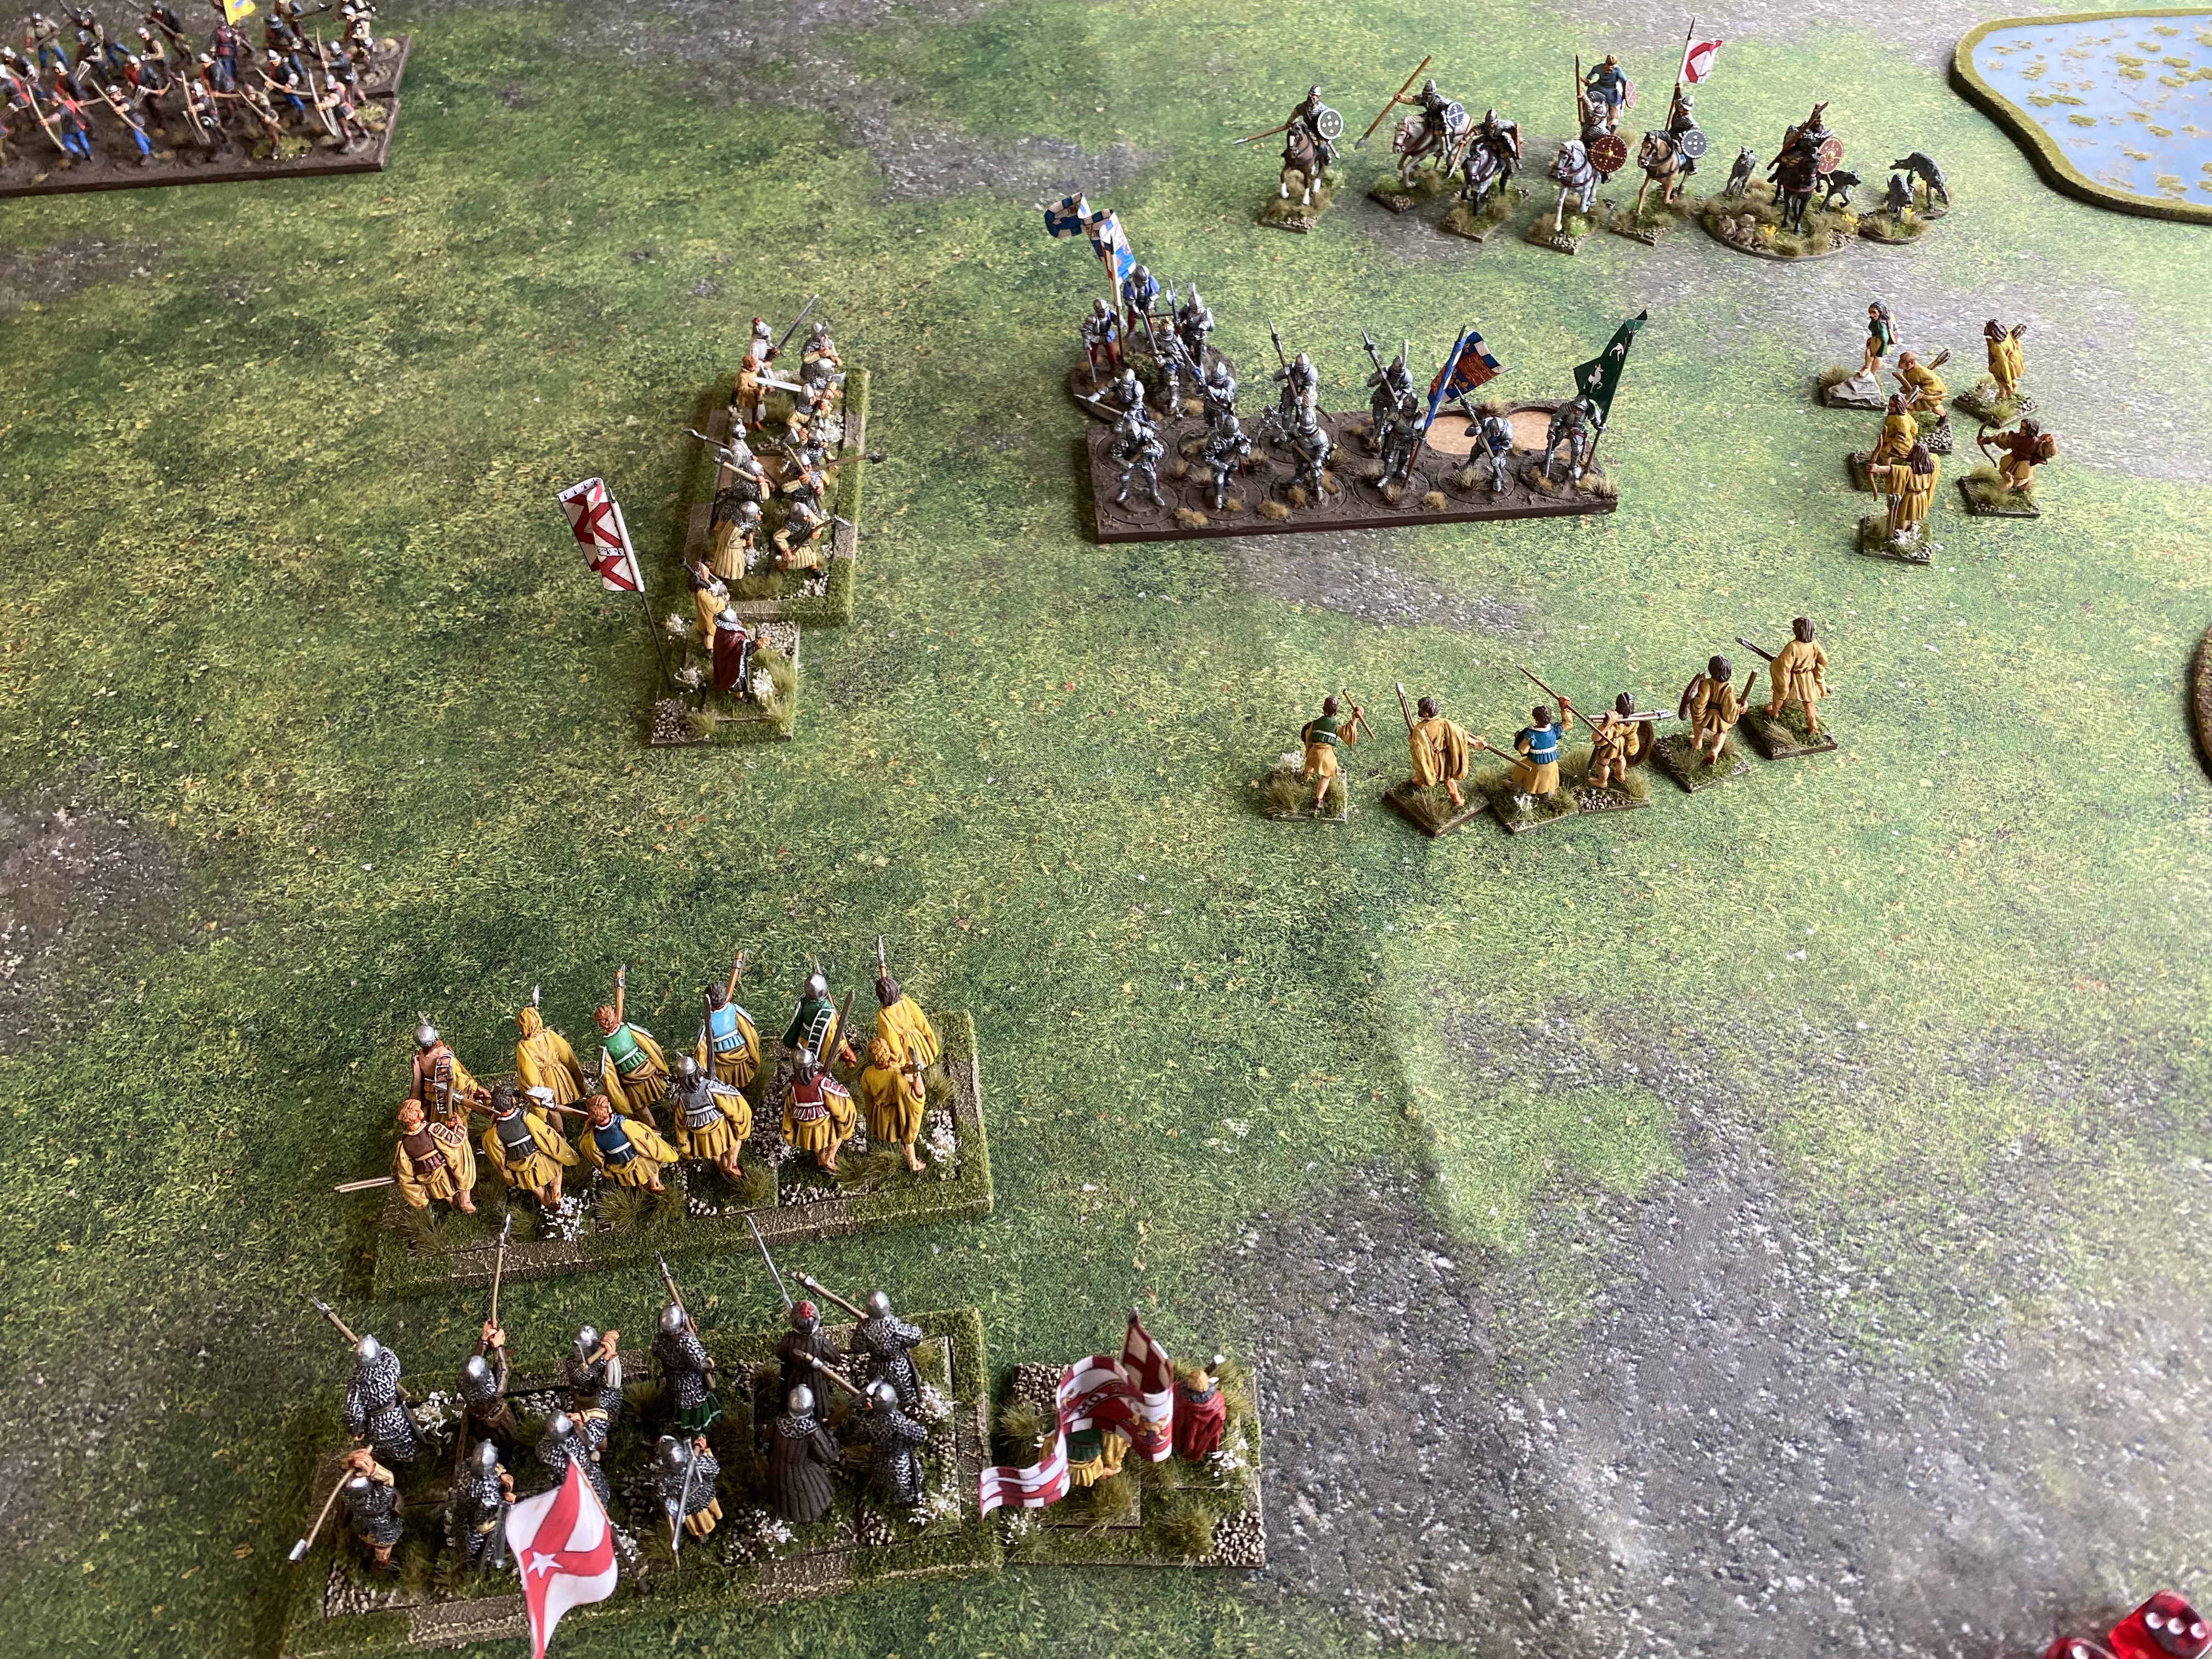
I spent a very enjoyable Saturday at the fourth ‘Bill Hooks BASH’ organised by Peter Harris at the Boards and Swords venue in Derby. I must thank Peter for organising the event – there’s a good deal of work that goes into the admin, from collating all the entries, sorting the tables and scenery and keeping things running on the day. Peter has managed to create an event that as well as being well organised, is played in the spirit that most wargamers would appreciate. It’s great to meet up with like minded people in the hobby and spend a day in such pleasant company. The games are played with a wry sense of humour rather than a competitive edge, with good fortune and bad met with the same amused resignation and acceptance!
I must also add that I am very impressed with the venue ‘ Boards and Swords’. The staff were just great keeping us supplied with endless cups of coffee and making us all feel very welcome. I’ve added a link below to the venue. If you are in the area please drop in and support them.
Finally, before I get to the battles, the roving Umpire on the day was Andy Callan. You cant get better than the author of the rules being available to sort out any queries that come up in the heat of battle!
And so onto my day, where I fought three battles, one with a typical English WOTR army, led by Lord Harry Hotspur, the other two with my new Irish Army led by Brendan Fitzmaurice. As usual with my battle reports, I apologise for the one sided nature of the reports. Like all good (and bad) Chroniclers, only the highlights are included. The other problem that I have is that as I get more involved in the battle, I tend to forget to write down what actually happened, so like most accounts of the WOTR, the accounts are written long after the battles were over, although at least I can claim to have actually been there….
Battle number one vs Colin Bright’s Lancastrian/Tudor Army – The Lancastrian soft Centre
As Colin was relatively new to ‘Bill Hooks’ I was fighting with my standard WOTR Yorkist army commanded by Lord Harry Hotspur. The idea was to give Colin a play through as an introduction to the day and to get used to the flow of the game. In the initial set up, my light cavalry out scouted the Lancastrian force as they had no light cavalry or skirmishers.
Hotspur holds the centre as Sir Eric (on the left) does his best to provoke the Lancastrians into advancing!
Turn 1 saw the Lancastrian Army advance in a determined effort to bring the fight to the Yorkists and drive them from the table. Colin had deployed his two MAA units on either flank and looked as though he was going for a pincer move on my position. I immediately sent out my Skirmishers and light cavalry to the flanks to slow the advance and my cannon opened fire to good effect, causing attritional casualties amongst the enemy. Hotspur held his ground in the centre. To be precise, his card wasn’t drawn but it sounds better if it seems like some sort of cunning strategy!
Colin’s Tudor Bow and Bill block
Turn 2: With the armies now closing, and both Hotspur and Sir Eric now pushing forward, a fierce archery duel opened up, with the Lancastrian forces having the better of the encounter, remaining relatively unscathed themselves whilst Sir Eric Diehard and Lord Hotspur took heavy casualties. Out on the flanks, the skirmishers and light cavalry were doing an effective job of keeping the MAA at bay whilst continuing to inflict ever growing casualties. The cannon remained effective, and although a few scary double ones occurred, the gun remained intact.
Another of Colin’s beautifully painted units – look carefully! They’ve even got bow strings!
Turn 3: Lord Hotspur had closed with the Lancastrian Centre and although taking further heavy casualties from archery, almost wiping out the Yorkist archers, Hotspur was able to charge home with his MAA on the opposing Bill and bow block. Although the first round of combat did not force the Lancastrian unit to break, Hotspur inflicted 6 casualties on the Bills for the loss of just one MAA.
The Lancastrian MAA – isolated on the flank.The battle is finely poised – Hotspur is about to strike!
Turn 4: The flanks were still a problem for the Lancastrian army. Their units were being pinned by the skirmishers and cavalry and they faced the dilemma of trying to come to the aid of the centre without exposing themselves to a flank or rear attack from the cavalry. The cannon was still intact but with a fouled barrel, was becoming less effective. Meanwhile, in the centre Hotspur had won his ongoing melee on the drawing of the first bonus card, causing the Lancastrian bill and bow block to become daunted and fall back with their commander. This put Hotspur in a dominant position in the centre and as his card was drawn, he was able to charge into the next Lancastrian Bill and Bow block. This time, after another short but bloody encounter, the Lancastrians failed their morale test and routed from the battle field. Their route spread panic in the other retreating Lancastrian units and they fell back again to the table edge. At the turn end, the Lancastrian Commander was unable to rally his troops and so failing their morale test once again, they retreated from the field. Victory for Lord Harry!
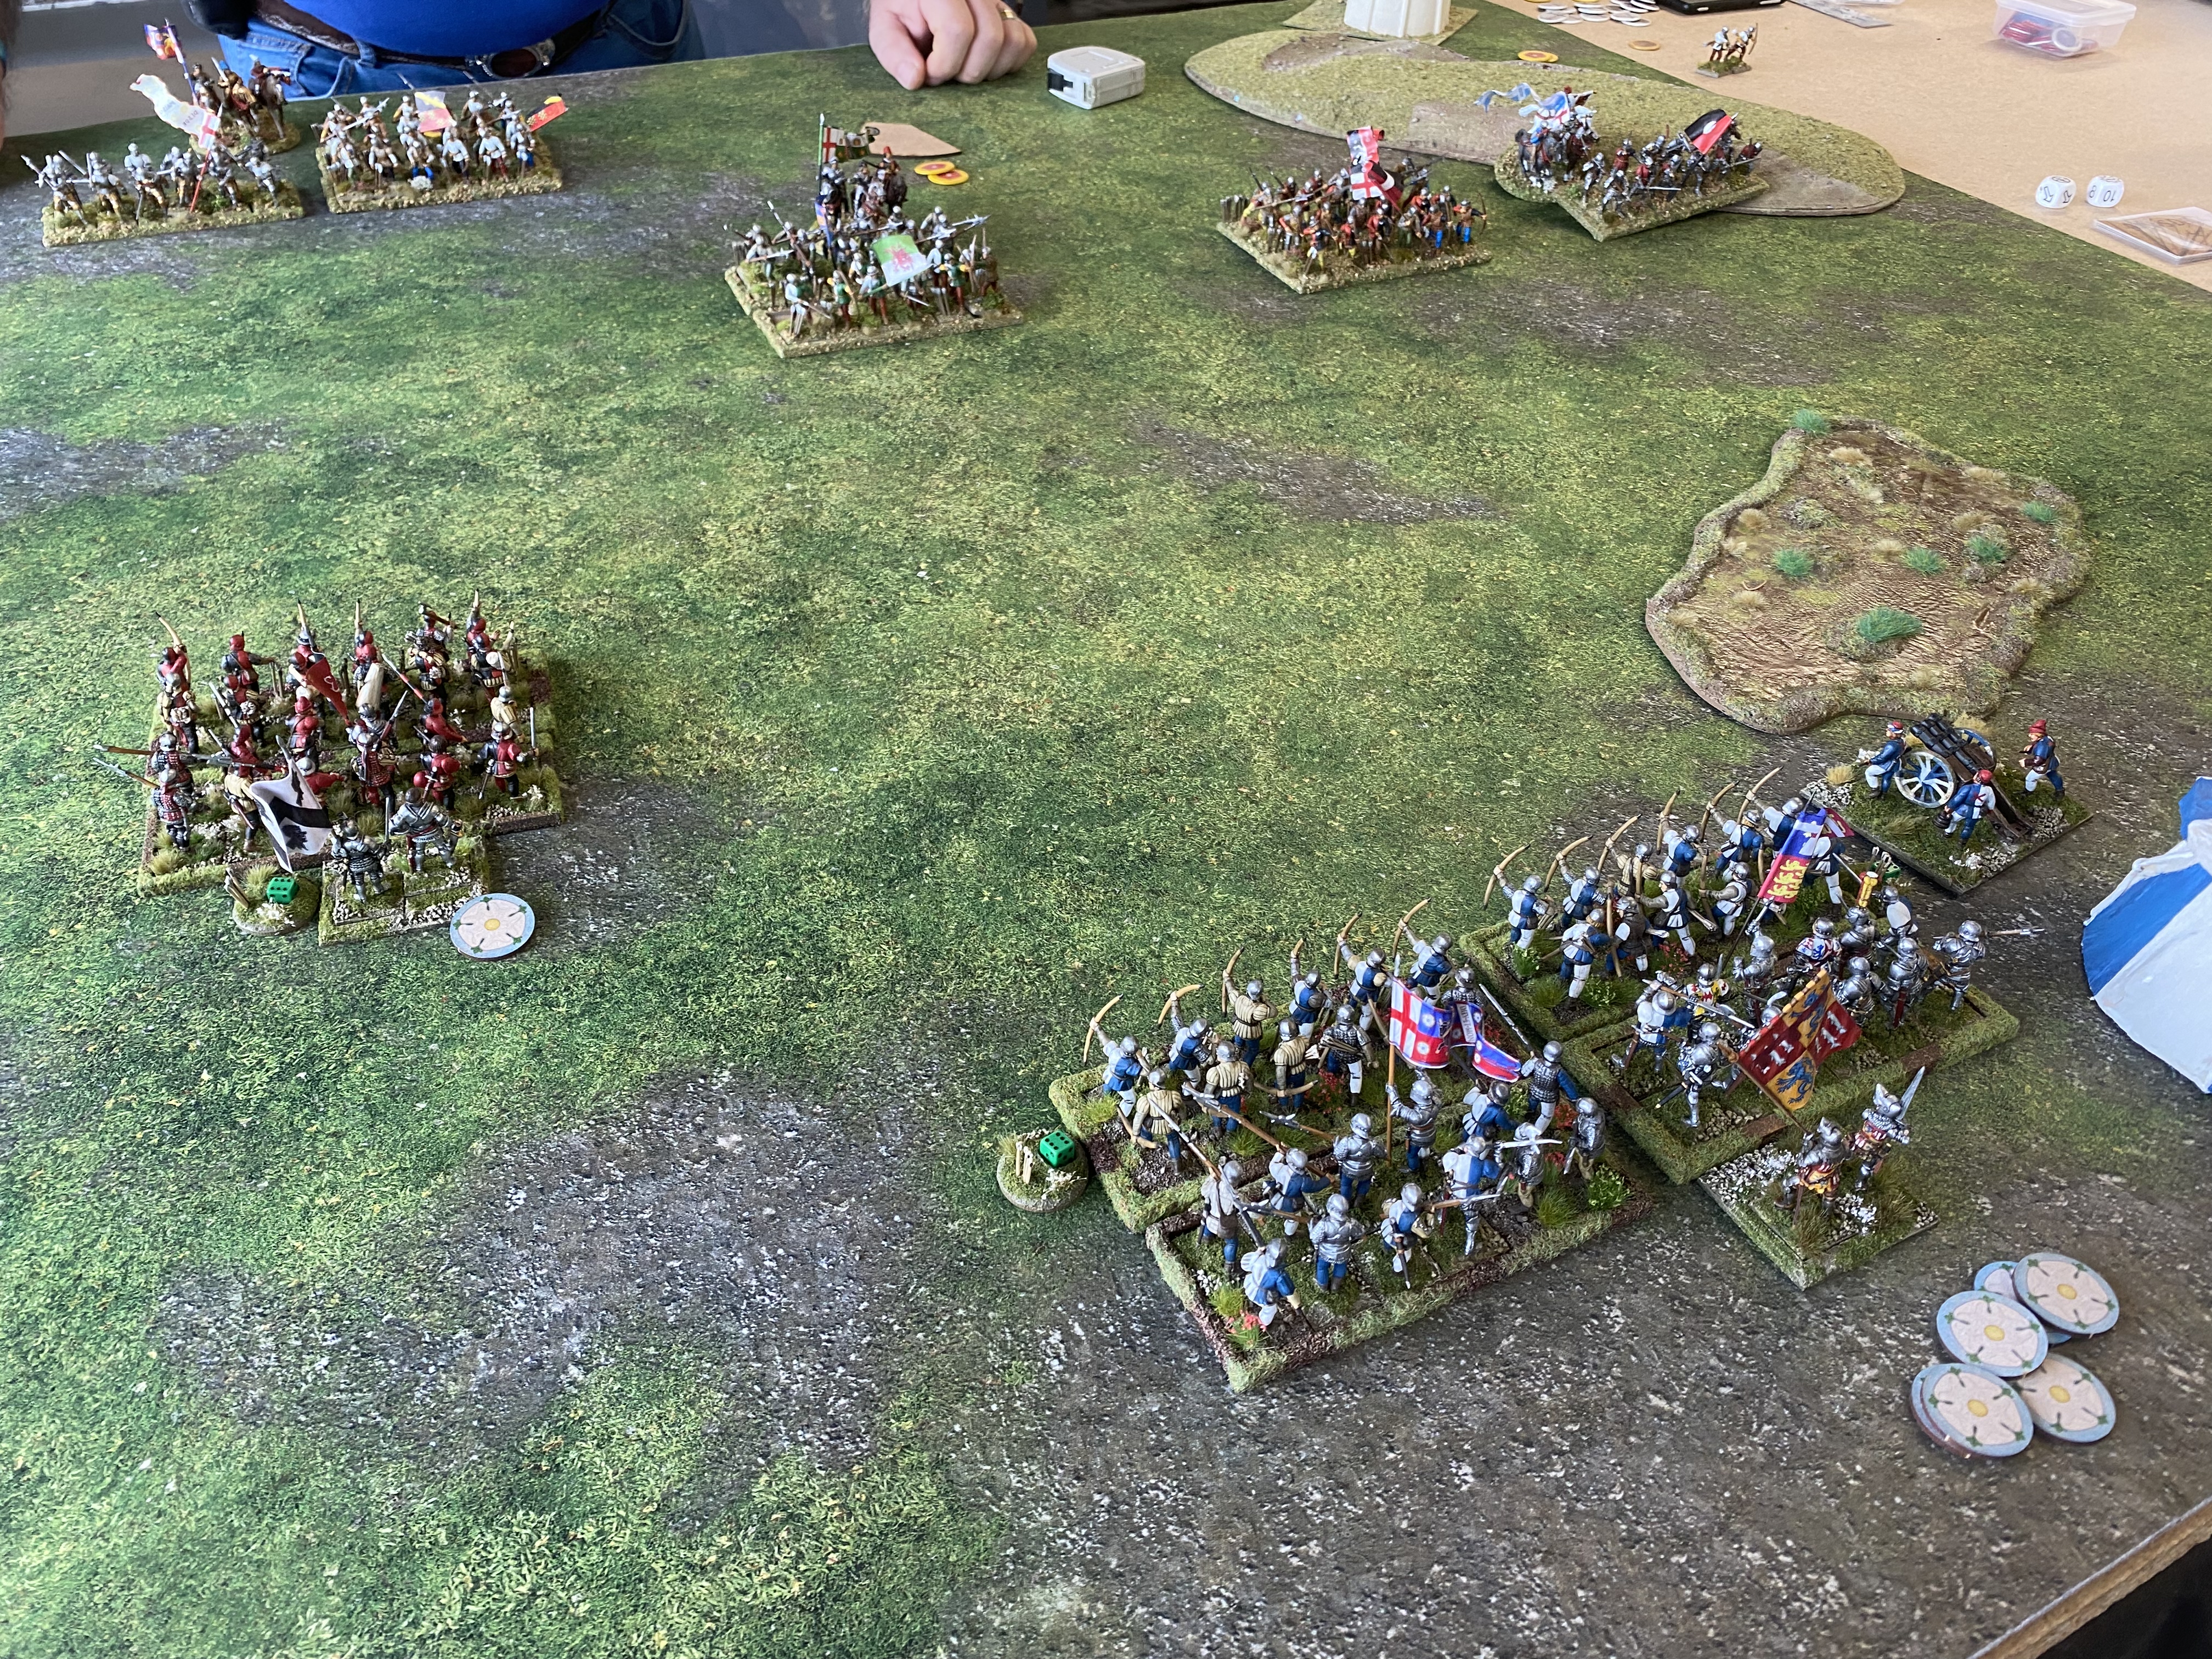
Battle 2 My Irish Vs David Grummitt’s Lancastrian Army – The luck of the Irish
For my second battle, I used my new Irish army. I had only used them once before, against Ian Callan’s Welsh and they had proved to be fast but brittle. I made a couple of changes to my order of battle. I used mixed wards of Gallowglass and formed kern rather than having them in separate wards. I also split my cavalry into separate units, one activating on the skirmish card as skirmishing cavalry, with Lord Kildare in command of the other unit. As usual, my ability to game and record the action turn by turn started to fail as did my picture taking ability!
The Lancastrians started with an aggressive push in the centre which once again was met by the Irish centre holding steady, whilst the skirmishing kern and the cavalry pushed out around the flanks, threatening to get behind the Lancashire lines. This unsettled the Lancastrians, their skirmishers were put to flight and the Kern started to make mischief, distracting the Lancastrian archers and bill blocks. The Lancastrian Commander, Lord Somerset ( I think) was made of sterner stuff and pushed on, smashing the first unit of formed kern and sent them running from the field.
Somerset surrounded!
However, The Lancastrian lord found himself isolated and surrounded by the Irish Kern Skirmishers, with Cavalry to his rear and Gallowglass to the flank, things were looking sticky!
How do I get out of this mess?
Somerset was in no mood to wait on the Irish and once again charged forwards into the next unit of formed kern. It was a brave strategy that would of worked as the MAA made short work of the kern. However, the Irish Commander had found a four leafed clover and lady luck came to his aid in the form of a special event card allowing a free flank attack! Fitz Maurice led his Gallowglass charging into the flank of Somerset and with 18 dice plus his leadership the Lancastrian casualties began to pile up!
Last man Standing!
With Somerset bravely urging his men to turn and face this dastardly flank attack, the melee was decided when the other Gallowglass unit turned and charged into the rear of the melee. Although in disarray, the front rank was enough to tip the balance and Somerset was slaughtered along with his men. Victory for Fitzmaurice and the Irish!
Battle Three. Irish vs Richard Marriotts Lancastrians – Stokes Fields revisited!
By now my chroniclers energy was exhausted and I am sorry that I did not take more pictures of Richards victory ( Oops! there should have been a spoiler alert there.) Richards army was slightly unusual in that he had taken mounted knights rather than men at arms. I had always considered that although they are dangerous, they are an expensive luxury in a battle of this size. Well after all the games I’ve played it seems I still have plenty to learn!
I used my well worn plan of trying to use my skirmishers and cavalry to dominate the flanks and pull the opposing army out of position. The battle started well for the Irish. Richard opened hostilities by firing his cannon, only to roll three ones and blow it up! Oh how the Irish laughed at this new technology…However, the smile was soon wiped off of their faces as the Lancastrian skirmishers made short work of the Kern on the left and the Knights advanced menacingly on the right holding the Irish back and keeping them out of the way!
I think that Richards commander had been trained by the grizzled Veteran, Oxford, who so competently disposed of the Irish at Stokes Field. The flanks were secured by the skirmishers and a unit of bows and bills on one side and the Knights on the other. One by one, my kern skirmishers and cavalry were destroyed, daunted or just pushed back. Meanwhile in the centre, the archers were causing havoc and the desperate charges of the Irish were met with a resolute defence. My commander, Lord Fitzmaurice was slaughtered in a last charge, his Gallowglass unable to break the Lancastrian Bills
The final melee – Fitzmaurice is vanquished!
So the day ended with a loss but as with all Bill Hooks games played todaqy, there were enough laughs and ‘if only’s to convince the players that next time, victory will be theirs! I enjoyed using the Irish and have learnt a great deal. They remain a fragile choice but their speed and the way that the skirmishers activate can cause a few problems for the opposition. However, if caught in the open, they don’t stand up to arrow storms very well – they definitely need a bit of luck to succeed!
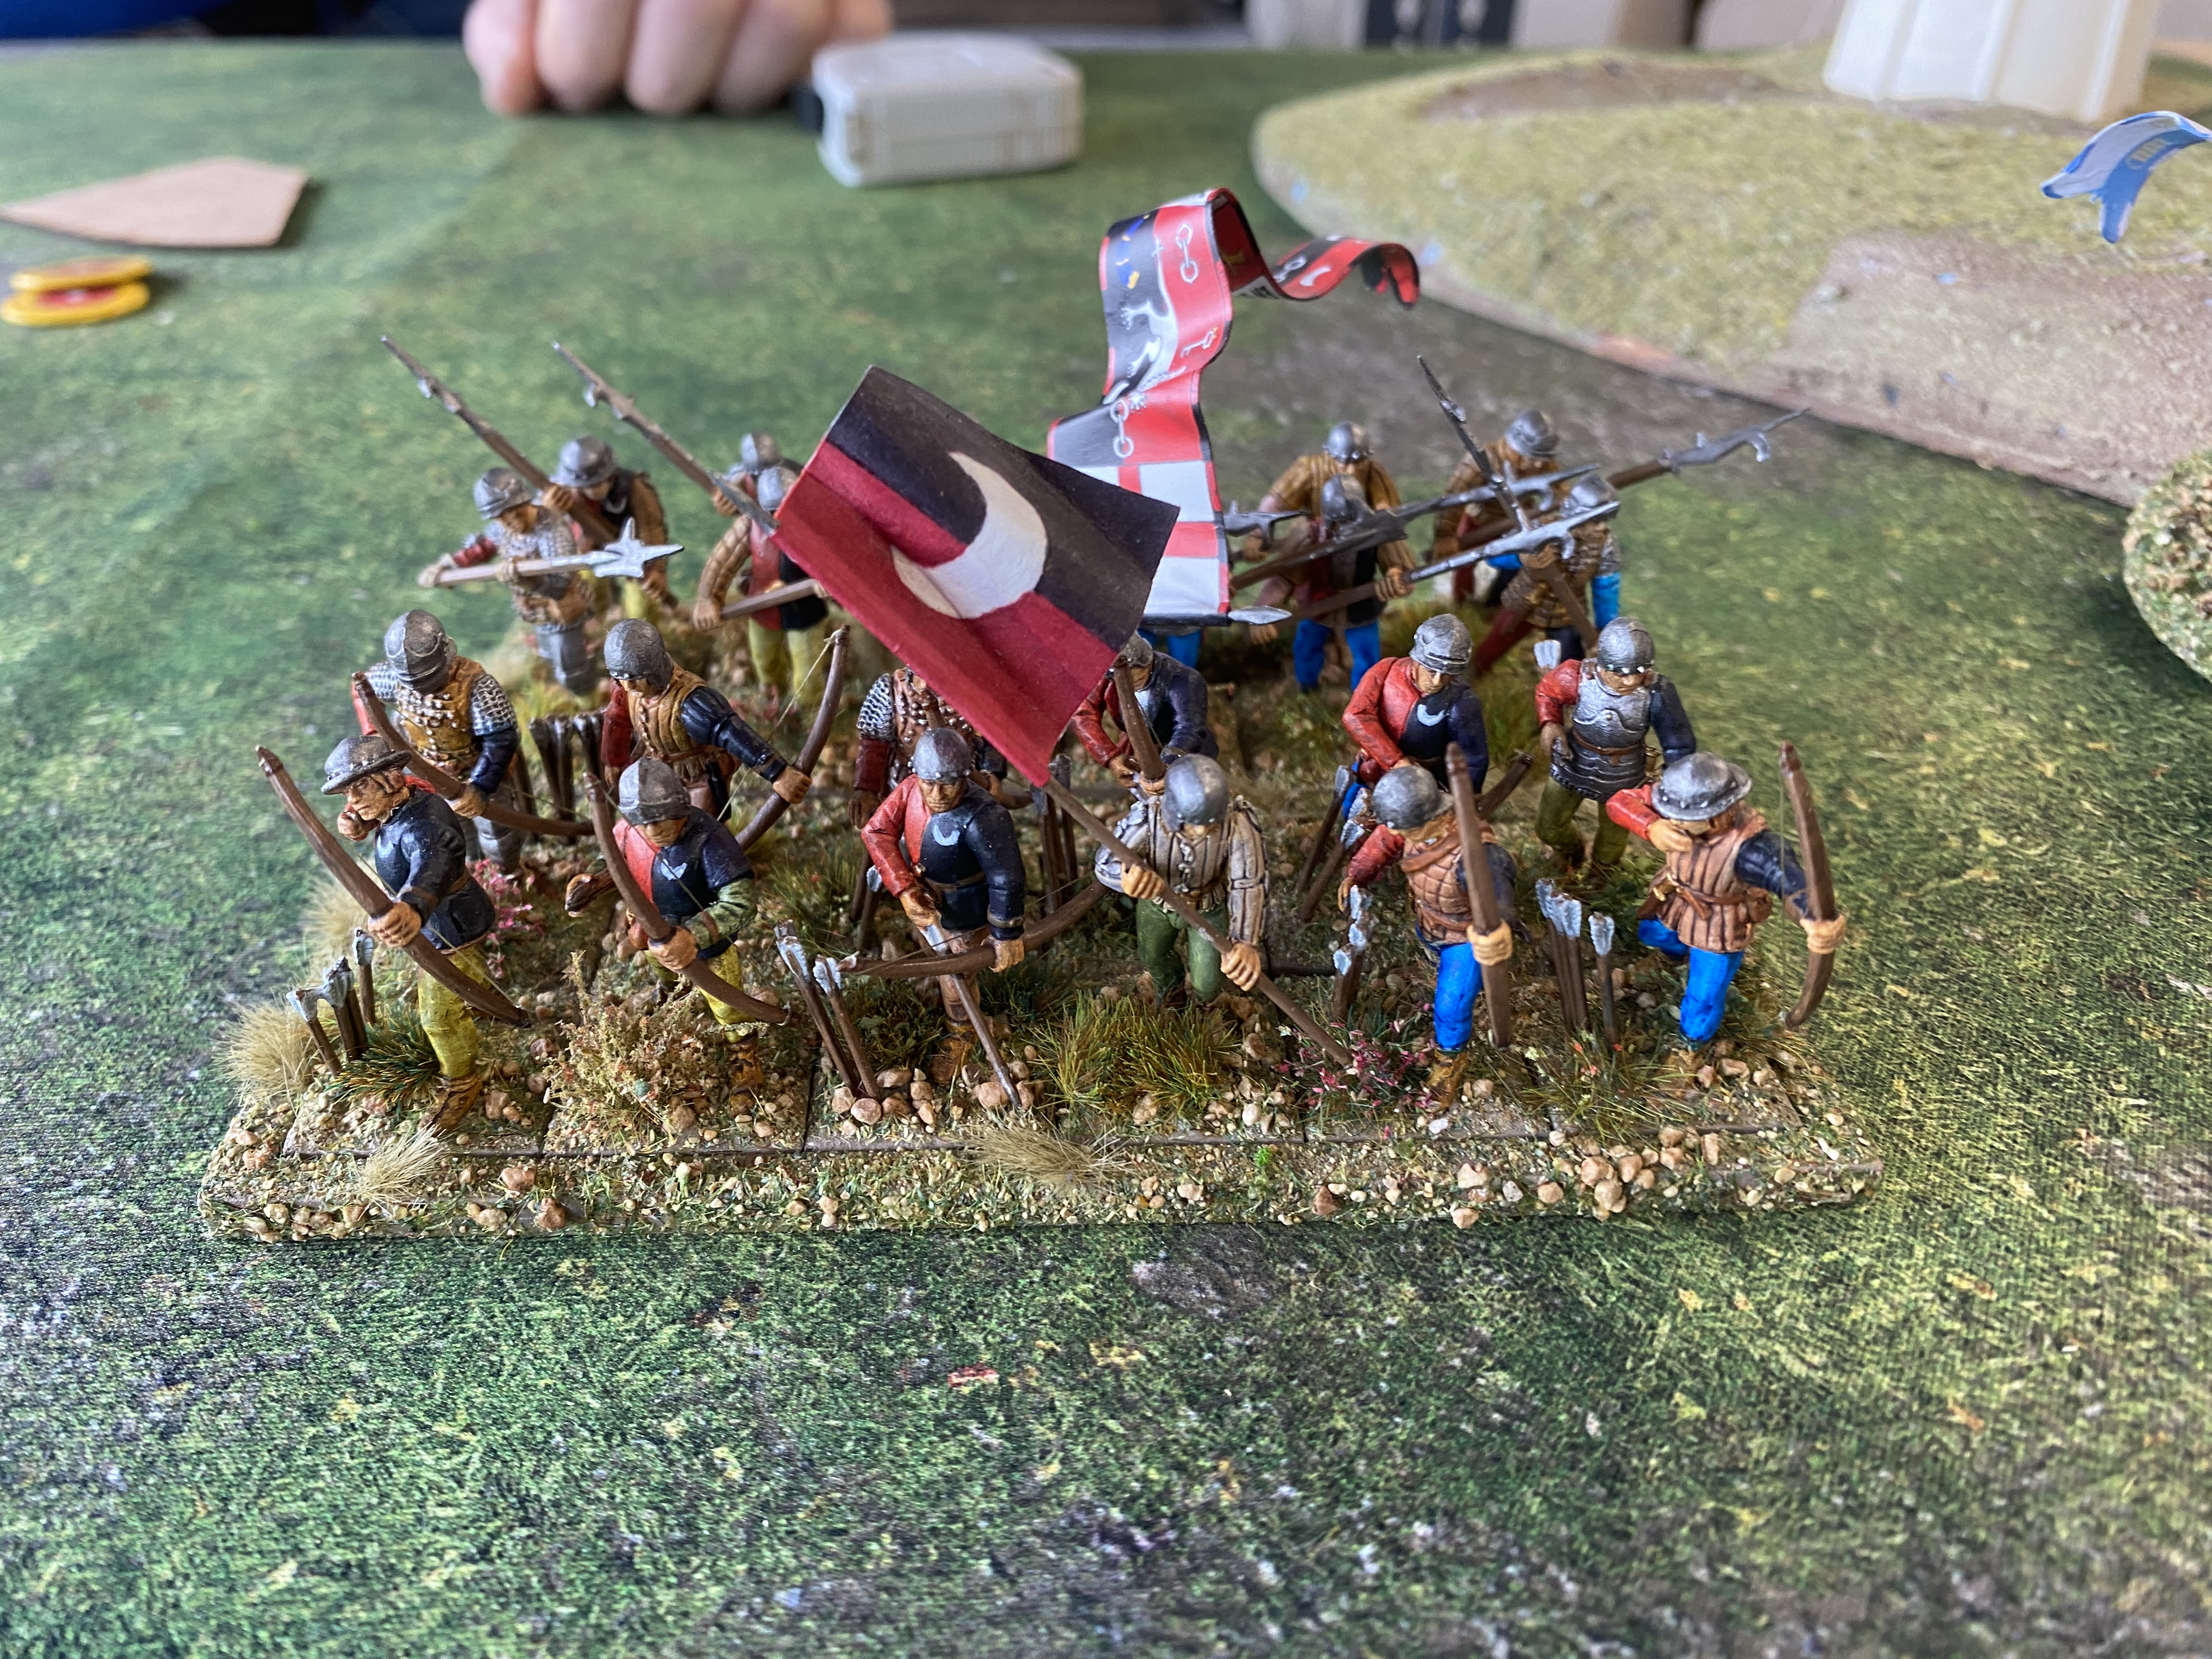
Just one example of Mike Peters superb painting skill – Yes, the banners are hand painted!
To round up a fantastic day, I managed second in the painting competition, with Mike Peters winning. Mike is a fantastic painter and modeller, all of his banners are hand painted and he has created some superb vignettes for his command stands. Watch out for an article in a forthcoming Wargames Illustrated mag showing you how to paint banners. Mike is also the official Bill Hooks BASH scribe, so you can read all about the day and see some of the fantastic armies on show in the next WI. As if he isn’t clever enough, Mike is working on a skirmish version of Bill Hooks. This will enable you field a small retinue of your own design to take part in various adventures from pillaging your enemy, hunting down outlaws or fighting off rivals trying to pillage you! There’s even talk of Pirates!
Once again, a big thank you to Peter Harris and Boards and Swords for organising and hosting the event; a very big thanks to my opponents, Colin, David and Richard for being such sporting and good humoured opponents and of course a big thank you to all the attendees for making the day so much fun. Next up, it’s Bill Hooks at B.I.G. down at Bristol – check out the NMTBH facebook page for details if you would like to go!
THE COMMERCIAL BIT
I hope that you all enjoy your hobby as much as I do – remember that our web site will have much of what you need! Click here to see our shop:
Having completed my Irish Army, I dont really have a ‘big’ project on the go at the moment, except a secret one that I’ll show you at the end of this entry….
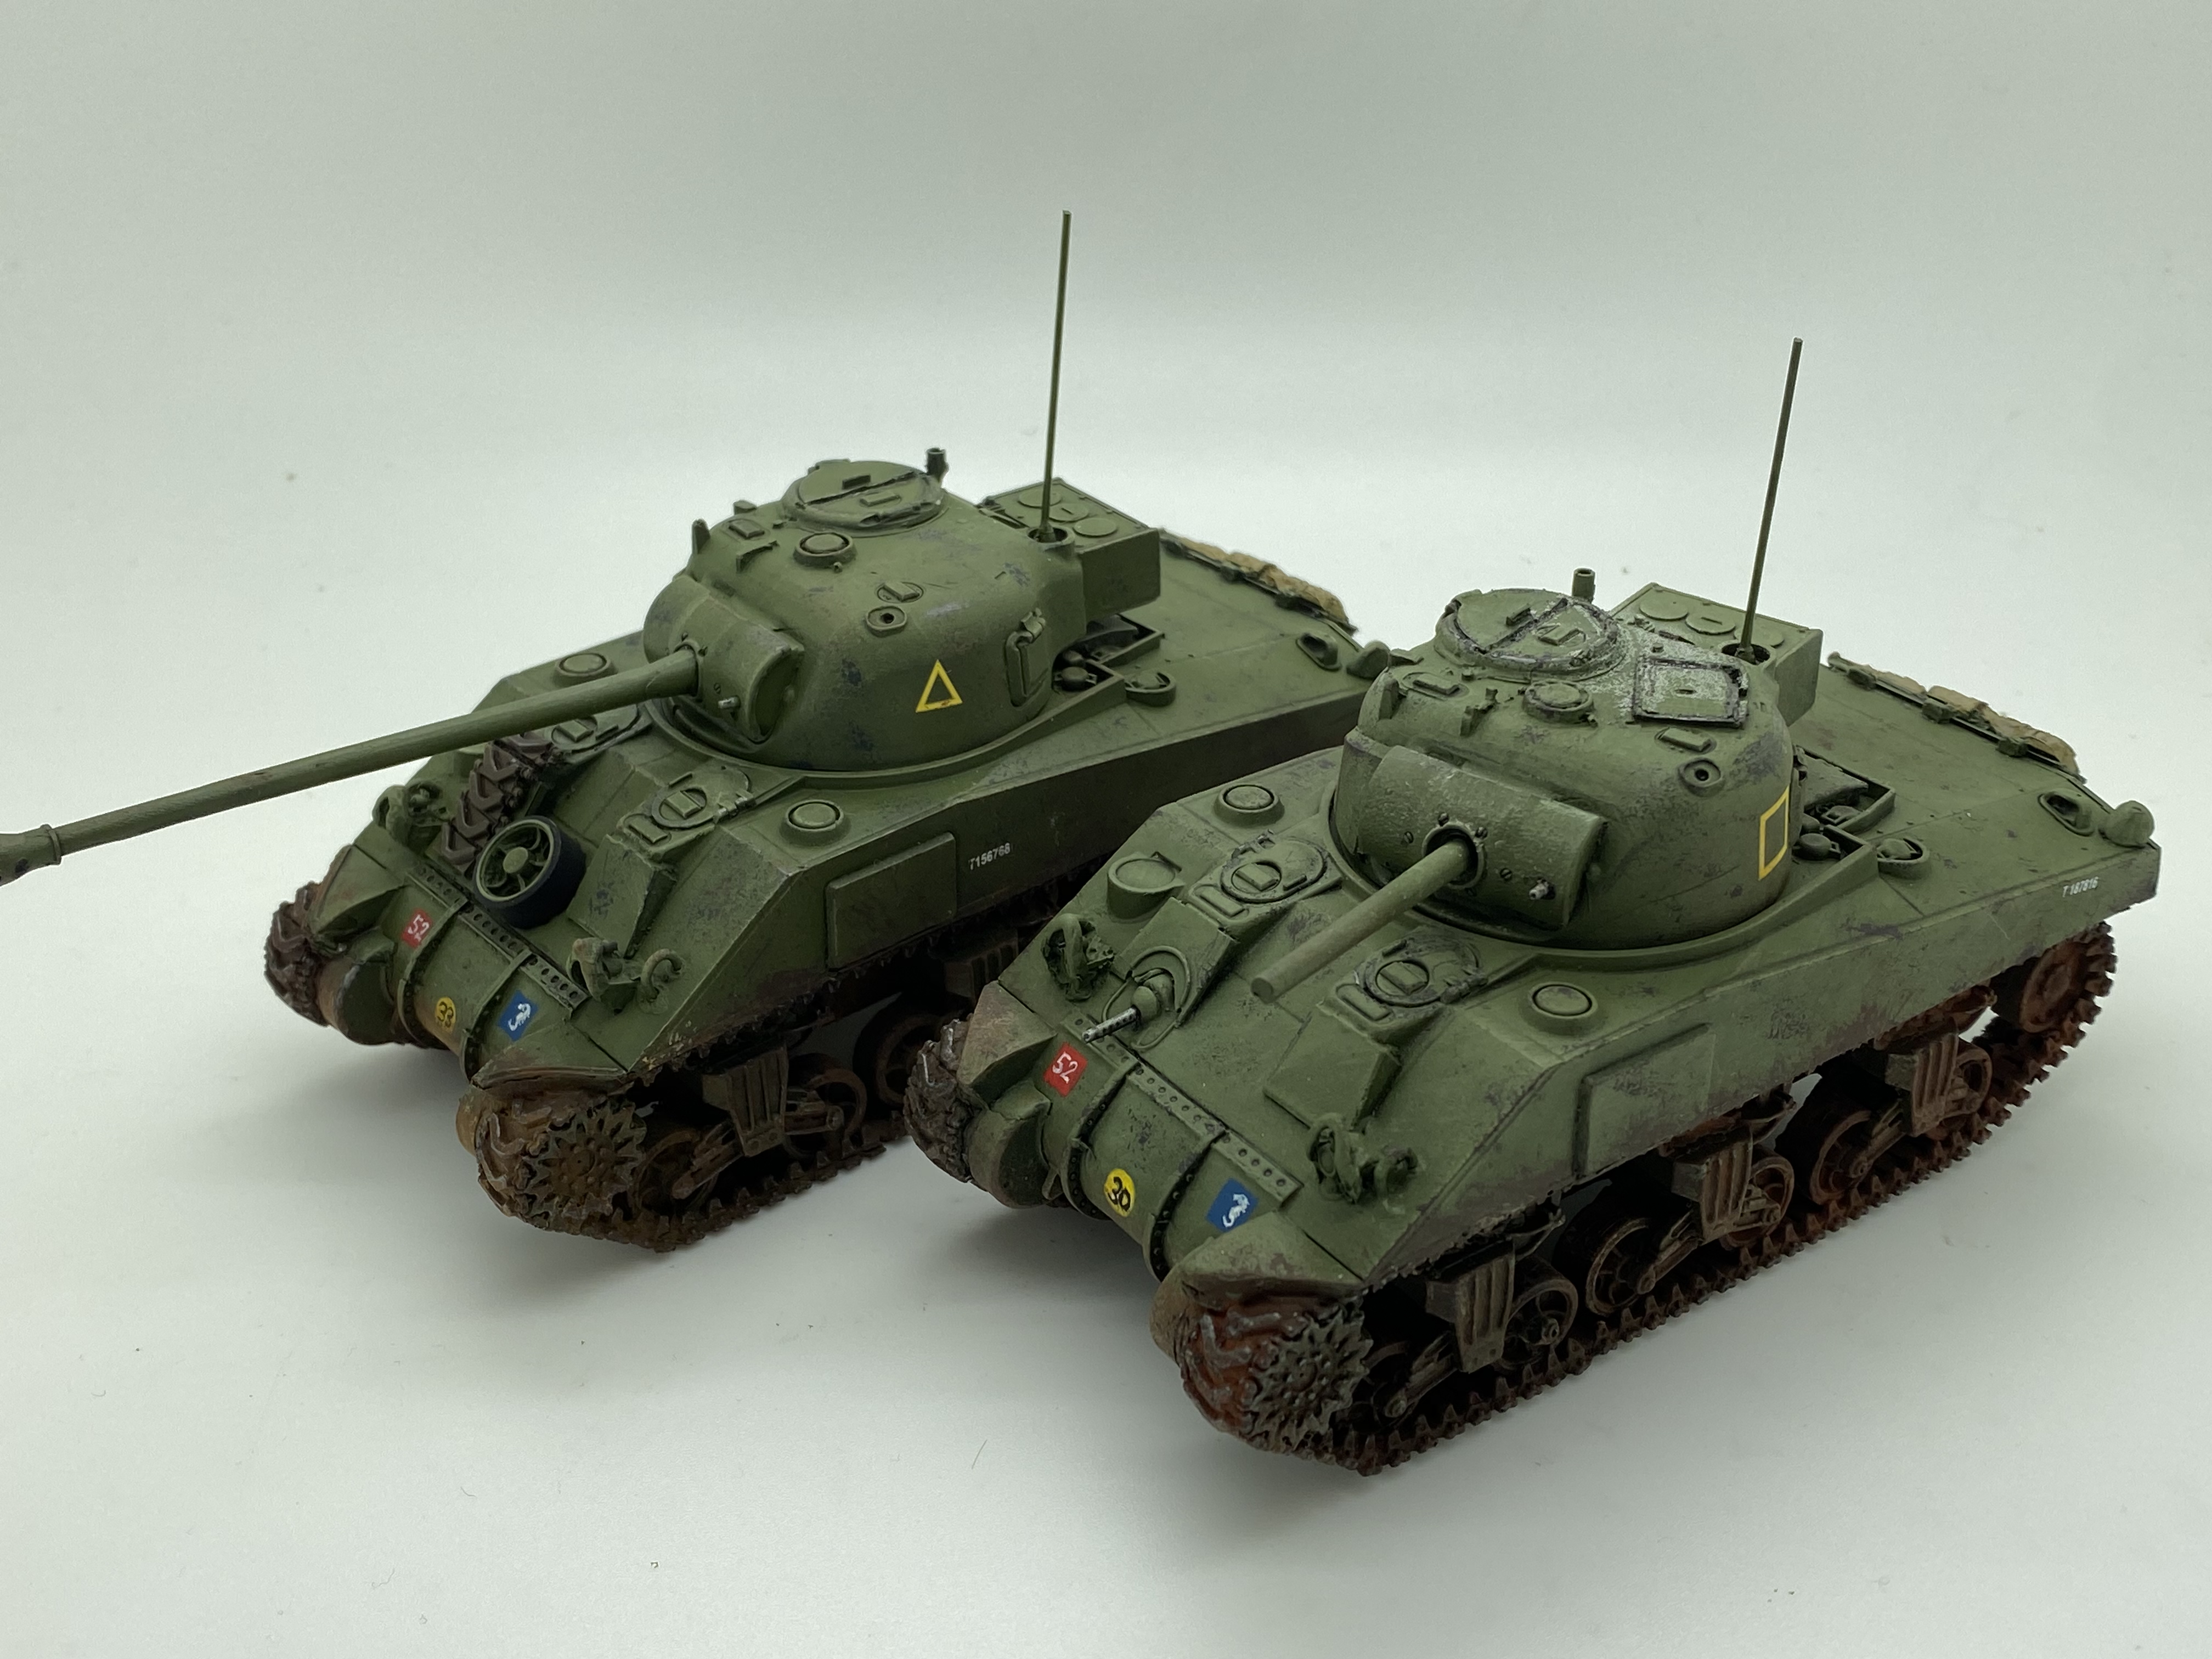
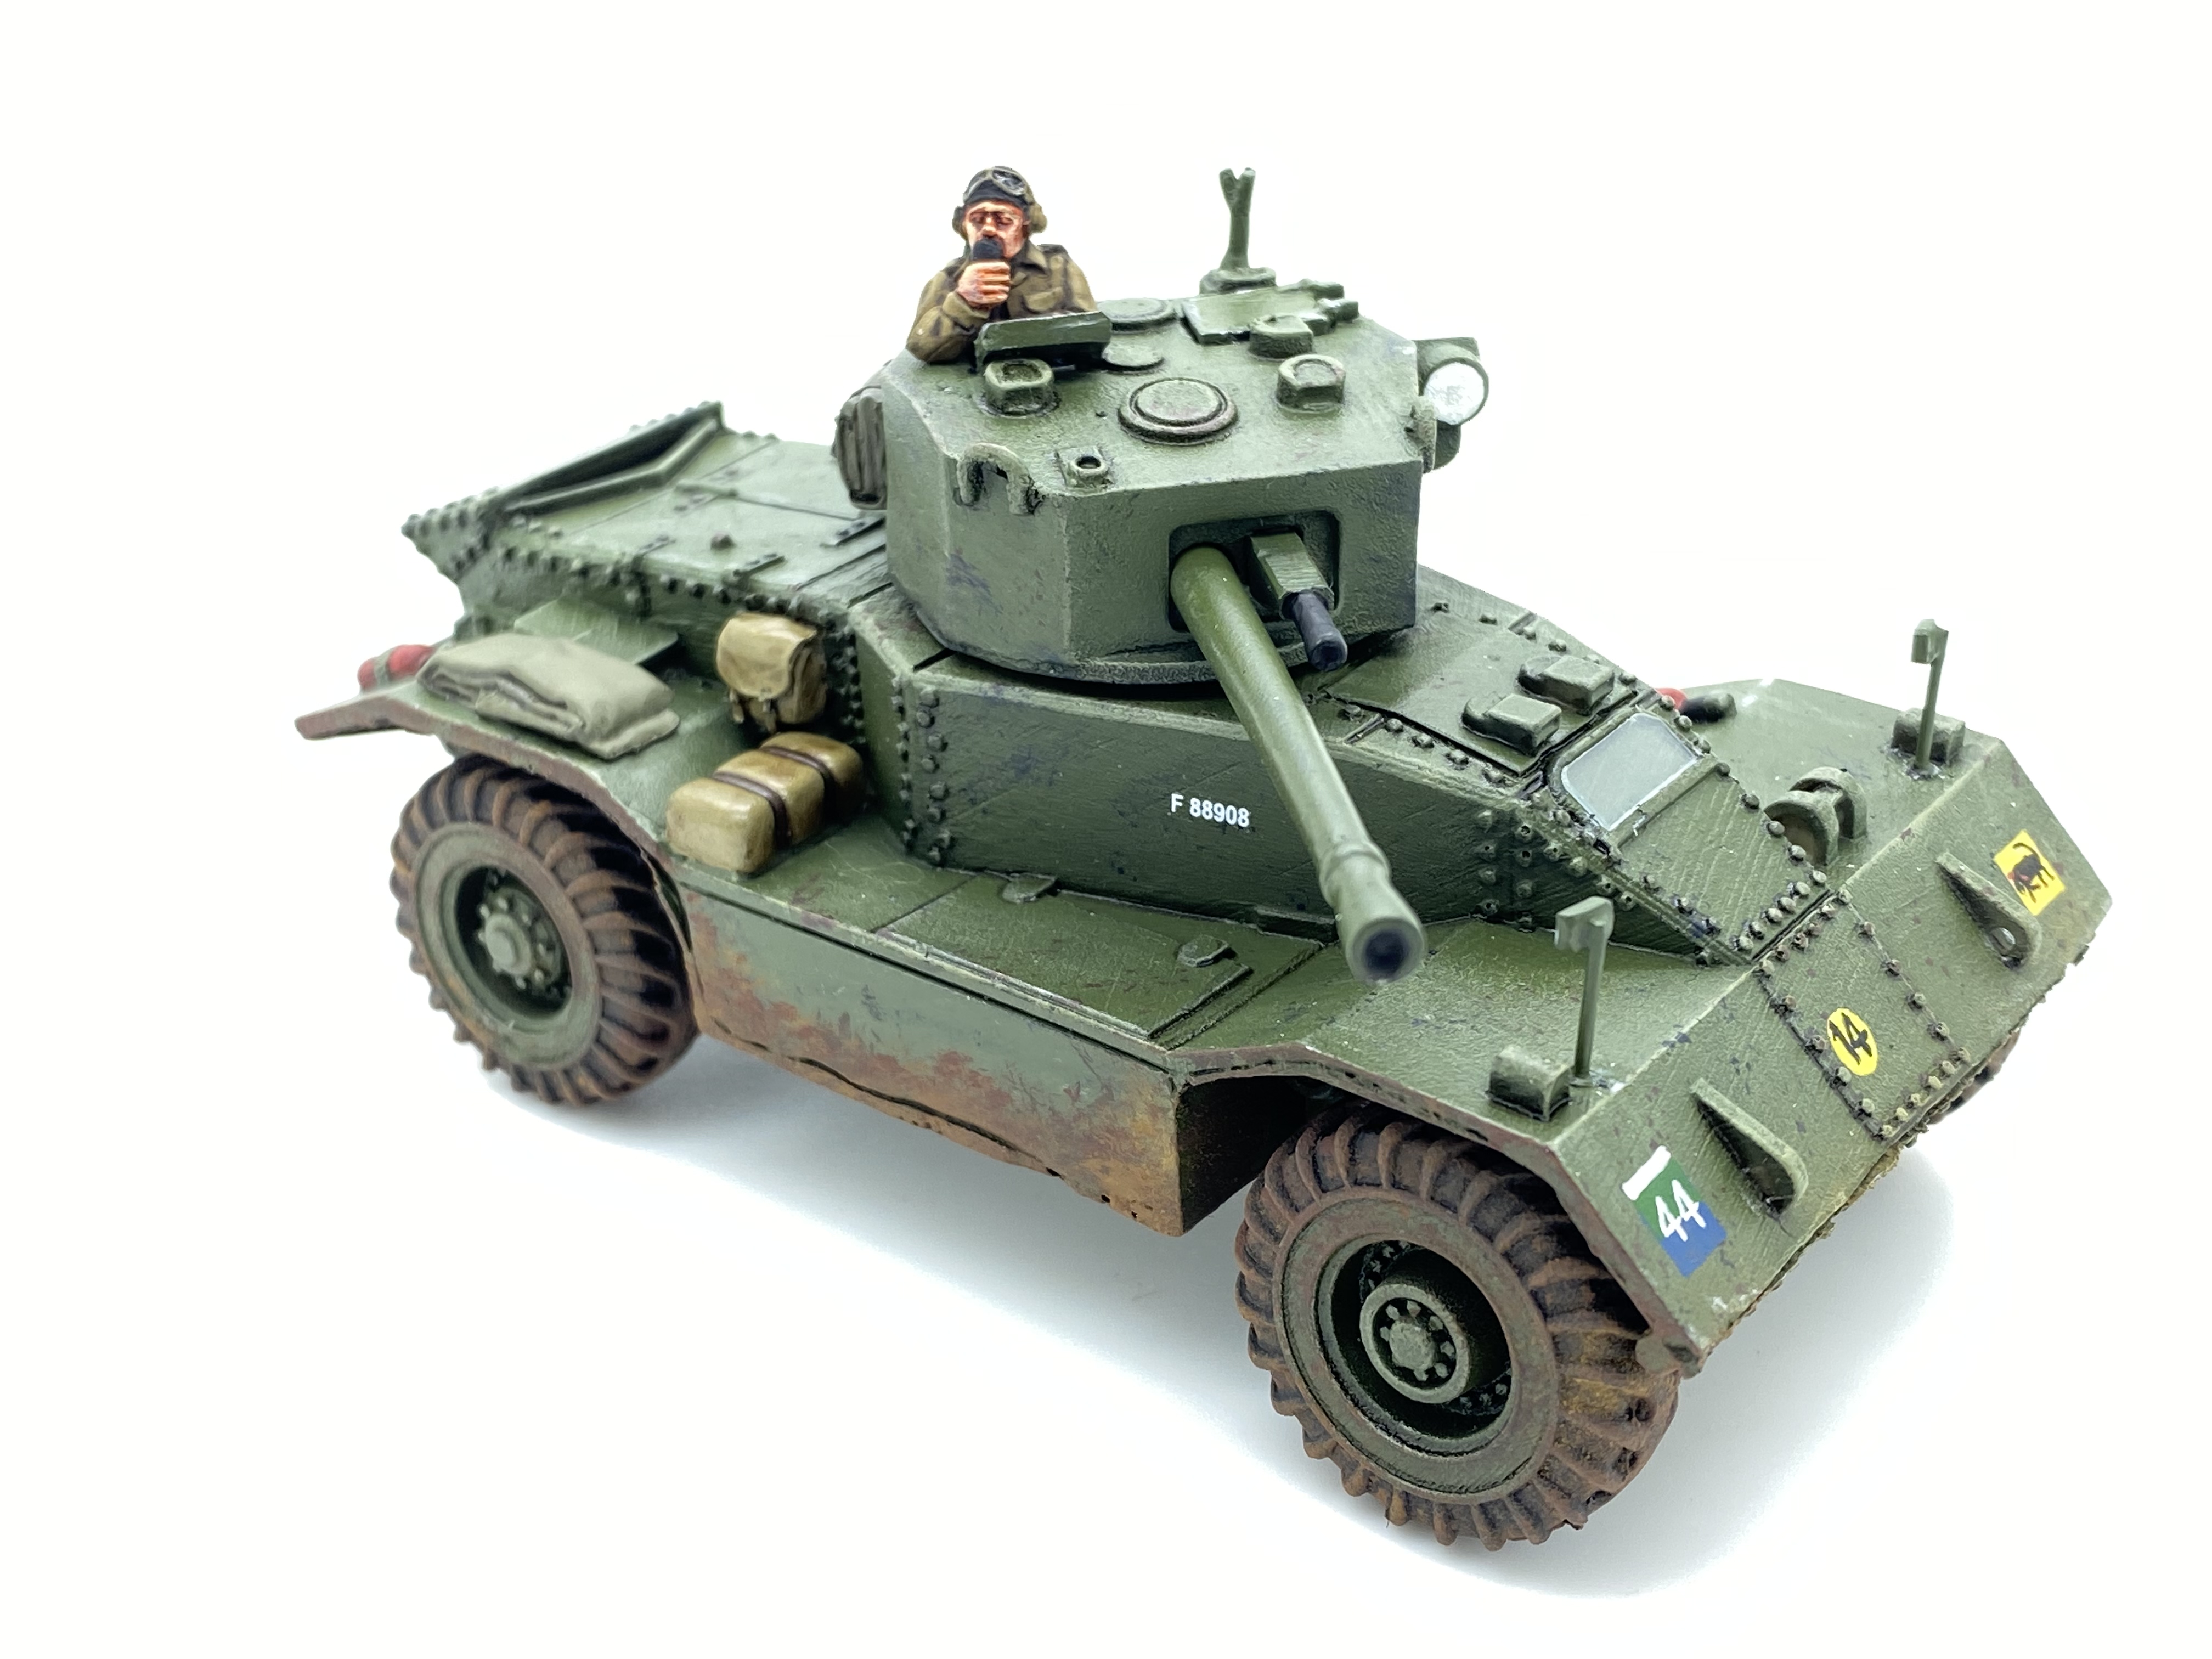
I’ve been working on a number of 1/48th scale subjects. These include an Airfix Snatch Landrover, a SMER 1/48th scale Swordfish, and a couple of Blitzkrieg models, The Firefly and an AEC armoured car. The Firefly is pretty much done, although I will be adding some extra stowage. Here’s a couple of pictures of the Firefly.
The Blitzkrieg Firefly – I think that I will add some stowageThe Firefly with the Sherman V
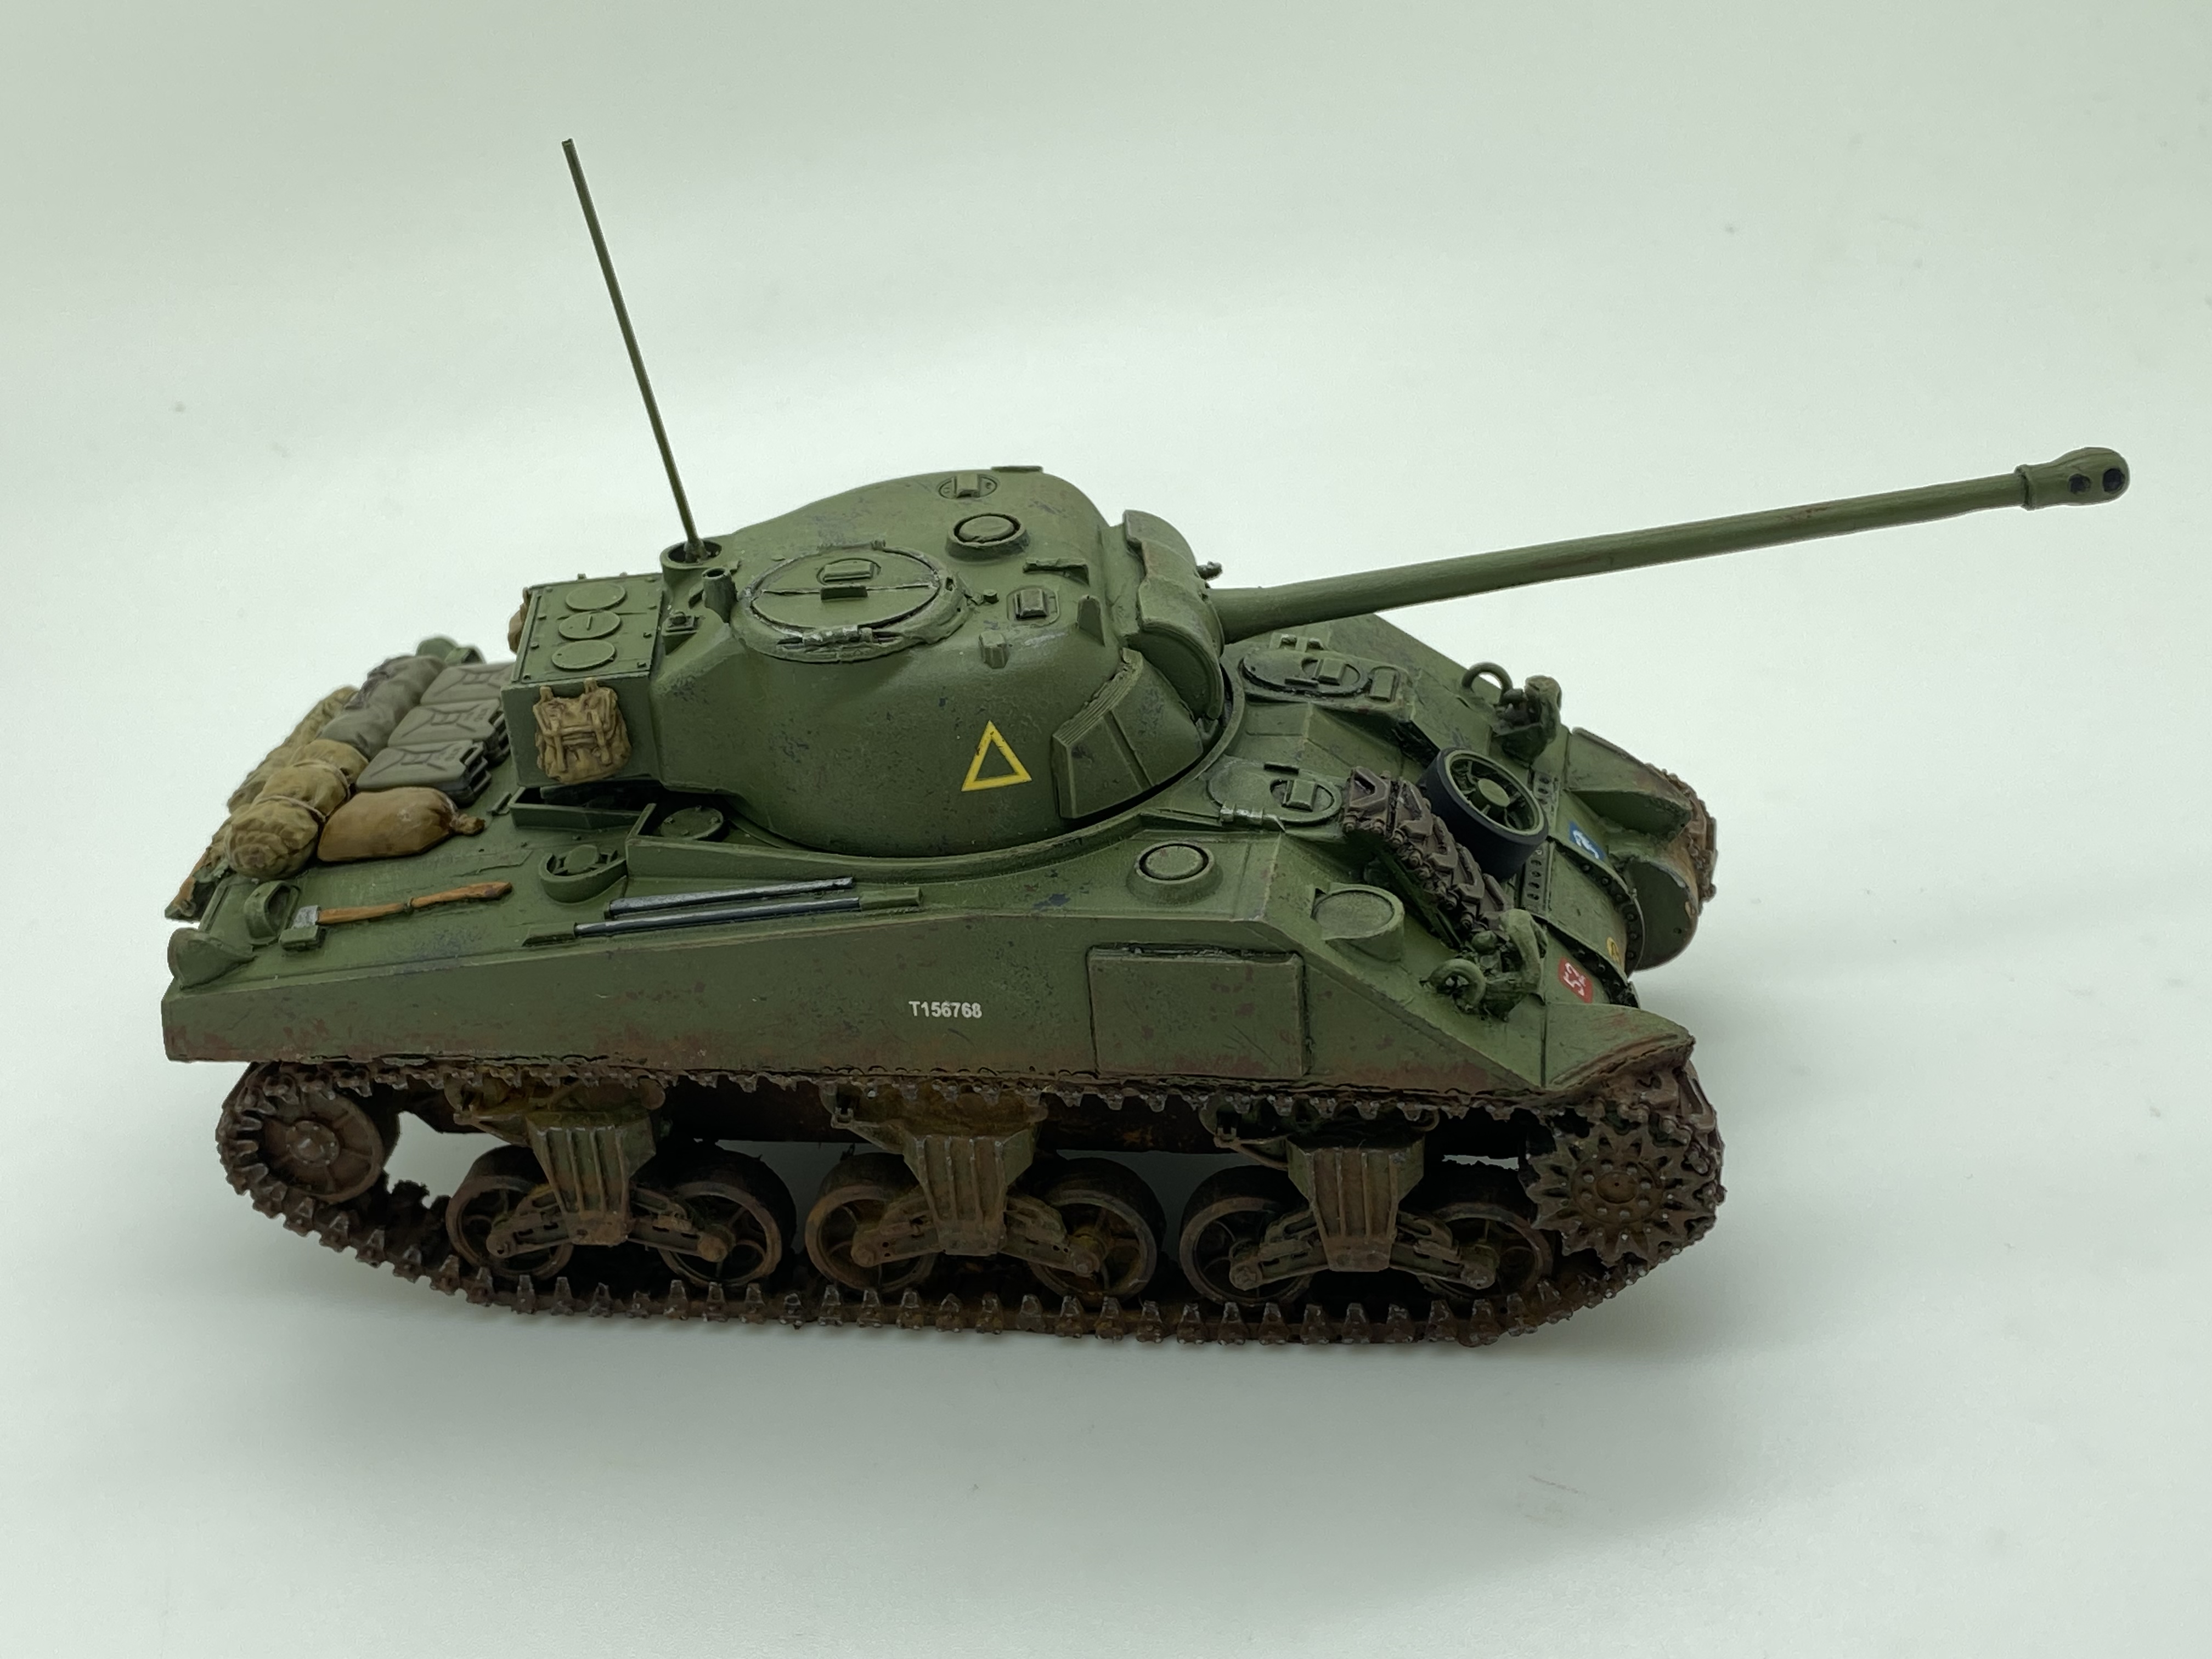
In between writing this blog and publishing it, I actually finished the extra stowage as well as the AEC armoured car. I was pleased with the AEC car. Even though it is resin, a few extras, stowage, wing mirrors, the drivers screen and a commander have brought it to life. The drivers screen was added by simply cutting an old blister pack down to get the clear plastic!
Firefly with extra stowage1/48th AEC armoured car from Blitzkrieg Miniatures
As far as my WOTR collection goes, I have already painted the Richard III figure that was available at Hammerhead 2023. The figure is a bit fat in the face for Richard, but he will make a nice addition to my collection and he’s in the cabinet rather than the leadpile!
I’m also working on a small vignette. Andy Callan gave me a set of stocks for my medieval village that is progressing at glacial speed. It seemed a shame not to have a subject locked up in them so I’ve converted a Wargames Factory Celt to fit. There’s a bit more work to do, as you can see.
If you are happy and you know it clap your hands…..
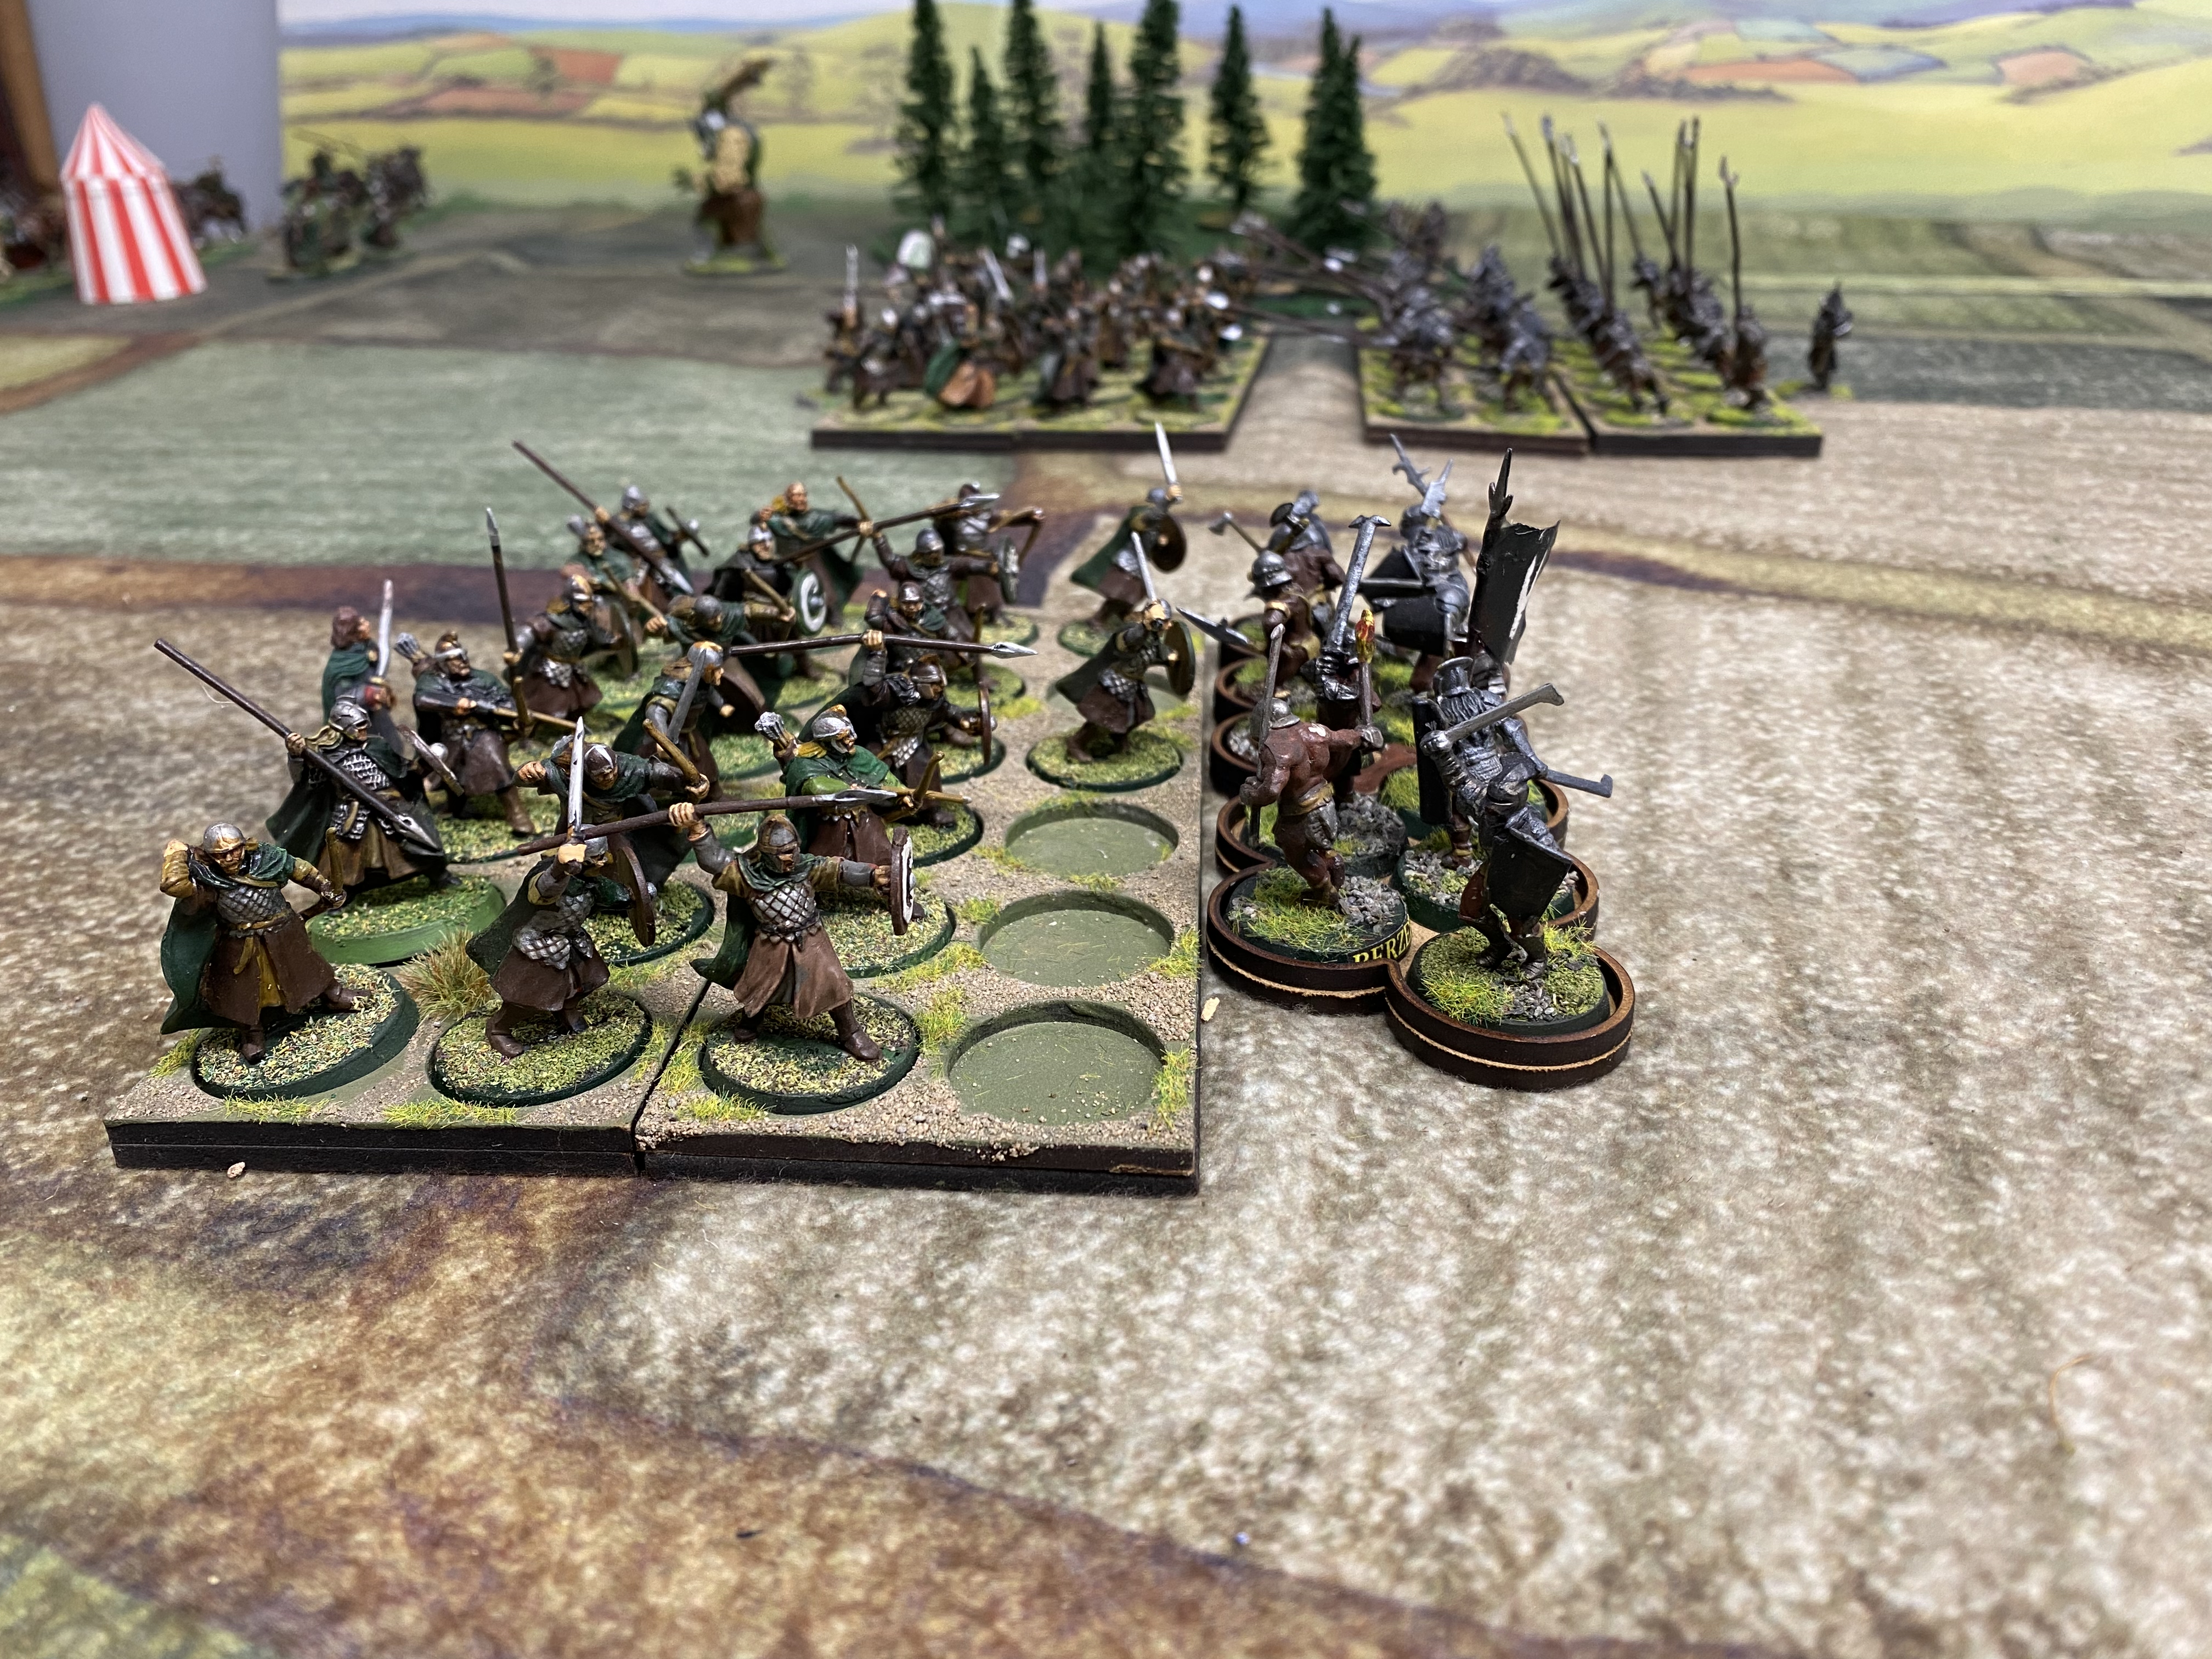
So on to the secret project! Andy Callan has been working on another spin off of Never Mind The Bill Hooks. This time it is Bill Hooks Fantasia or Never Mind the Warlocks – a fantasy rules set using the basic Bill Hooks game engine. Andy had written a fantasy version some time ago for his Grand kids to play. However, Bill Hooks had moved on and the rules never made it to the table. There has been a lot of back and forth between Andy and some keen Bill Hooks players as the new rules were added.
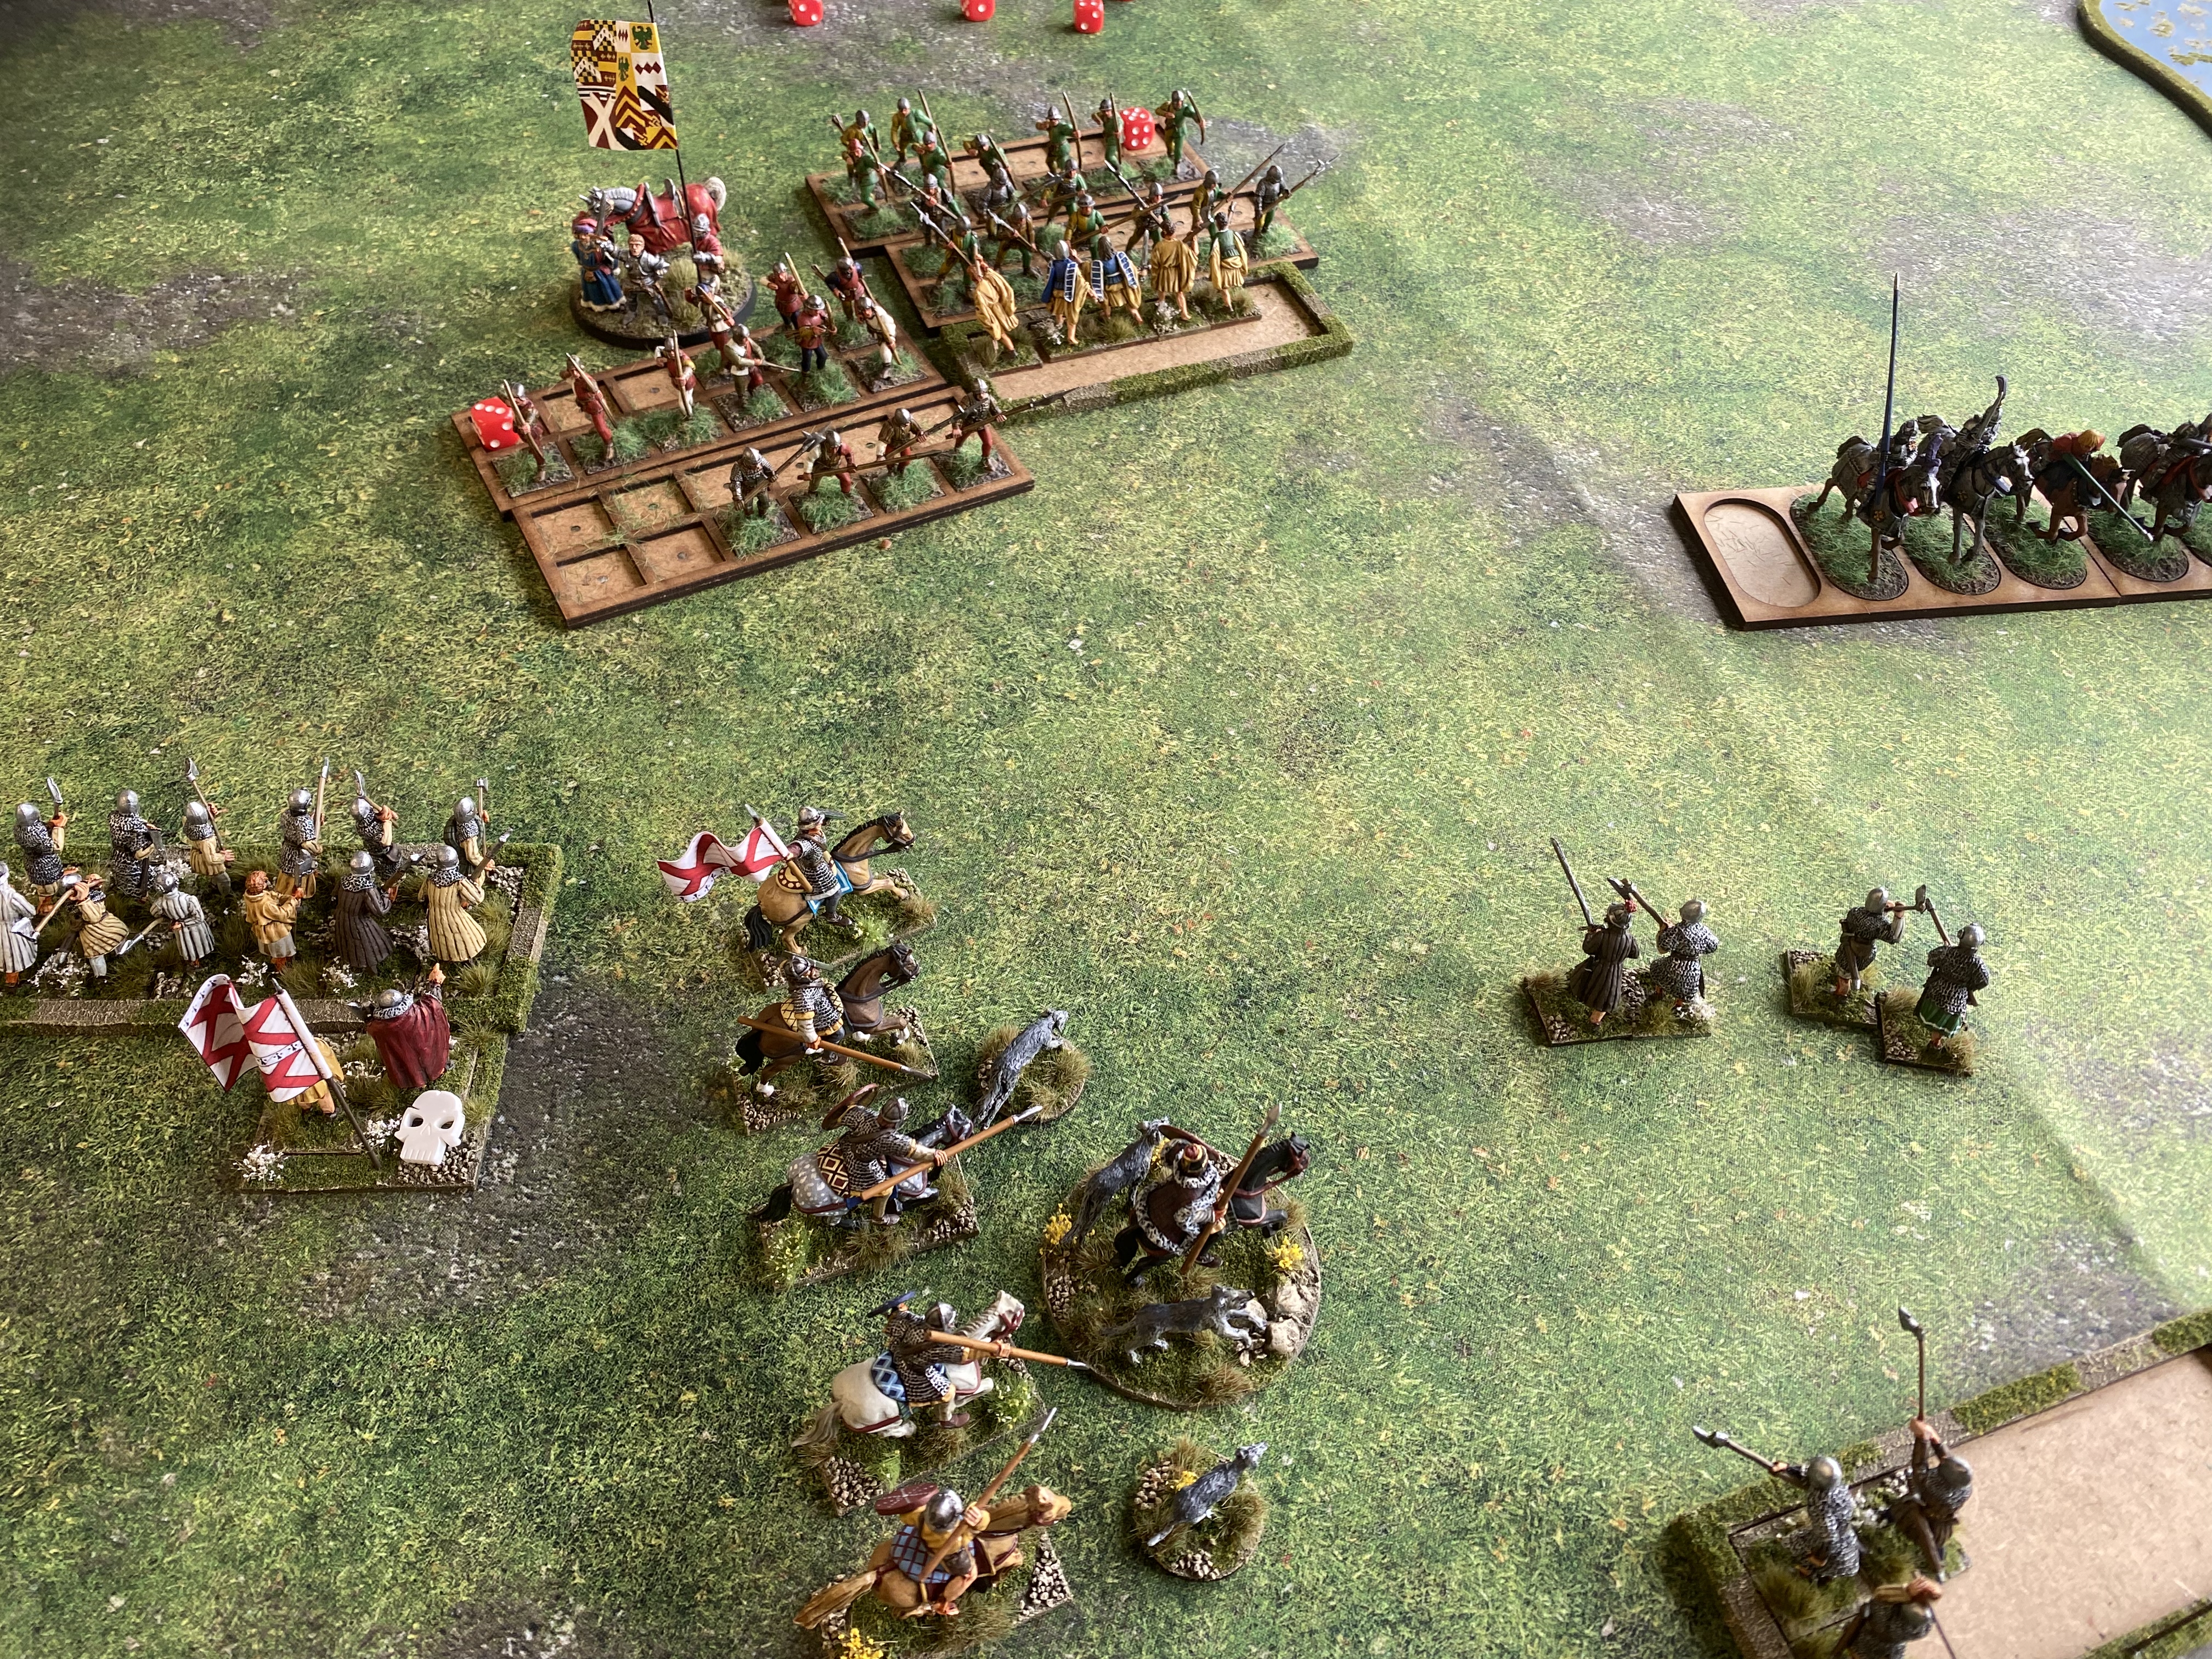
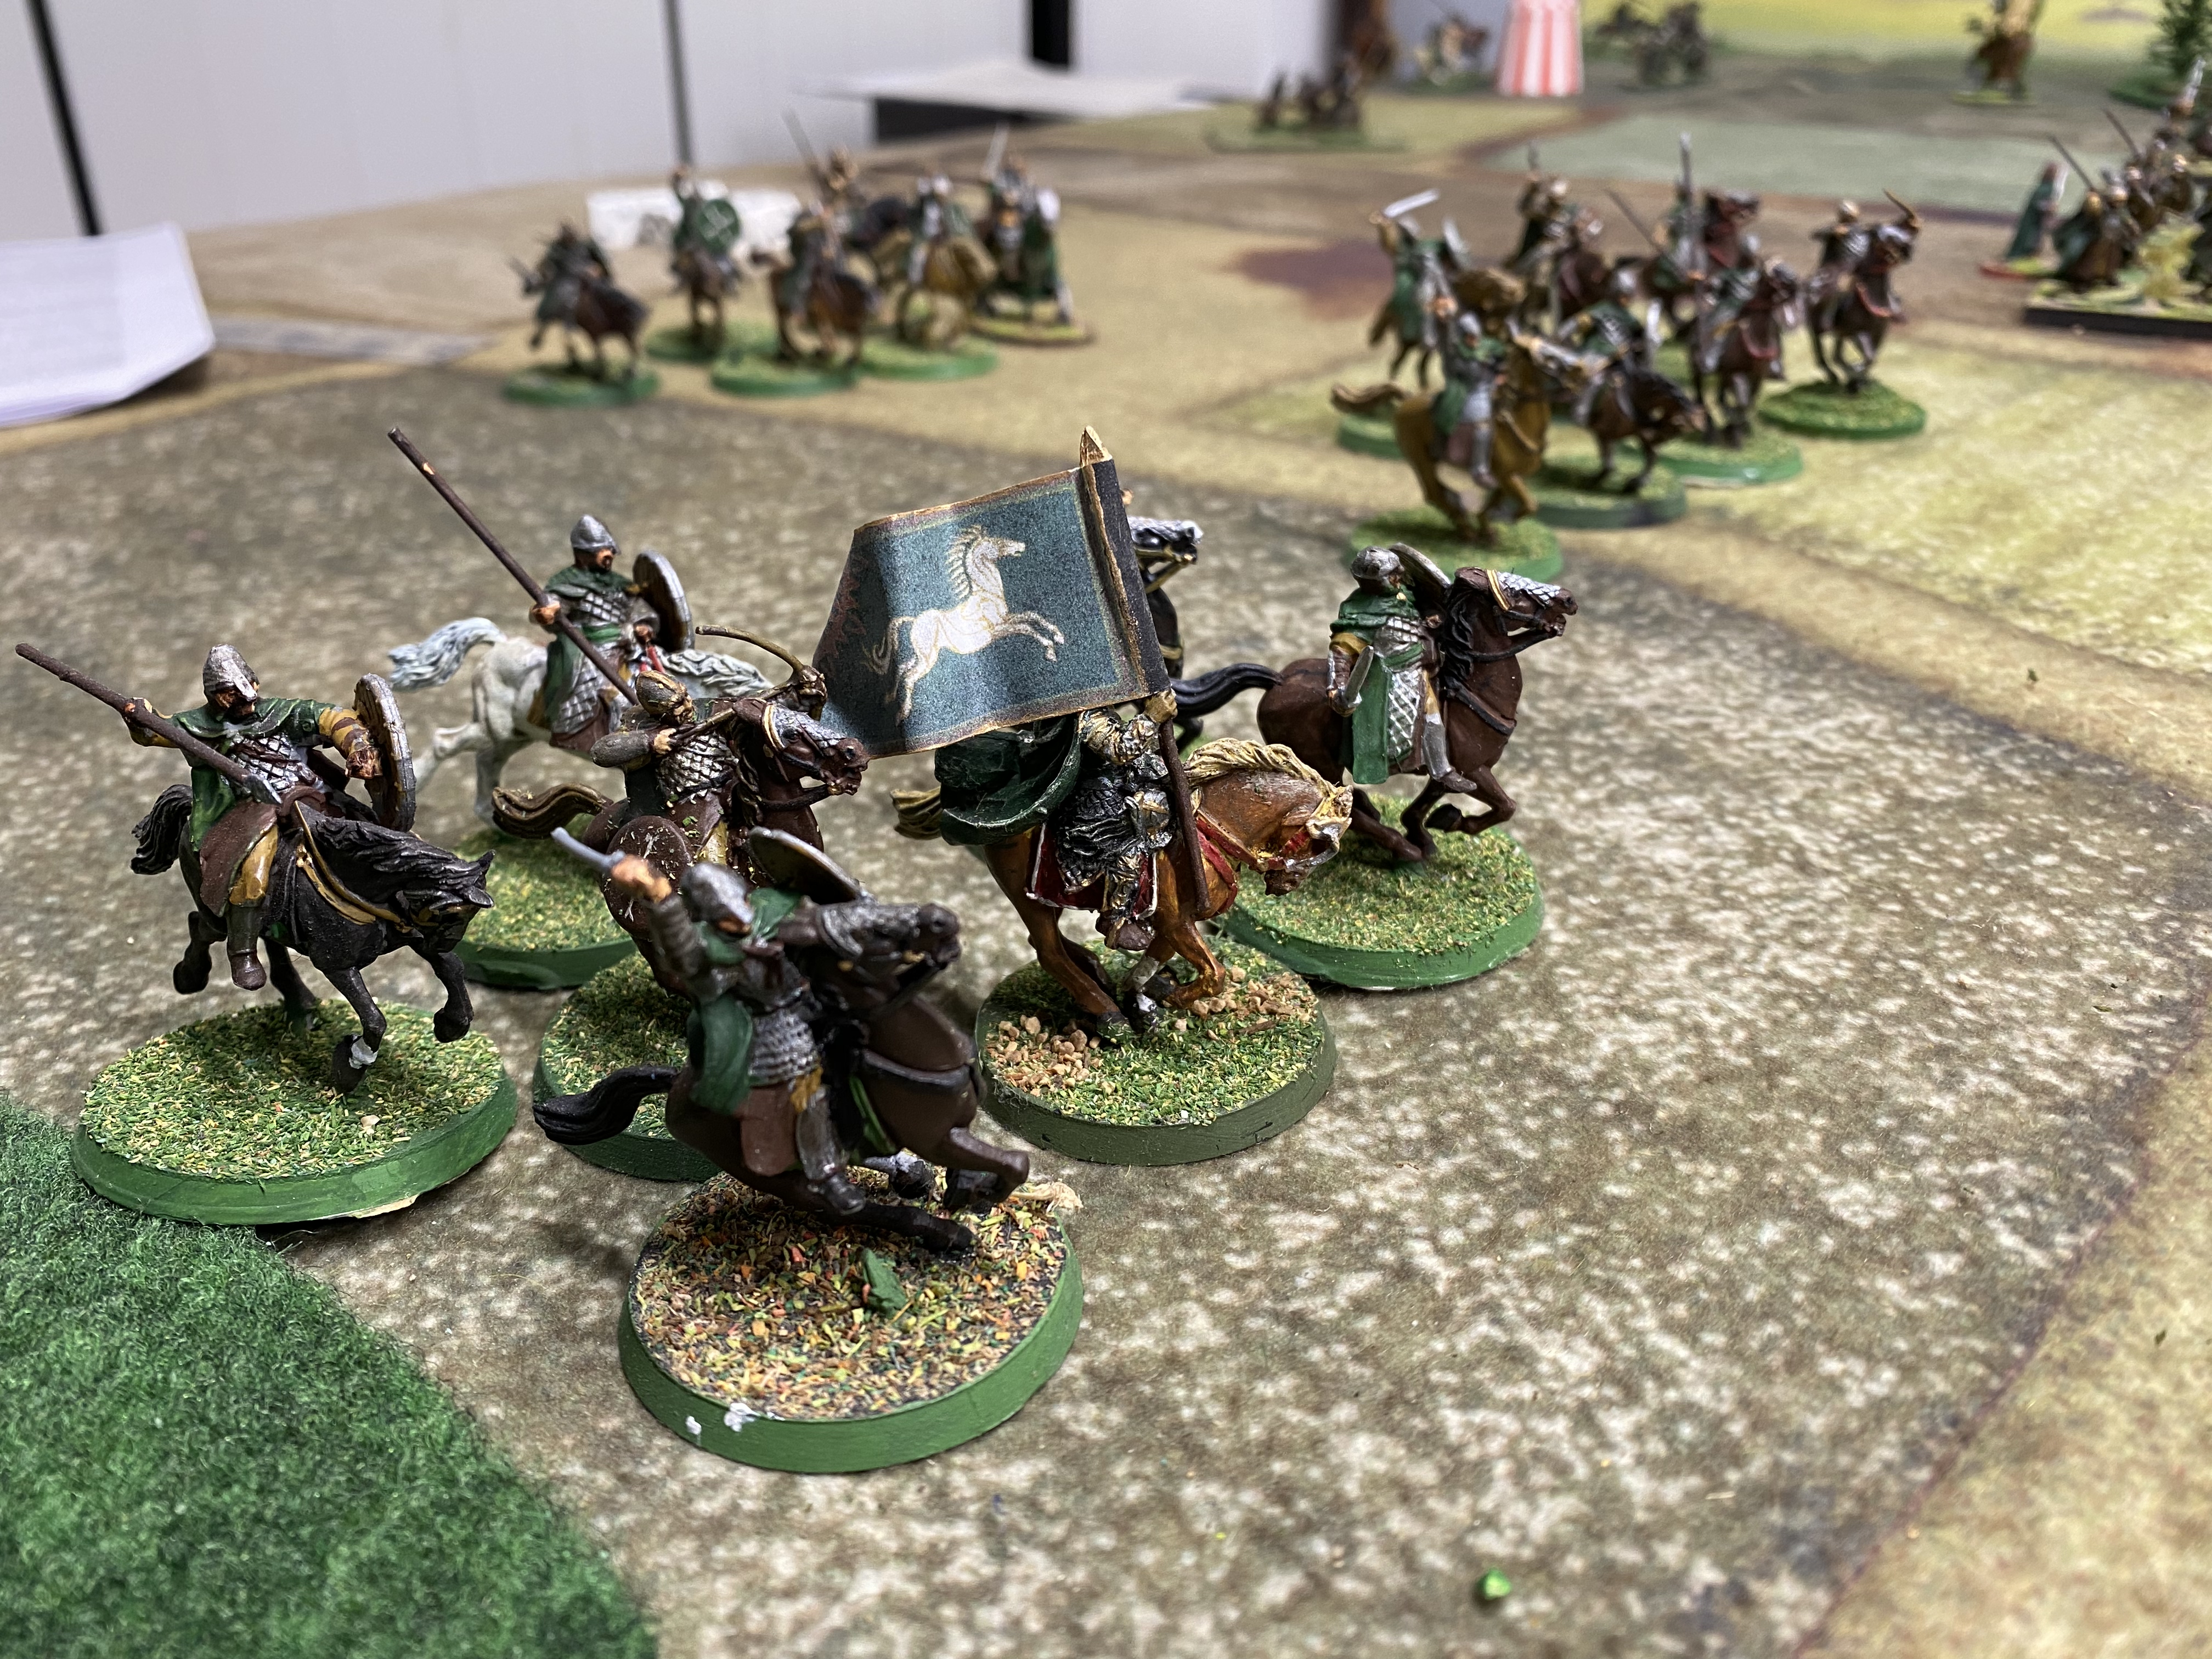
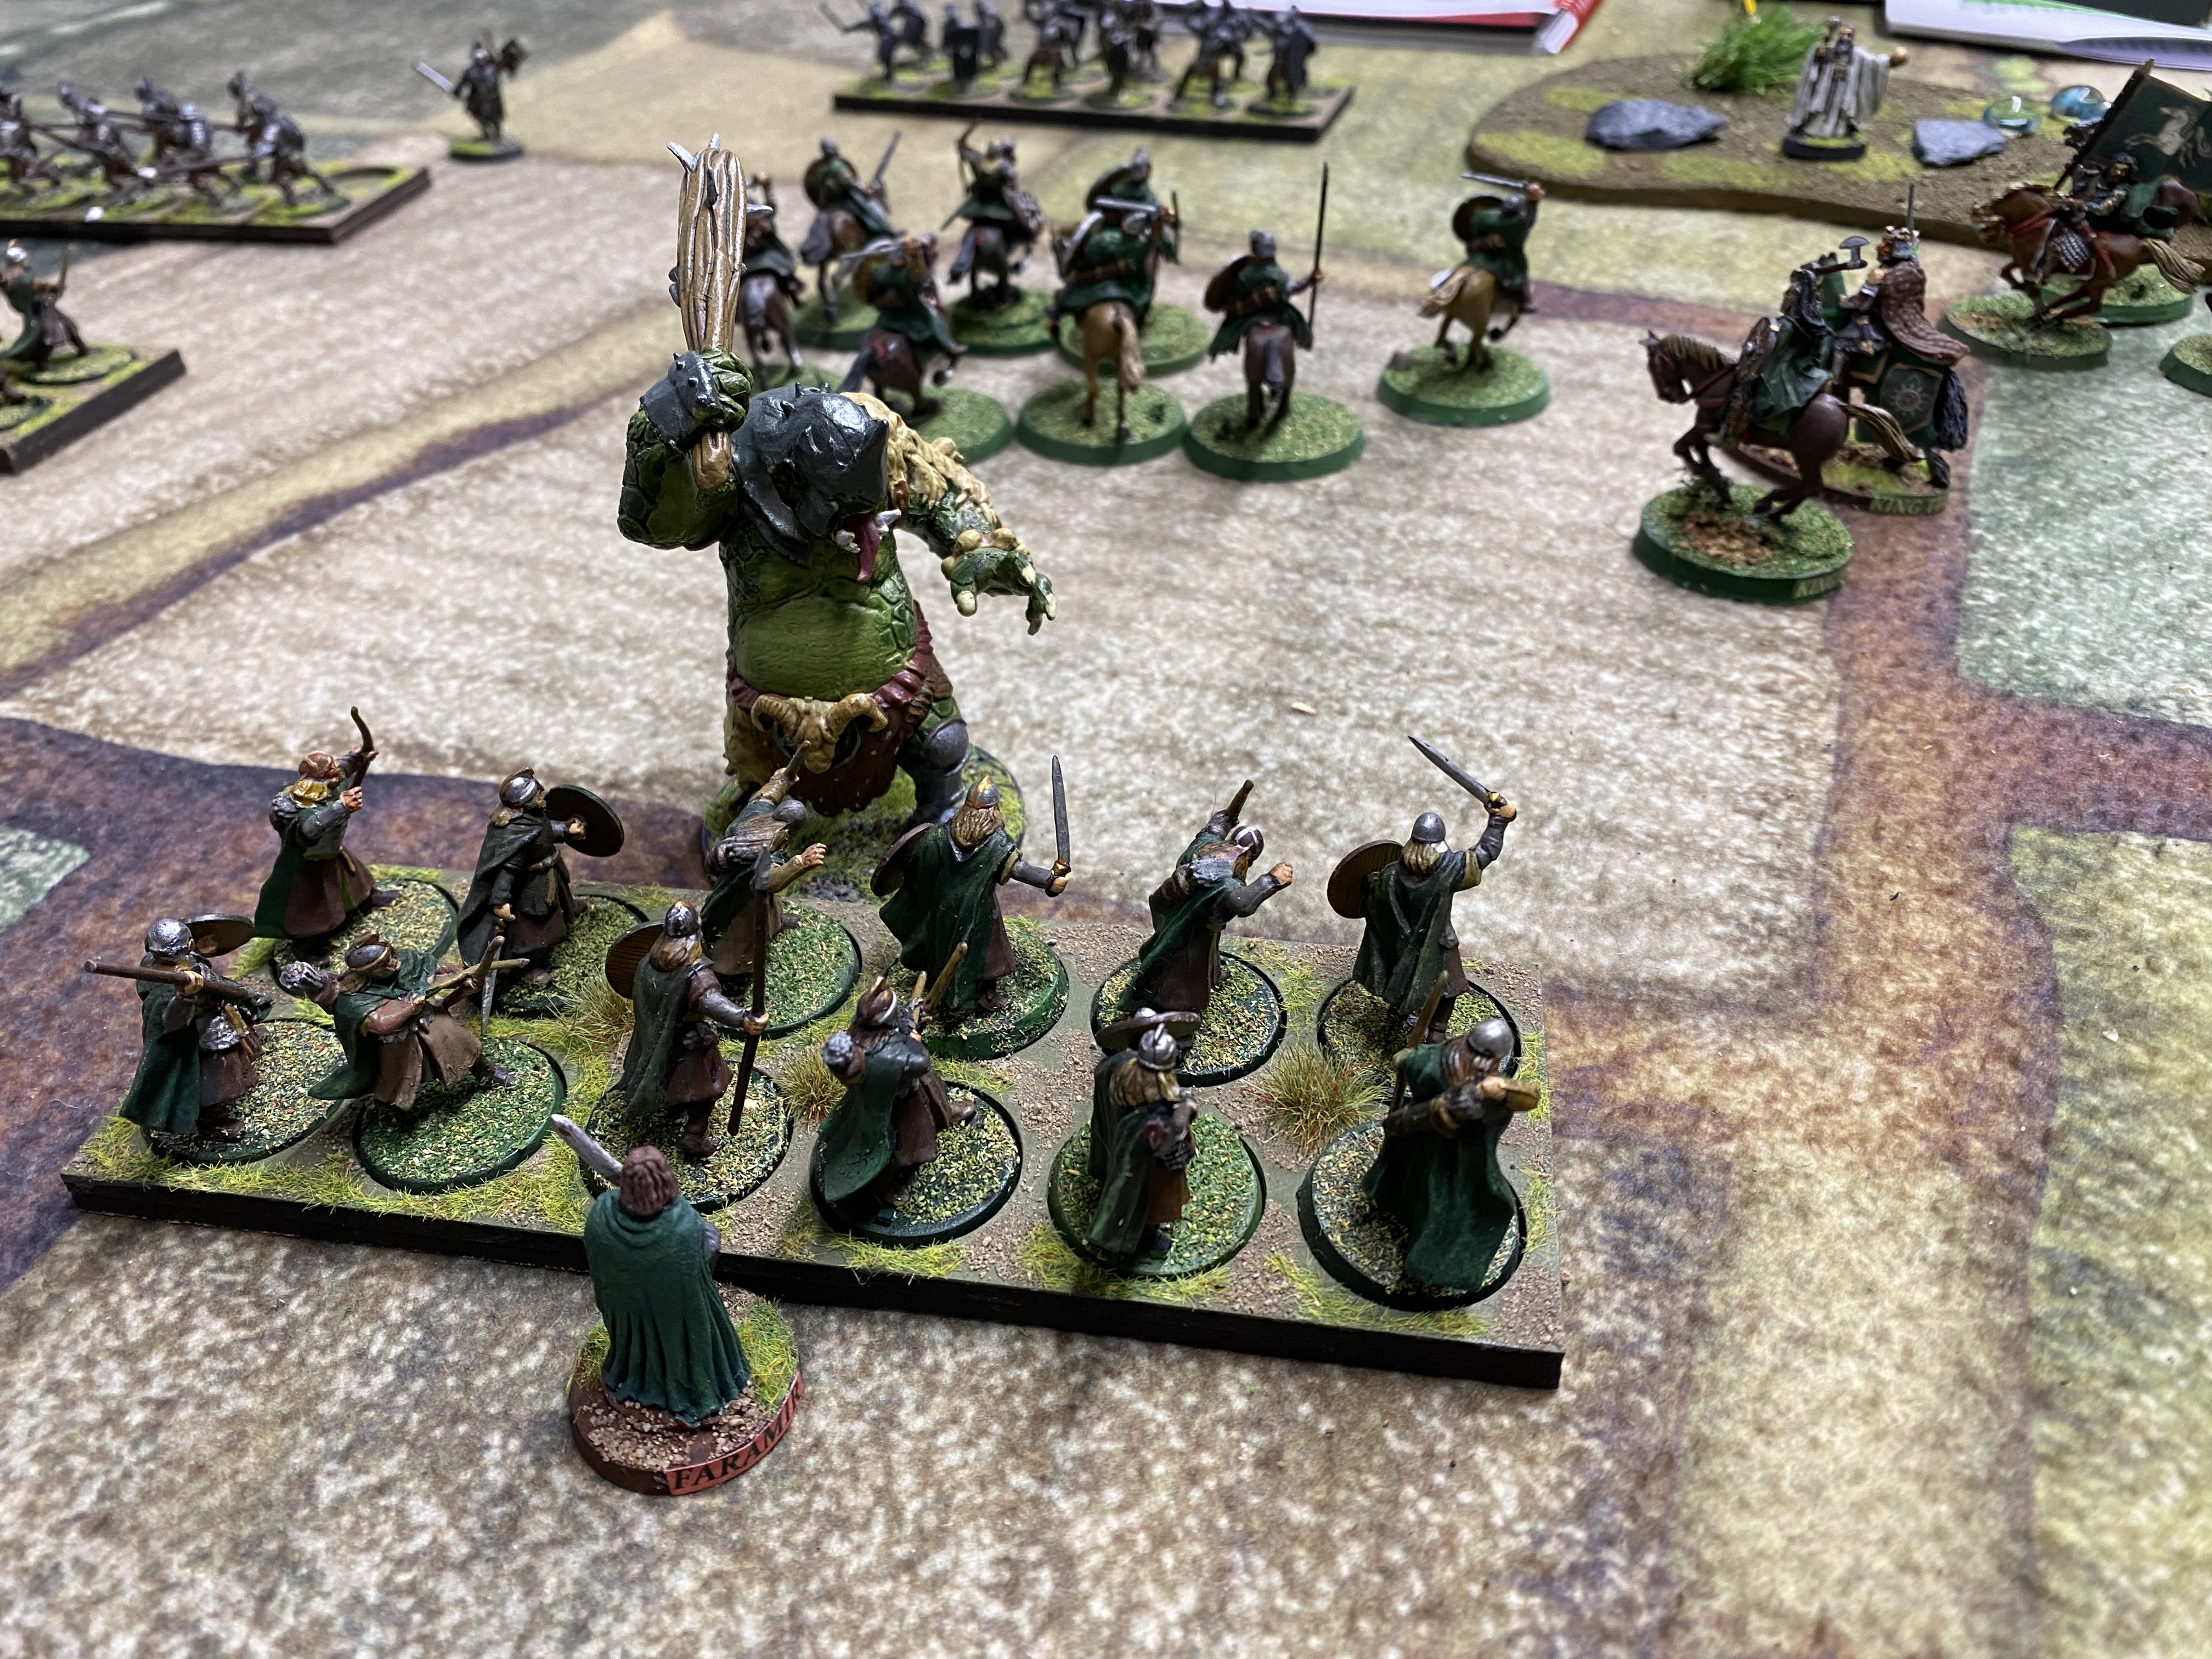
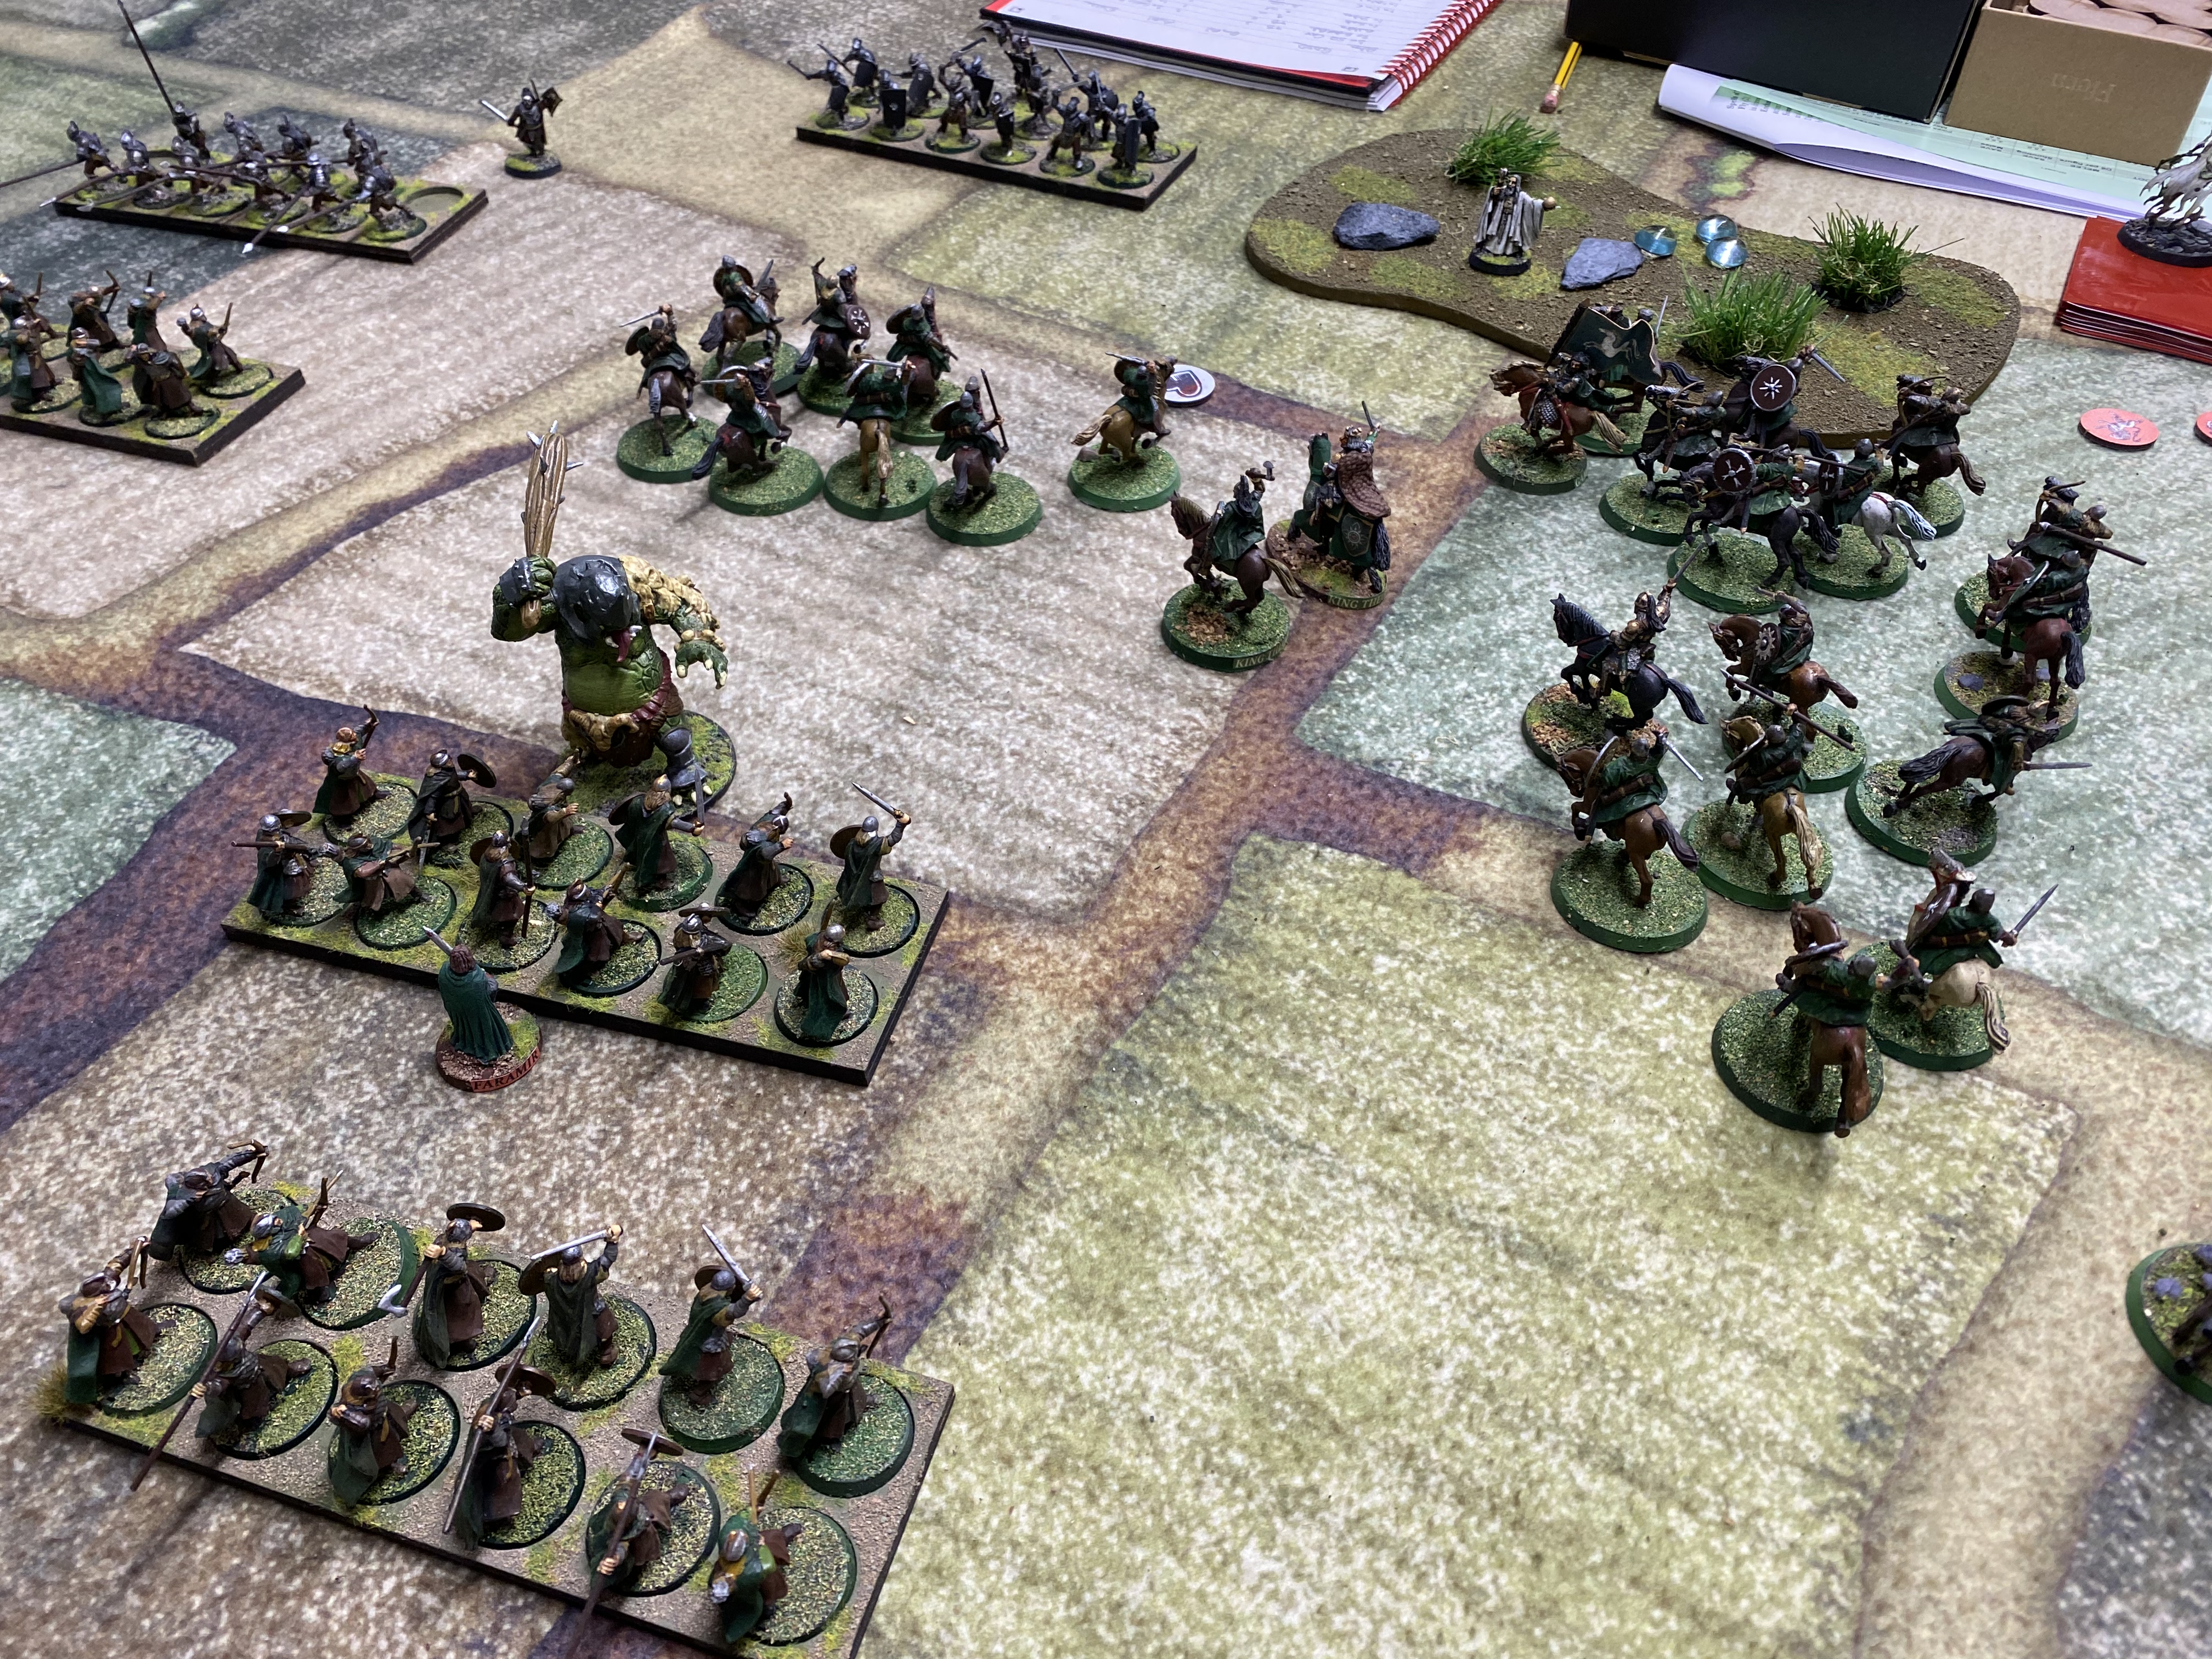
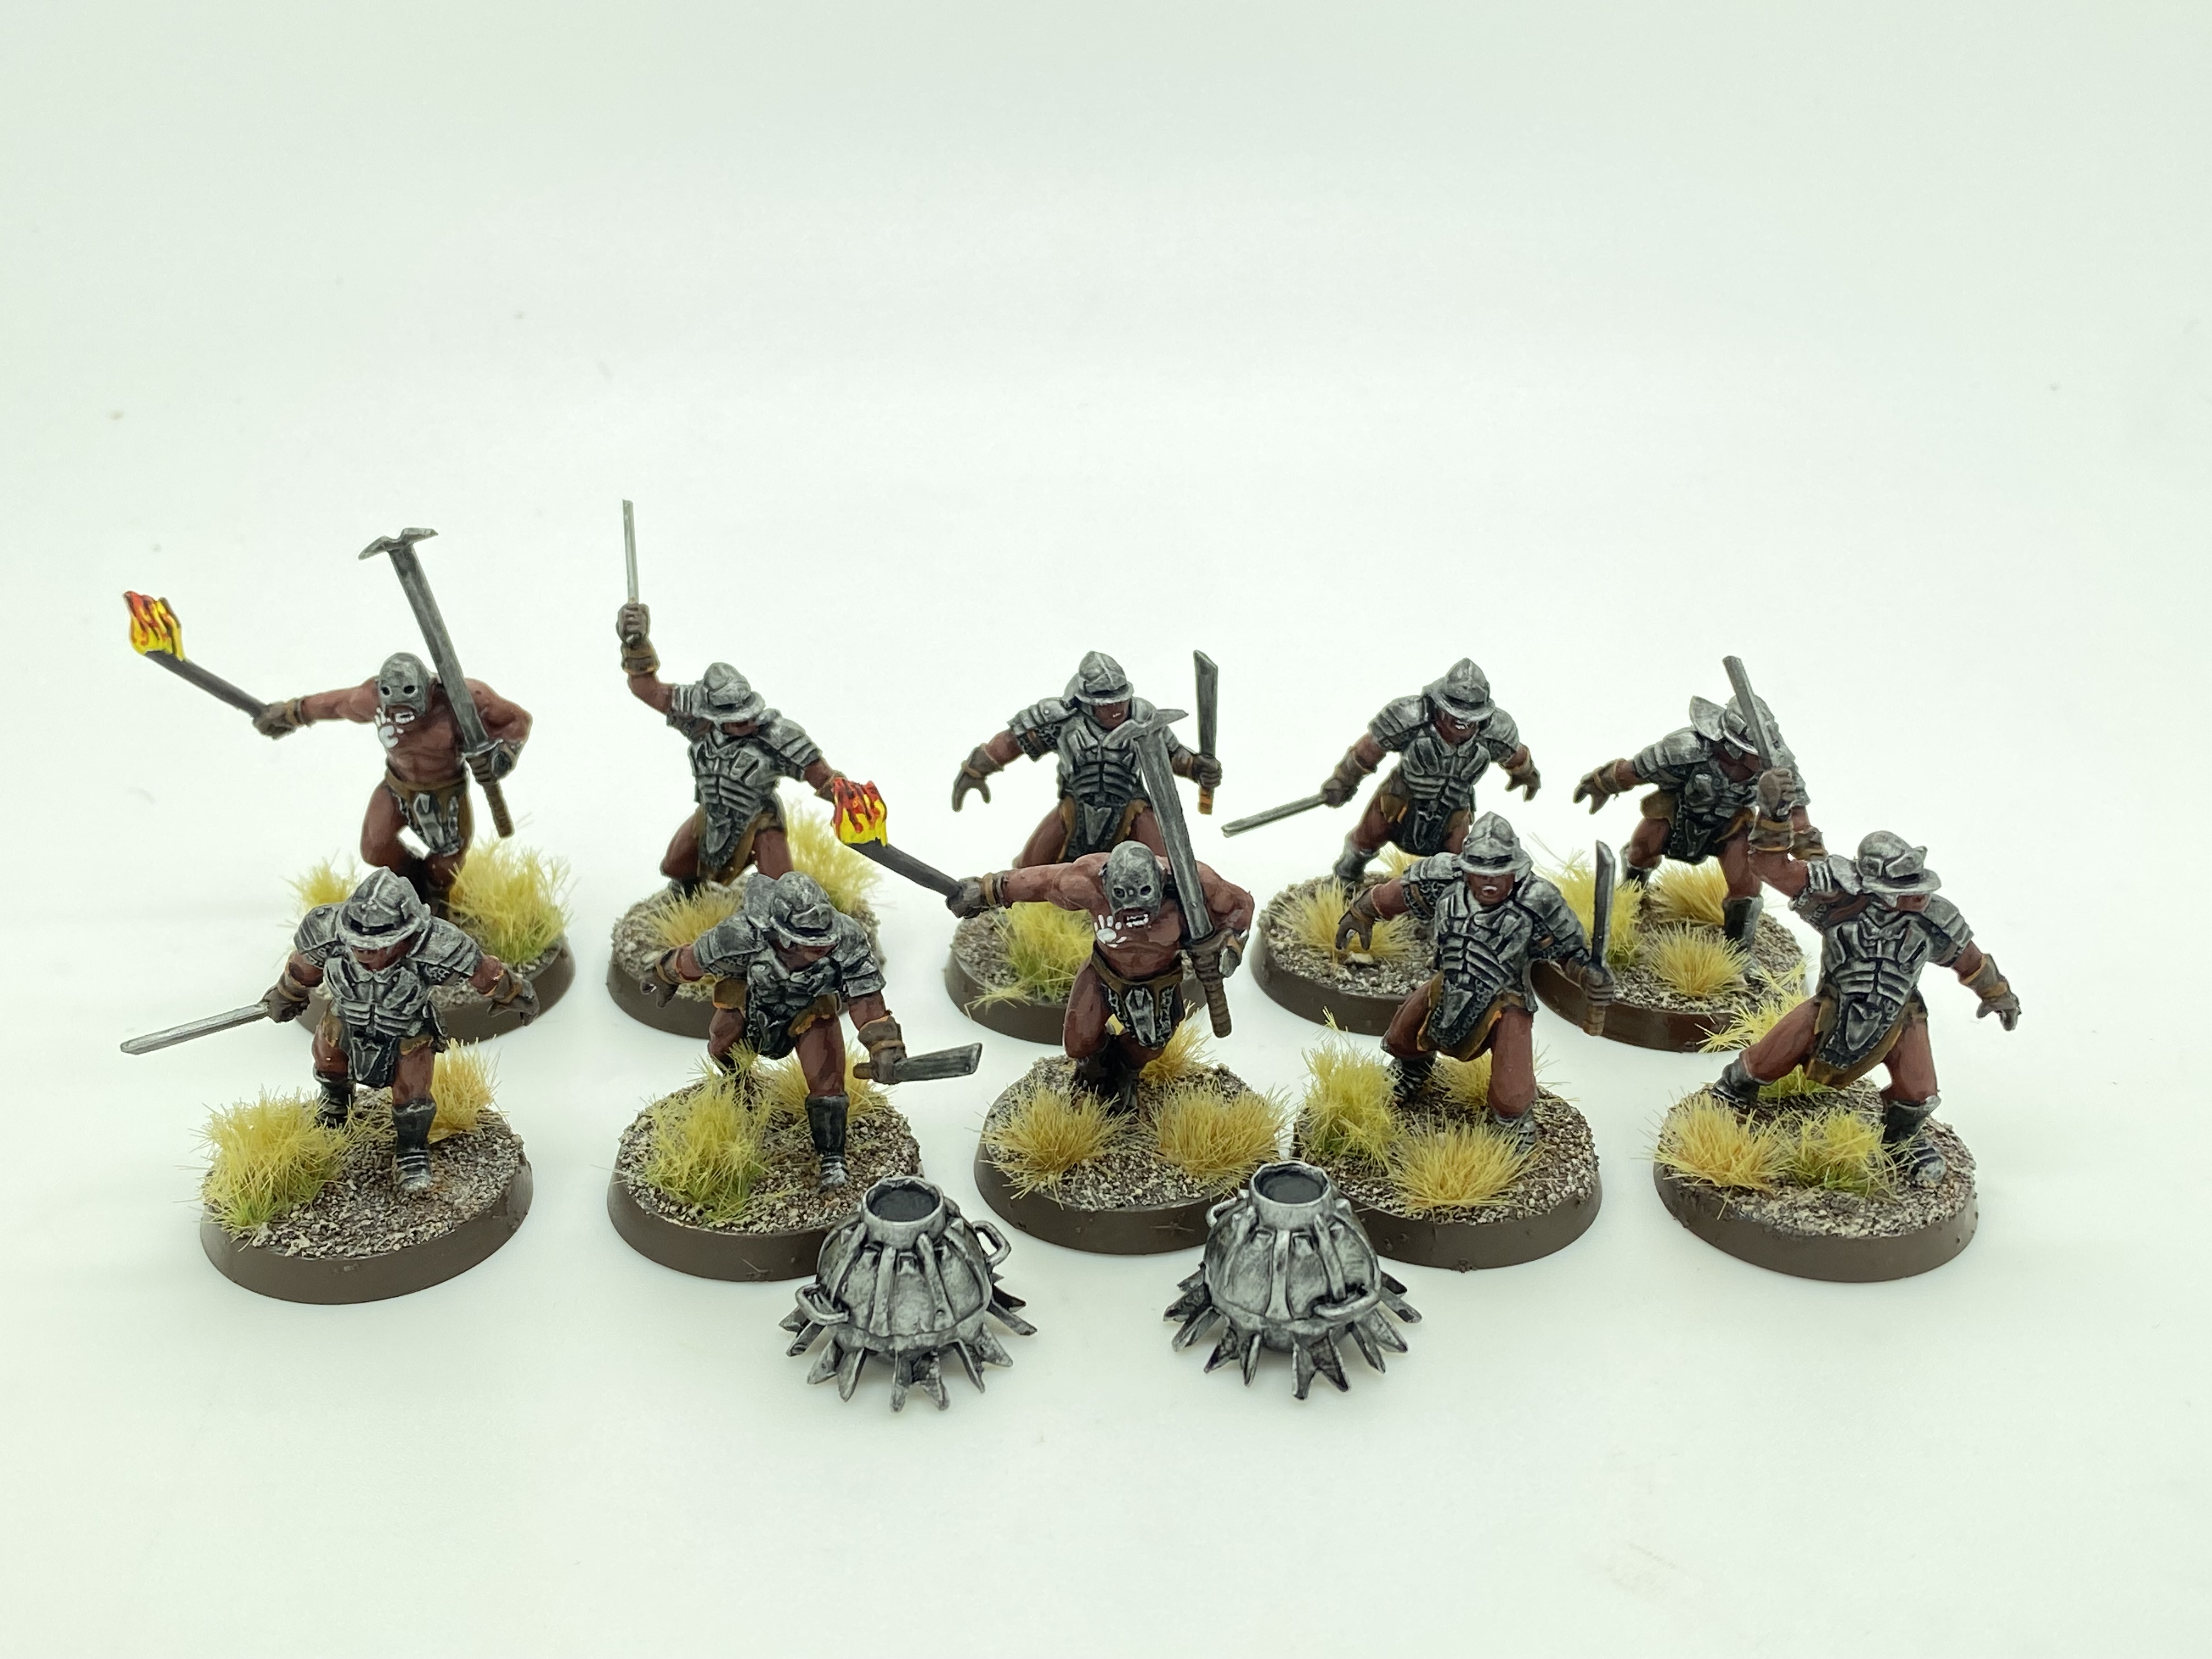
A company of Men face off against a mob of Orcs!
So it was time to put the rules to the test. I’m not going to go into specifics but I’m happy to report that we had an excellent game, full of cinematic cliff hangers. The Riders of Rohan pulled of a spectacular charge, repulsing a horde of angry goblins. Tony the Troll went walkabout in the woods, although we did test his effectiveness in combat. The wizard was a bit of a damp squib and the heroic infantry did what heroic infantry are supposed to do against the baddies!
Riders of Rohan prepare to charge!Orcs can form a pike block!Tony the troll does battle!Riders of Rohan breakthough and rout the ‘baddies’ A certain wizard looks on helplessly!
With the first play test out of the way and some re-assessment of the troop types and the new introductions, we are ready to go again. The next stage is to widen the player participation and see how the new mechanics will work. Watch this space!
the ‘seige’ Uruk Hai completed
So this has inspired me to get on with my LOTR painting project. I am now on issue 27 of the magazine and this came with a sprue of ‘seige Uruk Hai’. I actually have tackled two sprues as another sprue was given away later in the series. So another 10 Uruk Hai are added to my force!
Also on the wargaming front, we played another epic game of Never Mind the Boat Hooks. There an excellent battle report on the ‘Bill Hooks’ facebook page, written by Austen Kime, chief chronicler and co commander.
This website uses cookies to improve your experience. We'll assume you're ok with this, but you can opt-out if you wish.AcceptRead More
Privacy & Cookies Policy
Privacy Overview
This website uses cookies to improve your experience while you navigate through the website. Out of these cookies, the cookies that are categorized as necessary are stored on your browser as they are as essential for the working of basic functionalities of the website. We also use third-party cookies that help us analyze and understand how you use this website. These cookies will be stored in your browser only with your consent. You also have the option to opt-out of these cookies. But opting out of some of these cookies may have an effect on your browsing experience.
Necessary cookies are absolutely essential for the website to function properly. This category only includes cookies that ensures basic functionalities and security features of the website. These cookies do not store any personal information.