A Medieval Carriage

Now that I am comfortably moved into my new hobby room, my modelling output is beginning to outstrip my ability to write about it! I have at least four projects that are either in progress or completed and in the cabinet.

The completed carriage

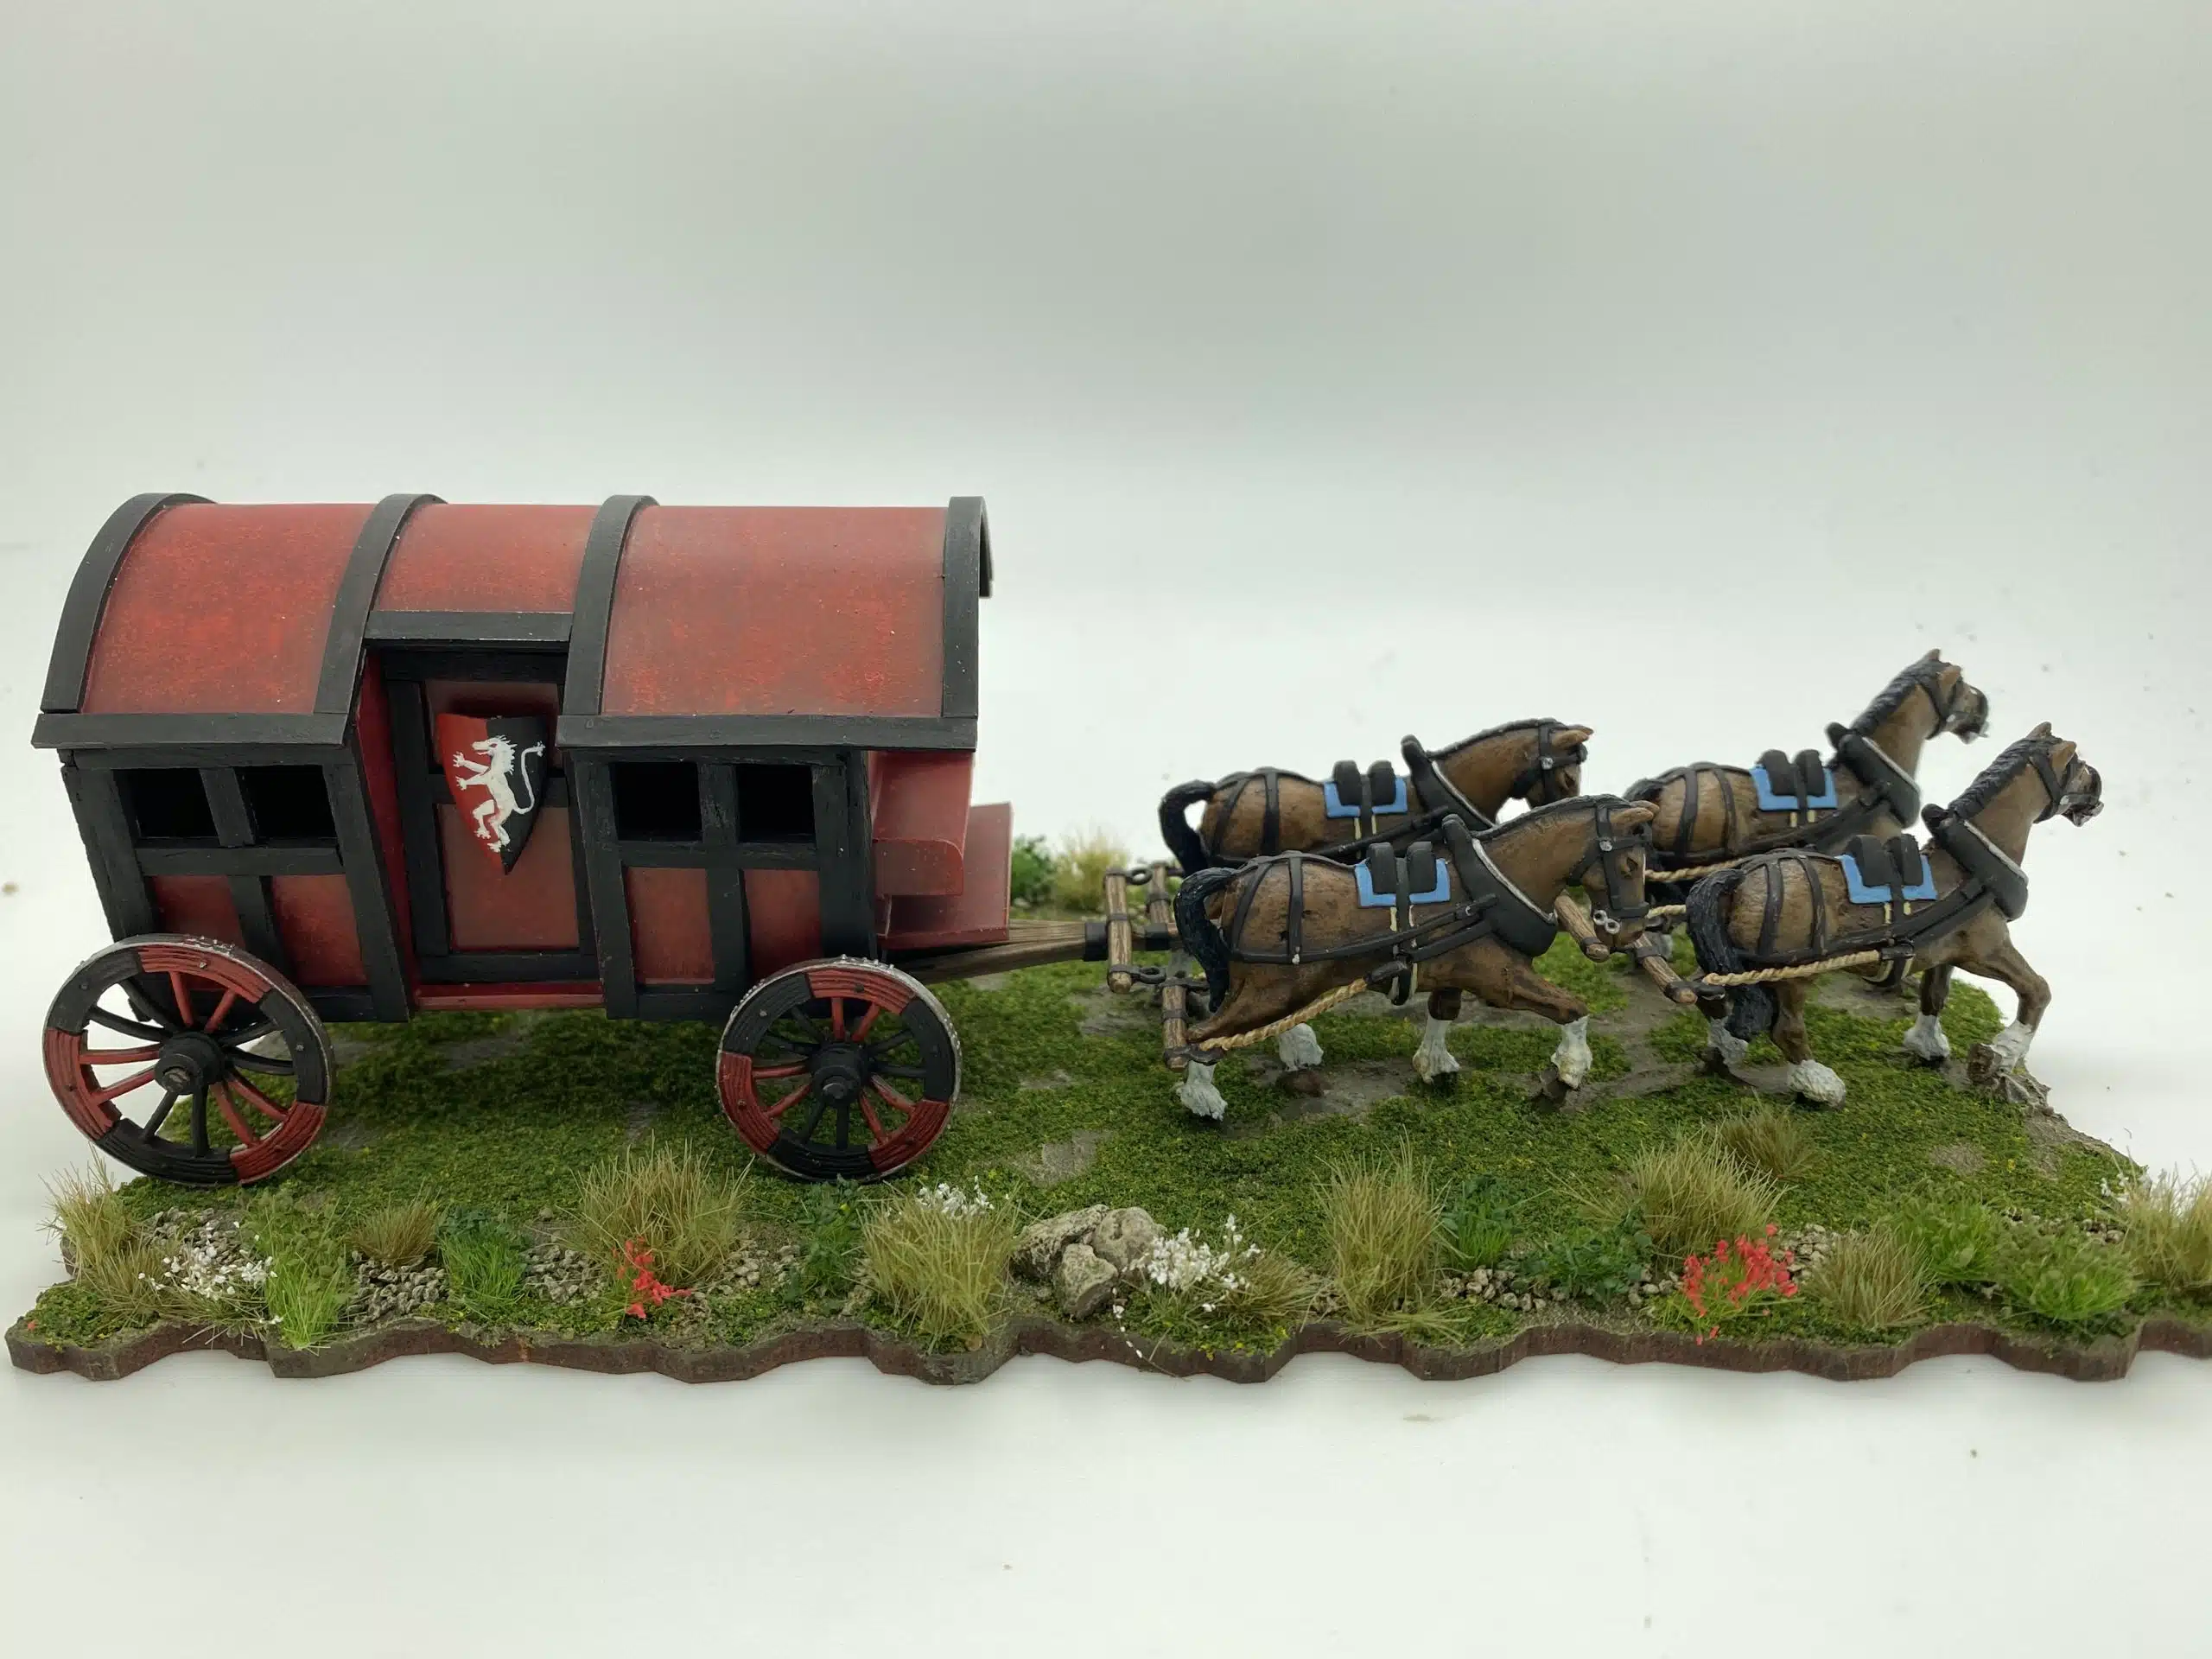
One such project is my medieval carriage. As you can see, it is all but finished and is just awaiting the driver and his assistant – you will see why at the end of the blog! The model is scratch built using a set of ‘plans’ from Wargames Illustrated #395. I use the term plans in a very loose sense. The originals were sparse enough and designed for 15mm figures. In theory, it should have been easy enough to scale up the drawings to 28mm scale. In practice, it just did n’t work – the resulting model was far too big and even with my eventual reductions, I still have the impression that my model is over sized! Ah well, it looks impressive and is a nice addition to my collection. I also made another slight error, in that I cut the pieces from 60/000 plasticard – 40/000 would have been better and easier on my scapel but the resulting model is quite sturdy!

Using the plans as a guide, I cut out the main parts for the carriage using 60/000 plasticard.
I then started to assemble the carriage – note that I switched to thinner plasticard to make the sides with the windows.
The rear of the carriage assembled. Note that by now, I am measuring pieces as I go along – there is no plan as such!
The centre section fitted and the first planks added.

I used some soft wood strip to add the planking to the sides of the carriage. I then added the wheels and axles etc using some spare parts from a Trent Miniatures wagon that I had in the spares box. I know that when I read other peoples modelling projects, I get very frustrated when they say ‘I found this bit in my spares box’ and here I am doing the same thing. The truth is that the more scratch building that you do, the more bits and pieces that you acquire. I could have scratch built these bits but it would have taken a long time for me so I went for the easiest option!

Progress so for Sir Thomas Hawkwood also in painting progress!

The next part of the assembly was to add the roof. Again, I measured this against the model and cut it out of 10/000 plasticard. I used the existing wall pieces to make ‘formers’ to glue and bend the roof so that it sat nicely on the model.

Roof added and Trent miniatures Draft horses in position.
I have also added the drivers seat and foot rest.
All the planking is now added and the roof reinforced to improve the shape.

With the main assembly completed, I just need to sand down any obvious errors and start the paint job.

Before fixing the roof in place, I had primed the interior with matt black – I could have added some detail but was too lazy it’s not likely that it will be seen anyway…. I then roughly masked the windows and primed the wagon in Army painter leather brown.

After priming, the base coat of Burnt red was applied.

A sponge was used to apply the top coats of red

The next part of the process was to highlight/texture the base coat using various lighter shades of red. Dont ask me why, but I decided to use a sponge to apply the paint. I think that it looks different!

The wood work on the wagon was painted black.

I then painted the wood work on the upper wagon in black. The underside and rest of the woodwork was painted to look like wood, with the iron work either black or for the wheel rims, gun metal.

The main construction was now finished. I just needed to paint the horses and base the model. I followed my usual technique for painting the horse – I’ve covered this many times in previous blogs. The same goes for the base. I used one of the Sarissa terrain tiles, as my intention is to construct a full length road for my table, with the option of ‘dropping’ the carriage into it as required. I also like non uniform edges to the base, although my gaming mates are not so keen! I’ve also added some shields with ‘Lord Callans’ livery painted on. My freehand painting is, shall we say a work in progress! I have the impression that my white lion looks a bit like a white monkey…..Never mind, I just need to keep practicing and should I get any better, the shields are only blu tacked in place for the time being!

The last task is to make the driver and the guard. I was going to use the figures from the Footsore range but they were a tad small, or rather, my carriage is a tad big. So I set about converting some figures. They are yet to be finished. For now, here’s how to turn an Aztec into a medieval car driver – well nearly!

Some major surgery going on here!

Once I get busy with the green stuff, I’ll post the final pictures!

THE COMMERCIAL BIT

I hope that you all enjoy your hobby as much as I do – our web site will have much of what you need! Click here to see our shop.

ARCANE SCENERY

You can find all the Vallejo Model colour paints here. If you don’t want to browse, just enter the paint number into the shop search bar;

VALLEJO PAINTS

You can find Sarissa Terrain tiles in this category:

SARISSA ACCESSORIES

You can find Gamers grass here:

GAMERS GRASS

If you need Milliput or other fillers, click here:

FILLERS

You can find plasticard here:

PLASTICARD

Happy Modelling!

More DeeZee painted models

I have said that I would like to paint all of the DeeZee range for my own collection. I do have painted examples of all of the range for commercial use but some of them are showing their age and I didn’t paint them! I’m in no rush with this project but it does make a nice change from the military stuff that I am working on.

DEEZEE 33 White Rhino first coat!

The next model on my bench was the White Rhino, DZ33, a resin model. A bit of research shows that White rhino’s can be either a very pale grey or a light sand colour. I presume that the sandy ones are simply covered in dust and earth, although it does seem that the Southern Rhinos tend to be the Light Brown ones and the Northern Rhinos tend to be Light Grey. Just to add to my confusion, it turns out that White rhinos are so called because according to google:

‘Why is the white rhino not white?

Image result

The story has a few variations but it basically states that the early Dutch settlers referred to this rhino as having a “wijde lip” or wide lip. The English mistook the word “wijde” (meaning wide) for “white” and so assumed that they were being called white rhinos by the Dutch.’

If you google images of the white rhino, you will certainly get plenty of variation in colour. I decided to go for the Light Brown finish and after washing and priming the model painted it with Vallejo Light Brown. As you can see from the picture above, I need a few light coats to cover the model.

I then proceeded to add Iraqi Sand 70819 to the light brown and after a number of dry brushes , I worked up to pure Iraqi Sand. It really was that simple. I then gave the model a wash with very thinned soft tone ink and added a final coat of Iraqi Sand with white added. I then based the rhino and added plenty of Beige and dry tufts and some long yellow grass. Job done!

While I was in the mood for painting animals, I decided to paint DZ pack 16, Crocodiles. There are three crocs in a pack and I decided to do all three and base them as a group. The models are actually identical so to get a bit od variation, I carefully bent the tails of two of the crocs to make them look a bit different. So long as you are careful when you do this, there is sufficient ‘give’ in the metal to make this a straight forward process.

I painted them using similar colours to those that I used when painting the DeeZee Giant crocodile. The only slight difference was that I used Army Painter bone to prime them and used the same colour for the belly. The basing process was also similar. I used milliput and some pebbles to make the ground work and then used clingfilm to protect the models as I pushed the into place to get the indentations. I could them remove the Crocs and paint the base without them being in the way. Here is the link to my earlier blog with details of how I decided to paint the Giant Crocodile along with details of the colours used:

CROCODILE ROCK – PAINTING THE DEEZEE GIANT CROCODILE

The finished Crocodiles in their new home!

I painted the base as per my usual ‘recipe’ using the emulsion colour ‘Dehli Bazaar’, which is my favbourite mud colour, added a dark tone ink wash for some depth and then added a variety of Gamers grass tufts, scatter and some spare jungle plants from my scenery stash. Once the crocs were added back onto the base. I used Vallejo water effects to finish things off.

DeeZee Crocodiles waiting for their dinner!

The final shots ready to add to the listing on my shop.

So that’s another pack added to my collection. Back to painting War of the Roses figures for now!

THE COMMERCIAL BIT

I hope that you all enjoy your hobby as much as I do – our web site will have much of what you need! Click here to see our shop.

ARCANE SCENERY

To see the full range of DeeZee animals, click here:

DEEZEE BEASTS

You can find all the Vallejo Model colour paints here. If you don’t want to browse, just enter the paint number into the shop search bar;

VALLEJO PAINTS

To find water effects and other textures, click here:

VALLEJO MEDIUMS AND TEXTURES

You can find Gamers grass here:

GAMERS GRASS

If you need Milliput or other fillers, click here:

FILLERS

Happy Modelling!

Perry’s Napoleonic Flat Boat Part 3

In the last blog I had completed the painting of the boat and all of it’s crew. The final stage in completing this lovely model was to add the Flags, and make some sort of base. This was how far I had got with the basic model.

I ordered the flags from my favourite flag supplier, GMB. I couldn’t find quite what I was looking for but settled on the Coldstream Guards’ flag from the Peninsular period. I’m not sure whether they were involved in a sea borne landing in this conflict but as usual, I am more interested in making a model that looks OK that I can use for my wargaming rather than a museum piece of a specific event.

Whilst I was waiting for the flags to arrive, I made a start on the base. I am working at the limit of my artistic ability here and I have never attempted to replicate the sea on any base that I had made before! I choose a Sarissa terrain tile as they are reasonably thick and durable, and I like the fact that there is no straight edge. In the unlikely event that I decide to add to the ‘fleet’ the sarissa terrain tiles will lock together. After priming with matt black, I painted the base, first with a Vallejo Dark Sea grey 70898 and then added some Prussian Blue 70965 to slightly lighten it up. The base needed about three coats to get a consistent colour and a smooth finish.

I then placed the boat onto the base and painted around it using Off White 70820 and marked where the oars touched the base.

I then added some light blue streaks to give some idea of movement in the water (Again, way out of my artistic abilities here!) and then covered the base in 26230 vallejo still water.

By now the flags had arrived, so I could add them to my Ensigns. The boat was now complete. I added it to the base, that was now dry and to finish off, added some vallejo Foam/snow effects 26231 around the oars and stern of the boat. I may have been a bit heavy handed here but it does give the impression of the oars splashing in the water.

So the model is done and is now in my display cabinet rather than in a box in the lead pile. That’s a result for me!

THE COMMERCIAL BIT

I hope that you all enjoy your hobby as much as I do – our web site will have much of what you need! Click here to see our shop.

ARCANE SCENERY

You can find all the Vallejo Model colour paints here. If you don’t want to browse, just enter the paint number into the shop search bar;

VALLEJO PAINTS

You can find Sarissa Terrain tiles in this category:

SARISSA ACCESSORIES

Happy Modelling!