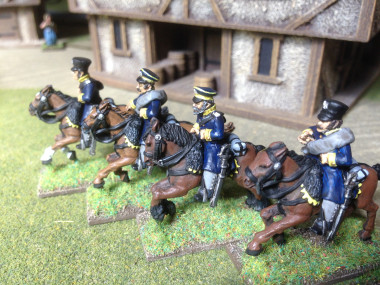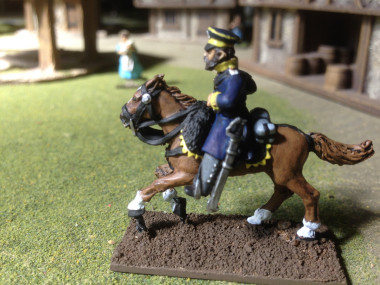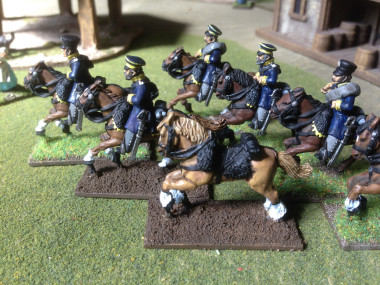
Summer madness….

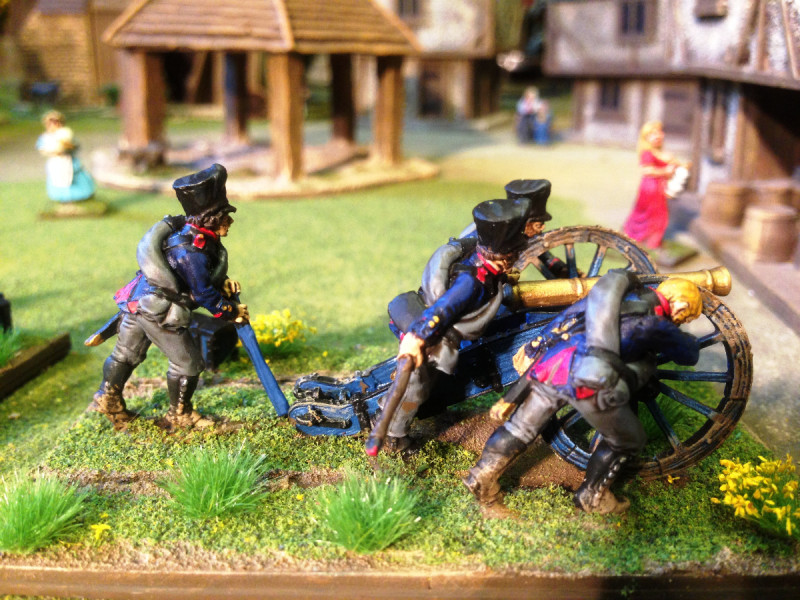
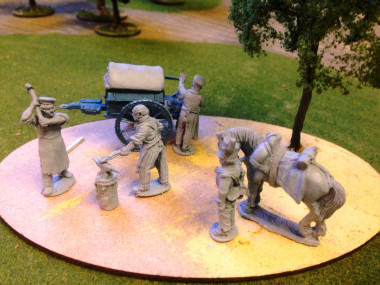
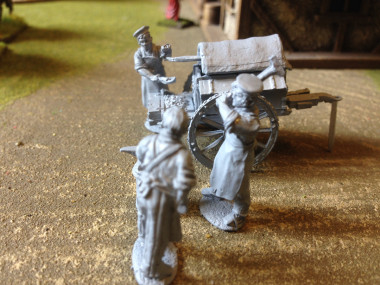
The weather has somewhat curtailed my painting over the last week. It’s a bit hot to be sat in my garage painting when other activities beckon. You know the sort of thing, burning meat on the barbecue, sampling the odd cold beer and the occasional gardening task which can be put off no longer. I have made some small progress on the Napoleonic field forge. The forge is finished, the crew are at the final stage of highlighting and the two other figures need about an hours work on them. What will really make the difference is the basing, which as you can see is nowhere near finished.

2015-07-02 10.26.05

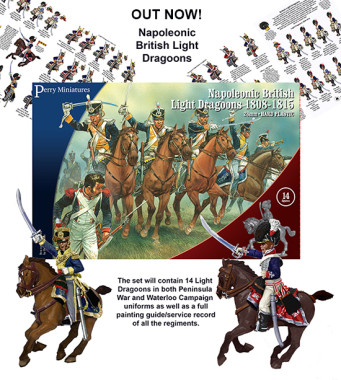
Just to add to my agonies over my lack of progress on painting, the Perry’s have only gone and released their new British Light Dragoons boxed set! Well, I expect to receive it into the shop tomorrow, so watch facebook for confirmation. I’ve been drooling over these ever since they announced the release at Salute.

Light_dragoon_advert_550_revised

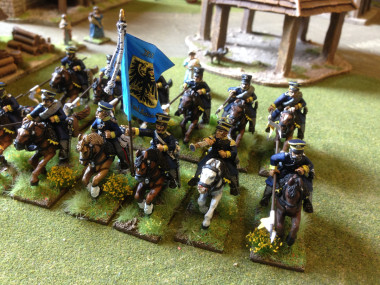
With fourteen figures plus loads of extras, I cant wait to get my hands on a set! Those Hanoverians that are sat on the work bench might just get pushed down the painting line! Of course, my mind then goes into overdrive. If I bought three boxes, I could do the whole 4th British Cavalry Brigade at Waterloo. It comprised of the 11th Light Dragoons (Light Buff plastron & facings); 12th Light Dragoons ( Pale yellow plastron & facings) and the 16th Light Dragoons (Scarlet plastron & Facings). Even better, if I keep to 12 models per regiment, I will have 6 spare, so I could get some of the Perry Metal Dragoons and have an extra regiment, say from the KGL. Of course then there is all of the spare Tarleton heads that I’ll have. Just thinking about the conversion possibilities is giving me a head ache! Tarletons were worn by horse artillery and rocket troops and of course the Out riders on limbers etc, so a quick search in my spares box and I bet I could soon find the bits that I would need to build a few of these…

And there lies the madness! In the time that it takes to sink a cold beer, I have convinced myself that I can have 48 Cavalry figures painted and based in the next couple of weeks and meanwhile the other project of completing the Infantry brigade has been put to one side. Whats the betting that just before I finish the Light Cavalry Brigade another new release will set me off on the next project! I guess it is what makes the hobby interesting and gives us all something to talk about whilst we are gaming!

But I’m still going to get those Dragoons!!!

Prussian Artillery Ready For Battle

The New Prussian Artillery at drill in Little Bingham!

The New Prussian Artillery at drill in Little Bingham!

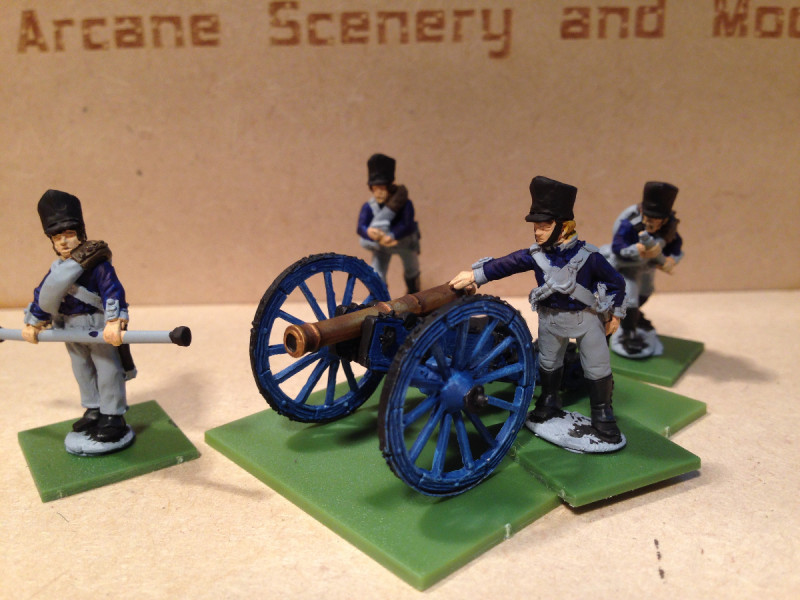
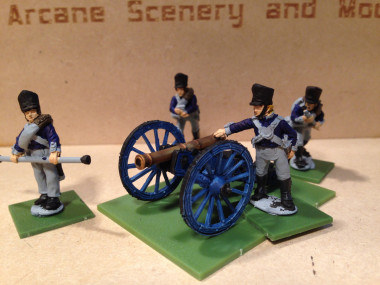
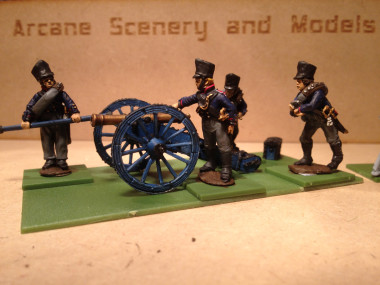
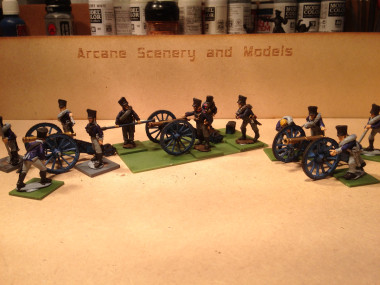
After all the excitement of the previous weeks Waterloo spectacular, my painting output has  slowed down again. However, I have finished my Prussian Artillery Battery, so I wont be quite so out gunned in the next battle. I’ve changed my basing size for these. I’ve used 60mm by 90mm  for each gun. It allowed me to get the full crew onto the bases and to be fair, it was a way of using up some spare 60mm x 45mm Renedra bases that I had – I just glued two of them together. To strengthen this arrangement, I glued them onto  a piece of 40/000 thou plasticard. It means that the bases are a bit thicker than normal but they now look better along side the troops, who are normally in movement trays.

The other slight innovation for me was to use the Vallejo paste for the ground work. In the past, I have used this but then painted over it and then added sand for texture. With hindsight , this was totally unnecessary! The Vallejo paste has more than enough texture when it has dried, so all that was needed was to paint it – Chocolate Brown, then highlight and dry brush with Earth brown and then Iraqi sand added in to highlight further. It was actually very quick to do and will be my basing method of choice for the future.

Prussian artillery from above showing basing.

Prussian artillery from above showing basing.

To finish off the bases, I added some green scatter and my usual assortment of grass tufts and flowers. The yellow flowers match the bases on the rest of my Prussians and add a bit of color to what is otherwise quite a dark paint scheme. Incidentally, I think that the pictures are a bit on the blue side! In real life, the figures look a bit darker to me. Oh! I haven’t mentioned that they are from the Perry Metal range. One last point about basing. I actually finished painting the figures and then fixed them to the bases. When I painted the ground work on the base, I also carried the colour up onto the guns & the figures to give the impression of mud.

'utching up the guns according to Peter Harris....

‘utching up the guns according to Peter Harris….

So another project is complete, the next is on the work bench! I’ve decided that now there is less pressure on me to turn out battalions, I will alternate between painting units and painting special projects. I already have a painting plan in place but the first project is a little diorama of a field forge. It’s from Perry Miniatures, although the Artillery man & horse are out of my ‘spares’ box. Here is a rough layout of how it will look, I’ve started to paint the forge and the tree is already fixed in place with Vallejo desert sand paste.

Field forge work in progress.

Field forge work in progress.

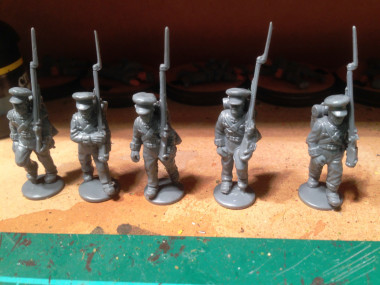
Whilst I am painting this diorama, work still continues on the troops! My next (and final) battalion of Hanoverians are being prepared. These will be the Osterode Hanoverian Landwehr battalion, with green facings & shoulder tufts. Once these are done, I will have a representation of  the full Hanoverian 4th Brigade which in turn, with the 10th British brigade ( already finished), will complete the 6th British Infantry Division!

Osterode Landwehr Battalion advance to the work bench....

Osterode Landwehr Battalion advance to the work bench….


Waterloo June 13th 2015!

British deploy behind La Haye Sainte

British deploy behind La Haye Sainte

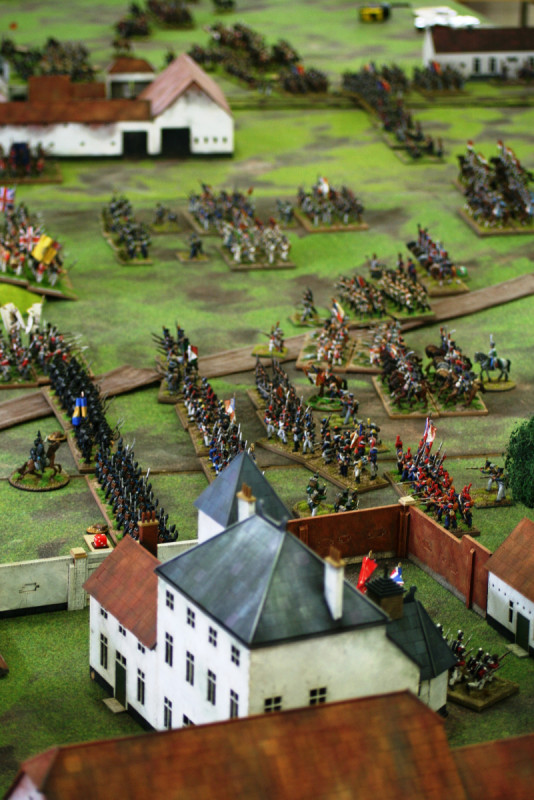
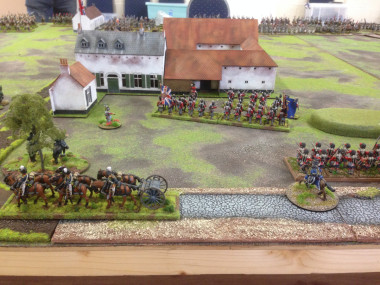
The plan for this years ‘homage’ to Waterloo was to re-fight the battle on the biggest table that we could find, with as many troops that we could muster. It really was ‘all the toys on the table’! We were lucky enough to be able to secure the Polly Bowling Club hall as a venue. This is the home of the Mansfield War gaming club, and many thanks to Quinton Dalton for helping us to arrange this.
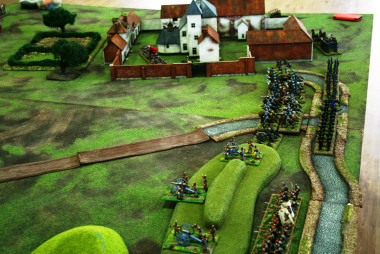
The view along the ridge to Hougomont

The view along the ridge to Hougomont

As for the players, there were just the four of us; Myself and John Grant playing as the British, Peter Harris and Mick Rood as the French. The latter have massive figure collections and as well as providing the French opposition, they were also able to provide reinforcements for the British and Prussians as well as some Brunswickers! We had thought about bringing more people to the table but the difficulty with this is that you then need a command and control system and getting a big group of war gamers to work in concert can be the equivalent of herding cats….. I think four to six is the optimum number of players, even for a game of this size.
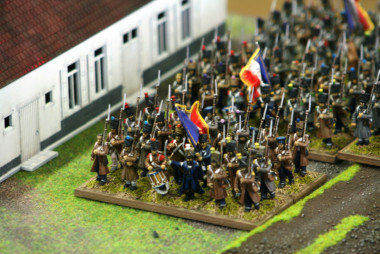
The Fench Troops advance past La Belle Alliance Inn

The Fench Troops advance past La Belle Alliance Inn

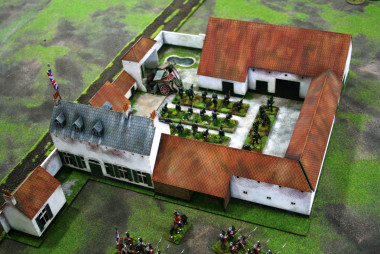
As for the tables, we had five 6×4 foot tables side by side to give a playing surface of 20 foot by 6 foot. On one end we had an additional table in an ‘L’ position to represent Plancenoite and as an entry point for the Prussians. As regards scenery, we were very lucky to be able to borrow the painted versions of all the main buildings from Sarissa Precision. So present on the battlefield were Hougomont, La Haye Sainte, Pappelotte farm, La Belle Alliance and for Plancenoite, the church and windmill, as well as a small farm made by Pete Harris. A few hills were used to make the ridge line at Mont St Jean and the Battlefield was ready.
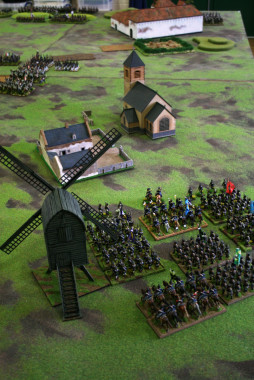
The Prussians Arrive at Plancenoite

The Prussians Arrive at Plancenoite

We then deployed the troops. There were approximately 2000 figures on the table! We deliberately did not count who had what or what the points value of each army was. It was clear that the French outnumbered and out gunned the British but the Brits had the stronger position and the buildings to defend, whilst the French had to go on the attack.
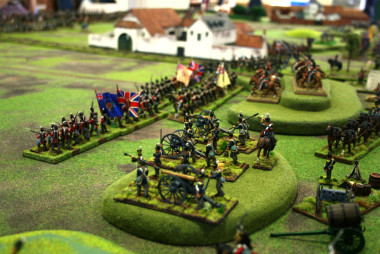
The British Defend the ridge to the left of La Haye Sainte

The British Defend the ridge to the left of La Haye Sainte

Finally, we were using the ‘vanilla’ version of Black powder with very few additions or modifications. Our reasoning being, that in a game of this size, trying to remember which unit has what attribute or special ability just slows things down. Let the dice decide who will be the heroes today!
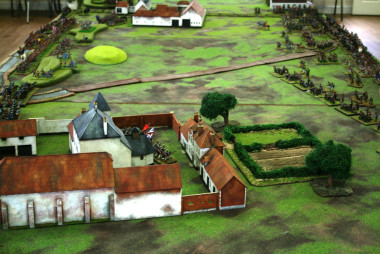
The view of the battlefield from Hougomont to La Haye Sainte

The view of the battlefield from Hougomont to La Haye Sainte

And so at 11.00 am precisely, the French players proceeded to attack. Pete Harris facing John Grant along the area from La Haye Sainte to Hougomont, I was facing Mick and defending La Haye Sainte to Papelotte. The British side had a brief meeting to decide on tactics. It went like this. John: what are the plans? Me: Hold! On reflection, less like tactics and more like Tic tacs…
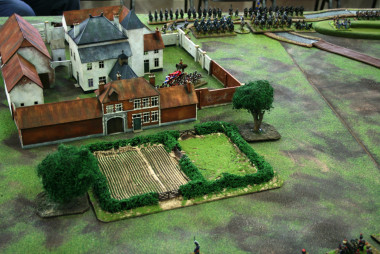
The Guards defend Hougomont
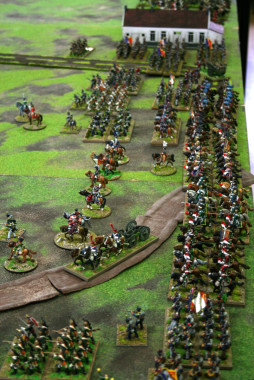
The Guards defend Hougomont

TheFrench prepare to Advance!

TheFrench prepare to Advance!

The first moves went largely without incident, the ranges being too far for effective artillery fire. The French were maneuvering to assault La Haye Sainte but it was clear that they intended to ignore Hougomont and focus on the British centre. At Papelotte, the British were attempting to use their cavalry to flank the French & draw them onto the defensive position of the farm.
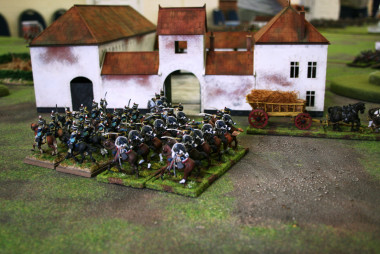
British Light Cavalry deploy behind Papelotte
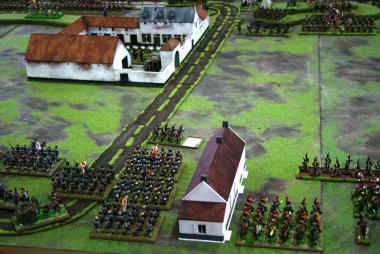
British Light Cavalry deploy behind Papelotte

The French comence their advance down the main road to Brussels!

The French commence their advance down the main road to Brussels!

The British rocket batteries were actually very effective at this point, causing casualties in the advancing French Columns and throwing them into disorder, slowing the advance. However, confusion also occurred in the British ranks, as a result of a blunder, the 52nd Light Company defending the ridge towards Hougomont rushed forwards in a charge toward the enemy.
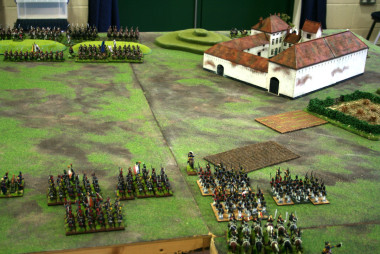
French Columns march against Papelotte.

French Columns march against Papelotte.

The flanking move at Papelotte was under way but largely ineffective. As the morning moved on, the French artillery moved into position and started to take a heavy toll of the British defenders. La Haye Sainte was subjected to a fierce bombardment!
The Light Companies of the KGL and 95th Rifles hold on!

The Light Companies of the KGL and 95th Rifles hold on!

It’s fair to say that at this point, any real communication between the two wings of the British Army began to break down as they fought for survival! A flanking attack by Cavalry around Hougmont had been stopped by the French and the 52nd were now in square after a French cavalry attack. Despite the overwhelming odds, the British right was drawn off the hill in a desperate attempt to rescue the 52nd!
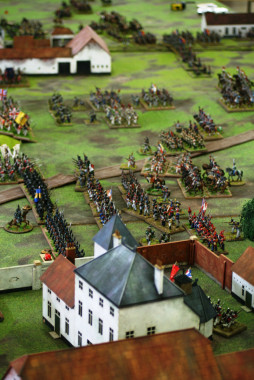
The British attempt to relief the 52nd!

The British attempt to relief the 52nd!

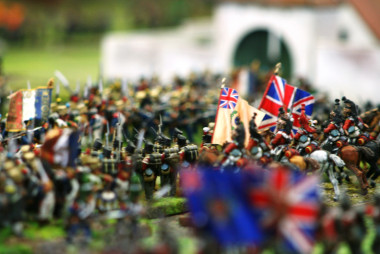
At La Haye Sainte, the French continued to pulverise the defenders, causing them to break. Fortunately, the British were able to move in a fresh unit. But they were being pressed hard by the French Infantry columns!
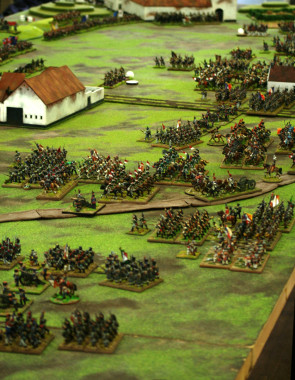
The French Army assaults La Haye Sainte
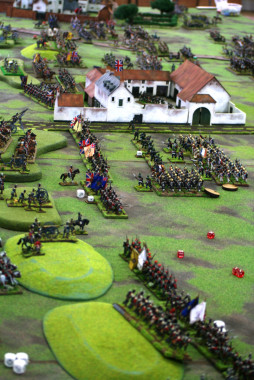
The French Army assaults La Haye Sainte

Difficult times at La Haye!

Difficult times at La Haye!

If things were hard pressed at the centre, at Papelotte, the British were not enjoying success either. A determined cavalry attack had been pushed home catching two French columns in the flank but despite this, the French were only forced to retreat, without losing their batalions. The British cavalry faired far worse, losing two regiments, one to artillery fire, the other to combat. As a result, the British cavalry in this sector became ineffective, with a further two regiments of heavy’s refusing to move all battle!
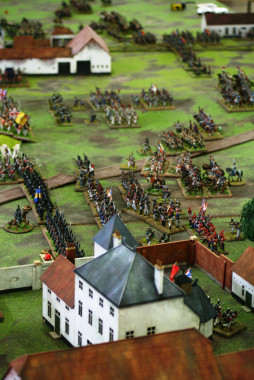
French Pressure begins to tell!
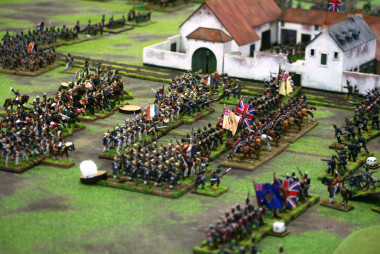
French Pressure begins to tell!

The Defence of La Haye Sainte

The Defence of La Haye Sainte

So where were the Prussians? They arrived on the battlefield at 1.00pm but despite all the encouragement from Blucher, they were tied up in Plancenoite. Although only faced by a smaller French detatchment, they were making slow progress and had yet to join the battle. Even their Cavalry were ineffective. When they finally did charge, they were roundly beaten by the French and fled from the table…
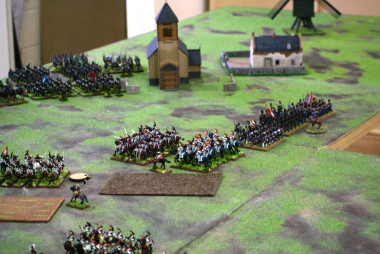
The Prussians had reached Plancenoite but would not move much further than this.
The Prussians had reached Plancenoite but would not move much further than this.

Desperate fighting at La Haye Sainte!

Desperate fighting at La Haye Sainte!

The French assault on La Haye Sainte and the centre of the British line was relentless. There was nothing to divert them and gradually the British were worn down. The 27th and 40th were shaken and as a result began to fall back with the rest of the brigade. At Papelotte, although resisitance was stuborn, a further disaster occurred when a Battalion of Hanoverians, rather than rally, enthusiastically charged the nearest French column only to be routed!
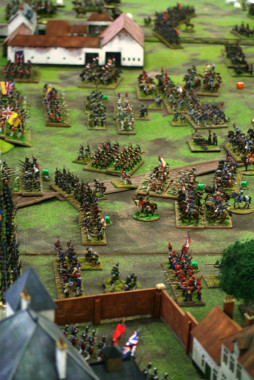
The French tide sweeps around Hougomont!
The French tide sweeps around Hougomont!

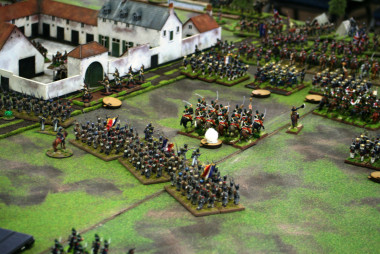
La Haye Sainte is by passed as the French advance towards Brussels!

La Haye Sainte is by passed as the French advance towards Brussels!

The battle was lost! With the Prussians bogged down in Plancenoite and unable to reach the British, French numbers were begining to tell. Papelotte was holding on but in the centre, La Haye had now fallen! The road to Brussels was open. Hougomont was still held but all support was being driven back, it would be a matter of time before the Guards would have to retreat.
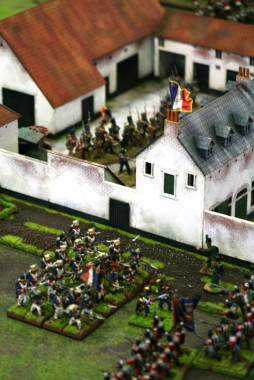
The French flag flies over La Haye Sainte!

The French flag flies over La Haye Sainte!

And so the battle was lost! The French had a clear strategy of forcing the centre and were not to be diverted from this. On the other hand the British had spread their forces too thinly and engaged in diversionary attacks that just took valuable resources from where they were needed. At around 4.00pm, the British withdrew from the field leaving the French to march on Brussels!

A fantastic game, played in the true spirit of Black Powder! Thank you once again to Quinton for helping with the Hall, Steve at Sarissa for the loan of the fantastic buildings and of course to Pete, Mick and John for being such great gaming companions!
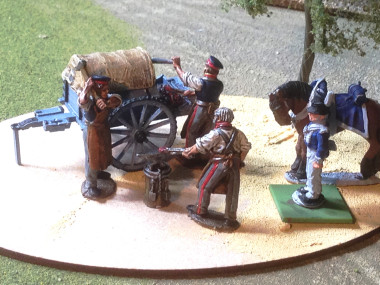
Prussian Artillery 11 June 2015

Prussian Artillery - Work in Progress

Prussian Artillery – Work in Progress

With the 200th anniversary of the Battle of Waterloo fast approaching. I’m desperately trying to finish another unit for our ‘Grand Battle’ planned for this Saturday. It’s not going to happen though! I’ve fallen into the trap of trying to do too much and not actually finishing anything that I’ve started.

The ‘Grand Battle’ planned for this Saturday will be our annual tribute to Waterloo. We don’t actually re-fight the battle as such. It’s more a case of that we put as many troops as we can muster on a battlefield that has some similarities to Waterloo. After spending an hour or so admiring the scene and having a chin wag over a cup of tea, we then roll some dice and play a huge game of Black powder. It takes all day, and the result is largely immaterial, but it is great fun and the random results of the dice throwing usually causes some merriment and some good talking points. You can see last years battle report here http://arcanesceneryandmodels.co.uk/battle-report-waterloo-2014/

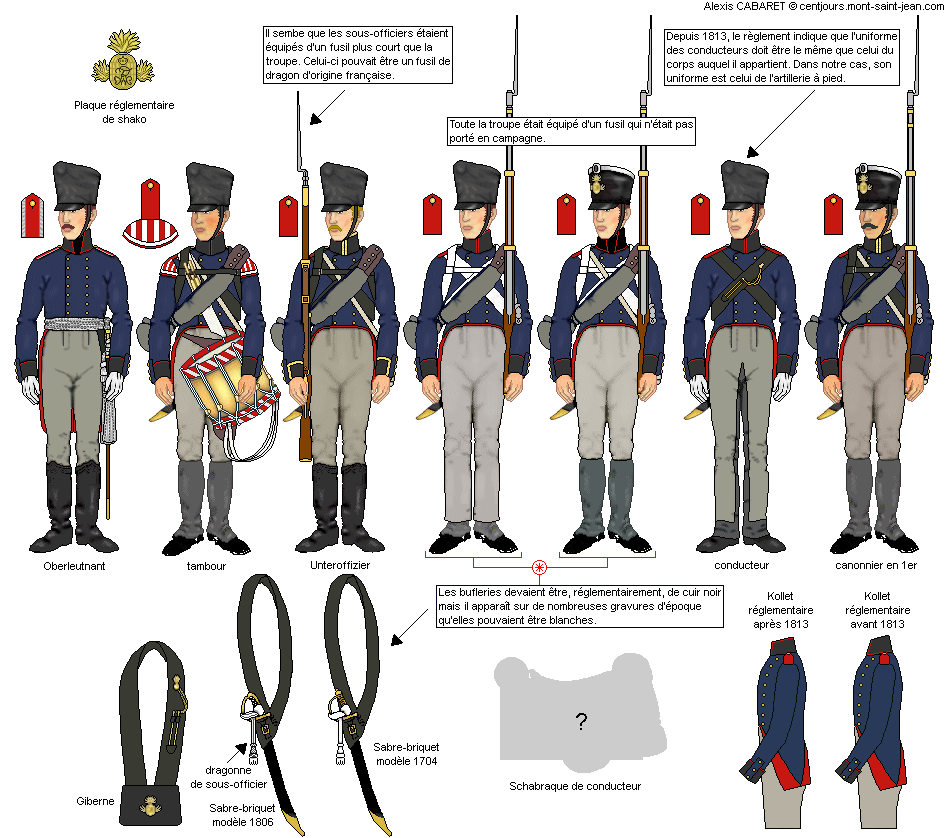
with the need to field more artillery, I thought that I would crack on with my next Prussian unit, a battery of three guns, 6pdrs to be precise, made by the Perry’s. The first task was to do some research as to what colours to paint the guns and the Uniforms of the crew. My usual quick source, the superb Mont St Jean web site gave me this picture to use.

alternative text

I always use this website as a starting point. That and of course, and the Manufactures’ own painted examples. You can be fairly confident that they have done their research when producing the models and the pro painters will be following their own research. I also consult my collection of Osprey books and various other references that I have and then finish off with a trawl through the internet – google images is a good source! By the time I have done all of this, I have a picture in my mind as to how I want the figures to look. The are always discrepancies and contradictions in the material. For example, I have found pictures showing the short sword scabbard in both brown and black. And the blanket covers & straps in both dark grey and leather. At the end of my research, I just make a decision as to what I think will look the best for me, no doubt to the horror of some purists!

So onto painting! The guns were painted in Vallejo Prussian Blue, with the ironwork in black and the gun barrels in brass. The crew in Vallejo Dark Prussian blue jackets, Neutral Grey trousers, Black Grey gaiters, red turn backs & facings, Black collars, cuffs & boots, much as the picture above. The first gun and crew are now almost finished, the the other two not far behind but they are not going to be ready for Saturday!

Prussian Artillery - nearly complete!

Prussian Artillery – nearly complete!

Prussian Artillery Battery - still much to do!

Prussian Artillery Battery – still much to do!

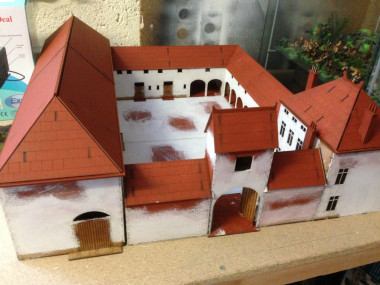
I could possibly rush them, but in reality I know that I have at least three more ‘sessions’ to go before they are ready for the battlefield. Even the first gun will need a final highlight & tidy up, and then there’s the basing. Rather than cut corners, I’ll wait – they will be ready for next year! What really caused the problem was that I was diverted and panicked into trying to finish another project that has been sat around on the bench – Papelotte Farm! Talk about biting off more than you can chew! I started to paint this as well and again, it is nowhere near finished….

Papelotte Farm - Under construction!

Papelotte Farm – Under construction!

It will end up on the table – even in this state it will be OK but it’s not quite what I had in mind. And just to show how I have engineered my own failure, whilst preparing the Prussians I decided that it would be a good idea to get this Field forge ready for painting…

2015-06-11 09.28.43

Never mind, at least the Cavalry are now finished and ready for battle!

Prussian Cavalry ready for battle!

Prussian Cavalry ready for battle!

Black Powder for Club Nights

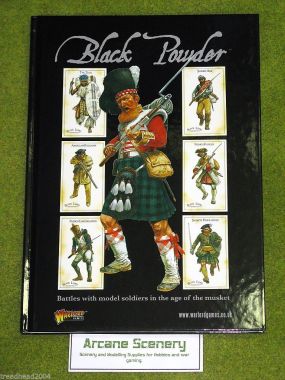
BLACK-POWDER-rules-for-Wargames-from-WARLORD-games-400569960224Playing Black Powder with Napoleonic figures continues to be my obsession, with no sign of ‘game fatigue’ appearing. I still play at least once a fortnight at the club, only recently having a break every other week to play Muskets and Tomahawks. The other guys at the club are quite amused at our adherence to this rule set and period and we are now known collectively as the ‘Black Powder’ lot! That said, our ‘gang’ is growing and whereas it used to be just two of us slugging it out over a table, there are now at least six ‘hardcore’ members of the sub club, so to speak, with a few more that are happy to join in and even more that come over to check our battle progress during the evening.

So whats the secret that keeps us locked into this rules set. Well, read the opening line of this blog. We are well aware that we are playing a rules set with Napoleonic figures and we are not too hung up on how realistic the rules may or may not be, we just know that we will have a fun game. Of course, there is a nod in the direction of historical realism, but thats all. When ever we play there will always be a talking point about what may or may not be realistic. Our current debate concerns the use of Howitzers and the limitation on the effectiveness of these guns at close range. The rules say that you cannot fire on an enemy that has closed within 6 inches of a Howitzer, which pretty much implies that you have no closing fire option. It also prevents you from firing canister into Squares at close range.

Is this historically accurate? Probably not, but I don’t think it matters too much when playing a table top game. The rules are clear, and you take a howitzer in your ‘army’ knowing those limitations. Of course there are benefits in the game for Howitzers and when you put your army list toALBION-TRIUMPHANT-VOL1-The-Peninsular-Black-Powder-Napoleonic-rule-supplement-181303809372gether, you take the rough with the smooth. That’s not to say we haven’t  modified some of the Black Powder Rules to suit our style of gaming. The two Napoleonic Supplements, Albion Triumphant 1 & 2,  introduced some new rules and ideas, some of which we have adapted, some not. The beauty of Black Powder is that it allows this, provided everyone is clear at the start of the game.

For anyone that is interested, here’s the points system and a few of the rules modifications that we use for our club night. They are designed to allow us to play a reasonable game on a 6 foot by 4 foot table in an evening or a couple of hours.

The 30 Point System

Level 8 Commanders are free. +1 point for each addition level (Max 10)

Regular Line Infantry = 2 points

Regular Light Infantry = 2.5 points

Militia, Conscripts, Reserves = 1.5 points [Cannot be upgraded]

Foot Artillery ( 1 Cannon = Battery) = 1.5 points [No half Batteries]

Horse Artillery ( 1 Cannon = Battery) = 1.5 points [No half Batteries]

Regular Heavy and Lancer Cavalry = 2.5 points 

Regular Light Cavalry = 2 points

Vetran Status = + 0.5 points

Elite Status = + 0.5 points

Rifles = + 0.5 point

Old Guard = + 0.5 points in addition to Veteran and Elite Status cost

Large units = + 0.5 points

Small units = – 0.5 points

Tiny units = – 1 point

Unit Sizes

Standard Infantry = 12 to 16 figures

Small Infantry = 8 figures

Tiny Infantry = 4 figures

Standard Cavalry = 6 figures

Small Cavalry = 4 Figures

Tiny Cavalry = Not Permitted

Unit Restrictions (Maximums)

Rifle Units = 9 points

Old Guard Units = 9 points

Lancer Cavalry = 9 points

Regular Light Infantry = 15 points

Notes:

Small and Tiny units cannot constitute more than 25% of a brigade and do not count towards the Brigade’s morale.

Infantry brigades must have a minimum of three infantry units and Cavalry a minimum of two units in addition to any Artillery.

Mixed Brigades must have a minimum of two Infantry units.

Brigades and Army break on greater than 50% loss

Cavalry may retire in the movement phase when disordered.

Mixed Order Columns do not benefit from a column save bonus if you are shooting at the skirmishers or from artillery fire.

French Columns do not benefit from Pas de Charge – they already have a bonus from being in column.

British first fire only applies if you have not moved more than once during the orders phase.

British troops fight in line and do not form column

Now I guess that there will be a few dissenters out there with regards to these amendments but don’t worry, they are not official and you will only be asked to use them if you join us at the White Hart…. In the meantime, I can only hope that other gamers enjoy Black Powder as much as we do.

Prepare for Battle!

Prepare for Battle!

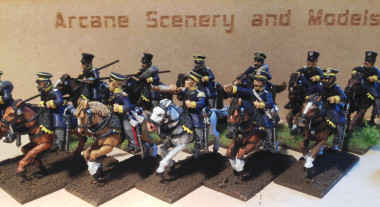
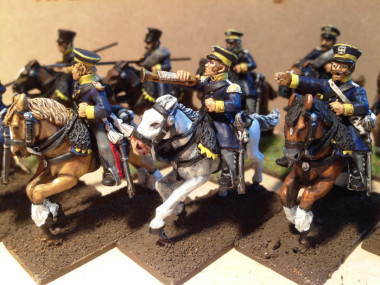
Prussian Landwehr Cavalry 28th May 2015

Prussian Landwehr Cavalry

Prussian Landwehr Cavalry – Nearly finished!

It’s been a slow week or so for painting but at last, my Prussian Landwehr Cavalry unit is nearly ready to leave the work bench. As you can see, the command group is just about finished, with just the bases to highlight and detail. I’ll finish these off with a quick dry brush with an Iraqi Sand and Chocolate brown mix, and then a final highlight with pure Iraqi Sand. Once that is dry, I’ll add the Static grass ( I prefer the flowered field mix) and then my usual mix of grass tufts & flowers. I find that a bit of colour on the base will tend to lift the figures, particularly when they have a dark uniform. It will also unify the army if the basing is similar.

Prussian Landwehr Command Group

Prussian Landwehr Command Group

I’m quite pleased with the way that the horses have worked out – see my last blog post for details of the paint ‘recipes’ used. I’ll have a last look over the figures as I base them to decide whether to add any further highlights. It’s always difficult to know when a unit is really finished.  There’s always a compromise between producing my best possible finish or moving on to the next unit. Do I spend another session adding a few more highlights to the uniforms and a bit more ink to add shadows to some of the equipment or do I just get them on the table?

Regardless of the above question, the final job will be to add the lances and pennants and the flag for the unit. I have these ready to go, you can just make out the first two Lances added to the figures in the background and it will be another evening session, to finish that job – so these boys are about two evenings away from the war games table…

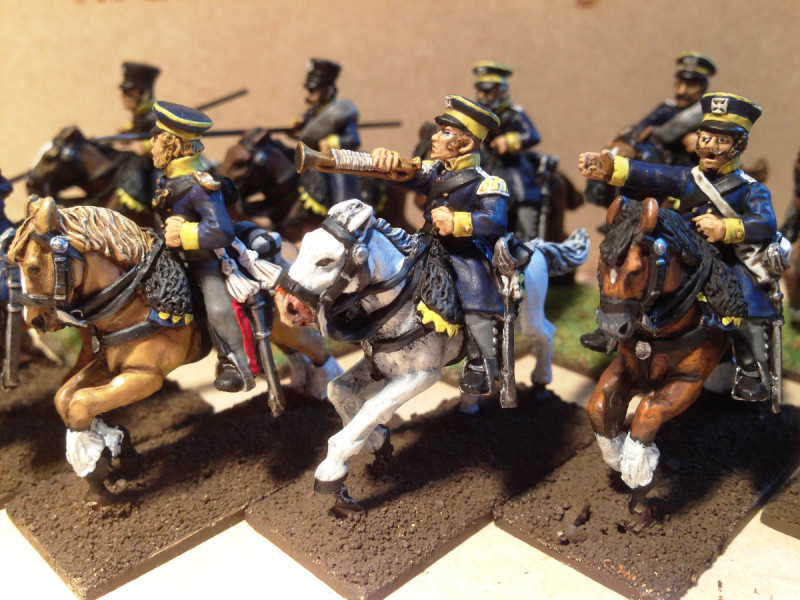
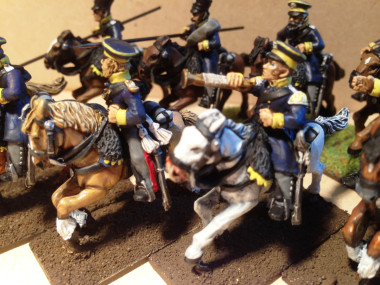
Close up of the Trumpeter

Close up of the Trumpeter

Actually, there is one other job to do before they are ‘table ready’ and that is to make the movement trays. I could use a ready cut MDF tray but will probably make my own as I have a different style that I prefer to use rather than a normal tray. It’s a straight forward job and I think I’ll show how I do this in another blog post.

So my Prussian brigade now consists of 2 Battalions of Regular Infantry, 2 Battalions of Landwehr Infantry, a Command base and a Regiment of Landwehr Cavalry, all in Silesian colours, making a total of 110 men and 14 horses painted. Next up, some Artillery – now can I get them finished for the 13th June, the date of our next big battle…..

Painting Horses – Prussian Landwehr Cavalry

Prussian Landwehr Cavalry - Work in Progress

Prussian Landwehr Cavalry – Work in Progress

I guess that you can make painting horses as easy or as difficult as you like, from just a brown coat to the more complex spotted greys. I have tried quite a few of the different techniques over the years but I’ve been trying to improve my results to make the horses look a bit more interesting without spending too long on each horse. It’s also been a good way of practicing highlighting and shading, without relying on Quickshade or Inks.

There are two techniques that I’ve been trying with this latest batch of horses. Both are very similar and both are based on using the three colour; shade, main coat , highlight technique that the professionals, such as Kevin Dallimore use to such good effect. Lets be clear, I’m a long way from that standard and I’m still set on producing regiments for wargaming rather than high quality figures for photography. However, practice makes perfect, as they say, and learning a particular style will help me speed up my painting process.

If any one is interested in seeing a master class in how to paint horses using this method, then I recommend this youtube video by Toby of Art Master studios – it’s an hour and a half of watching paint dry but still better than 90% of the stuff on TV these days! There are some great ideas here and I’ll just summarise them, as much for my own reference, although I hope that it will be useful for other wargamers.

First choose your colour pallet for your horse – using three colours will allow you to get variation on horses, even when using the same colours on a batch of horses. Here’s a few of my favourite recipes using Vallejo paints! All of them are used over a black undercoat.

For Browns:  German Cam. Black Brown,70892, Flat Brown,70894, Orange brown 70891 or Mahogany Brown 70846. Be careful with the mahaogany brown, it is quite red and adding white to it will make your horse look pink so if you want to lighten it, use a Light brown, 70929. Another useful combination is Chocolate Brown 70872, Flat Brown,70984, Cork Brown 70843.

For a light brown or cream horse, try Flat earth 70983. Cork Brown 843 and Green Ochre 70914. Or try  gold brown, 70877 as the mid colour.

For black horses, use Black 70950, Black Grey, 70862, and highlight sparingly with light grey,70990.

For Grey horses, Dark grey 70984, Neutral Grey 70992, Light grey 70990.

And for White horses ( still Grey really!) Light Grey 70990, Sliver grey, 70883 and Off White 70820.

So that’s the horses body done. I stress that these are just some of my paint combo’s that I have tried. There are plenty more out there but using three colours in combination will give you plenty of variety. I mentioned that I was trying two techniques when painting. The first one is to carefully paint one colour over the other building up the highlights by picking out the muscles on the horse. This is the most time consuming and if done well gives superb results. The other method is to use a dry brush technique with the the colours. This is much faster and the results are still pretty good but you will need to go back over the harnesses etc as the paint will cover them if this method is used.

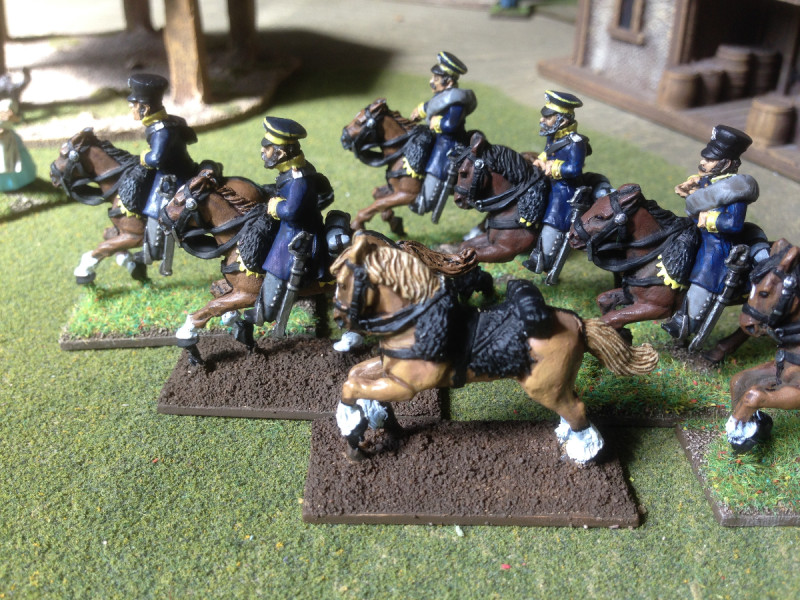
Prussian Landwehr Lancer on Brown horse

Prussian Landwehr Lancer on Brown horse

Next up, is the detail on the horses. The obvious ones are the mane & tail. You can either paint these in the same colour as the body of the horse or use black or green ochre to give variation. On the Cream horses, Biege 70917 looks good and on the greys, either a dark grey or white mane & tail looks fine. As these areas tend to have more texture, using an ink and then dry brushing with a light shade or even white will really bring the detail out.

The next area to look at are the legs – painting white or black ‘socks’ on one, two, three or four legs is fine and will  give variation in your regiment. Finish off the legs with the hooves. I paint them either black or a dark brown, it just tidies them up. You can also paint the horse shoes in steel if they are showing but it’s something that I tend to leave as a detail too far – besides , my thought is that they will be covered in mud…..

The last thing that I paint is the head. Again, a bit of variation here can make all the difference. I usually paint a white ‘blaze’ on the horses head. You can leave the muzzle the same colour as the horse or paint it black, dark grey or even a dark flesh colour. The eyes are painted black, although I will sometime use gloss black for this to get a shine.

The final bit is to paint the horse furniture and that is dependant on your Regiment and an article for another time. I have mentioned variation in horse quite a bit. Some of the elite cavalry regiments would of course ensure that the opposite was true. For example, the Household cavalry would be mounted on all black horses but I think that other regiments were less fussy and of course when on campaign or in battle, so long as the horse had four legs, it would do!

Work in progress - light brown horse

Work in progress – light brown horse

The pictures in the article show my latest regiment, Prussian Landwehr Lancers. As you can see they are yet to be finished, with some based with riders & some still not quite painted fully and none of them with their lances yet! I tend to paint horses in batches of three using one colour combo and then finish with the command group. As the trumpeter usually rode a grey and the officer would have had his own ‘posher’ horse, I leave these until last of all. Once they are all painted, I’ll go back over them all adding a few last quick highlights, correcting any obvious paint errors and of course detailing the bases with a few tufts and flowers.

So that’s my take on painting horses – Cheers!

The latest resident in LIttle Bingham - just the basing to finish!

The latest resident in Little Bingham – just the basing to finish!


Scenarios for Black Powder

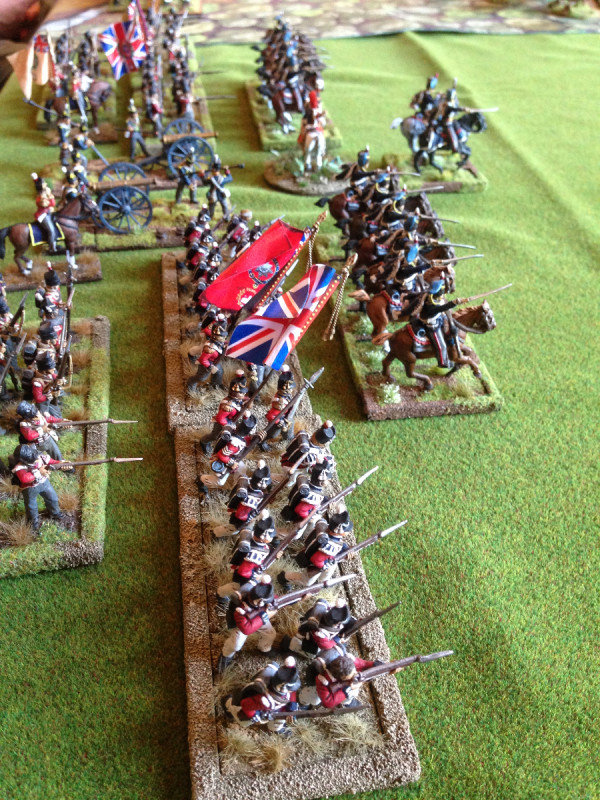
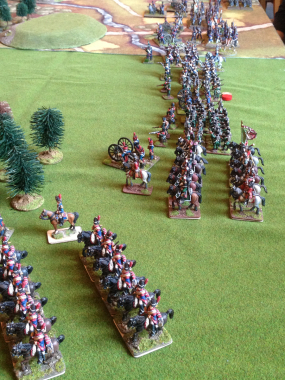
The Guards line up ready for battle!

The Guards line up ready for battle!

In an ideal world, where we all have plenty of time and unlimited resources for our hobby, we could spend hours re -enacting all the battles of the Napoleonic era, exploring the ‘what if’s’ and ‘if onlys’ of history on accurate terrain boards, with all the right troops in all the right uniforms! It would be the ‘Carlesberg wargaming club’.  However, for me the reality is that I get to the club once a week on a Thursday evening and we fight a battle that lasts for about 2 hours using the troops that I have to hand with a rules system ( Black Powder) that allows an easy flow to the game on a gaming cloth with a few pieces of terrain to make it look pretty. Sure, once in a while we get to play the ‘mega’ battle on a posh table with special scenario rules and the correct force but that this is a rare exception in my gaming calender.

The real problem is that there is a tendency to just line our armies up on the table and try and win the game by breaking more of the enemies units than he breaks of yours. OK, it’s still good fun but it can get a bit repetitive. So we were looking for a quick fix to make our games a little bit different and to start to introduce a bit of narrative into the games –  this is the ‘back of a fag packet’ ( in our case more likely to be the back of a crisp packet….) solution.

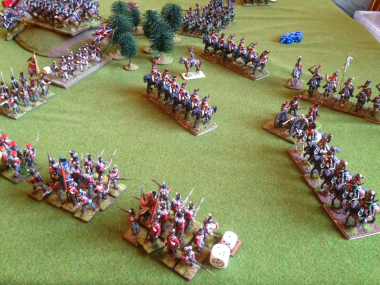
The Line Advances!

The Line Advances!

We quickly came up with a list of 6 simple scenarios and before our game we roll a dice to decide which scenario  we will play. The exception being of course, when the same one has come up and every one groans ‘we played that last time’ – just roll again and let the dice decide. Here is the list that we are using at the moment. The intention of course is to add to them, rolling a D10 or D20 would be even more interesting!

Scenario 1 – The River

The battle is fought on a table with a river running across it. We use strips of painted paper to represent the river. It’s not the quality of scenery that you would find in Wargames Illustrated but quite adequate for a club battle. The river sections are about 12 inches long and we place a dice on each section. As a unit attempts to cross the section of river, roll the dice. On a 1 to 3 the unit will become disordered as it crosses. A roll of 4 to 6 means that the unit crosses safely. These are just our basic river rules – we have quite a few variations but these simple rules add another dimension to the game and will give commanders something else to think about when planning their battle.

Scenario 2 – One of your brigades is late!

Just pick a brigade on each side and roll a dice. The dice roll indicates on which turn ( 1 to 6 ) it arrives in your deployment zone. A variation on this scenario is to test each brigade in the army. Roll for each brigade, on a 1 or 2 ( or whatever you deem appropriate) the brigade is late. Then roll to see when the late brigades arrive. Great for players with Prussian armies…..

Scenario 3 –  Flank March

The two opponents roll a dice. The winner will get the flank march option and can choose a brigade that will deploy on one of the side table edges. Roll a dice to decide which on turn ( if it’s turn 6 it can be tricky…) your brigade will arrive. When the turn arrives for deployment, roll a dice. On a 1-3 you can deploy on your left flank, 4 -6 it’s your right flank. We allow deployment anywhere on the side of the table so beware  – you may have an enemy brigade that is  effectively deploying in your rear!

Scenario 4 – Off Table Deployment

Both armies start off the table. Before any orders are given to a unit, roll a dice. In the first turn, on a roll of 5 or 6 you may place the unit in your deployment zone on the table and issue it with an order as usual. On this first move, movement is reduce by one order. In other words the maximum that you can move is two ‘orders worth’ of movement. You can apply the rule to individual units or brigades or a mixture of both. After that, movement is as per normal Black powder rules. On turn two, the dice required to deploy is reduced to 4,5 or 6. Turn three, you need 3 to 6, turn 4 you will need 2 to 6 and this stays in place so if you throw a one in turn 5 your brigade still will not arrive!  It happens and can be quite frustrating. We rename those units as the Grouchy Brigades…

Scenario 5 – Capture the Flag!

A simple objective is placed in each half of the table. The objective is to capture the opponents objective whilst protecting your own.

Senario 6 -Pitched battle

Straight forward enough – back to the usual set up in deployment zones and beat the enemy. You can give this a bit more flavour by altering deployment zones rather than just lining up along the back of the table.

The other interesting variation is how to place the scenery. Rolling a dice for this is a good idea but we just tend to take it in turns to set the table out each week. We have had some interesting results when we have asked a non participant player from the club to set out the scenery though!

Stopped by the Cavalry!

Stopped by the Cavalry!

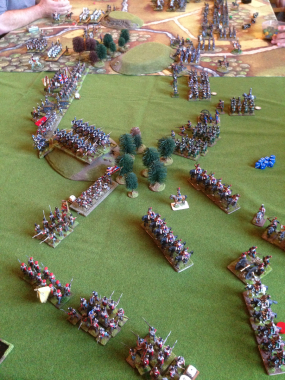
The scenarios have certainly thrown out some interesting games. The pictures that I have used for this blog article are from our game last week where I had the Flank March. I thought that I would easily pin my opponent and out flank him with an extra brigade of three battalions of Infantry. As it turned out he held those battalions in check with his cavalry and after forcing them into square, proceeded to pound them with his artillery. I was then forced into trying to rescue my flank and more Battalions were drawn out of position and the army was eventually broken as they were pushed into square as well and shaken by artillery fire. It was the most effective use of cavalry in a Black powder game that I have seen and despite the musket fire that the cavalry were facing, by clever use of rotating the cavalry and rallying them it was the infantry that broke first!

The Flank is in Trouble!

The Flank is in Trouble!

What Constitutes An Elite Unit?

Actually the title was just an intro to another round up on the progress with my  Hanoverians. But, before we get to that, a couple of things have set my mind working. The first was a throw away comment at our regular Black Powder game last week. My opponent, Pete, was explaining our game to his new ally and they were going through the troop types. He pointed out my Hanoverian Landwehr Battalion and said that ‘Steve uses them as British, so they still get first fire (Black Powder rules)’. Now, nothing derogatory was meant by this comment, Pete was just pointing out why one battalion looked different to another, on my side of the table. But it set me thinking about how should I differentiate between my various troops.

The other thing that was on my mind was that I had just finished reading my sixth book on Waterloo. Since my visit to the actual battlefield, last May, my fascination has intensified and I cant help but keep reading about it! The book that I had just finished was an account of the defence of Hougomont by Julian Paget & Derek Saunders, a nice little book that looked specifically at the attacks on Hougomont and the brave defence by the British Guards. Except that it wasn’t just the British Guards. There were Hanoverians and Nassauers there as well. Now before you think I am going down the Peter Hofschroer route of  ‘it was the Germans wot won the Battle really’, I’m not, that debate can wait for another day. What I’m interested in is the perceived quality of the troops involved in the battle and how wargamers portray them on the table.

Barry Hilton has touched on this subject in a very good article in Wargames Illustrated and I think he’s got a point. Should we really judge how good troops are and give them extra advantages over opponents based on reputation or should we let the dice decide as the game goes on. In other words, should all troops should be equal at the start of the game and only broad National traits based on operational factors  built into the rules. The latter is  certainly my preference, when it comes to general wargaming.

Back to Waterloo,  Wellington himself was concerned about the quality of his allied troops, partly due to their inexperience, I think and perhaps because some of them had been fighting with the French not so long ago. Reading accounts of the battle though, very few of these troops appeared to have under performed, ie. run away! Its been argued that this was because Wellington had cleverly bolstered the morale of these troops by mixing them with seasoned British battalions. Certainly at a Divisional level this was true, but not so much at brigade level and rarely at Battalion level. It looks to me as though the Allied troops performed every bit as well as the British regardless as to whether they were Landwehr or line battalions.

Being Devils advocate (why not, it’s my blog!), there were three notable instances of troops that ran under fire or refused to attack and ran away. The most serious example were the Duke of Cumberlands Hussars, who simply refused to engage and ran away. They were in effect an amateur regiment of dandy soldiers with fancy uniforms that didn’t want to risk injury….They had very little impact, if any, on either the battle or the troops around them.

The other notable incident, often referred to, is the retreat of the Dutch Brigade under the command of Bijlandt. This incident is still a matter of debate amongst armchair generals and historians (usually the same thing…) but to be fair, the general impression that I have, was that the Brigade had conducted itself well at Quatre Bras, losing a fair few casualties, only to find itself at Waterloo on the front line facing the full force of D’Erlons advance after being softened up by the French Grand battery. They appeared to have cracked and retreated under the sustained pressure.

So to the last of my three instances of Troops that cracked under fire – I bring you the French Imperial Guard! These boys had been loafing around for most of the battle until being led by their beloved leader, Napoleon, across the battlefield to engage an enemy that had been under fire all day, charged repeatedly by the French Cavalry and were now facing yet another massive attack. So who was that broke and ran away? Why, the French Elite Infantry, taking with them the rest of the French Army. Confronted with an enemy that stood and fought, the Imperial Guard broke and ran. Well to be fair, they retreated in reasonably good order but retreat they did!

So the next time someone suggests that my Hanoverian Landwehr should be down graded as they are inferior troops, I’ll be happy to oblige if he’ll accept that The Imperial Guard will take a massive minus on their morale if they should come under fire, as history shows that they wont stand…

2015-02-22 11.08.01

Right, tongue out of cheek now! Here’s some pictures of my Hanoverians. You can see that I have modelled the cords on the shako’s using green stuff and thickened up the plumes using Vallejo filler which was much more suitable for that job. Painting is now underway, and the first four are nearly finished. Just the highlighting and basing required.Hanoverian Landwehr

Hanoverian Landweher

Slow Progress with the conversions…..

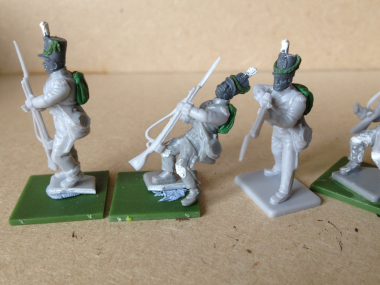
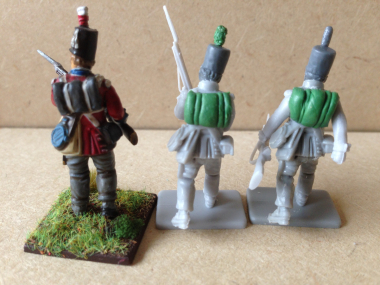
Hanoverians work in progressThe title of this weeks blog says it all! Progress has indeed been slow and I am stretching my  ‘sculpting’ ability and patience to their limit. The Hanoverians are the problem. I’m trying to match the conversions that I have done to the original Victrix models that I had painted. The first task was to make some blanket rolls to go on their backs in the place of packs. I have actually cheated with a couple of the models and despite saying that I would cut the british packs off of the ones that I had put on in error, I decided to leave a few on. May be those guys had picked a few spare packs up from Quatre Bras! Anyway, modelling the blanket rolls was not too difficult, although a bit time consuming, as I am not used to working with green stuff. You can see the result in the picture above – I think that once they are painted they will be fine.

The real problems came when I tried to modify the shako’s. The first thing that I changed was the plumes which are a bit long and thin. I simply trimmed these down and then used a tiny amount of green stuff to thicken them up. Well, that took forever, partly because I managed to get the green stuff to stick to my scalpel more effectively than the model! Again, if you look carefully at the picture above, you can see the difference it makes. The model to the left has the original plume, the centre model has the the modified one and the right hand model the thin tall plume that I want to replace. After a while of fiddling around I thought that I might just either cut the plumes from some other Shakos & replace them or perhaps just try some filler.

While I had the green stuff mixed though, I thought that I might try and make the cords for the shakos. To do this, I carefully rolled out a very fine ‘sausage’ of green stuff, cut it to the correct length and then attached it to the first shako. Or rather I tried and tried and tried and failed!!! I just could not get it to stick to the model. It stuck to my scalpel, it stuck to my needle. I tried using water to dampen the tools but it still would not stick to the model. After 20 minutes of this I gave up and I think it is back to plan B – using cotton. It may be that the green stuff that I am using has gone off a bit – it has been kicking around in my model box for sometime now. So I may have another go with a fresh batch. At this rate though, it will take me a fortnight to get to the priming stage with these models!

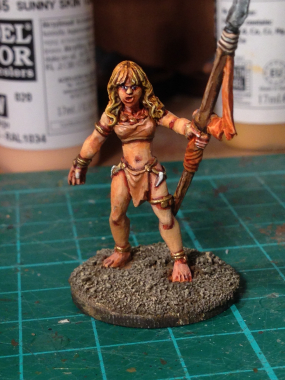
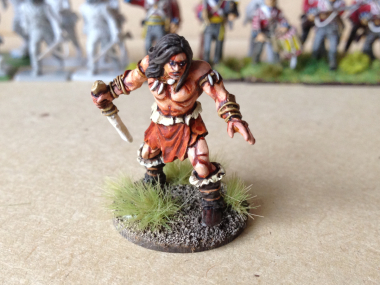
As if that wasn’t frustrating enough, the other project on my work bench hasn’t gone too well either. Having painted Lucid Eye’s Ke-Zhor, I thought that I would paint his mate, Harranah. I think that this was a case of trying too hard as I just could not get the finish and flesh tones that I wanted. Nevermind, I guess you learn more from your mistakes and maybe I’ll give the model another go later. In the meantime, She’s done and going in the cabinet once the basing is finished! Checkout Facebook later for some more scenic pictures of her in perhaps a more sympathetic setting!

2015-02-15 17.27.15

Whats on the Workbench – More Hanoverians!
Hanoverian LandwehrHaving finished the Lion Rampant Campaign, it’s back to painting my Napoleonic Army. I’m still working on the British 6th Division at Waterloo and having completed the English Regiments, I’m back on the Hanoverian contingent. There were four Hanoverian Landwehr units in the Division, Verden, Lunberg, Munden & Osterode and so far I have painted two of them. So on with the third unit now. First of all a disclaimer! I have decided to model two of the units wearing Stove pipe shakos and two wearing the flat field hats for no other reason than they will look nice on the wargames table. Actually finding accurate descriptions of exactly what the Hanoverian Landwehr really wore is difficult to say the least, with the usual conflicting advice from various sources and experts.

Broadly speaking, the Hanoverian Landwehr were dressed as British Redcoats but with stovepipe shakos rather than the new Belgiac shakos and with a blanket rather than the usual haversack & kit. The stove pipe shakos also seem to have the cords that weren’t present on the original ‘Peninsular’ Stovepipe shakos. Just to add to the confusion, the Hanoverian Field Battalions, or regulars were dressed more or less as British regulars and did have Belgiac shakos & all the kit! As for the officers, they were drafted in from the KGL or other British regular units so could be wearing any Regts uniform although they probably adopted the yellow sash of the Hanoverian Army.

I suspect that the general principle was that the regular field units were kitted out in the ‘latest’ British uniforms whilst the Landwehr had the cast off’s from the Peninsular campaign and anything else that was kicking around the quartermasters stores when they were called up!

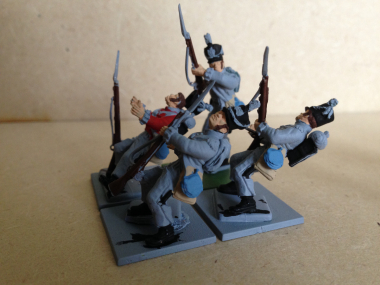
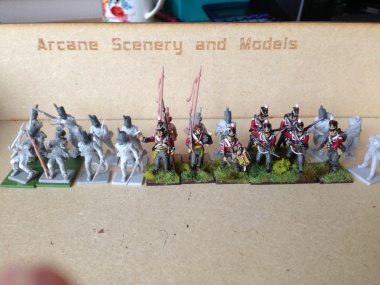
To add to my modelling woes, whilst Victrix used to do a nice set of conversion heads that I used for my first unit, they have now been discontinued, so some conversion work will be required! I already had 8 extra figures left over from my first go at painting Hanoverians so I would incorporate these into the new unit. The picture at the top shows how the new Battalion will look when finished. I decided to use the running figures from the Vitrix set as I had some of these left over from previous projects. Rather than have a lot figures in the same pose, I thought that Iwould convert them to look as though the unit was taking casualties. I like to have different poses in my units and try to have a bit of a story going on. I know that some wargamers prefer a uniform look and like to see all of the figuresin a unit in the same pose. Whilst it does make life easier, I find it tiresome painting the same pose over & over again. Besides, I like to do a bit of modelling for a change!

Landwehr Conversions

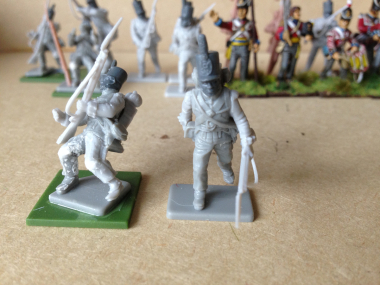
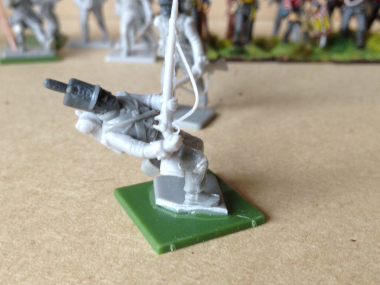
The close up above shows the original running figure on the right and the conversion on the left. To get the figure to look as though it is falling it was simply a matter of cutting through the back of each leg and bending them backwards. Once the glue had set, I put some filler into the gap on the front of the knees and I had my falling casualty. I then used a couple of standard arms from the set and the head is a spare peninsular head from the Perry boxed set. I’ve actually made an error by adding the back packs, so these will come off and be replaced by a simple blanket made using green stuff. The shako’s aren’t correct either, as they are missing the cords. So the plan is to carefully shave down the badge plate and either use cotton thread, thin wire or green stuff to make the cords.  I suspect that modelling the shakos will be the biggest challenge & somewhat time consuming but it will mean that the models in the unit will look about right. When they are painted , I’m sure that they will all blend in.

2015-02-12 11.47.24

As you can see, for a few small cuts, you can get a very different and dynamic pose!

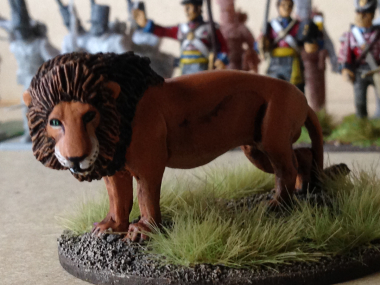
So there is my next project under way, a total of 14 more Hanoverians to finish modelling & painting. Meanwhile, I’ve been busy with the paint brush as well. I finished off the DeeZee standing Lion:

2015-02-12 11.49.58

and I couldn’t resist painting Ze-Khor, Lord of the Jungle, from the Lucid Eye range. These are just quick pictures. I’ll get some better ones up on face book later!

Ze-Khor, Lord of the Jungle

Varnish trouble!

2015-01-29 10.53.07

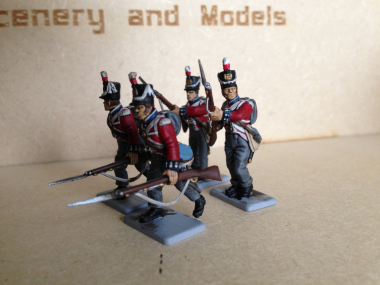
Having finished my Lion Rampant retinue, I moved onto the next project on the work bench, the 40th Somersetshires. With just the six figures in the command group to finish, I will have another Battalion for my Waterloo army. The photo shows the nearly complete group. I just need to add static grass and some army painter highland tufts to finish them off completely – Oh! and there is the small matter of adding the flags…

All did not go well with this batch of figures though. I had problems with the final stage of varnishing them. Normally, once the figures have been coated with Army Painter Quick Shade and allowed to dry, I give them a quick spray of Anti Shine matt varnish, re-highlight and all is done. However, with the weather so cold and windy, I was unable to spray the models outside ( I’m banned from spraying indoors!), so I thought that the easy solution was to give the figures a coat of Vallejo Matt Varnish by hand. I’ve used this varnish before to touch up any excess glossy bits on my models that the spray has missed, so I wasn’t expecting any problems.

I just gave them a quick coat of varnish and waited for this to dry. Arrgh! I was obviously a bit heavy handed with the varnish and when it had dried it had gathered in all the creases, blotting out the shading. Even worse, it had ‘bloomed’ ruining the main black and red areas! Arrgh! again, this isn’t supposed to happen with brushed varnish, only sprays do this don’t they?…Apparently not. So the lesson is only use a very thin coat and paint it on, not slap it on!
I repainted the worst affected areas on the figures and they don’t look too bad, certainly good enough for the gaming table. On the positive side, the brighter finish certainly makes the command group stand out from the rank & file. So another unit takes to the field and I am a little bit more wiser regarding using varnish – even water based brushed on varnish will bloom if you don’t use it carefully!

1 8 9 10 11 12