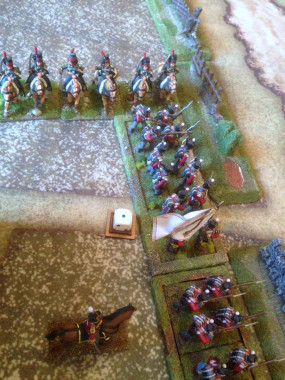
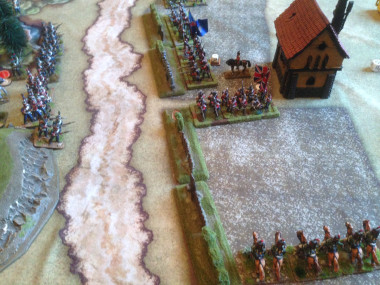
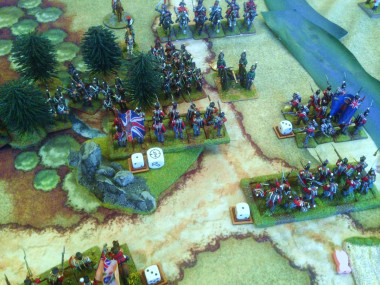
Lion Rampant – The Nine Bastards!

Wargames Illustrated were running a second ‘Lion Rampant’ event day at WI headquarters here in Nottingham. I had originally thought that I would be unable to attend but a last minute change in family plans left me with a free weekend. There was a place available and so it seemed sensible to sign up.
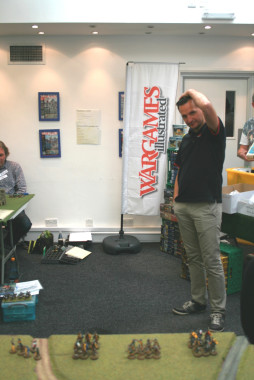
Dan, from Wargames Illustrated starts the day with a briefing and wonders how he will keep 18 gamers under control!

Dan, from Wargames Illustrated starts the day with a briefing and wonders how he will keep 18 gamers under control!

I had my retinue  ready to go and after a couple of games the week before the event, my knowledge of the rules was refreshed. My army was ready to take to the field of battle. My Retinue is based on a War of the Roses English Army and consists of:

Leader and 5 Foot Knights 6pts
Unit of 12 Foot Sergeants            4pts
Two Units of Expert Archers     12pts
unit of Bidowers                             2pts
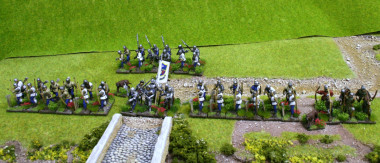
My Lion Rampant Retinue

My Lion Rampant Retinue

The army is essentially a defensive unit, that although lacking maneuverability, given the right position, can hold it’s own against the more aggressive and mobile armies that are often fielded in the game.
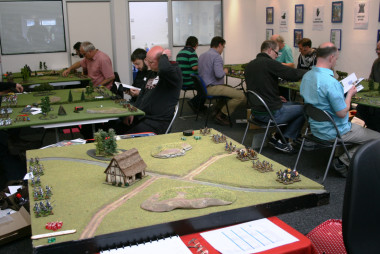
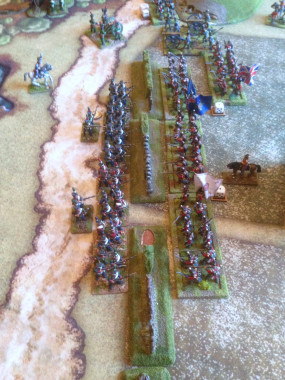
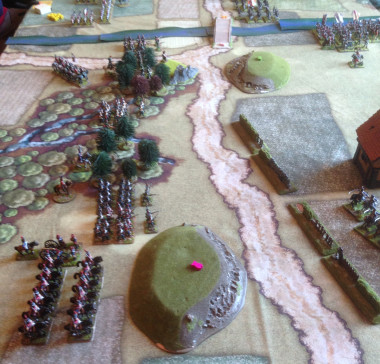
Set up complete - players now check the rules...

Set up complete – players now check the rules…

The Lion Rampant day was themed around the 9 Bastards of the previous king ‘Jeffery’ from the first Lion Rampant day and involved each of the factions doing battle with the view of conquering their opponent thereby forcing them to switch allegiance to the victors faction. There would be three battles to see who won the day and as usual, Dan from WI had built in some twists and turns to the scenarios to keep the day interesting and balanced. I represented House Wagner – it was time to join battle!
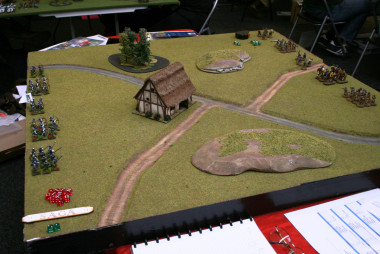
The first battle is ready to commence

The first battle is ready to commence

BATTLE 1 – BLOODBATH

My first battle was against Sir Mike who was fielding an army consisting of 2 units of Mounted Sergeants, 2 units of Crossbowmen, a unit of Foot Knights and a unit of Bidowers.

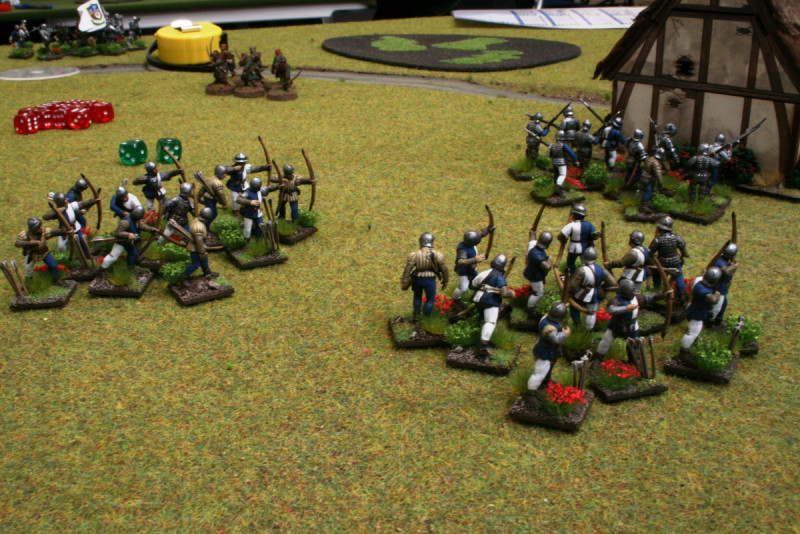
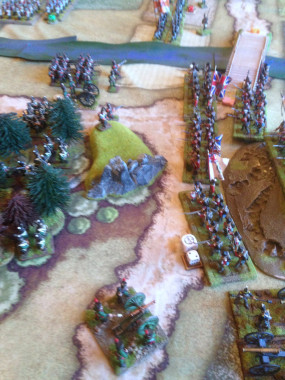
Sir Mikes’ army immediately advanced, with his mounted troops leading the way. One unit of Sergeants attempted to flank my army, the other going straight for the archers in the centre. The Crossbow men had moved up in support and his  Bidowers made for the woods on my other flank, where they would attempt to harry my army from cover. My reply was somewhat slow, having failed a couple of activations but my Foot sergeants formed Schiltron on the Left flank, effectively stopping the Mounted Sergeants in their tracks. My Bidowers charged into the woods to meet the enemy Bidowers and hold them. Whilst in the centre, My Foot Knights stepped forward under the cover of my Archers to meet the other mounted unit.
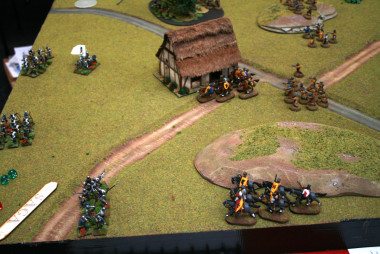
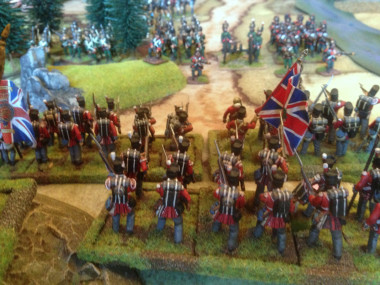
The Schiltron holds!

The Schiltron holds!

A fierce encounter ensued in the centre, resulting in the elimination of the first Unit of Mounted sergeants. Although my Foot Knights had taken casualties they turned to face the enemy foot knights who were now ominously approaching. The encounter in the woods between the two Biddower units got off to a slow start. There was a suspicion of a party going on, but obviously at some point, someones cider was spilt and the fighting started. The result being that my Bidowers were routed and killed.
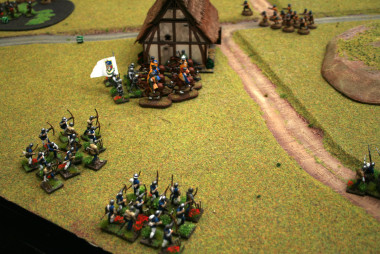
Foot Knights into battle whilst the archers await.

Foot Knights into battle whilst the archers await.

Although penned back on my start line, thing were not going too badly. I was helped by the fact that after a shaky start, my archers were now firing consistently at every turn, inflicting ever mounting casualties on the enemy. The other unit of Mounted Sergeants was destroyed by arrow fire as soon as it came into range, being no match for 24 English archers!  My fire superiority was helped by the Foot Knights, who were standing in range of the enemy crossbows, taking fire every turn but fortunately, their armour held and they shrugged this off. The only real threat now came from the enemy Foot Knights as they were determined to close with my troops. As the archers at last saw off a Crossbow unit, they turned and fired at the Foot knights, slowing them and reducing them to half strength, even killing the leader but unable to prevent combat with my Foot Knights.
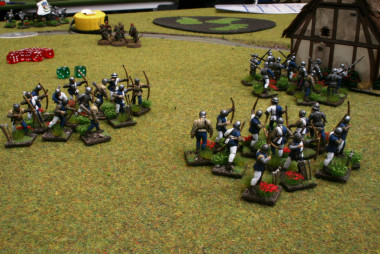
The enemy Bidowers in the back ground are feeling a bit exposed!

The enemy Bidowers in the back ground are feeling a bit exposed!

In the brutal fight that followed, my Foot knights prevailed but only my Leader, Kenneth Hotspur was left standing. He was then struck down by a final shot from the last crossbow unit – the cry went up ‘They’ve killed Kenny!’. Despite this, the archers avenged his death by forcing the last Crossbow unit to rout. Only the enemy Bidowers were left on the field and given their precarious position in the open in front of the Archers, they threw down their weapons and surrendered. Victory to House Wagner!

Battle 2 – The Messenger

Before the start of the second battle, we were given the chance to spend some of our victory points ( represented by Chocolate coins!) on small upgrades for our armies. I decide to speculate to accumulate and purchase an extra unit of Bidowers. I think these are very underrated by some players and can be quite a nuisance if deployed carefully. I had already noticed that there was plenty of cover on the tables and Bidowers and cover go well together!

The Messenger scenario involves escorting a messenger from one end of the table to the other, with the opposing player doing his best to stop you. Deployment is in opposing corners of one end of the table, with the player trying to stop the messenger allowed to deploy 6 points of his army at the far end of the table ready to meet the messenger! A further complication is that there is insufficient room in the deployment zones to get all of your army on the table, so some units start off table.

My opponent for this game was Sir Phillip, who had the following army: 1 unit of mounted Knights; 1 unit of Mounted Sergeants; 1 Unit of Mounted Sergeants with Crossbows, 1 Unit of Crossbows with Pavasis. A very mobile army but despite this, I decided to elect to be the attacker and to try and stop the messenger. I had a cunning plan…

The messenger had to be attached to the Mounted Knights, and Phillip deployed them and his two other mounted units on the table ready for the off! I sent one unit of Bidowers to the far end of the table along with my trusty foot sergeants. As the game got underway, the mounted units of Sir Phillip moved off and started their journey down the table initially leaving my foot sloggers behind. However, this soon changed as my Biddowers took up position in the Woods near to the exit point and my Foot sergeants formed schiltron, blocking the exit. As Sir Phillip desperately tried to bring up support (His Crossbowmen repeatedly failed their activation roll and stayed off table), my Foot knights found their ‘running shoes’ and had almost reached the far end of the table in support of my detached units.
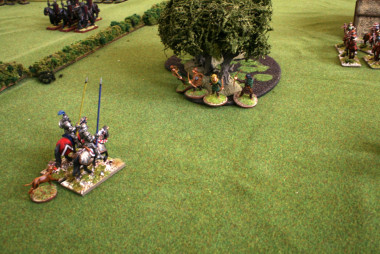
You mean we have to charge those Bidowers again?

You mean we have to charge those Bidowers again?

It was now that my cunning plan began to work. Sir Phillips mounted knights had to pass within 10 inches of the Bidowers in the woods. This would force the knight to make a ‘wild charge’ at the Bidowers. At this stage I was hoping merely to delay the messenger but my Biddowers in cover actually out diced the Mounted knights (the bonuses gained by the bidowers in cover put them on even terms with the mounted knights) causing them two casualties and making them fall back. Sir Phillip was not happy! As the Bidowers had held their nerve, they were able to fire on the mounted Knights in their turn, causing yet another casualty. Enraged, the Knights had to charge back into the woods again, only now they were down to half dice facing a group of confident Bidowers rolling twice as many dice in combat on even terms.

Once again the Knights were beaten back losing another casualty and once again, the bidowers stood firm in their woodland haven and poured arrow fire and scorn onto the Mounted Knights! Of course, whilst this was all going on, my Foot knights had gradually made their way to the scene of all the commotion and were now in striking distance of the messenger. Elsewhere on the table, Sir Phillips mounted sergeants had tried in vain to hold up the march of my archers whilst his crossbow men, having eventually appeared on the table were engaged with my other unit of bidowers ( in cover of course!) and my second unit of archers.

The killing blow was landed by the my Foot Knights, who although somewhat tired from their long march were strong enough to kill the last mounted knight and capture the messenger. Victory to House Wagner!

Battle 3 – the Final Encounter, Double Bloodbath!

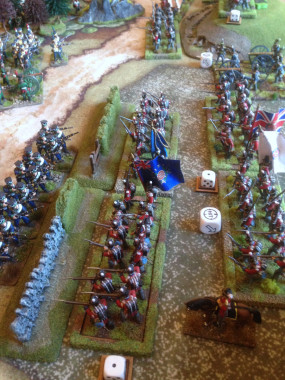
The final battle saw four players fighting a last battle to secure the field for their faction. In theory, units from either player on one side could engage any opposing unit on the other side. In practice, it was a case of first deal with your immediate opposition before sending units to help elsewhere. Of course the real danger would be from missile troops who could take a shot at whatever unit happened to be in range.
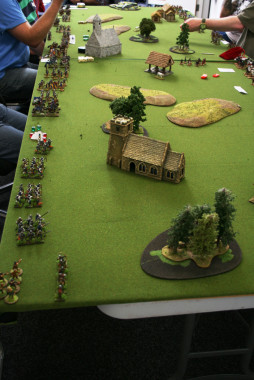
The Final Battle!

The Final Battle!

My immediate opposition was from Sir Ben, fielding an army consisting of 2 units of Fierce Foot, 2 Units of Foot Knights and a unit of archers. I was somewhat wary of the Fierce foot. They are devastating units when charging and do not suffer from being in cover or moving through rough terrain. Despite this I sent my two units of Bidowers out as bait to draw the fierce foot into bow shot where they are very vulnerable.
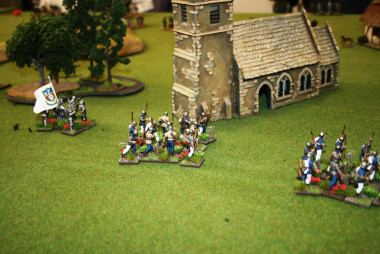
The enemy are out there somewhere.

The enemy are out there somewhere.

The game this time was somewhat stop go for me. I failed a number of activation tests and was barely able to move my army. I watched with increasing trepidation as the Fierce foot bore down on me. However, Sir Ben had allowed his army to become divided and thankfully, just as combat began, his fierce foot were unsupported. Even better, the first unit of Biddowers that he charged managed to skirmish their way out of trouble causing the now not so Fierce Foot to retreat! My archers now decided that they would join the battle and sent flight after flight of arrows into the enemy causing a rout in the enemy ranks, both units of Fierce Foot were destroyed.
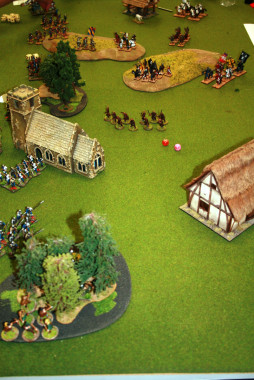
We're not moving - they'll come to us!

We’re not moving – they’ll come to us!


Although victory now looked likely, my army once again refused to move with any urgency and was unable to exploit the carnage caused. Gradually, we moved up the table and every now and then the archers would take a pot shot, wearing the enemy down. Eventually, another unit of Foot Knights were left looking like pin cushions and the opposition archers decided that they had had enough and took to their heals! Victory, albeit in slow motion, once again for House Wagner!

So three battles fought and three battles won was a good return for the day. Despite our good performance, House Wagner did not finish on the winning team or accumulate quite as many victory points as some of the other players at the event. Nevermind, though, we had a fine hoard of chocolate coins and had been fully involved in a superb day. You can read the full account of the day over at the WARGAMES ILLUSTRATED web site.

Should you have the opportunity to attend one the future WI days, I would heartily recommend that you do so. The team at WI are great at creating a friendly atmosphere in which to play the games organised and whilst there is a narrative running through the day, it is not about individual competition but on a team result. Great fun, all in all – now I’m off to eat my chocolate coins!

If you would like to try the Lion Rampant rules they are available in the Arcane Scenery shop. Even better, I’ve put together a little bundle of the rule set with a box of Perrys War of the Roses Infantry and English Foot Knights for just £50, post free, world wide of course! There are more than enough figures for you to build your own retinue. If you would prefer, Mounted knights instead of Foot knights, just add a note to your order and we will swap them over for you – watch out for wild charges though, they can get you into trouble….

LION RAMPANT BUNDLE DEAL – RULES SET plus 2 Perry Plastic boxed sets

A confession.

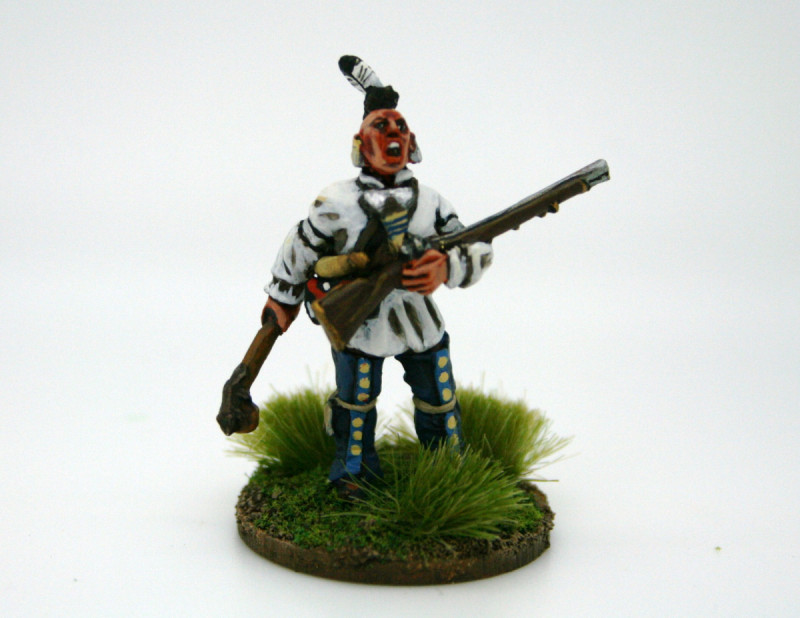
Yes, I need to start this weeks blog with a confession, I’ve been guilty of cowardice in the face of the enemy! But before I explain my sins, an update with what I have achieved in the last week. If you read last weeks blog you will know that I am working my way through some Galloping Major Mohawks Indians. After deciding that it wasn’t practical to batch paint them, I went for the one figure at a time approach. The result is that I have finished one figure – Doh!

The latest Indian to join the war party!

The latest Indian to join the war party!

Not exactly the progress that I was looking for. It seems that by painting one figure in isolation, I seemed to be drawn into correcting the most minor of errors, experimenting with different techniques and generally wasting time to produce a figure that whilst it is marginally better than my usual table top standard, is not going to win any prizes in a painting competition. So another readjustment is needed. Don’t misunderstand, I do want my figures to look as nice as possible but at the rate of one figure a week, it will be October 2016 before my Muskets and Tomahawks war band will be ready for the table…
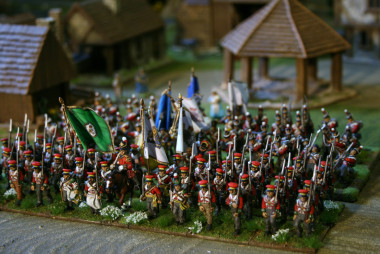
The Latest ladies to join Little Bingham

The Latest ladies to join Little Bingham

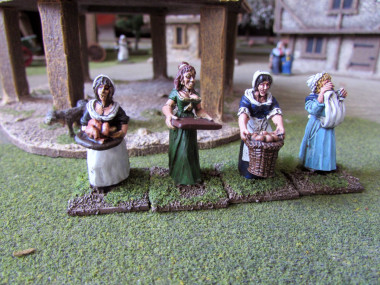
Having said all of that, I have been painting some other bits and pieces. I completed another four civilians for the town of Little Bingham. These are Female civilians from Redoubt Enterprises that I picked up at the Derby Wargames show last year. As this years show is approaching, I thought that I better get them painted. My rule is that if I haven’t painted what I bought at last years show, I wont buy anything at this years show. Well traders, you can relax, I will be open to buy! The ladies were a quick paint job though. Just block painted, coated in Army painter Dark Tone to get the shading, Matt varnished and then the lighter colours re-highlighted. Little Bingham now has a population of 14!
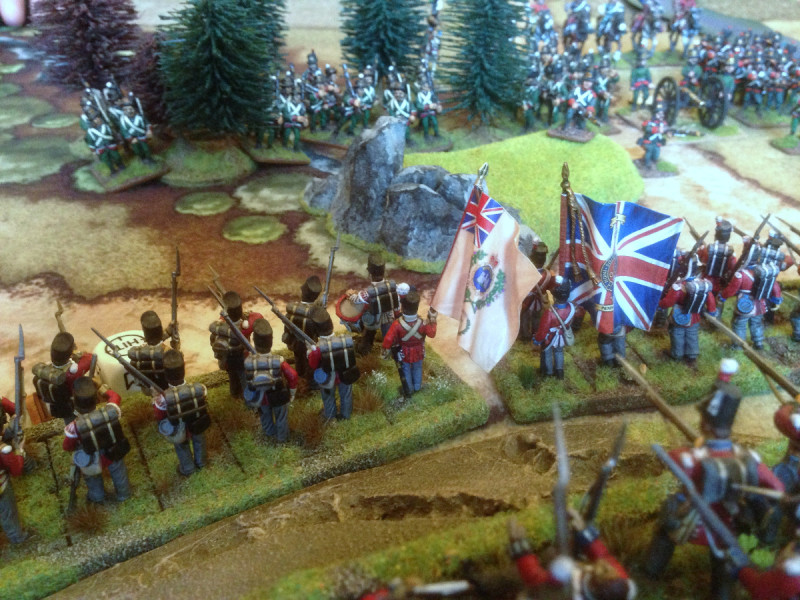
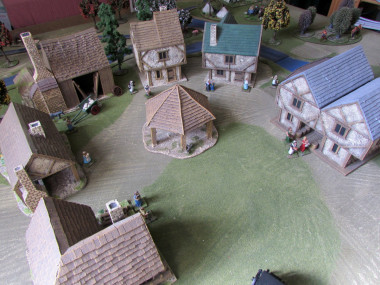
The Market Square in Little Bingham - Not quite as busy as I would like!

The Market Square in Little Bingham – Not quite as busy as I would like!

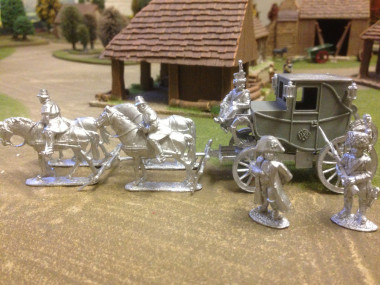
And so to my confession. The other project that I have started is Napoleons Carriage, a really nice model from Warlord Games. When it was first released, I really fancied having a go at making and painting it. Now the observant reader will have spotted that this subject would not really fit in with my desire to have a collection of British Armies and their Allies through the ages! The plan was, however, to make the model with it’s doors open, surrounded by Prussian Hussars, capturing it just after Waterloo! Well it’s one thing to imagine these things and quite another to produce it.

Napoleons Coach assembled.

Napoleons Coach assembled.

The model itself is quite complex but after the pieces have been cleaned up, they do go together nicely. As you can see, the model itself builds into something quite imposing. It was at this stage that I had my wobble. I went to take my scalpel to cut the door and chickened out! I had good excuses – the resin is too delicate, the door frame will be too thin, I’m not sure where to cut it, How was it hinged… and so on. Ah well I thought, I’ll just build it as it is supposed to be. I can still have some Prussian Cavalry halting it. And then I wobbled again. What colour should the coach be? Warlord have both Green and Red versions. What about the interior? How should I paint the horses?

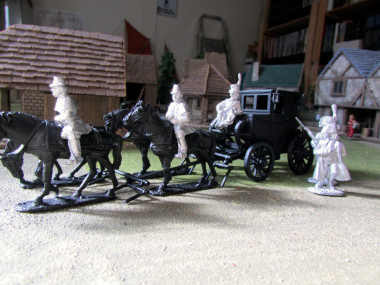
All good questions and all good reasons to pause. So the coach is on the work board awaiting for me to pluck up my courage and get on with it. The truth is there are three things that are really stopping me, all of them in my mind. 1. I may ruin the coach when I cut into it, spoiling the model. 2. I might choose the wrong colours because I didn’t research the subject thoroughly enough and some clever dick will point this out to me. 3. The finished result will not be good enough and wont match the perfect image in my head.

Napoleons Coach under coated - dare I take a scalpel to it?

Napoleons Coach under coated – dare I take a scalpel to it?

Of course, I know the answers to all of these. 1. I can always buy another one or just finish it as a battle damaged version. 2. Does it really matter, I’m not trying to create a museum piece but a talking point for the wargames table. As for clever dicks, I’ve yet to meet one that has painted his own models. 3. That’s always the case but at least I will have tried.

Right! Self talk over, where’s that scalpel!!!

There’s something about a uniform….

I mentioned in a recent blog post that I was having a break from painting my Napoleonic army and I am now concentrating on clearing down my back list of projects. This is really my way of painting all of those odd figures that I have picked up from shows over the past couple of years. To be fair, I am fairly disciplined when I  go to shows and only tend to pick up items that will fit in to my planned collection. I have yet to go off on a complete tangent, tempting though it is!

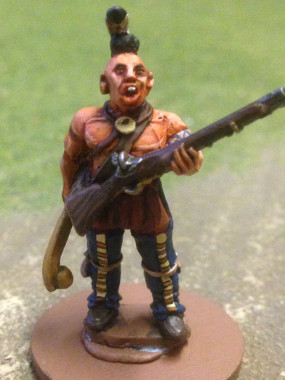
Mohawk Indian Character

Mohawk Indian Character

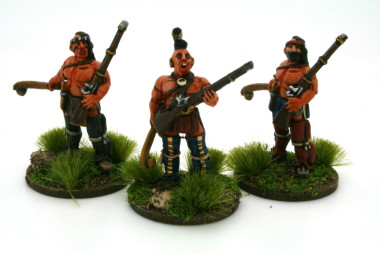
So next on my list of painting subjects were some very nice Indians that I had picked up from ‘The Galloping Major’ at a show at Owthorpe, of all places. ( see my review of the show here). I intend them to be the start of my French – Indian Wars/AWI skirmishing force that I will use in future games of Muskets and Tomahawks. My initial thought was that these would be quick and easy to paint, after all, there was no uniform to worry about. I could paint them in what ever colours I fancied. Well, not quite, it seems. Even Indians have their own style and one Indian tribe will tend to be slightly different to another. I guess it makes sense. If you are a Mohawk Indian, of the Iroquois tribe, you would not want to be mistaken for a Huron Indian, your deadliest enemy.

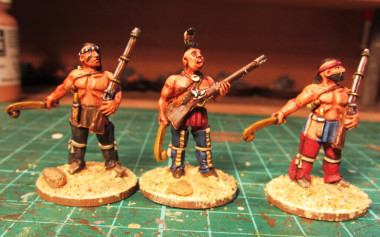
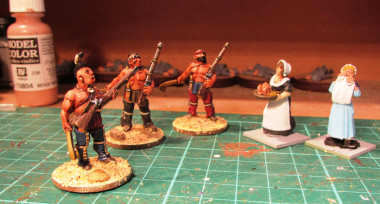
Mohawk with two Huron friends...

Mohawk with two Huron friends…

Fortunately, there is a great painting guide on the Galloping Majors web site to help out, so I had somewhere to start. I had of course chosen Mohawk Indians as my force ( they were allied to the British) but had also acquired a couple of Huron Indians – they were limited edition figures that had been given to me by friends that didn’t need them. Regardless, I decided that they would be part of my force and I would include them in the painting project. It was now that things began to get complicated.

Woodland Indians a bit more at home

Woodland Indians a bit more at home

When you are batch painting a group of troops in uniforms, once you have worked out the colours, it is just a question of working in a logical manner and every figure gets the same colour painted in the same sequence. These Indians weren’t like that. They are all dressed differently and would have been wearing different colours – they wanted to stand out as individuals! So even with just three figures, two of which were identical, I just couldn’t get a painting rhythm going. Sure, the flesh was all the same colour – I used Vallejo Beige red, washed over with a skin coloured wash and highlighted with the beige red again, with  Flat flesh mixed in to provide top highlights. The hair is black. The muskets are painted the same, Flat brown stocks with light brown to give a bit of wood grain effect, Steel gun barrel & lock, brass for the fittings, Beige/Ivory powder horn. But after that, although the colours that I used were similar, they were not the same and they weren’t going on in the same place at the same time if you see what I mean! It has taken me as long to paint three Indians as it would to paint eight Napoleonic Prussians!

Mohawk Character is waiting for his base to be finished!

Mohawk Character is waiting for his base to be finished!

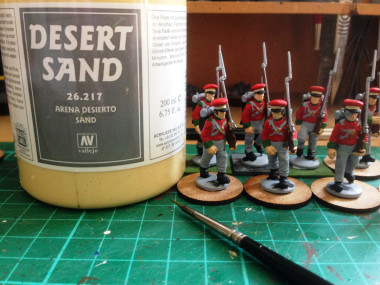
I eventually decided that the best way was to pick a few good colours  and use these. So, Prussian Blue, Light Blue, Burnt red, Leather Brown, Light Brown, Iraqi Sand, German Camouflage Beige all made it on the the work board and I finished each character individually. The first three Indians are more or less ready for the basing process. As you can see I have started, with my latest preferred basing method. Vallejo Desert Sand paste spread over the base, the figure pushed into this and then a sprinkle of real sand as I wanted a bit of a rough texture for the bases – I’ve also added a ‘rock’ or two. I now need to paint these and add some grass & tufts.

I’ve certainly learnt a lot whilst painting these three characters and there is another six to go! Rather than trying to batch paint them, I think I’ll do them one at a time, it might be faster and will save me faffing about trying to figure out if I can use the same colour more than once!

An offer of roast Chicken fails to impress the Indians!

An offer of roast chicken fails to impress the Indians!


STOP PRESS!

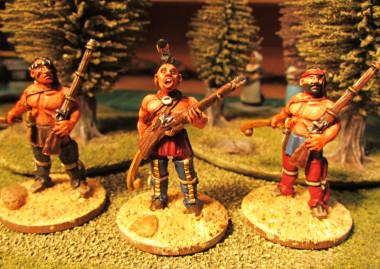
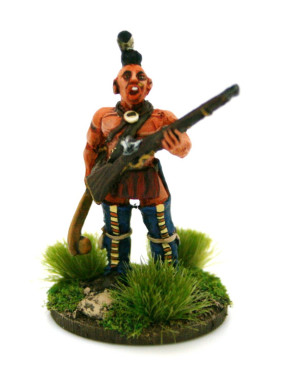
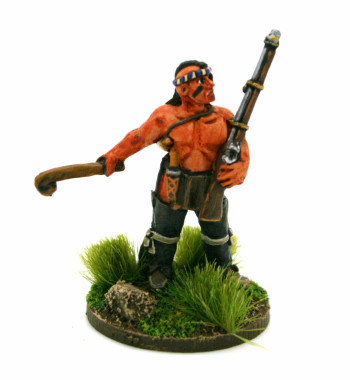
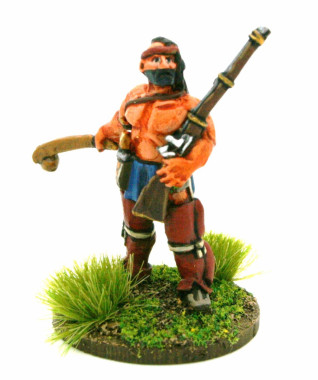
I managed to get the basing done, a few little corrections and took a few pictures using a light box. Here are the results. I’m a bit happier with these now. They are ready to endevour to persevere!

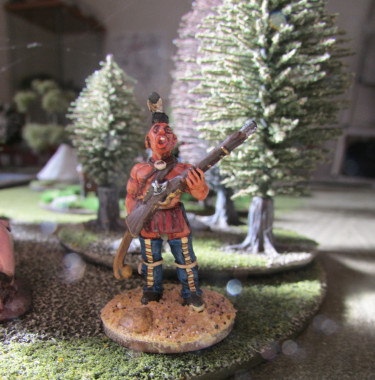
Mohawk Character, AKA Bubba!

Mohawk Character, AKA Bubba!

Huron Warior 1

Huron Warior 1

Huron Warrior 2

Huron Warrior 2

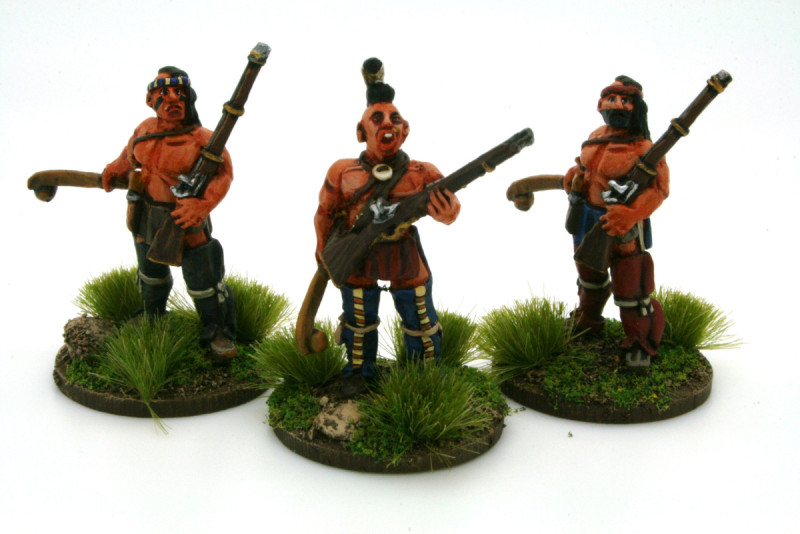
Three indians

Three indians


Wheel Wagon, Pig and Partizan

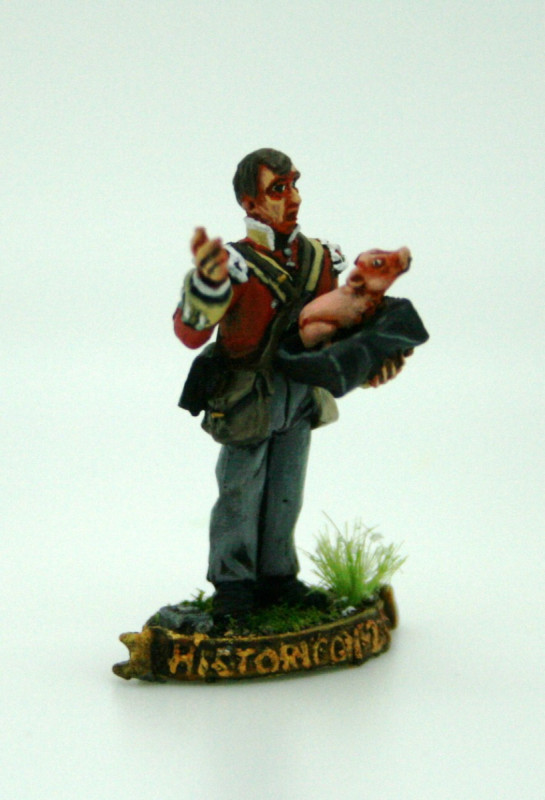
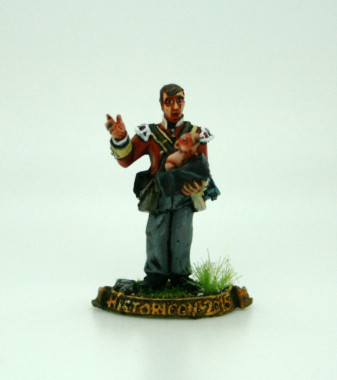
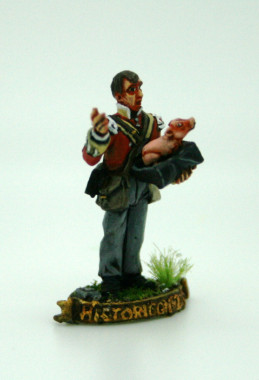
It’s been a bit of a hotch potch week for painting. I’ve managed to finish a few bits and pieces. First of all, I was very kindly given one of the Historicon figures by those very nice guys at Warlord Games. The figure is based on a scene from the film ‘Waterloo’ when a soldier of the 1stBattalion 27th (Inniskilling) Regiment of Foot is caught stealing a pig by none other than Wellington himself. You can see the clip here on youtube. Rather than add the figure to my ‘lead mountain’ I got on with him straight away, using the superb painted example by Andrés Amiàn on the warlord site as a guide. I had intended to rebase him and perhaps add a figure of Wellington but in the event, I finished him as intended. I can always revisit this option but for now he is done and in the cabinet!

Historicon Figure

Historicon Figure

Defending his position!

Defending a hopeless position


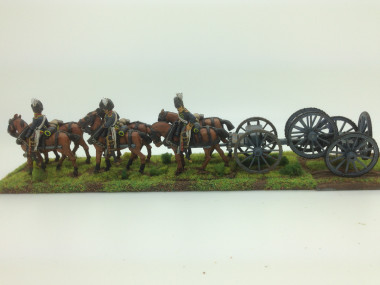
The next project that I managed to complete ( well nearly) is my Napoleonic Wheel wagon. Based on a drawing from C E Franklins superb book on British Napoleonic Field artillery, it is now almost ready to take the field. The sharp eyed will see that I just need to make some wheel hubs to finish the wagon. I couldn’t find my leather punch that I use to make the wheel caps with, so rather than wait, I painted it as it was and I’ll add them later. I am writing a step by step article on how to produce the wagon and hope that it will be included in a future issue of Wargames Illustrated. If not, you will read all about it here!

Wheel wagon and Limber

Wheel Wagon and Limber

Incidentally, if you, like me are interested in the various support wagons used in the British Napoleonic army, you might find these two previous blog articles of interest:

Wagons Roll!

Water Wagon

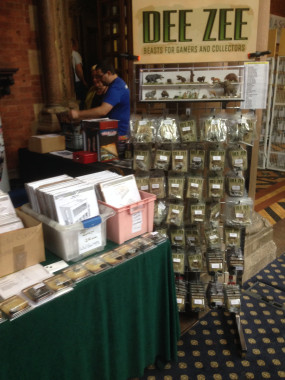
Thanks to a very last minute invite, I was able to attend the Partizan Show at Kelham Hall in Newark. As you can see, I had a small stand of DeeZee Miniatures, Sarissa Precision buildings and Lucid Eye figures. This is the last time that Partizan will be held at Kelham Hall, the venue is moving to a much bigger and brighter venue at the Newark Show ground.

The Arcane Scenery Stand at Partizan

The Arcane Scenery Stand at Partizan

I enjoyed the show and although I was busy on my little stand – I was sharing with Trent Miniatures and squatting in some spare space between them and Wargames Illustrated – I did manage to have a look around. I wont review the show here, I would refer you to the Wargames Illustrated site for an excellent round up. The real drama for me was that during the set up, I managed to drop a case with all my painted figures…Aargh! So the last couple of evenings have been spent, retouching all of the chips and breakages that occured. Next weeks blog might not have much in the way of painting progress to report….

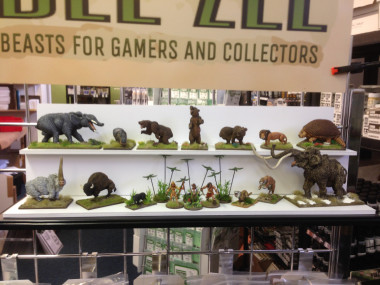
The DeeZee display before it was dropped....

The DeeZee display before it was dropped….

The National Civil War Museum Newark

A rainy bank holiday Monday should have been an excuse to get on with some painting and modelling but it seemed a shame to stay at home. So I persuaded Julie, my wife, that a trip down the road to Newark to do some shopping and call into the new National Civil War Museum would be a good idea.

The museum was a bit of a disapointment – perhaps I was expecting too much. First of all though, it’s a great idea that such a place should be built and perhaps overtime it really will grow into a tourist attraction that Newark can be proud of. The building has been beautifully refitted – it’s a bit telling that having visited, I have no idea what it was before it became a museum other than at some point in the long distant past it was a school.

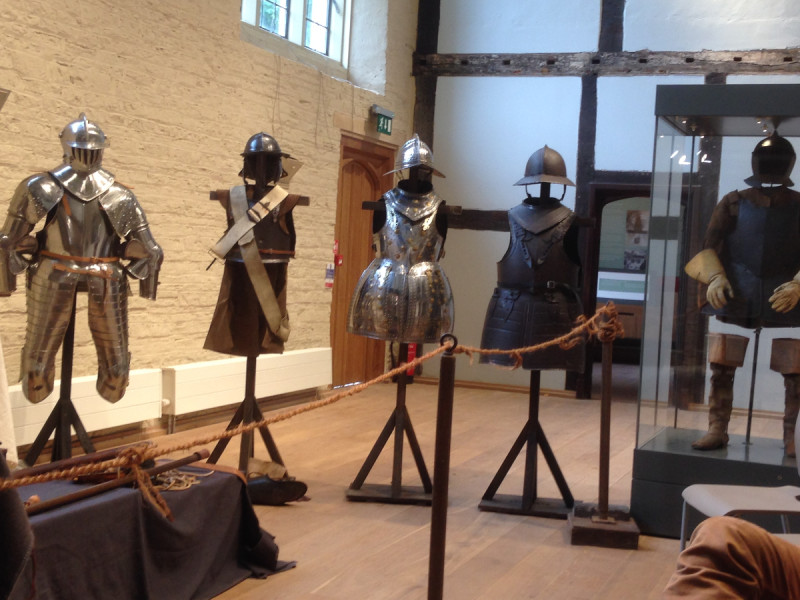
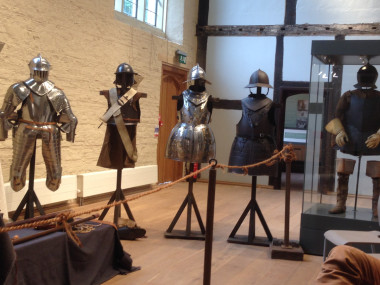
Costumes from the civil war

Costumes from the civil war

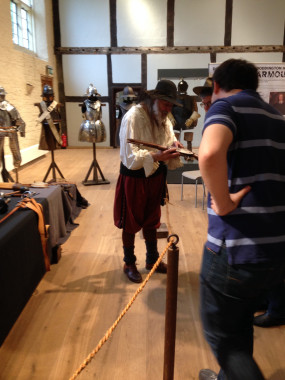
The staff get 10 out of 10 for enthusiasm and courtesy, they certainly were doing their best to ensure that visitors made the most of the visit. The final highlight was the presentation given by a Civil War re-enactor who gave a very entertaining and enlightening lecture on the roles of the Infantryman & Cavalryman during the civil war. The talk was illustrated with replica weapons, armour and clothing and delivered with knowledge, enthusiasm and humour.

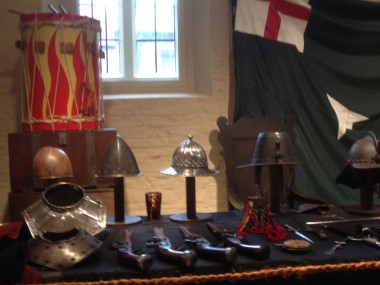
Weapons Display

Weapons Display

The museum itself was disappointing. There was one room devoted to the Civil War with the main focus being the seige of Newark. Attached to this room is a small cinema with a rolling presentation. There were two other rooms with exhibits related to the town of Newark. Upstairs, there were three or so rooms with a temporary display of photographs of recent civil wars around the world. Some of the photographs were quite graphic and at odds with the ‘child friendly’ ethos of the rest of the museum. The final room that we discovered (I use that word deliberately – the directional signage is not great) was an empty room that was once a dormitory for a school and the sole exhibits were the ancient graffiti left by the students.

lecture

The Museum has been lottery funded and most of that money seems to have been spent on the building and the technical gadgets that modern museums love these days. I’ve hinted that the museum was child friendly and there is a good ‘dressing up’ box so the kids can pretend to be soldiers of the time and there is a selection of interactive video displays. As to the displays themselves, it’s a bit like trying to solve a mystery by looking for the clues. The labeling is all over the place and difficult to follow, the logical sequence of the displays escaped me and the general layout seemed counter intuitive with no narrative. I think that it would be quite possible to visit the museum with no knowledge of the Civil war and come away with no knowledge of the Civil war other than it happened…

The cinema presentation was just as confusing. The films were of high quality and well acted but without context. One concerned the execution of Francis Hacker, the other the relationship between Charles 1 and Prince Rupert. If you didn’t know who they were before the films, I’m not sure if you would afterwards.

The final attraction is the augmented reality phone app that lets you follow the civil war trail around Newark. I didn’t try it as it was a rainy day, so I cant really comment as to how good this is. Newark Town and it’s surroundings has a fantastic history and heritage. I feel that the museum itself has missed the opportunity to tell the story and explain it all.

I guess my view is coloured by my hobby and as a war gamer with a keen interest in history, I found the museum disapointing and for it to claim to be the National Civil War museum is a bit of a stretch. My advice would be to save yourself the £7.00 entrance fee and go to the tourist information office and pick up a town trail leaflet and visit Newark Castle ( entrance free), go to the Queens Sconce (entrance free), go to the Polish Cemetery (entrance free) and spend your £7.00 in one of the historic coffee shops!


The Legend of the Hartlepool Monkey!

Arrest that French Spy!

Arrest that French Spy!

I’ve gone off on a bit of a tangent since finishing my last Battalion. I mentioned that I fancied a change and whilst sorting through my ‘lead mountain’ I came across a limited edition figure of a Pirate Monkey, issued by North Star. It instantly reminded me of the Tale of the Hartlepool Monkey.  I wondered why the Hartlepool Town football supporters were known as the ‘Monkey Hangers’. Every Saturday on Soccer a.m., Tim Lovejoy would refer to the Monkey Hangers and laugh, so I had to find out what the joke was.

The story goes, that back in the Napoleonic Wars, a french ship was wrecked off the coast of Hartlepool. The only survivor was a monkey, who was dressed in french uniform to amuse the crew. The locals who found the monkey, had neither seen a monkey or a french man before, and decided to hold a trial, accusing the monkey of spying. Unfortunately for the monkey, he was unable to answer the questions put to him and was indeed found guilty of being a french spy. The poor monkey was duly sentenced to death and hung on the beach!

There are two other versions of the story. In one of the alternative versions, the poor unfortunate that was caught and hung was just a poor cabin boy, or ‘powder monkey’. The most plausible (for me)  was that the whole episode was based on a comic song from the 18th century that was simply poking fun at the locals in Hartlepool. You can read the official versions on  wikipedia and see the song lyrics for yourself!

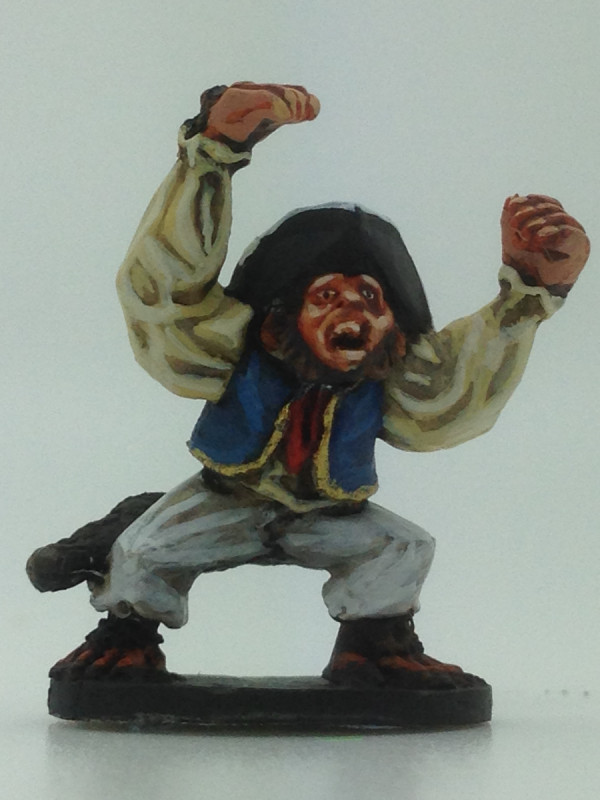
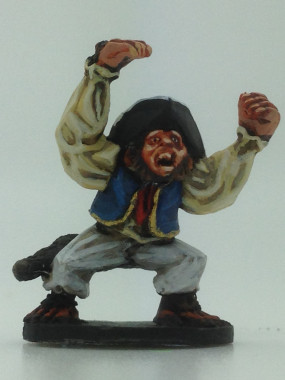
Hartlepool Monkey!

Hartlepool Monkey!

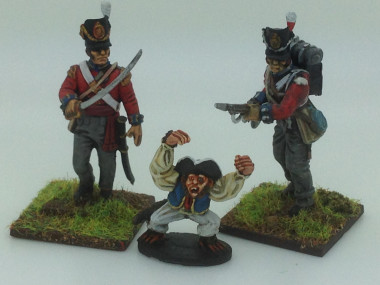
So I decided to paint my own version of the Harlepool Monkey to use as a French spy in my wargames! It would amuse me to be able to poke fun at my French opponents and come to that, some of my friends from the North east – little things please little minds and all that… The plan is to create a little vignette, with two of Hartlepools’ finest, arresting the monkey. You will get the idea from the picture at the top of the page.

I painted the monkey using Vallejo paints as usual, the main colours being Beige Red (flesh), Beige ( Shirt), Off White (Trousers), Prussian Blue (waistcoat), Gold (trim) Black Brown ( fur). I use these little projects as a chance to try my hand at ‘proper painting’ rather than using the army painter dip method that is so useful for churning out Battalions! So, I’ve highlighted with lighter shades of the base colours and used a couple of thin washes to add shadow. It’s just the basing to do – I’ll keep it quite simple – perhaps just a sandy base! I haven’t yet decided whether to use the figures that are in the picture (a couple of spares from my earlier attempts at building battalions) or remodel some new ones. For now, I think I’ll go with what I’ve got, after all. it’s just a bit of fun.

A Clear Work Bench!

Hanoverians 3

Osterode Battalion Hanoverian Landwehr

Well, not quite, but my final Battalion of Hanoverian Landwehr, the Osterode Battalion are finished, based and ready to take the field. As you can see, I’ve used my standard basing, four figures to a 40mm square rendra base. The base is coated in Vallejo sandy paste and then the figures are just placed into the paste. I use a sculpting tool to bring the paste up and over the actual figure bases to blend them all in. Once the paste is dry it seems to be strong enough to hold the figures in place. From there, the bases get a coat of Vallejo Chocolate brown, highlighted and dry brushed with Flat earth and then Iraqi Sand.

The final touch is to add some fine turf scatter and then a few grass tufts and of course, flowers! There was one other little addition that I made to the basing. The unit consists of Warlord Hanoverian infantry but I have used a command group from the Perry’s metal range. The Perry’s figures looked a bit on the short side compared to the Warlord men, so I added a thin piece of plasticard under the Perry Command figures to raise them up a bit. They now blend in quite nicely.

I’ve decided to take a break from churning out units for my Napoleonic army and just focus on a few of the random projects that have been lurking on the to do list.

Spare Wheel Carriage

Spare Wheel Carriage

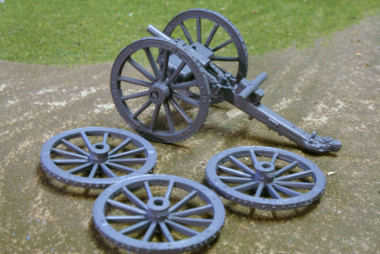
The first of these projects is a spare wheel wagon for my artillery park. Ok, so it’s still a Napoleonic subject but it involves a bit of a conversion using a Trent Miniatures gun carriage and a pack of their British wheels. The picture above shows progress so far and if I like the way it turns out, I’ll provide a full blog post with the modelling details.

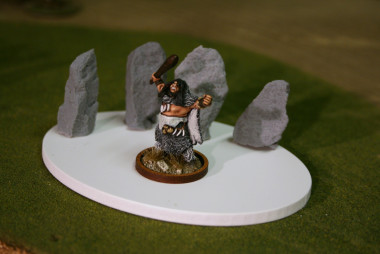
Next up, and totally different, I’ve been playing with the new Diorama bases and Standing stones from the DeeZee range and I’m looking at using one or more of the Lucid Eye Neanderthals to make a small diorama as a display piece. Here is the test shot of the layout so far.

base 2

Lucid Eye Diorama

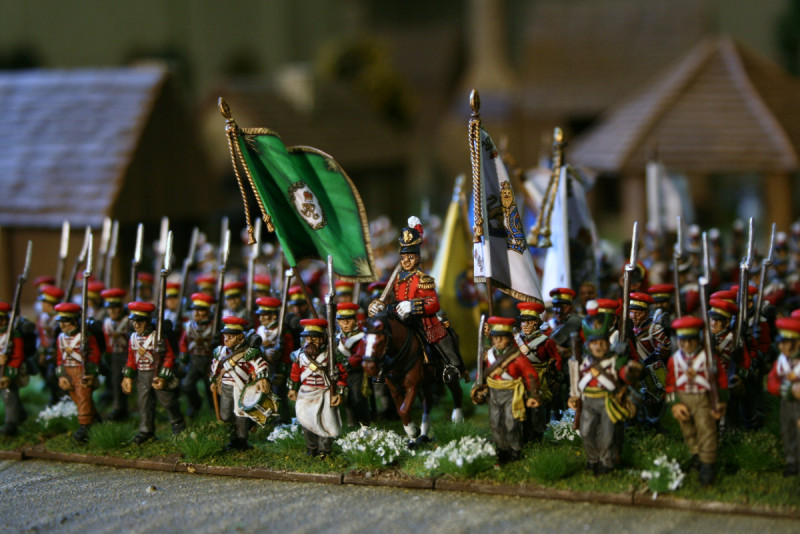
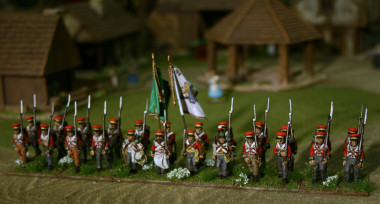
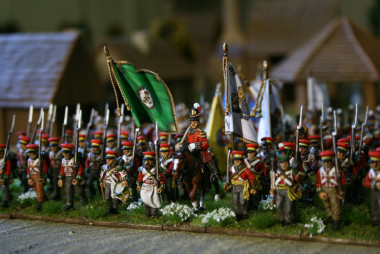
So that’s it for this week. They say that a change is as good as a rest so I’ll finish with a couple of pictures of the Hanoverian Brigade in all it’s glory! There are a total of 96 figures representing the 4th Hanoverian brigade at Waterloo, commanded by Colonel C. Best and comprising of the Verden Landwehr, Luneberg Landwehr, Munden Landwehr and Osterode Landwehr.

hanvoverian brigade close up - Command Figures

Hanoverian brigade close up – Command Figures

They were initially deployed left of centre at Waterloo under the command of Picton as part of the British 5th Division and presumably were in action or at the very least in close reserve as D’Erlons attack was made. As the day wore on, they were joined by the British 10th Brigade and placed under the command of Colonel Lambert as part of the 6th British Infantry Division – I think guarding the crossroads and the right from La Haye Saint towards Papelotte.

Hanoverian Brigade advances out of Little Bingham!

Hanoverian Brigade advances out of Little Bingham!


Battle Report – Polish/Italians Vs British Napoleonics….

You can learn a lot by looking at photographs, they give you another perspective and a chance to see detail that you might otherwise overlook. My last two blog articles have been quite instructive in this respect. First of all, it’s clear from the photograph of me painting the house that I need to lose a few pounds. From my usual perspective I had always thought that I looked quite slim…..looking upwards, that clearly isn’t the case….

That aside, I also reviewed the Hanoverians and it’s clear that they would benefit from an ink wash over the bayonets & a highlight with silver just to bring out the detail at the top of the muskets – A job that will take about 10 minutes – more on that next week.

The final insight and the real point of this observation was last weeks battle report and just how good the battle was, in part because of the scenery that we were using. I had actually commented that good scenery wasn’t really necessary for Napoleonics as you needed plenty of space for your troops. Well looking back at the pictures made me question this and at this weeks club battle, we put a bit more effort into both the scenery and the scenario itself. The result was a most enjoyable battle. We used one of the new ‘Cigar box’ battle mats that has a scenic design printed onto it. Although a bit expensive, there is no doubt that the result is much better than playing on just a plain battle mat. Some of the scenery that we used is a bit tired and battered but by adding a bit more than usual, the table was broken up and a few problems were added for the ‘generals’ to solve.

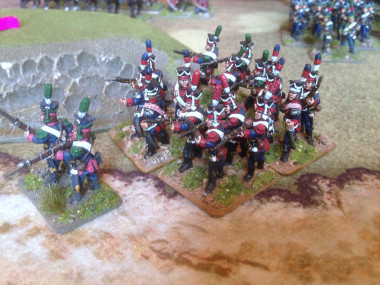
Italians & Polish take up position on their new battlefield!

Italians & Polish take up position on their new battlefield!

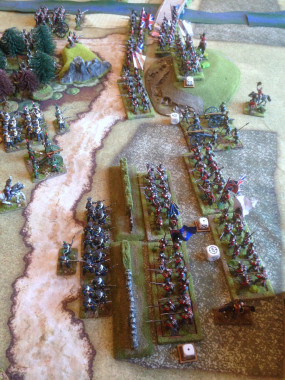
The actual game was an entirely fictitious affair involving a joint Italian/Polish force (Duncan) taking on a British force (Steve). The objectives being to secure one end of a bridge and capture the two hills dominating the approaches. Deployment was carried out simultaneously, without too much regard for each other, although the objectives became the focus of the main Infantry forces, with the cavalry deployed facing each other out on the far flanks. The British won the initiative and ordered an advance to secure the objectives. Unfortunately, the first roll of the evening produced a blunder, leaving the largest British Infantry brigade out of position, hard against the river in column of battalions.

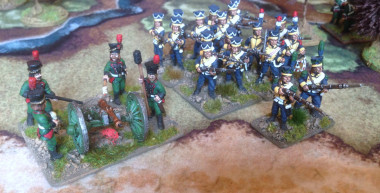
Polish Artillery supported by infantry

Polish Artillery supported by infantry

Polish advance in column - figure from the Trent miniatures range

Polish advance in column – figures from the Trent miniatures range

The opposition, taking full advantage of both the confusion in the British ranks and the terrain, moved forward at a more measured rate forming a cohesive line as can be seen above. If the British Infantry were somewhat slow to respond, the cavalry ( two heavy regts, two lights) did as they were ordered and advanced to threaten the Polish Flank. The response from the Polish/Italian force was immediate and a fierce cavalry battle ensued. The action was so ferocious that I didn’t have time to take a photograph! The result was a victory for the opposition. Although they lost one heavy cavalry regiment and two horse artillery guns, the British lost a whole brigade of heavy cavalry and a regiment of light cavalry, leaving the right flank somewhat exposed.

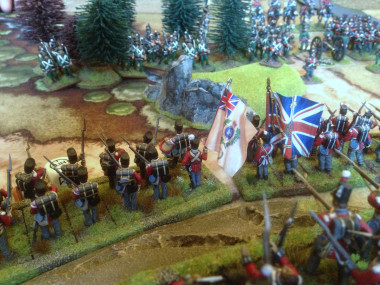
British hold the line!

British hold the line!

Despite the set back on the right flank the British infantry held the Italians in the woods, firmly anchoring the left flank. The Polish infantry, encouraged by the success of their cavalry, advanced in the centre to capture the road.

Poles capture the road and take position behind the hedgerow.

Poles capture the road and take position behind the hedgerow.

This move was in turn, matched by the British infantry who immediately engaged the forward elements of the Polish advance with a superior force of infantry.

British advance to drive the Poles back

British advance to drive the Poles back

The initial British musketry was somewhat ineffective, and despite the overwhelming odds the Poles held on long enough for reinforcements to arrive.

Polish reinforcements arrive.

Polish reinforcements arrive.

With a fierce battle raging for control of the centre and the Polish/Italian Cavalry threatening the right flank, held only by a solitary regiment of  British Hussars, the Italians consolidated their position in the woods by the bridge on the left flank, threatening to take yet another objective.

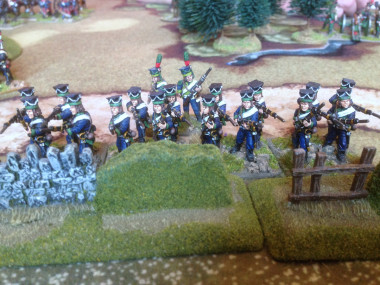
Italians hold their ground in defensive position at the wood

Italians hold their ground in defensive position at the wood

The British response was again to attempt to drive the Italians back with superior musketry. Volley after volley was poured on the Italians but their clever use of the cover and terrain meant that the British were unable to inflict the casualties required.

British Musketry attempts to remove Italians

British Musketry attempts to remove the Italians

As the infantry faced off against each other, the casualties began to mount! Virtual stalemate was the result on the left at the bridge but in the centre the British were able use fresh battalions and it was the Polish that were begining to waver.

Casualties mount!

Casualties mount!

At last the Polish Battalions broke under the constant volleys of the British and the whole brigade started to retreat. The centre belonged to the British!

Charged in the flank!

Charged in the flank!

This victory was somewhat short lived. The Italian Cavalry had by now brushed aside the last British Hussar regiment and charged into the flank of the British line! After a brisk engagement, despite the loss of an infantry battalion, the cavalry were driven off and finally the Polish were sent on their way. The centre did now belong to the British.

The Poles repelled!

The Poles repelled!

If the British had won the war of attrition in the centre, things were not going so well at the bridge on the left Flank. In an attempt to bring their superior Fire power to bear, the British had advanced to close range of the Italians and their solitary artillery piece. Initially, there was some success as the British destroyed an Italian column. That success was once again double edged, as it made space for yet another Italian Cavalry attack!

The attack reaches a critical point!

The attack reaches a critical point!

With the lead British battalion pushed into square under the guns of the Italians and casualties mounting in the supporting British battalions, the Brigade began to run out of steam – and men! The next round of Italian Musketry and cannon fire inflicted sufficient casualties to shake the brigade! With both of the British Cavalry brigades broken and now the largest infantry brigade in retreat, this meant that the British Army was forced to withdraw. The field was left to the victorious Italians troops and their courageous cavalry!

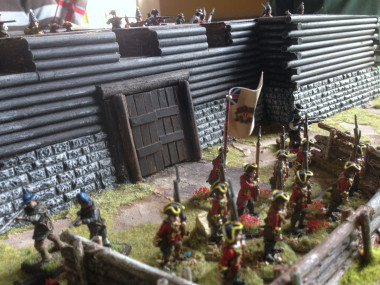
Muskets and Tomahawks – take the Fort!

Defend the Fort!

Defend the Fort!

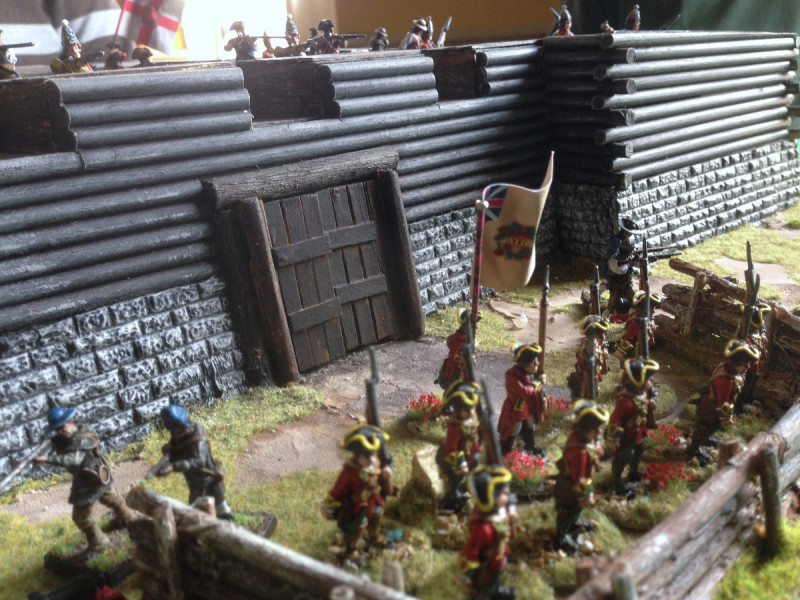
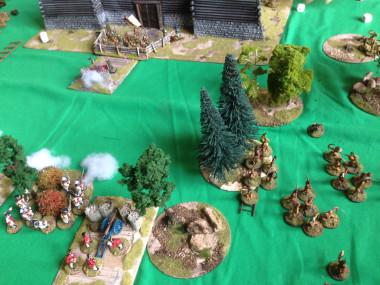
Most of our club games are played on a basic games table with the minimum of scenery. When you are playing Napoleonics, it makes sense to leave room for maneuver. However, Muskets and Tomahawks is a skirmish game that looks and plays better with more scenery and we are very lucky indeed to have John, who has a superb collection of scenery made for the job. In this weeks game, John excelled himself by bringing a beautifully made fort. The scenario was simple enough. The British had to defend the fort and prevent the French Regulars and Indians from capturing it.

To add a bit of spice, the British were able to send a runner from the fort on the turn of a special card. The runner would be opposed by two French Irregulars and if the runner won the combat, it would trigger a reinforcement column to march to relieve the Fort. Just to add to the excitement, after the first failed attempt, the next runner would receive one shot of covering fire from the fort. If it all sounds a bit familiar, it’s true to say that we did have the ‘Last of the Mohicans’ in mind when we added this extra!

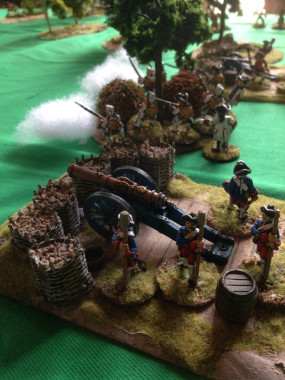
French Artillery

French Artillery

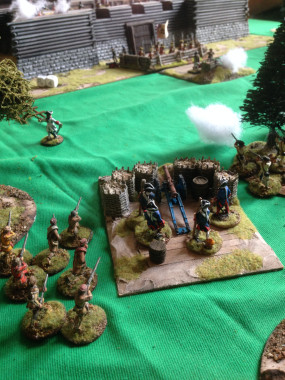
To start the game the French and Indian forces were set up just outside the perimeter of the fort and the British Forces, in the main, were safely inside the fort. However, Pete, the British player, had chosen to keep one unit of  Rangers outside the fort to infiltrate the flanks of the attacking French. In addition, just outside the gate of the fort, a barricade was protecting the main gate, so Pete had stationed three artillery pieces here along with a unit of regulars to keep the French at bay.

open fire!

open fire!

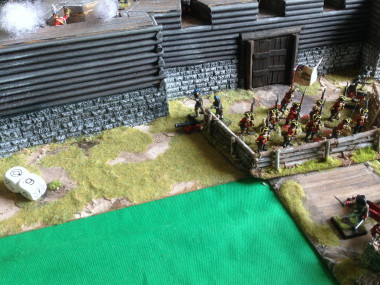
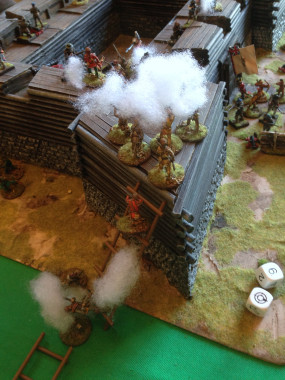
The game started with an diversionary attack by a unit of french regulars, supported by the french militia. This was met by a massive artillery bombardment as well as volley fire and grenades from the fort ramparts! The first French unit was wiped out just leaving an officer to shout encouragement to the next unit to leave the cover of the woods and pick up the siege ladder! The Militia also fell back somewhat discouraged, leaving more than a few of their colleagues wounded at the walls of the fort along with yet another discarded siege ladder.

A brave French Officer encourages the next wave!

A brave French Officer encourages the next wave!

The British seemed immovable and with their vast superiority in fire power it seemed impossible that the fort could be captured. To add to the French woes, the besieging artillery was largely ineffective, causing no casualties or damage and on the second attempt, the fort runner had fought his way through the French encirclement and British reinforcements were on the way.

Despite the apparent British Superiority in fire power, the Indians had taken advantage of the diversion on the left of the fort and were sneakily making their way to the walls. Using the cover available, they had massed just close enough to the fort to launch a mass attack on both the walls and the forward barricade. At the same time, the French musketry had finally found it’s range and the gunners behind the barricade were struck down leaving this position vulnerable to attack.

The Indians carefully make their way forward under the cover of the French Attack.

The Indians carefully make their way forward under the cover of the French Attack.

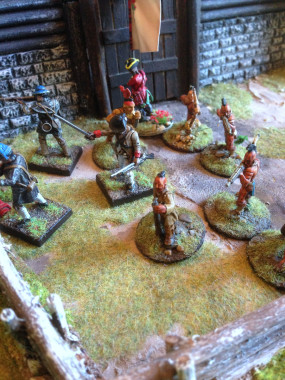
With the Indians threatening the right of the fort and the British Artillery frantically trying to reload, the French once again launched an assault, this time the irregulars managed to pick up a discarded ladder and began to climb the walls, fighting their way into the fort. Seeing their moment, the Indians surged forwards and catching the British facing the wrong way, massacred the units behind the barricade! The gate was now in Indian hands!

Indians take the gate!

Indians take the gate!

This was the turning point! With the Indians trying to force the gate, the French assault on the walls continued pushing the British defenders back into the fort. This allowed the Indians to force a second breach of the walls and a torrent of angry Redskins and French besiegers poured into the fort. As if to rub salt into the British wounds, an attempt to fire the fort mortar at short range resulted in the shell going straight up and landing back down on the mortar itself, killing all of the crew….The British were forced to strike their colours before the much needed reinforcements could arrive.

The French Gain the Battlements!

The French Gain the Battlements!

So victory for the French – Indian alliance! A most enjoyable game made all the better for the superb scenery. If you haven’t tried Muskets and Tomahawks, I’m very happy to recommend it as a very enjoyable skirmish game and a good excuse to start collecting figures form the French Indian wars and also the American War of Independence.

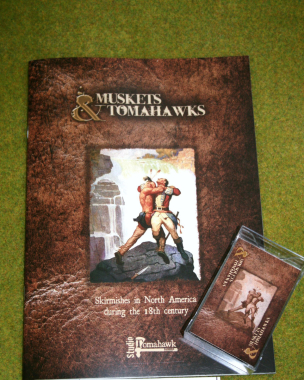
muskets & tomahawks from Studio Tomahawk.

muskets & tomahawks from Studio Tomahawk.


Rain Starts Play!

2015-07-25 12.10.45

I have been doing quite a bit of painting this last week. Unfortunately, it was with a four inch brush and a can of Dulux Weather Shield. As you can see, I have been up a ladder, painting the exterior of the house, so the important job of adding to my Napoleonic Army was put on hold. Fortunately, that all changed on Sunday, when the weather turned and the rain came down all day. No doubt, many people were dismayed but not me! It gave me a break from the chores and a chance to get on with the last regiment of Hanoverian Landwehr, the Osterode Battalion.

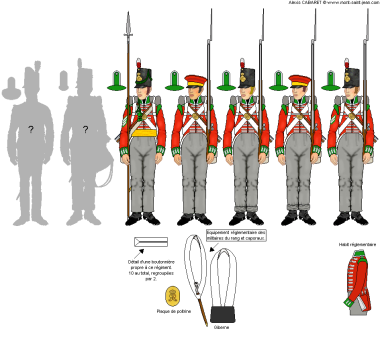
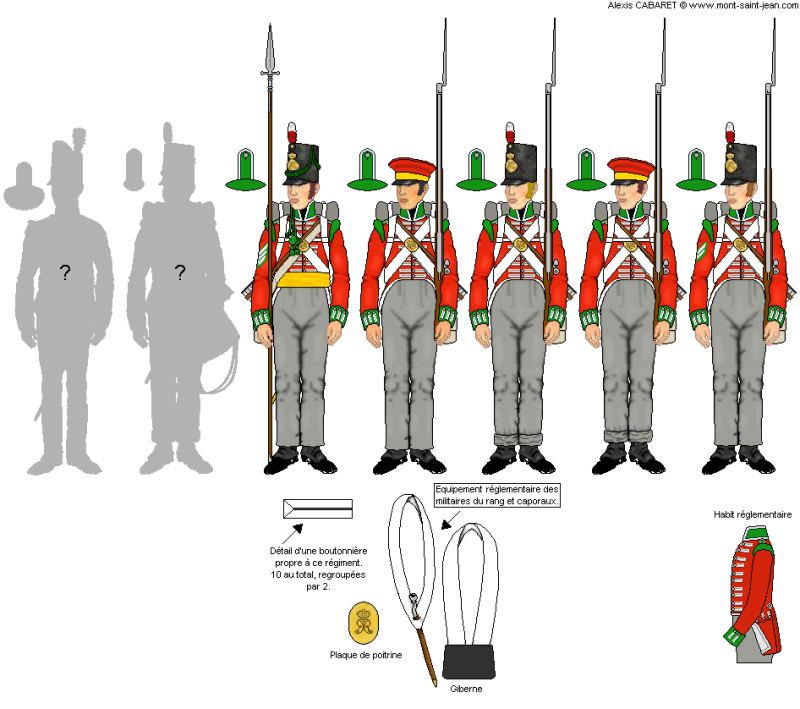
Hanoverian Landwehr Osterode painting guide from Mont St Jean

Hanoverian Landwehr Osterode painting guide from Mont St Jean

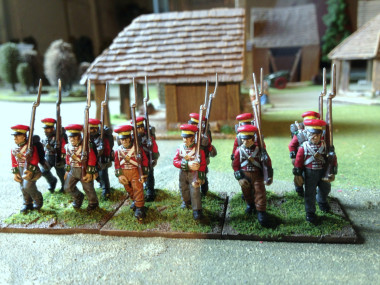
As you can see form the pictures below, the first 12 troops are done which is half the regiment. I followed the colour scheme on Mont St Jean, which may be incorrect but as I said in my last post, the chance to paint a slightly different looking unit was too good to miss.

Hanoverian Osterode Landwehr

Hanoverian Osterode Landwehr

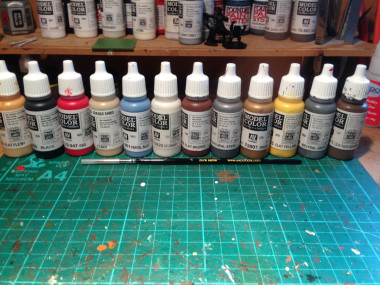
The colours that I used are shown in the picture below. I followed my usual procedure of block painting everything and then used Army Painter Dark Tone to provide the shading.  Once the dark Tone had dried for 24 hours, I used the Army Painter Anti shine to matt the figures down. I then repainted some of the lighter colours to give a better highlight. So the red, Yellow, white, green and metallics were all touched up. This last stage is not really necessary but does help the brighter colours to show up on the wargames table.

Vallejo Model Colour

Vallejo Model Colour

The basing scheme was my usual method of Vallejo Sandy Paste, over painted with Chocolate brown, highlighted with Iraqi Sand for the ground work. I’ve added the basic green scatter but will also add some tufts & flowers and static grass for a bit of interest once the whole battalion is complete.  With another 6 troops and the officers and ensigns still to paint, it will be at least another week before the battalion is ready for the table. This will definitely be my last batch of Hanoverian troops for some time now!

I’ve got a number of small projects lined up once these are done, most of them small dioramas that wont really add to my Army but will add a bit of interest to my collection and provide a bit of ‘flavour’ on the occasional big set piece games. These projects include a spare wheel wagon, Napoleons Coach, a Prussian mule train, a Vivandiere, and a tribute to the Hartlepool monkey.

All I need to get these finished is a few more rainy days……

A little knowledge….

I’ve read 7 books on the battle of Waterloo in the past 18 months, visited the battlefield itself and have just completed a distance learning course with Southampton University on Wellington and the Battle of Waterloo. For a change, I decided to give Waterloo a rest and I read an account of the Peninsular War ”The Peninsular war 1807-1814 A Concise military History” by Michael Glover.

All the above doesn’t include the blog entries, Uniform references and internet research, conversations with other gamers, Magazine articles, films and TV and radio program’s that I have absorbed. The net result of all of this is that I still feel as though I have just scratched the surface of the subject of the Napoleonic Wars. I have however, reinforced my view that definitive answers, whether regarding who did what, when or why, or who wore what uniform in which style are sometimes difficult if not impossible to come by. 200 years of distance from the events and only artist impressions and eye witness accounts to go by will often lead to confusion.

What we generally have is a collection of opinions and views ( some more thoroughly researched than others) from which we as gamers have to make a decision on which to follow. In making that decision though, be careful not to totally discard the possibility that you may just have picked the ‘wrong’  set of facts. Just take the thorny issue of uniforms.

During the invasion of Gascony in 1814, an observer described the 57th as follows:

‘The men are absolutely in rags and tatters. Here and there are five or six inches of bare thigh or arm visible through the patches; some have had only linen pantaloons all the winter through’

Remember, this isn’t the retreat to Corruna being described but the British advance into France at the end of the war. Meanwhile, elsewhere, the 1/39th Battalion was at St Jean-de-Luz, collecting it’s new issue of clothing ( Clothing was issued once a year if possible). I suspect that given the date, this new clothing was the new style uniform of grey trousers & Belgiac Shako. So it looks like you would have one Battalion (1/57th) in very tatty, patched ‘Peninsular’ uniform fighting alongside the much smarter Battalion ( 1/39th) in ‘Waterloo’ style uniform.

The point that I am making is that unless you are recreating a specific battle in a specific campaign at a specific date there is no need to be too vexed as to who wore what when. Which brings me to the last of my Hanoverian Battalions, the Osterode Landwehr. I’ve done quite a bit of research on the subject and the details of the Landwehr uniform appear to be sketchy at best. They usually have a paragraph devoted to them in a book. Here is the general guide:

Lüneburg Landwehr Batt: Red jackets with dark blue facings and grey pantaloons. All of the leather equipment was white. The battalion wore shacks of a tapered [stovepipe] design.

The above details are repeated for the Osterode, Verden and Münden Landwehr Battalions.

So thats pretty clear and to be fair, its confirmed in a couple of the other references that I use. However, when I checked my favorite reference, Mont St Jean, the following scheme was shown.

Hanoverian Landwehr Osterode

Hanoverian Landwehr Osterode

Quite clearly, the facings here are green, not blue and the shoulder tufts are also shown as green. Now it could be that there is a mistake, as the Field Battalion had green facings and the author of the site may have made an error in transposing them to the Landwehr Battalion. So what should I do? Well, as I have already painted three battalions in Blue facings the chance of a change in colour was quite an attractive proposition. So my Battalion of Osterode Landwehr will have green facings!

But I promise that if anyone asks, I will say that I have taken a possible liberty when choosing this option. Furthermore, if in the unlikely event that I meet up with a fellow gamer who has decided that his version of the Osterode Landwehr have blue facings I will keep my opinions to myself and just compliment him on his fine body of troops!


Napoleonic Field Forge completed!

Napoleonic Field Forge - Perry Miniatures

Napoleonic Field Forge – Perry Miniatures

My Napoleonic Army continues to progress and the field forge completes another mini diorama that will eventually build into my Artillery Park. I have always been fascinated by the support units that ensure that an Army is able to fight. It is a shame that the rules systems that I have come across fail to take into account the logistics required to get an army into battle. I have just finished reading about Wellingtons Peninsular campaign and it seems to me that the battles were won because of Wellingtons attention to this area. The French seemed to have lost the campaign because of their decision to live off of the land rather than have a supply train in place. They were unable to continue to press any advantage gained because they ran out of provisions. This is best illustrated by the problems that Massena experienced when Invading Portugal. Held in check by Wellingtons defensive lines of the Torres  Vedras before Lisbon, Massena saw his army dwindle away due to starvation and sickness.

I wouldn’t expect ‘club Night’ games to reflect this logistics problem in every game but there is certainly room for a scenario or two here! Just to give you an example of the logistics involved, a Brigade of Infantry required about 150 mules to carry supplies. A troop of Horse Artillery required some 205 mules to carry supplies. And these were only the Commissariat mules. In addition, every unit had it’s own beasts to carry camp kettles, reserve ammunition, pay chest, medical stores and tents. Whilst all of these beasts were left in the rear during the major battles, I suspect that there were times when they were present ‘in the thick of it’ or certainly close to the action.

Blacksmith close up

Blacksmith close up

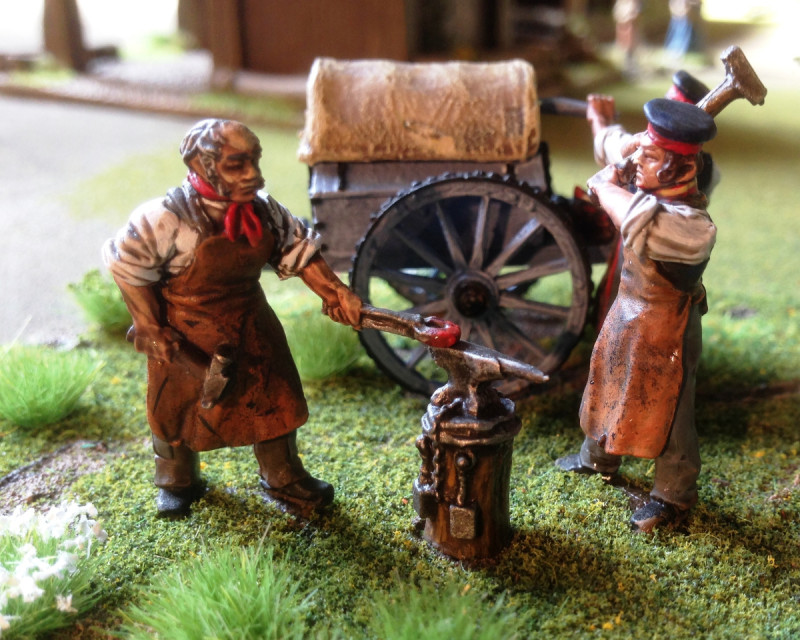
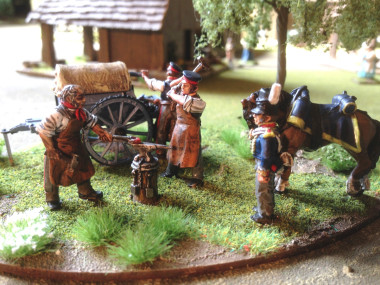
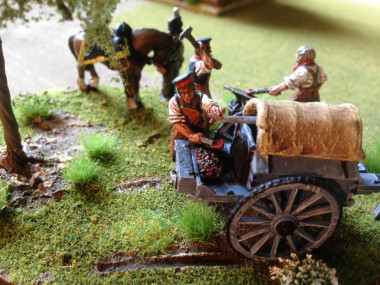
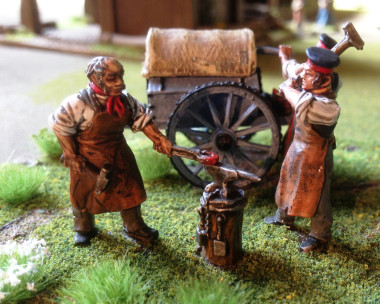
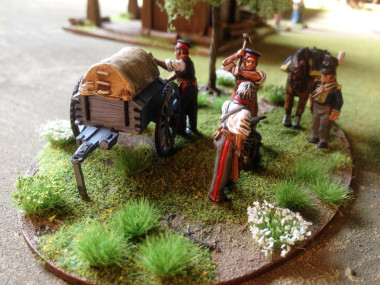
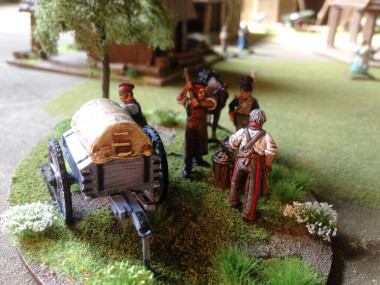
I digress, back to my field forge. It is from Perry Miniatures, although I have added a spare artillery man & officers horse to fill out the base. As usual, I have used Vallejo paints to complete the figures. I could find very few references for details of the clothing , So I painted the figures as Foot artillery in shirt sleeve order! The leather aprons were my first attempt at painting raw leather and I used the Vallejo Orange brown as the highlight and wash over the actual leather brown paint. I then just stippled some black on the aprons to represent the burns that would be there from working. I think that it has worked quite well.

Detail on Blacksmith aprons

Detail on Blacksmith aprons

For the base and ground work, I used Vallejo Sandy Paste. I actually have a pot of the desert coloured paste that was left over from another project, so I am working my way through this, being too mean to buy either the plain or brown that is available. I am a great fan of this product. It is ideal for blending your figures into the base and has sufficient texture when dry to enable a quick dry brush to bring up the detail.

Field Forge Ground work detai

Field Forge Ground work detail

Once the paste was dry & painted, I used a green scatter to represent the grass as well as some static grass dotted around to add some different texture & colour. I then added a few Grass tufts ( I like the ones from Noch) and flowers and the basing was complete.

The field Forge takes it's place in Little Bingham!

The field Forge takes it’s place in Little Bingham!

So although my Field Forge is unlikely to change the course of any battle that I fight, it will make either a nice objective or simply add to the scenery. It was of course a pleasant distraction from painting the rank and file….Talking of which, next up are my final battalion of Hanoverian Landwehr, the Osterode Battalion, More on those next week.

Work in progress - More Hanoverians! And my new favourite basing material...

Work in progress – More Hanoverians! And my new favourite basing material…


1 25 26 27 28 29 42