Warlord Open Day – Salt Peter Demo Game

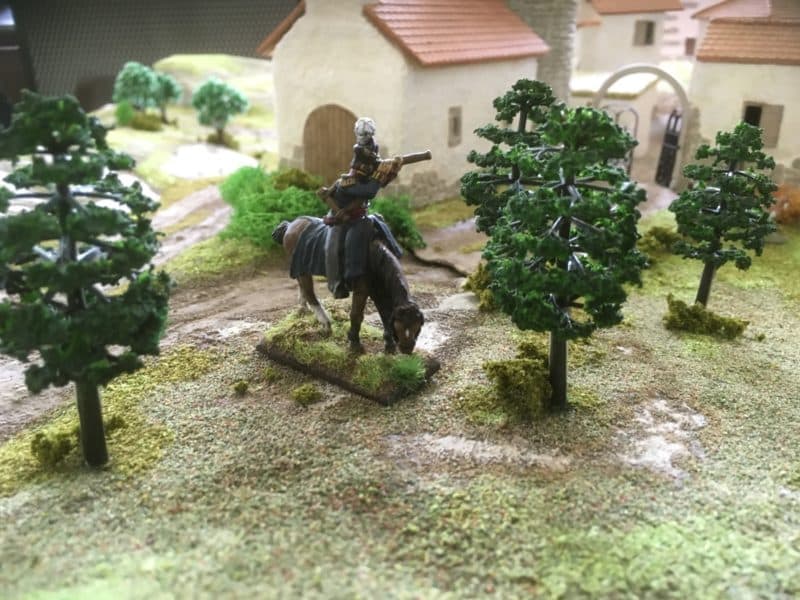
British Exploring Officer scouts the terrain!

British Exploring Officer scouts the terrain!

As good neighbours and friends of Warlord Games, we were very pleased to be invited to their Open Day to put on a Black Powder Napoleonic demo game. It’s no secret that I am a great admirer of the Black Powder Rules system in general and the Napoleonic period specifically. After a conference with my gaming group, the NG13 gamers we decided to re-run a version of an early demo game that we had played, ‘Combat at Foz D’Arouce’, this time using Black Powder as the rules for the game. You can see the battle Report for the ‘original’  Foz D’Arouce at the Bingham Napoleonic Days Event here:
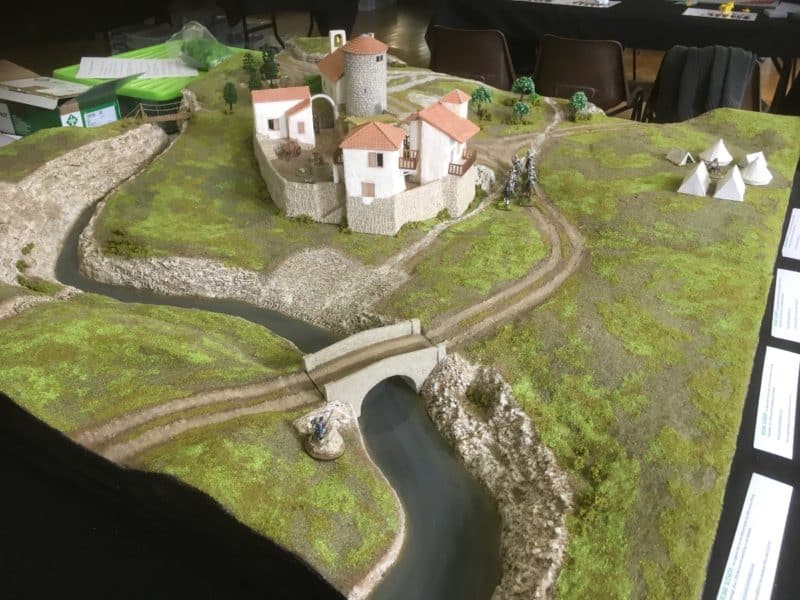
COMBAT AT FOZ D’AROUCE

Foz D'Arouce - setting up the table.

Foz D’Arouce – setting up the table.

The challenge in using Black Powder was that the table is only 4 foot by 4 foot. However, we have our own version of Black Powder that we use for our club games called ‘Salt Peter’. This stripped back version of Black powder allows us to play a decent club game on a six foot by four foot table in an evening. To be fair, it’s not so much ‘stripped back’ as sparing with the use of any of the additional rules or supplements. All measurement is reduced by two thirds and the units used are generally half the normal size, so a Battalion of troops is represented by 12 figures. Of course, there’s no reason why they should be referred to as a Battalion. They could just as easily be a company, with the ‘Brigadier’ or commanding officer, in charge of a detachment of Company’s. Purists may baulk at such a thought but the aim of our games is to spend a couple of hours in good company, using the figures that we have painted and collected.  We try to restrict the ‘serious’ side of the hobby to our research, reading, painting and modelling. Gaming is for fun!
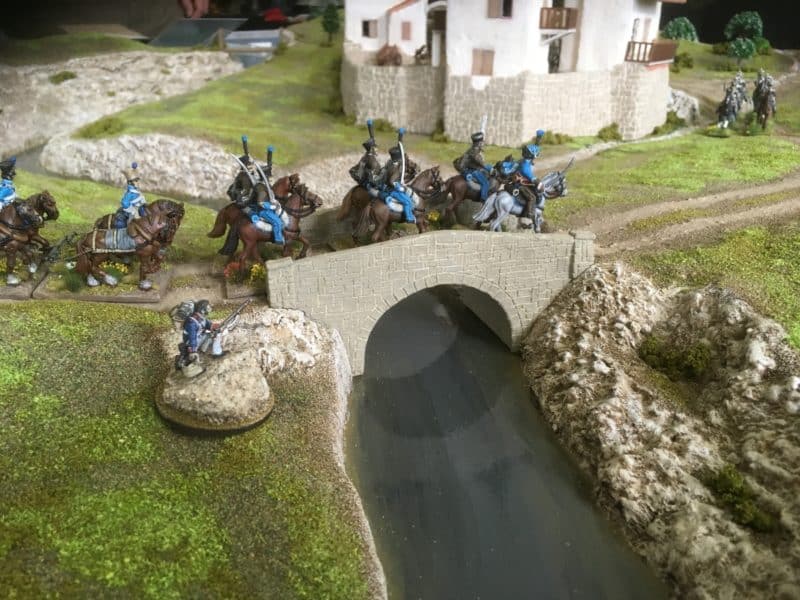
French Hussars - these troops would be late for the battle!

French Hussars – these troops would be late for the battle!

The game would again be using the superb table that Pete Harris had produced and this time, it would be Portuguese versus the French, for no other reason than I had a Portuguese Brigade that needed an outing on the table! Having said that we had stripped back the additional rules in Black Powder, we did have some extra Scenario specific rules that we had agreed on before the Battle. These related to deployment, command structure and limitations imposed by the scenery. These are listed below in the additional PDF.
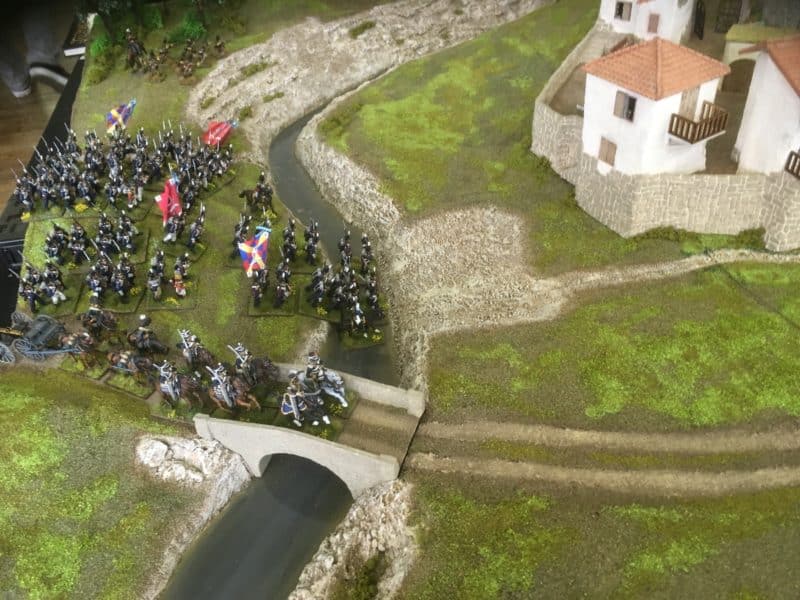
The Portuguese Army Deploys

The Portuguese Army Deploys

And so to the Battle itself. Pete, playing the French, had won the roll to choose the table side for deployment. I won the roll to decide who went first. Apart from a small unit of Skirmishers (Cacadores for me!), both armies were deployed off table and had to be ordered on. In addition, the units would initially be in march column. The commanders might know that the enemy were coming, but our troops didn’t! We had also placed a limitation on the number of orders that could be given – two was the maximum, which not only restricted movement but made fancy formation changes a bit trickier…. My Portuguese Army deployed in full but was somewhat crowded as it attempted to cross the river using the bridge and the ford. The French had no such obstacles to negotiate and the first brigade marched on without hindrance. The second brigade, however, failed it’s order and stayed off the table.
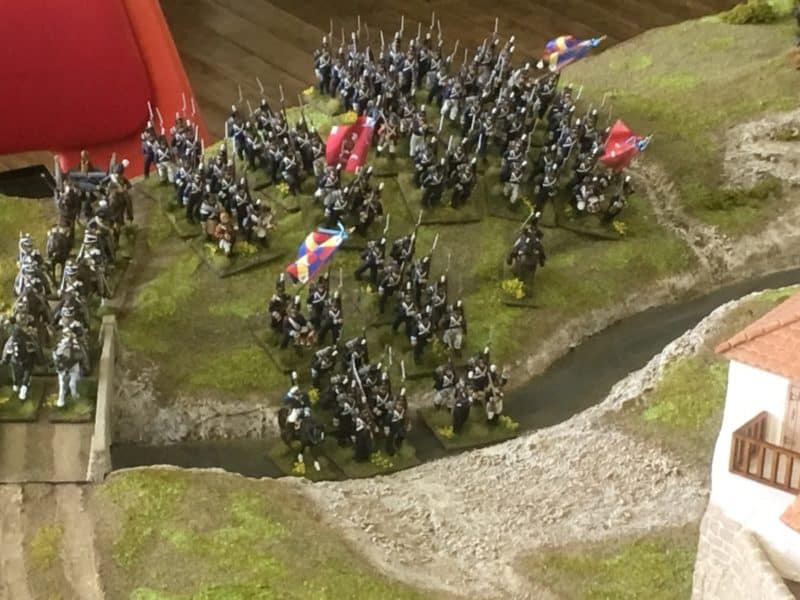
Portuguese delayed by the river crossing

Portuguese delayed by the river crossing

By Turn Two the French advance party of Skirmishers had reached the top of the Village and a Company of troops also marched towards the gates to fortify themselves inside. However, the second French brigade still refused to come onto the table. What should have been a bonus for the French then turned into a slight distraction. We had said that any commander rolling under 4 on an orders roll would receive a ‘bonus’ unit of skirmishers. The French achieved this in turn two and the second unit came on to the table – they also headed for the village.
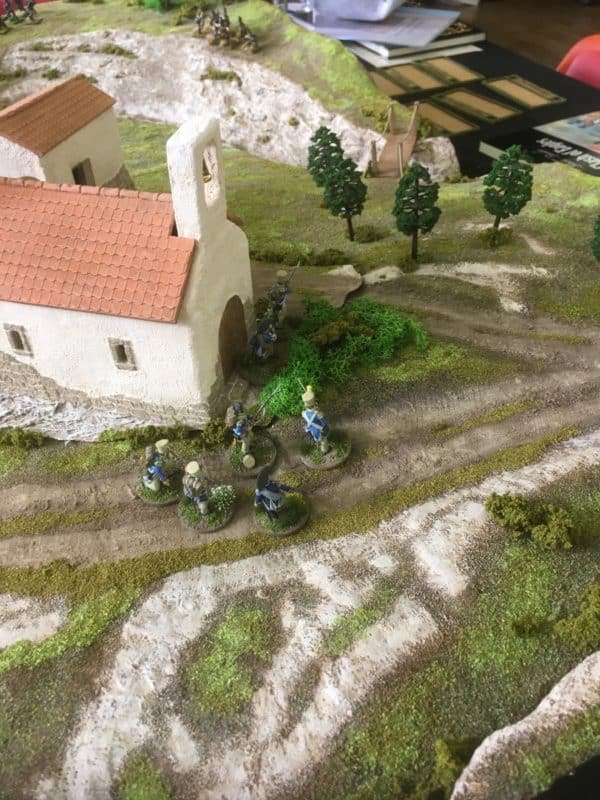
French Voltiguers secure the village.

French Voltiguers secure the village.

The Portuguese had managed to get a squadron of Dragoons across the river to threaten the French advance, as well as deploying their artillery. However, the balance of the force was still either on the wrong side of the river or stuck in it. The Cacadores, who were supposed to be rushing to take the footbridge at the top of the village had decided that a slow walk to admire the view was more appropriate and were making poor progress. The opening shots of the battle started with little effect but it was game on!
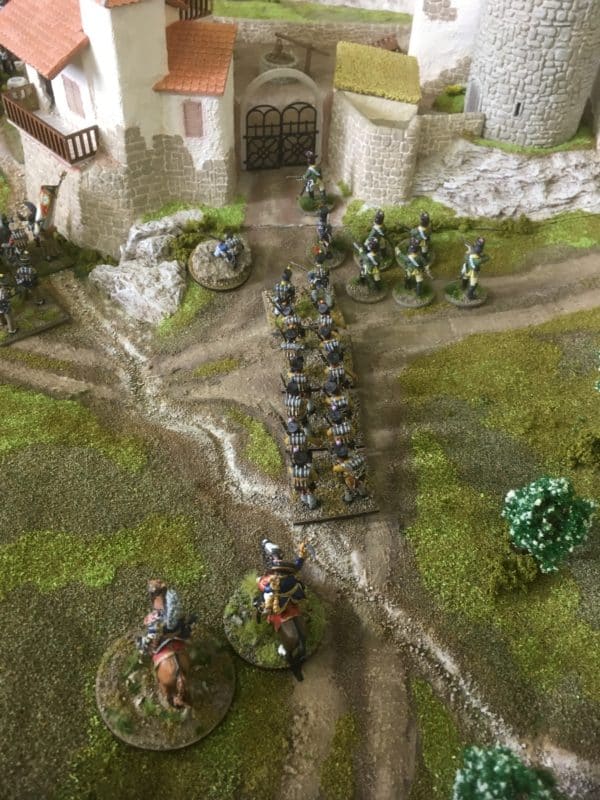
French about to march into the Village

French about to march into the Village

With the possibility of getting both units of skirmishers into the village the French commander halted his other battalion and diverted them to the main combat. The second French Brigade still refused to come onto the table! After all, Pete had spent the last few days lovingly painting a unit of French Hussars just for this scenario…why would they want to get into action and spoil their uniforms! If the French were being shy, the Portuguese were still struggling to clear the river. Once across, each unit had to test to see if it was disordered. To pass the test a 4+ was required. 3 out of four of the Portuguese failed! Meanwhile, although now joined by a ‘bonus’ unit of 95th rifles, the Cacadores were still taking their time to move up to the footbridge and now decided that it was time for tea!

The only good news was that the French were slow to take advantage of the Portuguese congestion. Their advance delayed by the move towards the village. The Dragoons had put a French unit into square under the nose of Portuguese artillery, holding their line. This at least kept the French at bay.
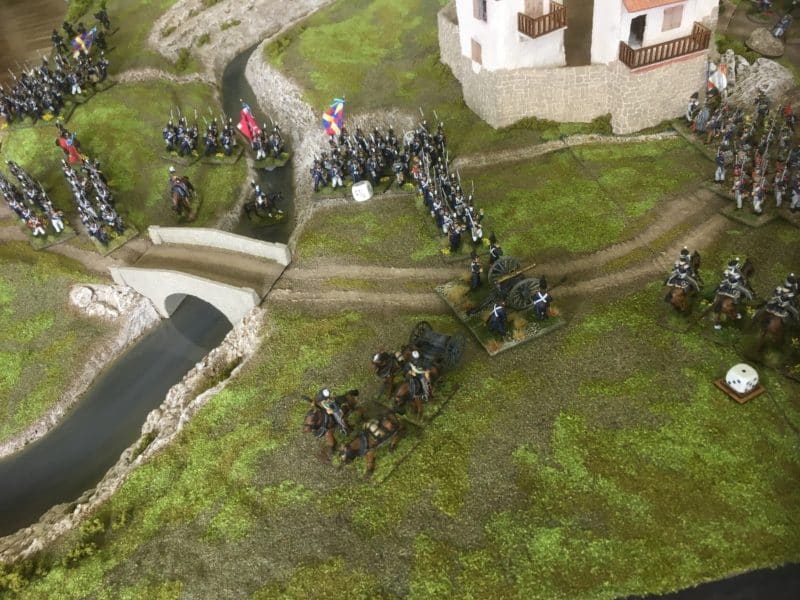
Portuguese cross the river but are caught in march column.

Portuguese cross the river but are caught in march column.

By now, Pete had a sudden moment of clarity and realised that with his General off table, he was entitled to a re roll should his missing brigade fail their orders! In addition, instead of trying to move the cavalry first ( Who required an 8 on two D6) he would start with the infantry, who in column, needed a 9+ to get moving! This new strategy worked and the second French brigade moved onto the table. Things were not looking so good for the Portuguese. To add to their woes, one of the Portuguese units attempted to reinforce the first one over the river only to find itself stuck in column with it’s flank facing a French unit… merde!
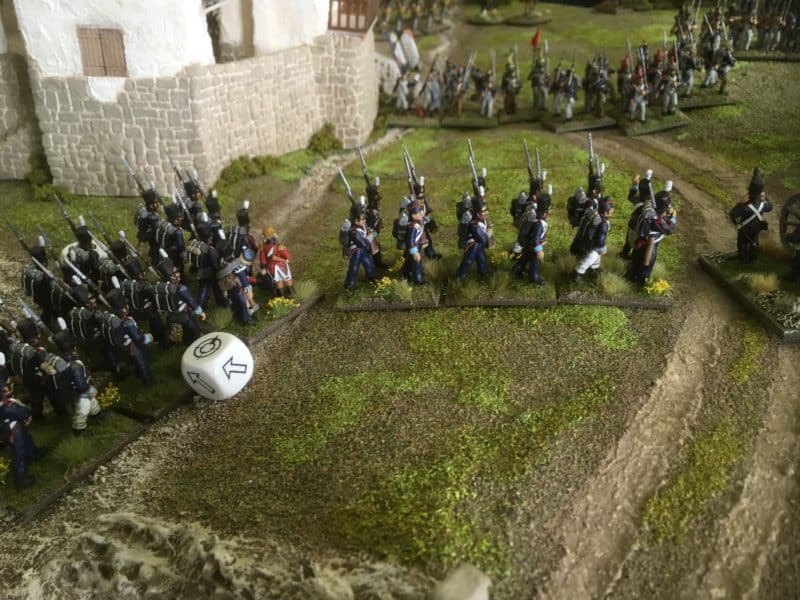
Portuguese caught in Column!

Portuguese caught in Column!

It was too tempting for the French to ignore, they charged in to attempt to batter the March column and break through. Confident of victory in this part of the Battlefield, Pete directed half of his second brigade up the hill behind the village to head off the threat of the very slowly approaching Cacadores and 95th units. The Portuguese were made of sterner stuff! Despite having to take the attack in the flank, with no reply permitted, they survived the first round of combat passing their morale test and turned to face the French unit, eventually winning the combat and pushing the French back! The Portuguese artillery fire into the unit in square was beginning to tell and casualties were mounting on both sides.
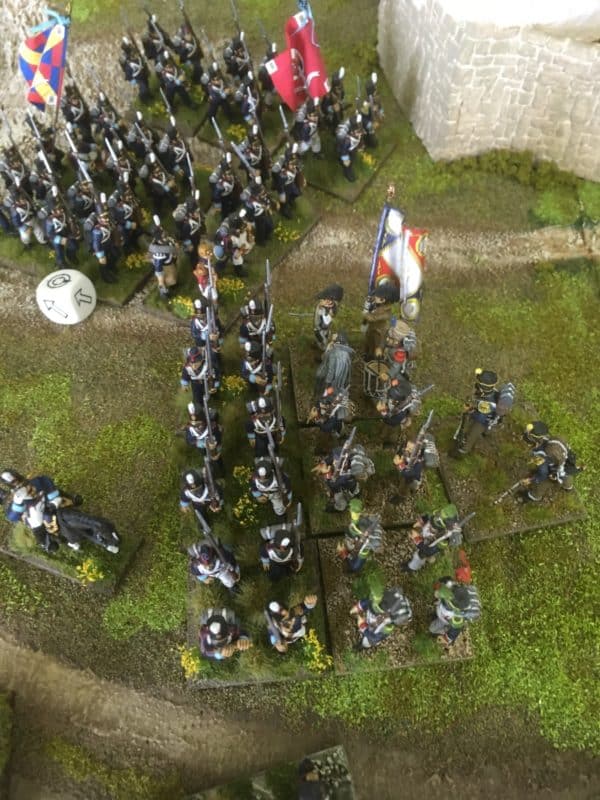
The French attack!

The French attack!

One of the French units broke under fire, running from the battle, forcing the French Commander to march his other brigade back down the hill ( Hmmm that sounds like a British tactic, first perfected by The Duke of York….) to support the forward brigade. Despite this set back, the French inflicted sufficient casualties, using additional fire from the skirmishing units now safely in place in the village, to break the Portuguese brigade, who retreated back across the river. Meanwhile, in all the chaos, the second Portuguese brigade had started to deploy and mauled the lead French brigade, causing it to break. The Cacadores had made it to the bridge….
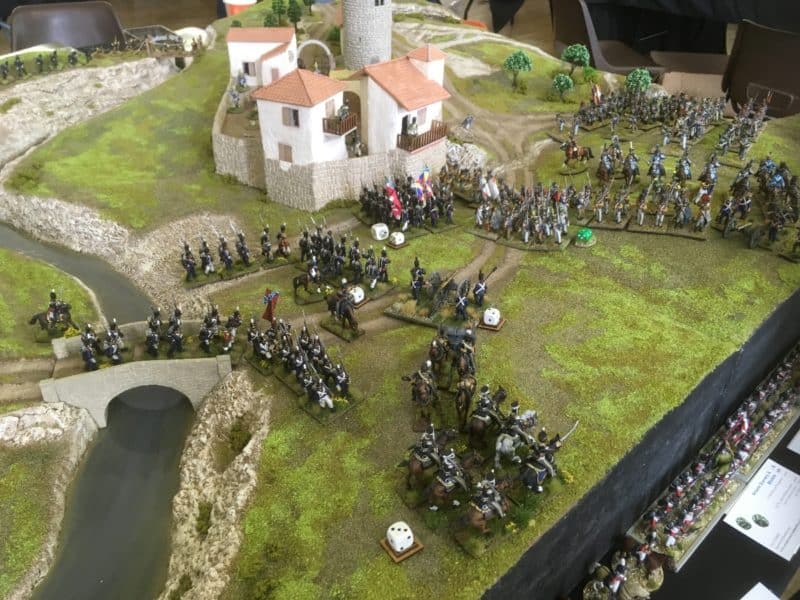
Portuguese under pressure

Portuguese under pressure

Although the Portuguese had taken a beating, with the lead brigade broken, the second brigade had now deployed successfully in strength and started to hammer the French. The French were now in a worse position. The retreating brigade was hampering the movement of the second brigade, blocking line of sight and because of the earlier attempt to flank the village, the brigade was strung out and it’s forward units vulnerable to fire. A successful round of shooting from the Portuguese persuaded the French that the battle was lost and they started their withdrawal from the field. The Cacadores never did cross the bridge!
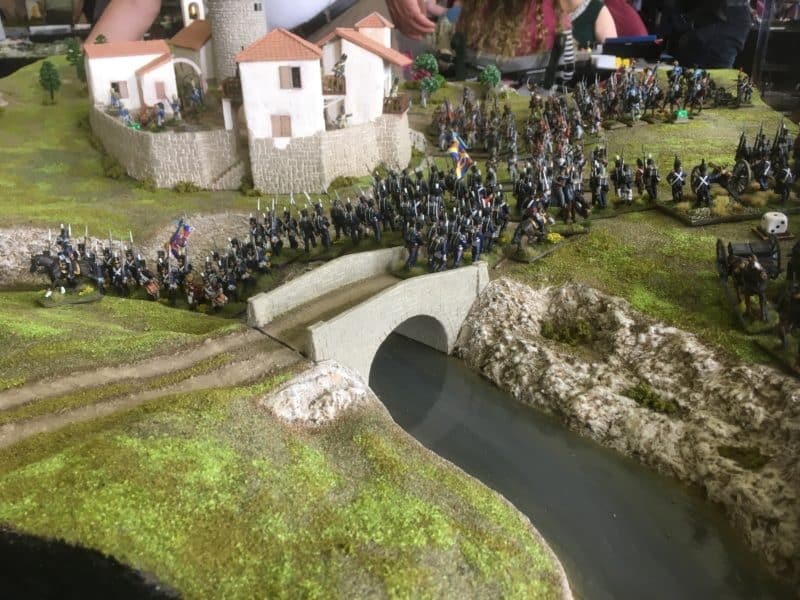
The Portuguese advance!
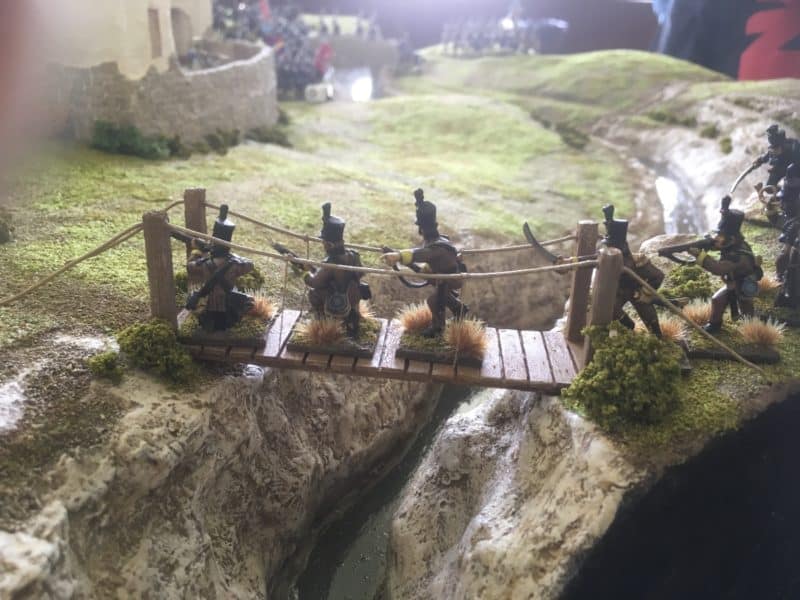
The Portuguese advance!

Cacadores reach the bridge

Cacadores reach the bridge

A marginal victory for the Portuguese and a most enjoyable game on a most enjoyable day. We played the game at quite a slow rate as we were stopping to chat to visitors to explain how that game was going and answer questions regarding the scenario.

The Warlord open day was a great success and I think the best yet. The main hall was packed full of demonstration games – I was very pleased to be able to try out the forthcoming Black Seas game – it looks great! I’m sure that Warlord will be running the event next year and I would recommend attending. As well as the chance to meet with the Warlord team of sculptors, designers and staff, try out the various Warlord games, there are plenty of other guests there to talk to – Sarissa Precision, Mantic Games and the Terrain tutor to name a few.

THE COMMERCIAL BIT

I’ve added the Quick Reference sheet that we used on the day for the shorter ranges etc here:

BlackPowderUnofficialQRS_66p

It’s a Black Powder Edition 1 sheet, so ignore the modifications for skirmishers hitting  with +1.

The ‘house rules’ for the game are here:

BLACK POWDERFOZ RULES

Arcane Scenery have most of the Warlord range available, as well as some 60 other manufacturers. Even better, we send post free to most world wide locations. You can visit our shop here:

ARCANE SCENERY

You can see the Warlord report of the day here:

WARLORD OPEN DAY

Happy Modelling!


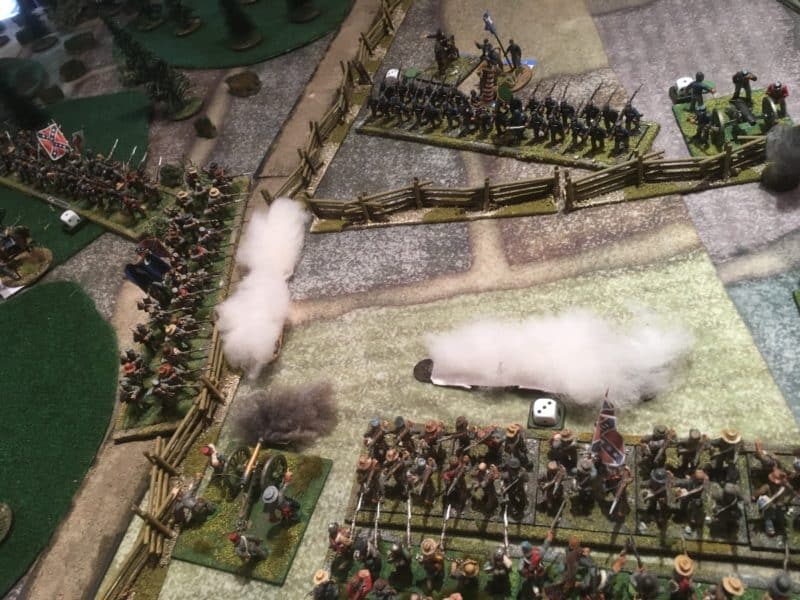
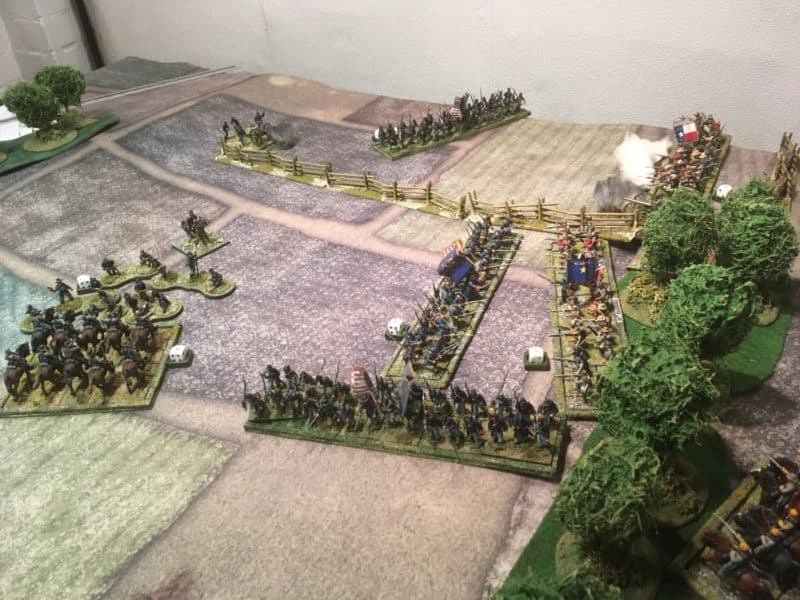
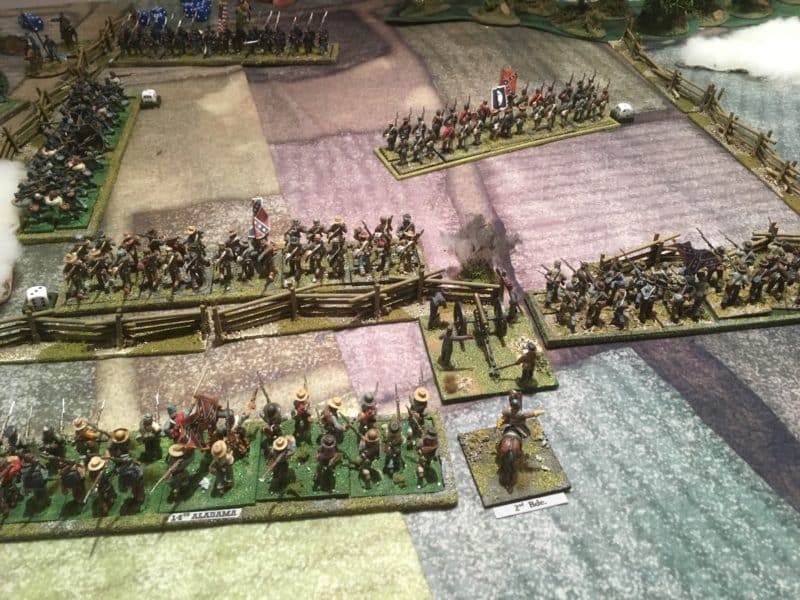
The Battle of Pea Ridge Arkansas 1862

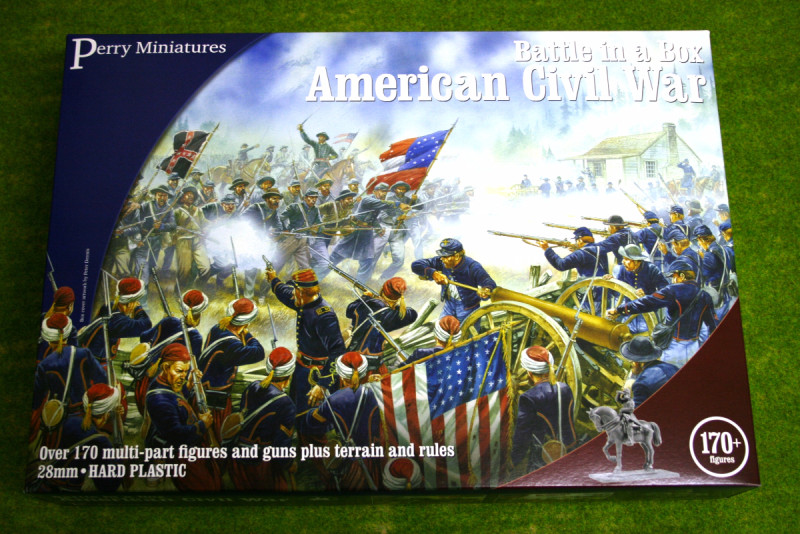
Our gaming group continues to work its way through the Battles of the American Civil War, with this battle, based on the action at Pea Ridge, Arkanas 1862. Our small group has long been fascinated by the American Civil War and all of us had a large collection of  Airfix /72nd scale armies – conveniently produced in grey plastic for the Confederates and blue for the Union, that we played with and gamed with as kids. I also had a lovely collection of the Britains ACW figures, including the beautifully produced artillery limber. So the temptation to collect armies in 28mm scale has been there and gnawing away, particularly as the Perry’s produce such a great introduction to the period with their Battle set.

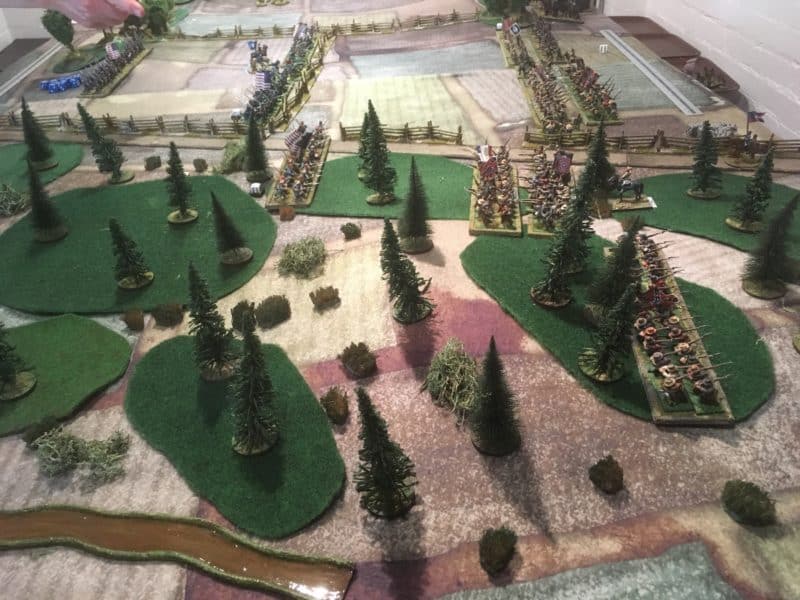
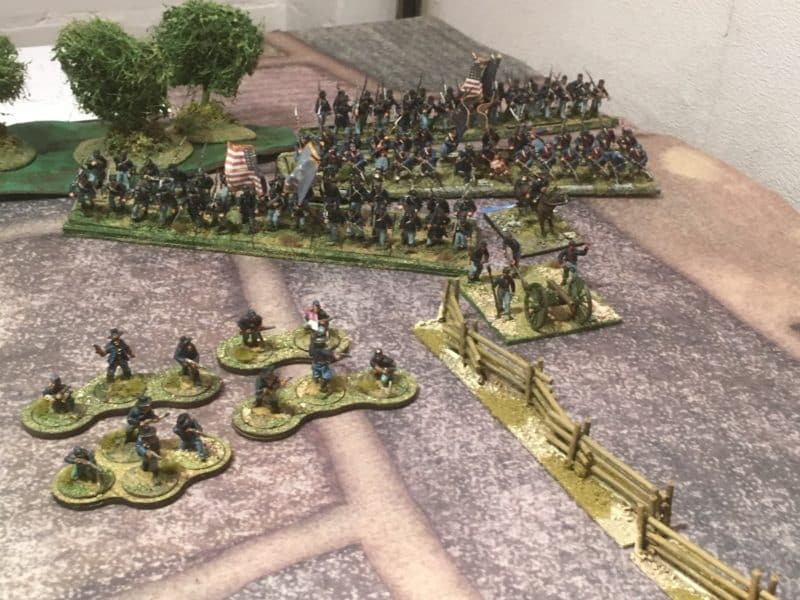
PM_ACW_BB1However, recently, Andy has treated himself to a huge collection of beautifully painted miniatures that covered both the Union and Confederate forces and this has allowed us to branch out into the American Civil War without having to paint armies! We have already fought a number of battles using these figures and you can see our version of the First Bull Run in an earlier blog here;
The First Bull Run

We are using Black Powder Rules, modified with the Glory Hallelujah! supplement, as well as some house rules that enable each battle to reflect some of the challenges that the Commanders faced on the day. For this battle, the main consideration was the large wooded area on the Confederate left flank, Morgans Wood, bordered by the road. The house rules were that no brigade orders could be issued to troops in the wooded area, each regiment would have to receive separate orders. In addition, units could only move a maximum of two moves per turn in the woods and would suffer a -1 on firing if two moves were made. Musket/Rifle range was limited to 12 inches in the woods. The Union forces were able to deploy first but were permitted to ‘hide’ some of their forces. The Confederates had to indicate their deployment on a map of the table, without first being able to see how the Union forces were disposed.  Pete would be commanding the Union Army as General Osterhaus, I would command the Confederates as General McCulloch. Andy was umpiring.

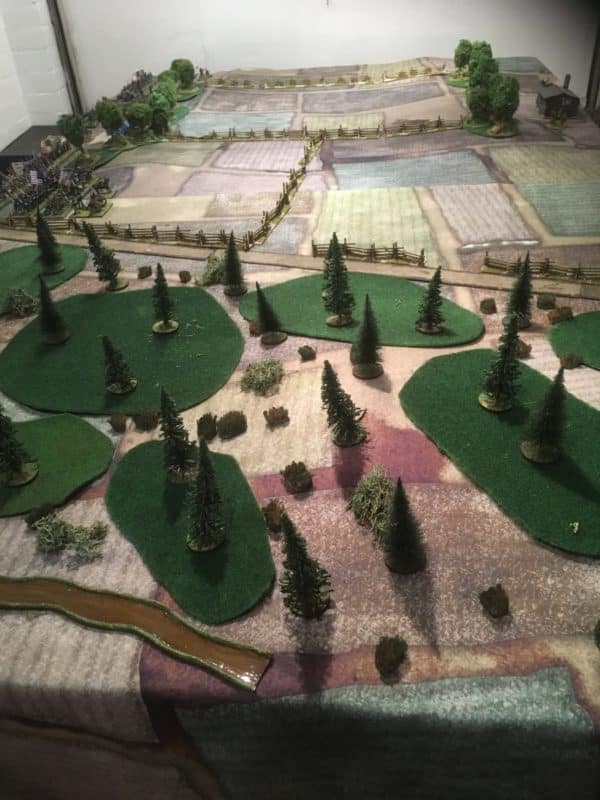
Table layout for Pea Ridge, Arkansas

Table layout for Pea Ridge, Arkansas

As ever, the battle report is somewhat one sided and picture heavy, with the highlights from the Confederate point of view!

Initial Deployment, with Confederates advancing into Morgans Woods

Initial Deployment, with Confederates advancing into Morgans Woods

Despite the limitations on movement in Morgans wood, I deployed a full brigade into this area. Taking advantage of the new Black Powder rules, which gives brigade commanders a re roll if the Army Commander is present, General McCulloch was moved to oversea operations on this flank. It was not clear how the Federals were deployed as some of their units were off table and hidden. The centre appeared to be unguarded with most of the visible Union forces far out to the right. I had decided to place my strongest brigade in the centre, supported by the cavalry, concealed behind the tree line. The right flank would be held by a weaker brigade under the command of General MacIntosh. The plan was to pivot the whole army on the right flank, with a probing attack through the woods on the left.

General Osterhaus commanding the strong Union Brigade on the right.

General Osterhaus commanding the strong Union Brigade on the right.

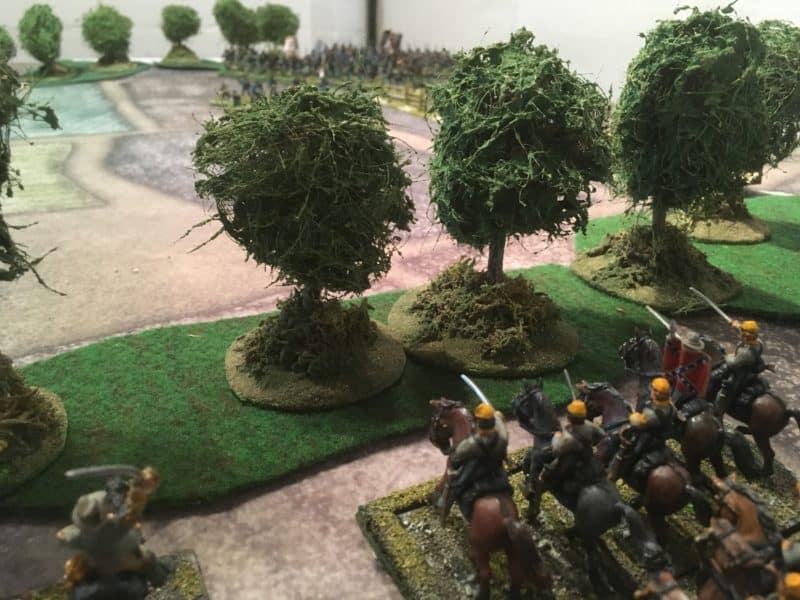
Confedrate Cavalry concealed behind the tree line.

Confederate Cavalry concealed behind the tree line.

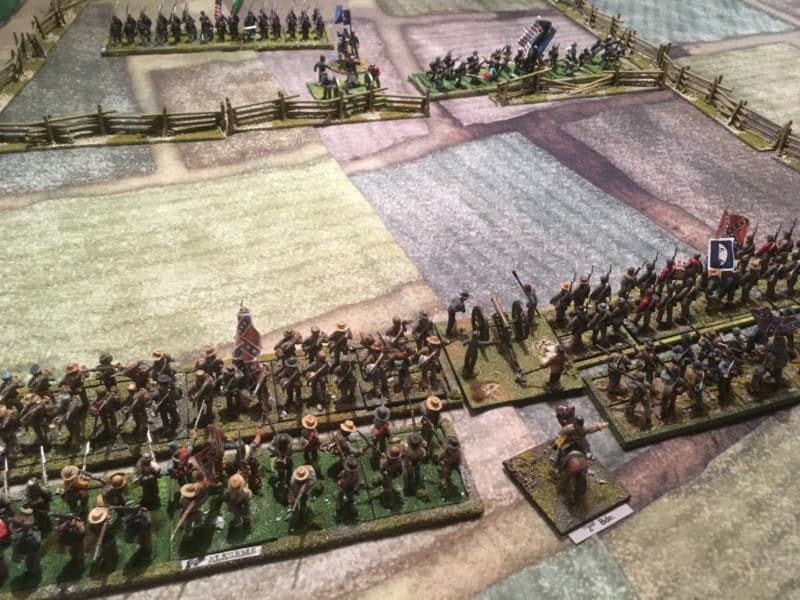
Confederate Centre commanded by General Herbert

Confederate Centre commanded by General Herbert

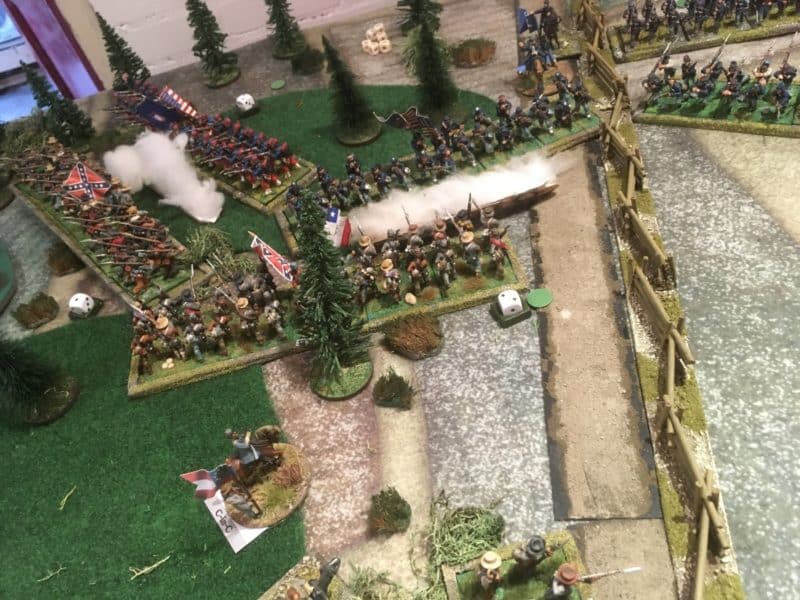
The brigade in the woods were extremely successful in their advance. Not only were they able to maintain cohesion through the difficult going but they surprised an advance Union Regiment and immediately put it to flight with superior gun fire. Or to be more precise, my strategy of having the General on hand for re rolling failed command rolls worked as planned and my dice throwing was extremely fortunate when it came to combat!

Union Outflanked!

Union Outflanked!

With the successful march through the woods the Union Centre was now out flanked and to add to the Unions woes, their reinforcements were late arriving. By the time they were able to deploy their reinforcing brigade, the advance brigade had been broken and once again, they were out numbered and out flanked.

Union advance on the right!

Union advance on the right!

An aggressive move by the Federal troops on the right flank was more successful, pinning the Confederate brigade and inflicting severe casualties. However, the Rebel cavalry were able to push back the Skirmishing line and threaten the rear of the advancing Union Brigades. Despite the Unions success on this flank the centre was crumbling as a second Brigade succumbed to superior fire power!

Pour it on Boys!

Pour it on Boys!

A lull in the battle, whilst the advancing Confederate troops reorganised and negotiated one of the many fences on the battlefield, allowed some respite for the Union. The Union almost stemmed the tide but the damage had been done and the retreat was sounded.

Forward! The confederates clear the fence and push on to Victory!

Forward! The confederates clear the fence and push on to victory!

Another victory for the Rebels and a complete reversal of the actual historical result! The surprise was, that despite the additional rules, the Rebels were able to force their way through the woods without any disruption and effectively outflank the Union forces. Add to this, thanks to some unfortunate dice rolling, the Union reinforcements arrived far too late, allowing the rebels to deal with one brigade at a time, effectively winning the battle on the left flank and the centre. The aggressive move by the Union forces on the right caused some consternation and badly damaged the Brigade commanded by General Macintosh but not enough to influence the overall outcome.

The Confederates march on – things will get tougher as we get further into the war. I suspect that my jammy dice rolling will also take a turn for the worse at some point….

THE COMMERCIAL BIT

If you would like to build an ACW army, a great place to start is with the Perry Miniatures plastic boxed sets. They are available, post free from my shop:

PERRY MINIATURES ACW RANGE

The Black Powder  ACW supplement ‘Glory Hallelujah’ can be found here:

GLORY HALLELUJAH!

To follow us on Face book click here:

ARCANE SCENERY FACEBOOK PAGE

Happy Modelling!

Portuguese Artillery – Part 2

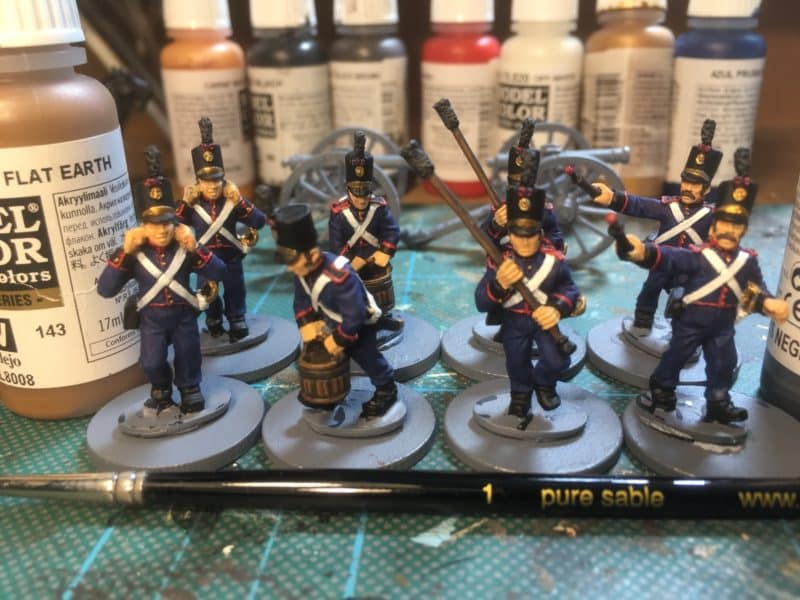
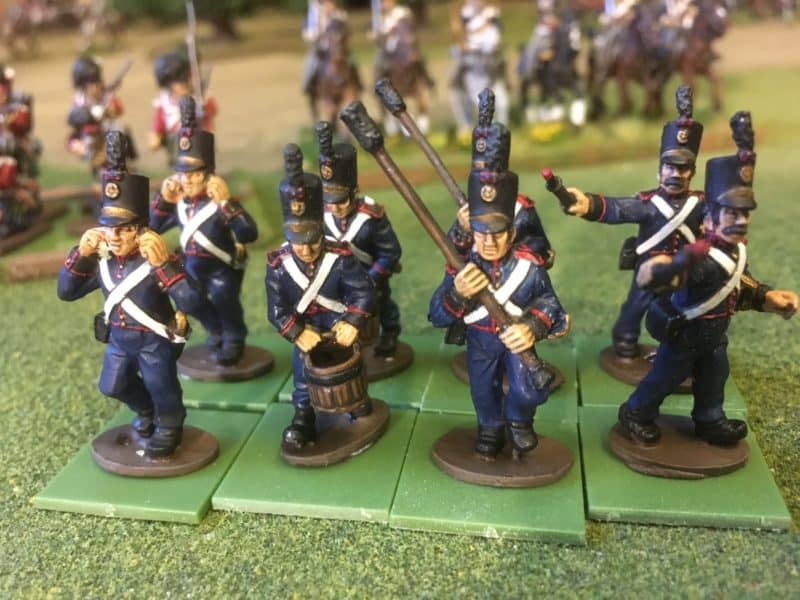
Following on from last weeks blog, here are the final steps in completing my Portuguese Artillery guns and crews. The figures were more or less complete but before I painted them with Army Painter quick shade, I added some detail to the equipment, painting the bucket and ram rod staff with first flat brown and then with a highlight of flat earth. I also gave the soldiers plumes and the ram rod head a coat of black grey as a highlight.

Portuguese Artillery - details added.

Portuguese Artillery – details added.

The next task was to paint them ( not Dip them) with Army painter dark tone. This will add some definition to the block painting, add some shading and provide a protective coat for the miniatures, reducing the likelihood of damage during gaming.

Portuguese Artillery - quick shade and matt varnished.

Portuguese Artillery – quick shade and matt varnished.

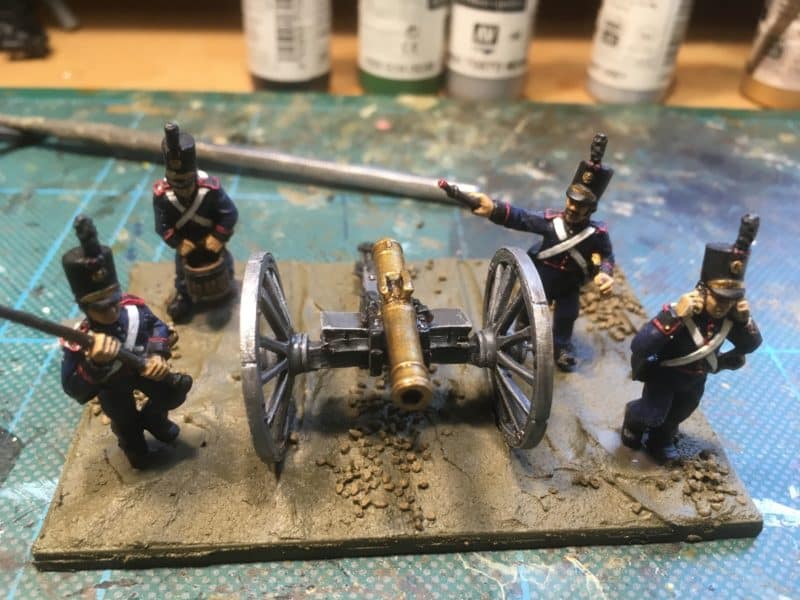
The figures are on temporary bases – I toyed with the idea of basing them individually and using a sabot system for the Artillery base but discarded this idea as too complicated. With the figures more or less complete, it was onto the guns!

Guns under way

Guns under way

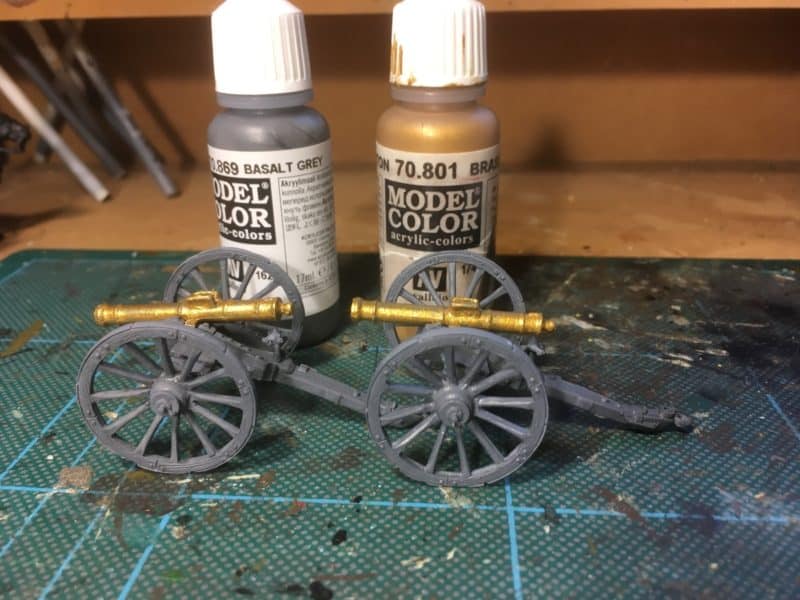
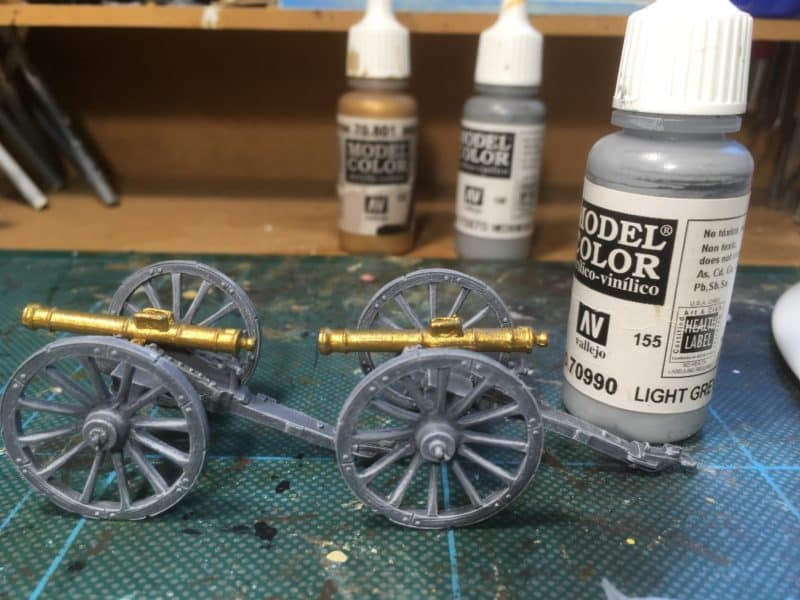
After priming the guns, I painted the carriages with Vallejo Basalt Grey 70869 and the barrels in brass 70801. I usually use a foundry triad for my artillery but there is a slight blue tinge to their paint so I decided to go for a grey as this is thought to be more accurate.

First dry brush

First dry brush

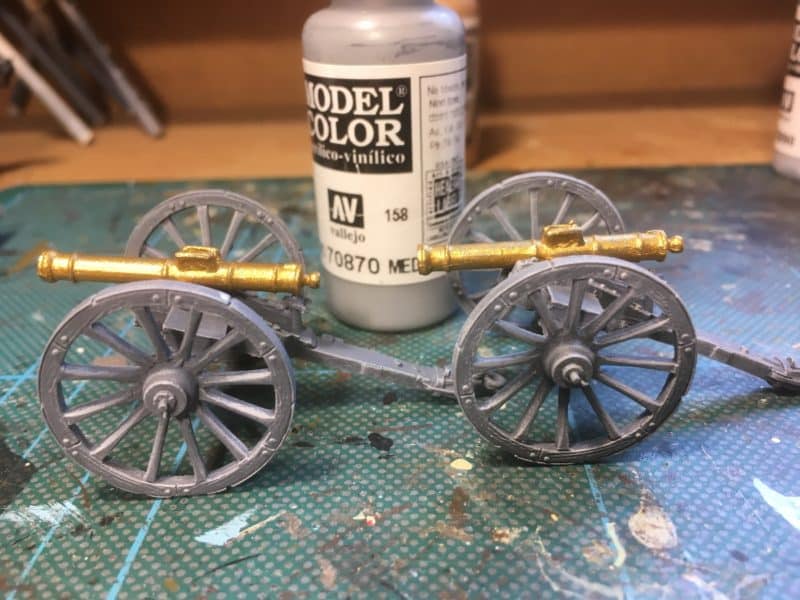
I then gave the carriages a dry brush in 70870 medium sea grey.

Second dry brush

Second dry brush

I followed this with a second dry brush in 70990 Light grey. With hindsight, I think that I could have used a heavier dry brush for both coats as when using the quick shade, the finish is darker than I planned.

Detail picked out in black

Detail picked out in black

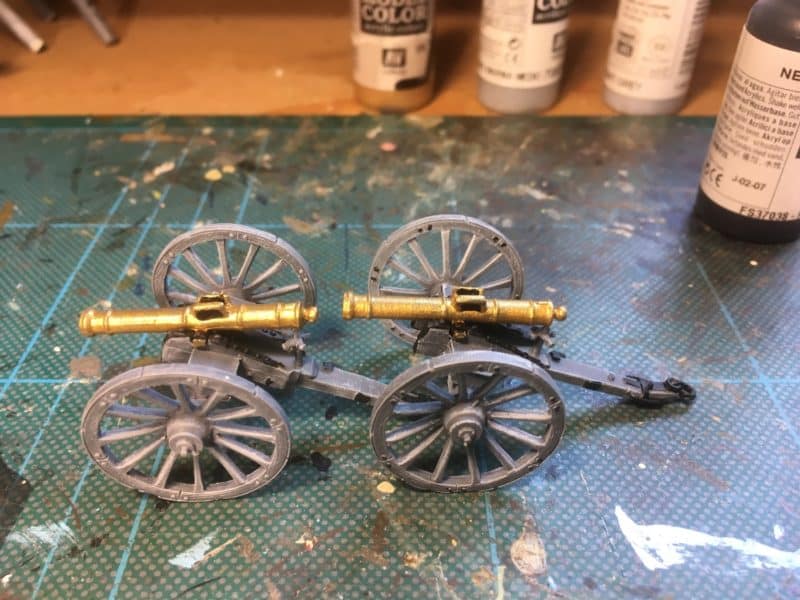
I picked the detail out in black – it was at this stage that I realised that I had glued the elevation screw in upside down…I’m not changing it now – just don’t mention it if you see me….I painted this and the wheel tyres and plates in Vallejo steel.

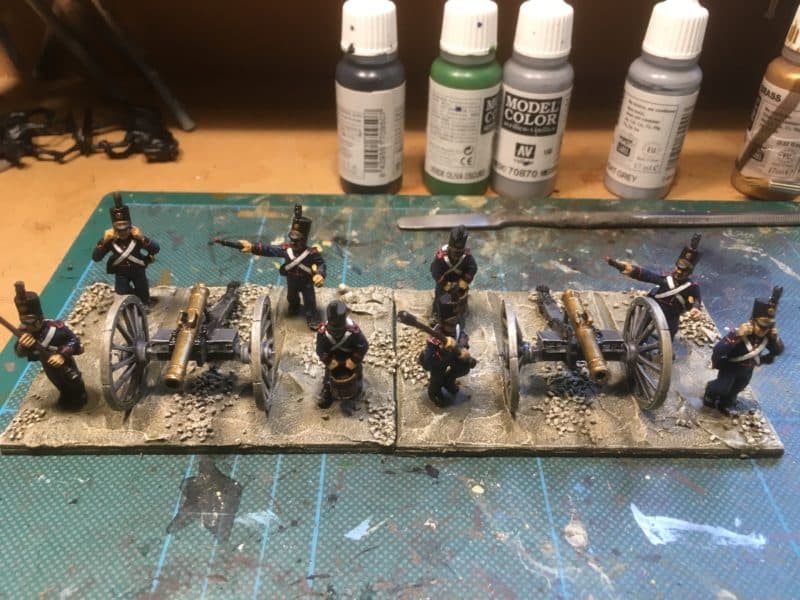
Guns - quick shade on the right hand gun.

Guns – quick shade on the right hand gun.

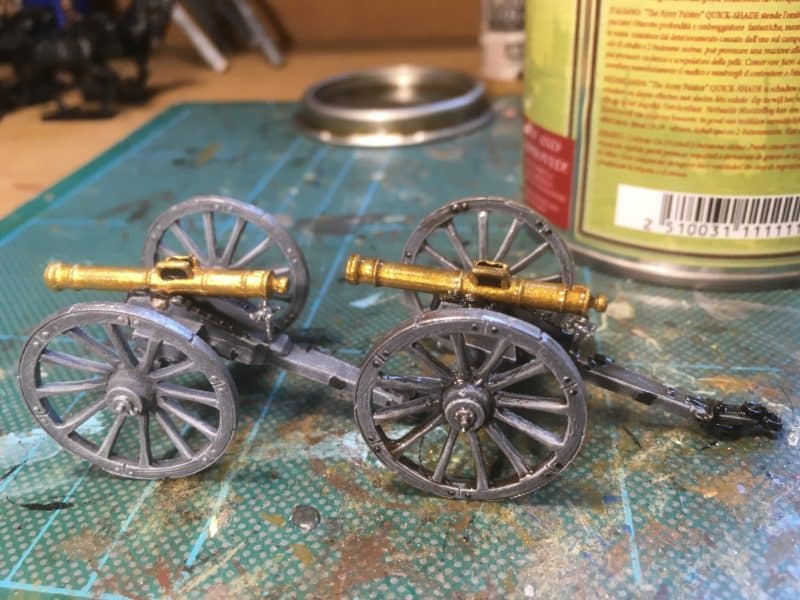
I then painted the guns in quick shade Strong tone. I’ve shown one gun done in comparison to the left hand gun that is awaiting a coat. I think that it illustrates how the quickshade brings out the detail, although, as I mentioned before I have finished with a darker look than planned. The guns were then coated with matt varnish, although on this occasion, I have left the gun barrels in a gloss finish – I just liked the look.

Basing in progress

Basing in progress

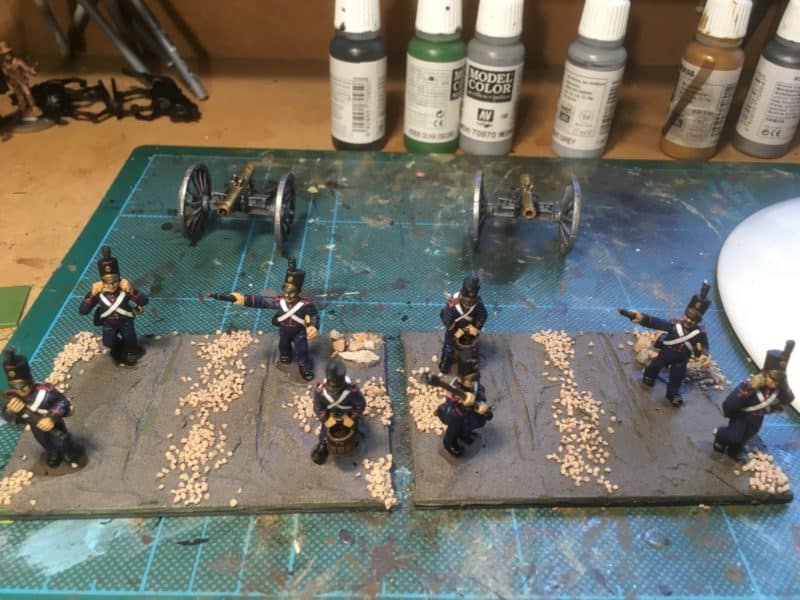
I used 90mm x 60mm bases that are actually made from two 60mm x 45mm bases glued over a piece of 40/000 plasticard cut to the correct size. Why? Because I have these bases spare from other projects and the size is about right for Artillery. I positioned the crew around the gun a lightly glued them in place. I then Covered the base in Vallejo textured dark earth paste and added some gravel (Woodland scenic ballast) and some rocks (from the garden!). The guns are not attached to the base at all – I can limber them up if required.

First coat of Emulsion

First coat of Emulsion

The base was then coated in my new emulsion paint – Dehli Bazhar – see my previous blog for details!

Bases Dry brushed

Bases Dry brushed

The bases were then dry brushed with successive layers of Delhi Bazhar and Iraqi Sand mix until I got the look that I was happy with. I added some white to the mix to really highlight the rocks. I wasn’t too worried if I caught the boots of the figures with the dry brush and I also lightly dry brushed the guns, particularly the wheels with the base earth colour.

Scatter added to bases

Scatter added to bases

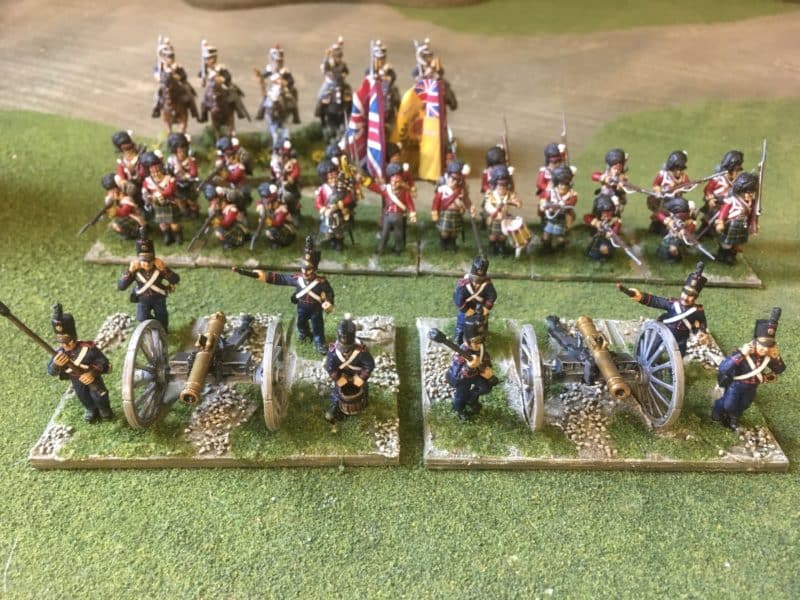
Using watered down PVA white glue, I added some green scatter to the bases. The final touch would be to add some gamers grass tufts. In the back ground you can see my battalion of Gordon Highlanders that I was basing at the same time. I often ‘batch base’ my units as it saves on paint and glue!

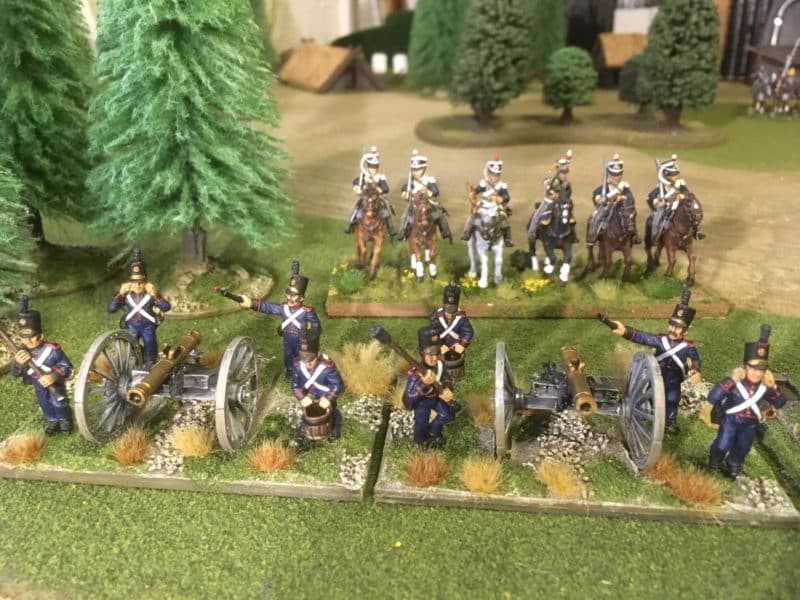
Potuguese Artillery ready for action!

Potuguese Artillery ready for action!

I used a mixture of the Gamers grass dry and beige tufts to represent the drier look of the Iberian Peninsular. The guns are ready to take to the battlefield!

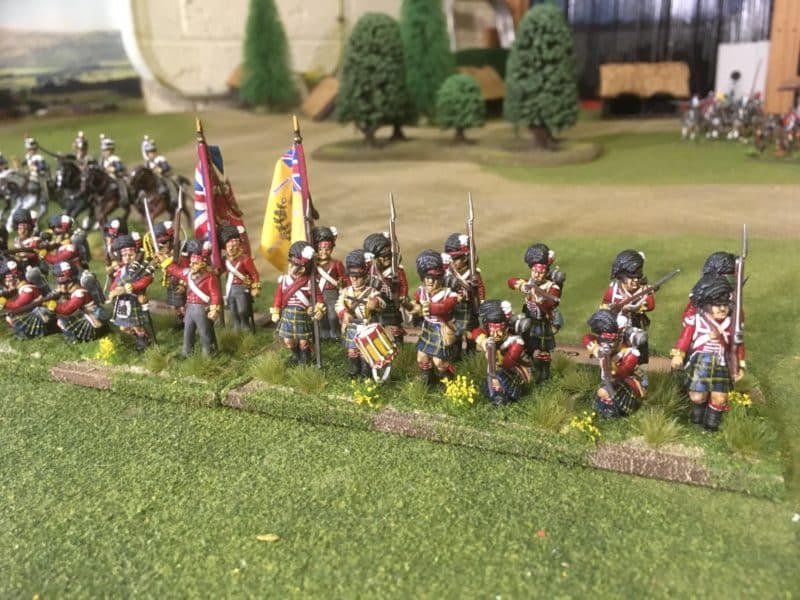
Gordon Highlanders completed

Gordon Highlanders completed

I also finished basing my battalion of Gordon Highlanders, so two projects off the desk – back to my War of the Roses Cavalry now!

THE COMMERIAL BIT

Nearly every thing that I use in my modelling projects comes from the Arcane Scenery shop. We supply post free to most worldwide locations!

VALLEJO PAINTS AND TEXTURES

If you are looking for a particular paint, use the code that I have given in the shop search bar.

RENEDRA BASES

GAMERS GRASS

WOODLANDS SCENICS

Happy Modelling!

Portuguese Artillery Part 1

It might seem that I am jumping around with different projects but there is a method in the madness. I have a Demo game coming up at the Warlord Games Open Day on 20th July here in Nottingham. The NG13 wargamers will be re running a Black powder version of the game ‘Combat at Foz D’Arouce’. We thought that it would be fun to show how Black powder can be adapted to run a Company level game on a small 4′ x 4′ table. Rather than use a British force, I thought that I would get my Portuguese detachment on to the table. Whilst I have plenty of troops, I have no Portuguese Artillery. The Demo game was a good excuse to remedy this.

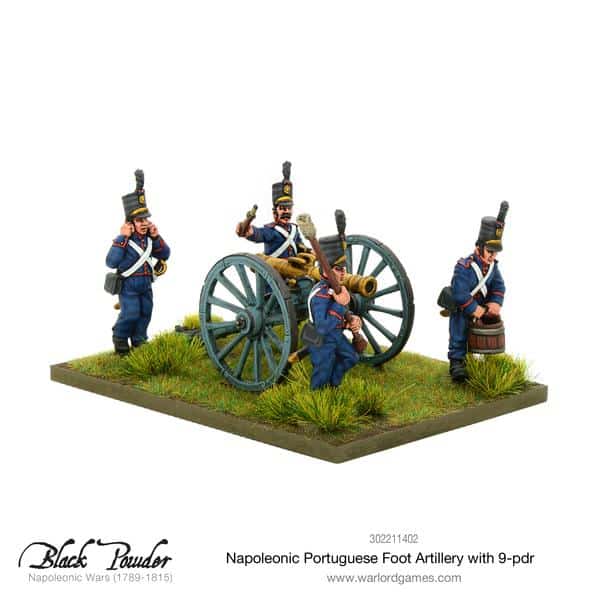
Warlord Games Portuguese 9 pounder.

Warlord Games Portuguese 9 pounder.

As you can see, Warlord make a nice Portuguese Artillery set, available as a 6pdr, 9pdr or Howitzer. I went for the 9pdr version and ordered a couple to compliment my Brigade of Infantry, even though I only needed one for the demo game!

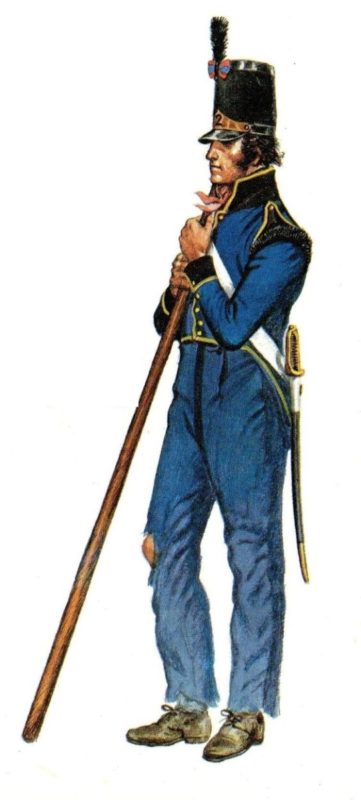
Portuguese Artillery from Pinterest board.

Portuguese Artillery from Pinterest board.

The next issue was to research the colour scheme. I guess I could have taken the easy option and just copied the Warlord photo but I wanted to check to see if there were any alternatives. Unfortunately, that resulted in the usual confusion as different references gave slightly different schemes. The Osprey book that I had gave the colour scheme as ‘Dark blue coat of infantry style with red collar and cuffs…’ However, the Napoleonic source book gives the uniform as ‘Dark Blue infantry style coats with black facings and plumes.’ It also goes on to explain that there were four different regiments but gave no idea if they had different uniforms. As you can see from the picture above, The second Regiment appeared to have yellow piping – nice, but is it accurate?

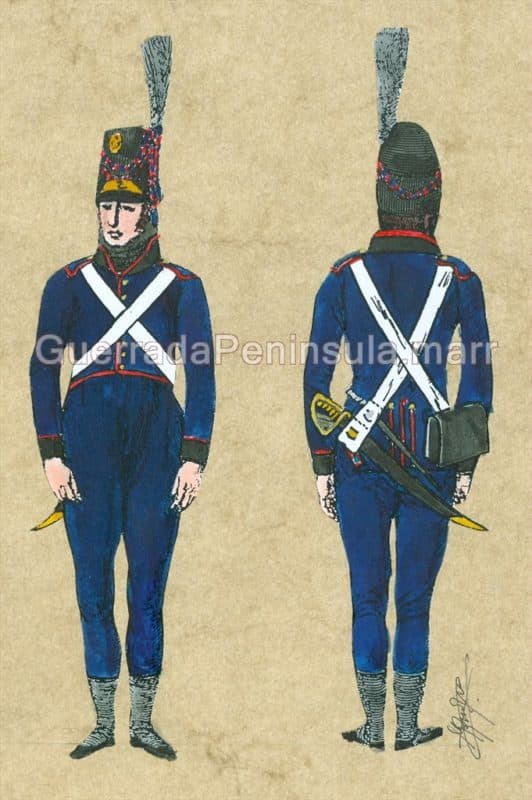
Another version of the same regiment?

Another version of the same regiment?

After trawling through the rest of my references and numerous google and pinterest searches I resorted to asking on the TMP forum. As ever, I received some excellent help and information. I was refered to the Osprey books again – this time to volume three of the Portuguese army – I only had two volumes so had missed this! The information was:

If you have Osprey vol 3, turn to page 3, Table C.

It shows the regimental distinctions for the four regiments (1st to 4th). Coat blue, then collar and cuff in a combination of blue or black – blue blue, black black, black blue, blue black in that order.

Turnbacks and piping were red for all regiments. Britches were blue in winter, white in summer. Gaiters black. Buttons yellow.

Stovepipe shako replaced barretino in 1810. Brass plate. Black plume.

Does that help?

Another contributor kindly supplied the above picture. So on balance, I went for the second Regiment but despite my liking for the yellow piping, I have gone with red!

Portuguese Artillery - primed!

Portuguese Artillery – primed!

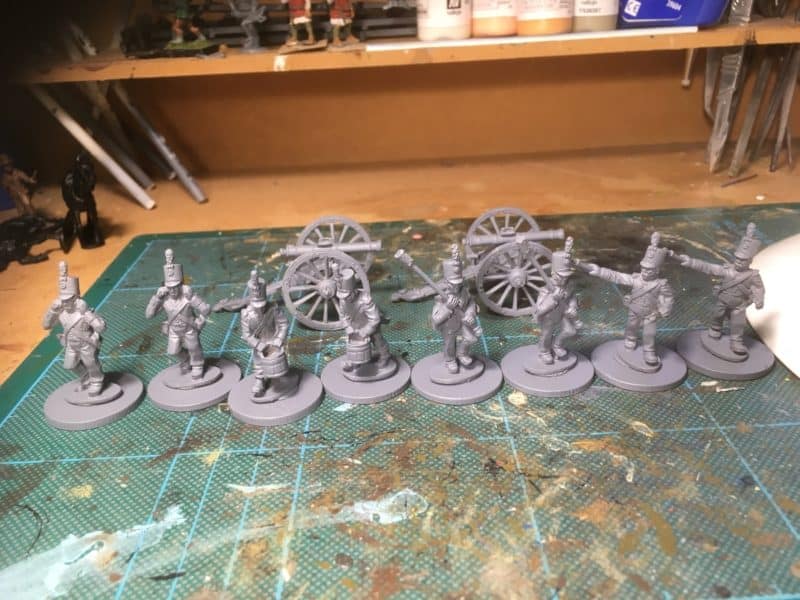
So, decision made as regards the colour scheme that I would use, it was on with the painting. As usual, I will batch paint, which will involve a combination of colour blocking, Army Shade and highlighting. First job was to clean the figures, attach them to temporary base and prime in Army Painter grey.

Portuguese Artillery - Flesh

Portuguese Artillery – Flesh

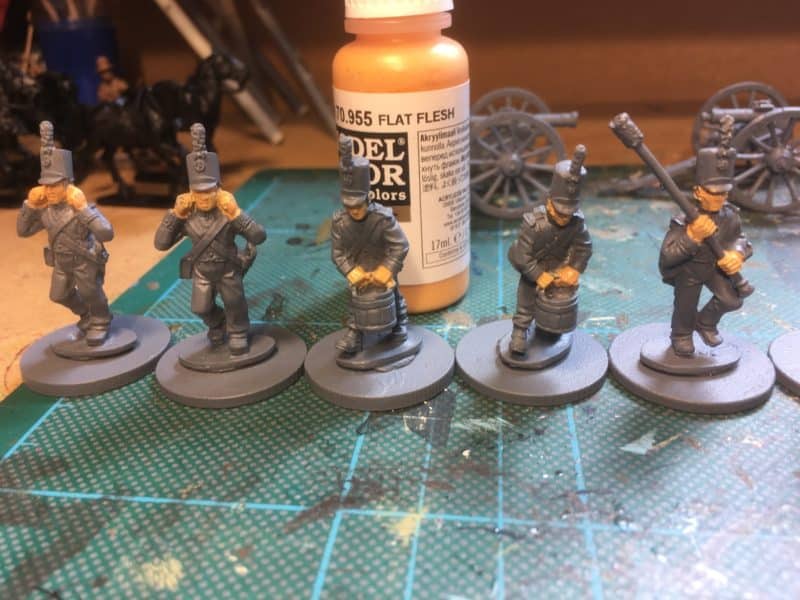
I use Vallejo 70955 flesh for the face and hands.

Portuguese Artillery - black

Portuguese Artillery – black

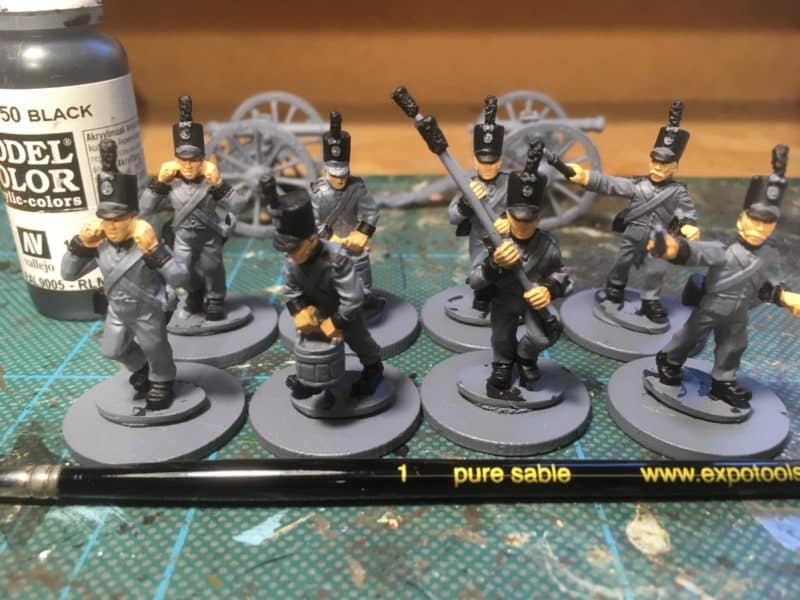
Vallejo 70950 black for plumes, hat, facings ( collars & Cuffs) boots, cartridge case and sword scarbard.

Portuguese Artillery - hair and accessories.

Portuguese Artillery – hair and accessories.

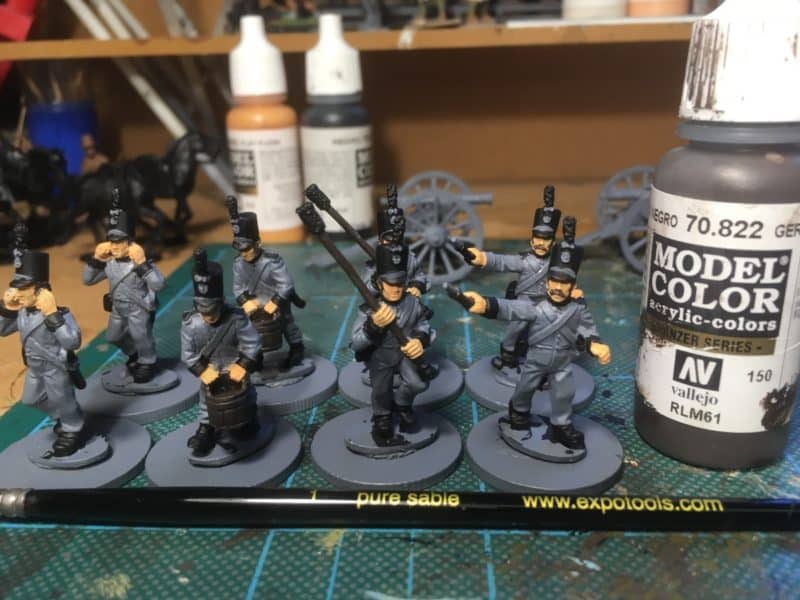
I used 70822, German Camouflage black brown for the hair (I could have used Black but wanted a slight contrast between the hair and shako) and as a base for the Artillery equipment.

Portuguese Artilery - Uniforms.

Portuguese Artillery – Uniforms.

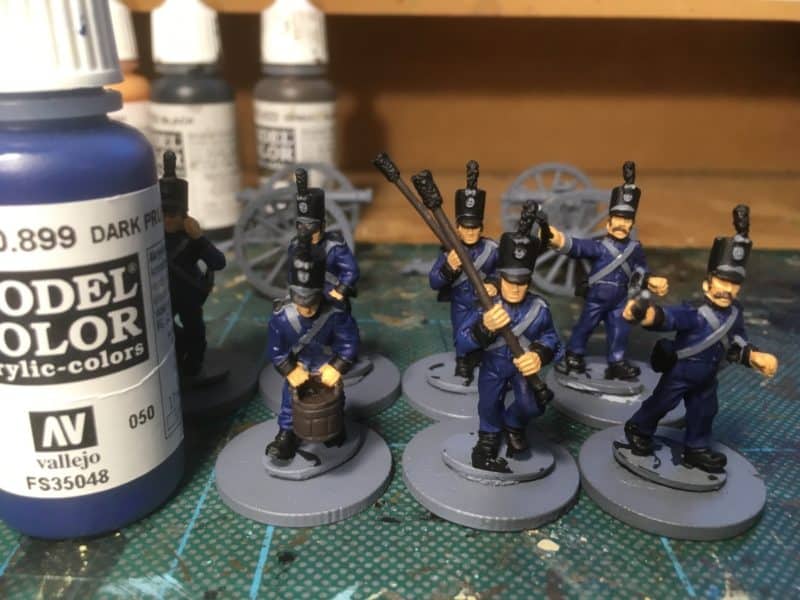
The uniforms were painted Dark Prussian Blue, Vallejo 70899.

Potuguese Artillery - white belts

Portuguese Artillery – white belts

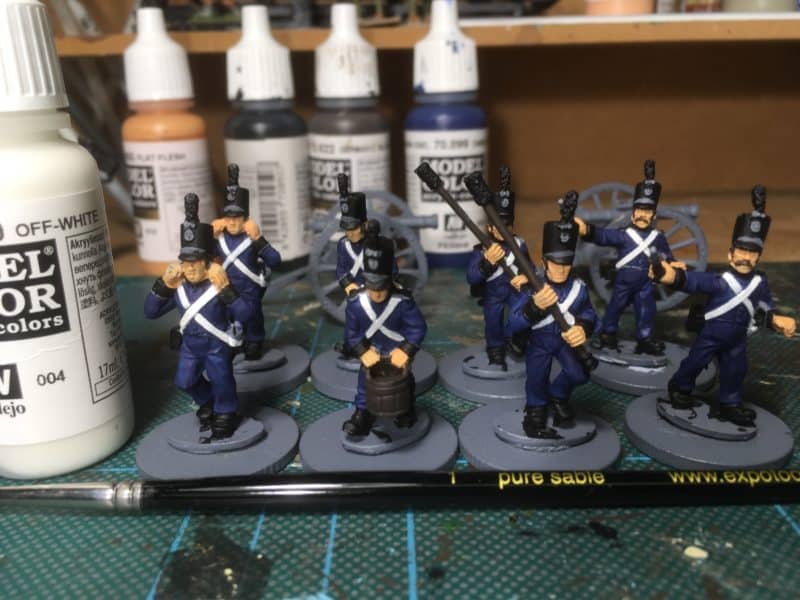
I use Vallejo Off white 70820 for the belts and prefer the softer look to this than the normal Vallejo white.

Portuguese Artillery - Brass

Portuguese Artillery – Brass

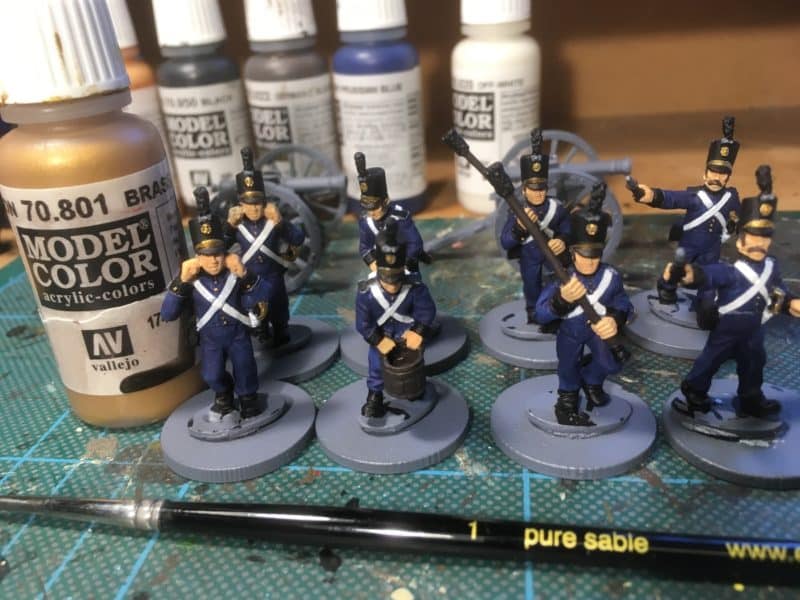
Vallejo 70801 brass for the cap badges, plates buttons and sword hilts & scabbard detail. With hindsight, I have gone out of my usual sequence here. I should have done the red piping next and the brass last. It keeps the brush cleaning water free of metallic specs and the piping will run over the buttons as I was to find out…

Portuguese artillery - Red Piping

Portuguese artillery – Red Piping

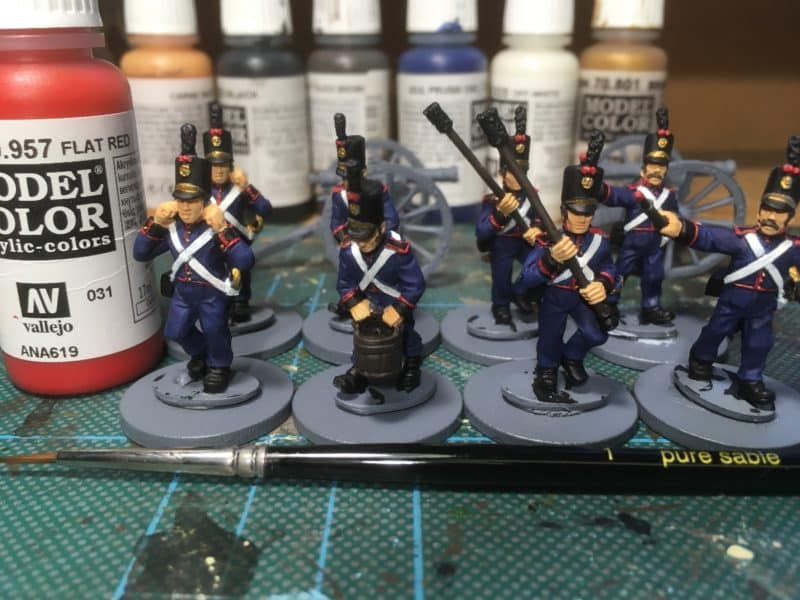
The red piping, turnbacks and ribbons on the shako were done with Vallejo 70957 red and the figures are nearly complete. That’s as far as I have got with them but all being well, they will be completed for next week and I will return with pictures of them based and ready for action!

Still to do – I will highlight the Plumes and ram rod heads in black grey, add the blue ribbon and detail to the shako’s, add the detail to the buckets and other equipment and then use quick shade to bring out the detail and seal the figures. A quick coat of matt varnish and re highlight the white belts if necessary.

The beauty of the batch paint method is that there’s no need to do the figures in one sitting. In reality, these figures could be completed to this stage in a few hours. However, my back and eyes wont last more than an hour and it’s rare that I get that much painting time in one session. The batch paint sequence allows me to make progress even in the smallest time gap. So Although I watched the Footie on Tuesday, I used half time to slap some paint on!

THE COMMERCIAL BIT

First of all, if you would like to visit my pinterest board to see other pictures of Portuguese Napoleonic Army, click here:

PORTUGUESE BOARD

To see the TMP discussion, click here:

THE MINIATURES PAGE

We sell a huge range of Vallejo paints and finishes in our shop. Just click below:

VALLEJO PAINTS AND TEXTURES

If you are looking for a particular paint, use the code that I have given in the shop search bar.

Happy Modelling!