Paintvember – The Painting Challenge

Yes, it’s a horrible title, Paintvember, but it did capture my imagination and as a result of a challenge issued on the Painting and Sculpting facebook page, for once I joined in one of the social media challenges. I normally steer well clear of such nonsense (I’m talking social media challenges – not painting), regardless of how worthy the cause, so no moustache growing, abstaining from booze, chucking ice cold water over myself or any of the other mass madness that goes on. This was simple, just commit to painting, sculpting or modelling for 30 minutes a day for the month of November and post your progress up on the facebook group page. It seemed like a good way of focusing on my hobby and it would be interesting to see just what could be achieved if I spent some time everyday doing some painting.
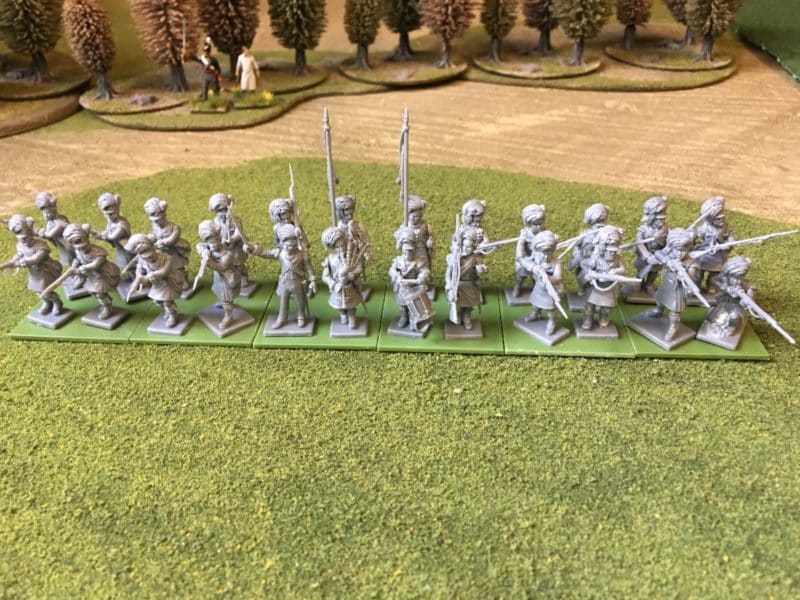
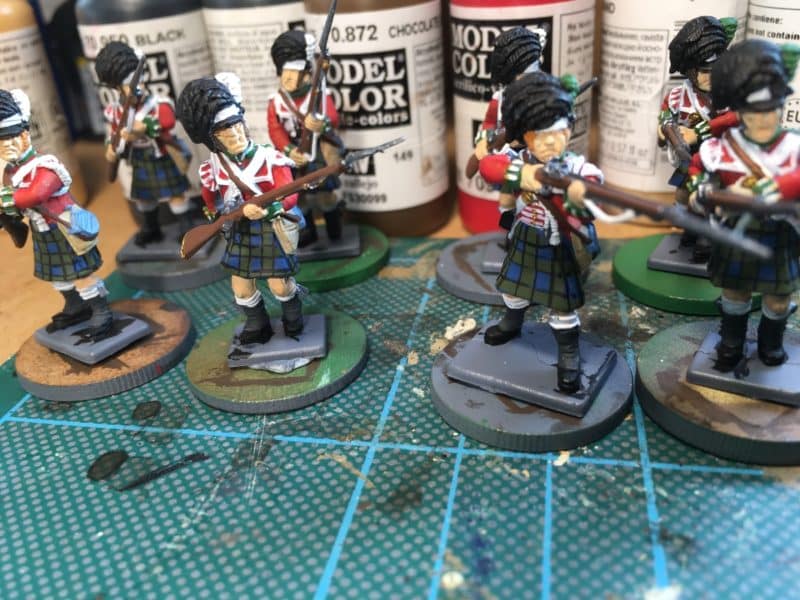
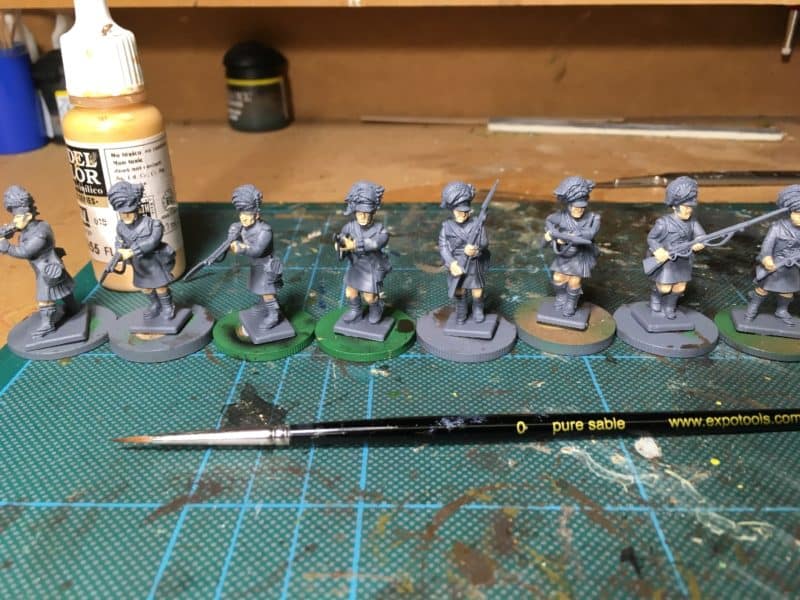
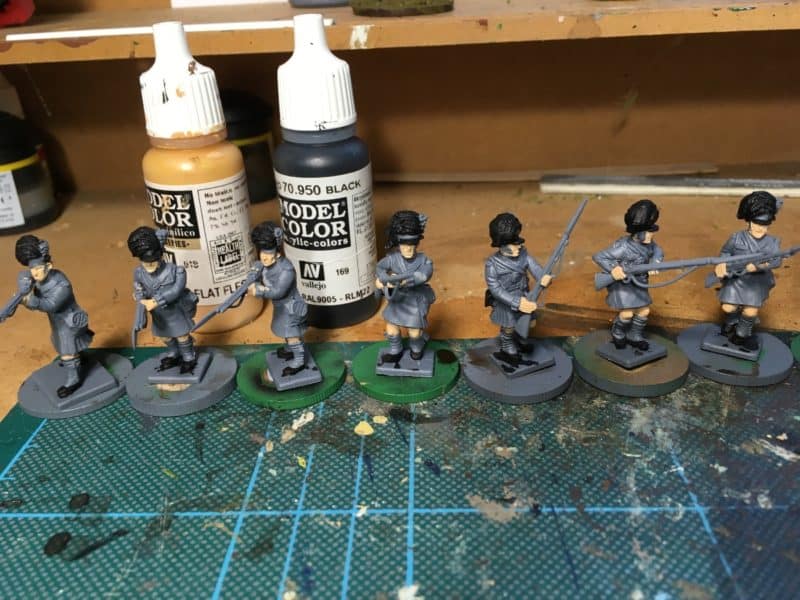
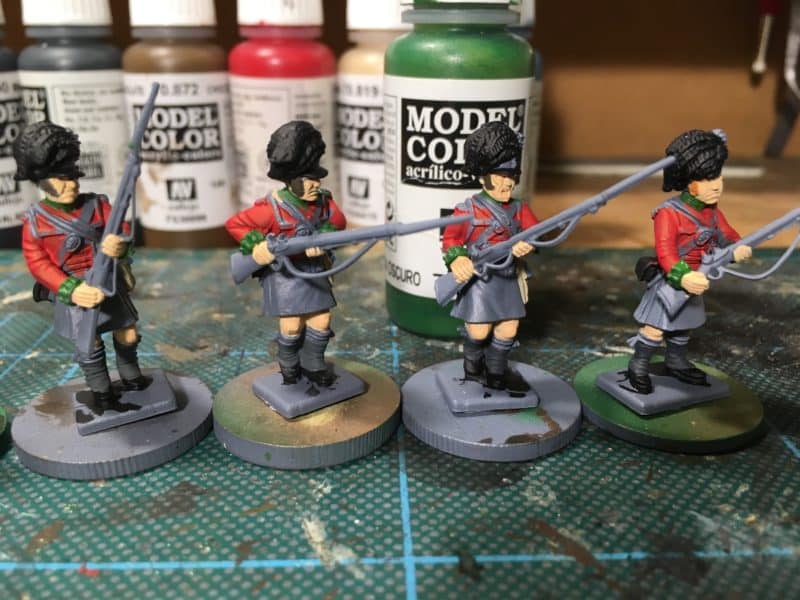
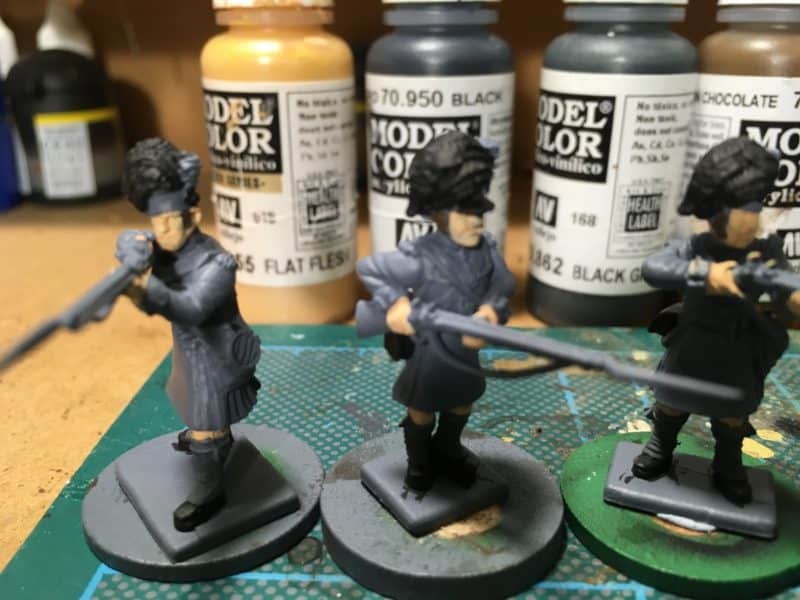
Victirx Highland Infantry assembled ready for painting.

Victirx Highland Infantry assembled ready for painting.

To be fair, it wasn’t a great stretch, I paint for a short period of time on most weekday evenings but usually have at least one evening off, if nothing else than to actually wargame! The weekends can be mixed. In the summer, there is plenty of other distractions and even on rainy winter weekends, there are things to do and people to see, meaning that my hobby is put to one side.

So what have I learnt?

The first thing was that it turned what can be a solitary part of the hobby into more of a social occasion. Social media can be useful when those contributing are not only giving encouraging feedback but also showing what they are painting as well. I looked forward to seeing how my facebook chums were progressing with their projects and the skill and variety of projects on show was certainly inspirational. Getting a few likes was heartening and helped to keep me focused.
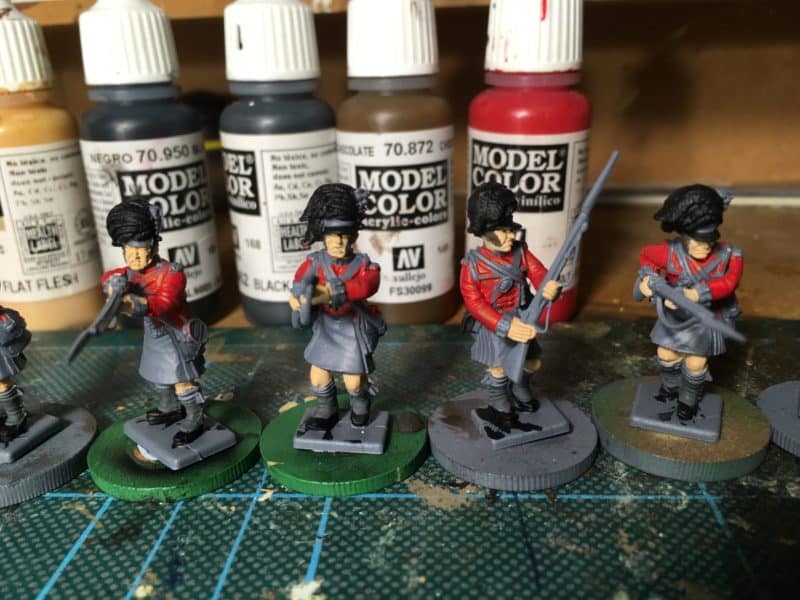
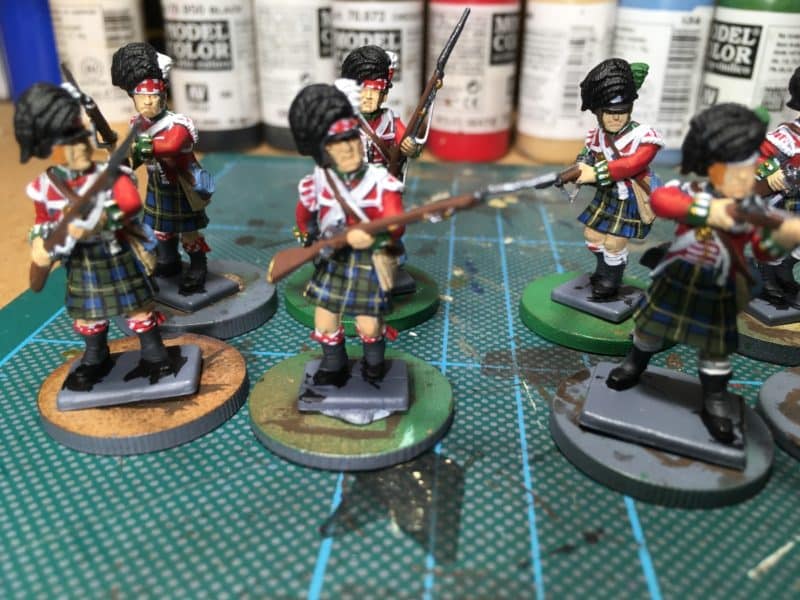
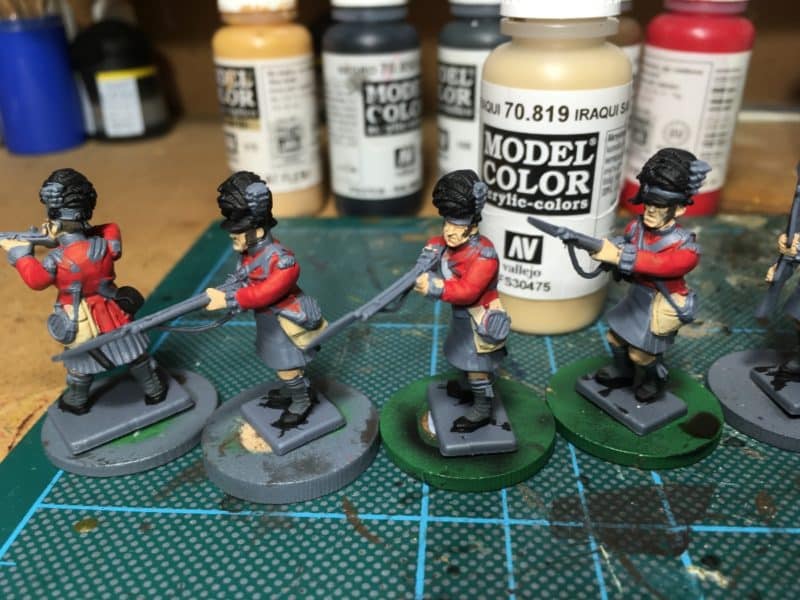
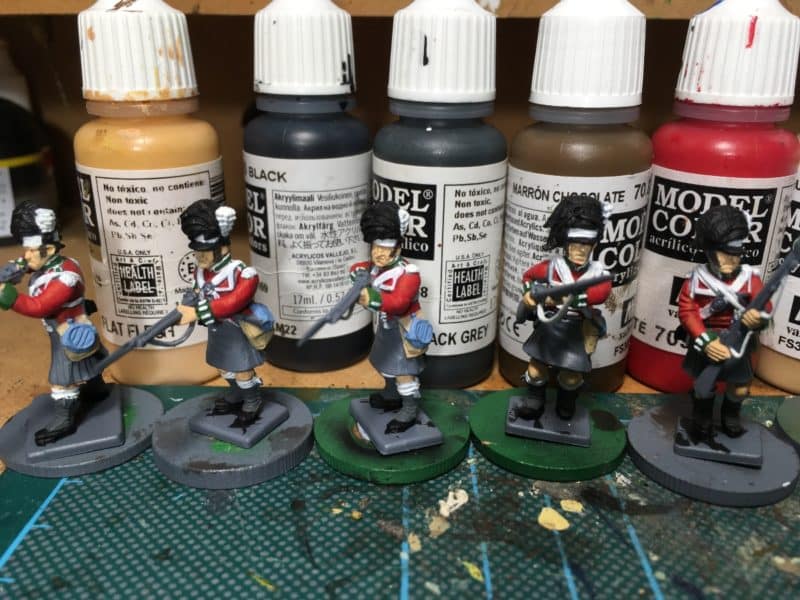
Red coats on!

Red coats on!

Batch painting is ideal for this sort of challenge. It helps that I have a work area that I can leave in a mess and know that it wont be disturbed. So if I am working through a batch of figures I can easily find just 5 minutes to get a bit  more colour on a figure. I think that this becomes more difficult if you are working on a ‘masterpiece’, one figure to a high standard or trying to paint a larger model. When I was working through my Highlanders, I had a set sequence, Flesh, Hats, Boots, cartridge case, jacket, bread bag, water bottle and so on. So I always know which colour I would be blocking on the next model.

The 30 minutes a day (minimum – I often did more!) does keep a project moving and so even when I thought that I might stall or wimp out of the challenge, the small goal of just paint for 30 minutes meant that I picked up my brush and did some more. The ‘Elephant’ was eaten a spoonful at a time!
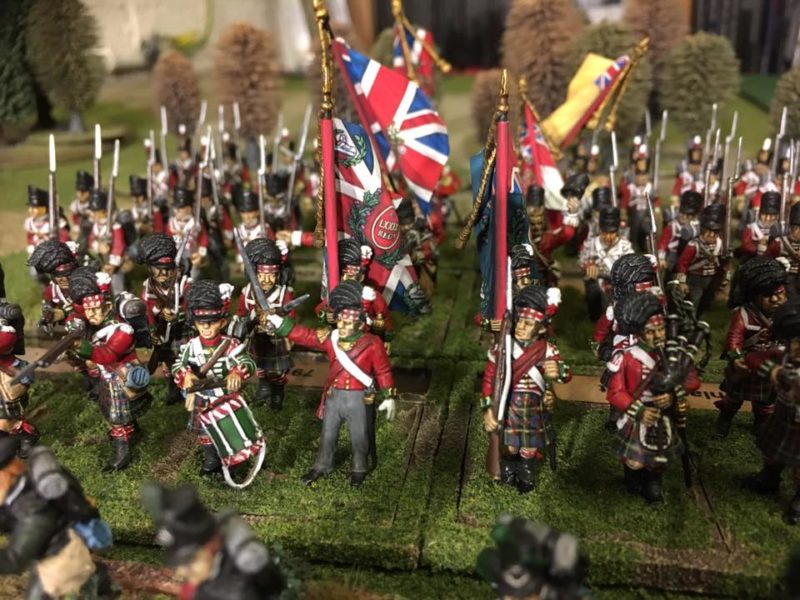
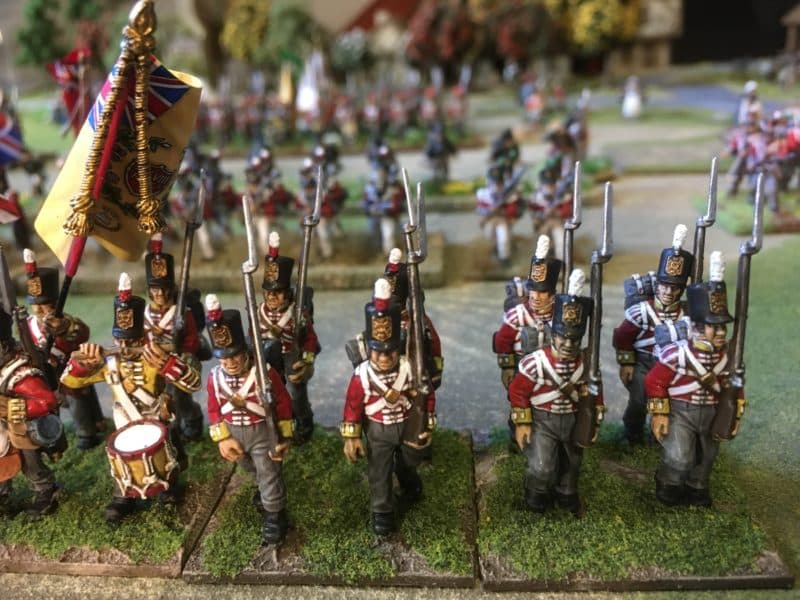
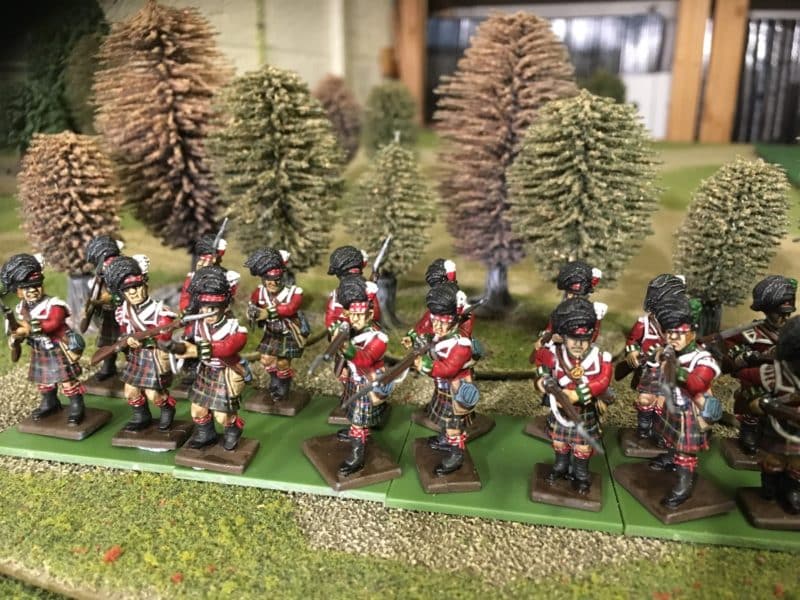
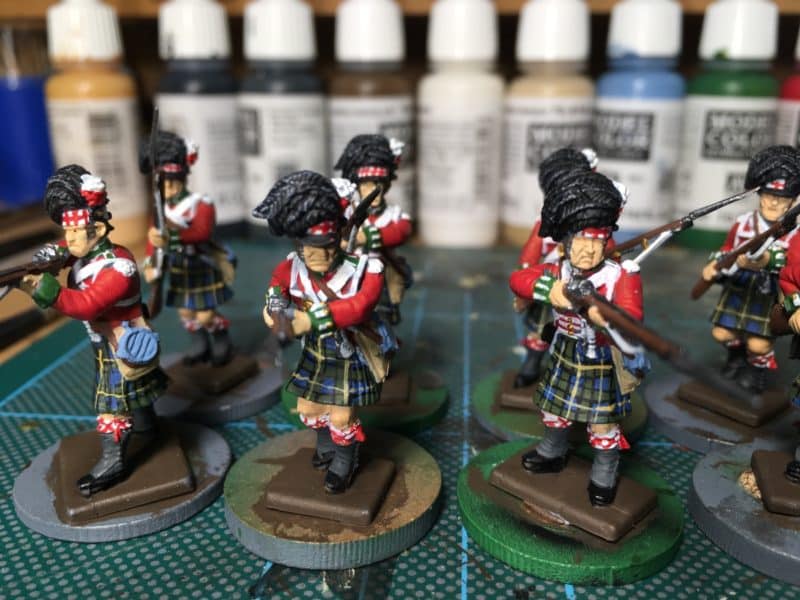
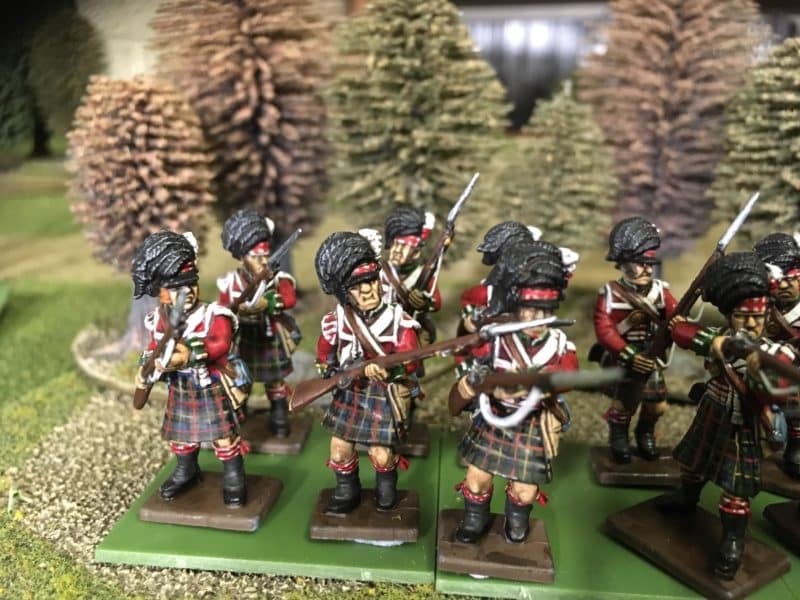
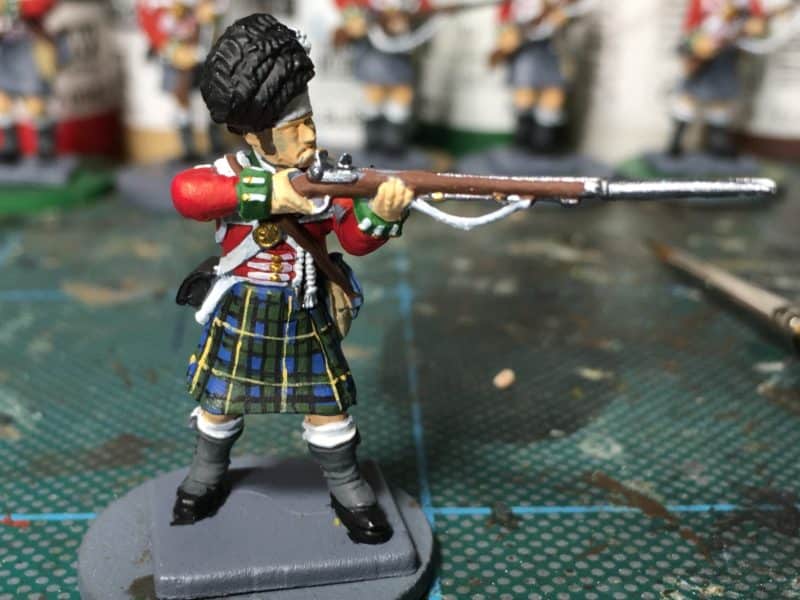
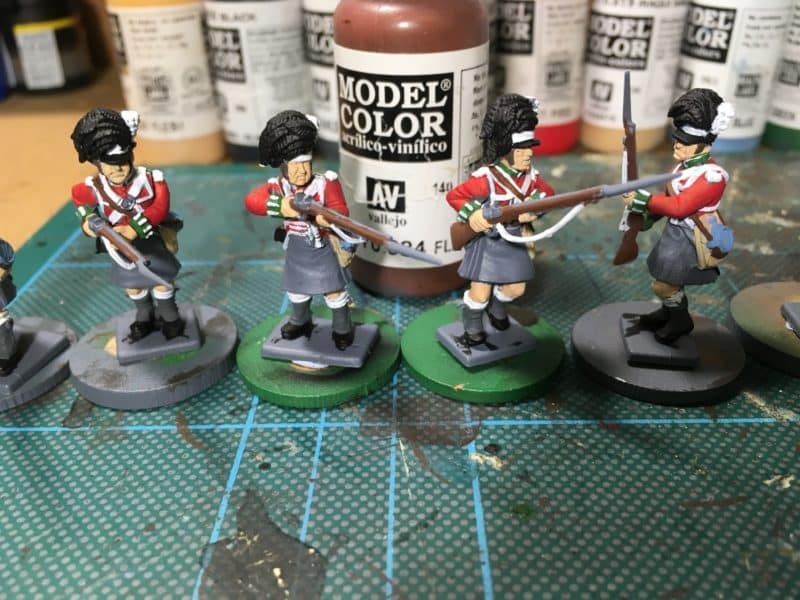
79th Camerons close up.

79th Camerons close up.

It helped that I had a couple of projects on the go at once. As well as painting the Highlanders, I was working on a new batch of movement trays for my collection. So if I wasn’t in the mood for painting or if I needed more than 30 minutes for a stage, I could switch from painting soldiers to the trays. I think that having a couple of different projects on the go at once is quite useful but would suggest that they do need to be different. Perhaps a scenery piece alongside a unit of figures is a good mix.
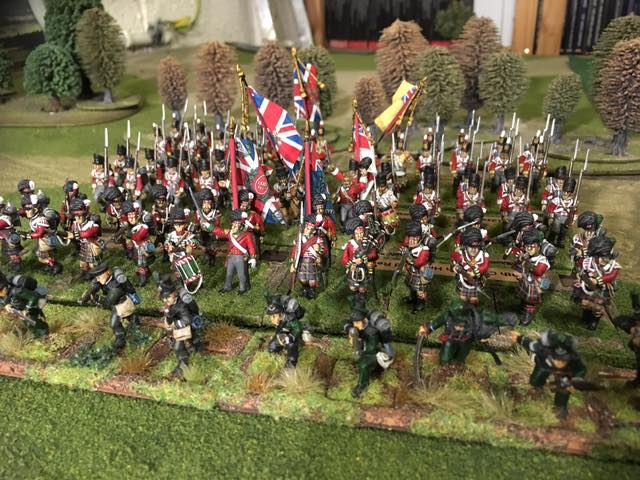
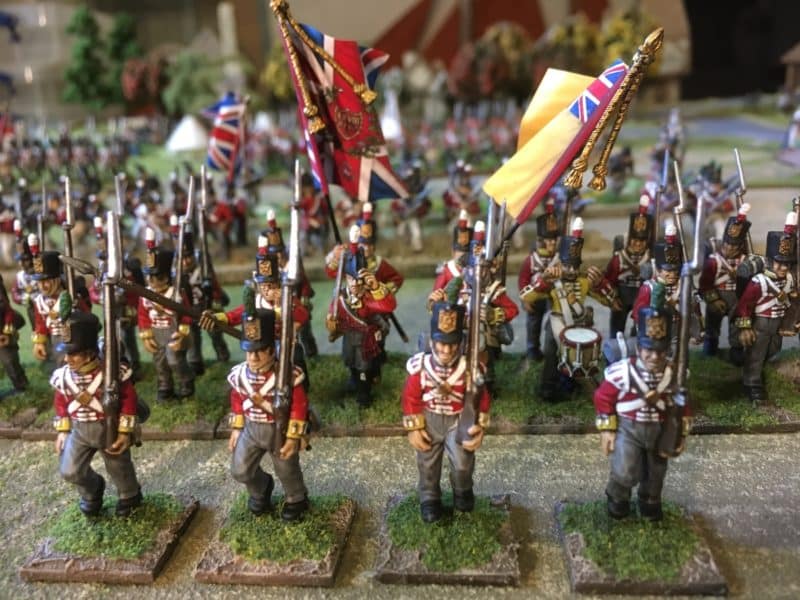
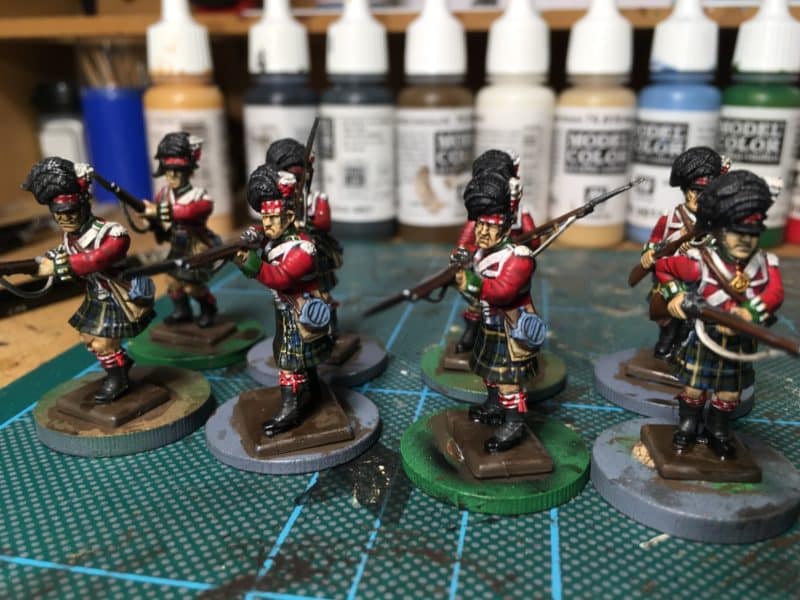
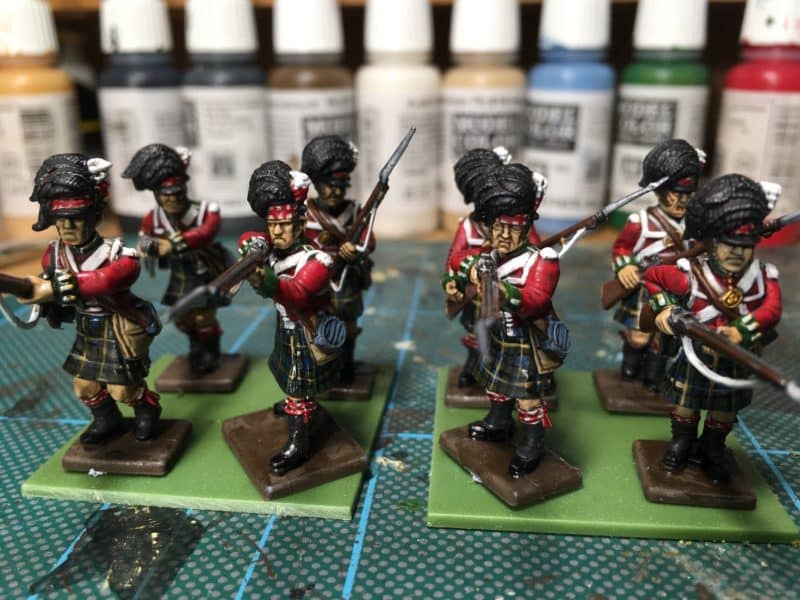
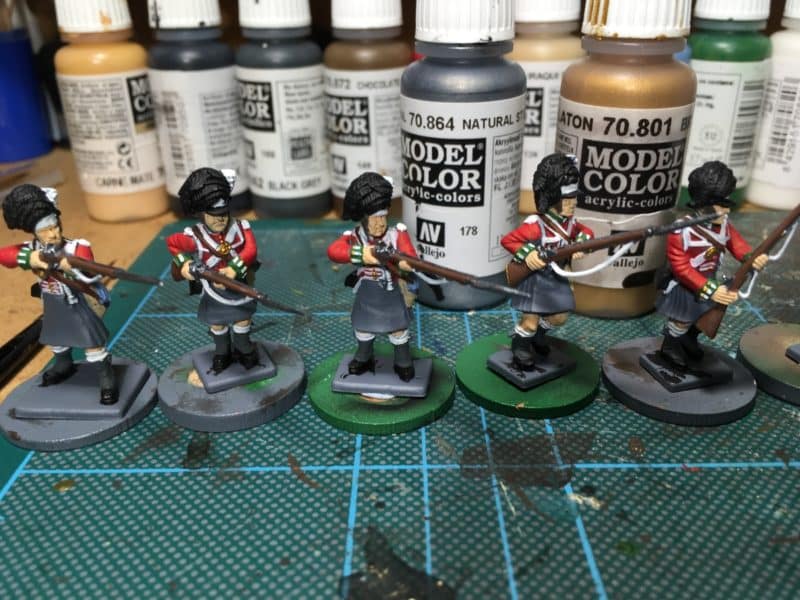
The 79th Camerons finishe as part of the Paintvember challenge!

The 79th Camerons finishe as part of the Paintvember challenge!

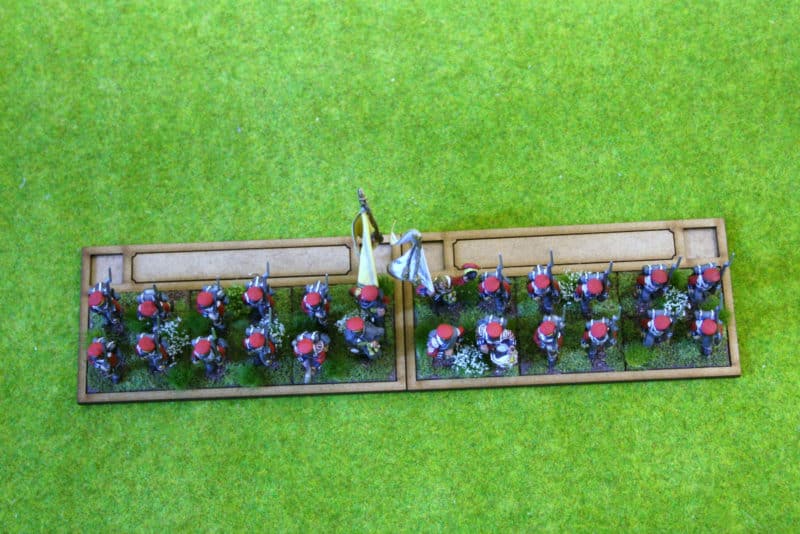
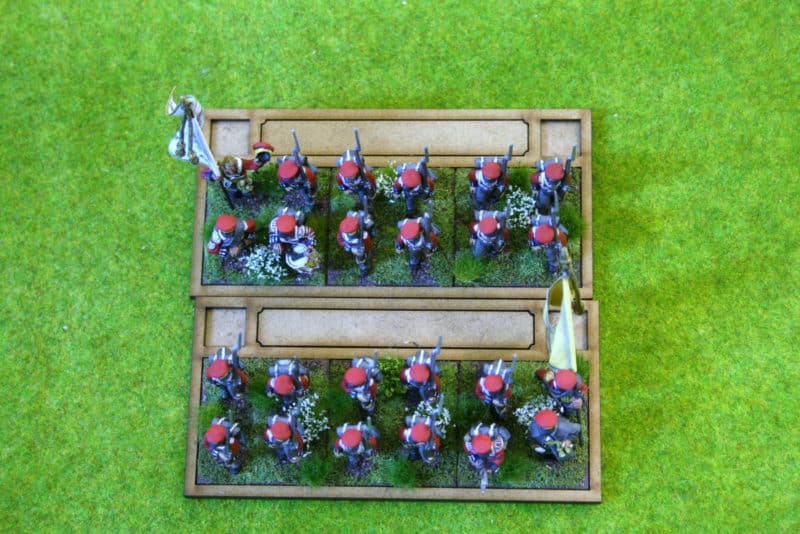
The challenge also focused me on to the question of when could I find 30 minutes to paint as opposed to the oft reached conclusion that ‘I haven’t got time to paint today’. As a result, I have been grabbing short periods of time in the morning and evening to get my session in. The nights when I might have succumbed to watching the idiots lantern have been replaced with something more productive. It’s taken most of the challenge but I now have a completed Battalion of Cameron Highlanders, which in themselves have completed my representation of the 8th British Brigade at Waterloo, complete with their own new labelled movement trays!
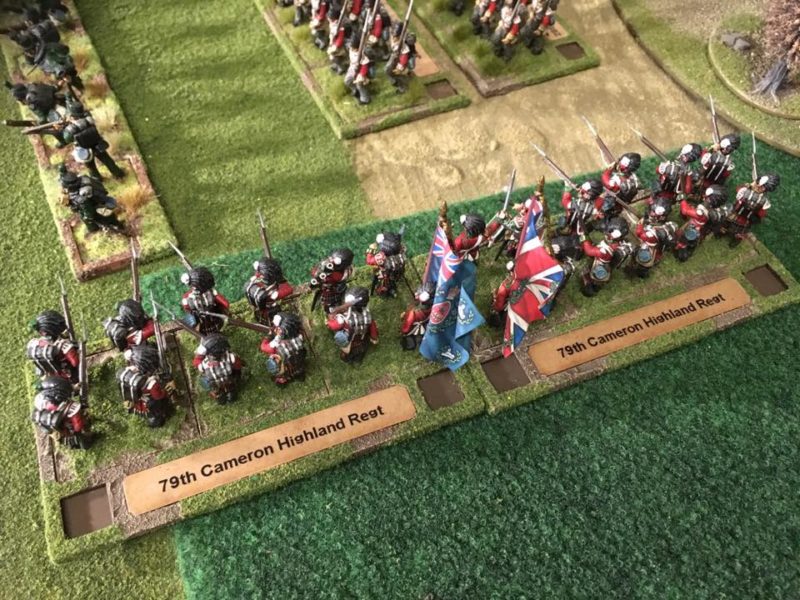
Labelled trays completed as well!

Labelled trays completed as well!

I dont think that I will be quite so relentless with my painting over the next 30 days. Sometimes, a break can be refreshing – absence makes the heart grow fonder – but I hope to keep the attitude of looking for opportunities to paint rather than finding excuses not to. As a final thought, social media, when it is social, has been a great help to my hobby. I have been fortunate enough to part of groups that have either provided me with encouragement with my hobby or inspired me by showing me what can be achieved. So no commercial links below, just a few of my favorite facebook groups!

So, finally, a big ‘Thank You!’ to Alfonso Oclaf for posing the challenge. I’ve never met Alfonso but I am grateful for his idea and for helping me to get my Highlanders done!

SCULPTING, PAINTING AND GAMING FACEBOOK PAGE

TEST OF HONOUR FACEBOOK PAGE

MORTAL GODS FACEBOOK PAGE

WARLORD GAMES BLACK POWDER FACEBOOK PAGE

And of course!

ARCANE SCENERY

Remember to like our page to receive updates of our latest releases, hobby news, on this day in history posts and you can follow my efforts at modelling!

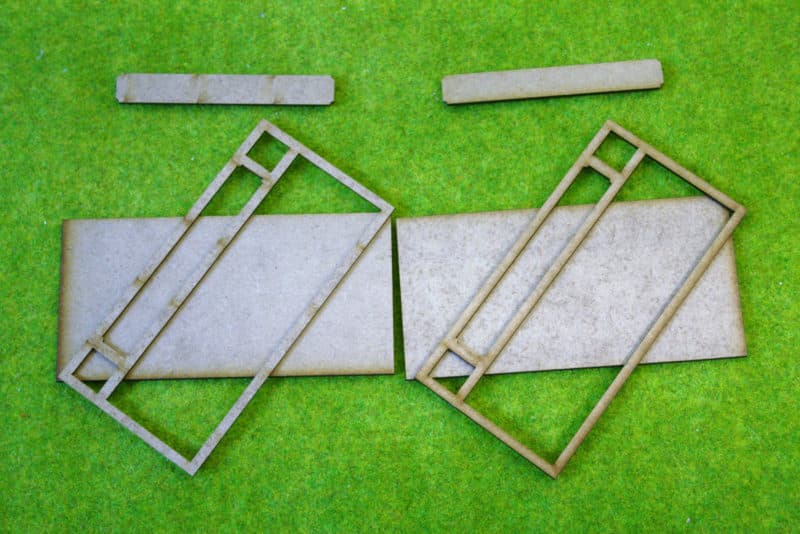
Movement trays

Perhaps not the most glamorous part of our hobby but a topic that has interested me for some time. I see an awful lot of questions on social media with regards to the best method of basing figures, this is usually referring to the number of figures per base or the base size rather than the landscaping! There is of course no definitive answer to the question as different rules sets will often require different basing requirements – not only the size of bases will vary but the shape (round or square) can vary.

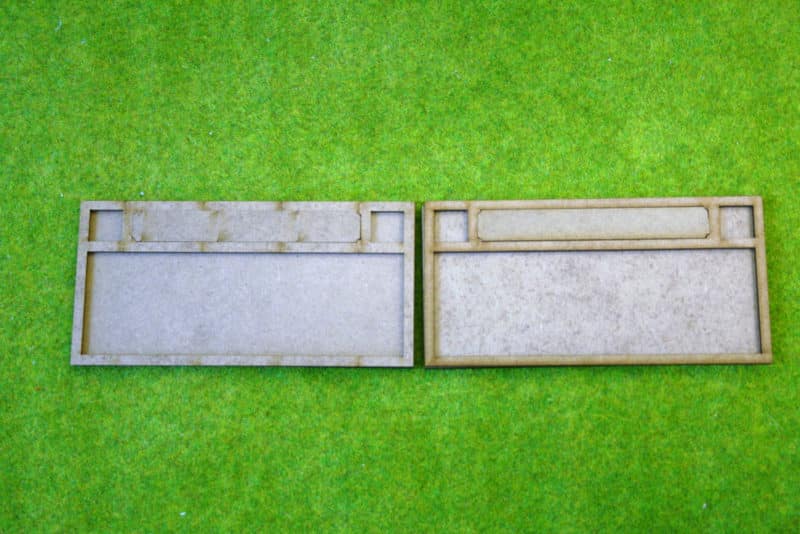
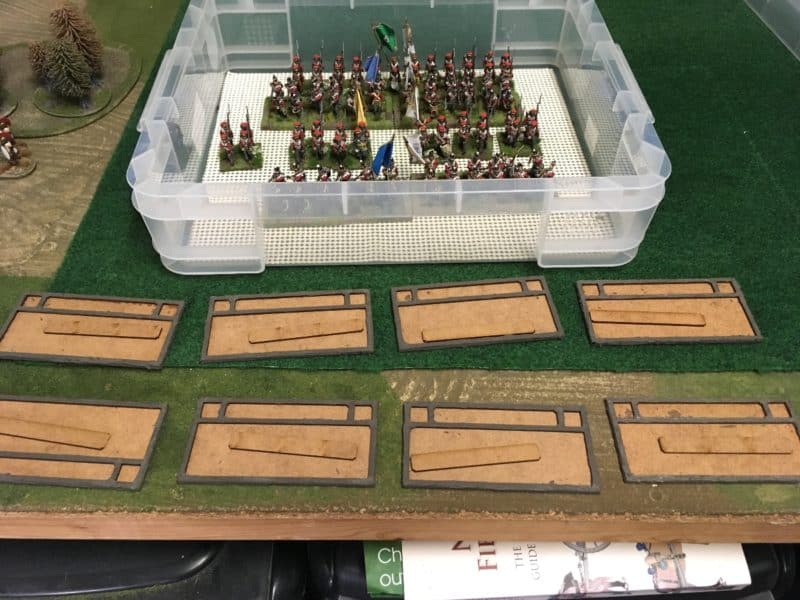
My new movement trays before assembly.

My new movement trays before assembly.

One solution is to use movement trays as a way of assembling units. This certainly helps bridge the gap between skirmish games, for example, Sharp Practice, and games that use larger units, say Black Powder. The problem is that by definition, the movement tray fixes the formation of your troops, making formation changes difficult duing the game.

Assembled trays

Assembled trays

As my Napoleonic collection has grown, I also wanted a way of identifying the different battalions in my army. Yes, I know that they all have flags ( well most of them) but the more my battalions have grown, the harder it has become to remember who was who! So my solution was to design a movement tray system that allowed me to label my troops, but was flexible enough to facilitate different formations. The other benefit of movement trays is that they can help with transporting and organising your army.

As you can imagine, there was no simple solution and a compromise was required. This was made slightly easier by the fact that I play mostly Black Powder Napoleonic games, with the occasional foray into Sharp Practice! I came up with the following system, that has given me a degree of flexibility and solved some of the problems.

Grenadier Company based

Grenadier Company based – four figures to a 40mm square base

First I decided to base all my Napoleonic infantry on 40mm square bases, four figures to a base. That said, some of my figures, usually the flank company’s, are based  singly on 20mm square bases. This gives me some single figures to use for skirmish games if I need them. I’ve then built my Battalions in 12’s for a small unit, 24 for a standard unit and 36 for a large unit. However, the movement trays are designed to take 12 figures, so a standard unit will need two trays.

Flank Company on single 20mm square bases

Flank Company on single 20mm square bases

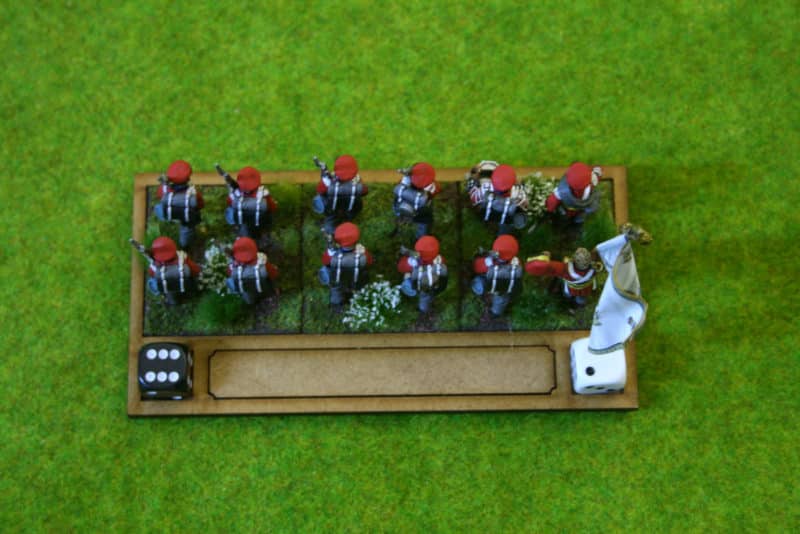
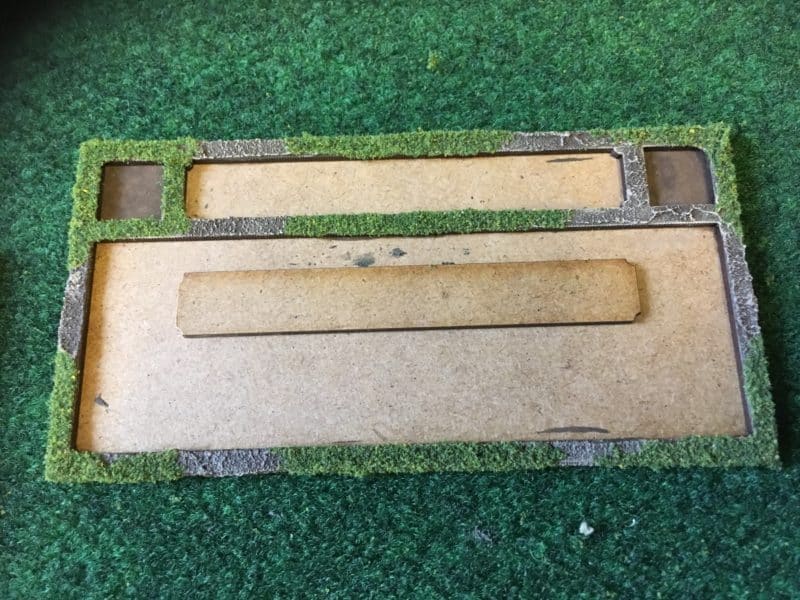
This has the benefit of allowing me to split the unit into two, facilitating most formation changes but also allowing me to field the Battalion as two units of 12 for small club night battles. My new movement trays also have a name plate at the back allowing me to label each battalion. I was lucky with the design – the name plate is exactly the same width as a Dymo electric label printer, making labelling very straight forward. There are also two cut outs per trays to use for disorder and casualty markers – a simple 12mm D6 is used, different colours can mean different results according to the game being played. This allows any disorders or casualties to move with the unit rather than get left behind on the table as is sometimes the case.

Tray showing dice used for markers

Tray showing dice used for markers

I decided that I wanted to ‘landscape’ the trays to help them blend into the gaming table. Some of my colleagues prefer to leave the trays as they are – it again is a question of taste. There is another advantage to texturing the trays. It covers any imperfections when assembled but more importantly helps to hide any differences in basing on the troops. I have been building my Napoleonic army over six years now and occasionally have strayed from my standard basing formula, which any way has evolved as I have found new products to use.

Textured movment trays

Textured movment trays

To achieve a textured effect I simply coat the assembled trays with Vallejo Dark Earth textured paste as in the picture above. Once this is dry, I just run a sharp scalpel around the edges to tidy things up and remove any excess. It is then a case of painting with your preferred basing colour ( mine is Vallejo Chocolate Brown) and then dry brushing with a lighter mix to bring out the texture. Once the painting is dry, I add patches of green scatter ( woodlands scenic is now my preferred choice) and the trays are ready for use.

Movement tray textured and ready for use!

Movement tray textured and ready for use!

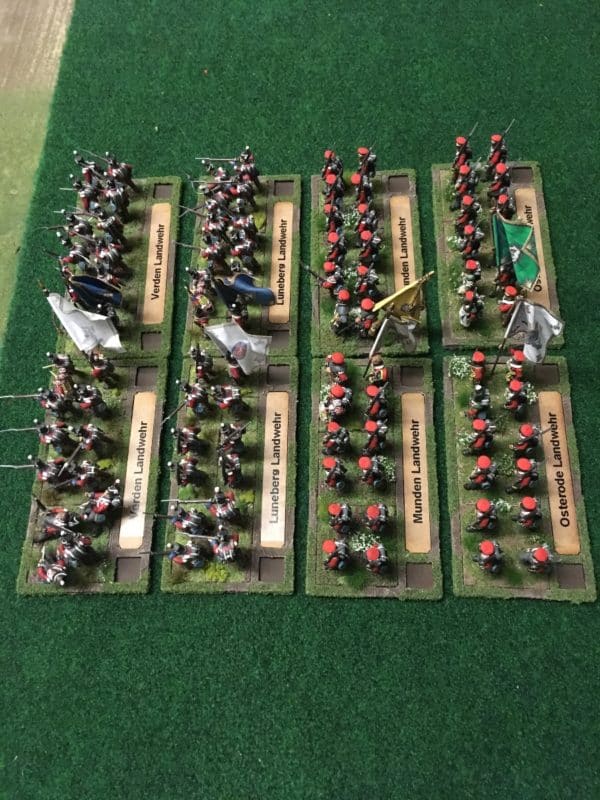
When it came to labelling, I decided on using the regiment name and number and only will indicate the Battalion number if there was more than one Battalion in service. It keeps things simple and allows me to use the largest font available for most of the labels. I used the Dymo Electric label printer to produce the labels on clear label material. As I said, I was lucky that the width matched my design exactly. The label maker was surprisingly inexpensive – just £14.99 from Aldi!

Landwehr battalions labelled ready for action

Landwehr battalions labelled ready for action

Of course the name plate is reversible, so if I decide to change the style – perhaps for a painted plate, I can do so!

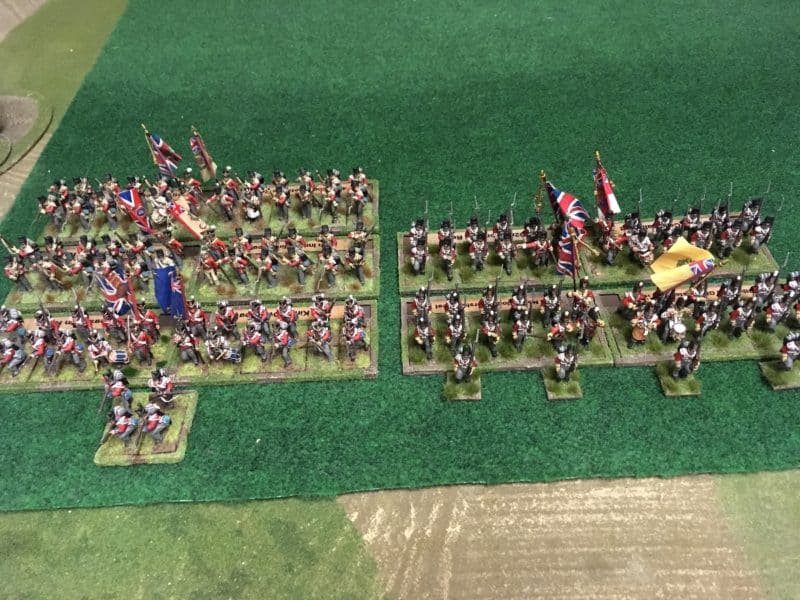
British Infantry Division labelled and ready for action.

British Infantry Division labelled and ready for action.

As you can see, from the front the name plates aren’t too intrusive, so my opponent shouldn’t be too distracted from the game. Another unintended benefit is that the name plate at the rear of the tray protects the bayonets of the units behind, helping to prevent damage.

Battalion in line!

Battalion in line!

Battalion in column - simply reverse rear tray to form square!

Battalion in column – simply reverse rear tray to form square!

So the task now is to get all of my units into these trays. With nine battalions done, I still have another nine battalions, or eighteen trays to do, but it will be a nice project to do in between painting yet more battalions!

THE COMMERCIAL BIT

If you would like to use these trays, they are available from my shop here:

BLACK POWDER MOVEMENT TRAYS

We also have quite a range of movement trays and bases here:

MOVEMENT TRAYS

For Woodlands scenic scatter and other scenic accessories, click here:

WOODLAND SCENICS

For Vallejo textures and paints, click here:

VALLEJO PRODUCTS

At the time of writing all of these products are supplied post free to most world wide locations!

Taming the Tartan Terrors!

In last weeks blog, I showed you how I have gone about batch painting my Battalion of 79th Cameron Highlanders for my Waterloo project. In this weeks blog, I show how I went about breaking down the tartan into a process that I could cope with to produce a reasonable table top standard finish to my troops in tartan.

I am no artist, more of a paint by numbers man, so I hope that this blog is useful to other gamers that have perhaps, like me, been put off from attempting to paint this complicated pattern on their troops. The idea is to give a representation of the tartan pattern on the troops that will look nice when the unit is complete. It is entirely beyond my skill to reproduce anything other than this on a 28mm tall figure.

The 79th Cameron regiment of foot, Centre Companies.

The 79th Cameron regiment of foot, Centre Companies.

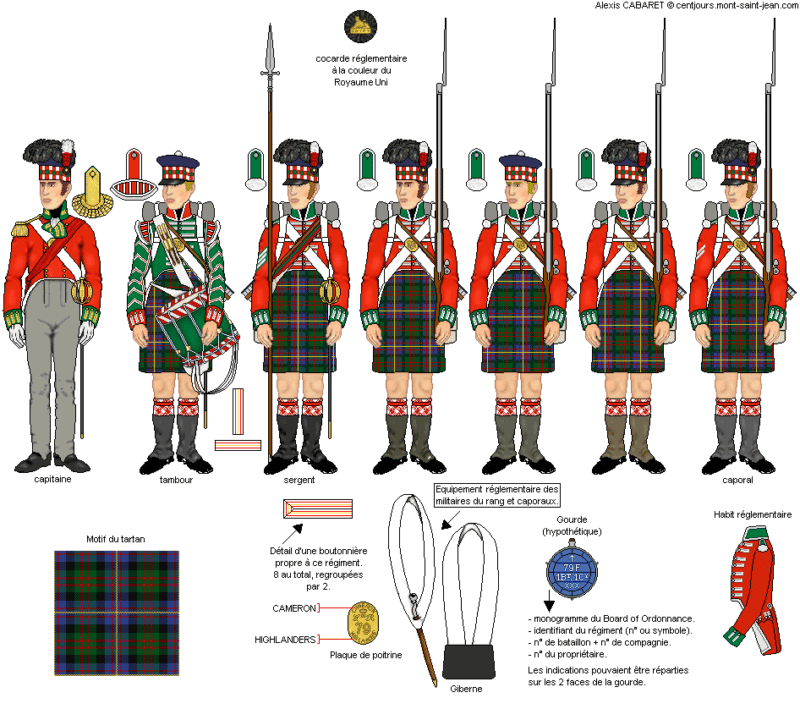
I did look at a number of references for the actual tartan but decided on a simple version based on what I could actually see when I held the book away from my face rather than the close up scrutiny that would show every colour! I should also confess that I am slightly red/green colour blind, so although I can see close up that there are fine red stripes running through the cloth, my overriding impression is of blue, green and black with a fine yellow/beige stripe, so that is what I would paint!

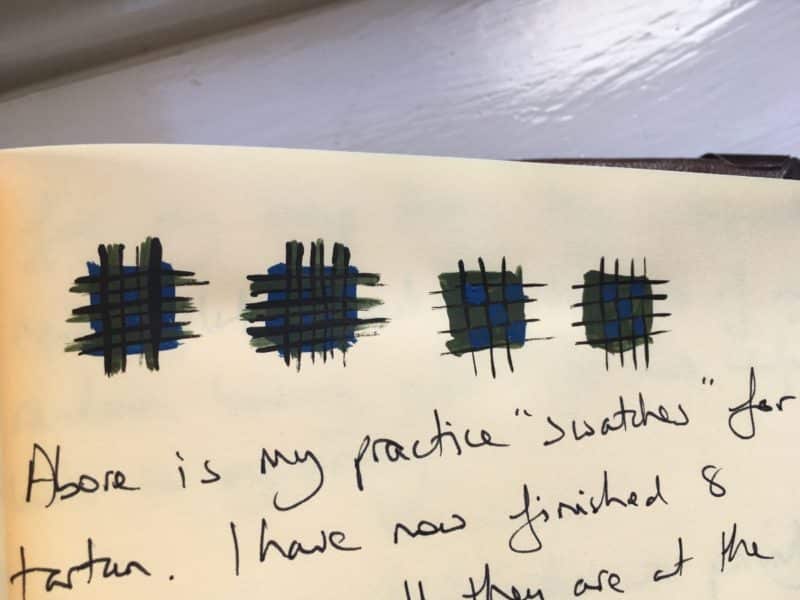
Before I started on the figures, I tried my hand in a larger scale in my note book to see how things would work out. The base colours that I chose for the tartan was Prussian blue 70965 and Reflective green 70890. I tried painting blue over green and green over blue, but decided that I preferred the latter.

Tartan practice - just going through the process helps fix how I will paint the tartan.

Tartan practice – just going through the process helps fix how I will paint the tartan.

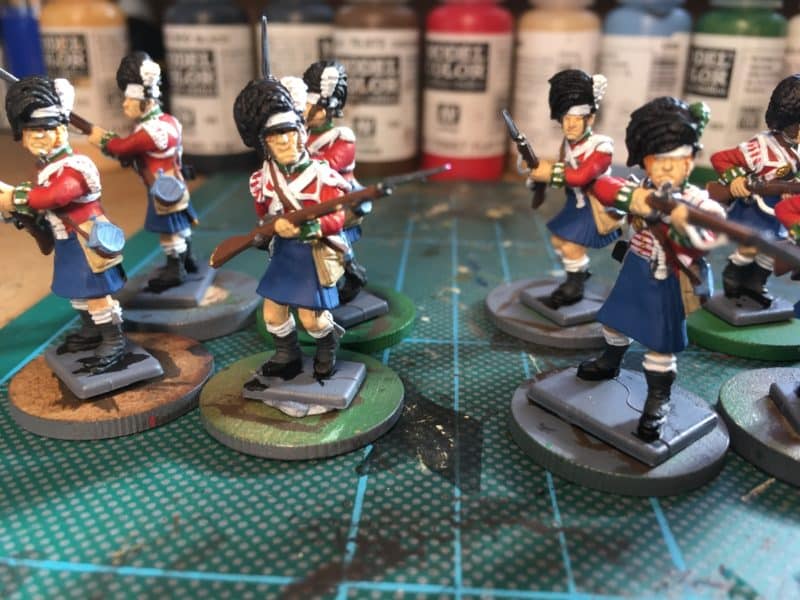
Having had a little practice I jumped in and made a start. First job, paint the kilts prussian blue.

Blue kilts to start!

Blue kilts to start!

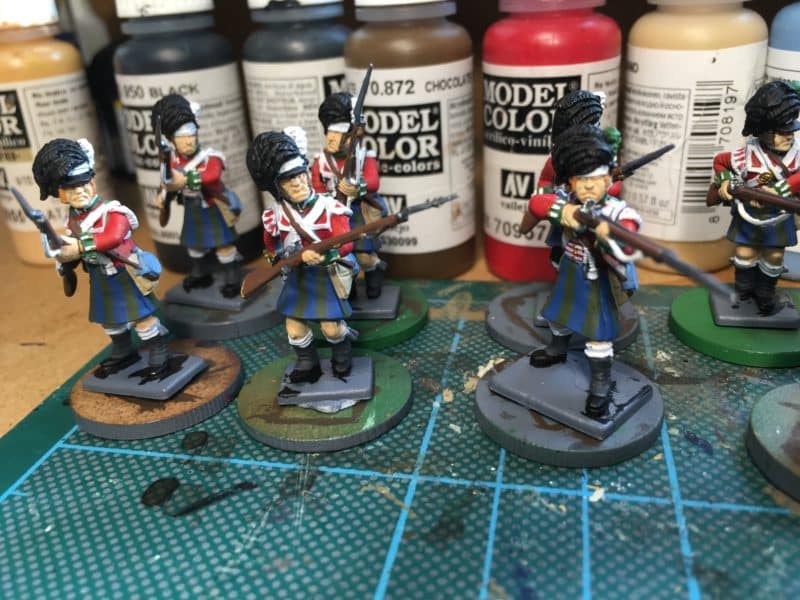
Next, I painted a series of vertical stripes in green.

Green stripes added

Green stripes added

Followed by the horizontal stripes. I tried to keep the stripes as uniform as possible, letting the paint brush do the work and determine the width. Having the paint thinned to a milky consistency helps.

Horizontal stripes added

Horizontal stripes added

The next part of the process is to outline the green strips with a fine line in black. I did consider using a fine liner pen at this stage but managed with a fine brush again, thin paint helps the flow. It is obvious from the close up pictures that my brush work is a bit raggedy and the consistency in line width varies from figure to figure.

The green stripes are then outlined in black.

The green stripes are then outlined in black.

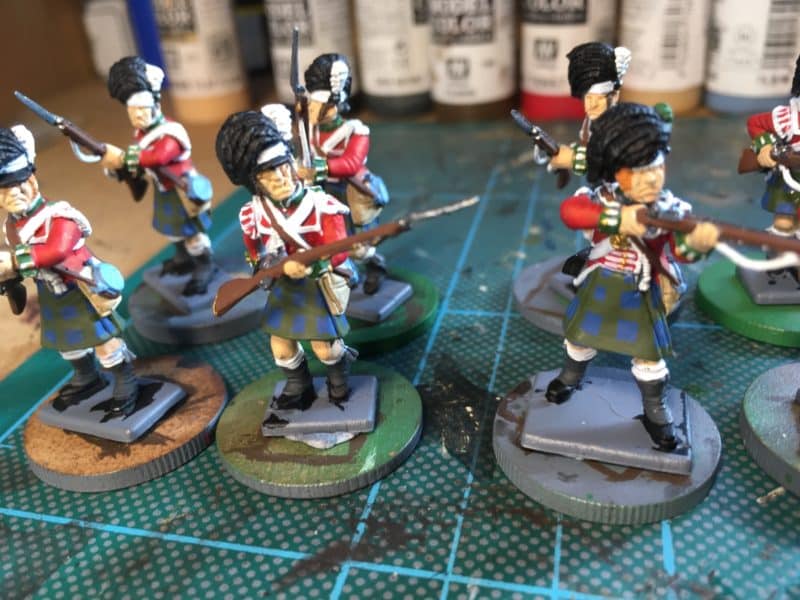
Finally, using 70913 yellow ochre, I painted a larger cross hatch to give the impression of the yellow thread that runs through the tartan. With the later figures that I have painted, I was a bit more careful with the placement of the yellow line, trying to ensure that it bisected the blue/green squares. I also have made the blue green squares larger to make the task easier. As I have said, I have chosen to ignore the fine red lines that are woven into the Cameron Tartan. This means that the tartan for my Camerons will be similar to the tartan used by the Gordons. Fortunately the facings are different, yellow as opposed to green, so I hope that will be enough to differentiate the units on the gaming table!

Tartan completed - or is it..?

Tartan completed – or is it..?

So with the Tartan done, the next job was to paint the red cross hatching on the bonnet and the socks. Once again, I have cut corners to make life easy. The cross hatching on the bonnet should have small green squares at the junction of the checks – I’ve left these off.

Red Cross hatching added to bonnets and socks.

Red Cross hatching added to bonnets and socks.

The next stage was to lightly dry brush the bonnets with light grey to bring out the detail of the feathers and then I carefully painted on the Army Painter Dark Tone quick shade. This really brings out the detail on the figures, covers up some of the smaller mistakes that I have made  and seals the paint onto the figures.

Quick shade carefully painted over the models.

Quick shade carefully painted over the models.

Once given a coat of matt varnish, I go back and re highlight the lighter colours, particularly the white. I also paint the bayonets in bright silver and paint the bases with chocolate brown to tidy things up.

Figures retouched and white highlighted.

Figures retouched and white highlighted.

The figures are now ready for basing. I may need to retouch some of the figures with matt varnish in places. I tend to be sparing with the varnish as I have had too many accidents with it in the past!

STOP PRESS!

After all that I had said about ignoring the red in the kilts, my OCD circuit was niggling away at me saying ‘the Camerons were the only one’s with red in the kilts – how could you leave it out…’ I also kept thinking that I didn’t want them to look too much like the Gordons, with their Yellow square pattern.

After much thinking I decided hell, just do it, and painted a red cross hatch pattern in between the large yellow pattern. I haven’t got a picture to show the close up of the technique – I was too busy just cursing myself and getting on with the painting! I even went back over the troops that I had finished.  But painting red was the same as painting the yellow stripe, just exactly in the middle of the yellow grid. The result is below. My concern was that the tartan would look a bit ‘busy’ on the small figures but I think it looks OK.

Red added to the tartan!

Red added to the tartan!

This is typical of my approach to my modelling! I convince myself that I cant do something and then decide to have a go any way! So, with 16 of the troops completed there is just another eight to go to finish the battalion. Having learnt how to paint tartan, I suspect that the next eight will be a bit more straight forward, especially as the officers and ensigns aren’t in kilts! Give me a couple of weeks and I’ll show you the final results with the battalion all based and ready for action.
A close up of the Camerons

A close up of the Camerons – the red stripe is a bit broad on some figures!

Past experience has shown that once the basing is done, the figures will look even better.  Having completed the Camerons, my intention is to paint the other two Highland regiments in kilts, the Gordons and the Black Watch. It looks as though the tartan for these two are actually less complicated than the Camerons and having now tackled one set of tartan, I’m hoping that these other two battalions will be more straight forward.

The Commercial Bit

Another lazy link this week…nearly everything that I use in my hobby is available post free from the Arcane Scenery shop. So Expo Brushes, Vallejo Paints, Victrix figures, Renedra bases, tools and sanding sticks – they are all there , just have a browse! Use the manufacturers category or the general category to browse products.  If you want a specific paint or item, just type the number or description into the search box, hit return and it should appear!

ARCANE SCENERY SHOP


From Spartans to Tartans

Last week I mentioned that I went along to a play test of the forthcoming Ancient Greek skirmish game, Mortal Gods – A test of Courage. I have on the work bench a small band of Greeks and Skeletons for this game and I will return to these in another blog – they are providing light relief from my ongoing Napoleonic project.

The next Napoleonic unit on the paint station is the 79th Cameron Highlanders. I have started to batch paint the 24 figures that I need for the battalion and the first 8 are about finished. In this blog, I’ll show you step by step how I went about the task of painting these eight. Incidentally, I had initially thought that I would paint 28 figures for the battalion but I have reined in my ambition and will go for the usual 24 figures. This isn’t quite the climb down that it looks like. Having painted the first eight, my confidence has grown and I have decided to paint all three Highland regiments at Waterloo, a total of 72 figures. The other reason for the smaller Battalion is that all the Highland regiments at Waterloo had been quite badly mauled in the fighting at Quatre Bras, two days earlier, so a standard sized unit makes more sense.

I’ll rely on the pictures to show the sequence in which I have painted the models, so a picture heavy blog – hopefully more use than me waffling on…I hope that the step by step method that I use will be useful.

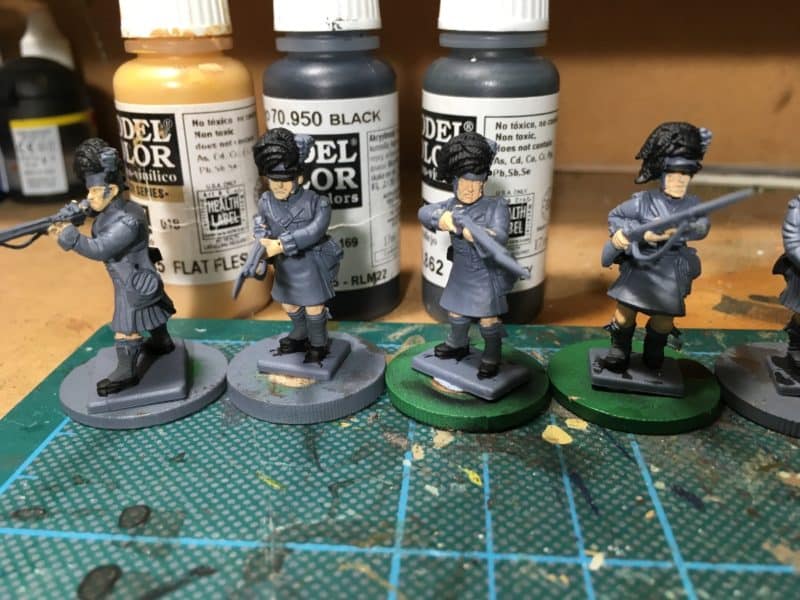
Step 1 Flesh

Step 1 Flesh

Once the figures have been primed with Army Painter grey, I start with the flesh – face, hands and knees! Vallejo Flat Flesh 70815. I’m using an Expo sable ‘0’ brush for most of the painting.

Step 2

Step 2 Black

Black 70950 for Hats, Cartridge Box, Bayonet scabbard and boots.

Step 3 - gaiters

Step 3 – gaiters

Black grey 70862 for the gaiters.

Step 4 Hair and sideburns!

Step 4 Hair and sideburns!

Chocolate Brown 70872 for hair, although I painted one as ginger haired using 70981 Orange brown!

Red coats on!

Red coats on!

Flat red 70957 for the Jackets.

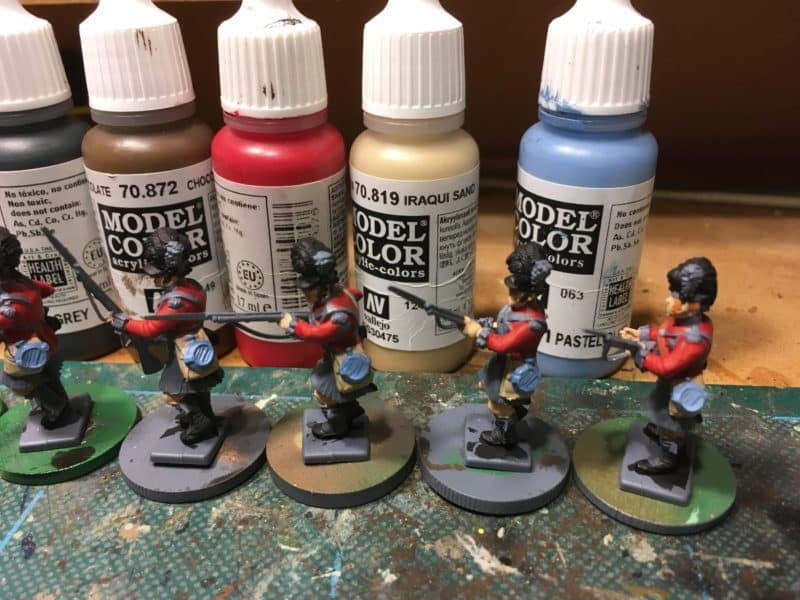
Food bags painted

Food bags painted

Iraqi sand 70819 for the food bags – you could do these in white and I should really paint the strap in Iraqi Sand to match but I actually paint them white as it makes the front of the figure look better -call it artistic licence or laziness…

Water bottles painted

Water bottles painted

Pastel blue 70901 for the water bottles. This looks on the light side but when I use quick shade on the figure the colour will darken and the texture of the bottles will show. Painting the unit number on the canteen is beyond my skill, eye sight and patience!

Facings in Green.

Facings in Green – spot the ginger….

Flat Green 70968 for facings – collars & cuffs.

White lace & straps

White lace & straps

The longest stint in one colour! 70820 Off white for tufts, turnbacks, belts, socks and lacing.

Muskets & Water bottle strap

Muskets & Water bottle strap

Flat Brown 70984 for Musket stocks and I cheated and used the same colour for the canteen strap – leather brown 70871 would perhaps be a better choice. Some painters like to paint a grain effect on the wooden musket stocks – again, a step too far for me and I think unnecessary.

Metallics done.

Metallics done.

Metallics! Steel 70864 for the musket barrel and other details, Brass 70801 for the buttons, belt plate and details on the musket.

Tartan Paint - it's magic!

Tartan Paint – it’s magic!

Vallejo Tartan paint….Well, not exactly but just to tease, I will explain how I went about painting the Tartan for the Cameron’s in more detail. This was the test shot and once I had gotten my head around the process I reverted back to the batch paint job.I’ll say up front that it is by no means an accurate representation, more a nod in the general direction of how Tartan looks. When it came to it, painting the tartan to this standard wasn’t as difficult as I had thought but it is time consuming. The first 8 figures that I have finished are looking OK for the table top, though I say so myself – you can an idea for yourself next week! But, there are a few steps yet to take, including the daunting task of painting the figures with quick shade and hoping that I didn’t lose too much of the detail.

I’ve also painted the red cross hatching on the hat bands and the socks. So until next week,  you can see how I tamed the tartan terrors!

The Commercial Bit

A lazy link this week…nearly everything that I use in my hobby is available post free from the Arcane Scenery shop. So Expo Brushes, Vallejo Paints, Victrix figures, Renedra bases, tools and sanding sticks – they are all there , just have a browse! Use the manufacturers category or the general category to browse products.  If you want a specific paint or item, just type the number or description into the search box, hit return and it should appear!

ARCANE SCENERY SHOP

Mortal Gods – Play Testing

I was lucky enough to be able to attend the Mortal gods play test event at Boards and Swords in Derby last Sunday. The venue is well worth a visit and if you are anywhere near to the Derby/Nottingham area, you might consider using the venue for a gaming event or hobby day with your mates. There are plenty of tables and the venue is very easy to get to by car, with safe free car parking on site. I think that the growth of such venues is good news for the hobby. Not everyone can find a local gaming club but a venue such as this can soon provide contacts and of course opponents! We have ‘bookmarked’ the venue as a possible location for one of our future Black powder grand scale games! The web site address is at the bottom of the page.

mortal gods

As usual, I digress, back to Mortal Gods. The demo games were organised by Andy Hobday and Mark Farr of War banner, so there was plenty of expertise to help facilitate the games. The game is based on the same game engine as Test of Honour, with all the Samurai background and flavour stripped out and of course, plenty of Ancient Greek flavour added back in! If you are not familiar with Test of Honour, it’s worth explaining that the game is essentially a skirmish game built around small war bands. This makes the game an ideal entry point into a genre that perhaps you hadn’t considered before. I certainly had not planned to start a Samurai Army, but Test of Honour facilitated the start of my collection and allowed me to try the period without having to commit to buying and painting hundreds of figures before I could start gaming.

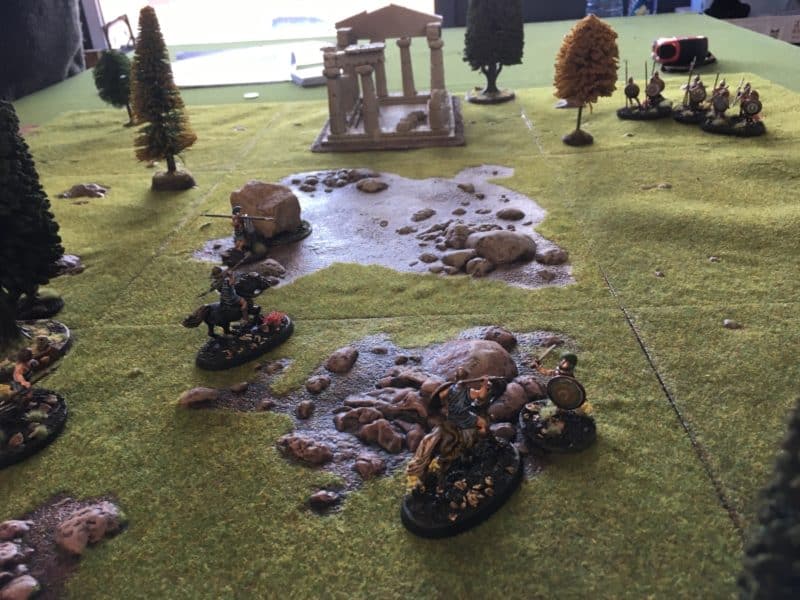
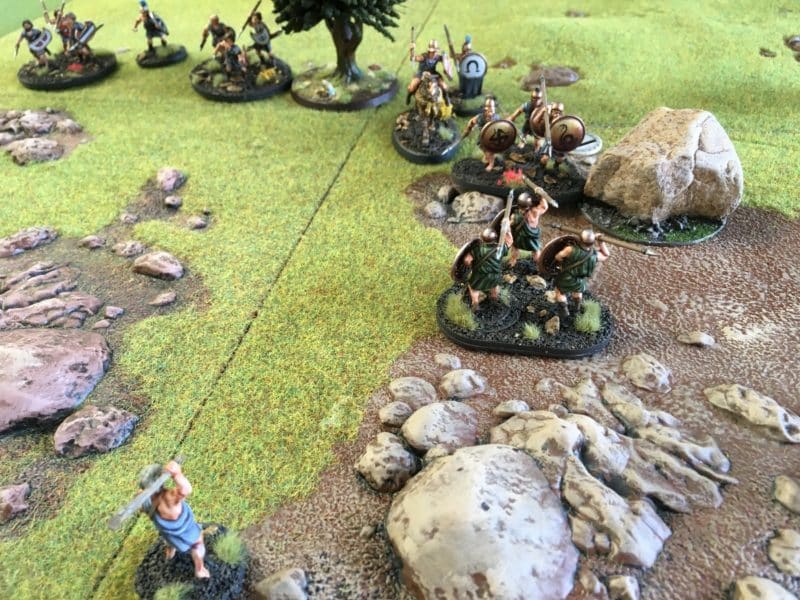
Test playing Mortal Gods

Test playing Mortal Gods

Test of Courage will do the same job for Ancient Greece. If you have been tempted by such films as ‘the 300’ – the Battle of Thermopylae – or other such or tales but never had the enthusiasm to paint a massive Ancient army, then this game will help to scratch that ‘itch’. A typical war band or Lochos will consist of around 20-30 figures, although it is possible to use more or less, depending on the scenario and the players involved. The other point to make about the game is that it is designed to be exactly that, a game. Whilst Test Of Courage is firmly set in the Ancient Greek realms, it is not designed to be a simulation or does not claim to represent an accurate view of combat in the Ancient world. Andy Hobday is very much focused on producing an enjoyable, cool game with some clever gaming mechanics, whilst Mark Farr and the War Banner team are steeped in the detail of the history and keep the game close enough to the period, with the appropriate troop types and weaponry, to make it feel like you are battling in Ancient Greece.

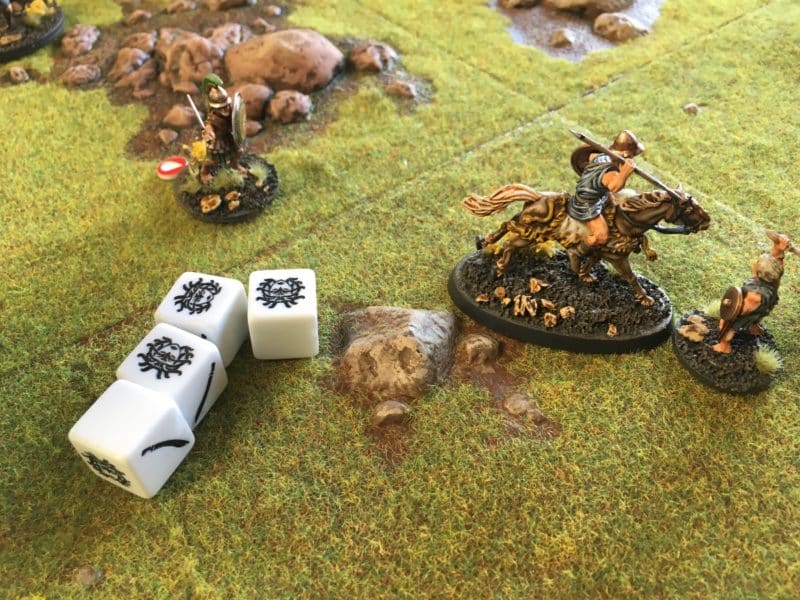
Not the best dice roll!

Not the best dice roll!

And so back to the play test game. I played two games, the games being superbly umpired by George and Jade, who were there to help with the rules and offer guidance when required. Having played Test of Honour, it was easy get get the general thread of the rules and we were soon focusing on the game rather than the rules. Your units or heroes are activated by drawing tokens and placing them on the appropriate card. The cards of course contain most of the stats and character rules that you need to play, so there is little need to refer to a rules book once you get going.  Most of the action is decided by rolling the special test of Courage dice. Three swords will give you a pass, Medusa’s are bad news! One of the cool changes is the ability to form your hoplites up into a ‘mini phalanx’ making them very tough to take on from the front. However, if you can get around the back….. The other change I like is the ability of your Hero or commander to use activation’s to give orders to other close units. Another mechanic is the fate tokens that are much more influential on the game but easier to come to terms with than drawing extra cards as in Test of Honour. Fate affects everyone in the game – watch out!

Combat begins.

Combat begins.

So when is the game released? Well actually not until March of next year. Which is another cool thing about the guys at War Banner. They are giving the basic game plenty of exposure to gamers and therefore the opportunity for the community to be involved in it’s development. The basic framework is there but in the light of play testing and feedback from gamers they are open to ideas. An example of this was on the day, the test for giving orders was moved from the receiving units stats to the hero giving the order, making it more likely that the order would be passed but still leaving the possibility of a fail occurring.

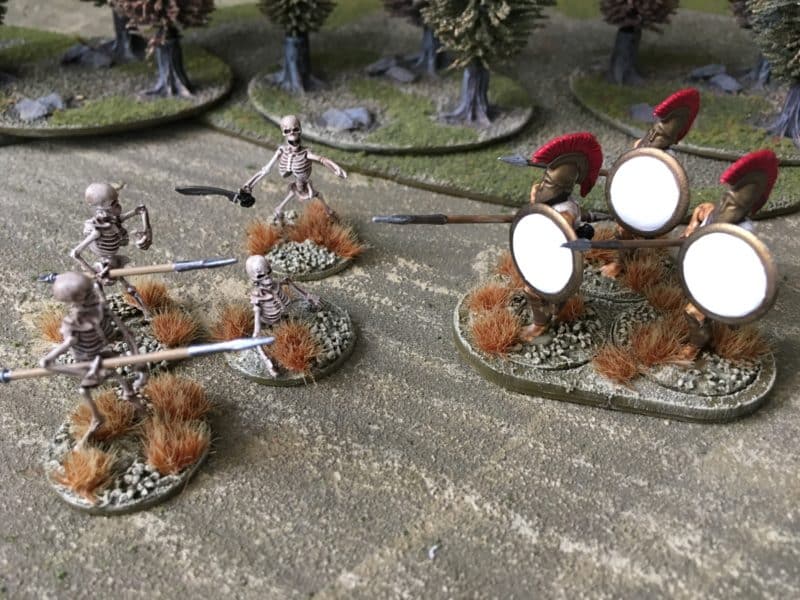
My Lochos is under way!

My Lochos is under way!

The other point to make is that whilst there may be some changes to the rules, Andy and Mark are working hard to ensure that the presentation of the game is top class. The Art work for the cards, rules tokens and all the other kit that you will need is already looking brilliant. With Stavros Zouliatis busy scuplting figures for the game to supplement the superb Victrix range that is already available and Sarissa Precision in the wings working on some evocative scenery, I can guarantee that the final product will be amazing!
THE COMMERCIAL BIT

If you would like to visit Boards and Swords here is the link to their website:

BOARDS & SWORDS

If you would like to know more about Mortal Gods: A test of Courage, checkout the Facebook page here:

MORTAL GODS 

If you would like to make a start of a mortal Gods Locos, we have some great models in our range of Vitrix Models, available POST FREE to most worldwide locations!
VICTRIX RANGE

Happy Modelling!