
This project has certainly turned out to be even more of a challenge than I originally thought. It has been as much of a test of my patience as my modelling and painting skills. Indeed, I think that if it wasn’t for the fact that there is no other project that is really pressing, I would have shelved this one and moved on. However, I have found a bit of time through the Holiday season to work on the coach and I’ve made steady progress.
As often is the case with this sort of project, I have changed my mind somewhat in how it will be finished. I had originally envisaged the coach being captured by the Prussians after Waterloo. Two things changed my mind. One, being the amount of additional time and resource to complete this diorama ( I hadn’t even got any spare Prussians to add to the diorama) and two, the more I looked at the model of Napoleon, the more I wanted to include him in the piece. There was also the issue of the size of the base required. Just basing the carriage and figures was going to need a fairly big area. So, I decided to finish the model as shown in the Warlord box art, albeit with the door of the carriage open.
As regards the base, I decided to use a laser cut Movement tray measuring 9cms by 21cms. It’s actually designed for 4 x 10 20mm infantry bases but it looks about the right size. I glued on the frame and then lined the tray with cling film. I then filled in the tray with standard milliput. The reason for doing this is to produce a infill slab that will not warp the base when I start to ‘landscape’ it. It’s a trick that I learnt from the military modellers. So once the milliput had dried, I removed it from the tray, peeled off the cling film and then super glued the ‘slab’ back into the tray.
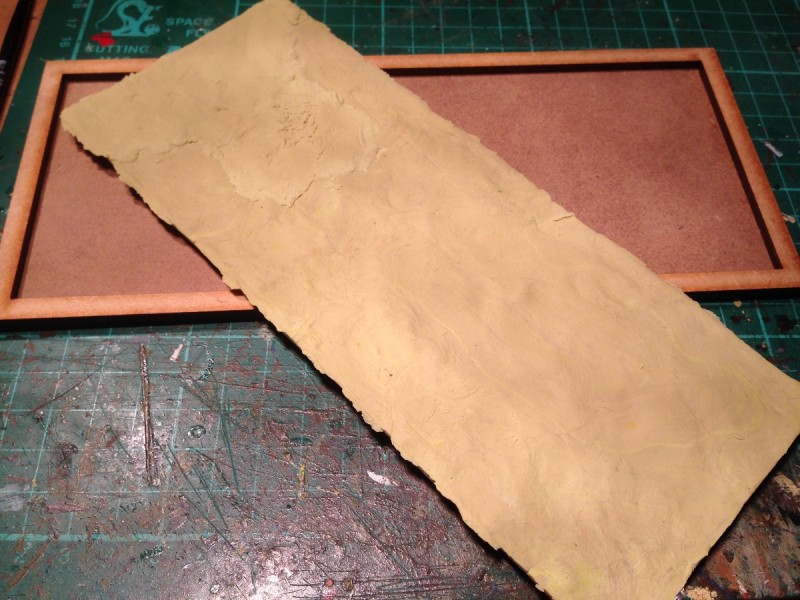
Milliput slab cast!

slab glued into tray
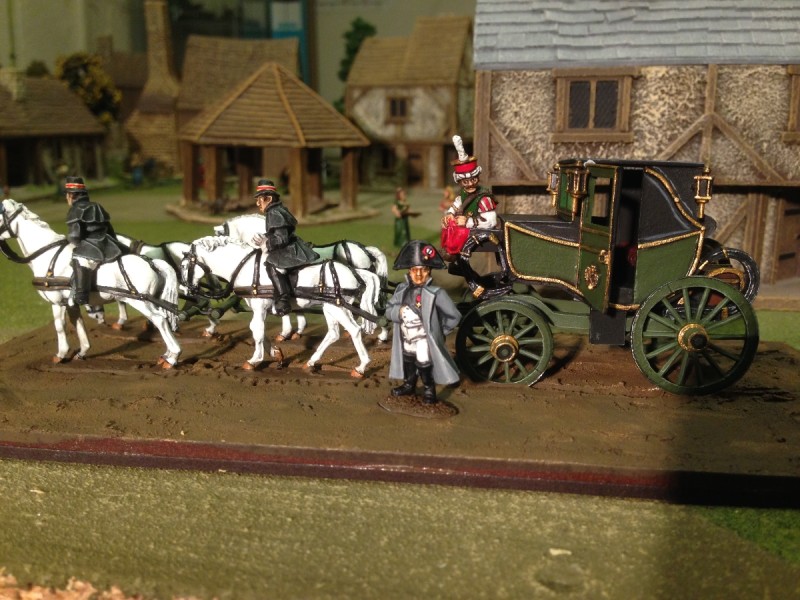
The next stage was to carefully drill into the back wheels of the coach and insert two pins that would secure the coach to the base. Now if I had thought about it, I should have done this before painting the coach but I managed to get the pins into place without causing any damage. Using these as a guide, I then drilled two holes through the milliput so that I could fix the carriage to the base. Before this was done, the whole base was coated liberally in Vallejo Sandy Paste. This allowed me to sculpt some wheel marks into the base as well as hoof prints and generally texture the ground work. I then pressed the coach into the base, using the pins to locate the carriage and carefully added the horses whilst the paste was still wet. There is enough adhesion in the paste to affix the horses but the slow drying time gave me the chance to adjust everything. Finally, I used the two figures of Napoleon and his guard to press out an indent for the bases. Again, the slow drying time gave me the chance to move things until I was happy with the layout.
Once that was dry, I gave the base a coat of Vallejo Chocolate brown and then turned my attention to finish painting the horses and figures. Incidentally, before I talk about the figures, I ought to mention that prior to fixing the coach down I had repainted the coach itself. I noticed that I had painted the top of the coach green where it should be black. I was also not happy with the various greens that I had managed to get. Just to add to my dissatisfaction, I tried to copy the style of shading shown on the warlord box art and that hadn’t worked for me either. So I repainted the black bits black & highlighted them with sea grey. The green was repainted with Vallejo Reflective green (70890), shaded with a light brown wash and then I decided that I wanted a slightly gloss finish to the paint work so I gave the panels a coat of satin varnish. The final touches were to add the gold lining and detail to the coach body, springs and the lamps and to paint the box on the back of the coach brown with brass details.
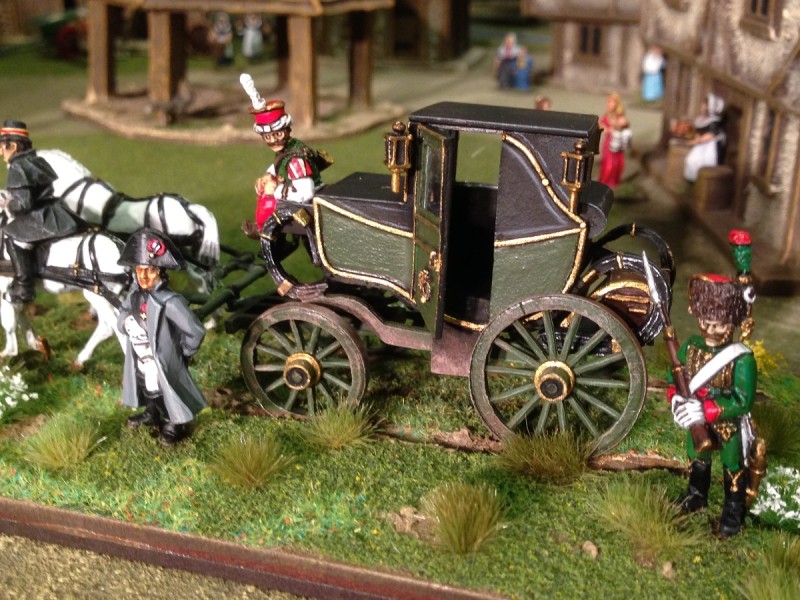
To finish off the coach, I used some thin clear plasticard to glaze the windows. I also painted the wheel rims with steel but then dulled this down with a black wash. The final thing was to add some light weathering to the wheels, springs and bottom of the coach itself using various shades of brown. I didn’t want to overdo this as I had left the horses in a near pristine finish but I felt a bit of mud would help the overall look!
Napoleons Berlin Coach gets a base!
The picture above shows the coach on it’s base before the weathering and with most of the figures in place. As far as painting the figures, I pretty much tried to copy the art work and the superb painting by Andres Amian Fernandez. A bit of a lazy approach as I didn’t do my own research as I would usually do. However, my excuse is that I am unlikely to be painting many French in the future…

Art work from the Warlord website
The coach outriders when finished looked a bit darker than I had intended and Napoleons coat a bit lighter but I was happy enough with the overall effect. I wont detail all the paints used for the figures but I used my basic technique of block painting the main colours, washing with a black ink and then re-highlighting. The other addition to my technique was to give the figures a couple of coats of anti shine varnish in between paint layers. It seems to help protect the paint as you are working and somehow adds depth.
Napoleon & his Guard
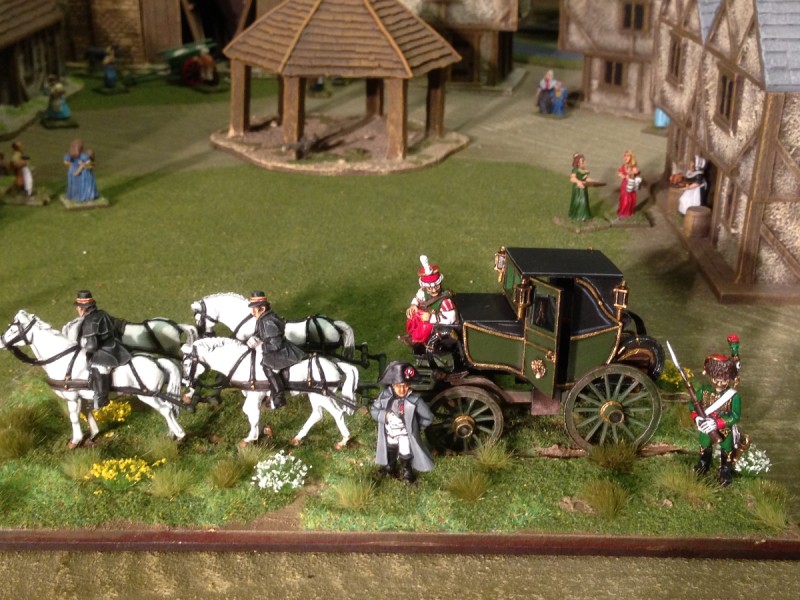
The final job was to complete the base. First of all I added some extra material around the bases of the figures and horse to blend them into the base. Everything was then painted chocolate brown and then highlighted with various mixes of Flat earth & Iraqui sand. Once dry, I added the green scatter, The static grass and my usual mix of grass tufts and flowers. So that’s it for now. I do like to contemplate my work before it is finally finished and I will go back and tweak a few bits. For example, I know that I need to repaint the sides of the base to tidy this up and I may add a few more details to the base – but for now the model is finished and it’s on to the next project!
Napoleon visits Little Bingham