The king is helpless

You chaps should know about this, and so I thoroughly expect some corrections. I will be disappointed if not.

War is an expensive business. All those guns, bombs and people don’t come cheap. Well unless you happen to have coerced and stolen, and even then you have a whole new bunch of people to kidnap and people don’t leave AK47s lying around everyday. Ideally you want to plan what you are doing in advance.
You might want to pop a few notes down :
“Monday-march a bit,
Tuesday-circle encampment,
Wednesday-storm encampment,
Thursday-shoot a bit more, probably bury Smith, always was slow,
Friday-win!
Saturday-celebrate,  get Smith to order beer and girls before death”

Of course this all relies on you knowing how to wage a war, and your enemy. If you’ve never gone to war before how do you know what to do? [This is where you chaps answer]

Luckily since ancient times there have been ways of training your officers that don’t require leaving the comfort of the mess hall.

Chess, Draughts… Go

Though the history of all three of these games has been disputed and confused over the years, they certainly have played some role in the strategy training even if unofficially. Chess and Weiqi (Go) both focus on defence and offence tactics, to protect your pieces and diminish the opposition.

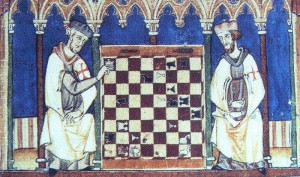
When they weren’t off persuading Muslims into Christianity the Knights templar were stealing their games.

The Indian part of Chess’ history (for it has two parents) names it chaturanga, which in one translation means the four parts of the military. The four parts being cavalry, infantry, chariots and elephantry. The elephants disappointingly got replaced by castles in the modern version. The Persian parent side shatranj was used by the military to train noblemen before they took on command roles.

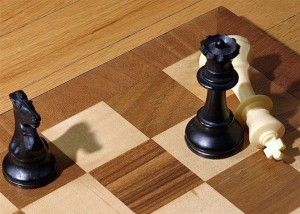
How your chess game might pan out today (photo by Alan Light)

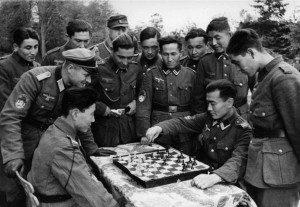
German soldiers watch a game of chess (photo by Bundesarchiv)


Roman Sand Pits to German War Games

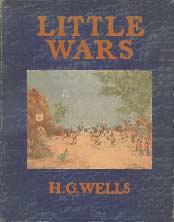
Something more familiar to many of you is the Roman approach to strategy and tactic with a sand box, and stones to represent your soldiers. Used to play out the possibilities that might face your legions as they advance on the yet to be Caesar-ed towns. Still used by some cadet training programmes in America (apparently) to introduce new recruits to the tactics they might need. You should be grateful to the Romans chaps, not only for their amazing roads, but they essentially are to thank for that thing that you dedicate so much to. The Germans in the 19th century of course expanded on these and chess to create military training games that mixed the two forms and are far closer to the sort of games you probably play. Though HG Wells characterised the German games that he based his rules on as dull, they were not designed to be a fun game, but a very definite training tool.

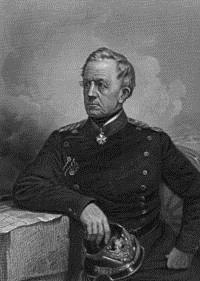
Helmuth Karl Bernhard von Moltke the man behind Kreigspiel


Graph Paper and Simulations

We’re going to skim over the 1950s games which were used by both the military and sold commercially. Not least because a good portion of you probably own one of these games. At a similar time a less game based strategic technique was also emerging. The start of the twentieth century was a great time for science, technology was moving on sufficiently to start making discoveries in the chemical, biological and physical science. And not to be left behind the maths dudes were finding proofs all over the place. The potential of  equations to plan war was not lost on the military, and they began developing wargames that resembled more a log table than a game table. This use of mathematics has largely led to the way that the military now trains soldiers, and how many of you might occupy yourself when not near the game table. Computers. Starting as an almost direct translation of the board games, computer simulations have become increasingly more sophisticated making use of AI and modelling.  No not that kind of modelling, I mean more like   m frac{d^2}{dt^2} x(t)  = - nabla V x(t)   or P(t) = frac{1}{1 + e^{-t}}   kind of modelling.

The military’s interest in computers has naturally distilled down to increases in consumer technology, it is after all the military we can at least partly thank for the internet. However, more surprisingly it works in reverse too. Reputedly the US Navy make use of Flight Simulator.

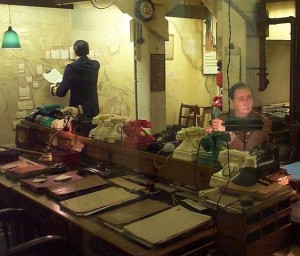
This kind of war room drove the second world war (photo by Kaihsu Tai)

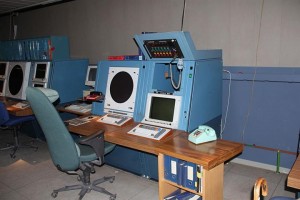
This kind the Cold war…(photo by Niels Elgaard Larsen)

And if we have a space war (lets hope not) this will presumably be the kind of planning room. Though I imagine the astronauts will look less jolly. 


The question is would you trust yourself to run a military operation? Or if you’ve done both does the game reflect real life?

If you’d like to read more on this here and here are quite useful sources.


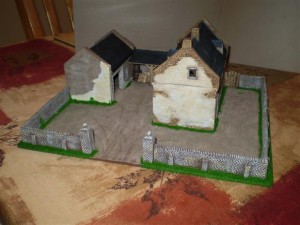
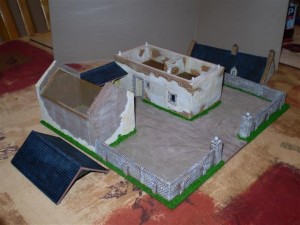
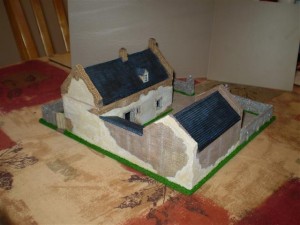
Napoleonic Farmstead by Pete Harris

We’re always pleased to hear of other modellers projects, this post comes from modeller Pete Harris…

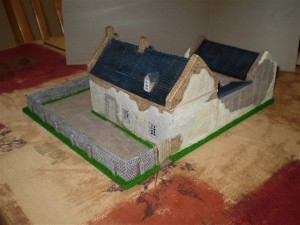
If like me, you are interested in the Napoleonic period, and specifically Waterloo, you will know the significance of La Haye Sainte and Hugomont. These buildings were pivotal during the battle and I was keen to have something similar for my war gaming table. Obviously, it’s possible to buy the exact replicas, but there are two drawbacks :

  • They are relatively expensive.
  • They take up a lot of space.

So I decided to produce something that had a similar look to La Haye Sainte, but with a smaller footprint. I started with the main farmhouse building and for this I purchased the Hugomont Farmhouse from Hovels, together with their 20mm wall sections and pillars. I chose 20mm sections instead of 25/28mm because the height is just right for a firing line to stand behind without a need for a firing step.

The rest of the farmstead is scratch built using an old Hornby station building, plasticard, Wills tiled roof sheets and Milliput. The base is two pieces of thin hardboard,  laminated together and then covered with PVA  and sprinkled with sand. All the structures were base coated in coffee coloured acrylic paint and then dry brushed in various shades to achieve the finished effect.

During construction I noticed the Hovel’s building, although stated as 25/28mm scale, had small doorways. So I cut out the stone framework to enlarge them and then used  Milliput around the new openings to replace the stonework. The doors and gateway were made from strips of balsa, and green scatter was added around the base of the walls and buildings. Finally, I added some Renedra barrels and sacks made from Milliput under the lean to shed.

If you’d like to share your work with us, then leave us a comment or drop an email to arcanescenery@gmail.com. 

Tomb Stalker

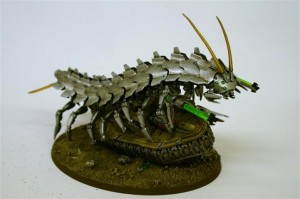
Too much of a good thing can get to you and after weeks and weeks of Napoleonics, Steve decided he needed a break. Having for many years been a devoted necron fan, he still had plenty of necron stuff around the house, so decided to break out and complete the Tomb Stalker…

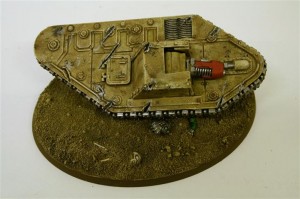
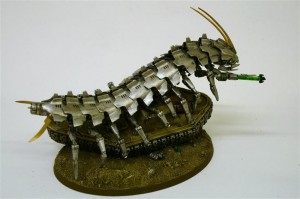
I started with the base and had decided I wanted the stalker clambering over a tank and so went to my bits box, and found an old Leman Russ model that I bought from eBay sometime ago. To make it fit to the base I chopped it in half very roughly, using a junior hacksaw and sprue cutters, and then attached it to the base with polystyrene glue. To hide the joins and to provide some groundwork I used standard milliput to cover the base, and blend in the tank hull. At this point I also added a few skulls and bones from the bits box to represent the remains of the crew.

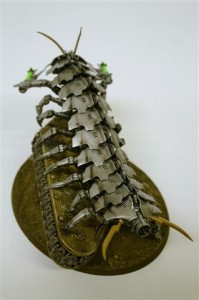
I then coated the base in PVA and covered it in sand, and set it aside to dry. The next stage was to assemble the tomb stalker. The instructions supplied are a bit sparse, so it is important to take your time and make sure you know the difference between the various legs, antennae and other appendages. As the model is in resin a certain amount of cleaning up was necessary, but there was nothing too demanding as the moulding was very good.
I first assembled the model using bluetac so that I could pose it over the tank, and then piece by piece superglued it together, checking the positioning as I went. When I had completed the Tomb stalker I added some more damage to the tank to simulate where the Stalker’s claws had damaged the tank’s armour, this was done by heating a scalpel blade and chopping into the plastic. Once everything was assembled it was onto painting. The groundwork on the base was simple enough, in brown, and then highlighted with Iraq Sand from Vallejo.

The tank was painted in Desert Yellow, and then dirtied down with washes of Devlan Mud and then dry brushed with Desert Yellow/White mix. I also used the stipple brush technique to add scratches using boltgun metal and black. There’s no scientific method to this just keep going until you are happy with the result. I then picked out a few details on the tank, the tracks being in gun metal and the gun on sponson in red. A final light wash of Devlan Mud tied everything together.

The Tomb Stalker was sprayed with gun metal and then silver. I then gave it a wash of black ink, followed by a dry brush with Mithril Silver. Again it is sometimes necessary to repeat this process until you are happy with the effect. I then picked out the eyes, and the detail on the guns with a bright green. The antennae were picked out in gold.


The final stage was to glue the green rods into the guns.
Et voila a Tomb Stalker.
Another putty history post

Yes folks it is indeed another history post that isn’t about a specific thing. We mentioned last week that history lurks all around us, so we thought we’d mention a few things that we are hoping to cover…

In Nottinghamshire/Derbyshire…POWs, Civil War (the most inappropriate description of war ever “civil”), bunkers, shot towers, aeroplanes…

Further afield locally…battlefields

From our own histories…a lot of sinking ships (it is probably wise never to get on a boat with any of us just in case luck is hereditary)

(PS-apologies folks for the delay in the post, web fairy had exams)

L’eau de Steve’s Wagon

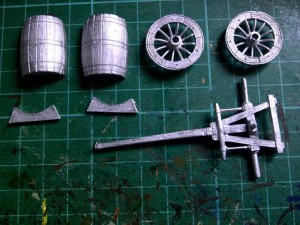
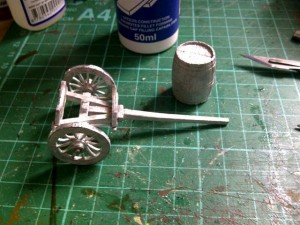
Today we are starting a new project and once again its one of my favourite topics, which is wagons and the support for Napoleonic armies. In this project, we are going to make a water wagon, or it could even be a beer wagon if you prefer! It is a simple conversion and makes into a nice model. Basically we’re taking a Gribeauval Limber from the Trent Miniatures range and we’re combining this with a Cask from the same range, to make a simple water wagon. So first off let’s just show you the components, and then it will be a question of filing them all down, making them fit together nicely and putting the parts together.

So, having laid out the components you just need to take a file and clean up any cast lines, and dry fit everything so you can see where it’s all going to go. Obviously, the two halves of the cask need to fit together, so you need to file these to make them nice and flat so that there willl be a nice join there. The two cask supports, the stands, will be stuck to the limber at either end. So file off the bottom to make sure you’ve got a nice clean fit here. Then, just tidy up the wheels with your file.

Once you’ve done that, the limber itself needs a bit of a clean up. In the middle there’s a spiky piece, which is where the French gun would be attached. You need to sand this flat, because it’s going to get in the way of the cask. Once that is sanded flat, the cask will sit quite nicely on the limber. So we can now assemble the water wagon.

First of all glue the two halves of the cask together. I use superglue, you can use epoxy resin, but I find that a thick superglue (we sell the expo variety) and some accelerant means that it will set off quite quickly, and the thick superglue will provide an element of filling. So some of the imperfections in the casting of the barrel will be taken out, and that will make life easier when it comes to painting.

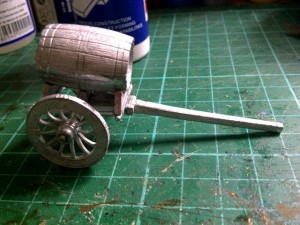
Now you’ve glued the barrel together, the next thing is to glue the supports for the cask onto the limber. I glued one support to the very rear spar of the limber, and one support to the front. Once you’ve done that, attach the wheels and the main construction is complete.

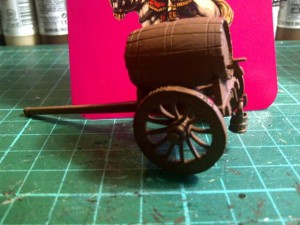
If you look at the picture you’ll see that I’ve got a separate barrel on a separate limber, but it’s a pretty straight forward job for the cask to be glued onto the top and hey presto you have what looks like a passable water wagon already. You could just stop there, a little coat of paint this would look quite nice, but I’m going to add some more detail.

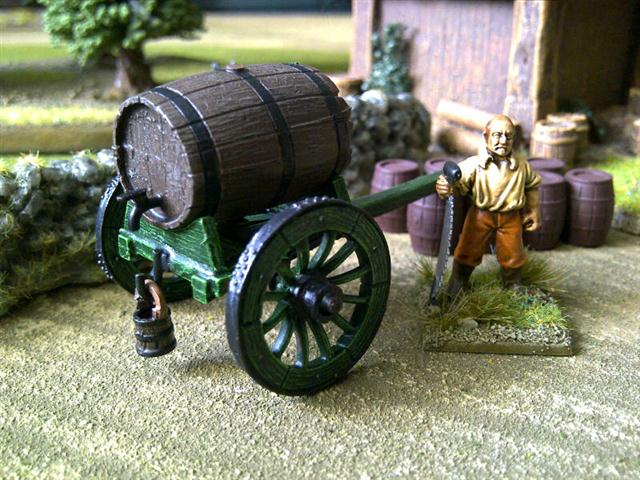
The picture shows the water wagon assembled, and as you can see I have added a few little details. On the back there’s a little tap, very straight forward to make,if a little fiddly. I’ve used some 5 core solder which I’ve bent into shape, drilled the barrel and inserted the tap into the hole. I’ve then used another piece of flattened solder to make a tap top. Then there’s a hook with a bucket on it; again fairly straight forward to make. I took a small square piece of plasticard to make a little plate, and then taken a piece of florists wire and bent that to shape, and I’ve super-glued that on to the back on the limber. There’s also a cork on the top of the barrel which is a little bit off of a plastic. The assembly is very straight forward, the key is to file it well.

I’m going to paint the Gribeauval Limber dark green as if it were French, so even if I use it with my British army I will claim it was a captured piece of equipment as I imagine many were. I won’t claim that this is an actual scale replica of a water wagon as I found it very difficult to find a picture of such a thing. However, I think that it makes a nice piece of scenery and it’s fairly convincing! No doubt it will feature in a future skirmish using the Sharp Practice rules to provide the background.

The Only Wargamer in the Village

I have been fortunate to find that I was not the only wargamer in the village, and there is now a small band of wargamers in Bingham that meet once a month.

This month we were guests of Andy Callan, a very experienced wargamer and historian. Andy was the inspiration that led me to build my own wargames table. It was after i saw him set up that I realised I could build me own wargames room in my garage (see previously).

Andy had set up this months’s game to be a refight of the Battle of the Byne, and using his own in house rules and figures, with Andy acting as umpire, the Protestant Army of king Billy once again attempted to cross the Boyne and defeat the catholic King James.

Without taking you through a blow by blow account of our battle, the game pretty much followed history. Once again the Elite Dutch guards (commanded by Dave King this time around) forced a crossing at Oldbridge to capture the village, whilst the Williamite cavalry were eventually able to cross the Boyne and hold back the Jacobite cavalry, forcing the Jacobite army to retire in good order.

The pictures show the various phases of the battle.

Also of note are the figures being used. Andy is still a great fan of 20mm or 1/72nd scale plastics, meaning that he has amassed the most amazing collection of armies as a result.

He is able to field comprehensive armies from most of the recognised historical periods.

So, if you are thinking of starting in the hobby, don’t think that 28mm is the only scale. You can build huge armies using 20mm figures and the result is just as much fun as battling in 28mm.

Hail Caesar Review

Hail Caesar is a game for those whom the gods have marked for glory-for men who do not quail at the sight of barbarian hordes nor quibble with what fate decrees at the roll of a dice. ” Foreword to Hail Caesar by Rick Priestley

The brand new book Hail Caesar (released 15 April 2011), is perfect for wargamers who enjoy the Roman, Greek and Egyptian periods. The main body of the book is devoted to the mechanics of game play , the latter section to battle reports and appendicies containing designer’s notes.

The book opens with  a little about the way the rules can be adapted to different sizes and types of game play, and the essential equipment: an army(!), six sided dice, tape measure and an opponent!

The first part of the mechanics is devoted assembling an army, either from scratch or building on existing troops, the different historical troop types and the fighting qualities of the different types of troop within the Hail Caesar rules. They then move onto the particular base sizes, and table sizes, most appropriate for gameplay. The section on formations discusses the various benefits of different arrangements of troops, how to move from one formation to another.

Games Rules and Command move onto the nitty gritty of playing the game, covering everything from the sequence of play to how to advance elephants through friendly troops. Briefly, the book moves into terrain and covers how this can best be utilised in battle, and also covers rules regarding use of terrain, such as buildings that can only be entered or assaulted by infantry.

The actual battling is covered in two comprehensive chapters, Ranged Attacks and Hand-to-Hand Combat. These chapters explain the intricacies of combat, from choosing your target, to how to respond to your opponent charging your rear, never a pleasant experience! Should combat not work out as well for your troops as hoped, your unit may have to take a break test, and this is conveniently covered in the following chapter. The book moves on to the various types of commander, and what to do should yours unfortunately meet his maker, and finally the gameplay section comes to the all important Victory and Defeat.

The next section of the book is quite data heavy, giving values for various troops on a range of qualities from their ability in combat to their morale and then a selection of Useful Rules which includes everything from wedge formations to what to do when your elephants stampede.

We then move into battle reports which give a good flavour of how Hail Caesar games can progress. The battles covered are:

  • The Battle of Kadesh 1274BC-between the Hittites and Egyptians.
  • 426BC-Athenians vs Spartans (yelling “I am Sparta” not obligatory)
  • Border Raid AD52-Romans endeavouring to crush the Britons, capture their women and send their livestock away.
  • 260 AD-Romans (again) battling the Persians.
  • 500AD-More Romans but this time against the Hun.
  • 937 AD-Viking alliance of Welsh and Celts versus The Saxons who accompanied by Viking poet Egil Skallagrimsson.
  • The Battle of Brada River 1148AD- King Baldwin III crusading against The Damascans.

The book finishes with some notes from the designer on the devlopement of the game of Hail Caesar from Black Powder, some hints on playing with smaller models, how armies were composed in ancient times and all the rules.

Hail Caesar is an attractive and well illustrated tome, providing a comprehensive introduction to the rules and strategies for playing ancient battles. There are full colour photographs throughout of battle scenes, troops and individual soldiers. There are also snippets of interesting historic information covering everything from Spanish swords to cooking molluscs daft enough to be caught;  Welsh poems and of course those all important period insults! Clearly, a great deal of research has gone into compiling this attractive book, a reflection of the expertise and enthusiasm of the authors, in particular, the rules maestro himself, Rick Priestley. Hail Caesar continues Warlord Games’ tradition of producing high quality, beautifully illustrated rules books that are ideal for both the novice to the hobby and those more experienced.

Invest in Hail Caesar and revive some Roman or Barbarian glories, unless you are a raven starver [see page 161] that is…

Reviewer Arcane Scenery’s Girl Friday.

Napoleonic Flank Companies!

It’s been some time since my last blog on the subject of Napoleonics but I have been busy painting and my Army is steadily growing, along with my knowledge of the period. My main reference in building my army has been the superb book, the Waterloo Companion by Mark Adkin. It really is a first class reference book and if you are at all interested in the period, I suggest that you must add it to your library!

The main fighting unit of infantry in the British Napoleonic army was the Battalion. You will often hear people refer to various Regiments when talking of the units at a particular battle , for example, the 27th Inniskilling Regiment. However, the Regiment in the British army was more of an organisational title and it was the battalion that actually took to the field. Some Regiments consisted of more than one Battalion; two or three were possible, but it was unlikely that there would be more (There were of course exceptions). In this case, the battalions would be numbered, so the first battalion of the 27th Regiment would be noted as 1/27, the second, 2/27 and so on.

A battalion consisted of around 800 men when at full strength. In reality, it was extremely rare for a Battalion to be at full strength whilst on campaign. The actual numbers varied from just over 700 to as few as 500. At the Battle of Waterloo, some battalions were below this number, due to casualties suffered at the battle of Quatre Bras. Regardless of numbers, the battalion was divided into 10 Companies, each usually commanded by a Captain. Eight of the Companies would be known as Line or Centre Companies and would be numbered 2 to 9. The other two Companies were the Flank Companies. Company number one, deployed on the right of the line was the ‘Grenadier Company’ and usually formed from the biggest & bravest soldiers. Company number 10, was the Light Company and whilst usually deployed on the left of the line was also used as the skirmishers for the Battalion. These troops were usually the best shots and the smallest and fastest in the Battalion. They were often deployed well in advance of the battalion and if trouble threatened, they needed to be able to get back to their lines quickly!

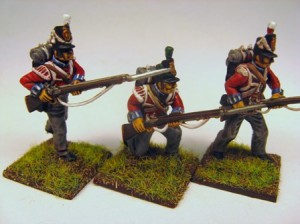
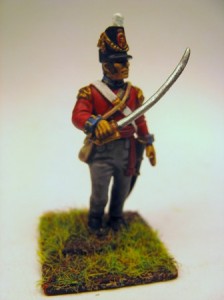
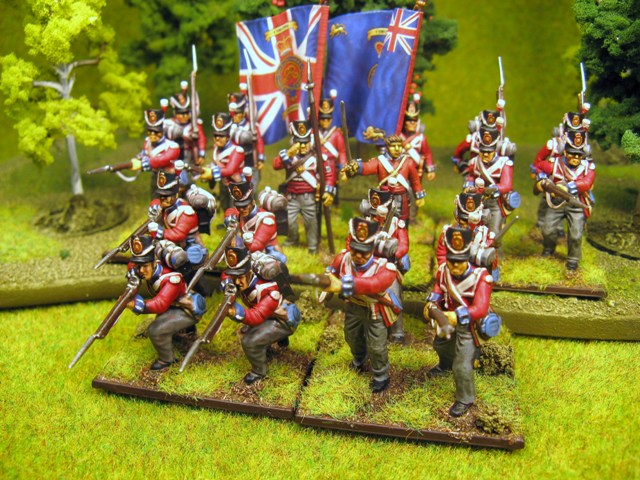
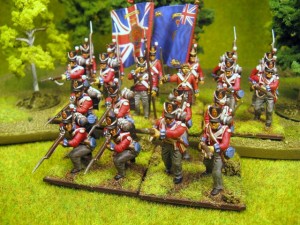
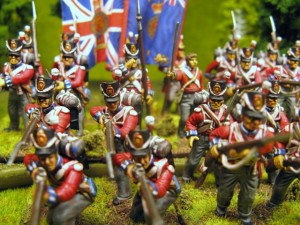
Flank Companies were distinguished from the Centre Companies by the size of their Epaulets and the colour of the plumes on their Shako’s. Flank Companies have the big ‘wing’ type epaulets ( first two models on the left of the pic.) as opposed to the’ tufts’ of the Centre company’s and the Grenadier Company would have all white plumes whilst the Light company would have green plumes. In addition, the officers in the Flank Companies tended to carry a Curved Sword or sabre as oppose to a straight one.

So having blathered on long enough about the technicalities of Flank Company troops I’ll show you in the next article how I put mine together.

New 1/32 Scale German Mountain Troops

I know that I keep on about it, but the new releases are coming thick & fast and I’m struggling to keep up with them, so the blog has been on the back burner for the last fortnight. I will catch up with my Napoleonic articles soon, so please bear with me. The good news there is that I am still painting and my first Battalion is now complete.

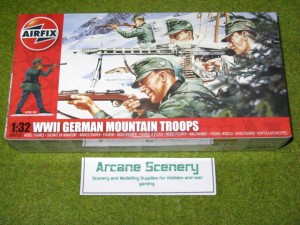
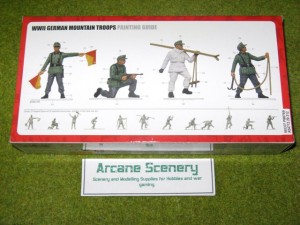
Airfix are continuing with their steady stream of new releases and re tools/ reboxing. This set hasn’t been available for some time and has been eagerly awaited by collectors. The set contains 29 unpainted figures and 20 accessory pieces ( mainly ski’s!). So there are plenty of figures for your collection. As with all the current 1/32 scale Airfix figure sets, they are moulded in hard plastic to make it easier to paint them and allow the experienced modeller to convert them. ‘Head swaps’ with the German infantry set being the most straight forward conversion, allowing you to produce Figures for the Russian front in winter!

All in all, a nice addition to the range and of course, available for my ebay shop at

My First Napoleonic Skirmish!

My British Napoleonic army is steadily growing and it has now actually been on the gaming table. Even though I have only finished 40 figures, I was able to join in with a skirmish game that was played at the club that I attend. The skirmish rules were actually written by one of the club members, Richard, and worked really well, allowing us to play with a small force of Napoleonic Infantry rather than the normal large battalions. Basically, we were re-creating the sort of adventure that you read about in Bernard Cornwells’ ‘Sharpe’ novels. So we had a great game, lots of fun and I’m pleased to report that the French Army was prevented from stealing the gold from the Spanish Villagers!

On my last Napoleonic blog posting I said that I would discuss the difference between British Flank & Centre Companies and why there are different sets for Waterloo Infantry & Peninsular War Infantry. Of course if you are a veteran of the hobby you will already know the answers but if like me, you are a newcomer to Napoleonics, these things can be confusing and a barrier to starting your own army. So this is what I’ve discovered and if anyone out there reading this has any extra information or would like to correct any error that I may make, please contact me through my shop email and I will publish your email through the blog. Unfortunately, due to the huge amount of spam that I was getting through the blog, I’ve had to turn off the comments (Thank you to the Russian & American spammers and the Pharmaceutical suppliers that have contributed so far….).

So when deciding what British force that you are going to field, there is one final decision that you need to make. Are you going to model a force from the Peninsular War or do you fancy the period around Waterloo? Or to put the question another way, would you like to have your Line infantry wearing white trousers or grey? Now that’s a gross over simplification that totally ignores the historical perspective but essentially that’s the main difference between the two troop types. If you are desperate to have an army that will fight in Spain & Portugal with all the allies & enemies that go with them, then you need the guys in the white trousers. If you want to fight Waterloo and the associated battles, then grey is for you! There is one other significant difference, the type of hats worn by the officers & troops. In the peninsular, it was the stove pipe shako with the plume at the front for the troops and the Bi-corn Hat for the officers. At Waterloo, the troops wore the Belgiac Shako with the plume to the side and the officers wore the same except that the cord on the front was gold rather than white.

There are some other subtle differences but if you stick to the above, you will be about right. Remember, although the button counters of this world will delight in telling you exactly what shade of underwear the Coldstream Guards were issued with in 1815, we are trying to create an army that looks good on the war games table and in war time troops had a habit of improvising and adapting equipment, even in the 19th century. So you will see troops on campaign wearing a mixture of uniform in different shades and states of wear and tear. If you are happy with that simplification, join me on my next blog article on the construction of my Napoleonic Army and I will start to assemble some figures. Oh! and I’ll get back to you regarding Flank & Centre Companies!

I owe Clive Owen an apology

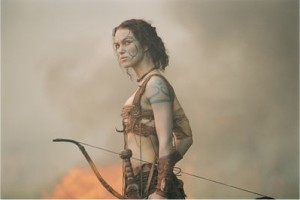
I remember watching the film ‘King Arthur’ a while ago. It’s the one about the fall of Hadrians wall that stars Clive Owen as a Roman Officer and a group of Sarmatian Warriors that were on one last mission to rescue a group of Roman nobles for the clutches of the Barbarians in the North. It also starred Kiera Knightley, who whilst looking very attractive in a languid sort of way, didn’t really convince me that she was the warrior queen Guinevere on the grounds that she doesn’t look as though she ‘s got the strength to draw breath, nevermind a war bow.

Anyway, I digress, although, it was a worthwhile diversion just to have an excuse to put a Picture of Kiera in my blog. The point was that the film looked at the legend of Arthur from a new historical Perspective and set the whole legend at the point when the Romans were leaving Britian rather than in the Middle ages.

I found all this a bit too much to swallow and was particularly sceptical that a warrior group such as the Samartians would be in the service of Rome in Britain.

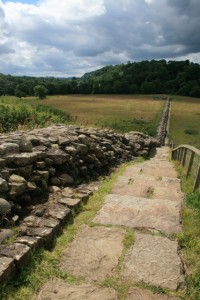
Well, I was wrong. I was lucky enough to have the time to go and visit Hadrians wall recently and I’ve got to say that it is well worth a look. We went to the fort at Birdosland and I was surprised to find that it was garrisoned by the Dacians and that the later history of the wall seemed to support the the idea in the film that as the Romans pulled out the existing population would have become self governing and the existing garrisons would have stayed on. Even more thought provoking was just how much wasn’t known about the ‘dark days’ as the romans retreated from the wall. So the premise of the film isn’t so outlandish after all.

So I think that I’ll be having another look at that film and this time enjoy it as a possible version of what might have been and not get too sniffy over the historical facts. I bet it will have some great ideas for wargaming scenarios as well…..

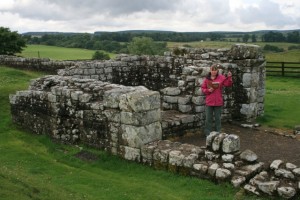
Finally, here’s a picture of Julie ( my Wife) impersonating a Roman Guard at Birdsoland Fort. Now, if she had been around at the time, she would have sorted out those Northern Barbarians…….

First Choose your weapons

So here’s the next article tracking my progress in painting my first Napoleonic 28mm wargaming army. It’s designed to help beginners to the hobby or those like me who have decided to move from Science fiction to real history.

There is a bewildering choice of 28mm Napoleonic wargaming figures available, so before you dive in and buy some troops there are some fairly simple questions to answer. Firstly, do you want to have a British, French or other European army? I decided to start with the British. After all, I had been brought up on tales of Wellingtons victory at Waterloo and the heroics of Bernard Cornwell’s Richard Sharpe. And of course, although the French Army at the time was undoubtedly a fine fighting force and contained some of the finest troops ever seen, as well as a vast range of superb units and uniforms, it’s one draw back was that it was French…..   :0)

Next, do you have a preference for plastic figures or metal? Plastic figures are usually cheaper, lighter and easier to transport. Metal figures are usually one piece and so do not need assembly, they ‘feel’ more substantial and the detail can be better although the new plastics are catching up. I have no strong feelings either way. I like working with plastic and I enjoy the process of putting the models together. I also like the infinite variety of poses that you can get when assembling your army. Plastic also tends to be less expensive so buying the Troops in plastic & the character and specialist models in metal is a good compromise.

So if you are happy to be building a British Napoleonic army that will be made up of plastic and metal figures read on!

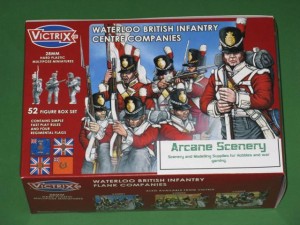
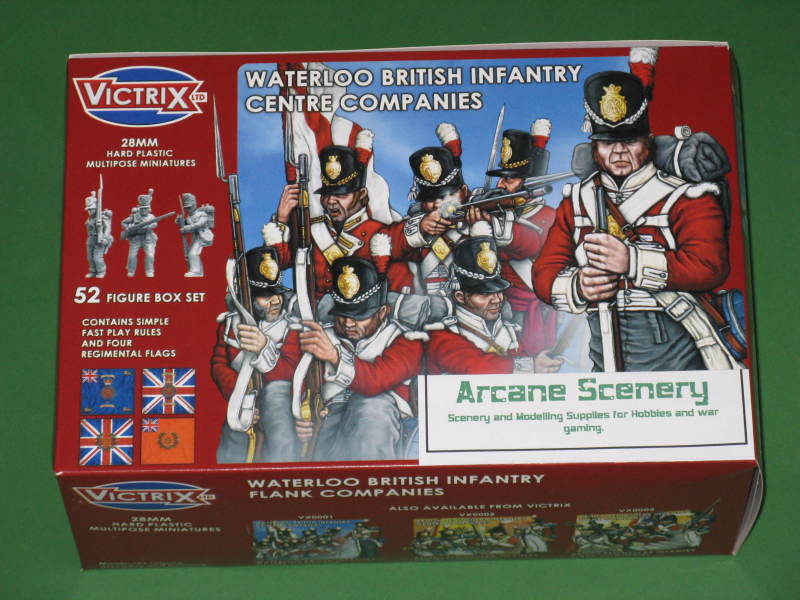
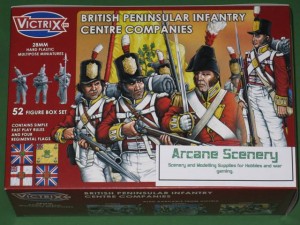
The next decision was to chose the box set. Would it be the Perry set or Victrix….If you have read my previous blogs, you will know that I am a great fan of the Perry Miniatures sets. The quality and sculpting are superb and they have cleverly put together a set that makes up into a British Battalion formed up as a firing line and includes 4 British 95th riflemen. That said, the Victrix sets are also nicely sculpted and although they are split into Flank and Centre Company sets ( the Perry’s include parts for both) you get 52 figures in a Victrix set and just 40 in the Perry set.

I chose the Victrix set to start with…I just wanted more men to start with and I figured that if I started with Victrix I would have to buy the Perry set at a later date so that I could add another regiment to my army. I know, it doesn’t really make sense but remember at this stage I didn’t have a firm plan but just wanted to build an army and start painting Napoleonics.

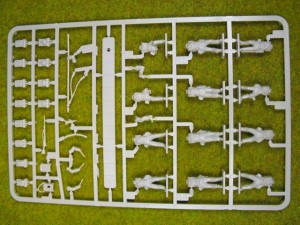
Having chosen the Victirx, lets have a look in the box . There are 8 sprues in the box. Four of these:

These sprues contain most of the soldiers torso’s. The top two bodies on the far right are for the Sergeant and drummer, the rest being normal Waterloo Centre Company troops. The rest of the sprue contains the drum for the drummer, back packs for the infantry and the ensigns or flag bearers flag.

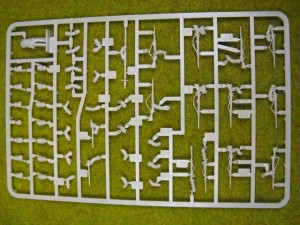
You also get four of these:

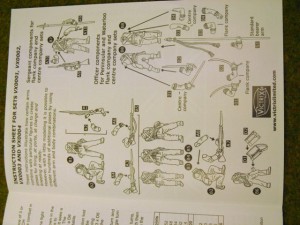
The one torso on this sprue is for the Officer and also doubles for the Ensign or flag bearer. There are also 14 different heads and lots of different arms. Fortunately, the instruction sheet is fairly clear and you should have no difficulty in putting the figures together, with a minimum of ‘cleaning up’ required.

The only issue that I had with the set was that some of the pieces on the sprues aren’t numbered very well or not at all. That said, assembly is straight forward and mixing and matching the different heads & arms is the fun bit!

If you take a close look at the heads, some are clearly Veteran Campaigners and some are more suited to the Drummer and Officer figures. Also some of the Hats ( or Belgiac Shakos to be precise!) have covers. I dont think that it matters whether you use the covered ones but I prefered to have all of my troops with the plume showing.

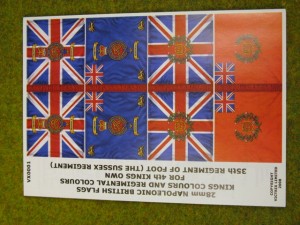
Also included with the instructions is a small flag sheet. Although there are four flags, you actually have just two regiments to choose form, this is because each Battalion carried two flags. One was the Union flag or Kings colours, the other the Regimental flag. The colour of the Regimental Flag usually determined the colour of the facings on the Troops uniforms. Or to put it more simply, a blue regimental flag meant that the collars and cuff of the troops’ uniforms would be blue. For my first regiment, I choose the 4th Kings Own, with the blue flag.

So that’s enough to be going on with now. In the next installment, I’ll have a look at the differences between Centre & Flank Companys and Waterloo and Pennisular Uniforms as well as showing you some pictures of my own version of the 4th Kings Own Regiment.

1 2 3