How to strip paint from Plastic Models safely.

I have been looking for a simple and safe way of getting paint off of second hand plastic models for some time now. Metal models are usually quite straight forward to strip down. Just put them in with some harsh solvent and you know that the paint will be removed and the metal model will be pretty safe. The only problem was that the solvent was usually quite harsh ( I know some guys that use brake fluid..not recommended!) and if you weren’t dressed in a full body chem suit there was a danger that you would disolve yourself. OK, I’m exagerating slightly but you get the point. Of course, you couldn’t possibly put plastic figures in these solvents as you would disolve your model as well.

So it was with some surprise that I found the answer in the wife’s Kitchen cupboard. Well actually, I found the answer when I caught Andy from Ibis Miniatures with his hands in the canteen sink apparently doing some washing up. This was a very strange event, as the boys from Ibis only tend to wash their dishes up once a month or so, and it was only the middle of the month. ‘What’s going on?’ I asked. ‘I’m just getting some paint off of these figures’ Andy replied. ‘What, with just water……’ At that point Andy gave me one of his whithering looks he normally reserves for opponents on the wargaming table. ‘No, Ive sprayed them with Fairy Power Spray first and I’m just washing the paint off.’ Sure enough, that was what he was doing and it works beautifully.fairy power spary

It really is as simple as this to use. Place your plastic models in a plastic bowl or container. Give the models a good spray with the Fairy Power Spray, making sure that you cover each model thoroughly. Leave for 20 minutes or so. Wash off in warm water and use an old tooth brush or similar to remove the paint from the model. Let models dry. Your models will now be ready to undercoat and repaint. The Power spray is quite safe to use so long as you follow normal sensible precautions and dont do anything silly like drink it or squirt it in your eyes. Pink Marigolds are optional. It costs just

Necron Genesis or How I Built My Necron Army part 2

Some time ago I started to describe my Necron Army and started with a description of my Necron troops. Well, here’s the next installment featuring my Necron Lords or HQ choices. I started my HQ with the Necron lord that was issued at the time of the GW Apocalypse launch. The Apocalypse supplement allowed you to field huge armies and was the first real expansion pack for 40K for some time. Necrons were not given a great deal of coverage in Apocalypse and I feel that they are somewhat underrepresented but the new Lord was a nice figure and had a ressurection orb so he was chosen to be the leader of my growing army.

012

I painted him in the colour scheme that I had developed for my army with the standard terracotta basing scheme and as well as the crystals supplied with the model, I added a few of my own ‘emeralds‘ to the base.

The next Lord was the Classic Lord, first issued when the original Necron Raiders supplement was published for the 3rd edition rules.009

Once again, I continued with the red, gold, silver, green, terracotta pallette so that he fits in nicely with the classic edition troops. For the sake of completeness, I then painted the original Necron Lord on foot, issued with the first full Necron Codex about 5 years ago. Yes, that’s the one that’s still in use now and well past needing an update…..rumour has it that it’s next year….we patiently wait, as all good necrons would!

010 011

I changed the arm on this figure as I thought that having the outstretched arm palm down made him look a bit like a magician sprinkling magic dust. The new pose makes him look a bit more sinister and he looks as though he is goading his opponent to come and get some! I also made the metal ants on the base. They were supposed to be a representation of the mini or micro creatures that are mentioned in the phylactery war gear rule in the Necron codex. I had intended to start including these on the bases of other Necrons but they are very fiddley to make. They are made from a metal bead, fuse wire and the tail is a small piece of guitar string. I lost count how many times I stuck the pieces to my fingers with super glue and the whole model nearly found a new home at the bottom of the garden at one point, so I have postponed any mass modelling of the metal ants for the time being!

I had to have one of the limited edition Lords that were issued with the army deals. I managed to get one as part of a job lot of bits on ebay for a very good price. I decided to change the colour scheme slightly. This was for two reasons. Firstly, I had just finished painting the Night Bringer and I wanted a Lord that looked as though he was one of his gang, so to speak. The second reason is that in the Apocalypse Supplement there is a very good article about the Necrons that seems to hint at a Hierarchical order within the Necron hordes. I thought that a Colour change could be used to signfy his seniority.

019

Having built all the lords on foot that are available it was time to build a lord with a destroyer body. However, I just couldn’t build the standard version, I had to have the one with Tomb Spyders legs. This is quite a common conversion and very straight forward to build. It really is as simple as cutting the Tomb spyders legs and superglueing them into the destroyer body. I also extended the warscythe by combining both types of staff supplied with the kit. A bit of a tricky operation but the result is a more imposing weapon, always a good thing ……

018015

The other modification was to add the scarab swam on to the base. The swarm is based on the swarm that is supplied with the Night Bringer model and I was lucky enough to have a spare piece (again, all bought on ebay as part of the same job lot that included the limited ed. lord). To make the swarm even more impressive I added some extra scarabs and topped the swarm off with a scarab with his claws outstretched. I also used a very simple moulding technique to produce lots of extra Scarabs to add to the base itself. I’ll cover how you can make these two simple projects in a future article.

016 017

My final Necron Lord (so far….there will be more!) is a complete conversion based on a model that I had seen on a forum. It’s a necron wraith Lord that uses the parts left over from the Destroyer Lord Kit. I used Sculpy to make the body and added a few extras from my bits box and hey presto, a new Lord!

013

So that’s the HQ covered. In part three I’ll have a look at the elites that are in my collection, although I might just jump to Heavy support and show you how you can still use the Tomb Spyder body left over from the Lord conversion. I would n’t want you to think that I had just discarded it into the bits box!

James May is Spitfiretastic!

If you didn’t get to see James Mays’ Toy Stories last Tuesday then please go immediately to the BBC iPlayer site and watch it NOW!

I’m not sure how long the link will last, so in case you don’t get a chance to catch this programme, in this episdode, James May ( of Top Gear fame) explored the wonderful world of Airfix kits. He tried to convert a group of young kids to the hobby and actually did a very good job. The grand finale was putting together a life sized model of a spitfire and showing it off to Veterans from the Second World War. It was my favourite TV show of the week and not just because James did a superb job of advertising Spitfire kits!

The show was a lovley blend of humour, nostalgia and interaction between the generation that grew up building Airfix and the Generation that spends most of their time on their mobiles & nintendos! All delivered with James May’s laid back, knowledgeable charm. James explained exactly why building Airfix kits was so pleasurable to my generation; from the way that you learnt to patiently build a model and over come the challenge that each kit presented to how we used to blow them up with bangers or shoot them to bits with air rifles when we were ready to cull our collection! Oh! and you also learnt all about history along the way, as each kit came with it’s own set of written instructions and facts about what you were building. I think that I have mentioned before, the instructions in every kit started with the words ‘locate and cement…..’

So if you fancy a bit of nostalgia yourself, I have Spitfire kits in stock now.

spitfire spit stater

The starter set is a great introduction to scale modelling as the set includes the glue, Paints and a brush. The glue comes with a precision applicator to help ensure the glue goes on the kit, not on you and the paints are acrylic and they are water based, so you can wash your brush out in water. A great present for the newcomer or those returning to the hobby, suitable for age 8 upwards.

If that isn’t enough nostalgia for you, try the ‘Boys Book of Airfix’, subtitled ‘Who says you have to grow up’. I’ve reviewed this item before in a previous blog entry, you can read it here. It will make an ideal Christmas present for any fan of Airfix.

boys book

Talking of Christmas, why not do a James May yourself? How about buying an Airfix kit for one of your younger relatives and even better, sit with them on Christmas afternoon or Boxing Day and put the kit together. Make sure that you dont hog the glue and dont get too picky if theres a few badly aligned pieces! I guarantee that you both will have more fun than the usual Christmas routine of TV & snoozing on the sofa!

New In From Zvezda – Polish Uhlans.

It’s been a busy week for new releases. I seem to have lots of great new lines coming into my shop at the moment and too many to go through in detail. That said, I have been really impressed with the latest set of soldiers from the Russian Manufacturer Zvezda. The subject is Lifeguard Polish Uhlans or Lancers from 1809 – 1815, the Napoleonic era. The models look fantastic and for 1/72 scale figures they are very detailed and well posed. They have also sold very quickly and despite only adding them to my range on Monday, I have nearly sold out, so it seems that my customers are also impressed. I’ve more stock on the way so if when you check my shop and they’re not there, dont worry there will be reinforcements next week!

008

Incidentally, if you would like to add metal lances to your figures, I carry three types of metal Lances & Spears that will help to detail your models. Of course, dont forget to base your models properly. A nicely based model will always look better than one that has been left unbased. A simple coat of Brown scatter with static grass for detail looks just great!

Mantic Games Launch Kings of War Elves!

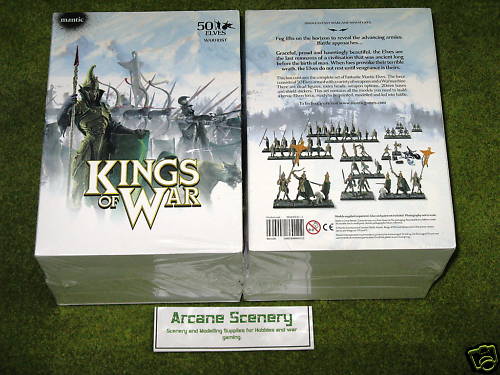
Yes, the Mantic ‘Kings of War’ Elves range has now been launched and I’m delighted to say that Arcane Scenery is an official stockist and we will carry the full range both in our ebay shop and our webstore all despatched post free to UK addresses.

Just before I give full details of the sets that are available I thought that I would show you the Spearmen set that I started in a previous Blog entry. The last time I showed you a photo, the figures were assembled and waiting to be painted. Well, they’re now finished and waiting for reinforcements!

002 003

I’m really pleased with the final result. This is my first Fantasy unit that I’ve done in recent times. I went for a fairly straight forward colour scheme. The figures were first undercoated in black, then dry brushed with gun metal, then a second dry brush of Silver to highlight the armour and I picked out some of the detail in gold to finish off. I then painted the the faces with Flesh, the boots with graveyard brown, the hair with desert yellow and the spears with gold. All of these colours were given a quick highlight in either a lighter tone or with a dash of white added to the original colour and that was the painting done. Oh, the shields were simply painted matt white and I ‘cheated’ and used the stickers supplied with the figures. I think that they look pretty good although you could paint your own design onto the shields if you prefer.

006

The bases were finished in Bestial Brown, coated with Forest Brown Scatter and then detailed with spring colour static grass.

004 005

So I have my first unit of Elven Spearmen ready to take to the battlefield. A unit like this will cost just

Getting the best from Spray Paints

They say that bad luck comes in threes and I suppose that it is one of those truths that I would prefer not to keep proving but this week it happened again. This time the culprit was spray paints. Myself and two customers had bad experiences with spray paints this week. I should have known better but despite all my experience, I still managed to ‘forget’ the basic lessons of using aerosol spray paints. I felt bad for my customers to. One in particular, who had a coat of varnish go bad on his model, had my sympathy. I knew exactly how he felt, he had spent 20 hours painting his model only to find that the final coat of varnish had ‘bloomed’ spoiling the shading on his masterpiece. Fortunately, you can usually cure the problem but it involves more work and of course it would be much better if it didn’t happen in the first place.

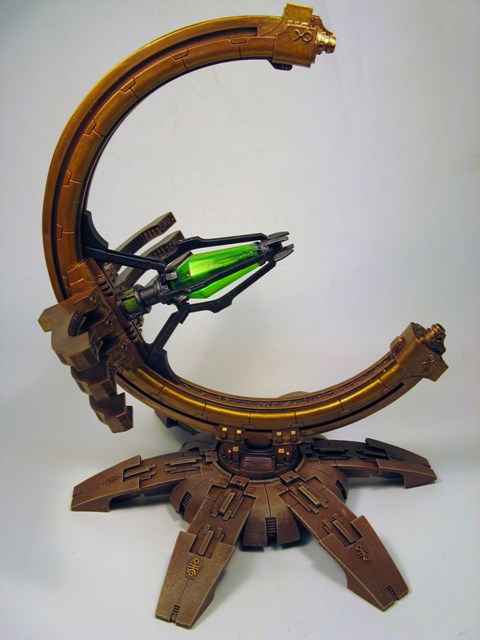
My problem occurred with the final spray coat on my new forge world Necron Pylon. Now just to be clear here, the model costs

New 1/32 scale Figures from Airfix

004I have just had the latest releases in from Airfix. They are 1/32 scale WWII British 8th Army and 1/32 scale WWII British Paratroops. As with previous releases, these aren’t technically new but reissues of old sets. They were originally produced back in the 70’s, I think, as I certainly had a set in my younger days!

003

These aren’t the multipose kits construction kits but boxes of one piece figures. The good news is that they are moulded in hard plastic, so they will be easier to paint than the old polythene versions and it will be possible to convert them & glue them with normal polystyrene glue.

Each box contains 14 unpainted figures and there will be seven different poses in each box. The figures that I have are all nice and crisply moulded and will need the minimum of cleaning up before painting. The poses are well thought out and realistic. I particularly like the 8th army figures, they look as though they have just stepped of the page of a picture of the advance on El Alamein!

As always, they are available from my shop. Watch out for the next releases which will include Afrika Korps, U. S Paras, U.S. Infantry, German Paratroops, German Infantry and British Commandos.

Wraith Wing conquers again!

Once again I find myself gloating over a Necron victory. That’s two in a row now and I’m beginning to believe that the Necrons aren’t such an uncompetitive army as I had first thought. The Necron Wraith Wing was pivotal in the victory and this time they were still standing at the end of the battle despite being in the thick of the fighting.

My opponent, Adrian, was fielding a Dark Angel Space Marines and this time the army size was 1750 points. So how did I spend the extra 250 points? Well I gave the Necron Lord even more wargear in the shape of a phase shifter and Warscythe making him a 210 point character. ( Just about legal, the codex says that the Lord can replace his Staff of light with a warscythe and have 100 points of war gear). I also added a squad of three heavy destroyers to deal with any heavy armour and I swapped out a squad of 10 Necron warriors for 5 Pariahs. I had a few points left so I was able to increase the scarabs to a squad of 8 to make a total of 1747 points.

pariahs

Now the most debatable change to the list was the Pariahs. They’re expensive and they’re not Necrons so they dont have the ‘we’ll be back rule’. They also affect the phase out number adversely, so the general advice is dont take them. Well I ignored this because on the positive side they have the same fire power as immortals but they carry warscythes so they can be devastating in close combat and they push down the enemies leadership to seven whilst being fearless themselves. On that basis, I thought that I would give them a chance.

The enemy consisted of 1750 points of Dark angels, which as I remember consisted of the following: 2 razorbacks with two 5 man combat squads embarked, 2 dreadnoughts, 5 terminators, An assault squad led by a Chaplain, A six man bike squad with an attack bike, a devastator squad and a spare squad of marines. The mission was a three objective spearhead set up so rather than go through turn by turn I thought I would take you through how each squad did.

To start with the scarabs did what they do best, turbo boost straight at the enemy gun line finishing just about 14 inches away so that it’s clear they cant be assaulted but licking their lips at the prospect of jumping the devastator squad. Well that sort of thing tends to concentrate the mind, so my opponent had little choice other than to try and shoot the little buggers before they chewed him up. So half of his army opened up on the scarabs. They survived , of course and piled into his devatators. They weren’t going to win the combat but they were going to tie the squad up for a couple of turns and stop them knocking over my troops.

While this was going on my Heavy destroyers stayed well out on the flanks picking off his armour. During the course of the battle, they accounted for one of the dreadnoughts, a razorback and two terminators for no loss to themselves.

The two squads of necrons were holding two of the three objectives, whilst the Immortals & Pariahs advanced on the third objective. They cleared the marines from this objective with shooting alone but I was holding them back as I expected the terminators to deep strike into the rear of my army. I wasn’t disapointed and on turn three in they came. It was at this point that the battle would be won or lost. The situation was that The wraith wing had jumped the marine assault squad and were gradually chewing through them, the Dark angels bike squad were engaged in close assault with one of my necrons squads on one objective and the other objective was now threatened by the terminators and a marine squad in a razorback. Fortunately the terminators scattered towards the Pariahs so Adrian had a simple choice. Shoot at the necron squad and clear the objective but then be assaulted by the Pariahs or try to kill the pariahs first. He went for the Pariahs & killed two and the remainder failed their morale check and so retreated from the battlefield…not so good. However, this left the Terminators open to rapid fire from the necrons. So all my unengaged necrons opened fire, That’e 16 shots from the Necron squad, 20 shots from the immortals & three shots form the heavy destroyers. Under this weight of fire the terminators were wiped out. Even better, on my turn the flayed ones came on and wiped out the bike squad in combat! The crisis was over for the Necrons. They continued to hold two objectives and the Flayed ones and the wraith wing & necron lord were going through the Marines squad by squad in close combat. One of the Wraith squads was assaulted by the last Dreadnought but even under this fearsome attack, the wraiths survived, their high initiative and invulnerable saves saw them gradually dismantle the dreadnought piece by piece…nice!

wraith 1

So will I keep the Pariahs? For the time being, yes. Although they were easily shot to pieces, they posed such a threat that they attracted fire whilst the rest of my army could get on with the job of killing everything else. That said, I might be tempted to substitute them for another tooled up Necron Lord……….

NEW FRENCH CAVALRY FROM THE PERRY’S

!BbZOyi!B2k~$(KGrHqYOKiQEq5B3VJT5BKv4k+WoKw~~_35

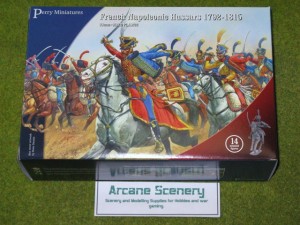
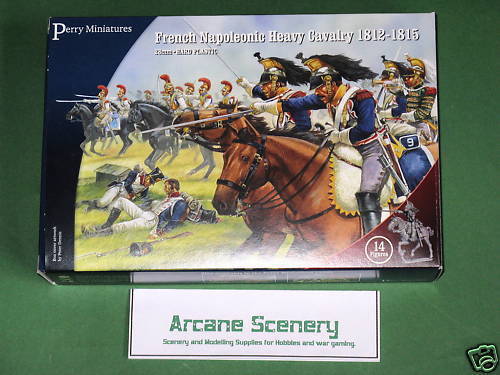
The growth of plastic 28mm figures continues with the release of this beautiful set of French Napoleonic Heavy Cavalry from the Perry Miniatures. If you are new to the hobby you may not be familiar with the Perry twins work. Well, to paraphrase another famous Nottingham celebrity, the Perry Twins may not be the best miniature sculptors in the hobby but in my opinion, they are probally in the top two! The Perry’s have a long history of sculpting for Games Workshop, Foundry Miniatures and are now producing their own range of figures.

Traditionally, 28mm wargaming figures have been produced in metal and anything in plastic was seen as a poor substitute. Well, the times are a changing, and with the improvements in moulding in plastic combined with improved production techniques, plastic now seems to be not only a cost effective way of building your army but also allows you to convert your figures to produce your own uniquely posed models. I have always had an affinity to plastic kits and these new 28mm figures are just superb. They assemble well, are easy to clean up and paint and the detail is as crisp as any metal model.

perry french cav 002

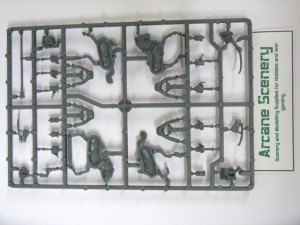
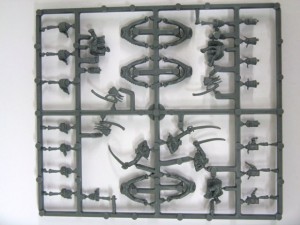
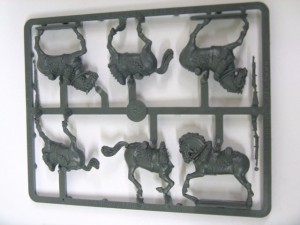
So what about this new set from Perry Miniatures? Well, you get 14 mounted cavalry figures in the box, with options to make either French Cuirassiers or Carabiniers. Included in these figures are 1 officer, 1 trumpeter and 1 standard bearer. There are enough spare arms for you to model the cavalry as charging or at ease and just to add some interest to the set, also included are some British and French infantry casualties.

perry french cav 001

The final inclusion in the box is the beautifully produced colour paint sheet that also includes four flags for your cavalry. It’s amazing how much information that is packed onto the sheet. Although I am not any sort of an expert on Napoleonics, by the time I had read through all of the notes I felt that I understood how to assemble and paint an authentic Regiment.

perry french cav 003

And that’s the clever thing about the Perry Miniatures sets, they give you a great entry into the hobby of Napoleonic wargaming. If you’ve never tried this era before because like me, you’ve been intimidated by the complexity of the different colour schemes and troop types then start with a set of Perry Miniatures and you wont go far wrong. In fact, I’m confident that you will have a super set of models to start your collection!

New From Italeri…

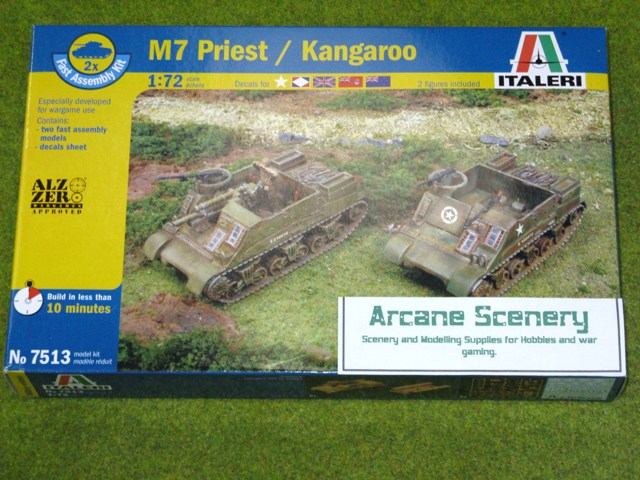
I’ve just received the latest kits from Italeri and thought that I’d pass on the news. I understand that the 1/72 scale kits may be reissues from Esci but never the less, they are great additions to the Italeri range and it’s nice to see them available again.

Panzer 2 172

I particularly like the Panzer II kit. You can now build a complete collection of Panzers from the first, the Panzer I, right throught to the King Tiger, all in 1/72 scale and all Italeri kits. I think that this would make a nice collection and a super example of Tank development though the Second World War.

The other new releases include the Sd.Kfz 251/7 Pionerpanzerwagen:sd.Kfz.251 pioneer wagon 172

The Sd.Kfz.124 Wespe,

Wespe 172

And finally, the Panzerjager 1,

panzerjager1 172

All of these are currently available from my ebay shop you can easily track them down by using the shop search box or clicking into the Italeri Kits category. I hope that you enjoy your modelling!

Douglas Bader tactics work for Necrons too!
Ok for those of you who haven’t heard of Douglas Bader, he was a World War Two spitfire ace with 22 victories to his credit. Incredibly, Bader had lost both of his legs in a flying accident in 1931 but despite this set back, recovered, retrained and fought in the Second World War with ‘tin legs’. A truly remarkable man who overcame incredible obstacles throughout his career. If you want to know more, have a look at Wickopedia on the subject. I like the summary of his character:

“Bader was considered to be an inspirational British hero of the era. His brutally forthright, dogmatic and often highly opinionated views (especially against authority) coupled with his boundless energy and enthusiasm inspired adoration and frustration in equal measures with both his subordinates and peers.”

Douglas_Bader

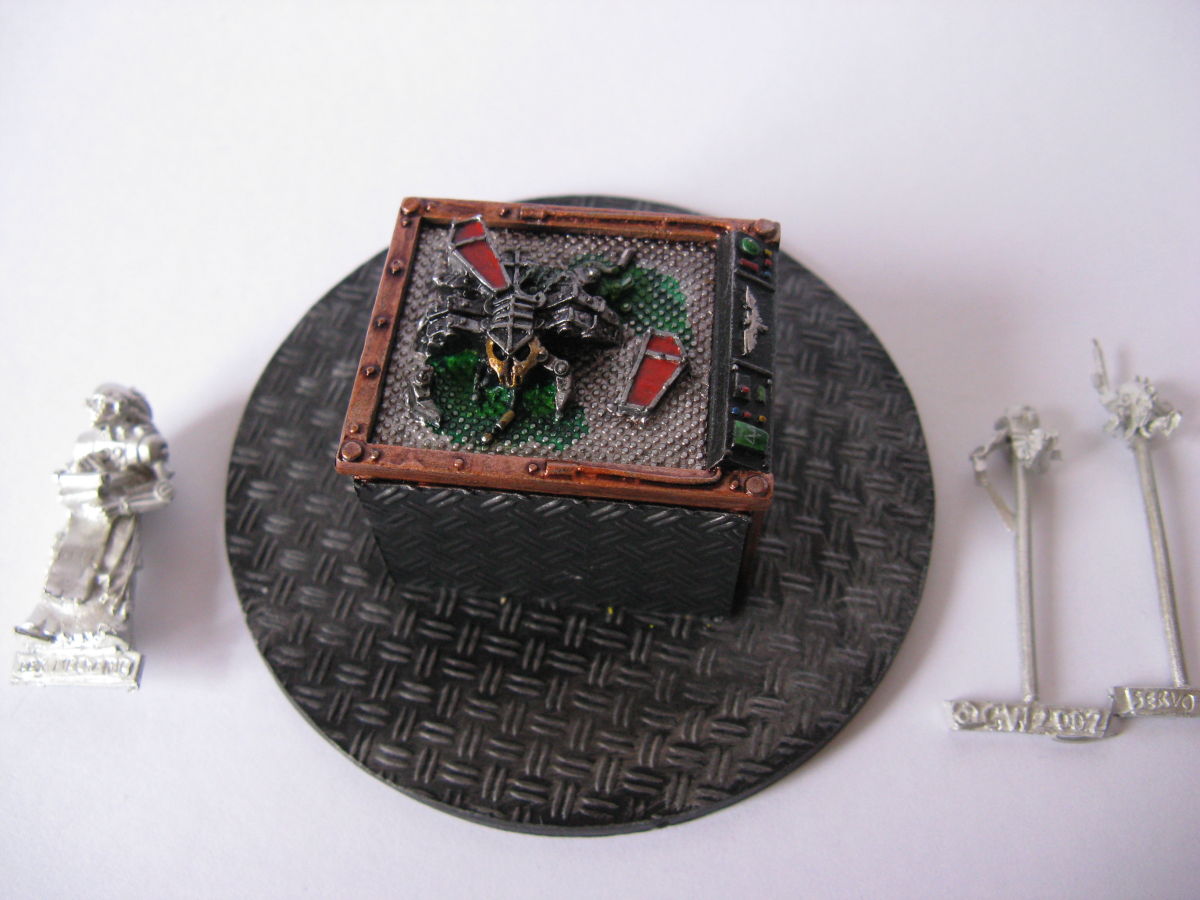
Sounds like my sort of hero! So whats all that got to do with Necrons? Well avoiding bad jokes about his tin legs qualifying him as an honorary Necron, Bader was a believer in the ‘Big Wing’ theory, which basically meant that instead of sending Spitfire squadrons up piece meal to attack the incoming German raids in hit and run style, you should send up everything at once in a large formation and hit the enemy in one big battle. So with this in mind, I had decided to rewrite my necron Army list. I was going to be playing a Tau Army and I wanted something nasty to cause problems in the Tau firing line. I had heard that the ‘big wing’ formation for the Necrons is two squads of Wraiths, led by a Destroyer Lord with Res. Orb.

new lists 094

So the complete army of 1500 points was Destroyer Lord + Res. Orb, 2 squads of three wraiths, a unit of 7 scarabs, 3 squads of 10 Necrons, one squad of 10 flayed ones and 10 Immortals.

The theory being that the scarabs turbo boost towards the enemy attracting suppressing fire ( their turboboost & swarm size give them a 2+ cover save….nice!), the Lord & Wraith squads also charge forward in concert, the lords Resurrection Orb providing protection from heavy fire & the Wraiths 3+ invulnerable save keeping enough of them alive for the next round. Add to that, the flayed ones are going to flank attack, so if my opponent is sitting at the rear of the board there’s a good chance that they are going to pile into his gun line. Of course, while all of this nastiness is going on, the 3 Necron squads will be advancing implacably, ( all within 6 inches of each other, so we’ll be back means that even if one squad goes down, there’s still another nearby for casualties to join) whilst being supported by the Immortals.

So how did it all work in practice? It worked beautifully. As I said, I was playing a Tau army and the set up was Dawn of war with each of us defending and objective. The Tau seized initiative & went first but this turned out to be an advantage as it let me see their disposition and took the sting out of the first round of fighting. The Tau have little to shoot at, so they whittle away at the nearest Necron squad & knock down 6, of which 2 get up. Necrons to move. So Scarabs turbo boost towards the Fire warriors, The Big Wing of Wraiths move out towards the core of his army, everything else moves and then runs under the cover of darkness……

Second turn, the Tau open fire but there’s too much to shoot at! The scarabs are already about to assault, the Big wing of Wraiths looks very threatening and the Necron Phalanx has made it clear that it’s going to take the opponents objective. So the Tau open up with everything but I get very lucky with the saving throws on the scarabs & Wraiths and only lose a squad of necrons.

Half of which get up and join the nearest unit to form a mega squad of 13 necrons. Second move for the necrons, Scarabs into combat with a squad of Stealth suits, Big Wing of wraiths now right into the Tau army ( with hind sight I should have turbo boosted these as they would have been into assault by now), Necron Phalanx move & fire and the nearest Kroot are either dead or running and joy of joys, the flayed ones are on assaulting the nearest broadside battle suit. To paraphrase Corporal Jones, the Tau ‘dont like it up ’em!’

Tau turn three and the Tau finally focus everything on the Big Wraith Wing. helped by three crisis suits that have turned up in deep strike, 4 Wraiths go down and the Lord suffers two wounds, leaving him vulnerable to further rail gun hits. One small problem for the Tau through, The Necron Phalanx is untouched and so to turn three for the Necrons. At this point I made a mistake and split the wraith wing. Of the four that went down, two got up again and so I sent two wraiths to deal with the Crisis suits whilst the lord and two wraiths assaulted a fire warrior squad. As it happens, the crisis suits beat the wraiths in combat and the Lord was left with just one Fire warrior to deal with after the nearby Necron phalanx had rapid fired so by splitting my Big Wraith wing I caused it’s demise. I’ll never do that again! However, the Flayed ones had skinned their first broadside and were now advancing on the second, whilst the necron Phalanx had dealt out a fearsome amount of firepower, killing another kroot squad & a firewarrior squad.

Tau turn four and now things are looking bleak. The Necrons are tying down some of his best units in close assault, limiting the amount of fire power at the Tau’s disposal. Add to this, the fact that the Necron phalanx is close enough to choose to assault or rapid fire and there’s no where to hide and the Tau are beginning to crumble. If there is a Tau Corporal Hicks you would hear him saying ‘it’s game over man, we’re history’ in true Aliens style. So the Tau try to redeploy and fire with what they can. The last of the Wraiths go down, along with the Lord and just a couple of warriors and a couple of flayed ones. Necron turn four, the lord gets up again! so it’s back into combat and into the Tau commander! Meanwhile, down go a squad of Pathfinders under fire from the Necron Phalanx. The Phalanx is also now taken the enemy objective and pushed or killed all the Kroot & firewarriors defending it. The Flayed ones have caught up with the last Broadside suit and the scarabs, which have finished chewing up the stealth suits have launched a cheeky assault on the squad of crisis suits!

new lists 092

So to Tau turn five…….nothing left to fire other than a Hammerhead & the burst cannon on the remaining devil fish. Time to try a desperate attempt to contest the objective by flying the devil fish into the danger zone. Necron turn five and the devil fish is toasted leaving the last five fire warriors sitting outside the wreck. The Tau commander is history although the scarabs have now been killed. The Immortals aving safely shepherded the Necron warriors to the enemy objective manage to stun the Hammerhead. The Tau are in big trouble and hoping for no turn six…….unfortunately there is a turn six, so after a pretty ineffectual turn of shooting & the resolution of the remaining assaults, theres not a lot for the Necrons to do other than mop up that last fire warrior team and the game ends with a resounding Necron victory!

necron lords 012

Well it’s about time that I had a win with my Necrons, having spent the last month getting beaten to a pulp. So I will bask in my victory for the rest of the week! The new army list worked a treat and although the Wraith Big Wing didn’t actually kill very much, it attracted so much fire that the rest of the army could advance and do it’s job….relentlessly killing the opposition. To be fair, it’s an army designed to beat the Tau. How it will fair against troops with a tougher assault capability remains to be seen. That said, I’ve learnt my lesson, dont split the big wing, overkill is better than no kill and if the Wraiths get pulled out of position, they have a 24 inch turbo boost move to get back to the battle. So the Douglas Bader Big Wraith Wing flys again!

Cheap Paint!

This hasn’t been a great week for me, modelling or blogging. Sometimes I feel as though I have achieved very little other than to run to stand still. However, that said, it is often times like this that you learn the most. The main cause of my frustration, apart from turbolister, has been a leaky toilet cistern, which has not only meant that the toilet was put out of action but the water leaking from it has found it’s way through to the lounge ceiling. The problem with these minor domestic maintenance problems is that I find it difficult to sit and paint or make my models when clearly, there are other priorities. Well, the other priorities are actually only clear because my dear Wife likes to make them so….

Apart from the obvious inconvenience of having a leaky convenience, the damp spot in the lounge could have turned into a major redecoration project and that would be a disaster when I have so many models to make, so the plumbing had to be done. The upside of this was a trip to B&Q to get the bits and of course a chance to have a nosy around the aisles, pretending to look for plumbing bits whilst investigating parts for my next scenery project. In fact, hardware stores are a brilliant place for stocking up the bits box and I’ll revisit this theme in future blog articles.

There was another reason for my trip. I had heard that B&Q have a clever paint matching machine. You just supply them with a sample colour and they will produce a fairly good match. Now, I am working on a piece of Scenery for my necron war gaming board and I wanted the base to be the same colour as my Necron bases, that is Foundry Terra cotta brown. If you use Foundry or Games Workshop paints over a large area, it will cost a fortune, but those nice people at B&Q have mixed me up a sample pot of 250mls of Terracotta( thats about ten times bigger than a Games workshop paint pot) for just £2.08! Now, I wouldn’t use this paint on a model ( mind you, I might try it on my figure bases) but for scenery, it’s ideal. So there you are, big pots of  paint for your scenery or dioramas that will match your Games workshop or Foundry paints at a fraction of the cost.

Oh! and the good news is that the leaky toilet is fixed as well, so this week I hope to get back to the modelling board with a clear concience, Hurrah!