In the last entry I had just finished block painting 22 Prussian line infantry. The next stage in completing them is to apply Army painter quick shade, or as it is known, dip. Quick shade has a mixed reputation. To some painters it is the Devils brew, a cheat, and should be avoided at all costs. To others it is a magic product that has revolutionized painting wargames figures. My view is somewhere in between. If you are painting large numbers of figures for the wargames table it is probably the best way to go. If you are entering a painting competition, dont go near it! I do not dip my figures in the tin & flick the excess down the garden as the instructions recommend – this sounds like a disaster waiting to happen if I was involved – I’m sure that my figure would end up at the bottom of the garden and the quick shade would inevitably end up on something that it shouldn’t! 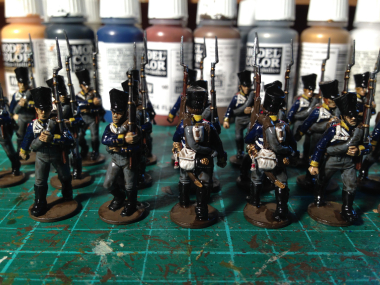
I prefer to liberally brush it on my figures and leave it to dry for about 24 hours. This helps me to control how much ‘dip’ is being used and where it is going! The point is that once applied it not only shades your figure but also protects it with a coat of varnish. There is one other issue with tins of Quick shade. It has a tendency to form a skin on the product as time passes. So long as you carefully remove this skin and give it a good stir, you can continue to use the dip. I also add a bit of white spirit to the tin before use and I am meticulous in wiping the top of the tin to try and get the best seal after use. That said, for an expensive product, I think that the tin could be of better design and quality. As you can see from the picture, the quick shade does what it says on the tin & shades the creases and gives definition to the figure. Dont be put off by the high gloss finish. The next stage in the process is to spray the figures with a good Matt varnish or anti shine. I stick with Army painter for this job. It’s not necessarily the best Matt spray available but it is designed to work with the quick shade & I get good results with it most of the time. Matt varnish can be temperamental so ALWAYS shake the can well, and spray in light coats from about 18 inches. Also if you can, spray in a well ventilated area with consistent temperature. It all helps to get a good finish.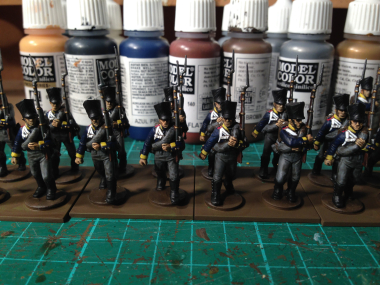
The next picture shows the figures once they have been coated with matt varnish. There is one other quick trick that will help bring your figures to life and that is to repaint some of the lighter colours to add highlights & clarify them. I usually redo some of the white ( particularly the webbing), the yellow facings and I also retouch the steel bayonets with silver and the brass items with gold. it doesn’t take too long but it does add something the the figures. The figures are now based on 40mm renedra bases in fours and the bases painted Vallejo Chocolate brown 872.
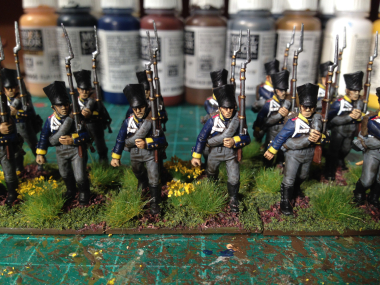
The final stage is the basing. I use a range of finishes on my figures but for the Prussians I have gone for a very quick & simple solution. Using watered down PVA, I coat the bases & then cover with a forest brown scatter. Once this has dried, I put on random patches of ‘grass’ using Javis fine scatter – again stuck with PVA. To finish and to add detail, I then use tufts of grass from either the Army Painter range or the Gaugemaster/Noch variety. I prefer the latter as they come in distinct clumps and are easier to use. The final detail is to add some flowers! In this case, yellow really contrasts against the dark prussian blue and adds the final touch! Hey presto, 22 Prussians ready for battle.