
The entry is a bit of a backwards step…. To be honest I had part written it sometime ago but not had time to finish it before I actually had finished my Prussian brigade. However, I haven’t done a great deal of painting over the last week so I thought that I would add this back in to the blog to show in detail the process I used to speed the painting of my Prussian contingent.
I usually paint my models in batches of about 6 figures at a time. It seems to take a long time to finish a battalion of troops this way but at least I had the reassurance of watching the battalion grow in numbers. However, I decided to have a go at a much bigger batch to see if I could speed up the process. I’ve heard a lot about speed painting but it’s not something that I’d ever tried. Besides, painting is supposed to be a relaxing pursuit, so I didn’t want the pressure of painting against the clock. Of course, if I could be disciplined to have a go at a full battalion in one go, it might help to grow my collection and if course reduce my painting back log.
So here’s how I got on. I hope that the following will contain some useful ideas for other modellers. I ‘ve also tried to take pictures at nearly every stage so you can see my progress. Before I start any painting project, I usually spend a bit of time researching the subject. I’ll cover this as a general topic in a future blog entry as I think it might be useful and thought provoking. I have found that often, the references can give different colour schemes, particularly when it comes to the detail. The most consistent source that I use, and the best that I have found for a painting reference is the mont st jean site. Here is the link:
http://centjours.mont-saint-jean.com/liens.php
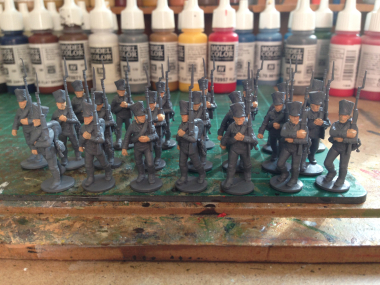
Before starting to paint a batch of figures it makes sense to paint at least one test figure, if nothing else to establish what paints that you will use and the best sequence for painting. As I had already painted a battalion of Prussians, I was already prepared and I knew exactly which colours I would use. To help me through the process, I lined the colours up in sequence on my work station. This keeps things organised and helps to mark my progress as I work through the colours. You can see the paints used in the first picture. Picture two shows the figures assembled and undercoated and with the first colour, vallejo 815 Flesh painted on for hands & faces. I tend to stick exclusively to Vallejo paints. I find them to be about the best around for painting miniatures so all the references to paint numbers are for Vallejo. The next picture shows the figures with 950 black applied to the hats, boots and cartridge cases.
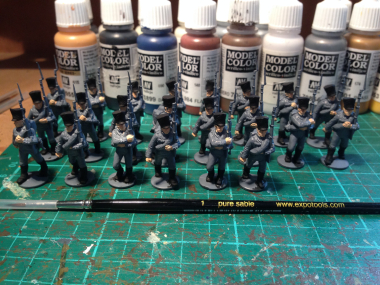
I’ve also shown the brush that I am using an Expo sable sized 1 brush. I find this ideal for block painting figures of this size and only use a smaller brush when it comes to painting the fine details.
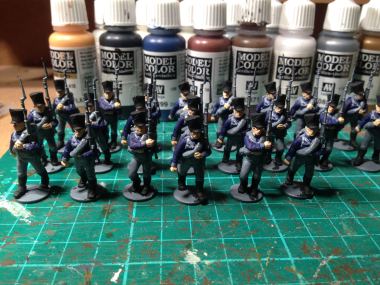
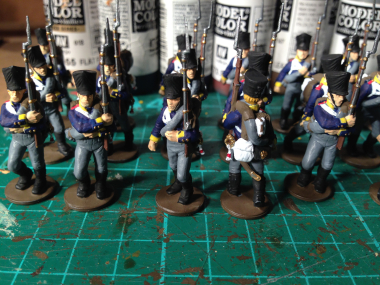
Picture three shows the troops with their jackets painted Dark Prussian Blue, Vallejo 70899. So far, painting has been fairly quick as I am painting reasonably large areas on the figures. Now comes the first of the fiddly bits, painting the Muskets, hair and leather straps on the blankets. I tend to do these all together as I use Flat brown (984)for the musket stocks, Leather Brown for the strapping (871) and both these and a variety of browns for the hair – Light brown (929), yellow Ochre(913) & Chocolate brown (872). You could use the different browns to paint a wood grain effect on the musket stocks if you wish, but it’s not a style that I like – plain brown is just fine! The detail on the muskets is finished with 864 steel for the barrels & bayonets & 801
 , brass for the bands on the barrel, stock, sword handle, scabbard end & badge on the cartridge box. Next up, I carefully paint in the webbing, Bread sack and detail on the back pack, as well as the sword knot. You could use Vallejo white 951 but I prefer to use the off white 820. At this stage the figures are nearly fully painted. So far, it has taken me about 8 hours of painting, or to be more realistic 4 evening sessions of two hours. Any longer & my back seizes up!
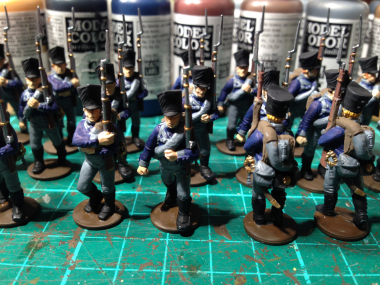
The next picture shows the figures with the facings painted Yellow 953, the shoulder straps & sword knot red, 957, and the buttons picked out in steel. The yellow facings are to represent the Silesian regiment and the colour of the shoulder straps & sword knot indicates the battalion & company respectively. The purists out there will want to paint different colours on the starps & knots but I am too lazy and the red gives a nice contrast to the yellow facings! The final bit of painting before using Army Painter dip is to use Neutral grey, 992 to touch up the trousers and Blanket rolls and to correct any obvious errors. At this stage they dont look too bad but the block painting leaves the figures looking a bit flat. I could go back
& shade and highlight the figures but this is an exercise in getting a batch of figures ready for battle, not a painting competition!
In the next article, I’ll show you how the Army painter quick shade helps to bring the figures to life and my quick basing technique.