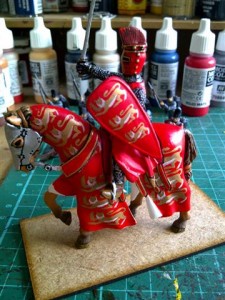
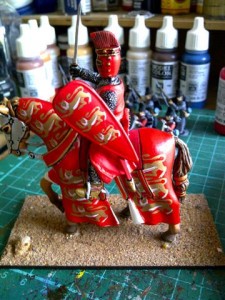
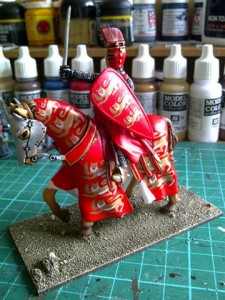
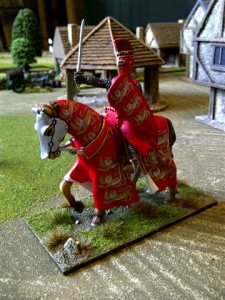
This is a basing project on one the D’Agostini knights that we sell. The knights were originally sold on the front of magazines, as part of a part work collection, we’ve managed to acquire quite a few of these, and they’re really very, very nice figures. I thought that we could make them look even better if they were on their own little base. So this is an opportunity for me to show you how simple it is to base a figure and just a few of the techniques that we use to improve the way the figure looks.
We’re starting off with a prepainted figure, its a model of Richard I looking very resplendent in his armour and red circoat. The first job is to fix him to the base; for which I’m going to use Devcon two part adhesive. Just recently, people have resorted to using superglue for almost every job, but there are other glues and we’ve done a previous article on the blog on this subject. We actually sell devcon, and epoxy adhehesive is a much better glue for this job, the thing about devcon, is that it is a two part adhesive, which will set off hard and gives a really really strong bond.
The difference between epoxy and superglue is that is that superglue is great if you’re trying to pull a joint apart – you will get exceptional strength , but it falls down on its shearing strength, when you tap it really hard. When you use epoxy resin you get an all round strong bond so even if the figure gets dropped the joint should stand, and the figure should stay in one piece.
For the base itself we’re using a wooden mdf base. We stock a vast range of bases but they basically fall into three types:
*We do the Renedra plastic bases, which I favour for my napoleonic army. These are really nice extremely well moulded bases, exactly the dimensions that they say, and are nice and thin, which means that the figures can be put into a movement tray and still look about the right size on the battlefield. These are particularly good for plastic figures.
* The next range are the plinth type plastic bases (similar to a certain large brand) these are also very good for plastic figures too, but the little plinth gives a little extra height, so I quite like these bases for hero figures. If you’ve got an officer, or a hero figure that you want to stand out, giving him a taller base is a great idea. We also have circular bases which have a little lip around them that makes it look like a little diorama and I think these are super for officer and command groups.
*Finally MDF laser cut. Absolutely precision cut bases which will allow you to put all your figures in very neat formations. I particulatly like MDF for metal figures, using expoy resin to glue them in place. For this metal figure I’m using a Sarissa Precision 100mm by 50 mm MDF base.
To use the epoxy, simply squeeze out equal amounts of the resin and hardener onto a piece of paper and mix with a toothpick. Then apply to base. It’s rapid drying, so it will be set in about ten minutes, though it probably needs about 24 hrs to fully cure, but it will be workable in the ten minutes.
Richard I has been drying for about 15 minutes, the epoxy is nice and dry and he is held firm. The next task is to cover the base in sand. You simply use watered down pva glue, a white woodworking glue. Cover the whole base in the glue, being careful not to get on the model, and once the base is covered, plunge the model into a box of sand. We sell basing sand, and I quite like to mix up the diferent types of sand so that you get a mixture of coarse and fine sand on the base.
I’ve also included a a few little pebbles to add a little extra interest. You might need to to give the base a little tap to shake off the excess sand. We’re going to leave it a good thirty to forty minutes for the glue to dry properly.
I let the sand dry for a bit more than an hour to make sure it really was dry. The next stage is to paint the sand. To do this we use an emulsion paint rather than a modelling paint. The cheapest way of buying paint for scenery and basing is to go to your local DIY store and buy a can of emulsion. A colour that I like using is called Dehli Bazar II, which is a nice browny greeny colour. When painting over sand, use an old brush as this work can be quite hard on the brush. Bear in mind pva is water based, so paint fairly quickly, so that the watered down emulsion doesn’t take the sand off.
This first coat of paint will take some time to dry, because its watered down. So take a break for an hour or so!
Once the base coat is dry, you can dry brush the base. You take a sploge of your original paint and mix it with a lighter colour. At this stage I am happy to use the vallejo paints and don’t worry about mixing the types of paint. As long as they are water based the paints will usually mix quite happily. I used light Iraqui Sand to lighten up the emulsion but a white or even some spare magnolia emulsion would have been fine!
To dry brush, you first load your brush with paint and then wipe most of the paint off. This means that only the detail or raised areas on the base would be highlighted, and the depths will stay the original colour. So you get a really good textured feel , and you can repeat this with increasingly lighter colours, to build up the effect.
These coats of paint will dry very quickly and you can really finish all of the highlighting in one sitting.
The next part is to add some foliage. I started with Javis coarse scatter which I splodged on using PVA, and then some Highland and Jungle tufts from Army Painter attached with superglue. I also outlined the base in a brown colour to tidy up the edge – there’s a lot of debate in our office as to whether you should edge your bases in brown, green or black. I prefer brown.
So that’s it, a nice simple project but a really efective finish. So how do you like to base your figures?


